
Hello, everybody! Today, I am going to show you how I fix dented front rings with a lens vise! Dings on the front ring can be caused by dropping a lens or having the front of the lens hit something really hard when you are not mindful of your gear. I usually will not bother with lenses with these kinds of damage because there is a big chance that other things are damaged by the shock. Imagine, the force is strong enough to dent metal so it’s common sense that other more fragile things inside the lens or camera might have been knocked-out of tolerance. Glass elements can be knocked-out of alignment and sensitive assemblies can be thrown out of sync. If you know how to fix these or you don’t mind at all then this is how you can fix the ding on the front ring and enjoy your dropped lens.
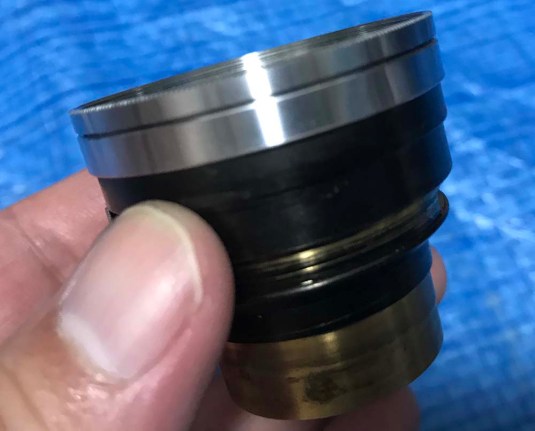
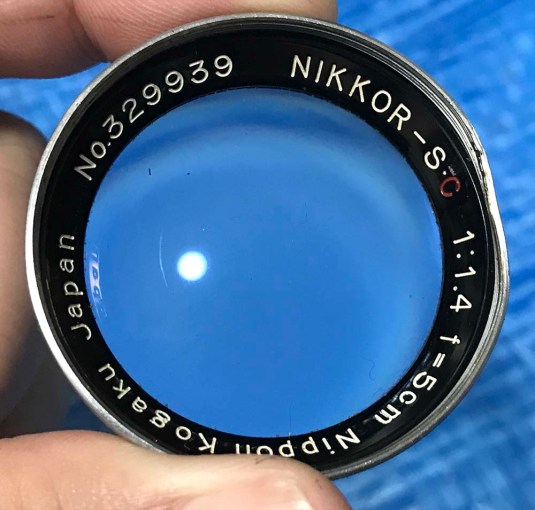 Here is a terrible example of a dented filter ring. The threads were ugly and mangled. Its lip are irregular because the previous owner attempted to correct it by using brute force. There are scratches on the outer surface of the ring and that is probably where the pliers or whatever he used sunk its teeth on it. The serrated nature of the scar is a telltale sign.
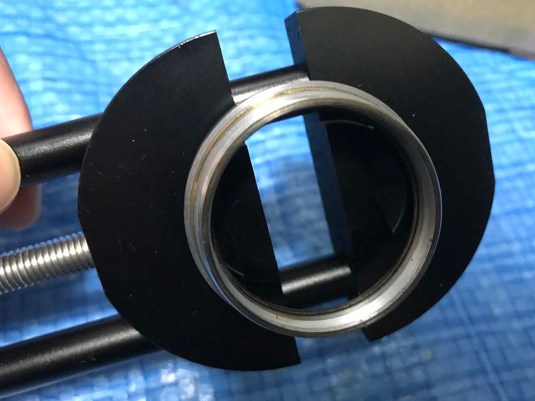 Here is the tool that you will need – a lens vise! You would want to remove everything on the ring before you begin using flexing it with the lens vise. If something is impossible to remove then just leave it there and be careful. Leaving any glass elements there is never a good idea but if you can’t take it off then you will have to go easy at it. Glass can flex a bit but it not as much as metal so any mistakes will end up cracking the glass!
Once you have stripped the ring to its bare parts, position the curved pegs of the lens vise inside the thread along the axis of the dent (X-axis from now). Slowly open-up the jaws of the lens vise so it will expand along the X-axis an push the damaged lip back to shape. It’s easy to go overboard and end up with an oval-shaped ring instead of a nice circle and if this happened to you, flex the ring across the other axis (Y-axis from now) until you get it back to shape again. Get a filter and test to see if it will screw-on and try attaching it back to the lens barrel and see if it will fit. If it didn’t, try making measurements with a caliper along both the X and Y axis and see if there are any differences. Use the lens vise to bring the difference down until it fits. If you go about slowly, you will not have to do this but it is so easy to warp the ring and this is what you should do in case that happens to you.
Whatever you do, always be careful not to damage the threads with your lens vise. If you damage the threads then you will just make the problem worse because a ruined thread will not mount or will cross-thread the other mating surface and ruin both completely. I will advise you to check if the pegs are sitting squarely on the threads before you flex it.
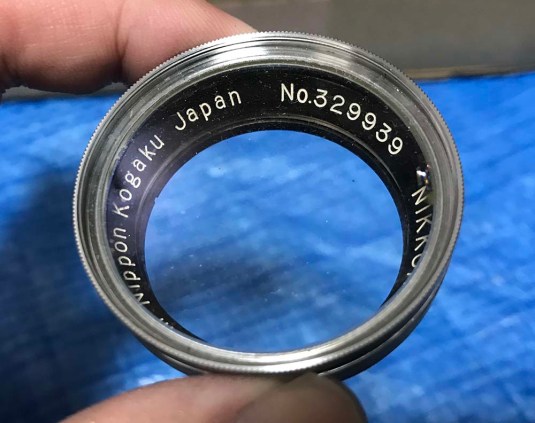
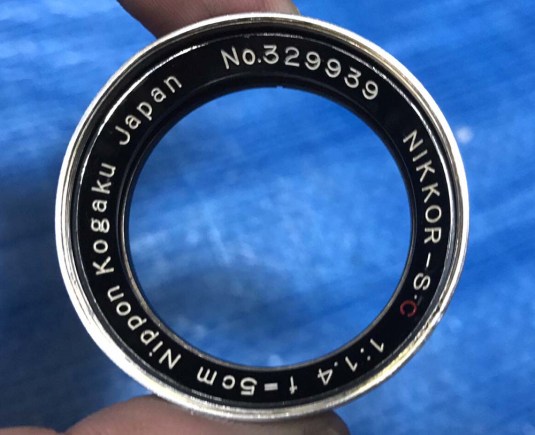 Here is the ring after the treatment and while you can still see the damaged part, it is not as bad as how it looked before. The beauty ring cannot be removed because the thread is damaged so I had to fix it while it is attached to the ring. The good thing is the front glass element can be removed from the other end of the ring and that made things a lot easier.
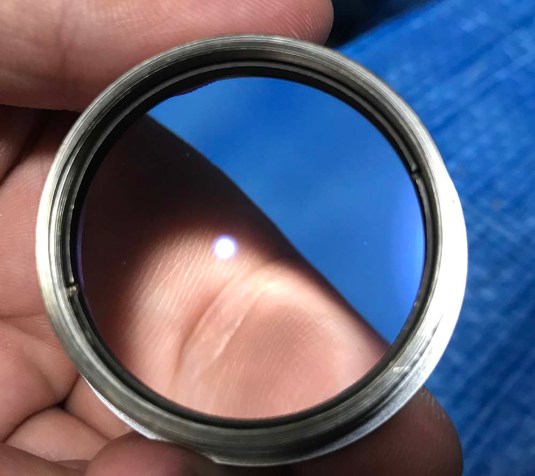 Here, I tried and reinstall the front glass element back into the ring and secure it with the retainer ring just to see if the it’s round enough. If it is a bit elongated/warped then either will not fit and you will have to massage it back to shape and do some trial and error.
 I installed a filter on the ring and while it was a very tight and imprecise fit, the filter sat squarely on the front ring. It took considerable effort to remove and I will not be putting any filter on this thing from now. The damaged thread from the botched attempt is to be blamed for this. Remember, always ask first before you attempt to fix anything!
 Here is another view. I am glad that I got it back to this state, not quite perfect but better than what we had. The ring isn’t 100% circular but it is good enough for me.
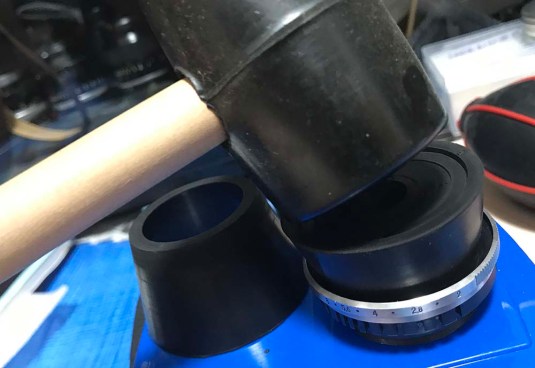 To make sure that the ring is as circular as possible, I use my rubber cups as a wedge. It’s rigid enough to withstand being beaten with a rubber mallet but soft enough not to harm the threads too much. Give it a good whack to put it back to shape. In the picture above, I was fixing a warped aperture ring of a Carl Zeiss Biotar. Screw-mount lenses seem to be prone to being dropped and as far as what I see here in the junk shops, the screw-mount lenses commonly have dented front rings. If you see one, low-ball the seller and try to fix the dent with what I showed you here! A dropped lens can have more problems than the ding so be careful or buy the lens for a very low price!
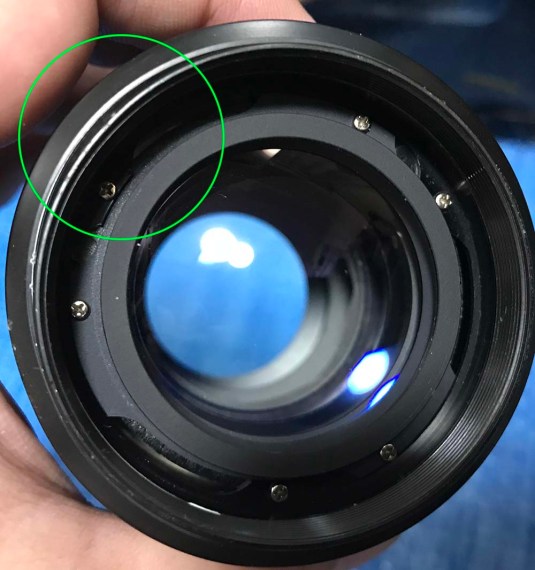 I also used the lens vise to fix the focusing ring’s front part (the outer ring) of this lens. It was either dropped or banged so hard that the front part of the focusing ring is now oval as you can see on the picture. I encircled the part with a gap to make it easier for you to see that this is no longer a perfect circle. This will prevent the focusing ring from turning smoothly but this is now functioning perfectly after the repair.
Conclusion:
Before I got the lens vise, I used to fix dings with a wooden down and a brass anvil. I also used a thick brass disk and a corresponding anvil with half a circle sawed-off from it. It’s like a pair of male and female die and I would strike the damaged/dented ring while it is sandwiched in between the die. Both methods will also work but the lens vise makes life so much easier. Just buy one online and try it for yourself. Remember, this is not an easy task and it requires you to have some know-how and confidence with repairing stuff. As usual, I will not be responsible for anything so do this at your own risk!
That’s it for this blog post. Did you enjoy it? I hope that this gives you an idea on how the dinged front rings are fixed and how to spot one when you see one. Knowledge is power as the saying goes and with this newly acquired knowledge, you will know if somebody is bullshitting you or not when they are trying to sell you a repaired lens. Thank you for supporting my blog and if you enjoyed this, do share this with your friends! Ric.
Help Support this Blog:
Maintaining this blog requires money to operate. If you think that this site has helped you or you want to show your support by helping with the upkeep of this site, you can simple make a small donation to my paypal.com account (richardHaw888@gmail.com). Money is not my prime motivation for this blog and I believe that I have enough to run this but you can help me make this site (and the companion facebook page) grow.
Helping support this site will ensure that this will be kept going as long as I have the time and energy for this. I would appreciate it if you just leave out your name or details like your country and other information so that the donations will totally be anonymous it is at all possible. This is a labor of love and I intend to keep it that way for as long as I can. Ric.

Sep 21, 2017 @ 20:10:23
I wish you had made a short video of all this.
Sep 22, 2017 @ 01:24:18
Hello, Alan.
That’s going to be impossible for me to do since I only have a rudimentary setup for my videos. I can make a video on this subject only to the point where I mount the tool but not while I am using the tool. Maybe I can make one in the future. Ric.