
Hello, my dear readers. I just unloaded plenty of digital gear yesterday morning. Shooting film and using analog equipment has been so much fun for me that I have relegated all of my digital equipment for low-light and indoor shooting exclusively or for really important events where there is no room for mistakes (paid stuff). Chances are if you are reading and following my blog then you are already at the same point in your photography adventure as me. Do not believe it when they say that shooting film is cheaper then shooting digital, we will talk about it in a future post because there is just so much cow dung being posted on the internet by film snobs.
Repair: Nikon F Eye-Level Finder
31 Jul 2016 10 Comments
in nikon,lens repair,lens maintenance,nikon repair,, Nikon,museum,classic lenses,, Uncategorized

Repair: Nikkor 200mm f/4 (K/Ai)
24 Jul 2016 28 Comments
in nikon,lens repair,lens maintenance,nikon repair,, Nikon,museum,classic lenses,, Uncategorized
Hello, everybody! Lately, there has been a shortage of cheaper lenses at the junk shops in Tokyo so I haven’t added anything new into my lens collection for a couple of weeks now. There are many factors that contribute to this and one of them is the swarm of mainland Chinese tourists swarming here to shop. It was different several years back but what can I do? It’s an open market and it is everybody’s right to shop. Luckily, I can still find a few good deals like the lens that we are going to talk about today.
Introduction:
We are going to discuss a very important lens in Nikon’s lens lineup during the 1970s and that lens is the Nikkor 200mm f/4 K/Ai lens! The K (New-Nikkor) and Ai versions are near-identical so you can use this guide for both lenses. I have overhauled both versions and I cannot find much difference between these versions. This was a popular lens for people who like to take a long lens along with them during hiking trips because of the size and it has a maximum speed of f/4 which is kind of decent for use in sunny days but isn’t useful when you don’t have a tripod during a cloudy day because you’ll need to shoot this using a tripod to prevent blurred photos. Landscape and bird photographers may appreciate it for its size and specs and it’s a versatile lens for portraiture, too. When shooting under a controlled environment such as a studio and using strobes, the rather slow f/4 maximum aperture won’t matter because you will be be shooting this lens stopped-down anyway. It is great for full-body portraiture because the compression a 200mm lens can give is going to make people look taller and faces look thinner.

The lens feels great in your hands, it’s dense and there’s certainly a feeling of quality and precision when you use it. This lens was built during a time when Nikkors were made to last forever. This also makes it slightly-heavy and you’ll wish that it has a tripod foot, this lens can make any setup front-heavy so you don’t want to handle this carelessly. If you’re going to use this with modern Nikon cameras then make sure that you get one that comes with an Ai-ring for the New-Nikkor version or else you will damage your camera when it is mounted by force. Mine has the Ai-ring and I am glad that I got it.
More
Repair: Nikon F Photomic Ftn (Foam)
17 Jul 2016 31 Comments
Hello, everybody! Summers here in Japan can get really hot or rainy. All the heat and water will result in high humidity and we all know what that means. If you got the misfortune of having one or more of your lenses infected with fungi then head this fungus removal post to remedy the problem.
Introduction:
This is a part of our Nikon F series. Last time, we talked about how we can fix and clean the film counter display of Nikon F and now we are going to talk about how we are going to fix and clean the very popular Ftn finder!
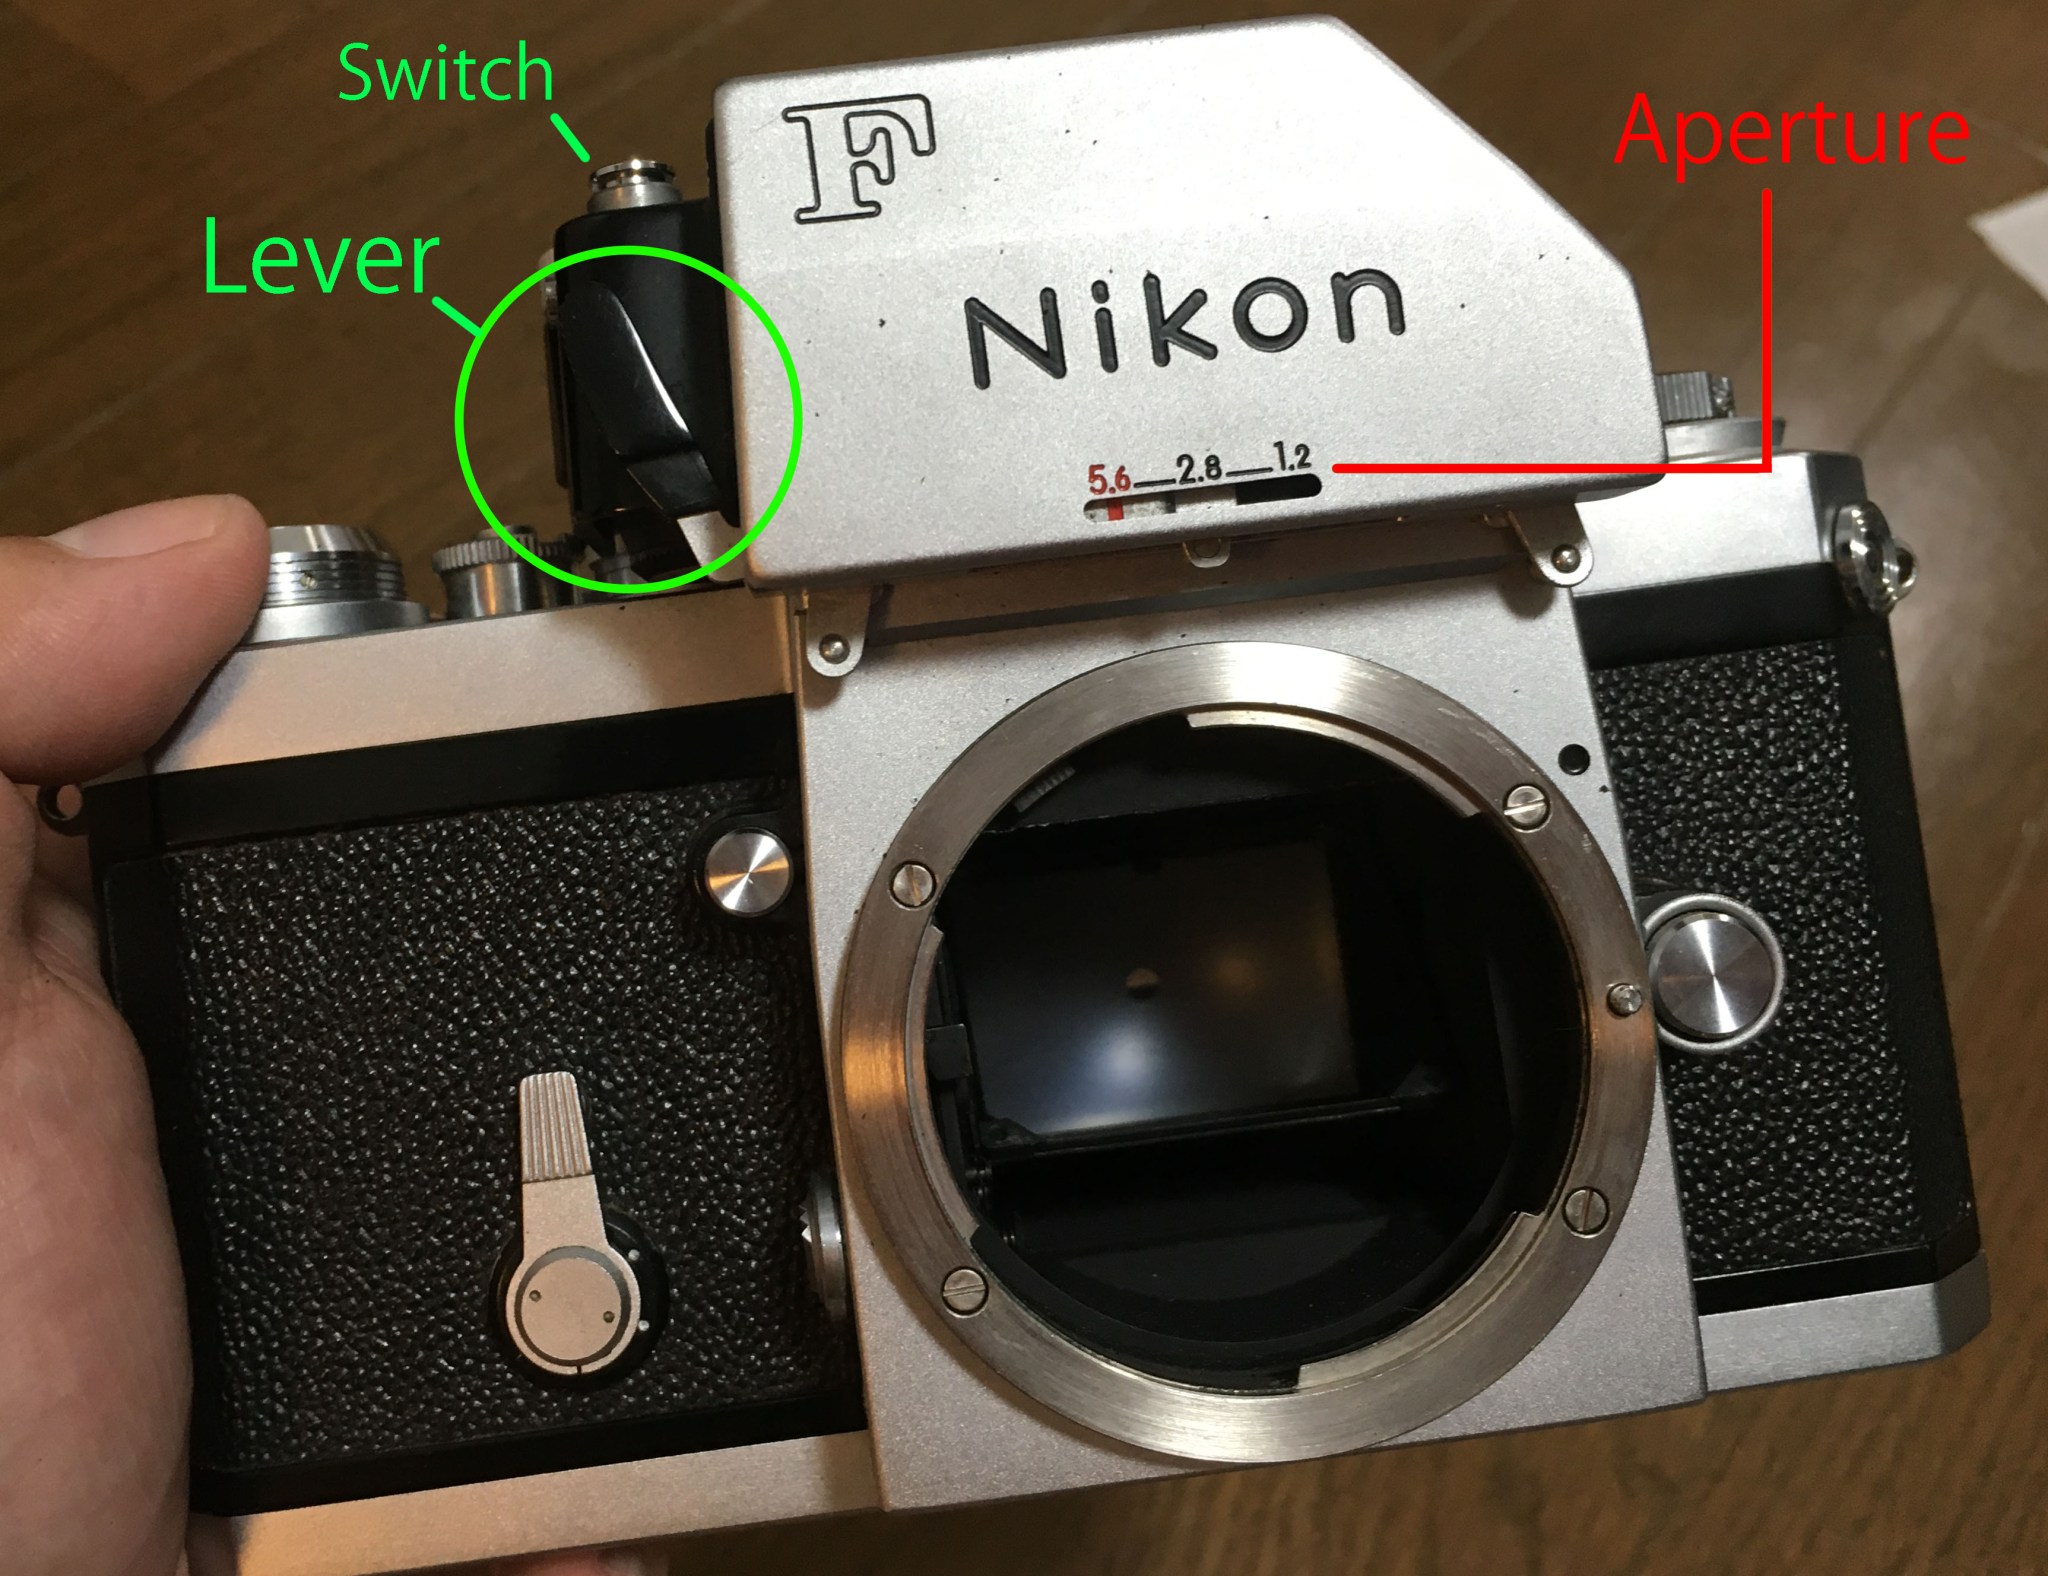 The Ftn finder can be distinguished from earlier models by the lever on it’s right side. This lever is used to open the 2 clasps that help secure it to the front plate of the camera’s face. There are 2 other earlier finders with a light meter attached and this Ftn finder is the last and most advanced iteration, making this the most popular metered head for the F so far. More
Repair: Nikkor 135mm f/2.8 (K/Ai)
10 Jul 2016 27 Comments
Hello, dear readers! How are you this weekend? The weather here in Tokyo is beginning to be unbearably hot as mid summer approaches, there are times where the heat would even reach 38! Please stay hydrated by drinking plenty of water because I care for your well-being. I don’t wish to read about a photographer who collapsed because of the heat, that would definitely spoil my mood. Do take care. Speaking of heat, I’ll talk about a “hot” lens today and when I say hot I mean it’s popular these days for people who like to adapt old lenses to their cameras. Stay and read what this hot item is all about.
Introduction:
Today, we are going to talk about the Nikkor 135mm f/2.8K! For those who are following my blog for some time you may have remembered that I made a tear-down guide of the Nikkor-Q 135mm f/2.8 Auto lens earlier this year – this lens is its successor! The older lens has set the bar high for Nikon but this new lens was able to surpass that in almost every way. It has a new optical formula and a new lens barrel design. This lens is totally new, it has nothing in common with the older lens apart that it’s from the same lens class.
 This lens looks great on modern DSLRs like this Nikon D750. Its image quality still keeps up with the best of Nikon’s (or Sony’s in the case of the Sony a7) sensor technology! There is a lot talk these days online about this lens and I will show you why this lens is special.
More
Detailing: Nikon F (Frame Counter)
03 Jul 2016 7 Comments
in nikon,lens repair,lens maintenance,nikon repair,, Nikon,museum,classic lenses,, Uncategorized
Hello, everybody. For today’s short post, I will be showing you how I adjusted and cleaned my Nikon F’s frame counter. My F’s frame counter is a little bit offset by less than 1mm. It may not seem like a big deal, but the arrow on the counter is always pointing in between 2 numbers. This makes it hard to judge which frame I am currently at and this is driving me crazy! The camera is old and it is likely that the frame counter housing moved a bit when the previous owner was using it.
Fortunately for us, this is a very simple thing to fix and since I am detailing this camera to make it look as good as I can I also taking this opportunity to clean other things within the same assembly as you will see later.
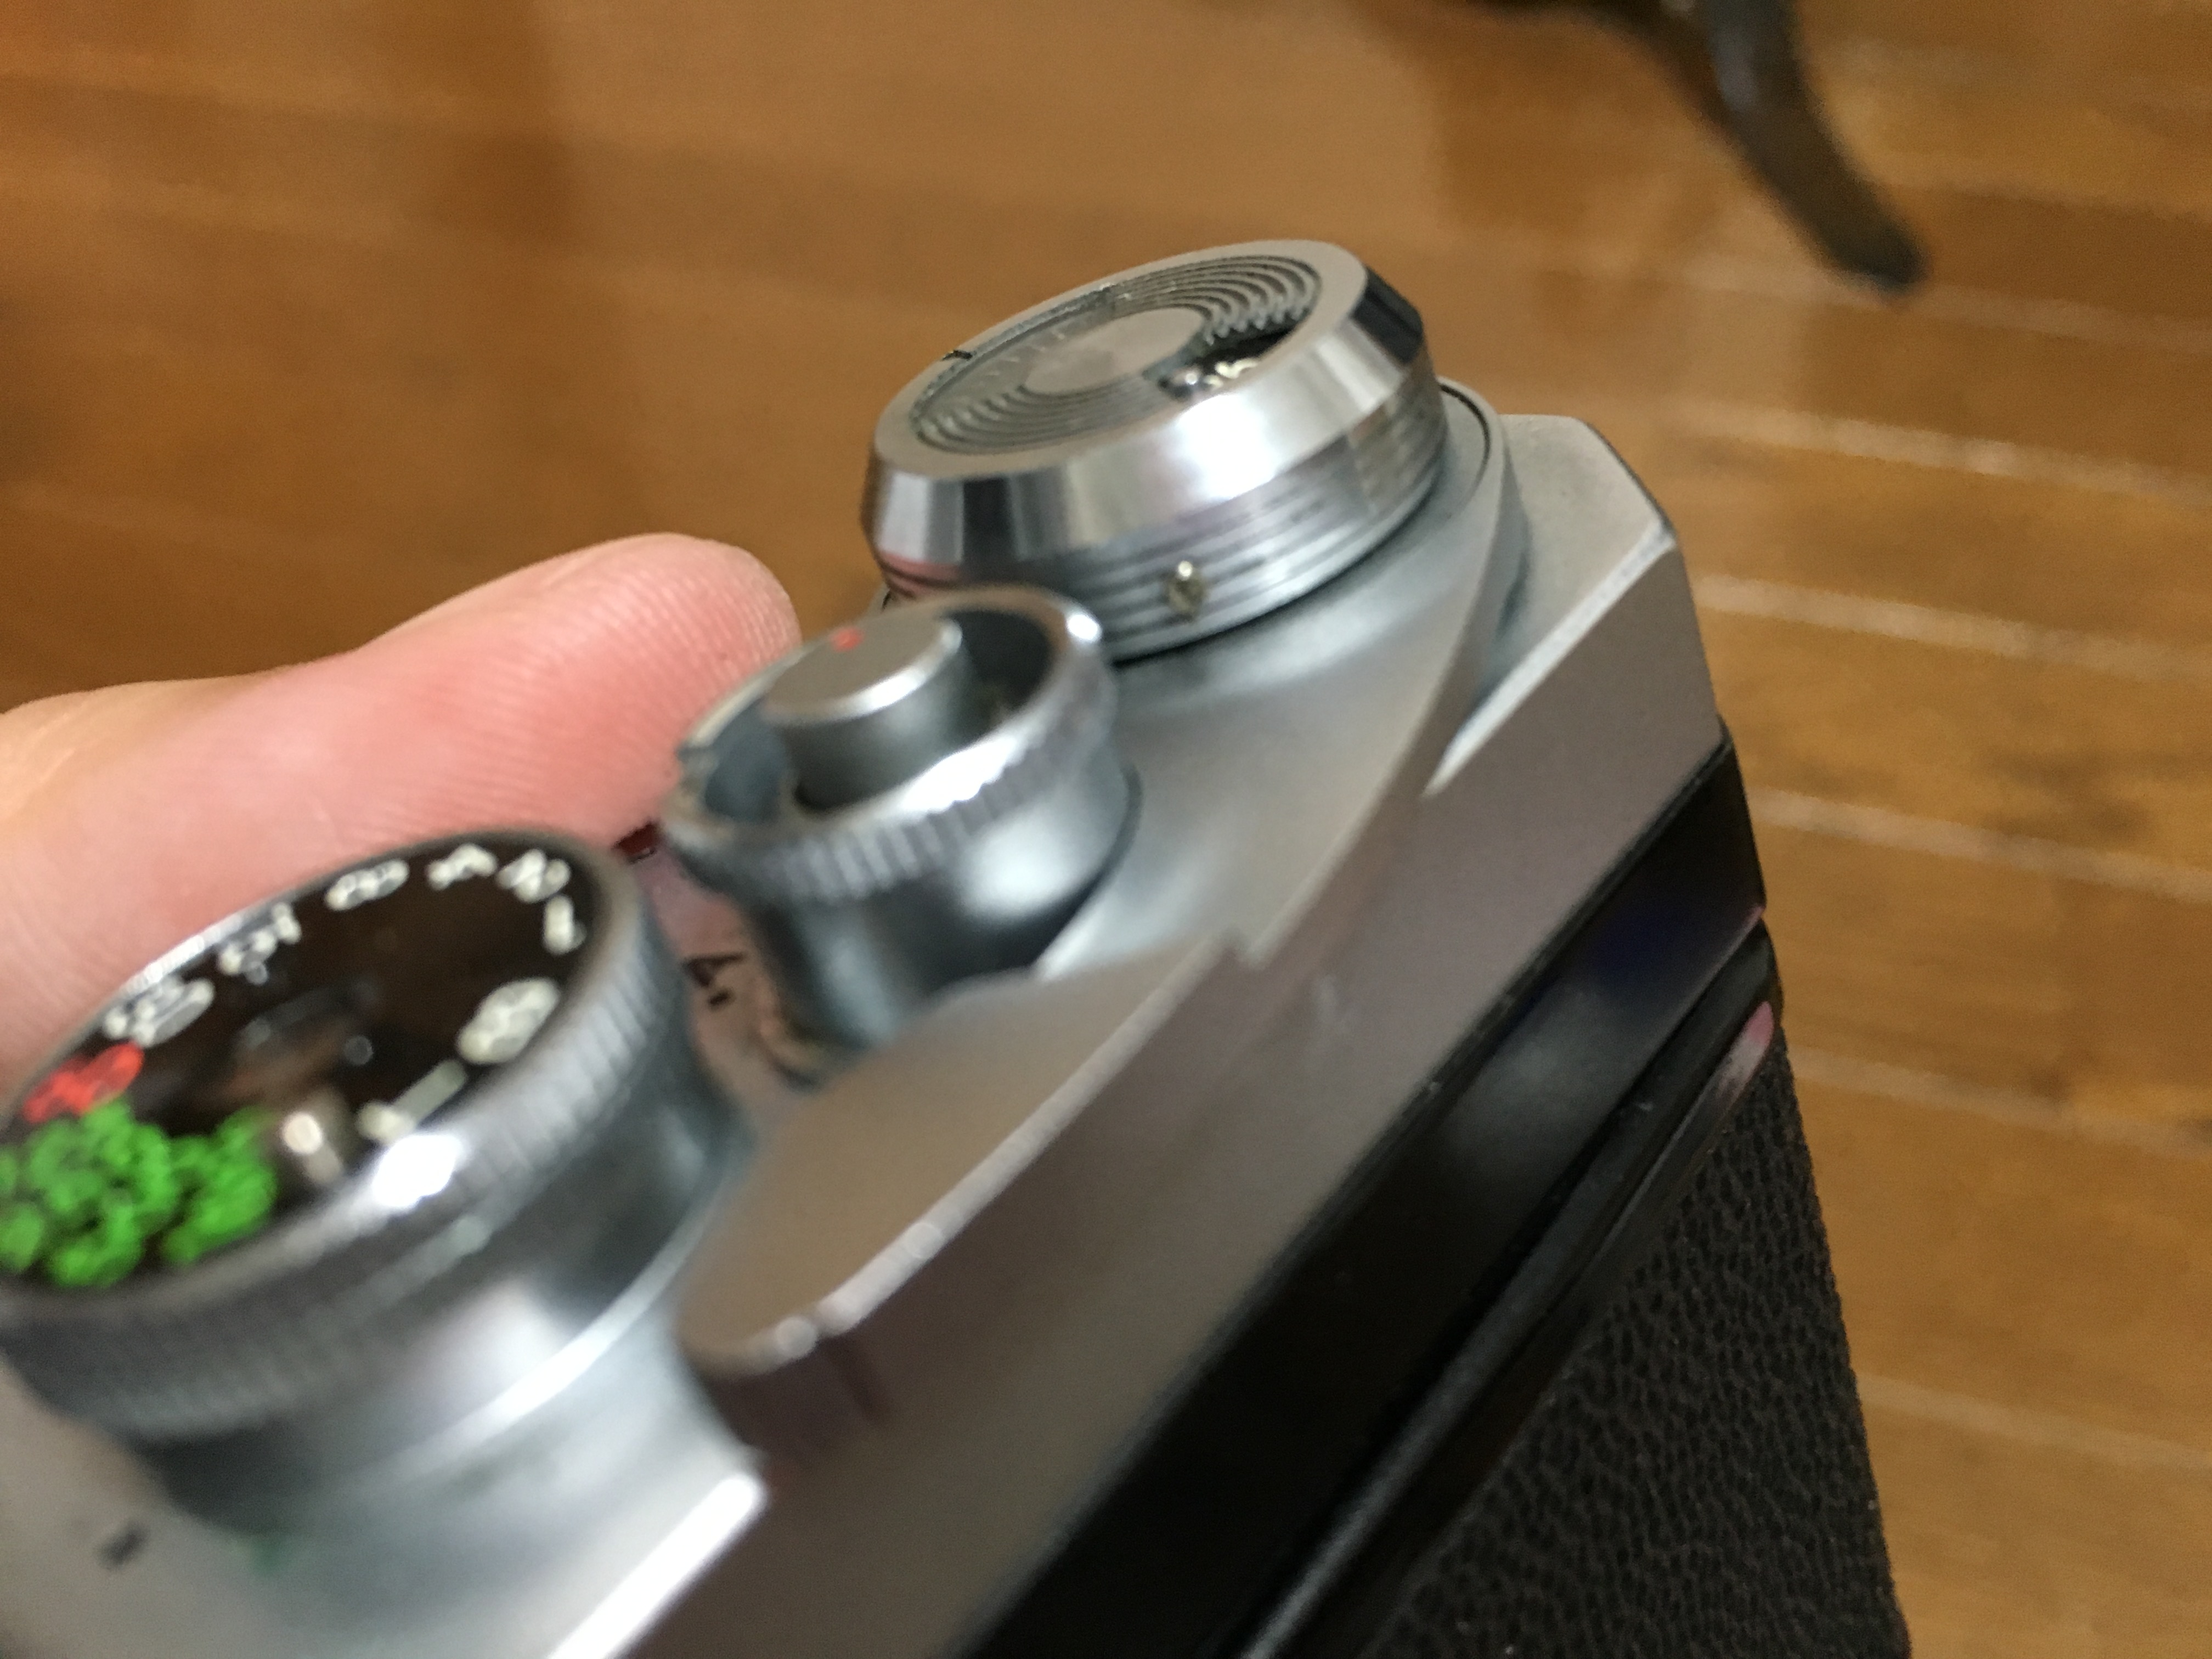 First, loosen up these 3 tiny set screws on the frame counter housing. You do not need to remove them from their holes so you won’t have to place them back later. I really dislike these things because they are small and delicate. These set screws secure the housing to the camera by locking the whole thing into the groove underneath. More
