
Hello, my dear readers. I just unloaded plenty of digital gear yesterday morning. Shooting film and using analog equipment has been so much fun for me that I have relegated all of my digital equipment for low-light and indoor shooting exclusively or for really important events where there is no room for mistakes (paid stuff). Chances are if you are reading and following my blog then you are already at the same point in your photography adventure as me. Do not believe it when they say that shooting film is cheaper then shooting digital, we will talk about it in a future post because there is just so much cow dung being posted on the internet by film snobs.
 That lovely camera you are seeing in the picture is the Nikon F with the standard eye-level finder. If this setup reminds you of the Vietnam war, then you are on the right track. This is the camera that photographed plenty of Vietnam war photographs. If you see pictures of war photographers in that era, big chances are they have one or more strung around their necks. The camera itself is not expensive but the finders usually cost multiple times more because finders with good prisms are not easy to find. You can fix one yourself, I will show your how once I source a reliable and cheap supplier.
You may also want to read a related post where I cleaned and calibrated the Ftn finder for the Nikon F. To see more of the Nikon F, check out this post.
Before We Begin:
If this is the first attempt at opening a lens then I suggest that you read my previous posts regarding screws & drivers, grease and other things. Also read regarding the tools that you will need in order to fix your Nikkors.
I highly suggest that you read these primers before you begin (for beginners):
- Essential tools
- Best practices 1
- Best practices 2
- Best practices 3
- Ai conversion
- Working with Helicoids
Reading these primers should lessen the chance of ruining your lens if you are a beginner. Also before opening up any lens, always look for other people who have done so in Youtube and the internet. Information is scarce, vague and scattered (that is why I started this) but you can still find some information if you search carefully.
I highly recommend that you also read my working with helicoids post because this is very important and getting it wrong can ruin your day. If I can force you to read this, I would. It is that important!
For more advanced topics, you can read my fungus removal post as a start. This post has a lot of useful information here and there and it will be beneficial for you to read this.
Disassembly:
Fixing this will not require any special tools but you have to make sure that you are using the correct screwdriver size for the screws because not all slotted screwdrivers are made the same. They may look the same but one may be thicker than the other one by a 0.1 of a millimetre. If it wiggles on the slot then you should need a slightly bigger driver. If you do not have one then you should make one yourself by grinding the tip of an old driver.
 Start by saturating the edges of the leatherette top cover with alcohol. Leave the alcohol there for some time to let it work on the old contact cement. As soon as you felt the edges of the leatherette give a bit, gently pull an edge and see how far you could pull that thing off. As soon as you get to a dry spot where the alcohol has not reach, add some more to it and repeat the whole process until the top comes of cleanly. Be careful not to tear this part because you will have to replace this with a new leatherette and cutting it to shape is a big pain in the ass.
 You will soon discover that there are 4 small metal tabs that cover 4 screws. These are used as covers to protect the screws as well as keep you from feeling the depressed parts when you touch that part of the finder with your fingers. It would really be awkward when your fingers sink into the leatherette, giving the finder a cheap feel.
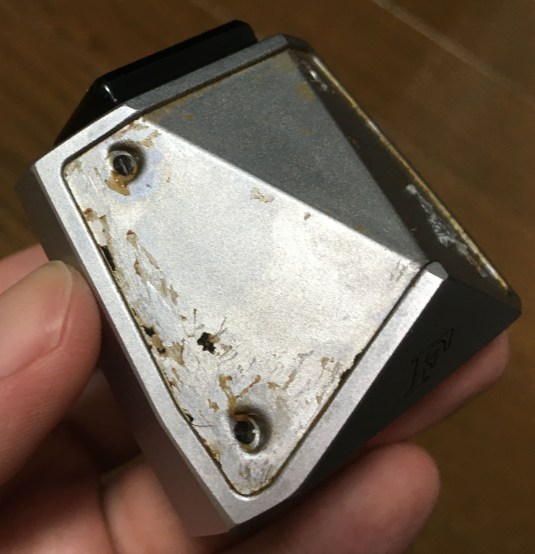
Simply unscrew the 4 flathead screws to remove the top. As you can see from the picture above, the screws are also covered with contact cement so it is wise to get rid of these first before working on one.
 The top cover should easily come off after you got rid of the screws. Notice that there are 4 washers corresponding to the 4 screws, be careful not to lose any of these.
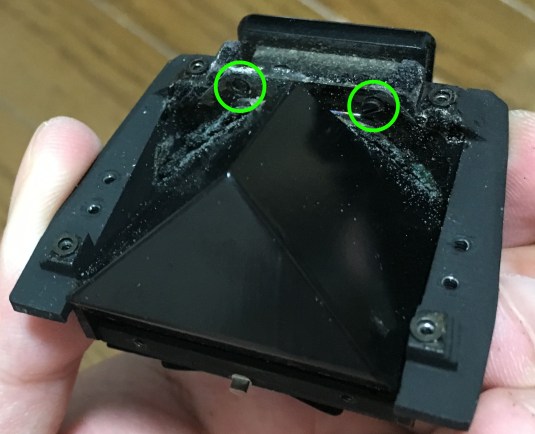
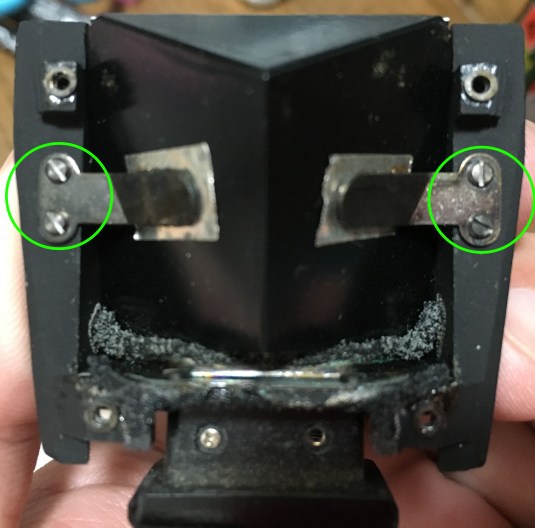 The prism is secured in place by these 2 braces. Remove the screws to get rid of the braces. Notice that the old foam seals have all been disintegrated.
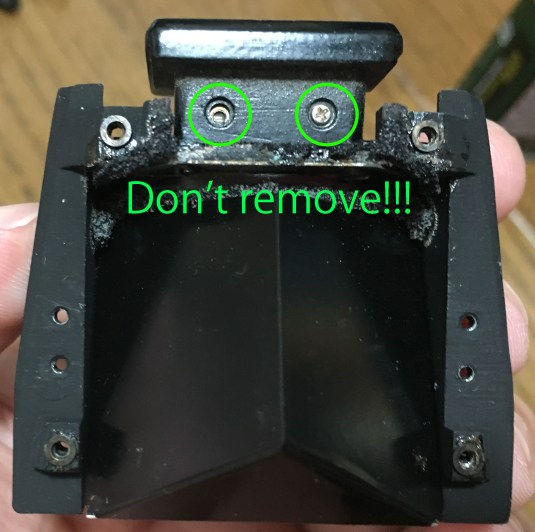 At this point, you may be tempted to remove these screws. Do not touch these screws or the glass in the finder will come off. Mine was missing a screw and there is also a philips screw in place of the original minus (-) slotted screw. As soon as I saw this, I know that it had been opened previously by another person and he did not even bother to use the right type of screw to replace what he had lost – what a cunt…
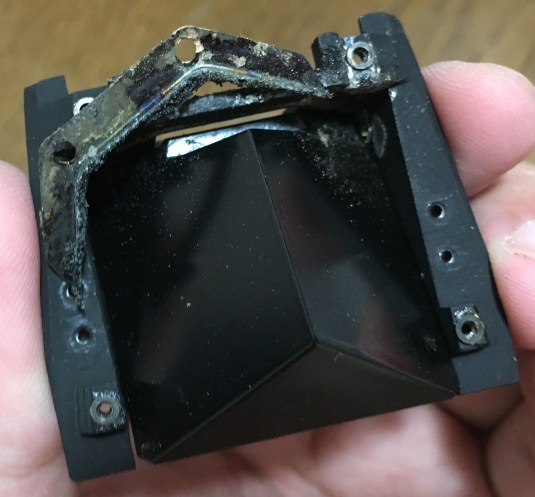
 The front part should be removed so that you can freely move the prism out of it’s housing or you will damage the delicate prism. Be careful not to scar the screws or anything in this part.
 So far, the front part of the prism looks good, thank goodness.
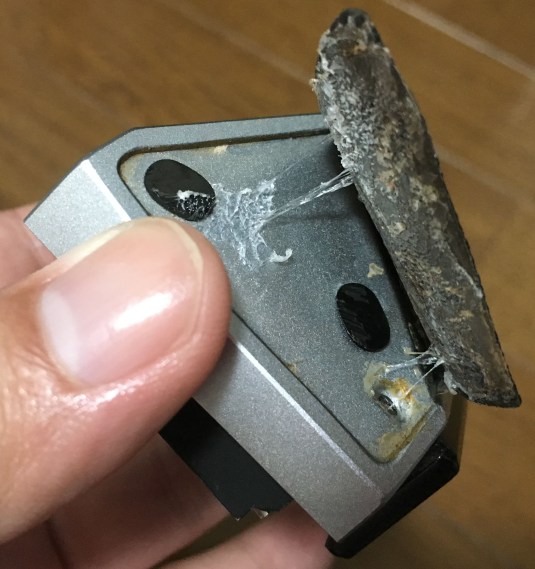
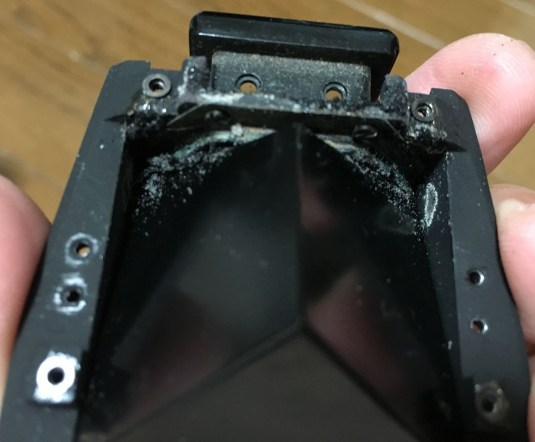 Now, back to the top. The rotten foam seal has eaten through the protective coating of this prism. It is not as severe as what we commonly see circulating in the market but this has to be fixed as soon as possible.
 The final brace that secures the prism has to be removed in order to remove the prism and to replace the foam with black electrical tape. Get rid of these 2 screws but be careful, one of my screws simply broke into 2 parts when I was using a driver to remove it. These parts are old and will sometimes break easily like what has happened to this one. I had to grind the head away because I do not have enough room to use a screw extractor. This was very tense as a slip would mean that my prism is ruined! I am a gout sufferer and years of hard Shaolin kung-fu and computer work has left me with carpal tunnel syndrome so this was not fun at all.
 Finally, we can remove the prism! Clean this brace properly and use electrical tape in place of the foam and make sure that the sticky part of the tape is facing away from the prism. If you used foam in this part again then it will corrode just like what happened previously.
 I cleaned the prism by carefully wiping the affected part with a Q-tip that was moistened with alcohol. You do not want it to be dripping wet, just moist enough to be able to wipe away whatever material was left. If you wiped with too much force then there is the danger of worsening the damage by chipping the paint around the corroded silver.
Conclusion:
This is supposed to be an easy task for me but the corroded screw took time to grind away. Working with decades-old equipment is not without risks; I would sometimes end up with broken bits of screws,etc even if I handled the parts with care. If you regularly destroy your parts (accidentally) then you should consider your technique and tools because that should not be a normal occurrence.
I dipped all of the metal parts in an alcohol bath and let it soak for some time and wipe the parts properly before I put it back together. I do not want to leave any junk in there to ruin expensive piece of equipment!
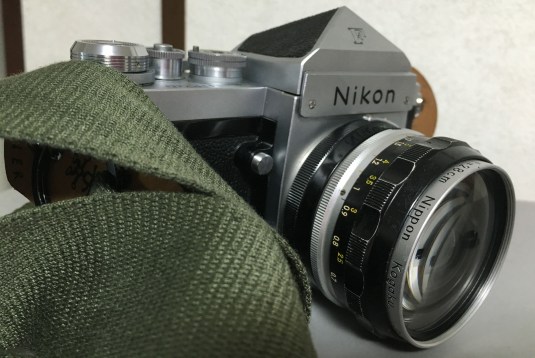 Here she is after a good cleaning. I am sure that she is going to “love me long time” for the effort.
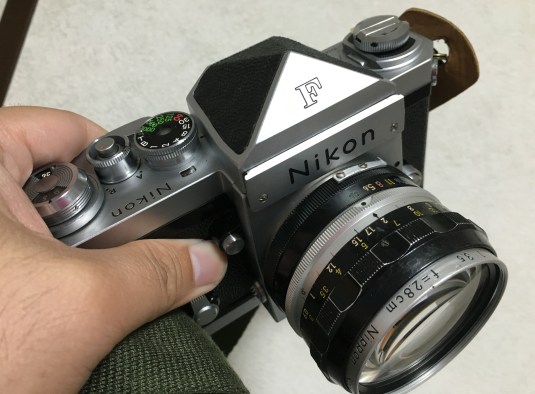 The F looks and handles best with an eye-level finder in my opinion. The Bauhus inspired lines just look and feel so good in your hands – form follows function (Bauhaus).
I hope that you enjoyed this short writeup. Next time, we will be looking into another lens tear down post. See you next week, Ric.
Help Support this Blog:
Maintaining this blog requires money to operate. If you think that this site has helped you or you want to show your support by helping with the upkeep of this site, you can simple make a small donation to my paypal.com account (richardHaw888@gmail.com). Money is not my prime motivation for this blog and I believe that I have enough to run this but you can help me make this site (and the companion facebook page) grow.
Helping support this site will ensure that this will be kept going as long as I have the time and energy for this. I would appreciate it if you just leave out your name or details like your country and other information so that the donations will totally be anonymous it is at all possible. This is a labor of love and I intend to keep it that way for as long as I can. Ric.

Aug 25, 2016 @ 03:40:06
I enjoyed your write-up of the F prism fix, I will be attempting something similar in a few days.
-Jim
Aug 25, 2016 @ 07:56:38
Thanks, James! Be careful with the screw head, be sure you have the right width screwdriver that fits perfectly on the slot. I learned the hard way, these screws are old and some are brittle. You may also want to use your upper body weight on some nasty screws. Ric
Mar 28, 2017 @ 13:30:36
Morgan Sparks at http://www.cameraleather.com supplies superb adhesive-backed leatherette at very reasonable prices but the link to Nikon Fs is currently broken. I am awaiting a reply to my email to see if he still does Nikon leatherette.
Mar 29, 2017 @ 03:02:52
Hi, Peter!
I did a search on this site and I got this:
http://www.rangefinderforum.com/forums/showthread.php?t=146867
My current supplier is Asahi Aki here in Japan. Talked to the guy himself and he was great. I have another supplier (Japan Hobby Tool) and they’re great as well. I would just stick to these 2, both speak English. Ric
Mar 29, 2017 @ 09:50:11
Richard, I just received this positive response from Morgan Sparks at http://www.cameraleather.com that may be of interest to you and particularly your readers around the world.
“Hello Peter,
Thanks for your note. We can still cut the parts for your Nikon prisms, or any other parts of the camera.
I had to partly disable the web site, not because we don’t make these parts anymore, but it’s the only way to throttle back, so to speak. We cut parts in bulk for other fabricators down the chain as well. Selling/supporting individual parts sets to camera collectors requires a different business model. It’s really suited for someone who works from his/her home (and who has another source of income!). There’s a family member here who is working up a new web site; I’d like to limit the online store to things that are stocked in advance, and shipped out the same day. (In other words, a normal online retailing model).
Let me know what you need and I am happy to assist.
Thanks,
Morgan Sparks”
Mar 30, 2017 @ 02:37:06
Thanks, Pete!
I can only vouch for vendors that I had interacted with. Asahi Aki is more than what I need for this sort of thing. Have you checked him out? He has a bery good reputation locally and internationally as well as I recently found out. Ric.
Nov 24, 2017 @ 02:40:21
Great article Richard. I am just about to clean my “F” viewfinder, so that info was critical. I served with the Australian Army in SVN, 1970. Still got some of the slides.
Think the 50mm lens is still east of the Long Hai Mountains though.
Thanks again.
Keith Hulme, ex RAA.
Jul 17, 2022 @ 07:05:29
Richard, though you wrote this article six years ago, and I am sure countless Nikon F owners have benefited from your ingenuity and sharing your experience. Thank you. May I suggest either a link to your article on Camera Leather Replacement or a short write up on reattaching the Nikon Leatherette without over-gluing and extruding it between the edges and the metal housing. So far, I have not found any suitable replacement glue at any of the warehouse-type pretend hardware stores, in Australia.