
Hello, everybody! Have you heard of the story of the “Giant Radish“? It’s an old East Asian folk tale about a farmer pulling off a giant radish off the ground with the help of his whole family along with the family’s pet rabbit. Some say that the story is just a variation of an old Slavic tale called the “Giant Turnip“, where the vegetable is the only thing that’s different between both versions. It’s just a lesson about people who get together to solve a big challenge, such as pulling an impossibly huge tuber from the ground that is as huge as a house. Today, I’ll tell you a story about something huge that has most of its body hidden, it’s so huge that it’s considered by many to be somewhat difficult to use with modern cameras but I’ll show you how to get around that issue. Read my article to know more about it.
Introduction:
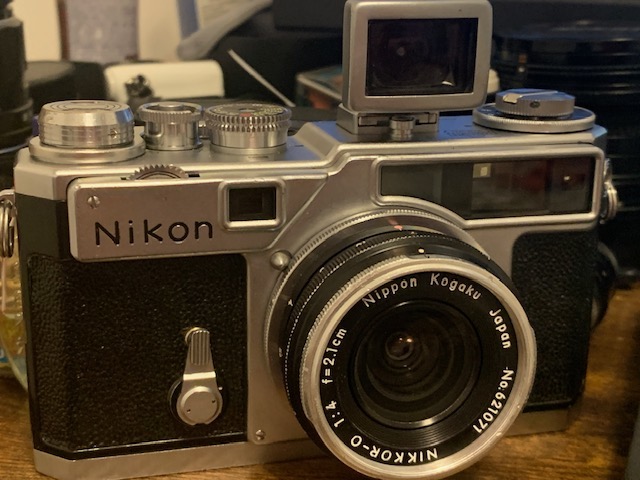
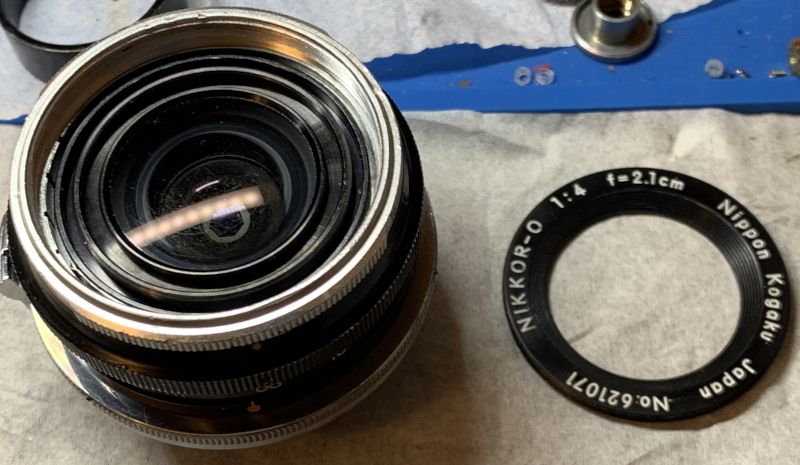
The Nikkor-O 2.1cm f/4 for the Nikon S-mount was sold from 1959 to an unknown date, with numbers as low as 300+ copies made. Some speculate that it was only sold for a year or less, but everyone agrees it’s one of the most desirable items in the Nikkor collectibles game. This lens was originally conceived for the Nikon rangefinder system but was later made as a Nikon F-mount lens, too. The latter is common and the rarest of them all is the mythical Leica mount one, once only thought of as a “phantom lens” until one was sold a couple of years ago! Many consider this to be a milestone in Japanese optics design.

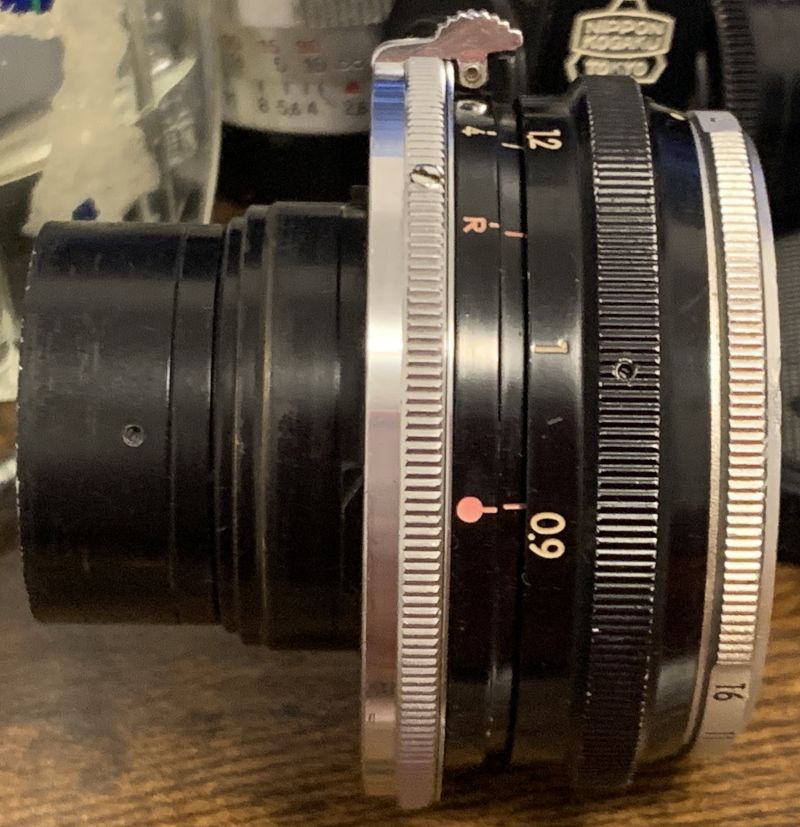
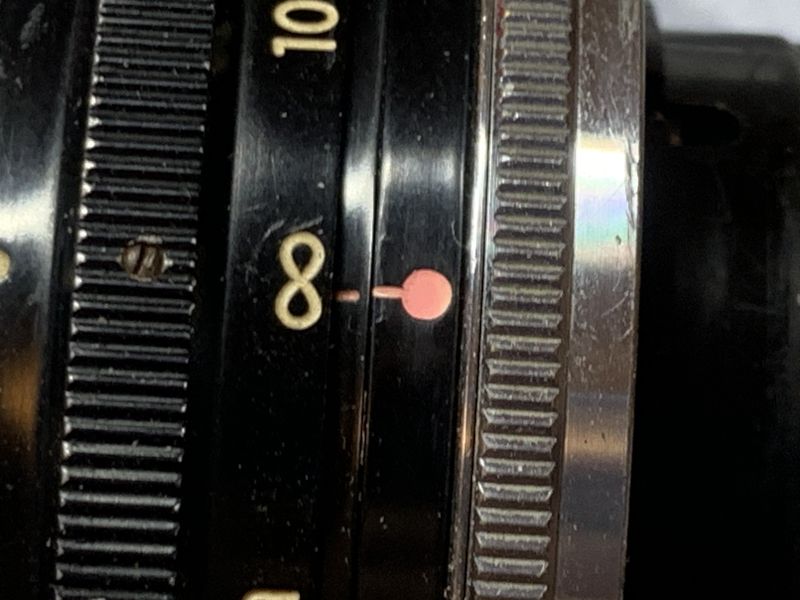
Everything is made out of metal except for the glass, there’s no plastic parts here. It sports the late design of many Nikkors made from the late 1950s like as the W-Nikkor 3.5cm f/2.5 which looks near the identical at a glance. The aperture ring has been modernized so the numbers are easier to read. The skirt also has a deep learning so it’s easy to grip it even while wearing gloves.
It has the same 8-elements-in-4-groups design of the Nikkor-O 2.1cm f/4 (F-mount), which is symmetrical. I have covered this lens in another article but if you want to read something more in-depth, read this very detailed article. That is the definitive resource for this lens.
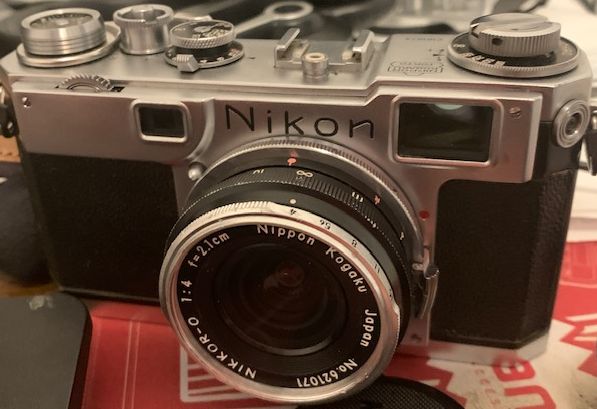
Despite being a very desirable item, it looks very unassuming. You can easily mistake it for just about any W-Nikkor because of its size and design. However, the rear tells a different story, it protrudes too much. It has the deepest protrusion from behind the lens mount of any rangefinder Nikkor.
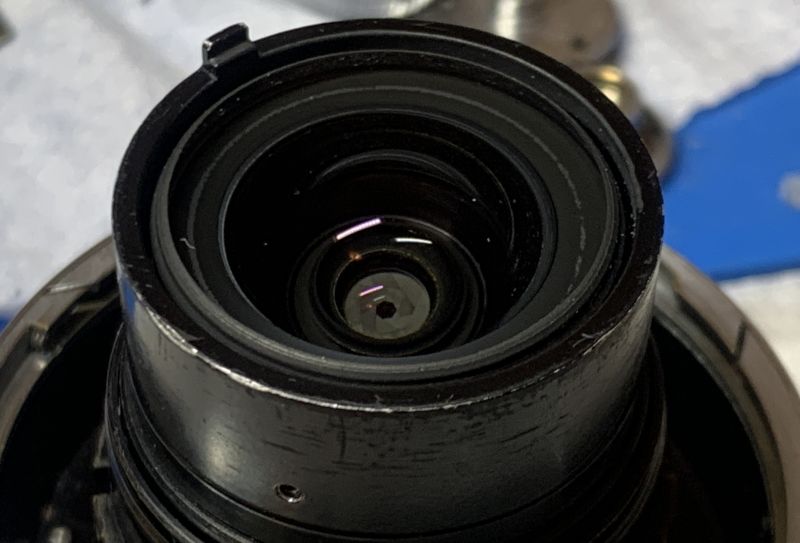
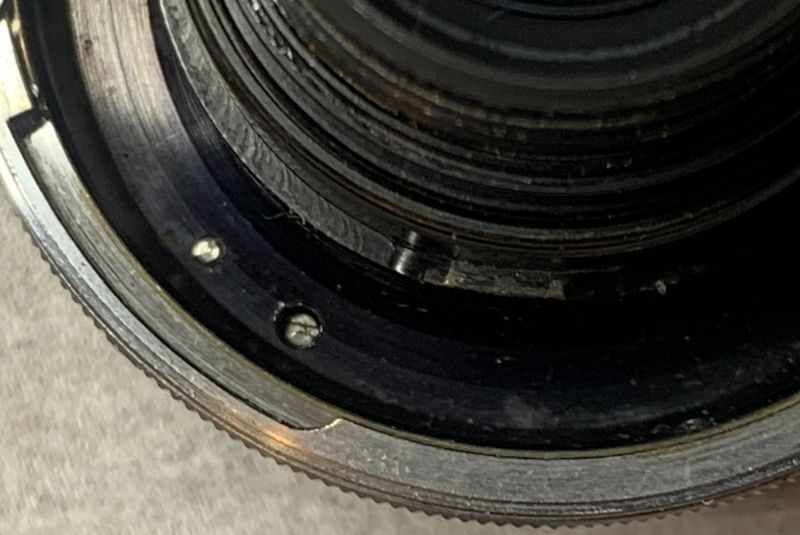
This protective claw at the rear prevents the glass from coming into contact with a flat surface. It’ll barely touch the surface, but it’s better than nothing. This claw will be problematic if you decide to adapt this for use with mirrorless cameras, read more about it later.
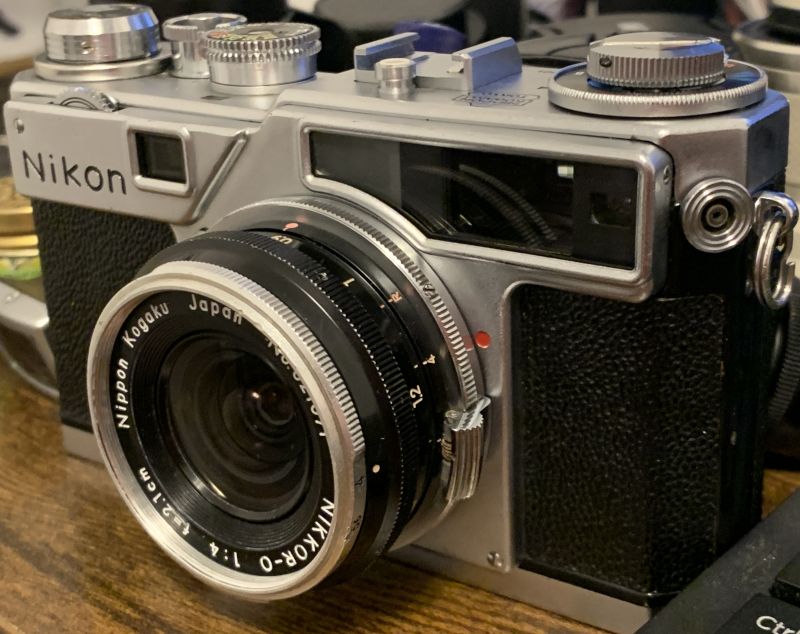
The best way to shoot with it is with a Nikon or Contax camera. I am not sure about the latter, but it works perfectly with my Nikons since that claw that I’ve mentioned previously won’t touch the camera at all, you will have to turn the ring with the claw towards a certain orientation for it to be considered safe. That is a lot of hassle so people just get rid of the ring along with the fucking claw just to get it over with. That’s all good so long as you remember to keep that part because your very valuable lens will cost a few thousand dollars less without it. People who sell incomplete copies of this lens at full price are just waiting for a few suckers to part with their money.
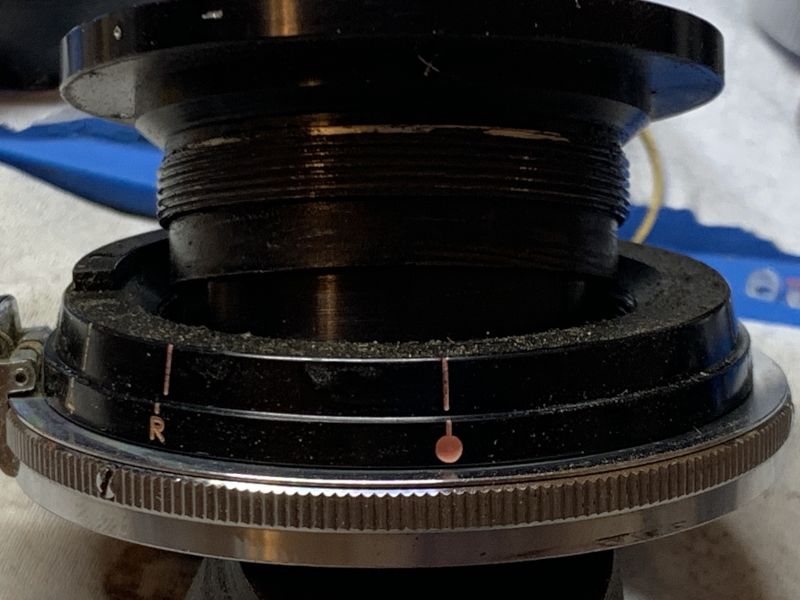
This is how it should look like at infinity, pay attention to the position of the claw. The rear sits very close to the shutter, almost touching the curtains. This is the reason why you should never adapt this to digital cameras, even without the claw! See my article on the Nikkor-O 2.1cm f/4 (F-mount) to find out how close it is for that version, it’s just as scary.

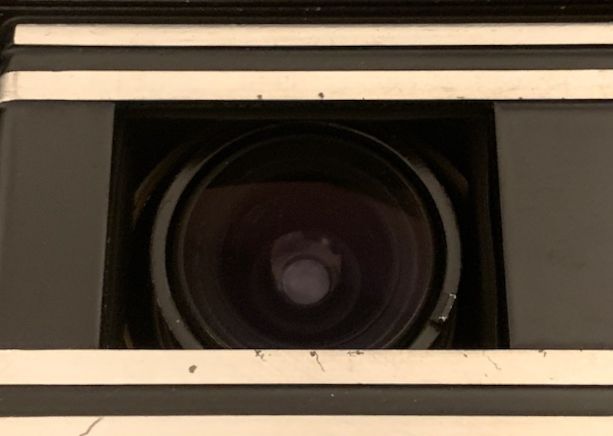
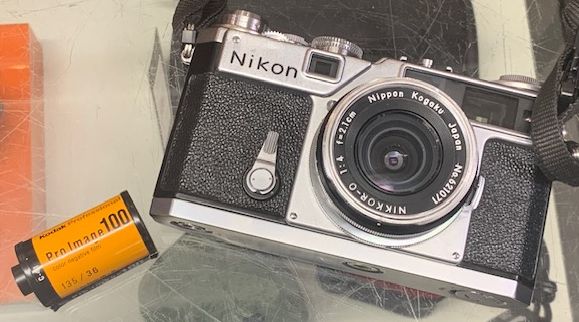
Whichever camera you choose to shoot it with, it’s mandatory to use an external viewfinder. Without it, it will be impossible to frame your shot properly. The one you see here is the special viewfinder that comes with the lens, it’s kind of rare and expensive. One of these can easily go for $700.00 if it’s in great shape!
The viewfinder is huge! There’s no place for an external light meter because of it so you must use another light meter type with you.
A Nikon S2 will also be a good choice for this lens. I wish that Nikon made a rangefinder camera without a rangefinder at all, with a clean top very much like a Leica IA, that will make the setup even more compact.
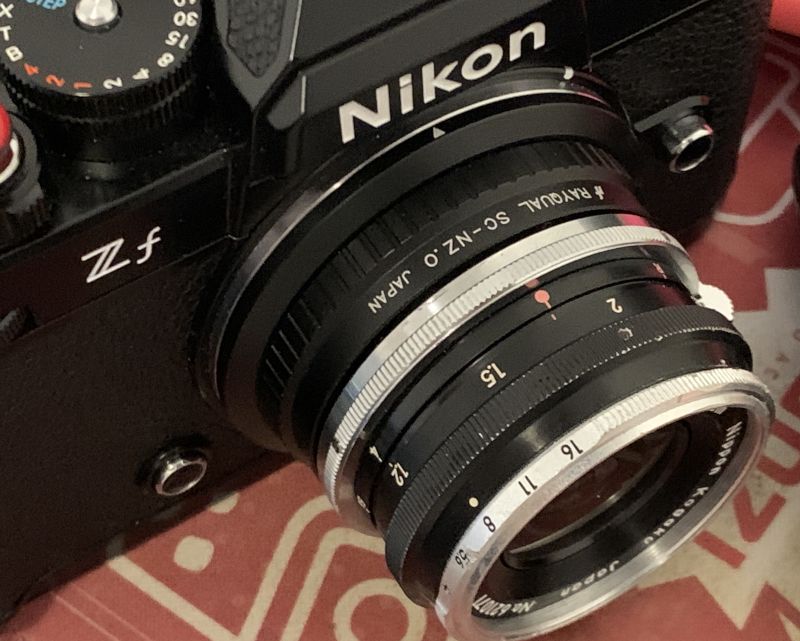
Adapting this lens isn’t trivial, you’ll have to remove the rear ring with the claw. That thing is long enough to scratch the inside of the camera and can interfere with the shutter. What you see here is not something I’d recommend because it’s very risky. I am able to mount it safely without the claw and the shutter fired. I held my breath and sighed, imagine the things that I am willing to do just for your entertainment. I used a Nikon Zf here together with a Rayqual adapter, the best that money could buy.
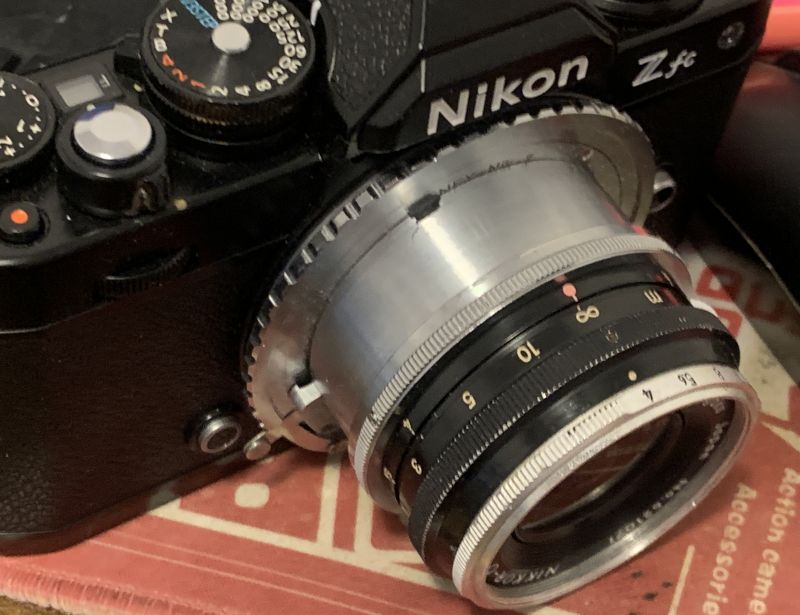
It’s even worse if you’re thinking of adapting it to an APS-C camera such as a Nikon Z fc. This is because it has a smaller sensor and the surrounding plastic material is raised. That damn claw I’ve mentioned will be able to scratch the surface. Even without the claw, the curvature of the glass may be enough to scratch it!
Since I have already covered the F-mount version of this lens there’s no point for me to repeat the tests. I will focus instead on how it handles when shooting with a Nikon SP. The ergonomics are similar to others in the W-Nikkor series so it won’t be much of a surprise to you.

Since this is an older lens with ancient coatings applied it will be more susceptible to internal reflections. I don’t take it as a negative because it’s what one would have expected it to be.

You will be able to avoid the ugly blobs if you just change your position. This is difficult to do because it’s not possible to look through the lens as you would with an SLR or a mirrorless camera. The viewfinder will be helpful in approximating how much internal reflections you’ll get because it will be visible there, too, It won’t be accurate but it’s better than nothing.

I’m not sure if it’s just me but the distortion profile I’m seeing is the opposite of what we have with the Nikkor-O 2.1cm f/4 (F-mount), it makes no absolute sense at all so maybe I’m just imagining things.

This is probably as close as you can get, or maybe a little bit closer because this was shot just a little over 1m away (0.9m is the minimum). It can be a little bit tricky to frame precisely using the external viewfinder because it doesn’t have the frame lines for focusing closer. You’ll just have to compensate but it’s easy for you to estimate your framing. Just be sure to frame wider than needed so you’ll able to crop later.
My lens has scratches all over the front element and some fungus damage elsewhere. This results in hazy pictures which pisses me off, because it’s not visible in the Nikkor-O 2.1cm f/4 (F-mount) one I have.

This is the widest Nikkor for the Nikon rangefinder system and it opens up lots of possibilities.

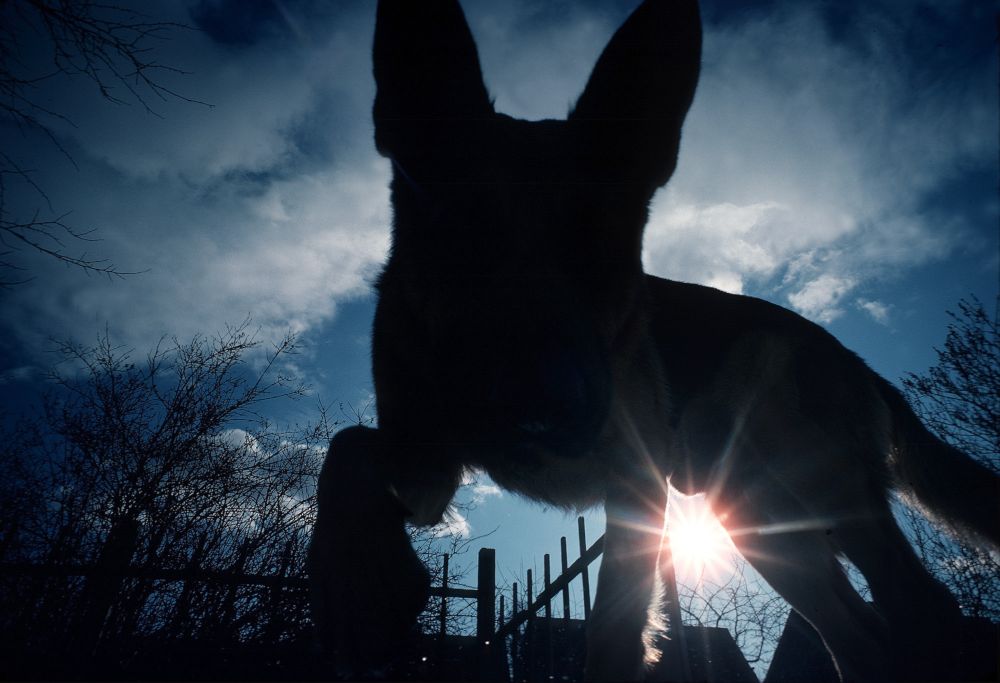
Just imagine how impactful this lens was because one will be able to take pictures like this when it’s not at all possible before. I’m pretty sure a lot of professionals got one of these if they could afford it.


(Click to expand)
Here’s the rest of the roll. I had a lot of fun with it despite all of its limitations, I just focused on shooting. I love how compact it is, it’s amazing how the engineers designed something like this without making it so huge externally. This enabled me to shoot in a nimble manner. The biggest thing that you should look out for while shooting with it is to be mindful of your fingers because you can accidentally lock your frame! It is so wide and accidents can easily happen.
Lastly, we have a picture from one of our dear readers – Birna Rørslett. The caption says: “I remember this lens fondly. It’s true the much more “recent” (from 2005 or so) Voigländer Skopar 21mm f/4, is superior, but the ancient Nikkor-O 2.1cm f/4 had its charm and helped me love the Nikon rangefinders back in the film days.”
I wouldn’t recommend this to anyone given how expensive they go for, you can easily find Voigtländers for much less. The latter has better optics, coating, and design, their viewfinders are also much better. It’s going to be more practical for daily use. Being expensive isn’t the only problem you’ll face, you must also find one first. These don’t usually show up and the ones for sale usually costs a small fortune, enough for you to buy a used compact car from a couple of years ago. I got lucky because I got a 20% discount from my broker so I’m able to get one. You should never pay more than $3,750.00 for a complete set that is in good shape. You must make sure that everything is complete including that annoying claw. You must see if the viewfinder has any damage such as cracks on the plastic parts because they are very delicate. Turn all of its rings and make sure that you’re able to focus and change the aperture properly. Look into the iris and make sure that it’s working and not missing anything, the shape should be even. It can be oily but it’s to be expected and can easily be cleaned by a professional. Check the glass and make sure that there’s no signs of fungus, large scratches, and most importantly – balsam separation. A small amount of scratches is not a problem given how old these are. Don’t rush it, you’re able to find one given the right time. Being a patient collector is the way to go. Even if you are a Saudi you won’t be able to get one of these if there is none for sale. Collecting lenses is not something that you should rush, so happy hunting!
Before We Begin:
If this is your first attempt at repairing a lens, I suggest that you see my previous posts regarding screws & drivers, grease and other things. Also read what I wrote about the tools that you’ll need.
I suggest that you read these primers before you begin:
- Essential tools
- Best practices 1
- Best practices 2
- Best practices 3
- Ai conversion
- Working with Helicoids
Reading these should lessen the chance of ruining your lens. Before opening up anything, always look for other people who have done so on the internet. Information is vague and scattered but you can still find some information if you search carefully.
For more advanced topics, you can read my fungus removal article. It has a lot of useful information, it will be beneficial for you to read this. I also recommend that you read the working with helicoids article so you will not get stuck because you couldn’t reassemble the helicoids back properly.
Disassembly (Focusing Unit):
The construction of this lens is somewhat similar to many W-Nikkors in that you are able to separate the lens into 2 separate parts by unscrewing a ring or collar. Other than that, there are some special things to consider the barrel design in unique thanks to its rather long objective and its housing. I don’t think this is a difficult lens to take apart for an expert but if you are an amateur, please do not consider working on it. Find a professional and show him my article so he will know how to take it apart safely. This is a valuable item that you don’t get to see often, many people have never even seen one in person! This is not what I would consider to be something for a beginner, even if you’re Elon Musk or a Saudi prince.
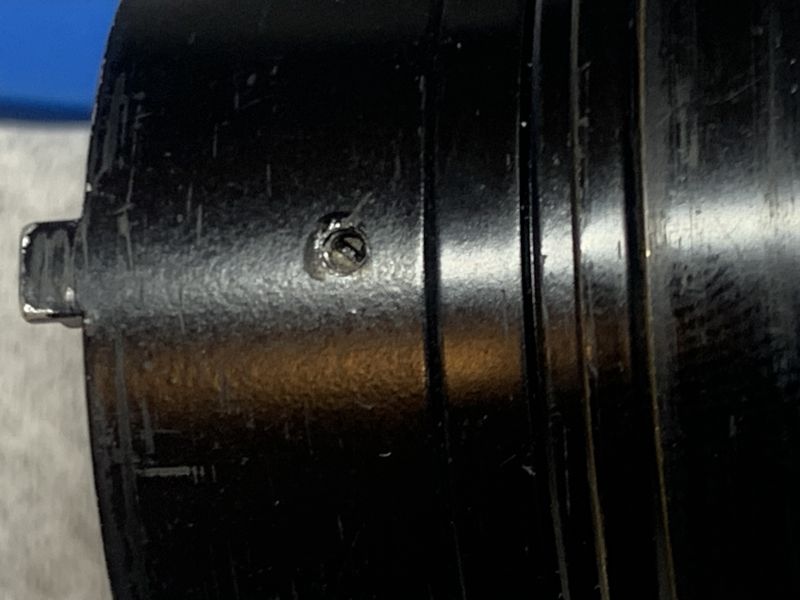
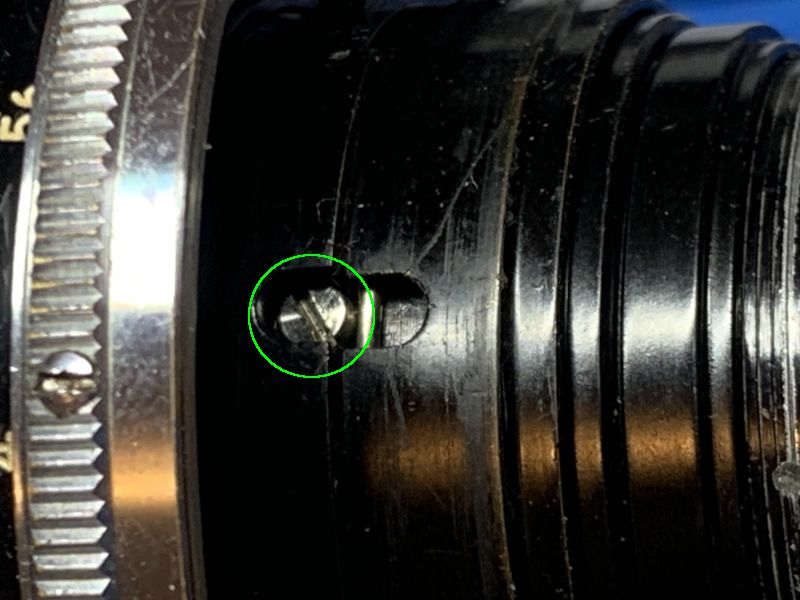
Carefully locate these screws and loosen them enough so you will be able to pull the rear ring off. Mine has three of them.
Before you pull the ring off make sure that you have a reference of its original orientation so you’ll know how to put it back again later. If you didn’t do it, you’ll have to do some trial and error later just to figure out the correct alignment of this damn ring together with its fucking claw.
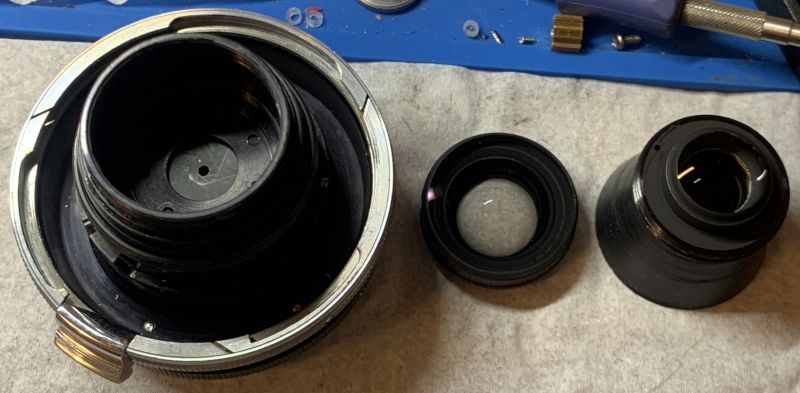
At this point, it’s best to remove the rear optics for safety. The rear element can be easily unscrewed and the inner one can be removed with a lens spanner that is small or narrow enough to fit. Be very careful, it is easy to damage the inner parts if you’re not careful. Store them in a safe place while you continue with the rest of the barrel.
Here’s a little detour, you can do this later but I’d rather do it now. Find a rubber tool to unscrew the front bezel.
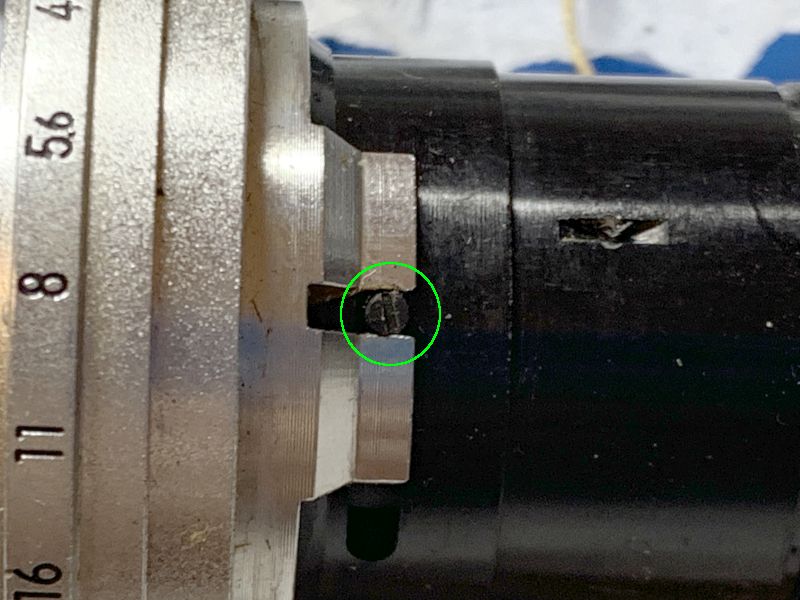
This screw serves two purposes, it keeps the focusing cam aligned along with constraining the front part of the lens so it won’t turn freely or slide out. Carefully extract it, and keep this in a safe place.
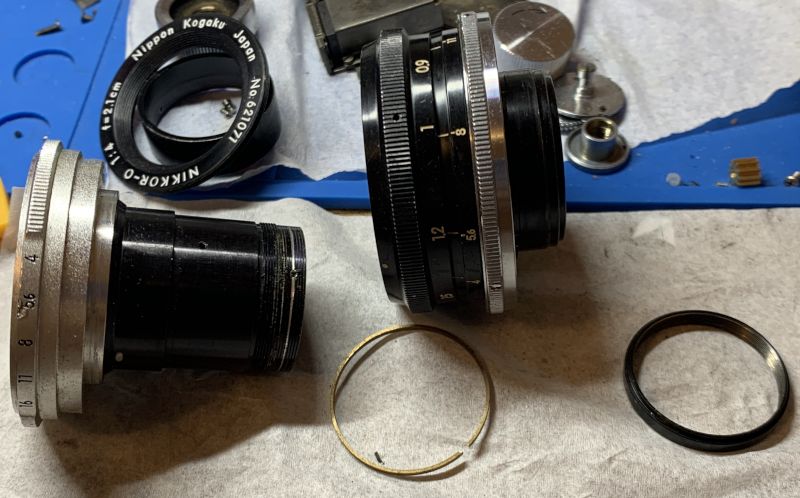
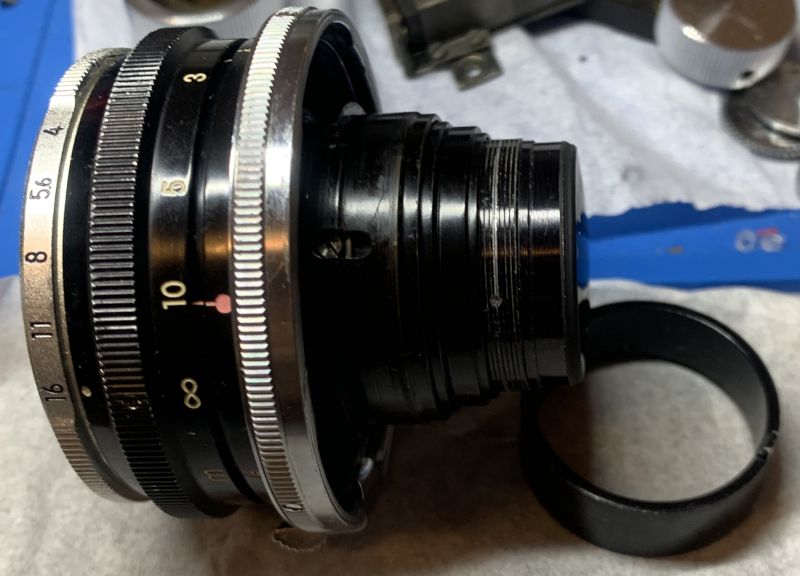
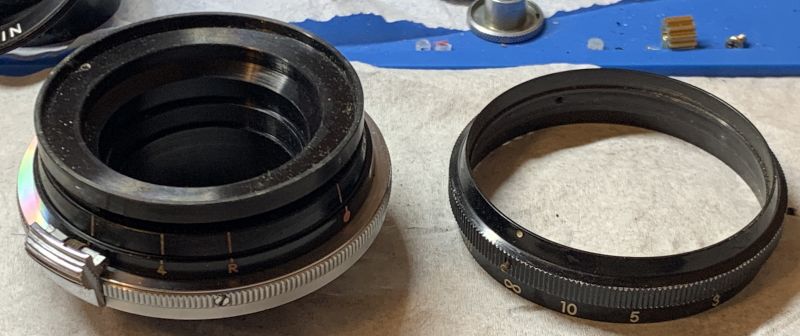
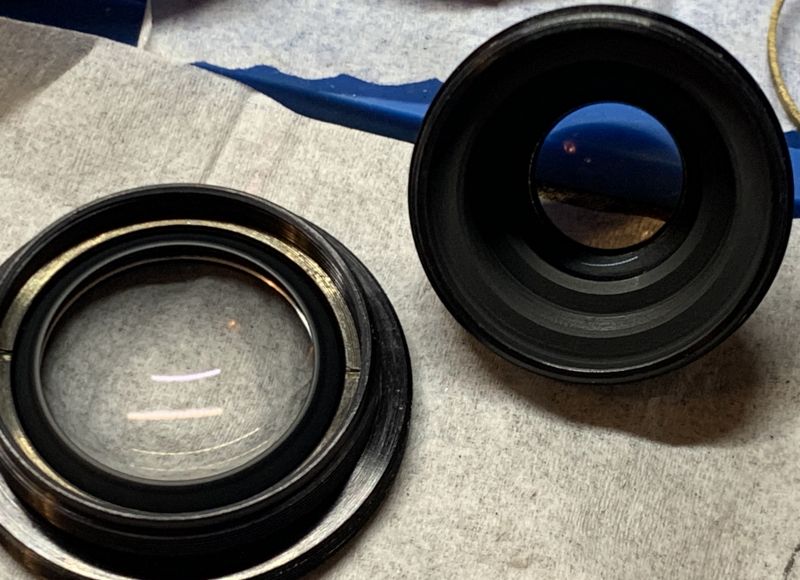
Like most W-Nikkors this one can be easily separated by unscrewing a ring somewhere. Look for the ring that is around the neck of the rear barrel, it is exactly before the rear ring with the claw. Unscrew it so you can pull the objective along with the front part of the lens off. There is a shim underneath the front part, it is made of brass and it’s used for adjusting the focus of the lens. Don’t lose or damage it because it’s not going to be easy to replace it. Mine’s broken, you can see that there’s a crack that opened the shim.
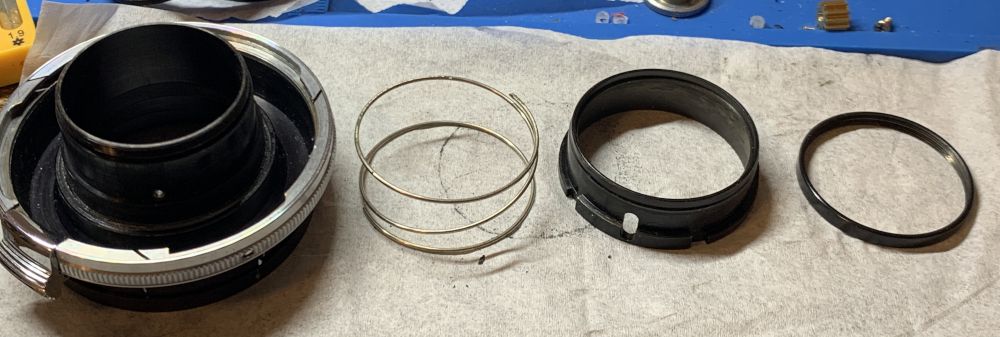
Find another ring somewhere in the rare barrel and carefully unscrew it off in order to dismantle the cam. When it’s time to put everything back, attach the screw that we have removed a few steps back first then install the spring and carefully put the cam back. When it’s time to put the objective back just loosen the screw a little so the objective will be able to slide in then tighten it again once it’s in place.
Turn the barrel to infinity so this screw is accessible through its hole, then extract it. This screw makes sure that the focusing ring won’t turn beyond its range. Don’t lose it, it’s very hard to find a replacement.
(Click to enlarge)
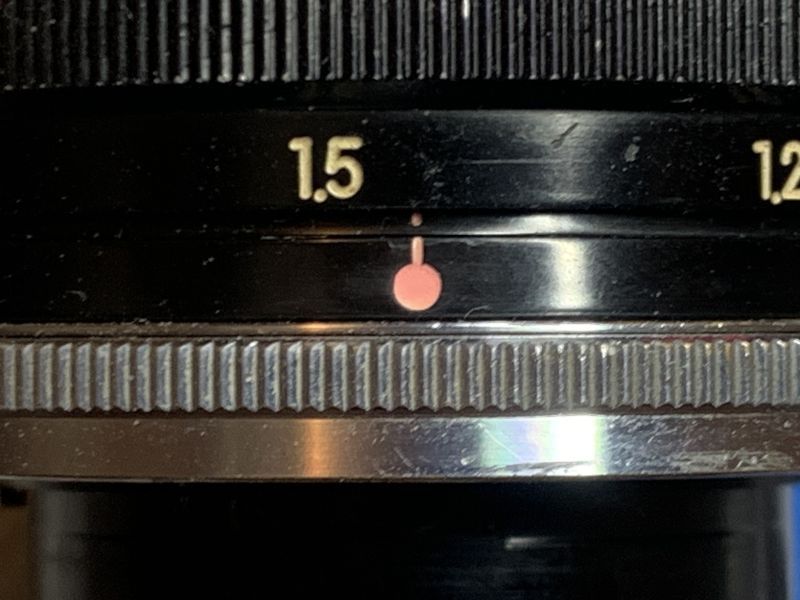
Now that the screw is gone you’re able to turn the focusing ring beyond its range. Take reference pictures of the correct alignment and height of the barrel while at Infinity. Also turn the focusing ring way past the infinity symbol so it’s collapsed. You should be able to reproduce this later during the assembly.
Loosen the screws of the focusing ring then pull it off from the barrel.
Unscrew the helicoid until it separates. Don’t forget to note where they’ve parted, it’s also the same place where they should mesh. Many people forget about it so they get stuck guessing where it is. To prevent it from happening to you, read my article on servicing helicoids, follow my guide to the best of your ability.
Clean everything thoroughly, I scrubbed mine with toilet cleanser and rinsed everything well. A final rinse was done with alcohol to remove any residue. Never pickle the black painted parts in alcohol, that will lift the paint off. It is best to wipe the black parts with alcohol and clean the excess so the solvent won’t pool and damage the paint. Once you’re done cleaning and the parts are dry you’re now ready to apply a fresh coat of grease. I used a thin type so I will be able to turn it with the focusing dial in the camera. Avoid the temptation of applying too much grease, you only need a thin film to make things feel smooth,
Disassembly (Front Barrel):
This part contains the optics and the iris. It’s almost certain that your lens will have an oily iris so this it’s necessary to overhaul everything down to the last part. There are many delicate parts here so you must be very careful, specially with the glass since they’re mostly cemented.
This screw couples the aperture ring to the iris mechanism inside, carefully extract it so you will be able to remove the aperture ring. Don’t misplace this screw.

Turn the aperture ring until you’re able to remove it.

The front optics assembly can be unscrewed with a rubber cup.
You can open it up even further by unscrewing the rear. The front group is being held by a retainer ring. I did not bother to go any further than what you see here.

The iris mechanism is being held together by this brass circlip.
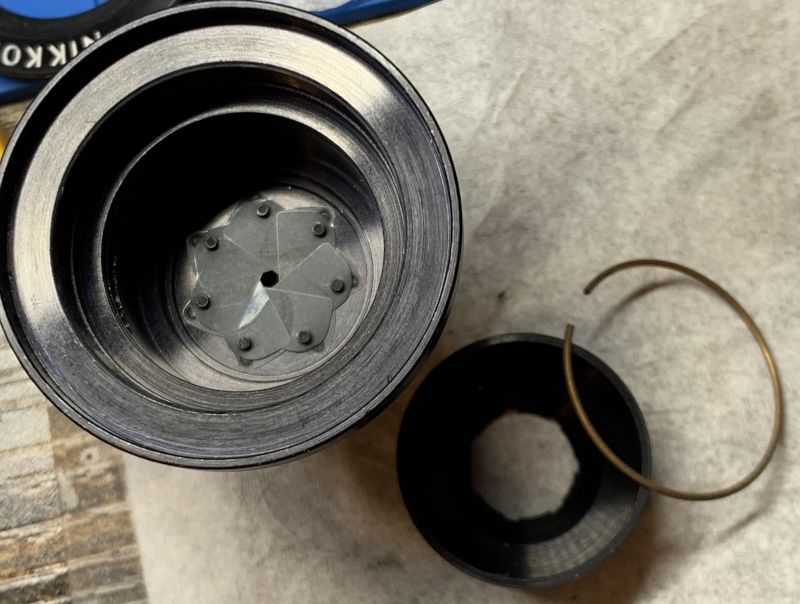
Carefully pick the circlip off and you’re able to pull the diaphragm cup off.
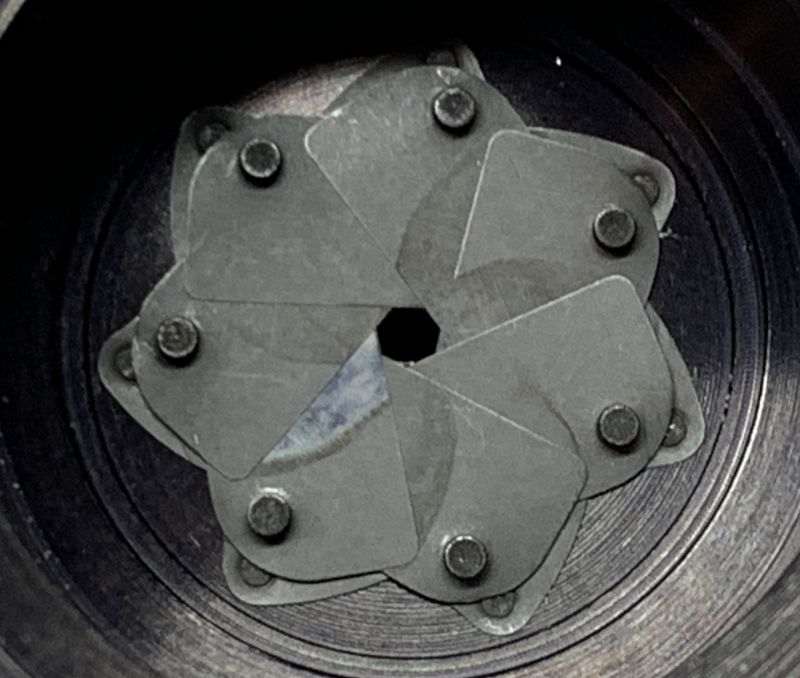
The iris blades sit deep within the housing. The best way to remove them is to poke them off from behind and carefully catching them with a soft towel. They are very delicate so handle them with care.
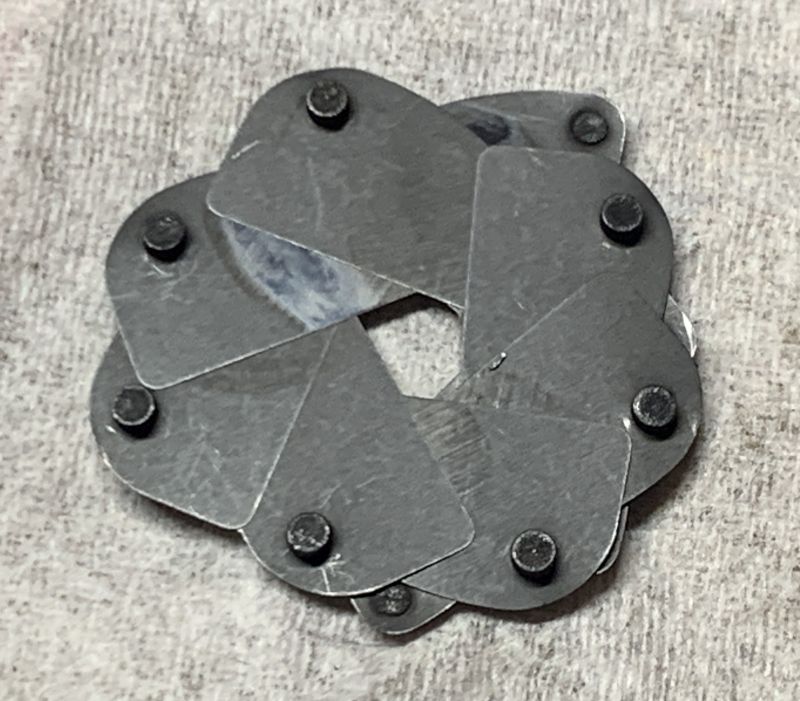
Mine came off looking like this. It’s oily so the blades stick together, so I carefully separated them in order to clean them individually with lighter fluid and a lot of Q-tips.
If your lens has fungus, read my article on how to clean lens fungus, just make sure that you dilute it with distilled water so it’s not going to be too strong as it may damage the coating.
When lubricating, be sure not to apply too much, all you’ll need is a thin film of fresh grease. Combine the helicoids then exercise them by turning several times, this ensures that the grease is applied evenly. Wipe off any excess. If you’ve applied too much grease it will settle in the iris mechanism eventually and you’ll need to open it again just to give everything another overhaul.
Never lubricate the iris mechanism, if you must, a light dusting of powdered graphite is enough, blow off any excess powder after actuating the iris several times to finish the job.
Conclusion:
It took me under 3 hours to overhaul this lens with most of that time spent cleaning everything up. I also spent a lot of time putting the iris back because it sits so deep within its housing. I had a lot of fun since I have always wanted to service one of these. It’s one of my personal milestones!
What an elegant little kit. This is one of those things that I will keep with me forever. There’s no other way to describe the feeling of owning one of the most desirable items in this expensive game.
That’s all for this article! This is definitely one of the most exclusive ones in my database, you won’t one in another site that went this deep on this particular lens. Thank you very much for supporting my work, the tip that you leave me helps a lot in helping me offset the cost of buying, developing, and scanning film. It is also helping me with the upkeep of this site because hosting such a media-heavy site isn’t easy. I could not have done this all by myself. You are the reason why this site has been posting quality content for the last decade! Thanks to you again and see you next time, Ric.
Help Support this Blog:
Maintaining this site requires resources and a lot of time. If you think that it has helped you or you want to show your support by helping with the site’s upkeep, you can make a small donation to my paypal.com at richardHaw888@gmail.com. Money isn’t my prime motivation for this blog, I believe I have enough to run this myself but you can help me make this site grow.
Leave me some tip?
Thank you very much for your continued support!
$2.00
Helping support this site will ensure that it will be kept going as long as I have the time and energy for this. I’d appreciate it if you just leave out your name or details like your country’s name or other info so that the donations will totally be anonymous. This is a labor of love and I intend to keep it that way for as long as I can. Ric.
