
Hello, everybody! Do you remember Quiet Riot? They’re best known for the cover of Cum on Feel the Noise by Slade and Metal Health. The Slade song is one of my favorites but Quiet Riot’s version is better in my opinion because it gave the music a more modern, grittier sound. I don’t know if the younger head-bangers know what I am talking about so just check them out if you’re not familiar with them. Speaking of revisions, I will talk about an important camera today that turned Nikon’s first camera into a world-class product by implementing many clever changes.
Introduction:
The Nikon S2 replaced the Nikon I/M/S line of cameras. It’s an important one because it laid the foundation for their next camera, the Nikon SP. It’s still a simple camera when it came out but it was a huge leap from the Nikon S. It now sports a much bigger finder, an advance lever, 1/1000s speed, a rewind crank, a proper A/R ring and much better build. This camera made Nikon an important name in cameras because Japan now has something serious and respectable to rival the German cameras to a certain extent. It sold well, it’s Nikon’s most numerous rangefinder camera and the most common one you will see in the used market. Despite the numbers, the prices for these aren’t going down but they’re getting more expensive as people get to know them and how comfortable they are for regular use.
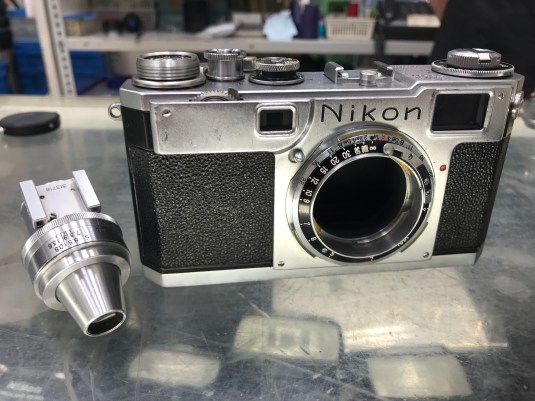 The Nikon S2 is a beautiful machine because of all the big dials and the nice silhouette. It’s probably the sexiest Nikon rangefinder camera in my opinion specially if you mate it with a good-looking compact lens. It only comes with a 50mm viewfinder, a standard for its day but it’s life-size and very bright. I love how you don’t have to squint because of it since what you see on both of your eyes is the same magnification. It’s not parallax-corrected, which is a missed-opportunity. If you need to shoot with a different focal length you will need one of Nikon’s many external finders such as the one you see here.
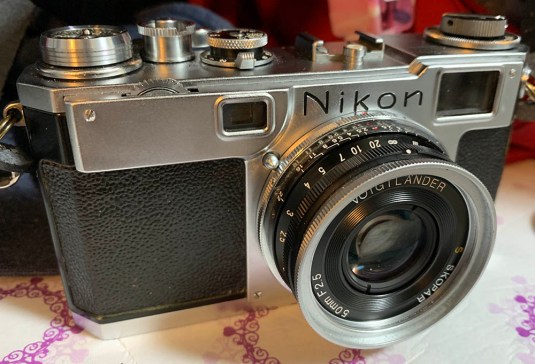 Here it is with my Voigtländer (Cosina) Color-Skopar 50mm f/2.5, it’s a lovely little lens that’s perfect for the Nikon S2.
It’s a very reliable camera with nothing much that can fail. The shutter is a development of the one in the Nikon I/M/S but it now uses a better governor for the slow speeds. The parts used are more precise and the build is much better compared to what Nikon has ever made at that point. It also now uses an improved shutter brake system with a unique mechanism with a bearing ball so the front curtain won’t rebound. While these may not sound much, it is important to note that these mechanisms will lead to Nikon producing the venerable Nikon SP which will ultimately lead to the Nikon F in later years and was heavily-based on the Nikon SP. This is how important the design is for the Japanese camera industry as a whole, it gave Japan the prestige that it lacked because everybody knows that Germany made the best ones at the time it came out.
These are wonderful “heritage cameras” and they’re still useful to this day, I only missed the convenience of a built-in lightmeter but that’s easily solved by the Voigtländer (Cosina) VC Meters. A hand-held meter is also great, I am partial to them at times because I can just “sweep” the scene and guess the exposure. Going back to the Nikon S2, make sure to check for the following things before you buy one:
- Brightness of the rangefinder patch and a clean viewfinder.
- The patch should align in both vertical and horizontal planes.
- Check if it focuses properly via the viewfinder and film plane.
- Every speed should work, even 1/1000s and the slow ones.
- The shutter should be clean, not dirty or wrinkled.
- Check for holes or fungus on the shutter.
- The advance lever should feel precise, snappy and smooth.
- The focusing wheel should turn the helicoid effortlessly.
- Make sure that the helicoid doesn’t squeak, a common issue.
- The film counter should advance as you cock the shutter.
- The curtains shouldn’t open if you turn the A/R ring (if cocked).
- Make sure that there are no big dents on the top deck.
These are just the basics when looking for a used Nikon S2. It’s hard to hunt for the perfect one so if you bought one and plan to use it regularly it has to be serviced by a repairman and a competent one, too. There are people who will advertize themselves as experts but they’re really quacks, they will not only destroy your camera but also waste your time and money. Make sure that you ask for recommendations and don’t be afraid to pay a little more if that means that you’ll get a better service. This article wan’t made so that it will encourage people to open the camera and fix it themselves. It’s only for your entertainment and education so nobody can pull-a-mickey on you. It’s not an easy task to repair cameras properly so don’t be afraid to spend a bit of money so the real repairmen can continue doing their jobs.
Before We Begin:
If this is your first attempt at repairing a lens then I suggest that you check my previous posts regarding screws & drivers, grease and other things. Also read what I wrote about the tools that you’ll need to fix your Nikkors.
I suggest that you read these primers before you begin (for beginners):
- Essential tools
- Best practices 1
- Best practices 2
- Best practices 3
- Ai conversion
- Working with Helicoids
Reading these primers should lessen the chance of ruining your lens if you are a novice. Before opening up any lens, always look for other people who have done so in Youtube or the internet. Information is scarce, vague and scattered (that is why I started this) but you can still find some information if you search carefully.
I highly recommend that you read my working with helicoids post because this is very important and getting it wrong can ruin your day. If I can force you to read this, I would. It is that important!
For more advanced topics, you can read my fungus removal post as a start. This post has a lot of useful information and it will be beneficial for you to read this.
Disassembly (Top Panel):
In vintage camera repair, nearly everything begins with the top panel and it is not different with the Nikon S2. It’s easy to remove the top panel, I usually spend about 15 minutes removing it. That’s fast, I am used to doing this and I have the right tools. You don’t even try to begin working on this camera if you don’t have the right tools or skills, doing so will just make things worse. I don’t think anything here was sealed but there will be times when some of the things here just won’t move, if that happens then just apply a bit of heat using a soldering iron or some alcohol to soften the seals. I never have to do any of this for the Nikon S2 but it may be different for you. You’ll also need a good way to organize your screws and parts so prepare your desk first. You will want to use the best screwdrivers available to you, use drivers with flat and parallel walls so you won’t scar the screws, too.
Some people will start working on these by removing the front panel but it’s better to start with the top because starting from the front means that you’ll have to contort some parts in order to remove them. I removed the front in this section for no particular reason at all so don’t get confused.
 Loosen the screw to remove the film counter cover.
 The cover should easily be unscrewed, if yours is stuck then just apply a bit of alcohol to help you loosen the threads. You can remove the screw or just screw it back so it doesn’t go anywhere, it’s so tiny you can easily lose it.
 The film counter dial can be pulled-off using your nails, simply grab it by its sides and pull away.
(Click to enlarge)
You can now remove the collar but you’ll have to remove these screws first. These screws simply grab-on to the part underneath them, these don’t sink into any holes.
 While removing the collar, be sure that you don’t disturb the hook of this spring or it will un-wind itself. Press on the hook to help put it in-place.
 Carefully remove the advance lever and press on the hook while doing it so you won’t disturb the spring. The inner walls of the advance lever secures it in place and it can easily snag.
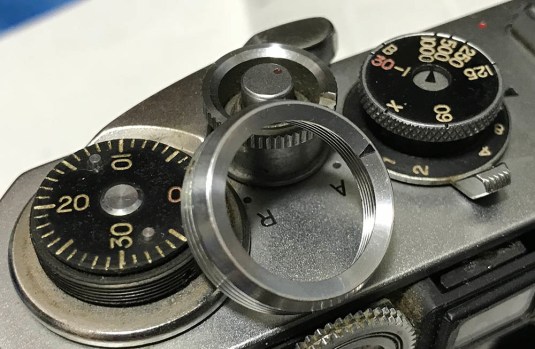
 Locate and remove a tiny set screw here so you can remove the A/R ring.
 The A/R ring is being secured by this collar. Use an A/R ring opener and get it out, make one if you don’t. These can be difficult to remove safely without a proper opener.
 The A/R ring can now be easily removed once the collar is out.
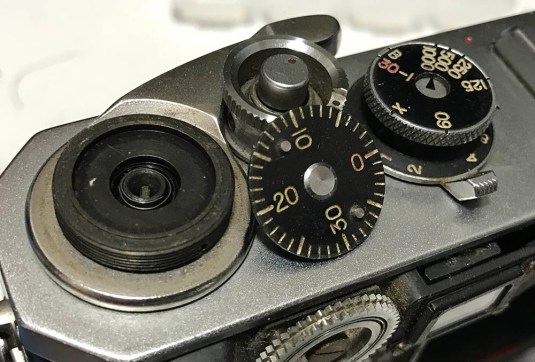
 You’re now able to access these screws with enough clearance so you do not scratch anything if your hand slipped. Remove these screws and keep them.
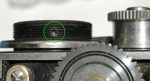
 The shutter speed selector comes in 2 parts. Rotate the top dial for the faster shutter speeds and locate this screw and remove it.
 The top dial can be unscrewed once the screw is gone. It’s easier to remove it if the shutter is cocked. You can cock the shutter simply by turning this.
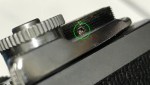
 Carefully remove this using the correct-sized driver. This secures the lower dial and is also sometimes used to adjust the position of the lower dial but it is mostly possible on some of the earlier versions of the Nikon S2.
 The lower shutter speed selector dial can now be safely pulled-off from the top deck of the camera.
 The flash contact can be removed by a special tool called a friction wrench. It’s a special tool that you can make yourself. An alternative is you can use a pair of pliers with no teeth and wrap the tips with thick, tough rubber.
 The rewind crank can be easily removed once this screw is gone.
 To prevent this from turning while you unscrew it, jam the rewind fork and turn it. I use a piece of acrylic or wood to jam the fork so I won’t damage it.
 Be sure not to lose anything here. These parts will fall down while removing the rewind crank because nothing is securing these.
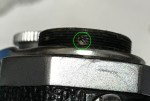
 The flash-sync selector dial is being secured by these screws. You adjust the alignment of the numbers to the arrow when these are loose.
 You can remove these screws later or now if you wanted to.
 Be sure not to lose the washer and spacer of the flash-sync selector dial.
 You can now carefully remove the top cover of the camera. Gently pull it off and never force it as this can easily-bend under pressure.
make sure that you don’t lose anything here and don’t forget which screws should go where. Since the top cover is gone you will want to be careful so you don’t accidentally damage anything when handling the camera.
Disassembly (Front Panel):
I have discussed how to remove the front panel in an older article and I will not repeat what was mentioned there. Go and read my old Nikon S2 article, that is part of this series and should compliment this article. Working with the front is quite easy, you don’t need any special openers here but you will have to be careful with how you handle things especially near the focusing wheel where there are many thin parts that can bend easily. You’ll also need plenty of alcohol to help you soften the cement used on the leatherette.
 Time to remove some important parts. Make sure to take plenty of photos so you will know how to put things back together again. Carefully remove the leatherette by saturating them with alcohol and peel them starting from the corners. These are old and can easily be damaged so do it gently. I use a tool that I fashioned from and old chisel to help lift the leatherette. A similar one can be easily made from an old screwdriver, just make sure not to leave any sharp parts on the tool.
 The helicoid is secured by 3 screws. I will not repeat what I wrote in my old article about the Nikon S2 and how to open the front so please read that one in order to see how things are done.
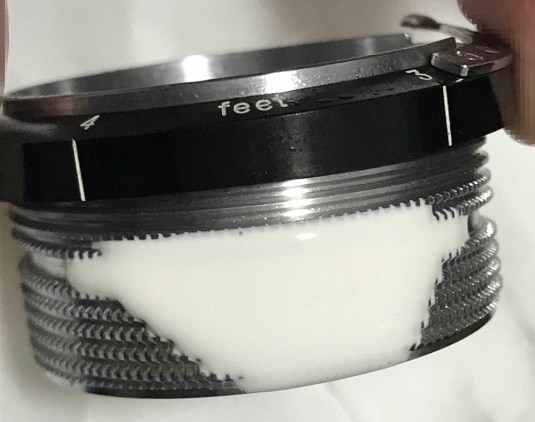
 Remove the helicoid carefully as per my instructions on my old article. This is very delicate so make sure that you don’t bend anything accidentally.
 Don’t lose the thin shims here, remember their positions by marking them, I sometimes find 2 shims in the same hole so also take note of that, too.
 Read my old Nikon S2 article for instructions on how to separate the parts of the helicoid. Never forgot to note where the helicoid separated because this is also where it should mesh.
The remaining traces of cement can be removed using a rag with solvents. I usually use the same solvent that the cement reacted to, alcohol is fine most of the time but there are times when you will need a stronger solvent. There are even times when I would even require a Dremel with a wire-brush to do the job properly.
Conclusion:
With the camera partially-disassembled, you can clean some of the parts so you can relax a bit. One of the things that you can do is clean the helicoid. It can feel gritty due to corrosion or damage and the only way you can fix this is to lap the mating surfaces. The helicoid is a fine mechanism so it has to be handled with utmost care. If you damaged the delicate teeth, the helicoid is going to feel gritty and it won’t even turn properly even with a lot of effort.
 To make the helicoid feel smooth again you can lap it using a mild polishing cream such as jeweler’s rouge and finish it off with an even-finer substance like metal polish. For those who are not familiar with lapping, it’s a process where you lightly take-away material from both sides of a helicoid by using a compound. Turning the parts will “grind-away” at both surfaces and you’ll get a smoother mating surface when done correctly. Doing it the wrong way will result in ruining the helicoid so don’t do this if you don’t know how to. I don’t have access to proper lapping compounds so I just had to improvise.
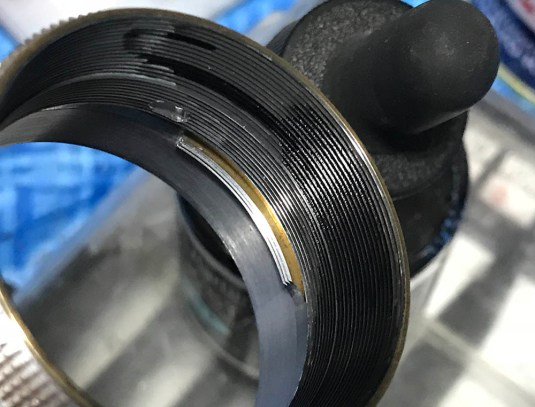 Once the helicoid is smooth, I painted the inner surface with a flat black ink to prevent light from reflecting-off the bright metal parts.
Here’s the rest of the series:
- Part 1 (Top & Front Panel)
- Part 2 (Internals & Rangefinder Mechanism)
- Part 3 (Film Advance, Speed Selector & Timing Mechanisms)
- Part 4 (Shutter Mechanism)
- Front Overhaul (Rangefinder Adjustment)
We’re done with part 1 of this series. Please don’t forget to share this with your friends. This will help with the revenue of this blog. You can also help support my work, this blog is an independent work and its revenue relies on ads, views and donations. Thanks for all the help and see you again in part 2, Ric.
Help Support this Blog:
Maintaining this blog requires money to operate. If you think that this site has helped you or you want to show your support by helping with the site’s upkeep, you can make a small donation to my paypal.com (richardHaw888@gmail.com). Money is not my prime motivation for this blog and I believe that I have enough to run this but you can help me make this site (and the companion facebook page) grow.
Leave me some tip?
Thank you very much for your continued support!
$2.00
Helping support this site will ensure that this will be kept going as long as I have the time and energy for this. I would appreciate it if you just leave out your name or details like your countrym name or other information so that the donations will totally be anonymous. This is a labor of love and I intend to keep it that way for as long as I can. Ric.

Dec 13, 2019 @ 21:43:30
Hi Richard, I’m dealing with a helicoid problem on my SP (noisy and gritty). A video in your YouTube channel showing step-by-step the removal of the helicoid and demonstrating the cleaning process would be amazing and infinitely appreciated! Thank you!
Jul 18, 2023 @ 21:57:41
Question on Nikon S2. Mandatory to advance film prior to changing shutter speeds? Otherwise damage? Thanks.