
Hello, everybody! I was watching the news once and I saw somebody trying to use and old-style telephone, the type with a dial that many of us grew-up using. You would dial-in a number and it will crank-back each time, it takes a lot of time just trying to dial few digits. Despite it being cumbersome I had plenty of good memories using those old phones, I would call my classmates and talk with them, most of them being girls and we would flirt “online”. It’s funny how time flies and many people don’t even remember these anymore to the point that it felt silly just watching somebody using it. I made friends with strangers and even met lovers using that ancient device, that was how people hooked-up anonymously back then. Before we get too nostalgic, I am going to show you something that made things convenient for everybody at a time when people were used to doing things the inconvenient way. This is important before I told you everything about my naughty teenage years.
Introduction:
The Nikon S3/S4’s speed-selector dial is convenient to use as it doesn’t spin. I love the fact that I don’t have to keep my fingers away from it while making an exposure. This was introduced with the Nikon SP to rival the Leica M3. It was epoch-making as far as Japanese cameras are concerned. In older ones like the Nikon S and Nikon S2, the speed-selector dial spins as you make an exposure. Disrupting it will cause faulty speeds so your exposure will be off by a lot. This won’t happen again in Nikon-land after the Nikon SP debuted.
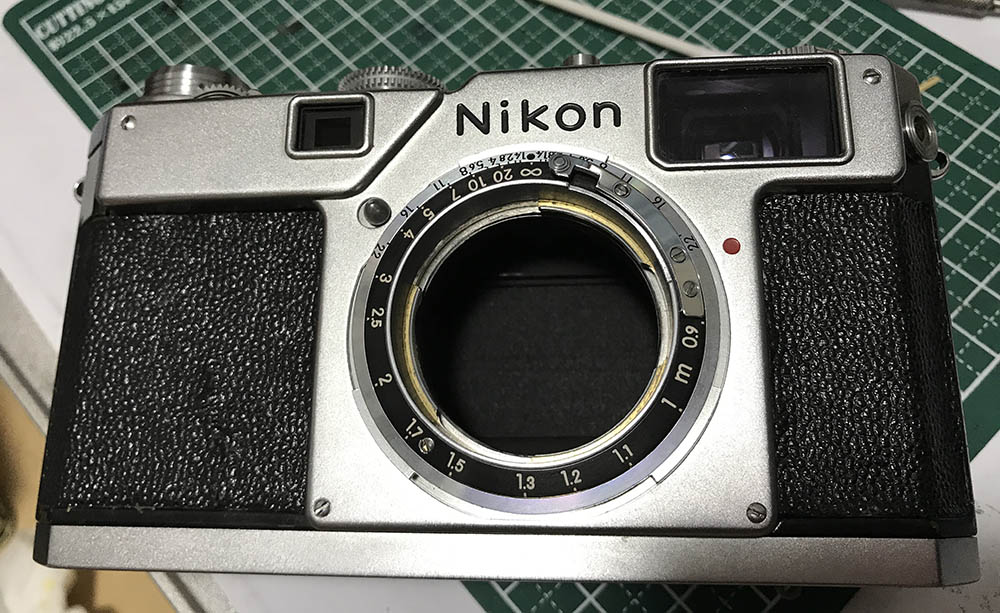
The Nikon S4 has a clean-looking face because it doesn’t have a self-timer. It is a very handsome camera, it looks good on you if you’re wearing a tuxedo.
I showed you how to remove the rangefinder mechanism and other things in the previous article so we’re going to go forward with the shutter today. I always clean the shutter carefully since that’s the hearth of the camera. It’s the most important part of the camera if you ask me.
In order for the shutter to work flawlessly it has to be maintained. A faulty shutter mechanism won’t give you the accuracy you demand from it. This is crucial specially with higher speeds, the slower speeds can be affected if the retarder isn’t working properly. I’ll show you how to clean these later in the following repair section.
Before We Begin:
If this is your first attempt at repairing a lens then I suggest that you check my previous posts regarding screws & drivers, grease and other things. Also read what I wrote about the tools that you’ll need to fix your Nikkors.
I suggest that you read these primers before you begin (for beginners):
Reading these primers should lessen the chance of ruining your lens if you are a novice. Before opening up any lens, always look for other people who have done so in Youtube or the internet. Information is scarce, vague and scattered (that is why I started this) but you can still find some information if you search carefully.
I highly recommend that you read my working with helicoids post because this is very important and getting it wrong can ruin your day. If I can force you to read this, I would. It is that important!
For more advanced topics, you can read my fungus removal post as a start. This post has a lot of useful information and it will be beneficial for you to read this.
Disassembly (Timing Mechanisms):
This is an advanced task, every overhaul has to involve working on this. It’s important that the mechanism here work flawlessly, this is all-mechanical. I usually spend the most time here and most of that time was spent cleaning everything well.
This task is reserved for advanced repairers. Novices and people who don’t have any practical experience repairing cameras should not touch this. It is best to just leave this job to the professional.

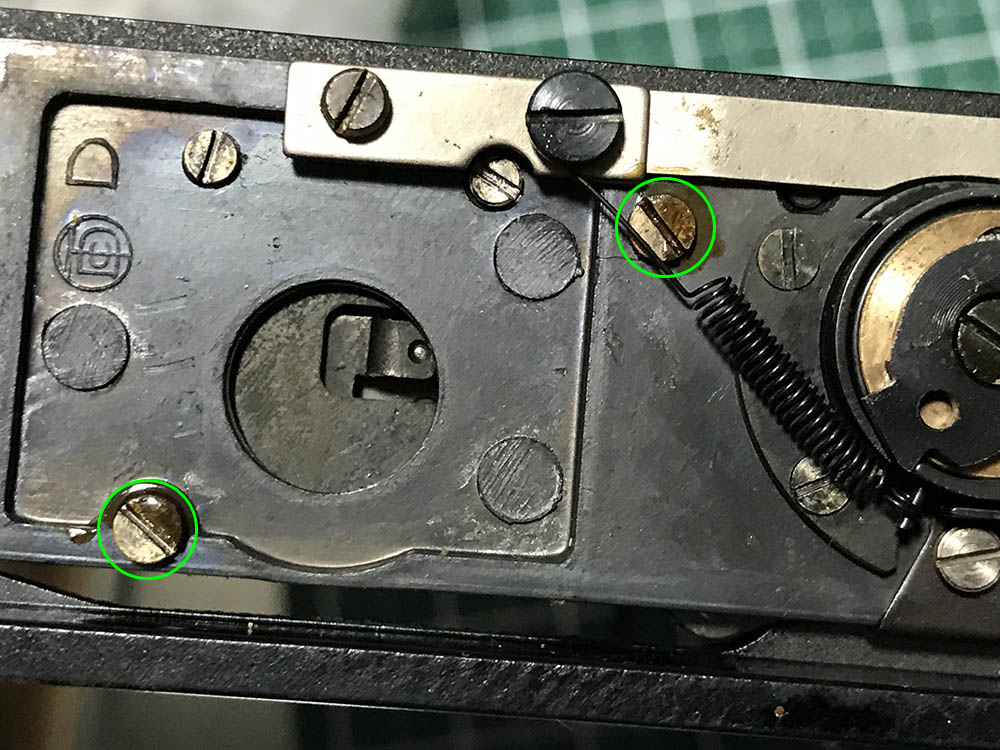
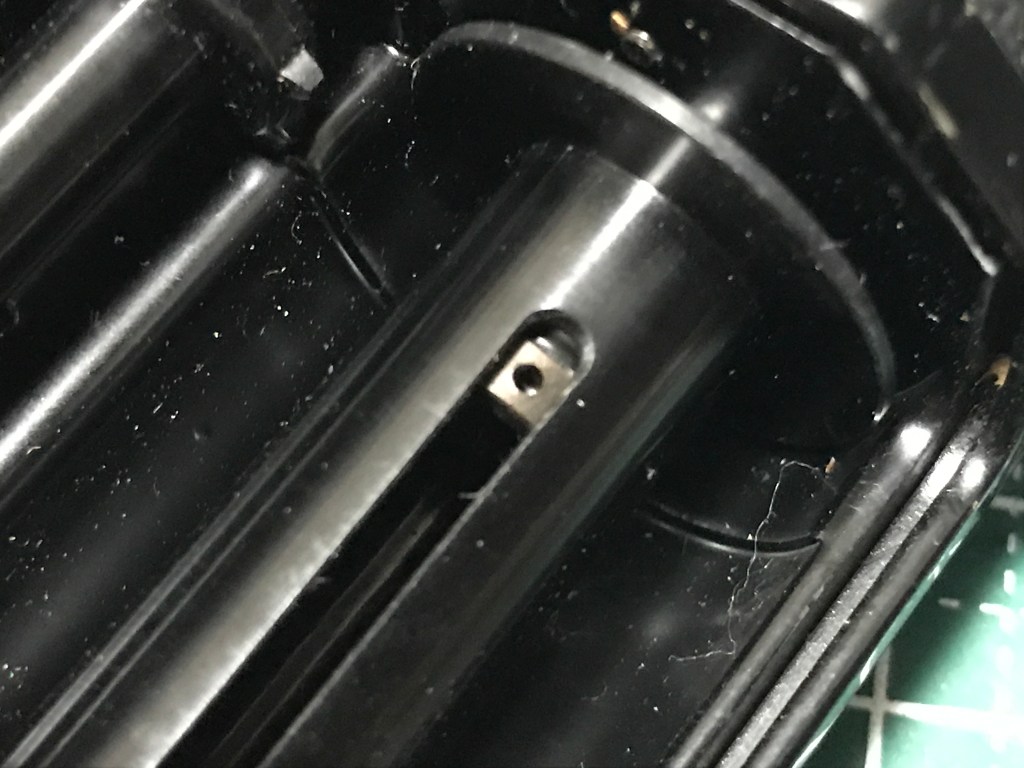
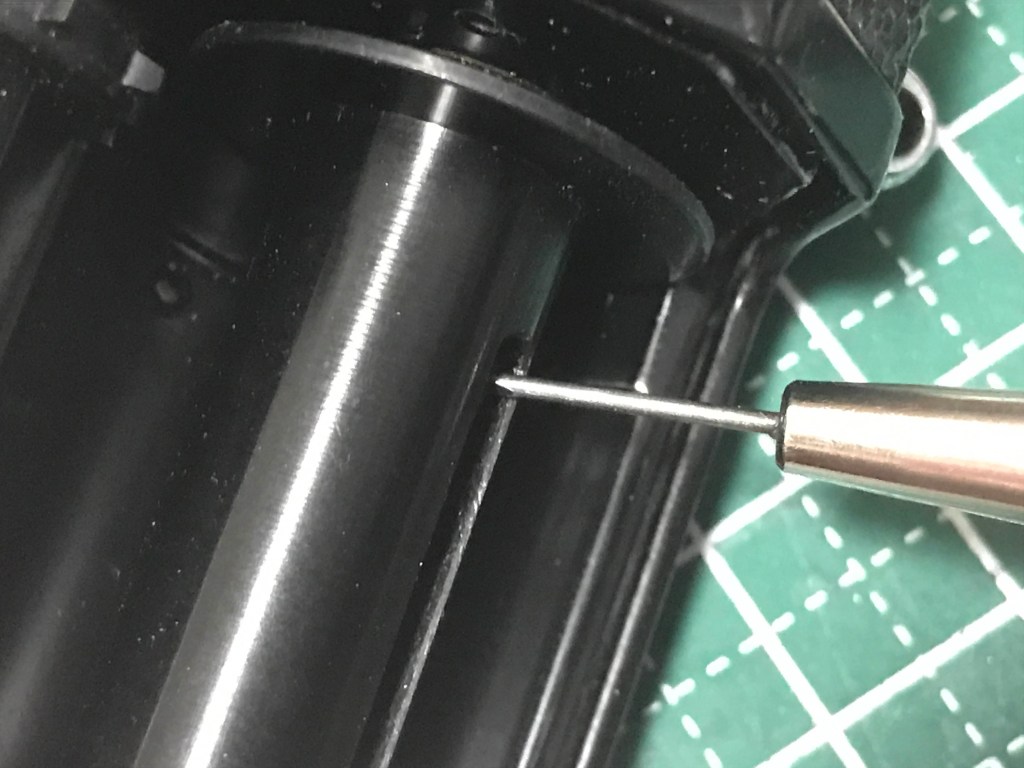
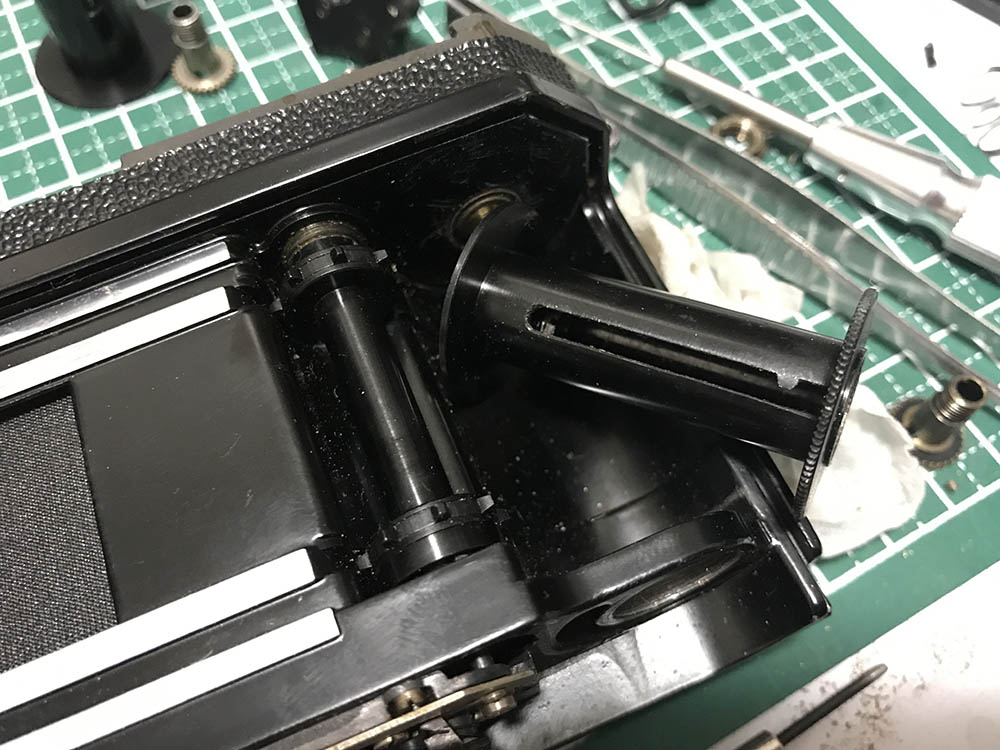
Loosen this screw to remove the inner shaft of the speed-selector assembly.
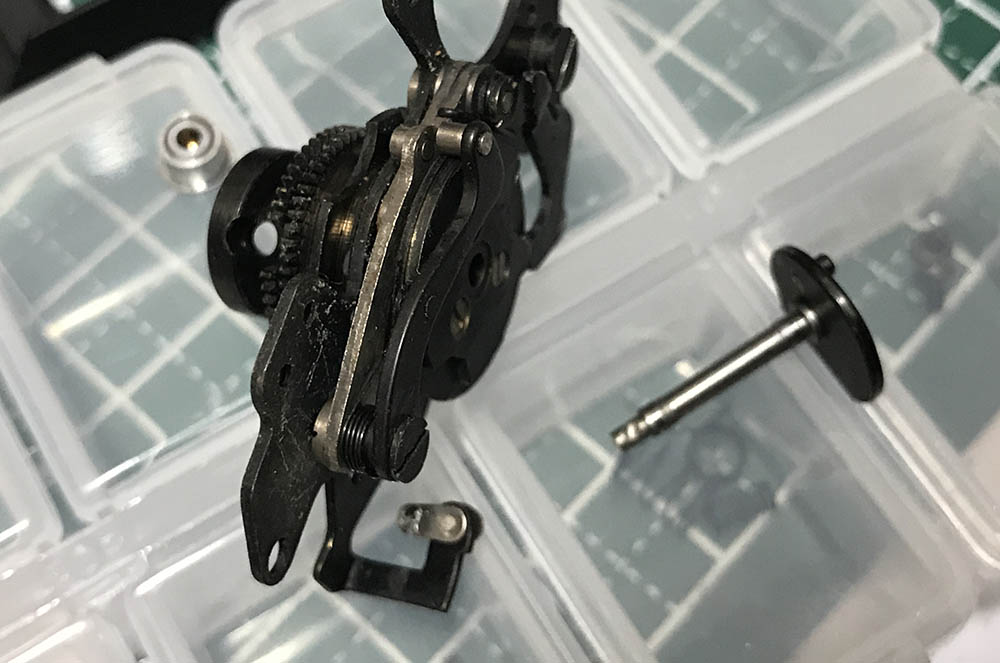
Carefully pull the shaft and clean its hole. Never over-tighten its screw or it won’t turn properly, you only want that set screw to prevent this shaft from popping-out of its hole.
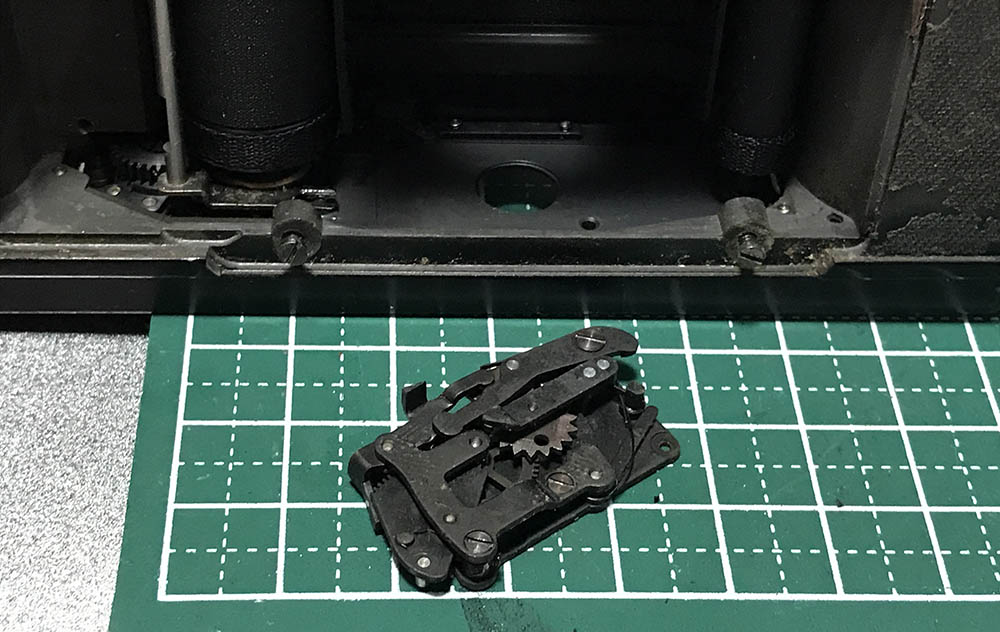
This is how the top looks like. I think this is the position of the dial when the speed is set to 1s but I’m not sure. I haven’t repaired anything for months. It is important that you clean everything here really well. I would soak this in a tiny pot filled with naphtha to flush any dirt away. Some people don’t like this idea because naphtha is highly flammable, it all boils down to what you are comfortable with. I grew up in a watch repair shop, this was a standard procedure and I am sure that people still do that now.

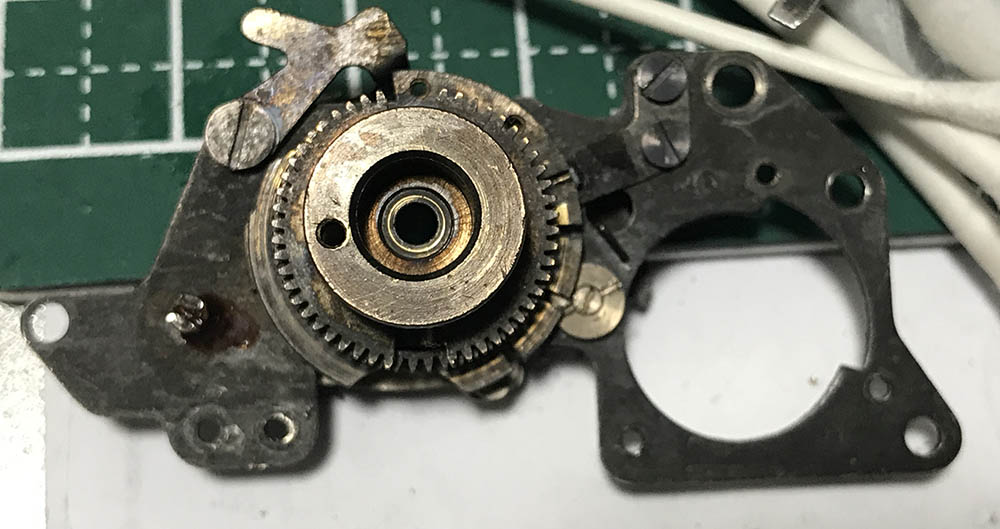
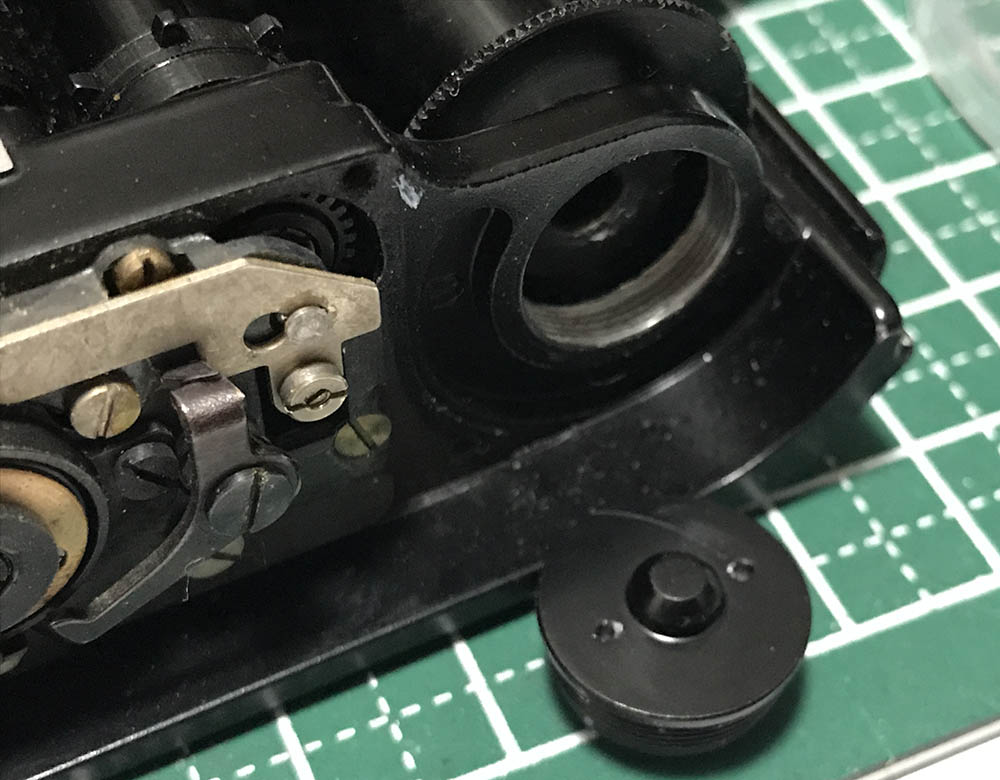
This is how it looks like underneath. Turning the dial will turn the disc with the screws. It has depressions which control how deep the slow-lever’s arm is and that’s how it controls or engages the slow-lever’s mechanism. Set the speed to anything faster than 1/15s where the slow-speed mechanism won’t have anything to do with the shutter and it automatically disengages it. This is very clever as it does this automatically when you turn the dial.
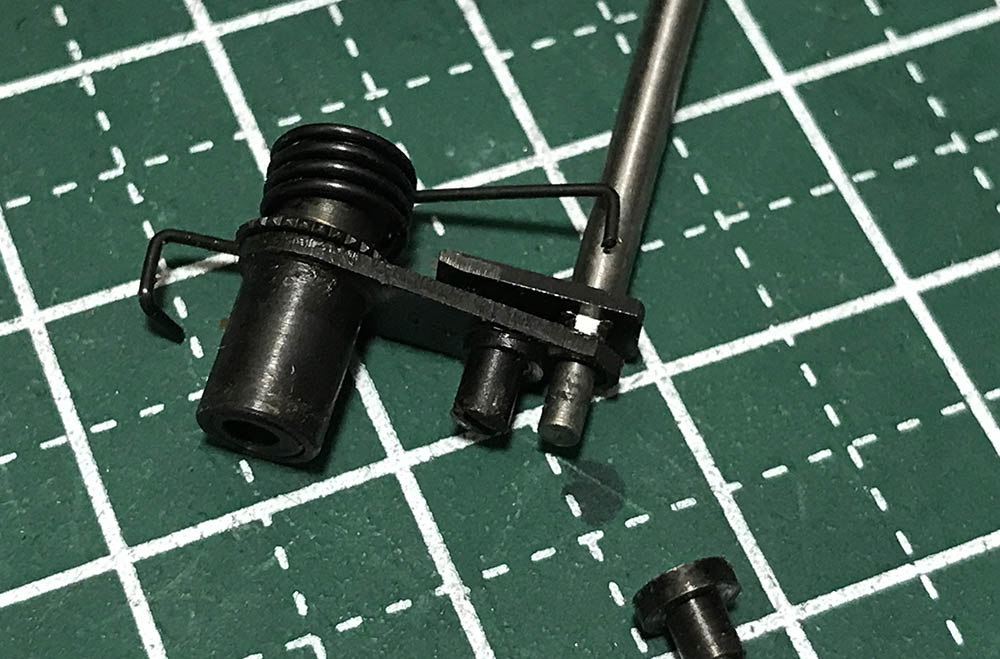
The slow-speed lever and its pawl should be removed and cleaned carefully in order for it to operate smoothly. Be careful with the parts here, these can be bent rather easily as some of the parts were merely stamped.
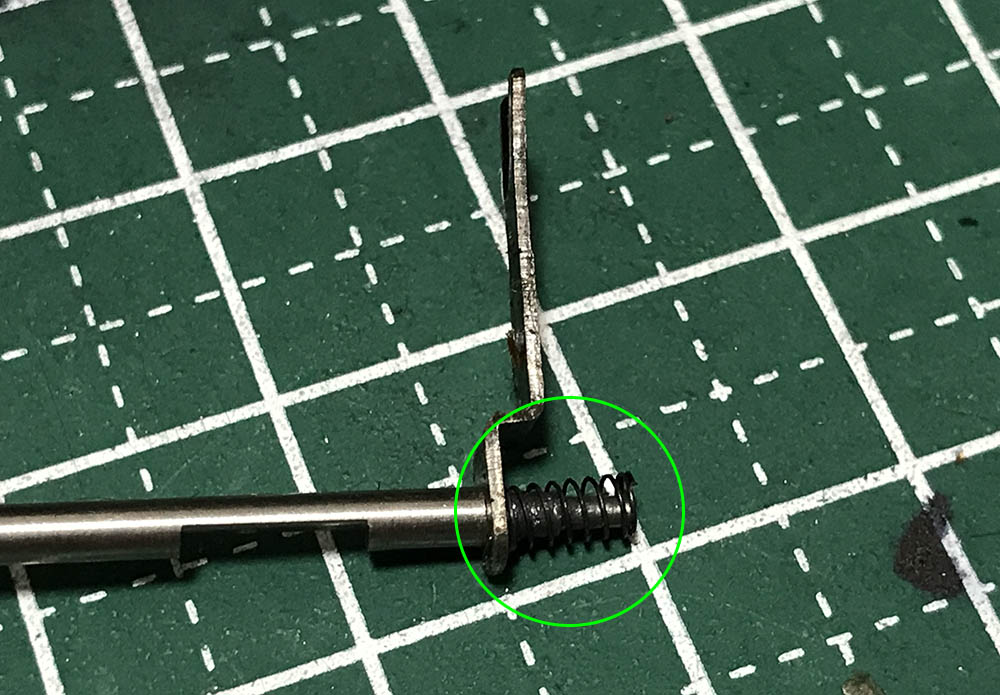
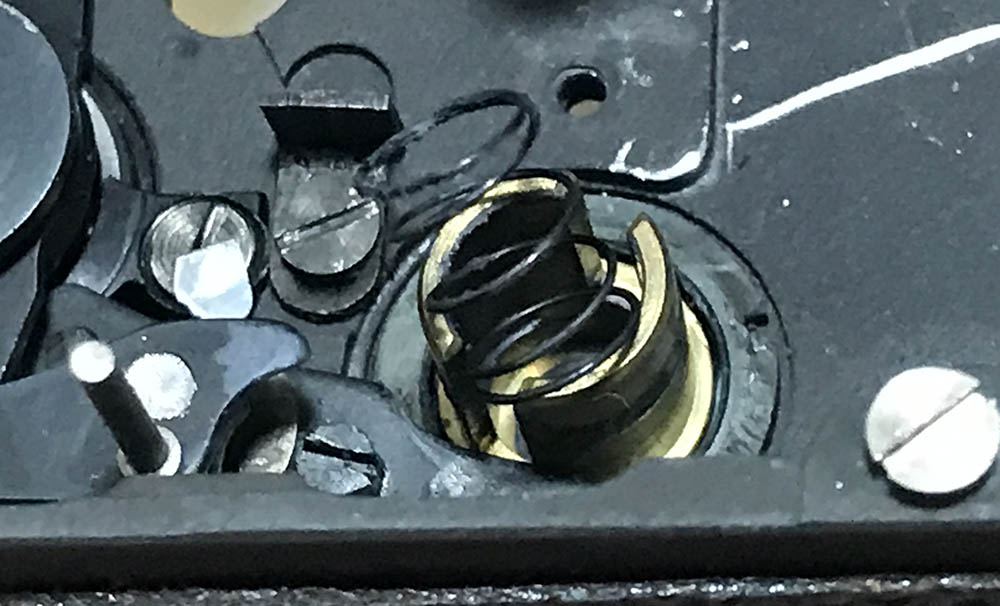
There’s a little spring a the bottom part of the slow-speed shaft. Never loose it, it’s easy to lose this little thing and replacing it can be hard because it has to be of the right tension.
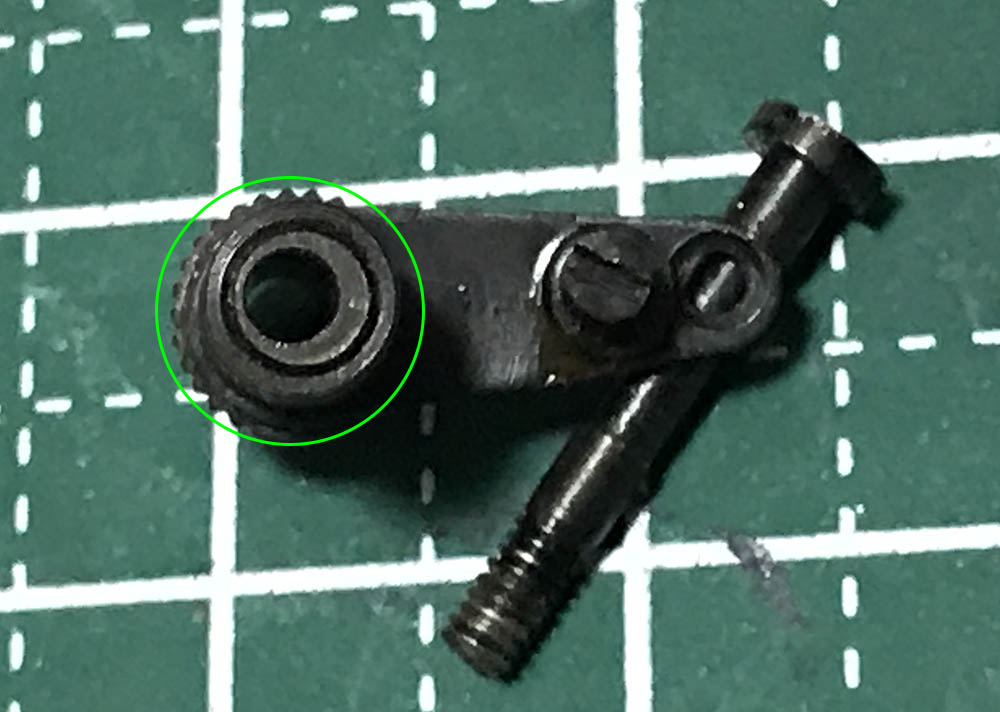
Note the position of this eccentric so you’ll know how to put it back. You will adjust this part later anyway when calibrating for the slower speeds but it’s easier to get things done if it’s set closer to its optimum orientation.
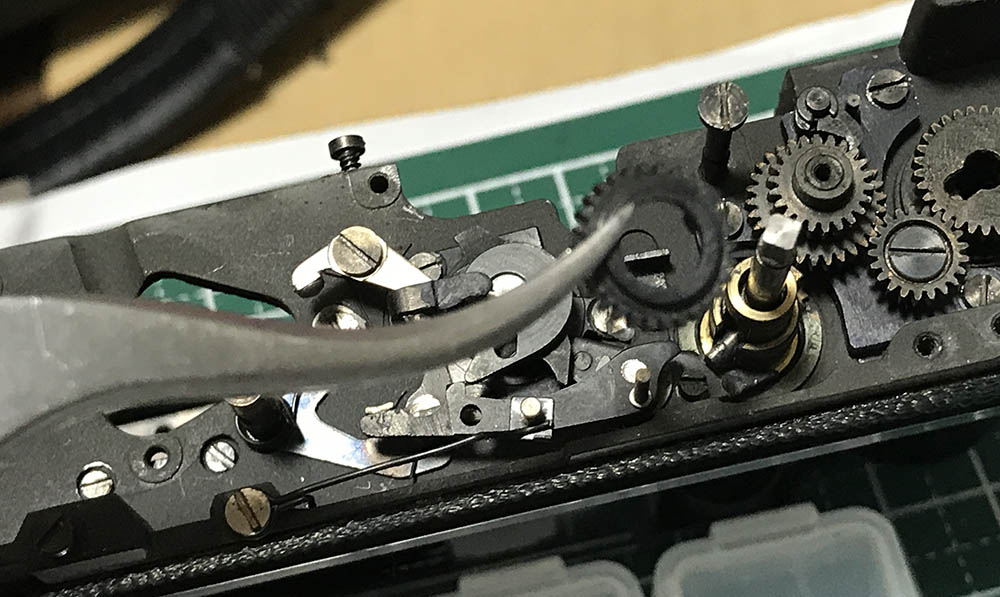
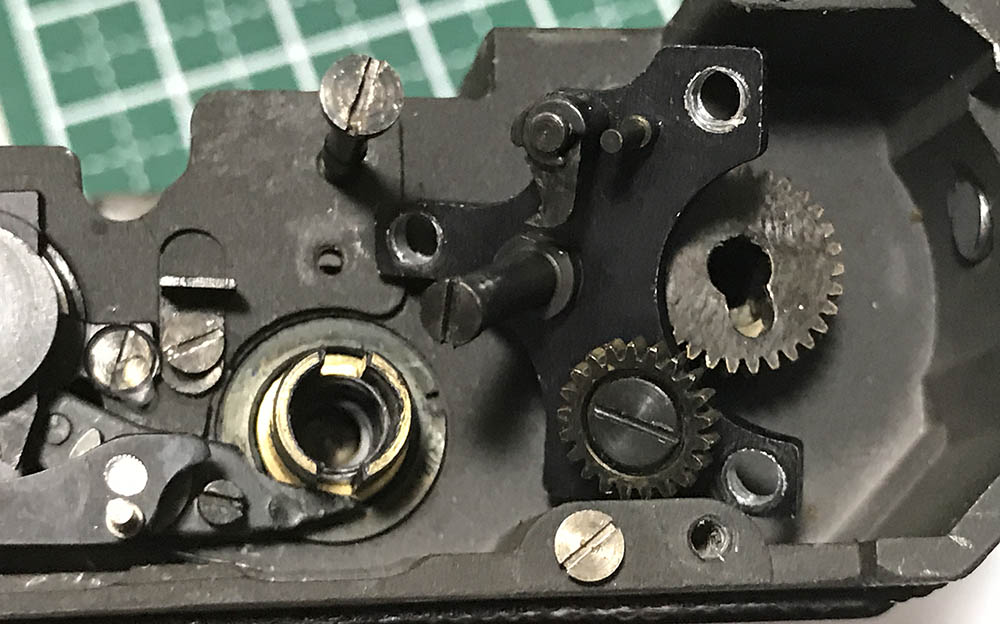
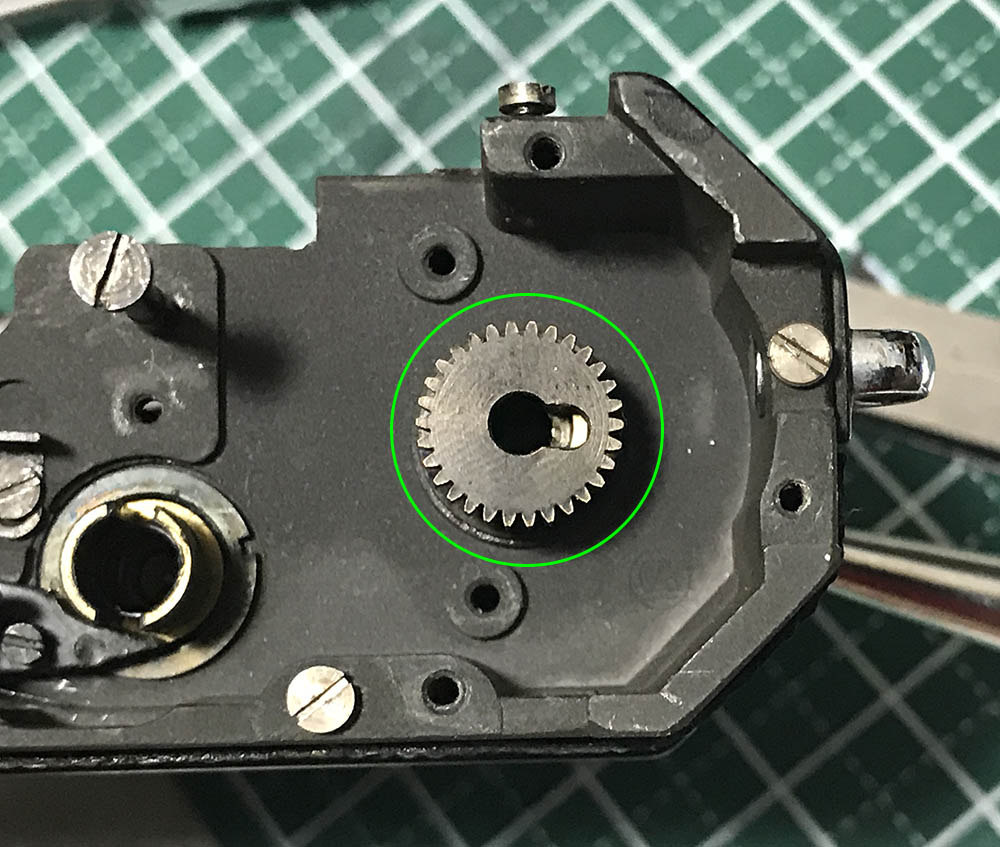
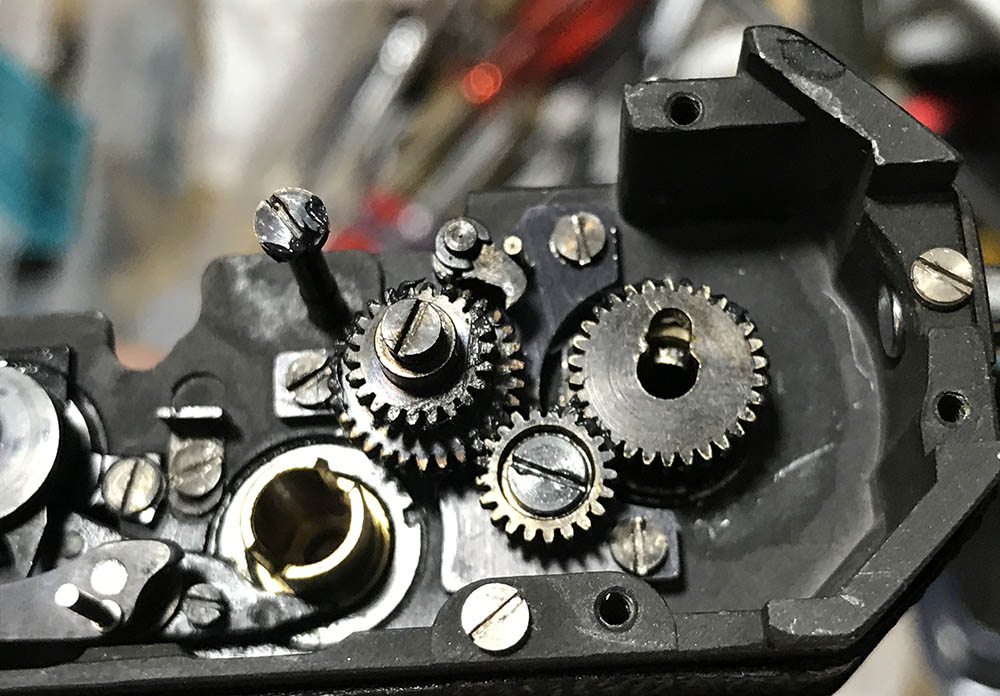
Let’s go back to the film-advance mechanism. Carefully remove this cog, it’s used to couple the film-advance mechanism to the shutter. When this thing engages both gear trains you can charge the shutter when you turn the film-advance lever. You disengage this by turning the A/R ring to R.
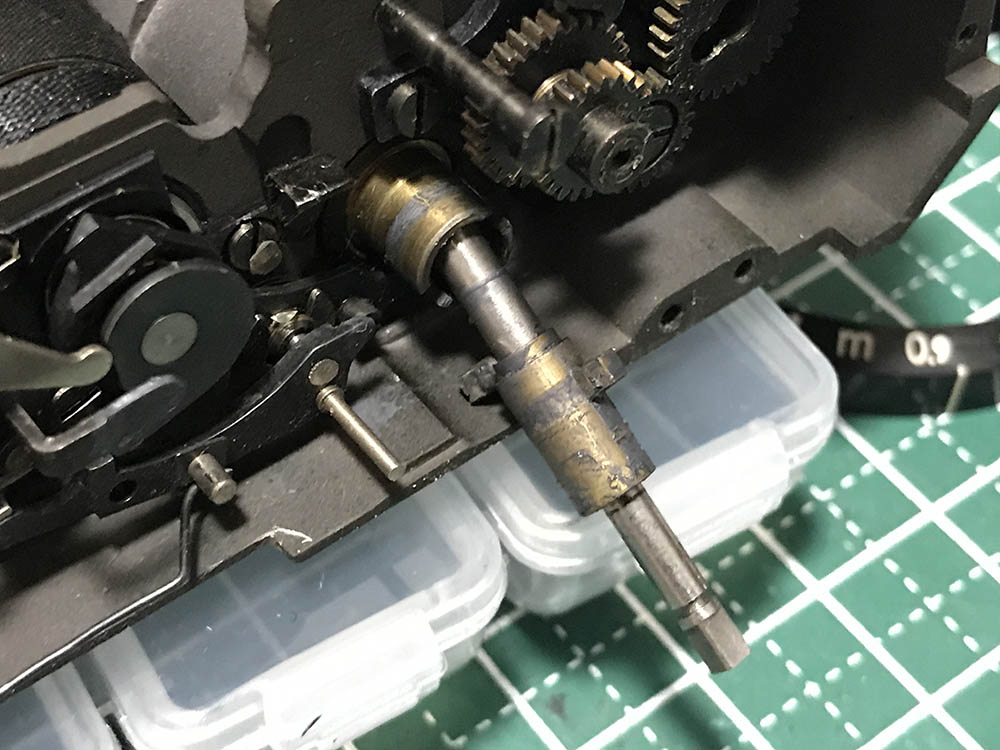
The plunger mechanism looks dirty but it’s Tamiya’s molybdenum grease. It is a nice grease for metal-to-metal lubrication as it last a long time and dries to a fine powder which you can clean easily.
There’s a spring inside of the plunger’s housing. This enables the plunger to go back to its position when you depress it. Clean this very well, I brush this part clean to make sure all the caked grease is gone.

Carefully remove this coupling gear. It has a tiny hook underneath it so this can connect and control the sprocket for film-advance. Without it you won’t be able to crank this in succession. It’s hard to see the hook in this photo but it’s there, it looks like a short length of bent wire over the gear.
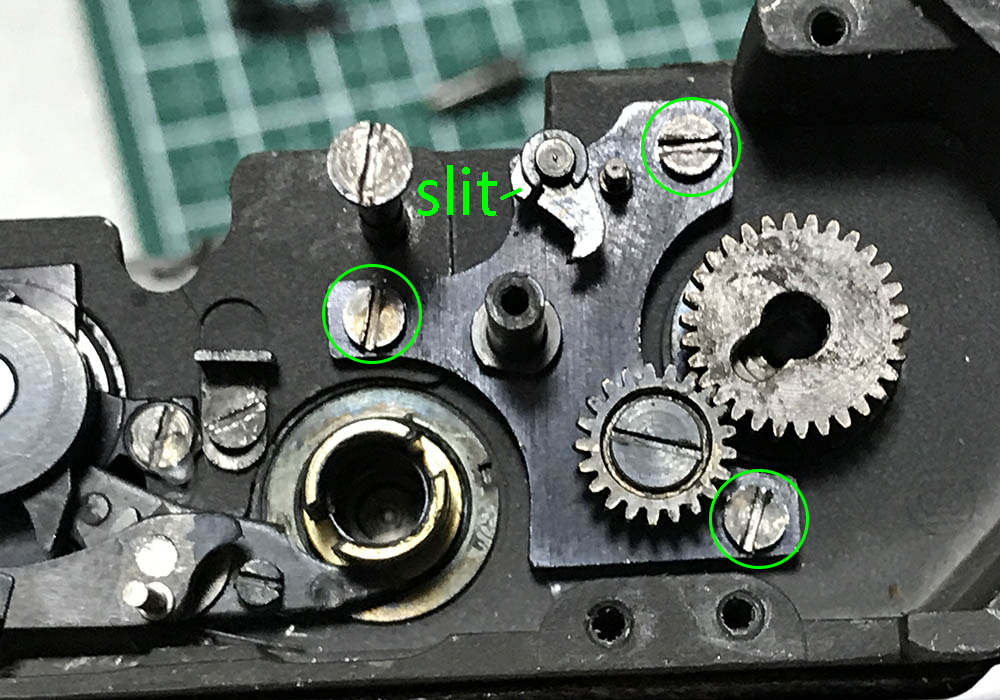
You don’t need to do this step, I just wanted to remove this because I needed to clean everything perfectly. It’s the film-advance mechanism’s gear train, I always clean this really well so it operates smoothly each time I charge the shutter. Visible in the photo is the pawl for the film-advance mechanism, it has a slit where the hook underneath the coupling gear should be placed. It is important that you don’t forget about this little detail.
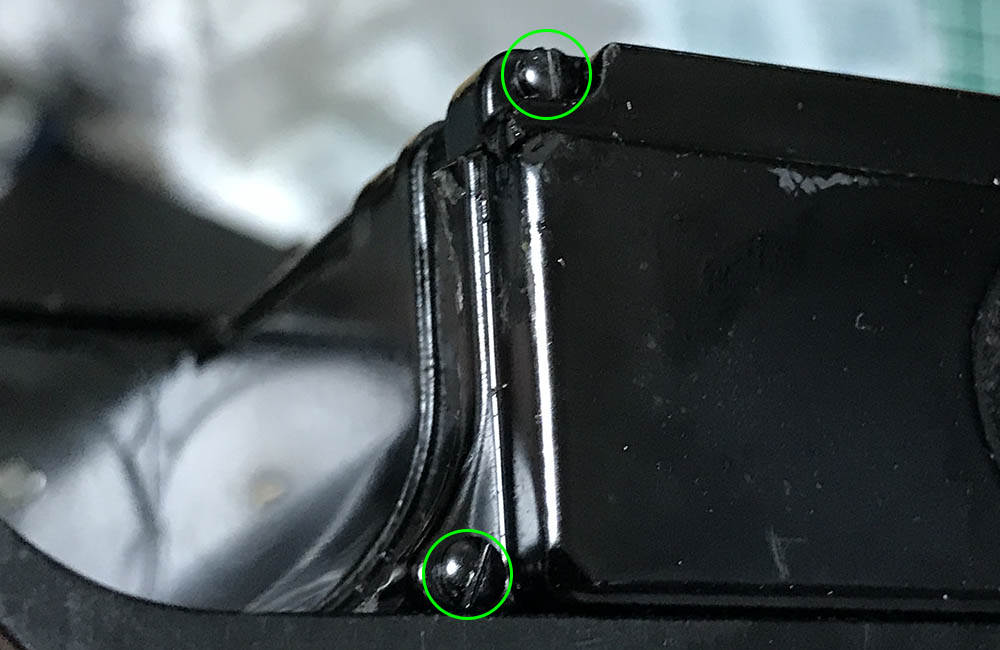
These were all sealed at the factory, use a torch to heat these, a safer way to do this is to place a drop of MEK at each screw and wait for it to soften the cement. Extract these carefully, you may snap their heads.
There’s no benefit from removing this as you can clearly see here. There is nothing underneath it. This assembly is usually gummed-up with grease or dirt and only cleaning it will do a satisfactory job. Flushing it will do but it’s better to do it properly.
Clean everything really well and don’t leave any residue. The quality of the cleaning job defines the quality of the repair. You’ll need a small brush, lots of Q-tips and plenty of solvents to clean everything here. Do not use canned air here because the pressure is too strong, it can dislodge any delicate parts here and you won’t know where it went or how to put it back.
In the case of corrosion, use a stiff-bristled brush to clean the parts. Using a good ultrasonic cleaner helps, too. I don’t have access to one so I clean these manually the good, old-fashioned way.
After cleaning everything really well, don’t forget to do a final flushing, that should remove any dirt. When lubricating the mechanisms here, only apply a small amount of the best oil you can find, made specially for cameras. Use a small amount to lubricate the pivots and only the pivots, nothing else. The teeth of the gears will have to be lubricated, too. I use molybdenum grease for metal-to-metal surfaces. Some people prefer silicon grease and that’s all okay.
Disassembly (Bottom Mechanisms):
Some of the steps here are unnecessary and only done if a camera needs it. I’m going to show you some of the things I do here only for your education. The only necessary thing to do here is to remove and clean the retarder. It’s easily jammed, resulting in inaccurate slow speeds. The only way to clean it is to remove it and clean it properly and I will show you show that’s done.

(Click to enlarge)
Extract these screws to remove the bottom cover. Some of these have longer shafts so don’t forget where each screw should go. These are not difficult to extract but you should still be careful since they’re just made from brass.

Remove the bottom cover to reveal the mechanisms underneath the chassis like the adjusters for the shutter’s tensioners and the shutter brakes. Put the cover aside and you can work on the mechanisms here.
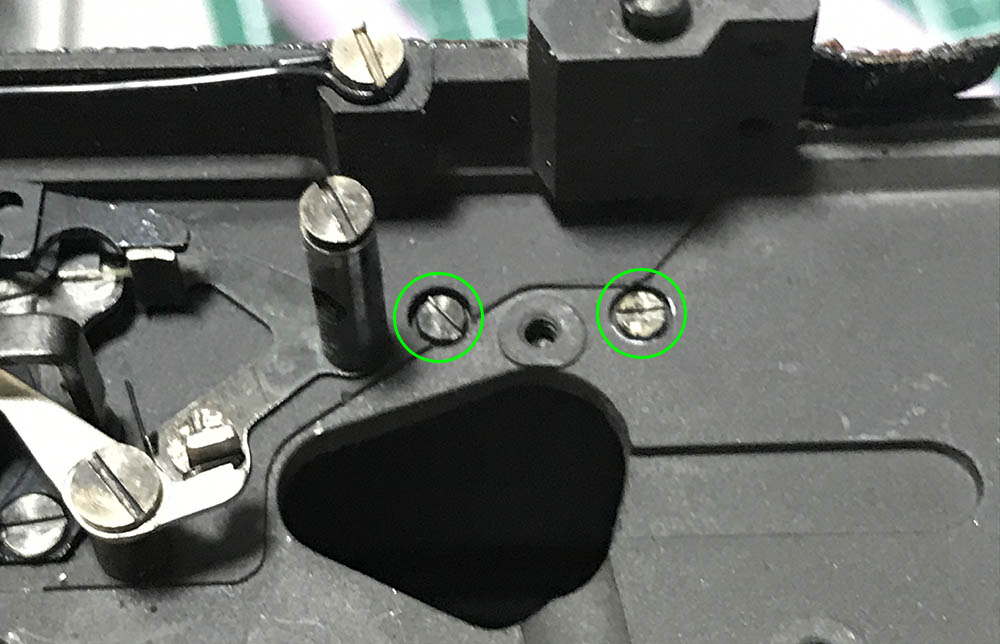
The retarder is secured by these screws. Soften their seals with MEK and it should be an easy job to extract these. The screw closest to the front can be adjusted, you move the retarder to its optimal position and then you tighten that screw to lock the retarder into position.
Carefully remove the retarder. Cleaning this is mandatory but it’s a difficult task since it’s delicate. I usually pickle this in naphtha for days to soften the solidified gunk. I then carefully brush this to remove any stubborn dirt. The parts here are very delicate and you should be careful not to bend anything or dislodge any small parts out of position.
This step is unnecessary since readjusting the spool can be difficult. It has to be done properly or else your film won’t stay-straight as it advances. I only wanted to clean this camera properly so I did this. Extract the bottom cap, it can be tough to remove but a few drops of MEK or penetrating oil helps.

There’s a small bush underneath it, don’t lose it.
The sprocket for the spool is connected to a suspended nut underneath it.
Before removing the suspended nut, measure the position of the spool first. Make sure to get all measurements properly so you can confidently install it back at the correct height. Shown here is the hole for the set screw. You will see several holes here but there’s only one hole for the screw. Loosen it then use a dowel to turn the nut, you insert the dowel in the other holes then you carefully turn it. Never insert your dowel in the set screw’s hole.
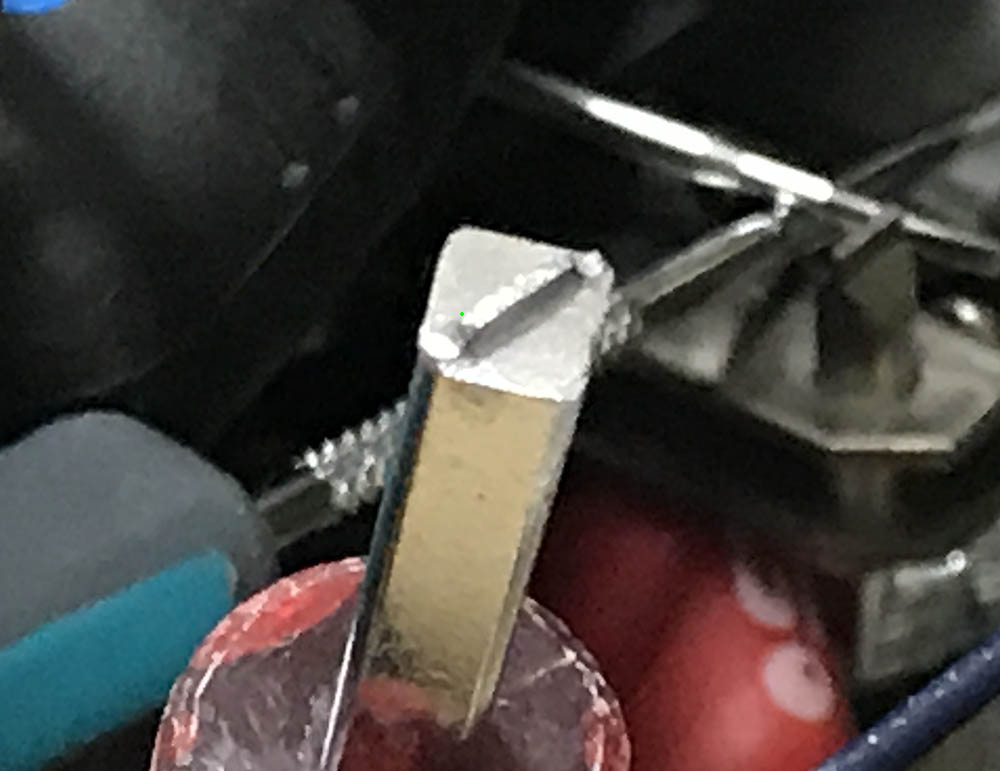
Loosen the nut carefully, it may take you several minutes to do it. This is my special tool for this kind of job, it’s basically just an old screwdriver with its tips filed-round.
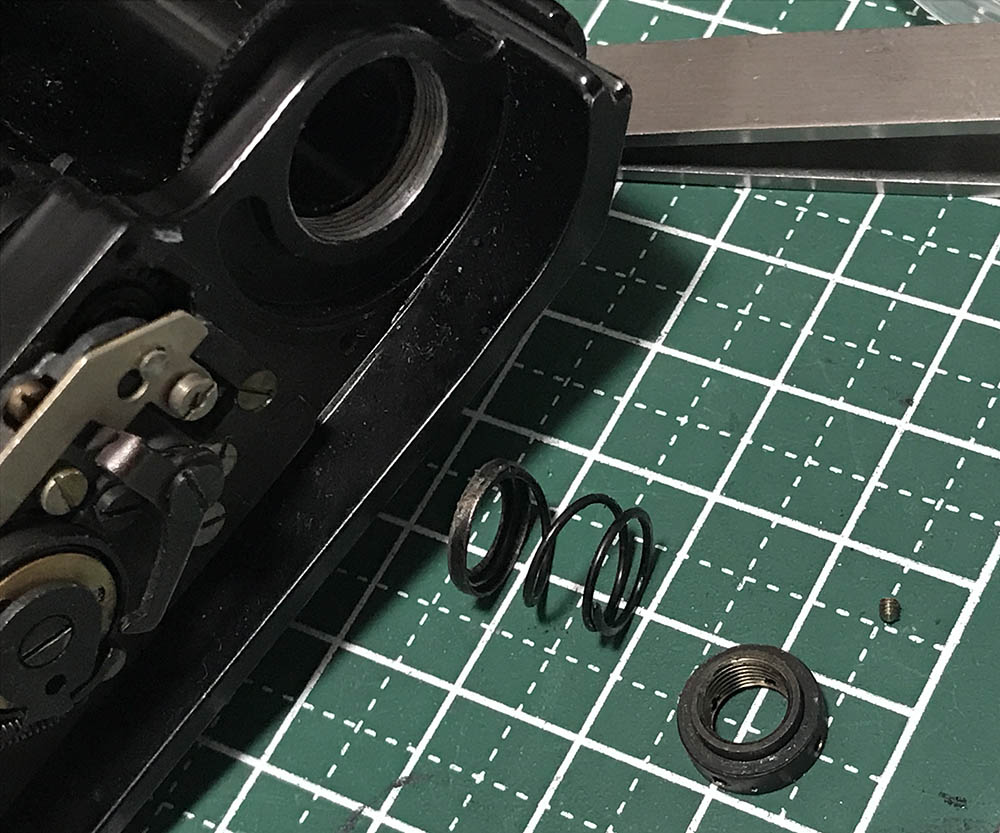
This is how the nut looks like. The spring suspends the spool in-place. You’ll see the small set screw beside the nut, don’t lose this little screw.
You should use a special tool to remove the spool.
Carefully remove the spool and clean what’s inside of it.
(Click to enlarge)
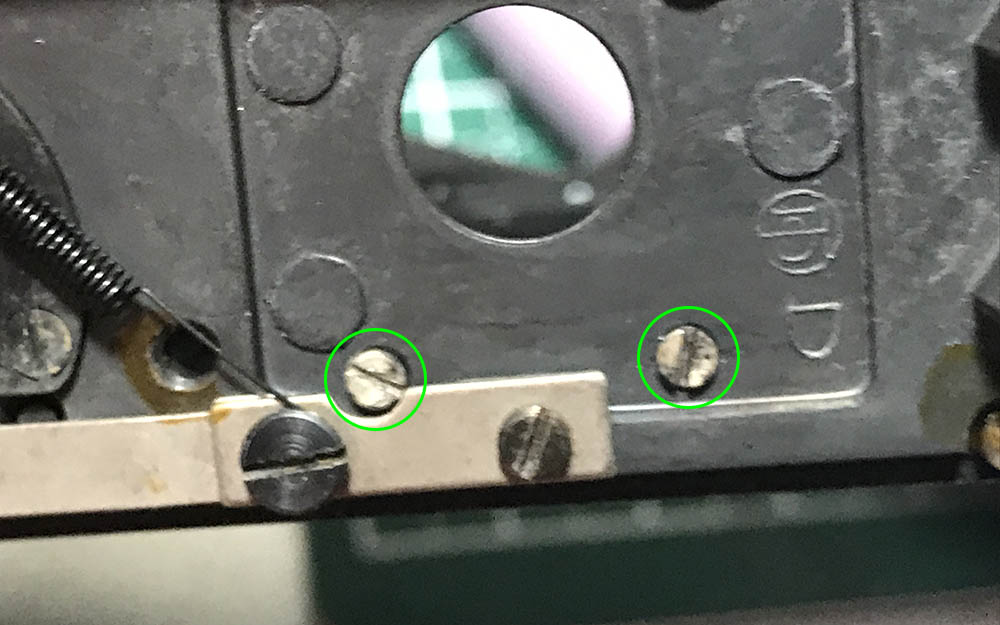
These screws secure the baffle. Apply MEK to them to soften their seals, use drivers that fit perfectly to remove these. Do not forget to note which screw should go to which hole so you’ll know how to put them back again later.
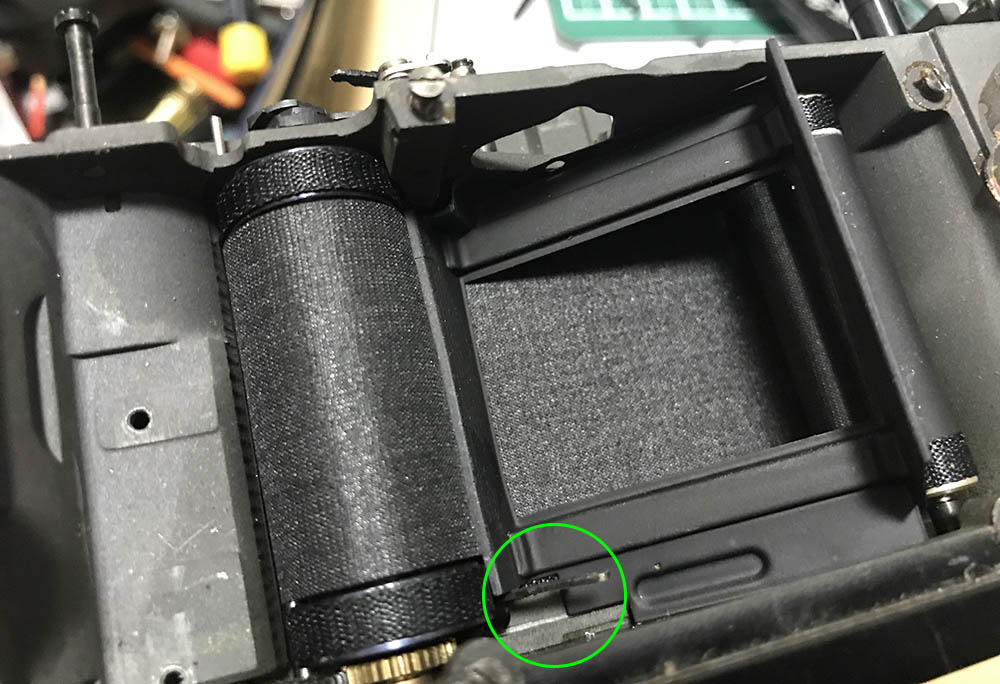
While removing the baffle, don’t forget to push the change-over lever. It can be easily-bent so do this carefully. Since the shutter was made from silk you should be careful not to scratch it or it will cause a tear. It’s rubberized but that doesn’t mean that it’s indestructible.

The baffle is flimsy so handle it with utmost care. Don’t forget to remove its retainers, too. They’re tiny strips of metal at the other side of their screws.
Carefully clean everything before you put anything back. Lubricate the cogs of the spool well so it turns smoothly. Once everything is gone you can clean the chassis with Q-tips saturated with alcohol. Flush any mechanisms, too. I usually avoid flushing the shutter mechanism at this point and save that for later. The shutter is delicate specially on cameras with cloth curtains. This is a very delicate job and it should be done carefully to prevent an accident.
Conclusion:
This step usually marks the start of the real job for me. It’s easy to dismantle but it is difficult to put things back properly. What is between those steps is cleaning and that takes the most time. You should take the chance to clean it as best as you can now that you have dismantled the camera down to this, it is foolish not to do so.
Clean as many things as possible with Q-tips and alcohol. Scrub the holes to remove any solidified grease, never leave residues. A small brush is useful here, I use the ones for cleaning the backs of the molars. Smaller Q-tips will be specially useful for smaller holes, too. If you’re using ultrasonic cleaners, be sure to remove any residual fluids or that will corrode the parts quick. It is important that you use a neutralizing bath after.
I lubricated the film-advance gear train with molybdenum grease. This will make it operate smoothly and you will certainly feel that when you cock the shutter. Only apply grease to their teeth and apply oil to their pivots. That’s all you need to do. Note that this photo is close-to-final, in reality this step is usually done before I reinstall the mechanisms and you should see how that is done in the next step. Just treat this photo as a preview of the next article.
For easy navigation, here are the links to the other parts:
I advise that you read them all in-order so you’ll follow everything better.
That’s all for this article, did you enjoy it? Share this with your friends, that helps me since every few views gives me a cent. If you love my work, please consider supporting this site. You help me offset the cost of maintenance, it also helps me purchase, process and scan film. Your help is vital in keeping this site alive and it ensures that more people will be entertained by this. It was my pleasure to bring you the best content available on the net. Thanks a lot and see you again in the next article, Ric.
Help Support this Blog:
Maintaining this blog requires money to operate. If you think that this site has helped you or you want to show your support by helping with the site’s upkeep, you can make a small donation to my paypal.com (richardHaw888@gmail.com). Money is not my prime motivation for this blog and I believe that I have enough to run this but you can help me make this site (and the companion facebook page) grow.
Leave me some tip?
Thank you very much for your continued support!
$2.00
Helping support this site will ensure that this will be kept going as long as I have the time and energy for this. I would appreciate it if you just leave out your name or details like your country’s name or other information so that the donations will totally be anonymous. This is a labor of love and I intend to keep it that way for as long as I can. Ric.

4 Comments (+add yours?)