
Hello, everybody! It was my daughter’s birthday yesterday, we could not go out due to the coronavirus problem so we had to stay indoors to celebrate. I would rather sacrifice a little bit of fun than expose my child to germs. This morning, I had leftovers from yesterday’s modest celebration. It’s not that I am complaining but there are some things that tastes much better the next day such as curry and stew. I used to cook a lot, I would at times cook some stew the previous day in preparation for serving it the next day. This allows the juice to seep-into the ingredients and tenderize the meat even further. I like the resulting texture of the meat as it melts in my mount. While we are in the topic of serving yesterday’s meal, Nikon was also doing the same but it’s in the form of a repurposed lens design. Did it end up better than what’s been implemented before or was it only a case of re-housing the optics? Let us find that out in this article.
Introduction:
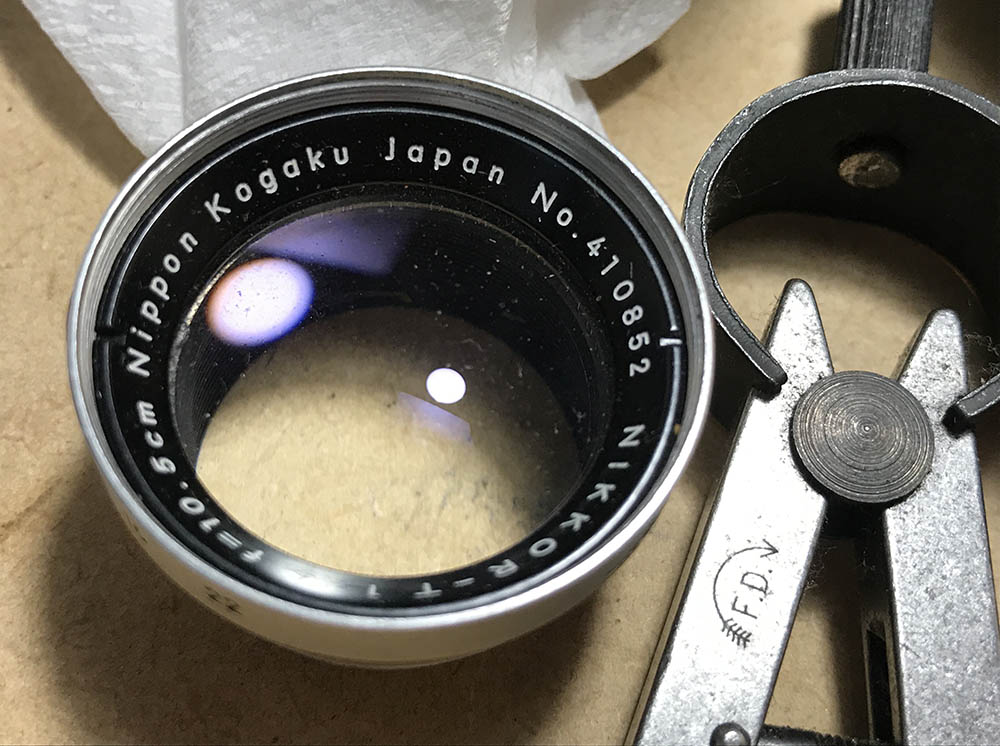
The Nikkor-T 10.5cm f/4 for the Nikon S-mount is an odd lens not because it’s a phallic-looking lens but because it has a lot of non-Nikkor traits that made people back then guessing if this was actually made by Nikon. The answer is yes, it’s a true-blue Nikkor but made to a different philosophy wherein price is the biggest concern which means that it was made to be budget-friendly. I made an article showcasing the Nikkor-T 10.5cm f/4 for the F-mount and you can read more about this lens there.
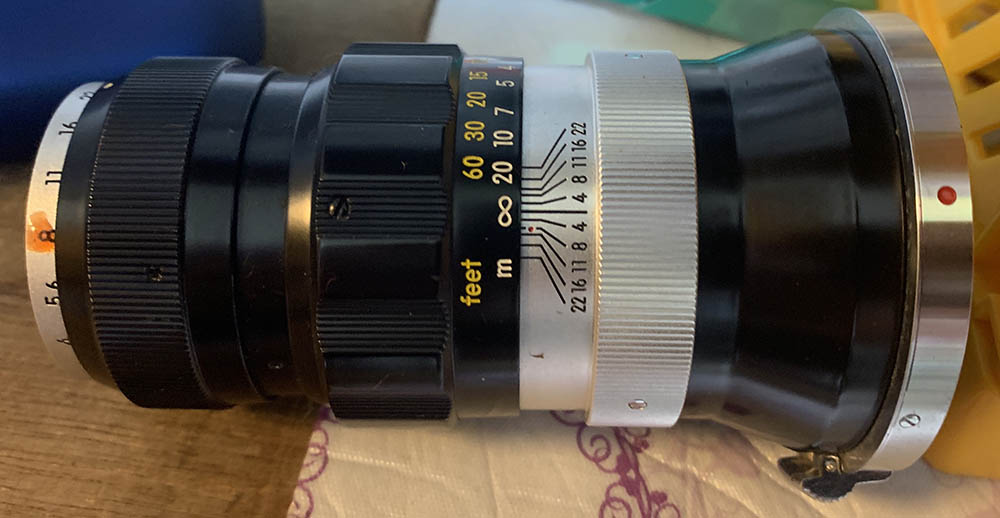
Despite being similar in essence to the Nikkor-T 10.5cm f/4 for the F-mount it has many differences in terms of external styling which made it special in a way since it’s unique to its cousin. Even details that doesn’t have anything to do with the bayonet mount were made to look different. Of the 2 versions, I like this one better in terms of styling and handling. The Nikkor-T 10.5cm f/4 for the F-mount felt awkward because it’s a rangefinder lens made to fit the more-modern Nikon F but this one is just fine.
Like the F-mount version, it was also given the nickname “Mountain-Nikkor” in reference to “Mountain-Elmar” which this lens shares a common use. The name was given by enthusiasts, it’s not an official designation but it stuck. It is still called by that in some circles and you’ll hear that name quite often. If you want to learn more about the history of this lens, read my article on the Nikkor-T 10.5cm f/4 for the F-mount or the excellent Nikon 1001 Nights site.
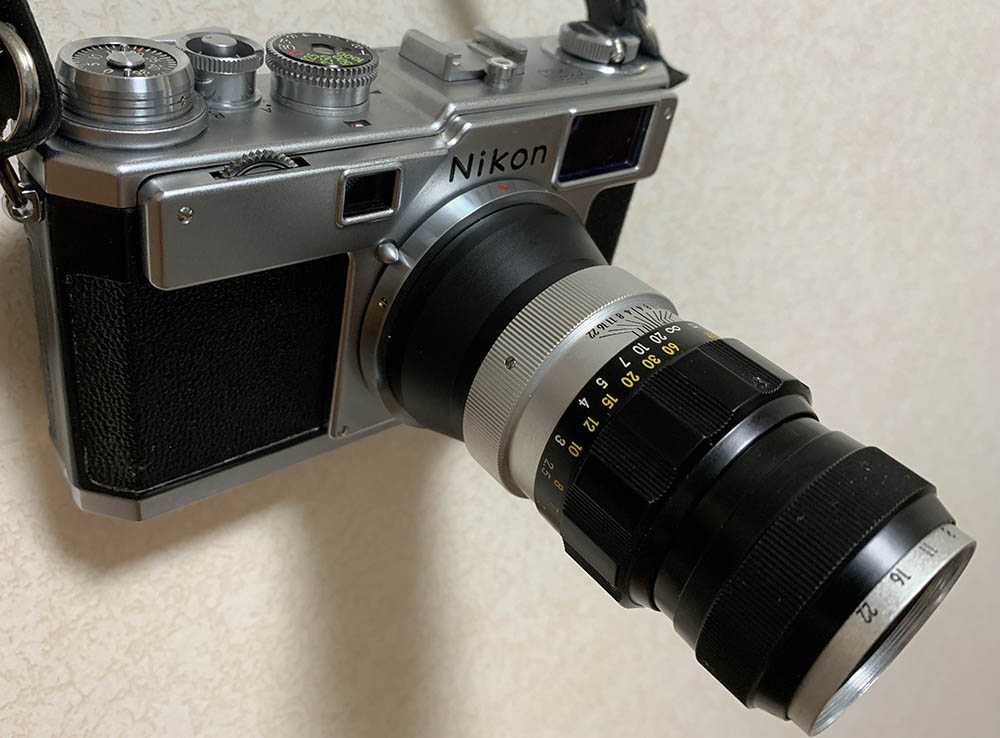
It’s long when mounted to a Nikon S4 or any Nikon rangefinder camera but it balances really well. It looks great to be honest, it’s something will turn a lot of heads. It handles beautifully, all the information can be easily seen. It has lots of engraved numbers and the depth-of-field scale looks exquisite. I do not know if you can notice it but one of the biggest difference between it and the Nikkor-T 10.5cm f/4 for the F-mount is the closest focusing distance is a lot closer on the latter, around 0.8m, this is because the S-mount lenses are constrained to what the helicoid of the camera will allow. Anything that is beyond the range of the camera’s helicoid won’t work.
Let’s now see some photos that were taken with this. Learning how it works is key to maximizing it, you’ll learn how to avoid its weaknesses and exploit its strengths. This will also give you a better understanding of your lens, it’s going to help you decide whether you’re going to use this lens for a shoot or not. The next sets of photos were taken from f/4, f/5.6 and f/8. I imagine that these apertures are the most common ones that people will use. You’ll also see the most changes happen with these apertures. This lens doesn’t change its characteristics much as you stop the iris down but you’ll still notice some things and those are things that we’re interested in seeing.
These photos were taken with my Nikon Z6. I recommend that you also see my Nikkor-T 10.5cm f/4 for the F-mount article, they’re identical optically so what’s true with that lens is also true for this.


(Click to enlarge)
Just like its F-mount version it performs poorly in terms of flare resistance, I don’t know what’s causing these “god-rays”, they look annoying but you can use it to your creative advantage. You should use this lens with its dedicated hood to prevent this to some extent but it won’t do much when you have the sun directly-within your frame.


(Click to enlarge)
This is generally well-corrected when it comes to chromatic aberration but you’ll find some when given the right situation as evident in the first set. It’s not bad at all but that’s still something that you should consider. You won’t see it as you stop the iris down from f/5.6 on. Sharpness and contrast is good even wide-open, resolution is adequate, too. Stopping this down to f/5.6 will give you near-peak performance. You’ll only need to stop it down beyond f/8 if you want sharp corners. The corners don’t look bad at all at f/5.6 but your eyes can see that there’s still some room for improvement. While the shape of the iris is generally round it has the tendency to create saw-tooth-shaped discs when stopped-down to f/5.6. This is something that doesn’t only affect the shape of the discs but it will also affect the smoothness of its bokeh, too. I don’t think that it will affect it by much but a rounder-shaped iris is better for this. At least it’s not a 6-sided one like the Nikkor-Q 135mm f/3.5 Auto’s. It is horrible, read that article to see what I mean. The good thing is the shape of the iris loses its saw-tooth-shape at f/8. If you’re shooting a scene that will trigger ugly, clumpy defocused artifacts, avoid setting the iris to f/5.6 or just avoid focusing at a distance where your background is half-focused or half-blurry. On the brighter side of things, the discs look clean, even and there’s no severe traces of outlining. You’ll get to see some outlining occasionally, it is not bad at all and it’s in-line with most lenses from the same era.
Let’s now see some real-world photos. I judge a lens by its utility and not by what I see on semi-controlled tests. Charts and numbers do not mean much to me because I won’t be shooting charts and brick walls anyway.

Being a slow lens the quality of its bokeh isn’t as smooth compared to a fast one such as the Nikkor-P•C 10.5cm f/2.5 which is a legend amongst Nikkors. I am not saying that this lens has terrible bokeh quality it’s just that it doesn’t match faster Nikkors. The good-side is this lens is sharp wide-open, you will want to shoot with it at wider apertures because of this. Not only that but it is well-corrected even wide-open, just look at this photo and you will know what I mean.

The character of the bokeh can look a bit busy at times but it’s not bad at all. This is to be expected from a long lens with a modest maximum aperture. It still manages to give you beautiful photos despite of this.

This is a great example of just how sharp this lens is. The tonality is great, it can be attributed to this lens only having 3 elements. This is controversial, I have seen people argue about this statement over-and-over again. This lens can render beautiful photos with nice depth, making your subjects pop and look natural.

The photos that it takes look natural unlike what many modern lenses tend to do. Most modern lenses render “too-hard”, they’re too well-corrected and you lose a lot of things that makes a picture look “real”. This is subjective, it is something personal and it’s best for you to find your own perspective on this subject matter.

While this lens is sharp wide-open it is not super-sharp as to make the faces of your subjects look like stucco. With that said, it’s excellent for portraiture as you will soon see in the following photos.

The 105mm focal lengths is probably too-long for this kind of portraiture, it is better to have something like an 85mm for this kind of shot if you ask me.

This is a lovely portrait, I think the 105mm focal length is best-used for tight shots like this. It gives you the proper distance between you the subject, too. Many people do not consider this at all but part of choosing a focal length is thinking about your working distance. If you’re too-close to your subjects it may cause them to react unnaturally, that goes for the eye-line, too. He was not looking straight at me here in the photo but what if he was? That is one more thing that you should think about.

The biggest problem with this lens is its poor performance against flaring. It can give you an interesting effect if you know how to use it but generally it’s not something you’d want in your photos.

This is a lovely portrait, something that a 105mm lens was made for. This is a nice photo not only because our subject looks interesting but it shows a lot of nice characteristics about this lens, its ability to render nice backgrounds and how sharp it is even at wider apertures. You can find hints of spherical aberration and chromatic aberration but they’re not bothersome at all and I love how they made this photo look more interesting. If a lens does that, it’s a sure-sign that its designers really thought about the lens design very well.

I love this photo since it shows how nice sharpness and contrast is with this lens even wide-open. The subject separation is very nice, too. This lens will give you nice pictures so long as you don’t give it the things that will trigger flare and ghosts.


(Click to enlarge)
Here are more photos for your enjoyment, please click on them to see them better. This is an exquisite lens despite its budget-conscious nature. It’s nice for portraiture, it won’t give you clumpy-looking out-of-focus details despite its slow maximum aperture. These should give you a nice idea of this works with a modern digital camera. I think that it’s still a nice lens despite its age and you’ll take wonderful photos with it.
Let’s now see some photos that were taken with film. This lens was made to be used with film since digital cameras weren’t available in the 1960s so it’s only fair that we judge it with its intended medium. Film has a unique look, it’s difficult to simulate it with a digital camera because of film grain. Grain looks natural unlike the structured-look of noise which looks horrible. This is the reason why many people like to shoot with film. Another benefit with shooting film is that grain helps mask certain flaws and the character of the bokeh may look slightly different because of that, often for the better. Since film is less-reflective compared to a sensor you should get less artifacts with it. Light can reflect from a sensor’s mirror-like surface and cause reflections when that light hits the inner elements and transmit it back to the sensor to be recorded in your final image. Shooting with film feels romantic because many people consider it to be “real photos”, it feels nostalgic, too. I used my Nikon SP to take these photos and the film I used is Fujifilm Industrial 100. It was a sunny afternoon so I guess most of the photos were shot with the iris stopped-down.

This was probably taken with a smaller aperture as evident with the depth-of-field being deeper, maybe around f/8. It’s a very good lens if you asm me. It’s very sharp and the rendering of the background looks nice.

The long, 105mm focal length allowed me some reach so I could take this. It is an amazing lens for documenting but shooting with it using film can take a long time because you’ll need to figure out your exposure first before you click the shutter. This is part of the allure of shooting with film.

Very nice rendition of the scene, you can certainly see the 3D-like feel of the scene, you won’t get a wall-of-focus, the transition is smooth and natural.

This is an excellent lens for use on a sunny day since you can stop-down the iris to smaller values. Not that this lens performs poorly wide-open, you will get even sharper photos when you stop the iris down to f/8.

This is a good photo for studying the characteristics of its bokeh with film. It is interesting because the asphalt road is multi-faceted and high-frequency in nature much like foliage. These are hard to render and you will get ugly, clumpy details using a lens with poor bokeh quality. Even a good lens won’t be able to render these beautifully at times with a digital camera, the sensor has a rigid array compared to the organic structure of film grain. I’m glad to see that this lens barely made it with the help of grain, it narrowly-avoided rendering a clumpy mess in the background. The subject is pin-sharp, I like this photo a lot since it uses a lot of negative space. This was obviously shot wide-open as evident with the vignetting.

The nice focus transition is evident in this photo. This is an excellent lens, it will certainly be a good companion for traveling, it’s nice for documenting a lot of things such as festivals and the like. Partnering this with a 35mm lens will give you a nice kit, you won’t be needing any other lenses and you’re all set. Just make sure that you pack enough film with you on your journey.


(Click to enlarge)
Here are more film photos. These should give you a good idea as to how this lens performs with film. These photos are the closest we have to seeing how this lens was envisioned by its designers. I can confidently say that they did a great job with the optics, I am certainly satisfied with this lens. I hope that these photos satisfied your curiosity since there aren’t a lot of photos online that were taken with this and there’s even-less film photos taken from it on the internet.
Is this lens a good buy? I don’t think so since it’s not cheap at all. You can get the amazing Nikkor-P•C 10.5cm f/2.5 for less, it’s faster and the quality of the bokeh is legendary. It’s bigger and heavier, those are the only issues with it. It’s a better lens but there are more of it so it’s cheaper. The Nikkor-T 10.5cm f/4 is a collector’s lens and it’s best to think of it that way. If you really want to enjoy shooting with this then nobody is stopping you so long as you have plenty of money to spare. It’s more-compact and it’s lighter compared to the Nikkor-P•C 10.5cm f/2.5 so your neck won’t hurt. It’s friendlier to the camera as well since it’s not heavy so you won’t have to constantly hold your setup. When buying these, make sure that there’s no play with the focusing ring, it should also have a nice, dry iris. The oily iris problems is common with a lot of vintage lenses, it’s something that you should be prepared to deal with. If yours are oily, send it to a repairman. This is not for the amateur to repair. I hope that you enjoyed this introduction, let’s now see how I repaired this.
Before We Begin:
If this is your first attempt at repairing a lens then I suggest that you check my previous posts regarding screws & drivers, grease and other things. Also read what I wrote about the tools that you’ll need to fix your Nikkors.
I suggest that you read these primers before you begin (for beginners):
Reading these primers should lessen the chance of ruining your lens if you are a novice. Before opening up any lens, always look for other people who have done so in Youtube or the internet. Information is scarce, vague and scattered (that is why I started this) but you can still find some information if you search carefully.
I highly recommend that you read my working with helicoids post because this is very important and getting it wrong can ruin your day. If I can force you to read this, I would. It is that important!
For more advanced topics, you can read my fungus removal post as a start. This post has a lot of useful information and it will be beneficial for you to read this.
Disassembly (Main Barrel):
The main barrel is simple but it’s not conventional in terms of construction. It has similarities with the Nikkor-T 10.5cm f/4 for the F-mount but not all of it is the same. It doesn’t have plenty of parts and you should not take plenty of time servicing this if you’re an experienced repairer. Beginners shouldn’t work on this since it’s a rare lens and this requires special tools just to open some of the parts.

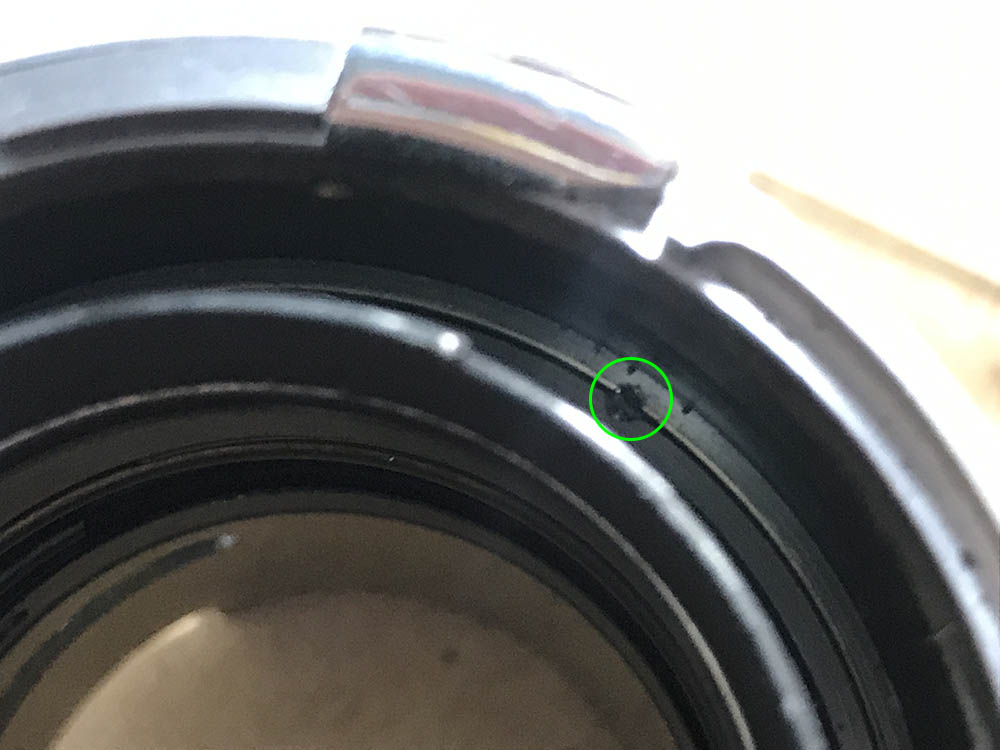
Before I begin, this should be the proper way to begin dismantling it. Mine’s stuck so I had to do some “detour” just to take everything apart. If your lens isn’t stuck, this should be the proper way to do it. Skip the rest of the article and go to the section where I removed the collar to learn how to remove it.
Extracting these will enable you to remove the aperture ring. Your drivers should fit the heads perfectly or you risk damaging the surrounding metal.
It should be simple to remove the aperture ring.

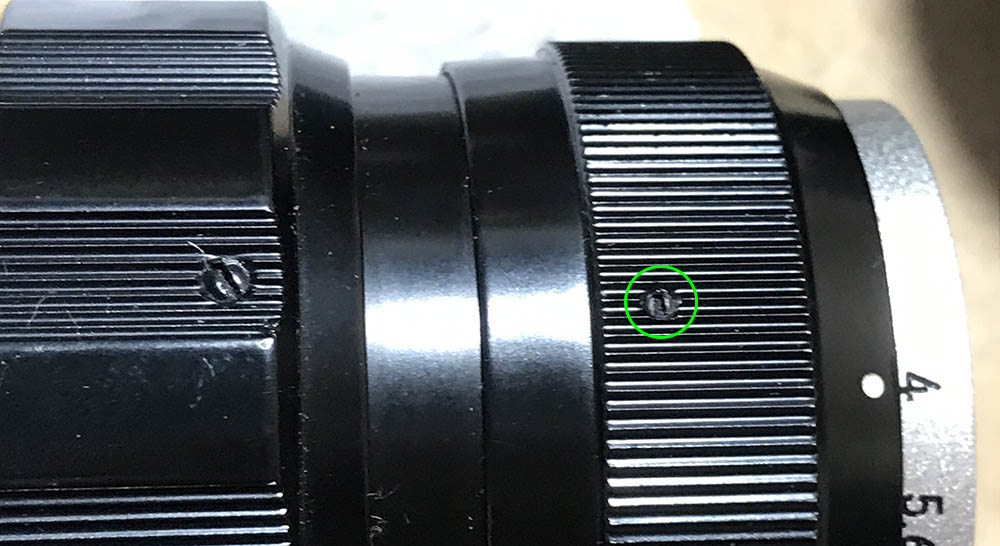
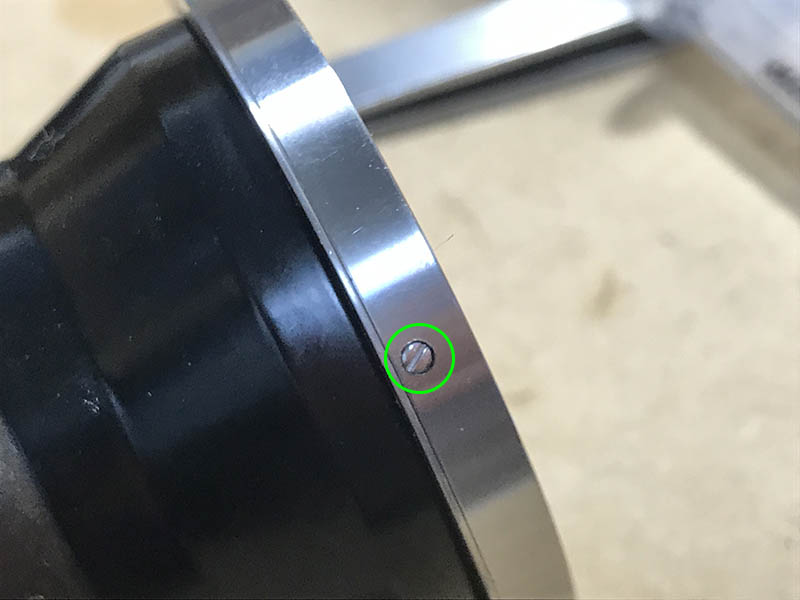
This screw secures the sleeve. Removing it now won’t do anything but this is a good time to remove it while you can still grip the lens properly.

Extract these to remove the focusing ring.
Clean the focusing ring really well, the inner surface is a breeding space for germs and other nasty stuff.
You can unscrew the front elements group if you wish after removing a tiny set screw. You could’ve done this earlier, too.

Carefully extract these to remove the focusing scale. Be careful not to harm the surrounding metal.

Keep this in a safe place so it won’t get scratched.
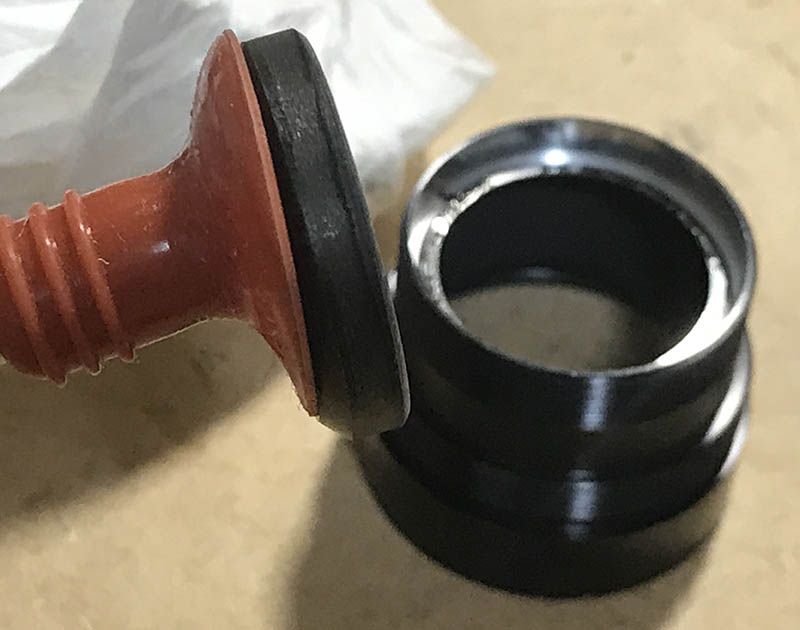
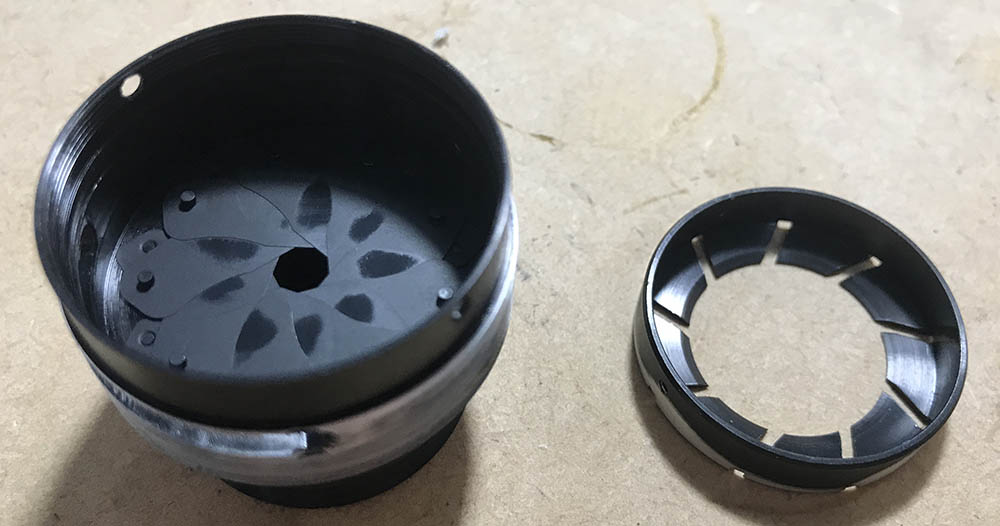
This is the thing that’s securing the front assembly to the barrel. You won’t be able to remove this until you remove the baffle.
The baffle can be easily removed with a rubber plug of the right diameter. I could have used a lens spanner but I the rubber plug option is much safer.
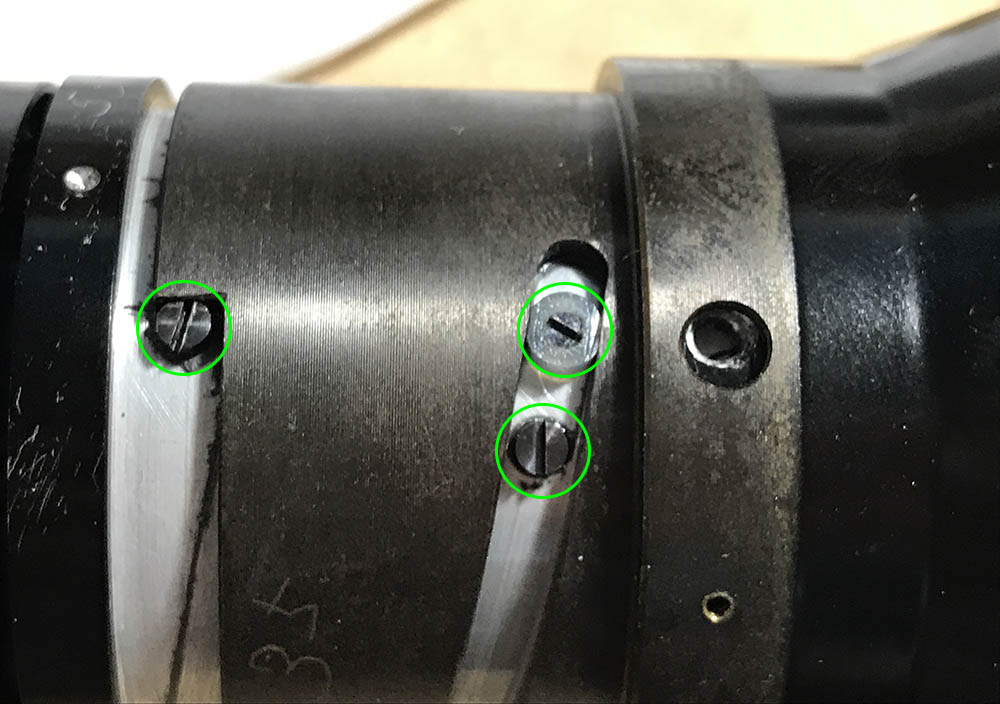
Extract the sliders and screws to remove the inner tube of the cam. Careful with your tools so you won’t scratch the smooth inner tube or damage that delicate nylon slider.

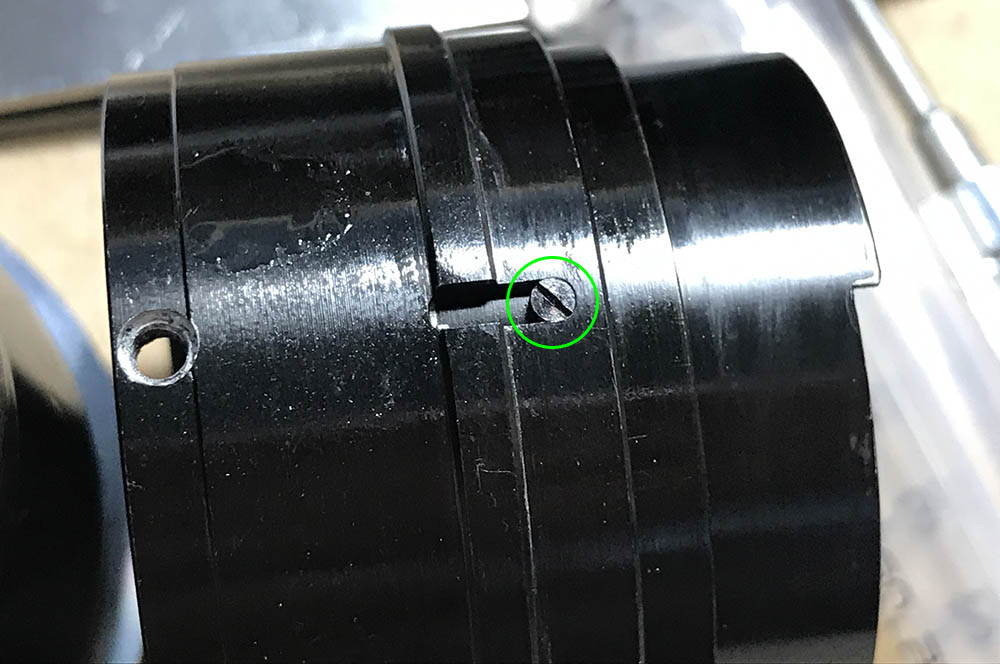
Locate this screw and extract it.
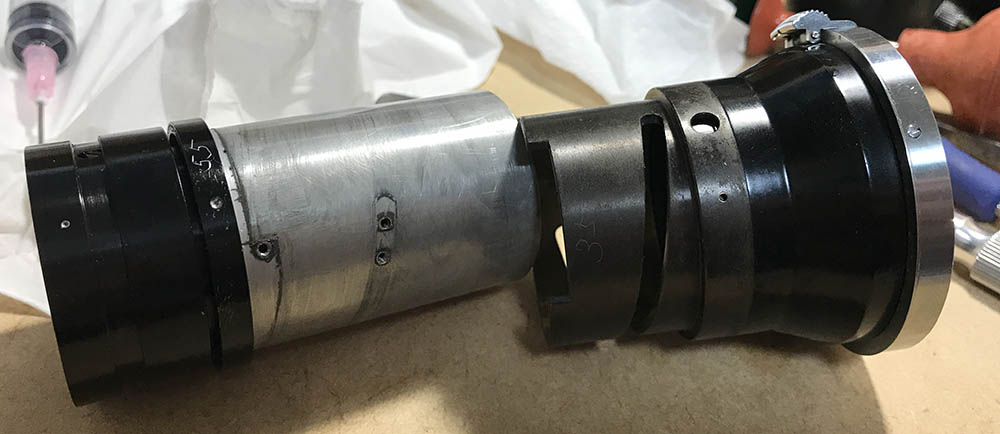
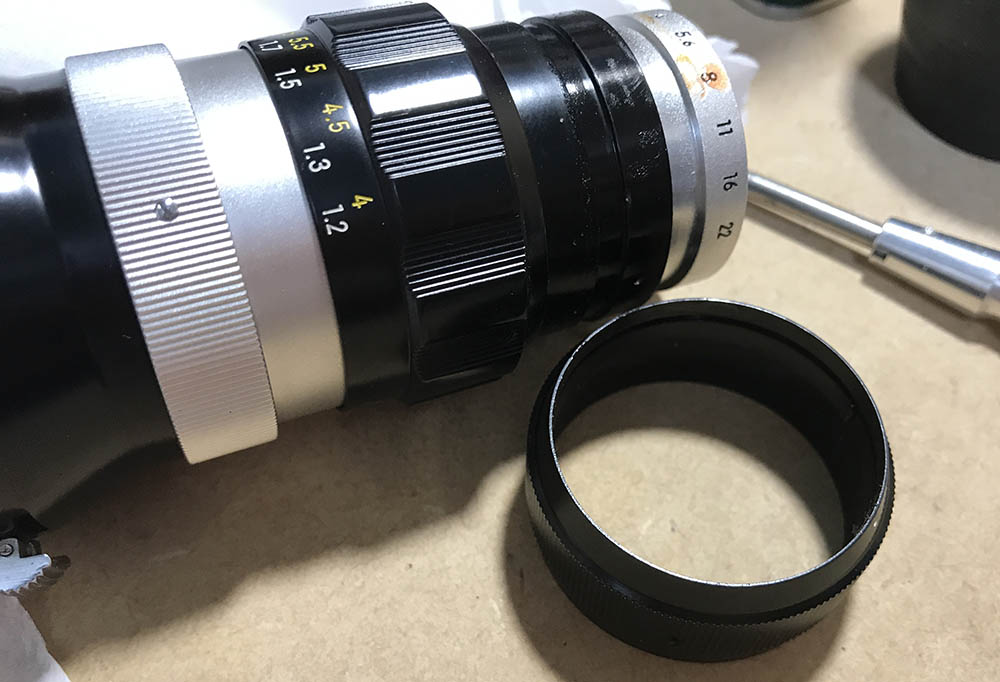
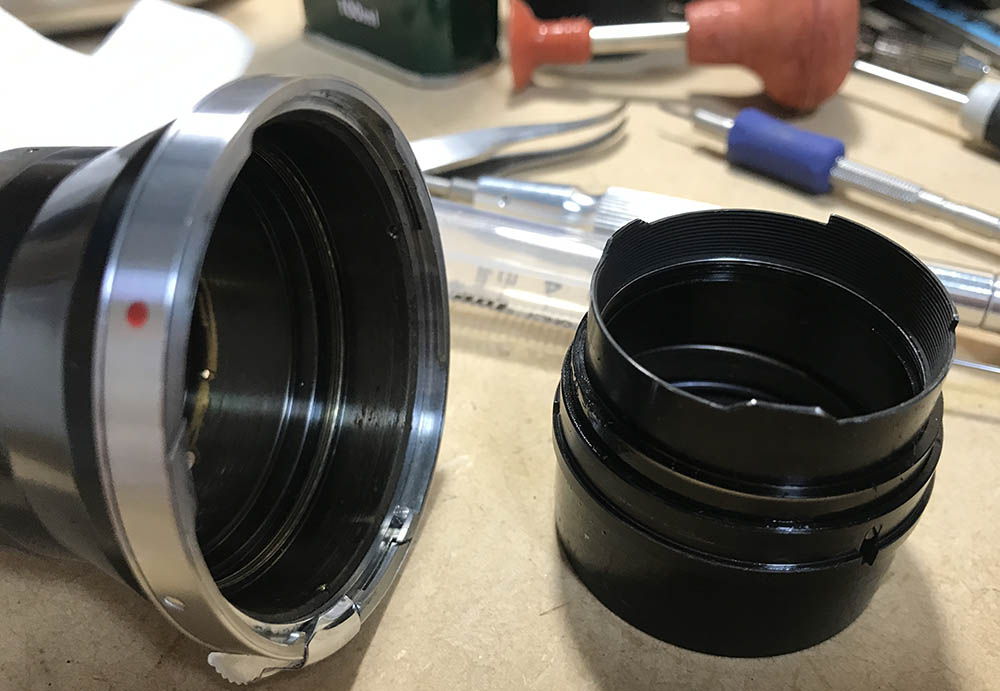
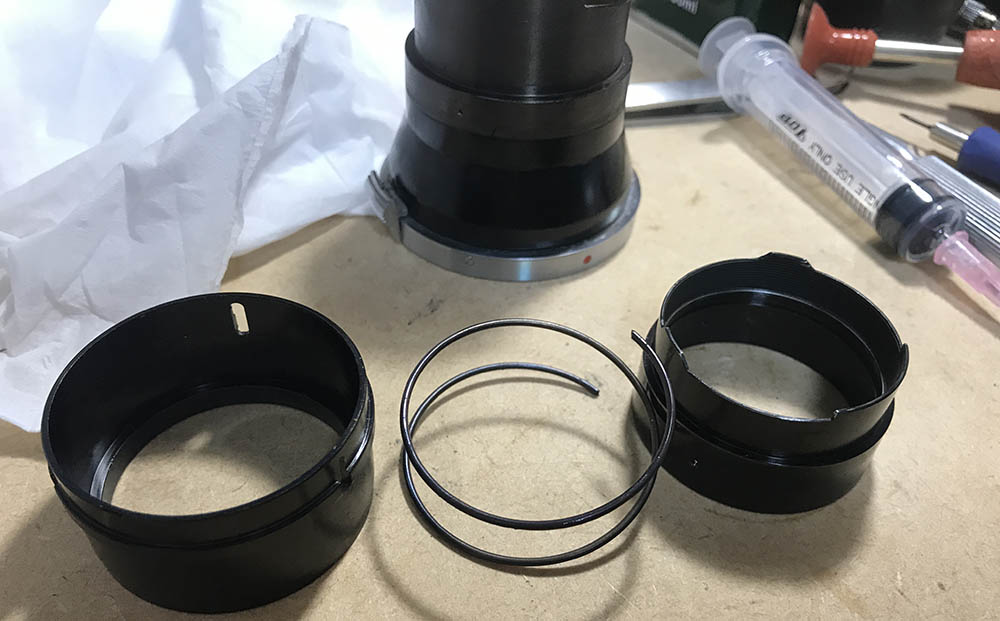
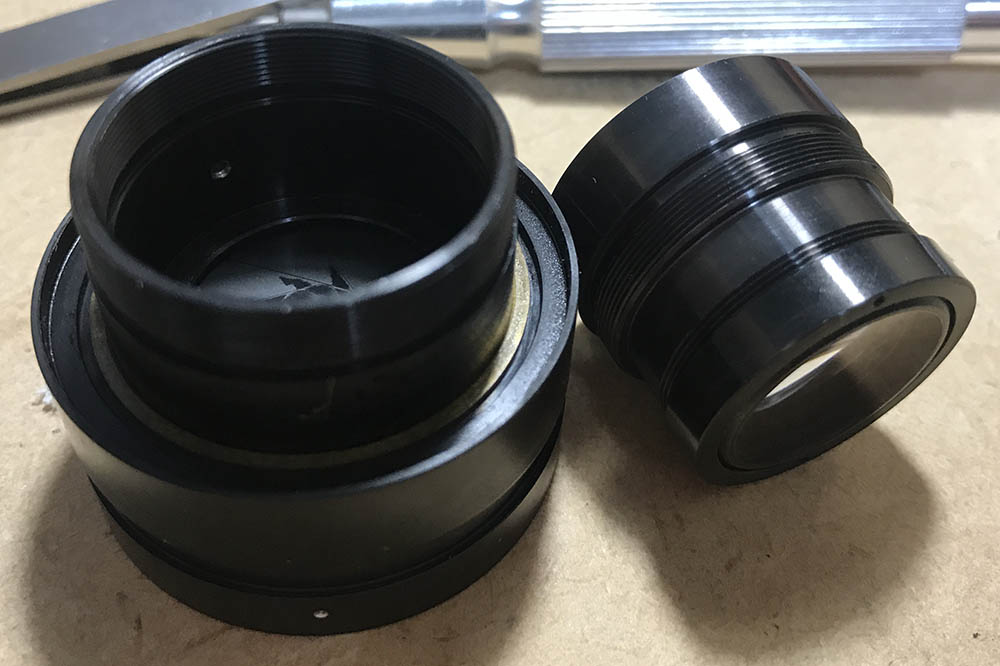
Once everything is gone you can safely pull the inner tube out. Obviously, it is very different from conventional lenses since this does not have a proper set of helicoids. This is probably a cost-cutting decision but I’m not sure.

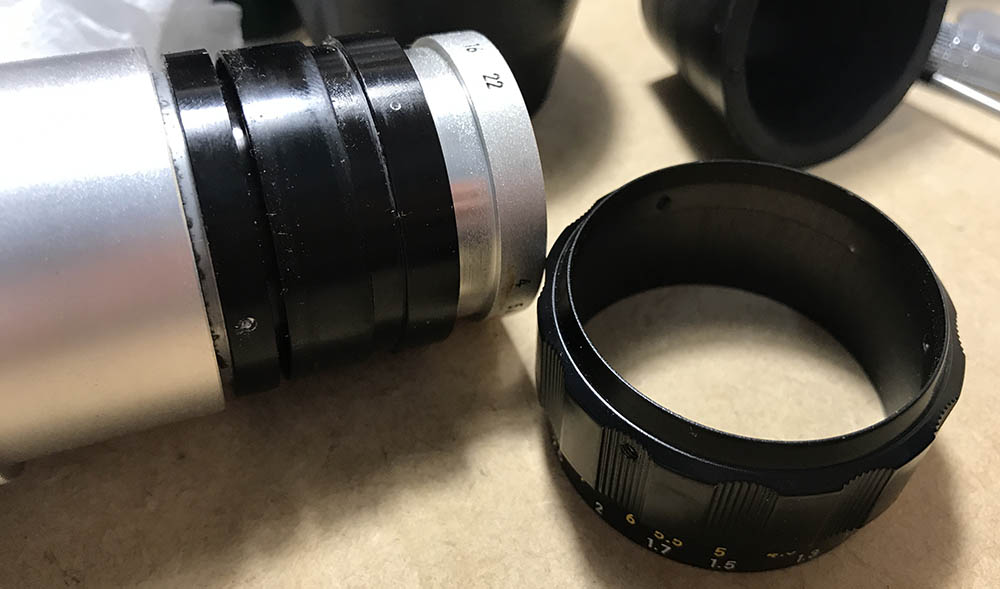
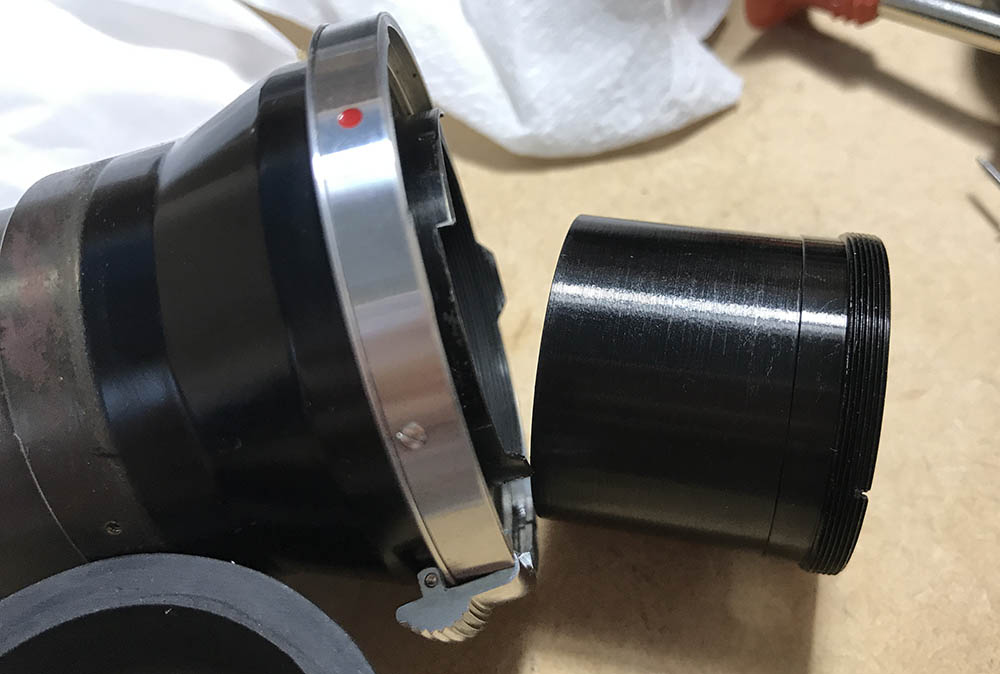
I could’ve done this earlier but the thread was so tight that I only got this off at this point. Removing this collar enables you to remove the objective block as it’s the only thing securing it.

The objective should not be stuck after that collar is gone.
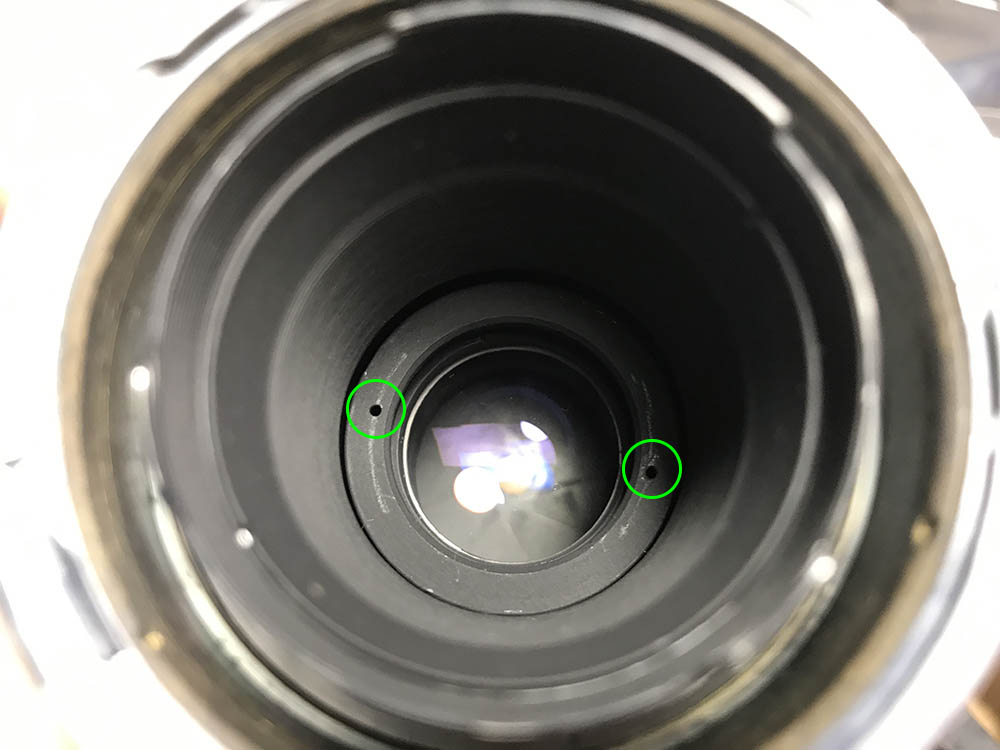
To clean the rangefinder-coupling cam, carefully extract this grub screw.
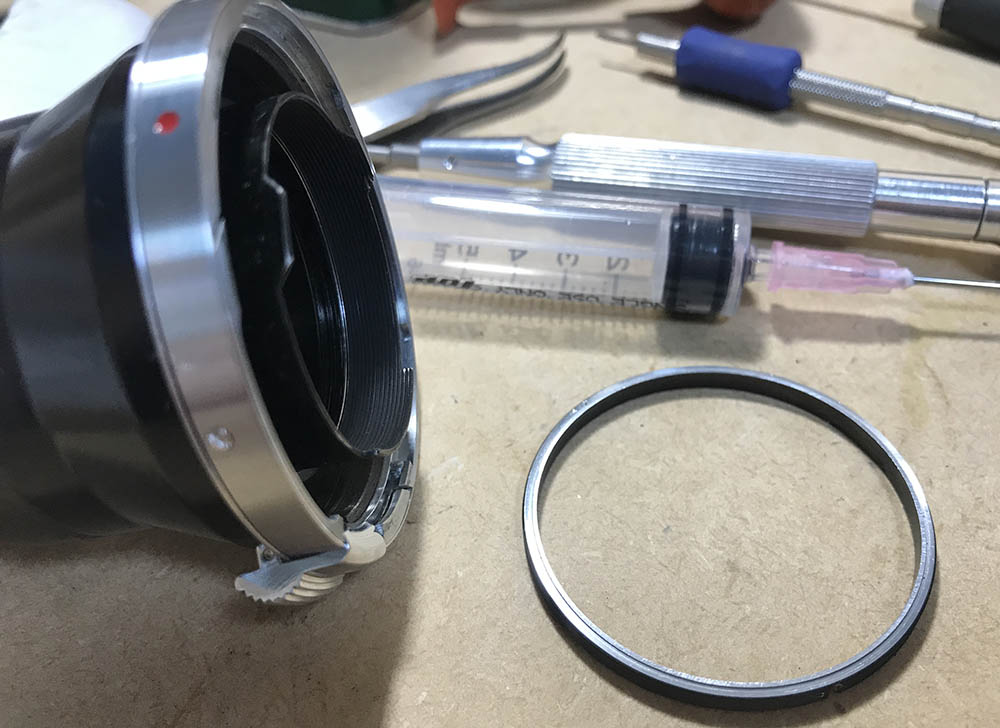
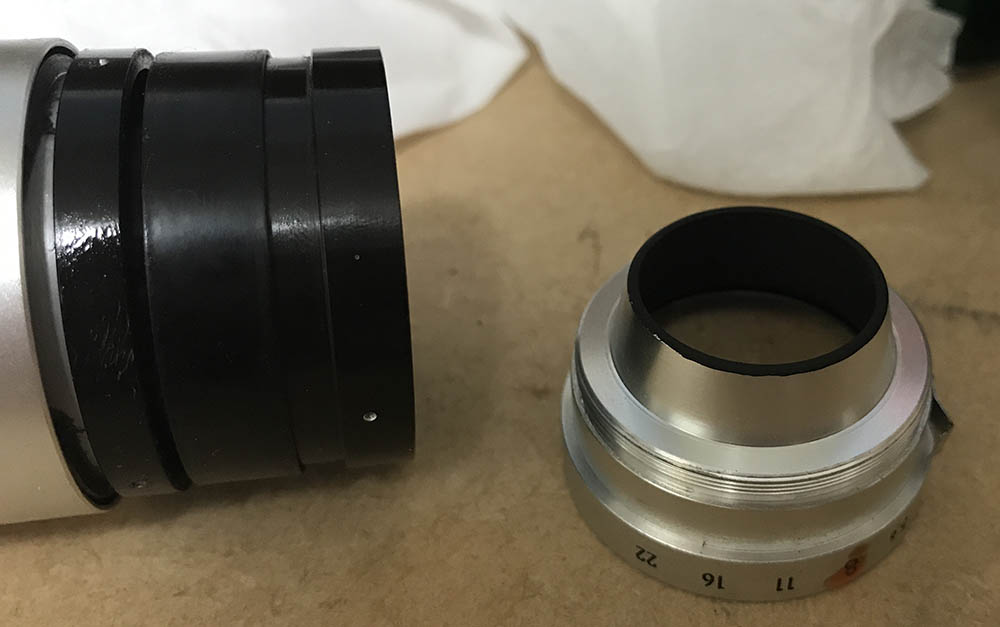
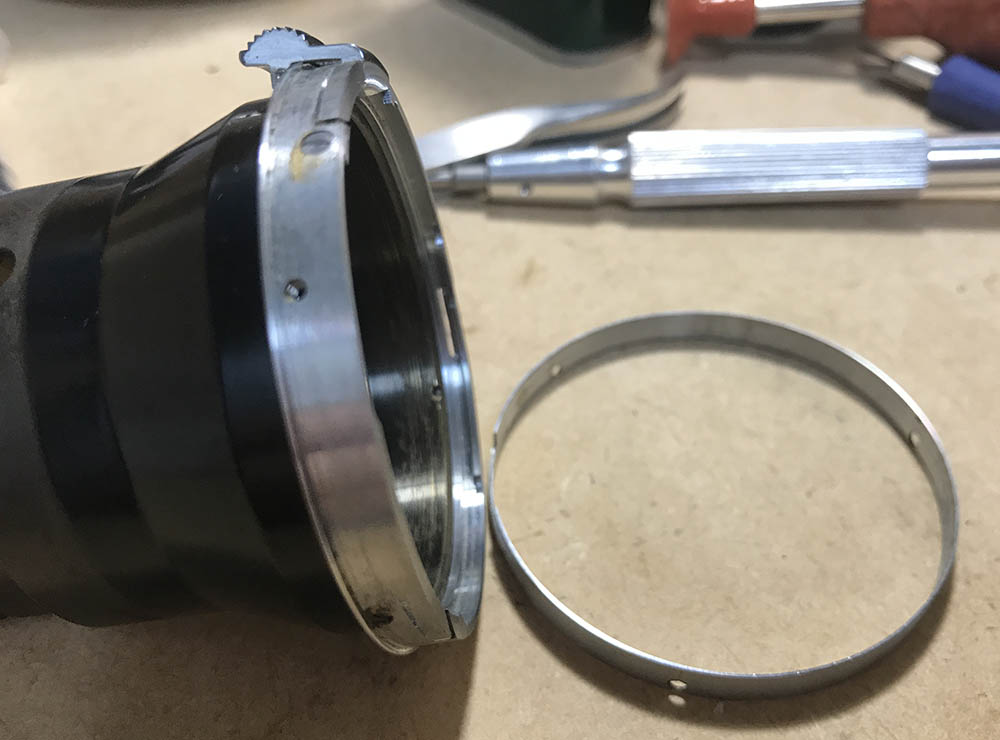
Unscrew this ring with a lens spanner.
The rangefinder-coupling cam should come-off as a single unit.
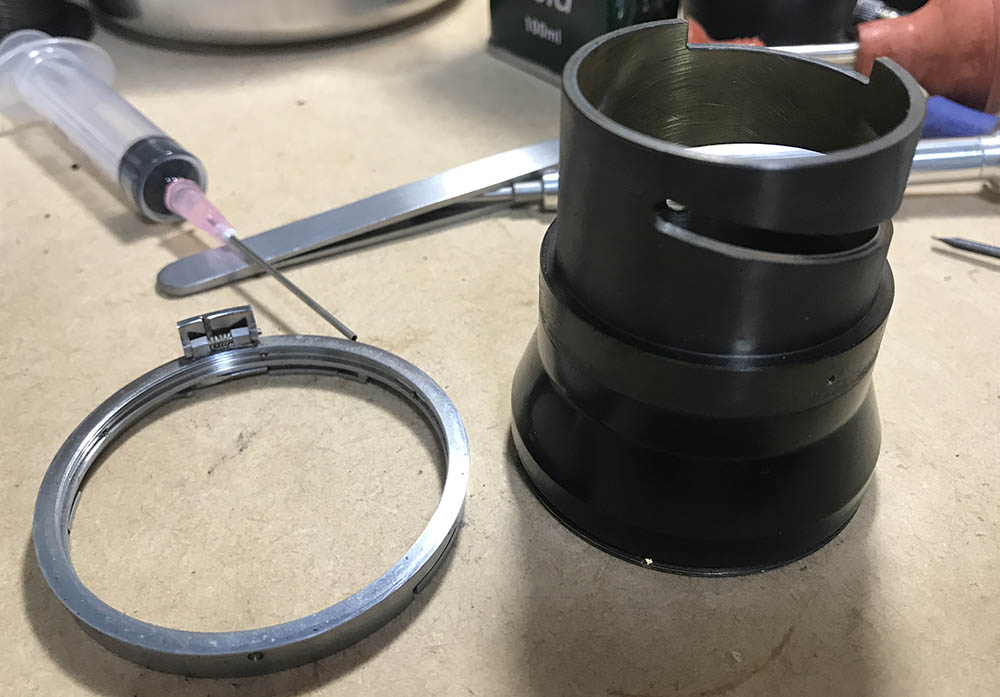
The whole assembly is being held-together by this guide screw. Extract this to dismantle the whole thing.
This is how it looks like once dismantled. Clean everything very well, do not forget to brush the spring properly to remove any rusts and deposits. It can be greasy here so make sure that you don’t leave any residue.
This is unnecessary but I wanted to clean this lens as good as I can. Leave it alone if you don’t have to service the bayonet. Extract these to dismantle it.
The cover of the bayonet can be removed by prying it off with your nails. It can be a tight fit and you should press on the lock to free it. It’s can be easily warped so exercise caution when removing it.
Extract all of its screws and you can unscrew the bayonet mount. Clean this very well, germs and grime can accumulate in its inner surfaces.
Clean everything really well. Be careful with cleaning the barrels, the brass parts that were painted don’t have an anodized substrate so the paint won’t stick well, it can be lifted easily with solvents and strong detergent so clean the painted brass bits by wiping them well with alcohol.
Disassembly (Objective):
The construction of the objective is typical of many rangefinder lenses of its time. It’s simple since it only has 3 elements which you can easily access. It’s not a difficult assembly to take-apart for a seasoned repairman. This section will contain both sections for the objective and the iris mechanism since the assembly is quite simple. You should not work on the iris mechanism if you can avoid doing it but if you see even a slight hint of oil on the leaves then it is best that you take the whole thing apart to overhaul it properly. You can’t simply flush the iris mechanism and call it a day, you’re only ignoring a big problem underneath the surface and the only way to clean this properly is to take the dismantle the whole thing.
The front element can be removed after unscrewing the bezel. Use a rubber cup to remove it to prevent any damage, if it’s stuck, a few drops of alcohol applied to its threads should help soften the seal. A lens spanner is your last resort, it’s something that you should prevent yourself from using unless it’s absolutely necessary.

The front element can be extracted with a lens sucker. Use a pencil to mark which edge should be facing the front.
The rear optical block can be unscrewed rather easily with your fingers.

Unscrew the rear element’s collar and extract it with a lens sucker. Again, it is important to mark which edge should be facing the front.
Here’s a closer view of the rear element.

The 2nd element can be extracted once its retainer is gone.
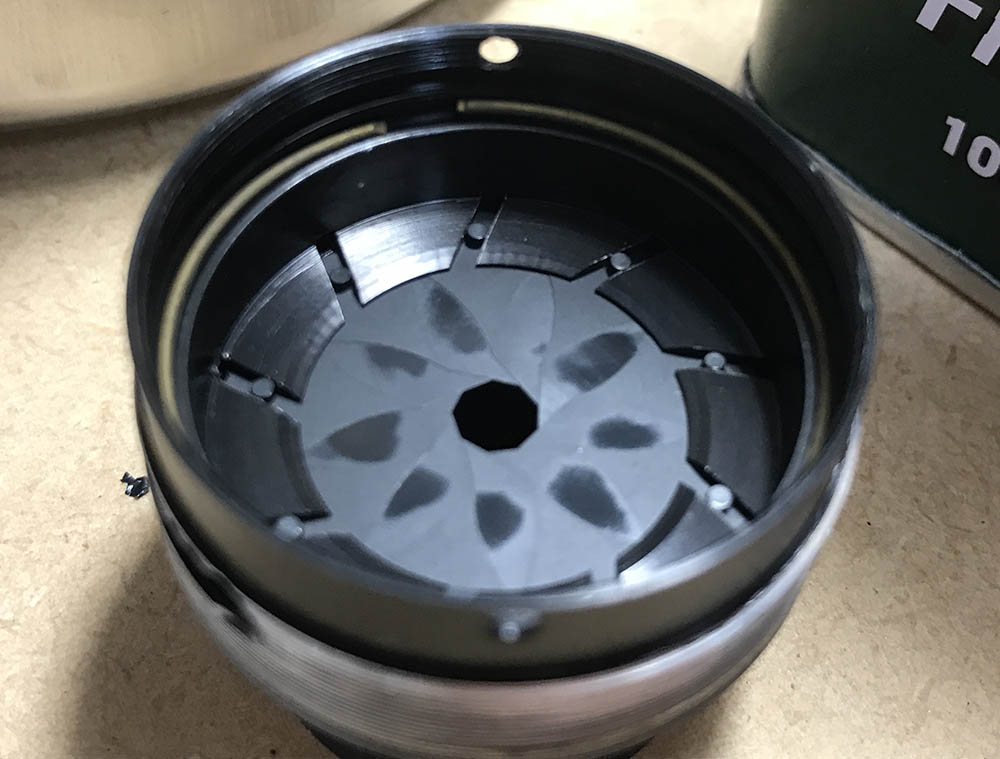
The iris mechanism is being secured by this collar. It’s just a brass ring, you can use a screwdriver to pick this off.
Carefully extract the rotator plate.
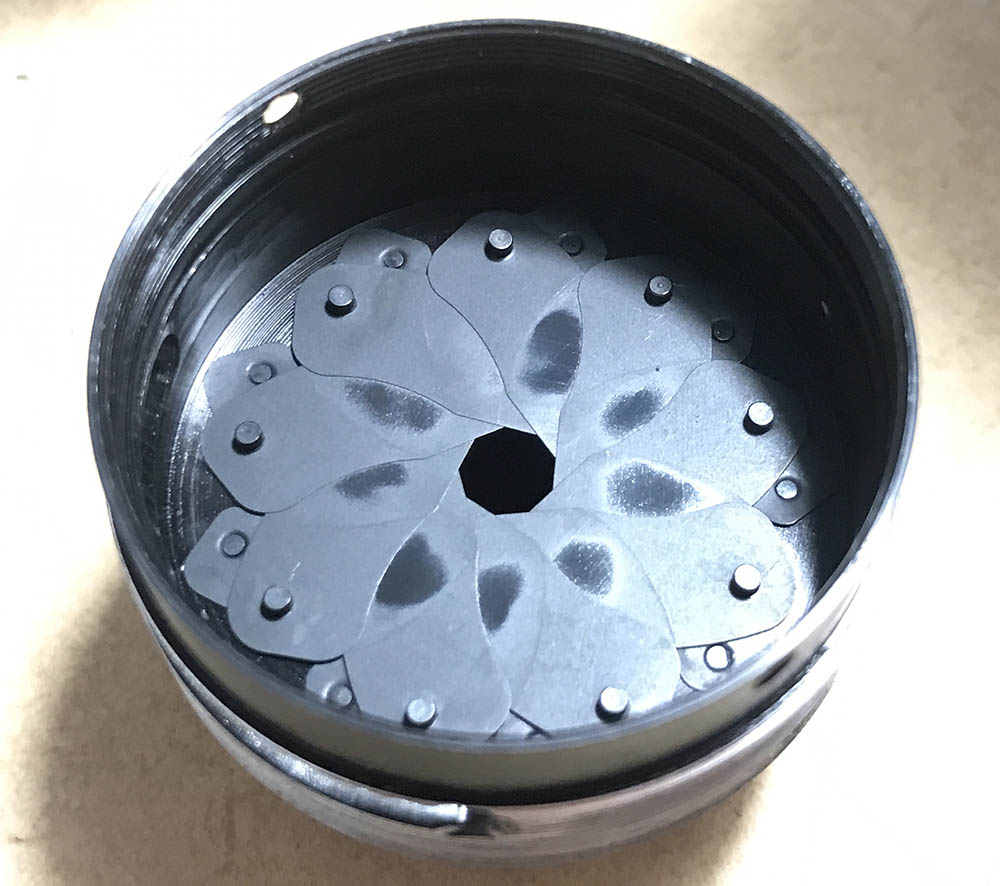
The iris leaves should be accessible to you now. Notice that there’s oil on it, this probably came from the main barrel or the aperture ring. The only way to clean this is to do a thorough job.
The iris was so oily that it came-off in one-piece. If you have to remove the leaves one-by-one, carefully poke at its pegs from behind with a toothpick. I am always very cautious when working with irises since they’re so delicate.

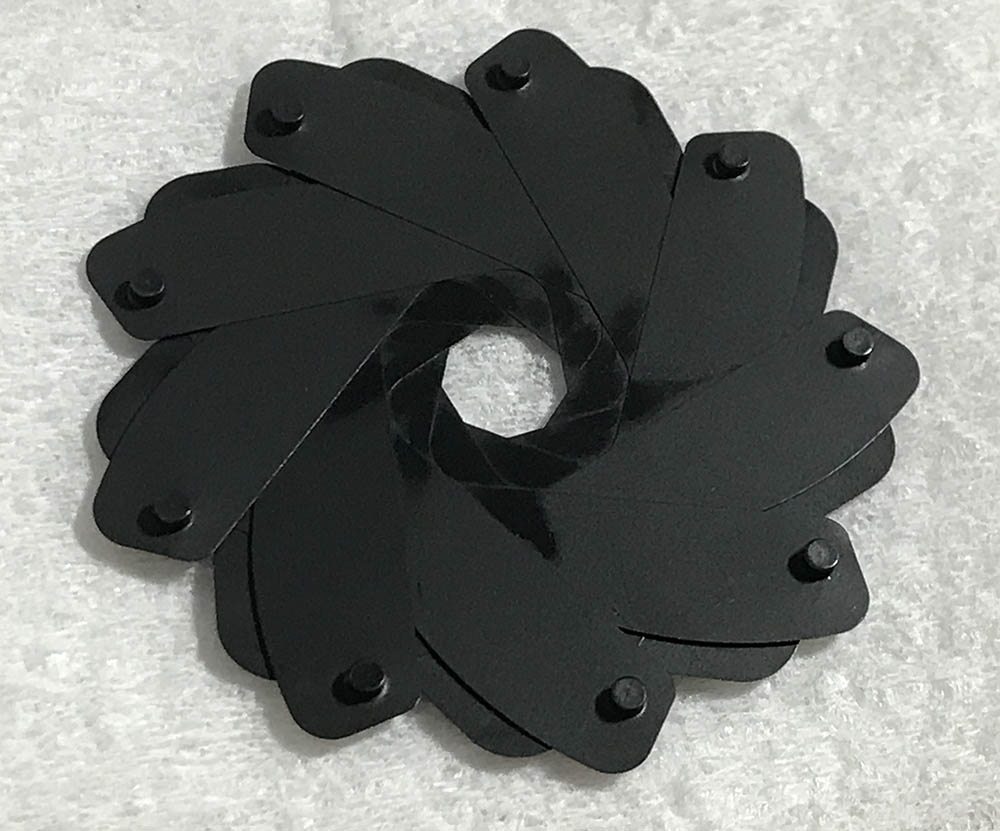
I cleaned each blade carefully, wiping them with naphtha to remove oil and rust deposits. Putting them back can be a pain but that’s something that I’m used to after repairing rangefinder lenses for years. I you want to see how I repair preset-type irises, read my article on how to service these.

I applied a generous amount of powdered graphite to the iris mechanism, it was then exercised so the powder coats everything evenly. A bulb blower is handy for removing excess powder. Make sure that you remove as much as you can while still leaving a thin, even coat. It shouldn’t be obvious, a shiny patina should be enough.
Clean the elements very well. If you want to know how to get rid of fungus, read my article on cleaning fungus on a lens. You should be careful with my method as the chemicals that I use are potent, you can strip the coatings off from your lens easily. Make sure that there are no oily residue left so before you reassemble everything, this should be obvious to everybody.
Conclusion:
I enjoyed working with this. Despite being similar to the F-mount version it gave me lots of new information on how Nikon managed their production. I was in the impression that Nikon would go cheap and just replace the main barrel but that wasn’t the case since there are plenty of differences both big and small. This is surprising, the premise of manufacturing this lens was to cut cost but Nikon decided to push a bit and give us something more. Nikon could’ve saved a lot of money by simply recycling everything but the mount which is the main difference between the 2 version.
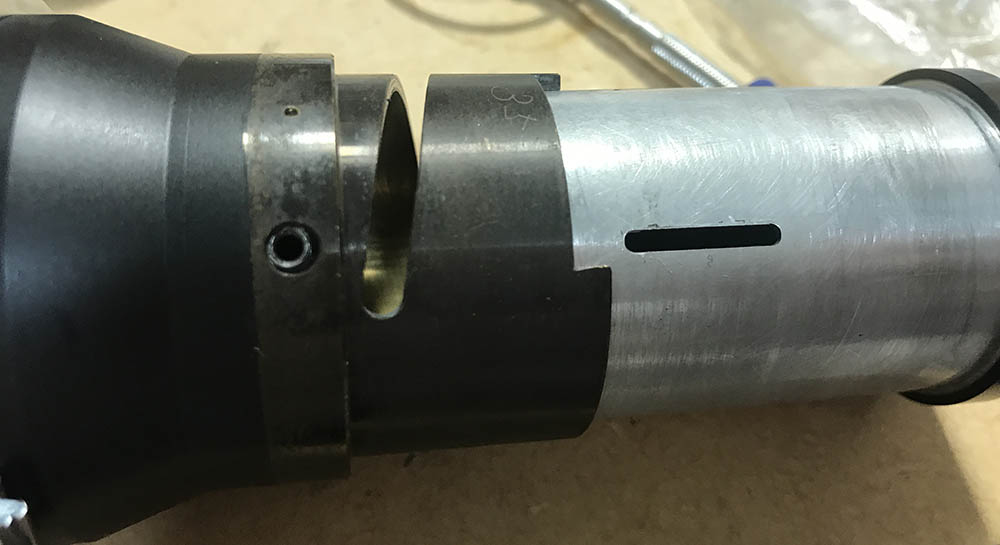
The front part of the lens was re-assembled carefully. If it wasn’t stuck then I would’ve dismantled everything in the proper order.
The barrel and inner tube are now clean. Never leave any residue and use a slightly-thick grease to lubricate it. Just make sure that it’s not too-thick or it will make the lens difficult to turn.
Did you enjoy this article? If you did, please share this with your friends. It’s my passion to share with you my repair notes and show you some pictures along the way so you’ll know how some of more obscure lenses perform. It’s all thanks to your support that this blog continues to exist. Your support is a big help since it helps me offset the cost of maintaining this blog. It helps me purchase, process and scan film, too. This enables me to show you pictures that were taken with film so you can appreciate the gears that I review even more. Thank you very much again and see you again next time, Ric.
Help Support this Blog:
Maintaining this blog requires money to operate. If you think that this site has helped you or you want to show your support by helping with the site’s upkeep, you can make a small donation to my paypal.com (richardHaw888@gmail.com). Money is not my prime motivation for this blog and I believe that I have enough to run this but you can help me make this site (and the companion facebook page) grow.
Leave me some tip?
Thank you very much for your continued support!
$2.00
Helping support this site will ensure that this will be kept going as long as I have the time and energy for this. I would appreciate it if you just leave out your name or details like your country’s name or other information so that the donations will totally be anonymous. This is a labor of love and I intend to keep it that way for as long as I can. Ric.

Apr 20, 2020 @ 14:57:45
Another good article. It is also nice to see some photos taken with this rare lens. I was impressed to see it mounted on an S4 as the two were “budget brothers.” Keep up the good work!