
Hello, everybody! Looks like I cannot go out for the weekend as the city is in a state of voluntary lockdown, thanks to coronavirus. This is starting to be a big inconvenience for a lot of people, including me. My usual work routine’s time has been affected, too. Even time for social functions is affected and it is wiser to stay home than going out for a pint after work. Abstaining from a lot of vices and unnecessary things will be the theme for the next couple of weeks for everyone. While we’re on the topic of only doing the essentials, it is time that we take a look again at the Nikon S4, a stripped-down version of the Nikon S3.
Introduction:
Let’s now continue our series on the Nikon S3/S4. In part 1, we talked about the reasons why both cmaeras exist. We’ll mostly talk about the Nikon S4 in this article and what makes it unique from the more-common Nikon S3.

The Nikon S4 is an elegant camera. The viewfinder doesn’t have frame lines for 35mm which makes it less-cluttered and less-stressful to view. If you like shooting with 50mm or 105mm lenses this camera has frame lines for them. You won’t have to see the 35mm frame line that you won’t need. I love using the Nikkor-S 50mm f/1.4 Millennium with it. The Voigtländer VC meters work perfectly with it despite not being coupled.
The film counter is also similar to the Nikon S2’s manual one. It’s simpler so it doesn’t have as many parts that can go wrong compared to the automatic one. It’s an inconvenience to manually-turn the counter each time you load a fresh roll but you will get used to it. I’m not sure if this was catered to the professional’s request but it makes a lot of sense.
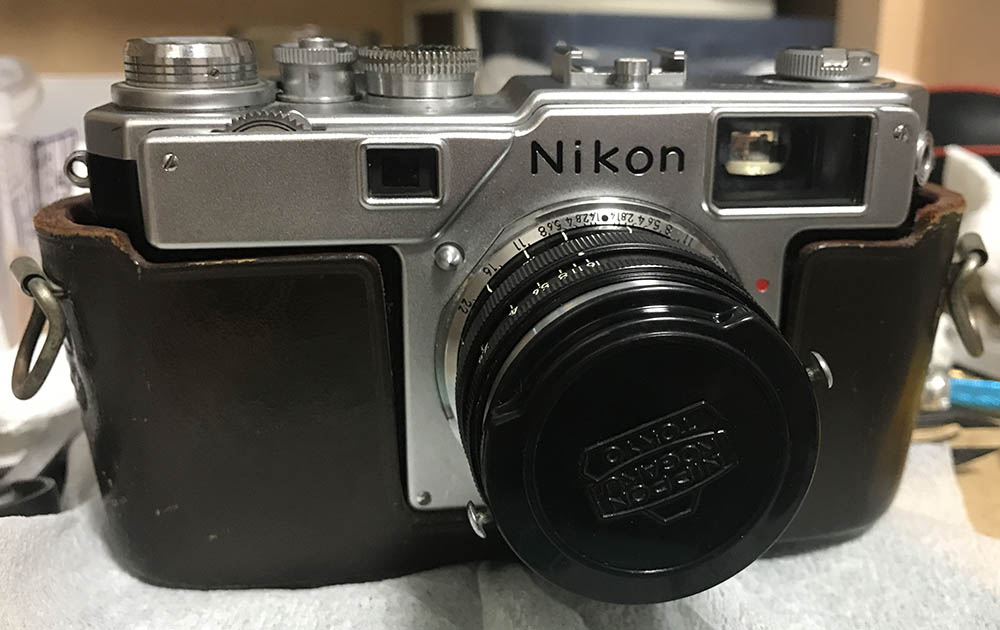
Not having self-timer means that nothing can catch on anything. You’ll also be able to use a case that will fit the front face of the camera snuggly. Your fingers won’t accidentally wind the self-time, too. Attached to the camera is a Nikkor-H•C 5cm f/2, a likely part of its kit.
The Nikon S4 was considered to be quite rare as it wasn’t produced as much as its more expensive siblings, it was never sold overseas, too. Searching for one is much easier these days and the prices have gone down, too. In fact, I have 2 in my collection and I am not rich at all. I was just lucky, I bought the 2 for really low prices since they were in such terrible states and I will show you how I serviced one of them in this article.
Before We Begin:
If this is your first attempt at repairing a lens then I suggest that you check my previous posts regarding screws & drivers, grease and other things. Also read what I wrote about the tools that you’ll need to fix your Nikkors.
I suggest that you read these primers before you begin (for beginners):
Reading these primers should lessen the chance of ruining your lens if you are a novice. Before opening up any lens, always look for other people who have done so in Youtube or the internet. Information is scarce, vague and scattered (that is why I started this) but you can still find some information if you search carefully.
I highly recommend that you read my working with helicoids post because this is very important and getting it wrong can ruin your day. If I can force you to read this, I would. It is that important!
For more advanced topics, you can read my fungus removal post as a start. This post has a lot of useful information and it will be beneficial for you to read this.
Disassembly (Front Parts):
Removing the front panel is part of an extensive maintenance routine. This enables you to clean the focusing wheel’s gear train and the helicoid. These are important parts in terms of operating the camera so these should work smoothly. The parts here are delicate and most of the screws were sealed. It can be difficult to remove them so you should consider using heat or some solvents to dissolve their seals. You will require several sizes of drivers just so you won’t strip the screws’ heads. Be careful while working here, you can damage the rangefinder mechanism since it’s exposed after you remove the front panel.
The helicoid can be removed after extracting these. Be careful while you’re removing the screws, you don’t want to lose the washers underneath it. The washers are there to ensure proper focus, these are thin and delicate.

Don’t forget where these washers were originally located, their heights are exact and they were placed there to precisely adjust the focus. Mismatching them will result in less-than-optimal focus. Store these in a safe place, mark them so you will know which one goes where.

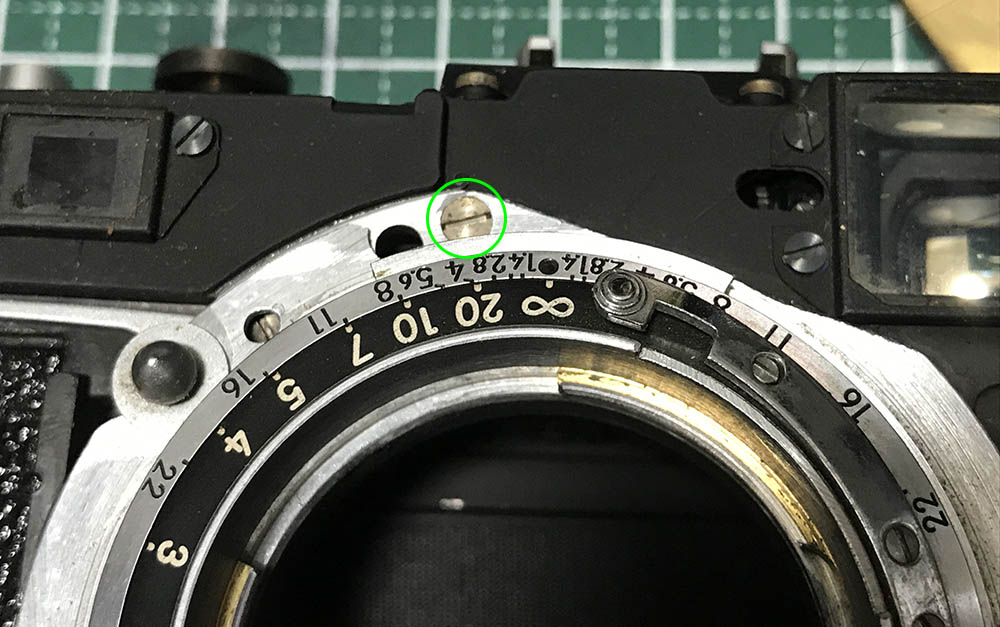
The helicoid has a lock to prevent you from turning it beyond its range. This screw has to be removed in order to disengage the lock.
Loosen the screw at the base of the lock so you can lift it.

Separate the helicoids and remember the spot where they separated. This is also the same spot where these should mesh. If you haven’t seen my article on how to work with helicoids please read it before you proceed.
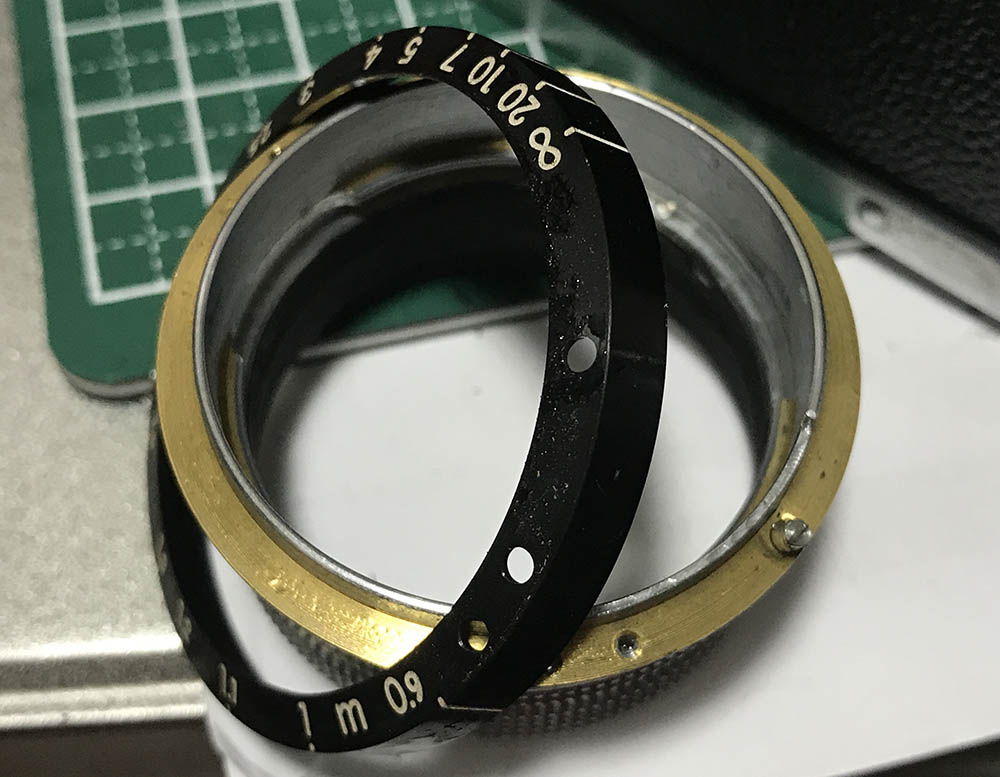
This is unnecessary but I had to do this. The distance scale can be removed after you extract its screws.
The next step is to remove the leatherette covers from both sides of the face of the camera. Apply some alcohol and lift the corners to remove them, you must apply steady pressure so you won’t tear them.
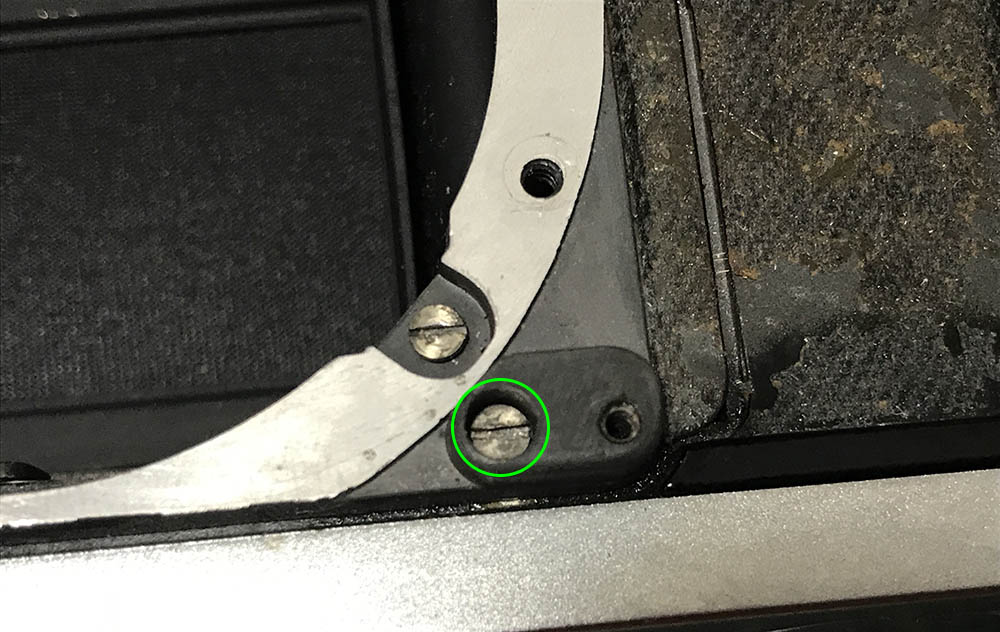
Extract these screws to remove the baffle.

The baffle is simply a thin sheet of pressed brass, carefully remove it so you won’t warp it.

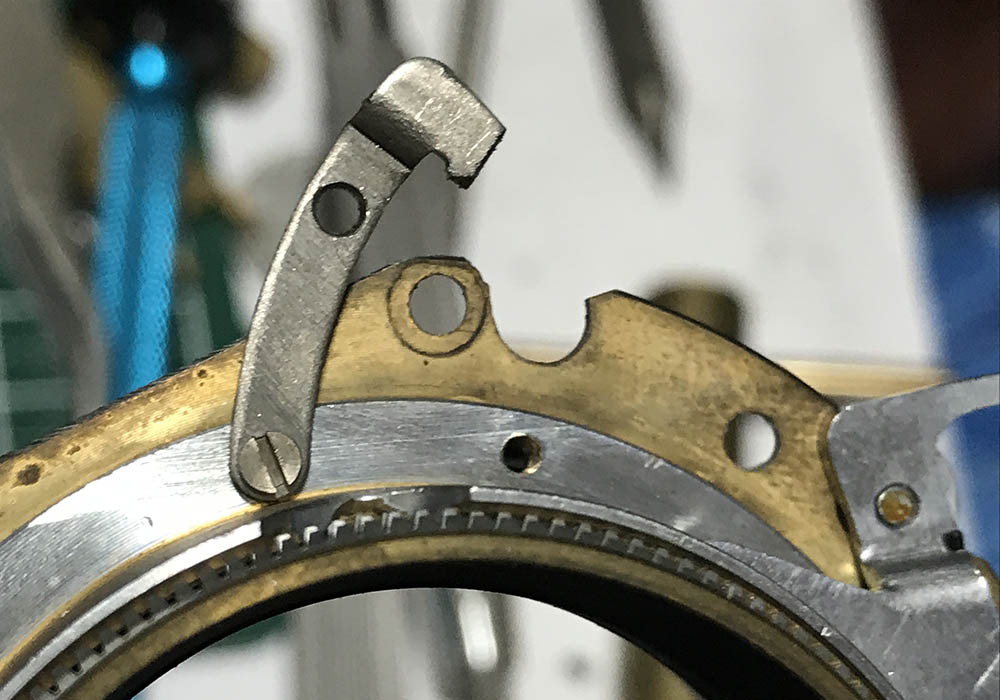
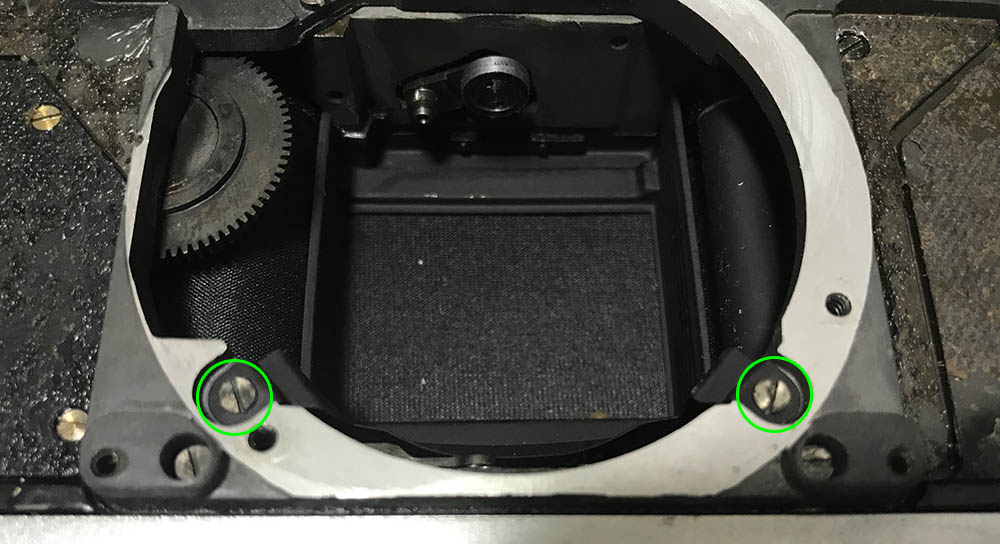
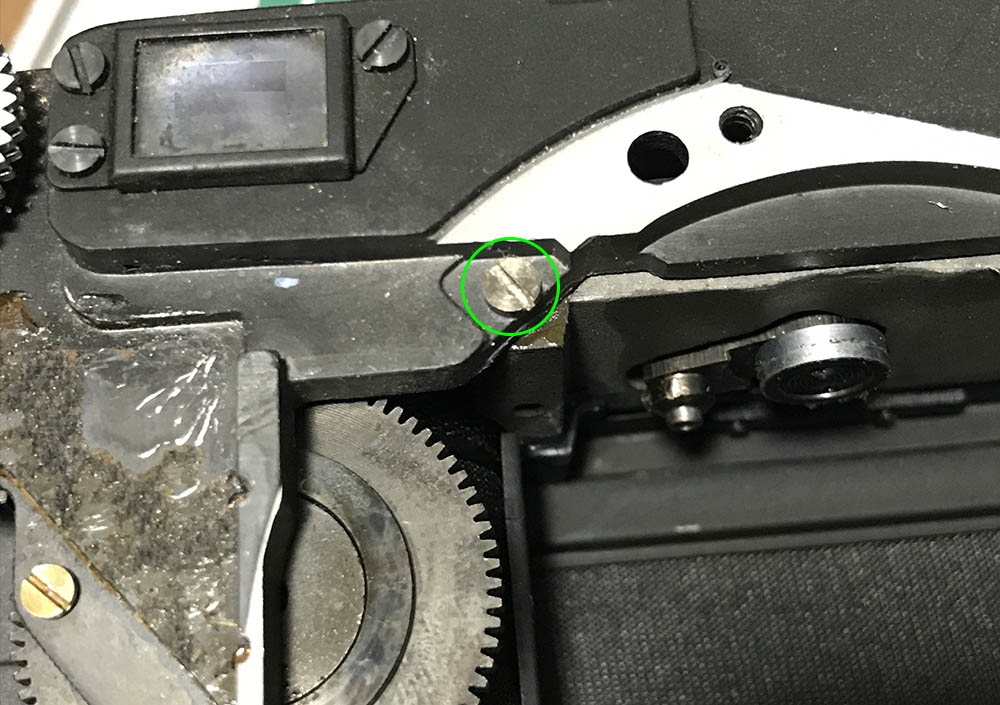
Extract these screws to remove the self-timer mechanism. The Nikon S4 has no self-timer as you can see in he photo above so it’s only a flat panel.
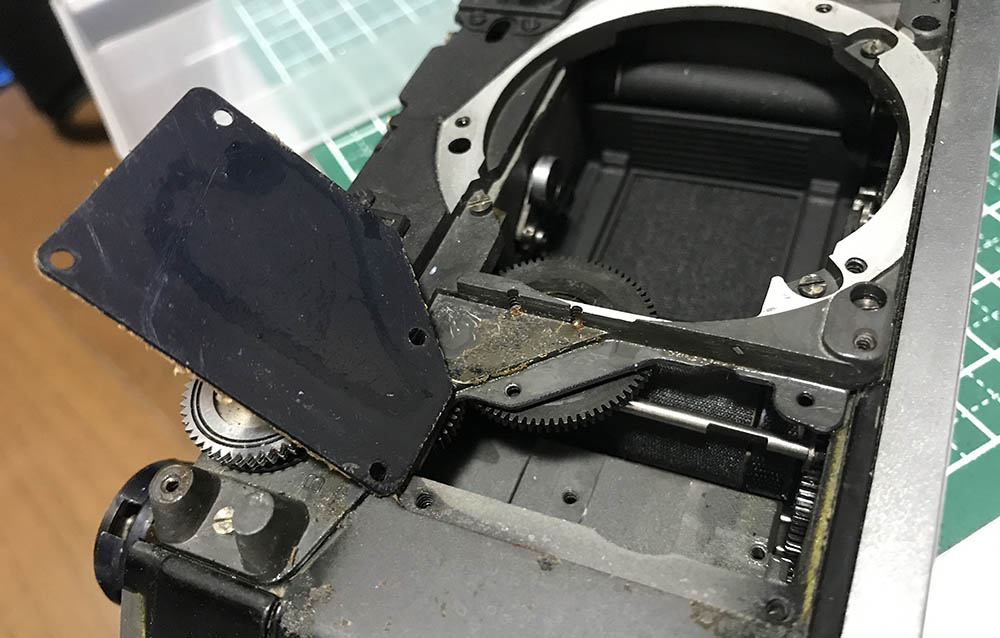
There’s nothing underneath the Nikon S4’s panel, it’s wasted space. The slot in the shutter rod is where the self-time mechanism engages in the Nikon S3 or the Nikon SP. You should remember this when repairing those models. In the Nikon S3 and Nikon SP you’ll have to remove the self-time lever before it is possible to remove the leatherette from this side of the camera’s face.


(Click to enlarge)
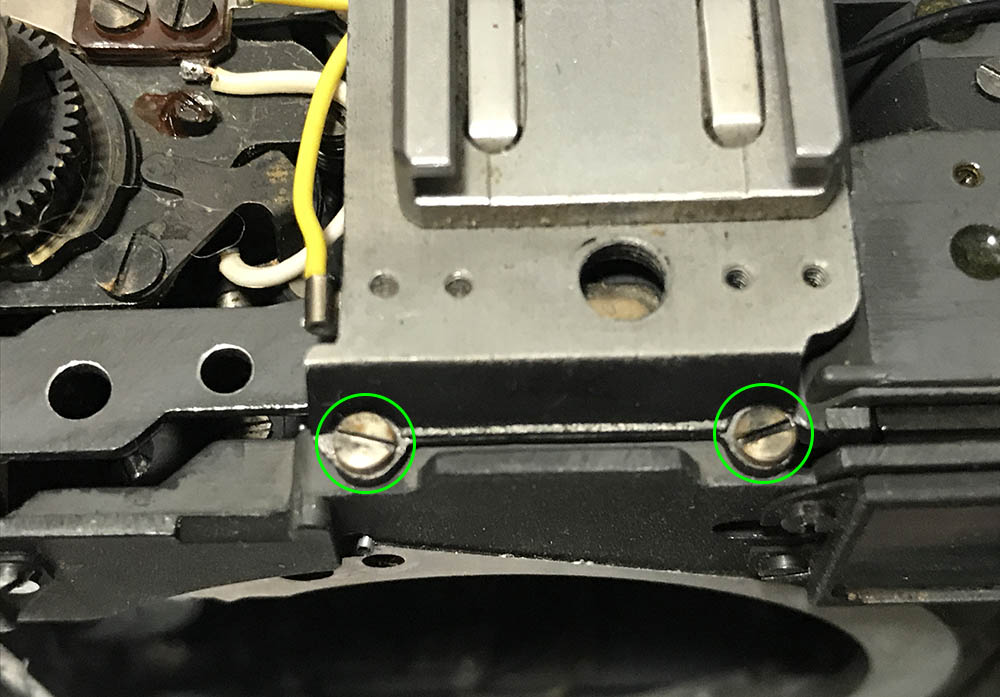
Carefully extract these to remove the front panel. These can be stuck due to seals and contact cements, a bit of alcohol will help you soften these.
Here are the last screws that you should extract to remove the front panel. Carefully remove the front panel so you won’t crack it. It’s made from alloy, not brass so it can be brittle.
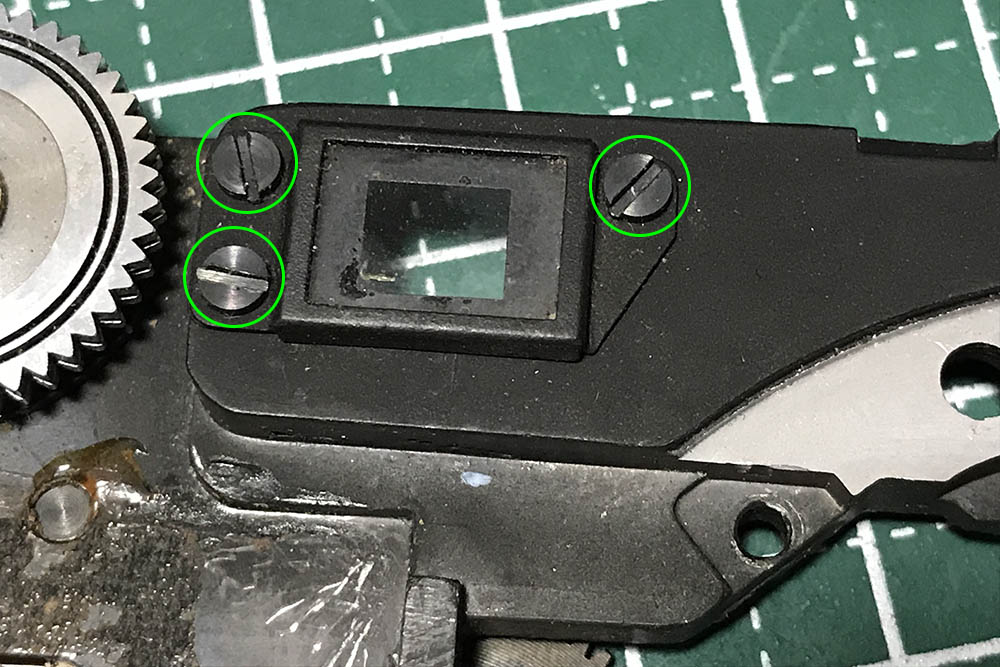
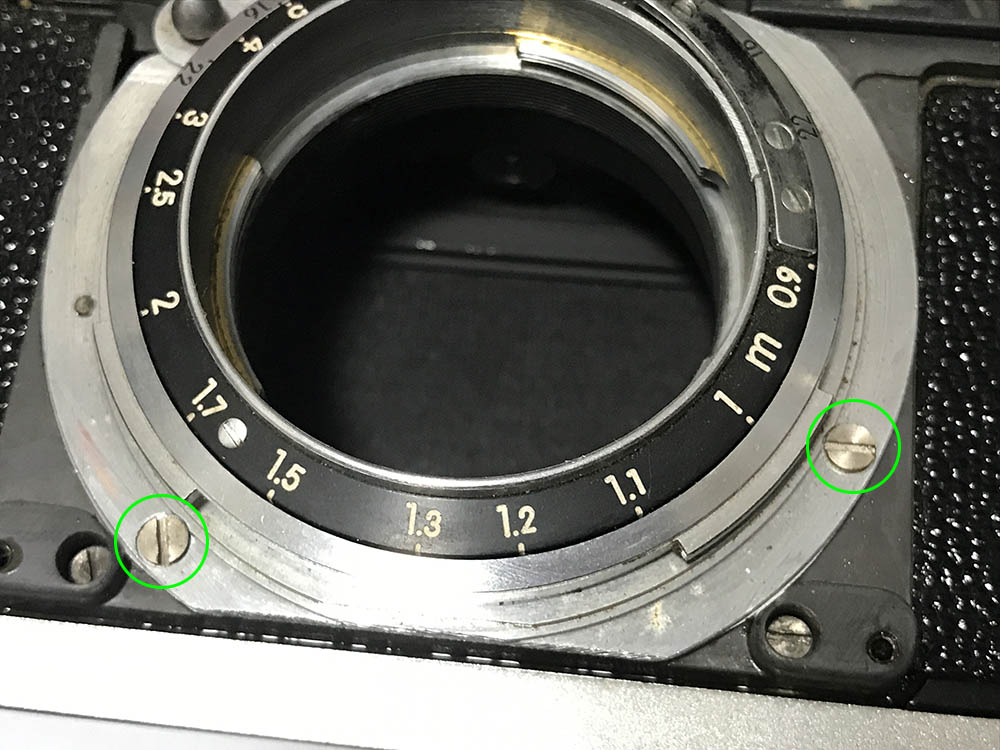
The window for the rangefinder can be removed after you extract these.
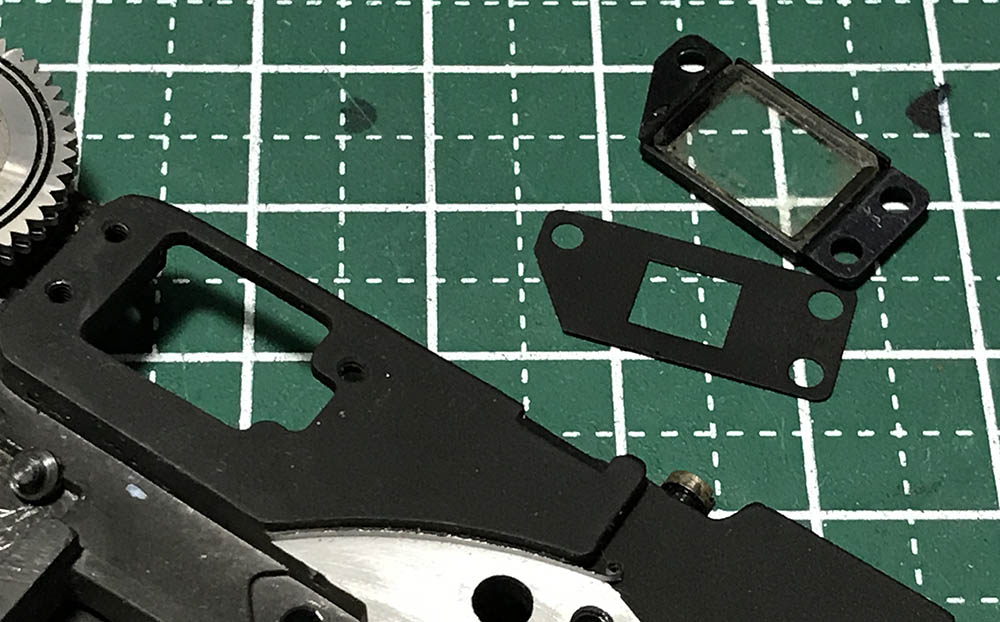
The frame of the window and its mask can be removed. The mask serves as a baffle to prevent stray light from making the rangefinder look washed-out and it also helps keep the protective glass stuck to its frame. The glass is just glued to its frame so it’s easy to remove.
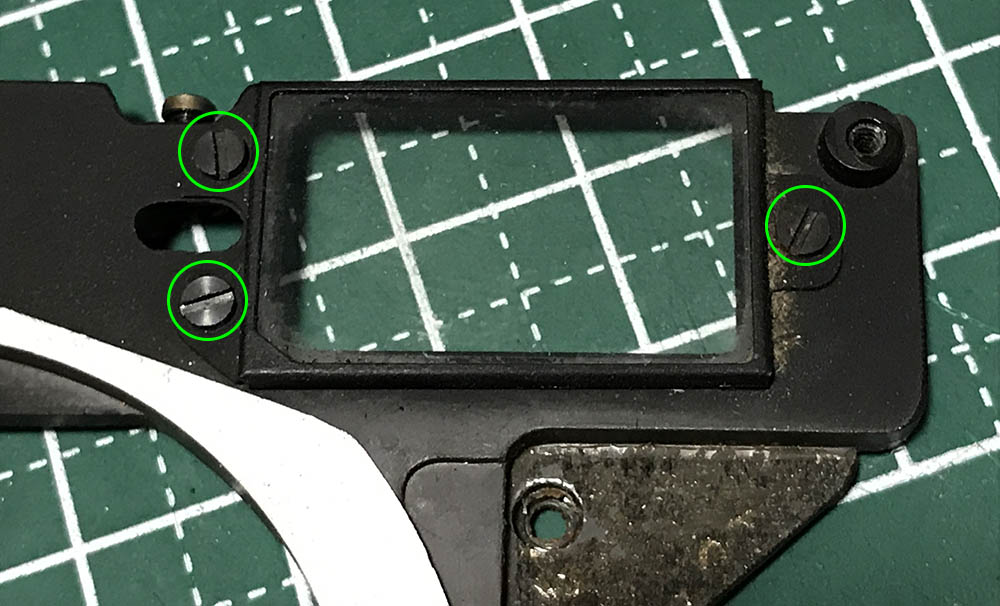
The viewfinder window can be removed once you extract these.
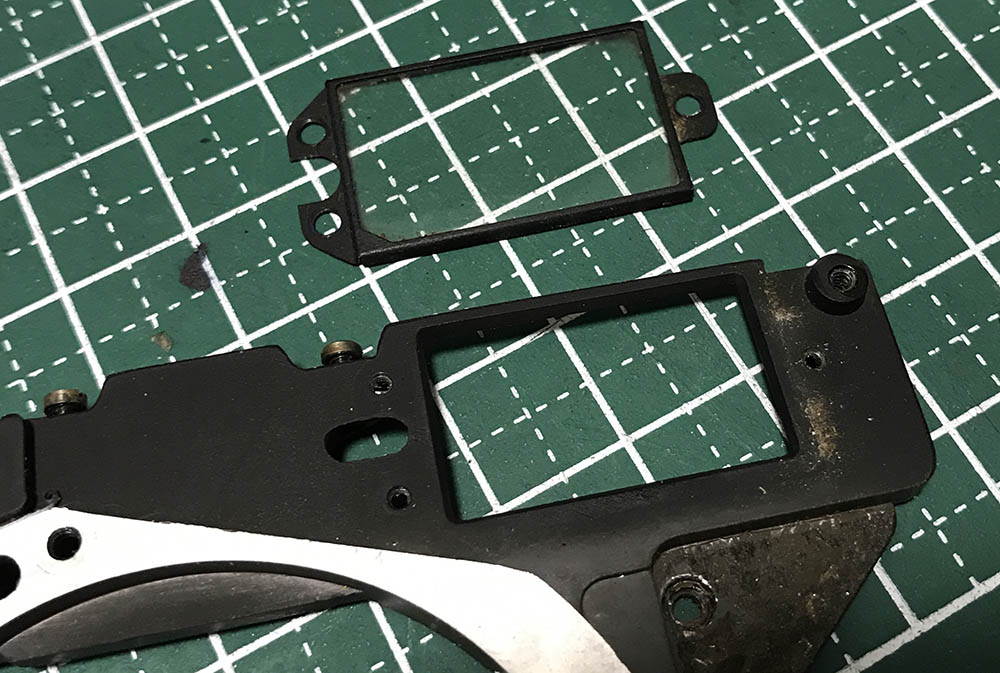
The protective glass is just glued to the frame.
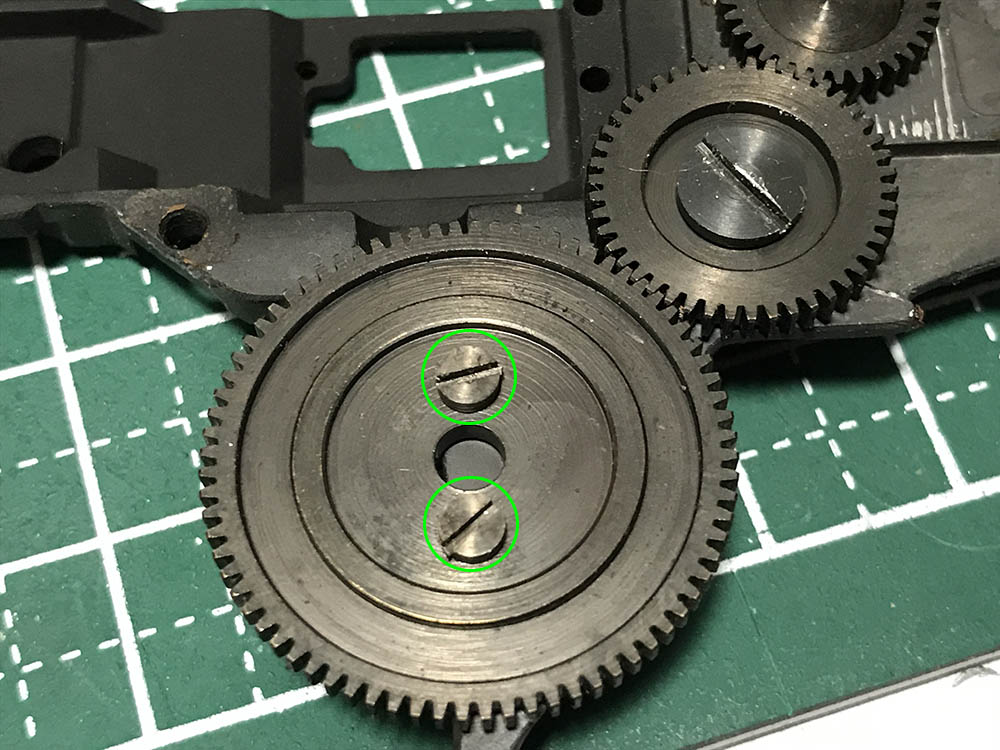
The focusing wheel’s largest gear is secured by these screws. All the screws in this gear train were sealed and you should heat them with a torch just to soften their seals. Not doing this will make it risky to remove these, you can strip the slots easily since these are brass screws.

This is how it was assembled, there is a washer underneath it and a central plate that holds everything in place. You can clearly see the sealants in this photo around the screw holes. This is the reason why you should heat them or apply some strong solvents to the screws just to soften these first.

This is the toughest screw to remove. Heat the other end with a torch so you can safely remove this. Use a driver that fits the slot perfectly or you’ll strip it easily.

There’s a washer underneath it, too.
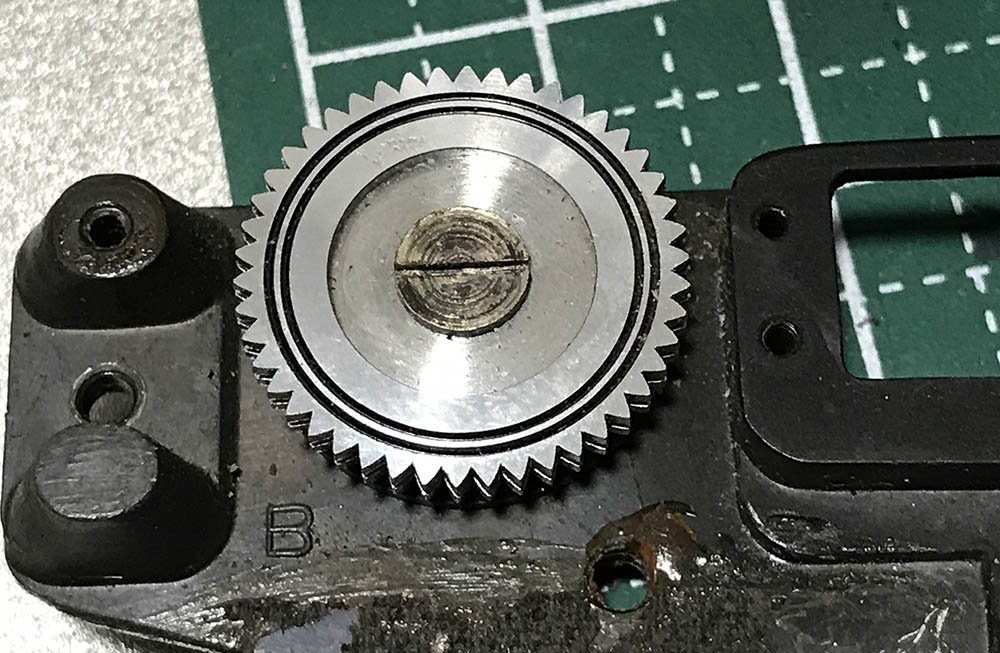
The focusing wheel can be removed after you extract this. Again, heating it will be beneficial so you won’t damage the slot.
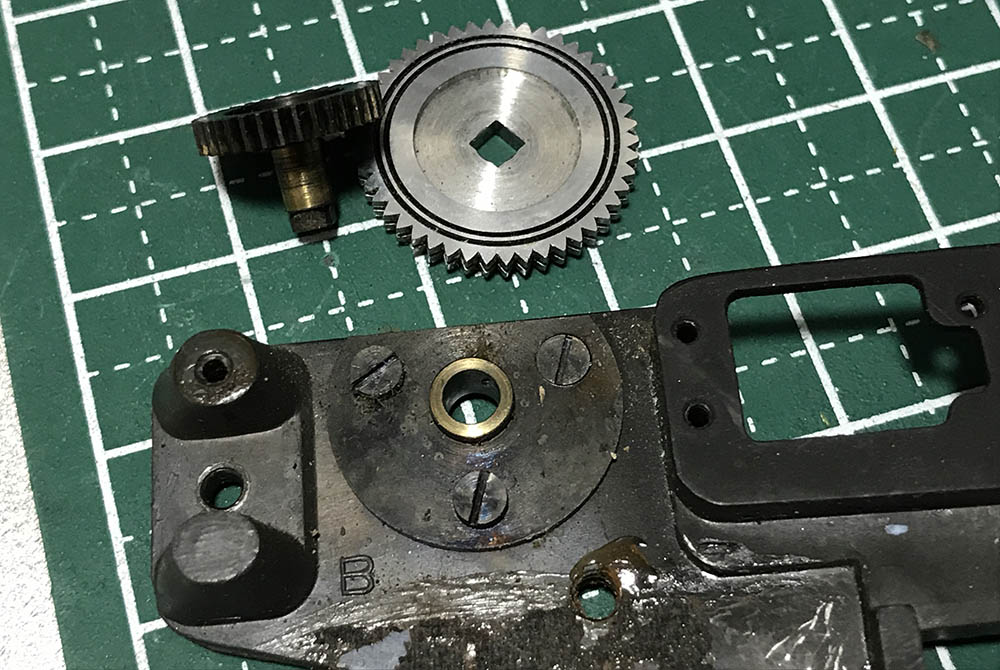
This is how the focusing ring was installed, it drives another gear behind it that drives the whole gear train until it reaches the helicoid. It’s delicate as you saw in the pictures so don’t use the focusing wheel with heavy lenses or force its operation or you can break something.
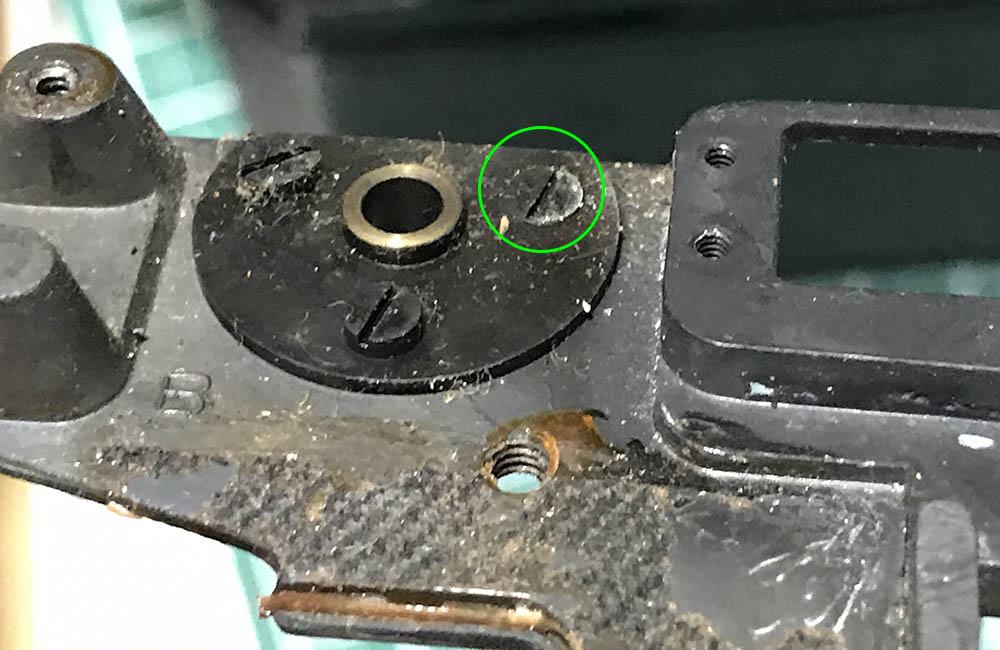
You can remove the base of the focusing wheel by extracting it screws. Note that one of the screws have a flushed head. This is to get some clearance for the helicoid’s locking lever which was situated here.
Carefully clean the helicoids and lap the threads if you have to. Clean all of the gears carefully with a brush or dunk them in solvents overnight. Make sure to remove all of the dirt and solidified gunk here. The front panel has plenty of contact cement residue, the only way to remove them is to soak it in an alcohol bath.
Conclusion:
Most of your time will be spent cleaning everything. Once all the parts are clean you can put them all back together. Apply fine watch oil on the pivots of the gears and don’t oil or grease the helicoid. I rarely grease it, if I had to I only use the lightest grease available to me and apply a very thin coat. The helicoids can get gummed with dirt and other things which can make it a lot stiffer to turn compared to a dry one. Once that’s soiled or gummed-up you will have to open the helicoids again just to overhaul it which is a waste of time. It’s really all up to the individual.
For easy navigation, here are the links to the other parts:
I advise that you read them all in-order so you’ll follow everything better.
Thanks for following my work. I am to only show you the best so I write the articles that you won’t see anywhere. If you like my work, please share this with your friends. If this blog has helped you or you want to continue to see it helping people, please consider supporting it. Your support helps me keep this alive as it goes to hosting and maintenance. It also helps me purchase, process and scan film so everybody can see more film photos. Thanks to all of you this blog continues to operate throughout the years, helping people while keeping people entertained. See you again next time, Ric.
Help Support this Blog:
Maintaining this blog requires money to operate. If you think that this site has helped you or you want to show your support by helping with the site’s upkeep, you can make a small donation to my paypal.com (richardHaw888@gmail.com). Money is not my prime motivation for this blog and I believe that I have enough to run this but you can help me make this site (and the companion facebook page) grow.
Leave me some tip?
Thank you very much for your continued support!
$2.00
Helping support this site will ensure that this will be kept going as long as I have the time and energy for this. I would appreciate it if you just leave out your name or details like your country’s name or other information so that the donations will totally be anonymous. This is a labor of love and I intend to keep it that way for as long as I can. Ric.

4 Comments (+add yours?)