
Hello, everybody! It was snowing yesterday despite the sakura trees being in full-bloom. This is a rare occurrence, something that not a lot of people experience in their lifetimes. It’s like watching Tom Jones perform with his stable-mate Engelbert Humperdinck at a pub, can you imagine that? This is my first time to experience such a thing and this will certainly stay with me for a very long time. Speaking of rare occurrences, I’ll show you a rare lens that many people don’t see often. It was only made for over-a-year and that is the reason why it’s rare. Owning one is special but I have two of these so that makes it even better.
Introduction:
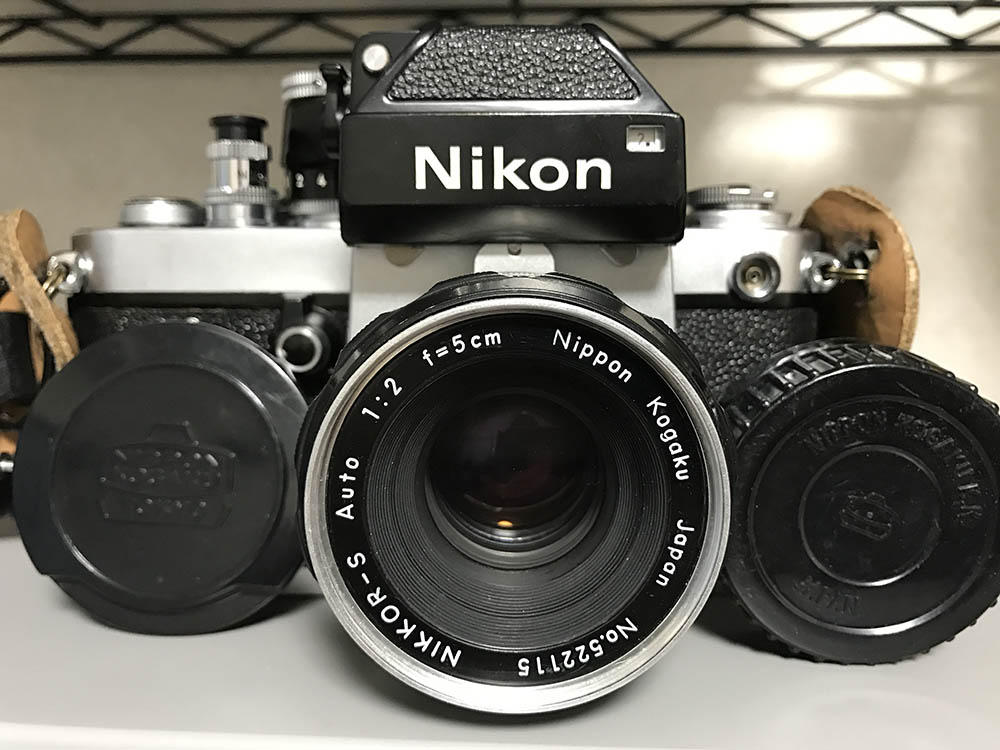
The Nikkor-S 5cm f/2 Auto was made from 1959 to 1963, it is the first 50mm lens for Nikon’s then-new F-mount. The flapping mirror of an SLR became a challenge for lens designers back because existing rangefinder lenses have long rears that will hit the mirror. This became such a problem that making a “standard” 50mm lens became a challenge. Nikon had to improvise just to create a proper 50mm lens for the Nikon F and the solution was to have the front element act as a sort of “magnifying element” to achieve a 50mm AOV or angle-of-view. It’s a stop-gap until the Nikkor-H 50mm f/2 Auto succeeded this lens a few years later.
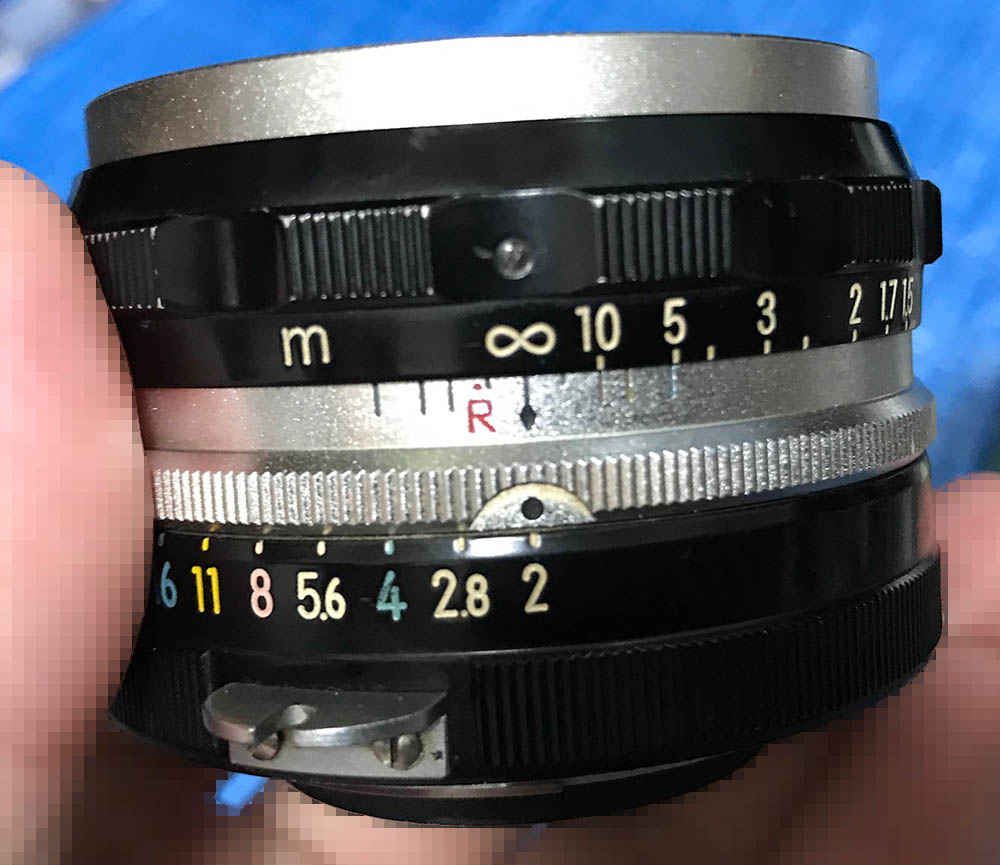
Admire the beautiful lines in the aperture and focusing rings, these are the reason why the earliest F-mount Nikkors are called “tick-mark” lenses by the majority of the Nikon collectors community. It’s a throwback to rangefinder Nikkors, to an era where craftsmanship reigned supreme.
A word about the so-called tick-mark lenses. These lenses represent a small line of F-mount Nikkors that were sold at the time the Nikon F debuted. You won’t see them regularly because these are rare, these were only sold for a few years. This line is composed of 4 lenses, the Nikkor 3.5cm f/2.8 Auto, the Nikkor-S 5cm f/2 Auto, the Nikkor-P 10.5cm f/2.5 Auto and lastly, the Nikkor-Q 13.5cm f/3.5 Auto. These are highly-desirable in the collectors’ circle, they are usually several-times more expensive than the more-common versions. Mint-condition samples with complete accessories will cost a small fortune. Their rarity makes them mysterious, many people do not even know these exist. This is because these were made for only around a year before their more-common versions were produced. Many didn’t survive, what we have now circulating in the used market are but a fraction of their real numbers.

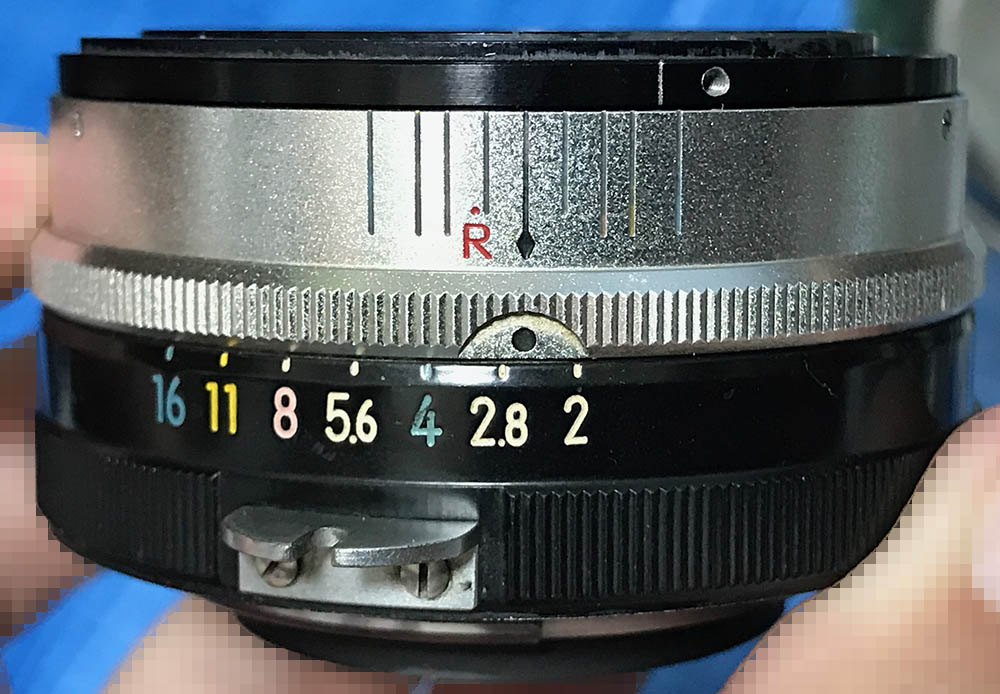
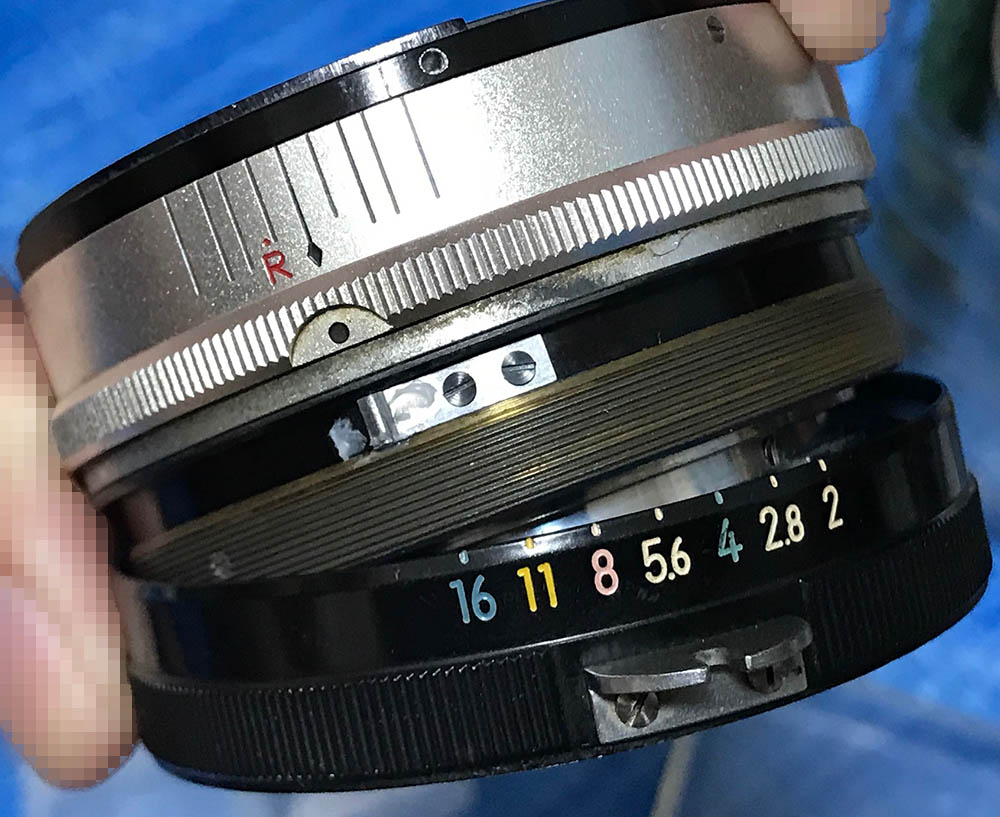
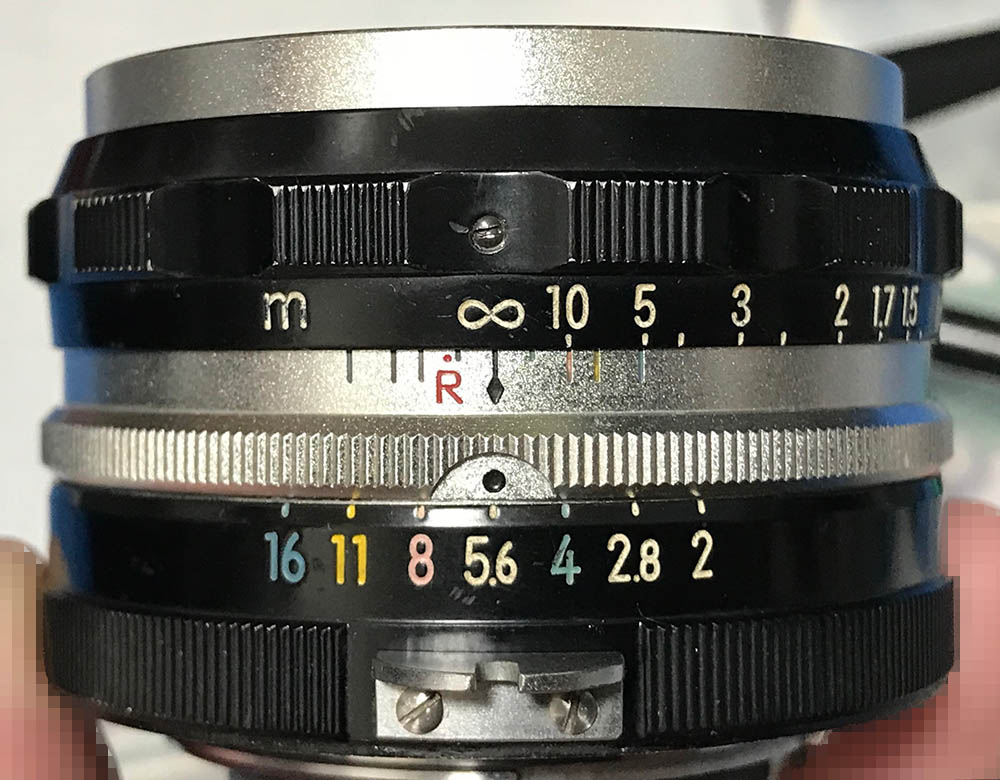
The build is top-notch, its finishing is better than later F-mount Nikkors but not by much. Small details such as lacquered finish and hidden screws are reminiscent of older rangefinder Nikkors. It’s expensive to continue making Nikkors at such a high quality so the bar was set lower in subsequent lenses until Nikon found a formula that works for mass-production. Later Nikkors were built much-better than other Japanese lenses but none will match the craftsmanship of the tick-mark Nikkors. Notice that the aperture ring is a bit longer than what you see with later Nikkors. It covers the mount’s throat so dust won’t get in through it easily. This became a problem when Nikkormats were introduced because its shutter speed ring will prevent lenses with the longer aperture rings from mounting properly.
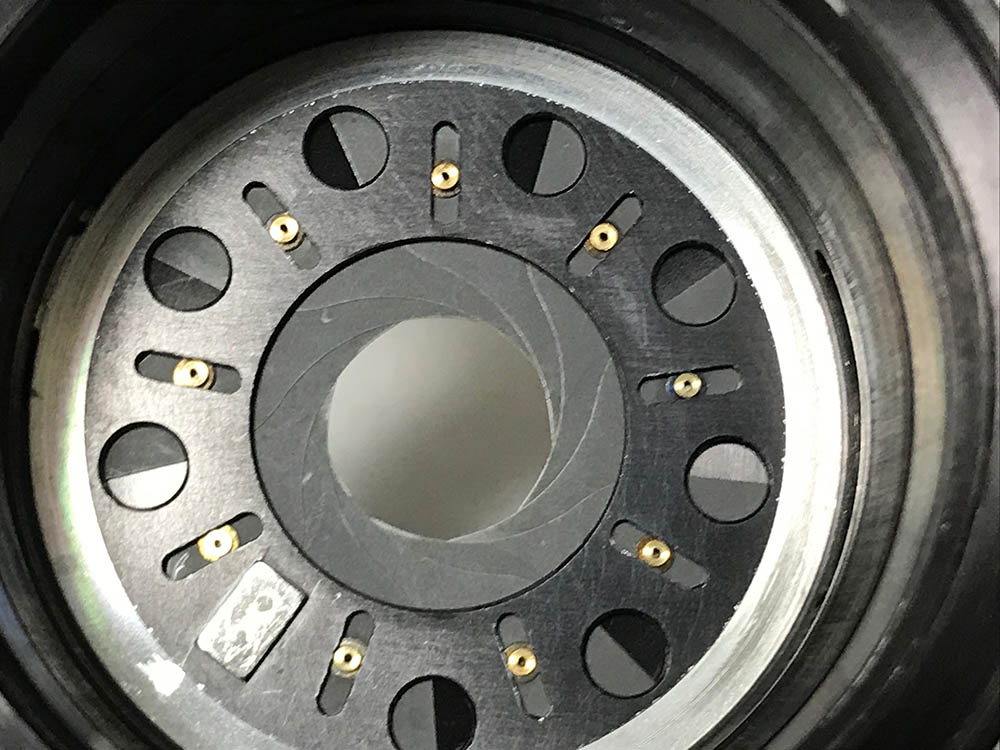
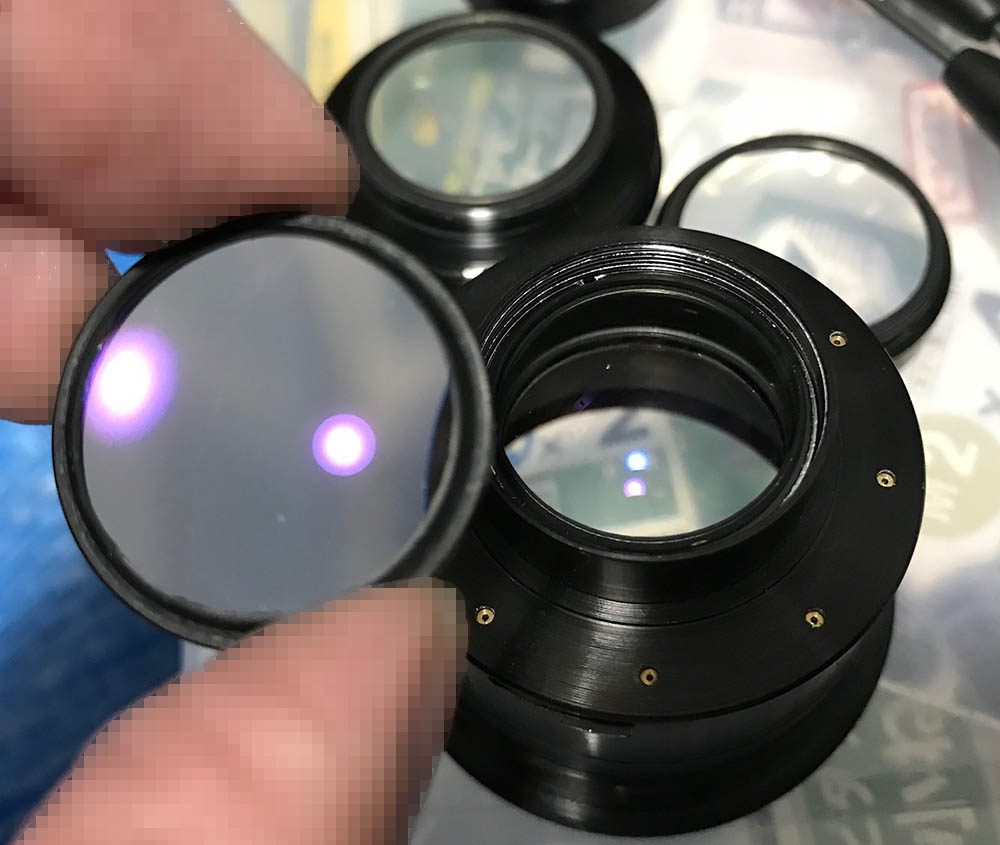
Its most important feature is its magnificent 9-bladed iris. It ensures that its iris stay-round even while stopped-down to a smaller aperture. This enables the lens to render beautiful, smooth bokeh throughout its aperture range. It is a difficult mechanism to produce but it was made for 2 or so years more. The more-common non-tick-mark Nikkor-S 5cm f/2 Auto still have this but it depends on which production batch we’re talking about, earlier lenses still have it while later ones don’t.
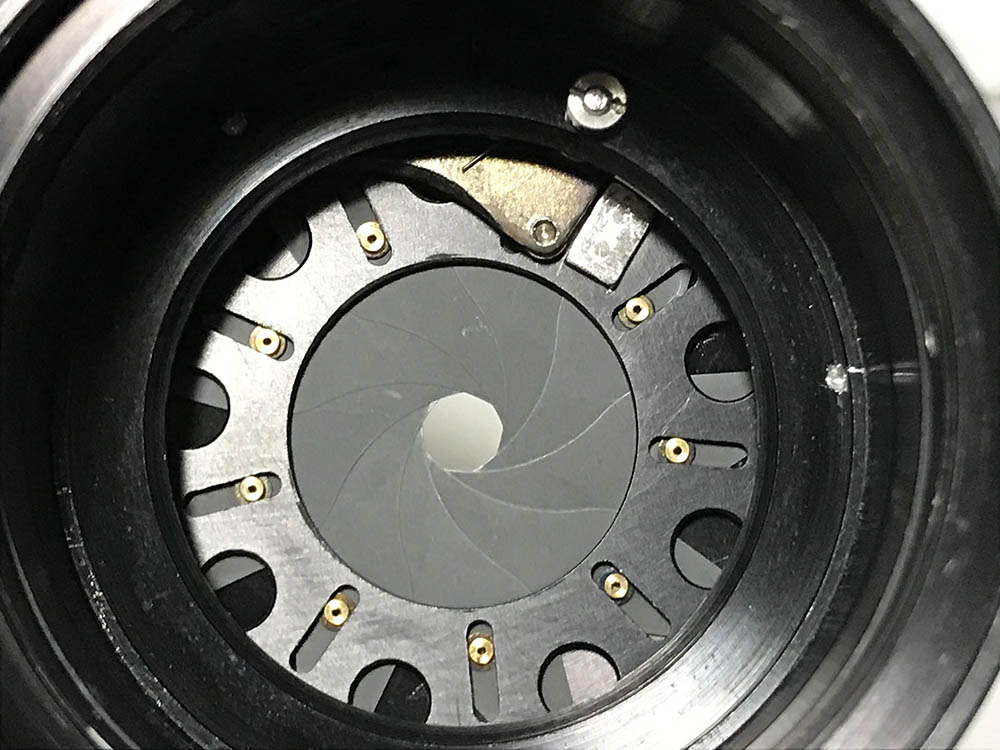
This is how it looks like when stopped-down to smaller apertures. The iris is still relatively-round even at this tiny aperture. The later and more-common Nikkor-S 5cm f/2 Auto models have a 6-bladed iris, while it’s more reliable it won’t give you the beautiful rendering of the 9-bladed version. Keeping the production cost low is the biggest reason why this was discontinued.
This lens’ aperture ring has a skirt that will prevent you from using it with later Nikons that have a slightly-wider throat such as the Nikon F-501. These have wider throats, the mount now houses mechanisms for autofocus. Even some classic Nikons won’t allow you to mount this, the Nikkormat FT series won’t let you mount it since the shutter speed dial is at the camera’s throat. This is the reason why some early F-mount Nikkors have aperture rings that were “made kosher”, this drastically lowers the price of the lenses because collectors always wanted lenses that are as-close-to-original.
It’s a nice companion to the Nikon F2, I haven’t tried this with the Nikon F3 but I suspect that it won’t be possible even if you’ve pushed the aperture tab aside as the lens’ skirt will still be in the way.
Let’s now see some photos that were taken with this. It’s important that we study how a lens performs so we’ll know its strengths and weaknesses. This will help us decide whether a lens stays at home or stays in your bag. I shot these photos from f/2, f/2.8, f/4 and f/5.6 from left-to-right with my Nikon Z6.


(Click to enlarge)
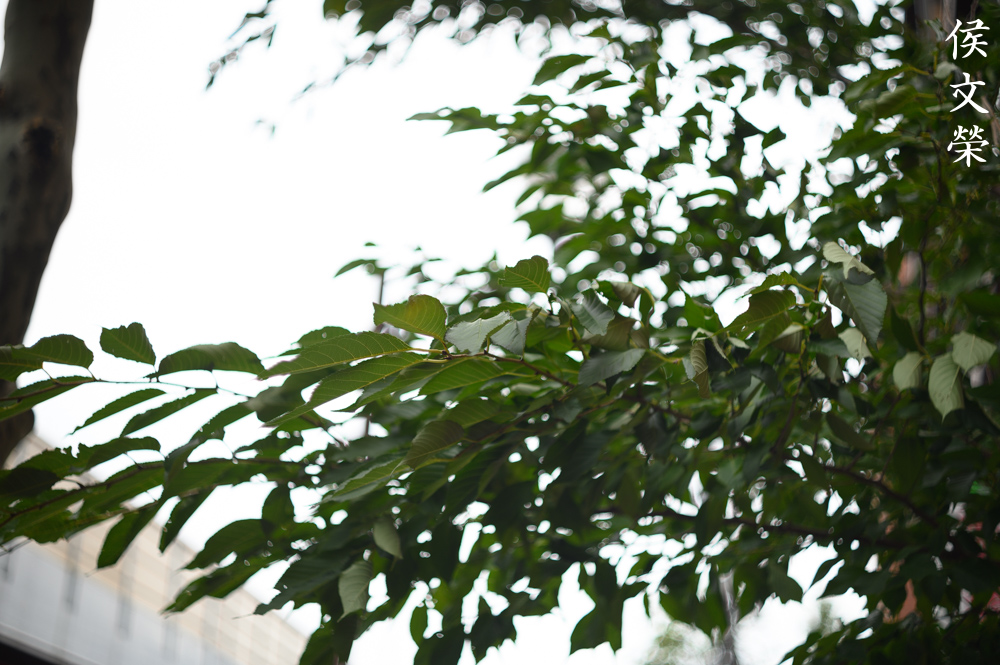
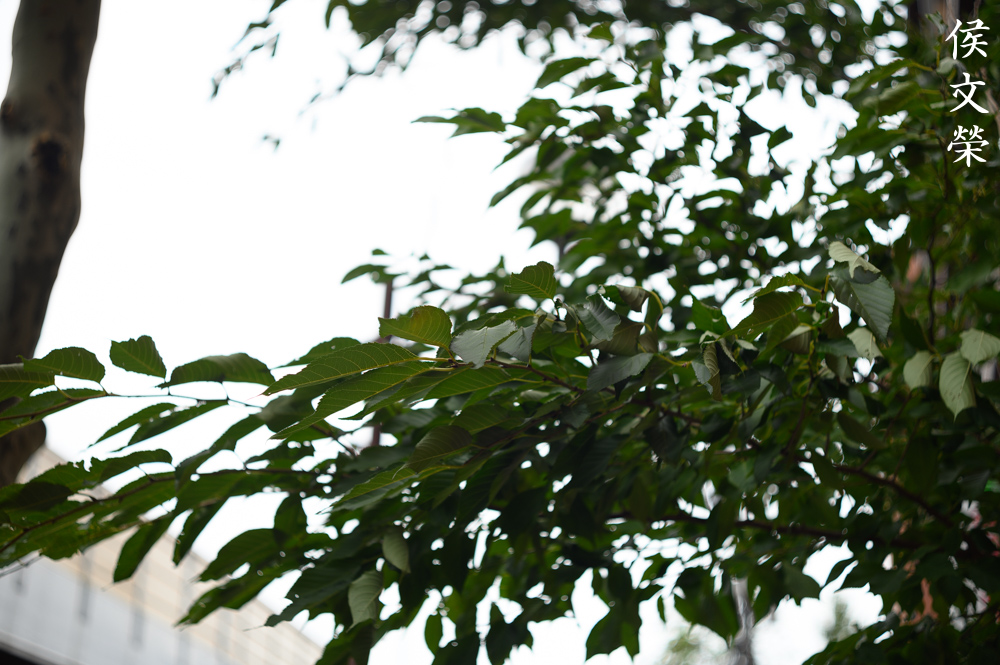
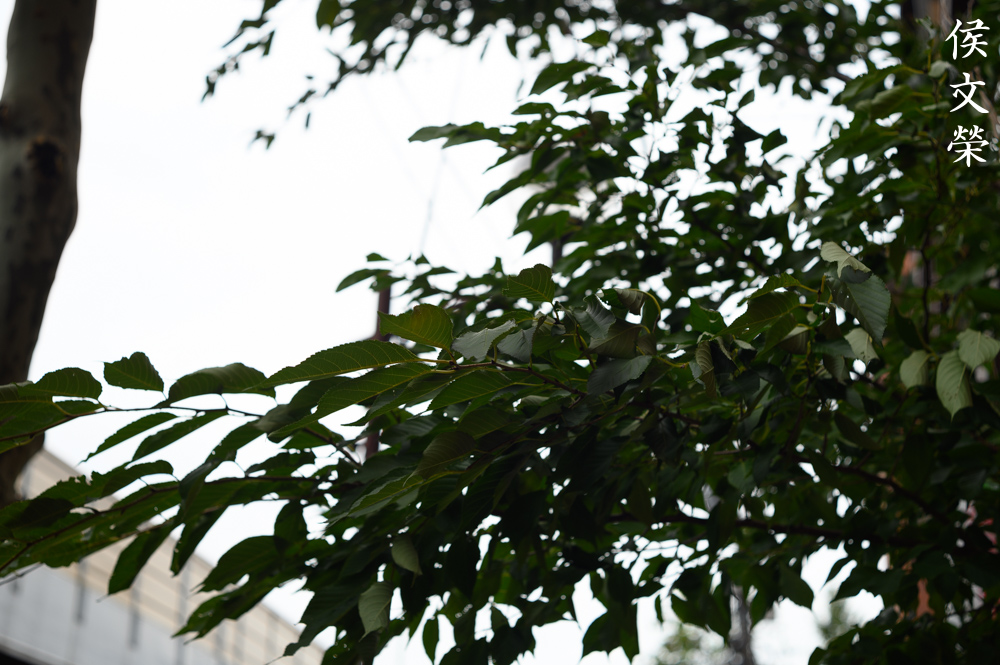
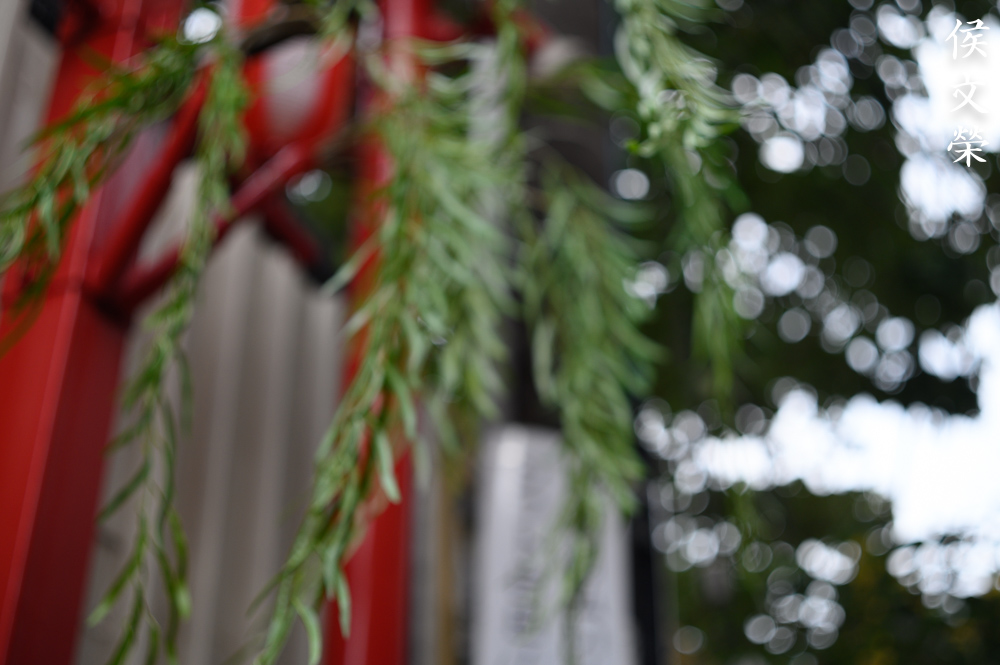
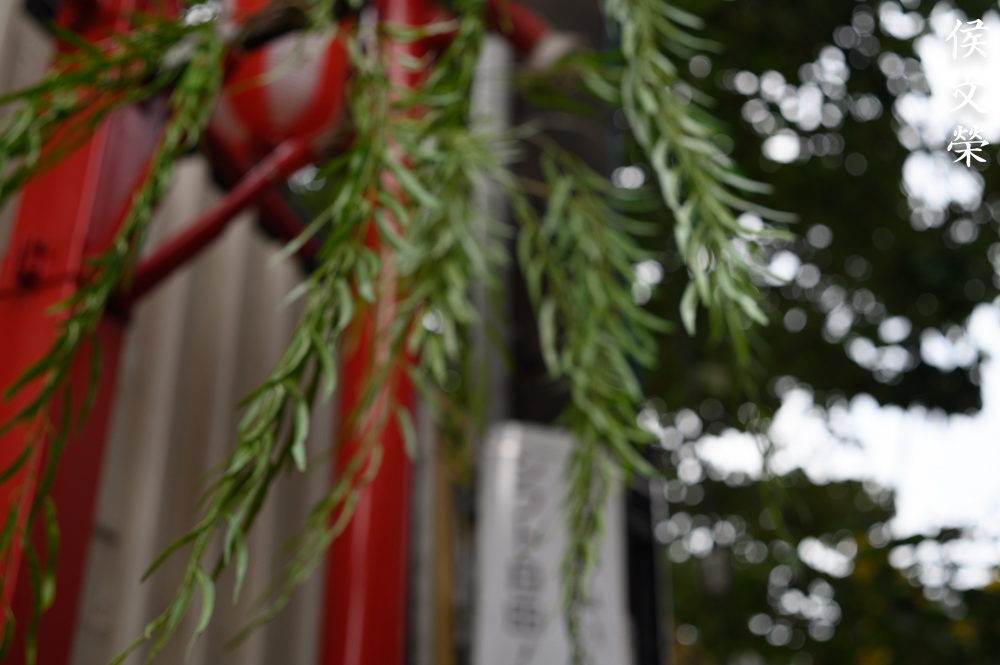
The character of the bokeh is quite good, the 9-bladed iris helps a lot. This is apparent as you stop the iris down. Difficult subjects such as twigs, straight lines and foliage are rendered beautifully without smearing so much. This is a very good lens in this regard. The transition is smooth, not abrupt. That helps in rendering natural-looking photos.


(Click to enlarge)
It’s sharp at the center wide-open, the corners seem like a stop behind here. Chromatic aberration can be observed as well as spherical aberration, too. I am pleased by the result so far, I was expecting something worse but this is much better than I expected. Stopping the iris down to f/2.8 improves center resolution by a lot, it can now support the sharpness at the center better. Its corners seem to pick-up and chromatic aberration is now better-controlled. Things look a lot better by f/4 and by f/5.6, the lens is performing at its peak. It seems that this lens is better at moderate distances but further objects are rendered pretty-well, too. You can say that this performs reasonably-well at either end of the focus range. Vignetting can be seen wide-open but it’s not a problem at all from f/2.8 on. This is a very good lens overall.
Let’s now see some photos that were shot in real-world scenarios. I judge a lens’ value by the pictures that it takes under these circumstances, I do not rely on charts and tests as much. I base my opinions on the impression that I get from using a lens instead.

It’s sharp and the transition between what’s in-focus to what isn’t is smooth. It certainly has that “vintage-look” to it, something that people either like or hate.

It’s a very practical lens, it’s fast-enough for lowlight photography but you’ll definitely want something faster if you’re shooting at a dark place. 50mm is what some people prefer for street photography as it enables you to shoot a bit further for candid photos.

The 50mm focal length is too-short for things like this but it’s nice because it gives your photos a sense of depth since it’s wide-enough to capture more of the surroundings. A longer lens won’t give you this and the effect will make this scene look like a miniature.

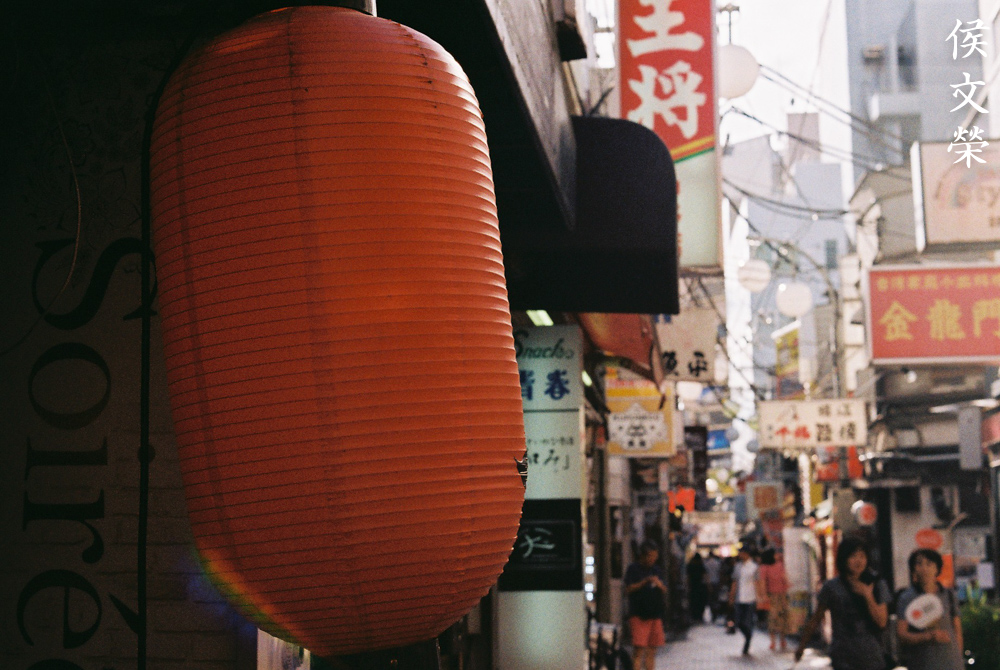
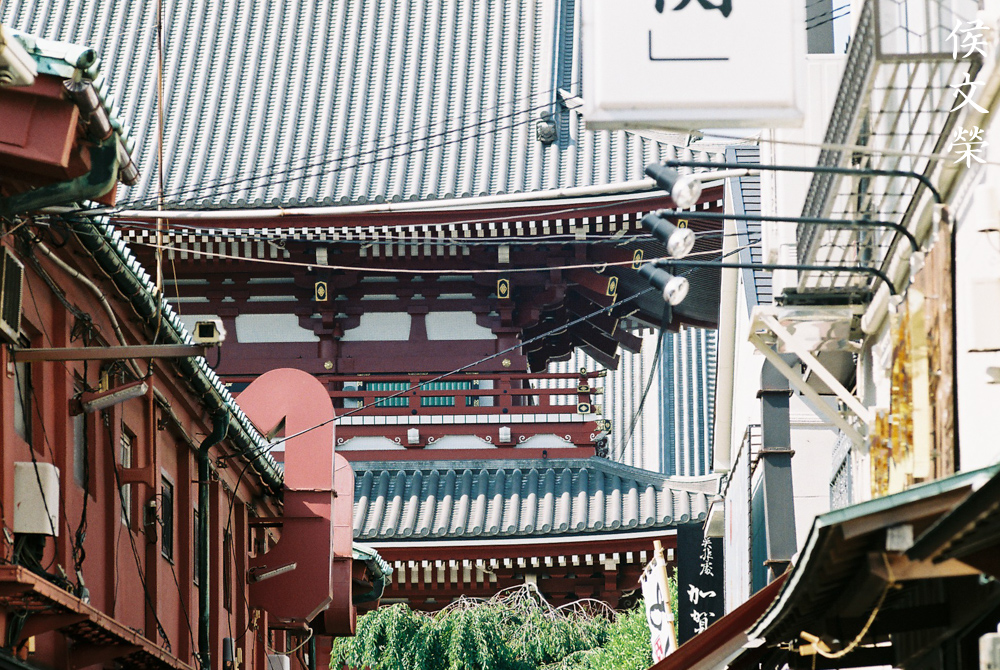
The 50mm field-of-view looks natural, as if you’re looking through the lens with your bare eyes. You won’t confuse your viewers or disorient them.

Spherical aberration can be strong at times but not as-strong as what you’re used to seeing in many early Sonnar-type lenses such as the Nikkor-S•C 5cm f/1.4. Spherical aberration can sometimes be nice, specially for portraiture. I like it at times depending on what I’m shooting, it can give you a dreamy or surreal look.
Let’s now see some photos that were taken with film. Film has a special look that’s difficult to replicate with digital because of grain. It looks organic, not rigid like digital noise. It can also mask or amplify certain flaws of a lens so it is important that we look at photos that were taken with both digital and film. This lens was made for use with film so it’s only fair that we judge this using its intended medium.

It’s a phenomenal lens when used with film, you’ll get sharp photos with it regardless of which film you use providing that it’s decent enough. It makes for a nice walk-around lens, ideal for nearly-all manner of use.

The photos that it takes has a nice, vintage-feel to them. It can be addicting to use specially with an older camera that’s able to mount it.

Resolution is quite high once stopping it down for a bit, I think I shot this at f/2.8 or f/4. I am very satisfied with the photos that I get from this, this is not what I was expecting from a lens of this vintage.

The rendering is very natural, I was expecting that it would lean on the blue side since I assume that it was designed for use with black-and-white film. I am pleased that it photos that have a neutral look.


(Click to enlarge)
Flare and ghosts are prevalent but that has more to do with its coatings and the old-tech used for it. The ghosts look horrible but the flares look nice, it’s a nice feature of this lens if you ask me.


(Click to enlarge)
Here are more photos for you to enjoy. This is an amazing lens considering its age. It’s worthy of its reputation, it certainly made its designers proud. I love using this lens a lot, it’s certainly a keeper.
I can’t recommend this lens for the casual shooter, it’s more for collectors. I would point you towards the non-tick-mark version that has a 9-bladed iris instead, they cost less and is easier to source despite being rare themselves. If you wish to use this with you a digital camera, make sure that you use it with a mirrorless one such as the Nikon Z6. Mounting these to an adapter is the best way to enjoy it with a digital camera since most adapters don’t have the aperture-coupling tab. You may want to check that the adapter’s throat is narrow-enough to take it or else you’ll damage the lens as you mount it. If you like to shoot film, use this with older Nikons except for the Nikkormats. Owning one of these is definitely an honor, you’re owning a piece of Nikon’s rich history.
Before We Begin:
If this is your first attempt at repairing a lens then I suggest that you check my previous posts regarding screws & drivers, grease and other things. Also read what I wrote about the tools that you’ll need to fix your Nikkors.
I suggest that you read these primers before you begin (for beginners):
Reading these primers should lessen the chance of ruining your lens if you are a novice. Before opening up any lens, always look for other people who have done so in Youtube or the internet. Information is scarce, vague and scattered (that is why I started this) but you can still find some information if you search carefully.
I highly recommend that you read my working with helicoids post because this is very important and getting it wrong can ruin your day. If I can force you to read this, I would. It is that important!
For more advanced topics, you can read my fungus removal post as a start. This post has a lot of useful information and it will be beneficial for you to read this.
Disassembly (Lens Barrel):
The lens barrel is simple to service, it’s similar to earlier F-mount Nikkors in terms of construction but there are a few differences specially at its base. It has a thin lacquer coat so you shouldn’t clean the barrel with alcohol, that’s going to strip the lacquer coating and dissolve the paint. This is a rare lens, I would recommend sending yours to a professional to service instead. That’s the best advice I can give to a beginner. You do not want to ruin a valuable lens in the name of practice.

The focusing ring can be removed once you extract its screws.
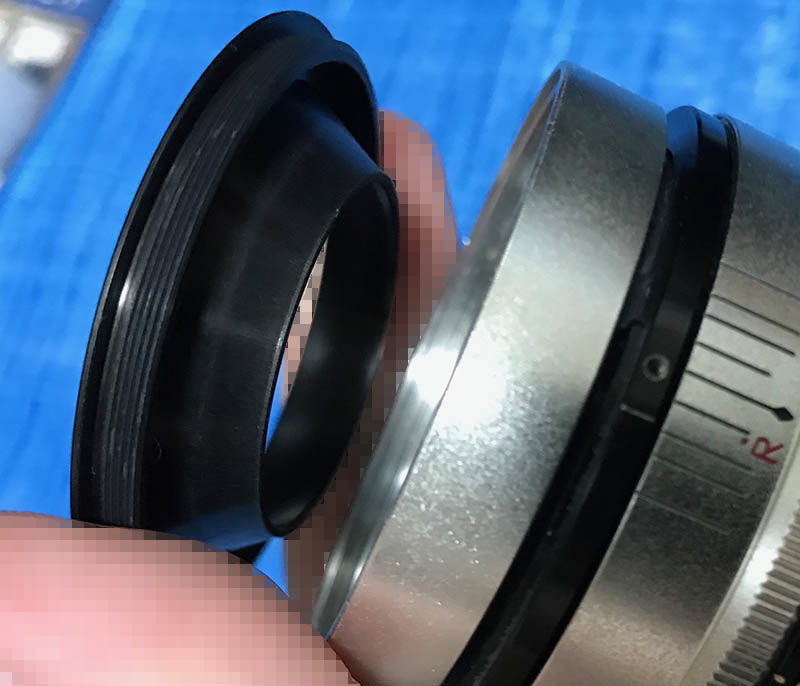
Extract the front elements assembly with a rubber cup and store it in a safe place. This can be tough to remove, a drop of alcohol at its threads will help soften it a bit.
Extend the barrel a bit by turning the central helicoid to access these. These secure the objective to the lens barrel.
Once those screws are gone you can now pull the objective from the barrel.
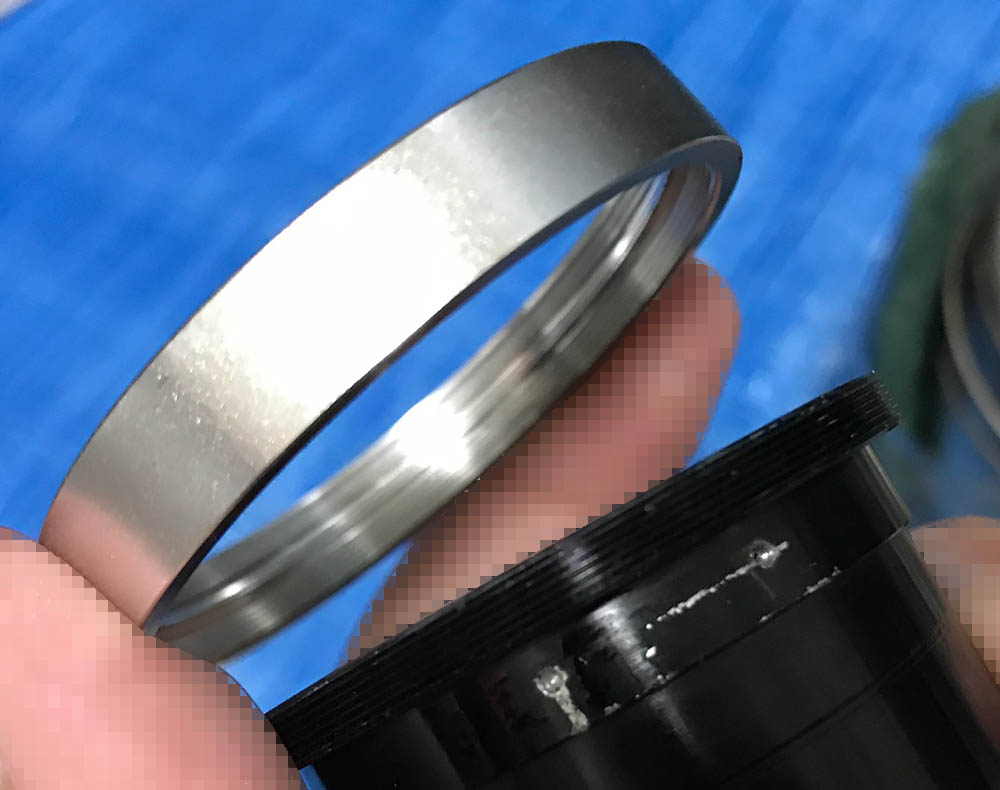
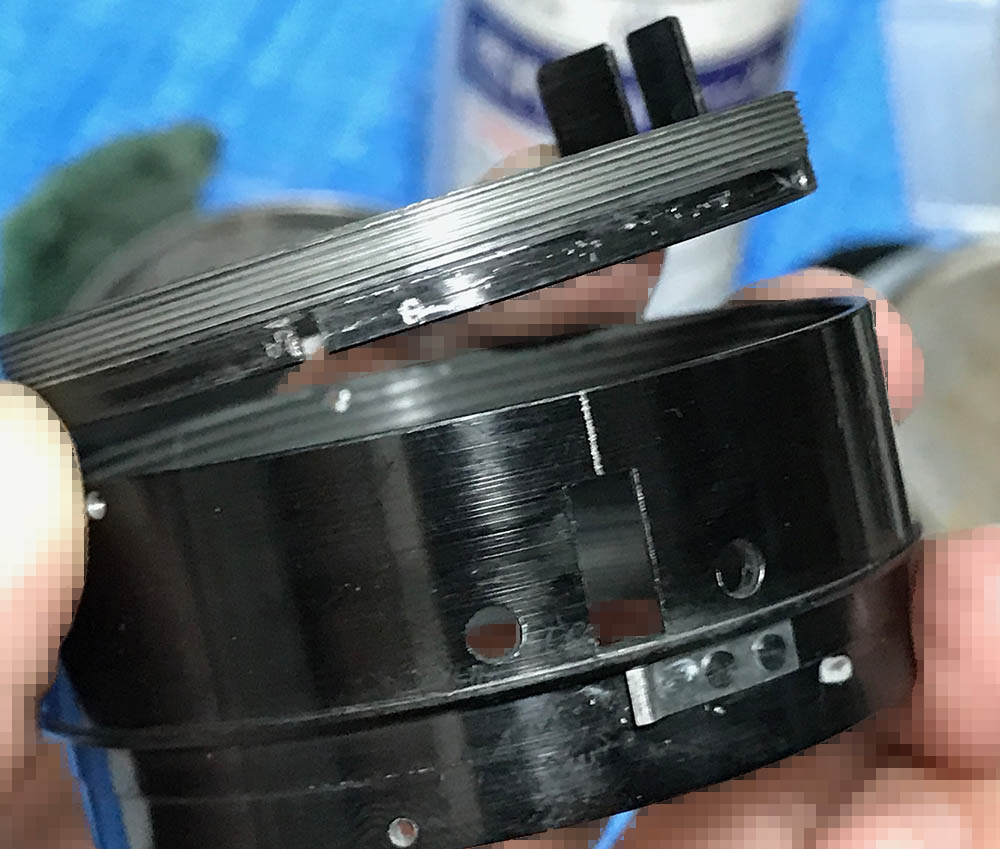
You may also want to remove the front barrel. It can be stuck so just leave it alone if yours won’t budge. These were usually sealed at the factory using a type of lacquer.
This is how much the lens barrel collapses on my lens. Note the position of the aperture ring as you’ll have to replicate this later.

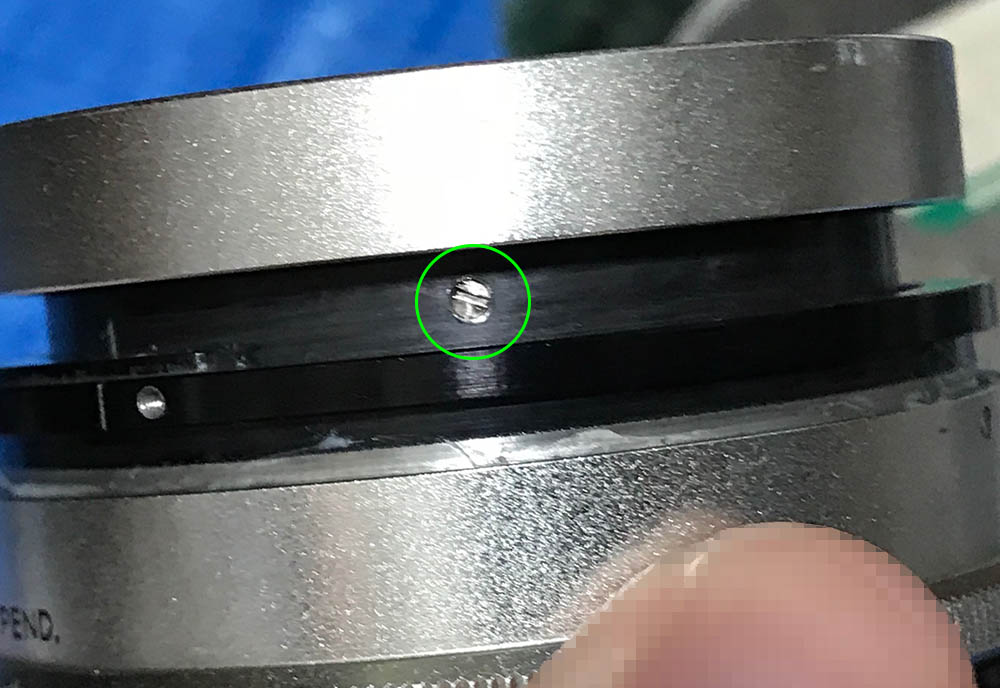
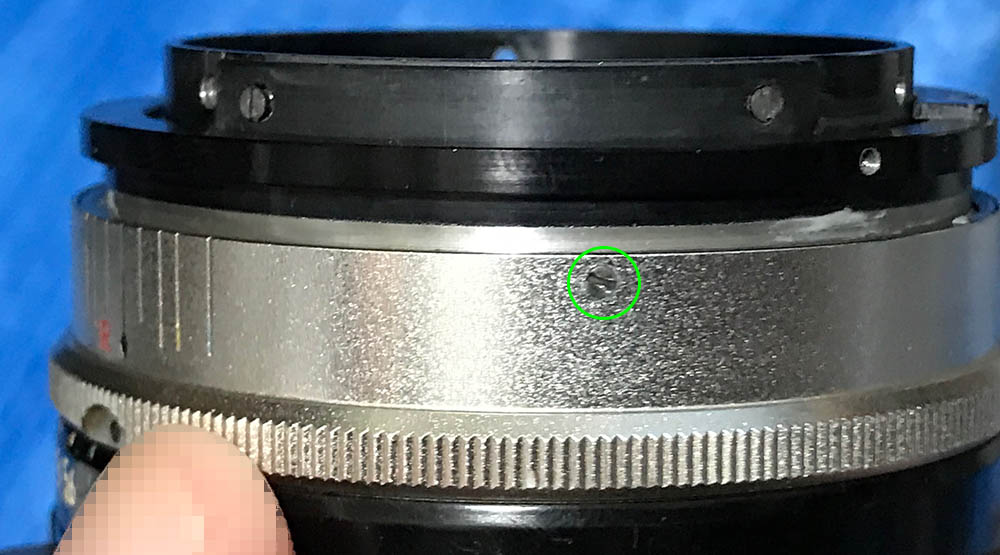
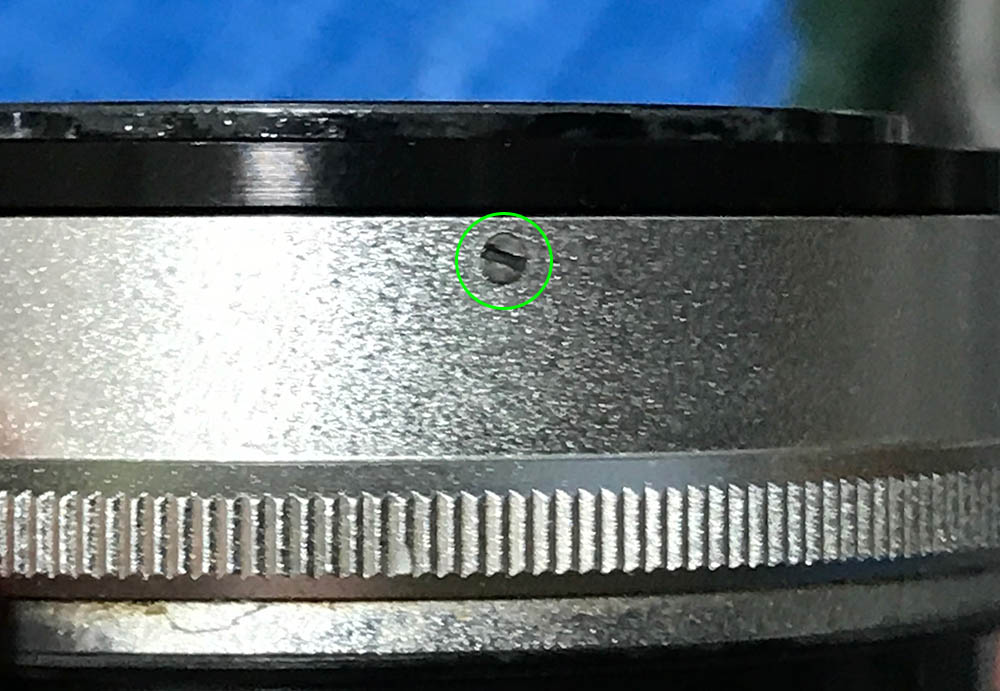
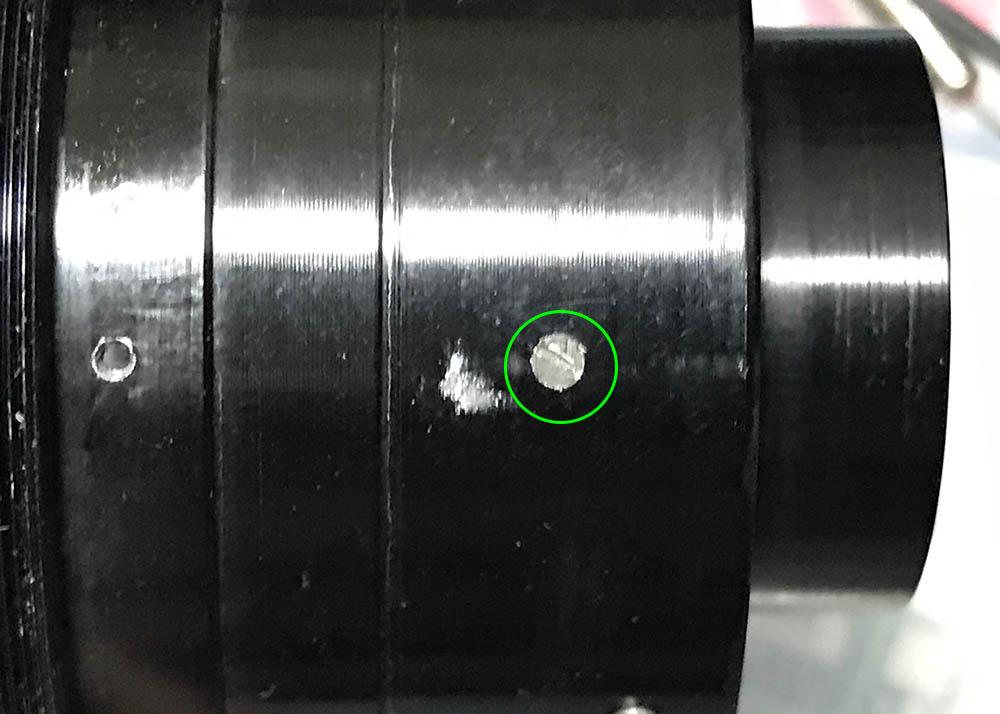
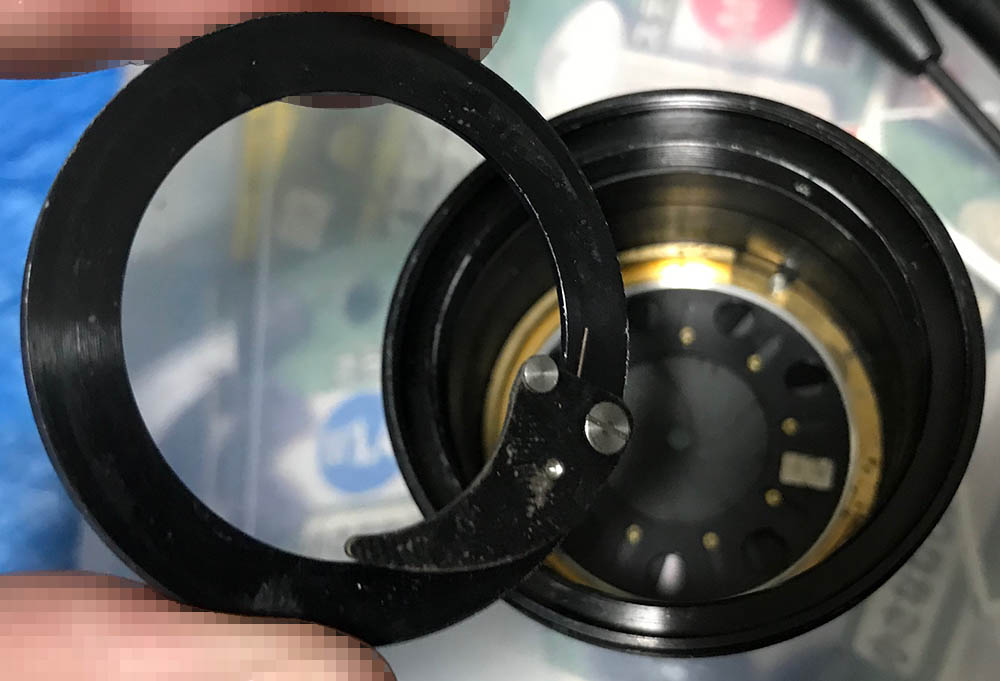
Before you remove the aperture ring extract this screw first. This screw acts like a pin to couple the aperture ring to the iris mechanism.
Once the screw is gone you can safely remove the aperture ring.
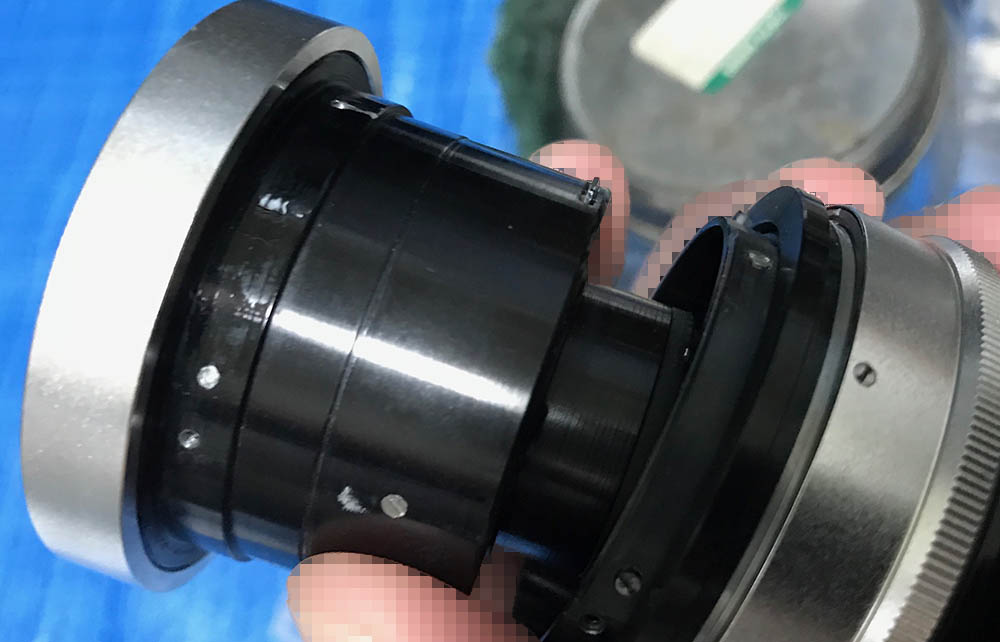
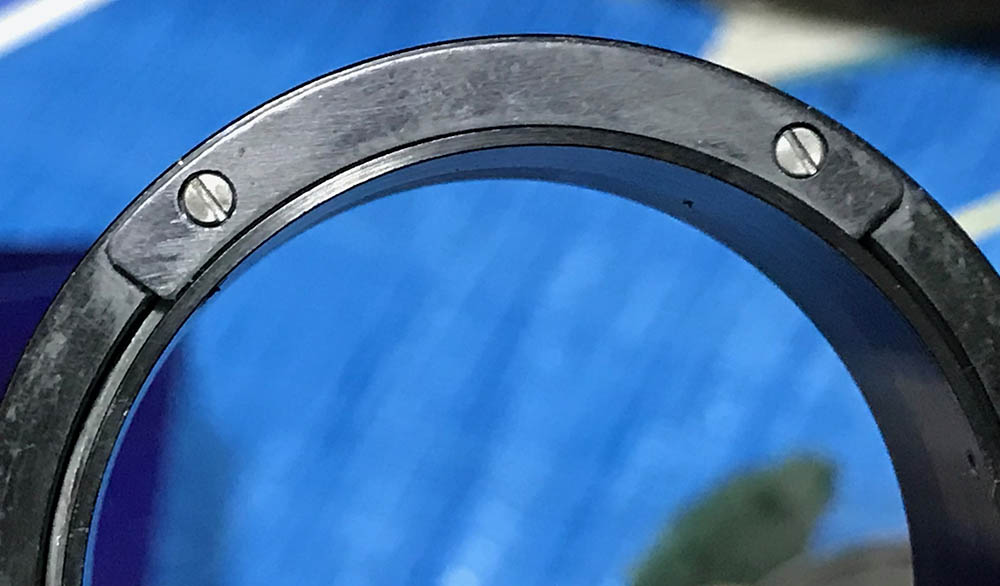
Compared to later versions of this lens, the screws for the sleeve are hidden neatly underneath the focusing ring. Carefully remove them so you will not damage them.
These should be flush with the sleeve so they won’t scratch the focusing ring when you focus.

Carefully remove the sleeve.

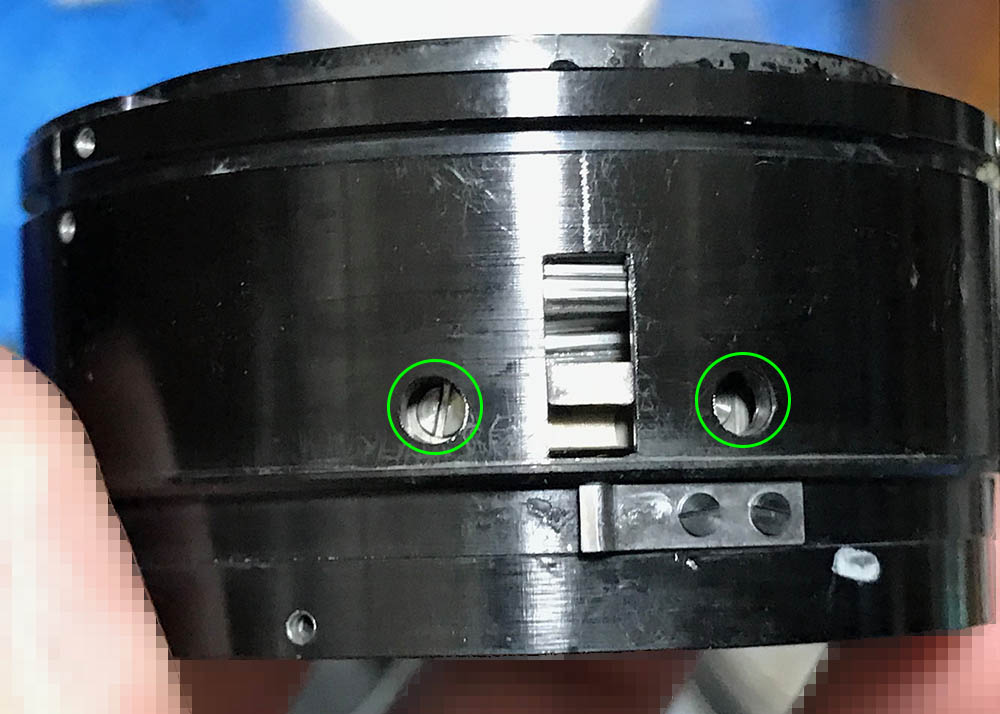
The bayonet mount can be removed after you extract these. Carefully look for these as they can be hidden underneath layers of gunk. Use a driver that fits perfectly in order to prevent damaging the surrounding threads. If you stripped these or damaged the threads then it’s going to be a painful lesson.

Simply pull the bayonet mount off once you’re done.
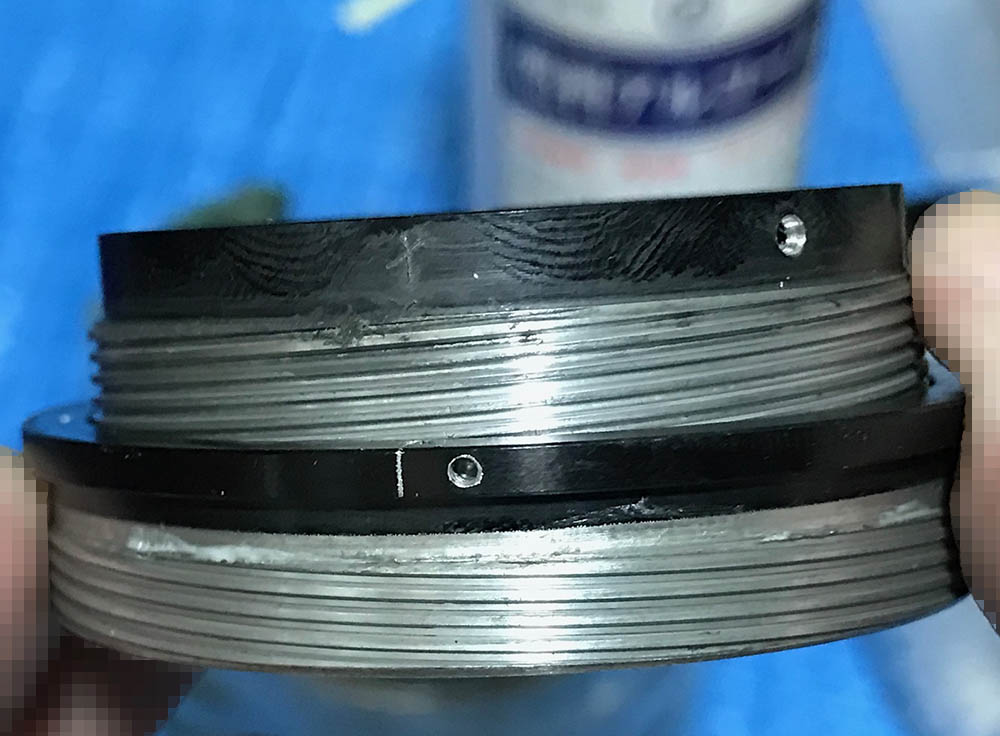
You will have to turn the helicoids a bit until you can access these screws. It is important that you align them to the holes perfectly. The helicoid key can be removed once these screws are gone.

The helicoid key makes sure that the helicoids turn at the same rate, making the barrel extend or retract.

Carefully separate the helicoids, don’t forget to mark where they separated. If you haven’t seen my article on how to work with helicoids then please go and read it first before you do this. Many people get stuck here just trying to guess how the helicoids should mate, you don’t want this to happen to you.
The helicoid stop constrains the focusing ring so it can’t turn-past its range. Remove it so you can further separate the helicoids.
The inner helicoid can now be separated. Never forget to mark the position where these separated.
The aperture fork and its ring can be removed once everything is gone. This is a delicate part, do not scratch or strip the threads, it’s easy to cross-thread it while putting this back.
Clean the helicoids thoroughly and don’t leave any residue. Use a brush and scrub the helicoids with detergent. Clean the aperture fork and its ring, too. Apply a thin coat of grease to the helicoids, something that’s not too-thick so the focusing ring won’t be difficult to turn. Clean all the external parts with soap and water, brushing them with a soft toothbrush. Alcohol will dissolve the lacquer coating.
Disassembly (Objective):
The objective is similar to most early F-mount Nikkors but it feels more like a lens that’s stuck in the rangefinder era. Some of the parts here are similar in construction to much-older lenses. It makes a lot of sense since Nikon was transitioning fro making rangefinder lenses to automatic once for the SLR. I had to use a few special tools to work on this. The parts here are delicate so I worked as slowly as I can.
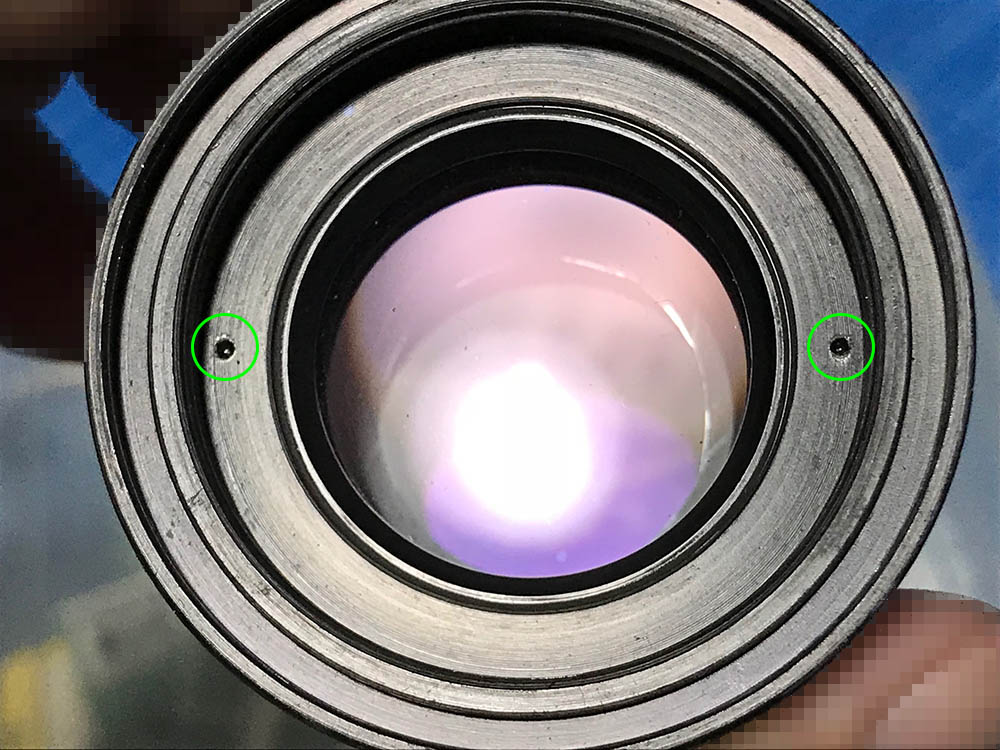
Use a lens spanner and carefully extract this.

Be careful not to chip the raised lip of the rear part.
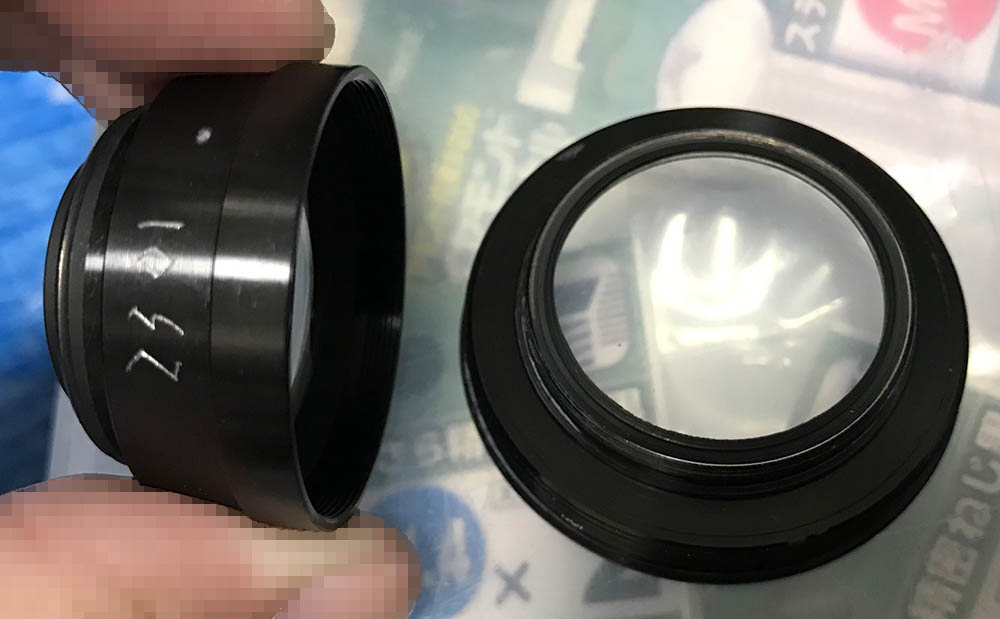
You can further open this up by unscrewing it.
Carefully extract the next element. Don’t disassemble this any further, there is nothing you can do to remove the elements.
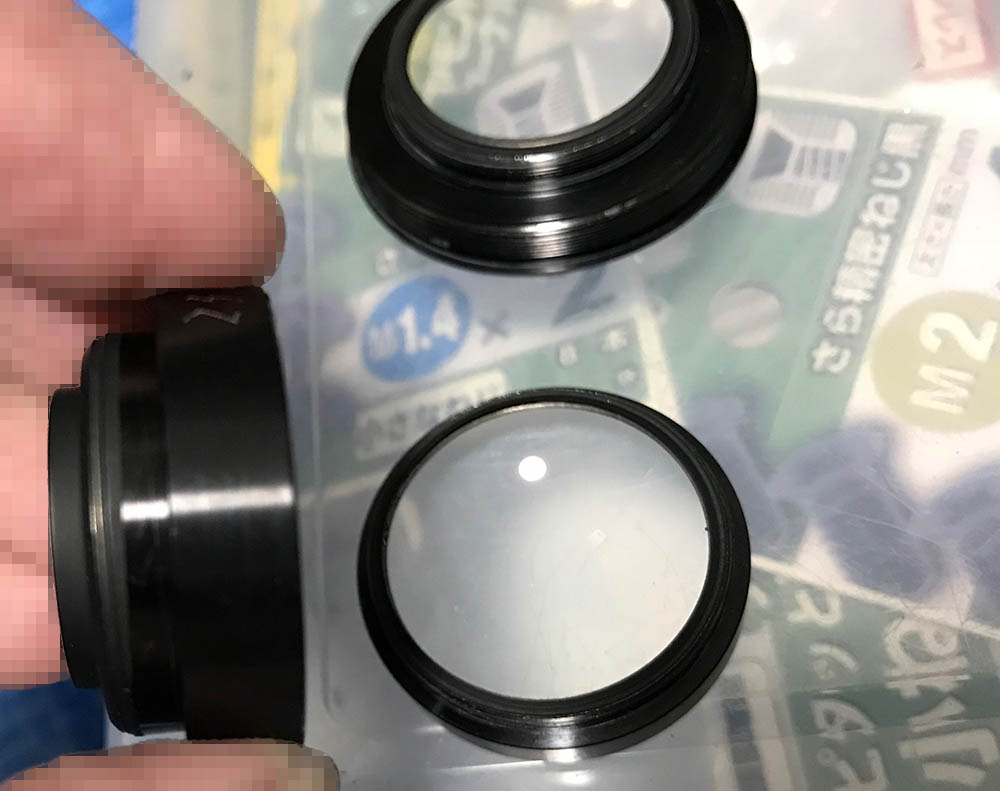
The rear element can easily be removed. Its ring is thin so be careful not to warp it crack the rear element.
Carefully extract the 6th element and its housing with a pipe-key. It’s really delicate and you can scratch it if your hand slipped.
Use a lens sucker to extract it.
Don’t bother removing the elements that were sealed at the factory. You can clean them anyway since both of their air-to-glass surfaces can be accessed. Carefully clean any fungus away, you don’t want to damage the old coating. If you haven’t seen my article on how to remove lens fungus, please read the article and follow my instructions. You may have to thin the solution down, this is an old lens and strong chemicals will surely degrade the coating.
Disassembly (Iris Mechanism):
The iris mechanism is what makes this lens special. It has a 9-bladed iris, it’s intricate and it’s difficult to construct, you’ll soon see why. Those of you who have little or not experience with lens repair should not work on this, this is a very delicate mechanism that requires an experienced repairer to fix.
Extract these screws to remove the ring with the iris regulator.
The ring and the iris regulator can be hard to remove as the fit it snug. Don’t force it or you’ll damage the iris mechanism.

Extract this to remove the brass ring, this couples to the aperture ring’s fork so you can control the iris when you turn the aperture ring.
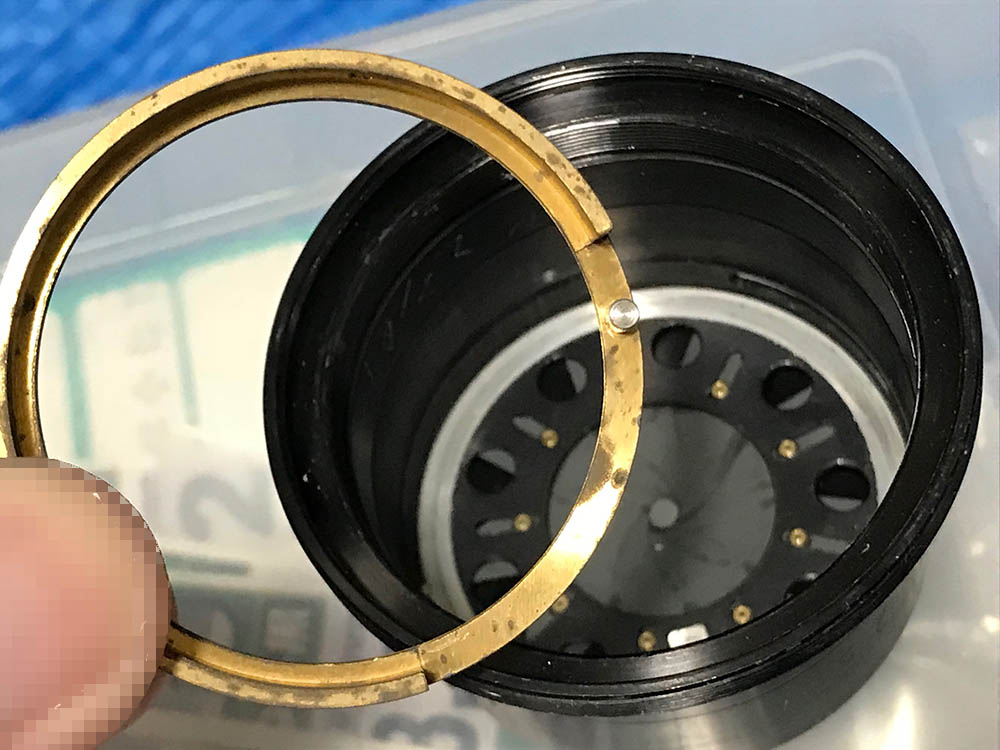
Carefully remove the brass ring.
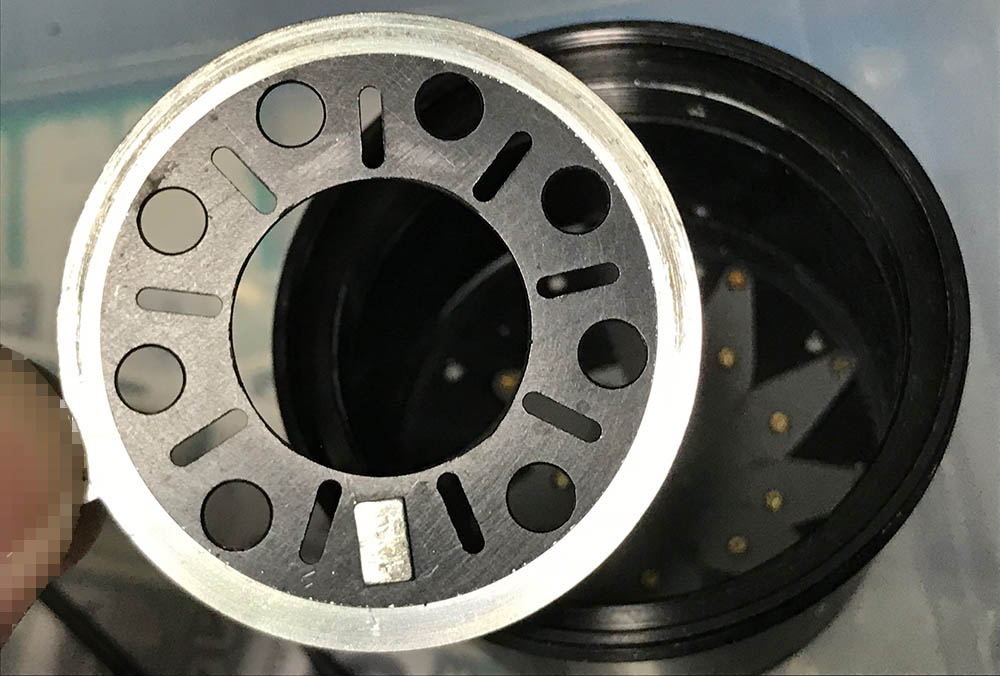
The rotator cup can be removed by picking it off with a pair of tweezers. It’s a delicate part that can be easily warped so be careful handling it.
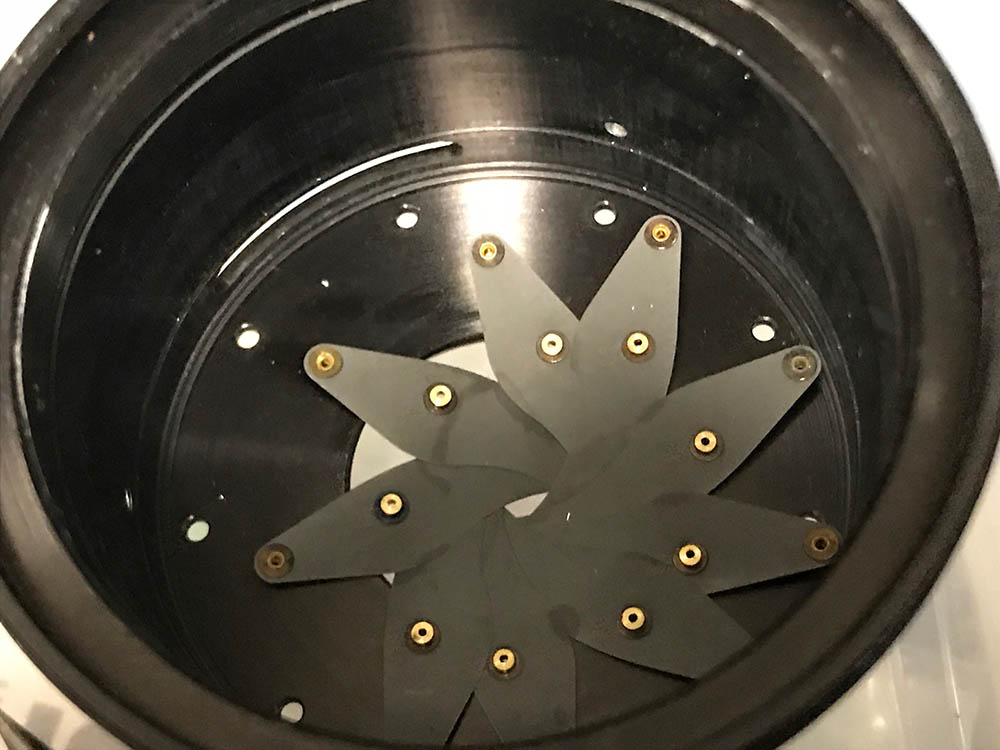
The iris blades can now be removed. These are more delicate than the usual ones as they are thin. You can easily damage the pegs, too.
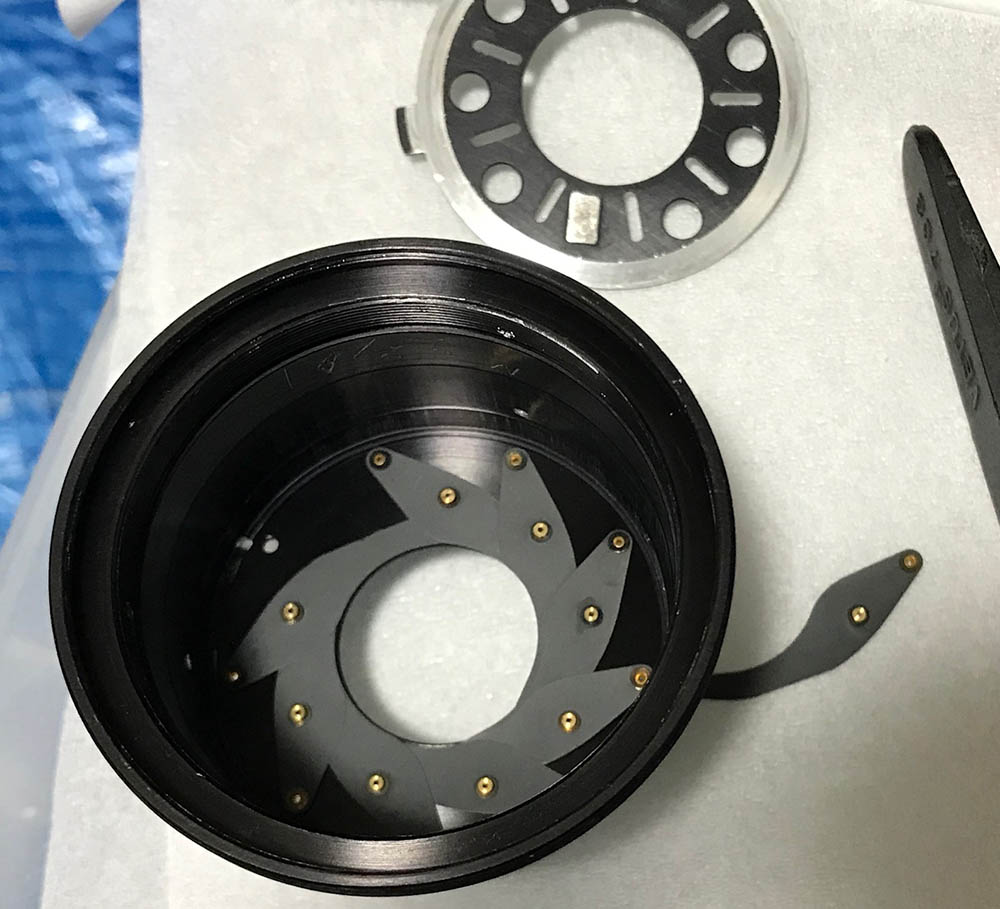
I cleaned the iris mechanism thoroughly, wiped the blades with lens tissue saturated with naphtha and put them back one-by-one. It’s more difficult to put these back because they are small, it’s easy to dislodge one if you’re not careful and you’ll have to re-do everything again.
This is probably the most frustrating part of the project. It is frustrating just to put the individual blades back and even more frustrating putting the last one back. This require a lot of patience but you’ll soon get it.
Conclusion:
This is an easy lens to repair by my standards. This took me under 3 hours to service with most of that time spent cleaning the lens. This lens is special so it’s only fitting that we service it so it will continue to work long after we are all gone.
It’s now clean, you won’t get coronavirus even if you kissed this. You can see the beautiful details that sets these tick-mark lenses apart from other lenses.

That was a fun exercise, it’s now time to reward myself with some soba. The lens is now functioning perfectly again and we can be sure that it will work flawlessly for more decades to come.
Thank you all for following my blog. Your support enables me to keep doing what I love and that is to document and share my repair notes with you. It’s important that I do a proper writeup so you’ll understand the context of the lens featured in every article. Your support help me purchase, develop and scan film but the most important thing is you are helping me offset the cost of hosting. Thank you very much, Ric.
Help Support this Blog:
Maintaining this blog requires money to operate. If you think that this site has helped you or you want to show your support by helping with the site’s upkeep, you can make a small donation to my paypal.com (richardHaw888@gmail.com). Money is not my prime motivation for this blog and I believe that I have enough to run this but you can help me make this site (and the companion facebook page) grow.
Leave me some tip?
Thank you very much for your continued support!
$2.00
Helping support this site will ensure that this will be kept going as long as I have the time and energy for this. I would appreciate it if you just leave out your name or details like your country’s name or other information so that the donations will totally be anonymous. This is a labor of love and I intend to keep it that way for as long as I can. Ric.

May 16, 2023 @ 18:15:00
It 5cm f2 cannot be mounted on Df, as incompatible, as is listed in ‘incompatible lenses’ in Df handbook