
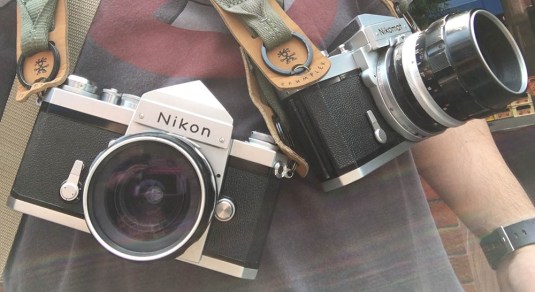
Hello, everybody! I was window-shopping at the watch section of the mall and something caught my eyes – a Seiko-5. The Seiko-5 movement is reliable and tough, it’s easy to fix so it’s not hard to see decades-old samples still working like they were new. It’s familiar to a lot of watch repairers because it sold very well and parts are easy to obtain. The bad side of this if you can call it that is they don’t hold value very well unless it’s special or rare. It is easy to find one for less than $100 used (and new!) so they’re popular for people who’s budget dictates what they wear. While we’re on the tangeant of cheap and reliable, I will share with you a camera that I believe has the same qualities as the Seiko-5 and it is one of the classic Nikons that every collector or Nikon user should have – the Nikkormat FTn.
Introduction:
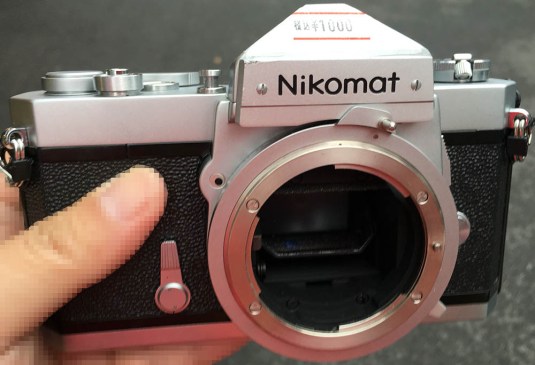
The Nikkormat FTn is the most common Nikkormat variant you will ever encounter. This is probably the most successful one in terms of units produced and it’s not hard to figure out why because the Nikkormat FTn is a wel-rounded camera that’s still relevant today. It was developed from the earlier Nikkormat FT which is a good camera but it added things that made the original camera even better in terms of handling. Both models have built-in TTL meters that have an average 60/40 metering pattern that’s standard with Nikons. I also love how you can the meter’s needle without looking-through the eyepiece since it’s also visible at the top part of the camera. This makes it easy to measure your exposure so you don’t have to look like a creep pointing your camera at your subjects just to see if the exposure is right. It also has a handy mirror-up switch so you don’t have to waste a single exposure (like on the Nikon F) just to flip the damn mirror up. A self-time is also standard and you also have a useful DOF preview plunger for stop-down metering and checking if the DOF is right. You even get an auto-resetting film counter! I know that all these sound trivial today but they were considered to be premium back then.
 The Nikkormat FTn’s are the cheapest Nikkormats you can get these days because they’re the most common type and as a consequence their value is highly depreciated. They also use the old 1.35v mercury cell batteries that are not made anymore these days and this is also another factor for their cheap price. The ones that were sold domestically (Japan) all use the Nikomat trade-name instead of Nikkormat but they’re basically the same.
 What some people find unusual with the Nikkormat FT series is they all have the shutter speed selector situated near the bayonet mount like the Olympus OM series which came about 7 years after the first Nikkormat FT was made. It’s the only Nikon that has this and some people either like this or hate this. It can be awkward if you’re used to the standard layout where the shutter speed dial is positioned at the top, it can also be annoying to use if the camera is mounted on a tripod. You’ll have to look at the bayonet mount area of the camera each time you change speeds. This is true of the Nikkormat FT and Nikkormat FS because the Nikkormat FTn made things much easier since it how incorporates a display within the viewfinder so you can see which speed you’re in but it’s still cumbersome and I will always prefer the traditional layout. The advantage of this setup is that it’s easier to turn the shutter speed dial and you don’t have to lift your hand just to turn a dial since it is easier to just turn the ring with your left hand since it naturally-sits under the lens.
The Nikkormat FTn was introduced in 1967 and was made until about 1975. This is a long production run as far as Nikon is concerned. There are small variations between the late and early models and most revolve around cosmetic things like plastic tips for the timer and advance levers. There are many small changes internally but they’re trivial and they don’t matter to anybody except for the most hardcore collector (or me).
 Key to the Nikkormats’ legendary toughness and reliability is the Copal Square shutter. It is the heart of the Nikkormat and it’s so reliable that many are still working today despite their age and condition. This is the AK-47 of shutters and it’s hard to make one fail. It will lose its accuracy in the highest speed but all the rest should still operate fine. Flushing it with naphtha will clean a stuck slow speeds escapement and other simple troubles. It’s a simple mechanism but it’s hard to adjust it without removing the whole assembly that is why Nikon and other camera manufacturers just replace the whole module when there’s a problem with its accuracy as replacement is cheaper than the effort and time it takes to adjust it. These were sold as complete units to camera companies so all they do is install one at the factory as a sub-assembly. Contrary to what many people say, this shutter isn’t a “black-box” and making adjustments is possible but just tedious and isn’t worth all the trouble unless you absolutely have to adjust it.
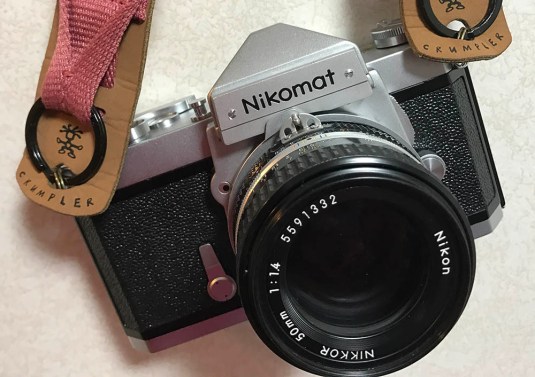
 The Nikkormat FTn improves on the Nikkormat FT that went before it by adding a clever way to register your lens’ maximum aperture information to the camera so it can meter properly. Mounting lenses is a bit clumsy with the Nikkormat FT and on the Photomic FT metered heads for the Nikon F so this improvement automated the mounting process but it’s still not as easy as mounting an Ai-spec lens. I will make a video in the future on how to mount a lens for the Nikkormat FT and how different it is with the Nikkormat FTn. The lens you see here is the GN Auto-Nikkor 45mm f/2.8, by the way (it’s a very unique lens).
 The Nikkormats are worthy side-kicks to the mighty Nikon F but unlike the dynamic-duo, this pair isn’t out to do some mischief under the sheets. The Nikkormat FTn is built just as tough as the Nikon F and in some case, even tougher. It’s a solid piece of equipment that’s going to make today’s cameras feel like BIC lighters. In fact, many of them still work even if they’re found at the bottom of the junk box. It’s the Mercedez Benz W123 of cameras.
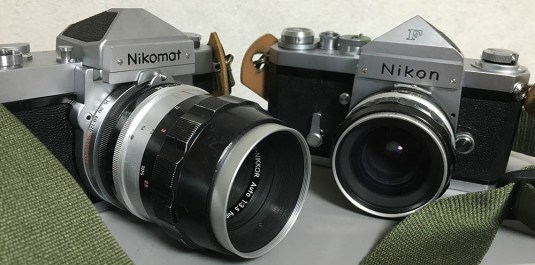 Their toughness and reliability made them the favorite choice for professionals when the need for a backup camera arises. It does nearly everything the Nikon F does except that it doesn’t have a 1:1 view and the prism and screens are fixed. You also cannot customize it the way you can customize the Nikon F and that’s where the line that separates these two lie. Many people can live without these so the humble Nikkormats sold very well. What’s mounted on the Nikkormat FTn in this picture is the Micro-Nikkor-P 55mm f/3.5 Auto.
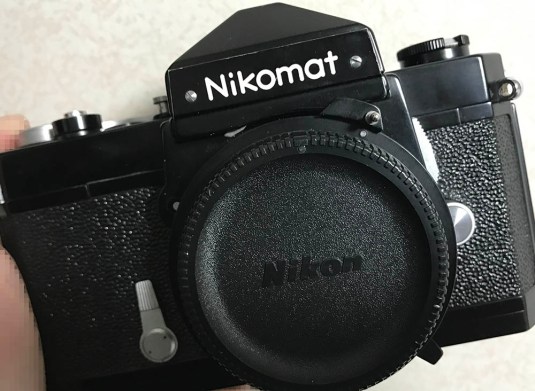 Like most Nikkormats, the Nikkormat FTn also comes in black. I like the black version but some people prefer the silver one. The black one looks sexy specially when you see brass peeking-through the worn spots in the camera.
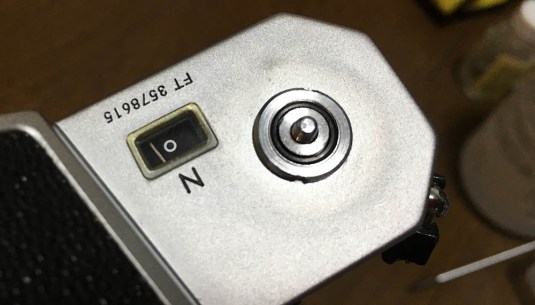
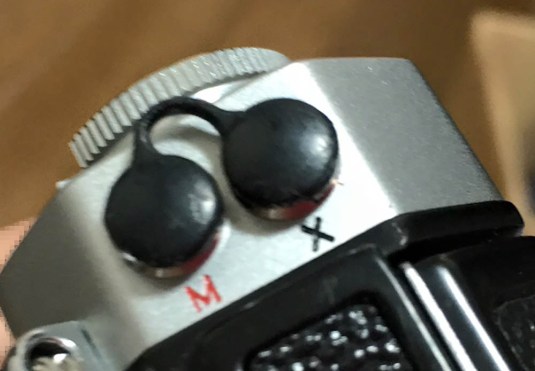 All earlier Nikkormats have the standard M/X flash terminals that were popular during their day. They were soon replaced with the standard terminals once the Nikkormats FT2 shipped and a very useful hot shoe was also added instead of the flimsy add-on one that’s similar to what the Pentax’s had back then. The covers you see here in this picture is rare because many people lose these. I don’t know if this came with the Nikkormats but they look stock since they’re of the correct fit.
Here’s a video that I made some time ago showing how to check your Nikkormats. Please watch it so you’ll know what to look for when buying one. The video also details some of the Nikkormat’s operation as I test the cameras out.
The Nikkormat FTn is one of those cameras that just works and their simplicity and easy-to-maintain nature makes them relevant even to this day. It’s a no-frills camera and they don’t cost much to obtain even in near-mint condition. Buying these is a no-brainer since they’re cheap, plentiful and practical. They’re the perfect cameras for trips to dangerous countries because they’re so cheap that losing one won’t be as painful as losing a Nikon F or a more expensive camera. They also come with built-in light meters which isn’t really that accurate on certain situations but is adequate for most things. I will also recommend these to students learning photography or anybody who just want to have a reliable and simple mechanical camera. Go online and buy one if you still don’t have one!
Before We Begin:
If this is the first attempt at opening a lens then I suggest that you read my previous posts regarding screws & drivers, grease and other things. Please also read what I wrote about the tools that you will need in order to fix your Nikkors.
I highly suggest that you read these primers before you begin (for beginners):
- Essential tools
- Best practices 1
- Best practices 2
- Best practices 3
- Ai conversion
- Working with Helicoids
Reading these primers should lessen the chance of ruining your lens if you are a novice. Before opening up any lens, always look for other people who have done so in Youtube or the internet. Information is scarce, vague and scattered (that is why I started this) but you can still find some information if you search carefully.
I highly recommend that you also read my working with helicoids post because this is very important and getting it wrong can ruin your day. If I can force you to read this, I would. It is that important!
For more advanced topics, you can read my fungus removal post as a start. This post has a lot of useful information here and there and it will be beneficial for you to read this.
Disassembly (Top):
The top is the first thing that you will remove when you want to access what’s inside the camera in order to clean it properly and replace what’s corroded. You will need specially made tools to remove some of the parts here so don’t bother with it if you’re just a hack. I wouldn’t recomment spraying the camera with WD-40 like what some people do and this is the proper way to clean things so if you’re serious with camera repair you should buy or make the correct tools. The good thing is it’s not difficult to remove the top at all and it will take me around 5 minutes or so to remove the whole top shell.
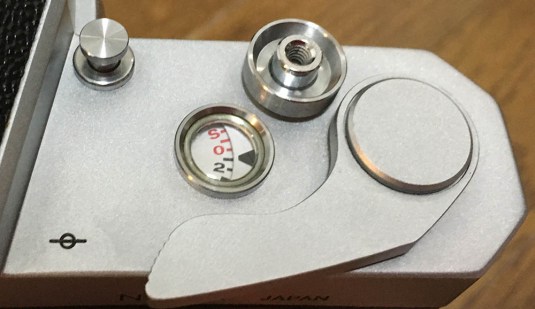 Begin by removing the cosmetic cover on the top of the advance lever.
 Use a rubber pad to help you grip it and unscrew it off. Do not force it or you will snap its screw and you will make the problem worse. I will admit that I snapped one of these and the cause was somebody glued it at the threads which is something that nobody does for Nikkormats! If something like that happened, you can soften the bond with heat or use a soldering bold to heat it. Shocking it gently with a rubber mallet is the last resort and you should never have to reach that point.
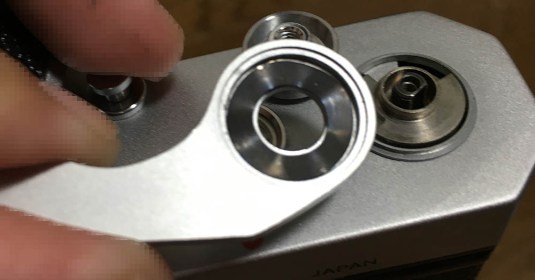
 The retaining stud can easily be removed using a lens spanner.
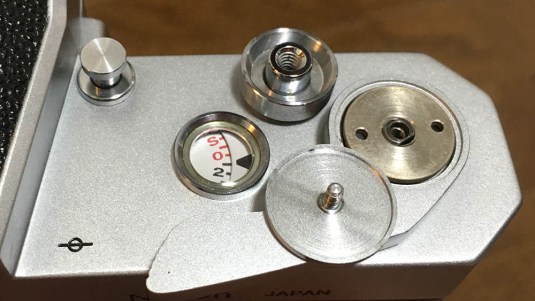
 It comes off just like this, make sure that you don’t lose the spring underneath it.
 Remove the advance lever along with the spring. Clean them both and store them safely.
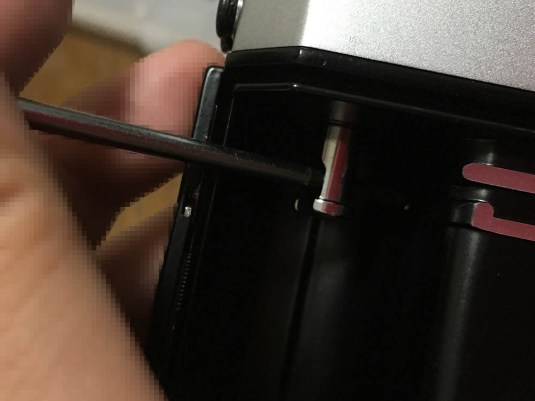 The rewind lever can be removed by unscrewing it but you will have to jam its fork first to help you unscrew it. A screwdriver may be too hard and can snap the fork so a plastic or wooden rod is ideal (when available).
 This is how the rewind lever comes off. Don’t lose the spring underneath it or the lever’s arm will easily flip-out since nothing is preventing it from doing so.
 The angled part of the spring has to be under the pivot of the lever when you reinstall it.
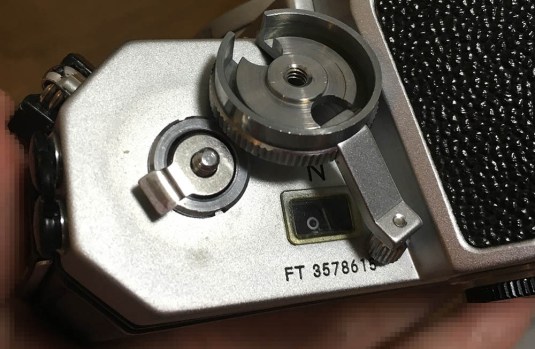
 There is a retainer under the rewind dial/lever that you should remove. You should use a pipe key that’s a perfect-fit to the retainer, if you don’t have one then use plastic to cover the surrounding metal to prevent whatever tool you have from scratching it.
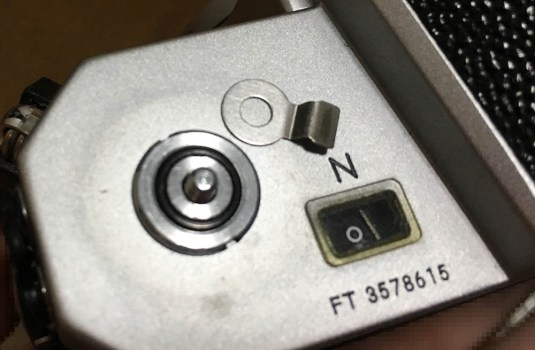
 Here it is. Don’t lose the tiny bushing.
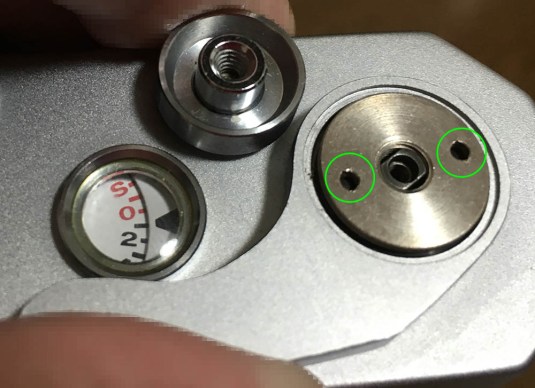
 All you need to do now is to remove 3 screws and 2 of them can be found here.
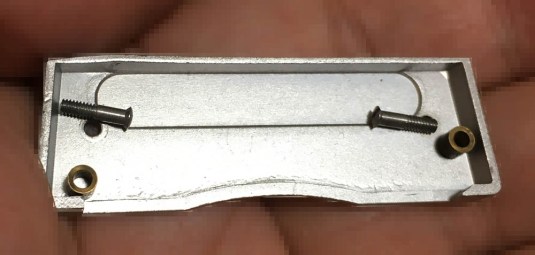 There are 2 brass spacers underneath them so don’t lose these. Putting them back later is frustrating even for advanced repairers but I have a few tricks that I use and the one that I use for these things is to place toothpicks in the screws’ place while I position things to prevent them from moving around before I install the screws.
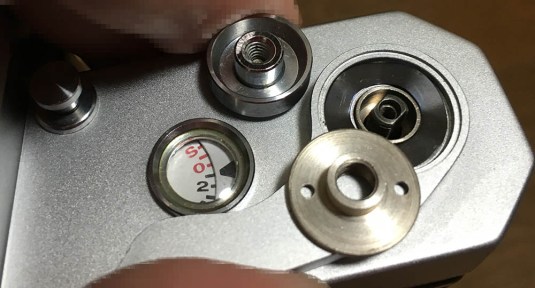
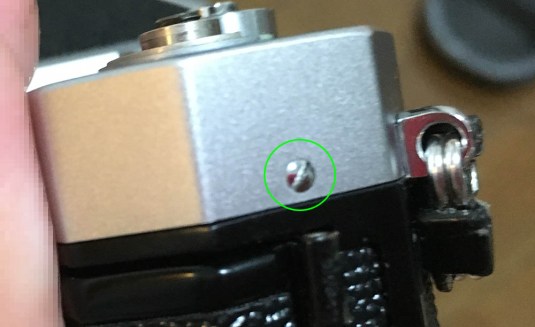 The last screw can be found here. Note that this one isn’t the same as the 2 ones we have at the front so don’t get mixed-up later.
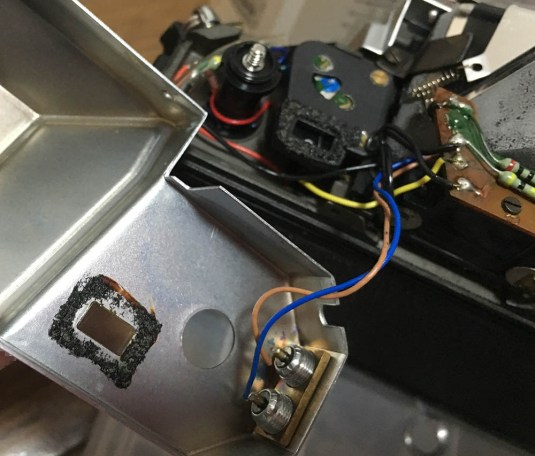 Gently lift the top cover until you separate it from the rest of the camera. Note that there are 2 wires soldered to the terminals and it will be convenient to remove them while the camera is being repaired. This will prevent you from accidentally damaging anything if the wires were tugged as a result of moving or cleaning the top plate. Don’t forget to put the wires back in their correct terminals later when you solder them.
That’s all for this section. If you think that this is hard then we’re ust getting started! This is where everything really begins and any serious repairs will begin with this step. Please be careful when you remove anything from the top panel because you don’t want to scar the beautiful and shiny patina of the chrome finish.
Conclusion:
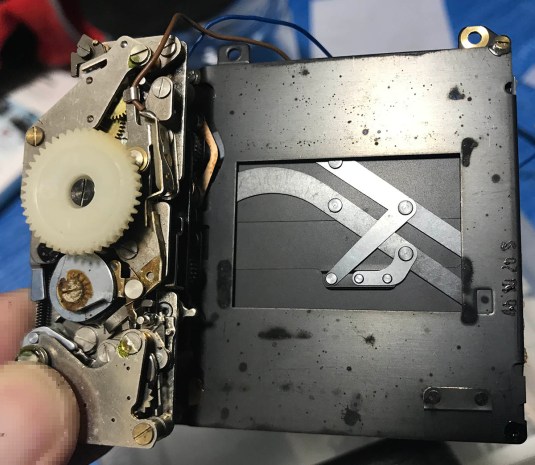
That’s it for our warm-up. We’ll carefully go through most of the important things here in part 2 and I will point-out the things that you should or can do in better detail. Removing the top will give you access to the meter, prism, focusing screen, film counter and other important things that makes this camera work. This is good because most, if not all of the common problems of the Nikkormat FTn can be addressed by removing the top panel or the bottom cover. Anything that requires removing more than these can be considered a major repair and will require more time and effort.
 Here are all the sensitive parts that are protected by the top cover. We’ll work on them in a later installment so please come back again.
See you guys in the next part, I am currently very busy with many things so I’ll separate this article into several smaller parts to help make things more manageable for me. This will probably be one of my more popular series since the Nikkormat Ftn is still popular to this day so I am going to make this series as detailed as possible for posterity’s sake. I’ll be adding things to this article from time-to-time as I get new pictures to add because I’m always working on Nikkormats the whole-year so come back occasionally to see if there’s anything new on the series. See you guys again in the next article. If you liked what you see please consider supporting the blog by donating a small tip. This helps me a lot with offsetting the cost of running the blog. You can also help by sharing this article and that’s going to help spread the word about my work. See you again and thanks for patronizing the blog, we have grown so much since we started a few years ago. Ric.
Help Support this Blog:
Maintaining this blog requires money to operate. If you think that this site has helped you or you want to show your support by helping with the upkeep of this site, you can simple make a small donation to my paypal.com account (richardHaw888@gmail.com). Money is not my prime motivation for this blog and I believe that I have enough to run this but you can help me make this site (and the companion facebook page) grow.
Leave me some tip?
Thank you very much for your continued support!
$2.00
Helping support this site will ensure that this will be kept going as long as I have the time and energy for this. I would appreciate it if you just leave out your name or details like your country and other information so that the donations will totally be anonymous it is at all possible. This is a labor of love and I intend to keep it that way for as long as I can. Ric.

Dec 16, 2018 @ 12:36:05
That camera honestly is so so pretty!
Dec 29, 2018 @ 02:49:14
Thank you, and so are you! I love these and I think I have about 10 of these. Maybe I should have named my daughter Nikkormat. Ric.
Jan 03, 2019 @ 23:40:38
hello Richard, well, this may not be the correct post to ask you this question, just want to check with you to see if you have any recommendation regarding the black type matte paint that apply to the lens internal part, maybe you have addressed this issue before. thanks
Jan 03, 2019 @ 23:47:27
India ink
Apr 23, 2019 @ 15:14:21
I have just this day (23-04-19) discovered your blog and your very valuable how to’s Richard. The main lesson I have learned at this point is not to bother too much with my Kiev cameras, as my five Nikkormats are infinitely superior in design. The Nikkormat is my favourite 35mm, my FT3 being highly prized.
Thank you for publishing your knowledge and efforts.
May 16, 2019 @ 22:54:28
Hi Richard,
I have an almost mint condition FTn i picked up, however it has a strange mirror behaviour.
I would love to give it a new life, but when i shoot the camera level, it works fine, if i point the camera to the ground, it shoots fine. if i point the camera at any angle above level, the mirror starts to drag and goes verrrry slowly.
I heard that the spring can gum up on the mirror hinge, and applying some solvent to this may help, unfortunately, it did not help in my case.
any ideas?
May 16, 2019 @ 22:54:48
Hi Richard,
I have an almost mint condition FTn i picked up, however it has a strange mirror behaviour.
I would love to give it a new life, but when i shoot the camera level, it works fine, if i point the camera to the ground, it shoots fine. if i point the camera at any angle above level, the mirror starts to drag and goes verrrry slowly.
I heard that the spring can gum up on the mirror hinge, and applying some solvent to this may help, unfortunately, it did not help in my case.
any ideas?
Oct 16, 2019 @ 18:29:12
Hi, Richard,
I like your blog and nice write up about vantage Nikon cam and lenses. In this article, you mentioned that:
“It will lose its accuracy in the highest speed but all the rest should still operate fine.”
My beaten up Nikkormat FTn has exactly this kind of problem. Th 1/1000 s becomes 1/500s and other shutter speed also become slower till 1/60. 1/60 and on slower one till 1s, they are just working fine. I know you mentioned that unlike Nikon F,F2, this one is hard to adjust unless you take the assembly out. But I cannot find any resource on how to adjust it. Drifting by 1 stop is too much for me. I’d like to be enlightened by you on what should I adjust to restore the 1/1000 shutter speed to its original design speed. I have taken out the shutter assembly, but cannot figure out what kind of adjustment i need to apply to it.
-Zach
Feb 21, 2024 @ 16:58:32
I have this same issue on 3 different Nikkormats, I would also love to have some information on how to adjust the 1/1000 on the copal shutter. Can’t seem to find anything in any of the repair manuals, did you have any luck?
Mar 31, 2021 @ 16:04:55
Hi Mr. Haw,
I’ve found your repair articles a great resource and helpful when it came time for me to do work on my Nikkormat ftn.
Will you be doing a detailed article on how to clean or repair the lightmeter resistor? My Nikkormats all have jumpy meters that prevent me from getting accurate readings.
Thanks.
May 07, 2021 @ 03:37:49
I’ve got a Nikkormat ft3 which has got a jumpy meter. Are there any things to be aware of, or could you do a step by step on “how to do” clean the resistor band, and recalibrate the meter?
Oct 29, 2022 @ 10:47:44
Just use a handheld meter, I recommend the Gossen Lunalite. Three LEDs and solid state plus readily available PP3 9v battery. The Duracell one lasts years
Oct 30, 2022 @ 07:58:20
Thanks, but that’s just avoiding the challenge.
I use handheld meters when using cameras with no meters when I’m not sure about the settings.
Oct 29, 2022 @ 10:44:30
I saw a Nikkormat in the window of a camera dealer in my UK town in 1981 for £45. It had no lens ot body cap but a somewhat disreputable black leather strap wrapped around it. At the time I was using a Pentax S1a and 55mm f2 Takumar. I gave in to temptation and bought it. I managed to pick up a new 50mm f1.8 AI Nikon lens, new, with a damaged filter thread from another dealer. My camera was the FT (1965-66). Meter not working but I was already using a Weston V with the Pentax. I took the Nikon, as I called it, everywhere. On a coach trip to London for a CND march, a young guy approached me holding an Olympus OM1. He was fascinated by my bit of old kit and I was amazed at how light his camera (and 50mm) was compared with my Nikon. But I’d got to love my heavy old kit. I bought a 135mm f3.5 AI and started portraits. I picked up a Billingham bag to carry my expanded outfit in.
In 2007 I had a legacy and bought a pair of Leica M3 bodies and 35/f3.5 50/f2.8, 90/f2.8, 135/f4.5 lenses and the Leicameter. I PX all the SLR stuff I had except the Weston V and the Billingham bag. Many years later I acquired a Leicaflex and a few R lenses 28-250mm and last year bought three R8 bodies to try Program with Matrix metering. And they say you can’t teach an old dog new tricks. The Nikkormat, in my experience, may very well be a better camera that the Nikon F/F2 as it’s got no removable parts. If one undertakes street photography and someone attacks you, hitting them very hard in the face with the F/F2 could result the the head flying off rendering the camera unusable. Not so the Nikkormat. Just a quick wip with the hankies to remove the blood, walk on and carry on shooting.
Aug 29, 2023 @ 21:41:32
Hello!
Thanks so much for this great info. I just got my first camera- a nikkormat ftn- and have had a great time shooting several rolls. Recently the film advance lever had seemed to stop rewinding correctly, I can pull it back but it doesn’t make that satisfying noise, and the shutter button won’t fire, it’s stuck in the up position. This issue came up when i was rewinding the advance lever and firing the shutter very quickly (some sheep were running by) so maybe I caused the issue. Ide love some advice on how to go about fixing this, I’ve don’t lots of research and haven’t found anything yet. Thanks so much 🙂
Lev
Feb 21, 2024 @ 16:55:46
hello Richard,
would you happen to have any information on how to adjust the 1/1000 on the copal shutter? I can’t seem to find anything in any of the repair manuals available.
thank you!
Jun 20, 2025 @ 12:38:01
Hello! I did some repairs and greasing on my FTN a few years back, but during the reassembly I apparently did something wrong 🙂 The shutter speed readout in the viewfinder is backwards. I don’t mean that they read wrong, I mean that when the shutter is on 1″ the viewfinder show 1/1000. And when it is actually set to 1/1000th, the viewfinder shows 1″. Of course I can listen to the shutter and know that it is accurate to what is set on the bayonet. 1″ is easily identified 🙂 so I can continue to shoot, but I’d eventually like to repair it.I’m sure I can start taking it apart and troubleshoot my way to victory, but does anyone have a video or quick tip and what to look for or switch to get this corrected and same me a little time? Thank you!