
Hello, everybody! We are finally going to see the second part of the Micro-Nikkor 5.5cm f/3.5 teardown! We were side-tracked a couple of weeks ago when I featured a teardown of the venerable Nikkor 35mm f/2.8 Ai but we are finally going to finish this series. I can even make a third part but that will be too long, I am sure people will get bored so I am going to stay with the original plan of having just 2 parts.
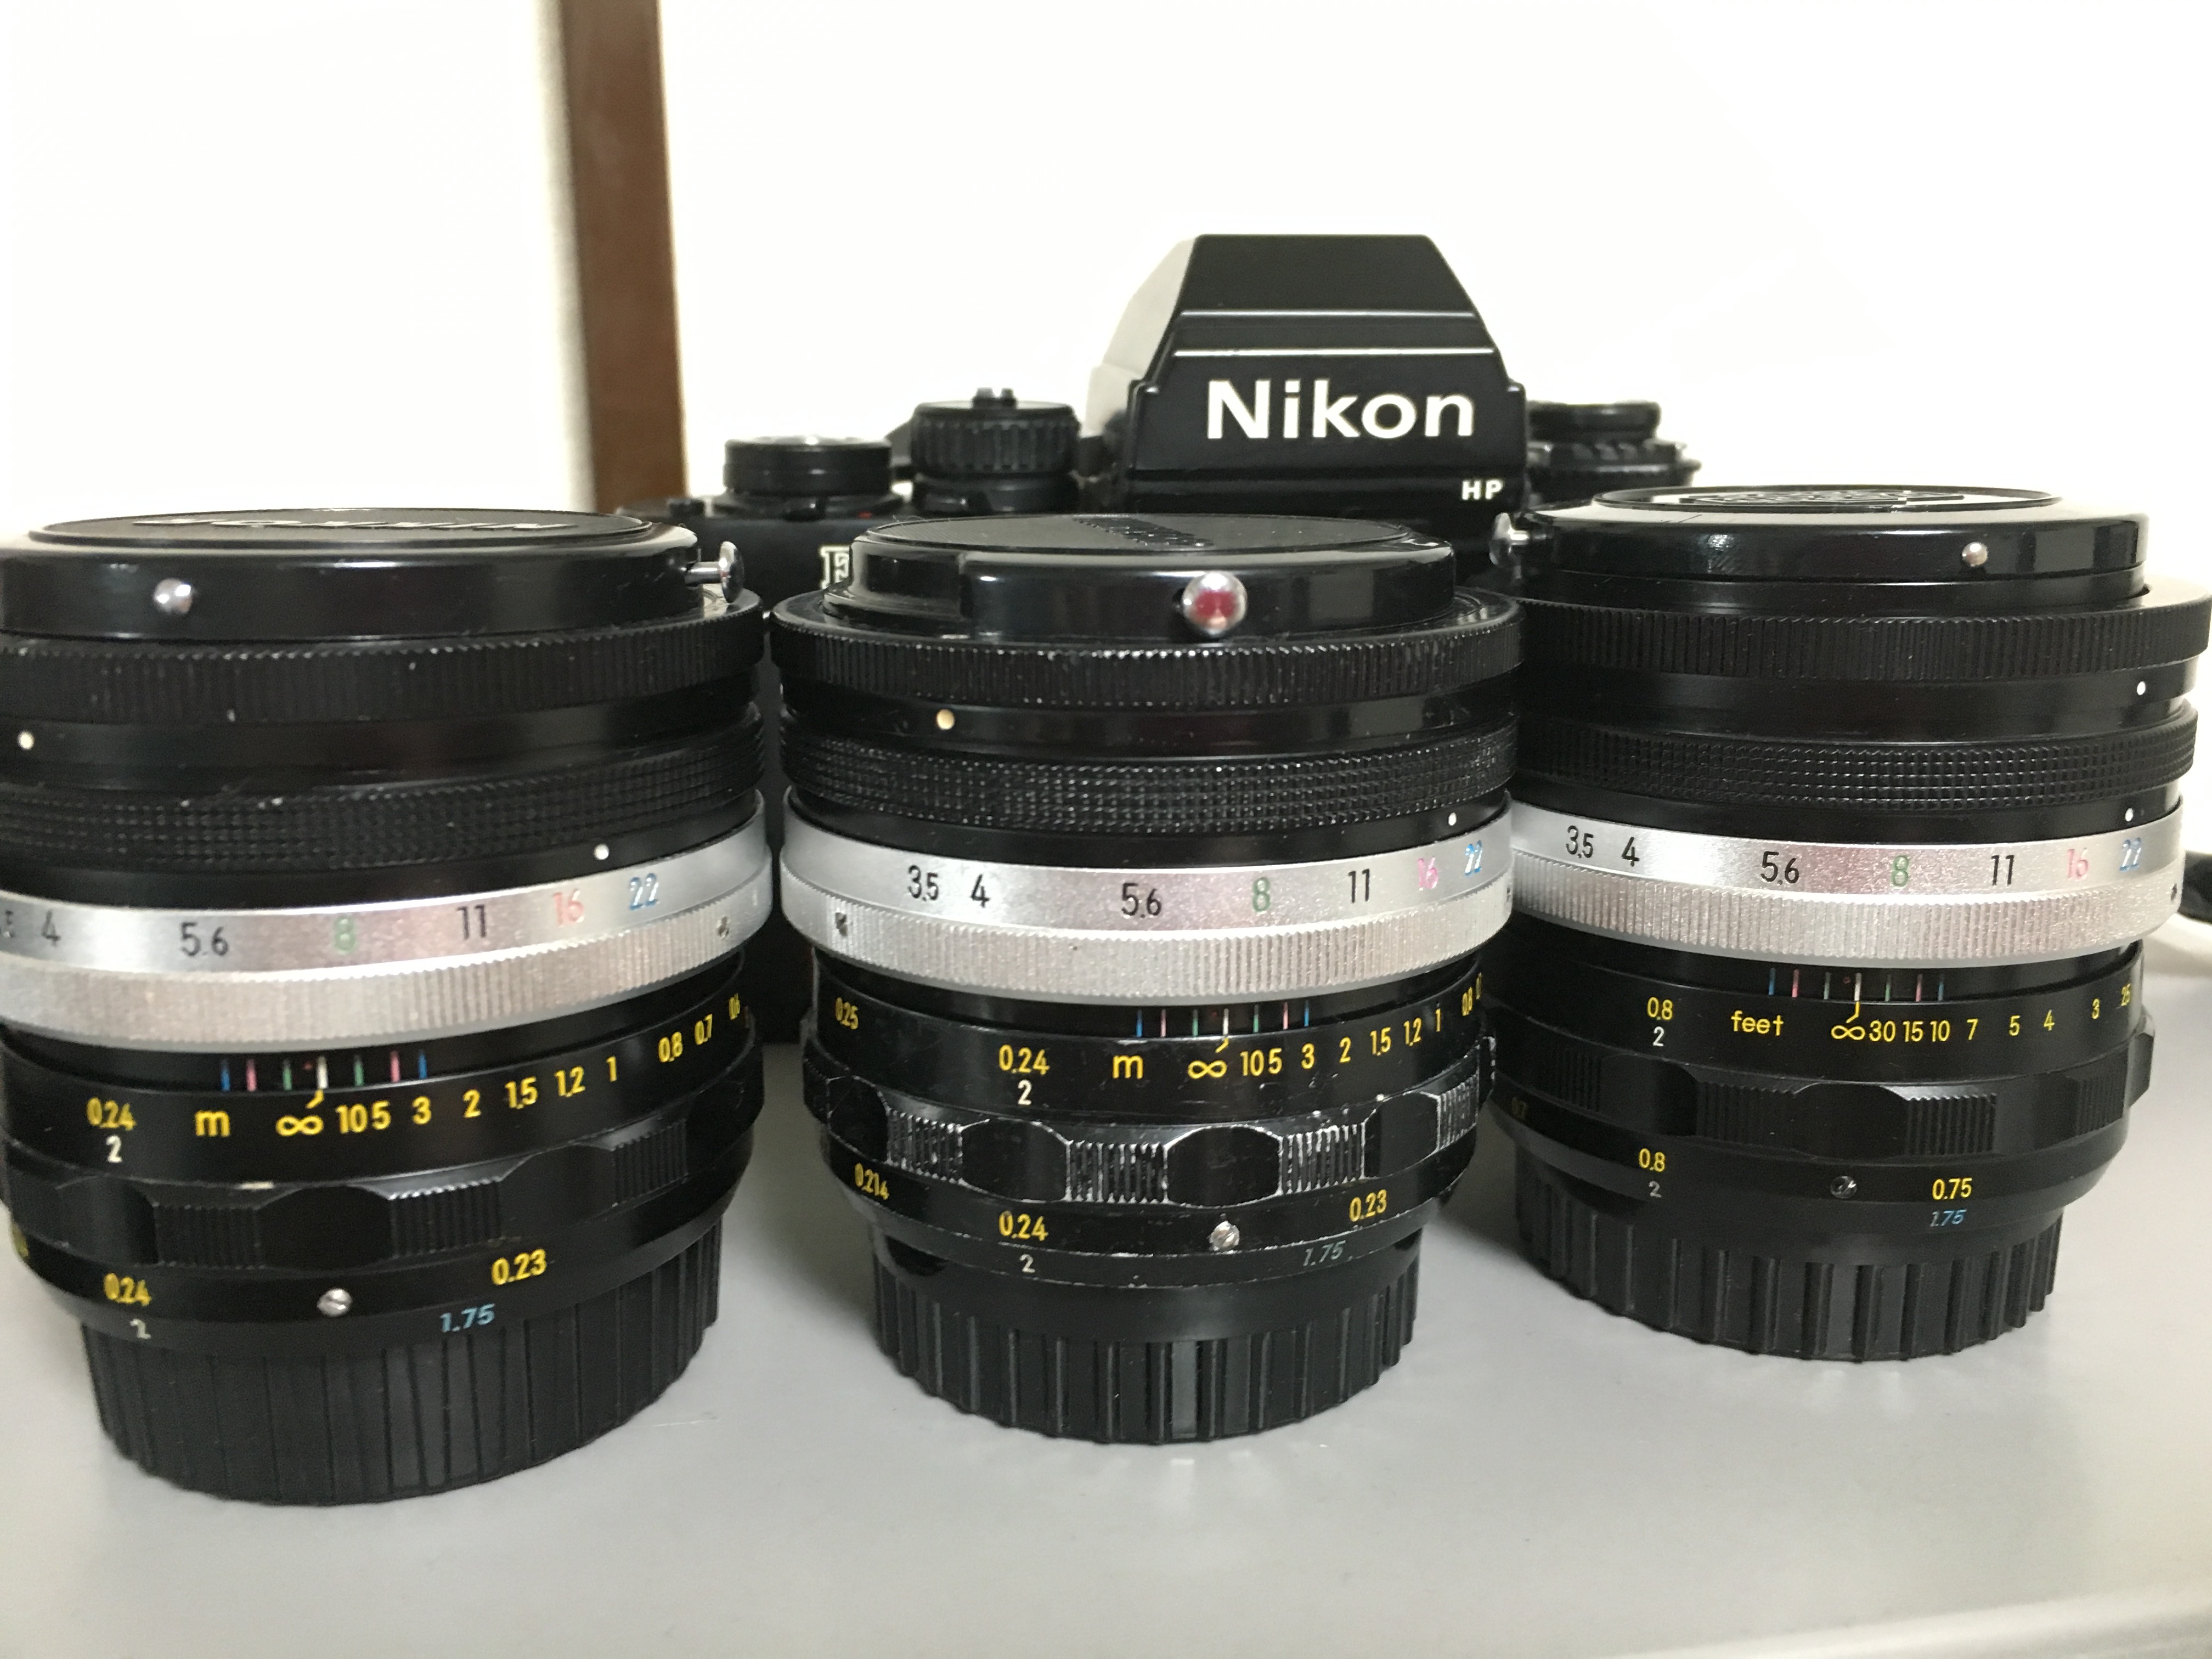
These look unique as far as Nikkors go. You can’t find any other Nikkor that looks like this lens. This is novelty lens and it’s best-left to the collectors. The later Micro-Nikkor-P 55mm f/3.5 Auto is a better lens in every way, if you are looking for a practical macro lens for cheap then that lens will fit the bill.
Before we continue, make sure that you read the first part. You do not want to miss anything important that’s discussed in that article. I have covered a lot of things there with regards to how this lens performs and how to work on the barrel and I won’t repeat them here.
Before We Begin:
If this is your first attempt at repairing a lens then I suggest that you check my previous posts regarding screws & drivers, grease and other things. Also read what I wrote about the tools that you’ll need to fix your Nikkors.
I suggest that you read these primers before you begin (for beginners):
Reading these primers should lessen the chance of ruining your lens if you are a novice. Before opening up any lens, always look for other people who have done so in Youtube or the internet. Information is scarce, vague and scattered (that is why I started this) but you can still find some information if you search carefully.
I highly recommend that you read my working with helicoids post because this is very important and getting it wrong can ruin your day. If I can force you to read this, I would. It is that important!
For more advanced topics, you can read my fungus removal post as a start. This post has a lot of useful information and it will be beneficial for you to read this.
Disassembly (Iris mechanism):
I’m going to show you how to dismantle the iris properly. Please read part 1 as a refresher before you proceed so you will not get confused as to which part I am working on and how it got that way. This part is straight forward except for the iris assembly so please pay attention as this is going to show you something that I have never featured on this blog.
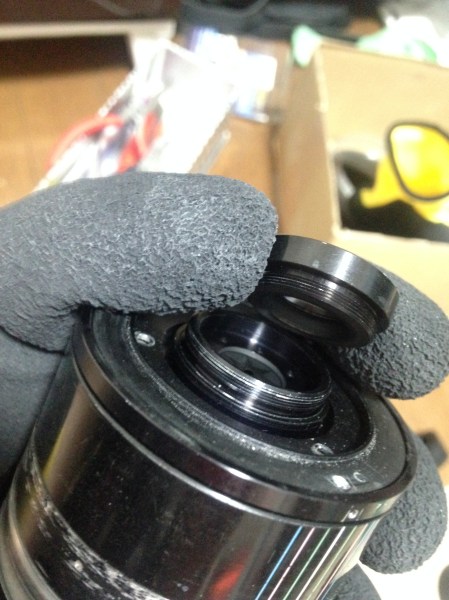
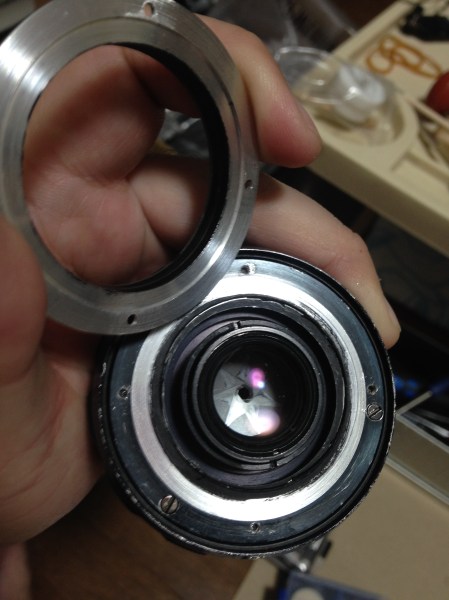
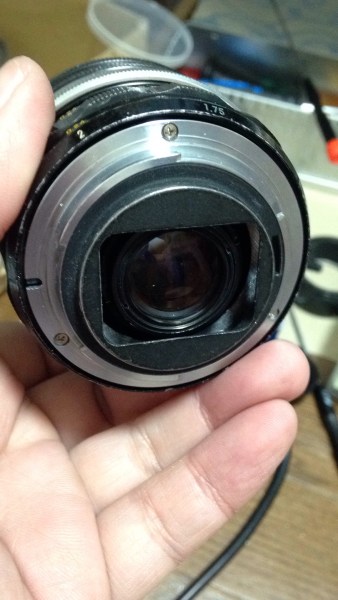
The rear element can be removed with your bare hands as it’s just screwed to the end of the objective’s case. Ignore the fact that lens barrel is shown in the picture. I took this pic as I was disassembling the lens barrel earlier.
This will look different if you have the 2nd version but it should be similar. The photo shows the 1st version with the recessed filter ring while the lens that was disassembled in part 1 is the 2nd version with the raised filter ring.

The front element is simply screwed to the front cup.

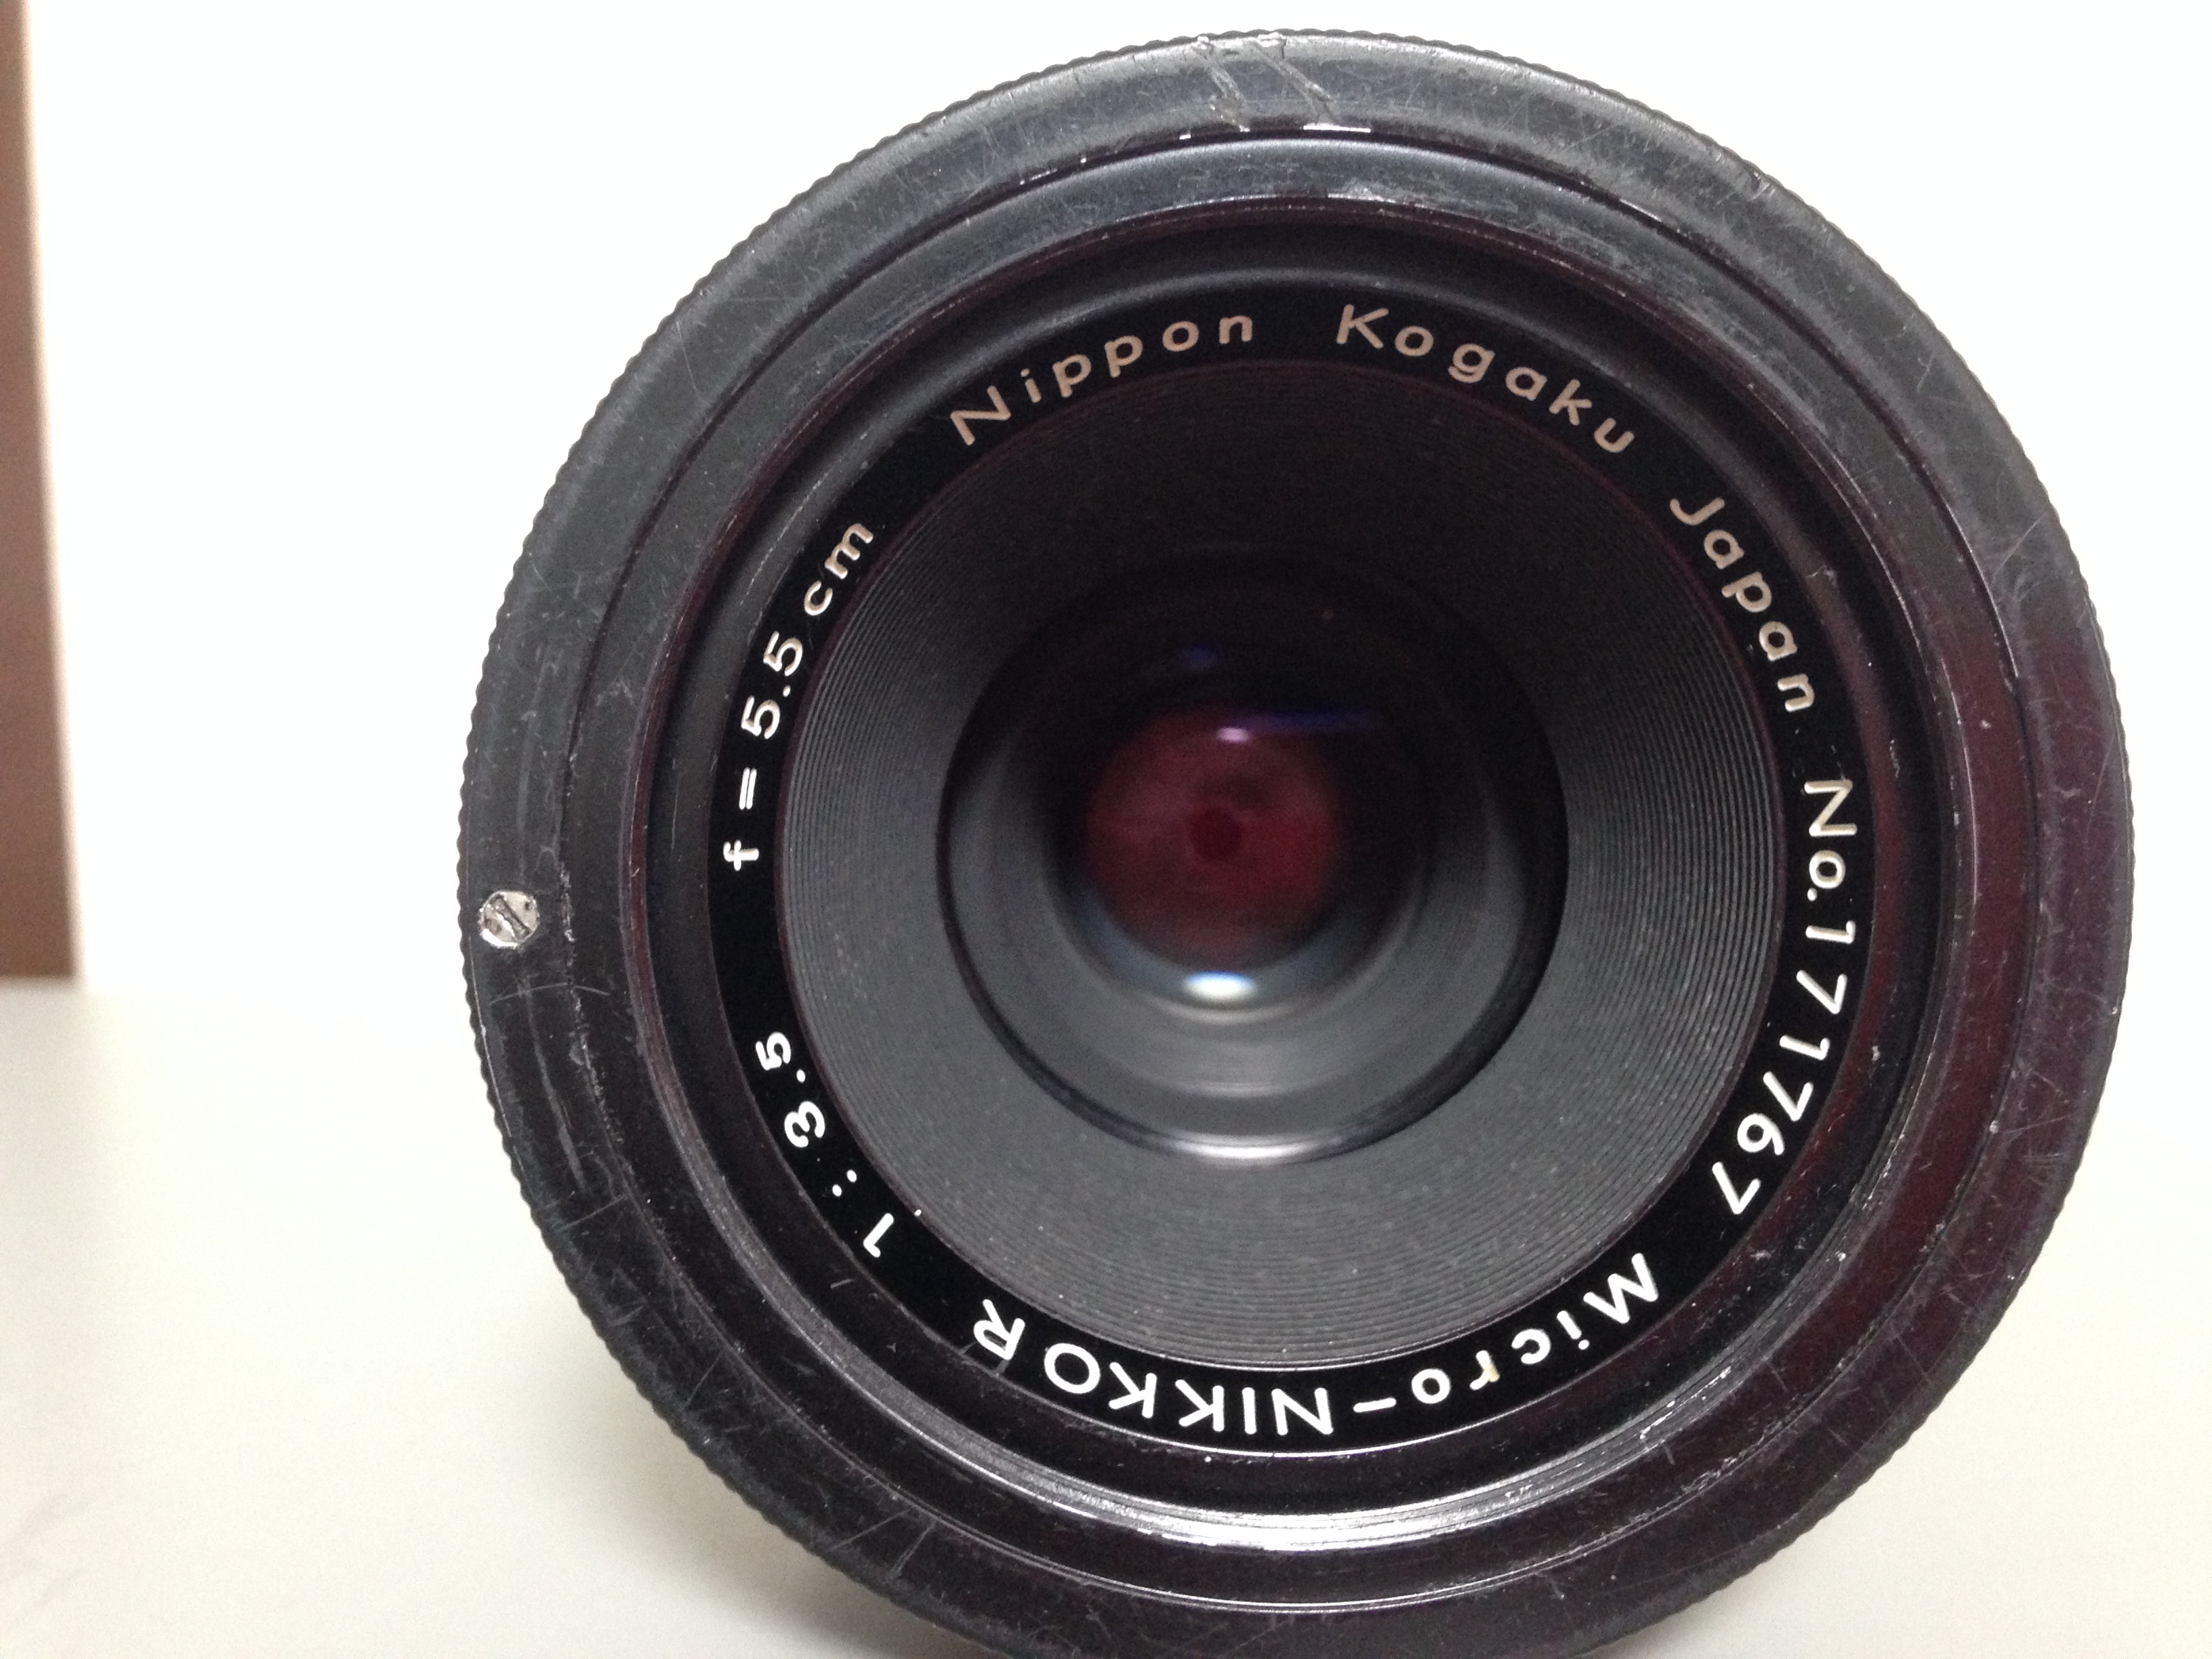
As you can see from the picture, the objective itself is small compared to the lens. Be careful not to damage any of the elements when you handle it. You will also get your hand dirty with grease so be very careful not to touch any of the elements or else you will contaminate it with dirty decades-old grease which will take some time to remove, the alloy filings in it is course enough to scratch the coating when you wipe the mess off.
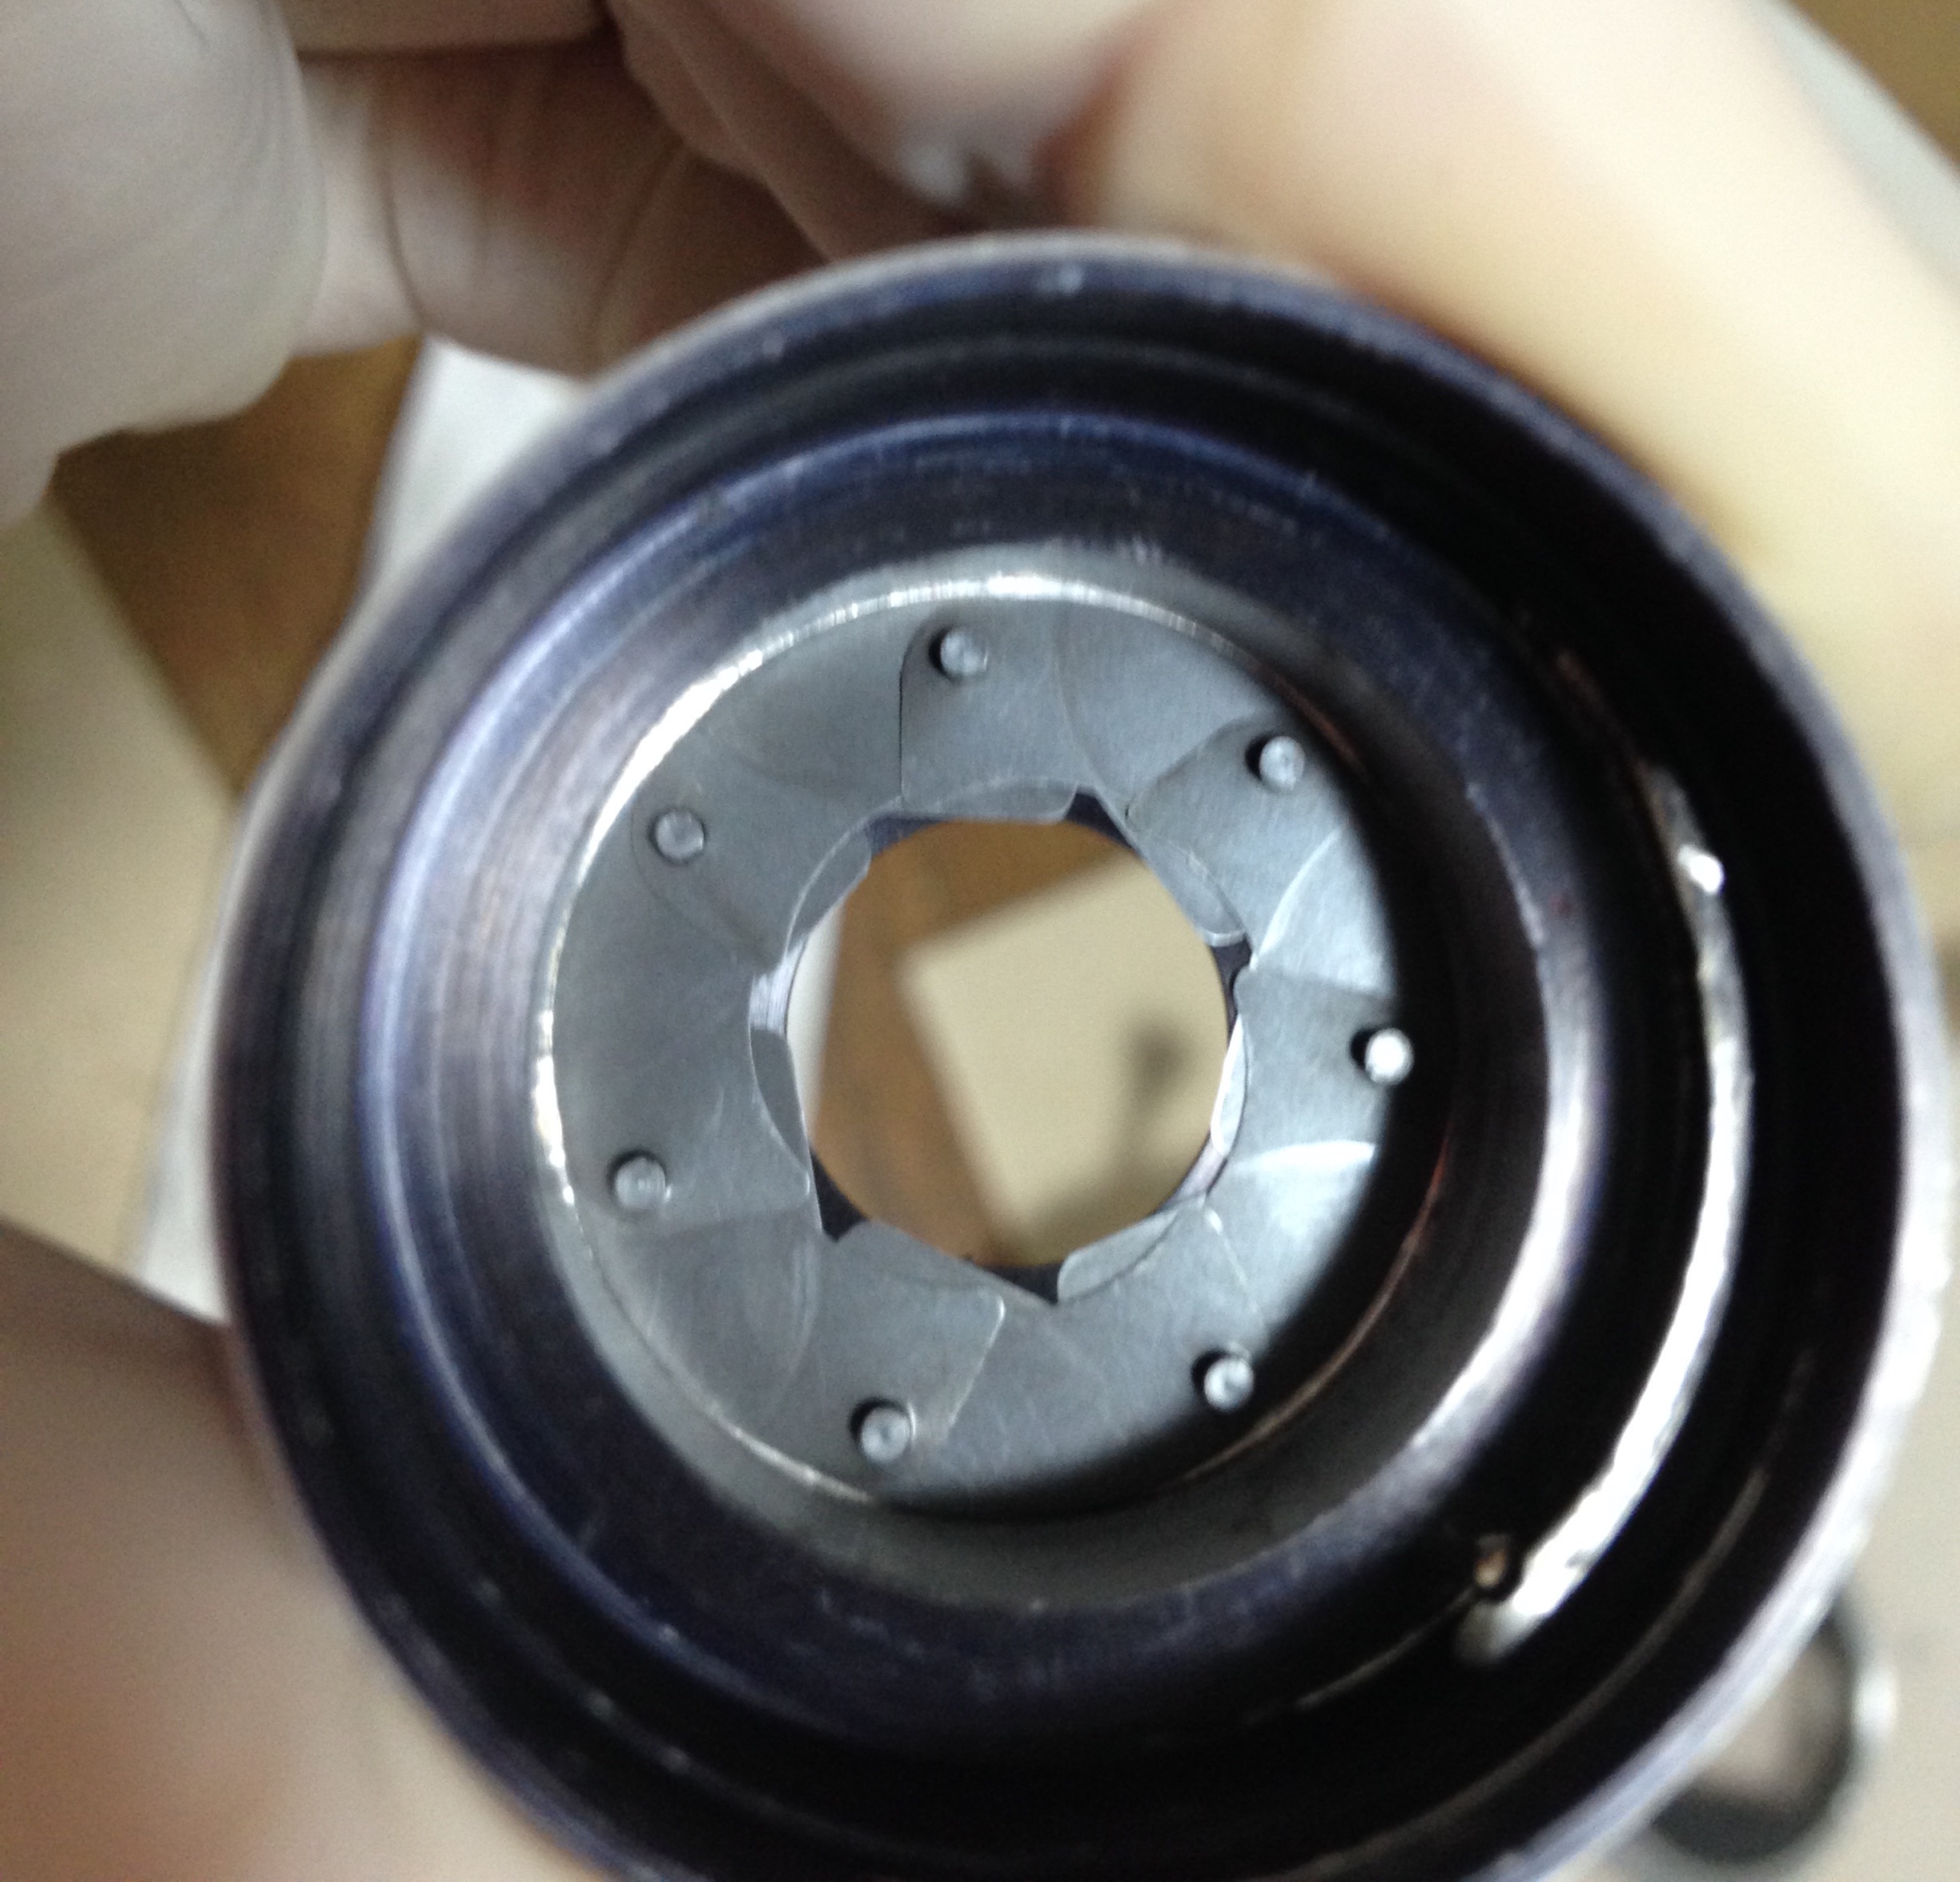
Remove the rotator cup from the objective’s casing and you can now access the iris assembly. Look at the picture carefully and you will see that the iris was contaminated with oil. This is not good as you shall see later.
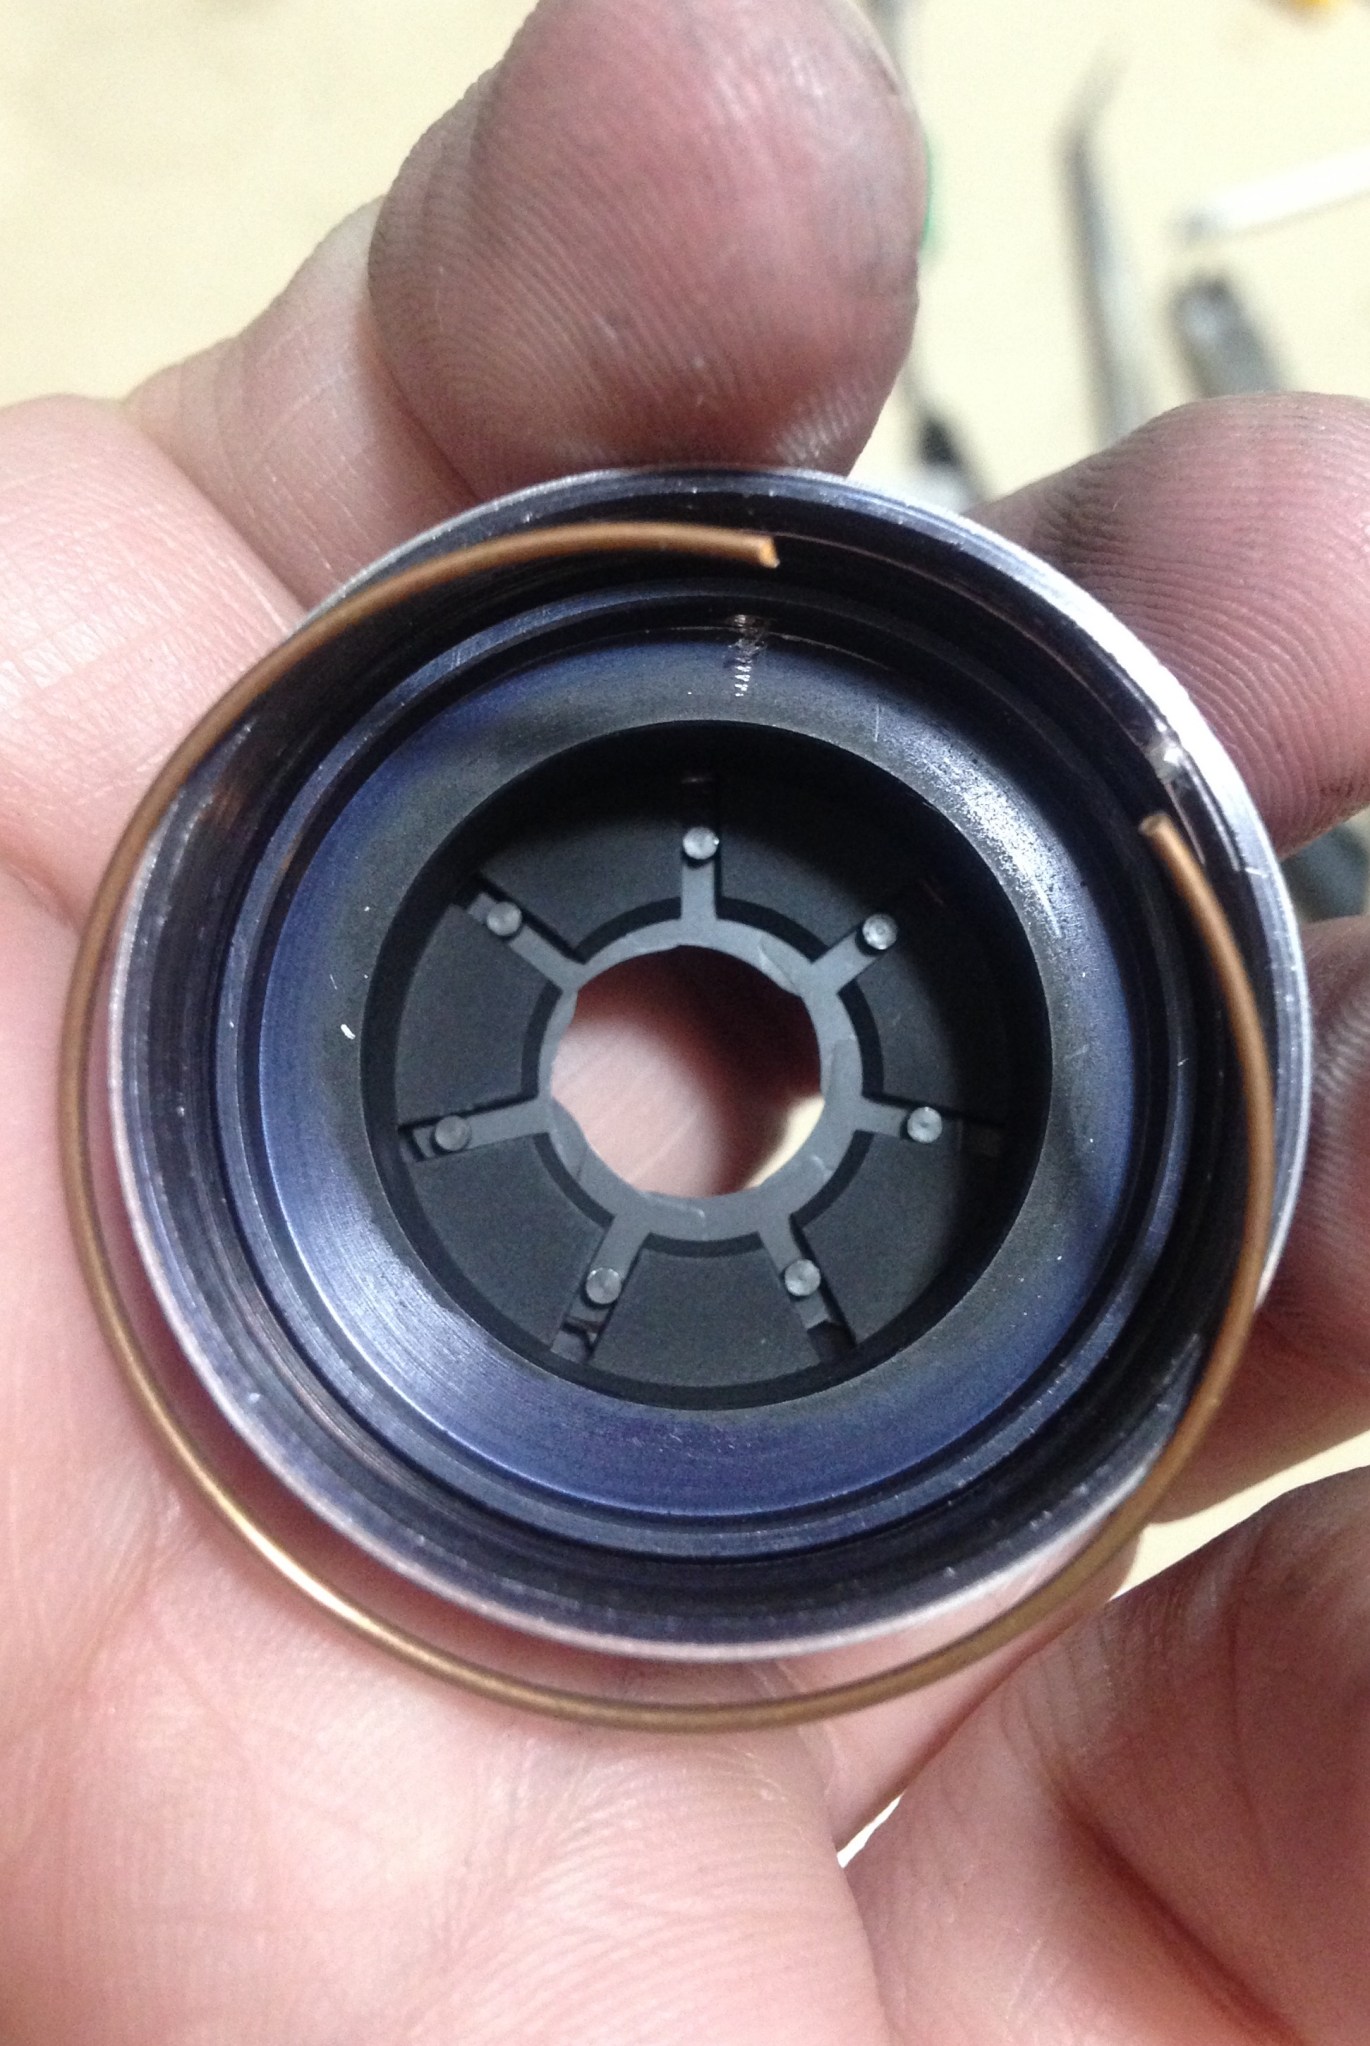
Remove the brass ring to remove the rotator plate from the iris assembly. It is the finely-milled part with all the slots to guide the pins of each iris blade.
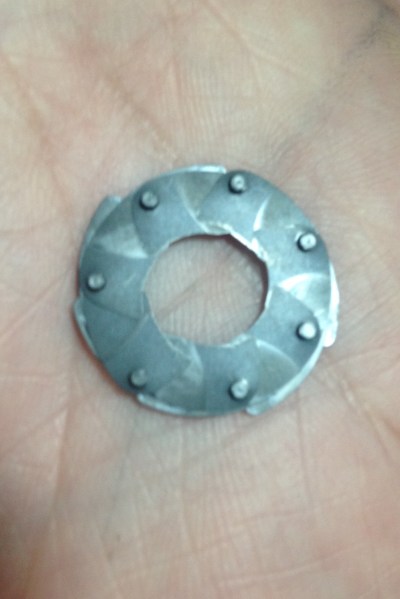
Once the rotator plate is gone the iris blades are looses so be careful not to drop any or you risk damaging this and that is going to be a bigger problem, you may end up with a useless macro lens that will not stop-down properly. The blades were so oily that it came off in one piece. This is not unusual for lenses of this vintage as oil has crept into the iris while the lens was stored improperly over the decades.
The old grease has coated the blades completely.

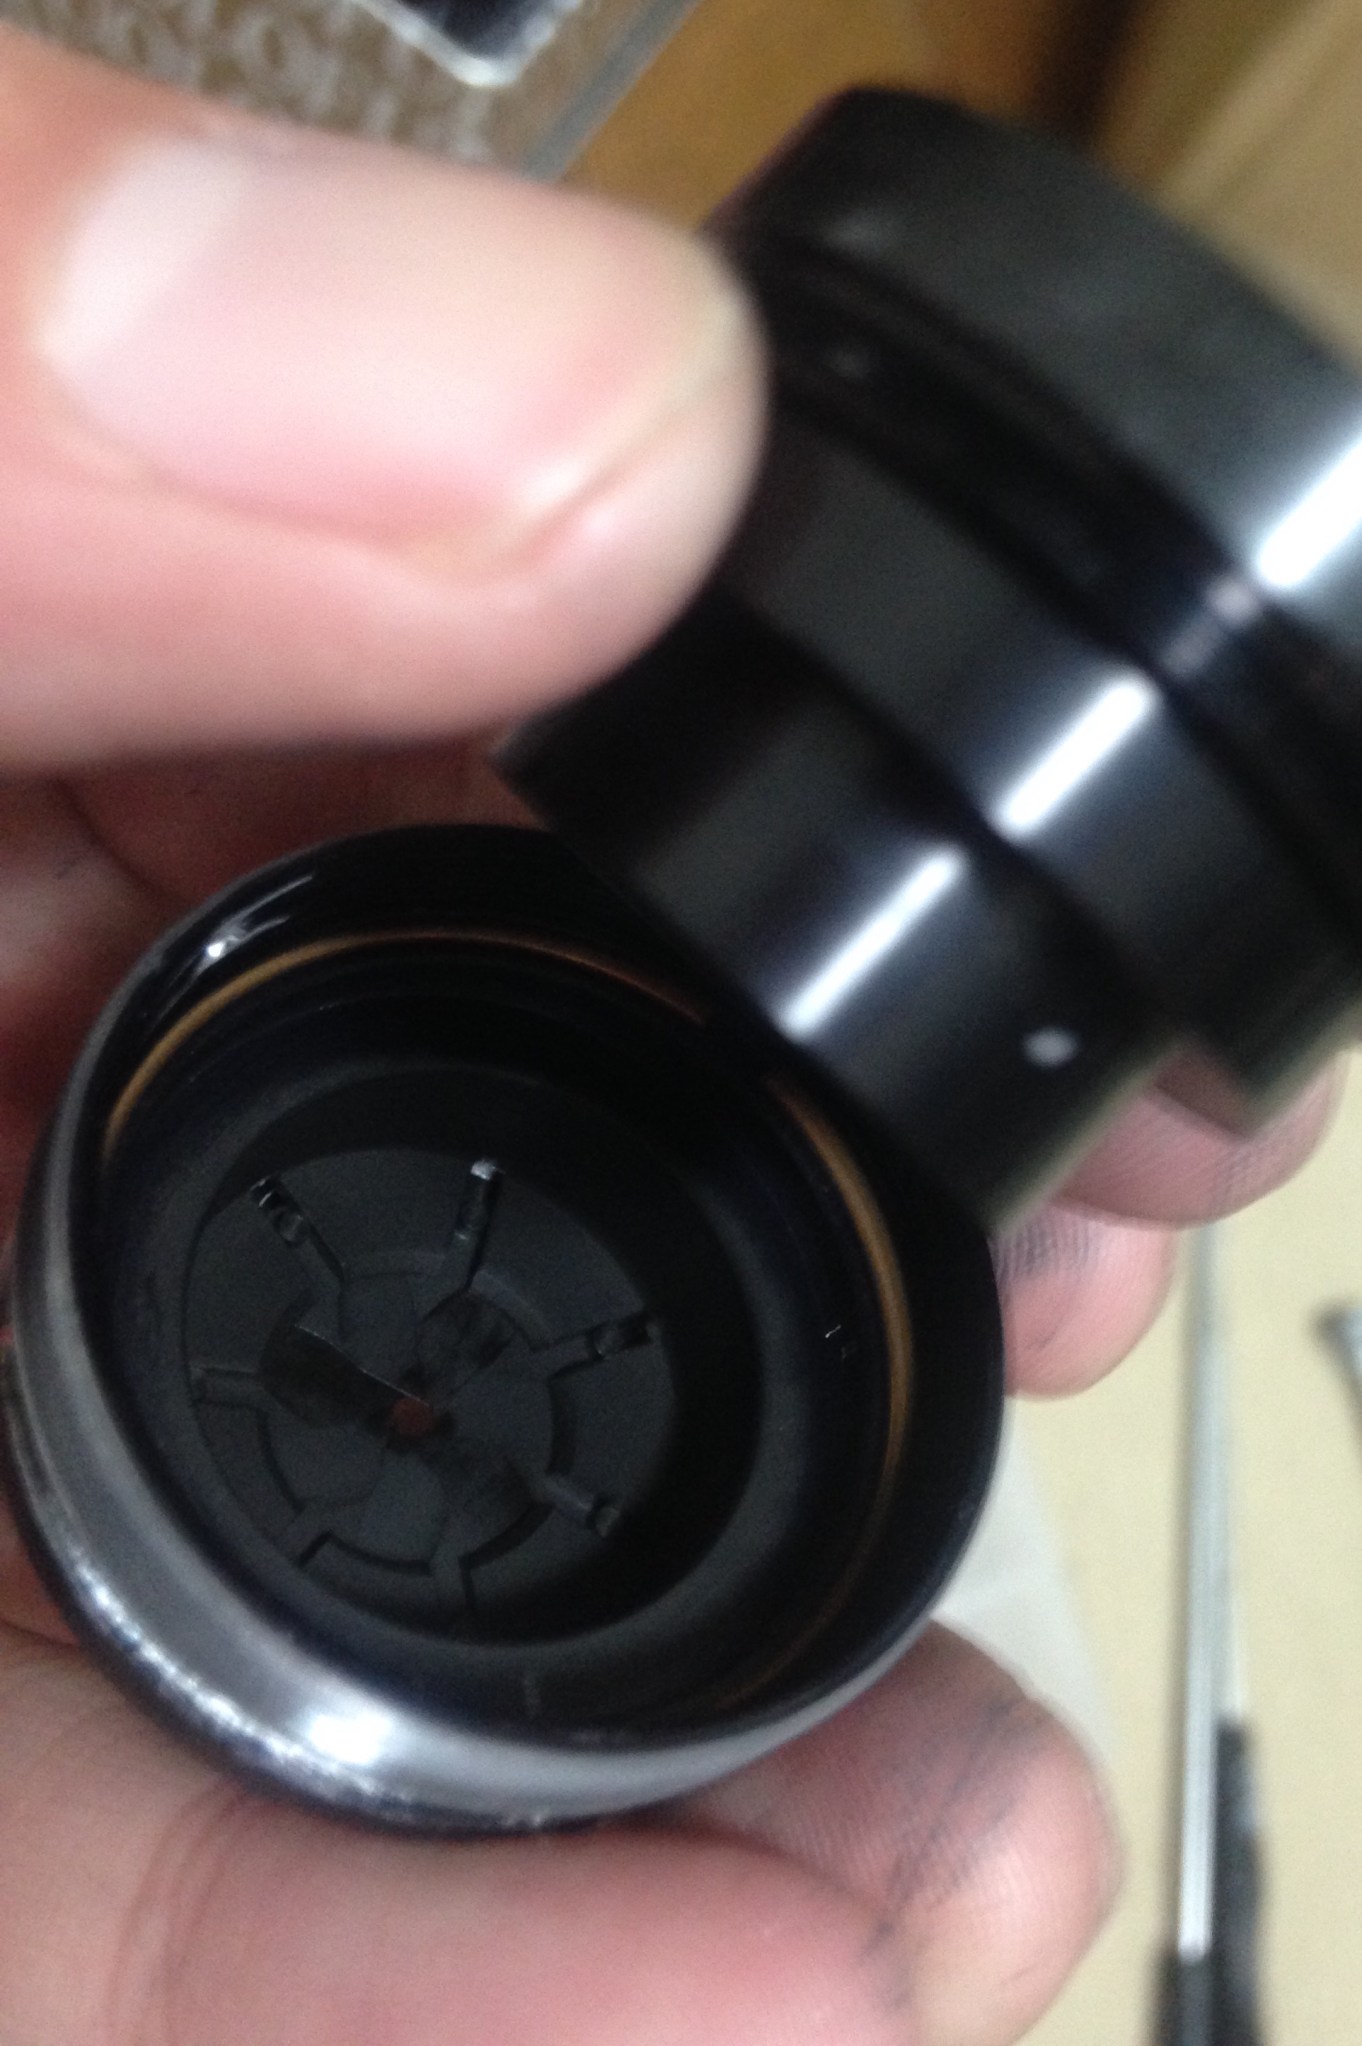
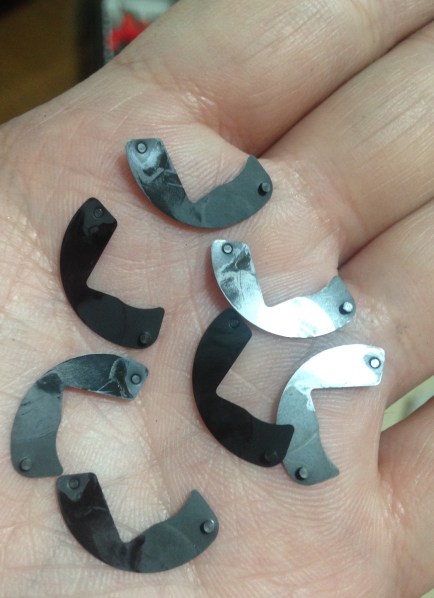
Not only were they oily but they were rusty, too. Note that the blade’s shape isn’t typical of SLR lenses. These L-shaped blades were common in the older preset aperture lenses. This lens was made during a time in Nikon’s history where they were transitioning from rangefinder cameras to the SLR system so it is an interesting link to Nikon’s rangefinder heritage.
The blades are now clean. As usual with iris assemblies, the last blade is the most annoying as you will need to slip it under the other ones. This problem is made more complicated with this type of iris. This is frustrating but I am used to working with these.
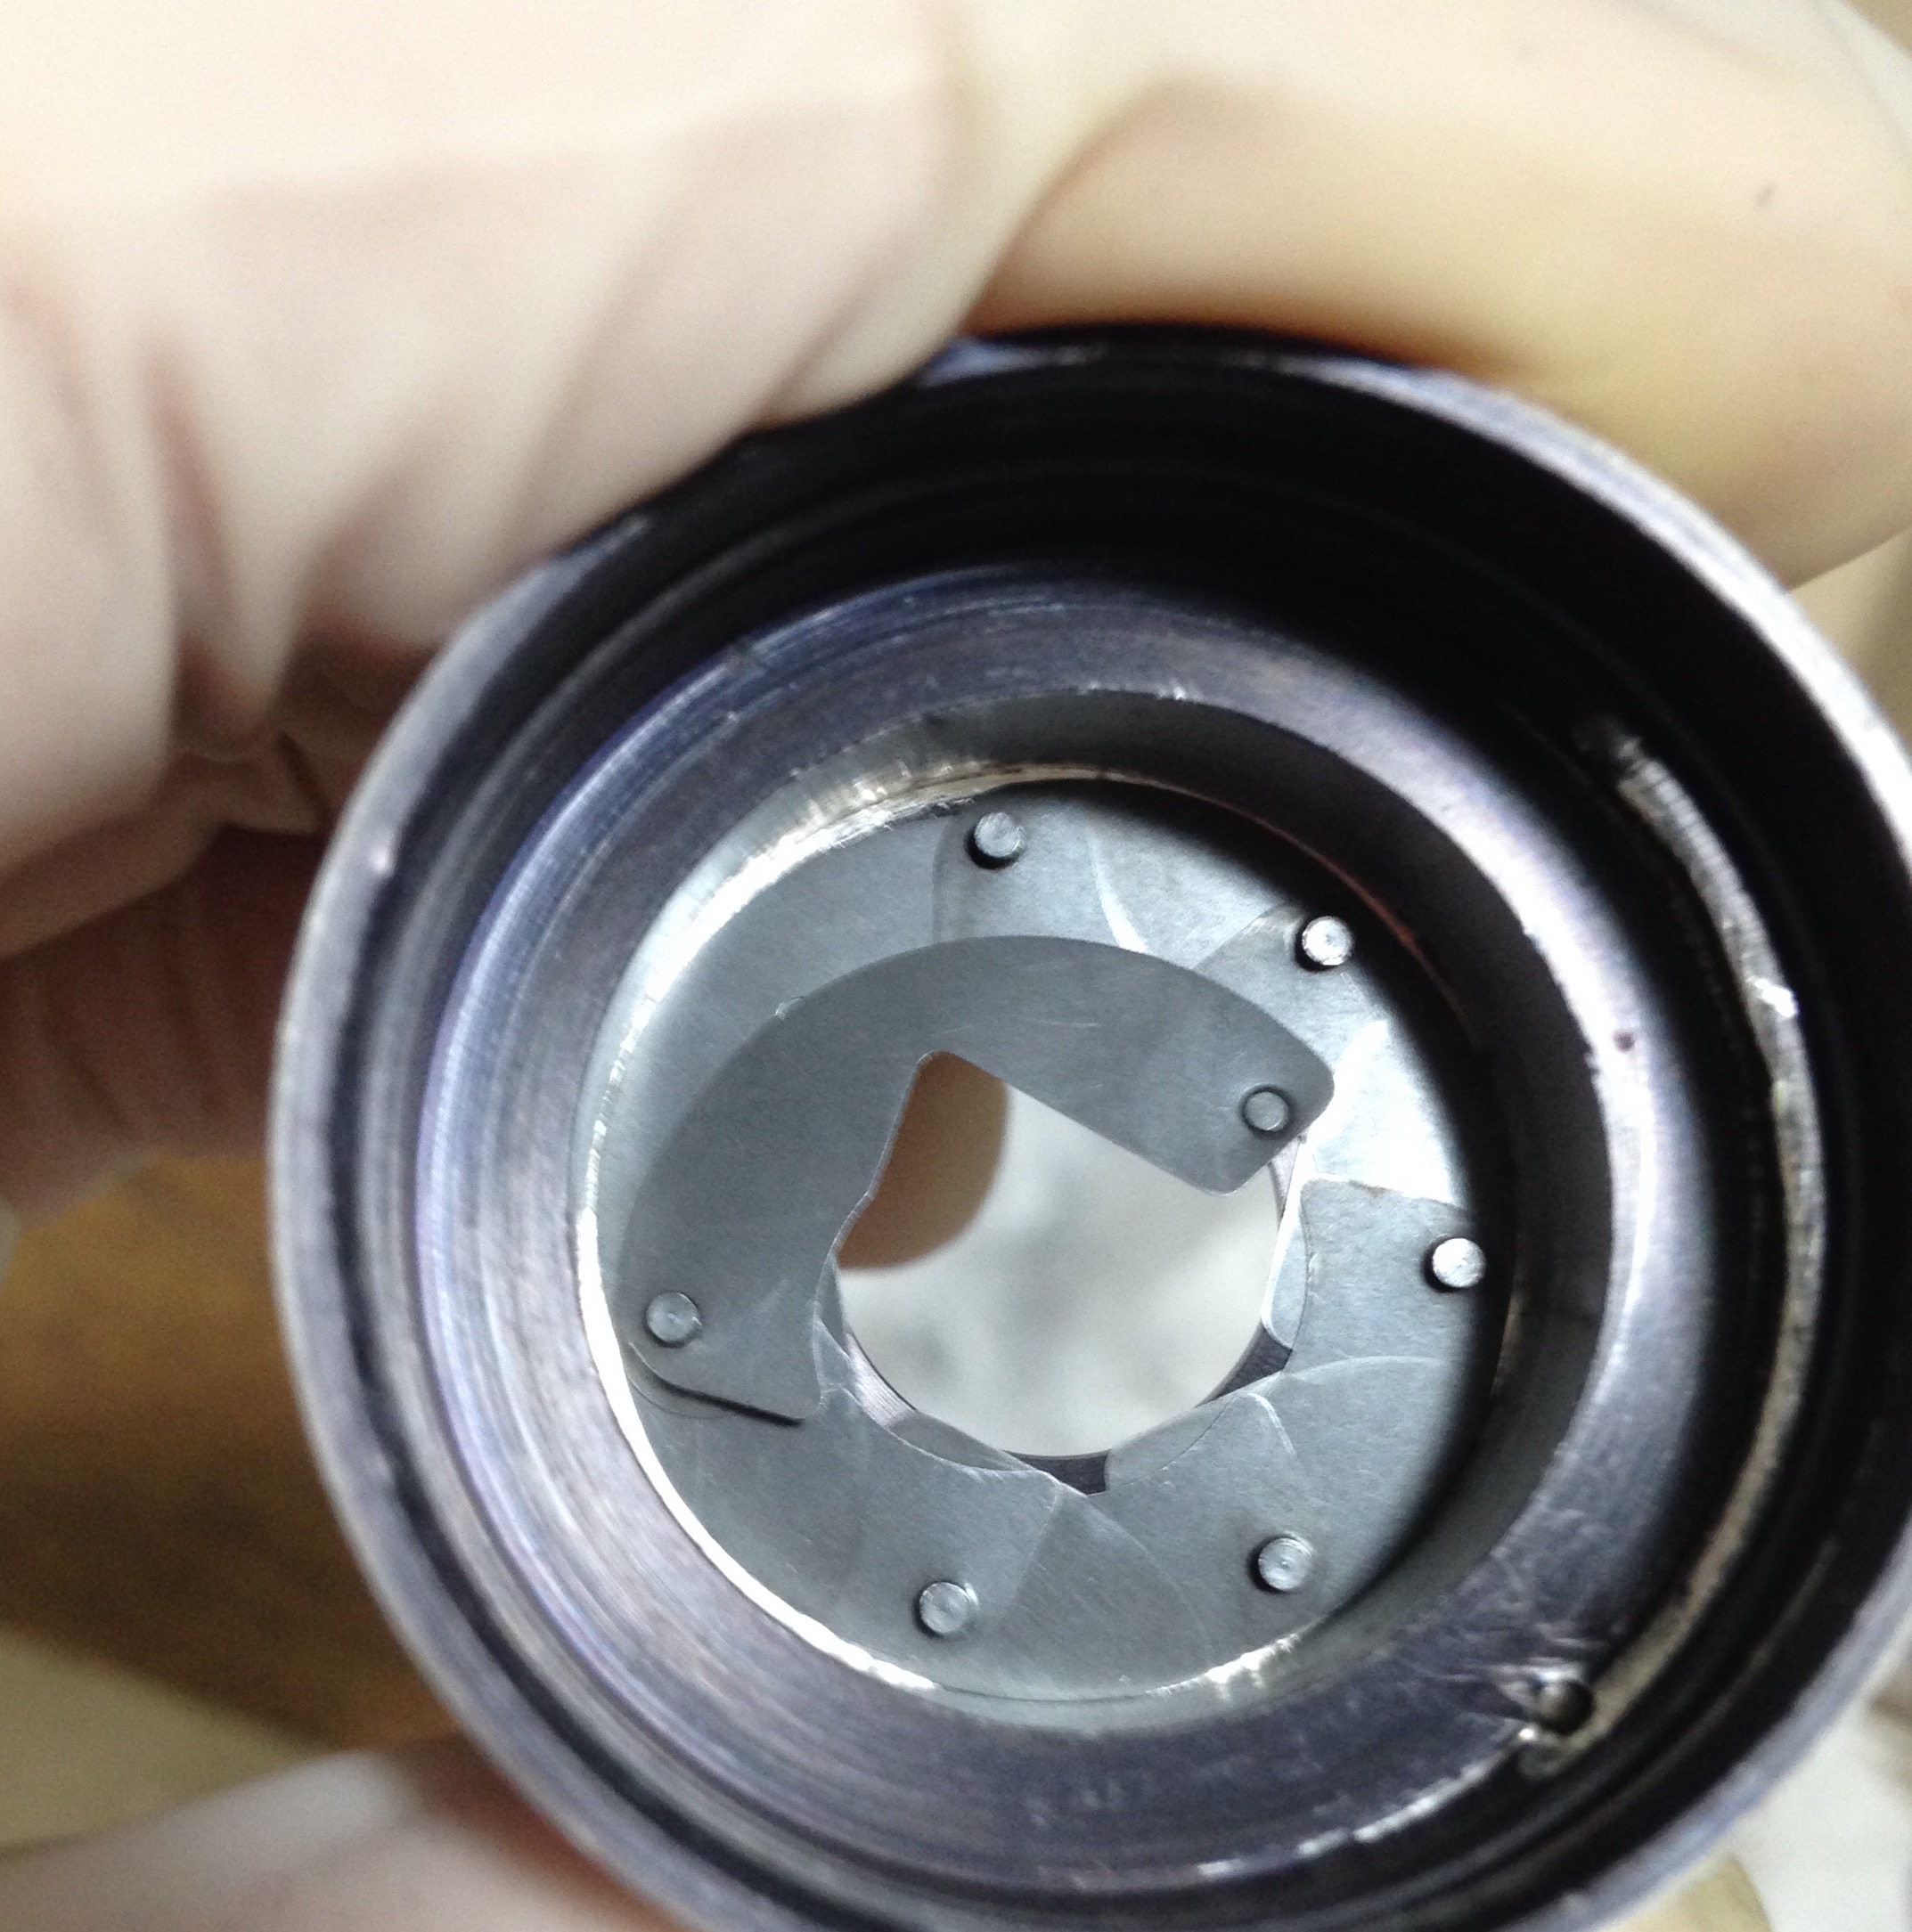
Carefully re-install the rotator plate, be careful about its orientation. Check your notes to see how it should be before putting it back, removing this may disturb the iris blades and you’ll have to put the pesky blades back together again.
When putting it back together, be careful of your tolerances. Always check your notes and you should be fine.
In case you got stuck with the iris you can read my article on working with preset-type irises to help guide you on the whole process. This one is simple and I have worked on more complicated ones that will test your patience.
Modifying for Infinity:
This lens was made in an era where Nikon had just made their first F-mount camera. Many F-mount lenses from the same era will have issues mounting on newer Nikons because the size of the bayonet mount’s throat changed a bit when the F-mount got an AF upgrade. Some older Nikon cameras will not accept some lenses from this era, too. A good example is the Nikkormat line of cameras or at least the mechanical ones, that is. Some people shave-away material from the barrels of their lenses to make them fit but this isn’t what I want because that’s destructive, I will show you a non-destructive way to modify your lens in order for you to mount it with newer Nikons.
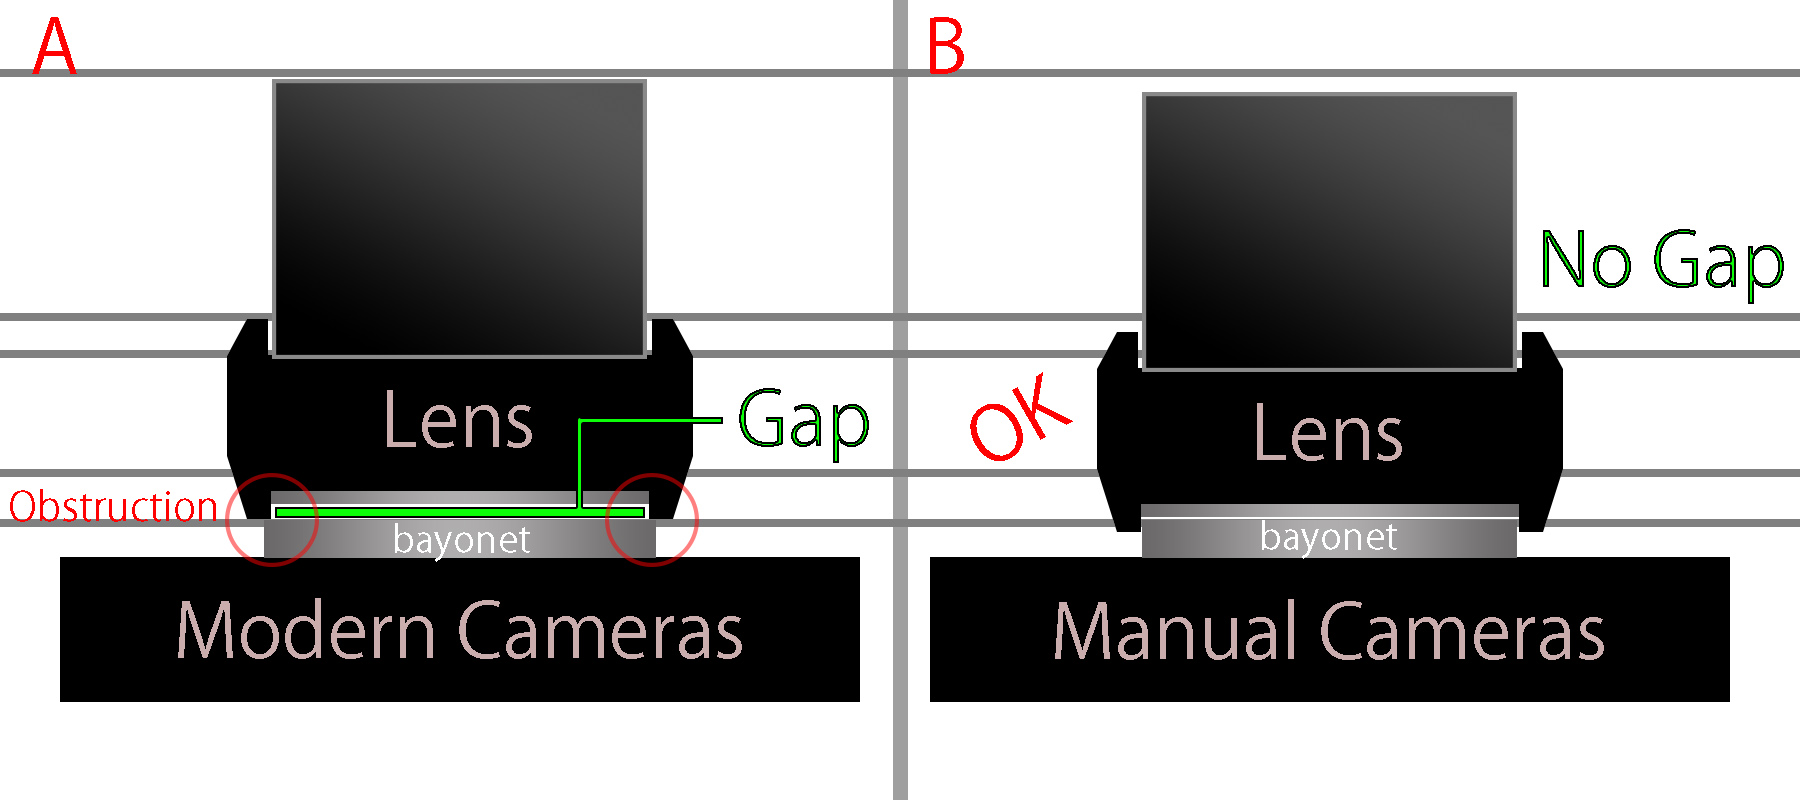
The illustration above will give you an idea of what I am talking about.
On A, the lens is mounted on a newer Nikon. These Nikons have wider outer diameters on their bayonet mounts, it will prevent this lens from mounting properly when it is focused to infinity. The focusing ring’s inner diameter is too narrow to accommodate the bayonet mount’s throat. You’ll successfully mount this to your newer Nikon but you can not focus past the 2-3m mark. Note the green gap in the illustration, we have to bridge the 2mm gap if we want this to focus all the way to infinity when mounted to a newer Nikon.
B shows it mounted on older/manual Nikons such as the Nikon F, Nikon FM, Nikon F3 or even the newer Nikon FM3A. Note that there is no gap between the male and female parts of the bayonet, the lens fits properly.
Note: This lens won’t mount with the mechanical Nikkormats.
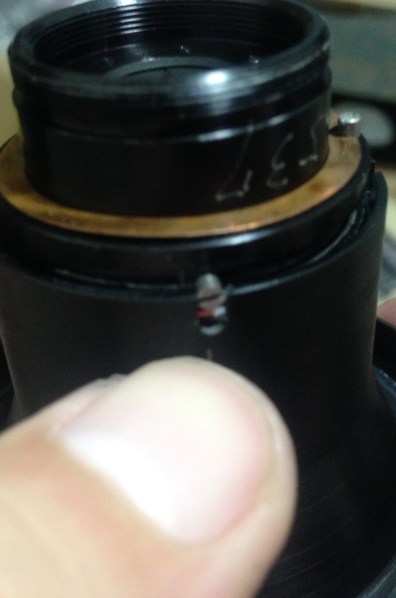
The photo shows the problem when you mount this lens on a modern Nikon body without modifications made. Notice that you cannot focus all the way to infinity.

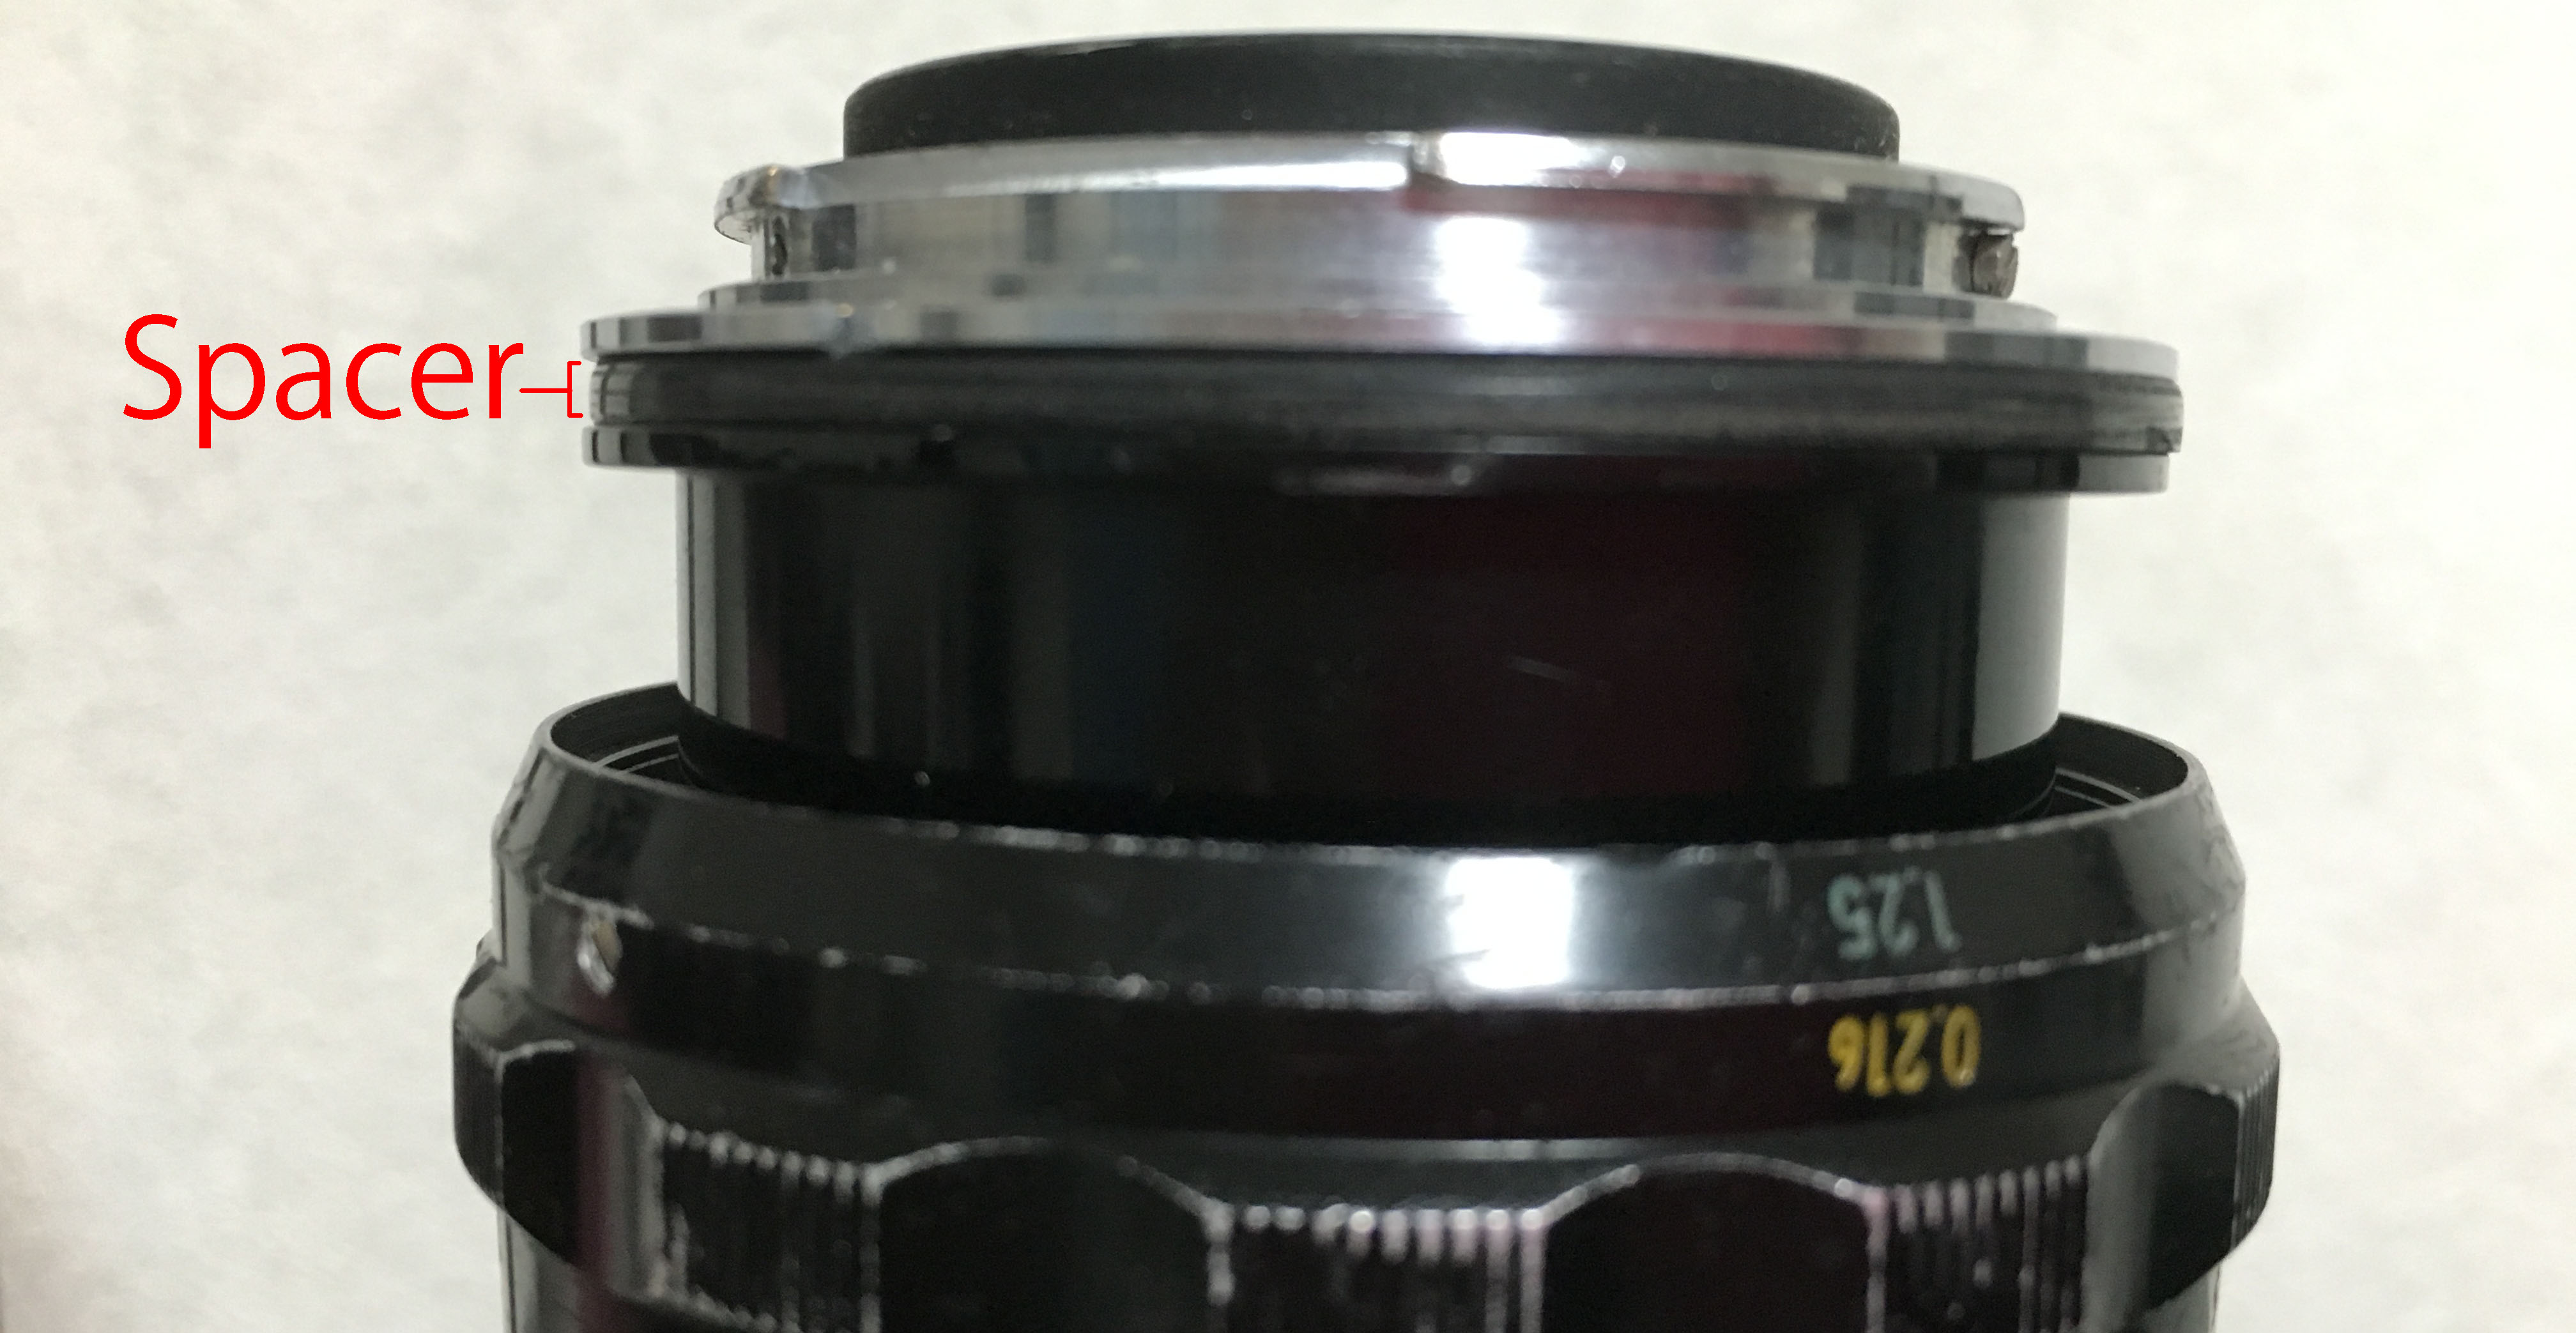
To bridge that gap you’ll need to mill a spacer. I milled one from acrylic as a prototype. This was sufficient, the acrylic spacer is still OK as of this date so I will just leave it there, milling one out of aluminum will take considerable effort.
When milling the spacer, take into account the raised ridge in the bayonet. See the photo to see what I’m talking about. The bayonet mount has a ridge that’s 0.5mm high in its inner diameter. This is probably used to catch stray light from entering the setup.
I drilled the holes using a bigger bit. It will allow me some room to position the spacer. This was only intended to be a prototype/template so I wanted to have the freedom to adjust the spacer’s position.
I had to replace the bayonet screws with longer ones since the whole thing was extended by around 2mm-2.5mm. This was easy for me as I have a box of spare screws.
Here’s the spacer in action. I do not have any intent to mill a new one out of aluminum but I may ask a friend to make one for me in the future since he has the proper machinery.
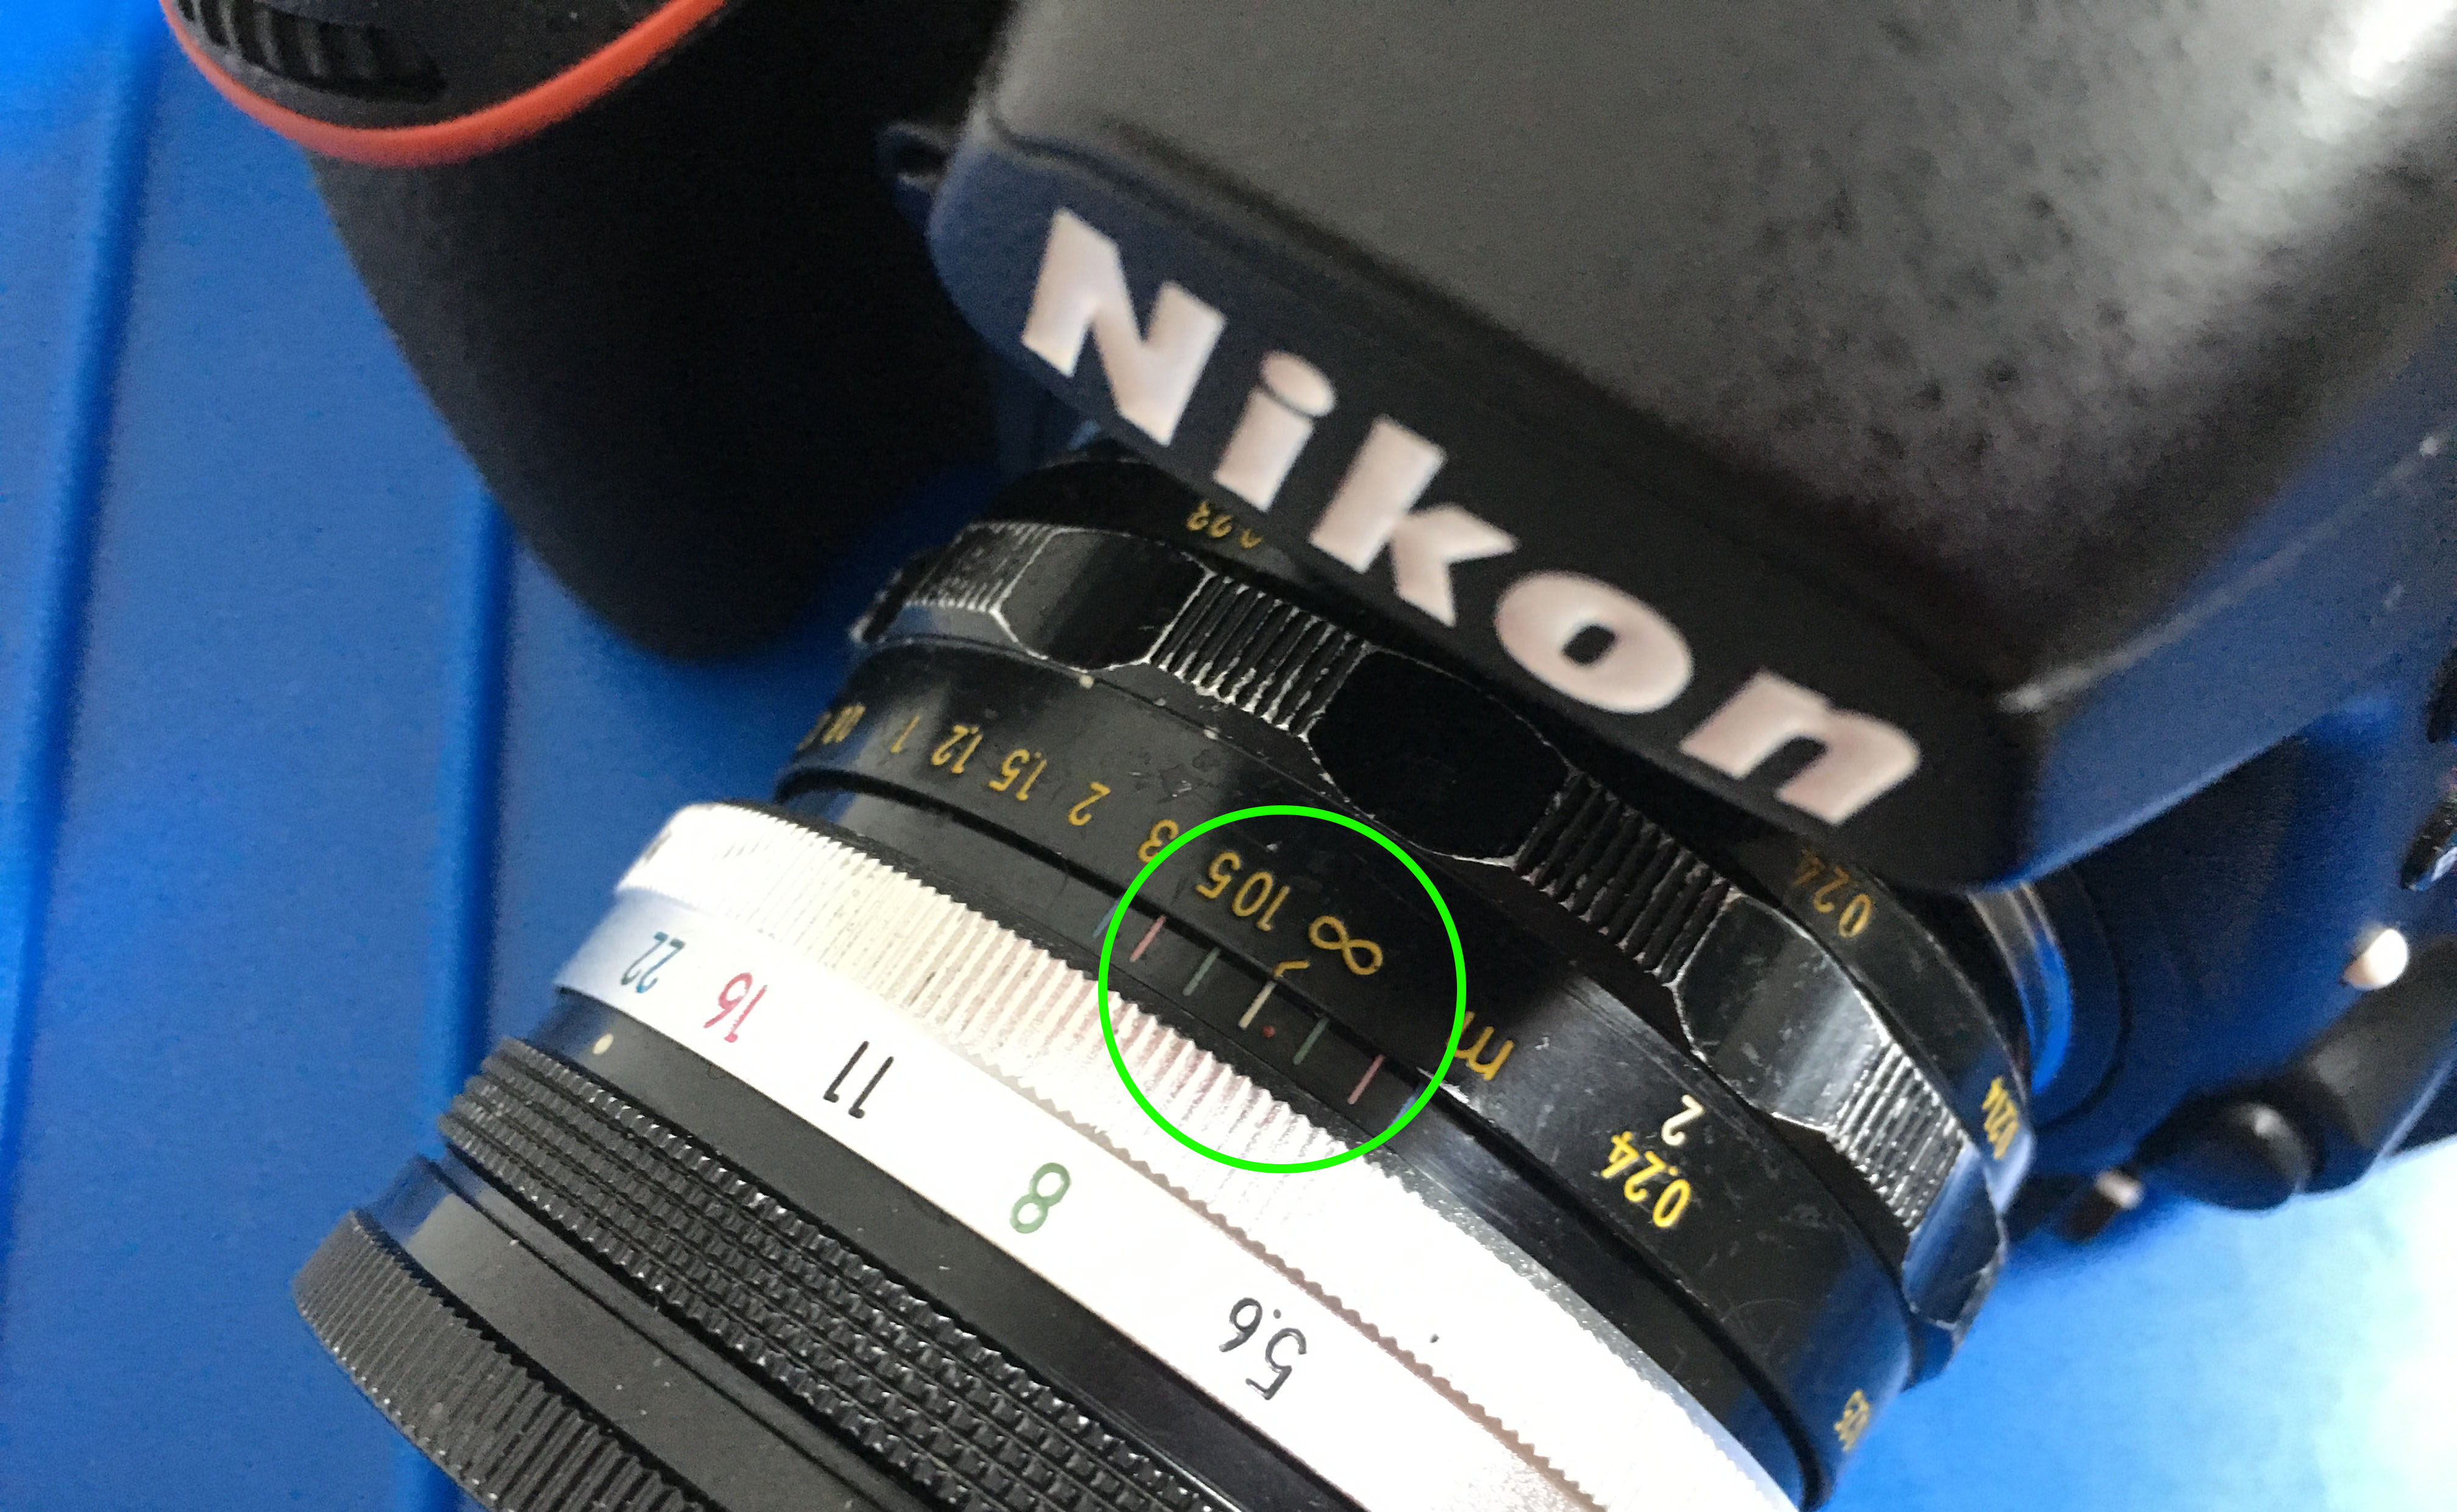
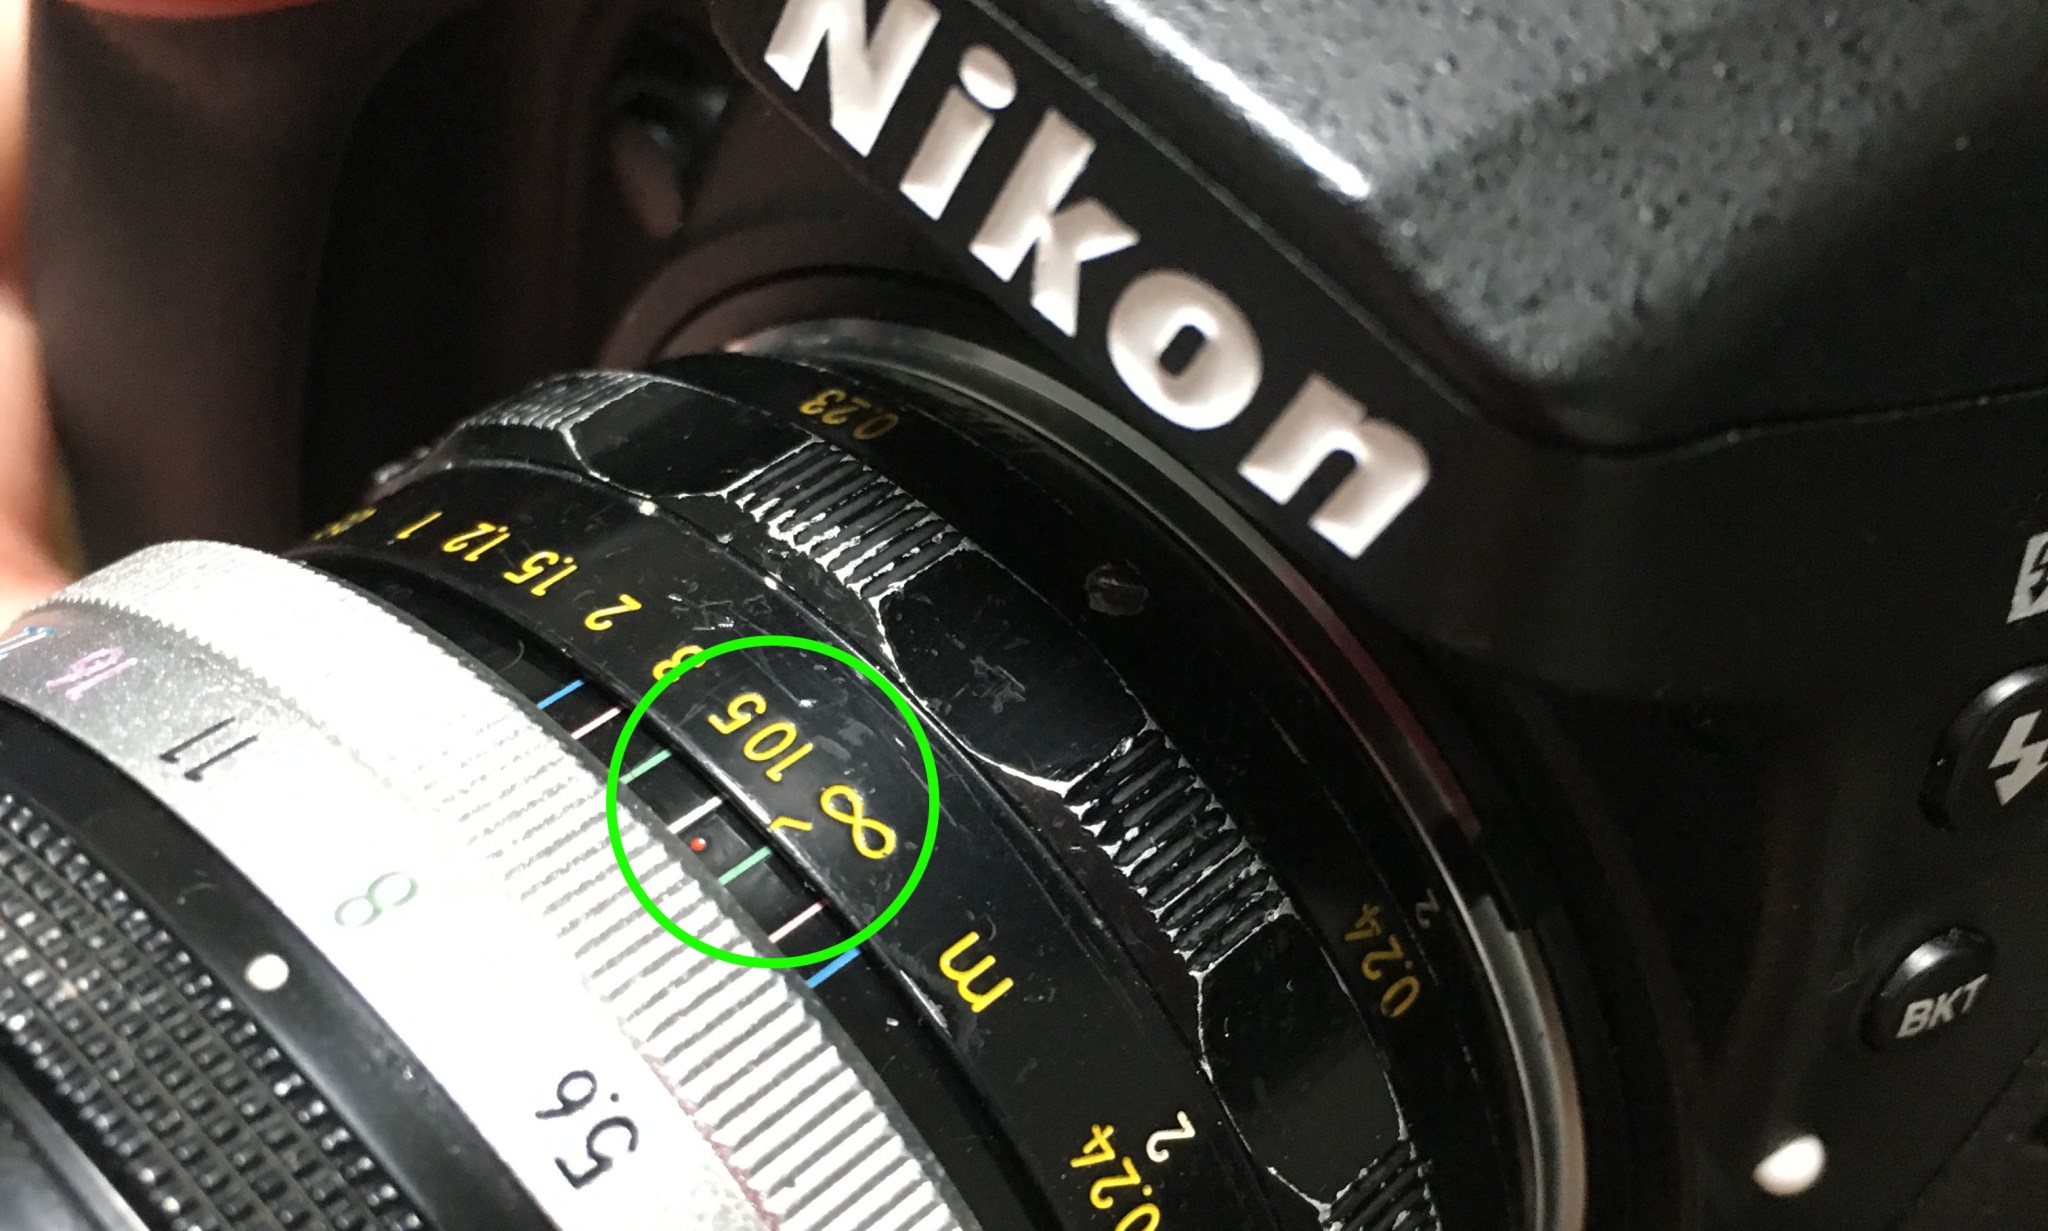
This picture shows that we can rotate the focusing ring to infinity. We still cannot achieve true infinity focus since the optics are still off.
The focusing ring can now be turned to infinity but the optics won’t behave the way that it should because all we did was add a 2mm extension ring. To remedy this, we need to offset the rear elements by moving it around 2mm forward (towards the film plane). It is ideal if we could just move the whole objective as a unit but this will require a lot of modification on the front cup and the base where the objective is secured. I do not want to spend so much time and resources into this so I went with the easiest, most economic way.
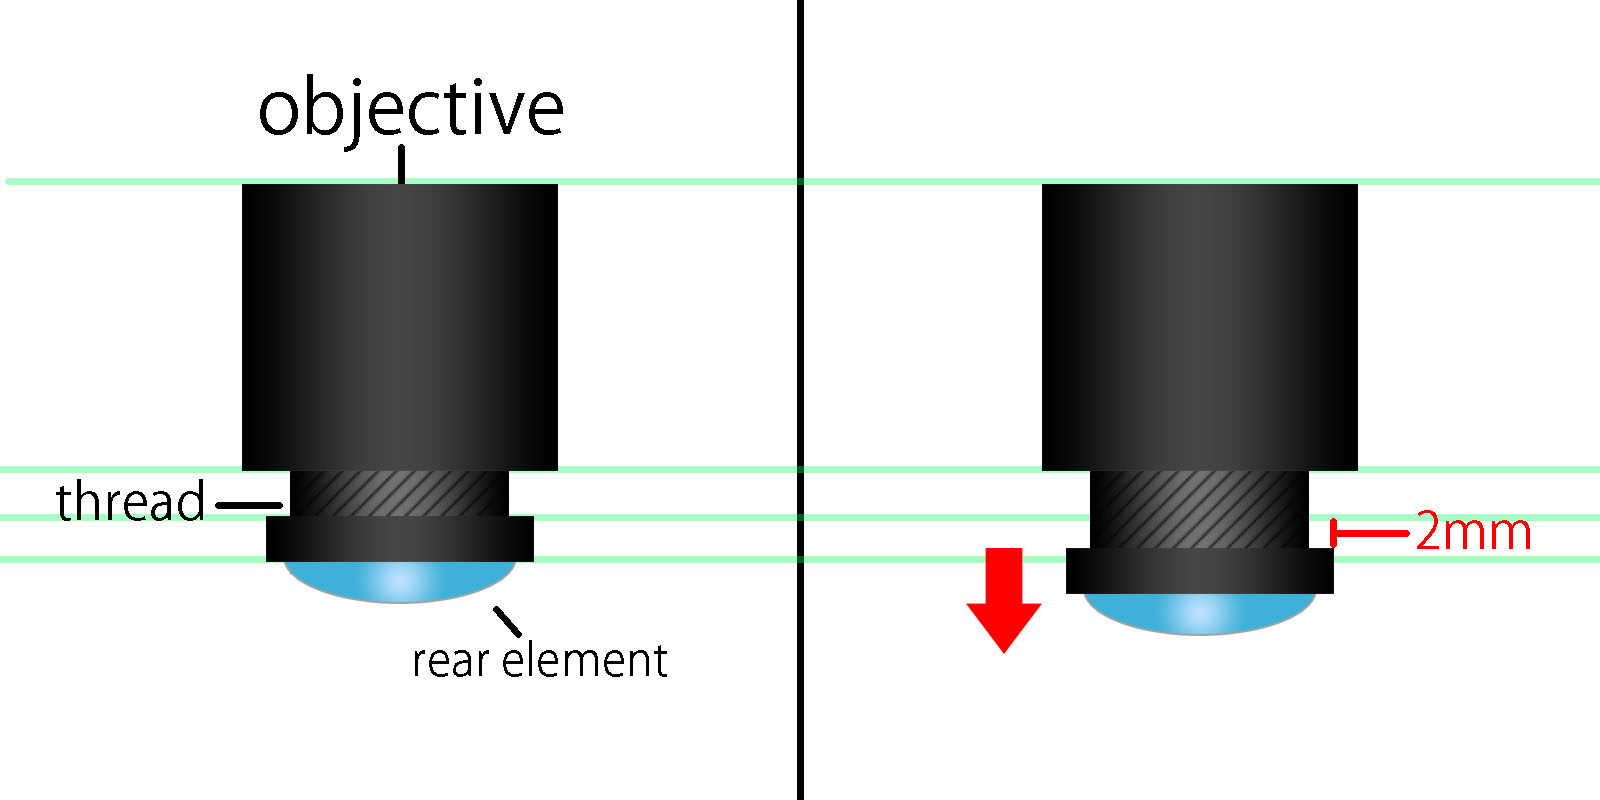
Please take the time to study this illustration.
The one to the left shows the original configuration of the rear element. We moved the whole lens forward by around 2mm so we need to get that 2mm back or our lens will not focus to infinity properly because the optics were not designed to work like this.
The easiest way to do this is to loosen the rear element and move it back by around 2mm, give or take. Mount the bayonet back and test it on a DSLR to check if the focus indicator dot would light up when you focus on a distant object like a building a few kilometers away. Read my old article on how to adjust your lens’ focus to know how to go from here.
Once you got the position right, tighten and secure the rear element’s ring with nail polish on the threads. Never ever get careless and use super glue (cyanoacrylate) on this part or anything that has to do with optics, this will fog the glass and your lens will be useless.
If you want to take it to the next level use a brass, aluminum or teflon shim to secure the rear element firmly. Make sure that you get the correct height and diameter or it will be pointless. Start by getting something that is just a bit taller than what you need then sand or file it down to the correct height. For instances like this, having more material is better then having less. You may use several washers to achieve the desired height. Combining multiple washers may be a smarter option.
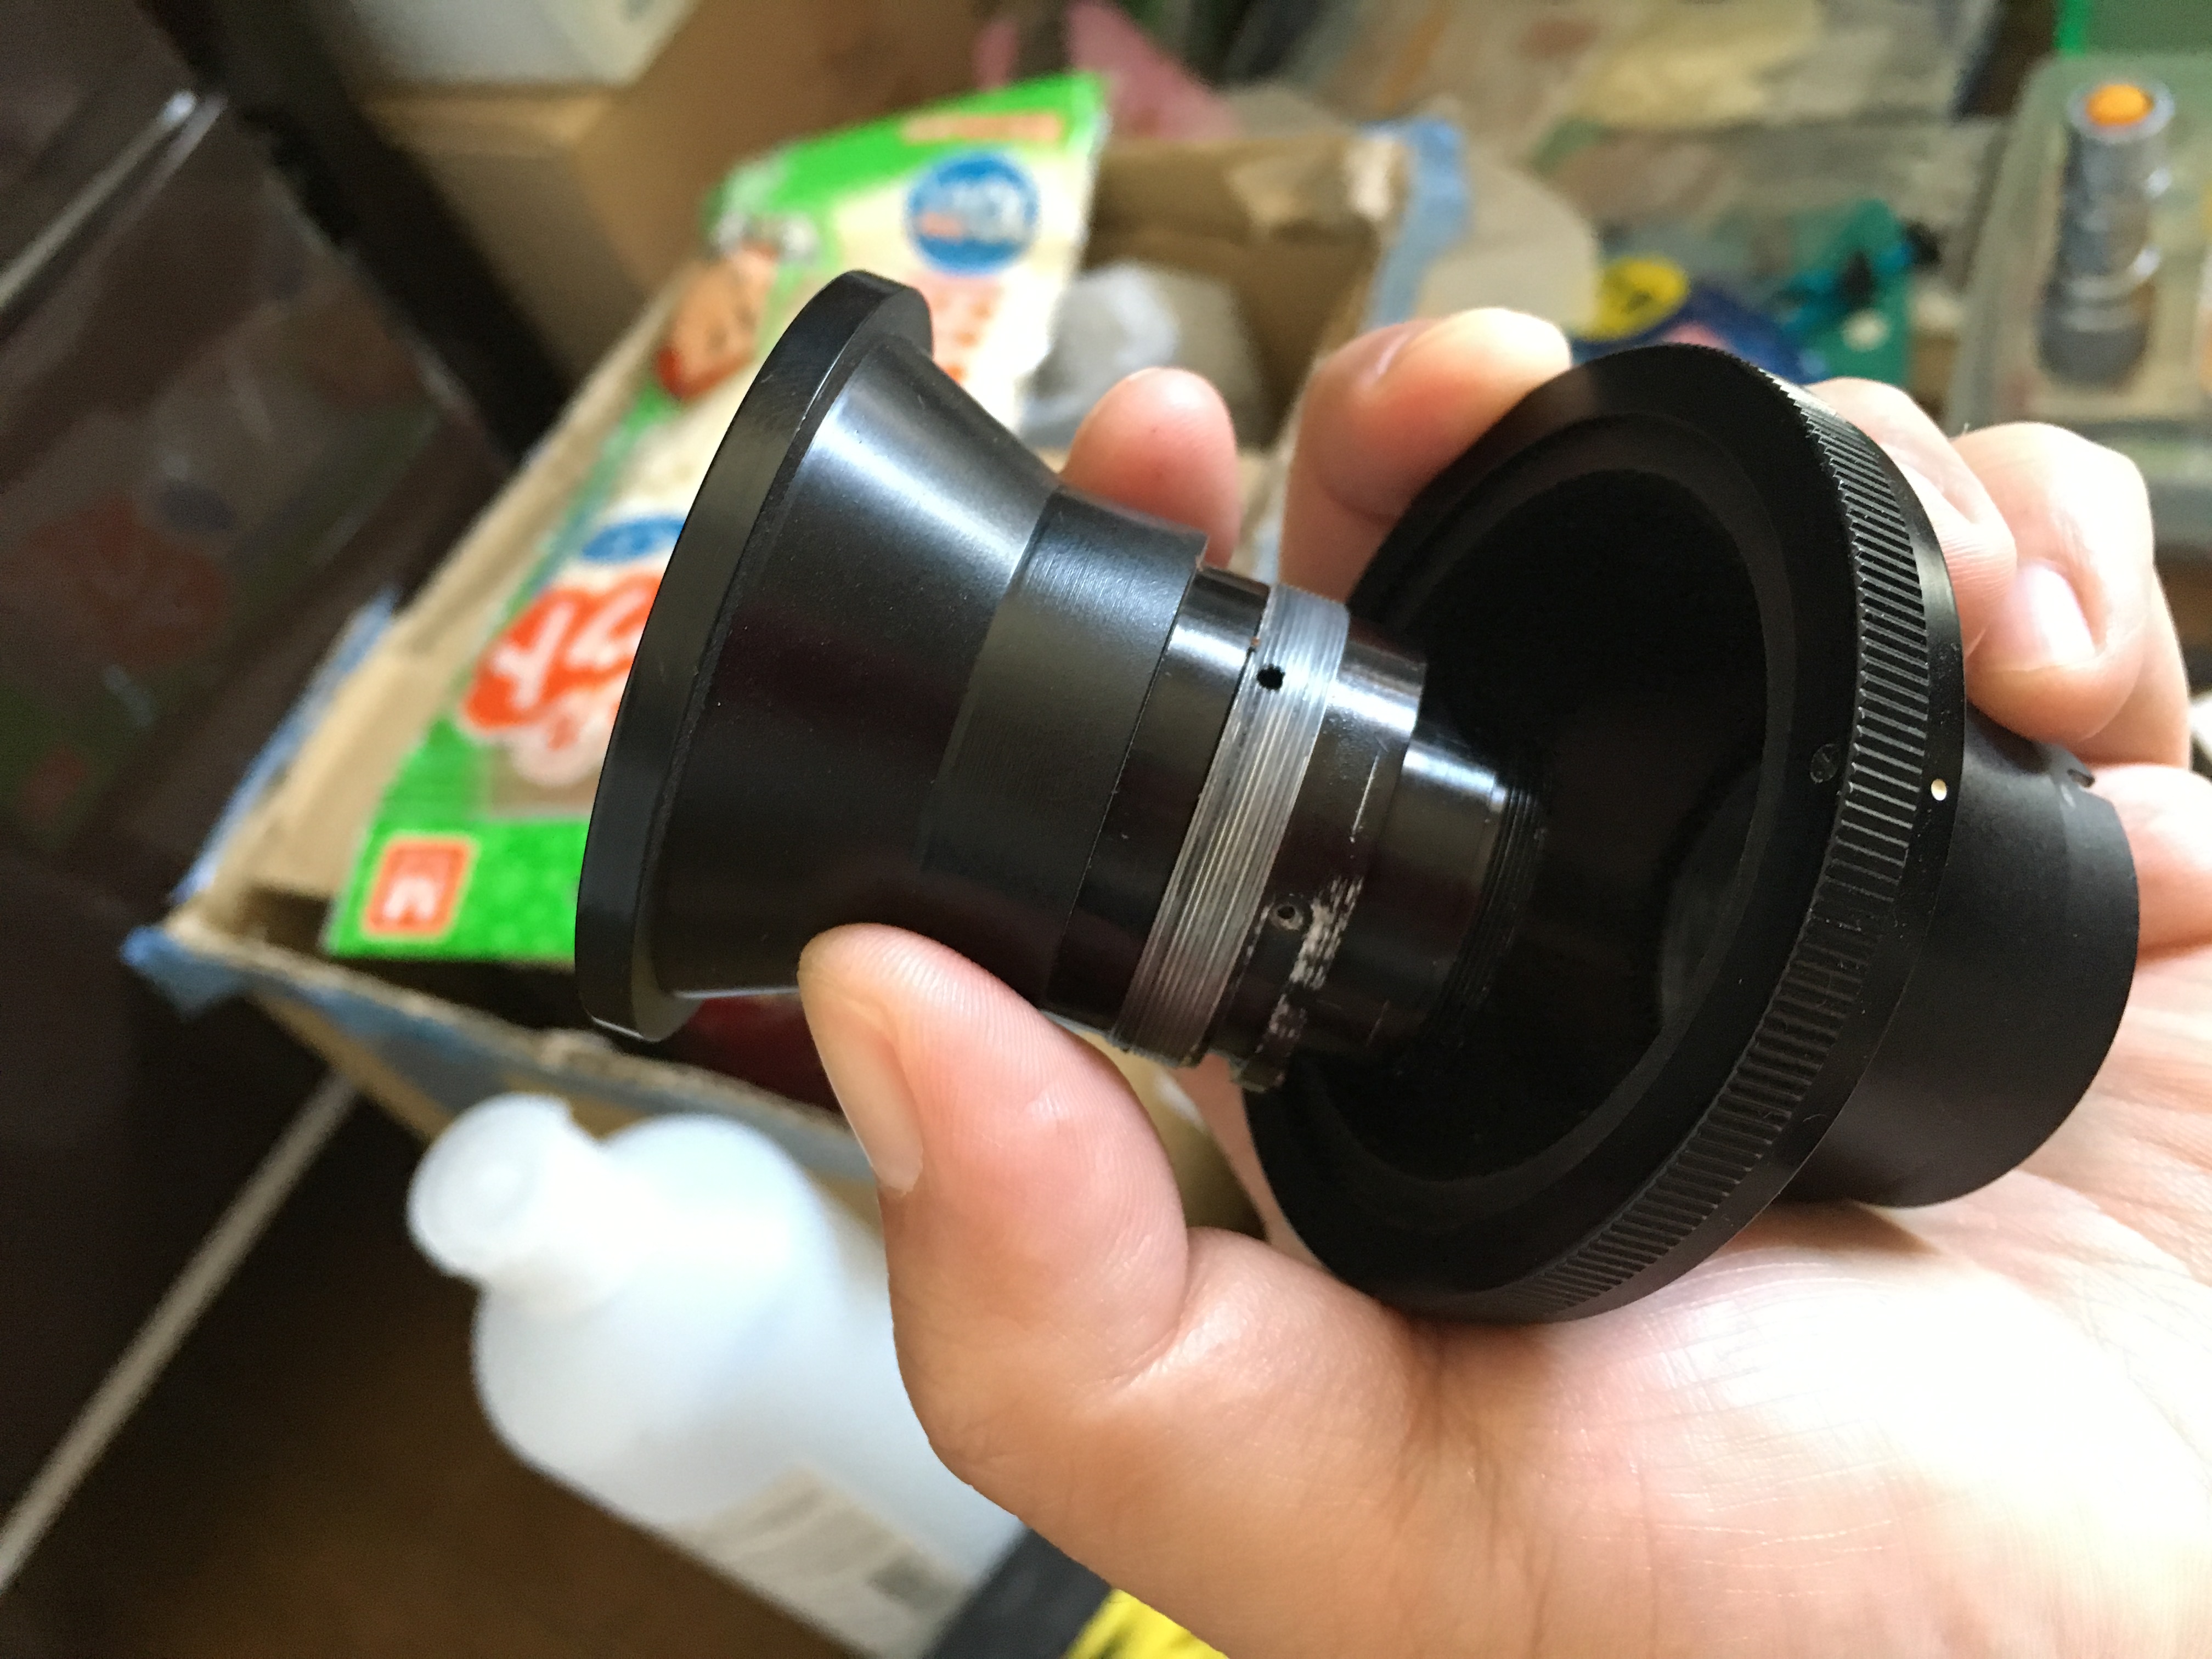
It’s worth mentioning that the bayonet mount can be substituted for the one used in the old M-rings. I got my first Micro-Nikkor 5.5cm f/3.5 with a screw mount instead of the proper F-mount. Somebody went crazy and made this mod. The previous owner probably wanted this so much that he adapted it to work with his system (maybe Pentax). Nobody wanted that lens because of that and it was waiting there on the shelf for the right person, very much like the legend of King Arthur and the sword on the stone.
Some may argue that moving the rear element out-of-position will affect the image quality. That was also my initial thought so I did tests at infinity and 1:1. What I got were sharp images and as far as I can see I found no drastic change in the image quality at all. There’s bound to be some changes since the position of the rear element was modified, that is for sure but whatever effect it has is negligible enough for me not to notice any degradation. Your mileage may vary, I’m not a pixel peeper, I’m more for the overall usability of a lens. Modify your lens at your own risk, I’ll not be held responsible for anything.
You can buy dinky Communist Chinese adapters today for very little money, you can modify them instead and use them exclusively with the mirrorless system of your choice so you won’t have to modify your lens. This is a smart way to ensure that your lens remains “pure” and you don’t have to modify it just to use it with digital cameras. I hope I had that option back then, if I did I would have done that instead.
Conclusion:
I hope you enjoyed this. I tried my best to condense all the information that I have so that I will not have the need to make a 3rd part. This has been fun and I hope that this helped anybody who is curious about this lens. There is not a lot of information about these online and I am confident that this post is the best source available to the general public.
This post is important to the photography community since it discusses and dissects one of the rarest production Nikkors and those who do own one do not usually go out and open theirs up for all to see or modify one to focus to infinity. This article has become a bit technical, I hope that I did not confuse you. If you have any useful inputs you can share them and I will update this article with your contribution.
Thank you very much for following my work. If you liked this article, please share this with your friends at social media. If you really liked my work you can consider supporting this blog, that will help me maintain this and help me continue writing quality, original content for the Nikon community. This blog is a “labor of love” and it’s kept running thanks to your support. Thank you again and see you again next time, Ric.
Help Support this Blog:
Maintaining this blog requires money to operate. If you think that this site has helped you or you want to show your support by helping with the site’s upkeep, you can make a small donation to my paypal.com (richardHaw888@gmail.com). Money is not my prime motivation for this blog and I believe that I have enough to run this but you can help me make this site (and the companion facebook page) grow.
Buy me a roll of film or a burger?
Thank you very much for your continued support!
$2.00
Helping support this site will ensure that this will be kept going as long as I have the time and energy for this. I would appreciate it if you just leave out your name or details like your country’s name or other information so that the donations will totally be anonymous. This is a labor of love and I intend to keep it that way for as long as I can. Ric.

Jun 12, 2016 @ 14:28:47
Very interesting write up and tear down. Excellent modification as well. Lenses are just far more fun when you can actually use them without getting out of your way to do so.
The L shaped aperture blades allowed the diaphragm opening to remain rounded at all apertures. This certainly is true for the preset lenses Nikon released
Jun 12, 2016 @ 14:58:05
Thanks! the L-shaped aperture also gives me star-shaped bokeh-balls. Some Leica lenses have more than 10 blades if I am not mistaken. That must be frustrating to overhaul.