
Hello, everybody! I hope that all is well with you. It is starting to get really hot and balmy here in Tokyo as summer approaches. This means that the air will be humid again and we should pay more attention on keeping our glass fungus free!
Today, I am going to show you how to fabricate your own lens spanner with the use of some plastic scraps and a little bit of patience!
 There are times when you need to access a retention ring or lens element that is placed too deep inside a barrel or tube and using the lens opener and compass is just out of the question because it may damage the surface of the barrel or it simply just won’t fit ot reach the slots that you want to access.
The picture above shows such a situation. The retention ring that I wanted to access is 3cm into the barrel. Using a lens opener is impossible as this is just too deep. Some people will use a screw driver and try to brute force their way into this but that just won’t work and is going to be dangerous as slipping will scratch the glass, turning your lens into junk.
This is a job for DIY LENS SPANNER!!!
 First, measure the inner diameter of the tube using a calliper. I am using a cheap one made of plastic as you can see from the picture.
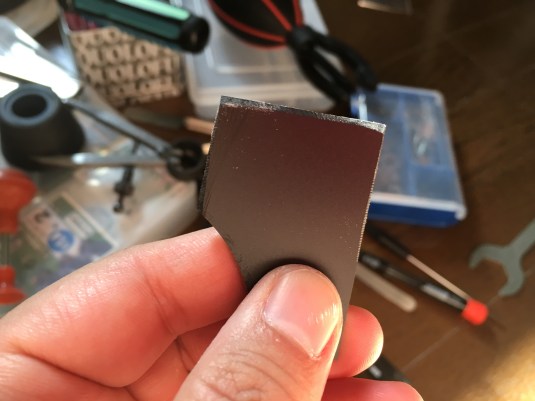 Next, find a piece of scrap acrylic, plexiglass or any hard plastic material and trim it to the same measurement that you got from the previous step. Using plastics is important as it is soft and will therefor minimise the risk of scratching anything. If it indeed scratched your surface then it would not be as bad as if a metal object had scraped it.
 Sand, file or grind the edge until you get a nice wedge like what I have in the picture above.
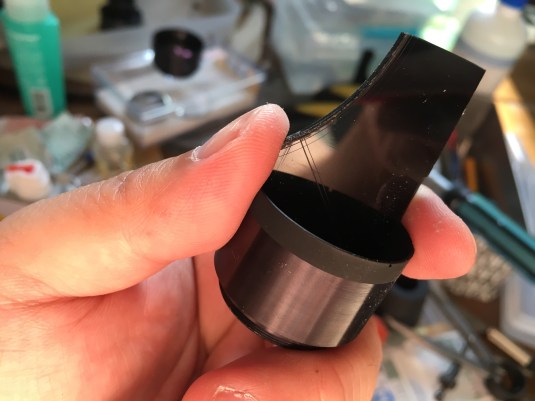 Insert the wedge into the barrel and see if you have a nice fit. It may take several attempts before you get it to fit properly. The edges of the wedge should fit nicely into the slots of whatever you want to remove. If not, try again until it fits.
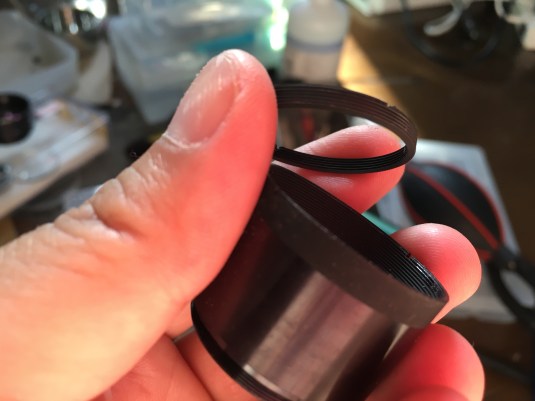 There you go. The retention ring was safely removed without damaging the inner surface of the tube!
I always keep these DIY lens spanners after I use them. There are plenty of instances when the one that I just made also fits the lens that I am going to service a week after. Besides, it is such a waste to throw something like this away considering the effort that you have just spent fabricating it.
The lesson that I want to impart is to always use the correct tool even if you need to make one from scratch. Using the wrong tools will just scar the surface of your lens and create more problems along the way.
That’s it for now. I hope that you enjoyed this post and please tell me what you think. If you liked this post and would like to see more things like this then I could probably think of something similar in the future.
Thank you very much for the support that you are giving to my blog. Regards, Ric.
Help Support this Blog:
Maintaining this blog requires money to operate. If you think that this site has helped you or you want to show your support by helping with the upkeep of this site, you can simple make a small donation to my paypal.com account (richardHaw888@gmail.com). Money is not my prime motivation for this blog and I believe that I have enough to run this but you can help me make this site (and the companion facebook page) grow.
Helping support this site will ensure that this will be kept going as long as I have the time and energy for this. I would appreciate it if you just leave out your name or details like your country and other information so that the donations will totally be anonymous it is at all possible. This is a labor of love and I intend to keep it that way for as long as I can. Ric.

Jul 23, 2016 @ 09:43:36
You show a pic measuring the inside of the lens using a caliper, couldn’t you file it down and use it to turn the ring on the lens? Since it is adjustable you could use it on different lenses.
Jul 23, 2016 @ 13:38:12
Hello, Owen. The calliper’s bits are not long enough. That is what many people actually do as their lens spanner. Here in Japan, the price of a lens spanner is almost the same as a good quality calliper so I just got myself the spanner instead. Ric.