
Hello, everybody! Lately, there has been a shortage of cheaper lenses at the junk shops in Tokyo so I haven’t added anything new into my lens collection for a couple of weeks now. There are many factors that contribute to this and one of them is the swarm of mainland Chinese tourists swarming here to shop. It was different several years back but what can I do? It’s an open market and it is everybody’s right to shop. Luckily, I can still find a few good deals like the lens that we are going to talk about today.
Introduction:
We are going to discuss a very important lens in Nikon’s lens lineup during the 1970s and that lens is the Nikkor 200mm f/4 K/Ai lens! The K (New-Nikkor) and Ai versions are near-identical so you can use this guide for both lenses. I have overhauled both versions and I cannot find much difference between these versions. This was a popular lens for people who like to take a long lens along with them during hiking trips because of the size and it has a maximum speed of f/4 which is kind of decent for use in sunny days but isn’t useful when you don’t have a tripod during a cloudy day because you’ll need to shoot this using a tripod to prevent blurred photos. Landscape and bird photographers may appreciate it for its size and specs and it’s a versatile lens for portraiture, too. When shooting under a controlled environment such as a studio and using strobes, the rather slow f/4 maximum aperture won’t matter because you will be be shooting this lens stopped-down anyway. It is great for full-body portraiture because the compression a 200mm lens can give is going to make people look taller and faces look thinner.

The lens feels great in your hands, it’s dense and there’s certainly a feeling of quality and precision when you use it. This lens was built during a time when Nikkors were made to last forever. This also makes it slightly-heavy and you’ll wish that it has a tripod foot, this lens can make any setup front-heavy so you don’t want to handle this carelessly. If you’re going to use this with modern Nikon cameras then make sure that you get one that comes with an Ai-ring for the New-Nikkor version or else you will damage your camera when it is mounted by force. Mine has the Ai-ring and I am glad that I got it.
The lens barrel is really compact compared to its predecessor. The lens that it replaced is the Nikkor-Q 200mm f/4 and if you have been following my blog you will remember that I made a write-up of that lens a couple of months ago here. I haven’t shot with these two versions much so I cannot comment much about how different their optics perform and what has changed in this new lens formula but I willll show you plenty of pictures so you can judge these 2 different lens formulas yourself.

Here is my collection of Nikon’s 200/4 primes. All of them were bought as junks and were restored during my spare time. These comprise all of the major cosmetic variants for this lens line and we will have a guide for each of these one of these days. I also have several sub-variants that are not in the picture.

Here is the lens mounted on my Nikon FM (“Ferdie“). It makes for a small setup that’s nice for shooting all-day. In fact, I usually have this setup along with my Nikon F3 with a wide lens mounted to it. It balances really well even on smaller cameras like this.

The reason why this lens line was not continued after the Ai-S version is probably due to the advances made in optics engineering. This enabled manufacturers to design smaller zoom lenses with comparable performance to prime lenses. The zooms also tend to have a more useful range of 70-300mm and this alone will make you decide against this using this lens because you can now bring just one lens instead of several lenses to cover that focal range. You can say that this lens family is now obsolete for practical use.
From left to right (chronological) you have:
- Nikkor-Q 20cm f/4 bis – This looks similar to its successor but there are a few minor differences between them in terms of construction. The later version was made to be more durable and short cuts in production were also implemented to make this lens faster/cheaper to make without compromising quality. The very-first version of this variant doesn’t have a silver cap at the hood and is considered rare because its production run is very short and only less than 800 samples were produced.
- Nikkor-Q 20cm f/4 – While nothing much has changed from the previous one there’s numerous improvements made in productions to cut corners and also to make the lens more durable. Note that it’s slightly slimmer than it’s predecessor so their parts are NOT interchangeable in most cases. I wrote an article for that lens here.
- Nikkor-Q 200mm f/4 – This is the last version of the Nikkor-Q variants. The minimum focusing distance was modified to 2m, handling/construction is vastly improved, the optics were tweaked a bit to offer better sharpness and the C version is probably the sharpest in this range because it uses Nikon’s multilayered coating. We have a guide for this lens and I advise that you also read it, here’s the link.
- Nikkor 200mm f/4K/Ai – These variants represent a big departure from the previous ones because the optics are totally different. They’re also smaller/lighter, for many people this change alone is a big deal when deciding which lens goes into the bag or stays in the dry box. The K (New-Nikkor) and Ai versions are almost-identical so I’ve bunched them together in one group.
- Nikkor 200mm f/4 Ai-S – This is the final version in the long-lived 200/4 lens family. Optically, it’s the same as the previous one above but its barrel construction is very different. The coatings are probably different on the later ones but I have no data for this. Handling was improved a bit and cost-cutting decisions are obvious in the construction, very typical of Ai-S lenses (scotch tape,anyone?).

The image above shows 3 of the 4 major versions of this lens family. Notice how the lens barrel has changed from really big to something a little bit more reasonable. You can see how Nikon changes the design of their Nikkors to fit into the aesthetics of the time.
The early versions are big lenses. They were all well-regarded and historically important to photography because they’re the first lenses in this class. The later versions of this lens family are noticeably more compact and the optics were also updated to the standards of their time as well. Finally, the last version is made even smaller but the optics remained mostly the same. The barrel was redesigned to be the Ai-S compatible. Performance wise, the last 2 versions perform very similar and the earlier ones are probably the weakest of the group (but still VERY sharp) due to the older technology of the coatings and outdated optics. The earlier ones also tend to render on the cooler side so your pictures will show a slight blue tint. It was done because those lenses were calculated to perform best with monochrome film which was the standard back in the day.
The old lens formula is a 4-elements-in-3-groups design while this one is a 5-elements-in-5 groups design. I suspect that the addition of another element is used to correct some of the older design’s flaws and also enable it to be more compact. I am not expert in optical engineering so please don’t take what I just said as fact.
I took the following sets of sample pictures using a Nikon Df and a Nikon F2 loaded with Fujifilm Industrial 400 film so we can examine how the lens performs with both film and digital. It’s important to see how a lens performs using both media because they render differently. Let’s see what are the stengths and weaknesses of this lens so we’ll know how to use it more effectively and avoid its weaknesses so we won’t be disappointed with it.

Vignetting isn’t going to be a problem with this lens. It’s not absent but it certainly won’t be obvious in your pictures so long as you’re not shooting a scene with the sky or a wall that’s evenly-lit and even if you’re doing both, I’m sure that you won’t notice it.

The lens is sharp wide-open and the quality of the bokeh is rather smooth. The resolution is adequate wide-open but stopping it down to f/5.6 will improve it significantly. Overall, the rendering is very natural and the pictures have a strong 3-D feel to them.

If you know how to compose your shots while using a telephoto lens then you can use its ability to compress your scene for telling stories. If I were directing, I would use this lens to help establish a shot of the hero in relation with his peers. The frame compression will help me make the characters at my hero’s back look just as big as my hero to show their importance to the story. If the other characters were insignificant then I would shoot the scene with a wider lens to make them appear smaller. Carefully planning your shots also involves what focal length you need to help you get your story across.

There will be times when you will notice that the bokeh can look a bit “busy” but this has more to do with the lens being “merely” an f/4 than anything else. Despite this, the bokeh is still pleasing and the subject separation qualities of this focal length is great so long as you know how to position your subjects and how to frame them properly.

Chromatic aberration is probably the weakness of this lens family from the beginning. It is obvious in this picture at the areas where the transition from what’s focused to what’s blurred is happening. This all goes away by f/5.6 so keep this in mind when shooting this lens wide-open. For some reason, I hated how the bokeh looks in this picture despite the bokeh looking decent in some of my other pictures. This is probably just a bad scene for this kind of photo. Like I always say, foliage is great for testing out a lens’ bokeh quality.


(Click to enlarge)
Here are some more pictures that I shot that morning. Please click on the thumbnails to see them bigger and see what works with this lens and what won’t. I love how it renders and the bokeh is usually pretty-good except on certain instances where the background is too cluttered with details like the one we saw before. Most, if not all of the pictures were taken wide-open and you can see a high-level of detail. I wouldn’t call this lens soft at all and I bet that this was calculated to yield sharp photos at f/4 because stopping-down the lens is something that you don’t want to do because you want to use it with a fast shutter speed that’s no slower than 1/250s or use a faster film or ISO value to compensate for the loss-of-speed when stopping the lens down in available light. I wished I brought a strobe with me and that will surely make things look interesting.
The following pictures were shot using film and you will notice a huge difference when it comes to the character of the photos. For some weird reason, the chromatic aberration is now absent in my samples. I doubt that using film has anything to do with it but that isn’t going to explain anything for us so let’s just take it as it is.

For stage photography in available light, this lens is probably not going to be the best for that purpose because f/4 will limit choice of shutter speeds unless you use a faster film. If I knew that the sun won’t be illuminating the stage that day then I would’ve used Fujifilm Venus 800 instead. Despite that, you can see that this lens performed really well and you can judge it from the details of her gown. You can see the intricate folds in faithful detail. Her face wasn’t focused here so please pardon me for that.

I think I shot this at f/5.6 or f/8 because the light allowed me to do so. See how beautiful it renders the portrait of this gentleman and you can literally count the strands of his hair.I like how the skin was rendered beautifully by the lens and film that I used.

This is kind of pushing it because I remember taking this with a shutter speed that I was not comfortable using but it worked. This should show you how this lens performs when the subject is close to the lens’ minimum focusing distance. I was expecting this lens to be a better performer at further distances than at closer distances but I was surprised that it performed equally well at both ends. I don’t have any pictures that were shot at infinify, I will bet that it will also look just as good. Going back to the girl, pay attention to her tiara and see how beautiful the beads look. Her skin was also captured in a very nice way and the embroidered collar looks sharp eventhough it’s situated at the corner of the frame. I am impressed with this lens and the value it brings because it’s cheap these days.


(Click to enlage)
Here’s the rest of the set that I took using Fujifilm Industrial 400. Some of the pictures are not perfectly in-focus because it was difficult to focus this lens since I foolishly applied a thicker type of grease when I overhauled it so it was difficult to turn it. The focus throw of this lens is rather long but it’s also a long lens so that’s expected. The pictures look nice and there’s certainly a “vintage-look” to them. This may probably be caused by the fewer lens elements incorporated to the design compared to modern optics. Despite the use of less glass to correct for optical flaws, the lens is well-corrected when shot with film. Like what I said before, I cannot explain why the pictures that were shot using film don’t have any signs of chromatic abberation compared to the ones I took with digital.
But wait, there’s more! As a bonus, I’ll show you a set that I took using Fujifilm Industrial 100! Let’s check the pictures so we can learn more about how this lens performs.

Here’s what I assume would be one of the uses of this lens. Bird photographers may find f/4 to be rather slow and the DOF is too deep for precise focusing but this lens is so small and light that some people won’t mind and use the lens to take bird photos. We can now see a hint of chromatic abberation at the bird’s right leg area. This is the worst that I can produce it. I think I now know why chromatic aberration is absent on most of my photos that were shot using film, it’s probably due to how a film renders and it cancels-out any traces of it with their color cast. Some of Fujifilm’s film stocks have a greenish or purple (magenta) hue to them and that’s probably negating the effects of chromatic aberration. Digital renders “too clean” so we get “purer” results if we shot RAW and didn’t do much post-processing work to the pictures. We learn something everyday, don’t we?

I took this wide-open and I like how her hair was rendered. The curls are all captured in great detail and the bokeh looks great. I love how the contrast is adequate wide-open but not too much as to make it look “cartoonish”. This will be helpful when taking portraits of older people so you won’t see every wrinkle stand-out and make your model look older. I also love how natural her skin tones look here but that has more to do with the film.

I am not sure if she’s really Japanese or not. Lately, there’s a swarm of mainlanders from China and they like to dress in traditional Japanese attire. Politics aside, this is how much you can blur your background if you position your subject properly. You can even make it look softer if you position your subject closer to you than what I have here.

Not quite taken at infinity but at least this was taken a bit further than what I have been showing you. I think I took this about 40m away from me. It’s a nice picture and there’s no sign of exaggerated distortion in this picture. Longer lenses tend to exhibit some kind of pin-cushion distortion but we don’t see it here. I will also add that prime lenses tend to produce less distortion than zooms because they’re simpler optically. Distortion is “fixed” by the addition of lens elements to counter the distortion produced by the other elements before it. This is one of the reasons why recently-designed lenses have so many elements compared to older lenses and that’s because modern optics are too well-corrected so they will exhibit less distortion and higher MTF chart ratings. This is a “necessary evil” if you ask an optics engineer but this also takes away “character” from a lens’ rendering since glass acts like a filter and it “filters” the light before reaching your sensor or film.


(Click to enlarge)
Here are some more pictures that I took using Fujifilm Industrial 100. Notice that the shot I took with the bird has nice-looking bokeh despite having foliage at the background. The picture I took several pages up with the funky bokeh is probably just a result of a bad mix of variables to it rendered poorly. I missed my focus on the picture with the chef because he took a step back to avoid the boiling oil so the wok is in-focus. This just shows that the 200mm focal length is still useful for environmental portraits like this. If I took this using a wider lens then the wok will be much-bigger and take away the emphasis on the chef. I liked how this picture was framed before I pressed the shutter but oil had to ruin it all.
From the test shots I made with this lens using film and digital, I can say that it’s a sharp lens and it is still relevant today when used together with cameras with high-megapixel sensors like the Nikon D7200. It’s a petite lens for its class and I can imaging that this will be a nice lens for trekking. It also takes standard 52mm filters so it is another advantage for keeping your system small. Smaller filters are good because they’re cheaper and you will use smaller attachments like hoods, ND filter holders,etc. I don’t have to worry about stopping this lens down because even at f/4 the image quality is already excellent. Stop it down to f/5.6 and there is little that can be improved from here-on in terms of sharpness. You’re only going to get more things in-focus when you stop it down further and a bit of improvement in resolution. Typical with lenses from this era, the chromatic aberration is a bit high wide-open but improves significantly when it’s stopped down to f/5.6. This isn’t much of an issue when shooting with film as my sample pictures showed. So, is this lens for you? If you don’t mind the longer focus throw and the rather “slow” speed of this lens then it’s one of the better deals today in telephoto lenses. Just make sure that you’re using a focusing screen that’s suited for slower lenses and avoid split-prism type screens since the prism can turn dark and useless when shooting in anything less than a sunny day. It’s harder to precisely focus this thing compared to a faster f/2.8 lens but you will get used to it quickly specially of you use the special focusing screens that were designed for longer lenses like this. Faster lenses will have a shallower DOF that makes it easy for you to see what’s in-focus through the viewfinder. These can be bought for about $70.00 each so get one and enjoy using it. It’s not like you’re spending a small fortune for these anyway and if you don’t like it you can just sell it again later for a little bit more. This lens will be good for beginners to learn how to use a manual telephoto lens, too. Let’s now proceed to our repair article.
Before We Begin:
If this is your first attempt at repairing a lens then I suggest that you check my previous posts regarding screws & drivers, grease and other things. Also read what I wrote about the tools that you’ll need to fix your Nikkors.
I suggest that you read these primers before you begin (for beginners):
Reading these primers should lessen the chance of ruining your lens if you are a novice. Before opening up any lens, always look for other people who have done so in YouTube or the internet. Information is scarce, vague and scattered (that is why I started this) but you can still find some information if you search carefully.
I highly recommend that you read my working with helicoids post because this is very important and getting it wrong can ruin your day. If I can force you to read this, I would. It is that important!
For more advanced topics, you can read my fungus removal post as a start. It has a lot of useful information, it will be beneficial for you to read this.
Disassembly (Front):
This lens isn’t too difficult to dismantle but you will have to be careful with removing the screws because Nikkors made in this era tend to have their screws glued using lacquer or even epoxy on some places. If that happened, simply heat the screw’s head using a small precision torch or a soldering bolt and remove the screw while it’s hot. Never force your way because you may ruin the screws and that will take special tools to extract. If you’re not sure if it’s stuck or not, just sit back and apply some solvents and see if that will help before you escalate to the method that I mentioned before using heat. Having said that, it is never a good idea to use heat near any glass elements because you may damage them if you’re not careful. Disassembly can be a bit confusing since there’s a lot of going back-and-forth. I’ll try to make it as simple as possible so please bear with me.
Now, if all you need to do is to clean the front elements then you can check out this video by Kenneth. Do follow his YouTube channel for repair videos. He’s a big inspiration to all of us in the amateur repair community and his channel is one of the reasons why I made this blog. Be sure to watch all of his videos.

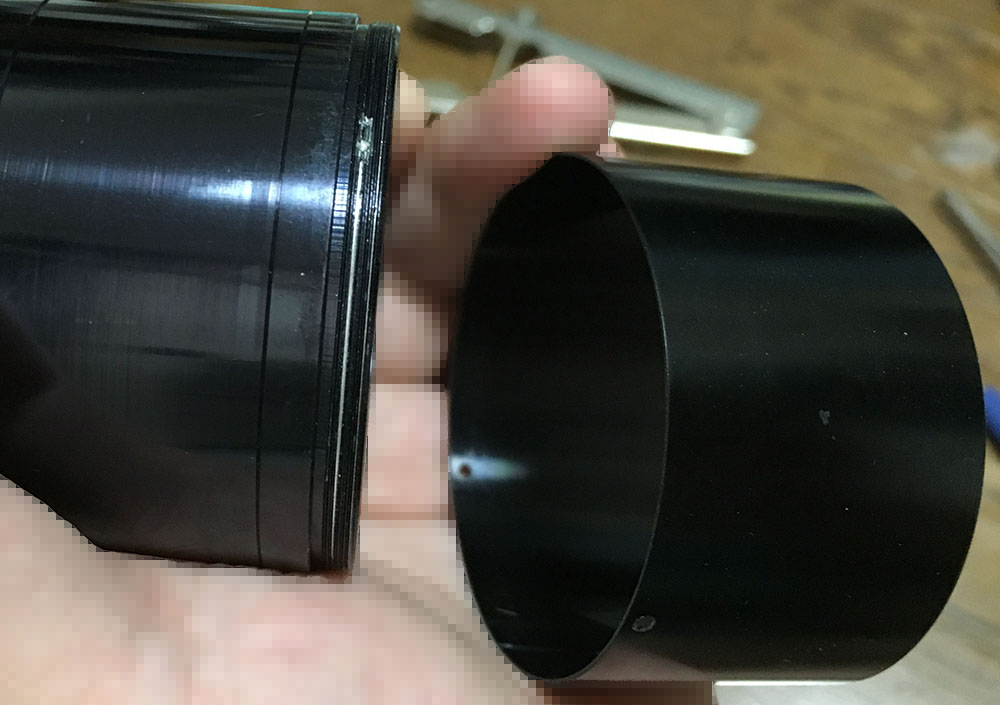
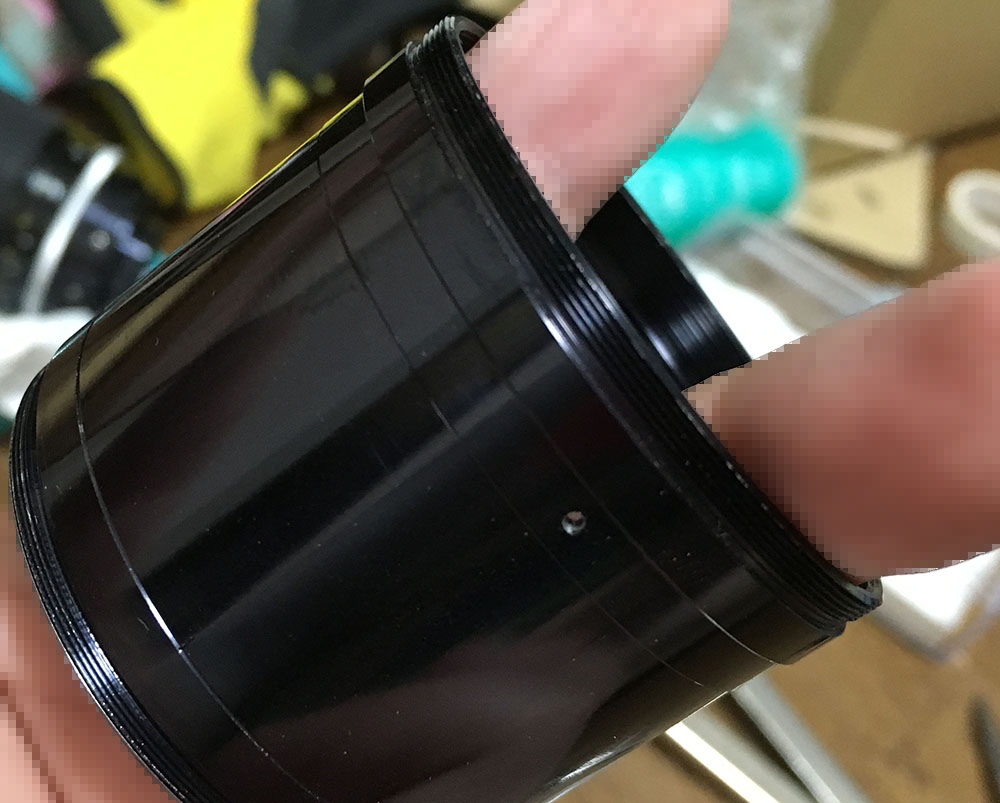
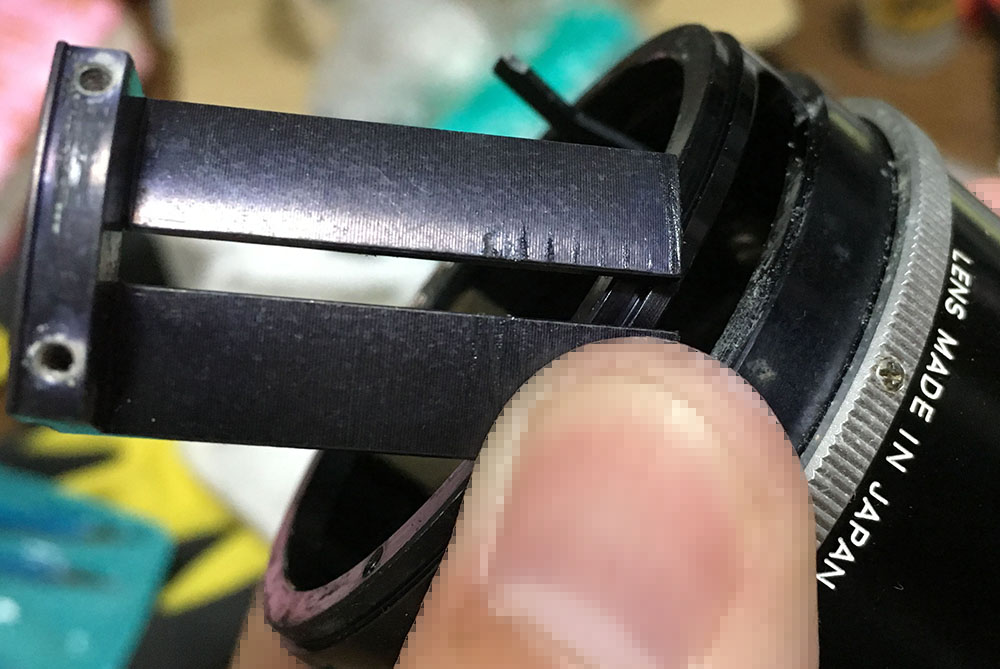
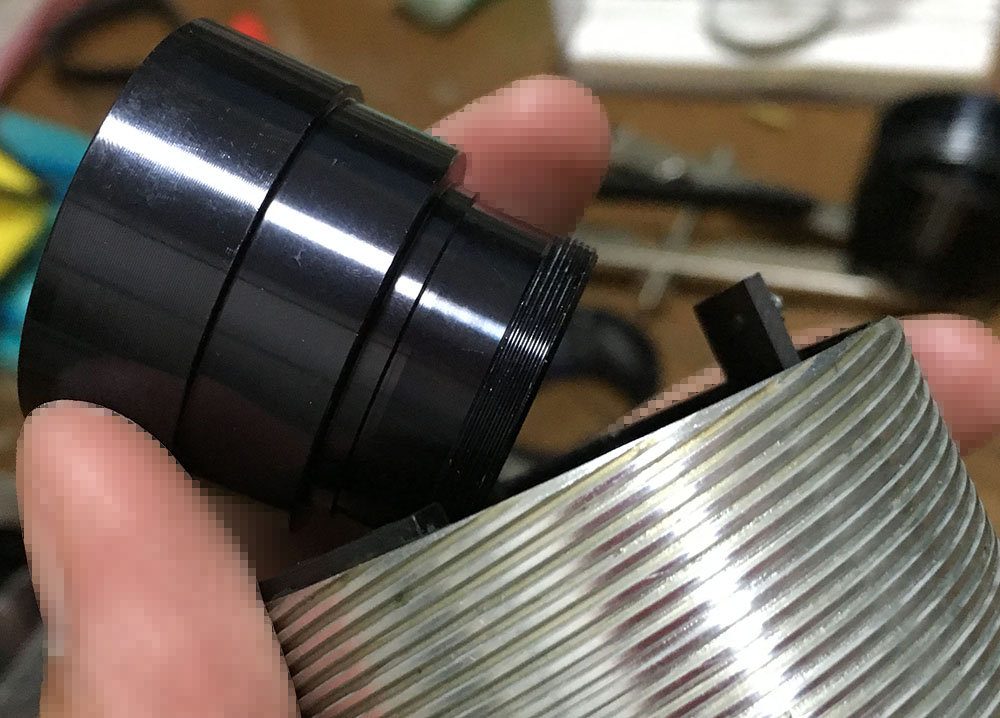
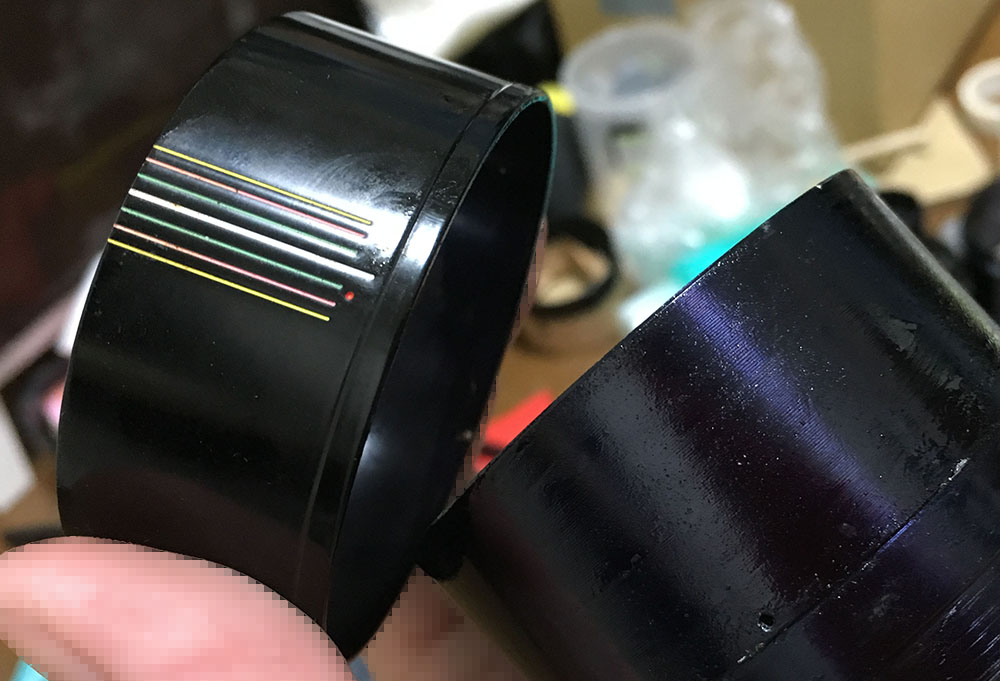
To remove the front ring, extend and rotate the built-in hood until you see the set screw in the hole. Get a precision screwdriver and remove that tiny set screw.
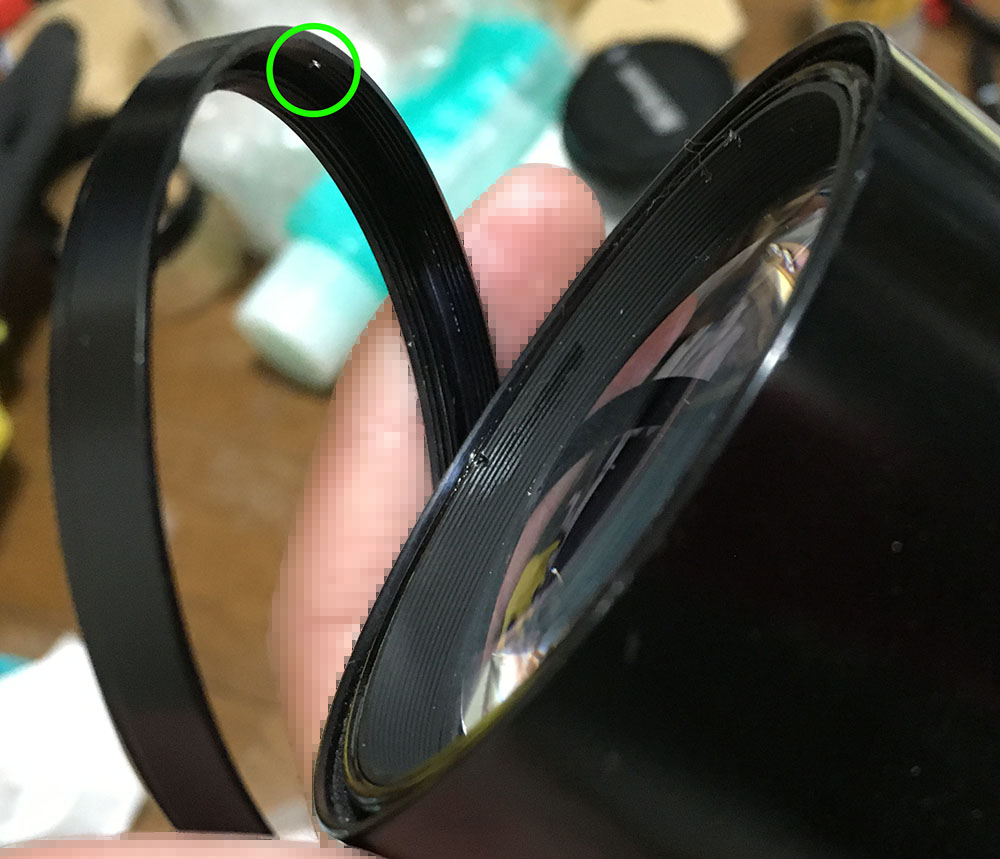
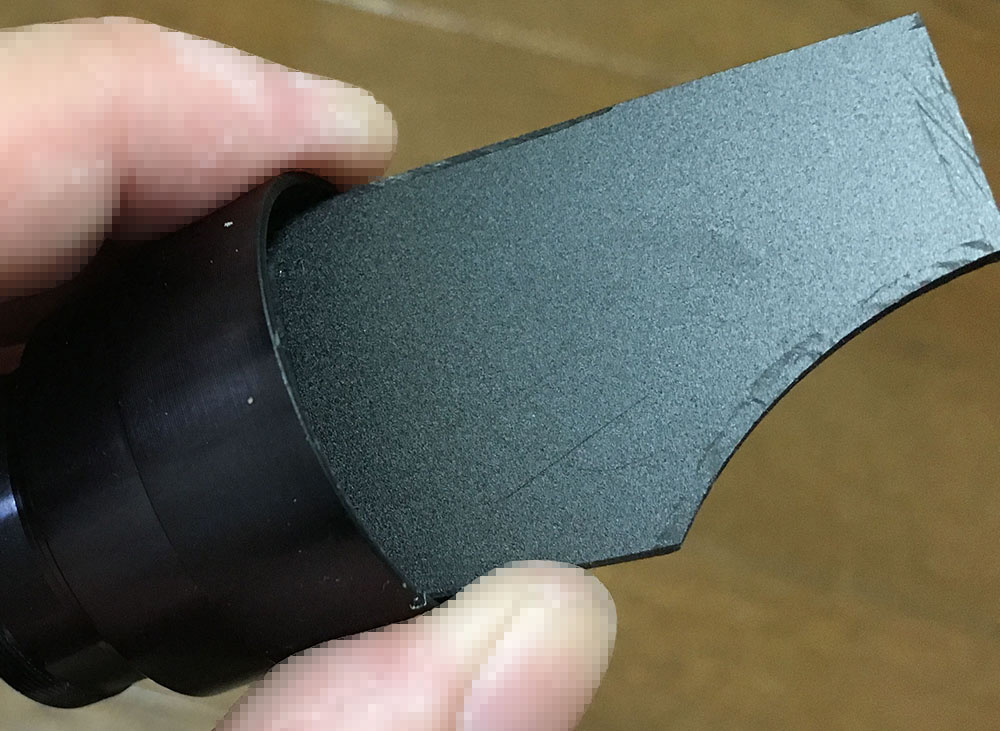
Get a rubber sheet the size of a coaster and use it to remove the front ring using friction. Leather or any material will also do as long as it grippy enough. If you look at the picture, the encircled hole is where the set screw used to be in. If this ring refuses to move then it is most probably glued so you’ll have to place a drop of alcohol or acetone into this hole and let it sit for a while for the alcohol to work on the glue before attempting to remove it again. Capillary action should be enough to take the solvent and coat the thread with it.

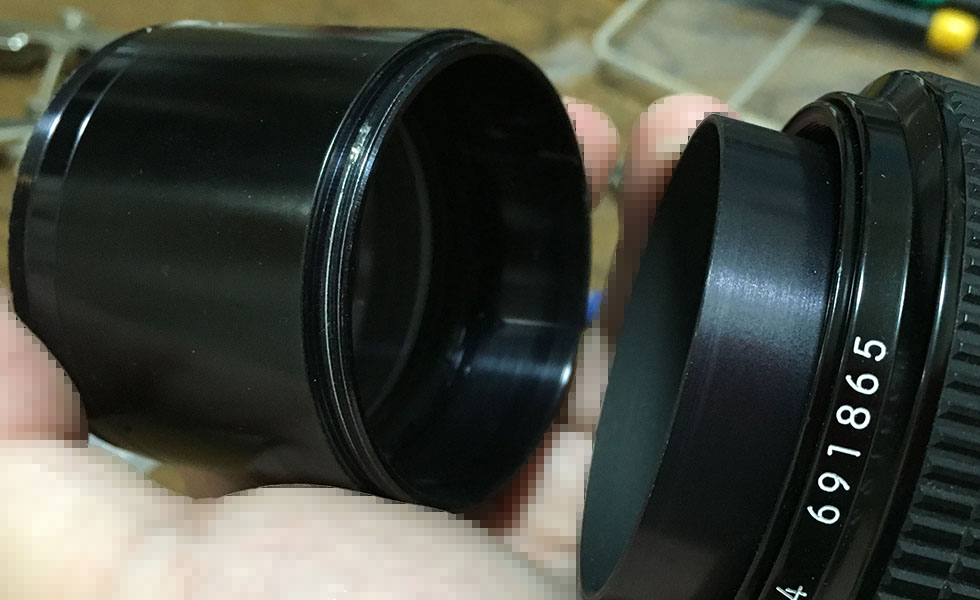
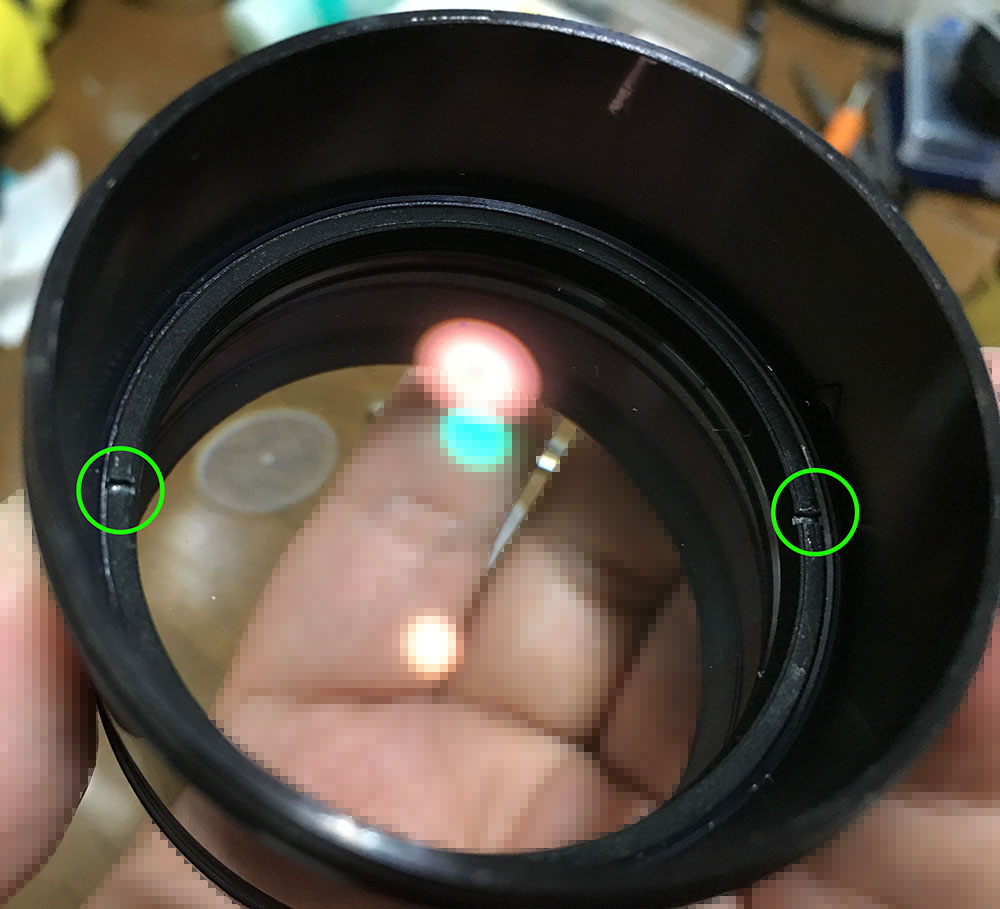
With the front ring gone, you can now remove the built-in hood from the front barrel. Its front lens elements can be accessed by removing the retention ring at the front. Mine is glued into place so I place a drop of solvent to the seams of the front ring and as I let the solvent do its job softening the glue on the retention ring, I will clean the felt on the inner surface of the hood by scrubbing it with a soft toothbrush. Mine looks OK so I don’t need to replace it.

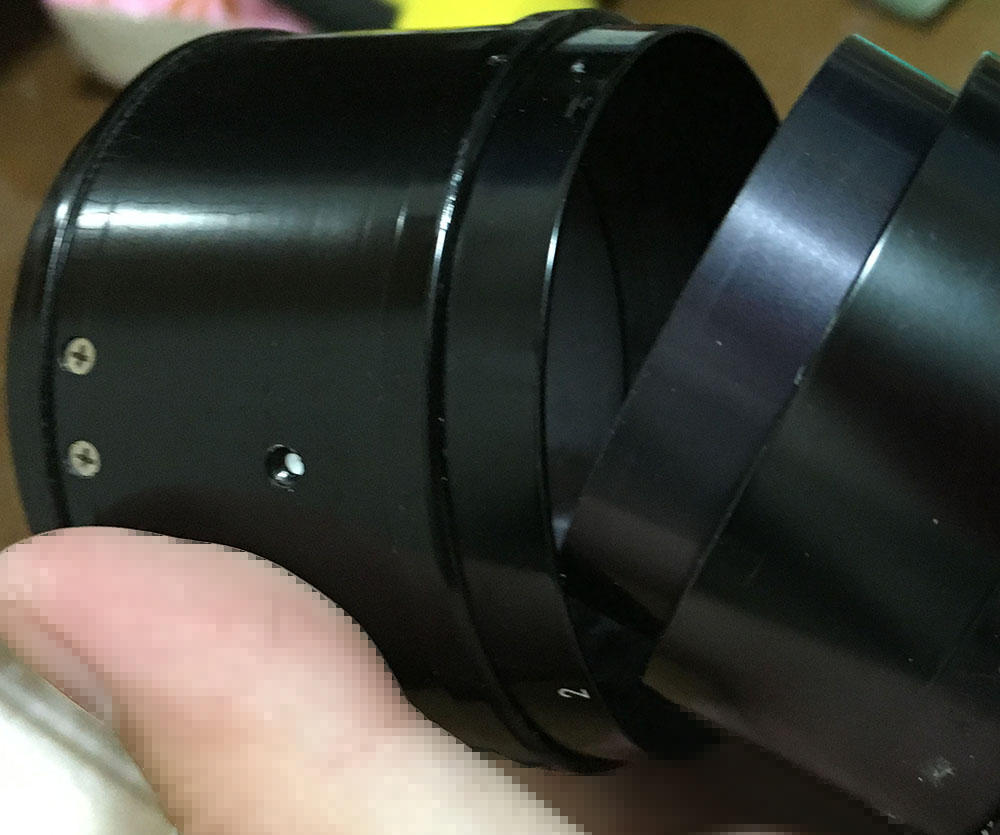
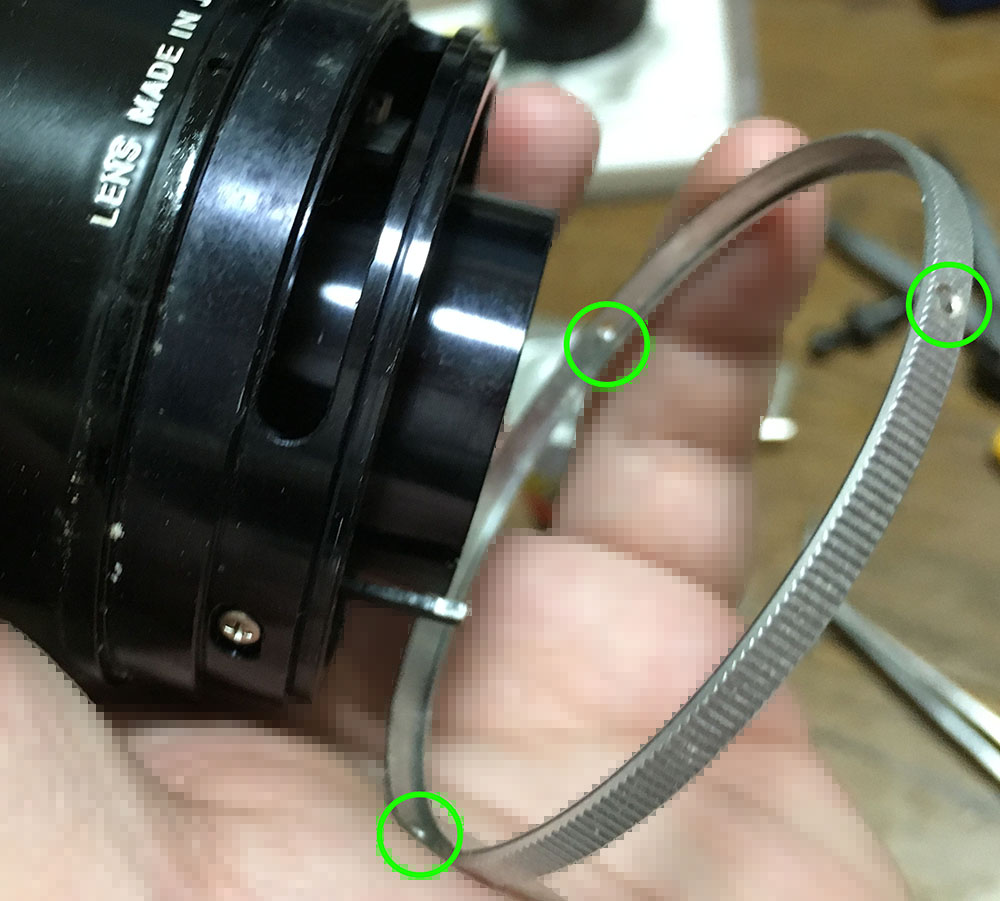
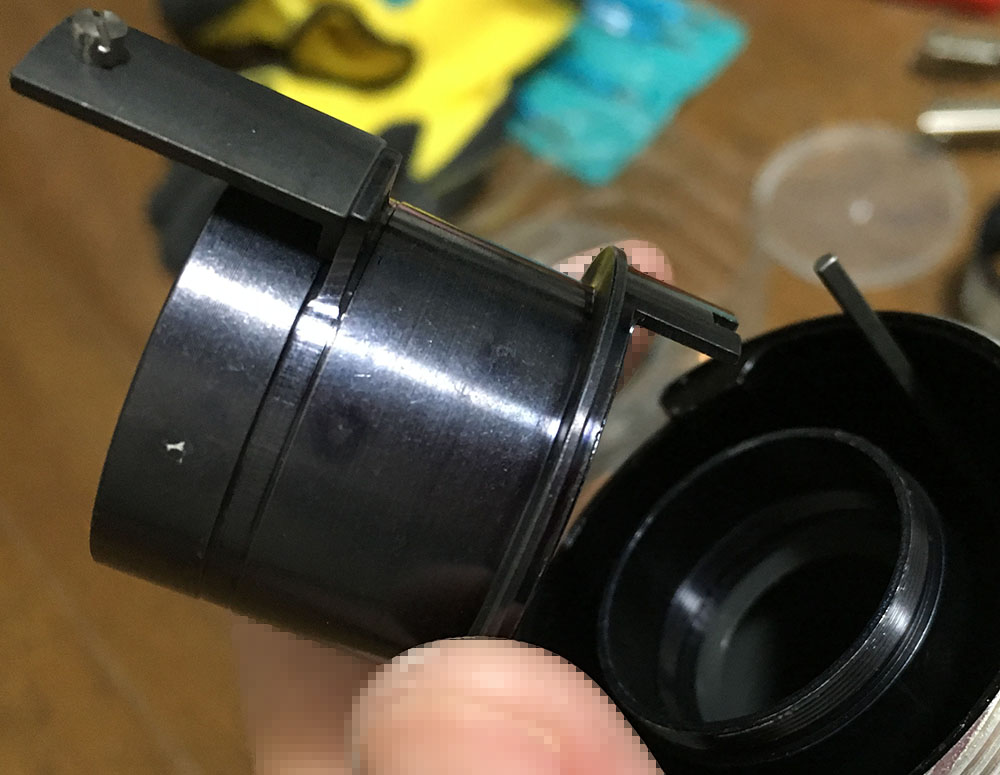
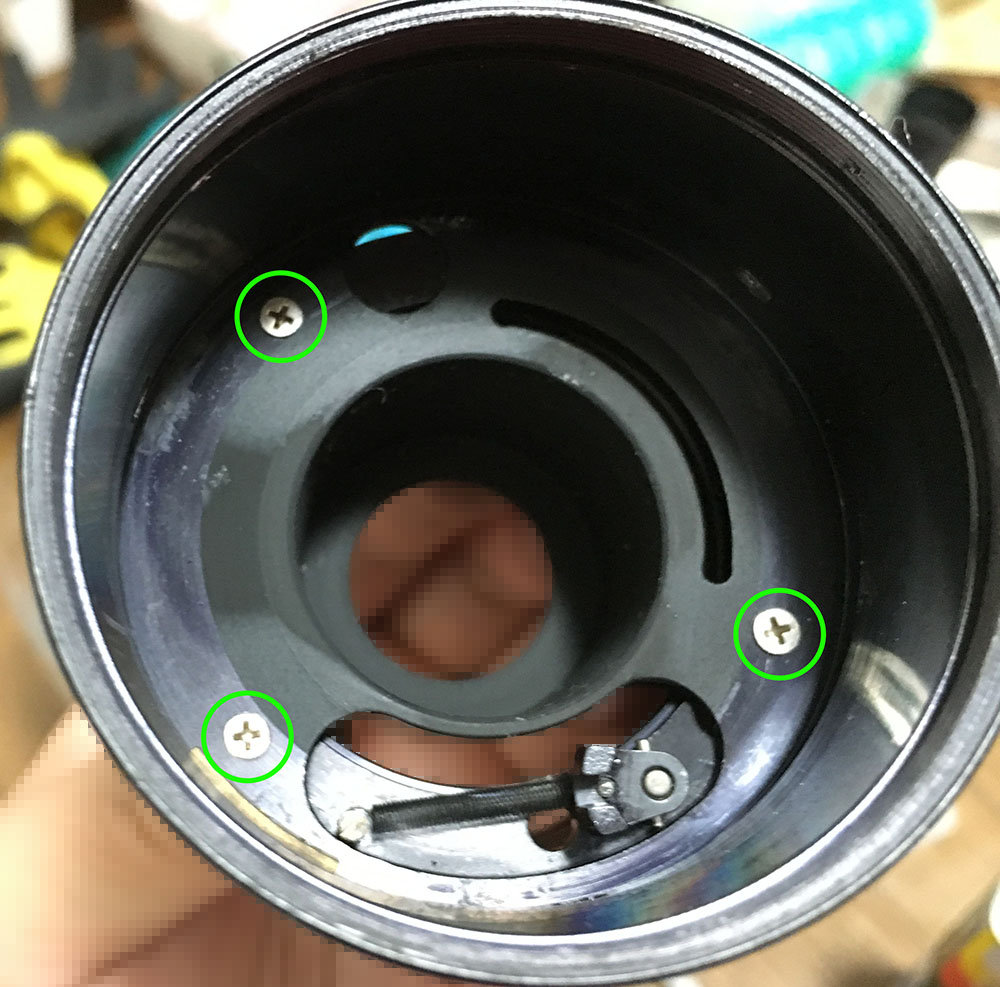
Going back to the front of the lens, locate these screws and remove them. These 3 screws hold a cosmetic metal sleeve. Removing these 3 screws will not remove the sleeve since it is sandwiched between the barrels so you’ll have to do a couple of steps more to remove it. I was told that there’s only 1 screw on some samples of this lens.
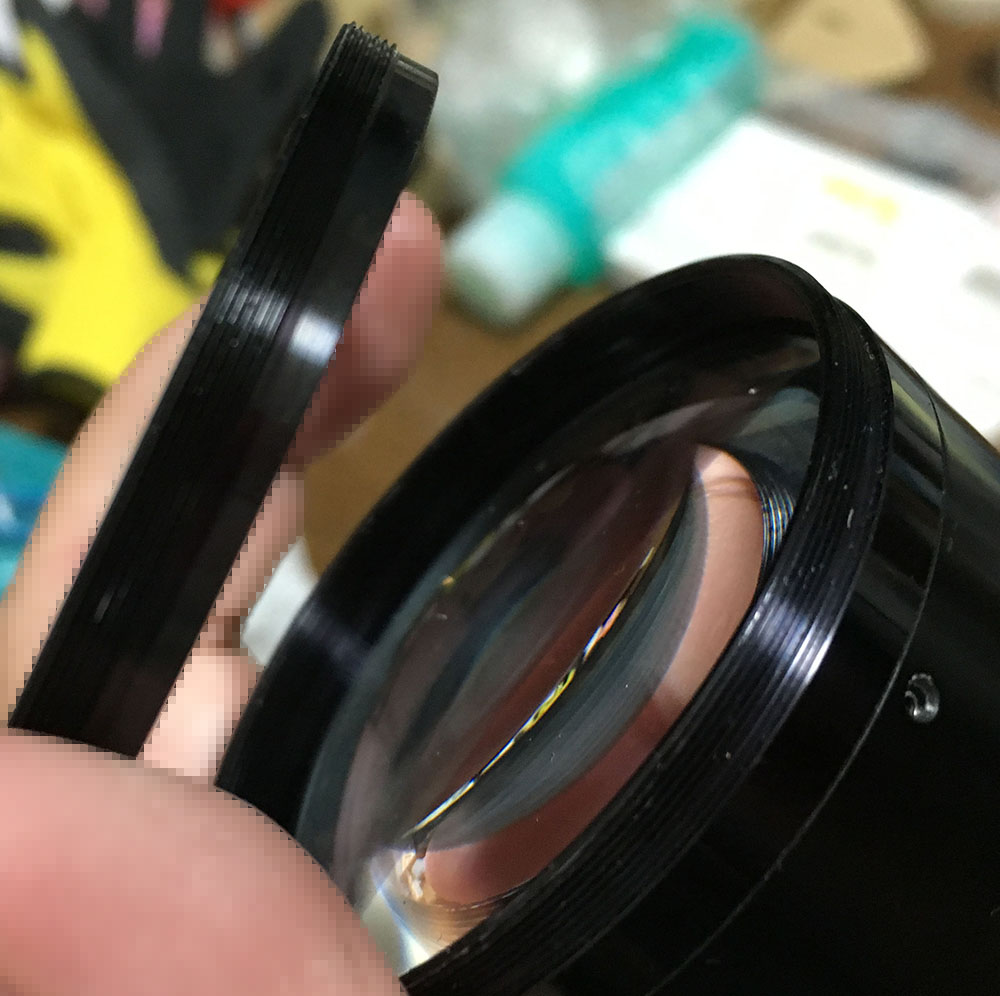
By this time, the solvent has penetrated and softened up the glue in the ring, I used a lens spanner to carefully remove this ring. This part can be tough because it’s screwed really tight so be careful. Maintain a firm grip so your hand won’t slip and the spanner is kept steady with pressure while you turn this ring counter-clockwise. Its front lens element is exposed and you do not want to damage it or you will end up with a junk lens.
The front element can be removed with a lens sucker. Be careful and note which surface should face forward. You’ll need that for your reference later when you reassemble this lens.

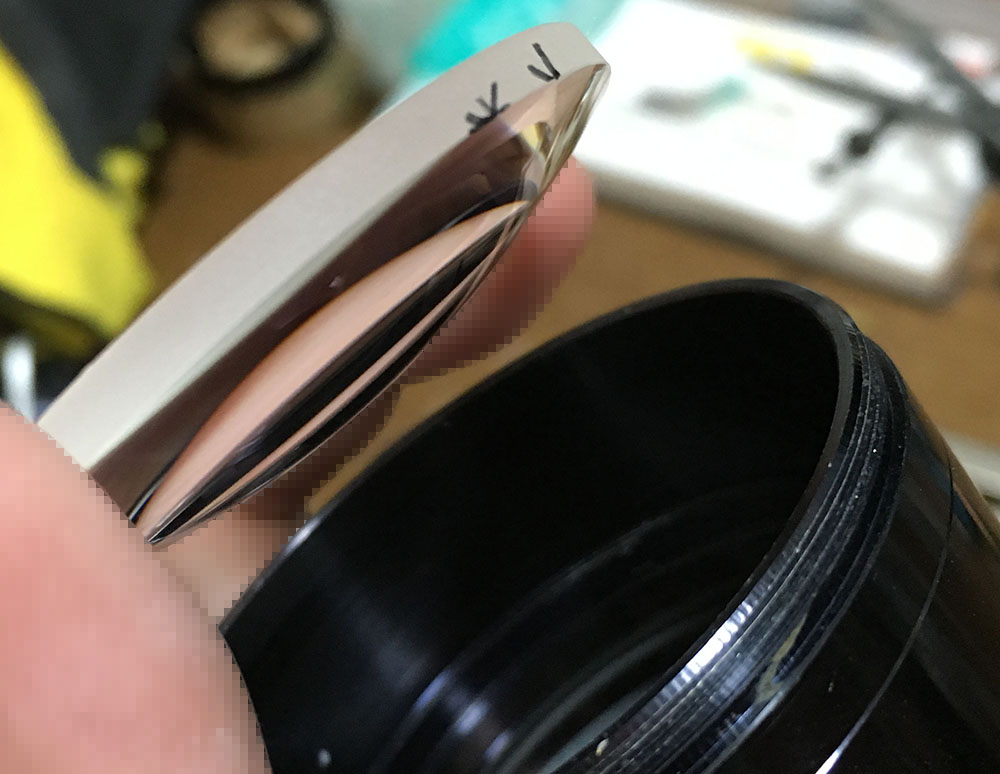
This ring is used as a spacer for the 1st element and the 2nd element. This ring was made with the same curvature as the lens elements it supports so take note which side should be facing where. You can pick it off using your nails.
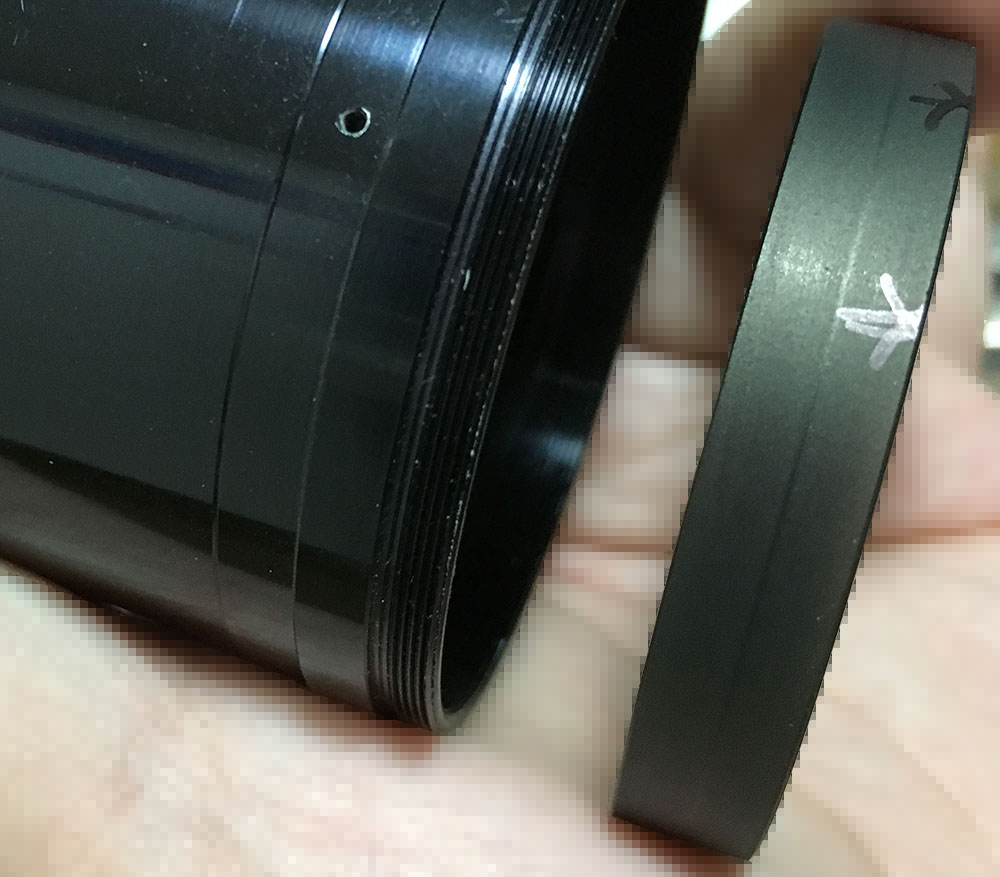
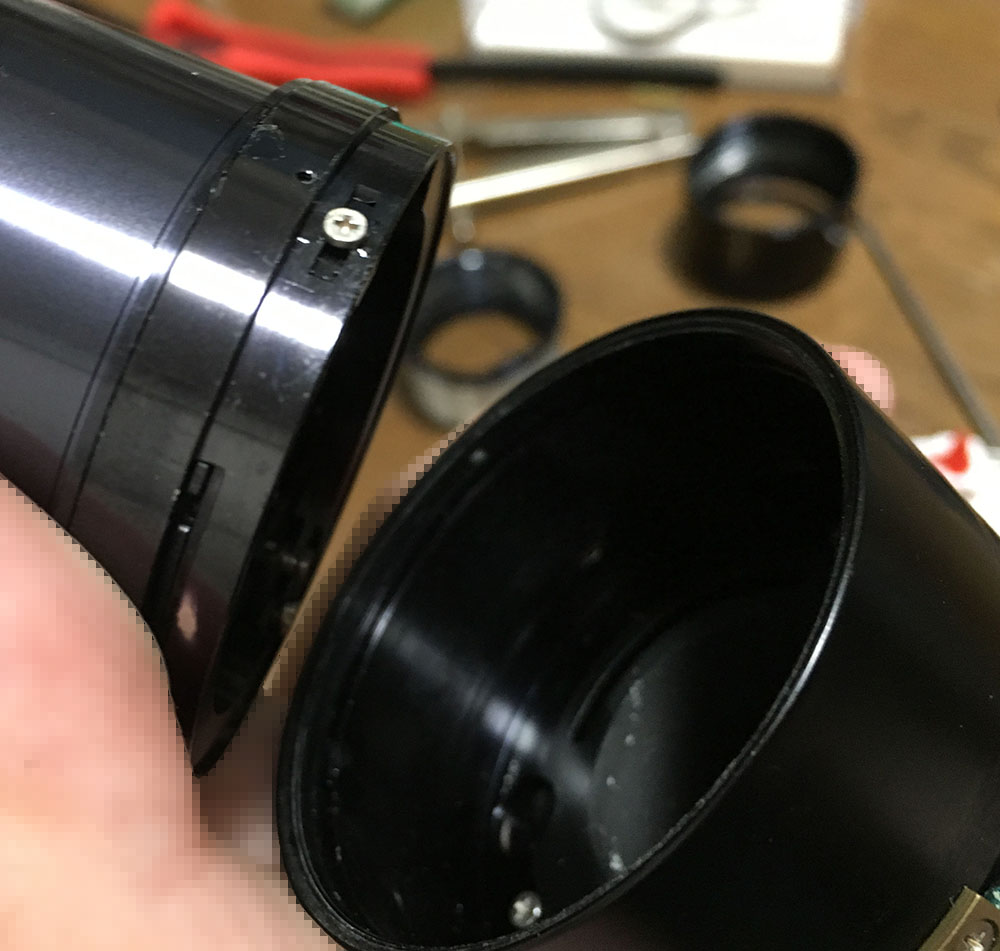
The front barrel can now be unscrewed after you remove the set screw that is securing it to the main barrel. Look at the picture and see the scar on the threads and that is where the screw was sunk into. The screw on this lens crumbled and fell off from its own hole so I have no picture to show you. These things happen sometimes due to the age of these lenses.
Now that the front barrel is gone, the metal sleeve can now be removed.
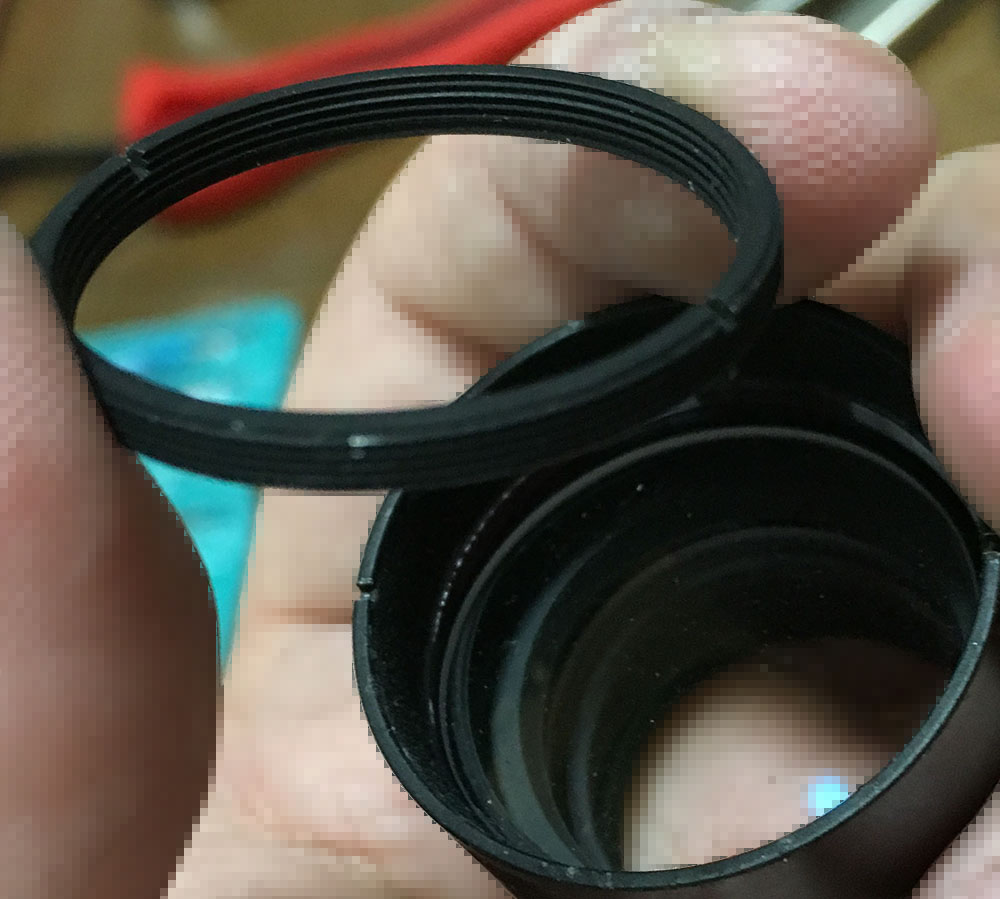
Removing the 3rd lens element requires you to remove another retention ring, this time it’s at the opposite side of the front barrel. Use a spanner and carefully remove it and you may want to do the alcohol trick on this part because it was glued. Look at the pic above and you’ll see a waxy film at the seams and that is a sure indication of glue being applied to the threads.

After a little bit of alcohol and patience, the retention ring was safely unscrewed.
You can now remove the 3rd element with a lens sucker. These usually take a bit of time and effort to remove using a lens sucker because it’s either being held by vacuum or the tolerances were just too tight so don’t force it or you may crack the edges of the element. Notice that I marked the edge of the element using a Sharpie. This mark will be cleaned-off later before I re-install this during reassembly. It pays to be sure so mark and take lots of notes and pictures!
OK, the 2nd element is not being secured by anything so it is in danger of free-falling into the floor and lucky me this was a tight fit. Mark which direction should be the one facing forward. This element looks symmetrical so marking it is important.
We have now stripped the front barrel to it’s bare components, congratulations!
This is just the start of a long journey, we’re merely 1/3 of the way. For many people, this is probably the furthest they need to go when all they need to do is clean some fungus on the front elements. If your lens needs to be serviced thoroughly then read the rest of my article to see how it’s done.
Disassembly (Rear):
The bayonet and rear part of this lens is pretty straight-forward. Careful with the screws used in this section because they are usually glued and if you accidentally stripped any screws then you’ll have to use a screw extractor to get rid of the screw safely and cleanly. Avoid getting yourself into a situation where you would need to use the screw extractor. If you are new to lens repair, please read my article on how to remove bayonet screws. It is important that you know the basics first before you attempt to repair a Nikkor. Use the cheaper lenses from another brand for practice and make sure that you buy the correct JIS screwdrivers when working with Japanese lenses, these are NOT phillips screws!
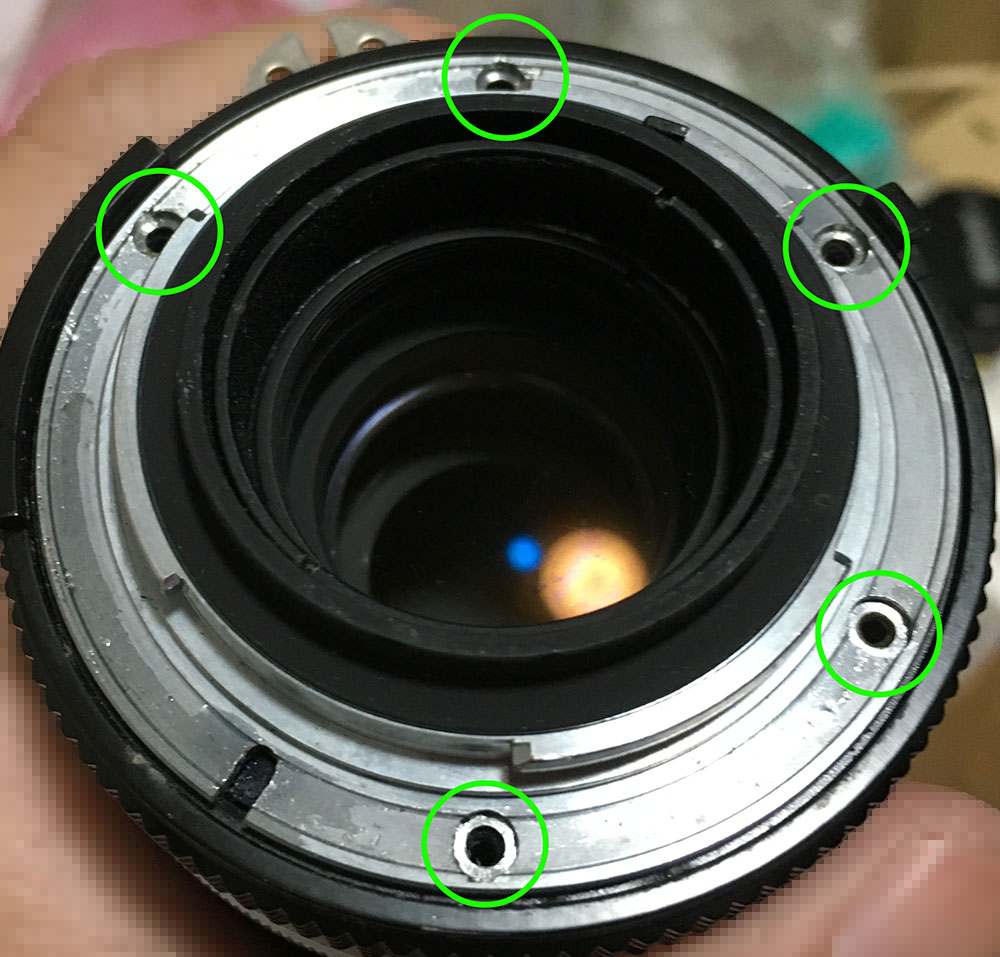
To get rid of the bayonet, you’ll have to remove these 5 screws. Be careful with removing these because they are most likely sealed with Loctite or epoxied into place as in the case of the K/New-Nikkor lenses. I applied some alcohol into these screws and let it sit or you can also use a soldering gun to heat the screws to soften up the Loctite before turning the screws while they’re still hot. It doesn’t matter which route you go as long as you use the correct type of JIS screwdrivers, you are less likely to strip the head.
The bayonet mount comes off easily. Some lenses have springs and some will have parts connected to the bayonet, this one has neither of them. You might be tempted to remove the aperture ring but wait after you finish the next step.
The aperture ring is screwed to the aperture forkinside the barrel. Simply unscrew these screws and be careful not to damaged these. Treat them like the ones at the bayonet, the screws here are usually secured by Loctite.

Now that the screws are gone, the aperture ring can be extracted. If you look at the photo you can see that the holes have some sort of residual powder in them. That powder is the dried-up Loctite/glue that was used to secure the screws. Just take a look at all that yucky fungus feeding-off of the old dried up grease. This is why I completely take apart almost all of the lenses that I buy. It may look clean on the outside but the inside can be filthy.
This aperture fork is used to connect the aperture ring to the lever in the iris mechanism. Simply pull the aperture fork from the lens but it might snag here and there so be careful as you pull it out.
That’s all for this section. Carefully clean everything here to make sure that all of the dirt is gone. Germs love to live under the aperture ring and eat the oil that accumulates there because oil usually settles there because of gravity. It’s never unusual to find clean lenses (from the outside) and discover that germs made a happy colony underneath.
Disassembly (Main Barrel):
This is the most challenging part of the lens because in order to make this lens compact, a lot of tricks have to be engineered and this makes things a bit more complicated. You’ll have to watch the order in which you dismantle things as well as how the parts interlock with each other. Do not forget to take plenty of notes and pictures as you go. Remember, this is not considered to be a lens for beginners.

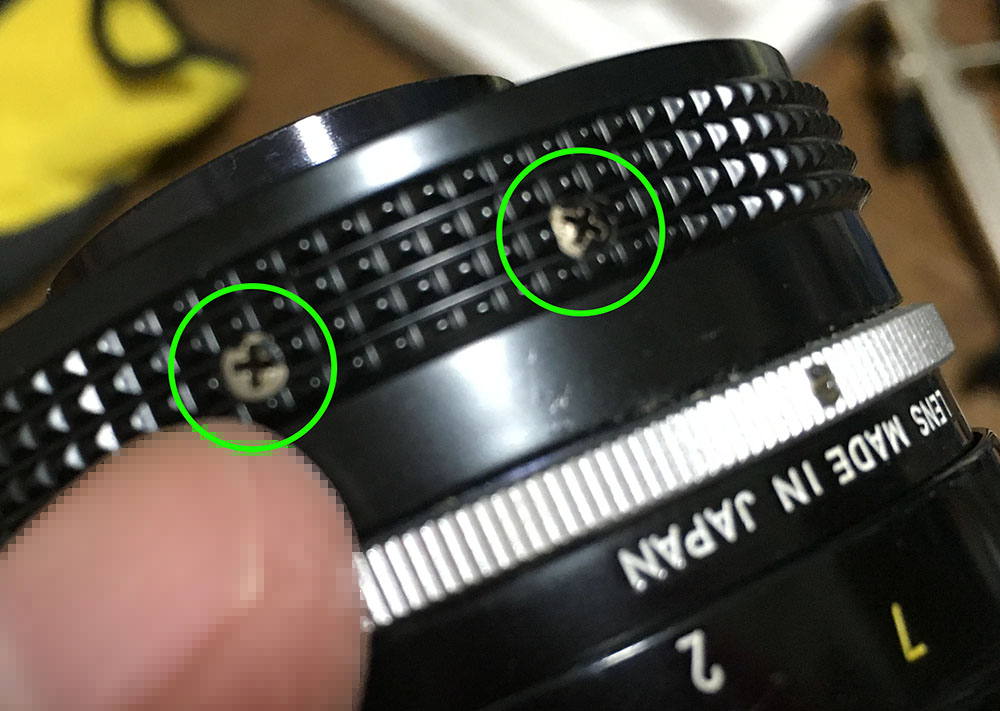
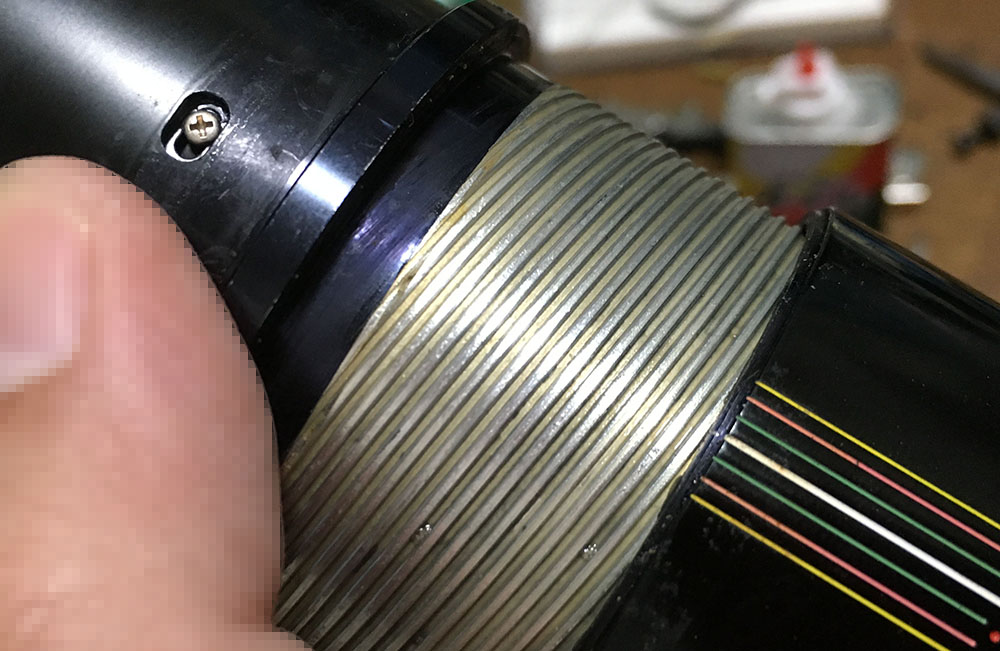
Removing the rubber grip will reveal these screws underneath it. Be careful not to rip or tear the rubber grip when you remove it. What I do is to run a smooth rounded toothpick around the whole circumference of the rubber grip to lift it from the contact cement that was used to glue it in place then I carefully pull the rubber grip out with my fingers.

Before removing any of the screws found in the focusing ring, make sure that the lens is focused all the way out to infinity. Remove these screws and that should free the focusing ring.
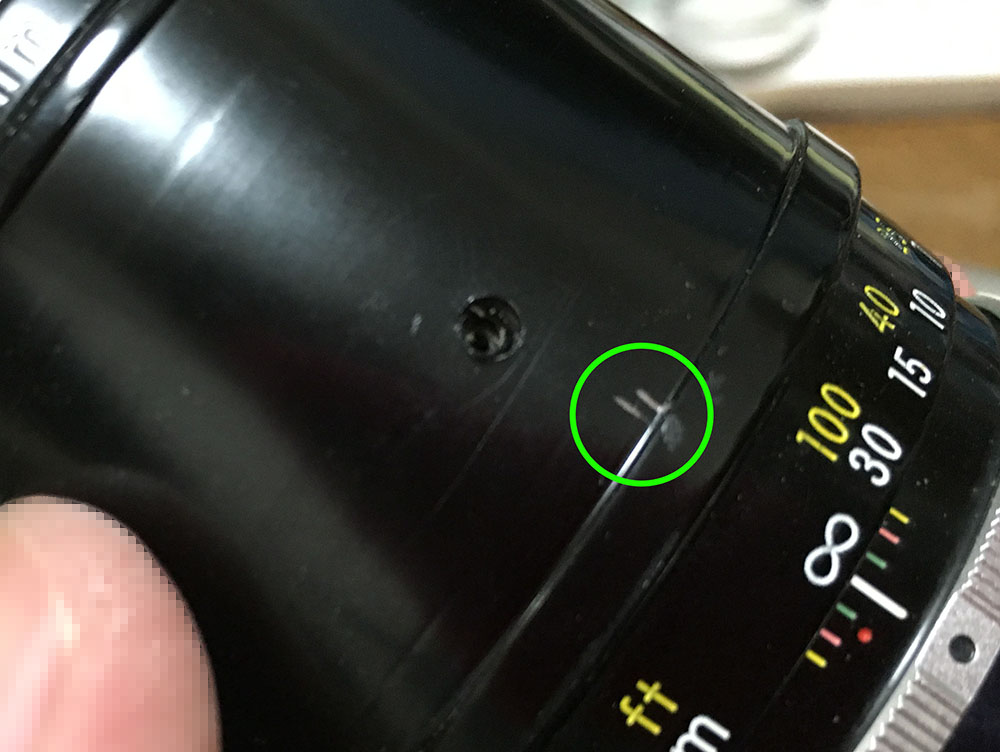
Before removing the focusing ring or its screws, just make sure to note where the infinity mark should line-up with the focusing ring, this will serve as your guide/reference later on when it’s time to reassemble the lens.
The focusing ring should come off easily. Just look at that disgusting gunk collected under the focusing ring!
This picture shows how the helicoid should be in relation to the white focus mark. Look at the picture carefully and you will notice another line that I made (circled). This line is used as a reference to the white line when the helicoid is compressed all the way until it will not go any further. I use this line to check if I indeed got the helicoid positions right.
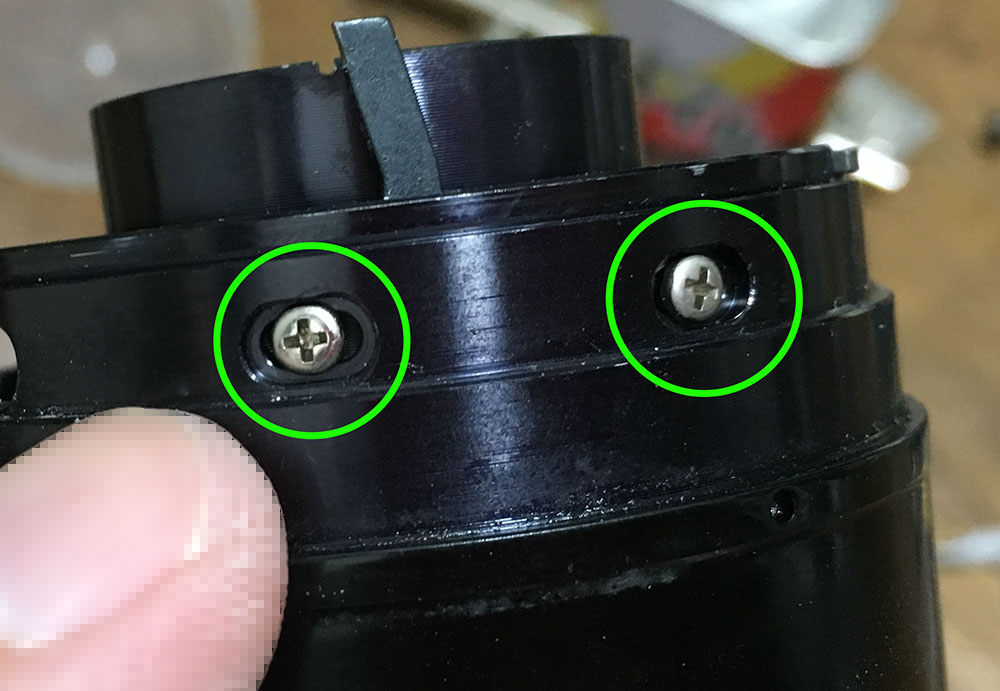
Before removing the helicoids, we need to remove some other things in order to make it possible. Remove the metal grip by removing these screws that are holing it in place. In the picture, I have encircled where these screws used to be.

Next, carefully remove these screws to remove the helicoid key. You may need to heat or treat these with solvent first because in my experience, these are usually glued in place with something heavy-duty like epoxy. Failure to treat these before removal can be risky and it may cause some of the screws to break into 2 pieces. Remember the fact that these are old lenses and can easily be 40 or so years-old by now.
With all the screws gone, the helicoid key can be popped-out of its slot. See what is left in the holes where the screws were? That is hardened decades-old epoxy. You can tell when epoxy was used by the colour, smell and appearance of the residue. It has a tell-tale smell of peanut butter, it tends to be beige in colour and it usually looks like a bead at the other end of the screw hole.
The helicoid key is used to keep the helicoids turning at the same rate and that will make your helicoid extend or retract to enable you to focus the lens. Some helicoids won’t turn pass their focusing range because the helicoid key is preventing them.
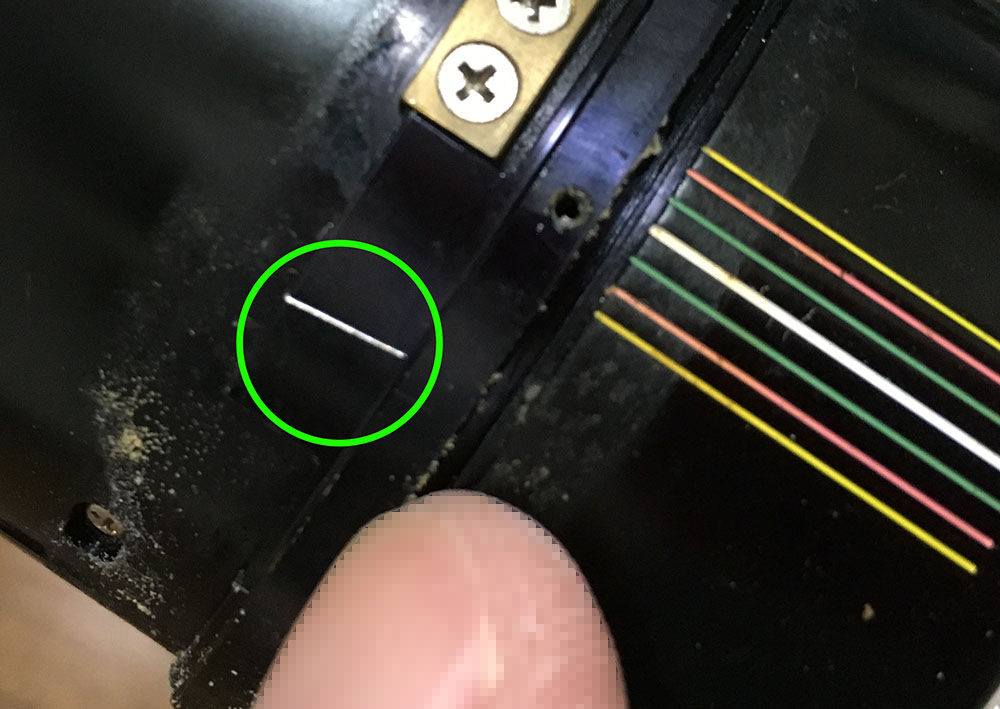
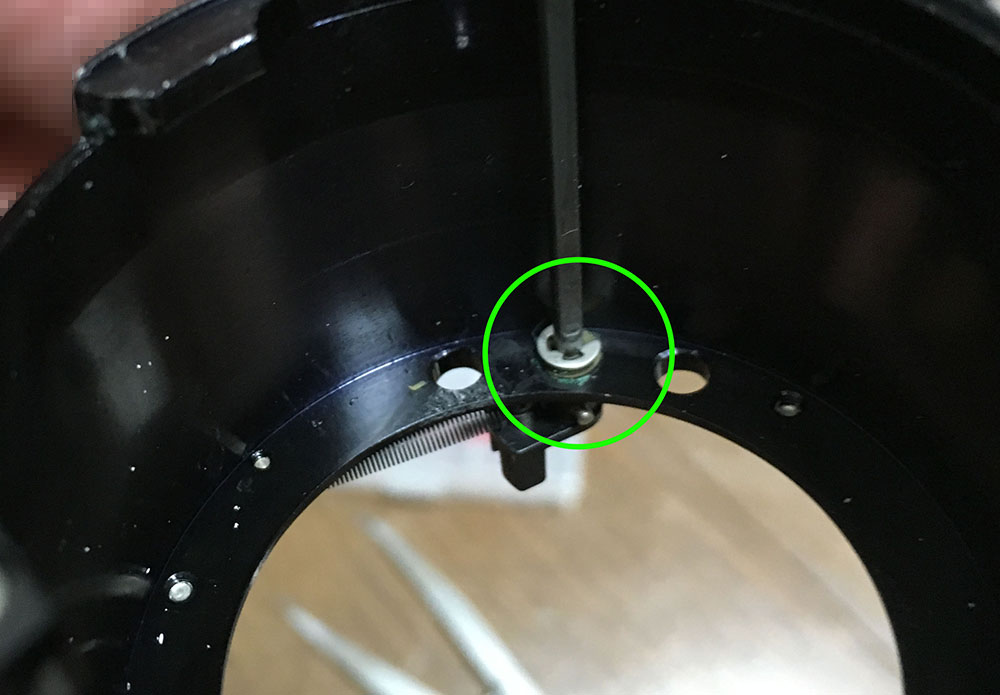
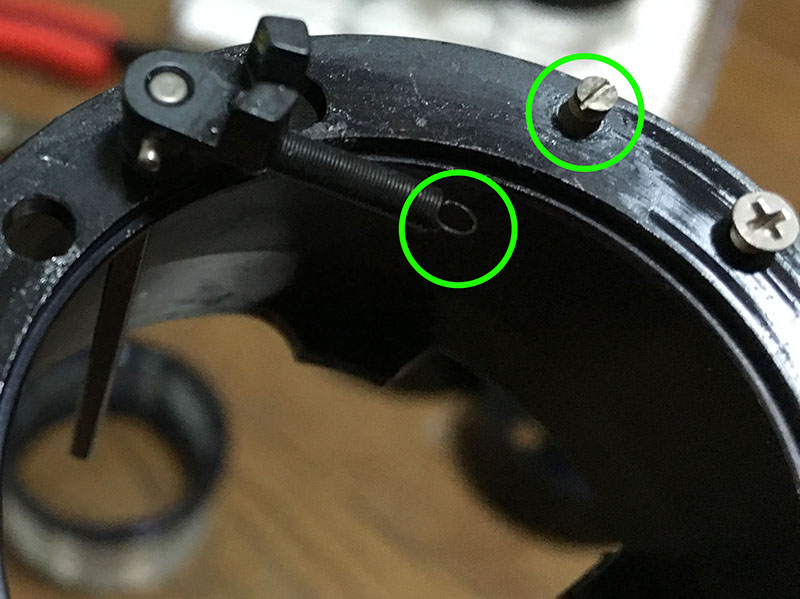
These 2 screws secure the aperture stop-down lever mechanism underneath. Before you remove these you would want to make some marks or take some notes. This assembly’s position can be adjusted and it was precisely adjusted at the factory and you will need to put this thing back the same way you found it. If you failed to do this then your iris won’t actuate accurately and your metering will be off by a bit.
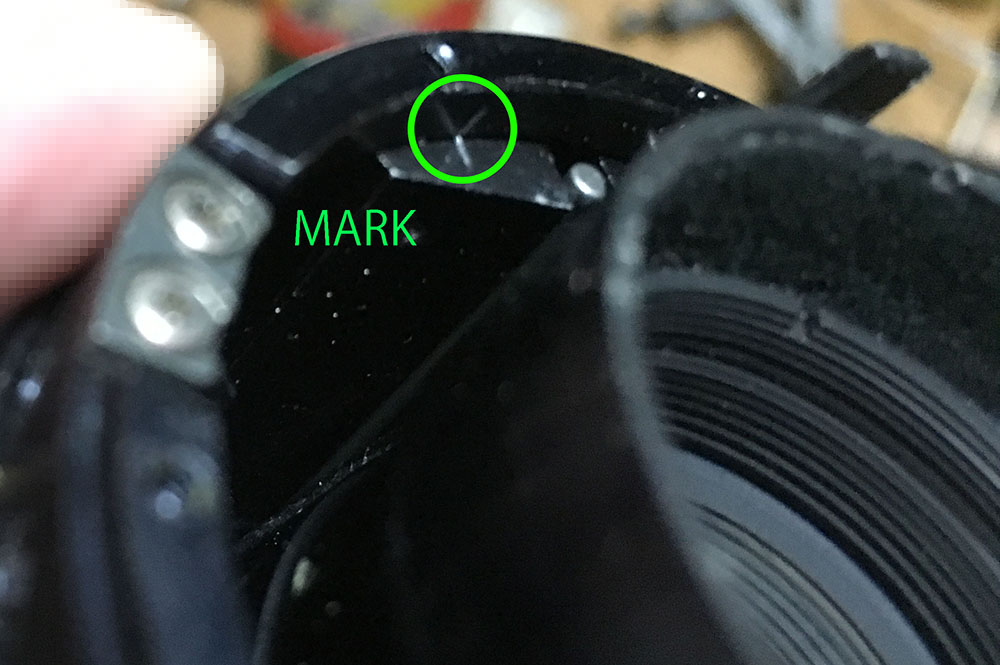
I made a mark on the mechanism as well as on the surface on which it was installed. This mark will help me align this later. I removed the screws after making these marks.
It’s now time to separate the helicoids. I keep on saying this and I will not stop saying it in every blog post – ALWAYS MARK where the helicoids separate. If you forgot to do so then you are going to waste a lot of time figuring out where it should mate. If you haven’t seen my article on how to work with helicoids, please read it because it’s really important.
As soon as the central helicoid was separated, I removed the stop-down mechanism. This mechanism is connected to a shaft leading all-the-way to the iris mechanism so it can be a little tricky to remove it without separating the helicoids.
Here is a clear view of the mechanism.

And this is another view. The screw can be removed if you really wanted to overhaul this part. My lens was filthy so I needed to overhaul it, yours might be OK and clean enough so you can just leave yours alone unless you really want to have a clean lens in and out.
We can finally separate the central helicoid from the inner helicoid. Again, Don’t forget to mark where they separate because that’s also where they should mesh.
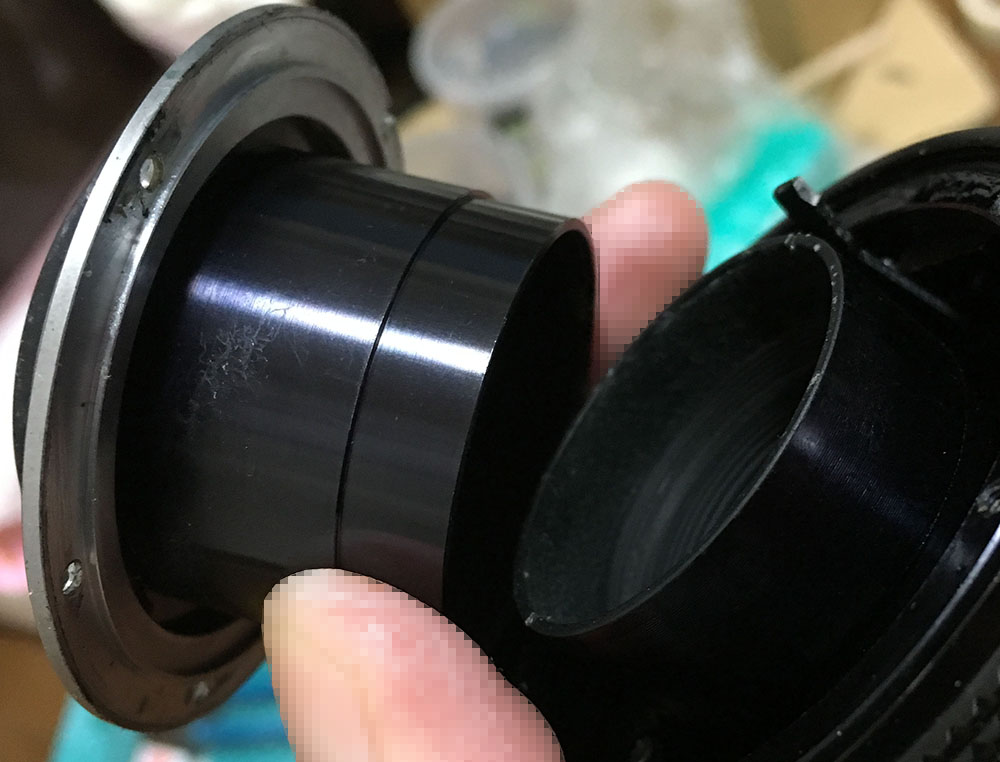
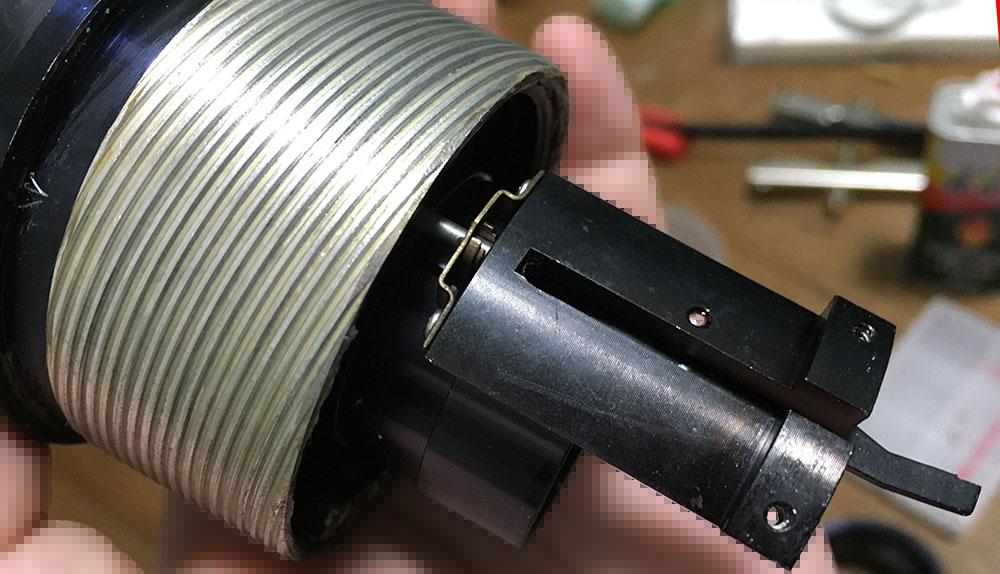
The rear elements assembly should be removed before you proceed. Simply unscrew the barrel with your bare hands or use a spanner if there are slots there for your spanner to sink into. You can remove this earlier if you got spanner bits that are longer than mine or make some yourself.

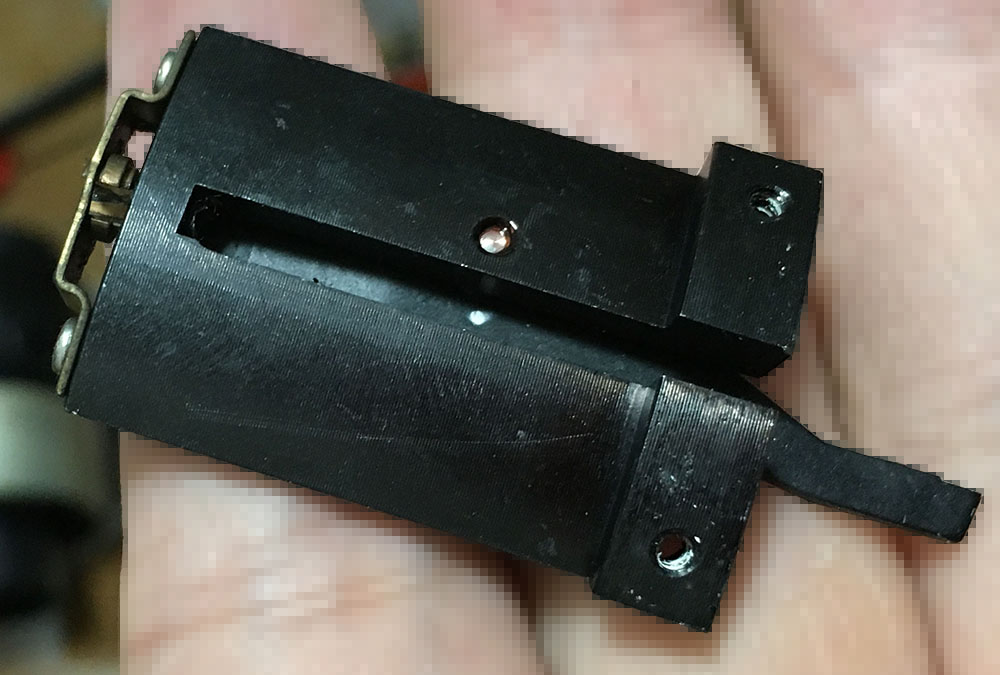
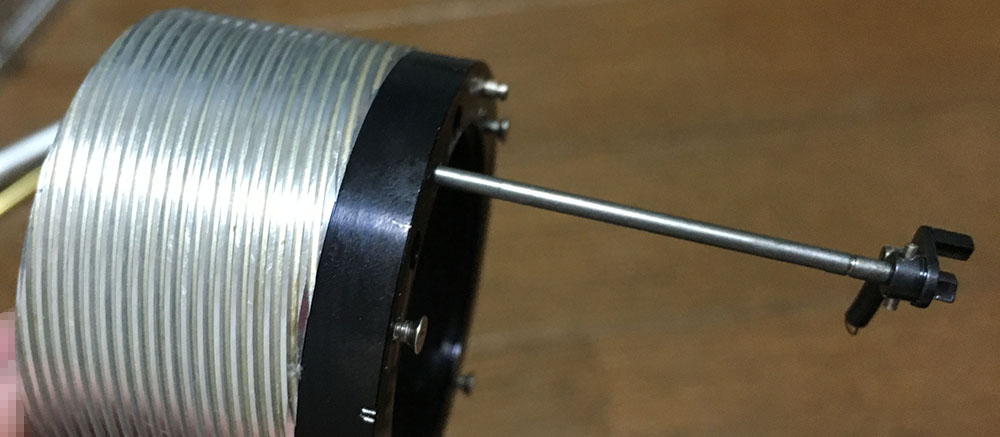
There’s a retention collar securing the iris coupling mechanism. This lens extends a bit, it can actually get pretty long if fully-extended so the aperture fork/prong needs to connect to this mechanism in order to actuate the iris when the barrel is fully-extended.
And here’s the whole mechanism. Simply pull it out from the barrel. Remember where or how things were connected before you remove anything. This can get complicated when it comes to re-assembly and this is just one of those things where you should be paying attention to later.

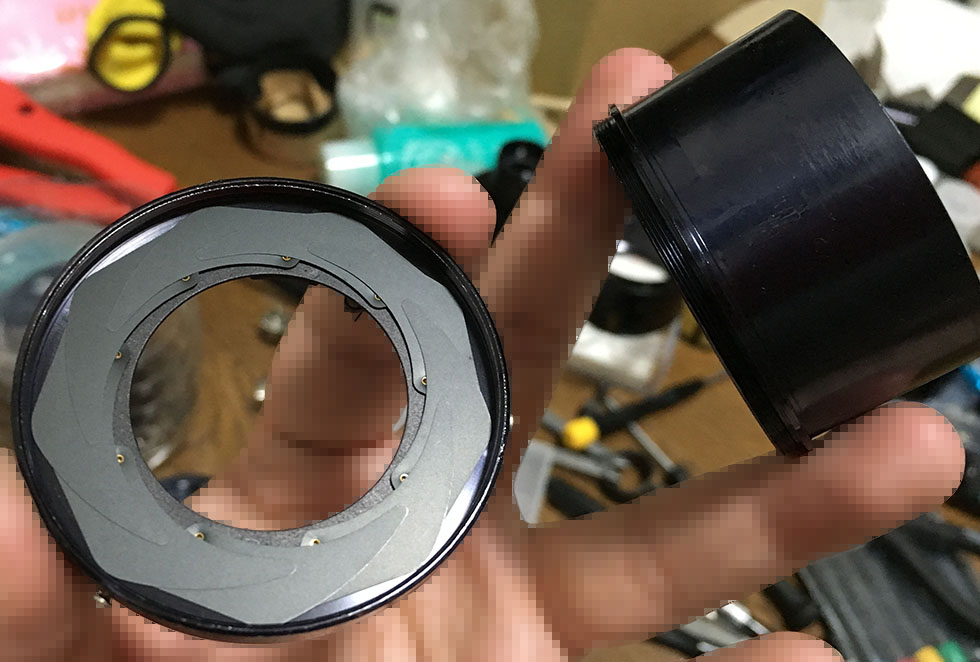
To remove the iris assemblys housing from its helicoid you should remove these 3 screws but you should make a mark first to note its position. Look at the right side of the picture and you will see 2 lines that I scratched at the surface. Aligning these 2 lines means that the parts are in proper alignment. Just like the stop-down mechanism, you can adjust the iris with this part so make sure that you put it back correctly.
After you are satisfied with the markings, you can remove the iris assembly.
The aperture blades were filthy but not oily as it functions properly. This isn’t acceptable to me so I will take it apart later to clean the fungus on the blades.
The case containing the iris assembly can be separated from the inner helicoid by simply removing these 3 screws. Again, do not forget to make some marks for alignment.
If you didn’t make the alignment marks in the previous step then there’s no going back.

Wow, just look at all that solidified grease. Encircled in the picture is a swivel mechanism responsible for stopping down the iris. The lens had to be made this complicated in order for it to be made this small.
To remove the swivelling actuator mechanism and clean it thoroughly, you’ll need to get rid of the E-ring underneath it.
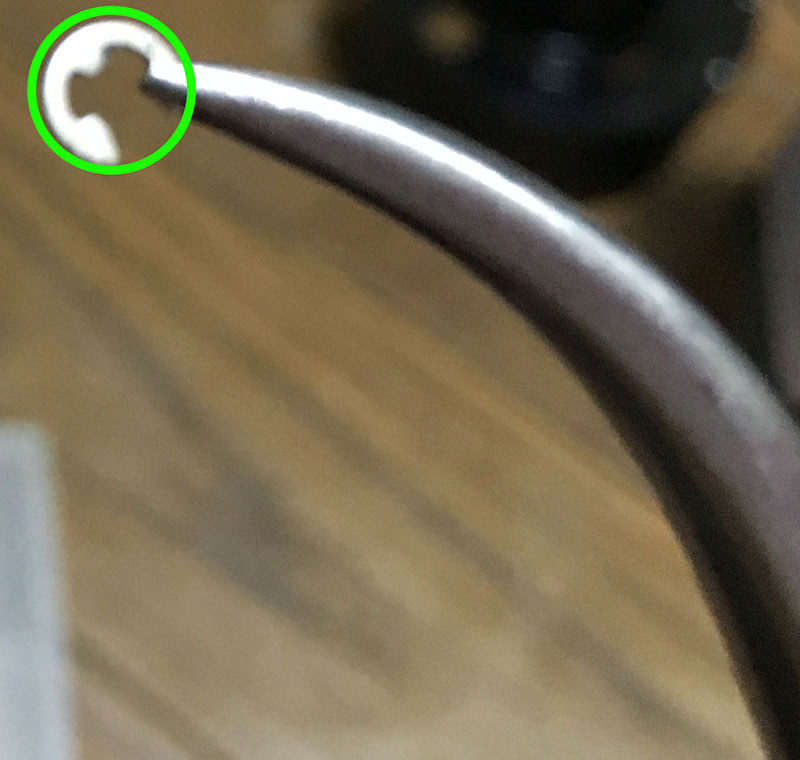
I don’t have an E-ring/C-ring plier so I just used whatever I had to get rid of this. It can be difficult with a screwdriver and a tweezer but I did it.
Before pulling off the swivel’s shaft, you need to undo the spring from its column first or else you risk ruining this fine spring.
Now it’s safe to pull the shaft.
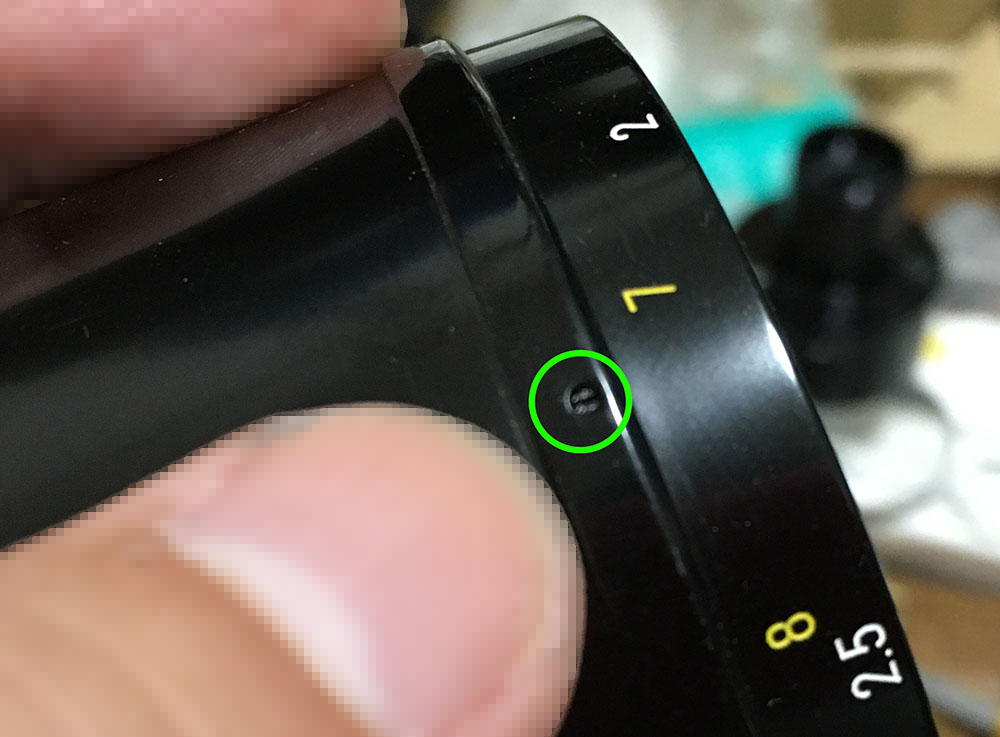
Let’s go back to the focusing ring. To clean this thing thoroughly, you will need to remove the scale from the focusing ring. First, remove these 3 set screws so that you can unscrew the scale. These are being secured with a dab of black paint so use some lighter fluid and soften the paint first before you attempt to unscrew these or you’ll damage these.
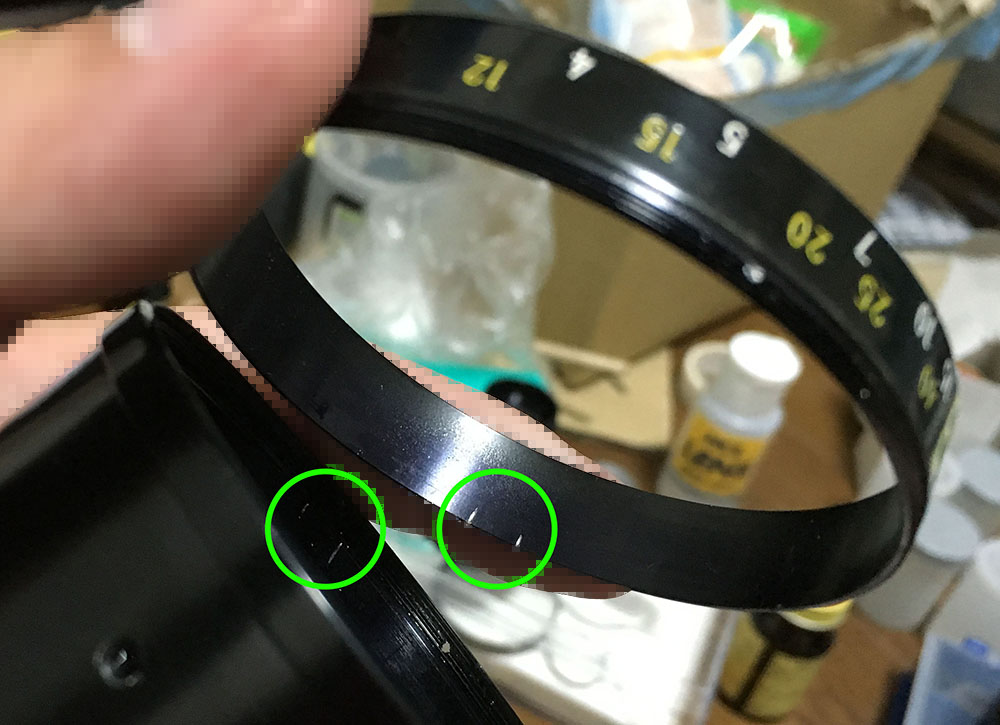
Before I removed the scale, I made some marks so I’ll know how these should align later.
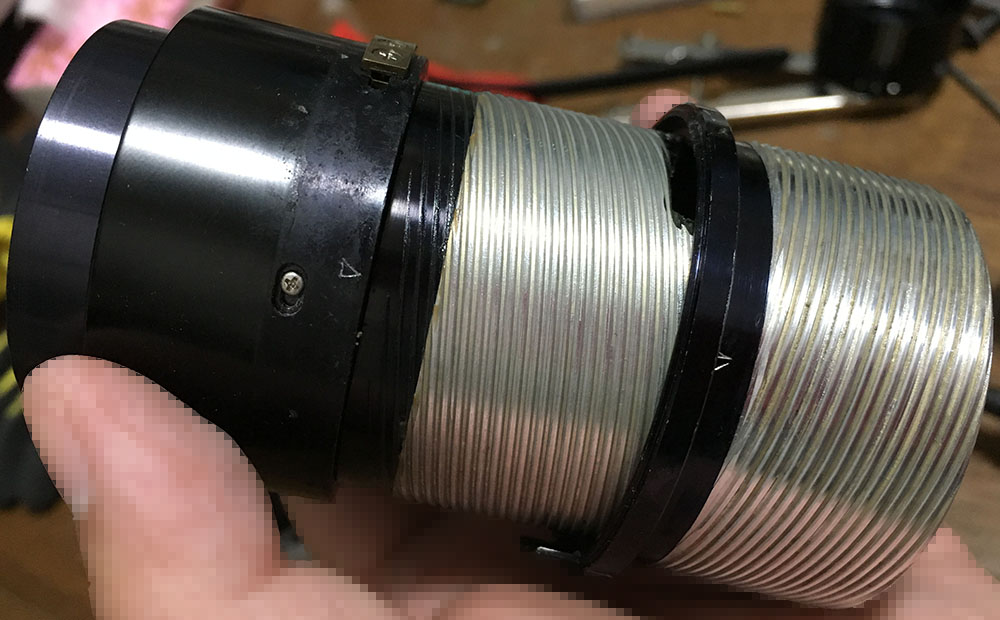
Remove this sleeve from the outer helicoid/rear barrel. Mine was secured with glue so I had to treat it with solvents and alcohol before it came of. It wasn’t easy.
Clean the old grease very well and make sure that you can’t feel any residue. You do not want the fresh grease to mix with the old one so make sure that everything is clean. This lens benefits from a lighter-type of grease because of its long focus throw. I made a bad choice because I used something thicker. This made my lens a bit difficult to turn and it’s hard to track moving subjects because of that.
Disassembly (Rear Optical Assembly):
This part has nothing unusual that’s worth noting. The only part where I spent some time and effort was on the retention ring because it was set too deep inside its barrel. You can skip this section if your lens is clean.
There’s a retention ring inside and to remove it I had to make myself a DIY spanner. Go to this link to see how I made mine. I used acrylic because it will not scar the alloy.
The rentention ring on my lens was sealed with enamel so I had to scour the seams using a very sharp knife to break the enamel seal. This will allow alcohol or naphtha to seep-in and soften the rest of the seal. It should be easy to remove once the enamel is gone. It can take several applications before this thing can easily be removed so be patient.

The rear element can now be easily removed with a lens sucker. Notice that I scribbled a few lines at the wall of the lens element to show which lens element it is and which side is facing forward.

After the last element is gone, you will have to remove this spacer. Be careful not to drop it on the floor because this thing is not being held by anything.

You can finally remove the 4th element with a lens sucker. The marks were made using a Sharpie and they will be removed before I reinstall the lens elements. I use a water-based marker, alcohol-based markers are also good.
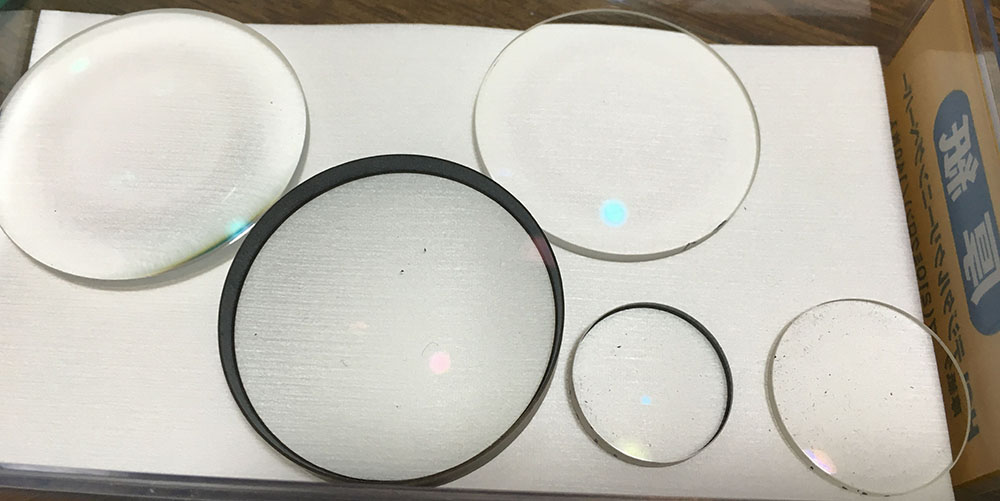
Here are all of the elements. These were safely stored in a plastic box while I work on the rest of the lens.
I cleaned the fungus using my fungus-cleaning routine. Be careful when cleaning and be sure not to clean too much and remove the coating. The chemicals I used are potent and it can easily strip the coating of your lens if you’re not careful. Make sure that don’t put these back facing the wrong direction or in the wrong order or else you may damage the lens elements when you tighten their retainers due to mechanical stress.
Disassembly (Iris Mechanism):
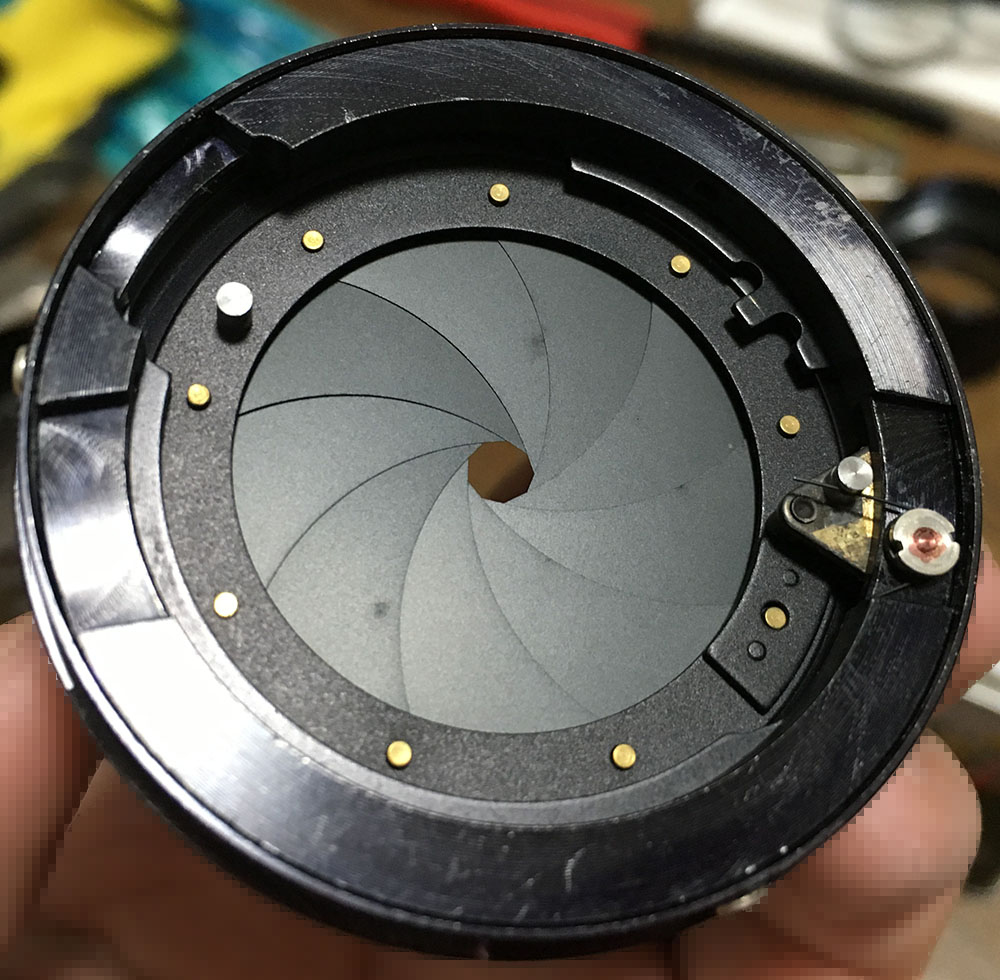
The iris assembly of this lens is impressive because it was made heavy-duty. Surprisingly, it also has a 9-bladed iris. Overhauling this part is not difficult at all in fact I would even say that I had an easy time with this. If your iris is snappy, clean and oil-free I’ll suggest you don’t mess with it. If you need to clean yours, use naphtha and lens cleaning paper to wipe the dirt off from each blade. Be very careful when with the blades because they are delicate and if you warped one then the iris will never work properly again.
The iris can easily be dismantled by unscrewing the barrel from the plate.
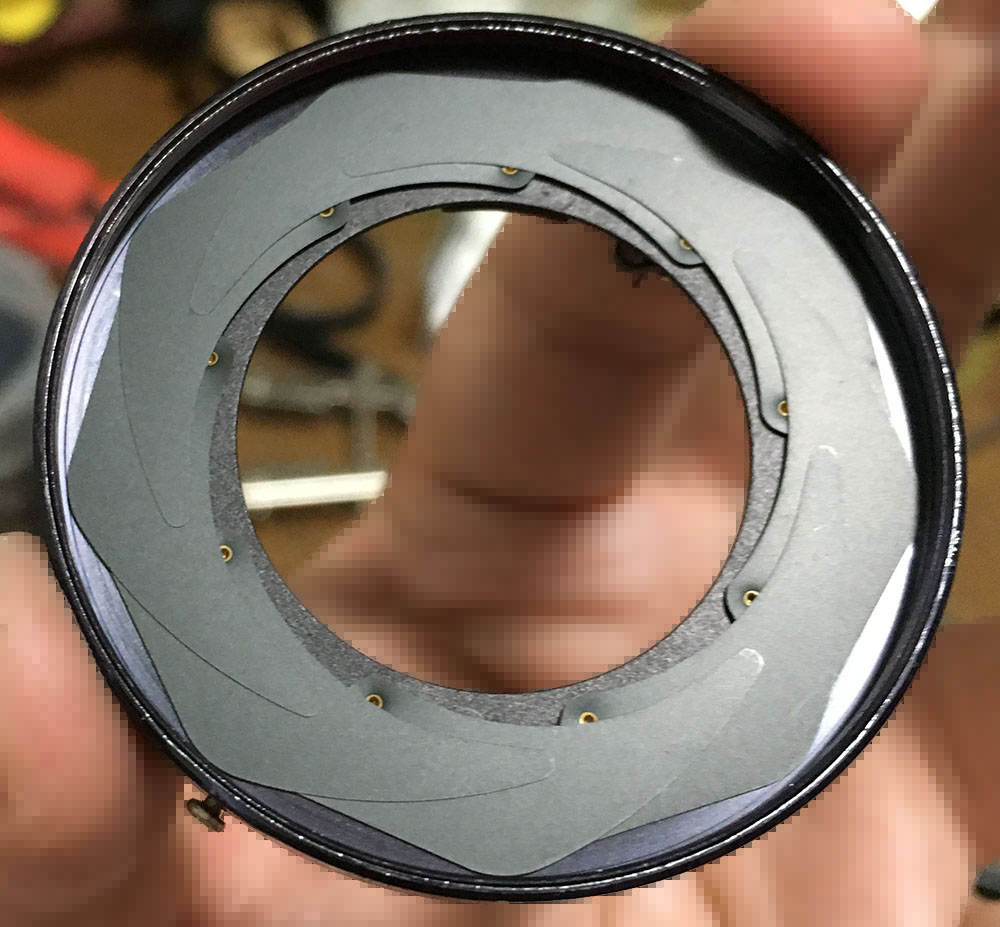
As you can see, this lens actually has 9 aperture blades, really neat for a cheap lens.

This the view from the other side. It pays to take notes or pictures while you can as these will save you from guessing later on. Notice that the shape of the iris isn’t uniform. This can be fixed by jumbling the order of the aperture blades. There’s lots of things that can cause this condition and one of those is storing the lens on it’s side for a really long time while the aperture was set to a small aperture. I know that this sounds stupid but there is an “old wives’ tale” to store a lens while with its iris set to about f/5.6. I have seen lenses where the iris is stuck wide-open or stopped all the way down. It seems that these blades have rusted and fused into that position. If the lens is stuck at f/5.6, you still have room to wiggle the aperture blades until the rust comes off. This might be the reason for the said “old wives’ tale” of storing a lens with it’s aperture set to f/5.6 or f/8. Did it make sense to you? Maybe it does for lenses with steel blades that corrode.
That’s all for the iris mechanism. You normally won’t have to do this so don’t worry. Oily iris syndrome is rare with this lens but it can develop if you applied too much grease or store the lens facing-down so oil will settle in this area because of gravity. Some people think that saturating a lens with solvents will cure anything and injecting oil helps with stuck parts. This is a sure way to contaminate the iris because the solvents will migrate to the iris sooner or later and cause this problem to occur. Leave the hacks to experienced repairers because they know what works and what won’t.
Conclusion:
This lens took longer to overhaul than what I initially planned. It will probably take you a whole afternoon and well into the early evening just to overhaul this properly. Most of that time will go to the proper disassembling of the aperture mechanism and stop-down lever mechanism. I would say that most zoom lenses will take more time to overhaul but this will probably be a close second. The only things that you should be aware of during re-assembly are the order and sequence of the parts as well as the numerous alignments found within the lens. Another thing which you should be careful about is the direction of the lens elements. If you got them wrong then you’ll end up with a blurry lens. I have another sample of this lens and the elements were assembled in the wrong direction so I end up with a blurry lens that is impossible to focus. I got it for parts so it never mattered to me.
If you think that you’re done with this lens then you’re in for a surprise because you will need to calibrate the focus of this lens. Reassemble the lens as usual but do not re-install the focusing ring. You will need to adjust the infinity focusing of your lens just in case the tolerances has changed ever so slightly when you were dismantling your lens. It’s a good idea to use a Nikon DSLR or any of the modern Nikon film camera bodies that has digital rangefinder because they are much more accurate as compared to using a split prism on manual cameras. Before you proceed, read my article on how to adjust your lens’ focus so you will know what’s involved before you begin.

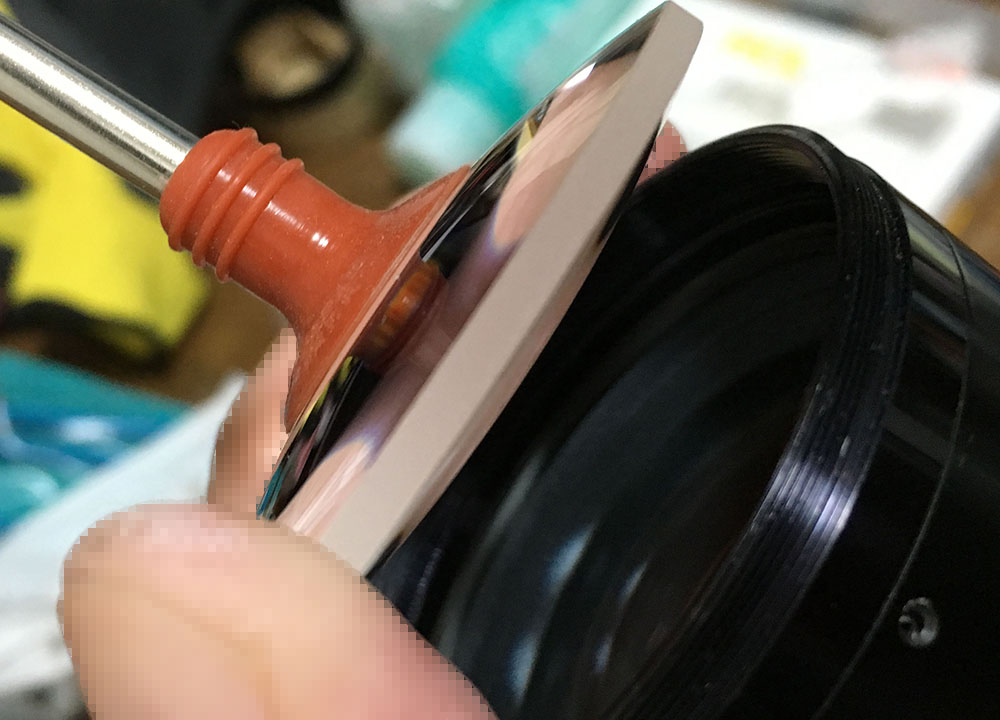
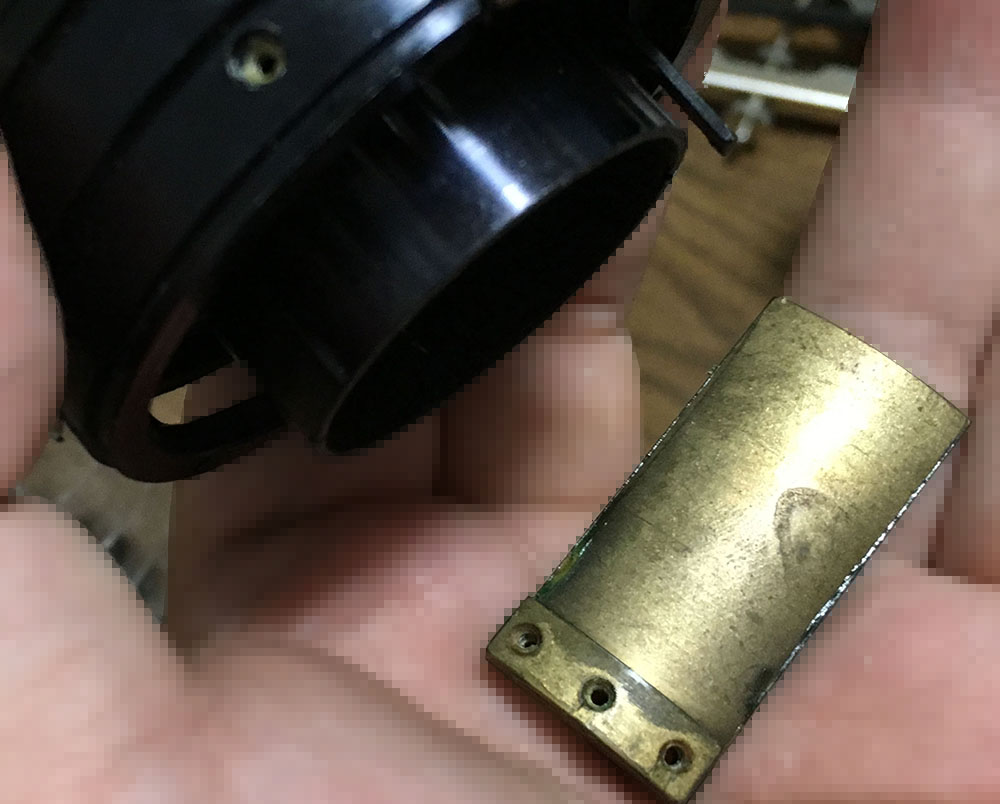
Be sure that you have your lens in the same state as the one in the picture above. Focus it all-the-way to infinity and loosen the 3 screws on the brass stop. Make sure not to loosen these screws too much because if the part keeping this together comes loose then you’ll have to open the lens again just to put it back into position. You risk damaging the iris if that part dropped on the iris blades. You just want to loosen it enough for the brass stop to move left or right when pushed, that’s all.
Now, attach the lens to your camera and focus on a distant object like a building several kilometres away. Focus your lens until you see the focus confirmation dot light up and not while it’s blinking. A blinking dot means that the camera isn’t sure if the object you focused is properly focused or not, you’ll need to be as precise as you can with this step because everything is calibrated to the infinity focusing of this lens. If you messed this up then all of the distances in your scale will be off.
While your lens is accurately focused at infinity, move the brass stop until you get it into position. In my case, the left edge of the brass stop should be situated squarely on top of one of the screw holes on the focusing ring. Fasten your focusing ring back and see if the focusing ring will stop turning when it hits infinity. When it does, give your self a pat on the back or else, try again until it does. Do several tests and see if it’s still good.
After the previous step is finished, loosen the set screws on the focusing ring to loosen up the distance scale. While the lens is still focused to infinity, move the said scale until the infinity symbol is centred exactly with the white focusing line then tighten the set screws to secure the scale. Do some more tests until you get this perfect. Secure the set screws by using a small brush or toothpick and place a small drop of clear nail polish or semi-gloss black enamel paint on the set screw to seal them. Don’t make a mess and also never use cyanoacrylate or super glue on this lens because it fogs. Congratulations! You have just successfully overhauled an advanced prime lens (for its era).
I hope that you enjoy this post. I took so much notes and adding the commentaries alone took me a whole week. I’ll take a break and write a short one for the next article. Thank you very much for supporting this blog, if you are not aware of our Facebook page then please check out this link. Until next time, Ric.
Help Support this Blog:
Maintaining this blog requires money to operate. If you think that this site has helped you or you want to show your support by helping with the site’s upkeep, you can make a small donation to my paypal.com (richardHaw888@gmail.com). Money is not my prime motivation for this blog and I believe that I have enough to run this but you can help me make this site (and the companion facebook page) grow.
Buy me a roll of film or a burger?
Thank you very much for your continued support!
$2.00
Helping support this site will ensure that this will be kept going as long as I have the time and energy for this. I would appreciate it if you just leave out your name or details like your country’s name or other information so that the donations will totally be anonymous. This is a labor of love and I intend to keep it that way for as long as I can. Ric.

Jul 24, 2016 @ 16:57:47
Good afternoon! Thanks for the very informative article! I read with pleasure! Respect and bowing
Jul 25, 2016 @ 00:05:01
Thanks, Roman!
Aug 24, 2016 @ 11:03:17
Hello,
thank you very much for the very detailed description of the process. I have the same lens, it is very clean but needs some lubrication of the helicoids. Can you advise me which steps are needed to re lubricate “only”.
thank you very much
Aug 24, 2016 @ 12:58:17
Hello, Stephan!
That is a very difficult task since the lens’ construction is a bit complicated! You can follow all of the steps but leave out the ones that has anything to do with the optics because all you need to access is the helicoids. If this is your first lens I would advise you to follow this guide carefully and read all of the prerequisites like grease, screwdrivers,etc.
There is a very lazy way to lubricate the helicoids and I would not recommend it but some people drop silicone oil into the helicoid itself. That is stupid because it will gum up the grease eventually. It will work for a couple of months,though. Ric.
Mar 19, 2018 @ 11:15:32
Hello from Germany. I love your site which has helped me many times. I have a little problem with a Micro Nikkor 4.0 200mm, the solution might be interesting for everyone. I wanted to remove the sun visor with sleeve. The small screw in the sleeve could be solved without problems. The sleeve can be unscrewed, but you can not pull it off to the front.
What did I do wrong? The ring with the serial number is connected to the sleeve. Must I remove it first?
Many Thanks !
Mar 19, 2018 @ 23:11:16
Hello. I Haven’t worked on that lens yet. If I am not mistaken, you can only remove it when the fron assembly is gone. Ric.
Jul 04, 2018 @ 17:40:30
Hello Richard, i really liked this tutorial, and i thank you for it.
What grease grade you used to overhaul this model?, is the 30?, thanks
Jul 07, 2018 @ 17:48:10
Hello, Kevin.
As stated in my grease article, I prefer thicker grease for wider lenses with a short throw. Ric.
Sep 03, 2018 @ 16:22:45
Got one today I had to clean fungus spot on front group.Thanks to video at the top did it successfully. Just remark, Those 3 bolts under the lens hood (found one only at the actual lens on video) no need to take off. There is tiny barrel under the hood, which is hold by those 3 bolts. If taken off, it is hard to adjust tiny barrel to holes when assembling back.
Sep 16, 2018 @ 22:44:57
I see. I tend to remove evertything because most of my lenses needed to be disinfected when they get to me. That video was made by Kenneth Olsen, Mikeno62 in Youtube. Please subscribe to his channel, he has lots of very helpful videos. Ric.
Oct 23, 2018 @ 18:36:46
Hi Richard. At few Nikkor lenses (same as on this one from article 200/4 Ai) I have the case of very small air gap in focus mechanism. It is obvious when changing direction of focus barrel turning, also it is possible to hear quite “tik” sound. According my research air gap is in part you call helicoid key. Actually between key and sliding slot where the key actually slides in. Gap is so small still is anoying while focusing and makes focusing harder.
Do you have any advice regarding? Probably only new parts will solve this.
Nov 28, 2018 @ 03:02:06
Great article for a great lens. I have collected the first three Nikkor 200mm f4’s, got my first one for only $10 on EBay. The only problem is it is stuck on f4, won’t stop down, but is a razor sharp lens. What is the process for fixing this no stop down issue; I also have a Nikkor 35mm f2 and a Nikkor 105 p f2.5 witch won’t stop down from the widest aperature. Thanks in advance.
Dec 29, 2018 @ 02:55:18
Hello, Frank. Opening the lens should show what’s wrong. It can come from a wide spectrum of problems. Ric.
Oct 15, 2019 @ 06:01:04
great work Richard i have a K version of this lens can you advise how to get it converted to AI ,regards
Dec 21, 2019 @ 03:39:17
i have an article on how to modify it but i would just leave that alone.
Oct 15, 2019 @ 18:24:55
I have the K lens looking to see if it be converted to Ai spec
Oct 15, 2019 @ 21:30:16
i have a nikon 200 f4 K lens can this be modified to ai spec
thanks
Dec 21, 2019 @ 03:38:47
yes but i wont recommedn it
Jan 28, 2021 @ 08:38:48
has an article been published on the repair of the Micro Nikkor 200mm f / 4?