
Hello, everybody! I am getting kind of addicted to boba tea or tapioca as the thing is called here. It’s refreshing and it reminds me of home. It’s also kind of expensive at about $5 a cup. This makes it profitable for the vendors and even the mobsters are into this according to news, which isn’t a bad thing at all because it’s an honest way to make money. It’s not cheap at all but there is a way for you to save money and that’s to make them yourself. They won’t need any special equipment at all and all you have to do is buy the required ingredients and follow a recipe. This will save you roughly $4 a cup because the ingredients are quite cheap. Today, I’m going to show you a way to save money on lenses so long as you’re fine with a little bit of hassle. It’s not the best when it comes to comfort but its performance-to-price ratio is going to make a lot of cheap photographers happy.
Introduction:
The Nikkor-Q 20cm f/4 Auto is a historically-significant lens. It made the SLR the best system to use for shooting with telephoto lenses because of its size which for its time was considered to be really compact for such a long lens. It gave the F-mount a big boost in prestige because of its performance. This lens can be seen being used by newsmen during the Vietnam War due to its ruggedness and sharp pictures. These were also favorites of sports shooters and nature photographers alike because they’re compact and you can shoot with it without the need for a tripod.

The earliest version of this lens debuted in 1961 to compliment the Nikon F and its growing collection of telephoto lenses. It’s a very old design but it’s a good one because it’s still quite nice today despite the fact that better lenses are available to us now and they have the advantage of using better coating technologies, autofocus and other refinements.
The optical formula is simple and is a 4-elements-in-4-groups design. It uses the minimum amount of lens elements and that’s amazing for its time since its performance is considered to be one of the best during its time. This was a very expensive lens when it came out but you can now buy these for less than what you would pay for a decent dinner. The specs do not excite many people these days and only collectors are interested in these with the only version that’s worth buying is the rare first version.

It can be confusing to talk about the numerous versions of this lens without a picture so I prepared one to help you identify the major variants. You can also refer to Roland Vink’s amazing site to help you identify them. It’s fun to collect these because of the many versions they come with and some people even own more than a dozen of these in total.
From left to right (chronological) you have:
- Nikkor-Q 20cm f/4 Auto bis – This is the original lens in the line. There are 2 variants of this lens with the earliest ones being the rarest with only about 800 ever made. The difference is it doesn’t have the silver cup in the hood so it doesn’t click-into place. The later one is identical except for the said difference. There are a few minor differences in the internal parts but it’s not important to document these because they’re only interesting to collectors.
- Nikkor-Q 20cm f/4 Auto – This is mostly similar to the previous versions but there are many improvements made in production to cut corners and also to make the lens more durable. Note that it’s slightly slimmer than its predecessor so parts are NOT interchangeable in most cases. It is the most common lens using the original barrel profile.
- Nikkor-Q 200mm f/4 Auto – This is the last lens of the Nikkor-Q line. It’s now able to focus down to 2m, handling and construction was greatly improved, the optics were tweaked a bit to offer better sharpness and the C version is probably the sharpest in this line since it uses Nikon’s better coating. This is the best lens that uses the original formula, this is the best one amongst the original line for actual use.
- New-Nikkor 200mm f/4/Ai – This one represents a total departure from the older line because the optics are totally new. It’s also much smaller and lighter so for many this change alone is a big deal when deciding which lens goes in the bag or stays in the dry box. The K (New-Nikkor) and Ai versions are nearly-identical so I bunched them together in one category.
- Nikkor 200mm f/4 Ai-S – This is the last version. Optically, it is the same as the previous one but the construction is different. The coatings are probably different on the later ones but I have no information for this. Handling is pretty much the same as the previous version despite the barrel being strighter. It’s the lightest one in the family and this alone makes it the most practical for regular use.
The simple comparison above sums-up everything. Use it as your guide for choosing which version fits your style and budget. The earlier ones are a bit limited in use because of the long 3m minimum focusing distance so only a few people will prefer them for regular use. The only advantage I can think of is the older ones were made for shooting black-and-white photos so their output is a bit cooler when taking color photos but is handy when shooting with monochrome film because it acts like a filter.

Here it is with an M-ring, some people like to use this as a macro lens. This is a trick to make the focusing distance much shorter so you can take photos of things that are closer to you and fill-the-frame with your subject. Shorter rings will be helpful so you don’t go into macro-territory so your lens is still useful for general use. It’s a lovely macro lens and you can take nice photos with it of flowers and other small things and have the background melt into a nice wash of colors. You do lose a bit of speed when doing this and it will be harder to focus because the view is darker because of the speed loss.

This is heavy but it balances really well with most Nikons that are big enoug. It’s balanced really well so it doesn’t feel heavy at all even on a small camera like the Nikon Df or on the film Nikon FM/FE series of cameras. With the Nikon Df, I don’t need to convert the aperture ring to use it. This is a pre-Ai lens and pre-Ai lenses that have no screws on the bayonet do not have the precious Ai kits so the only way you can use this on later manual film Nikon cameras like the FM2 & FE2 and the majority of Nikon’s DSLRs is to convert it to Ai. I made this guide on how I convert my pre-Ai lenses but before you convert any of your pre-Ai lenses to be Ai-compatible, be sure to think through it very well first because this is a destructive process and there’s no going back once it’s been made “kosher”.

The 200mm focal length is great with the 50mm and 28mm lenses. This is my walk-around combo and it’s nice as it covers all of my travel photography needs. A 50mm for general use, a 28mm for scenery and a 200mm for candids. The big gap between 50mm and 200mm can be bridged easily by positioning yourself properly. Use your feet to move further or closer to alter the framing.
I just put these in my bag and I’m set. I’ll even add a film camera if I’m in the mood to shoot with film. You can assemble a kit with very little money if you are fine with using older lenses. You don’t need the best and latest to take great photos.
I’ll consider this for day-time outdoor sports and for shooting wildlife. It has limited use for street photography but the compression a 200mm lens gives you is sometimes useful to get the tight framing that you need. Many people also value this lens for macro photography as a relay lens. Some people will even add extension rings to get even closer, I tried it but it was difficult for outdoor macro work because of the lack of AF and the slightest wind breeze can throw everything out off, from framing to focus.
Knowing how a lens performs is key to maximizing its use. This is an older lens but it’s not an excuse for not using it to take nice photos. You will learn how to use its strengths and avoid its flaws, this will help you take plenty of nice memories with this lens.
The pictures below were taken with the lens stopped down from f/4 to f/5.6 and f/8. These are the most common apertures that you’ll use this lens with and these also show the most changes in how a lens performs. Any further then this and you only get more depth-of-field. Diffraction will also start to show its effects when you stopped it down further than f/16. I don’t believe that people will use that aperture on a regular basis.


(Click to enlarge)
Vignetting can be seen wide-open and you’ll see traces of it by f/8. This isn’t terrible at all and shouldn’t be obvious unless you’re taking photos with the sky in the background. If this bothers you then just stop it down to f/5.6 and smaller.


(Click to enlarge)
The lens is sharp wide-open with ample resolution. Stopping it down won’t change the characteristics of the rendering by much. You can observe some chromatic aberration on the blown-out parts of the scene wide-open but it’s easy to avoid this by under-exposing your shot a bit. It’s gone by f/5.6 and it looks really sharp at the center of the frame. Things look great by f/8 and it’s performing at its peak by this point.


(Click to enlarge)
These photos were taken wide-open with distant subjects. They look sharp in my monitor when zoomed but there’s still room for improvement. Stop the iris down to f/5.6 and you’ll get a slight boost in sharpness because the lens is already sharp wide-open. You stop the lens down to get rid of flaws like chromatic aberration and vignetting or for more depth-of-field. Notice the dark corners, pictures like these should be taken at f/5.6 but I only took these to serve as examples for how sharp this lens can be wide-open.


(Click to enlarge)
Here’s how the lens performs with closer subjects. It’s really sharp, contrast is great and the saturation is nice despite being a bit muted. The rendering is nice and the quality of the bokeh is good, not harsh. The 6-sided iris is the biggest turn-off for me because a 7-sided one will give you smoother results but this is nit-picking on my part.
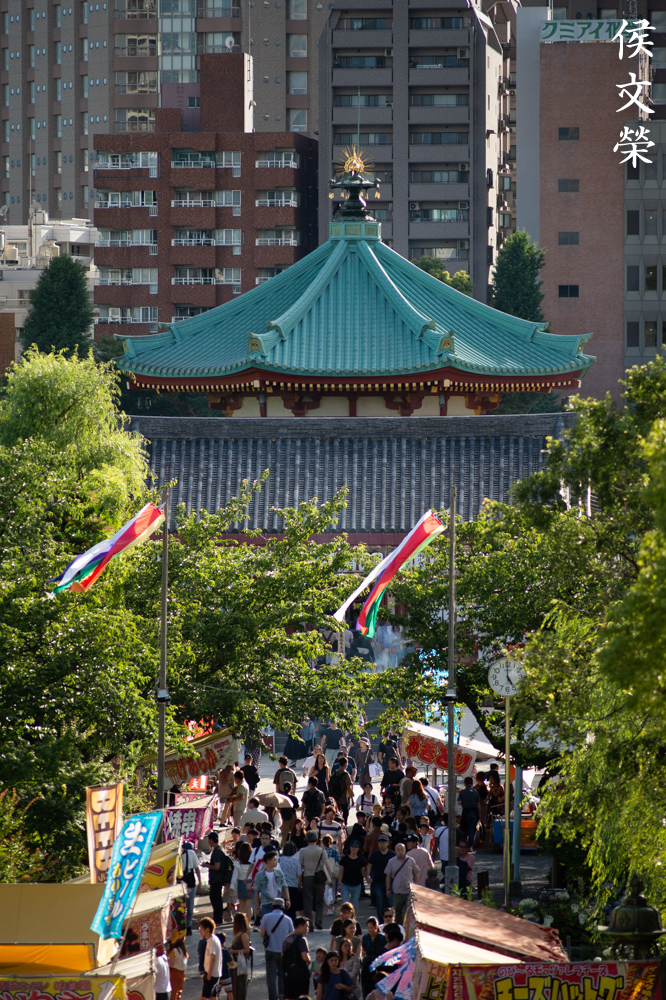
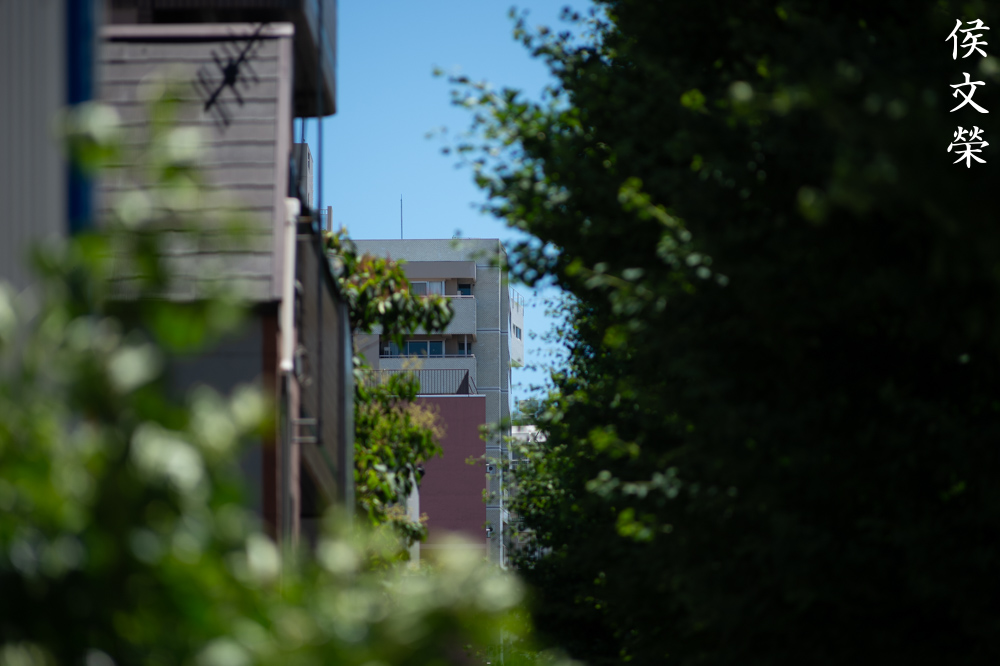
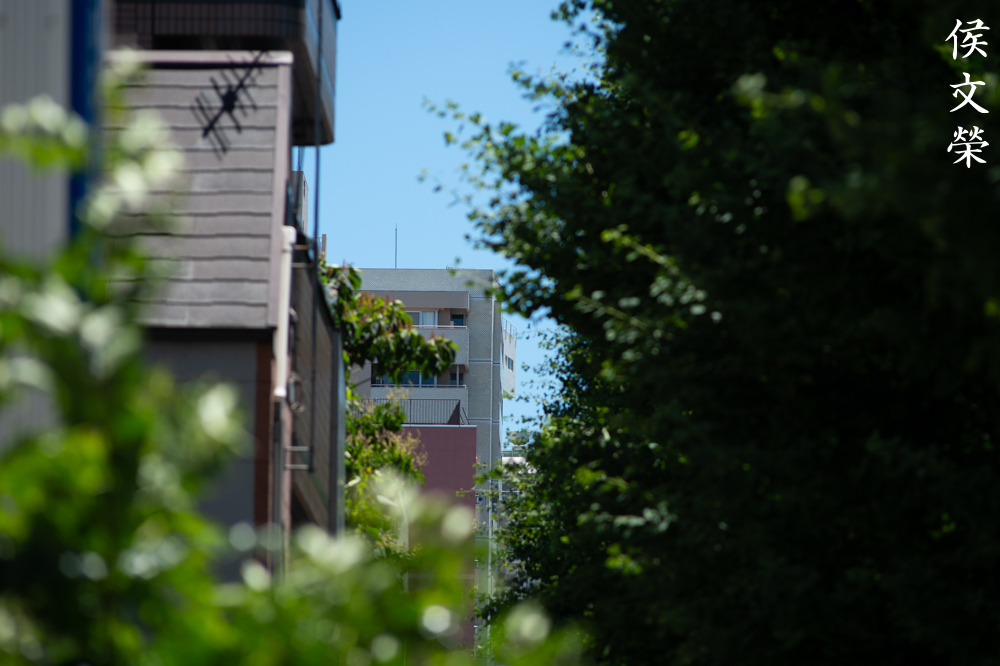
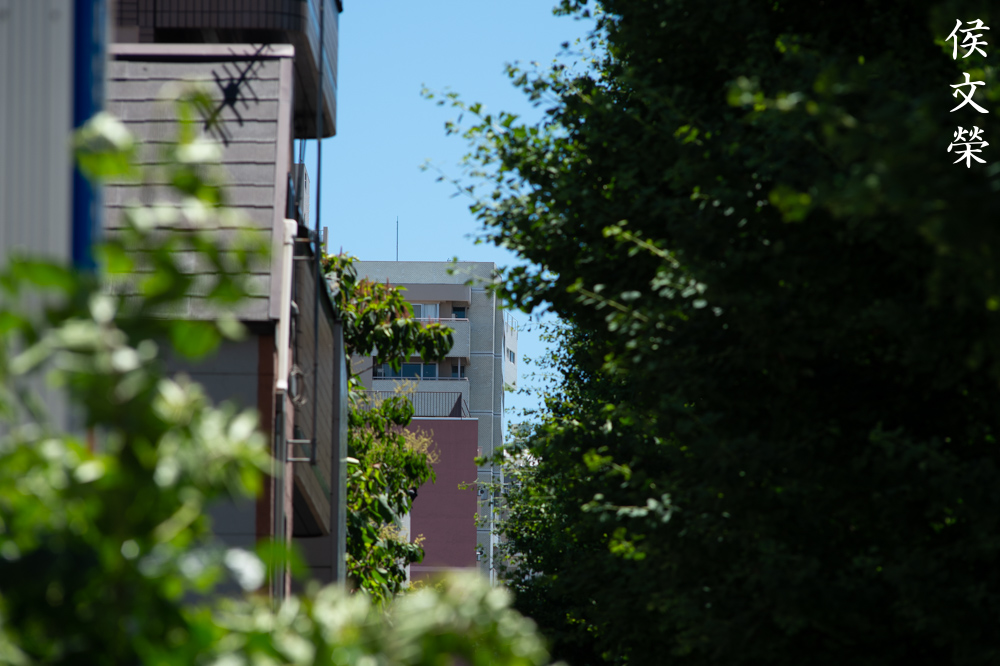
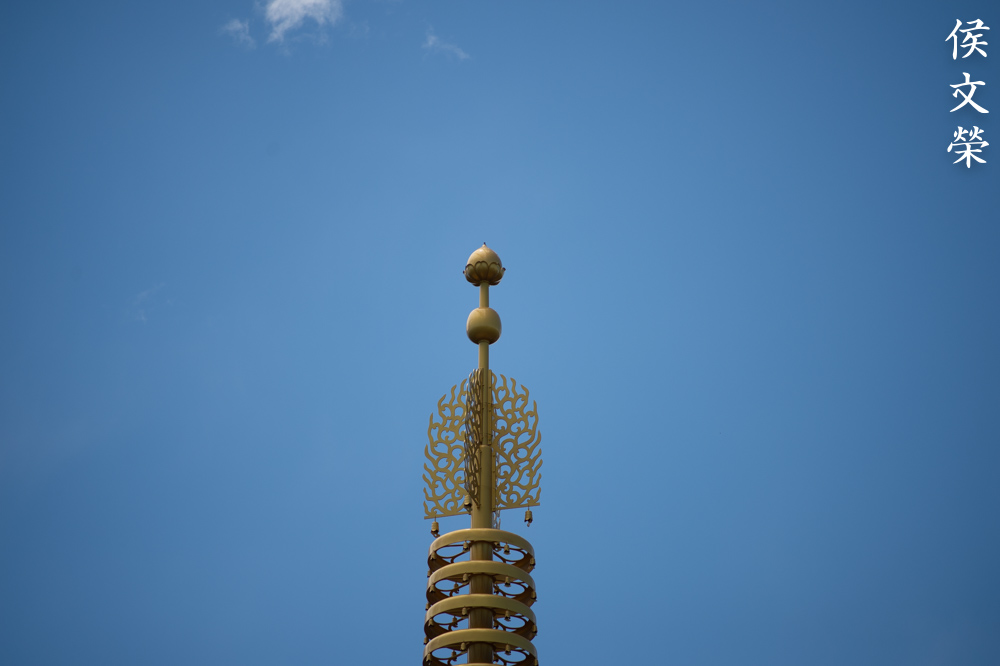
Zoom into the spire to see the effects of chromatic aberration. It’s difficult to avoid it in a scene like this because under-exposing isn’t an option because it will make the lower part of the frame dark and that’s the most important part of this picture. You use a 200mm lens for frame compression for a shot like this. If I used a shorter lens I will make the temple and the apartments look smaller due to effects foreshortening.


(Click to enlarge)
You can even use this lens for portraits, too. I would prefer a short lens but I can’t change my lenses at that time. A 200mm lens will make the model look slimmer if you’re framing them with the whole body in the frame. This is a trick that I use to make my models appear to have longer legs in the picture.
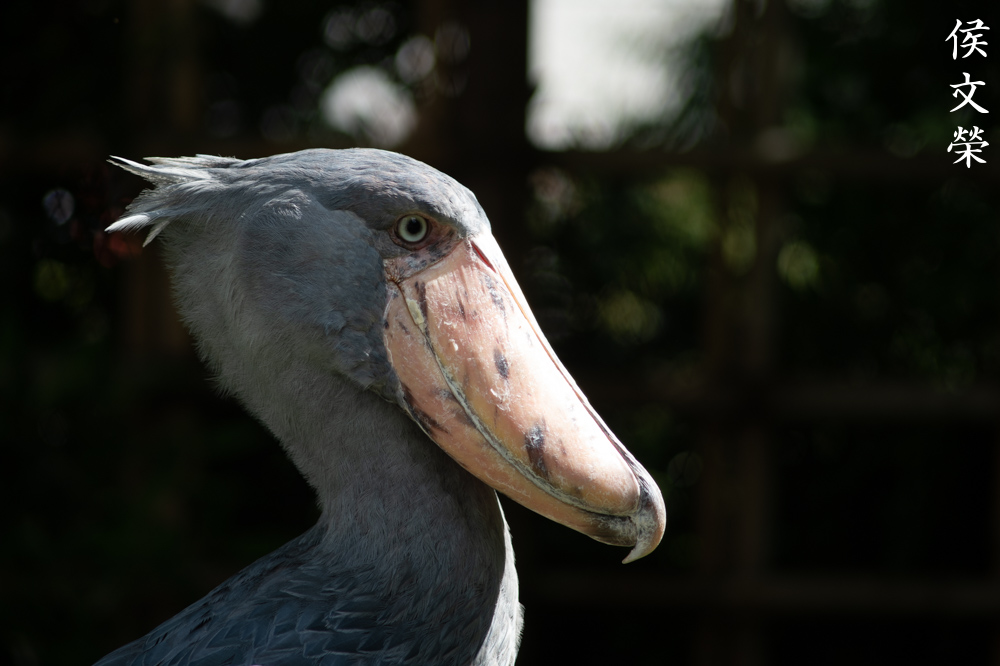
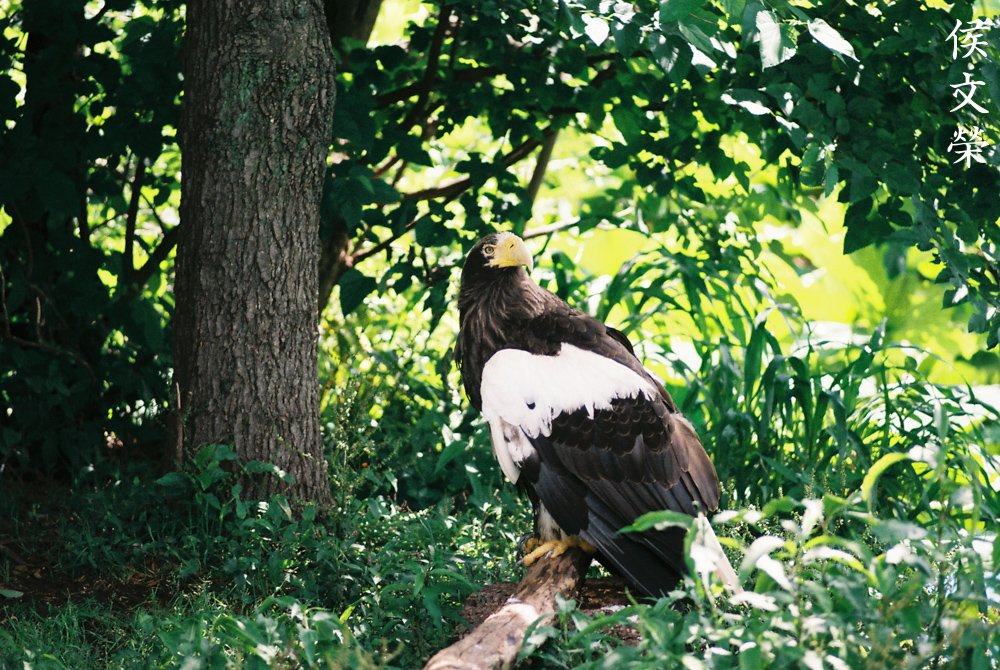
This lens is great for birding. The details of the shoe-bill look great and you can see the details of the feathers very well thanks to the resolving power of this lens. Don’t be afraid to use it wide-open.

(Click to enlarge)
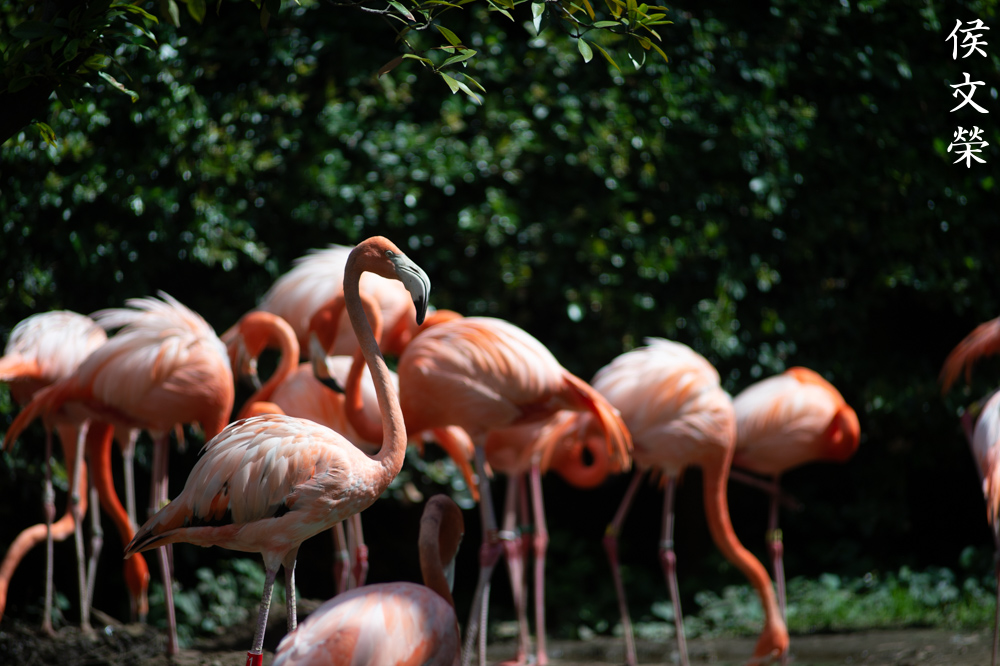
Flamingos! This reminds me so much of Miami Vice. The long reach is great for taking photos of shy animals but many will prefer a longer lens for this.


(Click to enlarge)
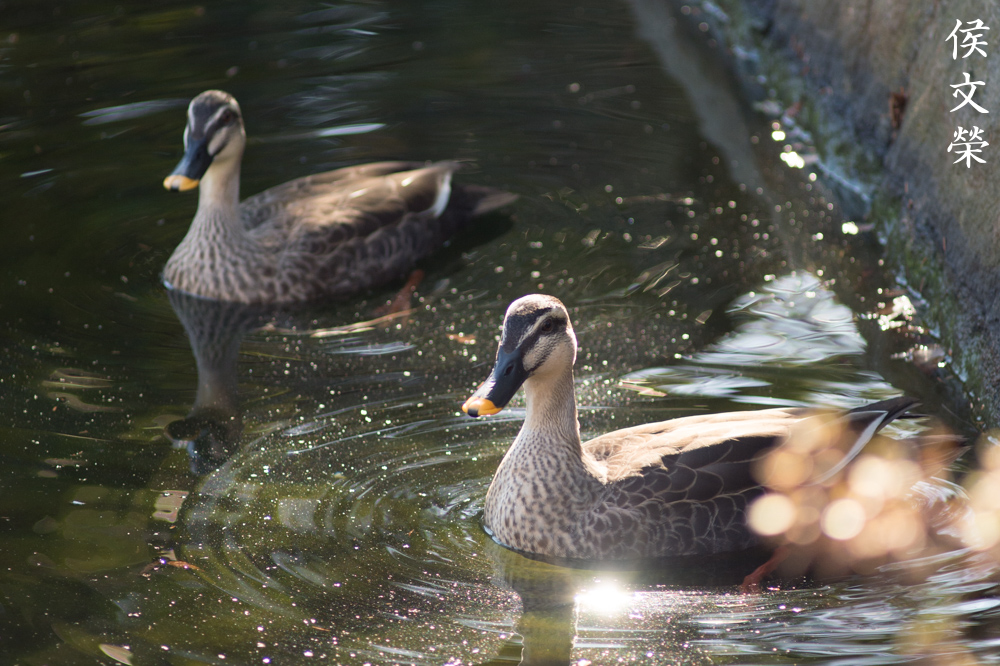
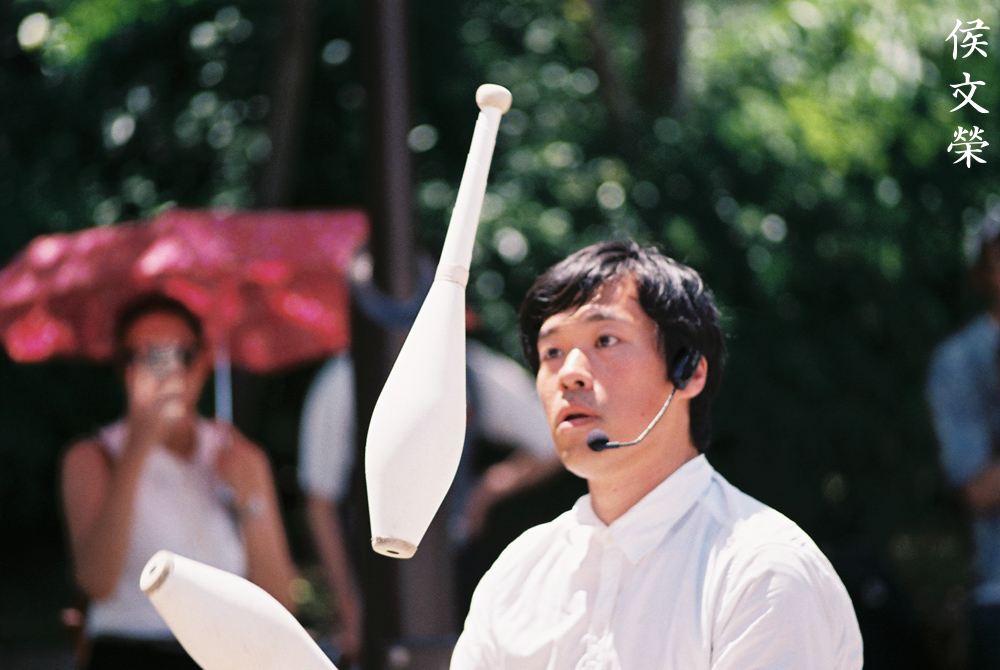
This can somewhat be probe to flaring but not as much as its ghost problem so you can ignore it. Shooting it at f/11 with the sun within your frame will easily produce a huge blob and a rainbow. Stop it down to f/22 and that blob will get smaller but less diffused. The sunstars look good despite the 6-sided iris. The picture with the ducks demonstrates how sharp this lens can be at f/4 but it can show some chromatic aberration if you’re not careful. It won’t be much of a problem when taking black-and-white photos, remember that this was primarily calculated for use with black-and-white film. It can be a big challenge to focus on moving people as you can see in my pictures. The people are not perfectly in-focus despite being acceptable in some cases. It’s best to stop the lens down to help you get more depth-of-field when you can shoot with a reasonably high shutter speed that won’t go below 1/200s.
Let’s now see some photos that were taken with film. Photos that were shot using film have a unique look that’s difficult to replicate with digital thanks to film grain and how film reacts with light. It’s important to see how a lens performs with its intended medium because it will show us what the design was originally about. Film is more forgiving because film grain can mask a lot of “flaws” that you get with digital because grain looks organic. Digital is sharper and the pizels are regular so you get things like moiré if you’re not careful. I took these using a Nikkormat EL with Fujifilm Industrial 100.

Chromatic aberration can’t be seen in this photo despite having very bright areas in the scene.
It is difficult to acquire focus with this lens on moving subjects but you can get it perfectly with practice.

There are times when I wish I had a teleconverter with me. I don’t have any at the moment and I don’t like using them much. People used to carry them many years ago and were usually a regular part of a photographer’s kit.

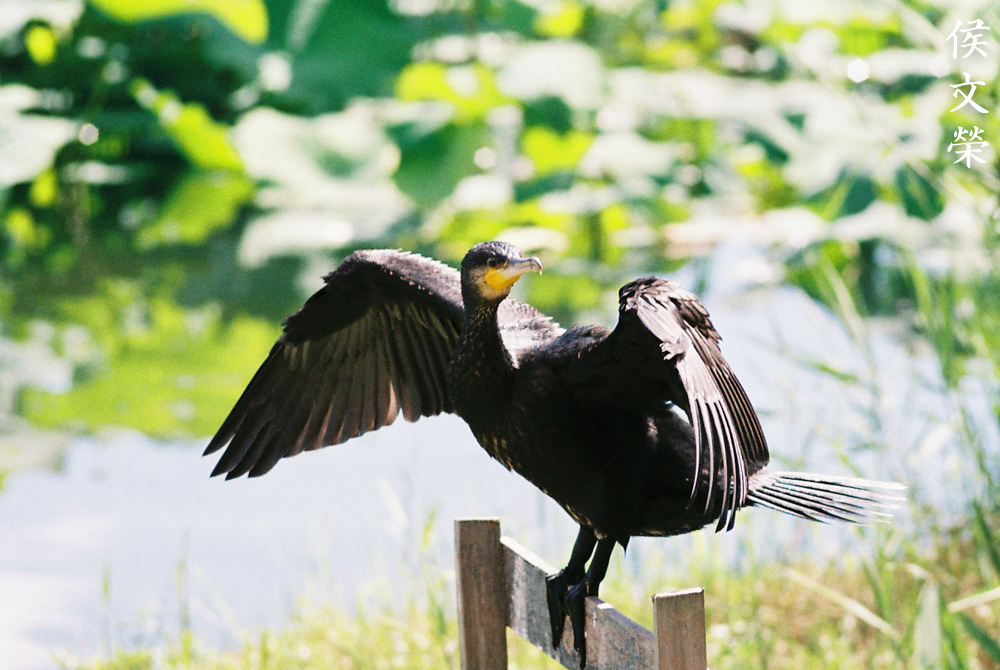
I finally managed to get this lens to exhibit chromatic aberration with film! Look close at the cormorant’s beak and you’ll see slight traces of magenta. It isn’t a lot so you don’t have to worrt much about it.

The lens produces very nice pictures that look natural, the tonal range that you get with this lens is great without making the picture look flat. Just look at the nice details of the pelican’s throat.
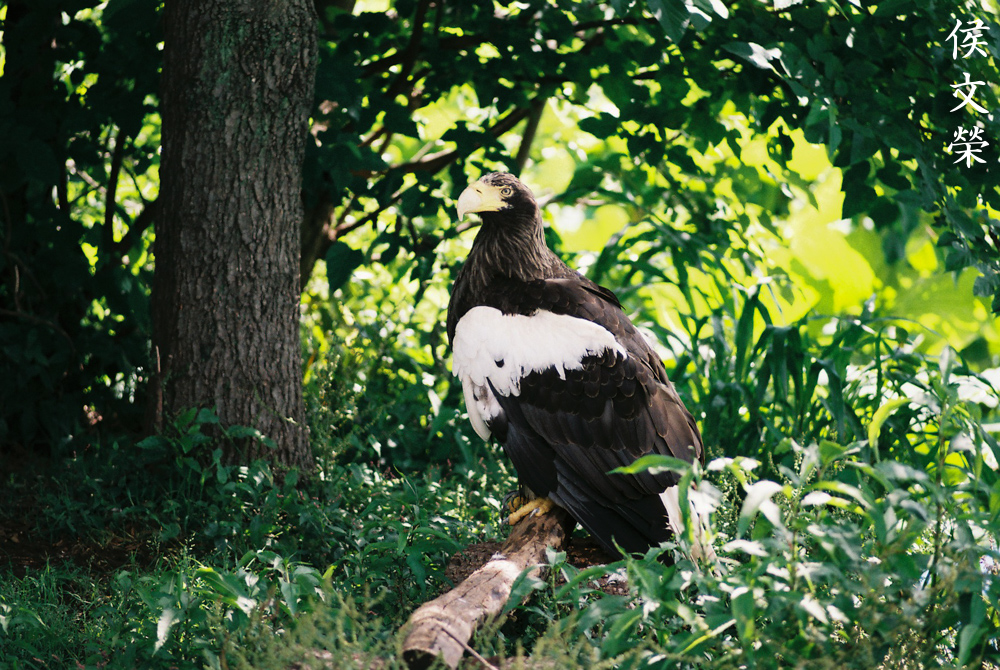
It’s hard to focus on this eagle since it kept moving around. You can see a bit of magenta on the leaves to the right but it doesn’t bother me at all because the subject doesn’t exhibit any of it.


(Click to enlarge)
Here’s the rest of the photos. I enjoyed using this lens because it’s small, it’s certainly easier to handle compared to the Nikkor-H 300mm f/4.5 Auto. That lens is heavy and you can easily get tired carrying that around.
I hope that this introduction was useful for people who are looking for info about this lens. Not a lot of people are interested with this and so people do not usually post anything about it today. It’s still a nice lens for daily use but that’s probably only true for people like me who collect and use older lenses for fun. If you don’t care much about history then you’re better-off spending a bit more and buy the later versions specially the small ones if you can get yourself to spend more than 2x the price for one of these. Those are worth it and it pays for themselves in comfort due to their smaller, lighter and better ergonomics. I’m biased towards Nikkors but I won’t advise you to get a lens that you may not want that’s why I’m being up-front about this. Having said that, let’s now start with the repair article.
Before We Begin:
If this is your first attempt at repairing a lens then I suggest that you check my previous posts regarding screws & drivers, grease and other things. Also read what I wrote about the tools that you’ll need to fix your Nikkors.
I suggest that you read these primers before you begin (for beginners):
Reading these primers should lessen the chance of ruining your lens if you are a novice. Before opening up any lens, always look for other people who have done so in Youtube or the internet. Information is scarce, vague and scattered (that is why I started this) but you can still find some information if you search carefully.
I highly recommend that you read my working with helicoids post because this is very important and getting it wrong can ruin your day. If I can force you to read this, I would. It is that important!
For more advanced topics, you can read my fungus removal post as a start. This post has a lot of useful information and it will be beneficial for you to read this.
Disassembly (Lens Barrel):
Repairing this lens isn’t difficult if you’re familiar with Nikkor primes and it has a lot in common with the Nikkor-Q 200mm f/4 Auto that replaced it. You can even think of this lens as giant a Nikkor-S 50mm f/1.4 Auto because this is basically what it is – an oversized prime lens. Do not work on this if you’re not familiar with lens repair, you will need the right tools and skills for this. This lens is one of those that had plenty of glue applied to it at the factory to make sure that nothing undos itself so you’ll need to apply solvents to parts that are stuck before you remove them,
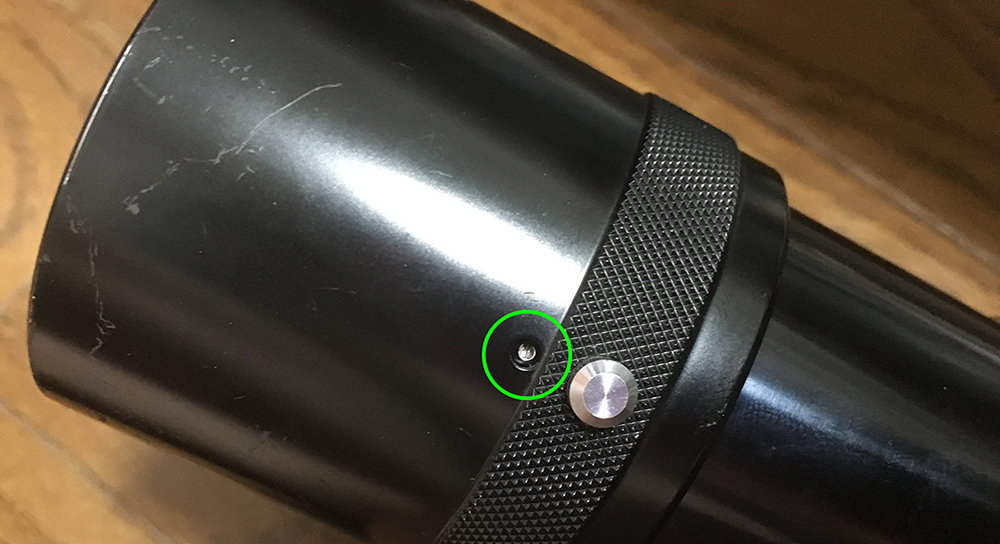
Extend the hood and turn it until you see this little screw. This screw serves as a pin to secure the front ring. But wait, there’s more! There are 3 of these so extract the other ones like you did this one.
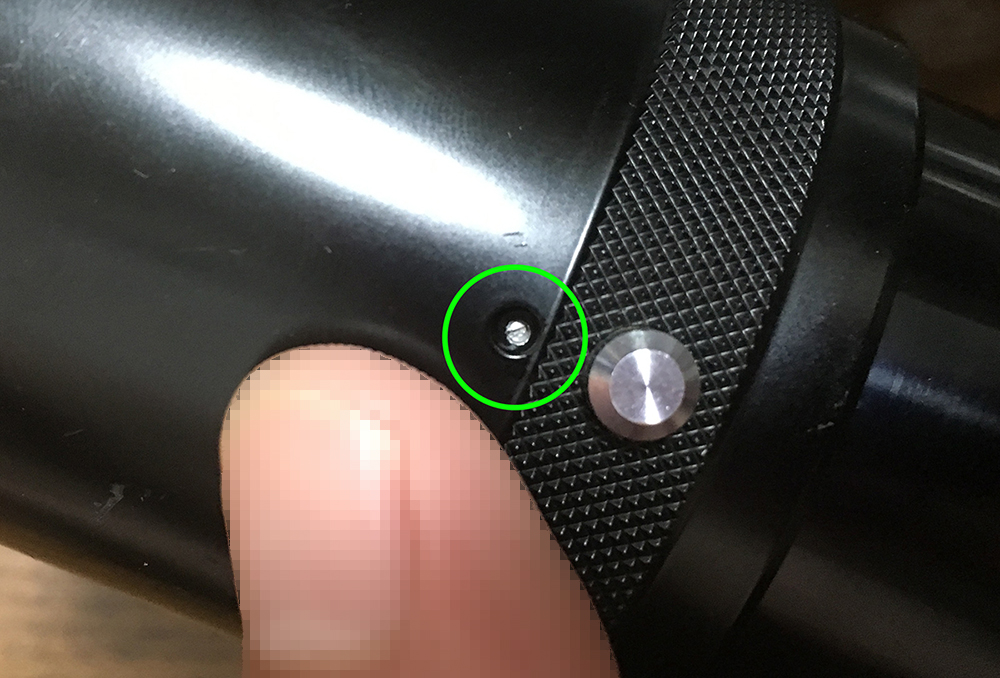
Here is another one.
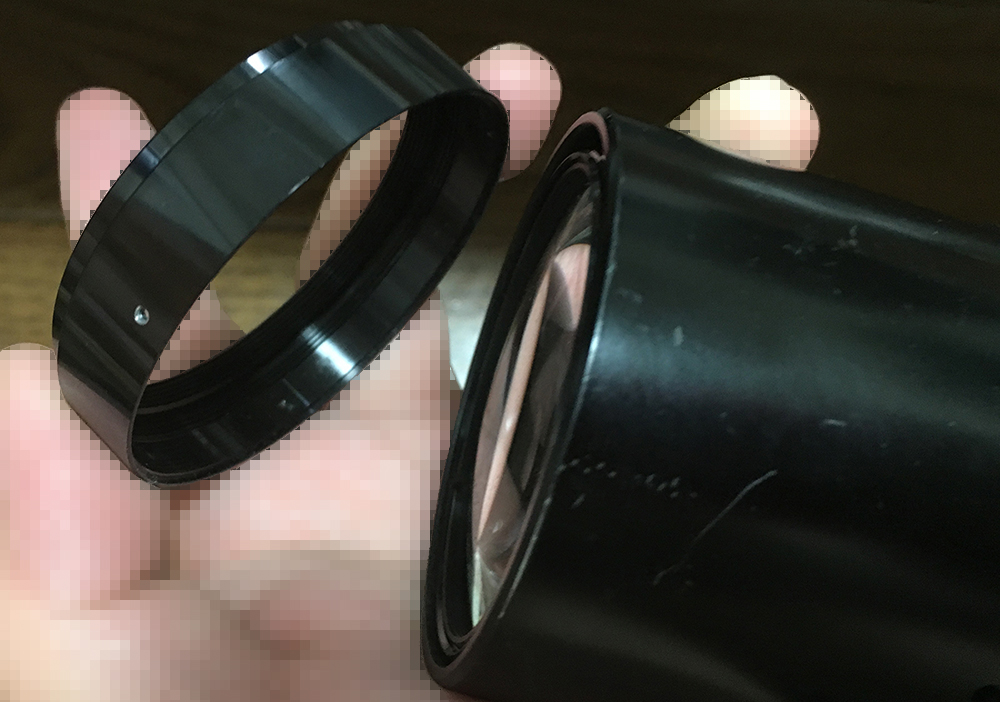
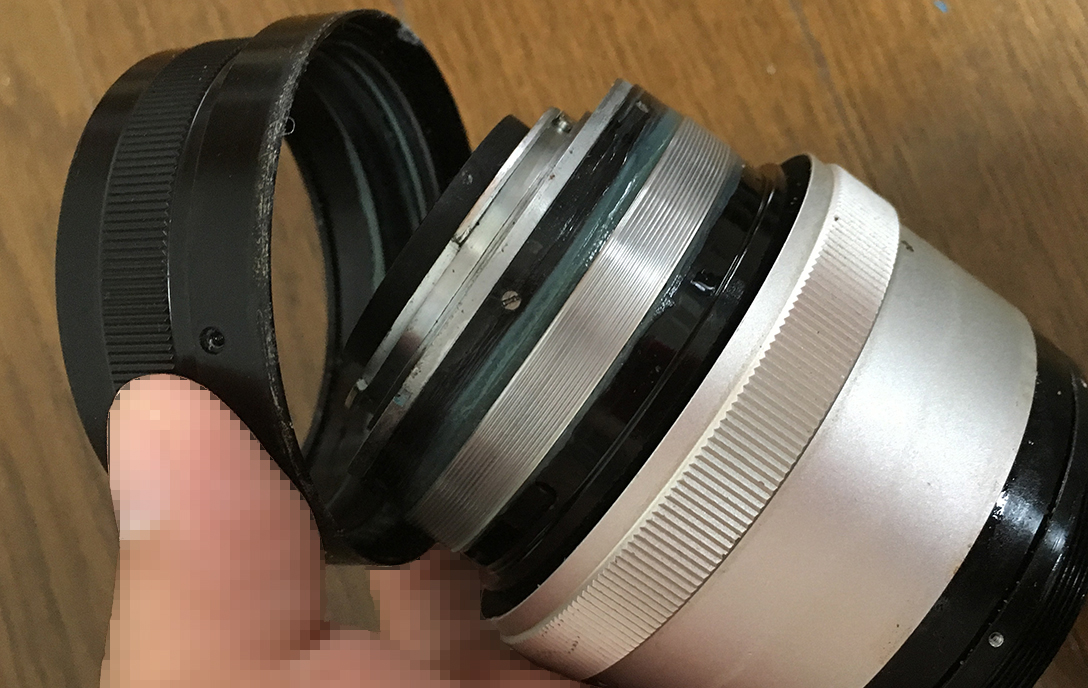
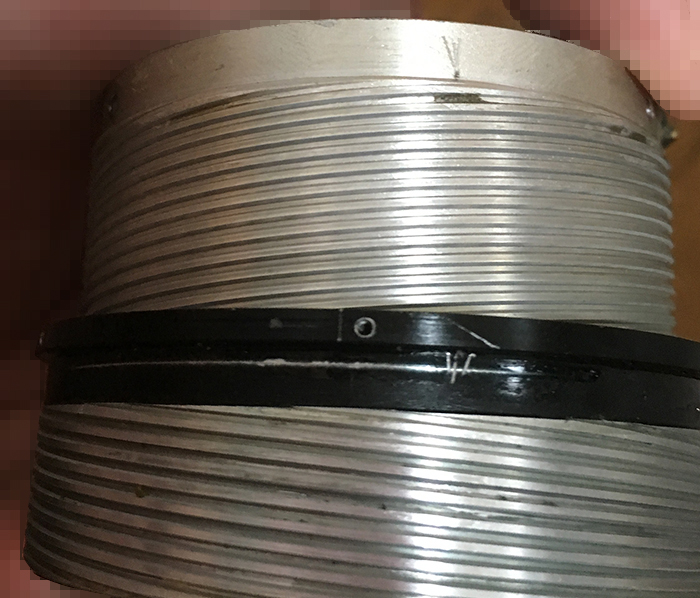
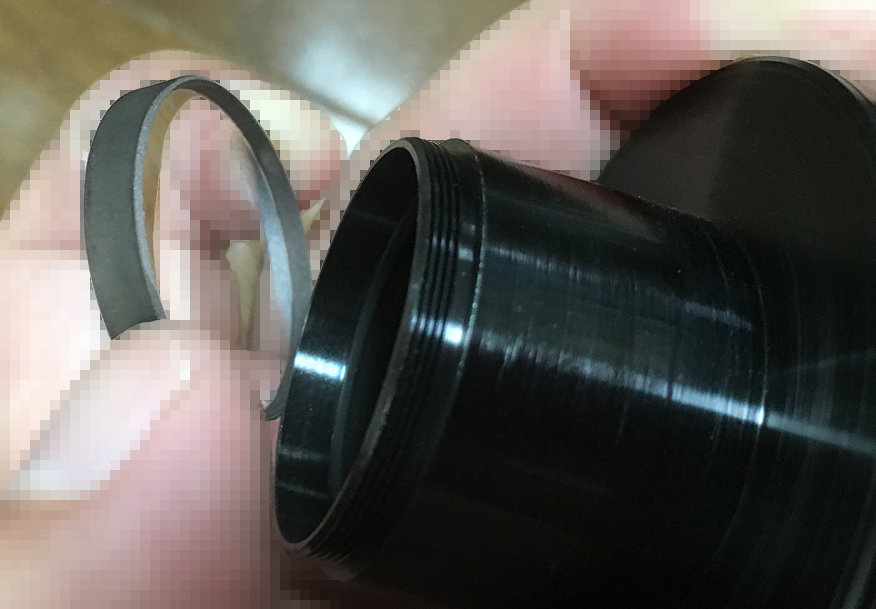
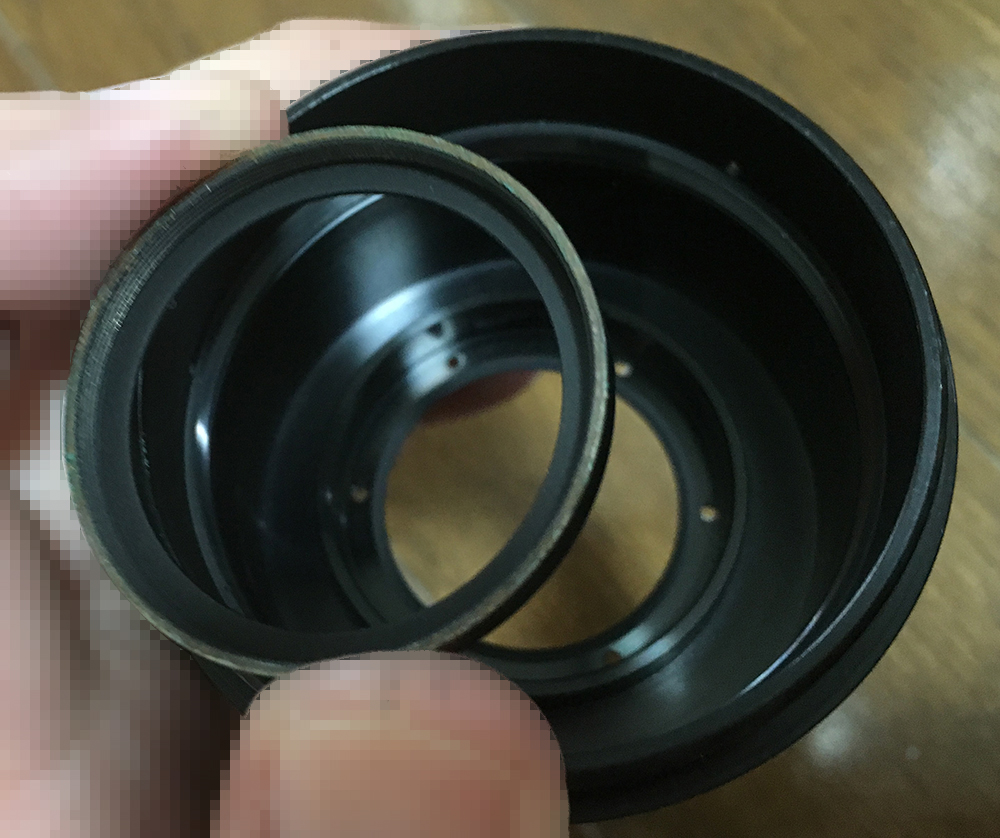
Using a rubber sheet or gloves, unscrew the front ring but be careful not to damage the front element while doing so. It can be hard because this might have been sealed. Drop some solvent into the screw holes of the set screws and let that soften the seals for you. With this ring gone you can remove the hood but don’t do it just yet until you see the next picture.
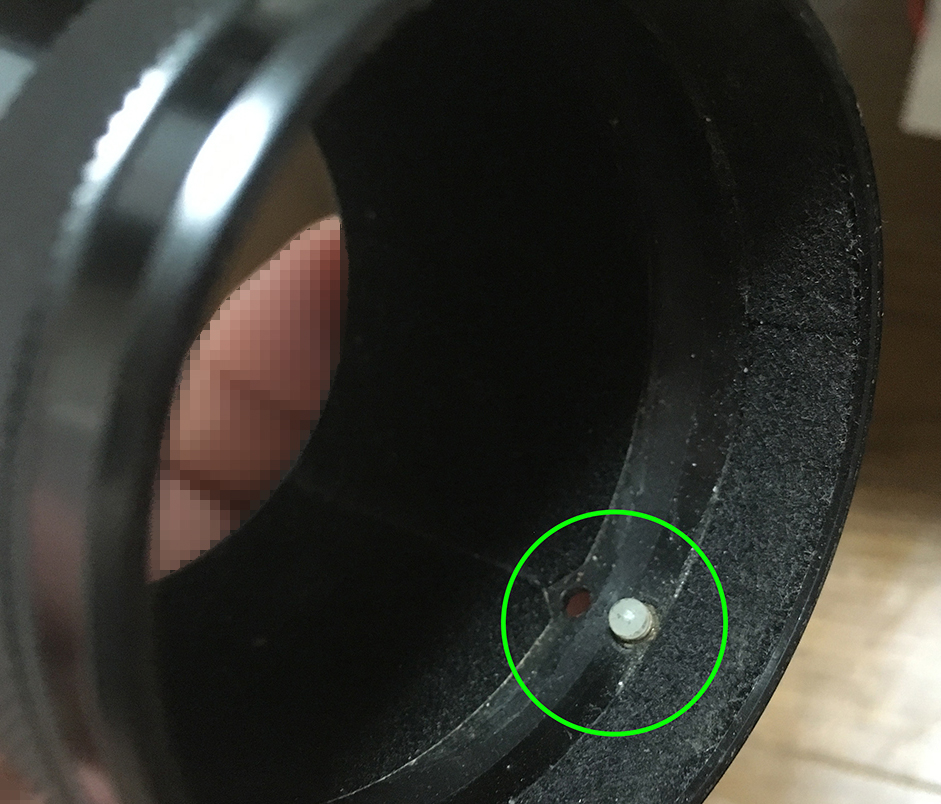
Be careful when pulling the hood, it houses a small clicking mechanism for securing the hood. This is spring-loaded and can easily get lost.
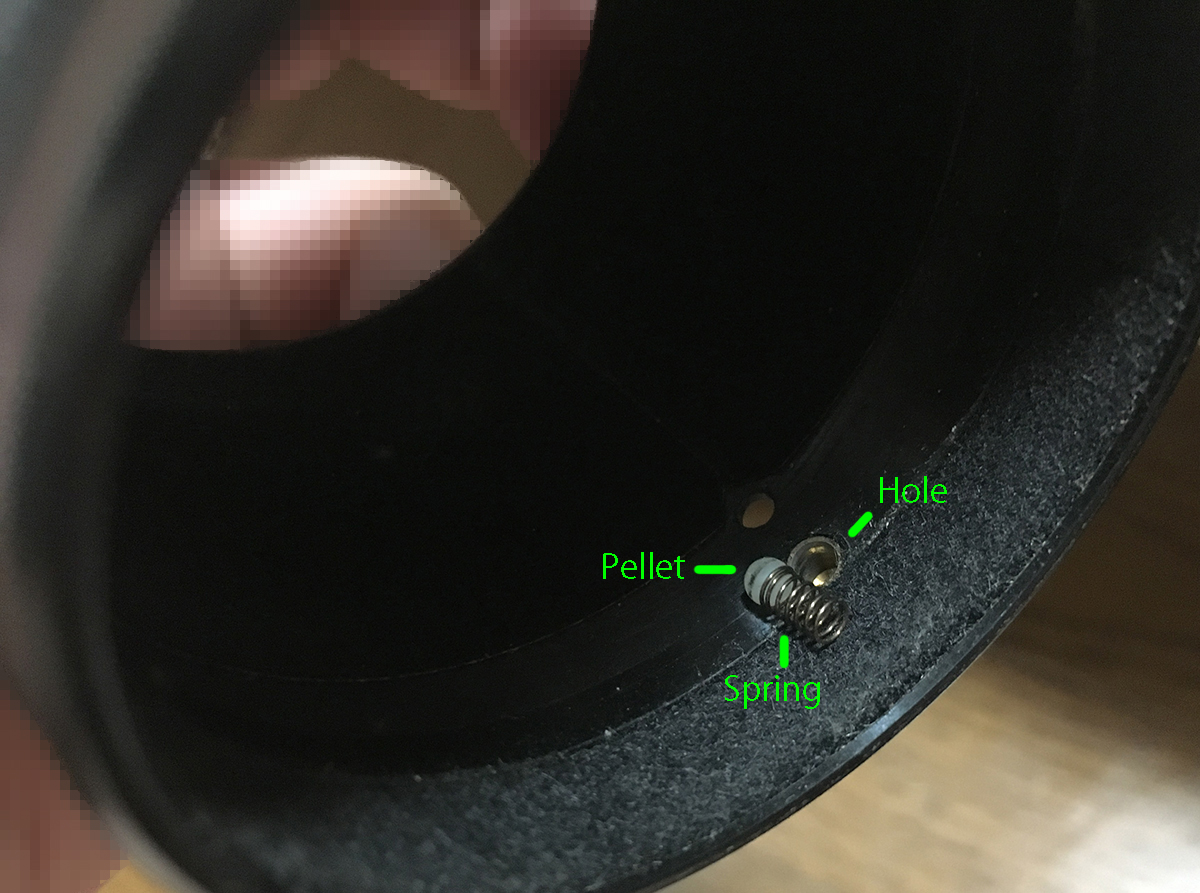
The mechanism consists of a pellet, brass cap (not shown) and a spring. The pellet sits on top of the brass cap which serves to protect the spring.

With the hood gone, you can now strip the lens further. Remove the screws (circled) from the focusing ring and just pull it off the lens. It can be hard to remove since solidified grease can bind it or it may be sealed, too.
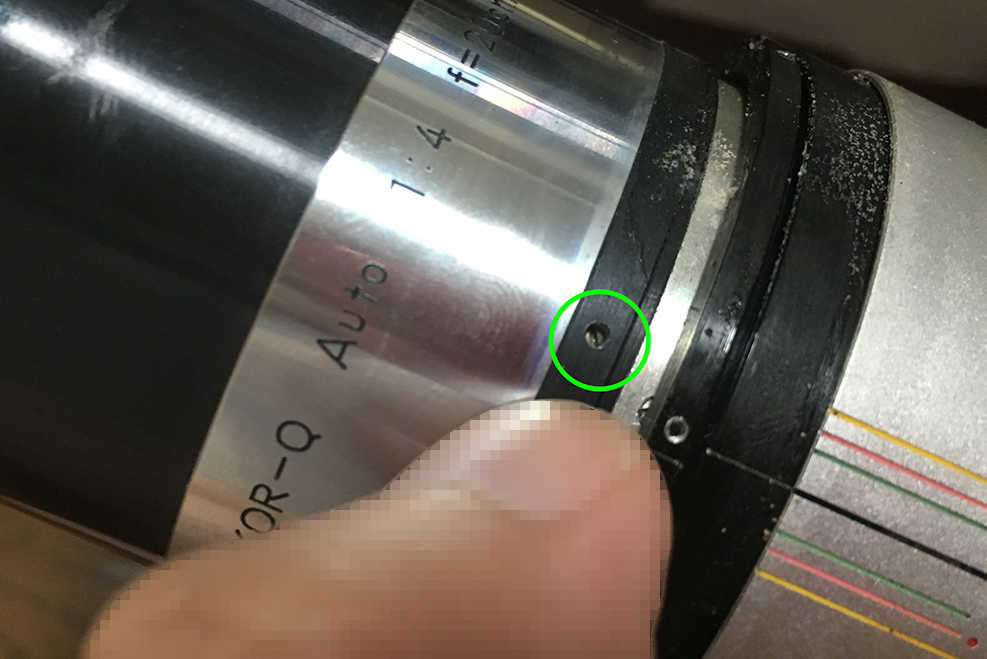
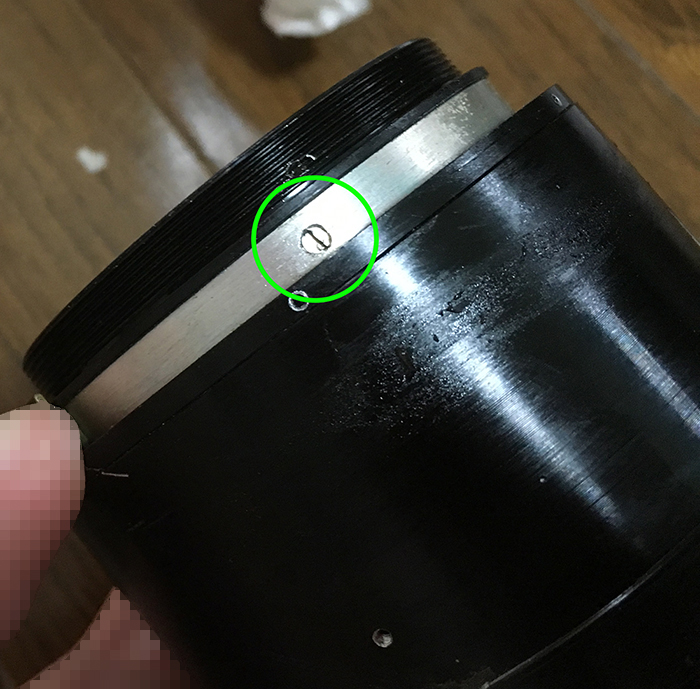
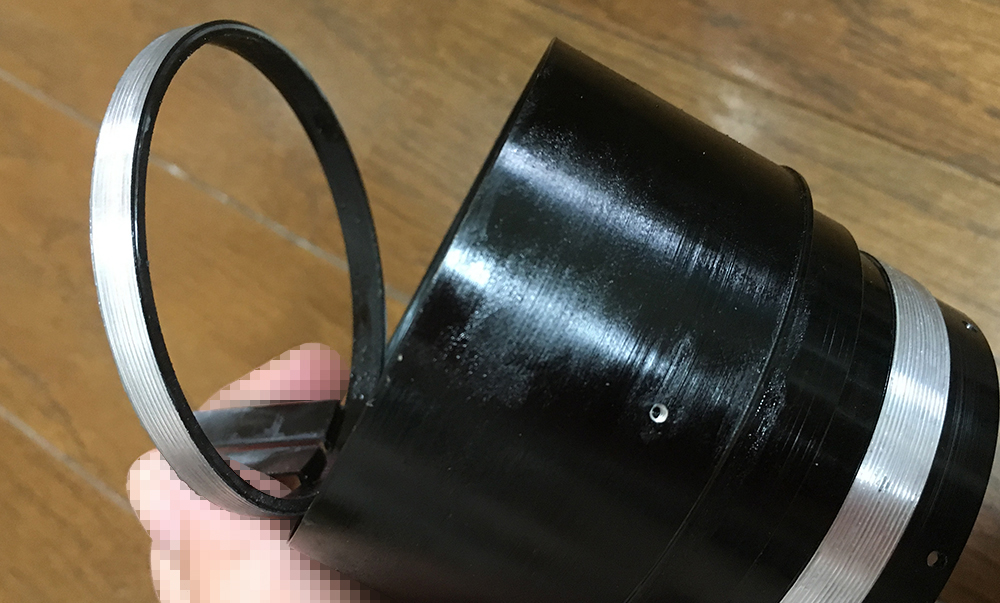
You can skip this part if you want to remove the objective in one piece but I wanted to keep the front elements safe so I removed this part early during the disassembly. Locate this tiny set screw and remove it.

You can now unscrew the front barrel once that thing is gone. Keep this safe because it has the front elements still in it.
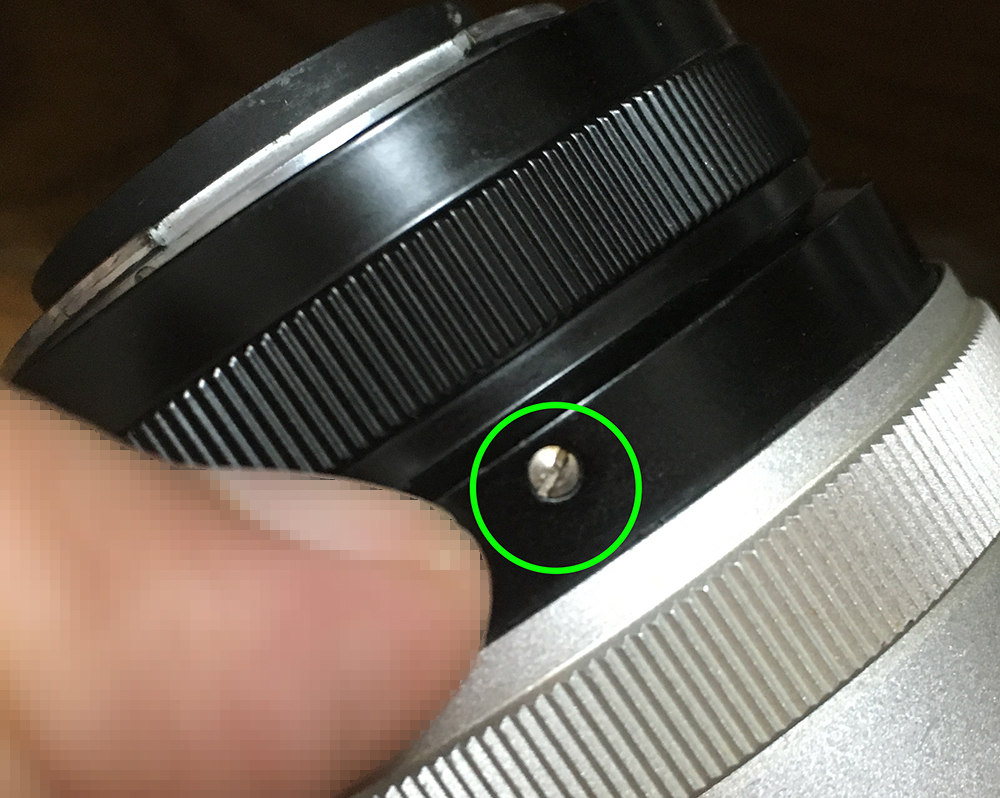
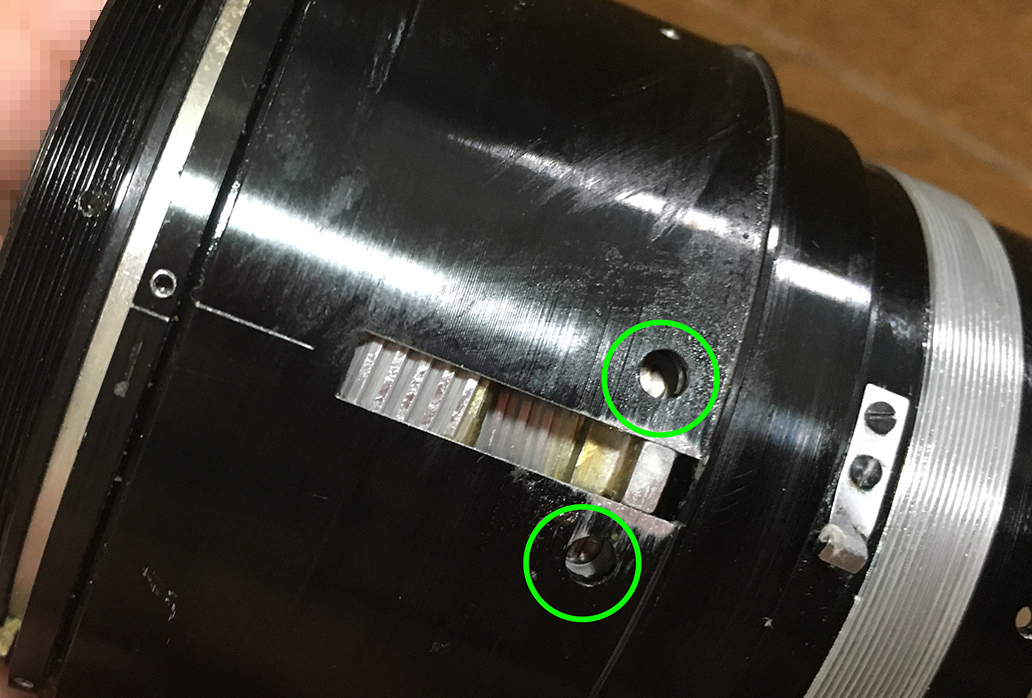
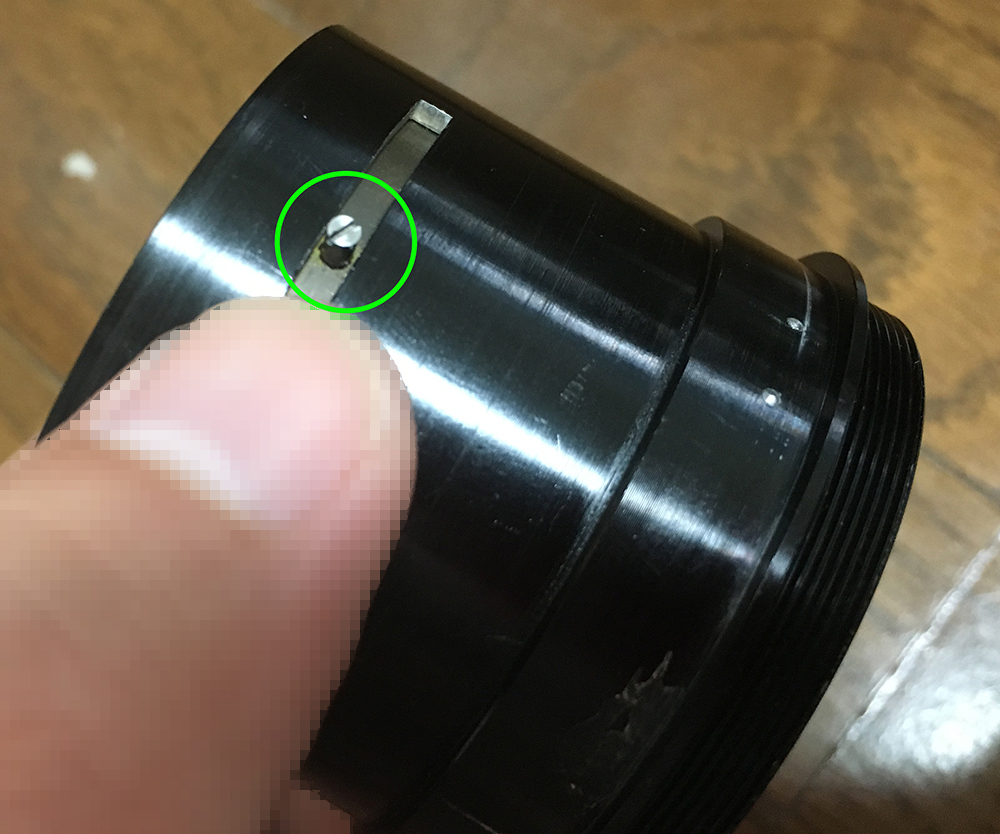
Unscrew this long screw from the aperture ring. This screw serves as a pin to couple the aperture ring to the aperture fork so you can control the iris.
With that screw gone, you can now unscrew the aperture ring. Count how many turns it takes to unscrew this. That’s how many times you will have to turn the aperture ring when you put it back later.

Wipe-away most of the grease from the threads to locate these and remove them to separate of the bayonet mount.

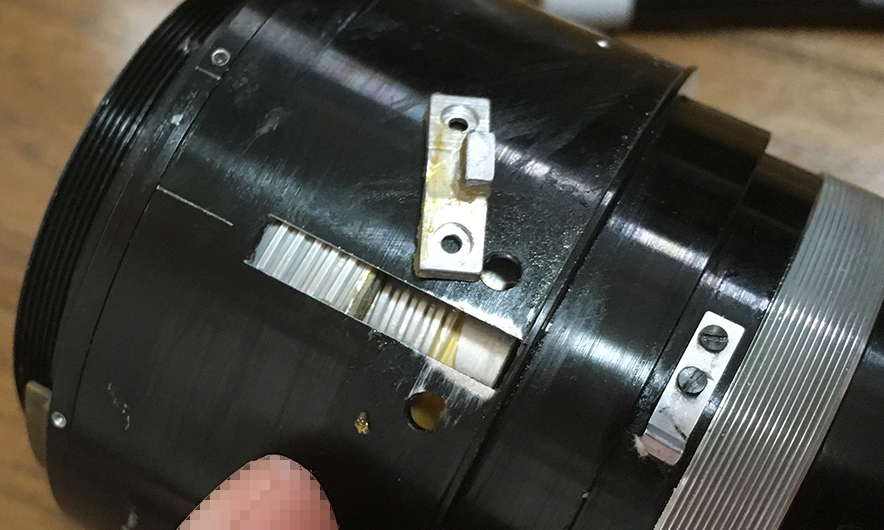
The bayonet can be removed once the screws are gone. The stop-down lever has a big and long fork. Nikon had to make this big since the thinner design that we usually see wouldn’t work with such a big lens because it may bend due to mechanical stress.

The sleeve can be removed by unscrewing the 3 screws securing it (circled).
Once the sleeve is gone, locate these screws and carefully remove them. The helicoid key is secured by these screws. The helicoid key constrains the turn rate of the helicoids so they all turn at the same rate when the central one is turned, collapsing or extending the whole barrel.
You may need to rotate the helicoids to get the key out but do not remove it through its slot. If the slot gets damaged then you will end up with a rough-feeling sensation when you turn the focusing ring.
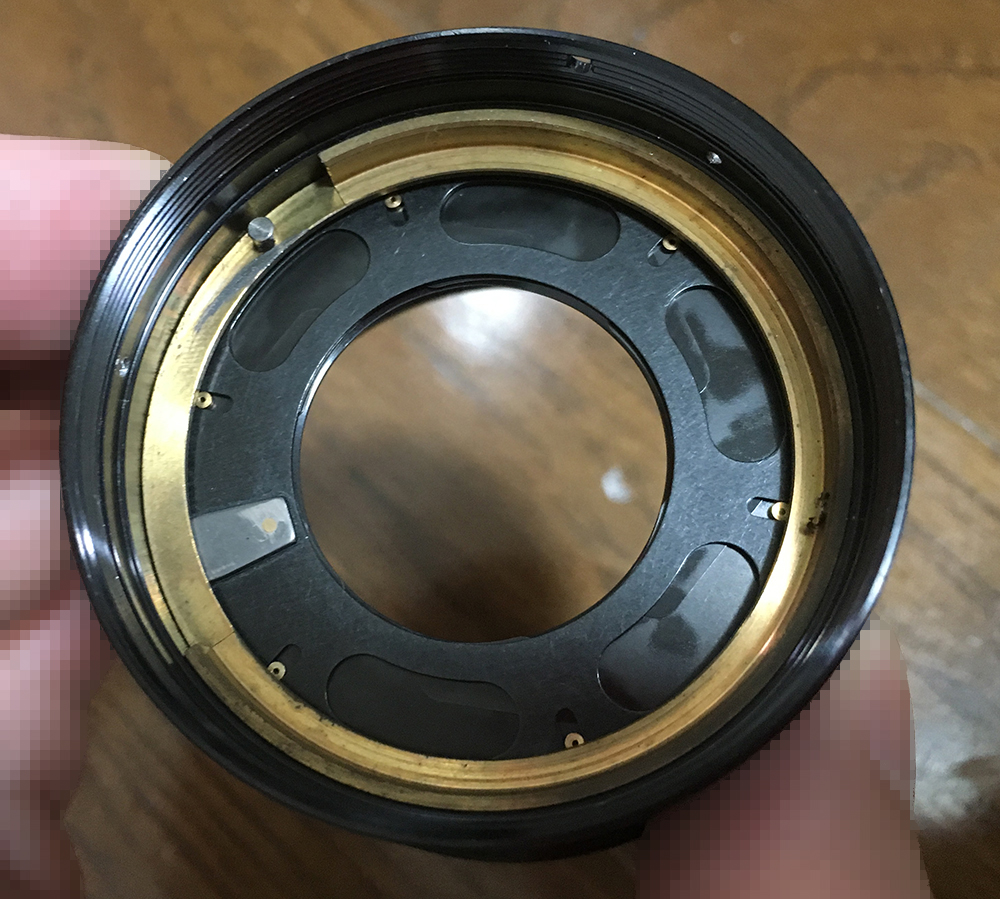
You can do this earlier as soon as you can access these screws but I only did it at this point. These 3 screws secure the objective’s housing, remove these to remove the objective from the barrel.

The objective can now be removed. If you removed the front barrel earlier like I did, reinstall it to prevent losing anything.

Time to separate the helicoids. Begin by separating the central helicoid from the outer one and don’t forget to mark where they separated because this is the same spot where they should be mate when you reassemble them. Read my article on working with helicoids so you’ll know what to do. Many people get stuck in this step because they forget to follow the right procedures. This is why you should read my articles on the basics and follow them.
Separate the inner helicoid from the central one and as usual, mark where they separated.
Once the helicoids are gone, you can unscrew the ring that has the aperture fork in it. The threads are fine and it would be wise to handle this carefully. It can be easily be cross-threaded if you’re not careful.
Clean the helicoids very well and don’t leave any residue. Clean them using a strong detergent and soak them in alcohol later to remove all residues. It’s a long lens so you may need a pot that’s deep enough so you can submerge the parts completely. Scrub them very well to make sure that they’re clean and dry them carefully before you apply a fresh coat of grease. I use a light type of grease so I won’t have to exert a lot of torque to focus this lens.
Disassembly (Objective):
The objective of this lens is huge and many of its threads were sealed with a type of red lacquer seal and even contact cement in some cases. The optical design of this lens is really simple so you do not have a lot of glass to worry about but the individual elements are huge. Handle them carefully so they won’t get damaged.
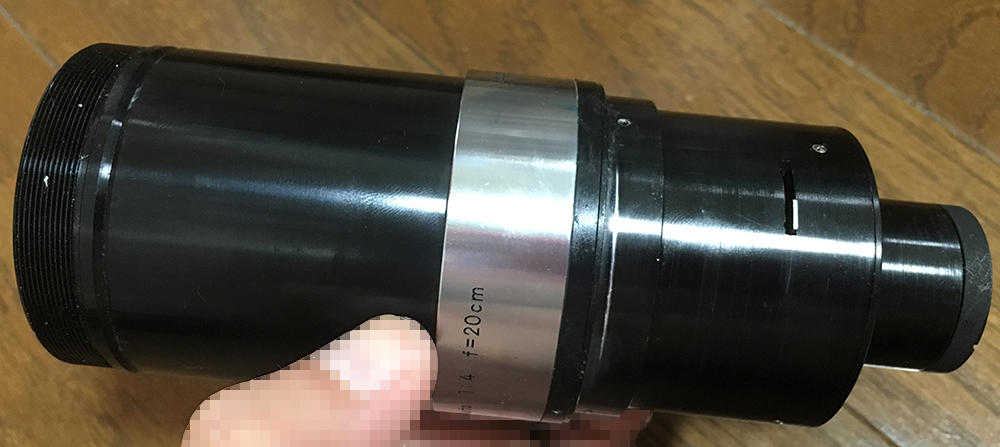
Here’s the objective. If you recall in the previous steps, I removed the front barrel early in the disassembly process. If you didn’t follow what I did then you should get something like what you see in the picture above. It doesn’t matter which way you did it so don’t worry.
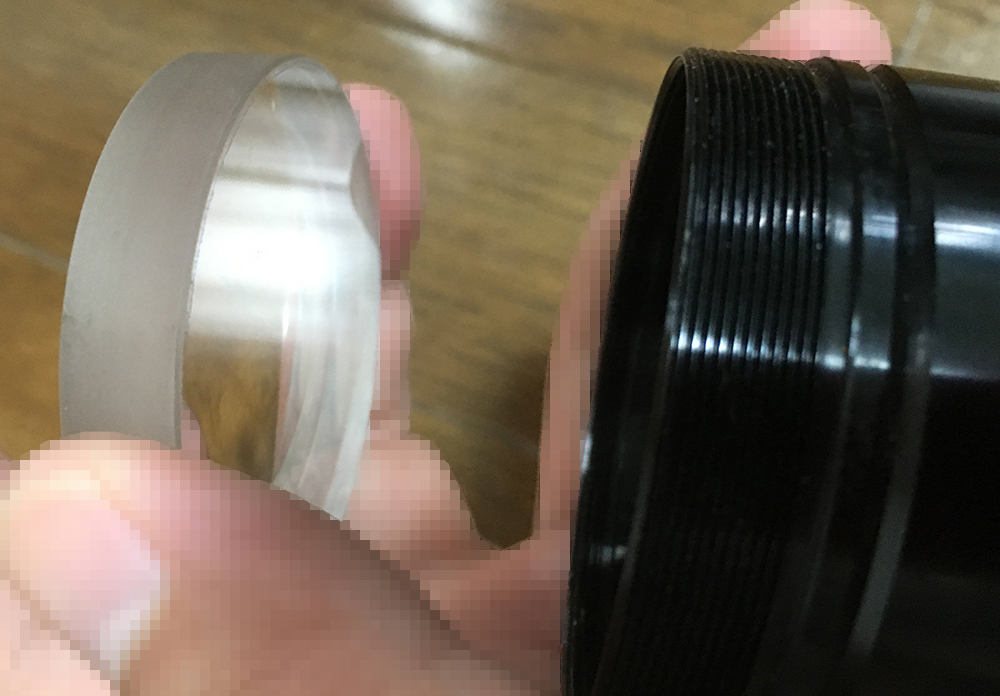
I started working from the rear. There’s a collar securing the rear element, I simply unscrewed it with my fingers. If yours is sealed, a drop of solvent to the threads will help soften the seal to make it easier for you to remove this.
The rear element can be removed with a lens sucker. Note which side of the lens this should be facing by marking the wall with a small dot using a pen.

The rear assembly be unscrewed easily. If it did not then just do the alcohol trick again with this.

The front element is being held by this ring which you should saturate with alcohol first as it’s usually sealed. Use a lens spanner to unscrew it. I would really be careful if I were you since the front element is exposed.
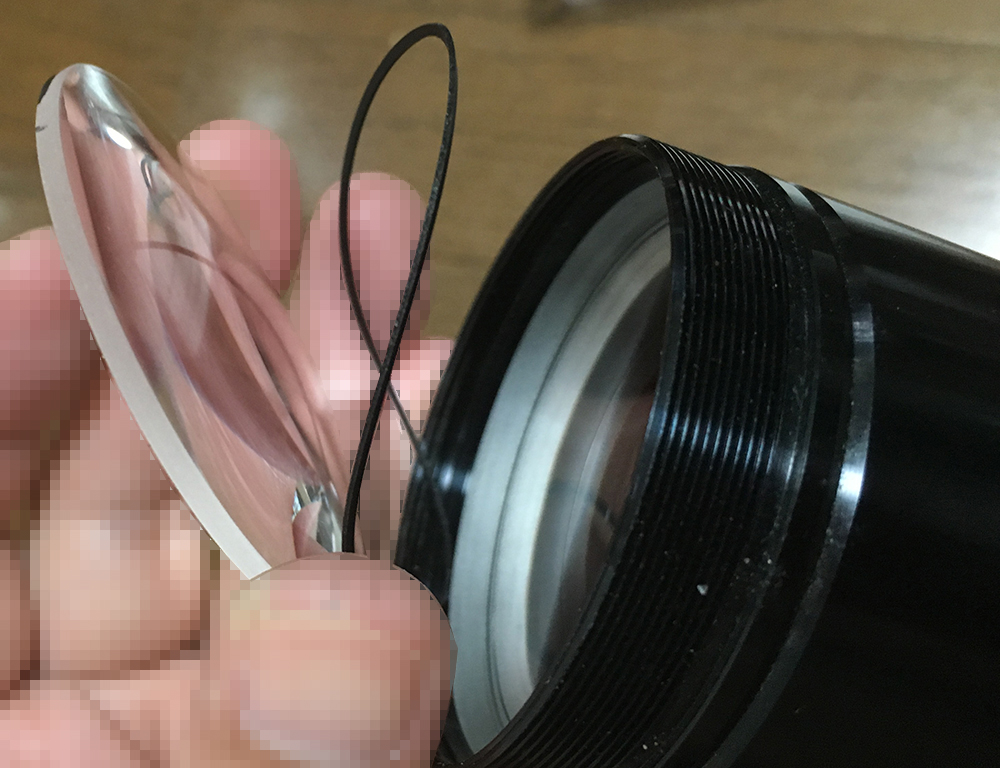
Extract the front element using a lens sucker. Notice that I used a sharpie to mark the leading edge of the lens. I did this to help me identify which side should be facing forward. Also note that there’s a gasket right after the front element. Never lose this rubber gasket or soak it in alcohol.
The 2nd element should also be removed with a lens sucker. Same with the front element you will definitely want to use a sharpie to mark it as well. A simple dot is all that you need. I use a series of dots to note which element number it is and in this element, I made 2 small dots.

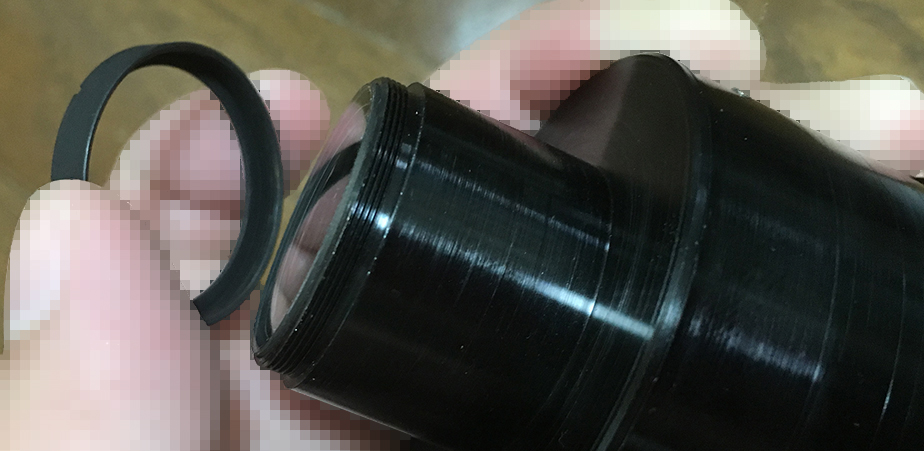
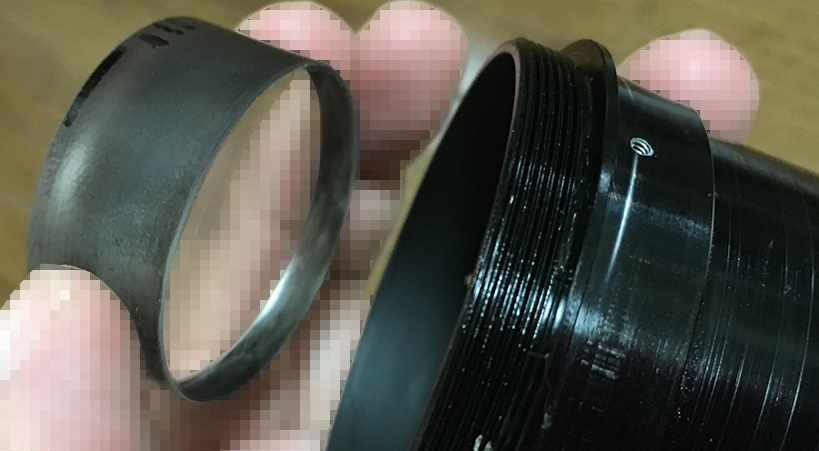
I am sure that you have seen this before. The front barrel can be unscrewed from the main casing after you remove its screw. The shiny sleeve is glued to the barrel but it will come off if you soak it in alcohol overnight. I found gunk and fungi underneath it.

Use a lens spanner or a lens opener with long bits and sink the tips into the dimples to unscrew this plate so you can remove the 3rd element.

The plate should be removed carefully to prevent scratching the glass. You’ll also need to be careful at this point because the 3rd element is loose.
The 3rd element is seated into a recess and it can be a snug fit. Pick it using your fingers if they’ll fit inside the housing. Note that I also made marks on the wall of the element.
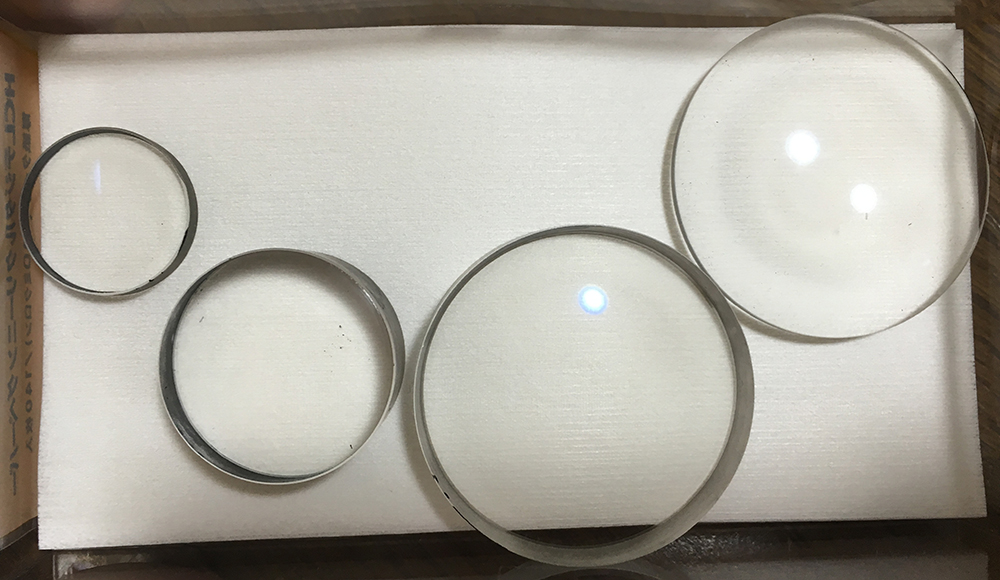
Here’s everything in their correct order from the last one to the first. Clean them very well make sure to handle them carefully.
It doesn’t take a lot of time to clean the glass since it’s just 4 big chunks. The glass were then stored safely to prevent damaging them while I work on the rest of the lens.
Disassembly (Iris Assembly):
I don’t usually bother with the iris so long as it’s working properly but mine was gummed-up with oil so I had no choice with this one. The iris assembly has a couple of precision adjustment points that you have to be very aware of so before removing anything, be sure to make small marks or take plenty of photos to help you later.

The iris is completely soaked in oil when I got to it.

Before dismantling the iris, make small marks so you’ll know how to put it back the same way again later. The marks are a bit too big, I should’ve been a bit more lighter with my hands.

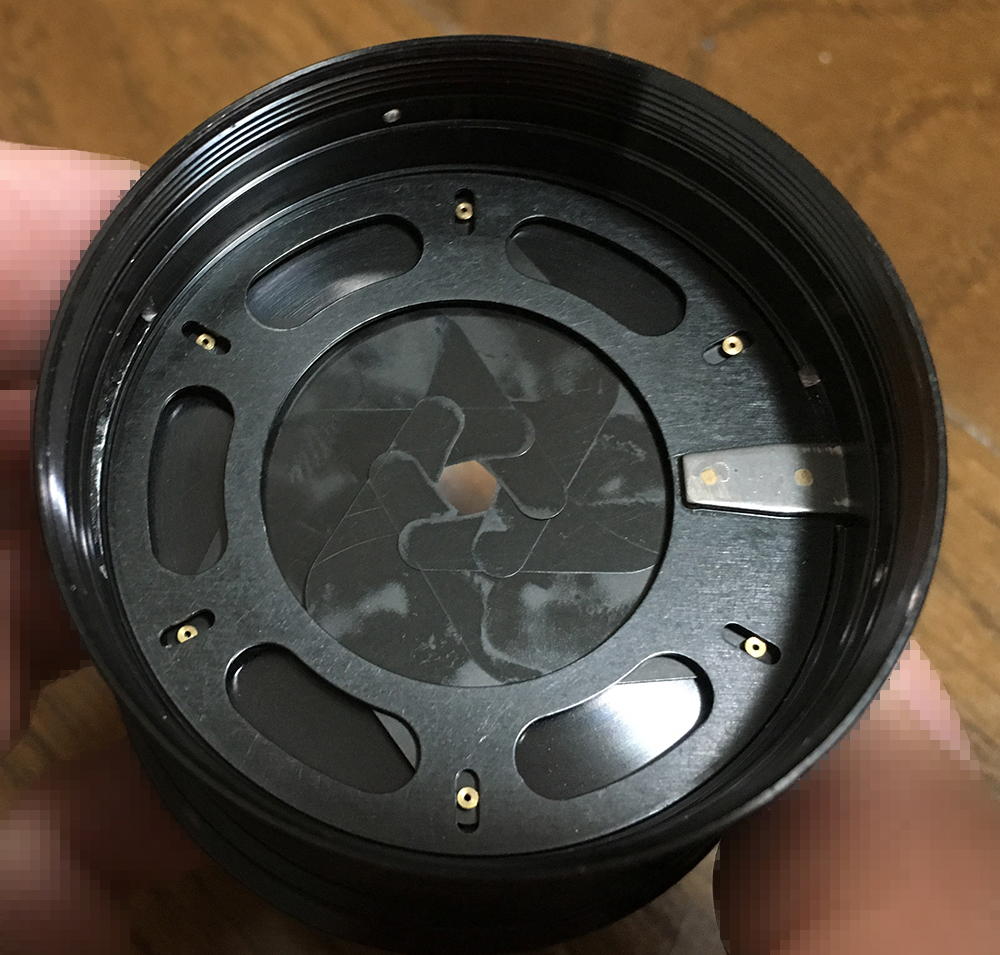
Remove these 3 screws from the objective’s case. These are for securing that ring that we just marked in the previous step.

The ring can be removed with your fingers and careful not to harm the iris blades. It can be tight so don’t use too much force or your fingers will slip.
The brass regulator ring helps secure the iris.
Carefully remove this screw so you can remove the brass ring. These can be easily damaged so handle these with care so they won’t snap at their necks.

Carefully remove the brass ring and don’t forget to note which side it should be facing.
Before I removed the rotator plate, I took a picture of it just in case.

The plate can be removed easily by pressing on its lever from the outside of the casing to lift it up and you can simply pick it using your fingernails or a pair of tweezers. The iris blades can be picked using a pair of tweezers but only handle them by their pegs. An easier way is to just pop them over a vat of alcohol and the surface tension of the alcohol is enough to cushion their fall so they won’t bend.
Once the iris blades are gone, you can also remove this ring from the inside of the casing. It’s used as an abutment for the 3rd element and for shielding the holes for the iris blades.
The blades were cleaned by wiping them with Zippo fluid individually. You should use a lint-free tissue for this so you won’t leave any lint on the blades and while doing so, you should be careful not to bend any of these as a bent blade won’t allow your iris to function properly.
Conclusion:
I am starting to get really familiar with this lens since I overhauled a couple of these. It took me several nights to overhaul this because of its size. It took a lot of time to clean everything because the lens was filthy. Reassembling it is easy, just back-track through your notes and you shuld be fine.
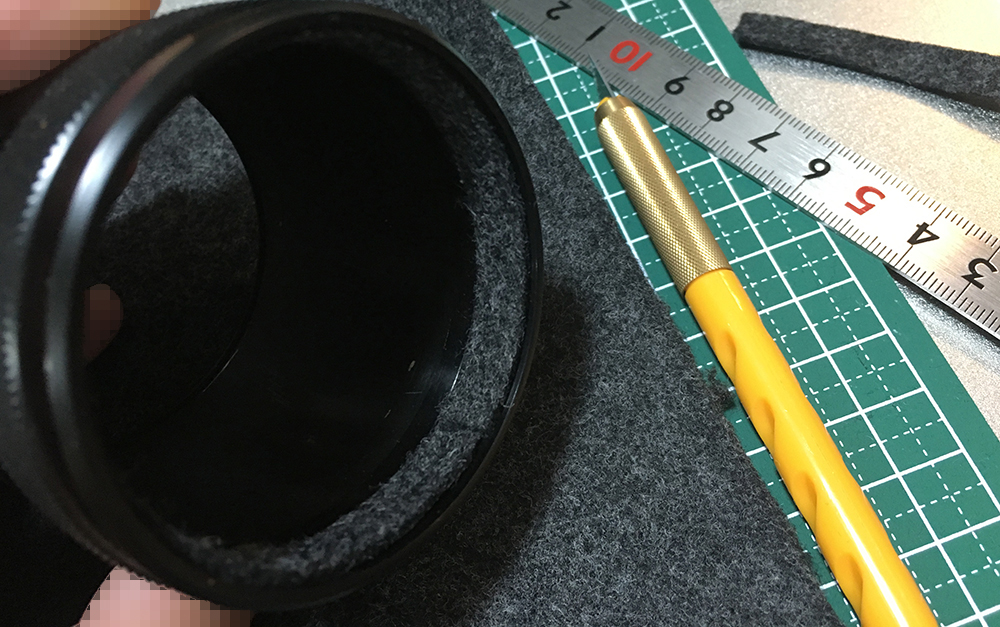
The felt on the lens hood had to be replaced as well. Felt paper was ordered from Amazon because the local Japanese supplier went belly-up. The lining had to be replaced so I looked for a 1mm sheet of felt from my supplies. The right thickness has to be used so the hood won’t be too snug or too loose. Go to your local milliner and ask for scraps.
There are no focusing adjustments for most early F-mount Nikkors, if your lens isn’t focusing to infinity properly then you definitely made a mistake here or there during reassembly. This is how tight Nikon’s tolerances were back in the days. The first place I will look is the helicoids, make sure they are properly reassembled.
Thank you for supporting this site and I look forward to your support in the coming years so please share and spread this site so we can get more hits. I just got a notice from several sources that the domain and subscription has been renewed this year and thanks to all of you who are supporting this site we are able to pay it automatically, we will move to a better hosting plan in the future because I noticed that we are running low on server space. That’s all for this article, see you again next time. Ric.
Help Support this Blog:
Maintaining this blog requires money to operate. If you think that this site has helped you or you want to show your support by helping with the site’s upkeep, you can make a small donation to my paypal.com (richardHaw888@gmail.com). Money is not my prime motivation for this blog and I believe that I have enough to run this but you can help me make this site (and the companion facebook page) grow.
Buy me a roll of film or a burger?
Thank you very much for your continued support!
$2.00
Helping support this site will ensure that this will be kept going as long as I have the time and energy for this. I would appreciate it if you just leave out your name or details like your countrym name or other information so that the donations will totally be anonymous. This is a labor of love and I intend to keep it that way for as long as I can. Ric.

7 Comments (+add yours?)