
Hello, everybody! Some people couldn’t seem to appreciate things that are considered “obsolete”, “vintage” and simplistic. I understand that they want something that is state-of-the-art and near-perfect in nearly everything. It’s not a bad thing to always want the best, however, it’s not good to put-down something just because it was of an older standard. Vintage equipment is a lot of fun to work with, it can also how if the person using it is skilled. New equipment can only take you so far but fundamentals mean everything. It’s what separates the good artists from the talented ones. Today, I am going to one such vintage lens that still has its place today. I will show you that gear means nothing much when you know how to use it correctly.
Introduction:
The Nikkor-S 50mm f/1.4 Auto was sold from 1962 to 1974. This was made in order to provide Nikon F users with a 50/1.4 lens, something that Nikon had for their rangefinder system. It was difficult to make since optical engineers back then hadn’t perfected the techniques required to calculate such a lens. What made it difficult was the then-new SLR systems need lenses that could provide sufficient clearance at the rear to avoid the flapping mirror. It was such a difficult feat, Nikon and the others used a slightly-longer focal length to compensate for it and that resulted in the Nikkor-S 5.8cm f/1.4 Auto being designed as a stop-gap in Nikon’s case.

It took Nikon a few years to get it right and that resulted in this lens. It was a big hit and it continued to be in production with the last version coming out in 1974 as the New-Nikkor 50mm f/1.4 (version 1) and was sold until 1976. It is a nice lens to use and I enjoy using it with my Nikon Df.
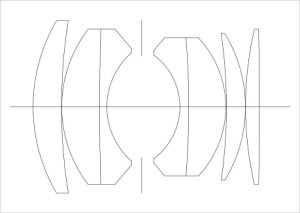
The new 7-elements-in-5-groups design is huge, resulting in a fat barrel. It is about twice the size of the contemporary Nikkor-H 50mm f/2 Auto. This was such a significant lens for the Japanese industry as it’s the first true 50/1.4 of its kind for SLR’s. The Nikkor-S 5.8cm f/1.4 Auto is great but this lens is even better in my opinion and it became one of Nikon’s best-selling lenses. It was one of the reasons why many photographers jumped to the Nikon camp. It’s difficult to focus accurately with a 50/1.4 using a rangefinder but a Nikon F made it trivial, you could accurately focus and compose with it even if your lens has a razor-thin depth-of-field.

This picture is from Nikon’s 1967/68 catalogue showing people assembling a batch of Nikkor-S 50mm f/1.4 Autos. It was selling really well, Nikon made a couple of versions in order to update this lens throughout its production.
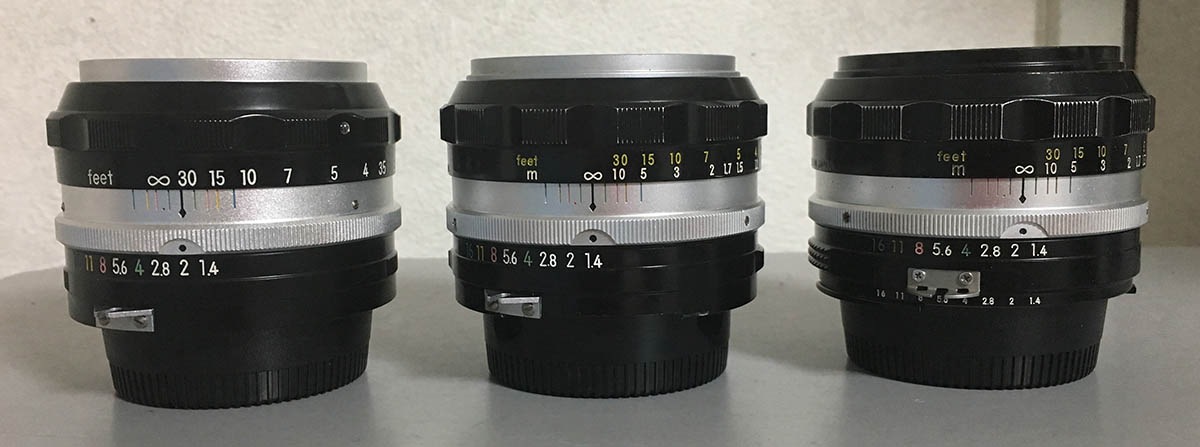
Here are its major variants. There are a couple of minor variants but I won’t mention them here since they’re insignificant. I’ll give a brief description in the next paragraph from left-to-right.

Nikkor-S 50mm f/1.4 Auto (early): The earliest one has a lot in common with the Nikkor-S 5.8cm f/1.4 Auto in terms of construction. It doesn’t have screws on the bayonet mount, its focusing ring has external screws. A couple of the screws are situated differently compared to the later versions. The internal construction of this one is different from the later versions, the objective is secured differently and there are rings that are absent in the later models. I won’t mention them all here. It couldn’t be adjusted, its parts were made-to-fit so tolerances were precise. It has a amber-tint which made it nice for use with monochrome film. The distance scale is either in meters or feet but the later ones have both. The aperture ring has the older, fluted-pattern, it looks similar to the Nikkor-S 5.8cm f/1.4 Auto. Those with late serial numbers have the “scalloped” type aperture rings. Its iris is usually 6-bladed but later ones have the 7-sided ones.

Nikkor-S 50mm f/1.4 Auto (mid): The version featured in this article. It’s the most common variant. It feels more-modern and you could at least adjust it for precise-focus. The distance scale now comes in both meters and feet. Its aperture ring has the the hill-and-dale pattern with deeper ribs unlike what you see in the older one which has a fine-pattern. It doesn’t have the bluish-tint. These have screws on the bayonet mount, the focusing ring screws are now hidden under the bezel, giving a clean-look. Some of these come with a factory Ai-ring. These are the cheapest, I got mine for around $10.00, it was sold as junk for-parts-only.

Nikkor-S.C 50mm f/1.4 Auto (last): The last version is multi-coated. These are nearly-identical to the previous version but you’re more-likely to find these with the factory Ai-ring. This is the best one if all you wanted is to take nice photos. These easy to identify because they have a black front barrel. These all have a 7-bladed iris and cross-type screws. These are the most expensive but still relatively cheap.
Do note that the differences that I outlined above are merely general and it isn’t unusual to find versions that have a mix of features between them. It’s exciting to collect these because these small and subtle differences.

The earlier ones have a 6-bladed iris which have a peculiar shape. Note that the coating has an amber hue.

Here’s a closer-look at the Nikkor-S.C 50mm f/1.4 Auto. The coating is bluish, the earlier ones have a deep-amber one. It’s a lot more-resistant to flare and ghosts which I will illustrate in the next slide. Note that it has a 7-sided iris.
How effective is the new coating used on the Nikkor-S.C 50mm f/1.4 Auto? It is certainly a lot better than the older, single-coated one specially when you are shooting against bright lights. See the next slide for a comparison.
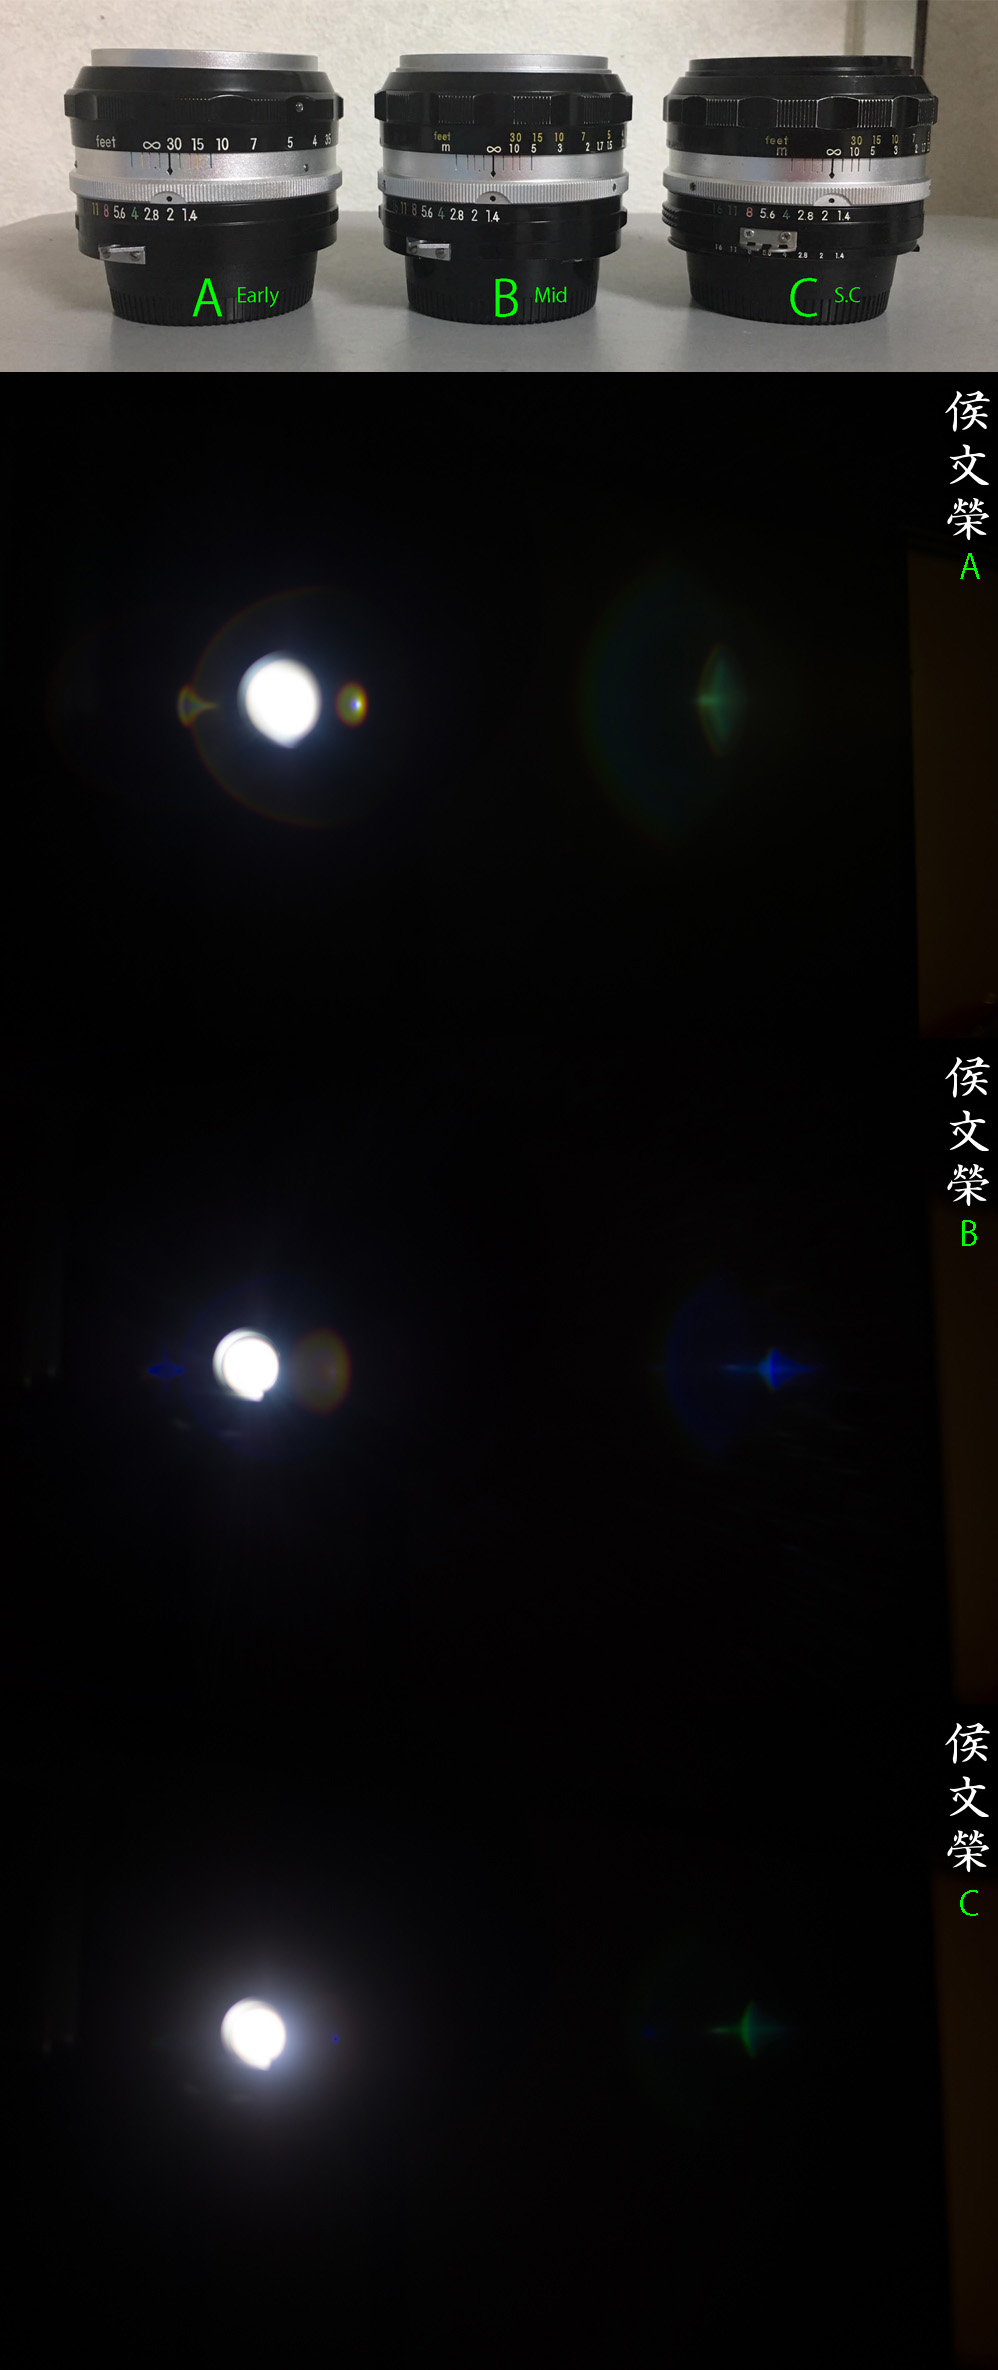
The earliest version performs the worst in terms of flare and ghosting. The last one shows the best overall resistance.

The large rear element is exposed so handle this with care. Any damage will show up in your bokeh balls. Read my article on damaged lens artifacts and see how it could affect your photos.

The factory Ai-ring is essential when you wan to use it with a modern Nikon or else you won’t be able to mount it safely. This enables it to communicate with the camera and tells it what aperture it’s at. Without that, the Nikon F6 won’t be able to meter correctly, wouldn’t even be able mount it, too.
Learning about how your lens performs is key yo maximizing it. You’ll able to know its strengths and its weaknesses, this knowledge helps determine if you should use this for an assignment or just leave it for later.


(Click to enlarge)
Vignetting is really high wide-open, this will certainly be obvious when you are shooting against an even-colored background. Even if you’re not, this is going to be a problem. Stopping it down to f/2 alleviates it but it’s still really dark at the far-corners of the frame. It improves considerably by f/2.8, your frame looks a lot clearer and only the extreme-corners will show a little bit of vignetting. You’ll only see traces of it by f/4 but it should be gone by f/5.6. I think you should shoot with at least f/2.8 if the situation calls for a bright or even-colored frame. There’s some barrel-type distortion that is observable, I don’t think it’s bad at all but this is more than what I’m comfortable with.
These were shot with the earliest version. While the the improved coating is a huge factor it’s too-similar to the mid-production variant so I’ll use this to illustrate what it could do at its worst.


(Click to enlarge)
These were shot directly against the sun. The left one was shot wide-open to exaggerate the effect. We get terrible flares and ghosts as expected. The iris was stopped-down to f/8 on the photo on the right. Flaring is nearly-gone, it also exhibits more-defined ghosts in the form of polygonal-blobs. You’ll also get nice sun-stars with it. While it looks terrible wide-open, the one with the iris stopped-down looks rather nice and you could use this to your creative advantage if you want.
Wide-aperture lenses are sometimes judged by their bokeh quality, let’s see how this lens performs in this regard.
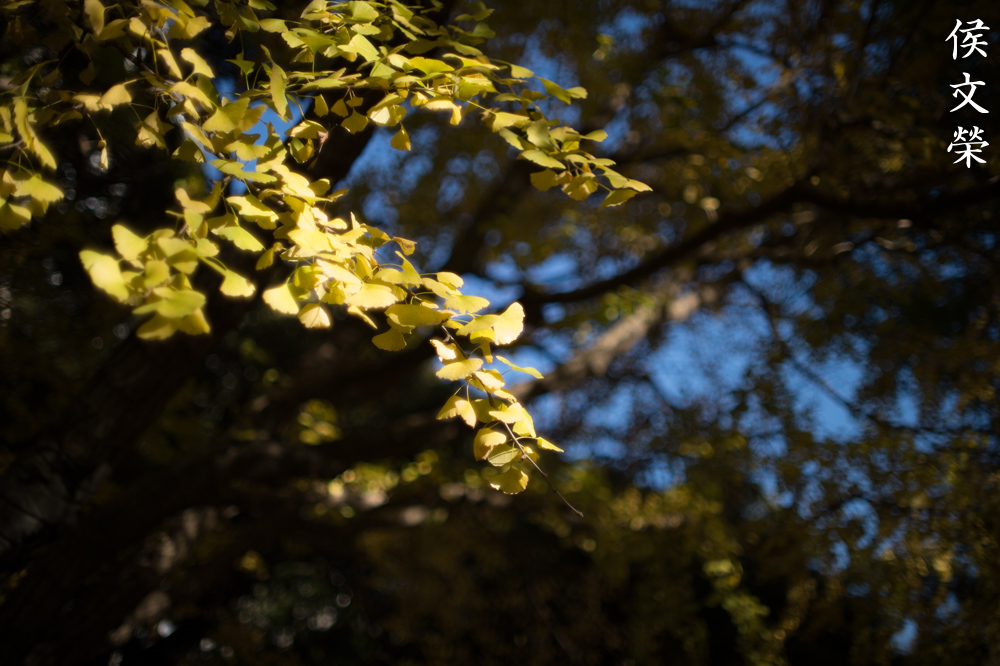
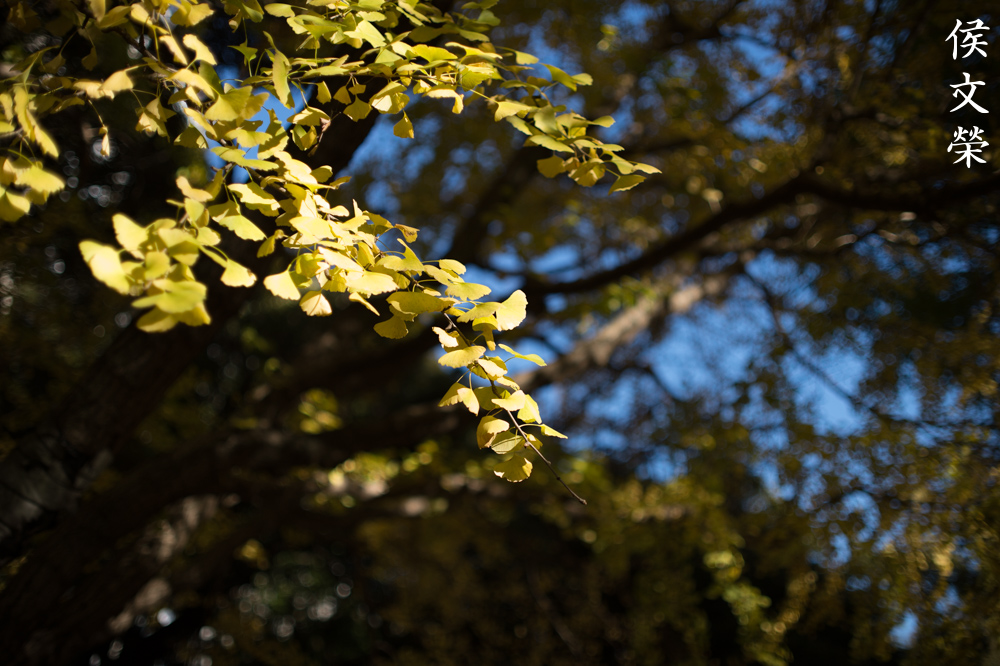
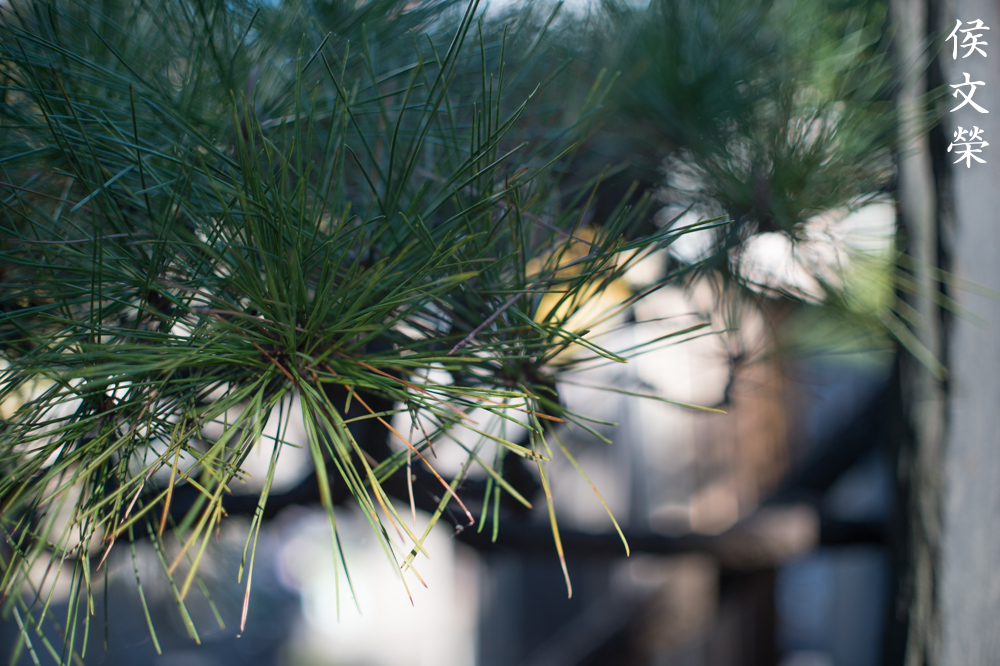
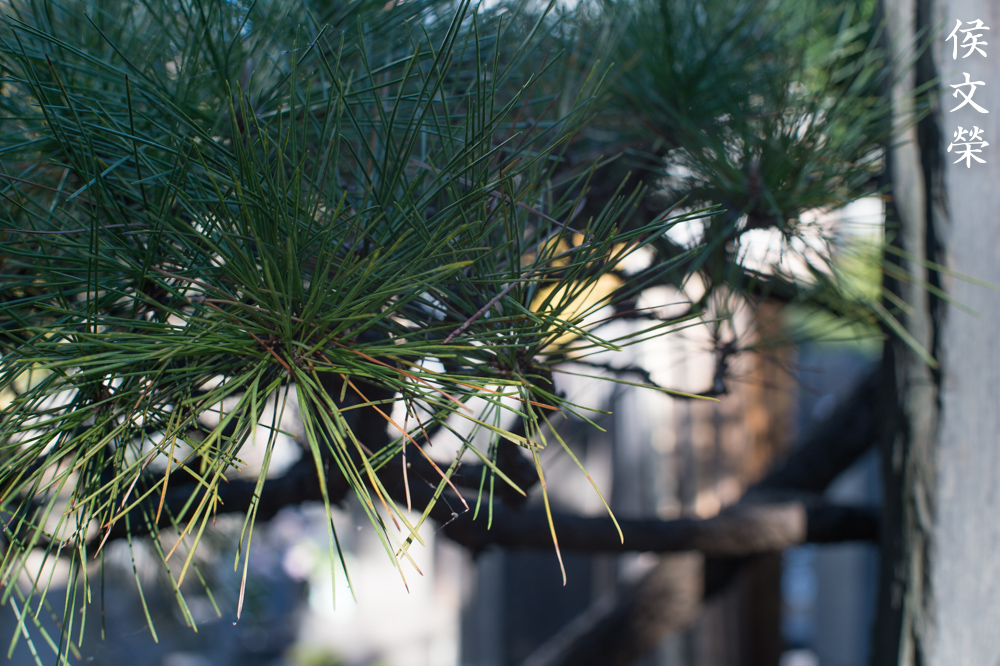
It’s really-sharp when stopped-down, it’s able to resolve the leaves well. It’s also worth noting that the foliage at the background looks nice. If this has a terrible bokeh character the branches at the back would look smeared. This is not the best lens when it comes to bokeh quality but it’s quite good.

Stopping the iris down to f/5.6 should reveal if it has terrible bokeh quality or not. It’s able to render a painterly-look, I like how it’s able to do this but I could also see some signs of smearing. It’s not bad but it’s something that is preventing it from performing much better.
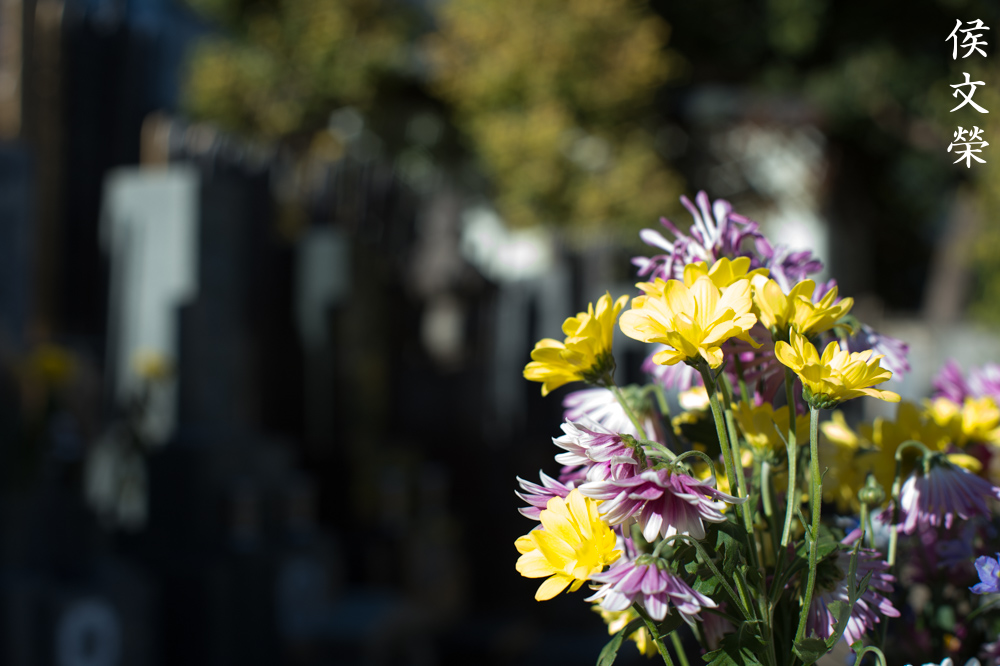
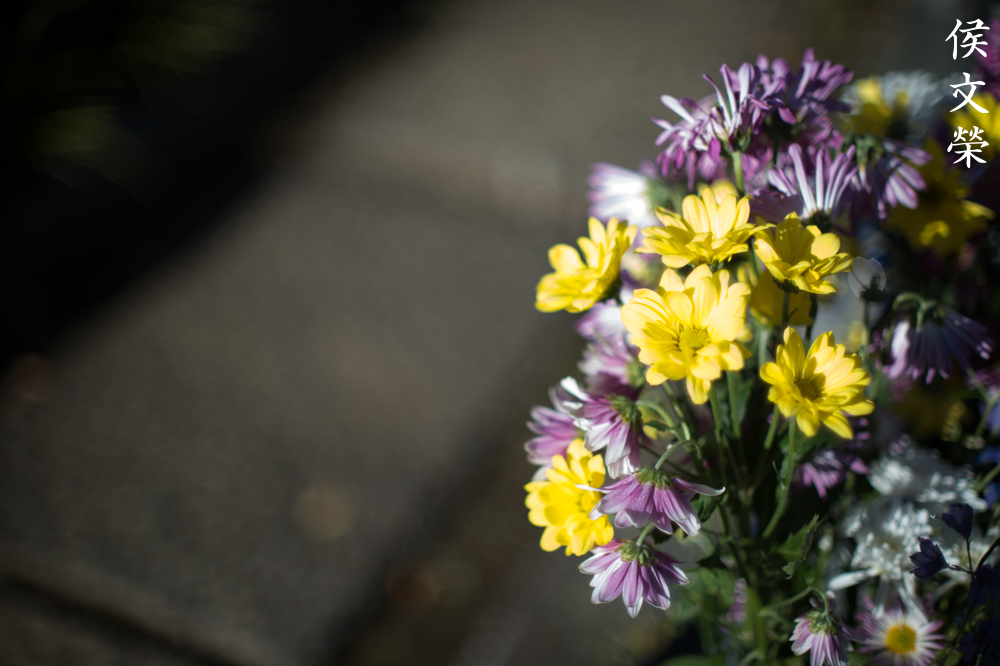
Shooting it wide-open turns everything into a wash of colors. There are few instances where you’ll see clumpy-looking artifacts but it’s not bad at all.

Flare can help add a unique look in your photos, making them look dreamy. This photo illustrates the outlines of the discs better, it looks harsh here. It’s kind of distracting here in my opinion. Chromatic aberration can be seen in areas with overblown highlights, spherical aberration can be observed, too. I don’t mind having both in this case, they make the picture look unique.
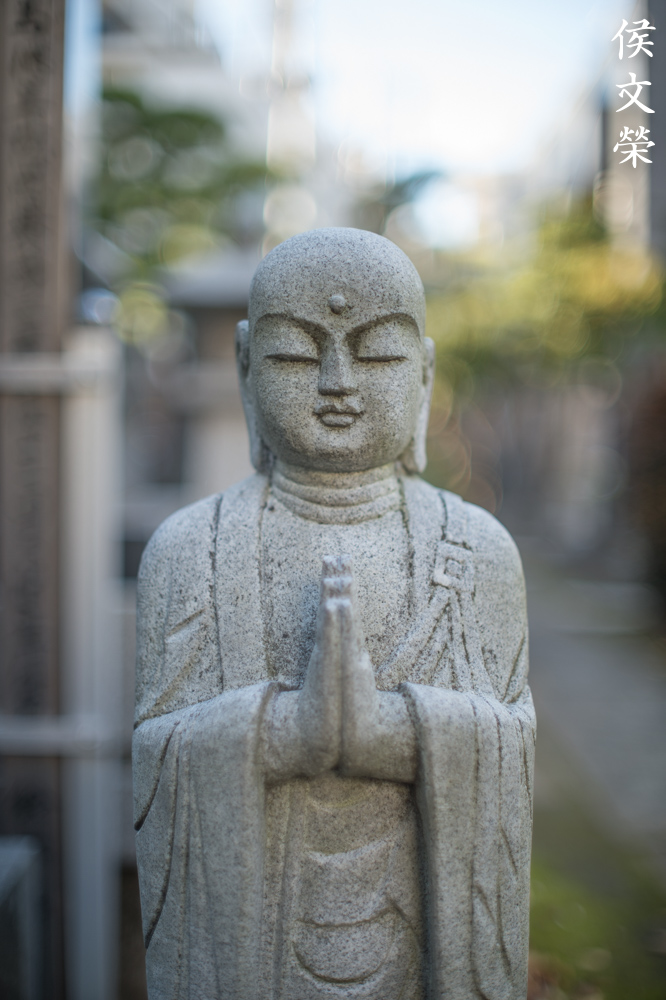
It’s able to produce pin-sharp photos wide-open when you nailed the focus properly. The background looks nice, the clutter is gone as it dissolves into a blurry-mush. You’ll see some outlines in the discs but it’s not harsh at all.

(Click to enlarge)
Here are more photos for you to observe. It’s quite pleasant and I like how it is able to deliver clean-looking bokeh. It’s certainly not mediocre for its time but it won’t be able to match later lenses in terms of giving a “clean-look”. I like it a lot to be honest as it makes the photos look more organic.
I shot the following from f/1.4, f/2, f/2.8 and f/4, we’ll see the most changes in these apertures. I also assume that people will want to shoot with it at these apertures, too.


(Click to enlarge)
It’s quite sharp wide-open but the resolution is not there yet. Set it to f/2 and the center looks really sharp as resolution has improved considerably. You’ll get better contrast by f/2 as the frame appears clearer. Its center appears to be performing at near-peak resolution by f/2.8, it’s be able to resolve details quite well and the corners look a lot better, too. Stopping it down to f/4 will make the corners look a lot better but it won’t make the center any sharper. This is quite nice in my opinion as you’ll be able to get usable photos using wider apertures. Stopping it down further to get better corners and deeper depth-of-field is something that you should consider if the situation calls for it. It does change its character as you change the aperture. You’ll get surreal results with it at wider apertures but it could still retain some of it even by f/4 which is remarkable.


(Click to enlarge)
Its ability to focus quite close makes it a versatile lens. It’s sharp wide-open as you can see in the cropped versions but things start to pick-up from f/2. I love how the center looks by f/2.8, this is a nice lens if you ask me.

It’s able to focus-down to 1m. The wooden owl’s eye is sharp, you’d think it was shot at f/2 but this was shot wide-open. The depth-of-field is shallow it’s able to isolate your subject really well.
(Click to enlarge)
These were shot at f/2.8, you can see how sharp it is. I love its character, the subtleness of its rendering and tones. It’s what many call the “vintage-look”, something that people either love-or-hate.
Let’s now see some film photos. It’s good to see how a lens renders with film since it has a unique look that is difficult to replicate using a digital camera because of grain. Since this was originally designed to be shot with film, we should judge it with its intended medium. I used Fujifilm Industrial 100 and I had these scanned with a Fujiflm Frontier SP-3000 at my favorite lab.

I took this at f/4, I think. The depth-of-field is deeper and that will enable me to get more things in-focus. It’s very sharp at this aperture, which is saying a lot for a Nikkor that was made in 1962.

Another picture that was taken using smaller apertures, probably at f/5.6 or f/4. There’s a bit of barrel-type distortion that’s observable since I have lines that are parallel to the edges of the frame. It’s tolerable in this case, nothing terrible and you won’t even see it unless you looked for it.

Not sure if this was taken at f/5.6 but I’m sure that this wasn’t taken at faster apertures. I love how natural the look of the photos are, some people call it “outdated” but it’s the reason why many prefer to use vintage lenses today.

This was probably taken at f/2.8. Sharpness is nice and I don’t see chromatic aberration at the important parts of the scene where things are in-focus. We do see some of it in the wires. This level of chromatic aberration is tolerable for me but some people won’t be pleased.

Focusing can be difficult wide-open due to the shallow depth-of-field. Even tracking a slow pedestrian can be challenging. What I do is pre-focus on the part where I anticipate my subjects to be and click when they’re at the same plane. I missed my focus here, I should be shooting with a smaller aperture in order to get more things in-focus.


(Click to enlarge)
Here’s the rest of the set. I’m liking the vintage-look that I get, I now see why some videographers like using it. This is certainly a lot of fun to shoot with specially with film. It’s difficult to simulate this look with a digital camera, it isn’t easy trying to mimic the organic-look that film grain gives.
These are great lenses in their time and you could own one for not a lot of money these days. You could buy one for as cheap as $10.00 if you’re lucky and they can go as high as $150.00 even for a nice, mint condition sample. I love these lenses, they provide a lot of value in terms of performance, they will also provide a lot of fun and creative potential. Be sure to buy one that has a factory Ai-ring so you could safely use them with modern Nikons. The early non-Ai ones are a lot cheaper but you won’t be able to use them safely with Nikons that don’t have an Ai-coupling tab that could be lifted-up. These are best paired with older manual Nikons. When looking for one be sure its rings all turn properly, the iris should be dry and snappy when actuated. It’s also important to check the rear element and make sure that there’s no sign of abuse like scratches or anything. I think everybody should own one, they are a lot of fun to shoot with and they could still perform beautifully under the hands of a skilled photographer.
Before We Begin:
If this is your first attempt at repairing a lens then I suggest that you check my previous posts regarding screws & drivers, grease and other things. Also read what I wrote about the tools that you’ll need to fix your Nikkors.
I suggest that you read these primers before you begin (for beginners):
Reading these primers should lessen the chance of ruining your lens if you are a novice. Before opening up any lens, always look for other people who have done so in YouTube or the internet. Information is scarce, vague and scattered (that is why I started this) but you can still find some information if you search carefully.
I highly recommend that you read my working with helicoids post because this is very important and getting it wrong can ruin your day. If I can force you to read this, I would. It is that important!
For more advanced topics, you can read my fungus removal post as a start. This post has a lot of useful information and it will be beneficial for you to read this.
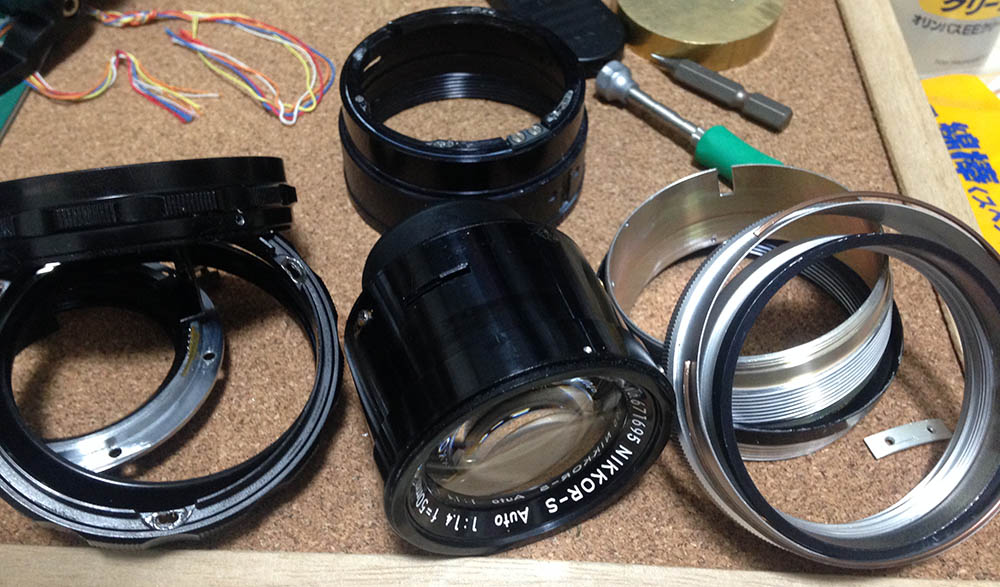
Disassembly (Lens Barrel):
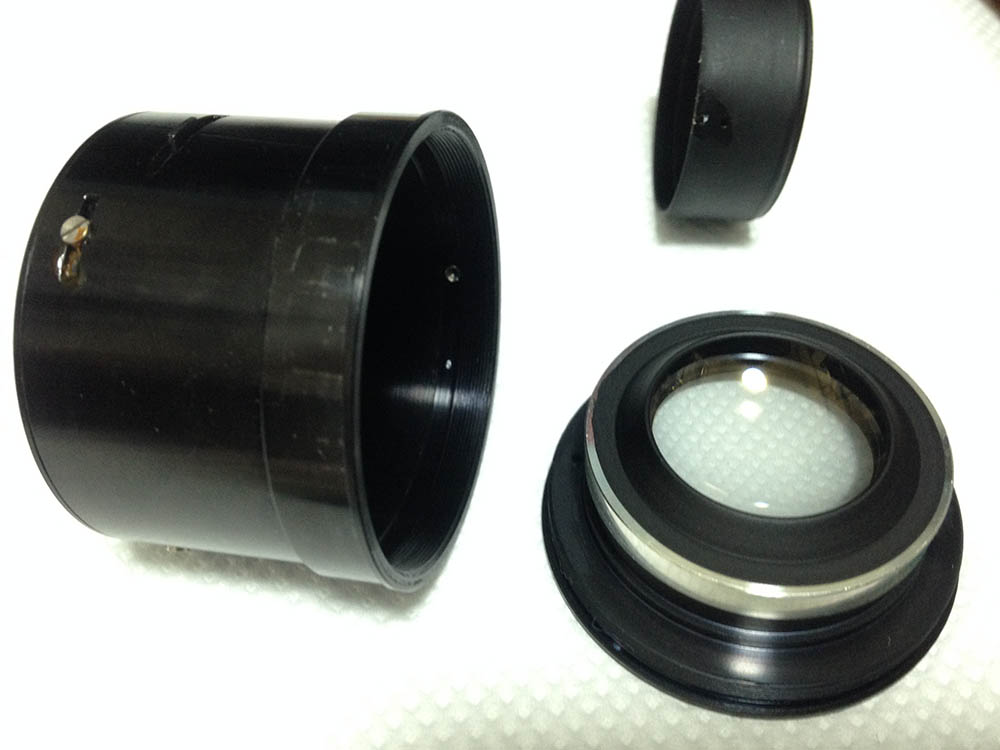
The barrel isn’t difficult to dismantle as its of conventional design but there are a few things that you should be aware of and I’ll show them to you later in the coming sections. Like most lenses, we’ll extract the objective first so it won’t get damaged while we work on the barrel.
In case you have the early version, the Nikkor-S 5.8cm f/1.4 Auto is closer to it in terms of barrel construction. It’s similar, you can use it as a reference.
Do note that the lens shown here is the last, multi-coated version. It has the same construction as the common mid-production variety so you could use this for that version, too.

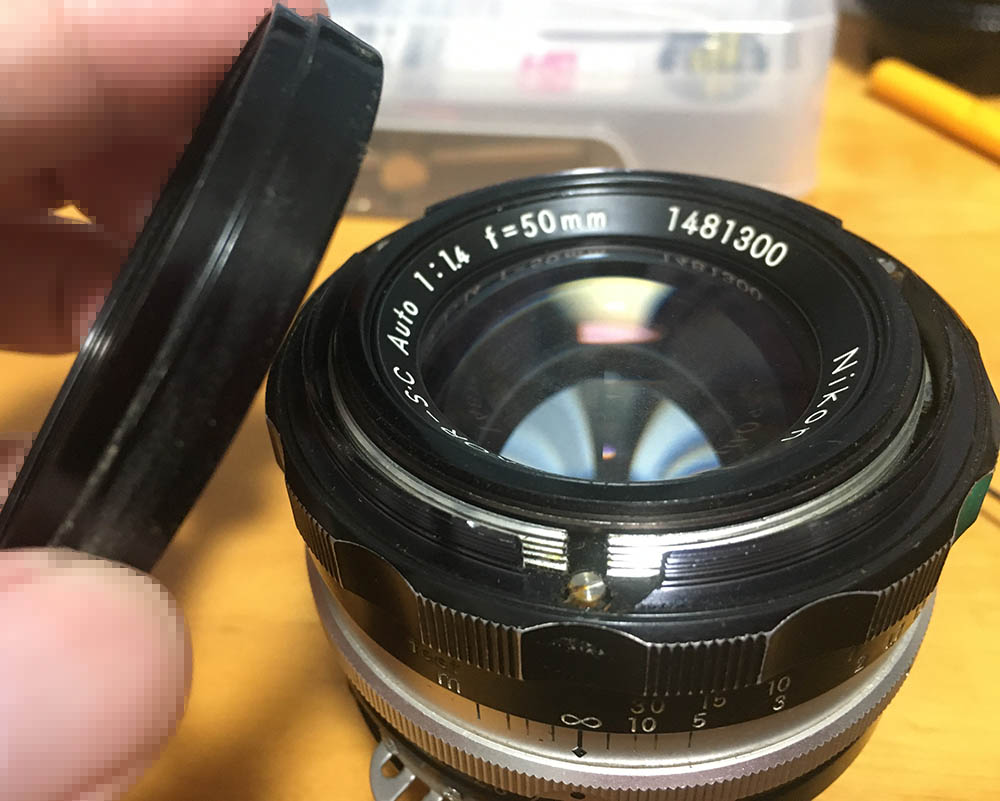
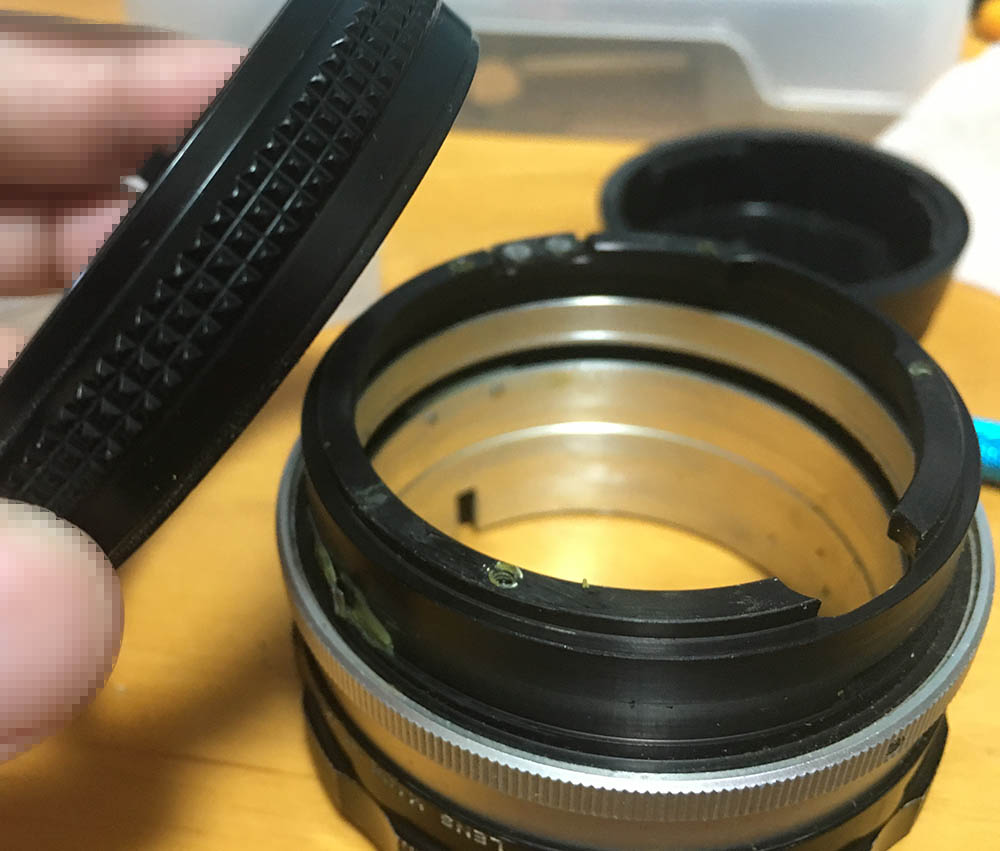
Carefully unscrew the bezel of the focusing ring. It may be tough to remove if it’s sealed so apply some alcohol to its threads to make it easier. A rubber tool is necessary for additional grip.
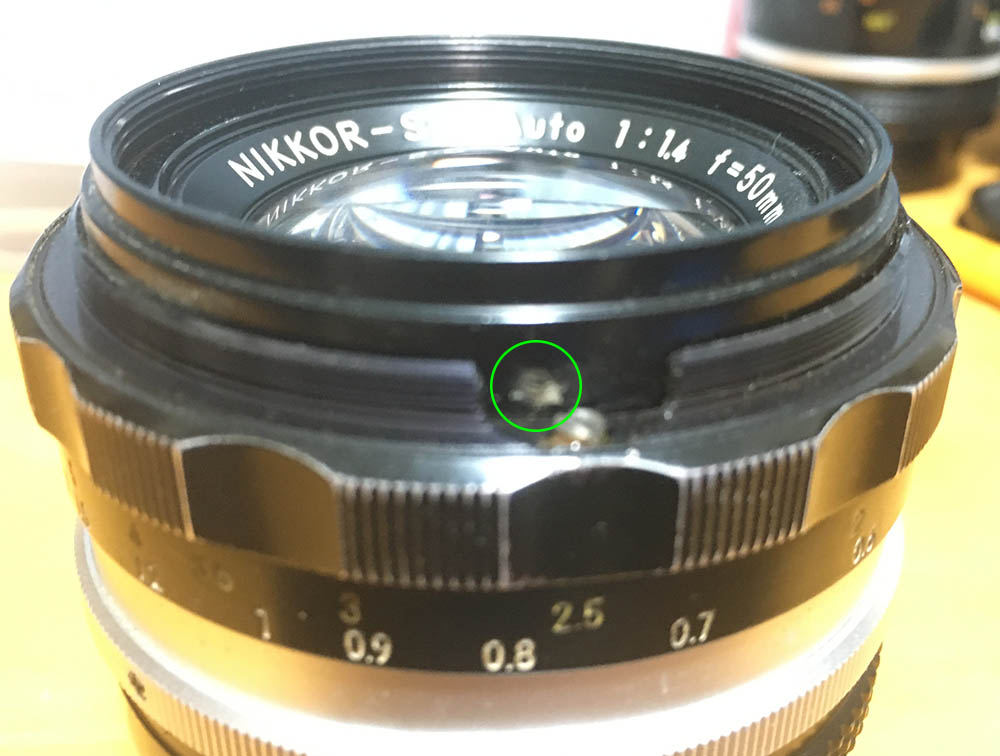
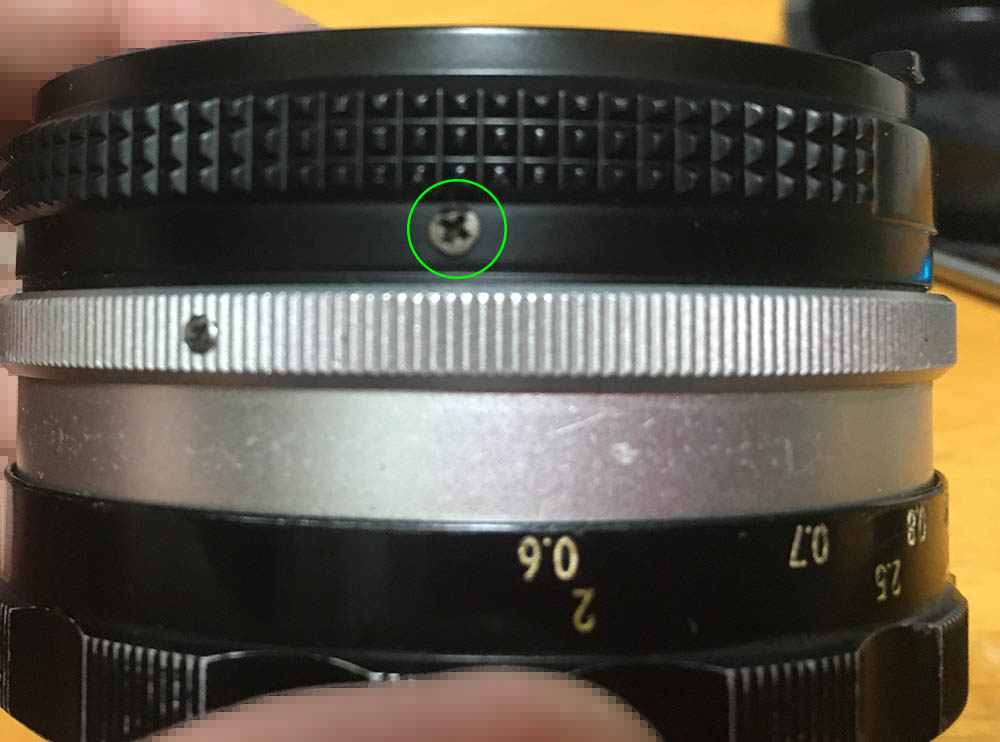
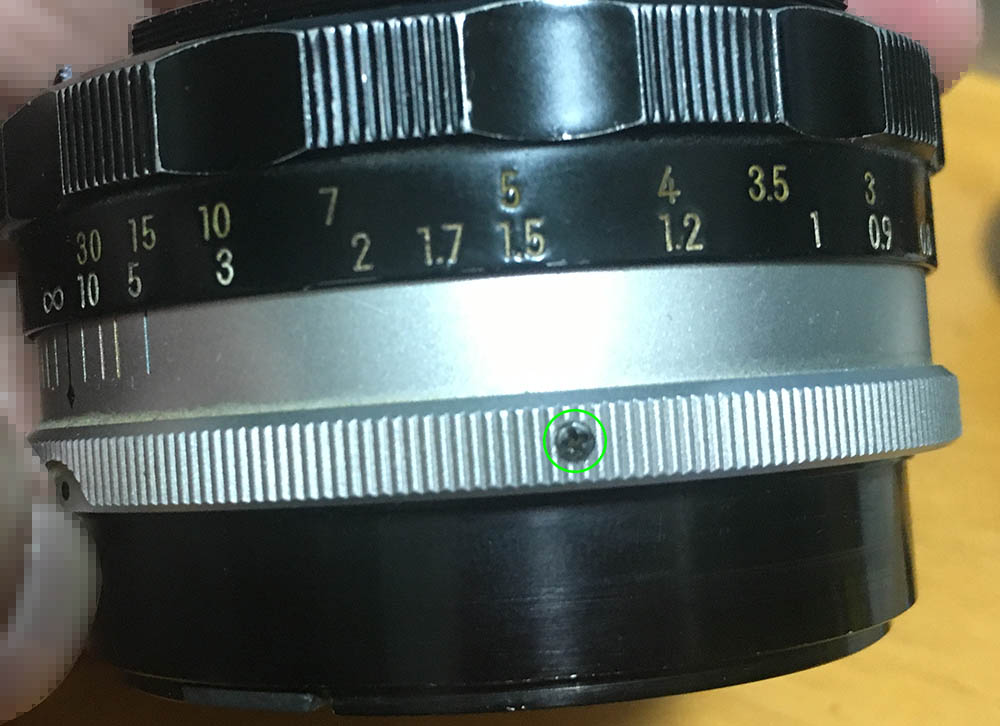
Locate and extract this set screw.
Unscrew the front barrel, it shouldn’t be difficult to remove at all.
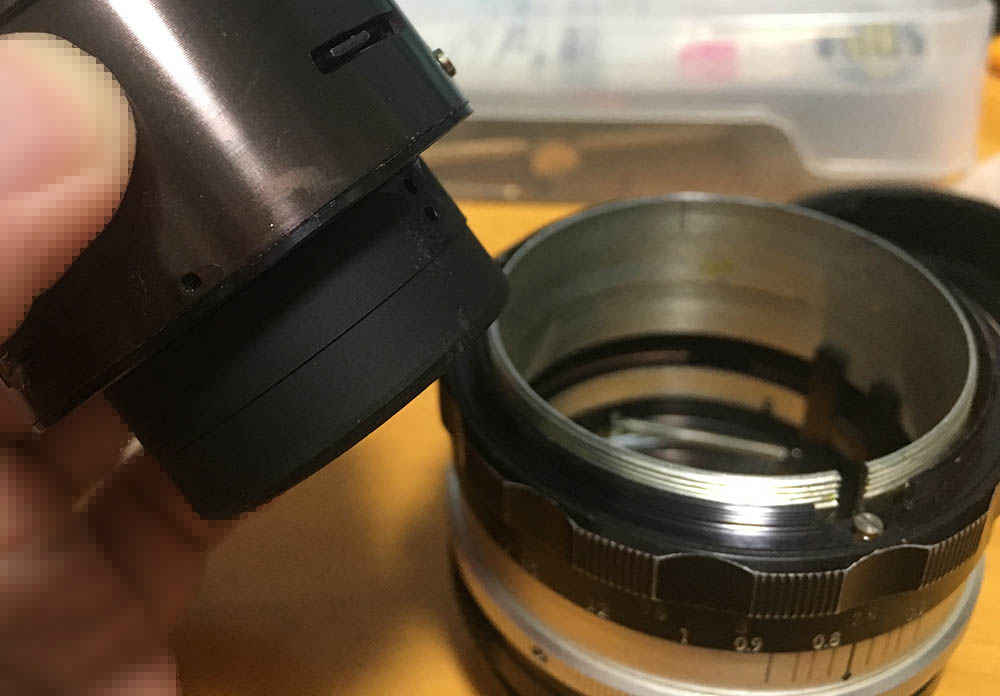
Carefully remove the objective from the barrel and store it in a safe place so it won’t get damaged.
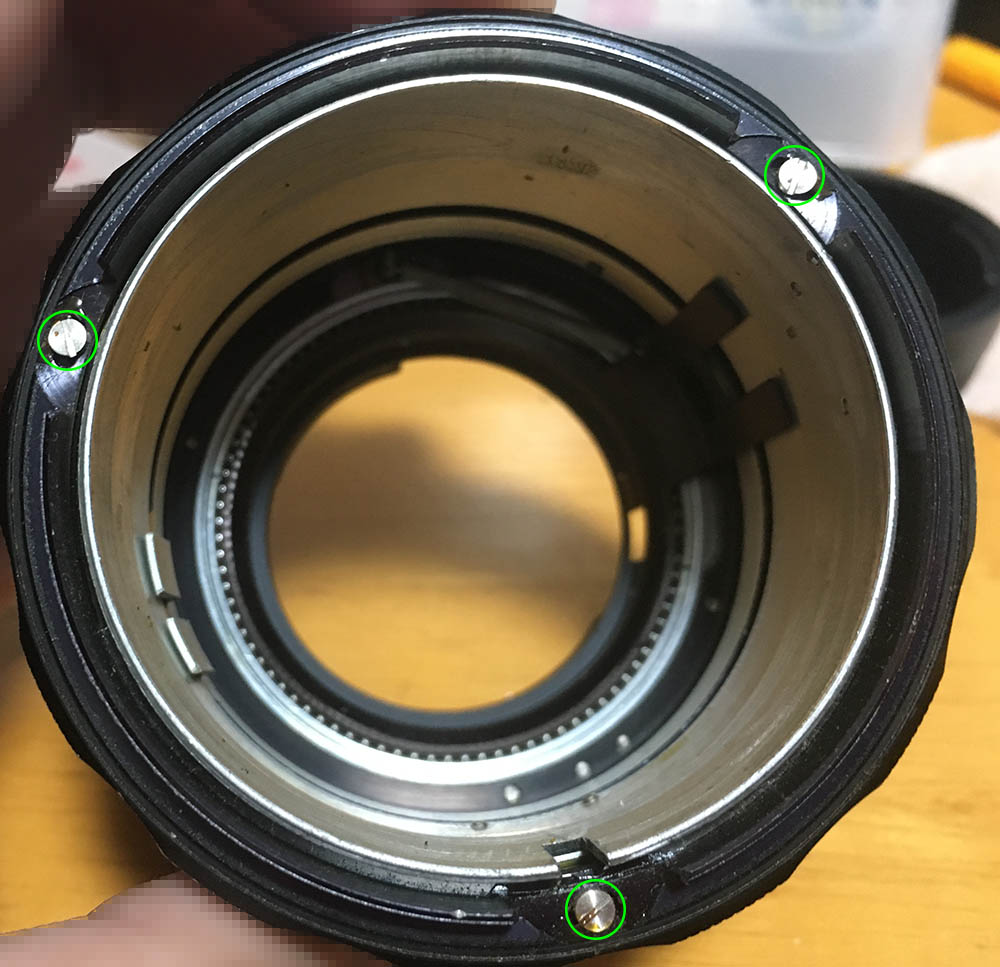
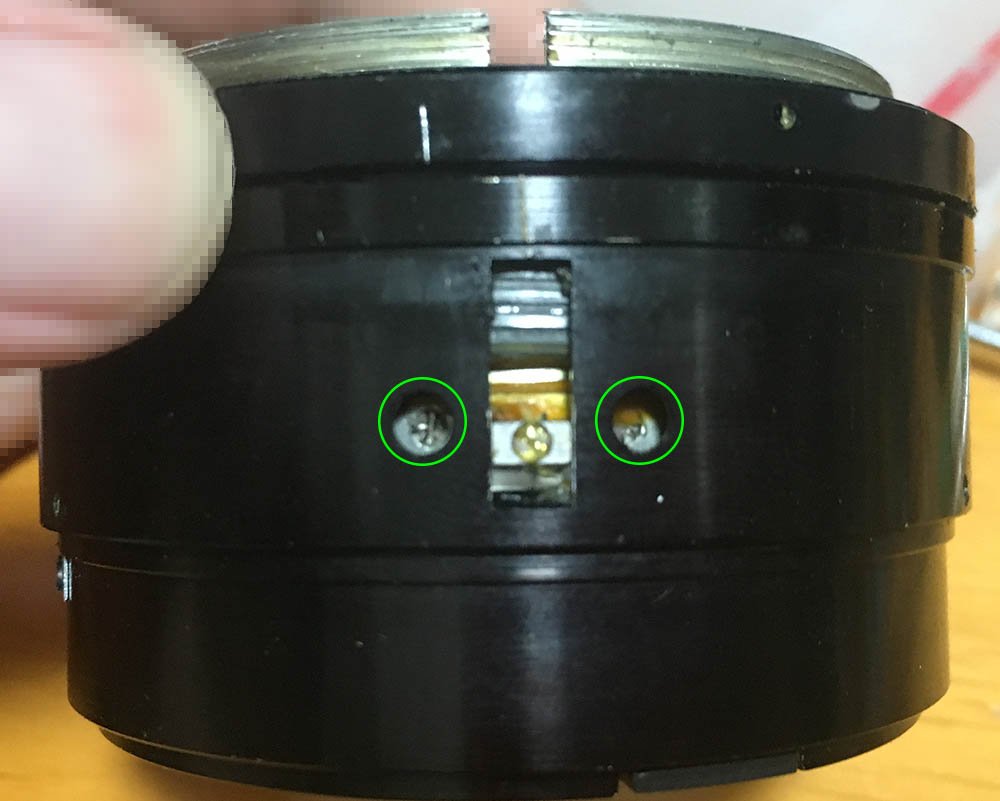
Extract these but leave one of them intact, it’s the one at the 12:00 mark. It’s not safe to remove it as you’ll damage the stop-down lever’s spring. Look at the inside of the barrel so you’ll know which screw that is.
Many people strip these by not using the correct type of drivers. In order to avoid that, read my article on how to remove bayonet screws. Follow what is written there and you should be fine.

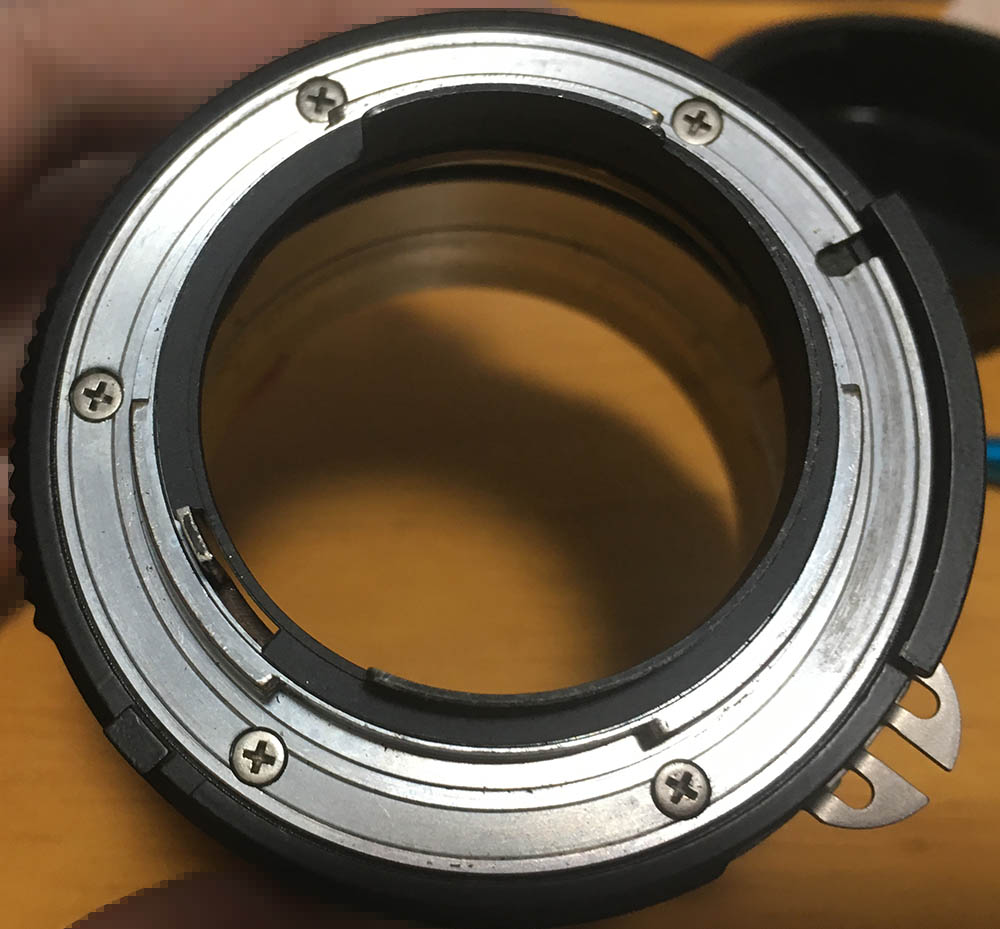
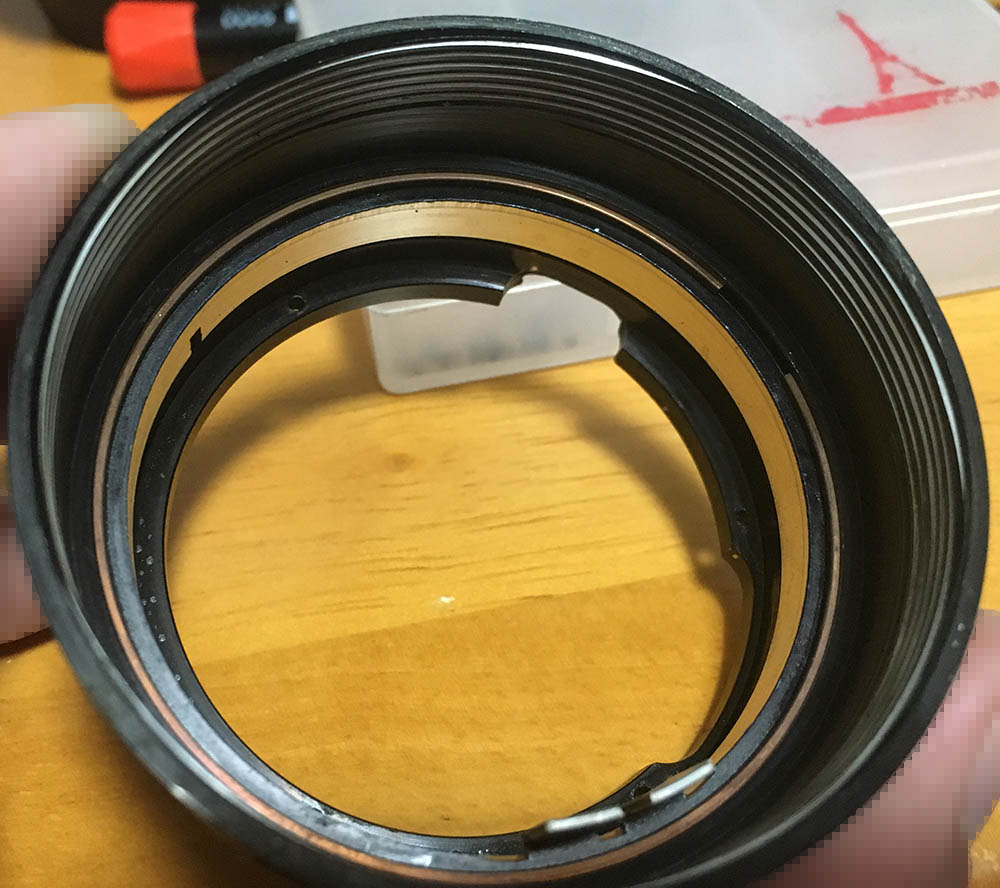
Remove the bayonet mount once the screws are gone. You can see how the end of that screw is attached to the spring in this photo. Extracting it isn’t a good idea as you’ll damage the spring or snap the screw.
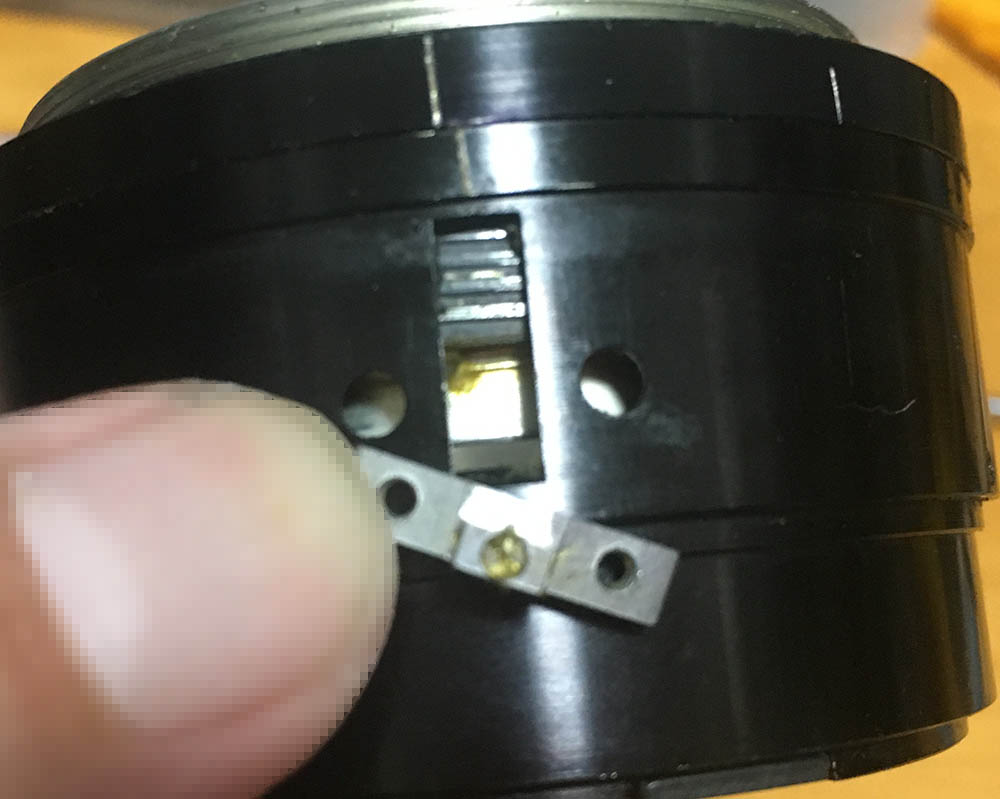
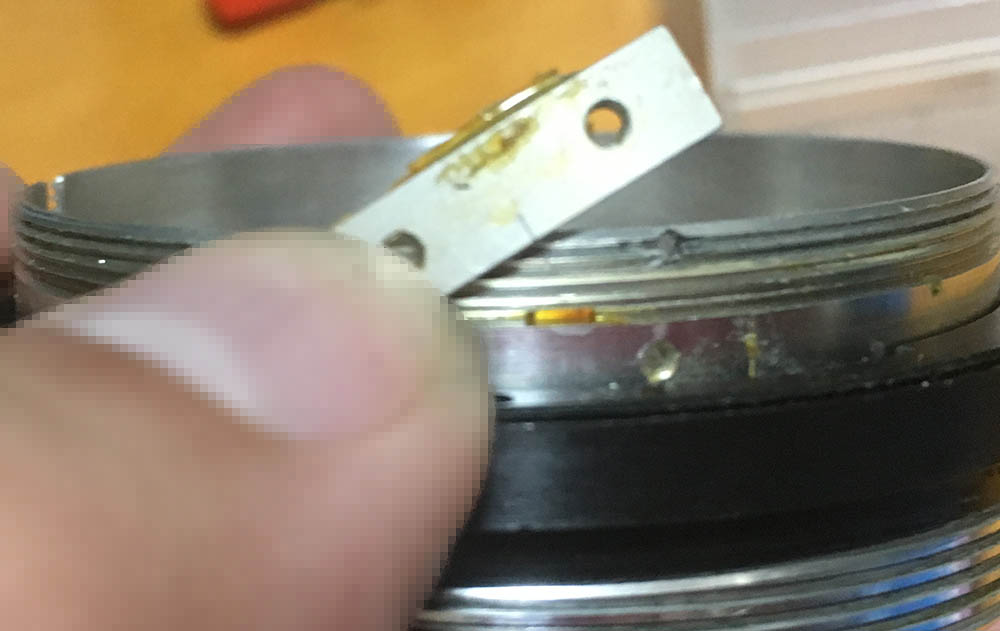
Before you can remove the aperture ring you must extract this first. This is a pin that couples the aperture ring to its fork inside the barrel.
Once the screw is gone you can safely remove the aperture ring.
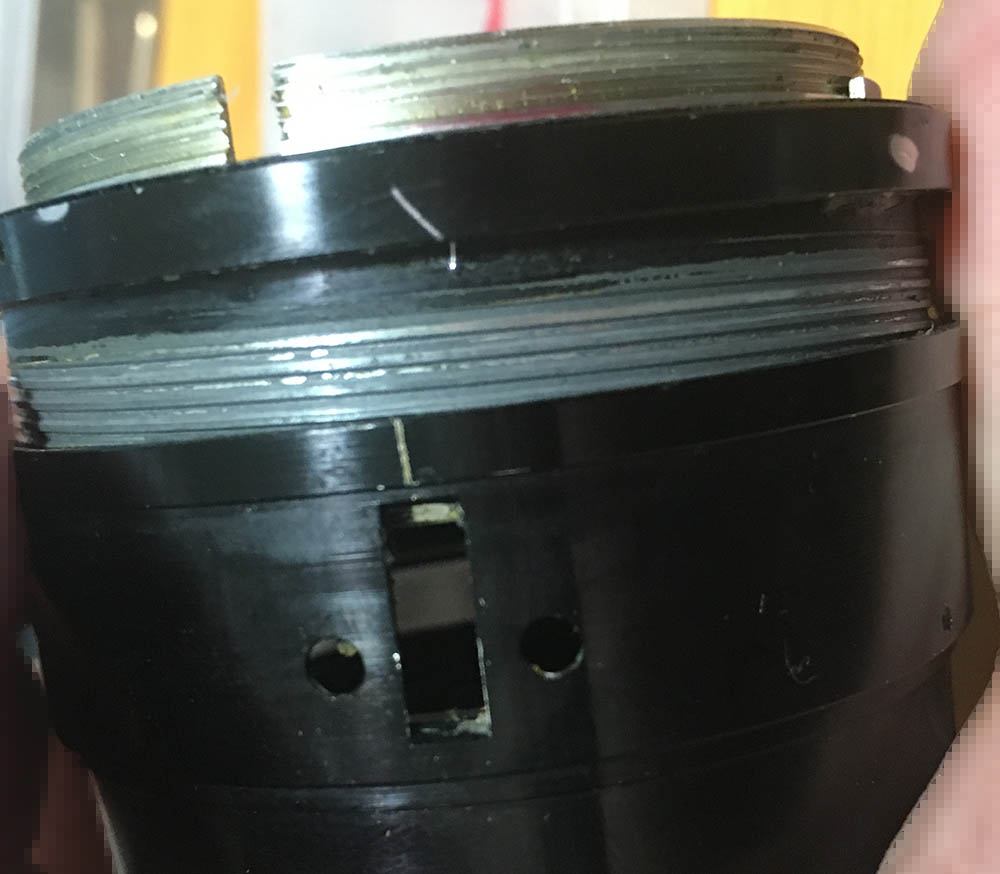
Carefully extract these and make sure that your drivers fit perfectly. If they are larger you’ll damage the surrounding metal, a smaller one will strip the slots.
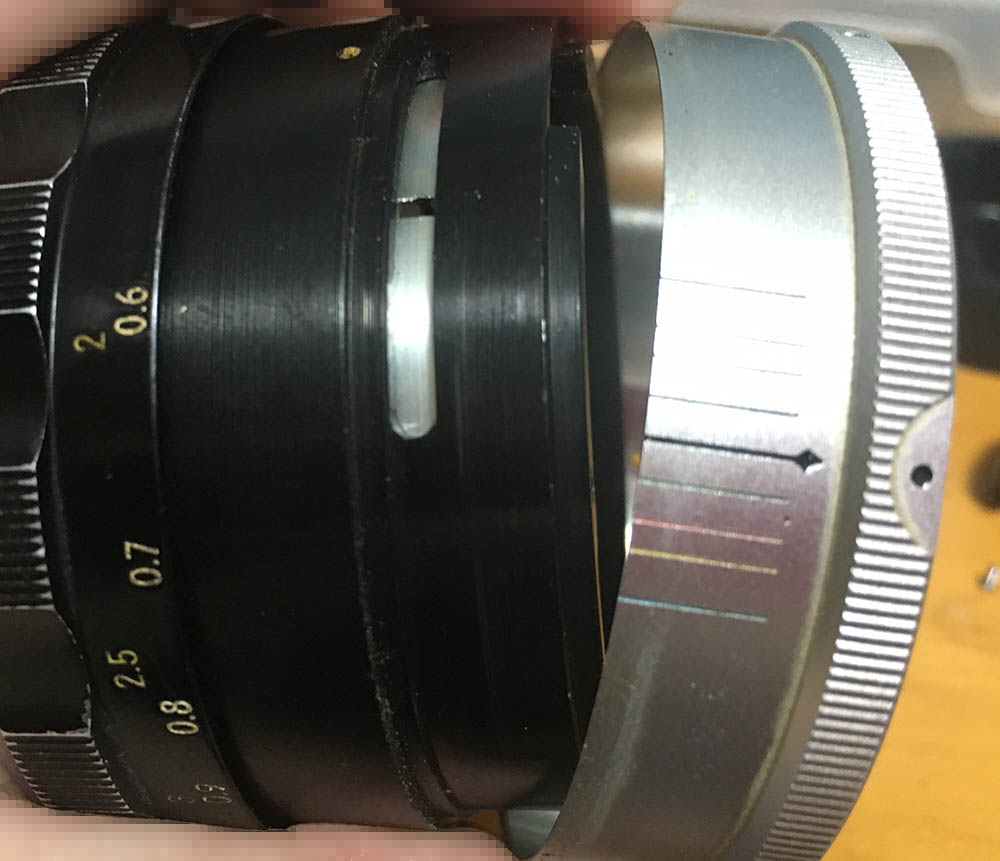
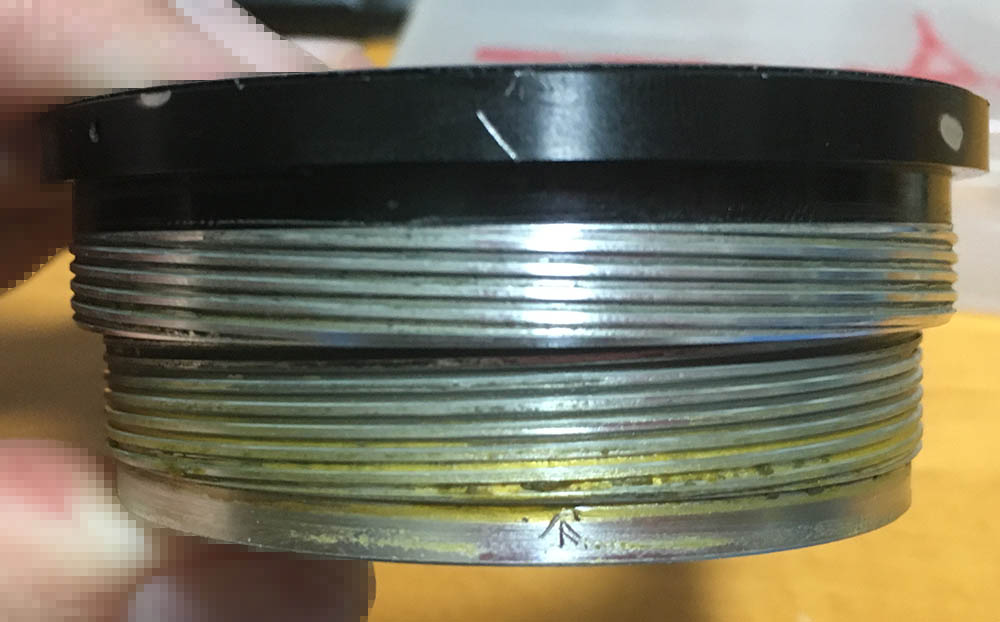
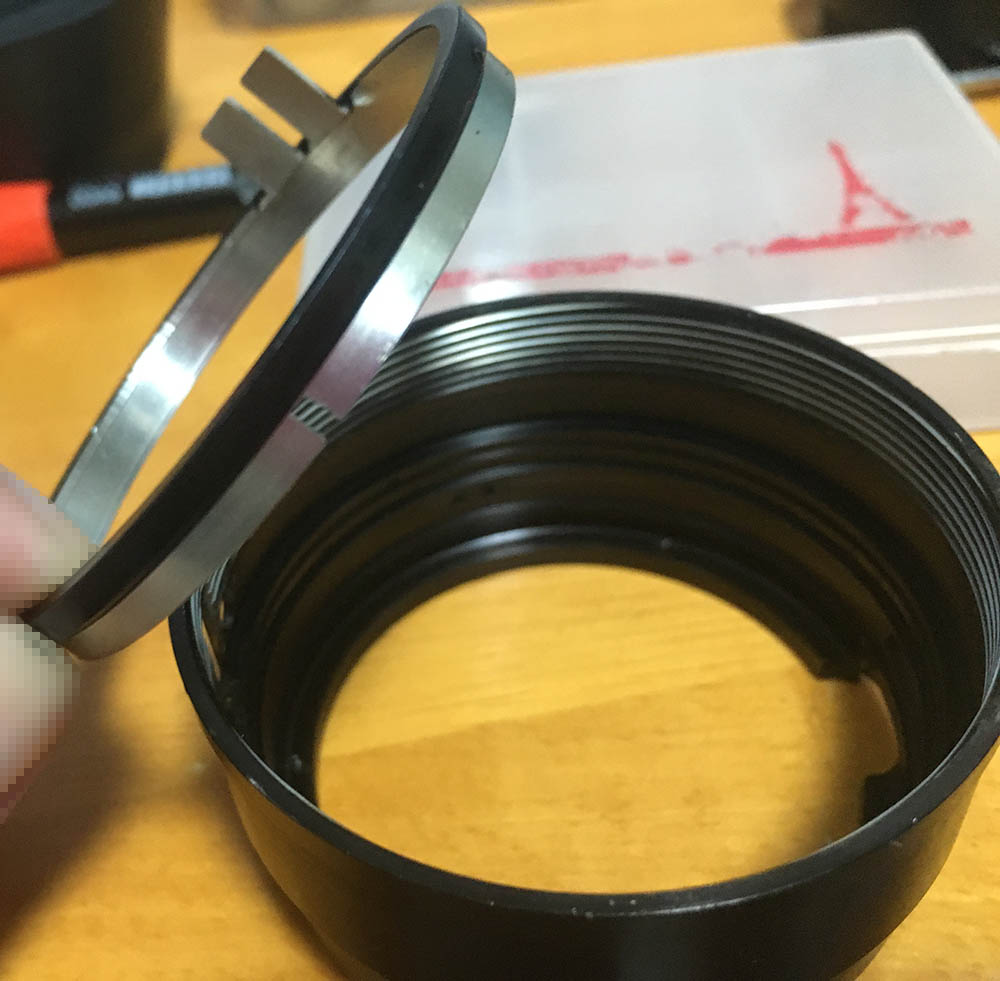
The sleeve can now be safely removed.
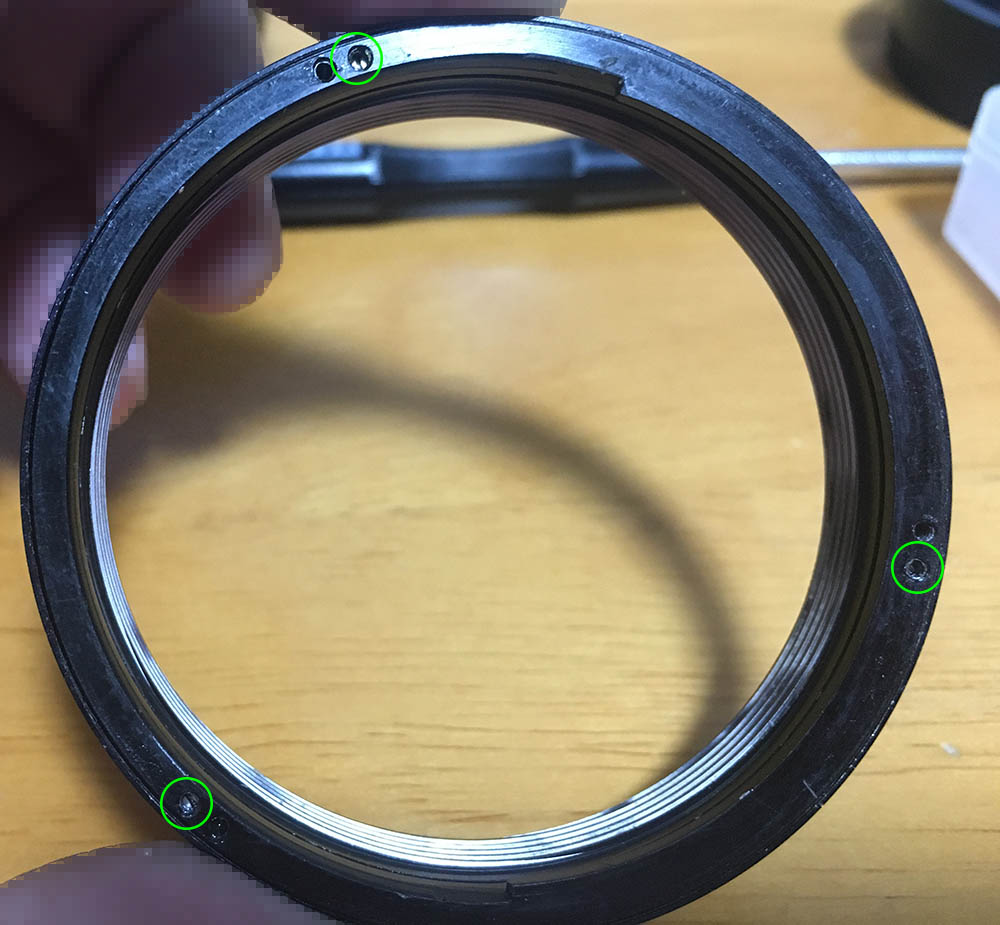
Carefully extract these to remove the focusing ring. These are usually sealed with cement, soften the seals with solvent before you extract them. You can adjust the distance scale by loosening these and turning the focusing ring.
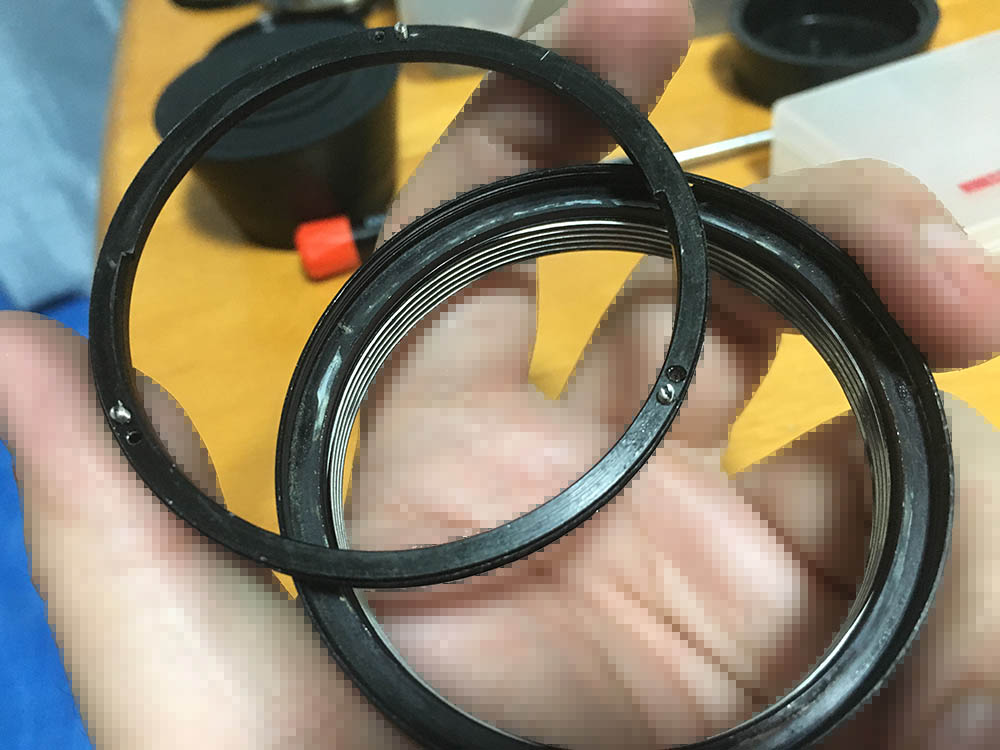
Carefully remove the focusing ring.
Extract these to remove the helicoid key. It keeps the helicoids synced so it’s able to extend-or-retract when you turn the central one. This is also a good time to take notes and photos so you’ll know how the helicoids should align and operate. I usually make small scratches at this point.
Carefully remove the key and don’t forget to note its position so you’ll know how to put it back later properly.
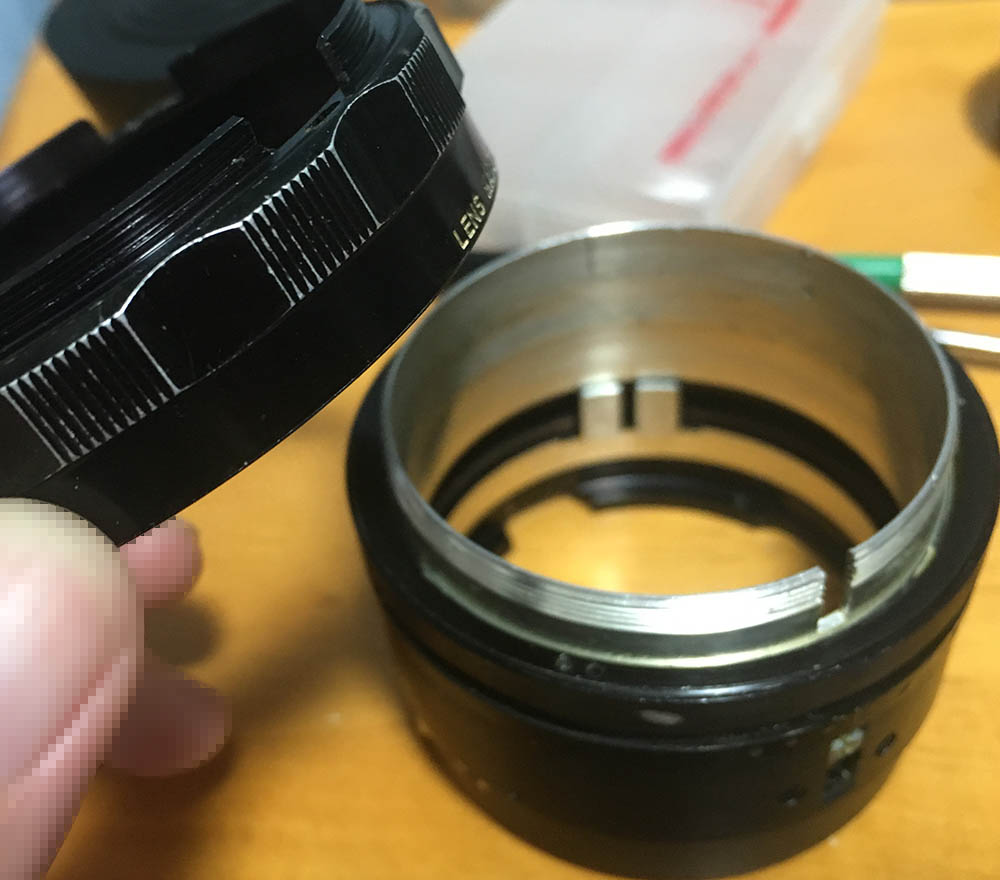
Separate the central helicoid from the outer one. Don’t forget to note where they parted since this is also the place where they should mesh. Forgetting it will result in plenty of wasted time guessing where these should mate. Read my article on how to work with helicoids so you’ll know how to do it right.
The helicoid stop prevents the helicoids from turning beyond their range. It has to go so you could separate the helicoids further.
Heat the screws well before extracting them. The stop itself is always sealed with cement so it can be difficult to remove. Don’t forget to note which side should be facing the top so you’ll know how to put this back later.
Separate the inner helicoid from the central one, don’t forget to note where they parted.
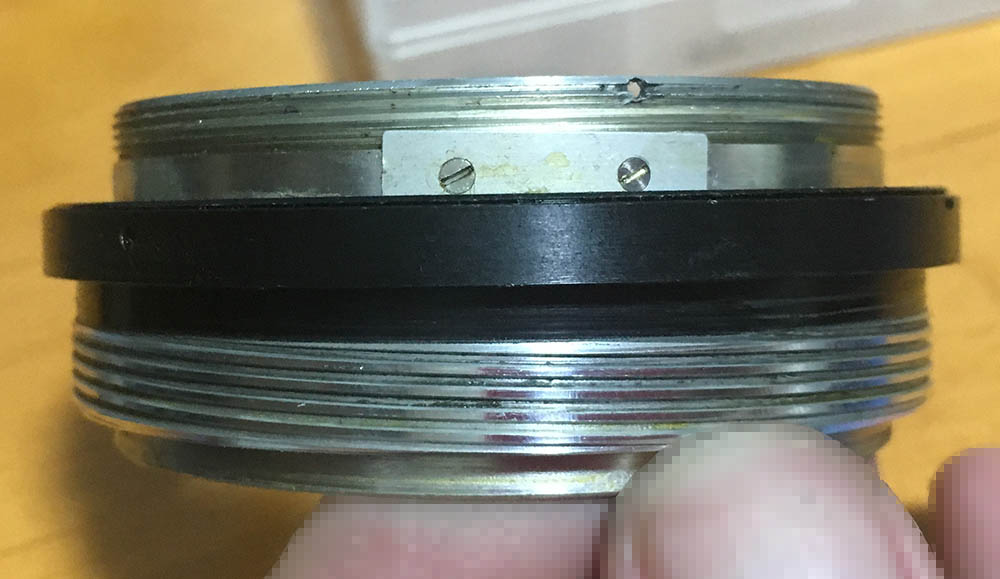
The adjuster ring is usually sealed and can be difficult to remove safely. The best way to work on it is to pickle this assembly in an alcohol bath for a few hours, maybe overnight. Before you unscrew it, make sure that you make a few marks to serve as keys so you’ll know how to align it later. Loosen these and then unscrew the adjuster ring carefully. The threads are thin, they can be easily cross-threaded.
Clean these properly since grease usually collect underneath them. You can adjust your lens’ focus by turning the adjuster ring.
Carefully extract the brass ring to remove the aperture fork and its ring.
Remove the aperture fork and its ring, clean this very well.
Clean everything well, do not any leave residue. Scrub the helicoids using a stiff-bristled brush and strong detergent. Soaking them in an alcohol bath is helpful in softening any hardened gunk. Polish them threads with cloth and dry them carefully. Use a grease that is not too-light so it will turn smoothly, a grease that’s too-thick will make this difficult to turn. A thin film is all you will ever need, excessive grease will create a mess, the oil will also migrate towards the iris which creates an even bigger problem.
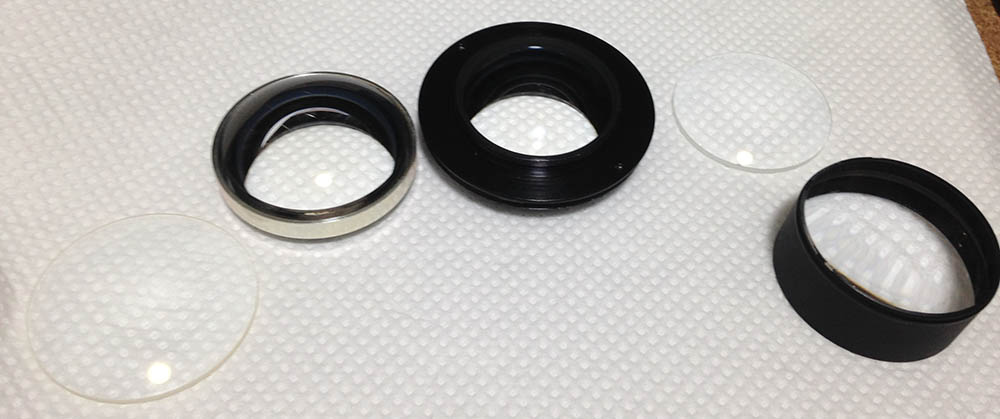
Disassembly (Objective):
The objective is simple to service if you have the right tools. Only clean what you need, don’t open anything if it works properly. The iris mechanism was left alone since it’s still clean. If you need to service yours read my article of the Nikkor-S 5.8cm f/1.4 Auto since they’re similar.
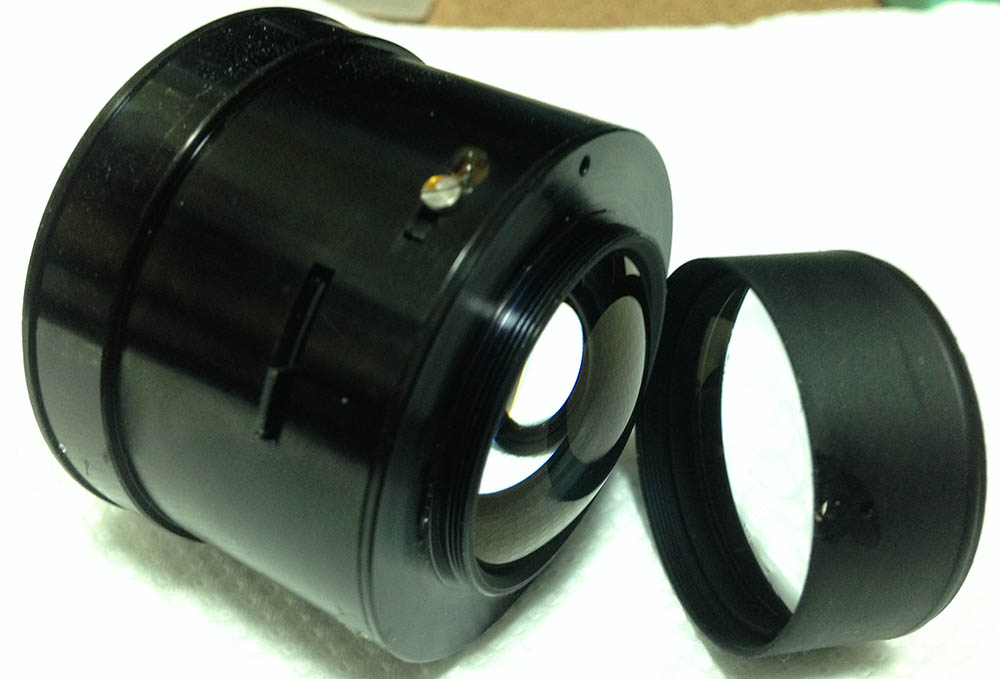
The rear optical assembly can be easily accessed.
You can further dismantle this by unscrewing the rear cover to clean what’s inside of it.
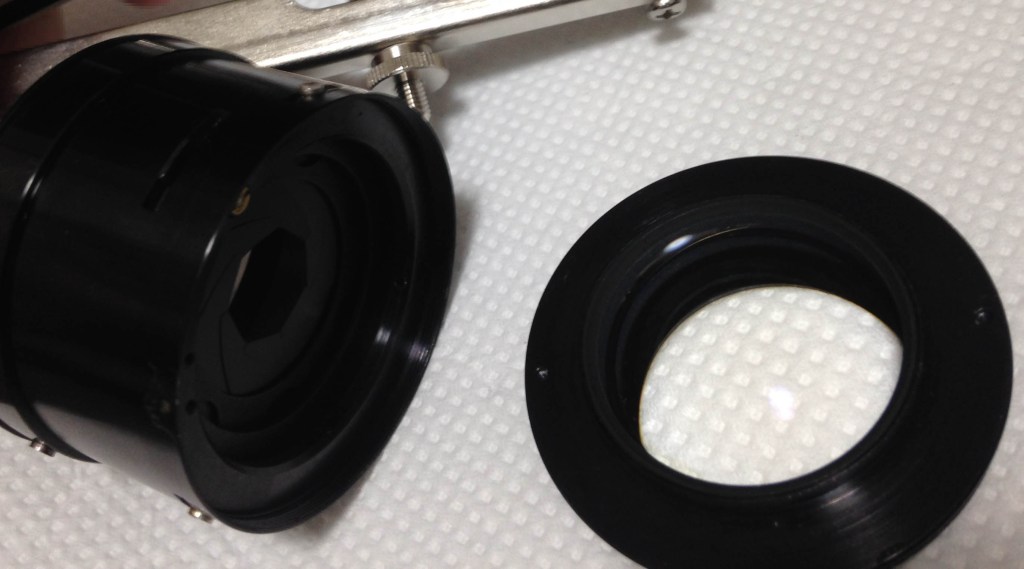
The front optical assembly can be unscrewed from the objective’s housing.

The collar is sealed with lacquer, apply a small amount of alcohol to soften the seal before you unscrew it.
You could dismantle everything further from here on. If a group is glued to its collar or housing, leave that alone and don’t separate them.
Clean the glass very well. If your lens has fungus, read my article on how to remove lens fungus. Don’t use the solution at full-strength, you’ll damage the coating in no-time, thin it with distilled water. Avoid soaking any cemented groups into the solution for a long time, just dip it and remove it as soon as you could and wipe the glass well so it won’t damage the optical cement.
Conclusion:
I have serviced many of these throughout the years so I’m familiar with it. I don’t even take notes but that’s just me. It took me about 2 hours to clean it, maybe a few more if it’s filthy. Despite being boring to service it’s always an interesting chance to document the minor internal differences within each lens that I dismantle.
This is an easy lens to service but it’s not something that a beginner should be tackling as their first-attempt. It still requires specialized tools and skills in order to service it correctly. If yours needs repair, send it to a repairman and make sure that he is reputable.
Before you put everything back, leave the focusing ring so you could adjust its focus. Once you’re satisfied with your results, adjust the distance scale. I have written an article about adjusting a lens’ focus, read that to know how it’s done in a DIY setting. Seal the screws with a small drop of nail polish to prevent the screws from loosening.
Thank you very much for following my work. If you enjoyed this article, do share it with your friends, this site earns $0.30 a day from views alone. You and your friends can help spread the word about this site. Downloading my content won’t help anybody. You can also support my work, it helps me pay for hosting and maintenance. You’re also helping me purchase, process and scan film. This site promotes the use of film so it’s all for a good cause. Come back again for more articles and see you again next time. Ric.
Help Support this Blog:
Maintaining this blog requires money to operate. If you think that this site has helped you or you want to show your support by helping with the site’s upkeep, you can make a small donation to my paypal.com (richardHaw888@gmail.com). Money is not my prime motivation for this blog and I believe that I have enough to run this but you can help me make this site (and the companion facebook page) grow.
Helping support this site will ensure that this will be kept going as long as I have the time and energy for this. I would appreciate it if you just leave out your name or details like your country’s name or other information so that the donations will totally be anonymous. This is a labor of love and I intend to keep it that way for as long as I can. Ric.

Jan 23, 2016 @ 13:39:56
Thank you. Another fascinating & instructive article.
Jan 23, 2016 @ 13:40:43
Thank you, sir! The kind words motivates me to publish more!
Jan 23, 2016 @ 17:30:33
Ang dami bang junks dyan? Ang galing naman…wala akong ganon ka tyaga…thanks for the effort to share this.
May 23, 2016 @ 14:26:24
Good morning!!! Or read with great interest your article, I would like to change in AI but this goal has not the screws that usually serve to dismantle the union of optical coupling, can you show me how to disassemble this ring? Thanks for the help they want to give me.
May 23, 2016 @ 14:34:01
Buon Giorno, Carlo!
So you have a 50mm f/1.4 without the screws on the bottom? Can you please give me the serial number and maybe I can help you. If your serial number is OK then maybe you do not need to convert it!
Aug 24, 2016 @ 15:47:17
Thank you for the guide! I just got one 50mm/1.4 from KEH with that 1mm set screw damaged that prevents focusing closer than 2.5 feet. Can I just remove it and use a small drop of a nail polish or some other weak glue to keep the silver front ring in place? Thanks!
Aug 24, 2016 @ 23:28:53
Hello, Lev!
I don’t get it. Is that set screw getting in the way of the front ring? Sometimes, that thing will sink in diagonally. You can just remove it and use nail polish like you said to secure it. You can even skip the glue if you opt to. Ric.
Aug 24, 2016 @ 15:52:10
Another question: To AI my old Nikkor-S 50/1.4, with no large 5 screws at the bayonet, do I need to remove the bayonet that is held by 3 small screws connecting it to the back barrel before I remove the aperture ring? Thank you again!
Aug 24, 2016 @ 23:32:01
Hi, it seems that you have the earlier version. Is that the version with the scalloped aperture ring or not? If it’s the fluted aperture ring then you can just remove the bunny ears and that will slip under the aperture coupling tab in the camera so you do not need to convert it to Ai. Check first and then I will show you a simple way to convert it to Ai non-destructively. Ric.
Aug 25, 2016 @ 11:51:06
Hi Ric,
My 50/1.4 are from 1960s Nippon Kogaku Nikkor S: one 6-blade, another is 7-blade, both serial numbers are in 400000’s but aperture ring looks the same on both, I think you call them fluted. The second one (was “broken” due to the set screw damaged) has a small notch already filed under the “bunny ears” prong (it is probably the conversion you meant). However, I want to use it with my N80 film camera that I still use sometimes, so it needs a more thorough filing including removal a part of aperture ring at 8 o’clock. Also, I need the prongs to use my 2x converter with this lens. So how can remove the aperture ring to file it?
By the way, what solvent would you recommend to remove oil from inside the lens, both from the glass and aperture elements? Thanks a lot!
Lev
Aug 27, 2016 @ 06:13:07
Hello, Lev.
For lenses like that, first you have to remove a screw in the aperture ring and simply unscrew the whole aperture ring off. It may take 7-10 turns because the thread is very fine.
For oil in the aperture blades, I use lighter fluid on lens tissue to wipe the blades one-by-one. Some people will simply wipe them without disassembling it, that is fine but it is the lazy way to do things. For the glass elements, I use alcohol but lighter fluid should also be OK.Just be sure to use the right type of lens tissue. Ric.
Feb 01, 2017 @ 08:49:19
Great article. Do you have a recommendations on how to repair / service the Mechanical Diaphragm Lever on this lens? I just got one, and it doesn’t have that “springy” feel. When I push it up or depress it, it just stays in that position; it doesn’t spring back. Needs oil?? Something too tight?? Advice greatly appreciated.
Feb 01, 2017 @ 09:57:15
Hello, Paul.
Please check and see if you have an oily iris, that will make that thing stick but there could be more problems. The spring inside is anchored in a very inconvenient place. Ric.
Feb 01, 2017 @ 13:28:28
Hi, Richard.
Thanks for the reply. Something like this? https://www.youtube.com/watch?v=CWZ9pPFKYb8
Feb 01, 2017 @ 13:40:28
Hello, Paul. Try sending it to me here in Tokyo and let’s see what I can do. Ric.
Feb 01, 2017 @ 14:17:43
Richard, you’re Tokyo-based?!! So am I!! This is not SUPER urgent, but if you have time to meet up for a beer or coffee or something. Re: the lever, I’ve been wiggling it up and down rapidly and some tension is returning; still sticking, though. I wonder if I continue doing that to create friction / give it some exercise.
Feb 01, 2017 @ 14:22:30
Hello, Paul. My studio is in Shinjuku, I can take a look at that during lunch break, just tell me when so I can bring my driver. Take a look at the iris from the front and from the back. Make sure the lens is stopped all the way down and see if there’s any trace of oil in the blades. Ric.
Feb 01, 2017 @ 14:26:53
Hi, Ric. I’m on the Chuo Line, so Shinjuku is not a problem.
Yes, I do see oil on the blades on the front and back sides.
By the way, please don’t go out of your way for this if it’ll take a long time; but, of course, any help would be much appreciated either in person or via this blog.
Feb 01, 2017 @ 14:32:05
Hello, Paul.
If that’s the case then you have to clean the blades properly. This lens has to be overhauled or the oil will come back. Just ask for a refund if you got this recently. Ric.
Feb 01, 2017 @ 14:38:12
Hi, Ric. Unfortunately, I got it on Yahoo Auction (no claim, no return)…. Also, it’s in in good shape cosmetically, and I don’t want to part with the Nikon F that it came with.
Reading your article, and seeing other tutorials online gives me motivation to DIY overhaul this piece of glass. I just need to get some of the proper tools.
Mar 07, 2017 @ 07:58:11
Hi Richard, I tried to take the aperture ring off — unscrewed the small screw on the side and kept turning it but it wouldn’t come off. It just comes around. I believe my version has a retaining ring which is the only thing that is different from my other 50mm 1.4. If I get that retaining ring off will that free the aperture ring?
This is the description of my lens: Nippon Kogaku Japan No. 553433 NIKKOR-S Auto 1:14 f=50mm.
Thanks in advance.
Mar 07, 2017 @ 11:56:54
Hello, Henry!
I will check my notes later when I get home for all versions of that lens. I don’t believe that it’s being geld by anything other than the screws. Can you please show me a picture of what you have? If you are referring to the brass ring you will have to remove a tall head screw that is connected to it outside of the casing. Ric
Mar 07, 2017 @ 23:54:49
Hello, Henry.
It looks like there is a retention ring there. Ric.
Mar 08, 2017 @ 14:32:29
Thank you. I’ll try and get the retention ring off when I have the right tool for that job.
Mar 09, 2017 @ 01:04:16
You can use a metal caliper and file off the tips so you have a tool that will fit or use 2 nails driven into a piece of wood. Ric.
Mar 09, 2017 @ 09:45:56
Thank you. Ordered a spanner wrench already, I should get it soon. Thanks again.
May 05, 2017 @ 21:00:36
Hi Ric,
I am fascinated by your site. It encouraged me to clean and lubricate my own lenses. I am having a problem with my Nikkor-s 50 1.4. It is a late 60’s unit with no screws on the focus ring, so I am attempting to disassemble it from the rear. However, the aperture ring will NOT come off. I havent run into this with other Nikkors…any ideas?
May 06, 2017 @ 01:48:41
Hello, Steve!
I made an article about that, you can do a search. It is one of the earlier ones that I wrote. The aperture ring screws off in that version. Please read other related articles just in case. Ric.
Jun 16, 2017 @ 10:46:08
Great article Rick!
Jul 27, 2017 @ 03:08:30
I got one of these in a bargain bin — terrible fungus and rough focusing. I can’t figure out how to get the objective out the front. There is the tiny screw on the side but the focusing ring is blocking it. No screws on the focusing ring?? Am I supposed to twist off the beauty ring on the front to get access to more screws?
Jul 27, 2017 @ 04:07:03
Can you give me the serial number? If you have this kind of lens then you may have to remove the focusing ring first. Check my 5.8cm repair article, that lens has more in common with that.
Jul 28, 2017 @ 02:23:59
I’ll check it out. Thank you. Nikkor -S Auto 1:1.4 f +50mm 1079265. It has had a professional Ai Conversion done.
Jul 28, 2017 @ 02:26:42
It looks exactly like the one in this article. I just can’t visualize how to get the front rings off..so I can get to the lens objective and clean out the fungus.
Jul 28, 2017 @ 07:47:33
Hello, Try removing the focusing ring. The screw might be under that. If you can wait, I can check my notes when I get home.
Jul 29, 2017 @ 01:45:23
Your serial shows that you have a later version so this article should be relevant. just follow the steps here and you should be OK.
Jul 29, 2017 @ 12:22:41
The screw is definitely under the focusing ring, but I can figure out how to remove the focusing ring as there are not screws on it. I’ll go back and look at the steps you posted but it isn’t clear to me how you do that part. Thanks for your help. It will be a really nice lens if I can open it up, clean the fungus and not bollocks it up.
Sep 15, 2017 @ 21:18:19
I’ll add here that on my late version lens, the diaphragm spring is connected to the screw directly opposite to the rabbit ears when the aperture is set to f5.6. It’s 90 degrees down from the aperture lever so that the aperture lever moves away from the screw (which also explains how it works: the spring pulls the lever toward the screw.)
Nov 12, 2017 @ 01:07:05
Anyone know how to get to the aperture assembly on this lens?
I have a 6-bladed version with no screws on the back of the mount. I have it almost all the way disassembled, I have the rear barrel out but the plate and the doublet are still attached to the back. Thats the part that the article says “and you should never ever attempt to remove it,” so how do I remove it?
I see the pin-holes for a lens spanner, but do I have to heat up the glue or weaken it with acetone or something? it feels really stuck on there. There’s a photo where he got it off so clearly its possible. Would appreciate any help and encourage you all to donate to the site, this guy is very helpful!
Nov 12, 2017 @ 01:17:15
Hello, the part where I said that you shouldn’t mess around with is the REAR ELEMENT. That thing is permanently glued in-place.
Read the 5.8cm f/1.4 article that I made. That lens is very similar to your 50/1.4 version and you will get plenty of hints there. Ric.
Nov 12, 2017 @ 01:57:52
wow thanks for the quick reply!
I took a look at that article, but am only more confused than before… the iris mechanism of the 58mm looks much easier to get to than what I’m dealing with, my rear barrel looks almost exactly like your photos in the article above. I’m just trying to deep-clean my aperture system because the blades are sticking together, currently I’m only battling it from the top but it would help to be able to reach both sides. How did you get that rear plate with the doublet off? do I need a lens spanner or should I be able to unscrew it by hand?
Nov 12, 2017 @ 03:06:23
you have to get the objective out of the barrel. are you following the guide properly or are you doing your own thing?
Nov 12, 2017 @ 03:47:12
I was following the guide, but after a couple rounds of cleaning with alcohol it seems to have freed up! I threw it back together and it now works perfectly. Thanks for taking the time to reply
Nov 12, 2017 @ 09:28:35
OK…
Nov 28, 2017 @ 10:15:15
Hi Richard,
I bought a second-hand 50mm/f1.4 AF (not D/S/G) and tried to mount it on my D7000. I can hear the motor trying to focus but the lens seems stucked. I have to note that can AF using other lenses so I tend to doubt about the 50/f1.4
Please can you give advise?
Thanks,
Sean
Dec 09, 2017 @ 23:11:07
Hello, Sean. Was the lens dropped? Try focusing the lens while it’s not mounted to any cameras and see if it will focus. Also listen for anything weird while you focus it with your hands. Ric.
Oct 22, 2018 @ 20:11:49
Hi, I don’t see where you can adjust the infinity focus. Could you tell me?
Oct 03, 2019 @ 06:16:11
Hi,
Thank you for the detailed guide. I had oily aperture in my lens. My lens had different construction where optical block and the front helicoid was a single barrel and it is not possible to remove the optical block. I could take out front group, back group and clean the aperture and it works perfectly now. I have however two difficulties
1. I think I overtightened the front objective and rear eyepiece while putting it back together. How much it affect if the distance between these two changes slightly because of this overtightning?
2. The helicoid key in my lens is made of plastic. I think it has worn out but I can’t see any gaps between the key and gap in the helicoid. Maybe the gap is microscopic. But I feel very slight play while focusing back and forth and it is very annoying. The focusing ring is not loose and the play is there even after removing outer focusing ring. Is this issue because of worn out helicoid key? I have cleaned and regreased the helicoids very well.
Regards,
Pratik
Oct 30, 2019 @ 04:19:47
Hi,
Thank you for this article. I could clean aperture blades and regrease the helicoids.
I am having a small problem though. The helicoid key is made of plastic in my lens. There is slight play in the focusing because of the wear out of helicoid key. I can see it because of movement of grease in the sliding gap in helicoid key and the barrel. I cant think of any solution except below two which also look difficult.
1. Replace helicoid key: hard to find the spare
2. Somehow reduce the width of the slot by depositing metal or some adhesive in the slot: this also seems difficult.
Is there any simpler solution on this issue?
Regards,
Pratik
Dec 21, 2019 @ 03:26:42
you should replace the nylon part.
May 18, 2020 @ 23:27:08
hello Richard , congratulations for your blog and all valuable informations and explanations you are providing which help a lot of us.Such a great job ! Since I have discovered your web site I bought a Nikkor-S-C Auto F 1:4 lens which is really same as the above lens you noted C with black front ring . Mine is not AI converted .I bought it with some fog ( very small white dots similar to dust particles ). It can be seen from the back of the lens and seems to be located on the internal face of the rear element . So i would to clean it by opening only the back side of the objective ? is it possible ? how to do this ? If I must follow your description but without dissambling the helicoid , do i still need to adjust infinity focus ? thanks for your help . daniel from France
Aug 07, 2020 @ 10:10:12
Hi Richard,
Thanks a lot for all the invaluable information you give us in your blog. It has help me clean and lubricate helicoid successfully of some of my old manual lenses. I just managed to disassemble my ‘new’ Nikkor-S-C 50mm 1:1.4 to clean internal dust. There are two things that I have hard time to do though during reassembly :
– when putting back the lens unit in the lens barrel, I fail to determine a systematic procedure to align properly the aperture lever and the aperture screw so that the aperture ring works properly afterward. I always manage to do it by trial and error, and I finally get it right by chance. Sometime it takes me about an hour to do so… Would you have a tip on that ? I couldn’t find the information in the other pages of the blog.
– when finally putting the front ring back (the one with the tiny screw) after having put the lens back, the ring does not screw enough, the consequence is that I cannot align the tiny screw hole of the ring with the corresponding hole on the front barrel. I managed to do screw the ring enough to align the two holes only when the lens is not put back in the barrel. I fail to see what I missed in the reassembly. I can of course not put the tiny screw and secure only with nail’s polish as suggested in a previous comment, but I’d rather avoid that.
If you have any ideas to solves these two problems I would be very grateful.
Thanks a lot. Have a nice day.
Yanick from France
Aug 20, 2021 @ 23:51:02
Hi Ric,
Hope you are doing ok in these interesting times.
We in NZ have led a charmed life for a while but even we couldn’t escape the latest variant and now are back into a heavy lockdown – if only I didn’t have to keep working it would be an excellent time to take apart some old Nikkors , oh well…
Anyways, I’m wondering if you have any suggestions for a sticky factory AI-conversion ring on a 1969 S Auto 50/1.4, I am unsure if different versions had different Ai rings and if so how could I tell what it is ? I am picking these are impossible to find now so wondering if I just have to live with it ?
All the best, Rod NZ
Jan 19, 2022 @ 18:23:19
I soaked the first element (SC) in 50/50 HP/Ammonia for three days and it removed the condensation spots without damaging the coating😜
Jan 26, 2022 @ 00:53:23
hello Tom ,could you please let me know what is HP ? daniel
Jan 26, 2022 @ 12:00:05
Hydrogen Peroxide (comes 3% off the shelf) I tried 30 min w/o success. Had to go on a three day road trip for work, so just went for it. The beautiful orange tint of the multi coating is still there in the sun.😊
May 21, 2022 @ 11:06:21
Many thanks, Richard.
Thanks to your description, I was able to disassemble and adjust the lens.
Jun 14, 2023 @ 17:23:09
Adding my discovery here to save future lens hackers similar frustration when trying to access the aperture ring on their lens:
My specimen uses a retaining ring between the bayonet and aperture ring to keep everything in place. You can tell if there are visible threads around the perimeter of the brass with 2 obvious slots for a spanner. Issue is that my retaining ring was STUCK. Really stuck. Turns out, there’s an additional set-screw holding that ring in place!
To access the screw, remove the auto-aperture fork. There will be third hole drilled in between the two fork mounting holes. Then spin the aperture ring all the way around until you see the head of the set-screw through the middle hole. A 1mm slot driver should do well to remove the screw and free the retaining ring.
My lens:
“NIKKOR-S Auto 1:1.4 f=50mm Nippon Kogaku Japan No.545473”
Mar 26, 2024 @ 21:23:39
Thankyou for the detailed teardown! I have a 50mm 1.4 that works perfectly apart from the fact someone has put the silver aperture/focus indicator sleeve on 120° rotated from where it should be!
May 23, 2024 @ 05:47:24
Hello, any tips on how to remove the bezel from the focusing ring? I have been using the rubber thing you mentioned and I tried applying alchohol to it, but it appears to be well and truly stuck. Would it be safe to try acetone?
May 23, 2024 @ 19:08:17
Not more than 30 min acetone, to protect the glass.
Nov 04, 2024 @ 16:17:08
I have the second version of this lens and this guide was essential. I could not figure out how to get the helicoid assembly out, as the tapered ring and focusing ring appeared to be one machined piece! This was a much easier repair than my Canon FD 50mm 1.4…
I always enjoy your commentary and examples before getting into the repair process. Thank you for these guides!
Jun 05, 2025 @ 20:37:23
Richard
Thank you for these guides
Roberto Sanchez