
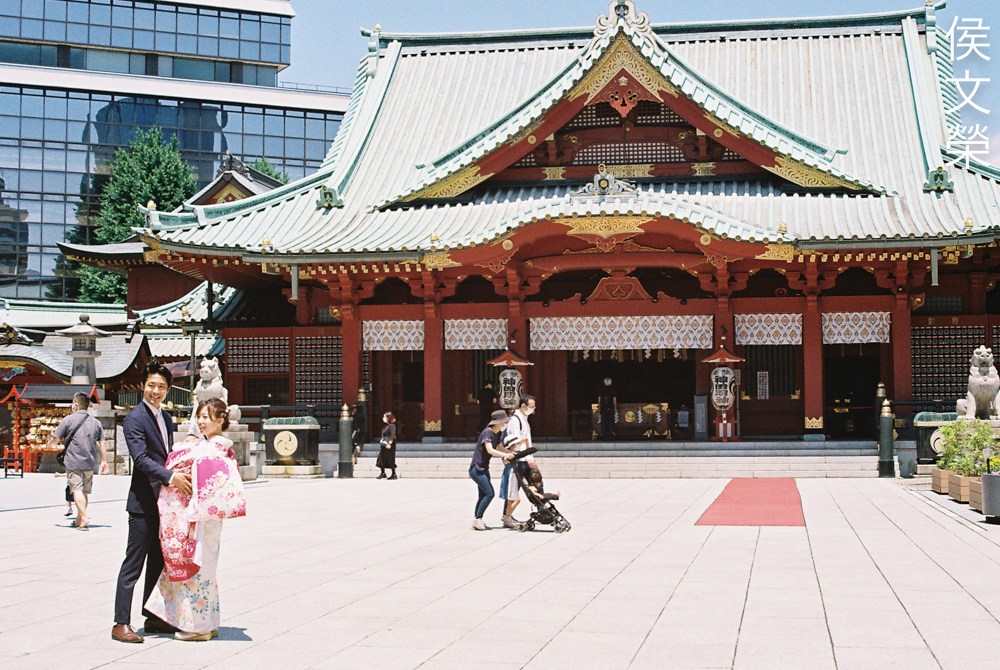
Hello, everybody! Do you know Nagabuchi Tsuyoshi’s (長渕剛) song “Kanpai” (乾杯)? It means “cheers” literally and it is a beautiful song about friendship and coming-of-age, things to celebrate in every culture. I love the lyrics a lot because it evokes a lot of complex emotions and memories that we all have while growing up and finally reaching a point when we’ll have to look-forward to bigger things and face the grand stage of our lives. Today, I will show you something that is somewhat of a breakthrough for one company, it signals their arrival to the big boys’ club, once exclusive only to the elite of the optics industry and it’s something to celebrate, too. For this, I say “kanpai”!
Introduction:
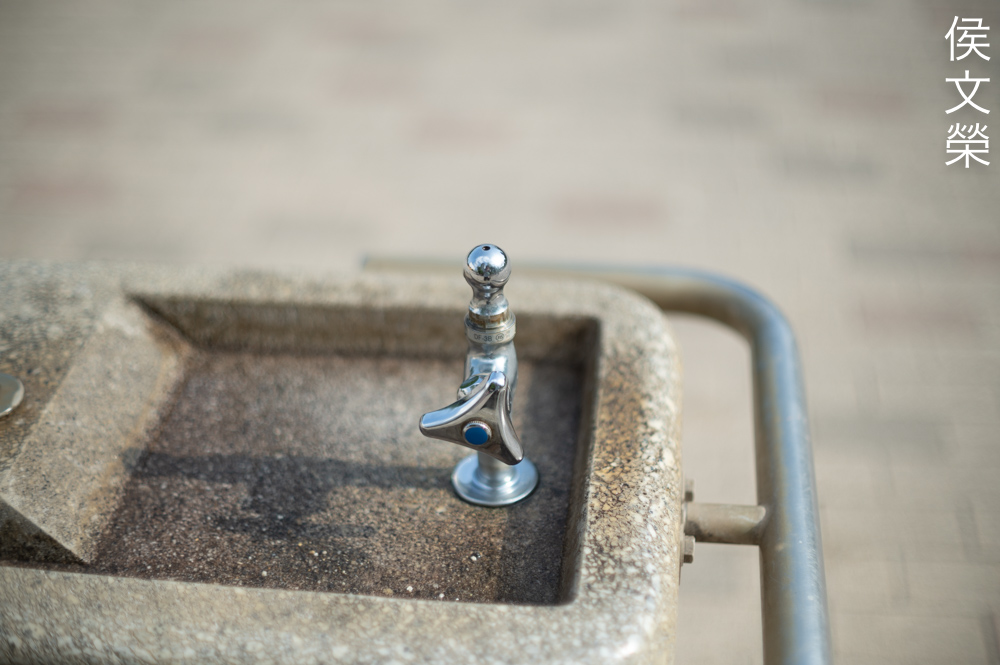
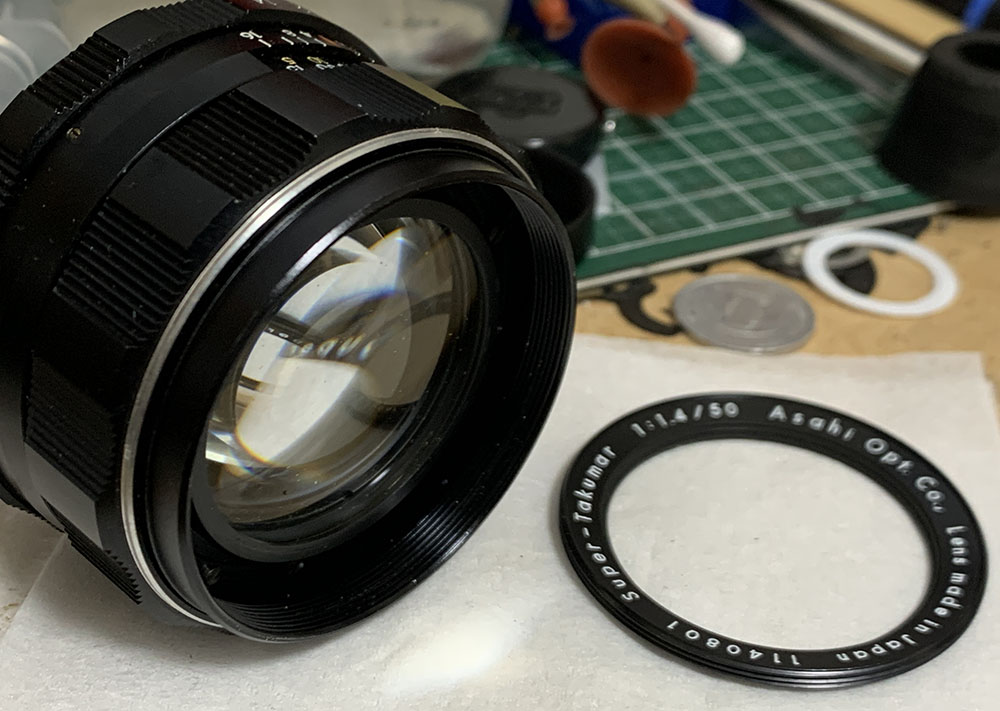
The Super-Takumar 50mm f/1.4 was sold 1964 to 1966, it was hailed as Pentax’s best lens and rightfully so because this lens performs rather well. Engineering a 50/1.4 lens at that time meant that you’re part of an exclusive few who could actually manufacture something so complicated for its time that many companies made it their mission to design their own. It’s now trivial these days but back in its day these lenses were considered the peak of optical engineering. Pentax achieved this despite having to work with several handicaps like the lack of capital since it’s a smaller company and the M42 mount which made it difficult to design more ambitious lenses due to its narrow throat. Pentax overcame all that, presenting us with a masterpiece. This lens has a huge following, it has certainly achieved cult-status. It’s very goof but we’ll see just how good this is in our article. Many people who’ve reviewed this are biased towards this brand so I hope that I will be able to present a more balanced view of this lens despite the fact that I secretly love Pentax, too.
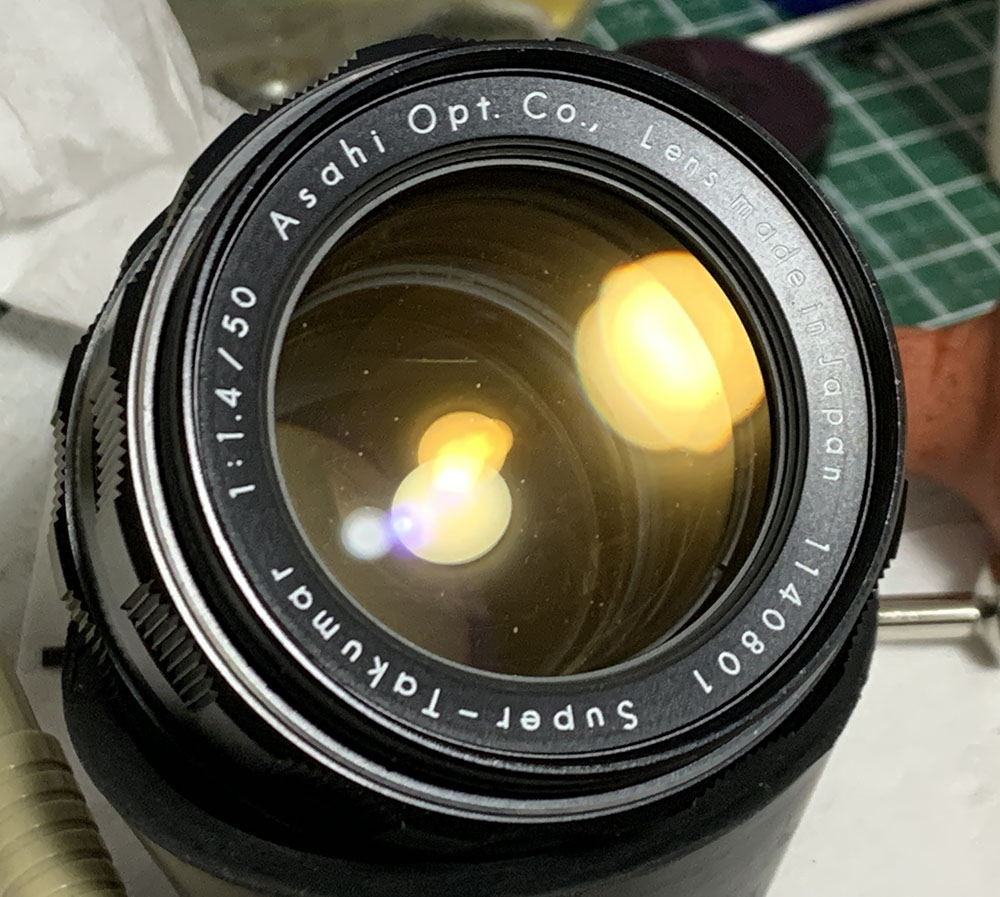
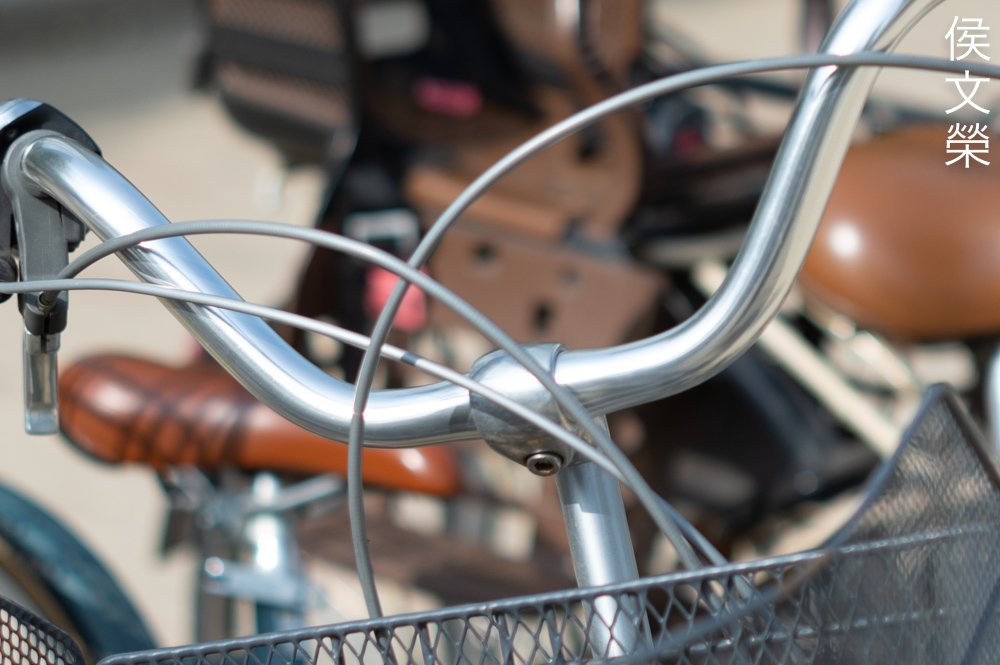
It appears to be single-coated, with a deep-amber hue common with many Japanese lenses of the same vintage. This is a lovely lens with its deep-knurled rings. Handling can be annoying, the auto/manual switch could be easily adjusted if you’re turning the aperture ring since there’s no lock for it. Even if you’ve just nudged it a bit that is enough to alter its operation if you’re not aware of it.
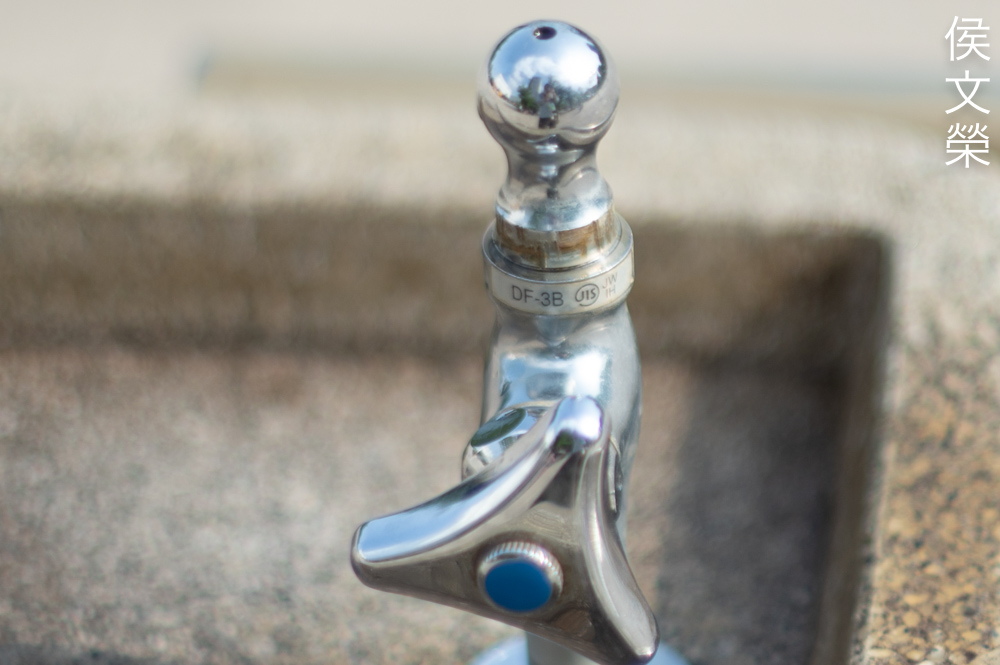
It’s famous for its 8-elements-in-6-groups design, an ambitious project for an underdog of the industry at the time. It’s said that it was made to compete with the Carl Zeiss Planar 50mm f/1.4 of 1963 which was considered to be the best in its class. In order for that to happen the designers added an extra element to the traditional 6-or-7-elements design of a Double-Gauss design to help it correct aberrations better. This led to an increased manufacturing cost and the rumor is Pentax was losing money each time one was sold just to one-up its competitors. I don’t think that rumor is true but I do believe that they’ve made an exquisite lens for its time considering how cheap these were compared to the German optic.

It’s a robust lens but it’s not as tough as a Nikkor of similar vintage but it’s definitely tougher than a Canon or Olympus. Despite that, I consider this lens to be well-built, enough to endure decades of use by professionals in the field. Like all Takumars with an automatic iris you’re able to operate the iris manually or automatically with a switch. It also has a pin at the mount so the actuator plate of the camera could trigger the iris during exposure. This resulted in a complicated mechanism which I think is the mechanical weakness of many M42 Takumars.

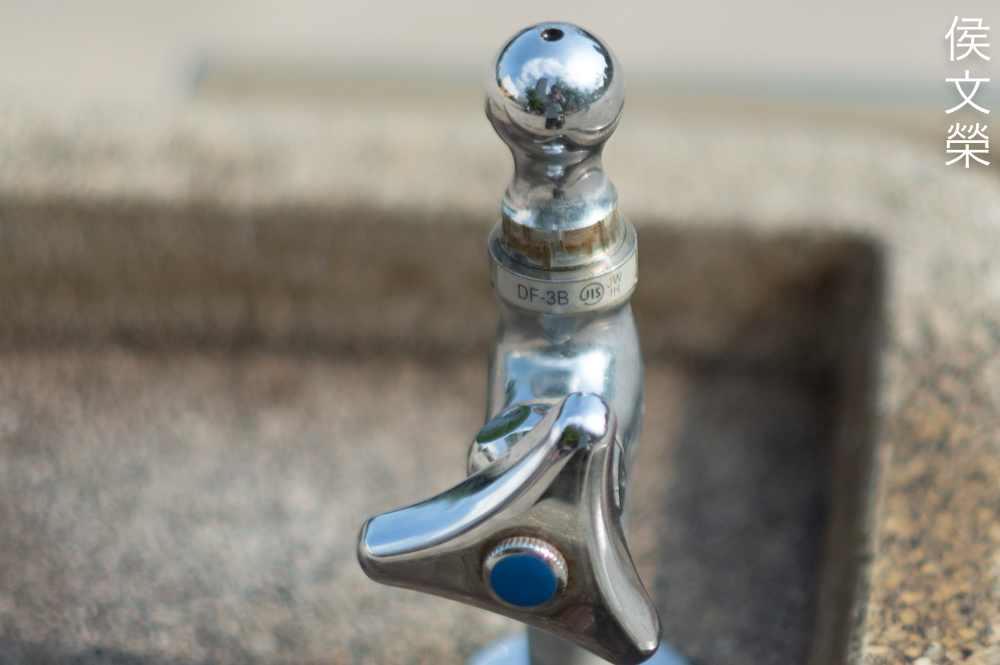
It’s best paired with an Asahi Pentax Spotmatic since this pair is made to be used with each other. It’s important to note that you shouldn’t use this with older Asahi cameras because the rear element will be hit by the actuator plate. Check if your camera is able to use this safely by searching the internet for compatible cameras.
Metering with it requires that you stop the iris down since it has no way of communicating with the camera’s meter. It’s cumbersome and may even cause you to miss a couple of shots but you’ll get used to it quickly. This is the reason why many professionals preferred other brands that allowed you to do that, the M42 mount is also another factor because professionals would rather use a bayonet-mount for easy, quick operation.
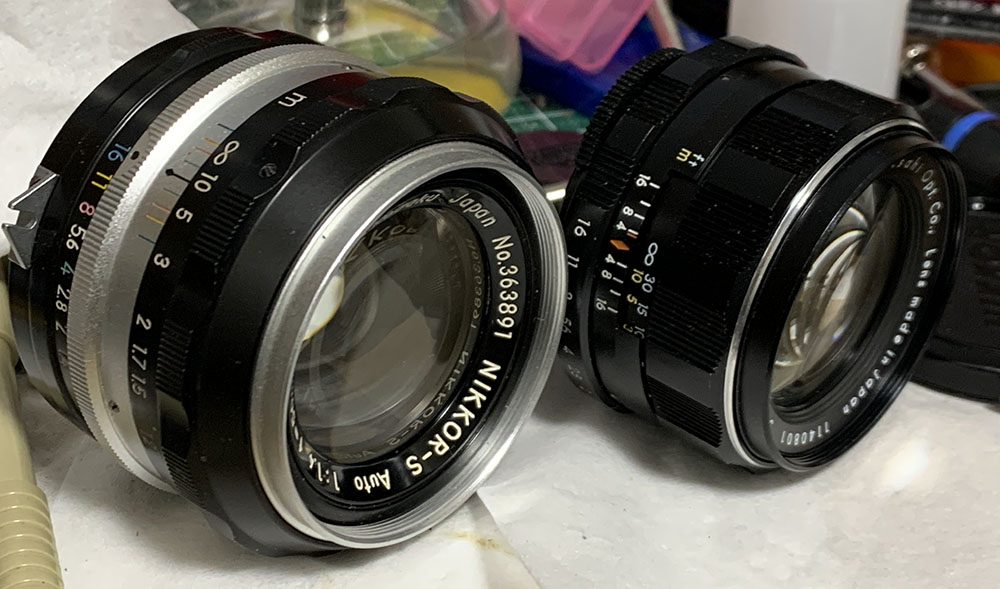
Its contemporary is the Nikkor-S 50mm f/1.4 Auto which is a larger lens. Compared to the Nikkor its barrel isn’t built as tough and it is prone to mechanical-slop when the fasteners have worn unlike the Nikkor which is made more solid. It performs just as well and it exceeds the Nikkor’s performance in some cases and the opposite is also true because the Nikkor performs better in terms of rendering and other small things.
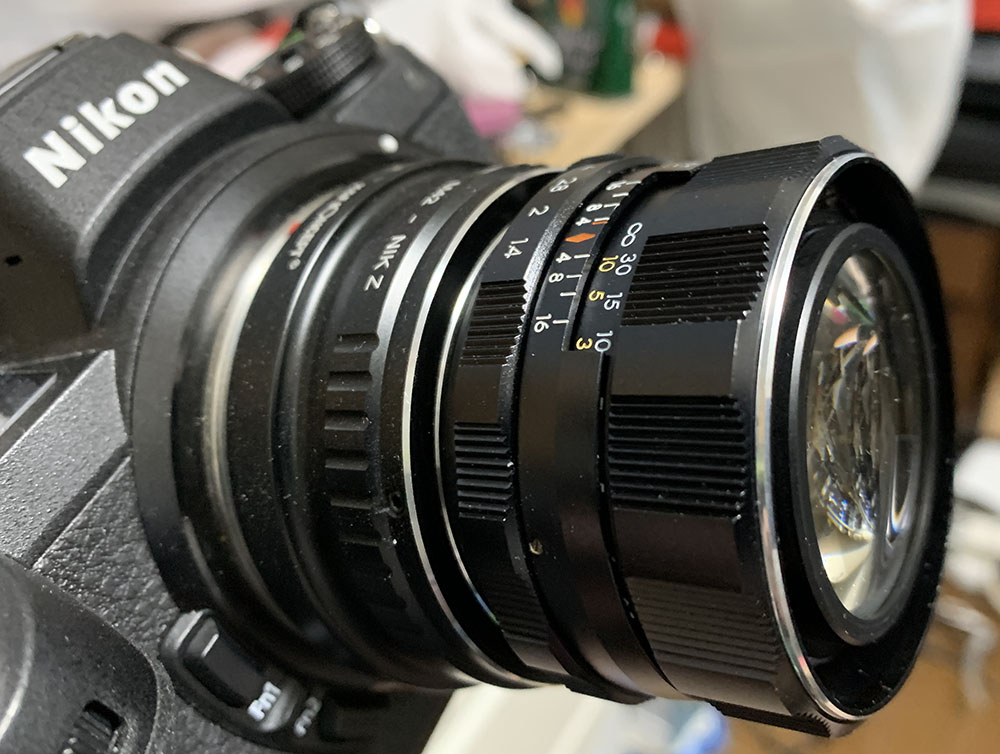
Learning how your lens performs is crucial to maximizing its use. You will learn how to utilize its strengths and avoid its weaknesses. This knowledge helps in determining which lens to use on an assignment. I shot these from f/1.4, f/2, f/2.8 and f/4 since these are the most common apertures that people would want to use this, we’ll also get to see the most changes happen with these values. I shot these with my Nikon Z6, some of the photos were cropped close to 1:1 so we could see the details better.

Barrel-type distortion is obvious, this is typical of many lenses of its class from the same era. I won’t use this for taking photos of architecture if I can help it.


(Click to enlarge)
Vignetting is heavy wide-open which is typical of many fast 50’s. Stopping it down to f/2 won’t help much and you will still get dark corner well-into f/4. This is pitiful, I’d expect something better out of this. It may be due to the smaller size of the front element but don’t take my word for it.


(Click to enlarge)
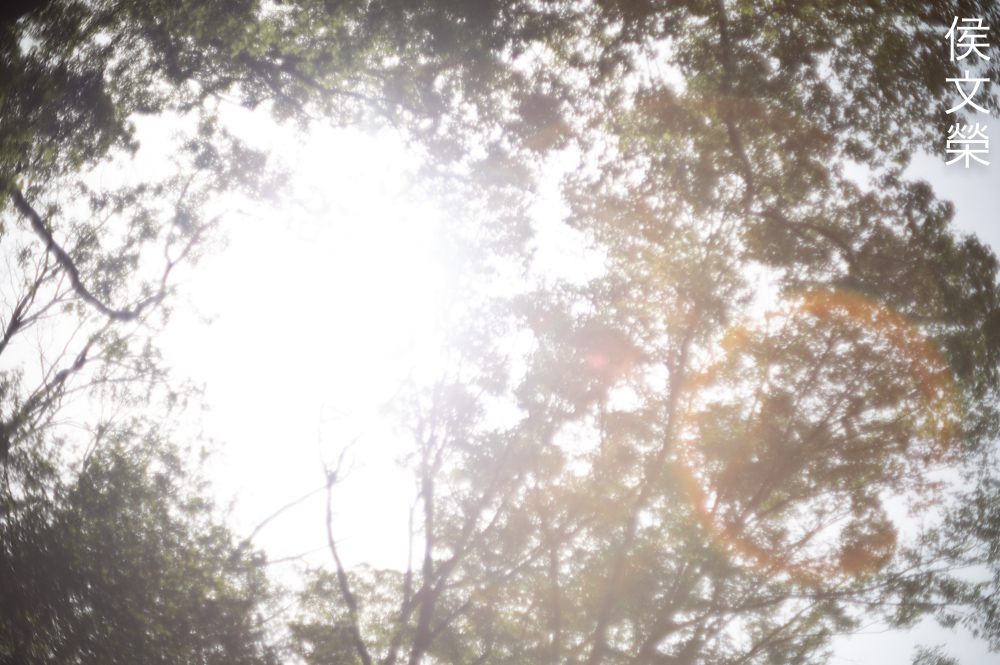
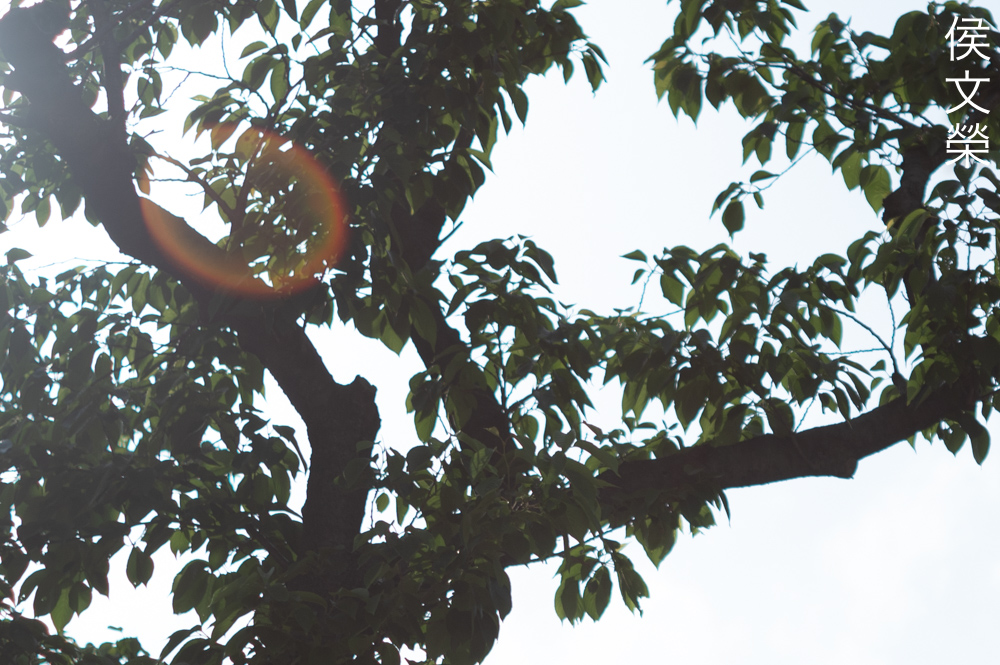
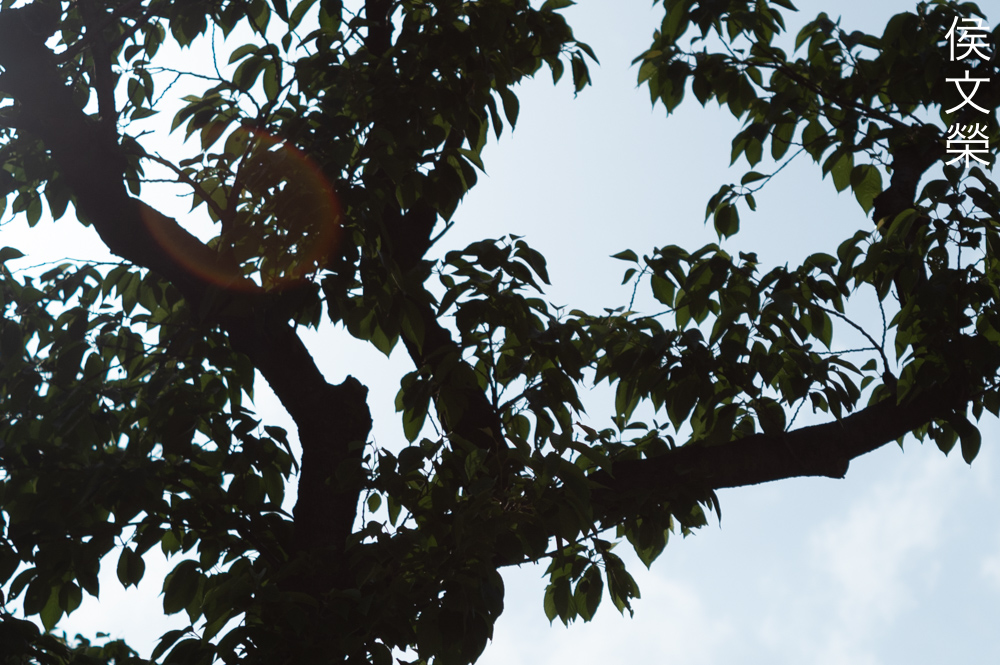
It flares terribly, more than what I’d tolerate and the blobs look large and hideous, too. Stopping the iris down will help improve the contrast but your blobs will look more well-defined. To be fair, many lenses from this era have rather low-tech coatings and things only turned for the better from the mid-1970s.


(Click to enlarge)
The character of the bokeh appears to be quite smooth in most cases which is it’s claim-to-fame but that doesn’t mean that it’s not capable of producing rough-looking artifacts specially when shooting wide-open. Stop it down to prevent the outlines from showing, that should help clean things up.


(Click to enlarge)
The discs look mostly clean and even wide-open with noticeable outlines but I’ve seen worse. Stopping it down to f/2 will help clean things up but the discs now begin to look like lozenges. The discs look more angular at f/2.8, the discs now look even with no obvious cores. I think it looks decent at f/4 but you’ll lose that shallow depth-of-field, this is not much of a problem unless you’re one of those who like to shoot at wider apertures all the time.
This is an example illustrating how the cheap-looking artifacts look when shooting wide-open. Some people like this, it is subjective so I’ll just leave it here. If this is not your thing, stop it down to at least f/2 to help clean things up.
The foreground blur appears to look better compared to the background blur, you can see that in the previous picture as well.


(Click to enlarge)
Chromatic aberration appears to be controlled decently except for extreme cases where it can look rather ugly. You will see this happen most when shooting wide-open. Things look a lot better by f/2 but you’ll still see plenty of it specially if the scene is overblown. You’ll only see traces of it from f/2.8, spherical aberration can still be seen to some extent. It’s going to look even better at f/4 and you won’t see any artefacts even in demanding situations.


(Click to enlarge)
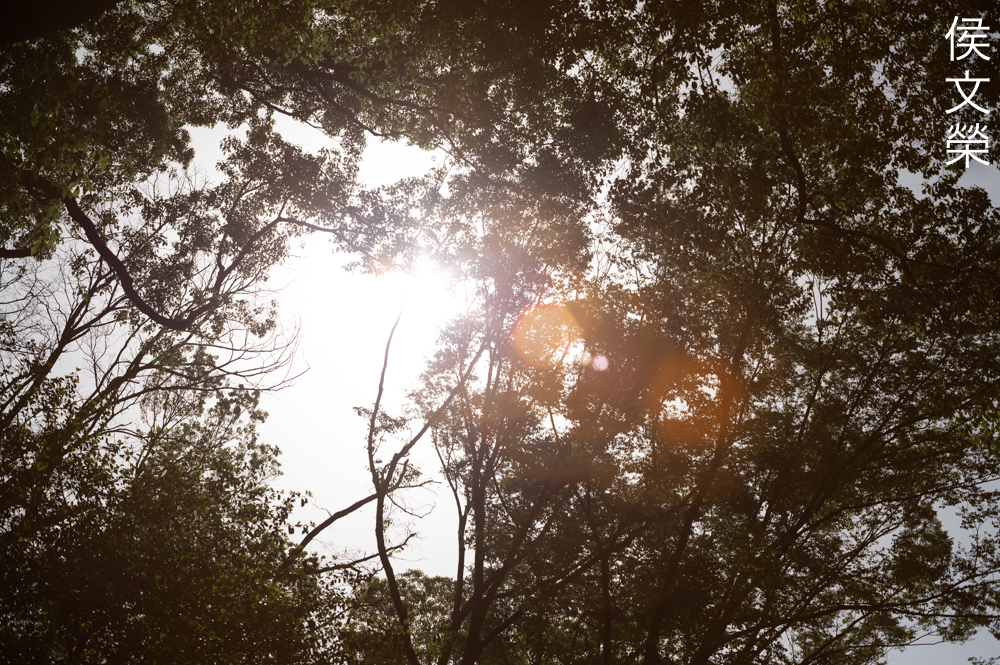
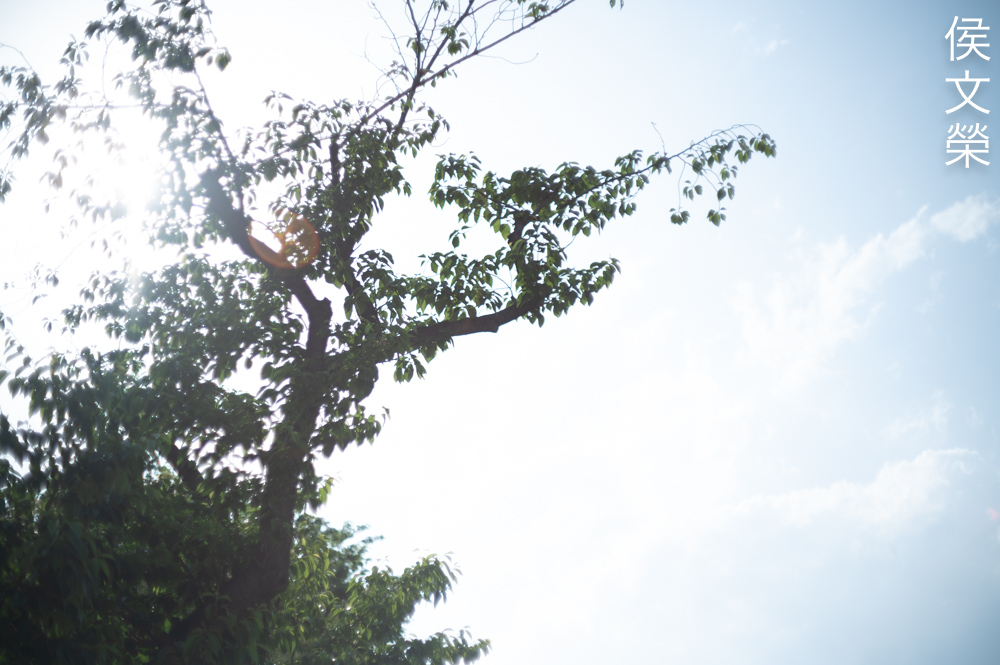
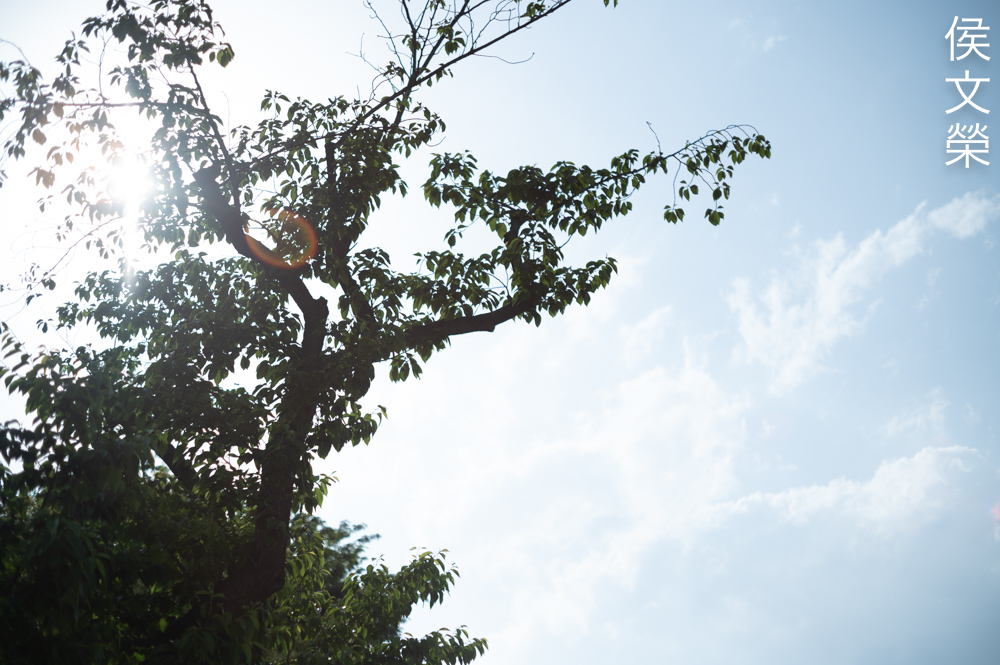
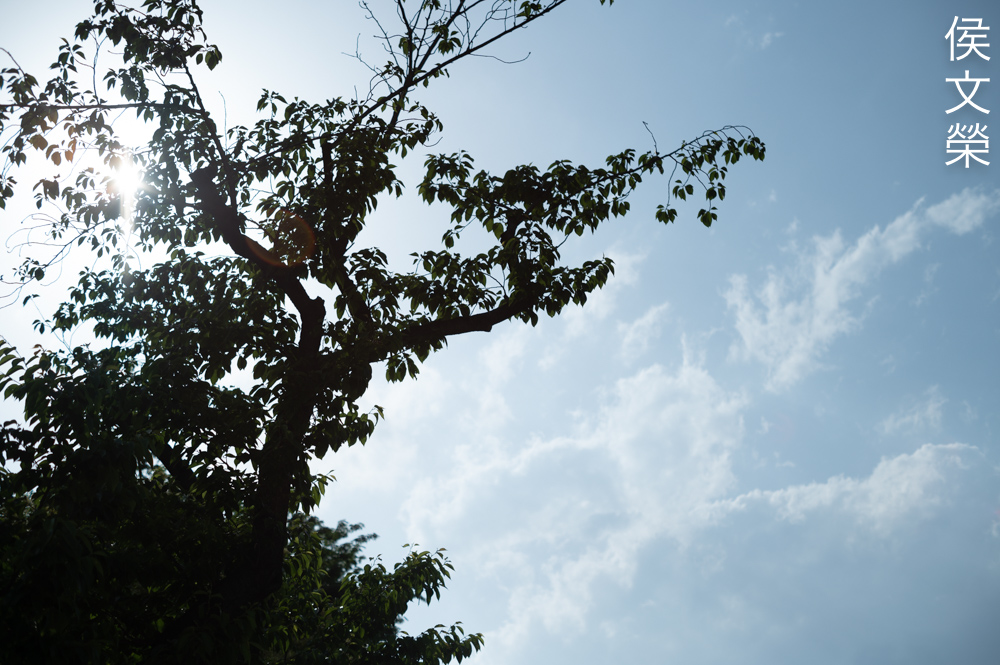
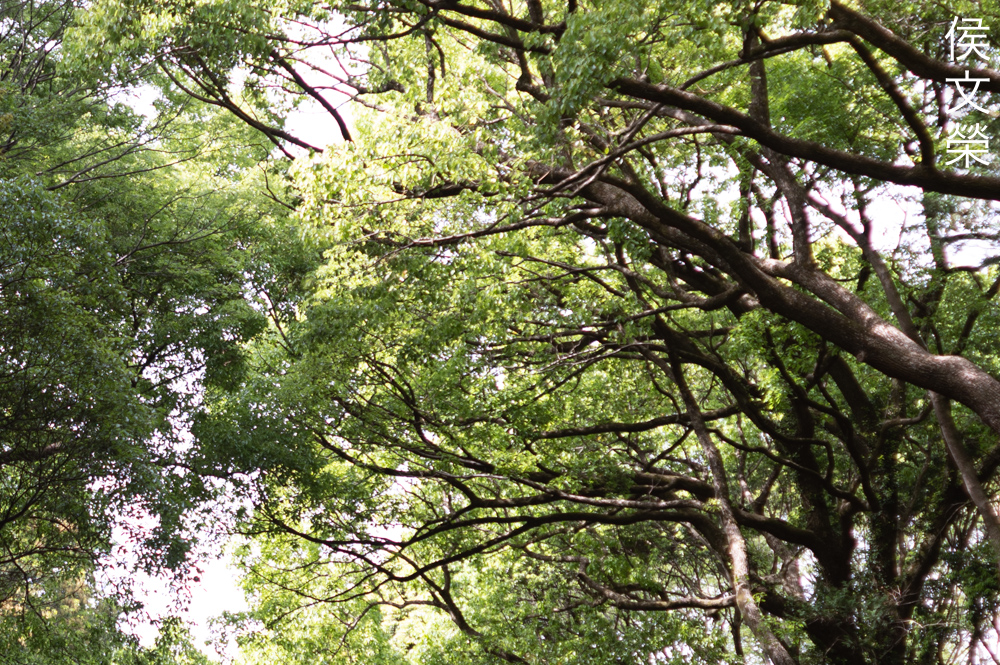
Backlit scenes are even more difficult to handle compared to the previous set which only shows overblown highlights. I shot these so you’ll know what to expect when shooting trees on a sunny day. As usual, things look ugly wide-open so it’s advisable to avoid shooting wide-open. It still looks horrible at f/2.8 and stopping it down to f/4 is the only reliable way to keep things looking clean but even at this aperture you will still see traces of chromatic aberration. Maybe it will look much cleaner as you get closer to f/8.
This is how ugly it looks like when shooting close to a real-world scenario. It’s difficult to avoid this specially if you can not anticipate the results.
(Click to enlarge)
Here are more samples. There’s a trend these days where people will always shoot wide-open to blur everything at the background. You should always shoot with a reasonable aperture when possible. These photos were shot under strong, harsh lighting so it’s just commonsense to stop the iris down to about f/5.6 at the very least in order to get nice, clean photos.


(Click to enlarge)
It appears to be usable wide-open despite looking a bit soft. In fact, it looks good-enough that you won’t even hesitate to shoot with it at f/1.4. Stopping it down to f/2 improves the resolution specially at the center, resulting in sharp, crisp details. The corners still look poor and is only marginally better compared to f/1.4. Things look even better by f/2.8 and the center look beautiful. You’re now able to see fine-details rendered sharply, the corners look a bit better but still not at the same level as what you see at the center. It appears to perform at its peak by f/4, the center looks very beautiful and the corners begin to look usable. I don’t see any point in stopping the iris further down if all you want is a sharper center but the corners will surely benefit from stopping the iris down to f/8.
This is a sharp lens in my opinion, I think the Nikkor-S 50mm f/1.4 Auto is just-as-sharp or even slightly better when it comes to the center specially at f/1.4. My example performs better at moderate to closer distances. The performance is not as good at infinity which is as expected from a lens from this class and vintage.

(Click to enlarge)
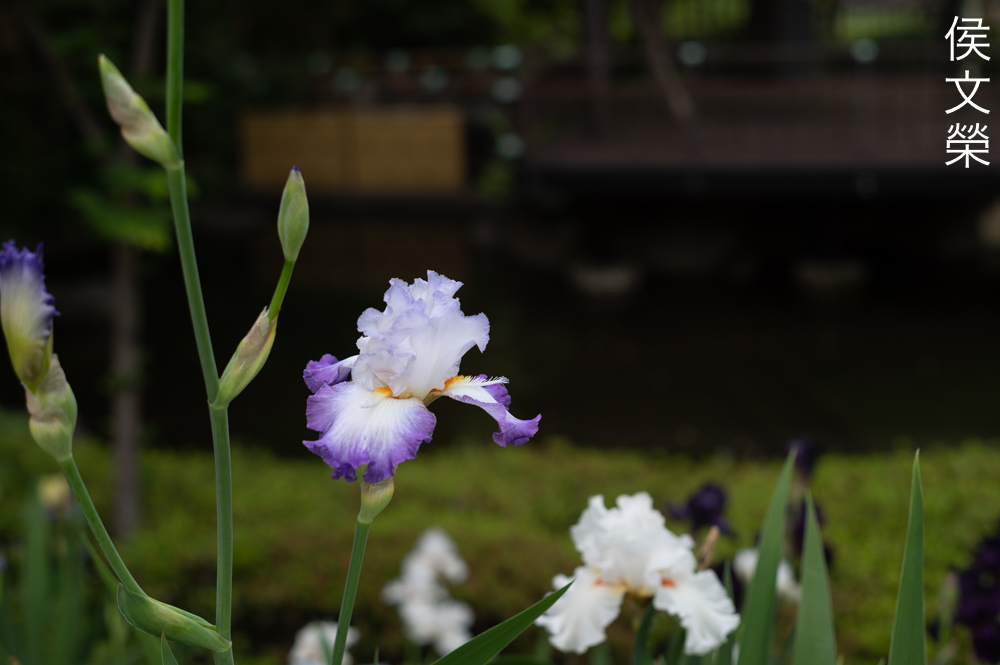
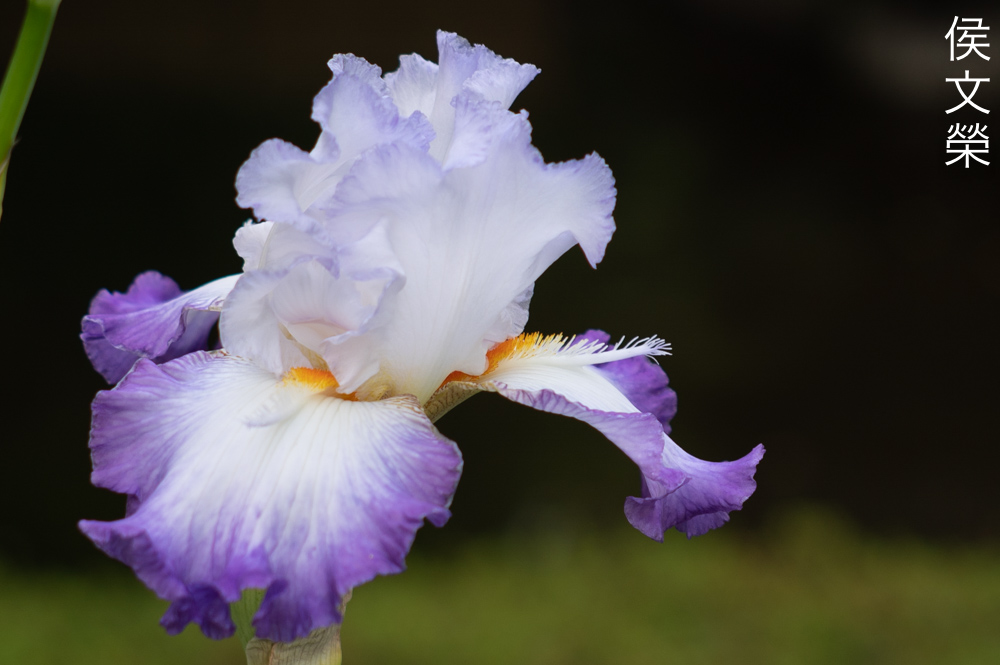
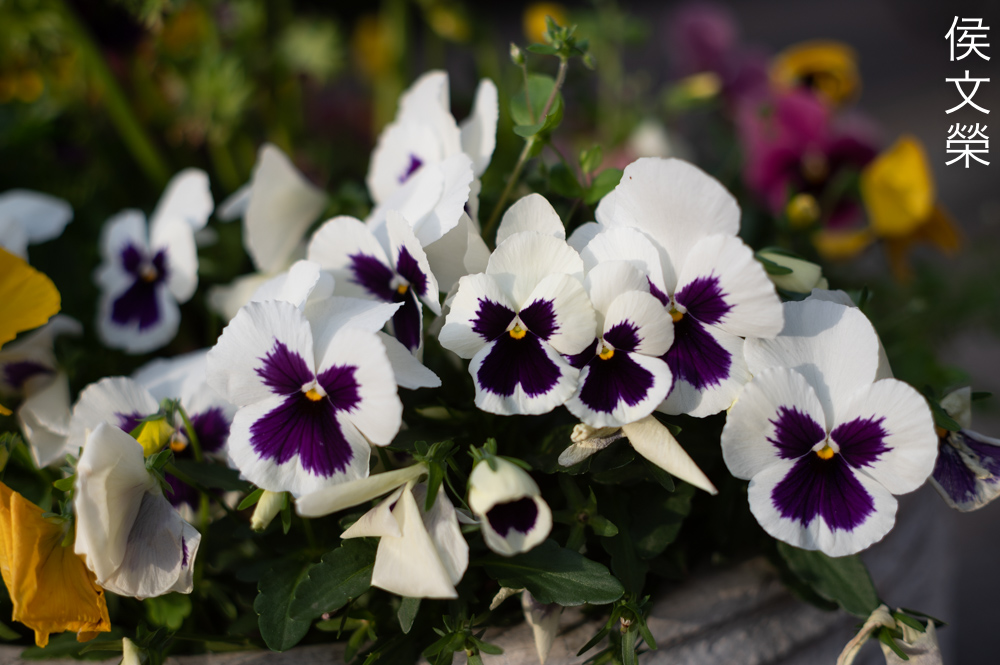
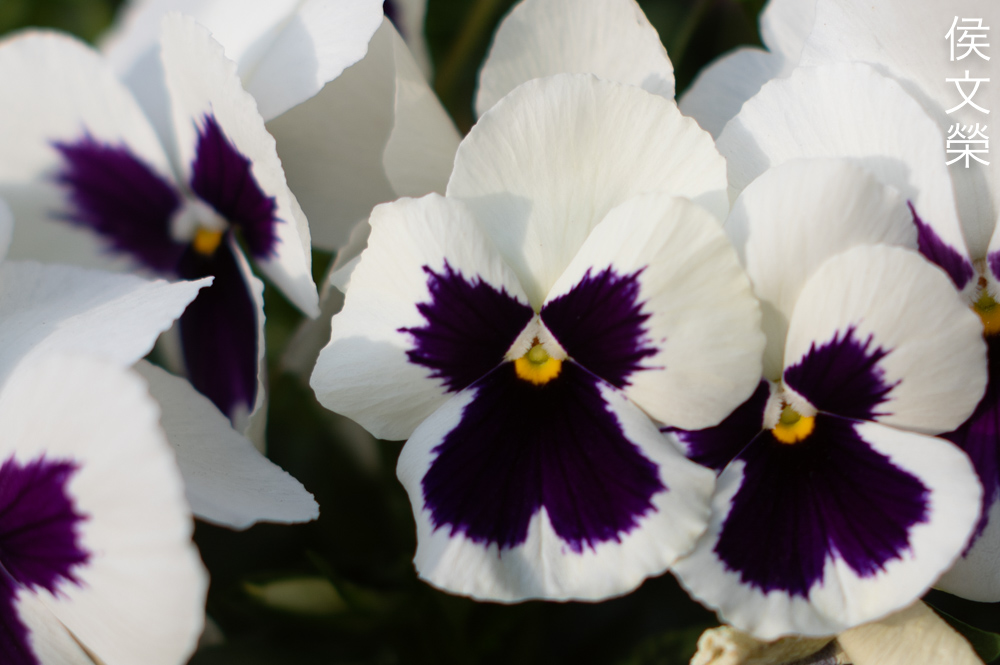
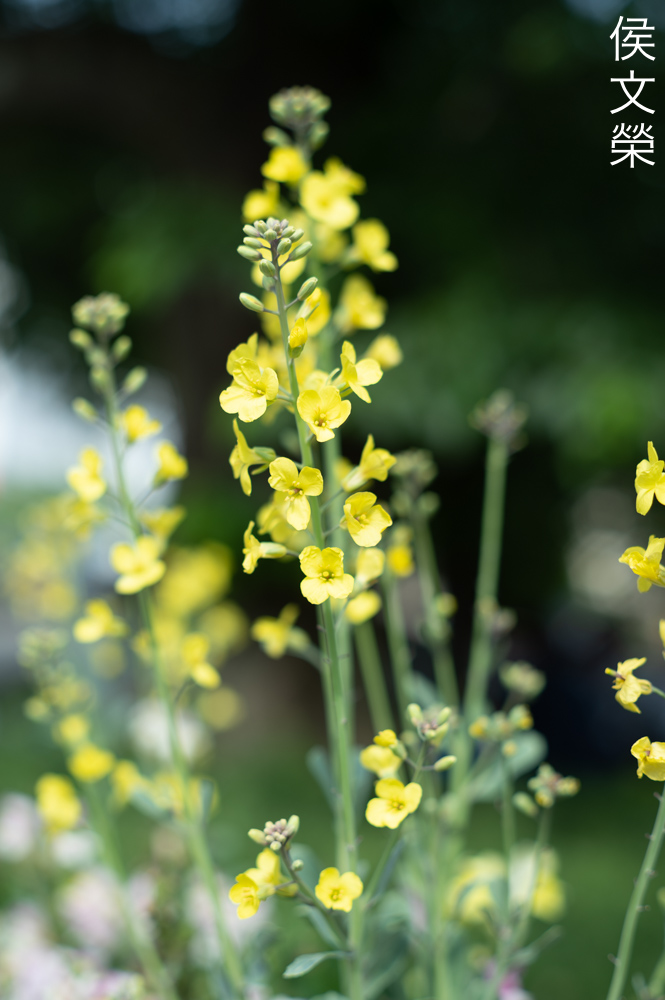
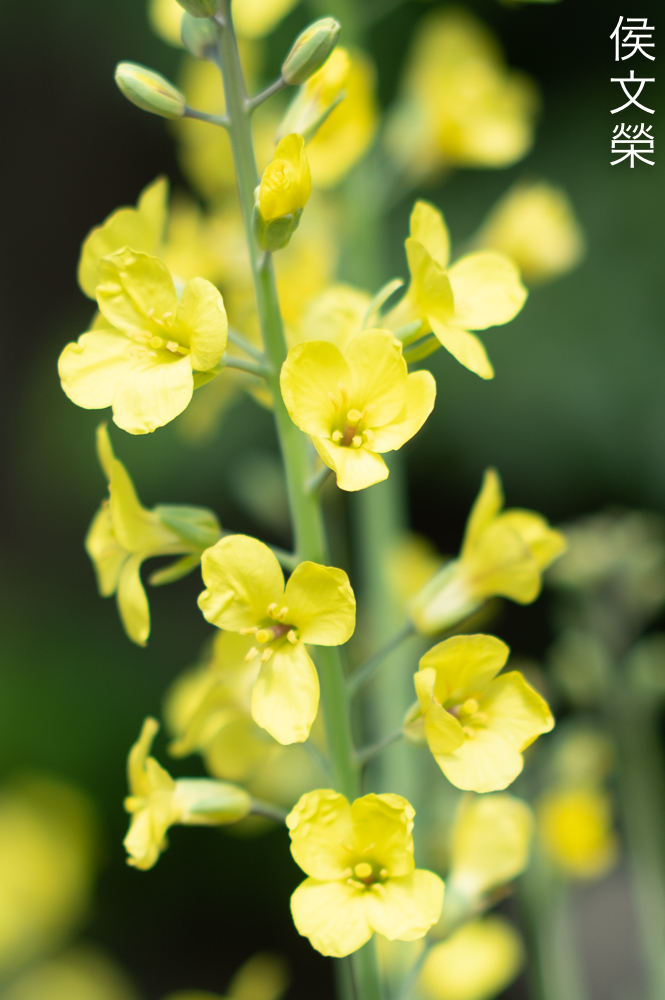
This is famous for its smooth bokeh character and that smoothness is amplified when shooting up-close. This makes it a favorite lens for many flower photographers as evidenced by the many flower-photos uploaded to the web that were shot with this lens.
(Click to enlarge)
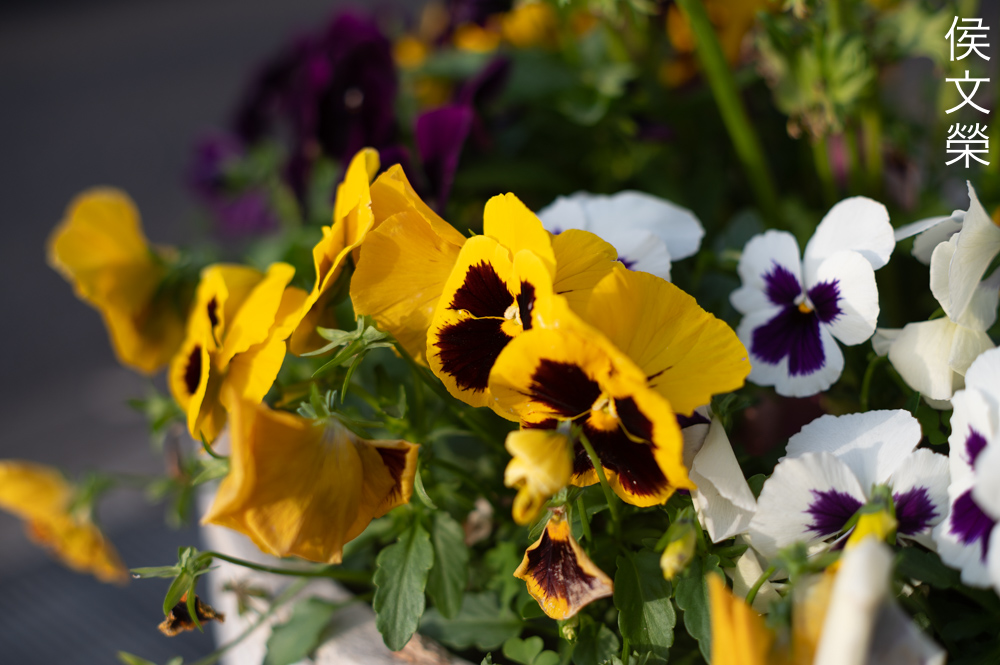
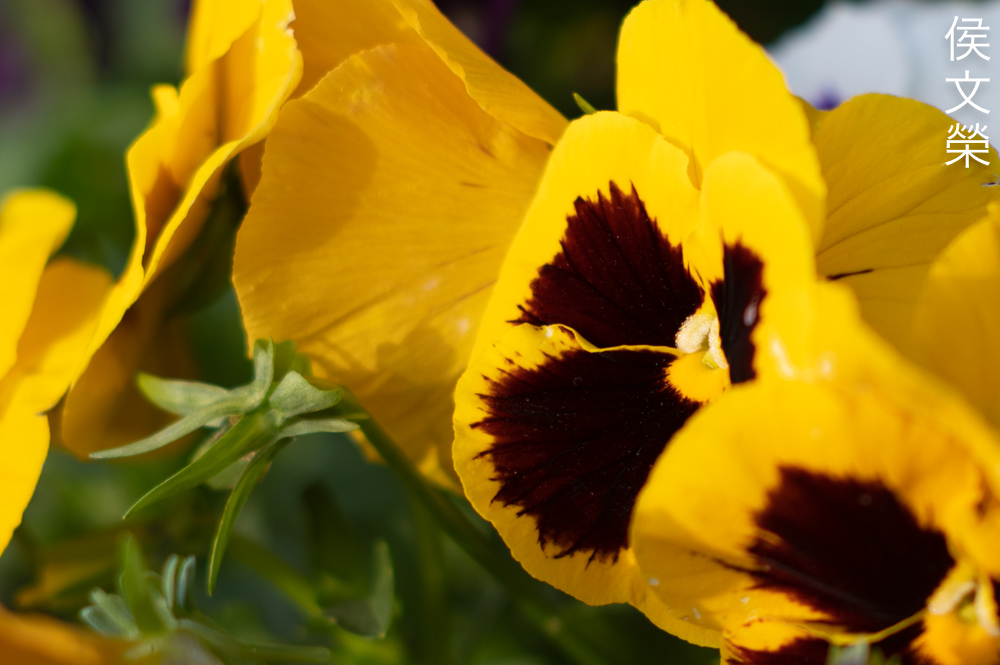
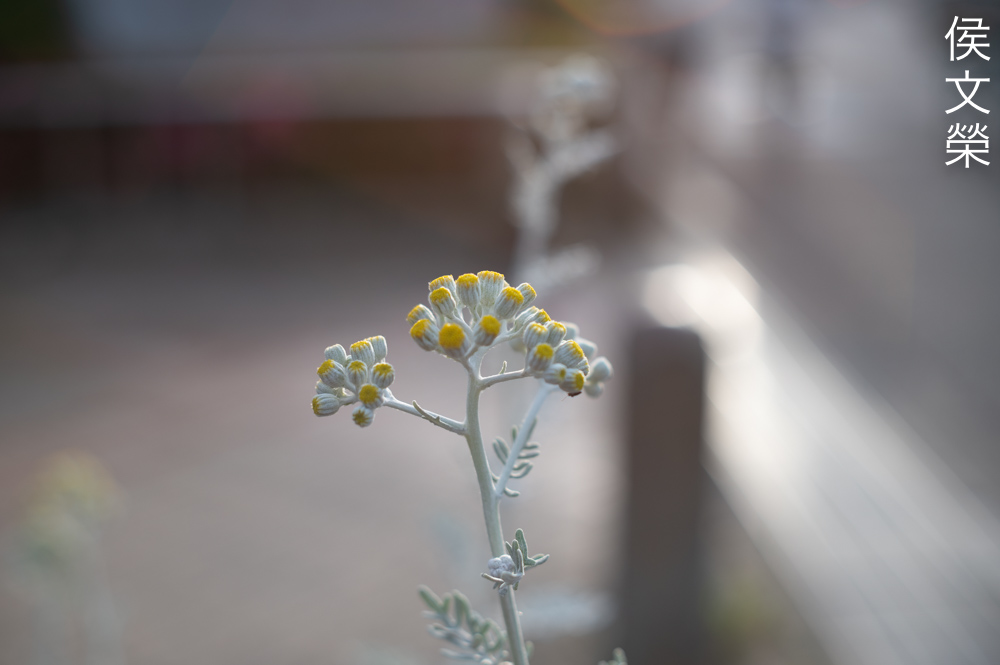
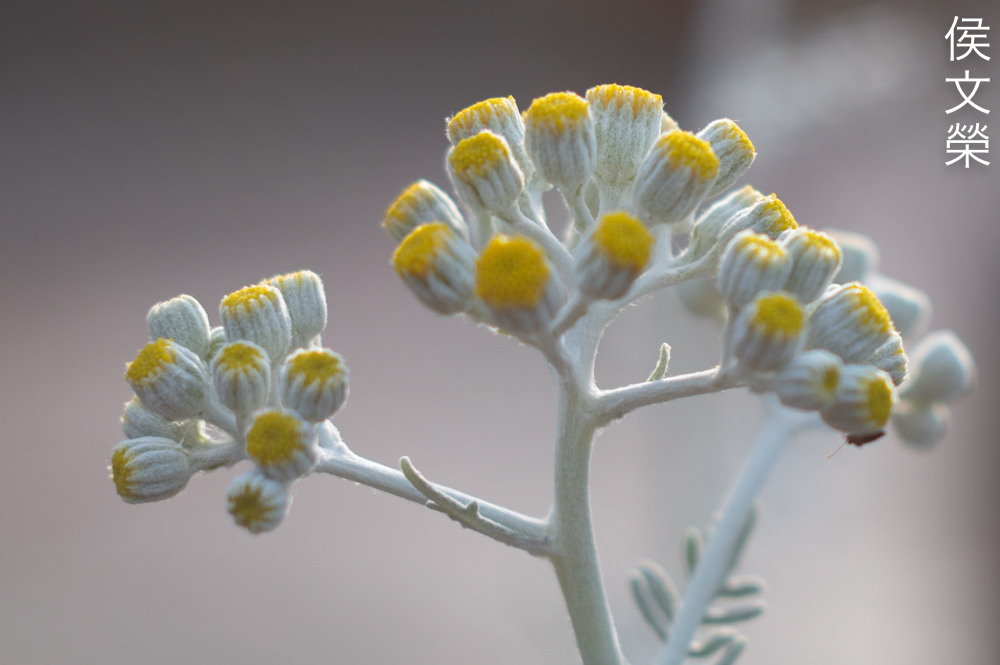
As mentioned previously my lens performs much better at closer distances. Here are some photos to help illustrate the point. It’s sharp without making your photos look “sterile”, it still retains the delicate look with all the artifacts working together to form a unique-looking photo.
This is a difficult scene to render since the background has several elements that could trigger ugly-looking blurs but it handled it perfectly, rendering the scene in a painterly-manner.

The sprinkles of the banana are just as difficult to render due to their shape and frequency. Shooting up-close will help you avoid rough-looking artifacts from showing.
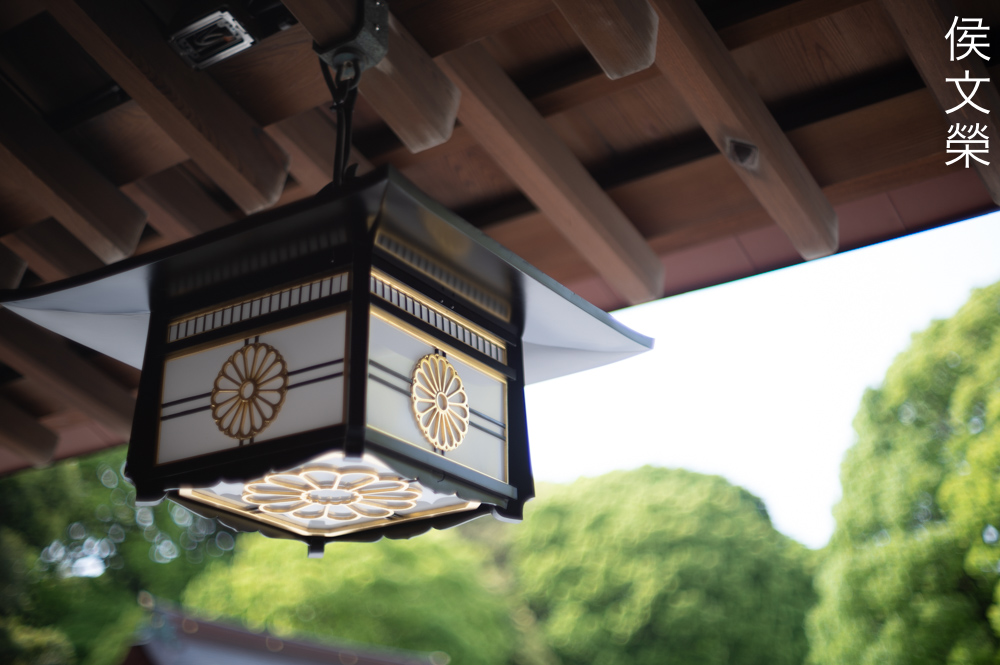
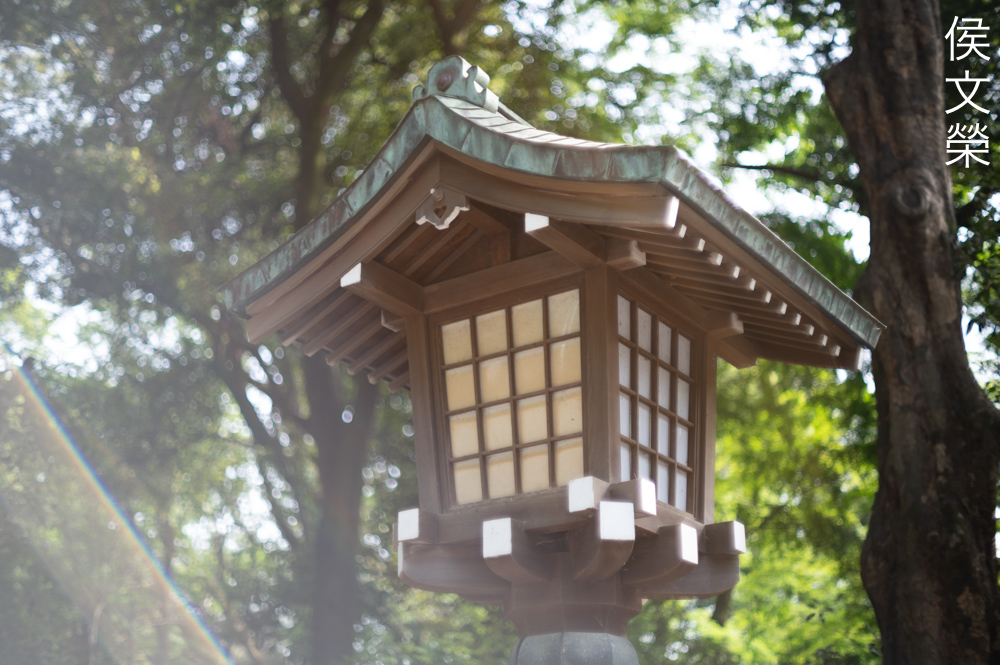
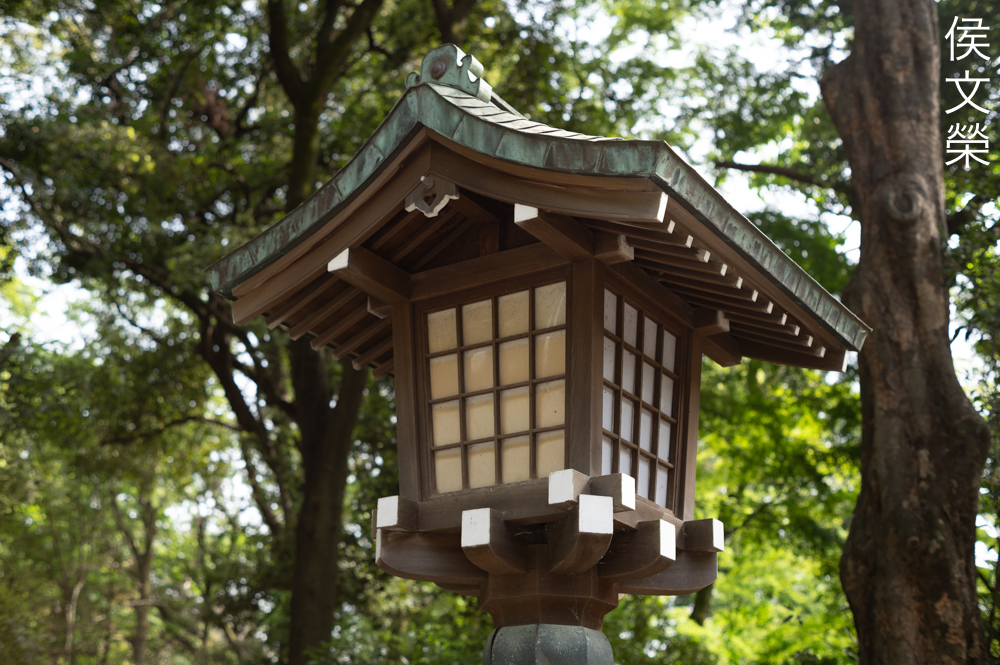
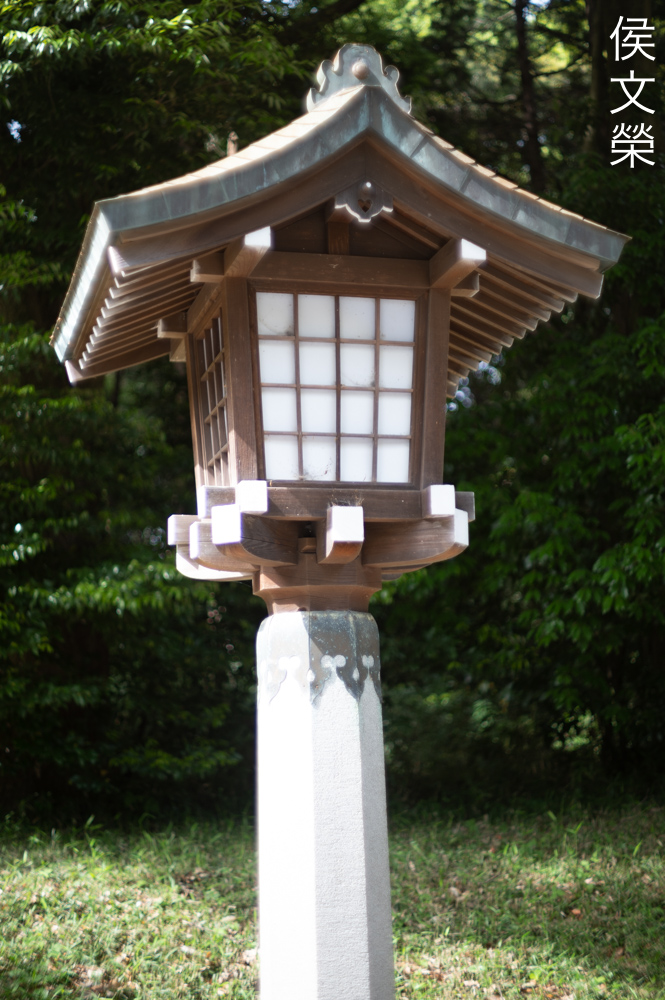
The clumpy-looking bokeh is something that I never liked, stop the iris down to help prevent this from happening. That ugly background is so distracting that it takes-away your attention from that beautifully-rendered lantern. I don’t recall the Nikkor-S 50mm f/1.4 Auto rendering anything looking like this.

Stop the iris down a bit and you will get beautiful results from it. The colors look nice and the details look exquisite, it’s a very good lens in my opinion.
It’s able to resolve beautiful details and the rendering looks nice, you won’t get a “wall-of-focus” effect with it. You will see a smooth transition from what’s sharp to what’s blurred.

While 50mm is considered to be too-wide for most portraiture tasks it’s perfect for shooting environmental photos. Its ability to isolate the subject from the background is appreciated in this application. Note that the cobblestones appear quite nice, it can be a difficult object to render for a lens with lesser performance, resulting in a smeary-looking mess.

Focusing with it can be rather difficult when you’re subject is energetic specially when shooting at wider apertures. This is a skill that takes some practice but you could do it once you’ve got the hang of it.

One way to achieve positive focus with it is by anticipating our subject’s movement. It has a tendency to produce a bit of that “soap-bubble” look thanks to astigmatism when shooting at wider apertures. It’s not overpowering but you will have to stop the iris down a bit more if this bothers you.
It’s capable of rendering delicate-looking photos, something that is useful when you’re depicting something surreal or sacred. This is what some people call the “vintage-look”, something that polarizes a lot of people.


(Click to enlarge)
Here are more photos for you to enjoy. I enjoyed shooting with it on a digital camera, it’s certainly still relevant today as it was when it first came out. Videographers will also want to use this for its ability to render beautiful blurs and how it renders spherical aberration is also worth considering.
Let’s now check some film photos. Film has a unique look that is hard to simulate with a digital camera thanks to grain. It reacts differently to light, this means that it could mask a lens’ flaws or amplify them. Since this was designed to be used with film, it’s best that we judge this using its intended medium.

I cannot waste my shots when shooting with film so I had to stop the iris down to a smaller value so I’m assured that it will be sharp when I took this photo. Since I was shooting with a cheap film it doesn’t have the resolution to render the flower in great detail.
Grain has a lovely character which makes a photo look natural. This is the reason why many people love to shoot with it despite the cost. As you can see, it performs rather well with film since this was originally designed for use with it.

The character of the bokeh looks smoother when shooting with film since grain can help mask some of the roughness.

The resolution is more than adequate when shooting wide open with film since grain can be a bit more forgiving here.

Focus-transition is exquisite, resulting in a very nice photo that looks organic. You’ll get both sharp and smooth details in the same photo with no awkward transitions.

The balance between what’s sharp and blurry looks very good, complimenting each other to form a nice photo.

The plastic flowers don’t look bad, they will look ugly if a lens renders poor blurry details.
Sharpness is quite high when shooting with film, it’s not difficult to achieve and all you’ll have to do is stop the iris a bit to ensure that you get a sharp photo.
Chromatic aberration can be seen in the cables, it’s not as obvious here compared to the photos that were shot with a digital camera.
As mentioned previously, there’s really no need to shoot with a wide aperture all the time, specially if it’s sunny. This is a good way to prevent chromatic aberration from making the overblown bits from looking purple or greenish
If you’re forced to shoot architecture with it be sure that you don’t place your straight lines near the edges of the frame so they won’t bend. You can get away with it if you know how to frame your photos.


(Click to enlarge)
Since this lens is known for its bokeh character here’s more photos showing how it looks like with film. Grain can help mask some roughness but there will still be times when you’ll still get some rough-looking artifacts. The photo with the plastic flowers and the clumpy-looking foliage illustrates this rather well. It’s not as bad compared to the photos that I took with a digital camera but it’s still there.


(Click to enlarge)
Here’s the rest of the roll. This is a great lens when shot with film, it’s certainly a classic. You’ll get addicted to this and I recommend that you shoot it with a fine-grained film in order to bring-out the best in it. This renders like a gentleman, a very good lens that you can get for not a lot of money if you are lucky.
I highly recommend this lens to anyone looking for a practical lens to shoot with, for both photos and videos. If you’re a Pentax fan I am sure that you already have one of this. If you’re just starting-out then this is something that you must have in your collection. If you’re adapting these for use with mirrorless cameras and you don’t care much for the brand a Nikkor-S 50mm f/1.4 Auto is cheaper and it performs slightly better specially when it comes to the smoothness of the blurry bits. It’s also sharp wide-open and the build is much better. If you’re still willing to look for one be sure that all of its rings operate properly. Actuate the iris and make sure that it’s snappy and dry. The glass should of course be clean, clear and flawless if that is at all possible. These aren’t expensive, I got mine for free with a pile of other junks that I got for $90.00, I wasn’t intending on buying one but the junk-gods deemed it worthy for me to repair one and I’m glad it’s able to satisfy my curiosity about this legendary lens. Happy hunting.
Before We Begin:
If this is your first attempt at repairing a lens then I suggest that you see my previous posts regarding screws & drivers, grease and other things. Also read what I wrote about the tools that you’ll need to fix your Nikkors.
I suggest that you read these primers before you begin (for beginners):
Reading these should lessen the chance of ruining your lens if you are a novice. Before opening up anything, always look for other people who have done so in YouTube or the internet. Information is scarce, vague and scattered (that is why I started this) but you can still find some information if you search carefully.
I highly recommend that you read my working with helicoids post because this is very important and getting it wrong can ruin your day. If I can force you to read this, I would. It is that important!
For more advanced topics, you can read my fungus removal post as a start. It has a lot of useful information, it will be beneficial for you to read this.
Disassembly (Main Barrel):
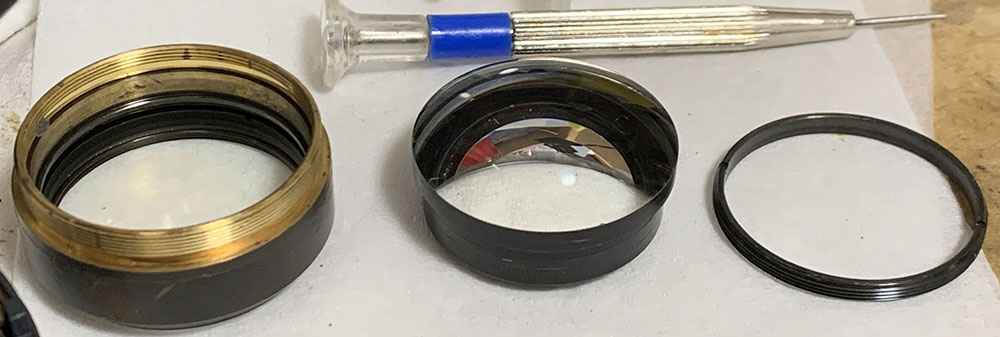
Like most lenses it’s best to remove the objective first in order to keep it safe while you service the lens. Luckily for us, it was designed in a way that allows us to remove the objective early in the disassembly. The construction of the barrel is not complicated but it’s not easy either, you’ll soon see what I mean by that in the coming section.
The stop-down mechanism is a complicated design and there are many adjustable parts here so it’s best that you take a lot of photos and notes before your remove anything so you will be able to put things back properly again. This isn’t something that I’d recommend a beginner to work on because of that.
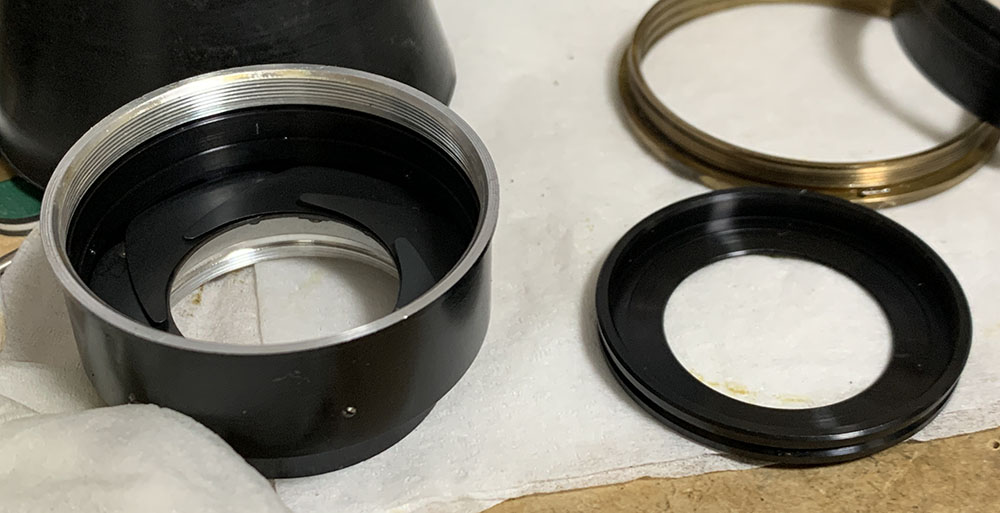
Unscrew the bezel with a rubber cup. A couple of drops of alcohol will help you remove this if it’s stuck. I am not sure if it’s made of plastic, if it is then don’t use acetone or that will craze the surface.
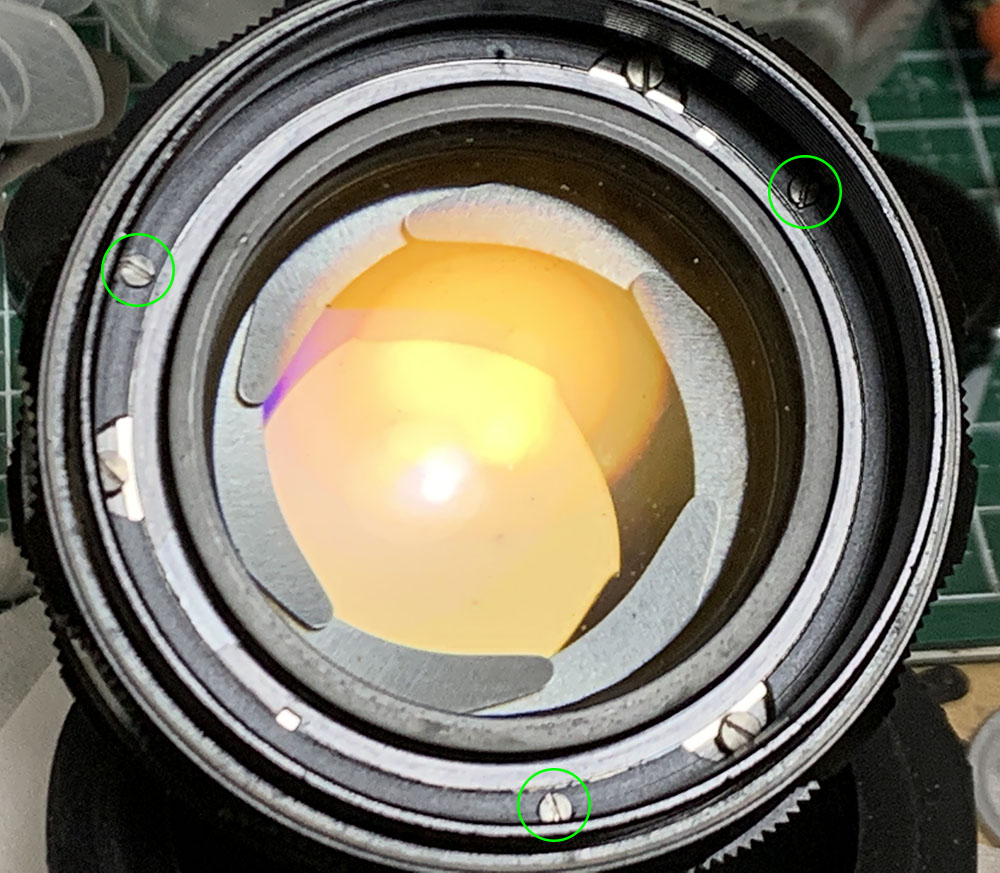
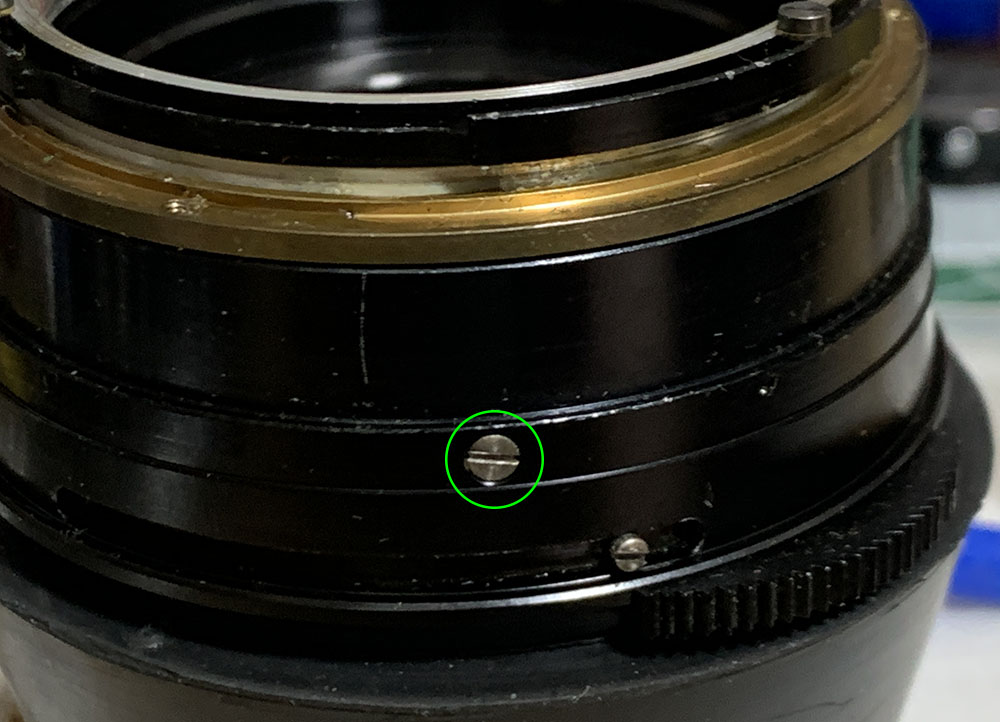
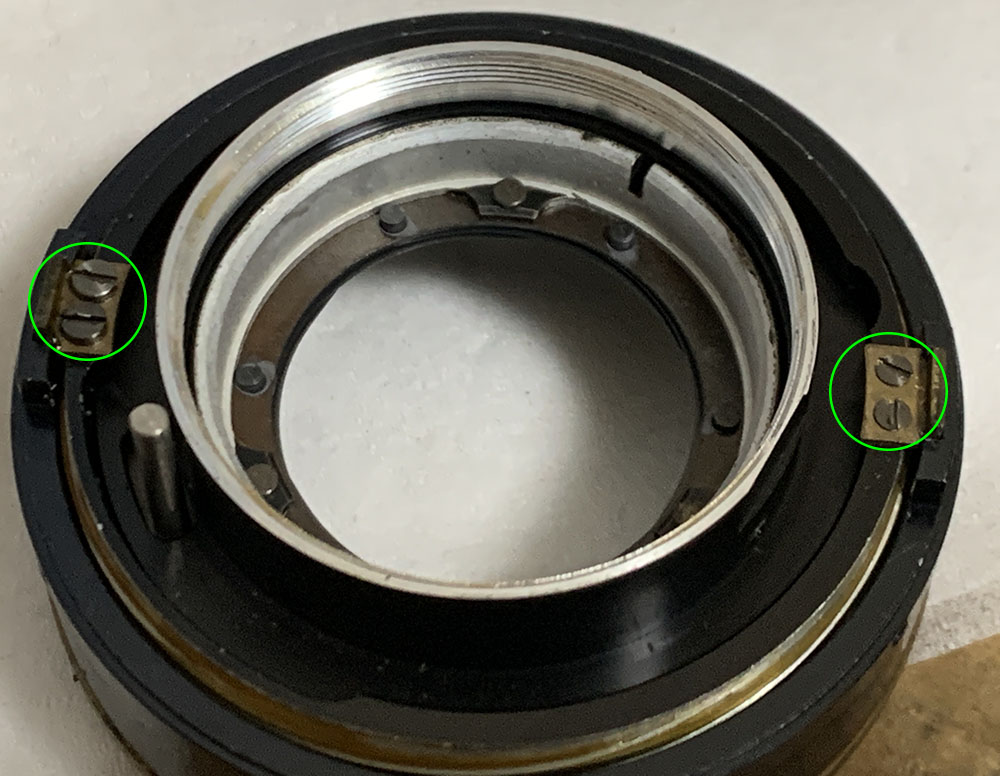
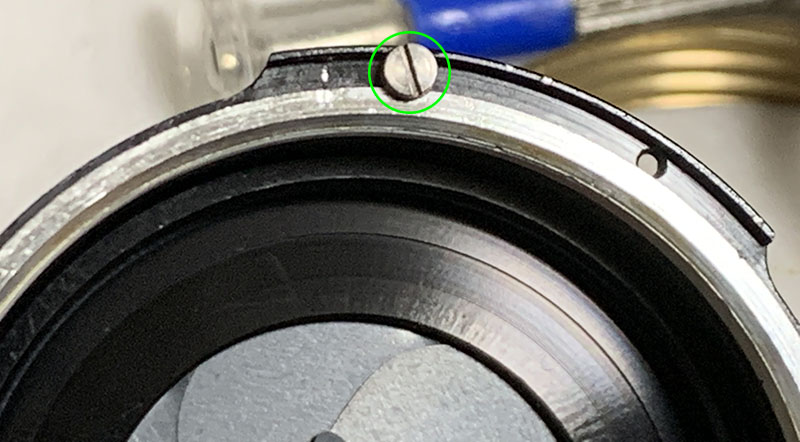
These screws secure the front barrel, carefully extract these.
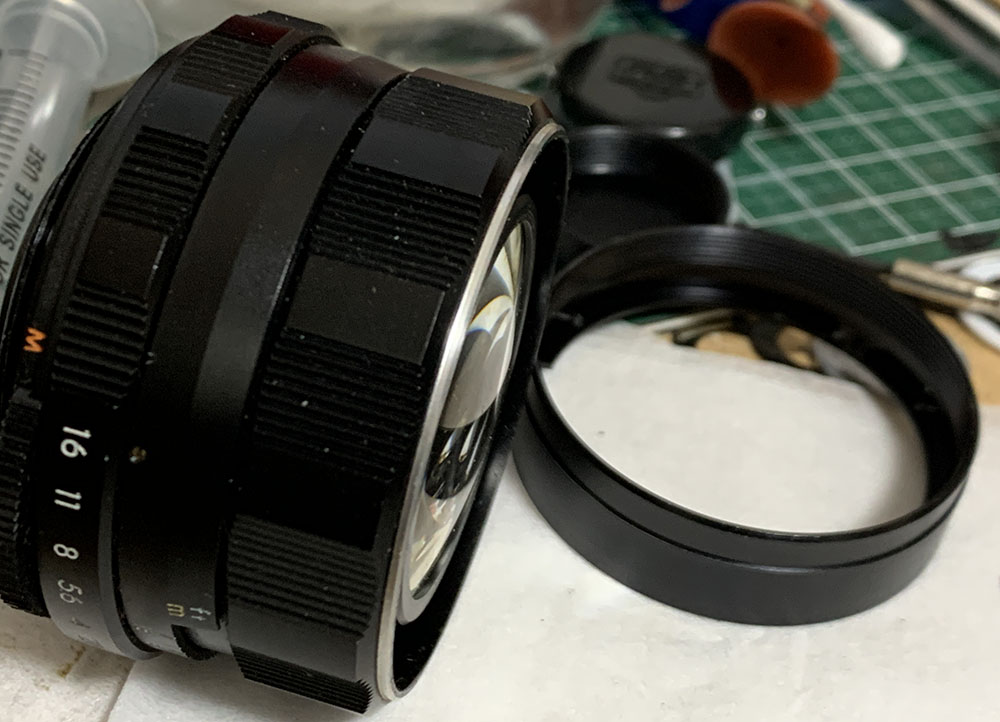
Pull it off and set it aside.
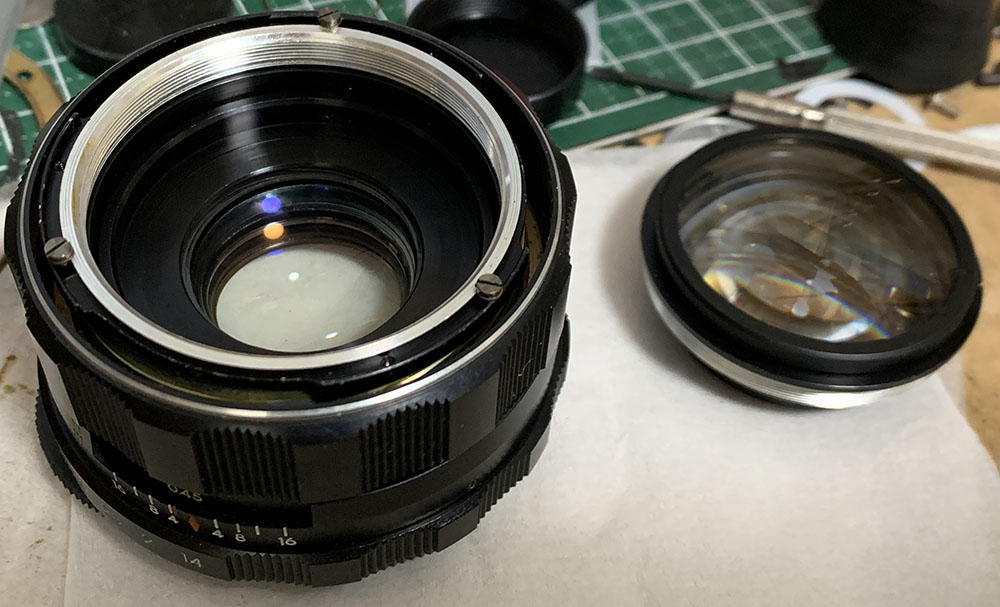
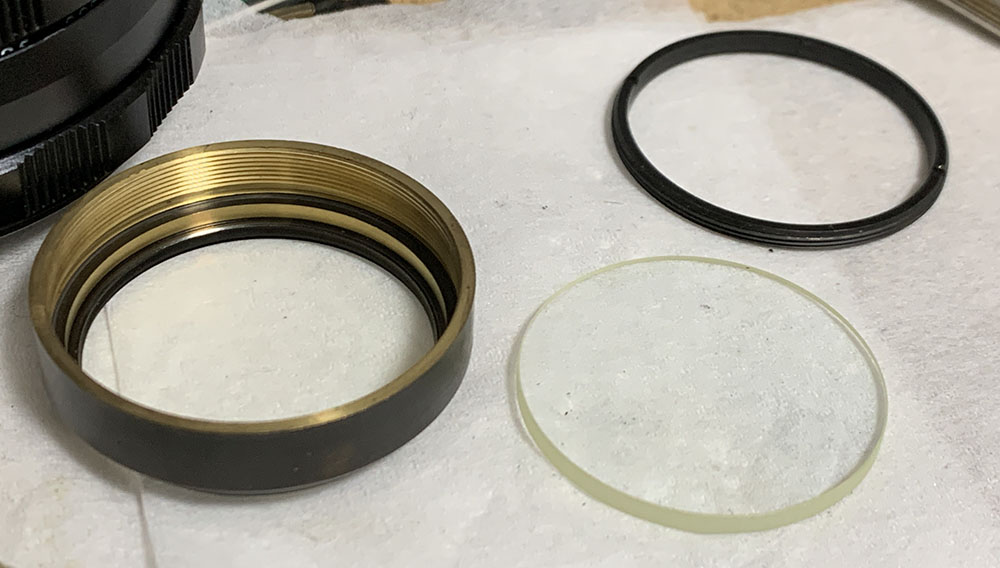
Unscrew the front optics assembly with a lens spanner or a rubber cup while being careful not to scratch the glass.
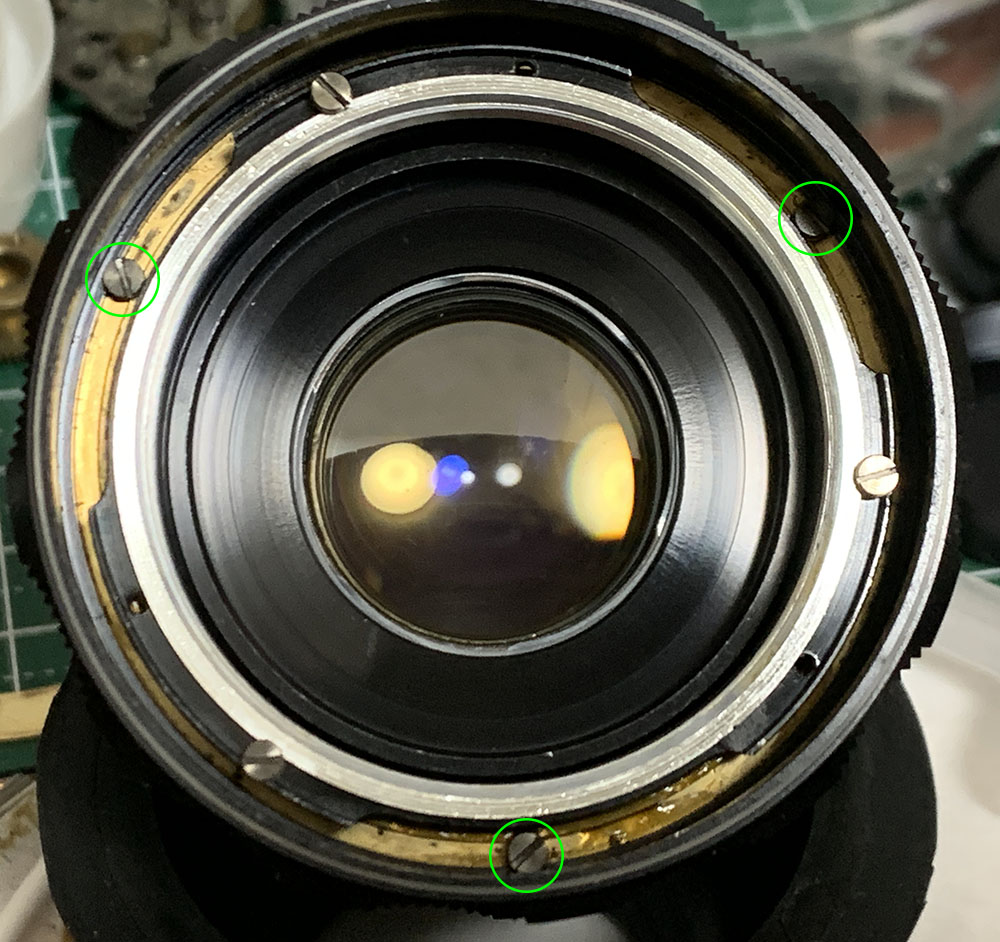
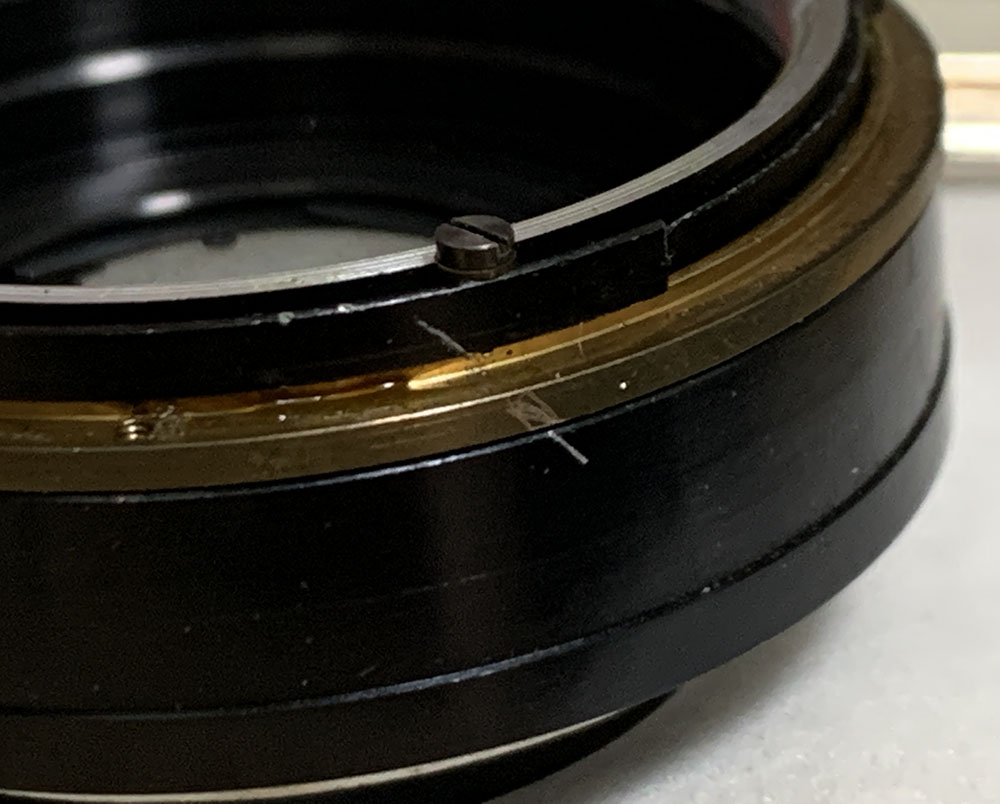
Extract these to remove focusing ring. You may want to note its position so you’ll know how to put this back or at least help you adjust the focus of your lens easier. Do not extract the other set of screws without making marks because the objective and its housing is adjustable in order to regulate the size of the iris.
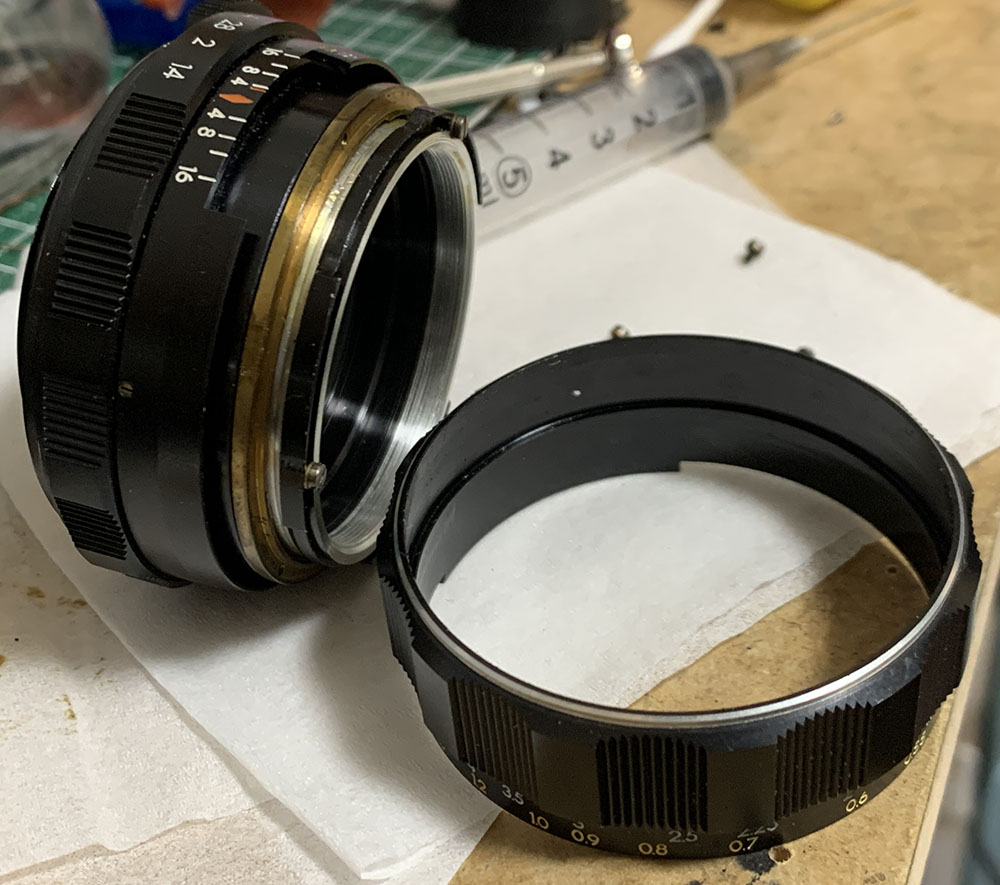
Remove the focusing ring and clean it properly. I am not sure if the distance scale is part of the focusing ring but some Takumars merely use a strip of brass for this and it’s only stuck with cement. Soaking that in alcohol will dissolve it and you’re now faced with the task of aligning that on top of adjusting the focusing ring.
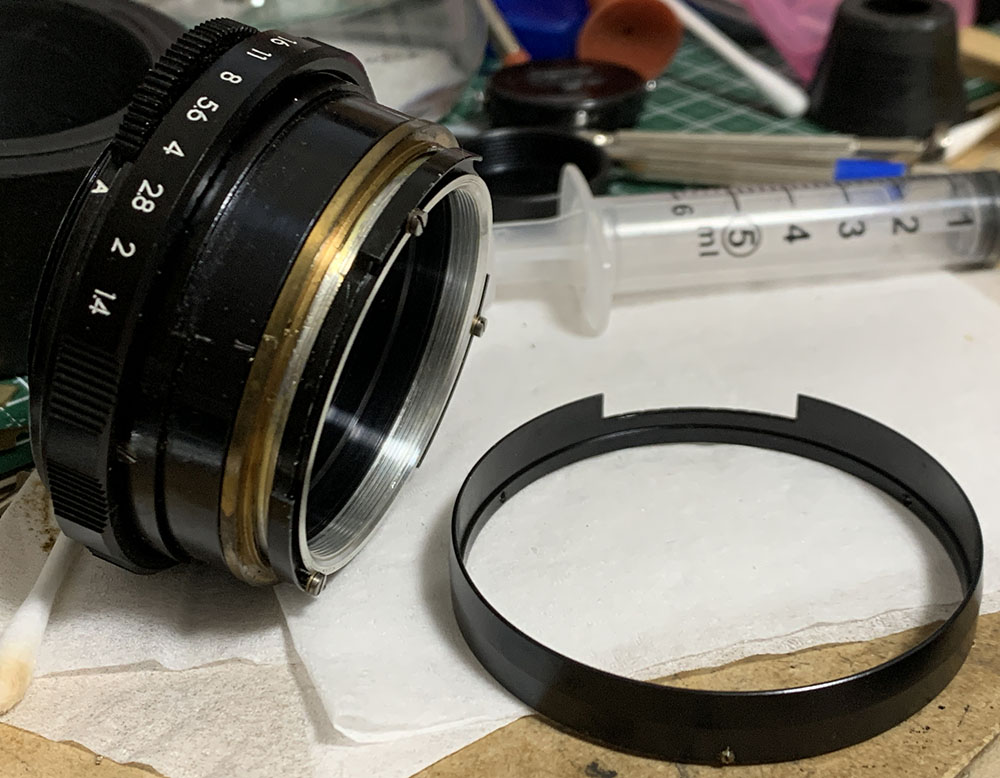
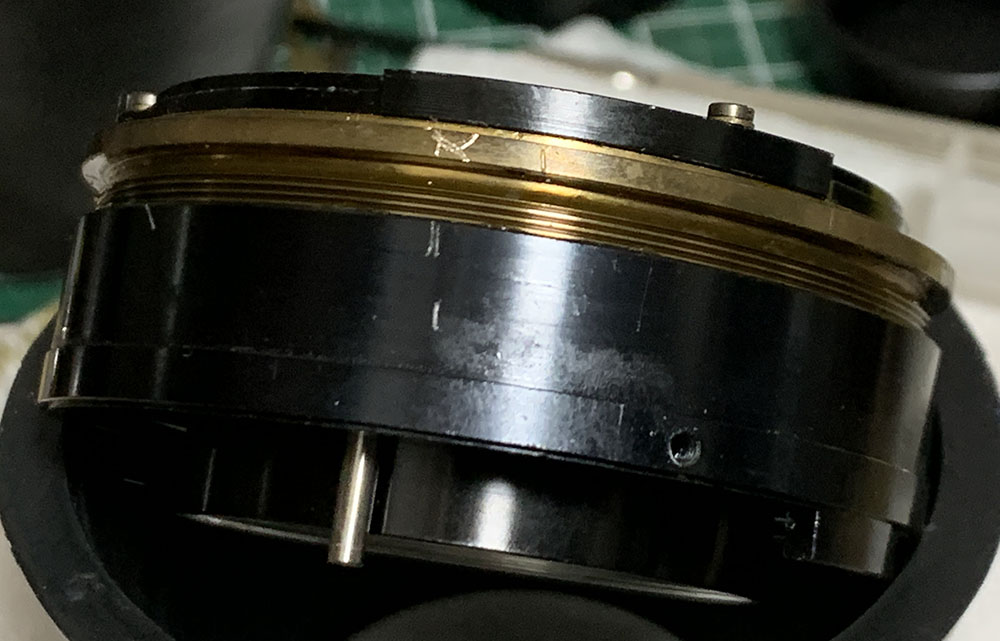
Loosen the screws of the sleeve to remove it.
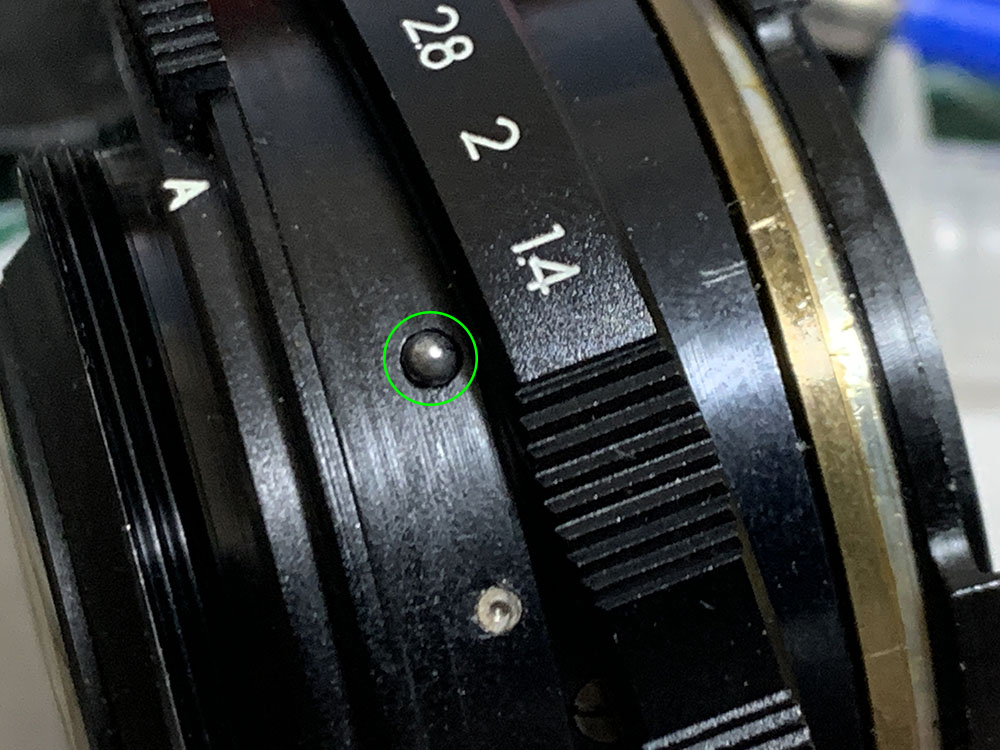
Carefully remove the aperture ring and be sure not to loose this bearing ball. It’s 2mm in size in case you lost yours.
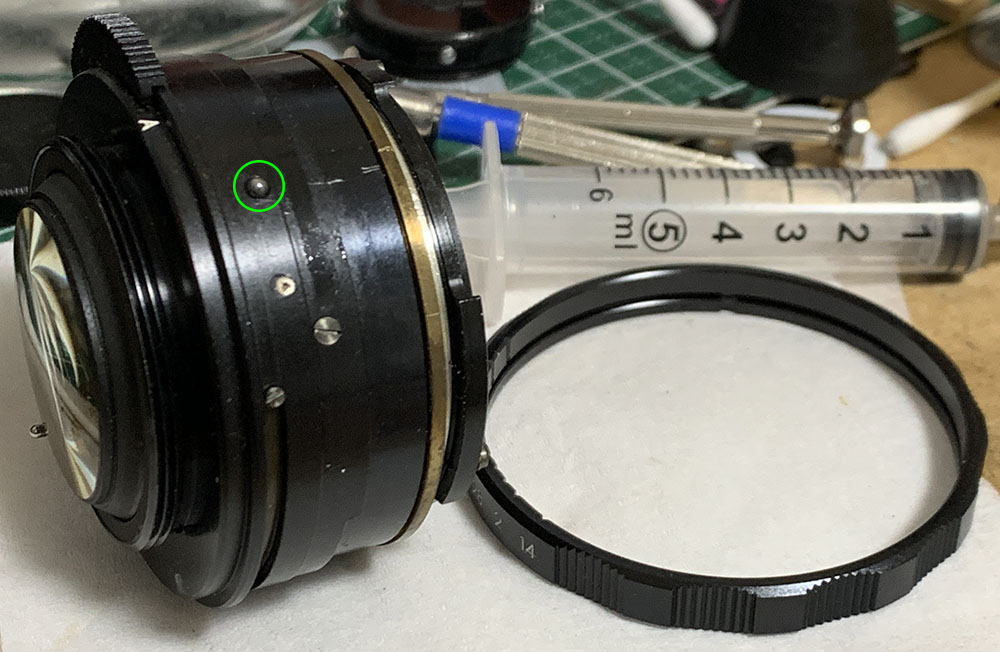
It’s spring-loaded so it will jettison across the table. This is also the best time to note the helicoids’ alignment, I made a few scratches so I will know how the helicoids should align when the barrel is set to infinity.
Extract these to remove the helicoids..
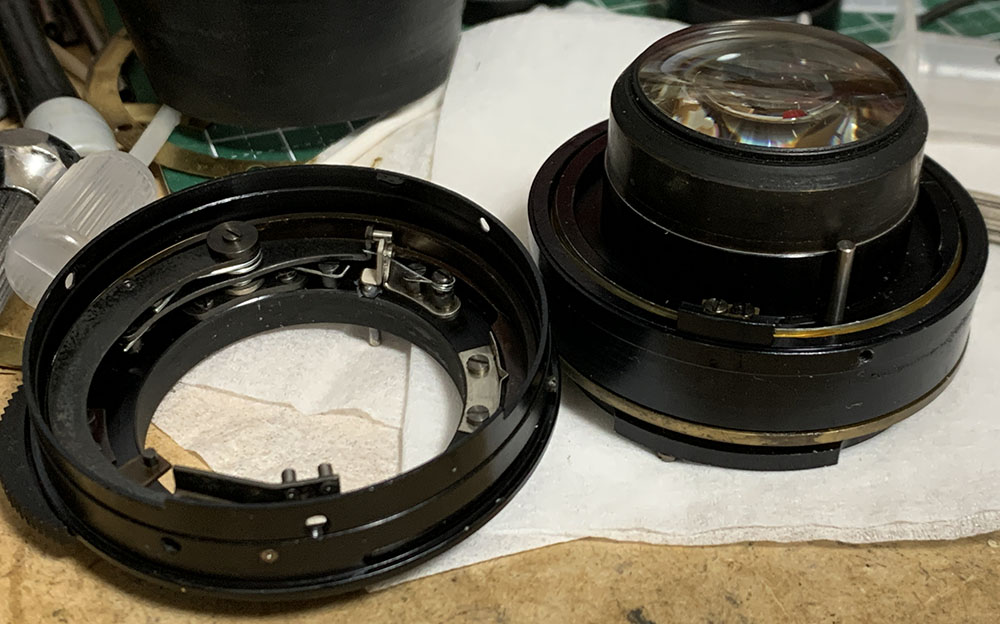
Separate the focusing unit and the objective from the base.
Unscrew the rear optics assembly with a rubber tool. You could actually remove this without dismantling the lens, that is if it wasn’t by anyone.
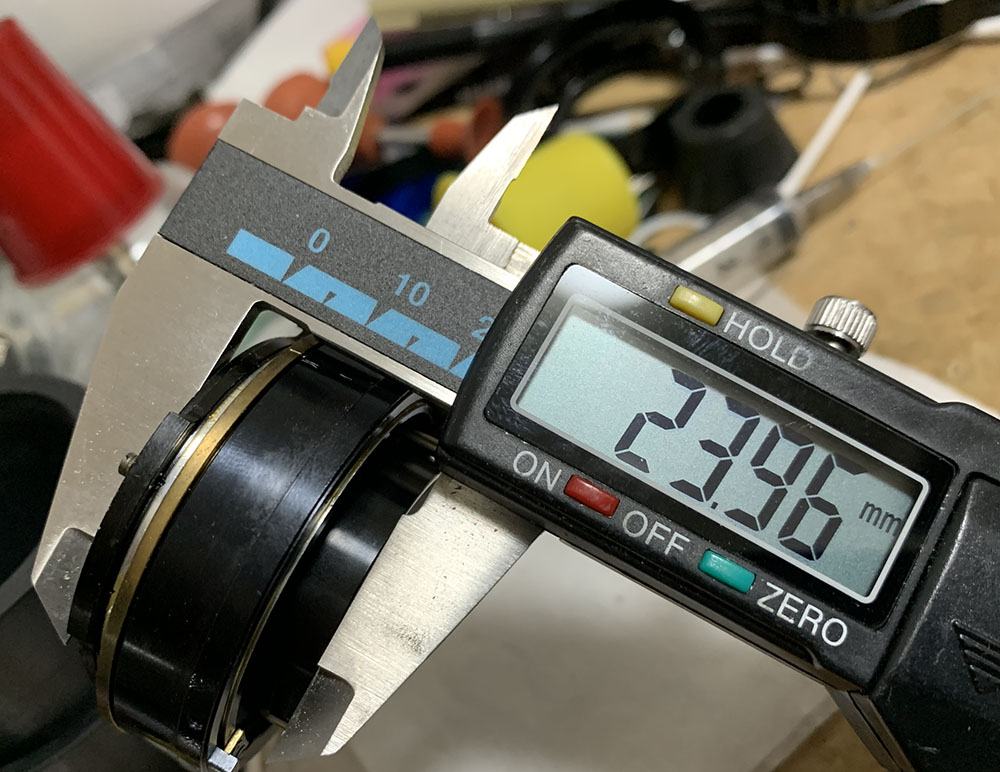
Measuring the focusing unit’s height will help you determine its right configuration.
Alternatively you can also make a diagonal mark to do the same thing.
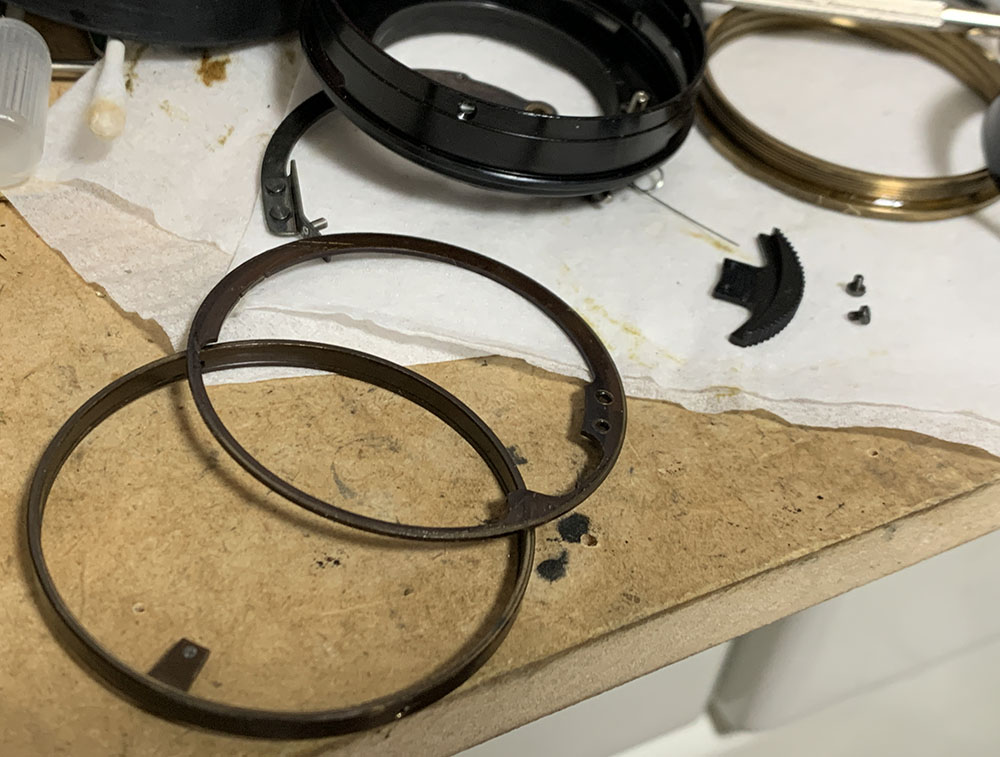
These are the helicoid keys, extract them so you could dismantle the helicoids. Unlike Nikkors, this only has 2 small and shallow keys which I don’t think is enough to keep the helicoids operating smoothly and they couldn’t be adjusted.
Separate the outer helicoid from the central one. Never forget to mark where the they parted because this is also the same spot where they should mesh. Many people forget to do this and get stuck. To prevent this from happening read my article on working with helicoids.
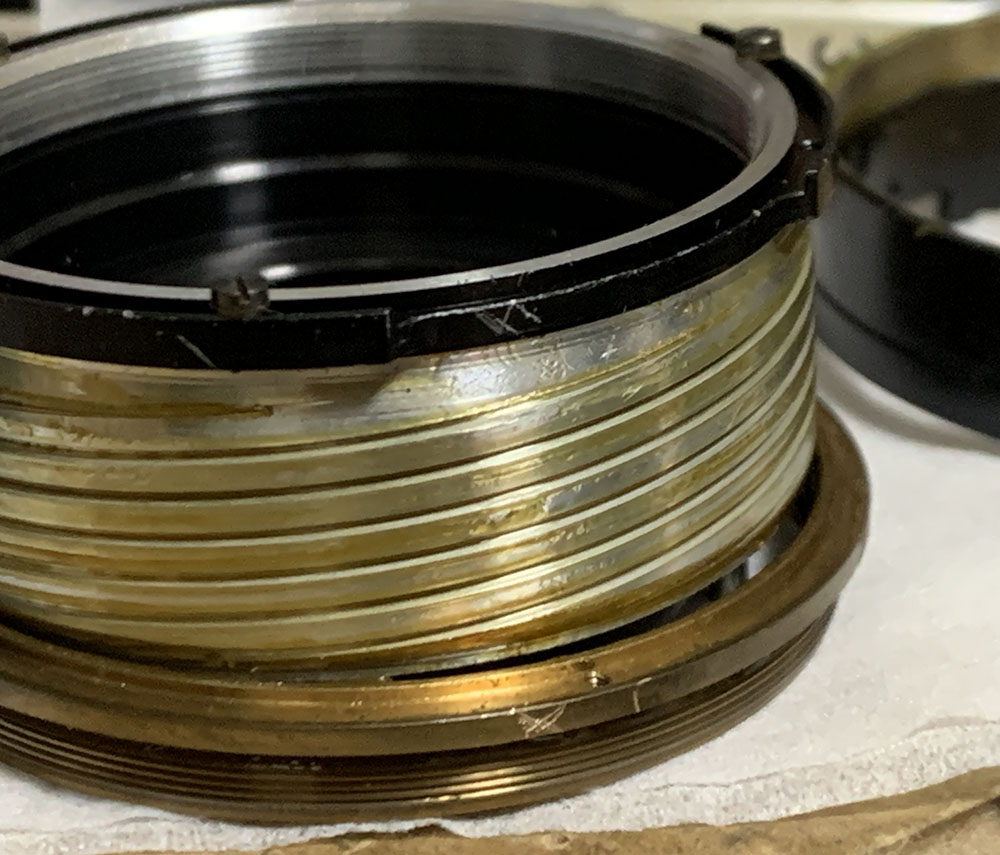
Do the same for the inner helicoid and never forget to mark where they parted.
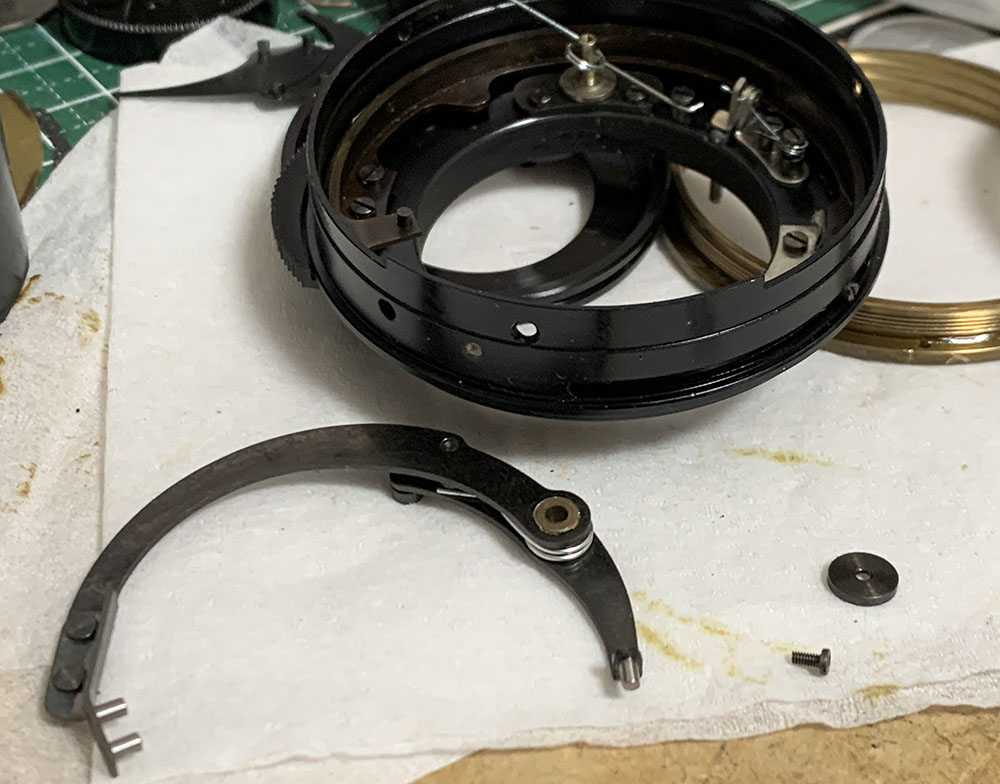
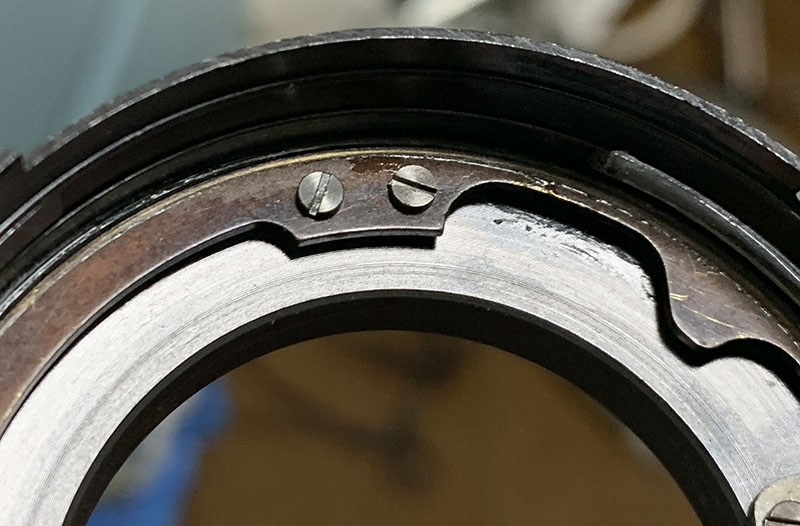
Extract these so you can remove the objective’s housing. I could’ve extracted this a lot earlier but I’ve decided to do this at the current step since I wanted to know how things operated. Be sure to note its alignment because this part can be adjusted, putting this back the wrong way will result in inaccurate aperture values.
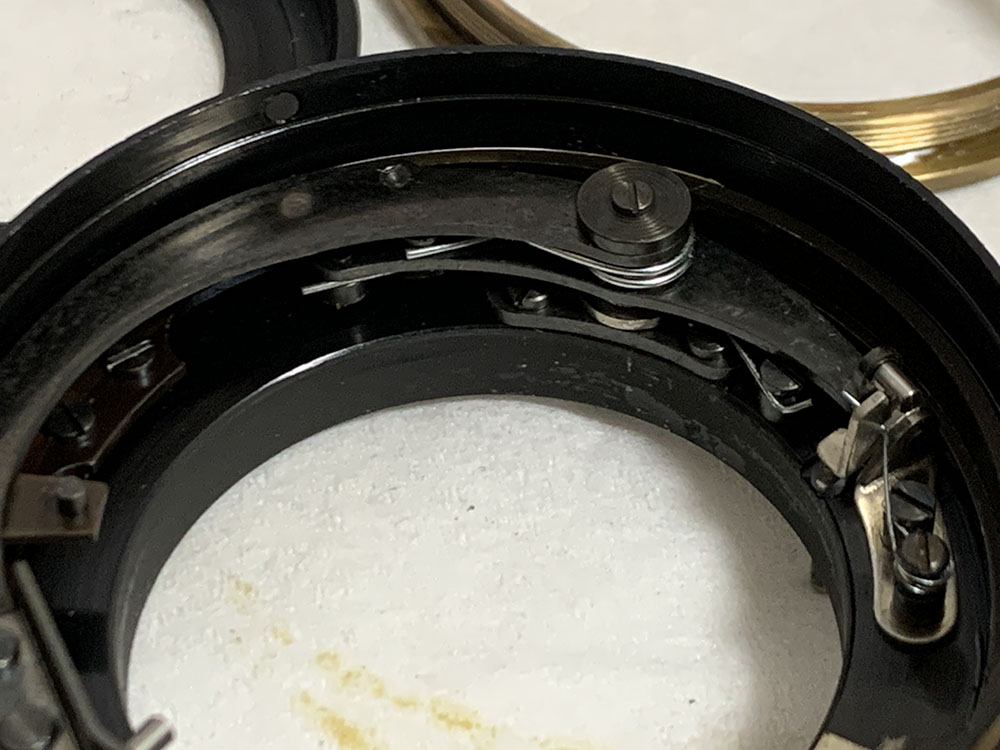
Study how the complicated actuator mechanism works before you dismantle it. Note the positions of the springs, tabs and levers.
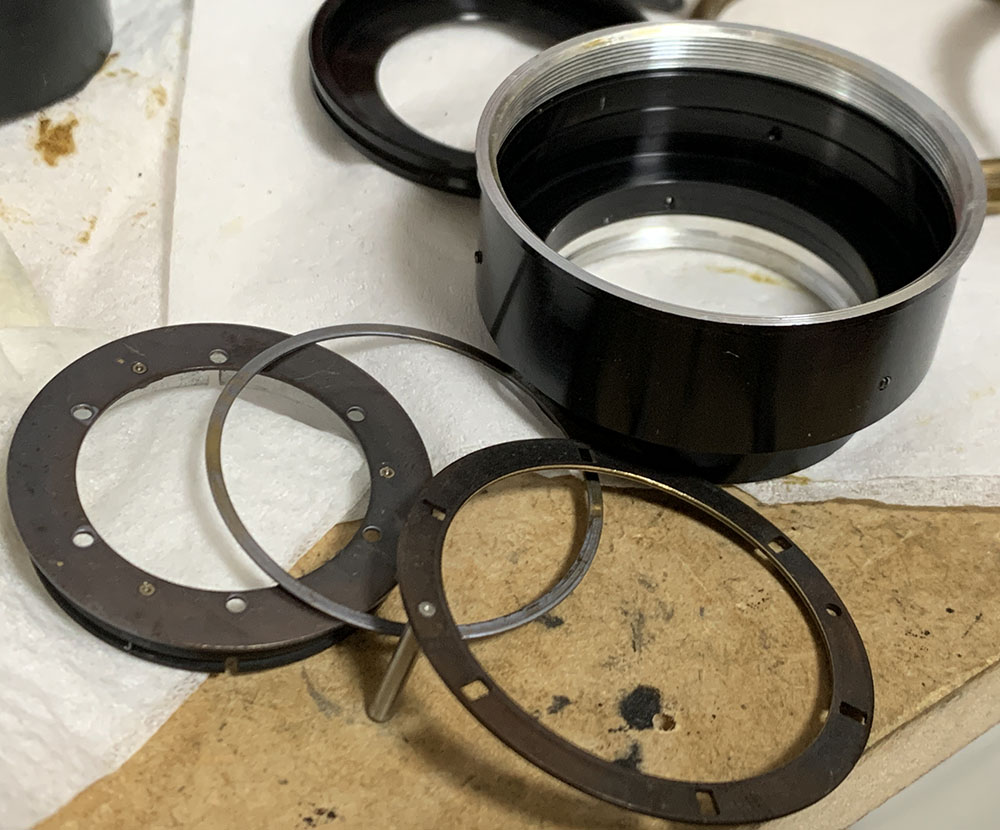
Remove the main screw of the elbow’s pivot and be sure not to lose anything, the shims and springs are tiny and could easily be misplaced.
Extract these, they’re used to couple the aperture ring to the regulator ring within the lower barrel.
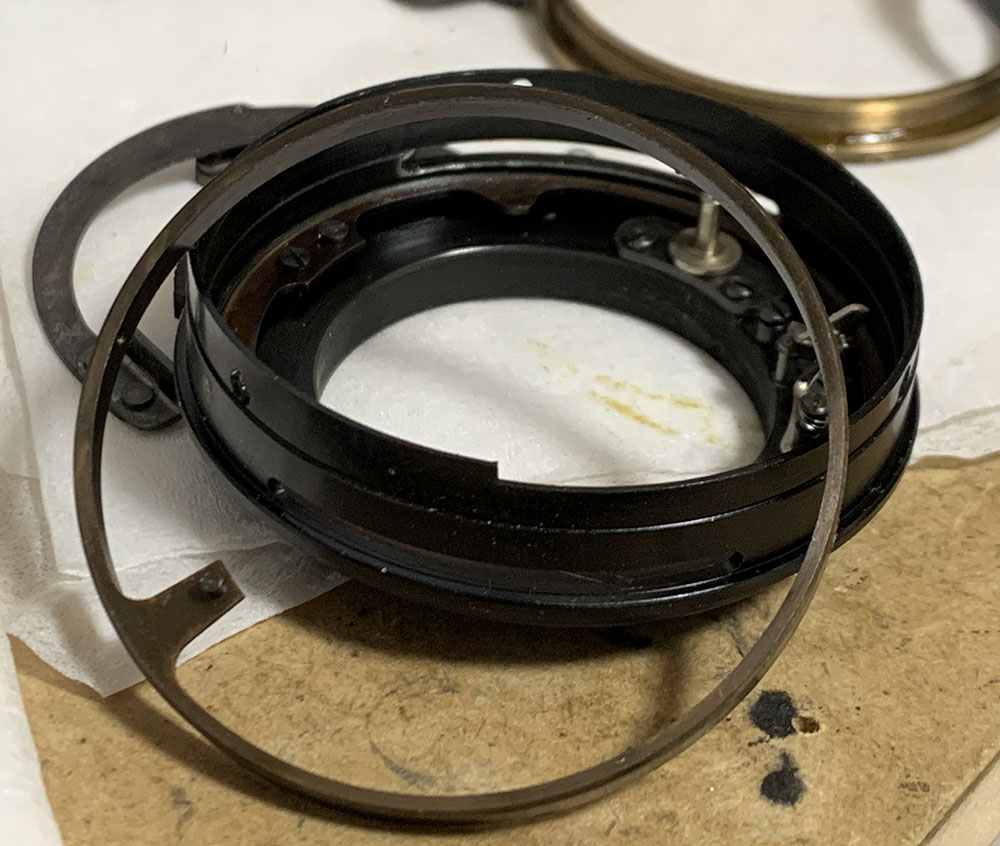
Carefully remove this ring, it constrains the movement of the stop-down lever assembly.
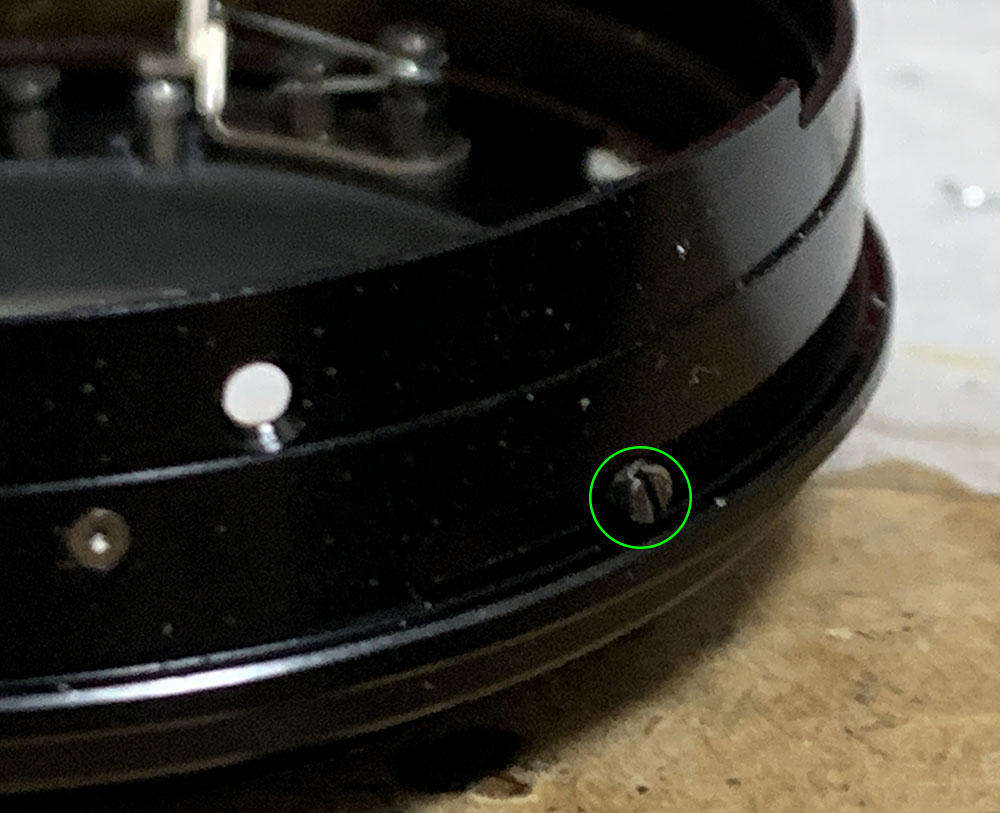
Extract these to remove A/M tab.
Clean these very well.
Clean the helicoids really well by scrubbing them with a strong toilet cleanser and cleaning them with alcohol very well in order to remove residues. This benefits from a grease with a little bit of resistance. If it’s too-thin the focusing won’t be damped and it’s going to be difficult to turn if the grease has too much resistance. Don’t apply excessive grease or it will migrate to the iris.
Disassembly (Objective):
This section should only be performed if you have to since it contains a lot of delicate parts and they’re adjustable, too. This means that you should take lots of notes before you dismantle anything or you won’t be able to put the iris back properly, causing inaccurate exposure. Since the iris is part of this assembly I’ll condense this section to include the iris mechanism.
Loosen these to access the iris mechanism.
Once its screws are loosened pull the iris mechanism’s cover off.
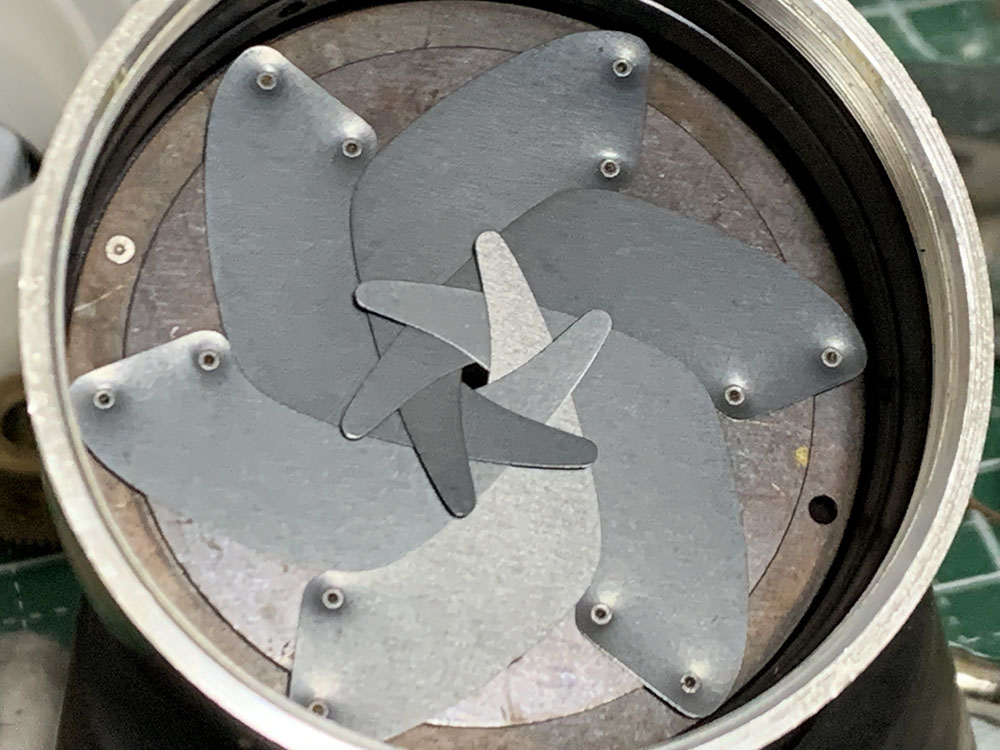
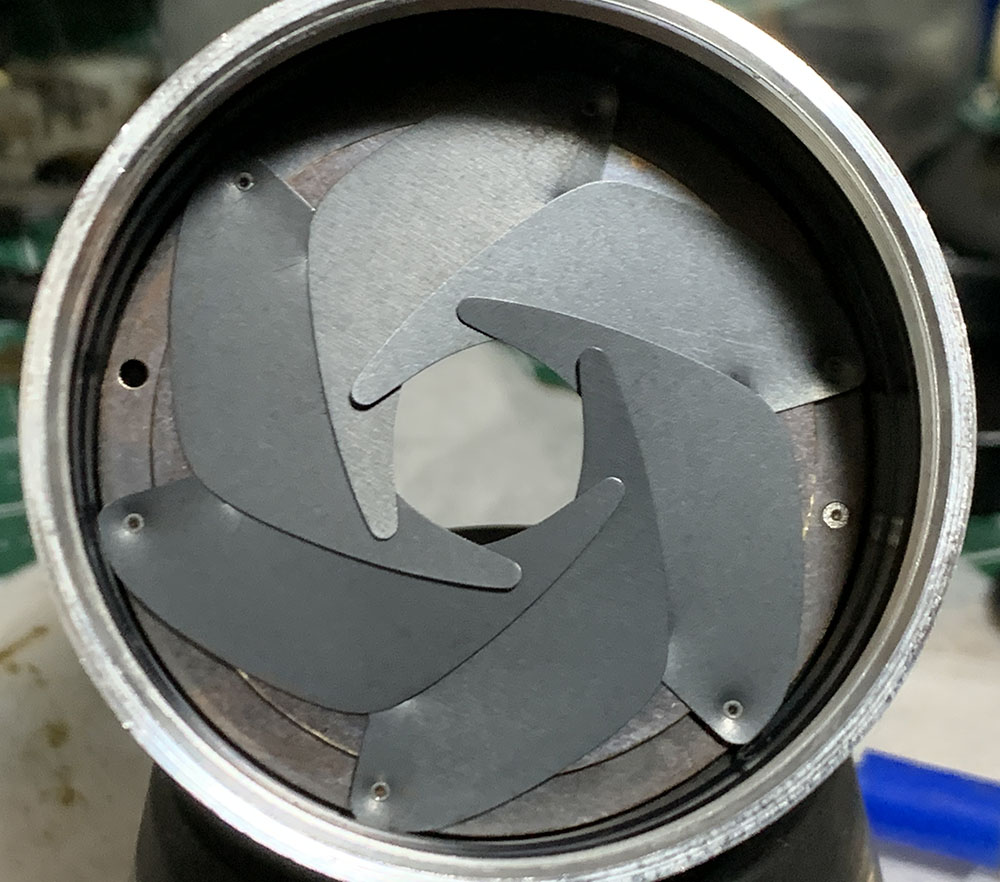
Study how the blades were positioned and how the iris mechanism operates. Note that the plates have corroded, this is the reason why the actuation of the iris isn’t snappy. A poor choice of materials resulted in a lens that needs cleaning after a few decades. A poor engineering decision in the name of cost-cutting.

These secure the main plate of the iris mechanism. Before you loosen these and remove the plate make sure that notes and measurements were taken so you could put it back properly. This step isn’t necessary but I had to polish the plate.
Dismantle the iris mechanism and be careful not to damage the pin.
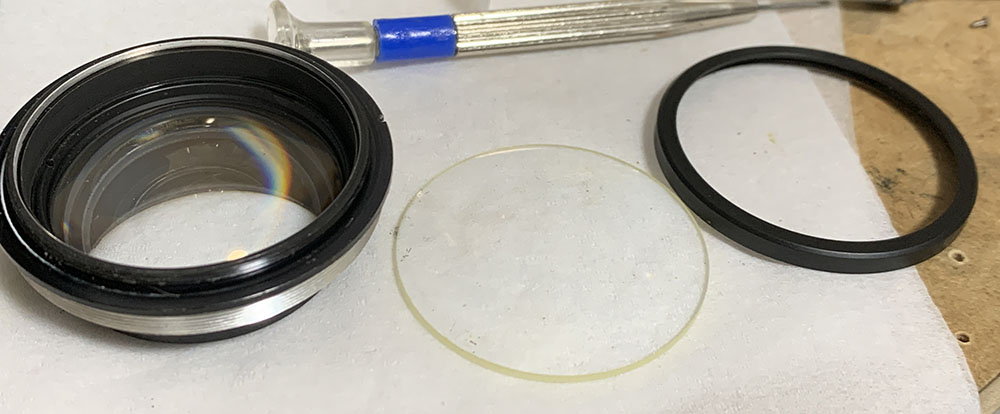
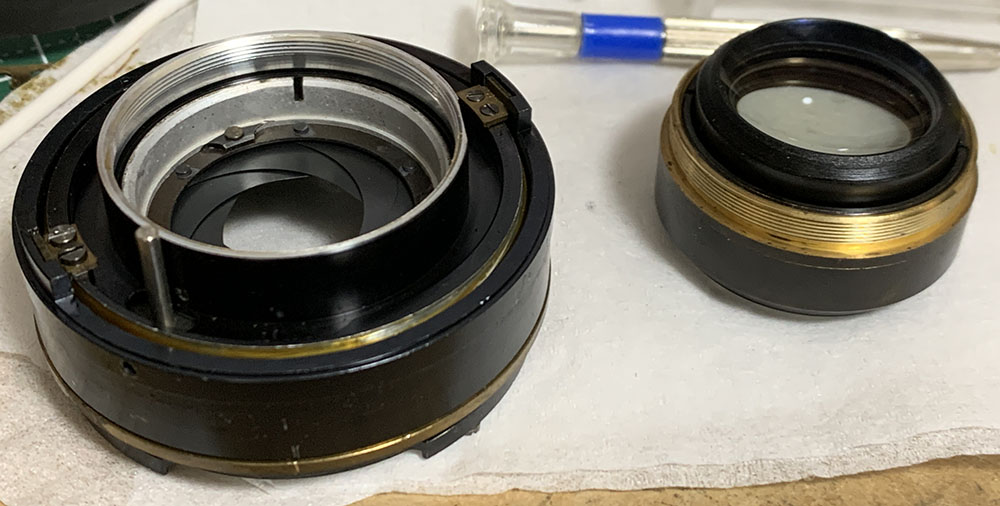
The front optics assembly can be dismantled in this manner. I didn’t bother to extract the 2nd group since it’s clean.
The rear optics assembly can be opened after unscrewing this retainer.

You can reach the last group by separating the housing.
Unscrew this retainer and you’re now able to clean the last group. Do not dismantle this further, the last group cannot be removed as it’s sealed to the housing.
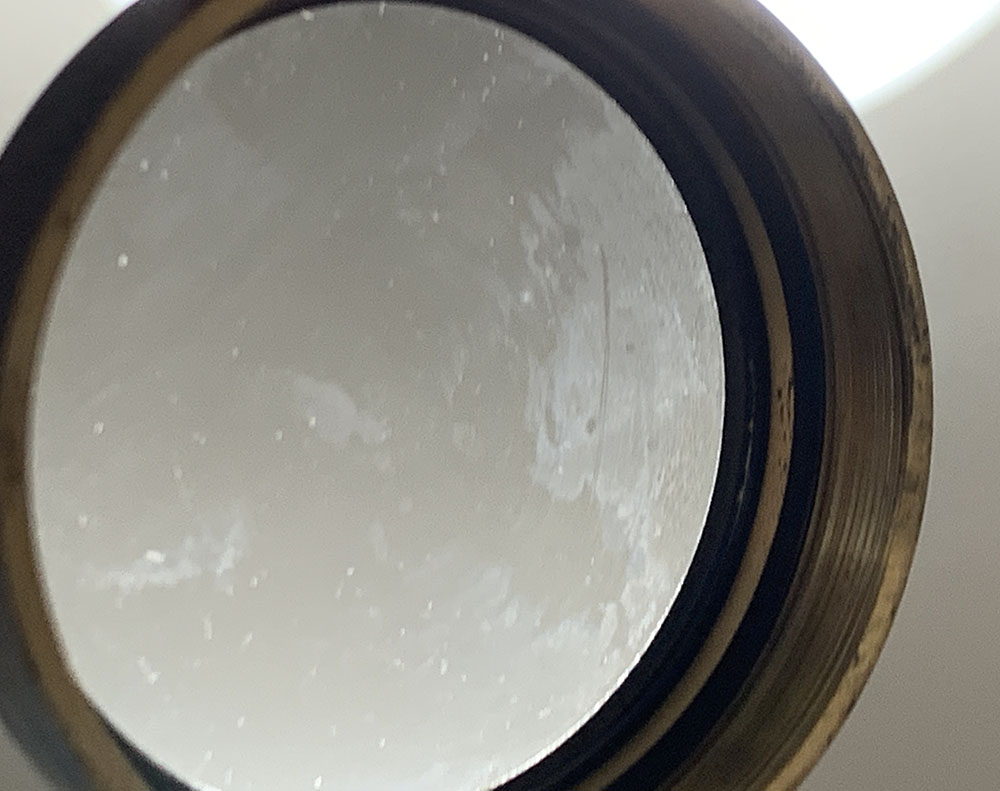
This is rather unfortunate, the lens was abused so the rear element is in this state.
If your lens has fungus read my article on how to clean lens fungus. That article should help you clean the fungus off. It is important not to lubricate the iris mechanism no matter how tempting it is, if you really have to simply apply a really thin application of powdered graphite and blow the excess away so it won’t settle in the glass.
Conclusion:
I’m glad that I got the chance to work on this lens as it taught me many new things about repairing Takumars. This one took me longer that it should since I was not familiar with Takumars and I had to clean everything well. I polished some of the metal parts and lubricated the complicated stop-down mechanism so the iris operates flawlessly. The glass has a lot of blemishes which I wasn’t able to correct as I don’t have the time to polish it but I left it as-is since I don’t think it will affect my photos significantly.
Now that you’ve seen how much effort is needed in order to service this properly please leave this to the professional if your lens needs to be serviced. I will never recommend this to a beginner specially considering how complicated the stop-down mechanism is. If you’re really inclined to do so, please practice with a cheaper Takumar first.

Reassemble the main barrel by backtracking all of your steps. This is how it should look like if you’ve decided to extract the objective earlier.
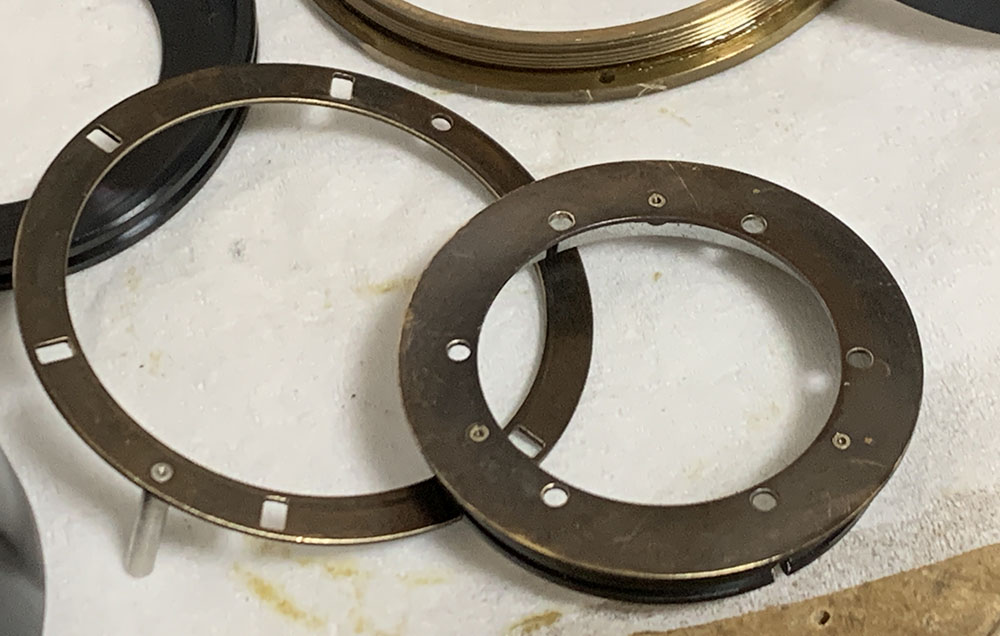
This is how the rings of the iris mechanism looks like after I polished them. The condenser and diaphragm seat should be very smooth in order for them to turn properly.
The iris mechanism now works perfectly.
Reassemble everything up to this point so you could adjust its focus. Read my article on focus adjustment so you’ll see how it’s done in a DIY setting with tools that are available to you. Once you’re satisfied, tighten the screws of the ring and do some last checks before you reinstall the front barrel.
Thanks for following my work, if you liked this article please share this with your friends so it will get more views. This site earns around $0.40 a day, we are totally reliant on views. You could also support this site, it helps me offset the cost of maintenance and hosting. You are also helping me purchase, process and scan film. This site promotes the use of film so we are all in this together. See you again in the next article, Ric.
Help Support this Blog:
Maintaining this requires resources and a lot of time. If you think that it has helped you or you want to show your support by helping with the site’s upkeep, you can make a small donation to my paypal.com at richardHaw888@gmail.com. Money isn’t my prime motivation for this blog and I believe that I have enough to run this but you can help me make this site (and the companion facebook page) grow.
Buy me a roll of film or a burger?
Thank you very much for your continued support!
$2.00
Helping support this site will ensure that this will be kept going as long as I have the time and energy for this. I would appreciate it if you just leave out your name or details like your country’s name or other information so that the donations will totally be anonymous. This is a labor of love and I intend to keep it that way for as long as I can. Ric.

Jun 22, 2021 @ 01:55:29
I’m a big fan of Pentax lenses so I was happy to read your thoughts to this one. I don’t have the 8-element version but something a bit later with the radioactive coating, definitely shines for black & white film!
Jul 15, 2024 @ 06:18:10
Wow that’s the first one of those I’ve seen with the early Super-Takumar font on the front!
Nov 08, 2025 @ 06:56:09
Incredibly detailed article! I own one of those 8 element Takumars in mint condition, however the focus ring gets very stiff half way even more so when mounted. Do you have experience with this issue? I wonder if this could be repaired/regreased or if it is a sign of irreversible wear.
Jan 07, 2026 @ 13:28:14
Hello Markus, I received an 8-element specimen in Dec 2025 and had exactly the same problem: stiff focus particularly mid-way, caused by the use of the wrong type of grease.
The above guide is awesome to fix this problem, but since there’s nothing wrong with the aperture or the glass of your copy (like mine), you can take a shortcut that’s much less risky and a lot less work, and involves only the regreasing of the focus unit.
So, what to do: follow the guide up to the point where it removes the front element group (glass) – don’t do that. Instead, unscrew the three screws and pop out the optical piece as a whole, and put it safely aside. No need to open up when the glass is clear and the aperture blades don’t need servicing.
Then, remove the distance scale ring (with the cutout), the aperture control ring (watch the ball) and detach the lens base/mount with the three larger flat screws on the side. The complex auto-aperture mechanism is in the lense base/mount and you don’t need to touch that. What you have in your hands now is the three-pieces helicoid: inner course helicoid, the middle brass focus ring and the outer fine-threaded helicoid. The outer is a single thread so easy. The inner one has 5 or 6 threads, so orientation is essential. I regreased the outer helicoid with FLOIL GP-125 and the inner with Helimax-XP. Also make sure you put the two focus tabs back exactly as there were, and tighten them carefully while trying the focus action, so they stay smooth and don’t grind against the outer cylinder.
In all of the above, mark/note the the infinity setting and orientation of pieces when they come apart, and (like above), to verify that you do it right, use a caliper to measure at infinity and disengagement point.
Putting back together is easy. Set the aperture to 1.4. It is obvious how the optical piece fits in the base because the aperture tab needs to catch the aperture control cam. Just make sure the wide open setting corresponds to f1.4.
It is as new now and the glass wasn’t even touched.