
Hello, everybody! I always love a great burger, last weekend I went to Kichijoji with my family and we all had burgers for lunch and dinner. For lunch, we ate at the biggest burger restaurant chain in the world and for dinner we had some great burgers from a new company which is the talk-of-the-town in recent months. Their patties tastes great, there are no extenders and the seasoning is all-natural and light which means you could taste the beef for what they really are. I loved every bite as the taste is clean on the palate. I won’t get tired of eating this classic comfort-food. Today, I’ll show you another classic, something that I never get tired off despite shooting with it many times over. Read this article and you’ll see what I mean.
Introduction:
The Carl Zeiss Jena Tessar 50mm f/3.5 came in many variations through the years that it was made, we’re going to talk about the one that was made from around 1950 to 1954 in the M42 mount. I consider this to be the epitome of what a true Tessar should be in terms of characteristics: sharp, small and reasonably well-corrected. It won’t be as desirable as the Carl Zeiss Jena Tessar 50mm f/2.8 or the Carl Zeiss Jena Biotar 58mm f/2 which are both faster but it has something special about it which you’ll see later. This was made as the budget 50mm from Carl Zeiss Jena, I saw an old catalog for Ihagee Exaktas and these were sold nearly 2x cheaper than a Carl Zeiss Jena Tessar 50mm f/2.8 and the most expensive lens in the 50mm range is of course the Carl Zeiss Jena Biotar 58mm f/2 which costs several tens of 1950s dollars more. There was a need for to ensure that every part of the market is represented and this one became the go-to lens for the professional or amateur who just don’t have enough money to buy the more expensive options.

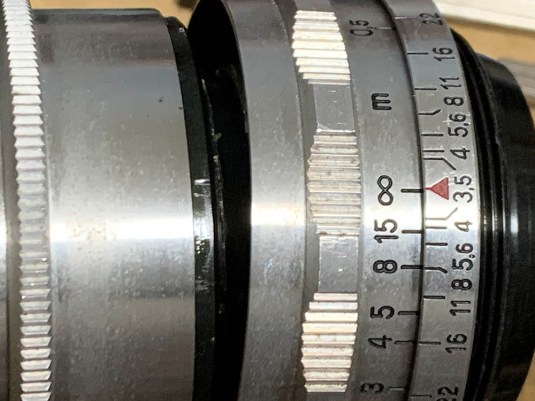
It’s a beautiful lens and the build is solid. It was made during a time when consumer products were made to last. It has a lot of useful information engraved on its barrel to aid you in focusing with it. The front element is recessed so you’re not going to need to shoot this with a hood.
Since it’s a true Tessar it has the classic 4-elements-in-3-groups design, something that was copied by nearly all brands and sold under their respective brand-names like the Lieca Elmar. The Tessars were known to be excellent lenses, sharp and able to resolve fine photos but they were never known to be fast so they usually cap at f/2.8 which is probably the limit for the classic design. It’s certainly the most-used optical formula out there and it’s still being used today in name and design across many industries.
Despite showing you a version that was made for the M42 mount this was also made in Exakta and LTM just to name a few. It was a very popular lens so you won’t have trouble looking for one.

The best camera to use this with is a Contax D or any of its variants. Later cameras won’t allow you to even mount this even if they have an M42 mount because the rear baffle extends far into the mirror-box which will impede the mirror or anything mechanical near the mount.
Handling is typical of many preset-lenses from this era. You adjust the preset-ring and then stop the iris down before your make an exposure. It can be confusing at first but you’ll get used to it. The focusing ring is also easy to determine by-touch so you won’t get confused when you operate it.
Learning how a lens performs is important so you will maximizing its use. You will learn how to utilize its strengths and avoid its weaknesses. This knowledge helps in determining which lens to bring on an assignment. I shot these photos from f/3.5, f/5.6 and f/8 since these are the most common apertures that people would want to use this, we’ll also get to see the most changes happen with these values. I shot these with my Nikon Z6, some of the photos were cropped close to 1:1 so we could see the details better.


(Click to enlarge)
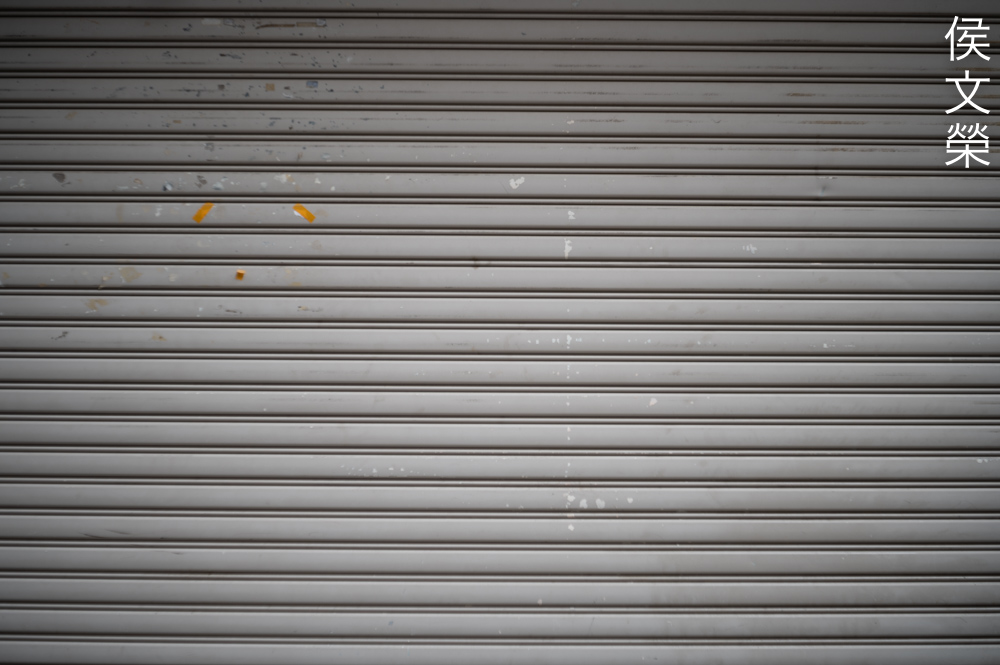
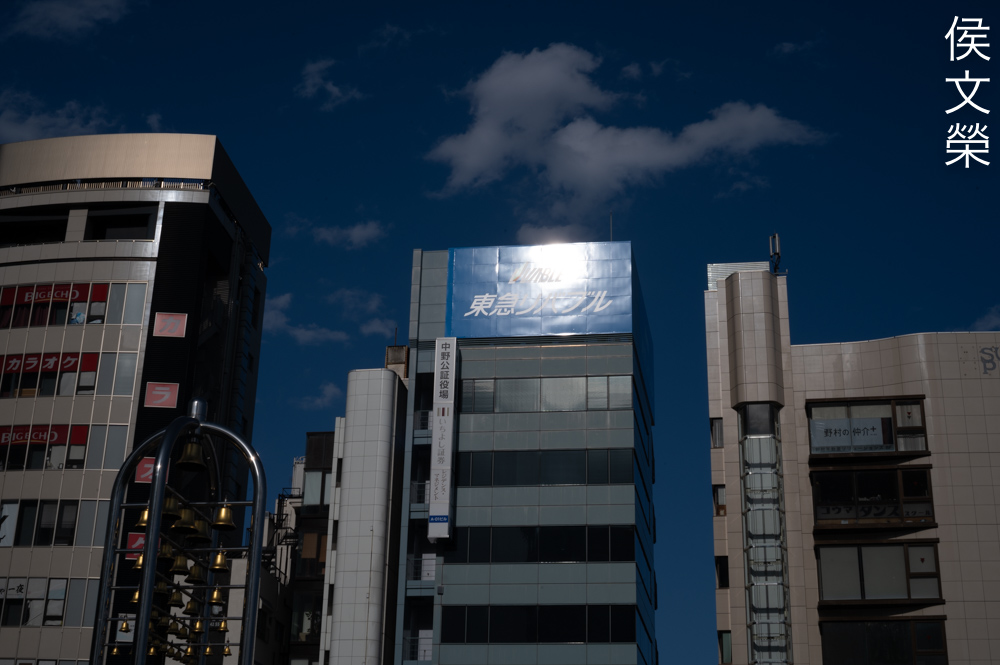
You’ll see some barrel-type distortion which is typical of lenses of this class and vintage. The profile is simple so this will be easy to correct in post. I won’t use this lens for shooting critical things such as art or reproductions but you can get away with it when taking photos of architecture so long as you angle your shot.
VIgnetting is rather heavy specially when shooting wide-open. Stop the iris down to f/5.6 and it starts to look better, it is still a bit dark but at least it’s not as bad. You’ll still see some darkness at the corners despite stopping the iris down to f/8, I expected it to be much brighter but sadly that’s never the case.


(Click to enlarge)
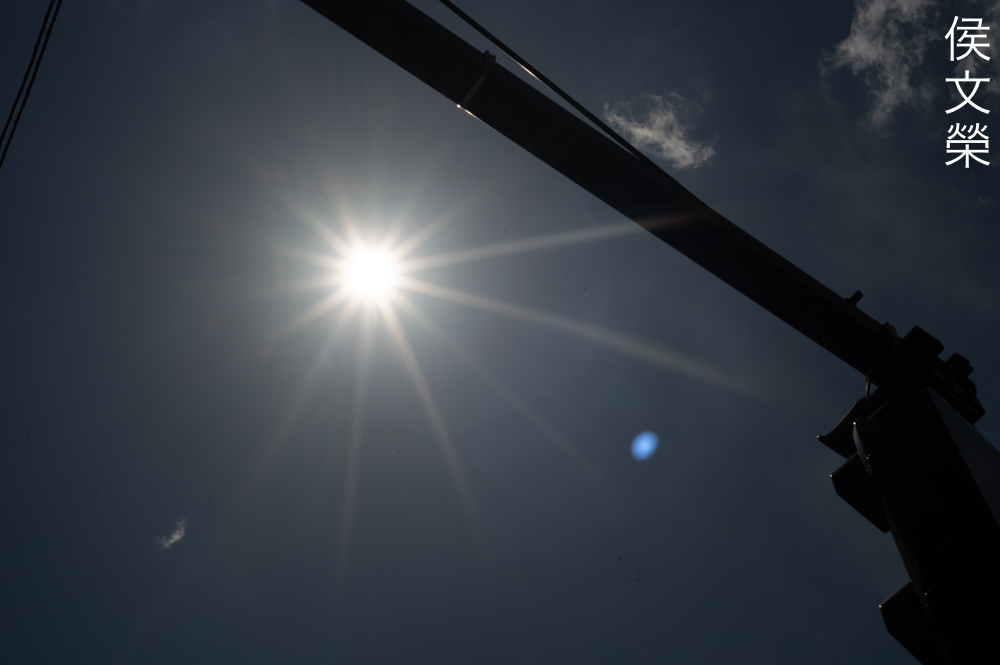
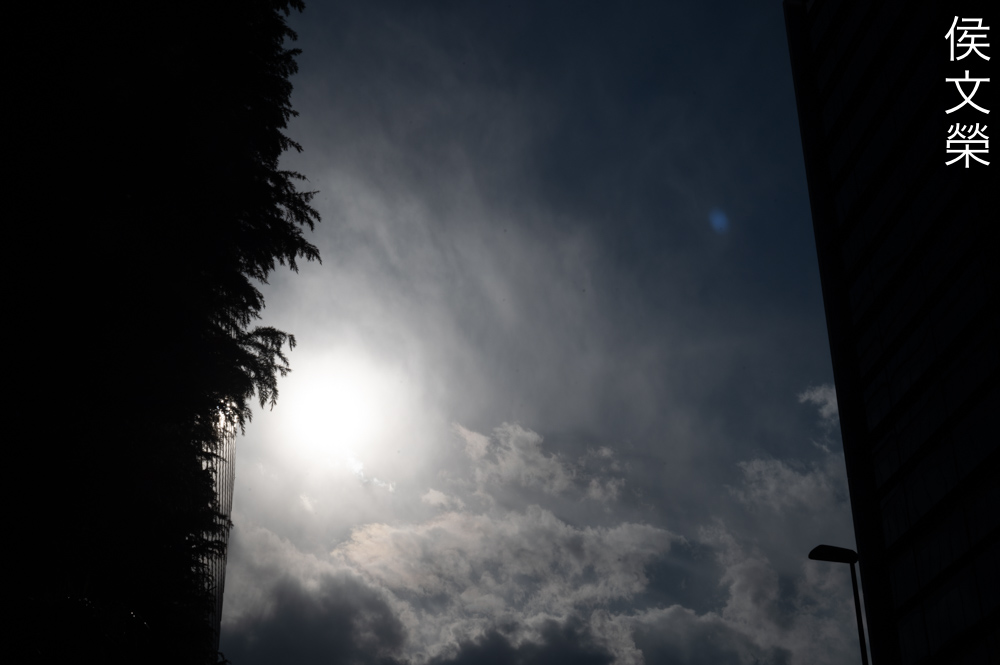
This won’t flare much as far as I am concerned. You’ll see a few blobs when you have bright sources of light within the frame and that’s all, it doesn’t look ugly either. All real Tessars have few air-to-glass surfaces so I’m not surprised to see this.


(Click to enlarge)
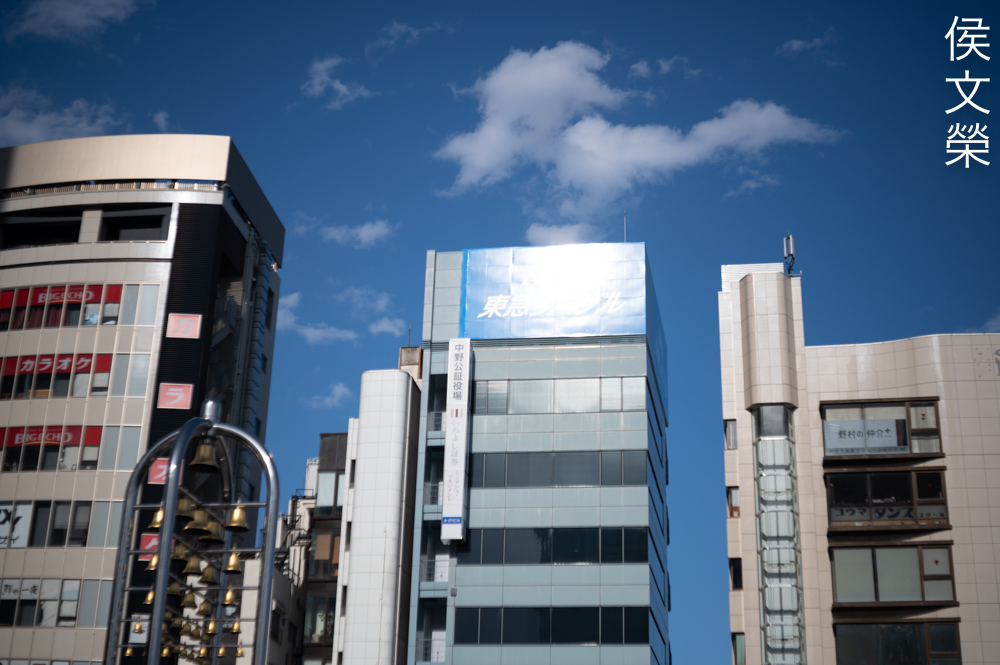
Optical aberrations appear to be controlled really well. I don’t see any traces of chromatic aberration even when I shoot with it at f/3.5, this is exceptional. Spherical aberration can be seen but it doesn’t look ugly. Stop it down to f/5.6 to get better results, spherical aberration is now near-absent. You won’t see anything by f/8, this is as good as it gets. This is a great lens and the photos are enough to justify that statement.


(Click to enlarge)
The bokeh characteristics is above-average compared to many Tessars from the postwar years, I’d even say that it’s the best amongst Tessars as far as I’m concerned. The true Tessars aren’t known for rendering the smoothest blurs so I am quite pleased to see how beautiful the results are considering that this is a true Tessar.


(Click to enlarge)
It looks beautiful wide-open. It’s sharp but the slightly subdued contrast will make it appear a bit soft but that’s not the case at all if you look carefully. Flare and spherical aberration are the causes for this, they’re simple to correct by setting the iris to a smaller aperture. The resolution looks a lot better and contrast will improve considerably by f/5.6, it’s great at the center and the corners don’t look bar either. You’ll still see some improvements when you stop this down to f/8. I don’t see the point in doing if all you want is a sharp center. The corners show huge improvements at this aperture, it’s now a lot better compared to how it was at f/3.5 but it will never look as good as the center. This is typical of Tessars, it is not some defect as far as I’m concerned.
This is a wonderful lens with amazing contrast when shooting at f/5.6, I have always known this that’s why I bought it. I believe this is the best 50mm Tessar as I have yet to shoot with something that’s better than this particular version.

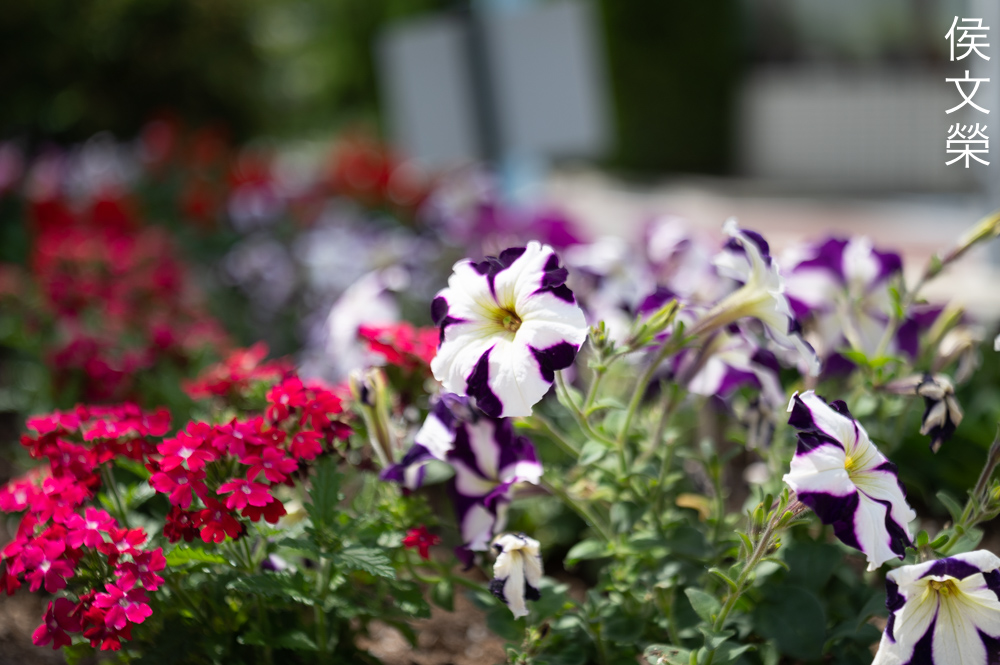
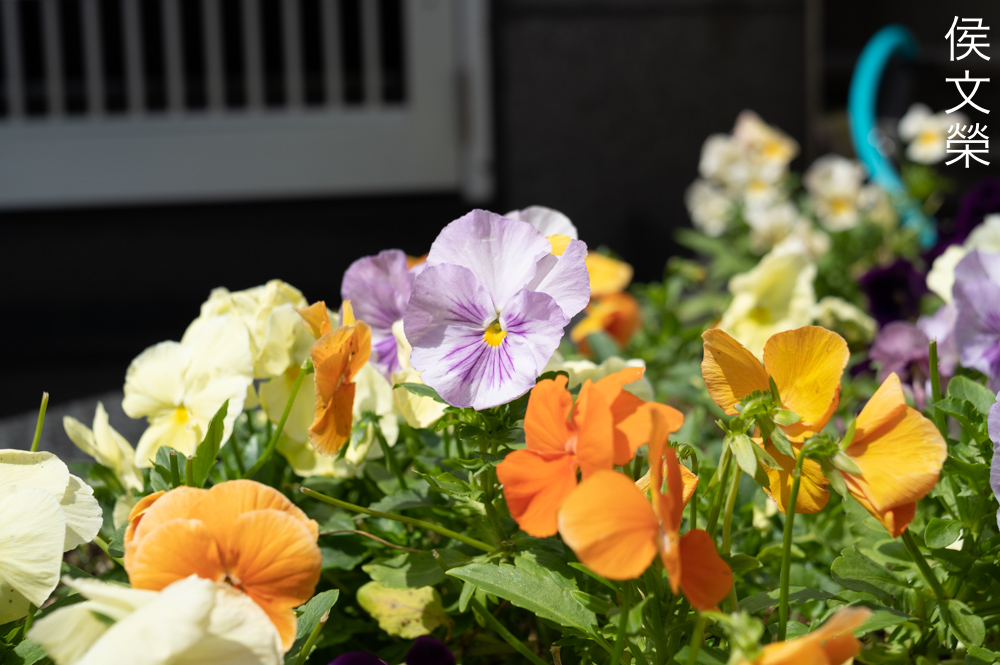
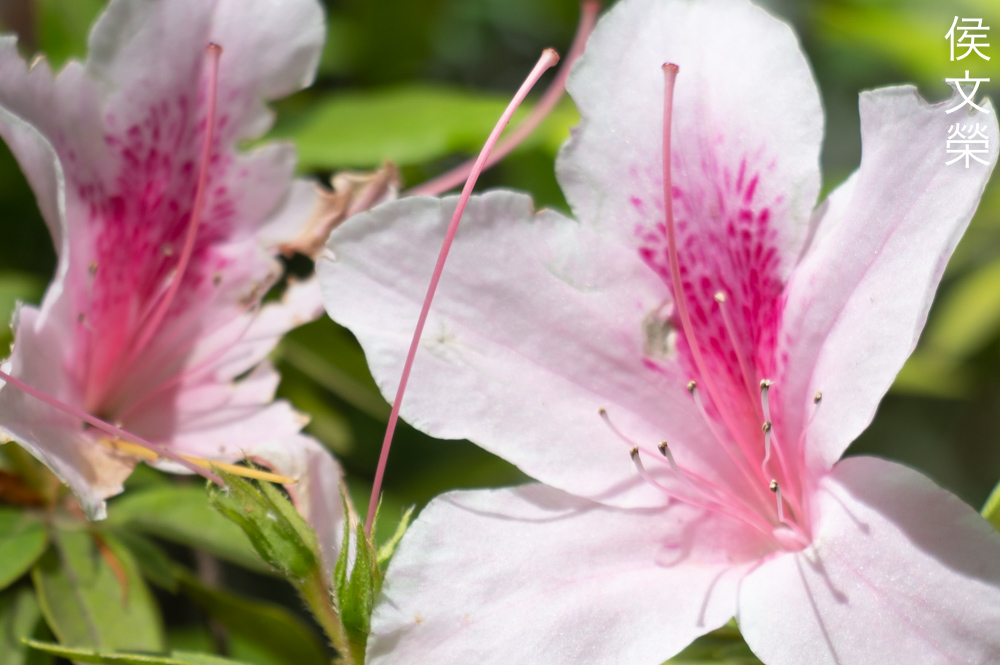
This lens has such a high potential for shooting flowers specially if you add a thin extension-tube to it. It can render the subject exquisitely with a nice balance of sharp and blurry details.
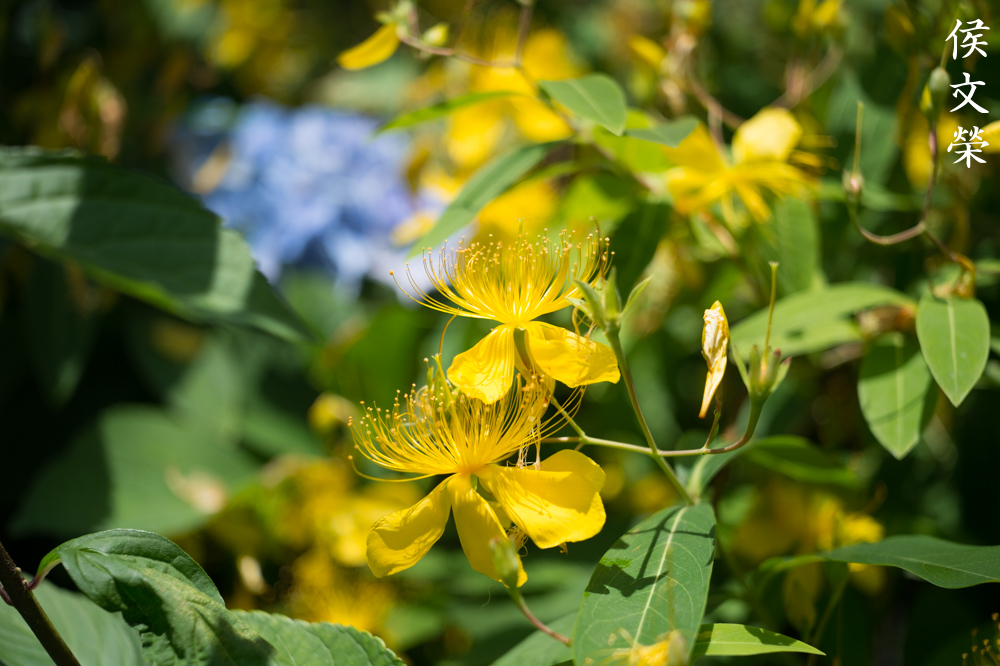
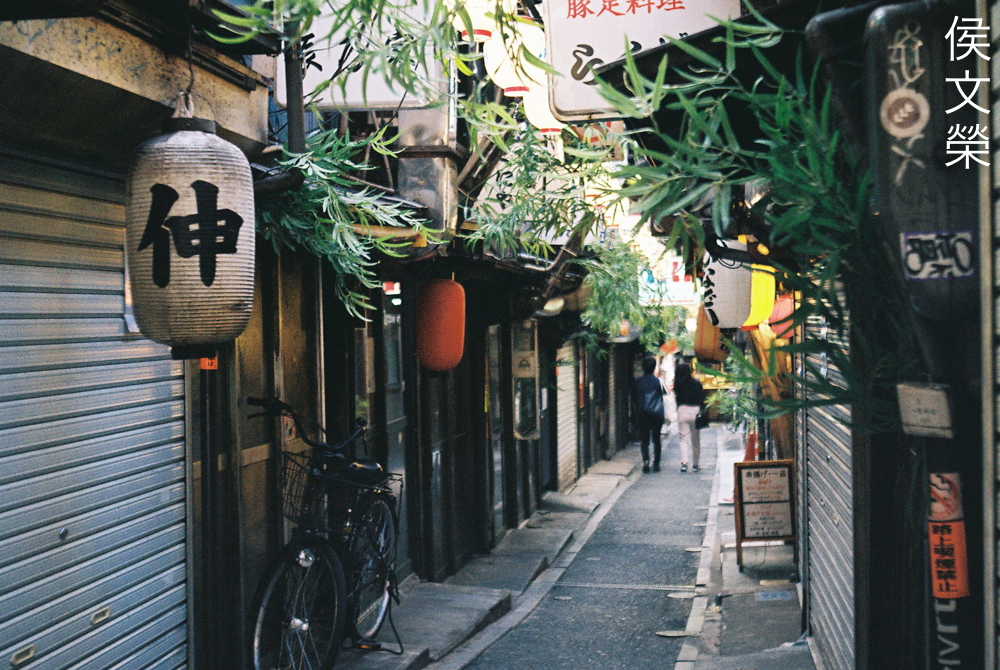
The older Tessars aren’t know for subtlety as far as my experience with them goes but this one is an exception. You will get great photos with nice transition from what’s sharp to what’s blurry. This is the lens that made me fall-in-love with Carl Zeiss Jena lenses that were made in the postwar years.
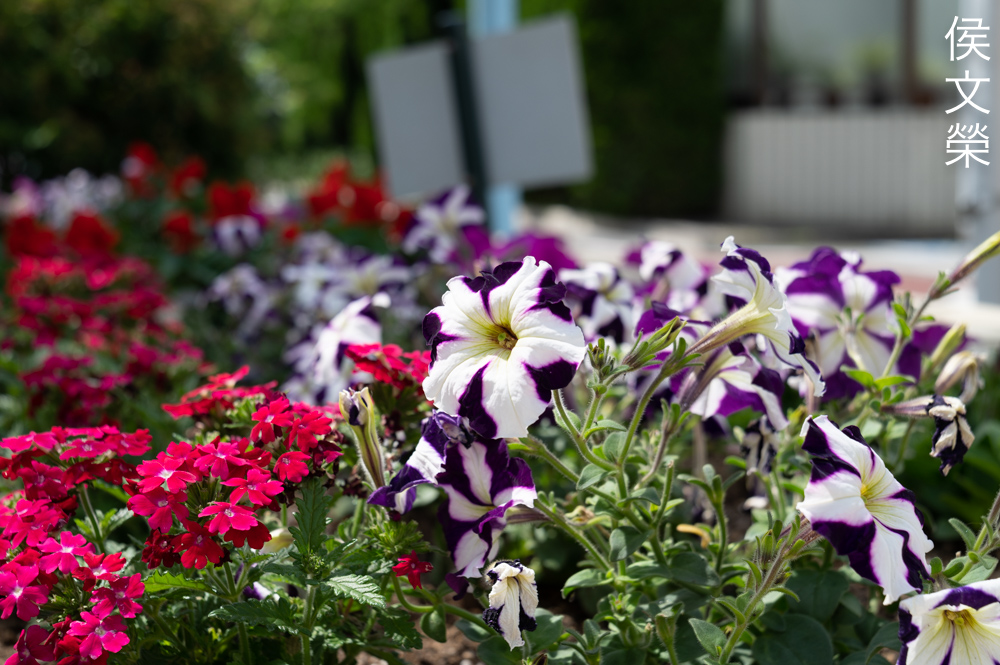
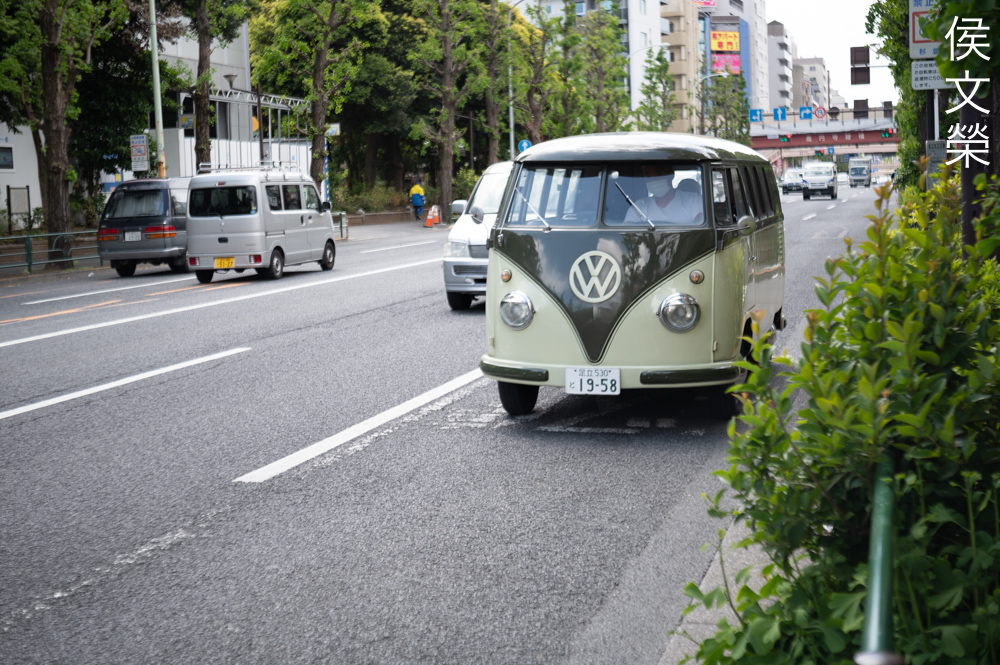
Despite not being a fast lens you’ll still able to get nice, blurry backgrounds if you compose your frame properly. Focus closer in order to blur your backgrounds even more.

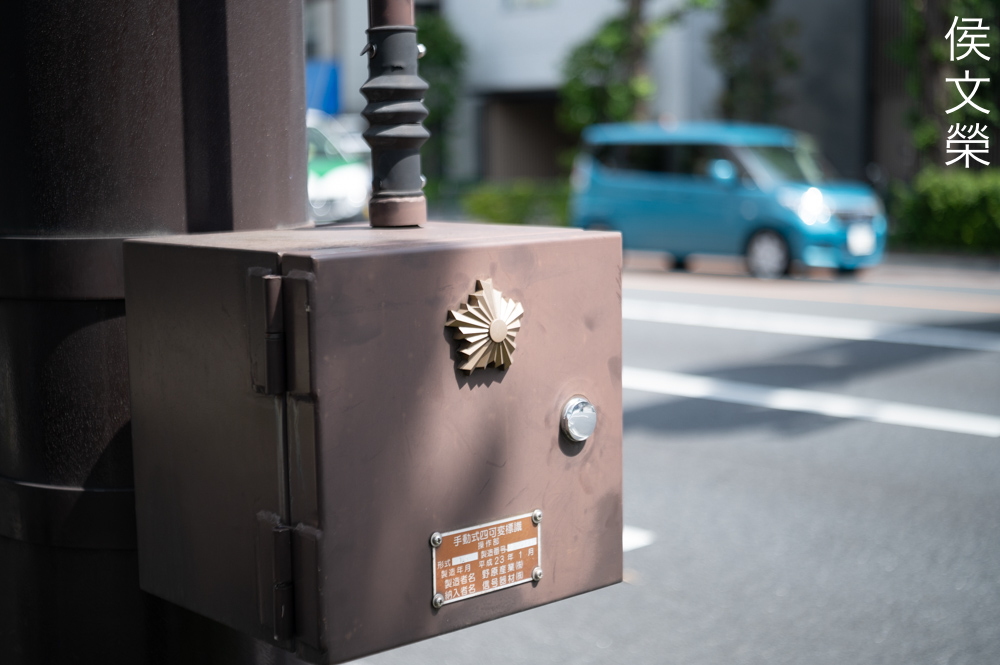
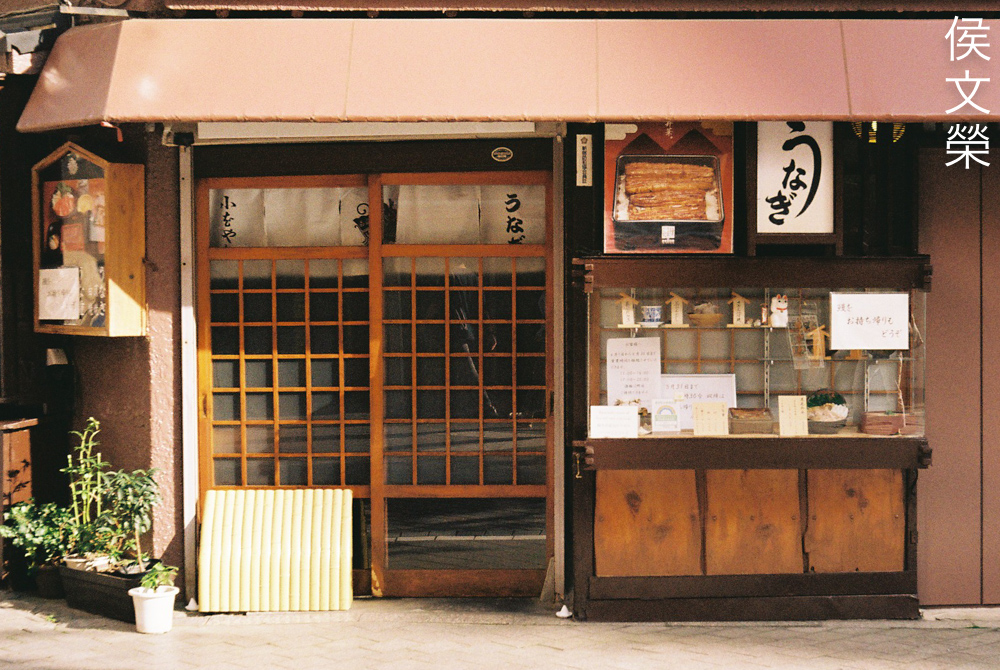
I love how high the contrast is with this lens, it’s something that many Carl Zeiss lenses have in common. You’ll get nice colors without the contrast and saturation being too-high as to make your photos look cartoonish.

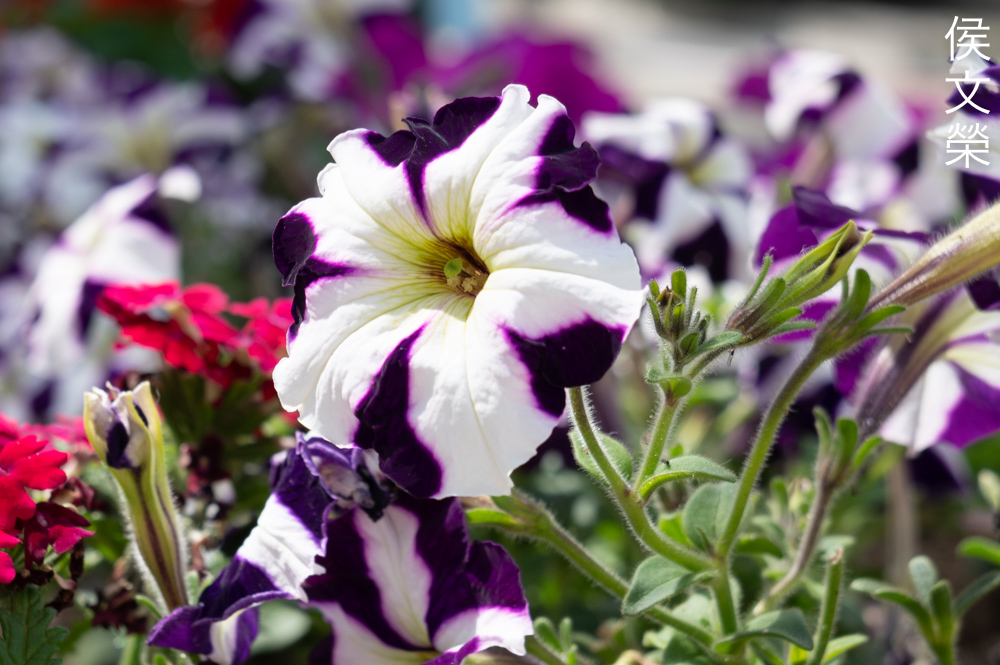
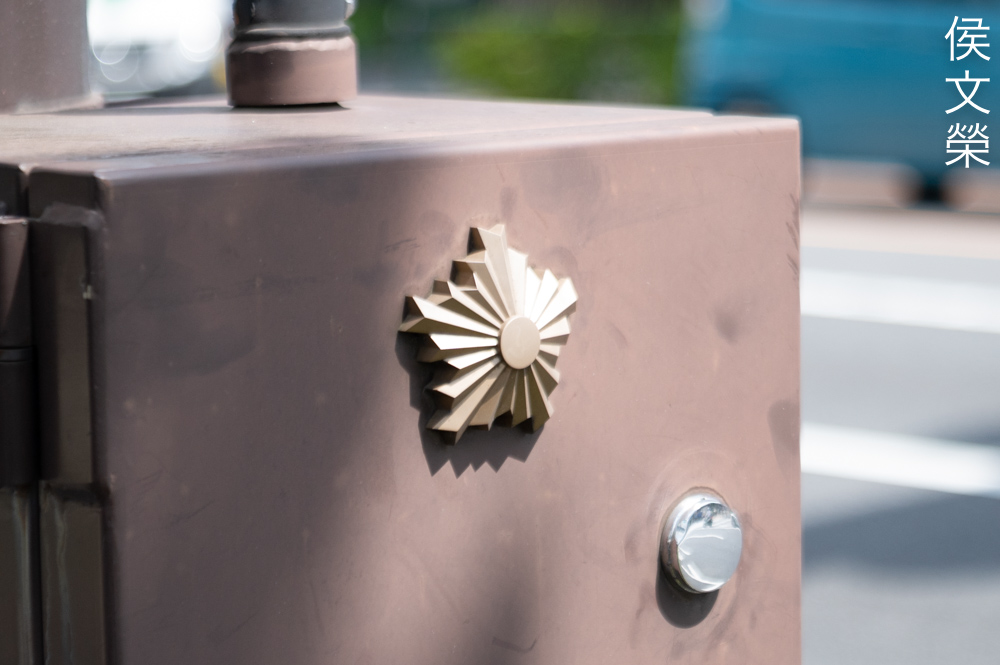
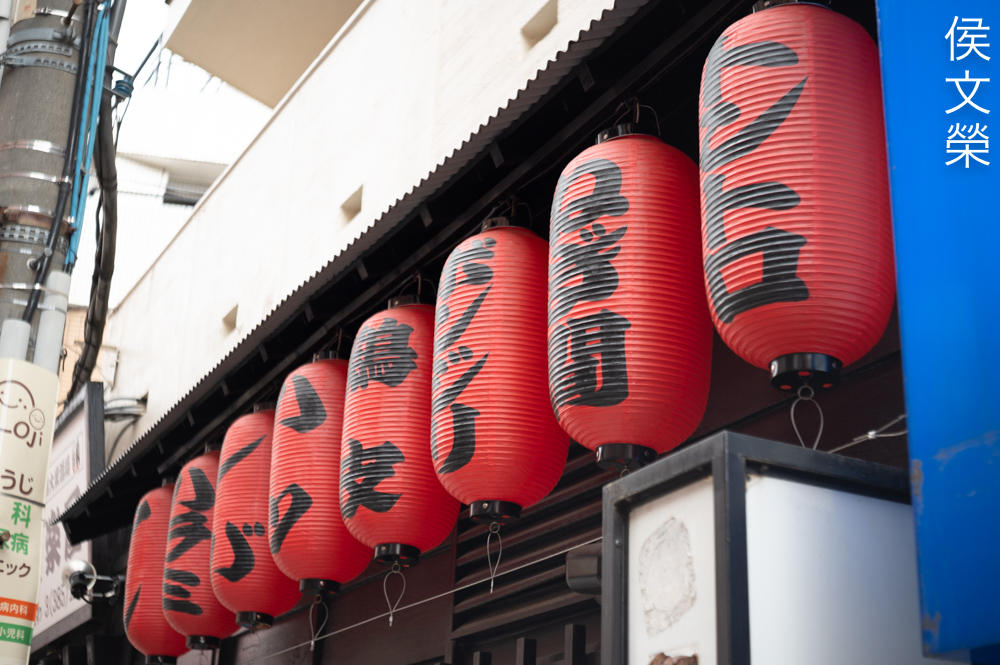
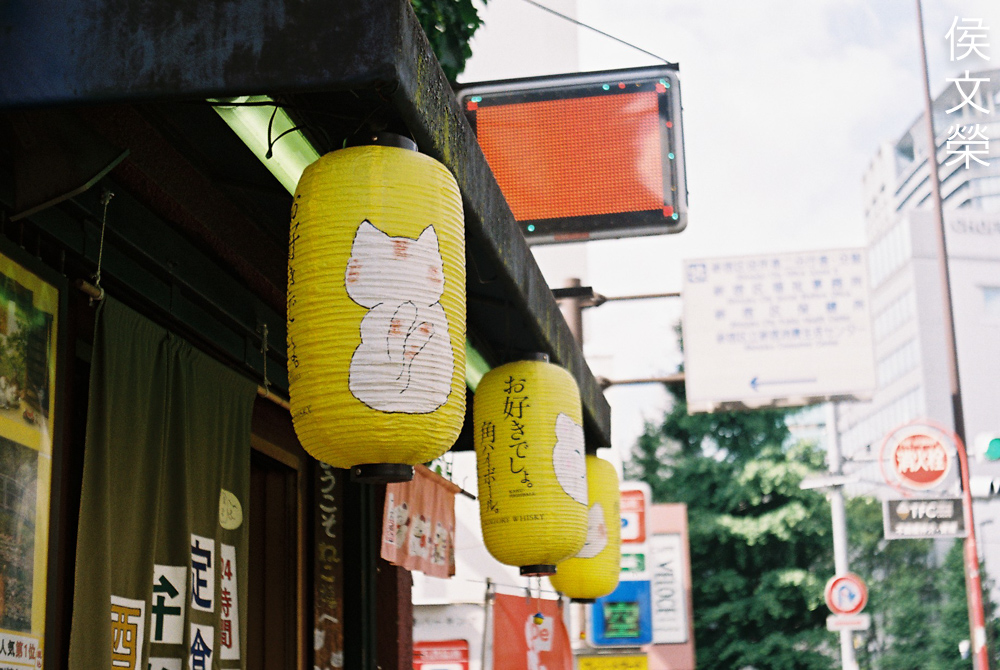
Here’s another photo to illustrate my point. It’s bold yet still refined at the same time. This lens has the ability to render exquisite photos with that elusive “x-factor”, it’s difficult to precisely point-out what makes it do what it does so I’ll just let the photos speak for it.

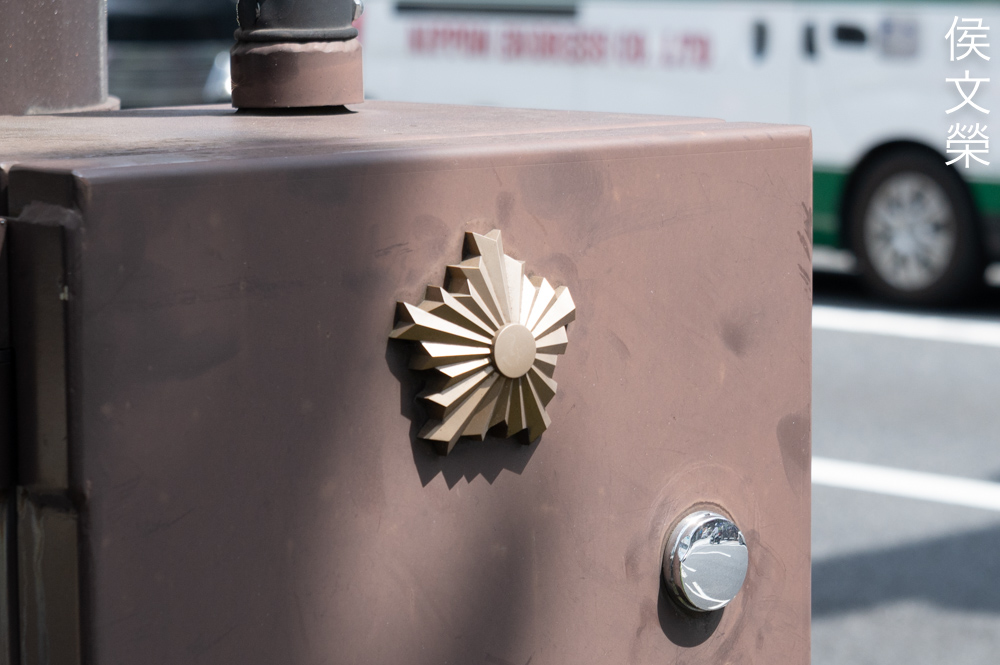
This is not the lens that you’ll want to use when shooting in lowlight scenarios, you’ll want a fast Carl Zeiss Jena Biotar 58mm f/2 for that which is also another amazing lens from the same era and manufacturer.

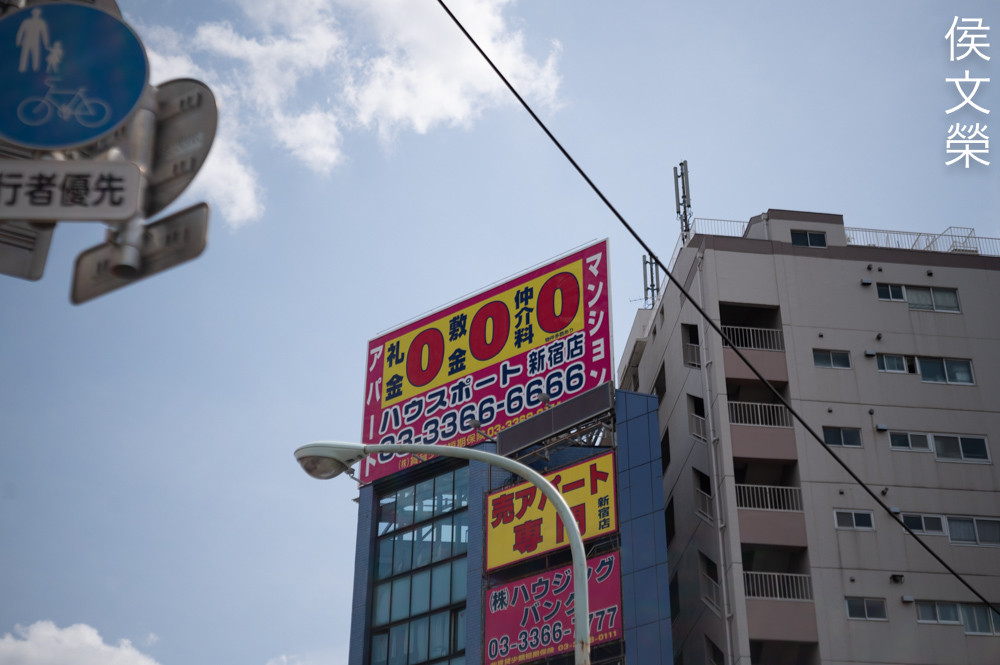
This is one of the few scenarios where you’ll see this lens show some chromatic aberration. To be fair, the cables do not show excessive amounts of it, I’ve seen worse even from lenses that were made in recent years.


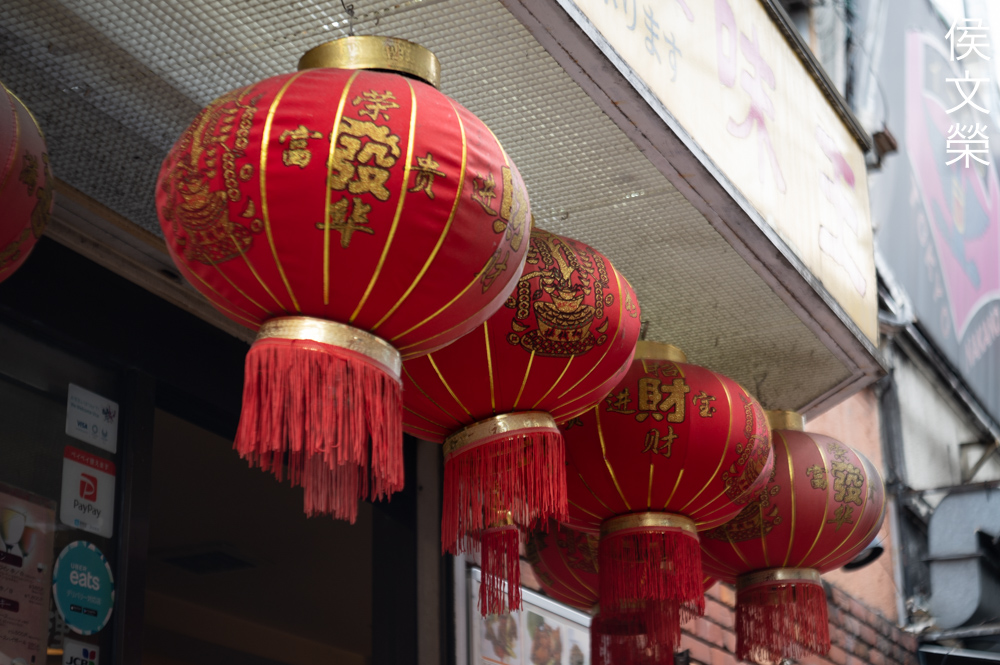

(Click to enlarge)
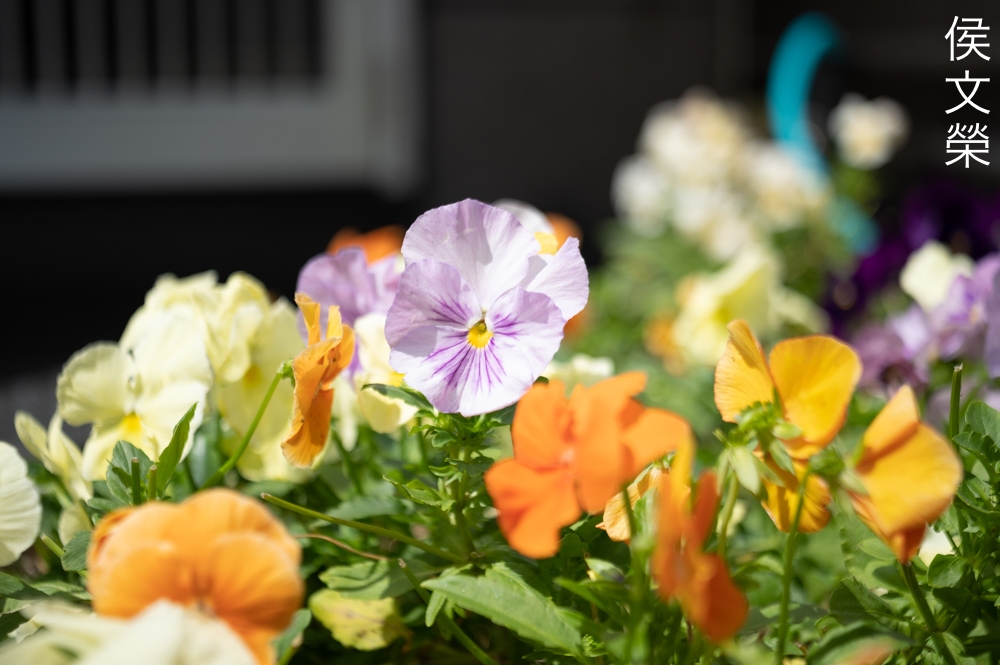
Here are more photos for you to observe. Despite being an old lens I think that it’s still viable for use today. This is not going to be useless anytime soon. If you’re shooting-style allows you to carefully work your scene then this lens is one of the best options you have if you want to shoot with a Carl Zeiss Jena lens.
Let’s now check some film photos. Film has a unique look that is hard to simulate with a digital camera thanks to grain. It reacts differently to light, this means that it could mask a lens’ flaws or amplify them. Since this was designed to be used with film, it’s best that we judge this using its intended medium.

This is overexposed. I shot this at f/5.6 if I remember it right. Overblown areas will “bloom” if you’re not careful so you will have to underexpose your scene in order to prevent that from happening.

It renders just as well with film and rightfully so since it was originally made for shooting with it. The tonality is smooth and deep, it renders like a true gentleman and not an “art” lens.

Here’s another photo showing how nice the tonality is despite shooting with a cheap film.
Of course, it’s absolutely sharp when shooting with film and the contrast is just as nice.
I’d avoid shooting this for lowlight situations even if you load it with a fast film, this isn’t the right tool for this. If you’re able to push your film then that may help you use a faster shutter speed but your viewfinder will still remain dark. The Contax D and many older M42 mount cameras have dark viewfinders and the maximum speed of f/3.5 just isn’t enough to give you a bright viewfinder for precise focusing.

When your scene is exposed properly you’re guaranteed to get nice tonality despite shooting with harsh-light. I think it is what makes this lens stand-above its contemporaries.
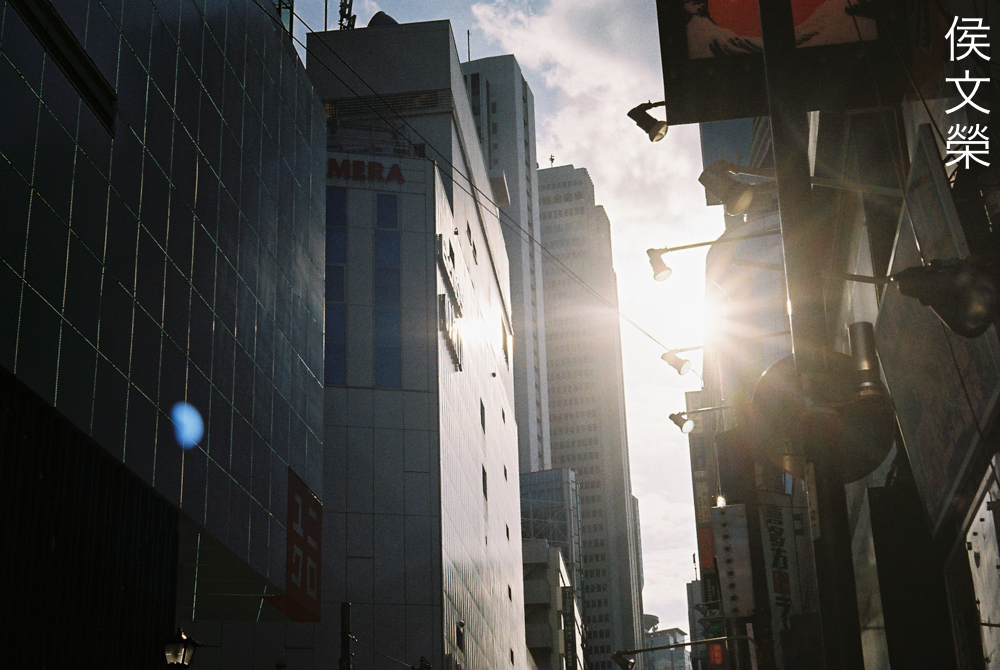
It’s a nice lens for travel photography so long as you have enough light to work with. You can use this for reportage or any other application where a 50mm lens is useful.
As with my photos that were shot with a digital camera you’ll still see overblown parts of your scene “bloom”. It won’t look bad since this lens handles it quite well, I could even argue that it adds another interesting layer to your photo.
Of course, you’ll still see that lonely blob if you have a bright source of light in your scene. The sun-star looks nice but it is not as well-defined because the iris has many leaves and is circular.


(Click to enlarge)
Here’s the rest of the roll. I enjoyed shooting with it a lot, it has that “vintage-feel” to its photos in a nice way instead of using that term to describe a photo that shows ugly artifacts that were shot with an old lens.
I highly recommend this lens to anybody looking for something fun to use with. This is certainly worth using if you are a professional portrait photographer, it’s a great lens for environmental photos where it’s slow operation isn’t going to be an issue. It’s hard to find another lens that renders like it. These aren’t expensive at all, I got mine for $80.00, maybe even less. Ones that come in excellent condition will cost even more but they should never cost more than $150.00. It’s certainly worth your time to look for one. If you’ve seen one be sure that all rings operate perfectly, the iris should also be clean and dry. It goes without saying that the glass has to be clean and clear. If you can buy it with the coatings still intact then that’s the best as the German coatings from this time are delicate and will be easily be removed merely by wiping it off. It’s hard to know if the coatings are untouched if you’re new to this so bring a friend with you. These are great lenses, owning one is like owning a part of Carl Zeiss’ heritage. You can never go wrong with this one.
Before We Begin:
If this is your first attempt at repairing a lens then I suggest that you see my previous posts regarding screws & drivers, grease and other things. Also read what I wrote about the tools that you’ll need to fix your Nikkors.
I suggest that you read these primers before you begin (for beginners):
Reading these should lessen the chance of ruining your lens if you are a novice. Before opening up anything, always look for other people who have done so in YouTube or the internet. Information is scarce, vague and scattered (that is why I started this) but you can still find some information if you search carefully.
I highly recommend that you read my working with helicoids post because this is very important and getting it wrong can ruin your day. If I can force you to read this, I would. It is that important!
For more advanced topics, you can read my fungus removal post as a start. It has a lot of useful information, it will be beneficial for you to read this.
Disassembly (Focusing Unit):
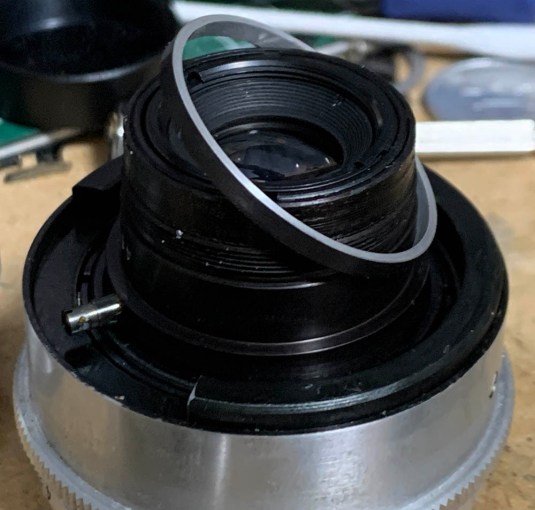
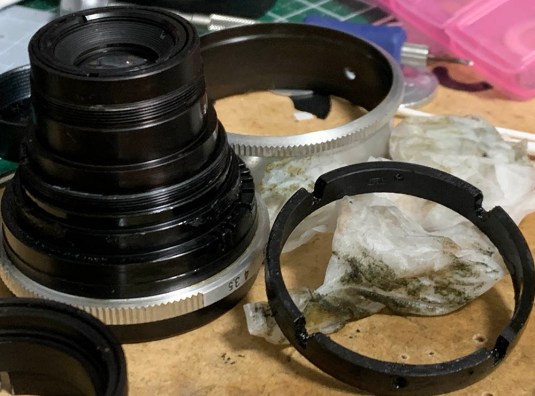
The construction is typical of many Carl Zeiss Jena lenses of the same vintage, which means you will have to remove a few things in order to separate the front barrel from focusing unit. It’s not complicated if all you want to do is to clean and lubricate the helicoids but it may get more involved if you need to do more like overhaul the objective. Since this is a setup where you could easily put the helicoids back in the wrong way be sure to measure the barrel before removing anything so you’ll know how tall the barrel should be when it’s set to infinity.
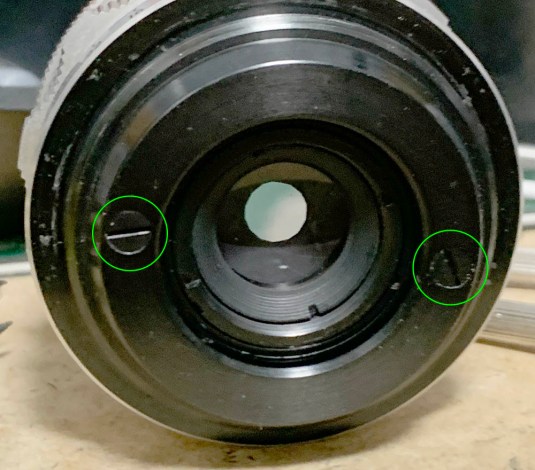
Extract these so you could separate the helicoids. These serve as helicoid keys so be careful not to damage these.

This is how they look. The shiny tips should be cleaned carefully since they’re the ones that contact the slots.
Separate the front barrel from the lower barrel and mark where the helicoids parted because this is also the same spot where they should mate. Many people forget to do this and waste plenty of time guessing where these should mesh. I wrote an article on working with helicoids to help prevent this from happening to you. Read it carefully and follow all of my tips.

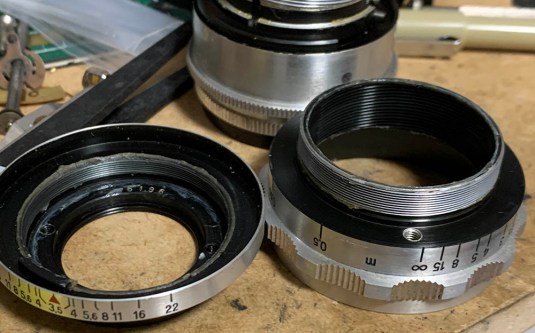
This helicoid is attached to the front barrel, unscrew its retainer so you could remove it. The retainer has been removed in this photo, it’s the widest ring in this part of the assembly.

Remove the helicoid and set the front barrel assembly aside.
Note that there’s a spacer here, be sure not to misplace it.

Extract this so you could separate the lower barrel to its basic components.
Unscrew the helicoids and don’t forget to note where they parted.
Scrub the helicoids with a strong toilet cleanser to remove the old grease then clean them well with alcohol to remove any residue. Polish the threads carefully so you won’t scratch them then use a grease with moderate resistance. Using a thick one will make it difficult to turn and a thin one will make it feel a bit gritty. Never apply excessive amounts, a thin film is enough. Put the helicoids back and measure them again to make sure that you’ve reinstalled them properly.
Disassembly (Front Barrel):
This is where things get more complicated. The front barrel houses all of the important and delicate assemblies. The iris mechanism is delicate and it can be a bit difficult to overhaul because it has many blades but if yours is oily or shows a bit of rust then it’s worth overhauling it the right way.
A word on cleaning the glass and they’re coatings. You should be careful when handling the glass because the coatings are so delicate, you can smudge it off even by touching it lightly. If you don’t need to wipe anything just leave it alone.

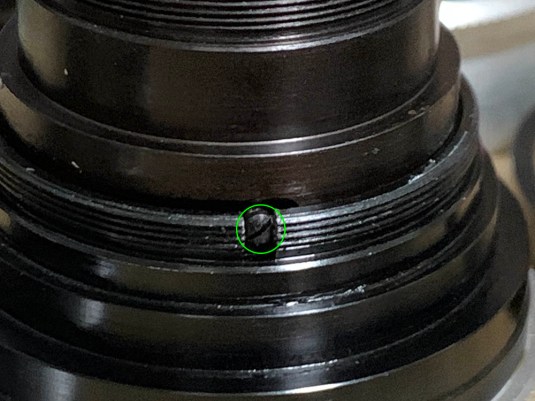
This screw is the main thing that centers everything and prevents the aperture ring from turning beyond its range. You can remove this later after a few more steps.

Extract these so you could remove the front barrel’s sleeve.

You’re now free to extract this screw safely.

Unscrew this retainer so you can remove the limiter ring. You’ll need a special opener for this because it’s narrow.
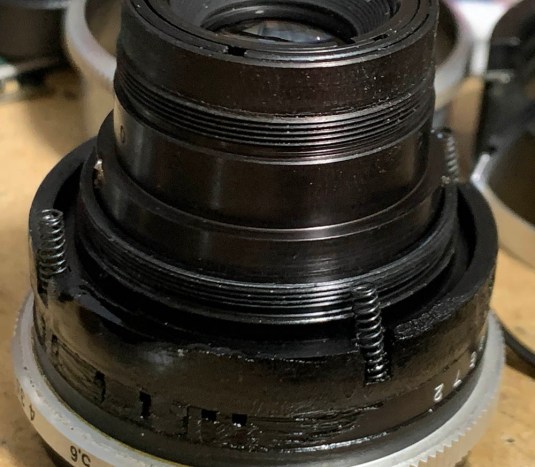
There are 4 springs here, be sure not to lose any. I usually apply a small amount of super-glue to these when it’s time to reassemble this part so they stay-put. Unlike more expensive Zeiss lenses from the same era these don’t have holes to support the springs.
Remove this ring and clean it very well.
Extract this to uncouple the aperture ring and the iris mechanism. It allows you to control the iris from the outside via the aperture ring.
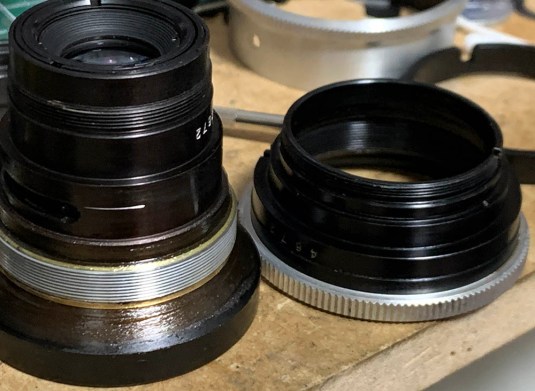
Unscrew the aperture ring from the housing of the objective but don’t forget to note its position first so you could put it back at the right height later..

The bezel and front baffle can be unscrewed with a rubber cup. Saturate the threads if it’s stuck, that should soften the seal up.
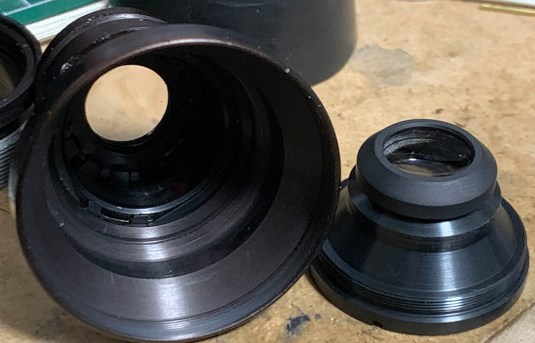
The front optics assemble can be unscrewed with a lens spanner and extracted with a lens sucker. Be careful not to scar or scratch the lip of the rear part.
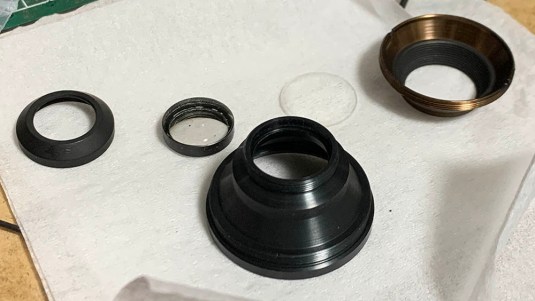
You can dismantle the front optics assembly further if needed in order to clean any fungus or huge chunks of dirt.

The rear optics group can be extracted after unscrewing the retainer. I don’t think there’s any need to remove the glass in order to clean this properly since both of its surfaces could be accessed while it’s still in its housing, unless it’s really dirty.
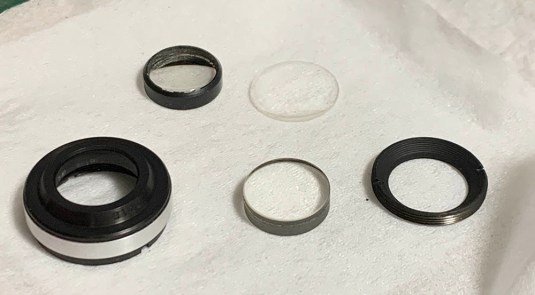
What you see here are all of the lens groups of the Tessar, the famous 4-elements-in-3-groups design.
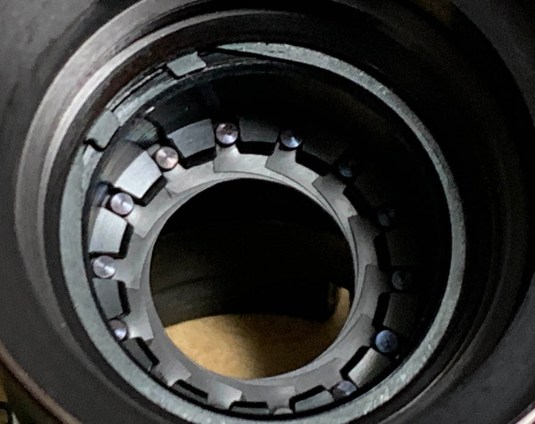
The iris mechanism is secured by this circlip, use a pair of tweezers to remove it.

Remove the diaphragm cup carefully so you won’t disturb the leaves.
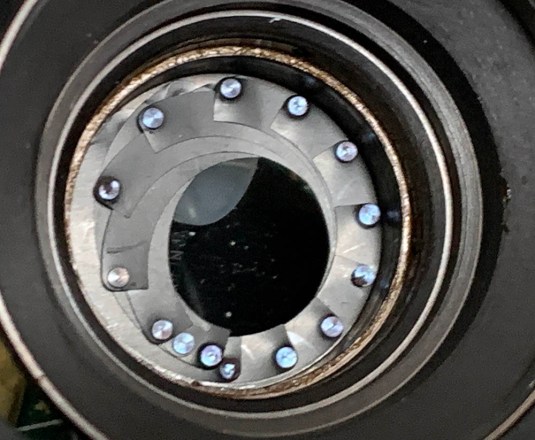
Carefully inspect the leaves so you’ll know how it looks like in order to put it back properly. Clean them carefully with a couple of Q-tips saturated with solvents to remove any oil and rust. Be sure not to warp and damage the pins. Remove the leaves in order to clean these properly, by the way.
Reassembling the iris mechanism will definitely take you some time specially if you’re not used to working with it. You will probably spend an hour on it if you’re a novice. You do not need to lubricate anything here apart from the threads of the aperture ring and the slots of the preset-mechanism, you’ll only need to apply a very thin film of grease and that should be enough. Applying excessive amounts will only result in an oily iris in the future which is an even bigger issue.
Avoid any mechanical contact with the glass if they’re coated, blow any dirt off and that should be enough. If your lens has fungus read my article on how to clean lens fungus so you will know how this is done. Dilute the solution well so it’s not going to damage the glass.
Conclusion:
I enjoyed servicing this lens a lot even if this is the 2nd time that I did it. Everything was made precisely by-hand so the fit is amazing. It took me the whole night to overhaul this completely, most of that time was spent cleaning the spoiled grease and assembling the iris mechanism. Now that you’ve seen how tedious the job is you should know that this isn’t a job for beginners. If your lens needs to be serviced send it to a professional, they should have the knowledge and the tools in order to service this properly. It’s not worth the risk, if you want to practice just start with a cheap Soviet lens, a Canon may even be a good candidate to butcher if all you need is to learn how to repair lenses.

Since this was adjusted at the factory to focus precisely at infinity there’s no need to adjust it if you’ve reassembled the helicoids properly. There are no adjustment points anyway, if you’re not able to focus properly to infinity then the lens was reassembled incorrectly. If you want to know more about adjusting a lens’ focus read my article on how to adjust a lens’ focus, that article should show you how it’s done in a DIY setting with tools that are available to you.
Thanks for following my work, if you liked this article please share this with your friends so it will get more views. This site earns around $0.40 a day, we are totally reliant on views. You can also support this site, it helps me offset the cost of maintenance and hosting. You’re also helping me purchase, process and scan film. This site promotes the use of film so we are all in this together. See you again in the next article, Ric.
Help Support this Blog:
Maintaining this requires resources and a lot of time. If you think that it has helped you or you want to show your support by helping with the site’s upkeep, you can make a small donation to my paypal.com at richardHaw888@gmail.com. Money isn’t my prime motivation for this blog and I believe that I have enough to run this but you can help me make this site (and the companion facebook page) grow.
Buy me a roll of film or a burger?
Thank you very much for your continued support!
$2.00
Helping support this site will ensure that this will be kept going as long as I have the time and energy for this. I would appreciate it if you just leave out your name or details like your country’s name or other information so that the donations will totally be anonymous. This is a labor of love and I intend to keep it that way for as long as I can. Ric.

Dec 06, 2021 @ 13:35:37
One of the reason I love my Exaktas is that I cam use all the wonderful Carl Jena lenses that I picked for a song years ago when people looked down on them because they weren’t “real” Zeiss.” Hello, Zeiss started in Jena not Suttgart. Any way, Zeiss Jena was the very best optical manufacturer in the entire Warsaw Pact. Great optics were an absolute necessity for the Soviet war machine.
Jan 07, 2022 @ 18:23:18
Hi! This guide seems really useful. I would like to ask what product would you recommend for cleaning the metal barrel pieces, the plastic inside pieces, and the glasses of the lens. Thanks a lot!
Jan 02, 2023 @ 12:49:18
Thanks for the great instructions. I only needed to disassemble to clean out the old grease that made turning the focus nearly impossible. The only problem I had was the focus scale is just slightly off now. When focussed to infinity the arrow is between 50m and the infinity symbol. Exakta Mount.
Aug 29, 2025 @ 06:31:06
Thank you for your work.
While the 3.5 vs. 2.8 version appears to have been a budget version, many users report that opening the Tessar to 2.8 compromised sharpness. (You are one of them in these pages!)
I wish to add that Voigtländer with their Tessar clone Skopar did the same to a similar outcome.