
Hello, everybody! I am not a watch aficionado, I am sure that many of you aren’t, too. Many of us know the names Seiko, Citizen, Bulova and Rado but there’s only one name that stands-out from them all – Rolex. It is a brand bring into mind tradition, quality and luxury. Even young children know about the name. There are a few names in this world that has such an impact. Today, I will introduce to you once such name, it’s not going to be as powerful as the name Rolex for the common man but it certainly has a strong presence in the hearts of many photographers – the Noct.
Introduction:
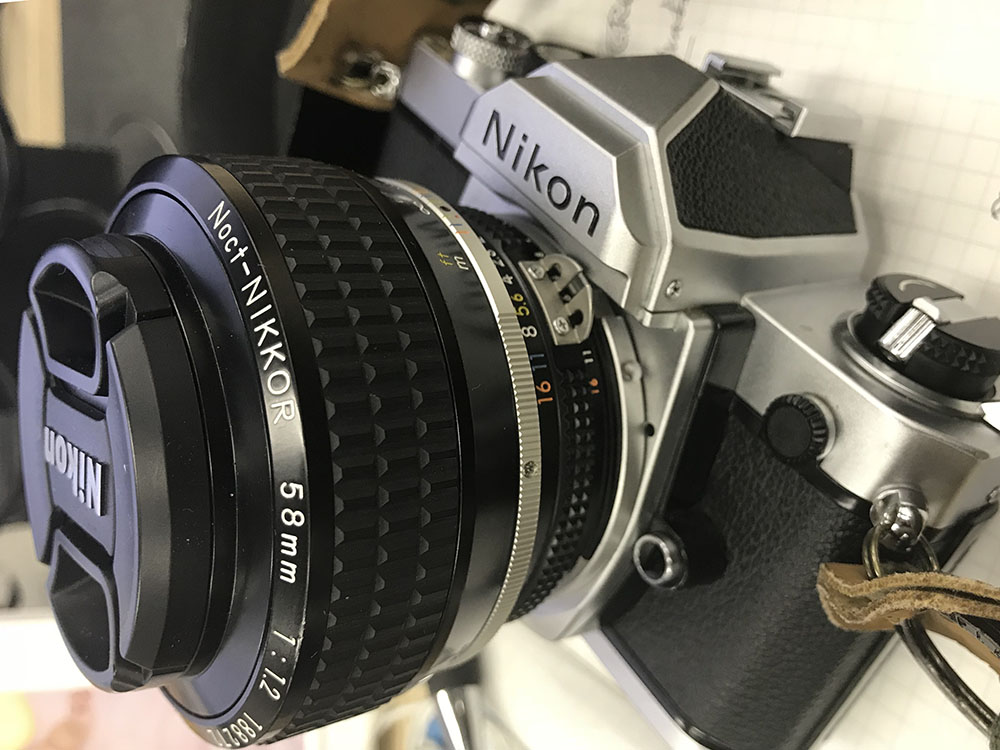
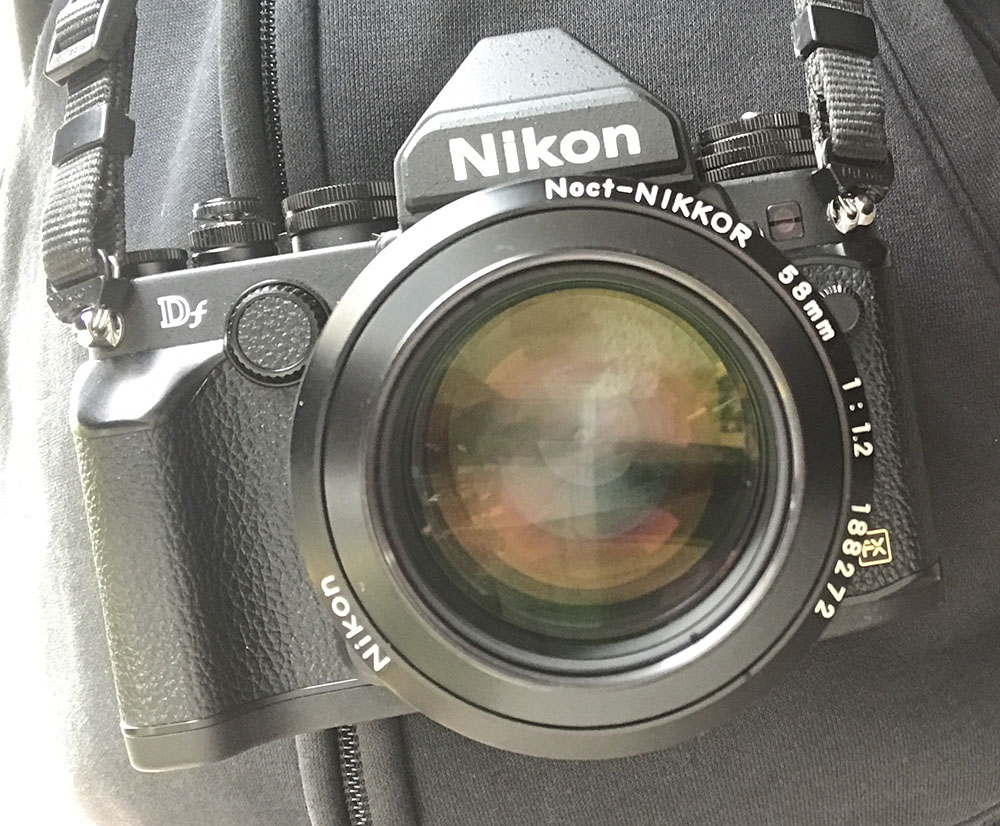
The legendary Noct-Nikkor 58mm f/1.2 Ai-S was sold from 1981 to 1998. It’s a legendary lens that many people dream of shooting with. Most of that has to do with the “religion” that was built around it. It’s an updated lens, its predecessor, the Noct-Nikkor 58mm f/1.2 Ai needed an Ai-S update so this lens came into existence. Both are special lenses made for astrophotography and for shooting at lowlight. They were optimized for the dark and their names made it obvious.

When paired with a Nikon Df you’re able to shoot in really-dark places like a candle-lit room with ease. What’s so special about this is it renders point-lights at corners beautifully, with minimal coma. Coma will make your point-lights at the corners look smeared, the only way to avoid this is to stop the iris down. You’ll lose plenty of light by doing this so this lens was designed to give you less of it wide-open. It also has some of the smoothest bokeh quality you’ll ever see from a Nikkor of its time and the corner performance is pretty good, too. It was a game-changer when it came it and it instantly acquired a legendary-status.
It has a 7-elements-in-6-groups design, something that it inherited from the older Noct-Nikkor 58mm f/1.2 Ai. It looks simple but one of the elements is aspherical which had to be hand-ground so yield is quite low. This and a few other things make it a low-volume product. Compared to the older lens it has a new barrel, 9-bladed iris and better coatings. Both perform identically in the optical sense so there’s no senses comparing them.

It was Nikon’s king-of-the-night until the Nikkor Z 58mm f/0.95 S Noct was released. it’s the spiritual successor to this magnificent lens and a worthy one, too. Despite that, it still fares favorably at the corners compared to a lot of fast lenses. It renders beautifully, too. Something that the other lenses fail to do despite being sharper. This is an optical masterpiece even by recent standards.

The front is aspherical as evident in its visible curvature. It allows this to negate coma and other aberrations, they’re not eliminated completely but at least they’re at lower levels than what’s normal for other fast lenses. Despite all that, Nikon managed to keep the 52mm filter-size which is a big-deal. The engineers could’ve made it bigger and had an easier time but they pushed and gave us the best that they could.
But why 58mm? For a time, it was difficult to design fast “normal” lenses for the F-mount because the flapping mirror is in-the-way. The best solution was to employ an old trick, making the focal-length longer. It was done with the Nikkor-S 5.8cm f/1.4 during the early days of the F-mount, its first fast “normal” lens that could reach f/1.4. Since 58mm has already been a familiar focal-length for Nikon it was only natural to use it. It is also the closest one that mimics what your eyes could see. Try looking-through a 100% viewfinder with a 58mm lens, it will be closer to what your other eye could see.
Film photographers will enjoy it the most since the bright aperture will allow the use of slower film. This is its real calling. People won’t appreciate it much until they’ve realized how it was to shoot film in the old days. It’s not an issue these days since digital cameras have insane performance at high-ISO.

Here it is with the Nikkor 50mm f/1.2 Ai-S and the New-Nikkor 55mm f/1.2. These are Nikon’s brightest lenses as far as “normal” lenses for the F-mount is concerned. These are all great lenses and they render differently, this is why it’s hard to compare these in one paragraph. To put it shortly, it’s not as sharp as the Nikkor 50mm f/1.2 Ai-S in the center but it retains the dreamy-look of the New-Nikkor 55mm f/1.2. Compared to these it has what I consider to be the best performance at the corners.
Knowing how your lens performs is key to maximizing it. You’ll know its strengths and weaknesses. This will help you decide if a lens is right for the job or not. I shot these from f/1.2, f/2, f/2.8, f/4 and f/5.6 because we will see the most changes happen within these apertures. I also assume that most people will want to shoot with it at these apertures, too. I shot these with a Nikon Z6 to see how it performs with a modern high-MP sensor.
(Click to enlarge)
Vignetting is quite high wide-open specially at the extremities. It improves drastically by f/2 where you’ll only see traces of it and it’s gone from f/2.8. If this bothers you just stop the iris down by a bit, it improves nicely at f/1.4 or somewhere around that.
There’s some distortion which is a bit high for a “normal” lens but not too much to distract or disorient you. It is still usable for shooting architecture at this level but not if the lines are parallel to the edges of the frame.


(Click to enlarge)
It’s resistant to flare and ghosts as far as I could see but you’ll still get blobs in your scene if you’re not careful. Note the very high amount of chromatic aberration.


(Click to enlarge)
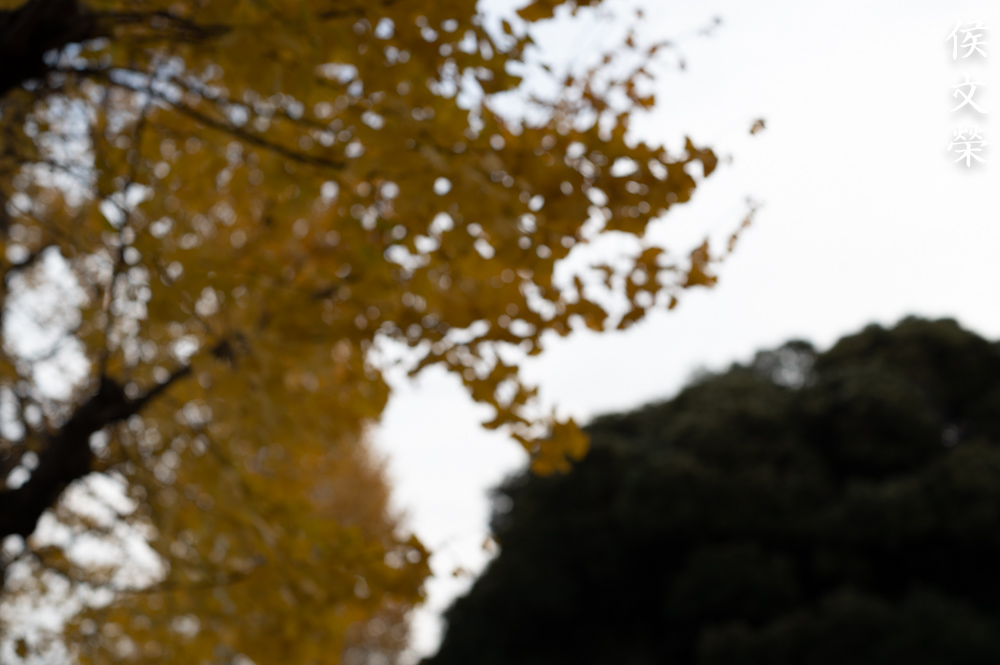
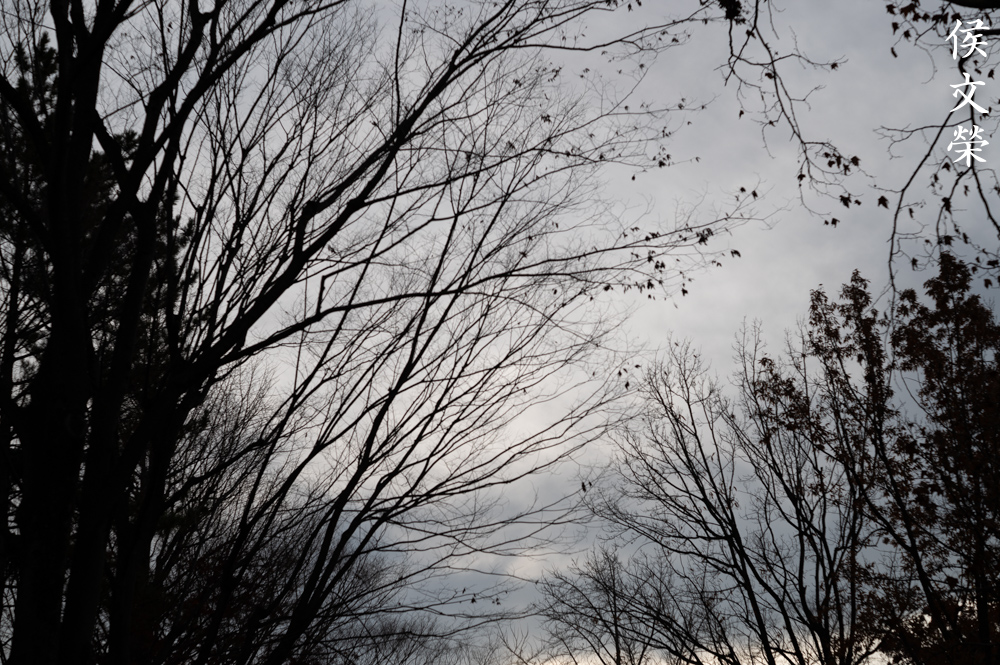
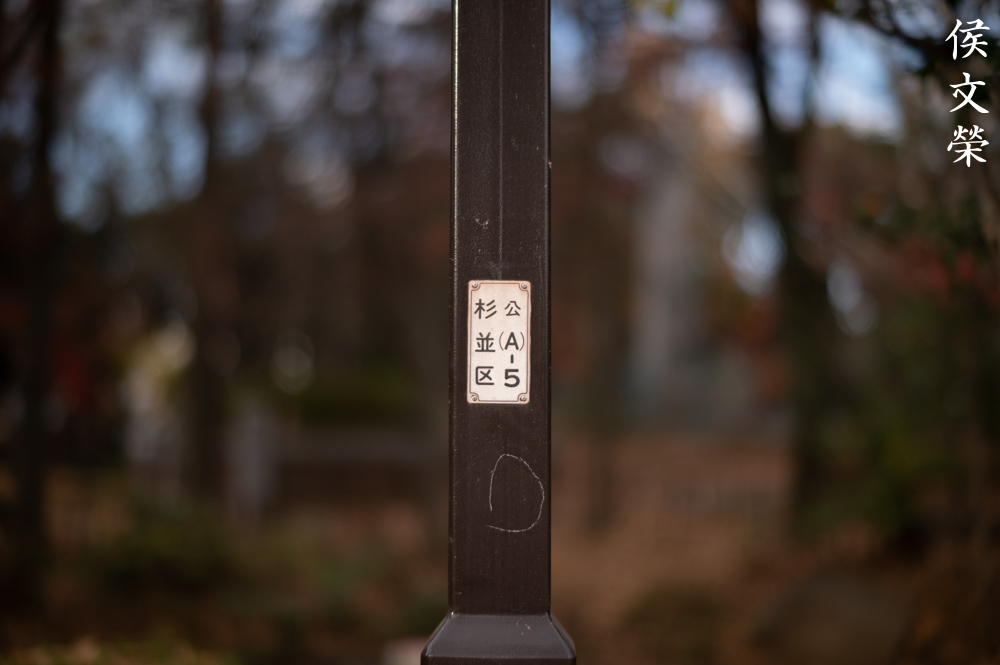
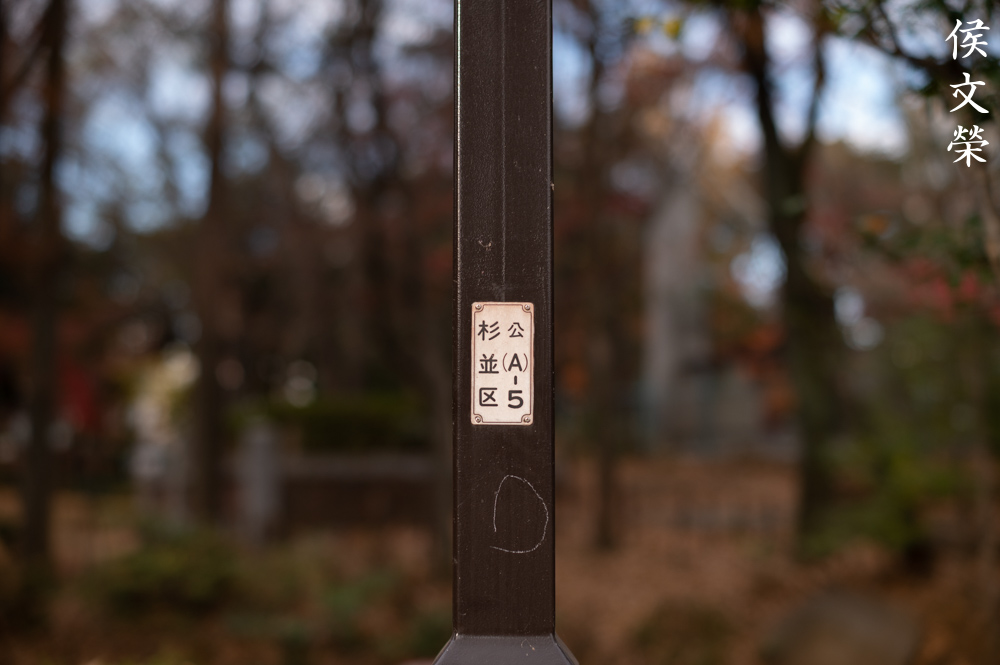
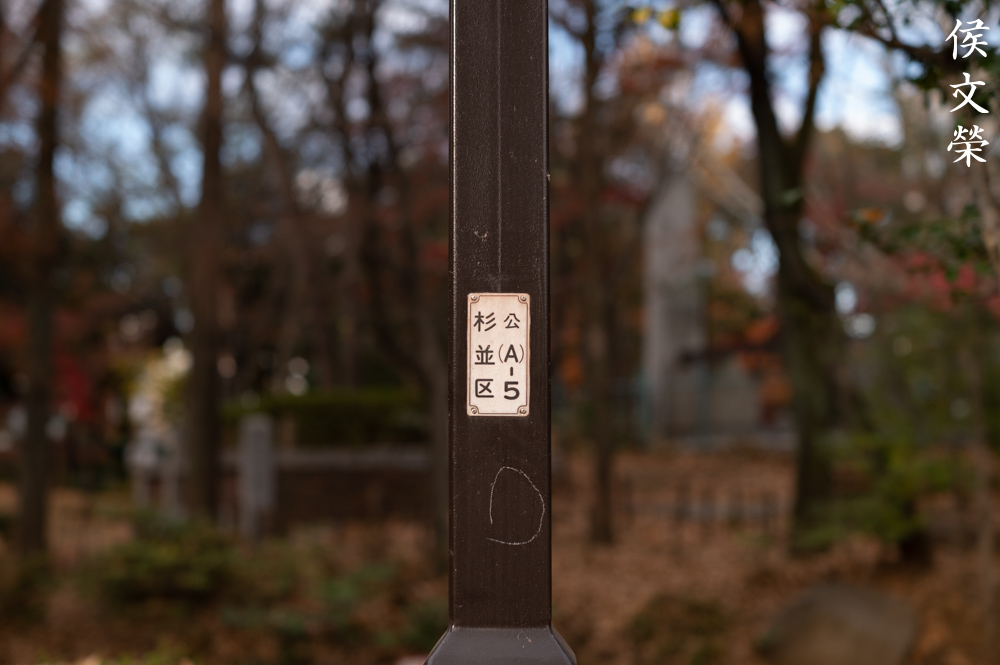
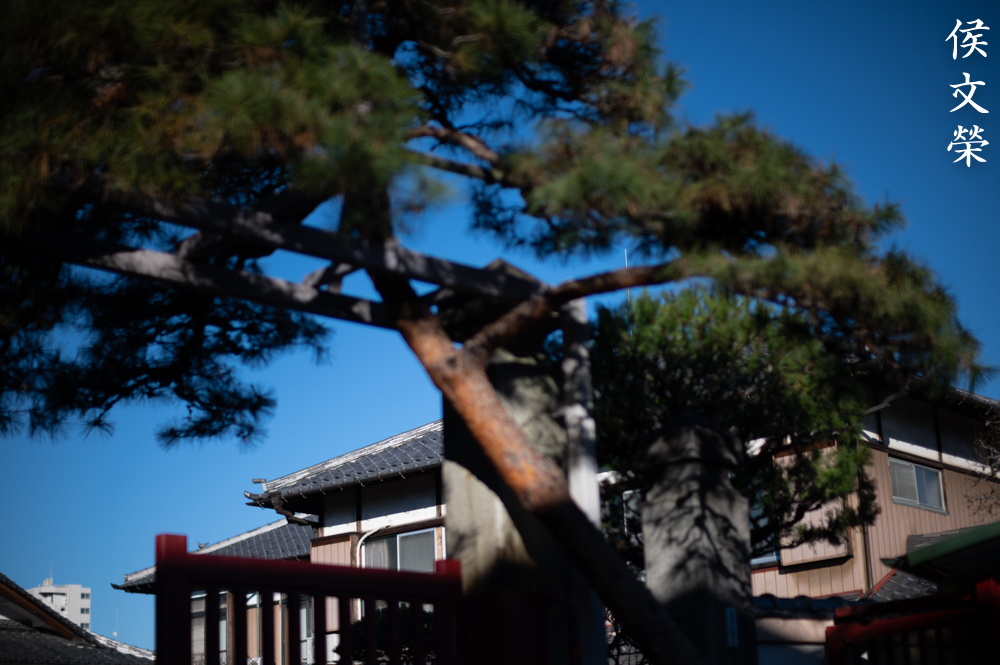
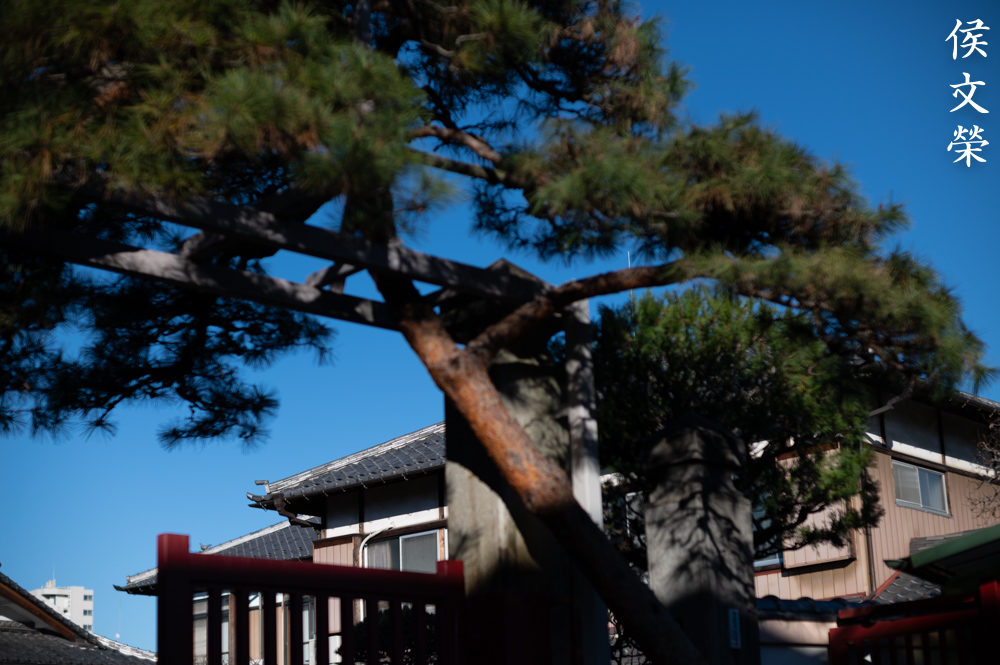
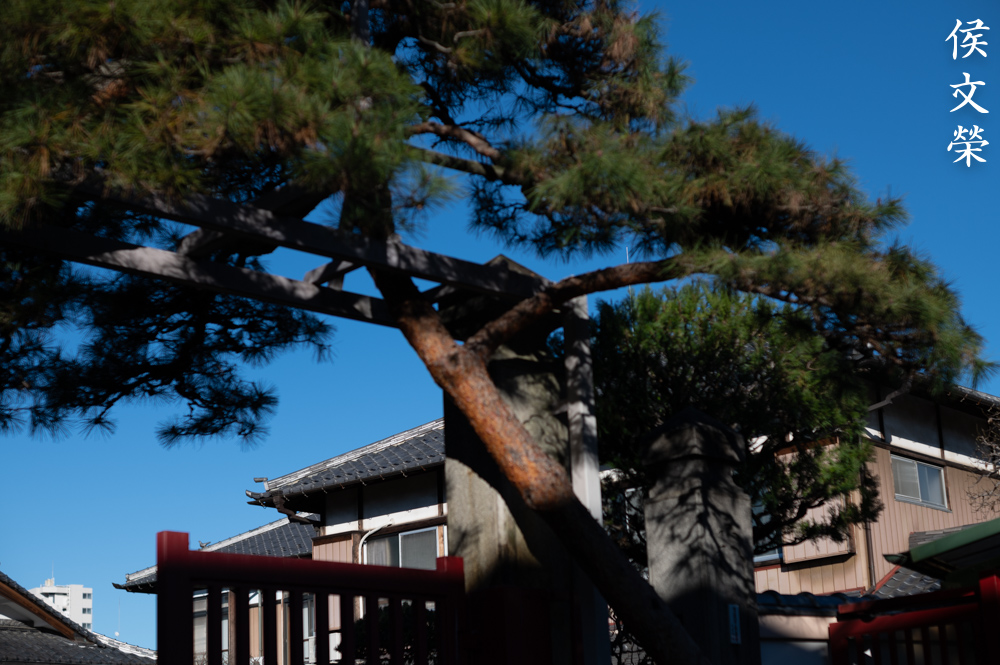
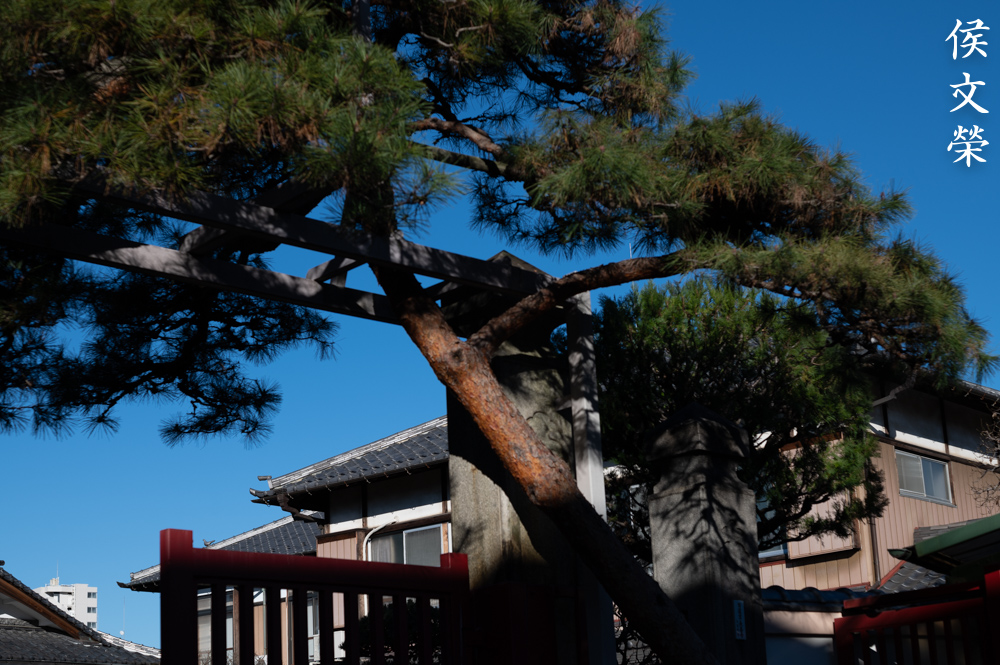
It has some of the smoothest bokeh quality you’ll ever see from a Nikkor. Twigs and foliage renders great with minimal artifacts and no roughness.

This is a tough scene to render but we didn’t get any ugly smears or rough details.


(Click to enlarge)
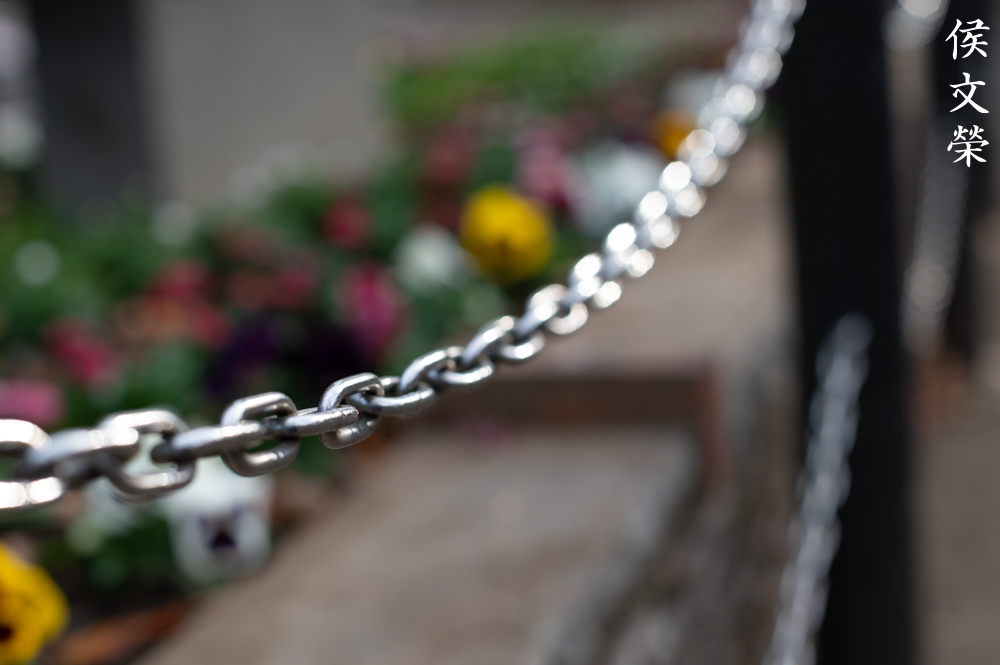
Chromatic aberration is kind of high wide-open at overblown areas or parts of the frame with high-contrast. It is mostly-gone by f/2 and you’ll only see traces of it at f/2.8 and only at areas of the frame where it’s bad. It’s an annoyance but this shouldn’t be an issue when shooting in the dark.


(Click to enlarge)
Coma is well-corrected even wide-open. It’s not gone but it’s a lot better compared to its peers. You won’t see any “wings” here, just slightly-deformed blobs. I didn’t seem to change much when stopped-down to f/2 which I find unusual, the point-lights still look deformed. It looks a lot better by f/2.8 where the point-lights now look like what they should be, points-of-lights. You’ll start to see sun-stars at f/4 and they look gorgeous by f/5.6.
This is a tight-crop at the extreme-corner. While coma isn’t eliminated totally it’s controlled quite well so you’ll see less of it. Stopping it down to f/1.4 makes it even better. This is the reason why this lens was made and this is what we should be talking about when it comes to this lens.
(Click to enlarge)
Here’s an example next to a tight-crop from the Nikkor-S.C 55mm f/1.2 Auto to give it some context. Note that the one from the latter exhibits uncorrected coma compared to the sample from this lens. It’s not perfect but I would prefer looking at the deformed-blobs rather than the wild, “wing-like” aberration we see here. Seeing this comparison made it easier to appreciate the AF-S Nikkor 58mm f/1.4G since it could correct coma better, it is even better than this lens. You could say that it really is the successor to the Noct-Nikkor 58mm f/1.2 Ai-S in this regard even if the designer doesn’t claim it to be.


(Click to enlarge)
It’s kind of soft at the center wide-open at closer distances and the corners look a bit worse. Despite that, this is still quite good compared to other lenses of its time. It performs better as you focus further where you’ll get acceptable to good results even at f/1.2. Flare, spherical aberration and lack of resolution contributes to this. It gets a lot better at f/2 where the center starts to look excellent and the corners begin to look a lot nicer. You’re going to notice a jump in resolving power which helps make the frame a lot sharper. Contrast improves quite a lot as well and the “hazy-look” is mostly gone at this point. The center is operating near its peak by f/2.8 and the corner is just behind by about 2/3 of a stop. The extremities look great at f/4 and the center looks amazing. You won’t see much of a difference at the center by stopping the iris down but the corners improve by a little bit. What’s frustrating is chromatic aberration will only go-away by f/5.6 at worst-case scenarios but it should be gone by f/2.8 in most cases. At least the purple-fringing is mostly-gone by f/2.8 which is a relief.


(Click to enlarge)
It’s worth noting that it’s tricky to focus with it even and that also contributes to blurry results. If you’re using this lens be sure to shoot with it stopped-down when you’re not using a tripod. Even if you are, it can be hard to focus with it accurately unless you’re using a mirrorless camera or shooting with Live-View. Despite that, it could give impressive results, some of the best in the corners that I have seen from a 1980s lens.

It renders beautifully, you’ll get softness and sharpness in the same photo, making it look delicate. It balances both aspects very well. This is impressive, most refined indeed.
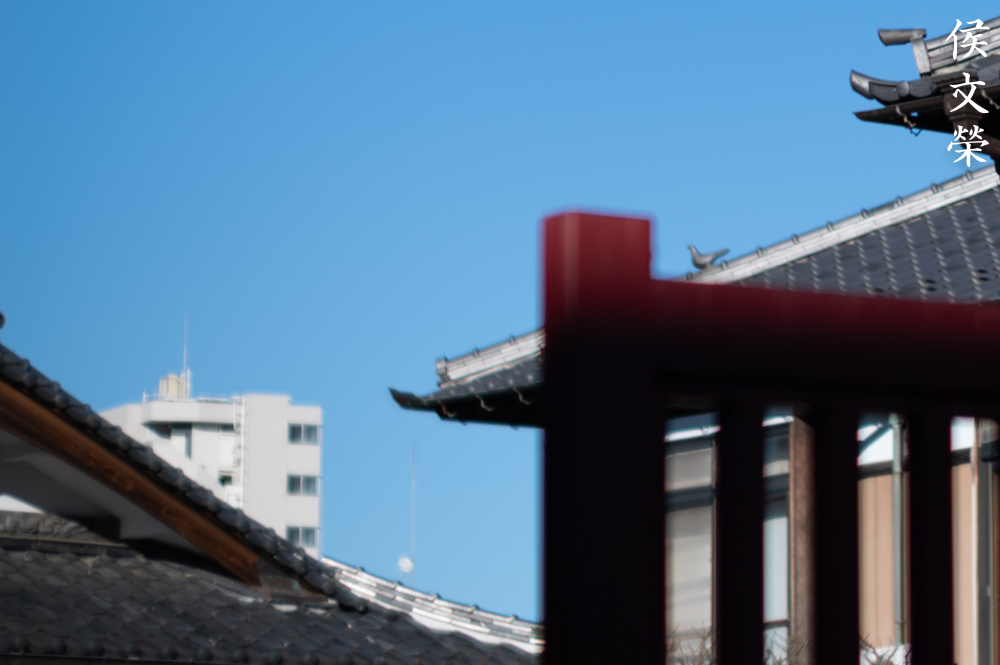
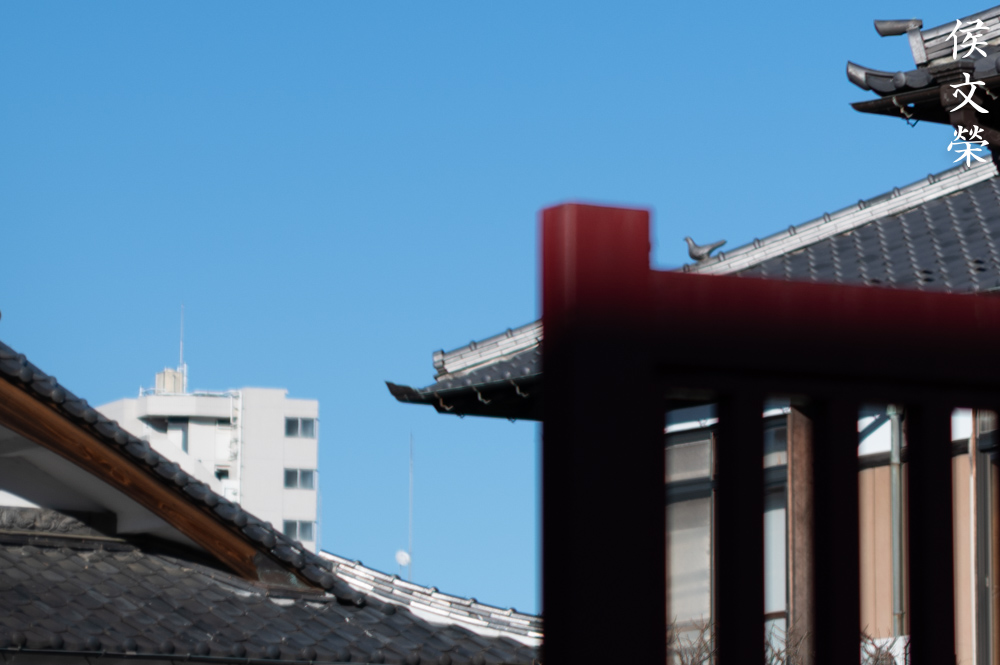
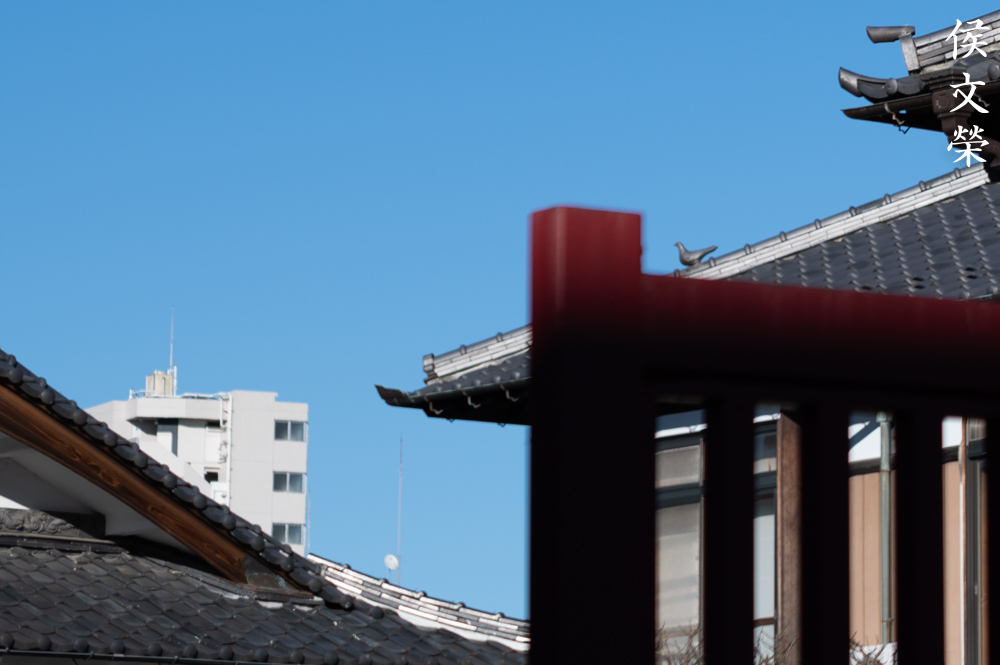
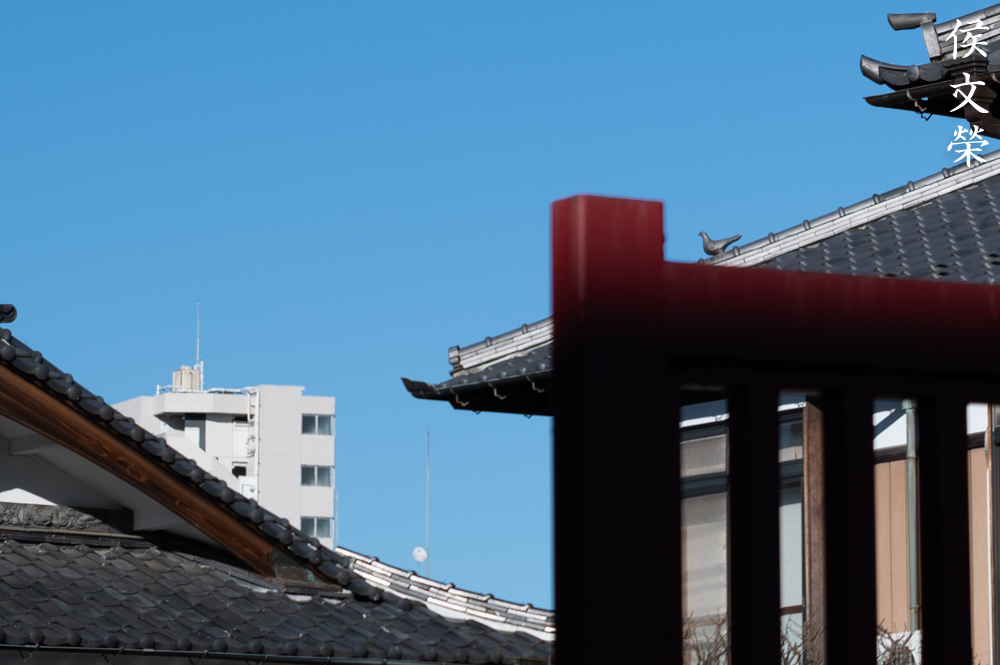
The photos below were shot with my Nikon Df. It’s a very good pair when shooting at night, the fast aperture speed of this lens works very well with this camera and its amazing sensor.


(Click to enlarge)
It renders delicately wide-open. Focusing is difficult specially with moving subjects. It takes a lot of practice to get it right and even more patience to get to that mindset. If sharpness in the center is what you want, you will want the Nikkor 50mm f/1.2 Ai-S instead. This one is quite sharp as well and the corners look better even wide-open. Like I said, it’s hard to compare these as they were made for different purposes.

The thin depth-of-field is very addictive. It’s capable of taking photos with a dreamy-look wide-open. You can use this creatively for portraiture. The background melts into a wash-of-colors and looks painterly.


(Click to enlarge)
It flares quite a bit but not worse than other lenses. You’ll get sharp photos from f/2 while retaining a shallow depth-of-field which helps with subject-isolation.

It’s amazing sharpness at f/2.8 allows you to render things in beautiful detail. You’ll get a mix of sharpness and softness at this aperture which is great for portraiture.

Subject-isolation is amazing, it feels like you’re shooting with a tilt-shift lens at f/2.8, it’s sharp where focused.

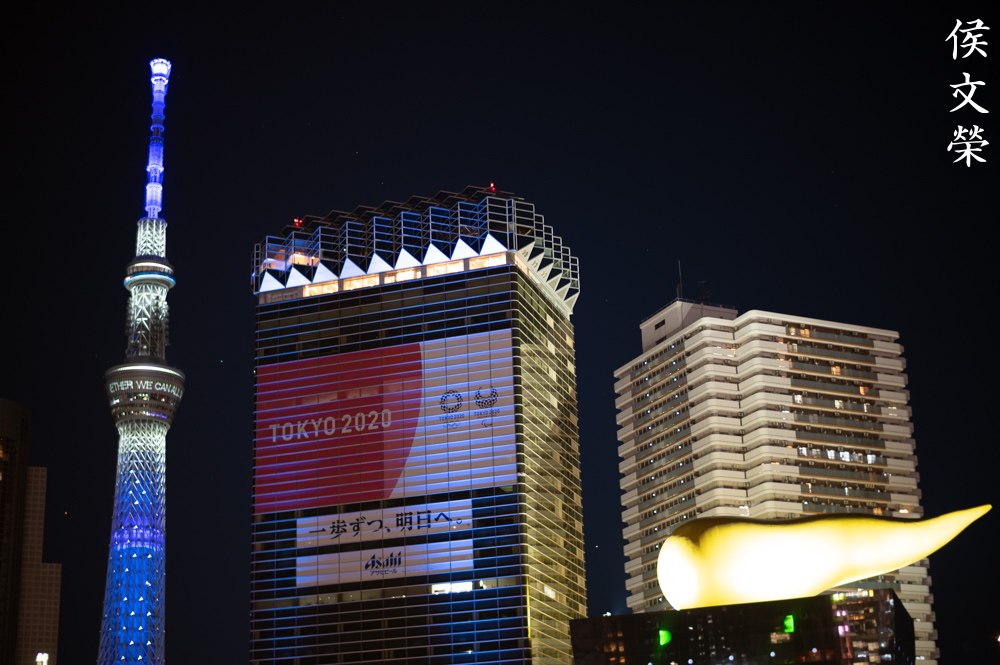
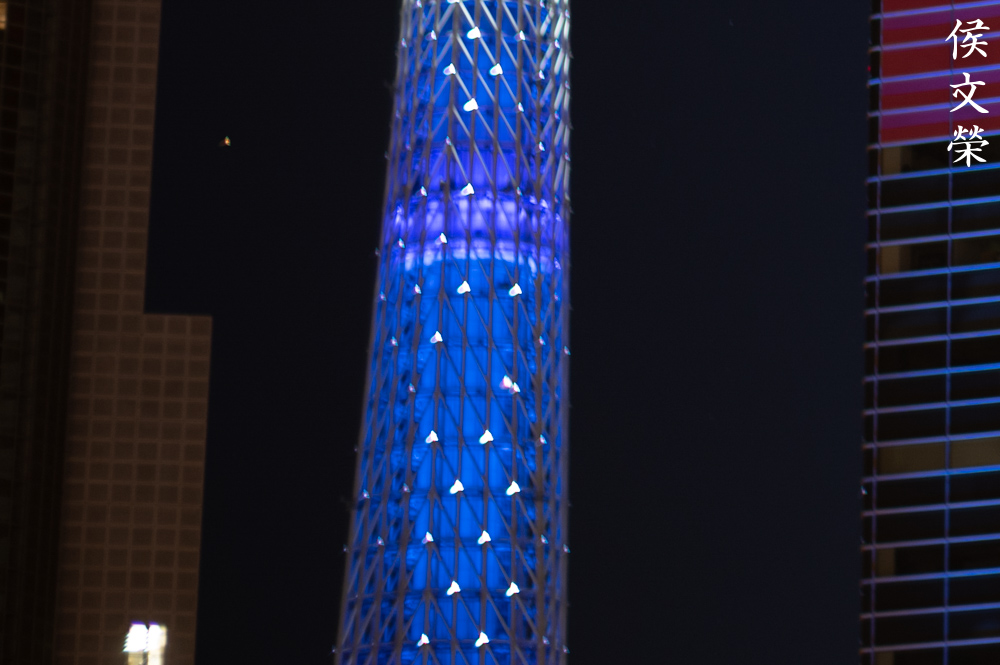
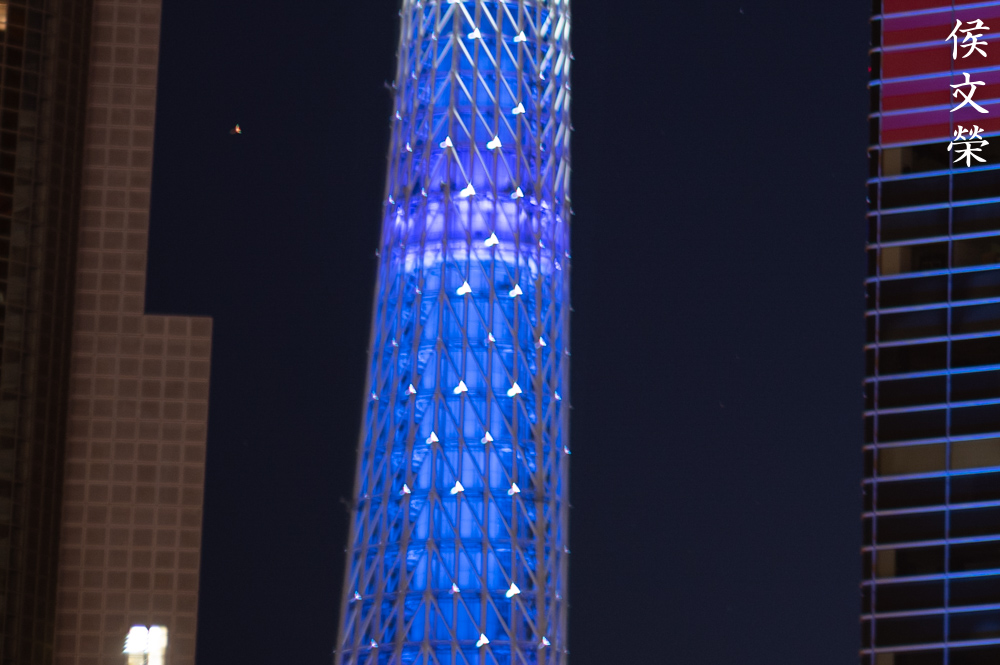
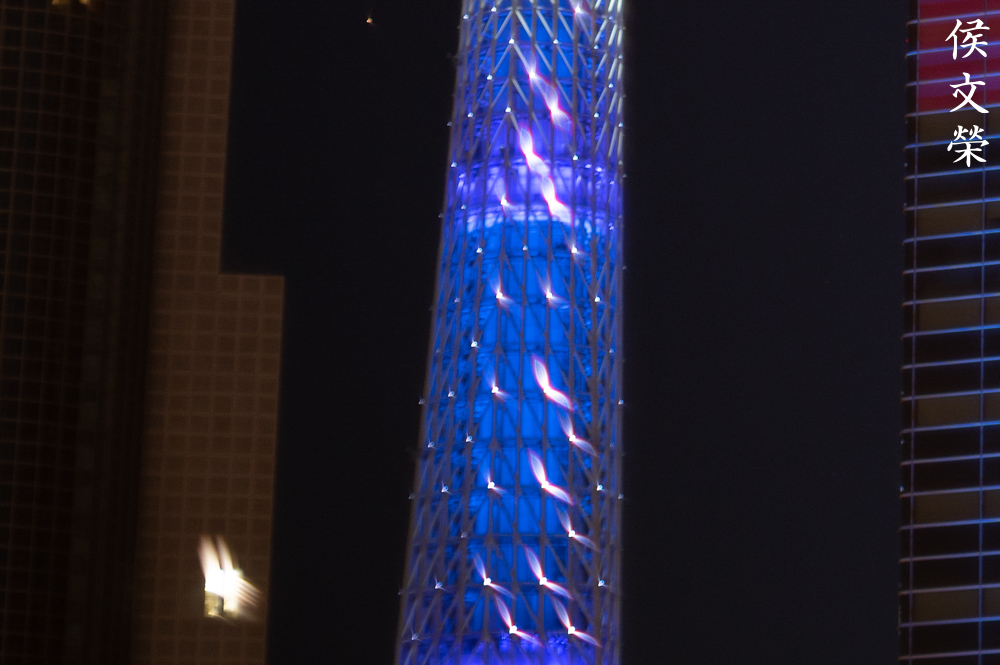
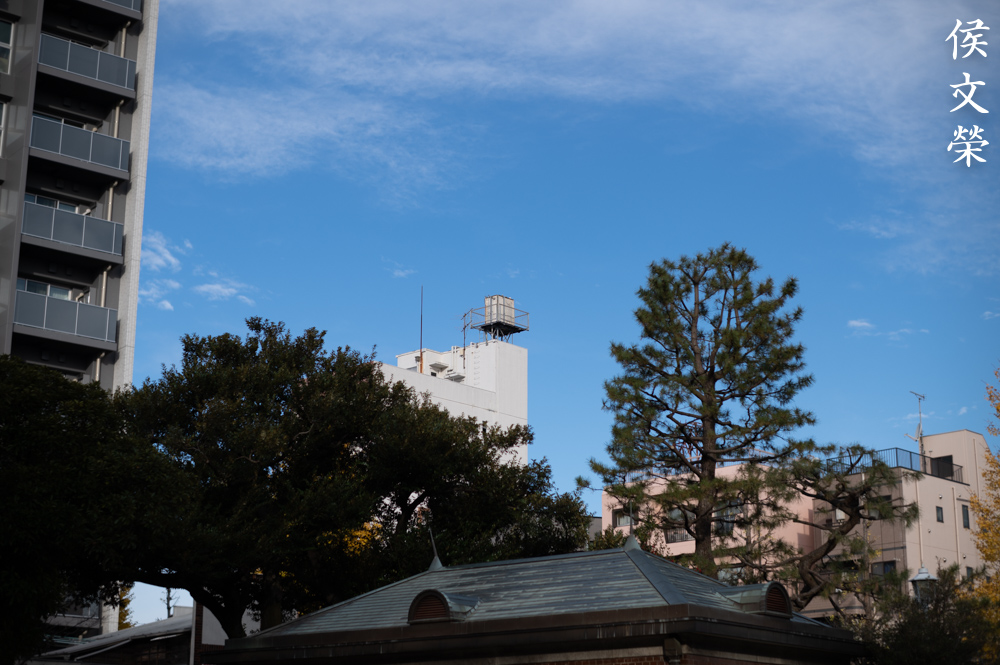
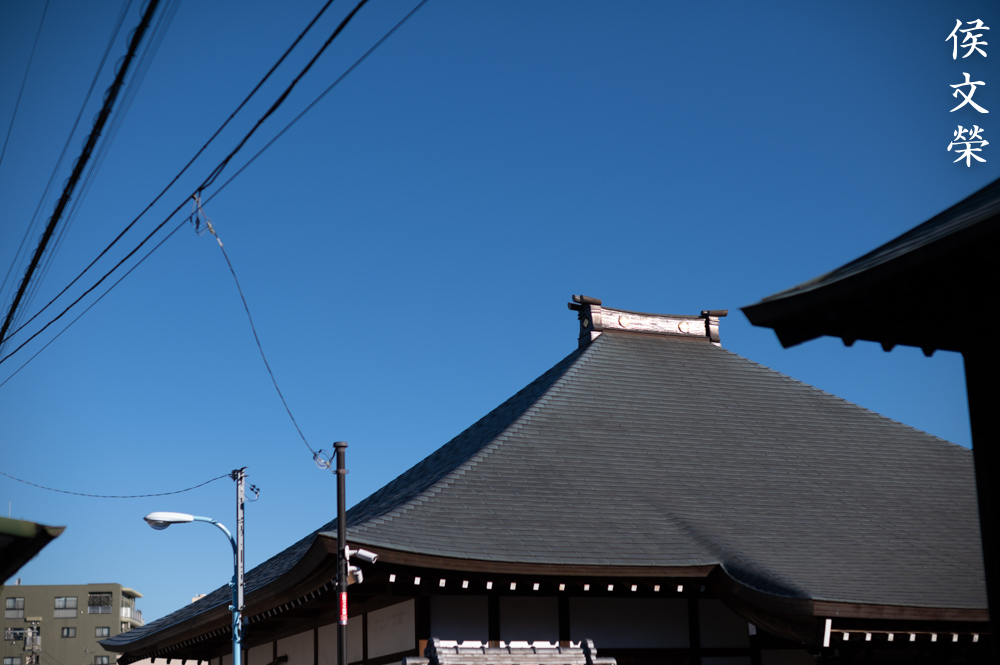
Shooting it at night is what this lens is all about. It renders night-scenes exquisitely. Notice the impression of depth you’ll get from it.
I wanted to see how it performs with a modern high-MP sensor so I shot some photos with it using a Nikon Z6. It has in-body stabilization which helps me get sharper photos at night.

It renders beautifully at night, some of the best that I have seen. Being able to take sharp photos at wide-open apertures makes this the perfect lens for nighttime photography.

Shooting at night means that chromatic aberration won’t be as obvious, that’s probably why the engineers did not focus on that since correcting coma is a higher priority.

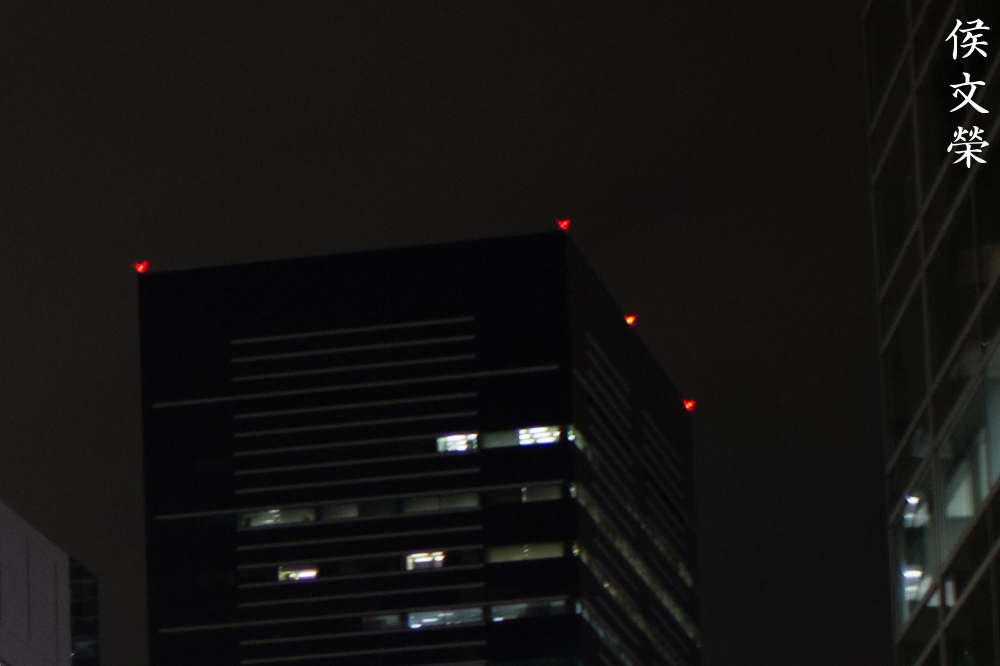
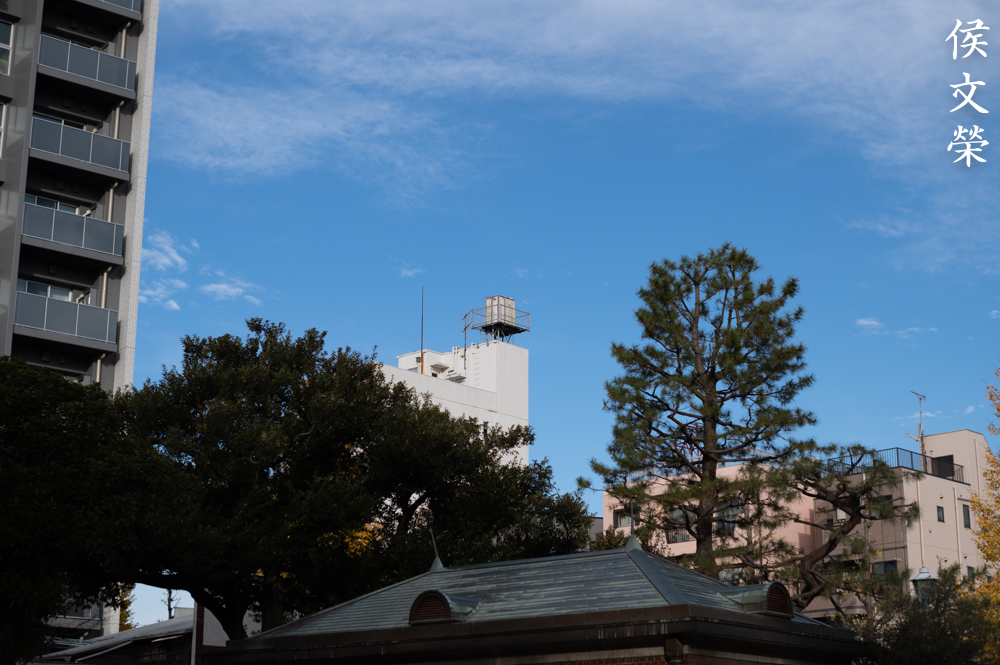
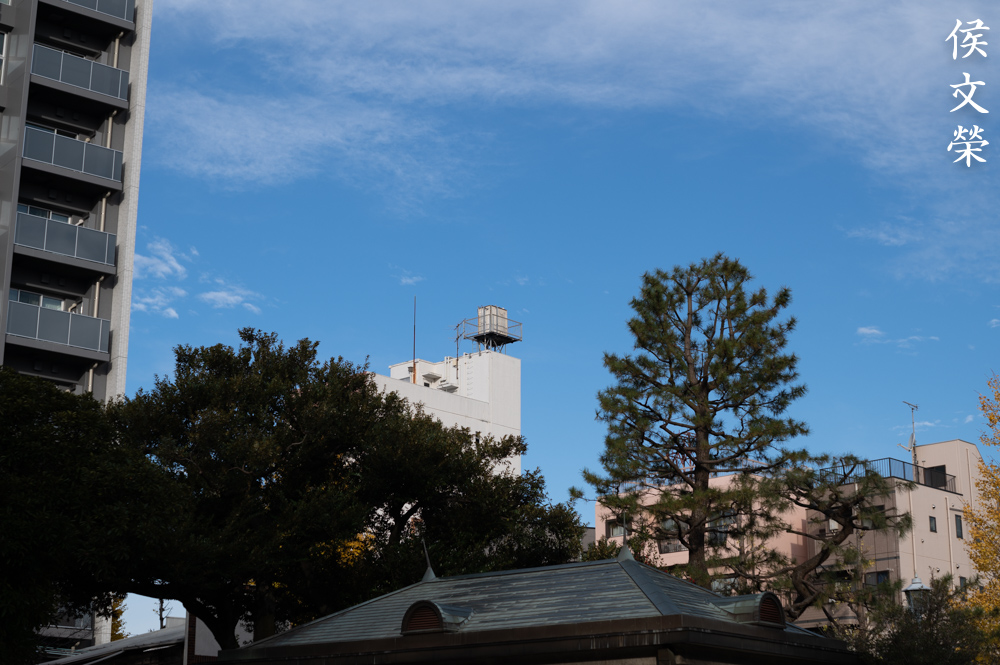
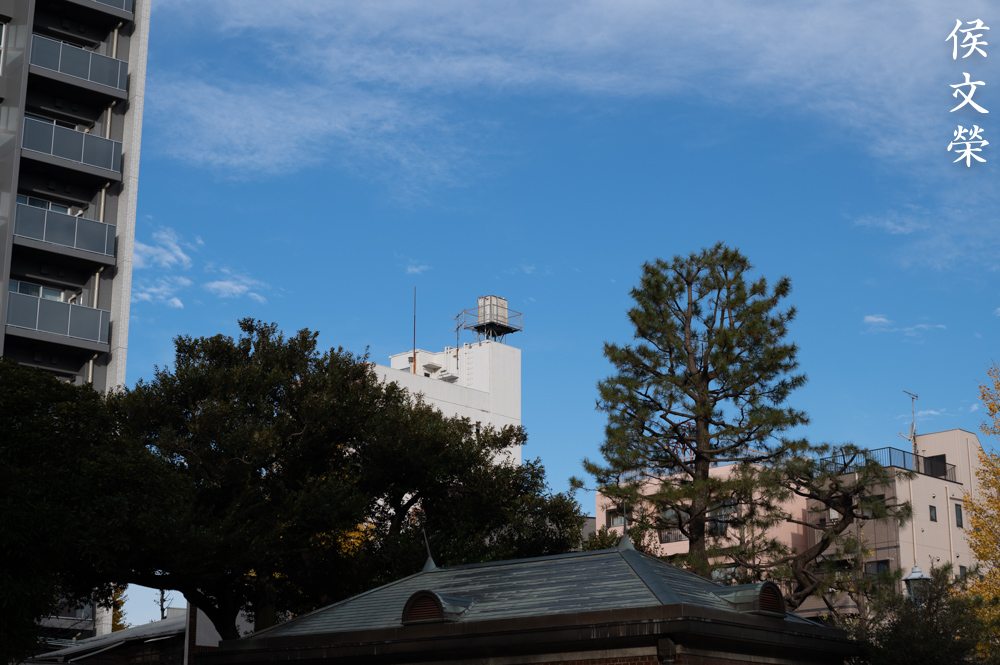
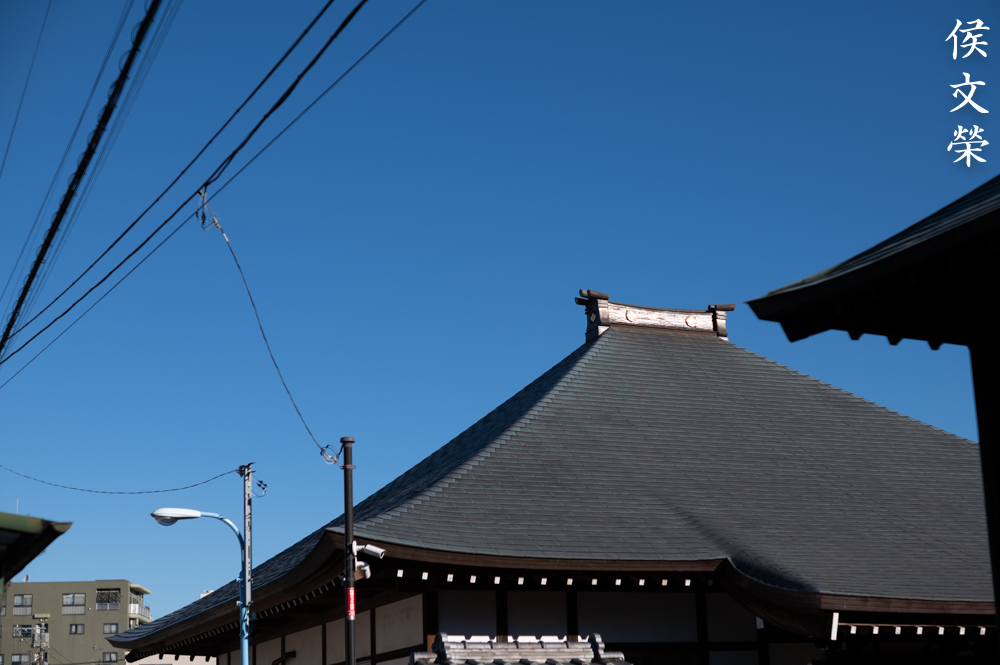
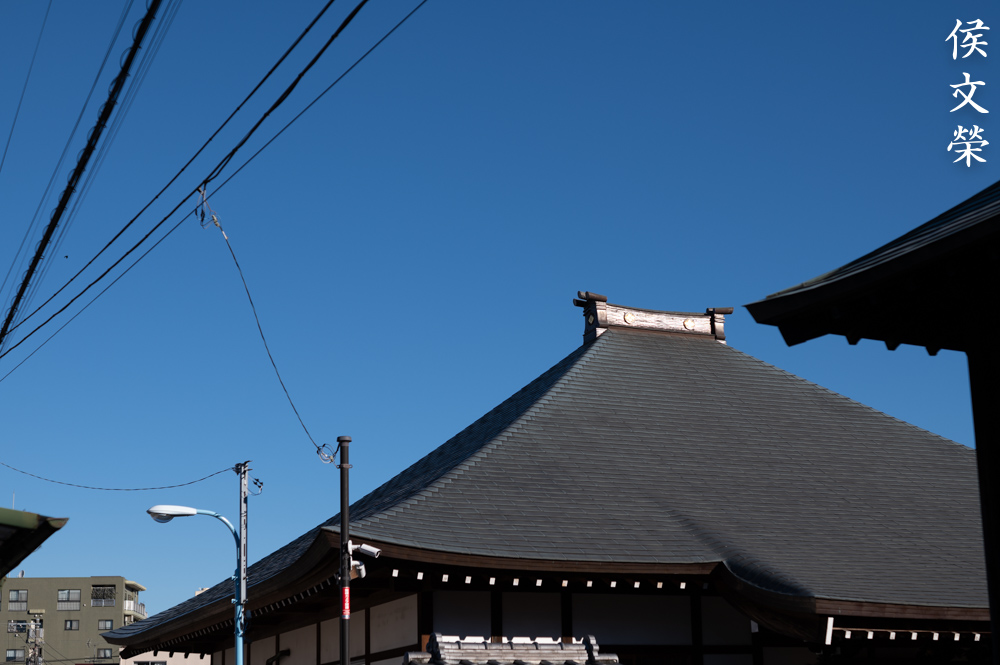
Its high-levels of distortion won’t be as obvious if you know how to angle the straight lines in your scene. This is still a viable option for shooting architecture so long as you’re careful.

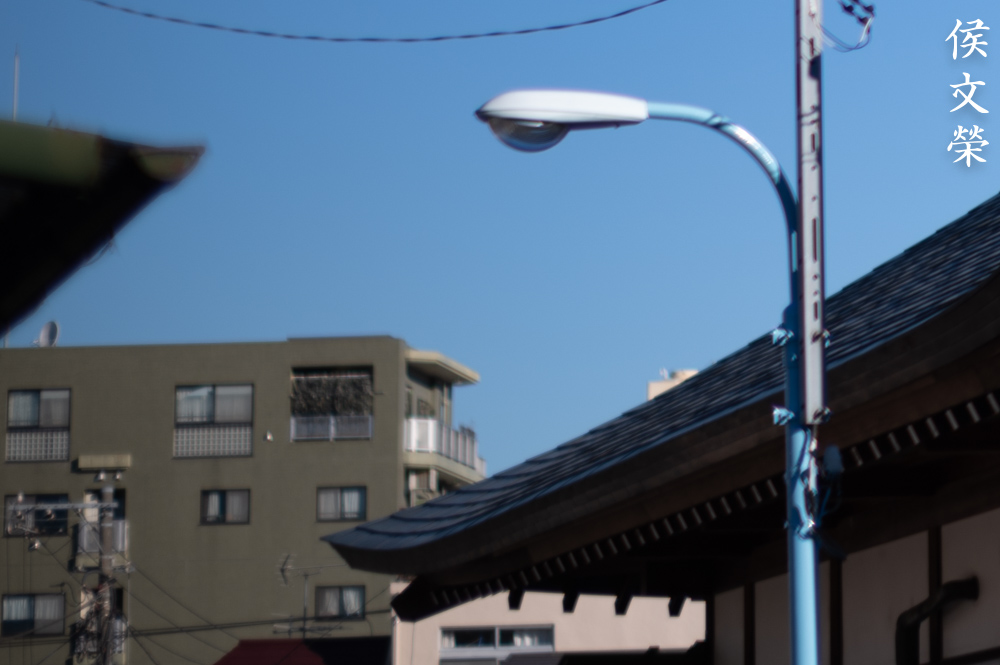
The curved beam is the result of positioning it close to the edge. Avoid placing any lines parallel to the edges so you won’t notice the effects of distortion.

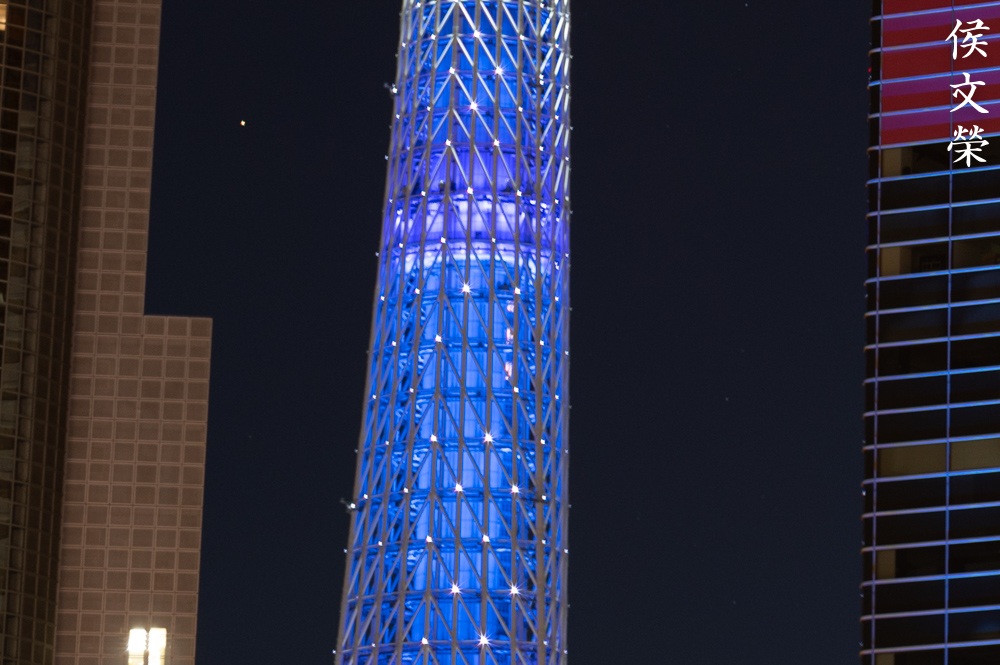
Sun-stars look great, they’re pointed with a clean core. I missed taking photos like this, I used to bring a tripod everywhere I took photos.

While it was designed to be shot at wide-open apertures there’s nothing preventing you from using it at small apertures so you could drag your shutter for long-exposure shots.


(Click to enlarge)
It renders beautifully when shot at night. This is the best way to shoot with it in my opinion. You’ll get smooth, exquisite bokeh quality at brighter apertures and sharp, clean photos when you stop the iris down to smaller apertures, it’s like bringing 2 different lenses.
Let’s now see some photos that were shot with film. It’s difficult to simulate film’s look using a digital camera, that’s because grain reacts differently to light and its structure is more-organic. Since this lens was made for shooting at night with film let us now see how it “really” performs. We’ll be able to assess it better this way as its used with its intended medium. I shot these with Fujifilm Natura 1600 and my Nikon F3.

The shallow depth-of-field gives this shot a miniature-like effect. I believe this was shot at f/2.8 or maybe even faster. The lens is already exhibiting near-peak sharpness at f/2.8, I am always amazed by the results that I get from this when shot at faster apertures.

This photo shows just how sharp the Noct-Nikkor 58mm f/1.2 Ai-S is. The rendering is so organic and there are no words that I could use for it except “exquisite”. This was shot at about f/2 or so, notice the nice 3D-effect.

This was taken between f/1.4 and f/1.8. Focusing with it is difficult, using a waist-level finder makes it harder. I usually pre-focus with this lens and avoid tracking my subjects if I could help it. I get more keepers this way.


(Click to enlarge)
This lens is magical with Fujifilm Natura 1600. You will get results that look like Wong Kar-Wai’s masterpiece “Chungking Express” with it. What an amazing combination, you’ll never get wrong with this so long as you’ll be able to meter your scene accurately.
Let’s now see some samples that were shot during the day. I took these photos using my Nikon F6 and the film that I used is Fujifilm Industrial 100. Many people use this lens for portraiture because of the lovely quality of its bokeh so I am going to shoot some people pictures this time so we can see what the hype is all about.

This was taken wide-open, see how special the rendering is? The subject is sharp but the background is blurry like watercolor. The quality of the bokeh is astounding, some of the best that I have seen.

I took this at f/2.8 just so you could see how it is when stopped-down. The details look very sharp and you’ll get more things focused due to the deeper depth-of-field. The background remains beautifully blurry and smooth. This is probably the best aperture to use if you want to shoot portraits because f/1.2 is too fast so the depth-of-field will be too-shallow. It will cause one eye of your model to be in-focus while the other one will be blurred if the subject’s eyes aren’t on the same plane as your setup. Blurring things is nice but you should use it wisely, there’s a right time and place for that.

I love how it rendered this picture. It looks so natural, the contrast and colors look great. The resolution is also amazing considering that this was taken wide-open.

This is my favorite photo from the whole set. See how sharp her hairpin is? The smoothness compliments the sharpness and clarity of the subject. This lens is great for cinematic use and you can use the shallow depth-of-field to help tell your story.

This was taken at f/4, I think. The lens achieves near-peak optical performance by f/2.8 so stopping it down to f/4 will make it even better. I don’t know which aperture the effects of diffraction will kick-in but I suspect that it should be evident by f/8 or f/11. I rarely take pictures with it at smaller apertures. In fact, I do not recall ever stopping this down to f/8 at all.


(Click to enlarge)
It’s going to be difficult to take photos at the minimum focusing distance with this lens. It has razor-thin focus wide-open so your pictures may not appear as sharp. Stop it down to f/2 or f2/8 if you plan on doing something like this.


(Click to enlarge)
Here’s more from the same roll. This is an amazing lens when shot with film. It’s hard to find a lens that has a similar way of rendering things. I now understand why many people consider this lens legendary. Seeing the results with film just made me want to shoot with it more and more.
I highly recommend this lens but only to people who know what they’re looking for. This isn’t something that a casual photographer will benefit much from. If all you want is the fast maximum aperture of f/1.2 then get a Nikkor 50mm f/1.2 Ai-S instead. It’s sharper at the center and more-friendly to focus with. It won’t render your scenes the way that this lens could but it’s close. The New-Nikkor 55mm f/1.2 could render beautifully but that won’t give you sharpness at the corners or even at the center the way this lens could but it’s close. Both lenses that I mentioned weren’t corrected for coma wide-open so they won’t be able to give you the same results that this one could. If you don’t shoot film the Nikkor Z 50mm f/1.2 S will be a better deal, they’re cheaper, too. Now, if you’re well-heeled the Nikkor Z 58mm f/0.95 S Noct will be the lens for you if you don’t mind bringing such a heavy lens around with you. It’s the spiritual successor to this legendary optic, it’s the best that Nikon has now. If you still want this, be sure to spend upwards of $3,000.00 for a nice copy. These are not cheap, I was lucky to get one for almost 1/3 of the price just because I know where and how to get a bargain. If you are looking for a copy, be sure to check the iris, they could get oily. The optics has to be clean and clear, too. If you have a friend who owns one, just buy his sample instead. It’s the best way to get one of these in good shape. It is an amazing lens, every real Nikon-lover should own one. Happy hunting (if you could afford one)!
Before We Begin:
If this is your first attempt at repairing a lens then I suggest that you check my previous posts regarding screws & drivers, grease and other things. Also read what I wrote about the tools that you’ll need to fix your Nikkors.
I suggest that you read these primers before you begin (for beginners):
Reading these primers should lessen the chance of ruining your lens if you are a novice. Before opening up any lens, always look for other people who have done so in YouTube or the internet. Information is scarce, vague and scattered (that is why I started this) but you can still find some information if you search carefully.
I highly recommend that you read my working with helicoids post because this is very important and getting it wrong can ruin your day. If I can force you to read this, I would. It is that important!
For more advanced topics, you can read my fungus removal post as a start. It has lots of useful information, it will be beneficial for you to read this.
Disassembly (Lens Barrel):
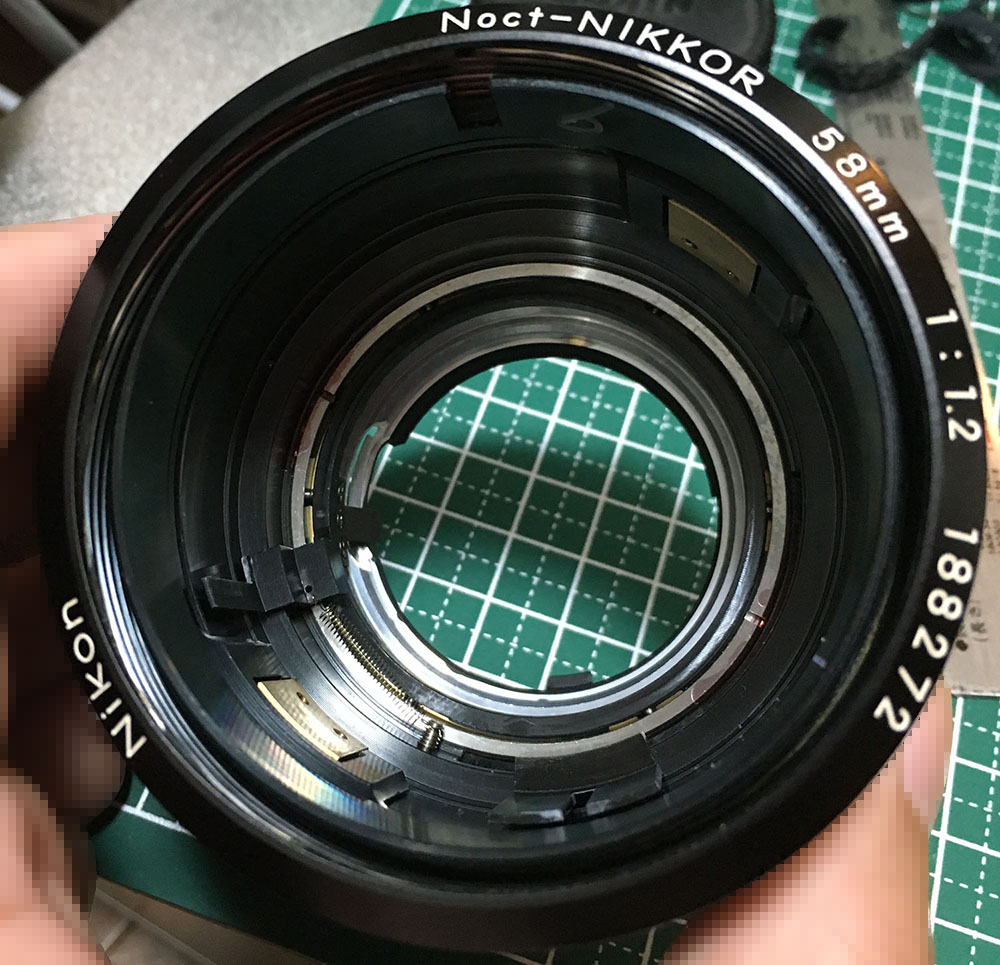
Its construction is similar to the Nikkor 50mm f/1.2 Ai-S which is good news since I could extract the objective and keep that precious thing from being damaged while I work with the barrel. Since the optics aren’t dirty I won’t be dealing much with it here. This is a very valuable lens and you should only let a reputable repairer fix this for you. You’ll require experience and dexterity to be able to put the objective back into the barrel. It’s always good to take plenty of notes as you go even if you’re an experienced repairer. This way, you will know how to put things back the same way you got them out.
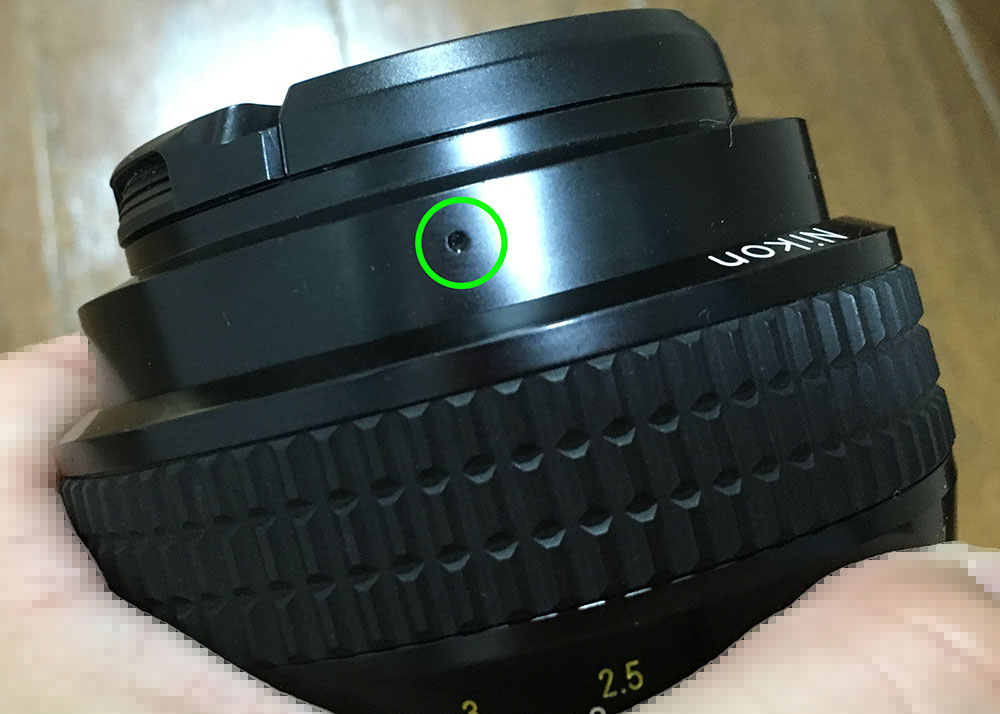
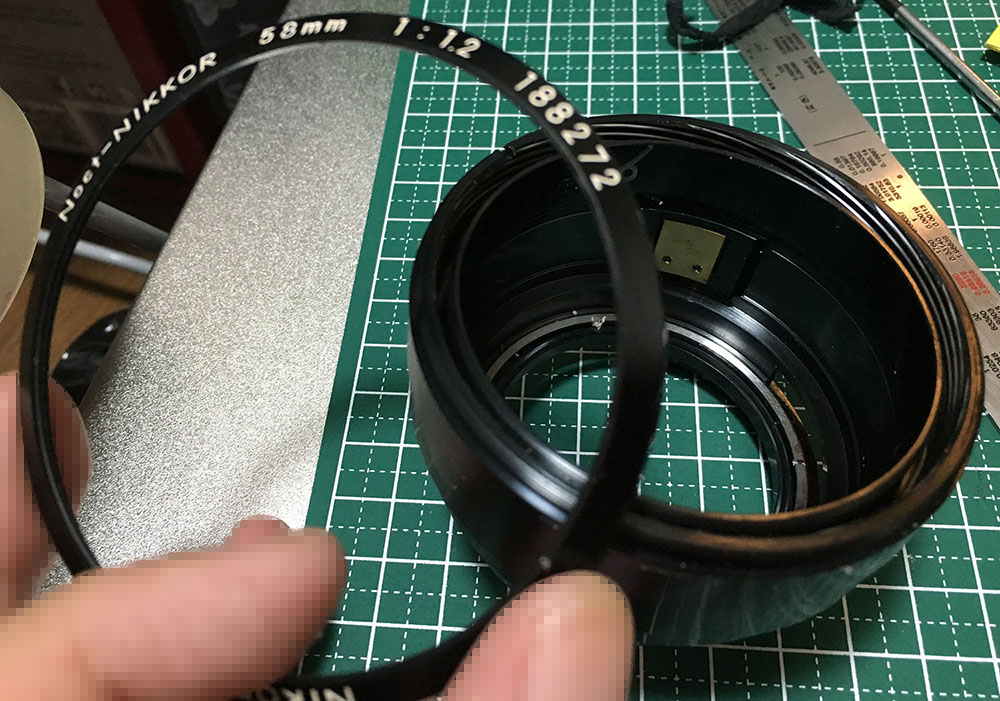
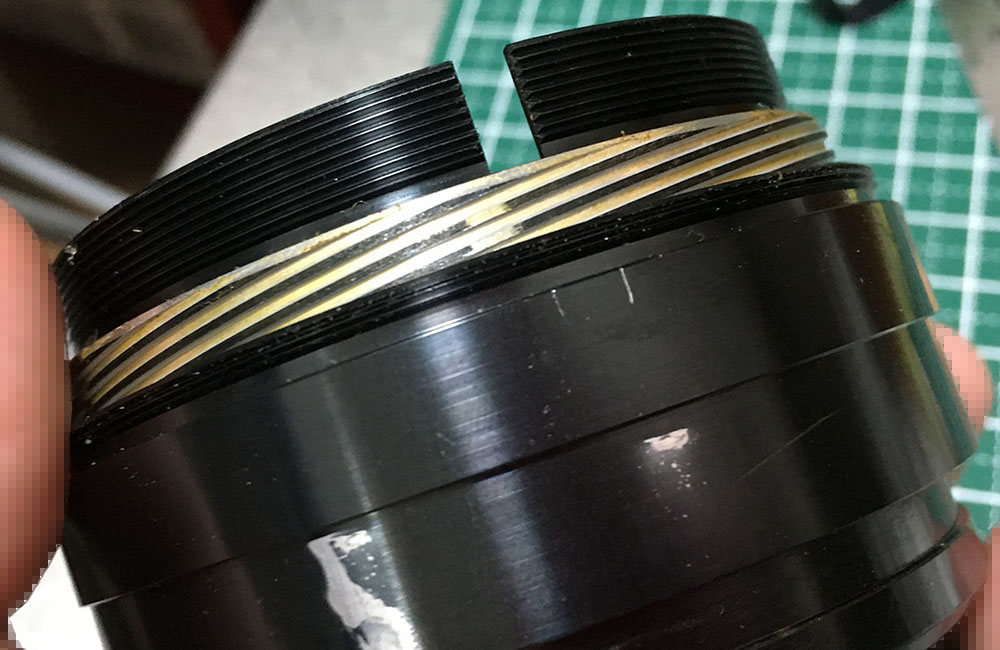
Extract this to remove the front barrel. Mine was sealed with paint so I had to dissolve it first before I remove it. These are delicate, only use a driver that fits the slot perfectly to prevent damaging it.
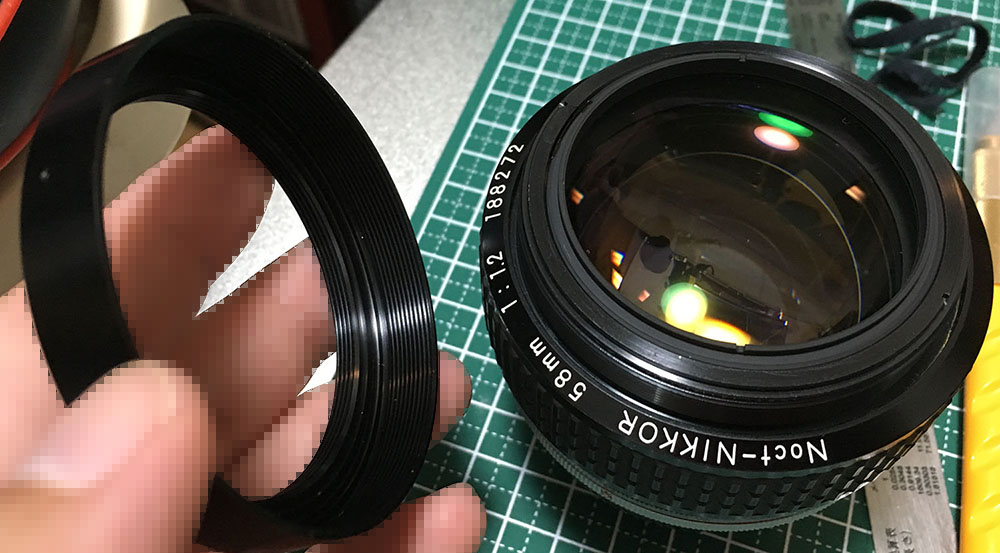
Unscrew the front barrel.
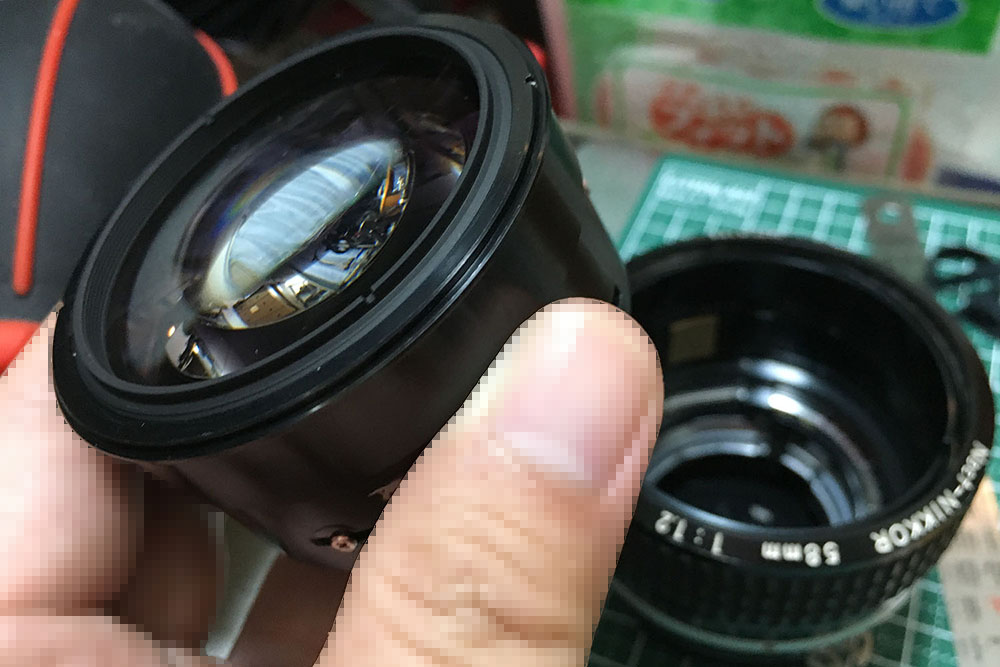
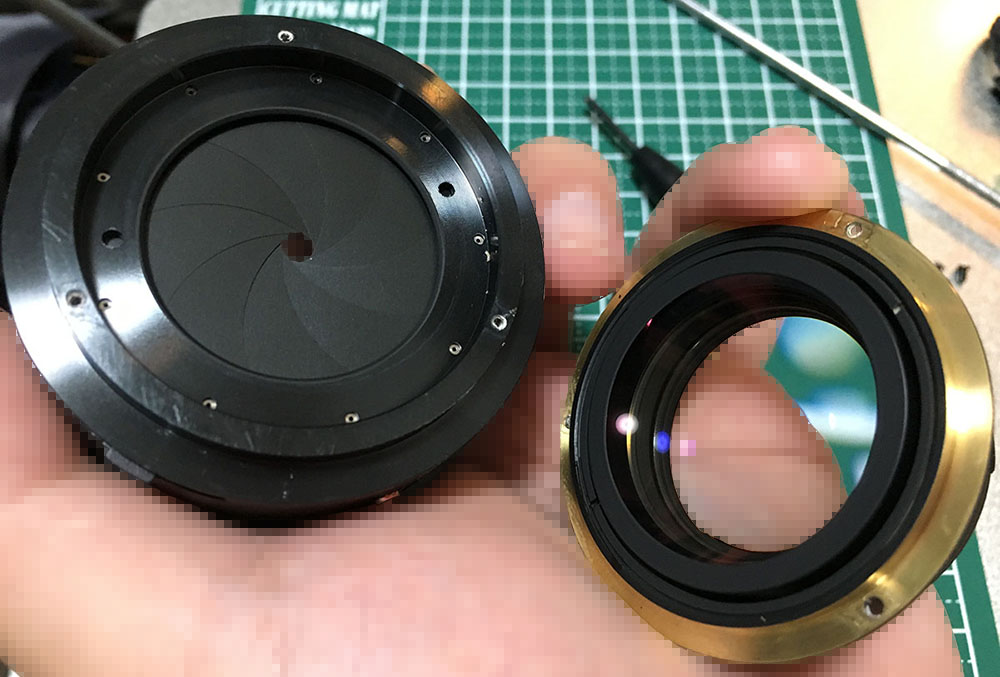
Carefully pull the objective out of the barrel and be sure not to scratch the rear element.
It’s cramped inside. Take plenty of photos so you’ll know how things should be aligned when it’s time to put it back together again.
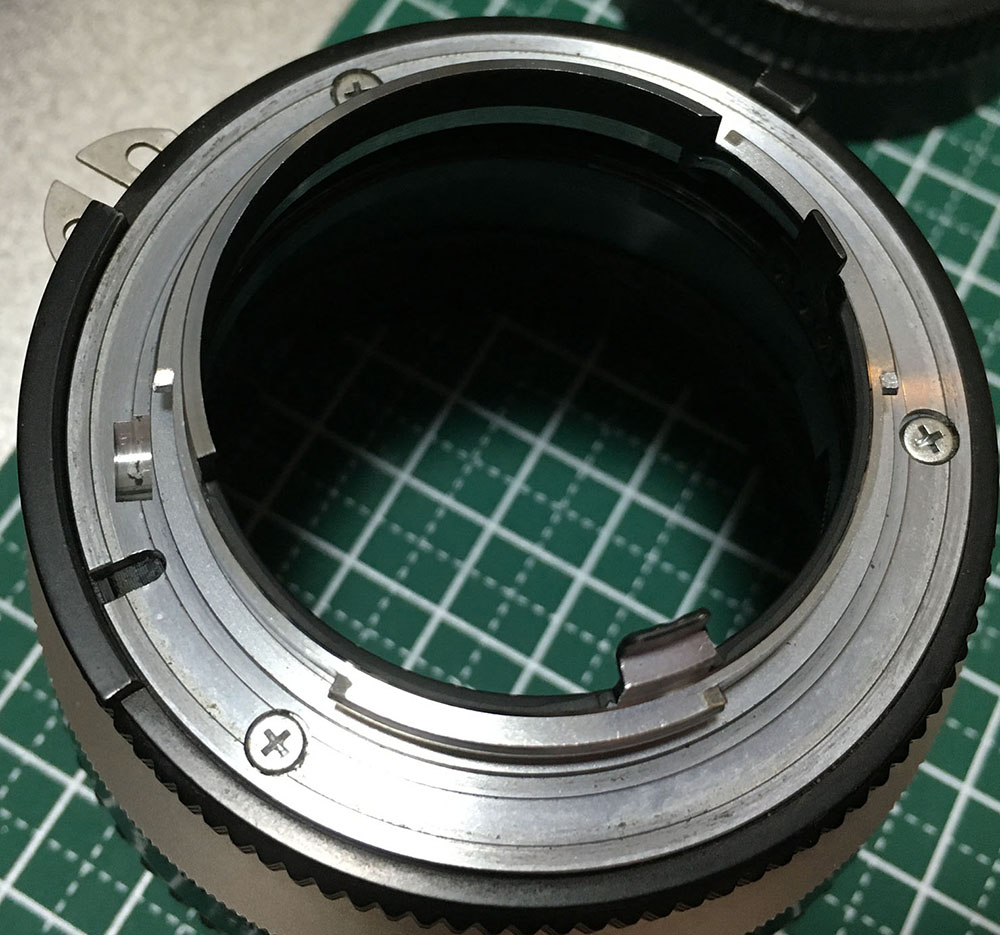
Extract the screws of the bayonet mount so you can remove it. Many people get stuck here because they don’t have the right tools and strip the screws. To prevent this from happening to you, read my article about how to remove bayonet screws. Follow my guide and that should help educate you on how its done and which drivers you should use.
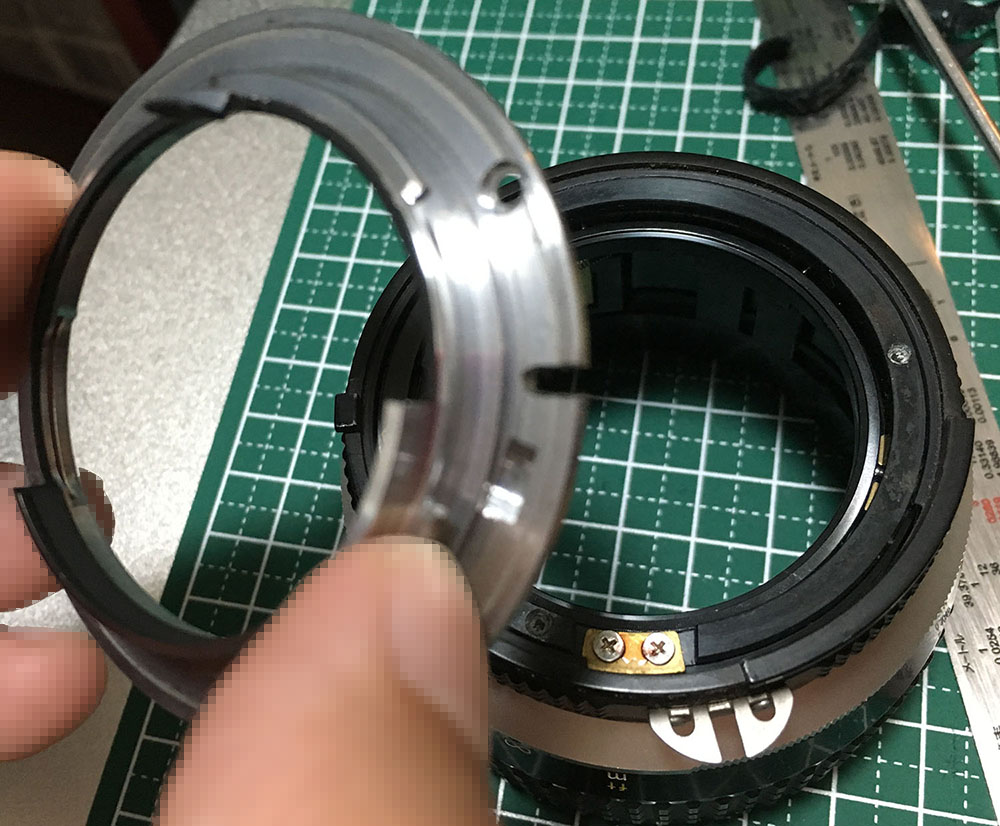
Remove the bayonet mount.

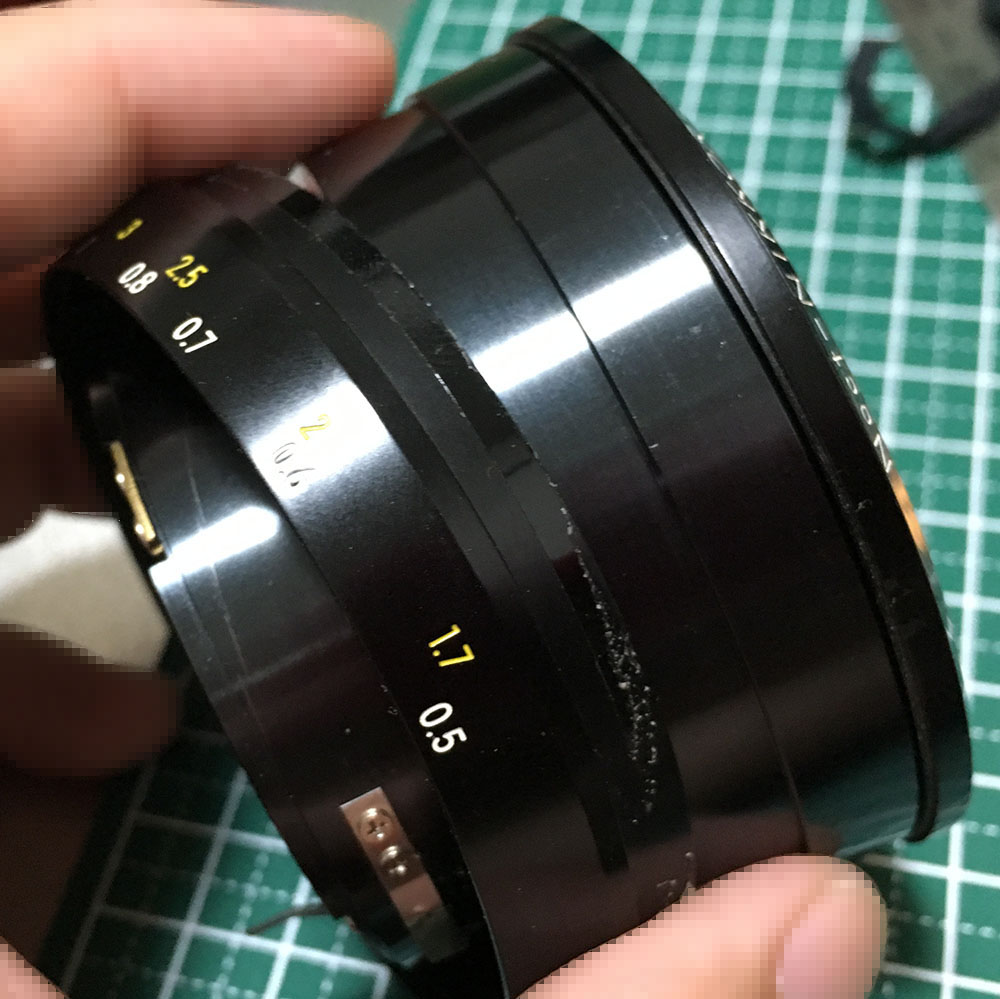
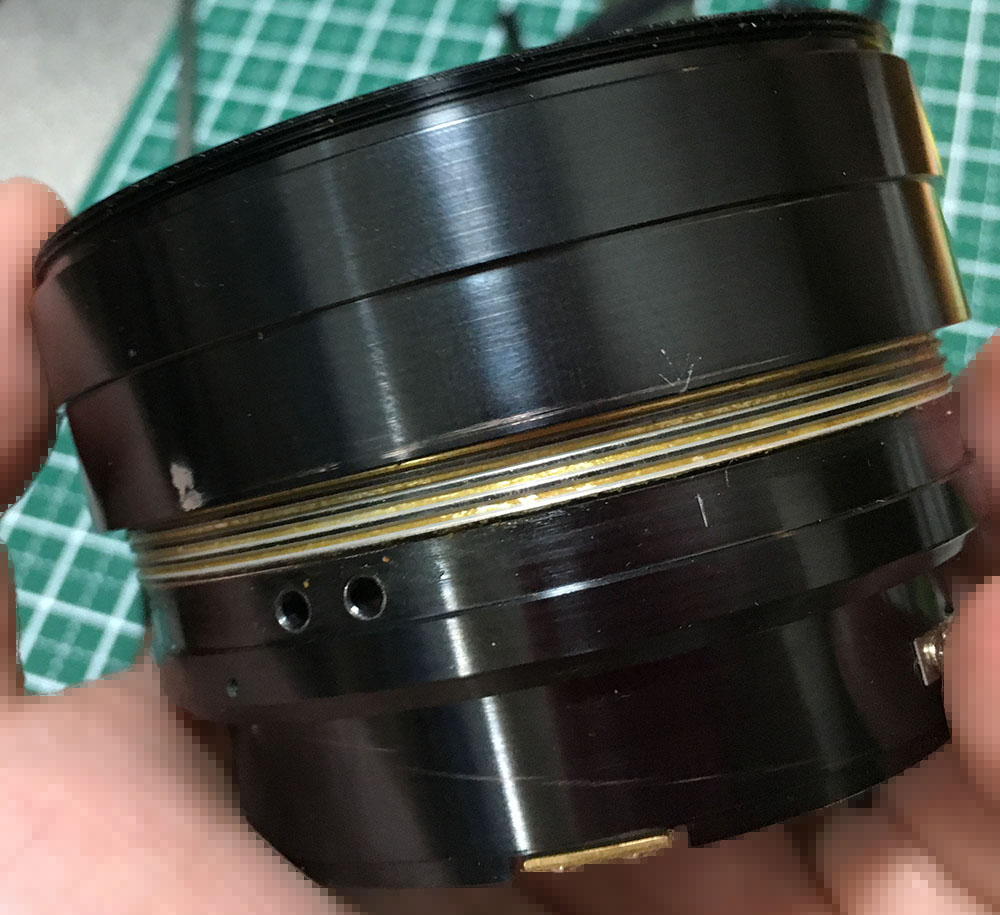
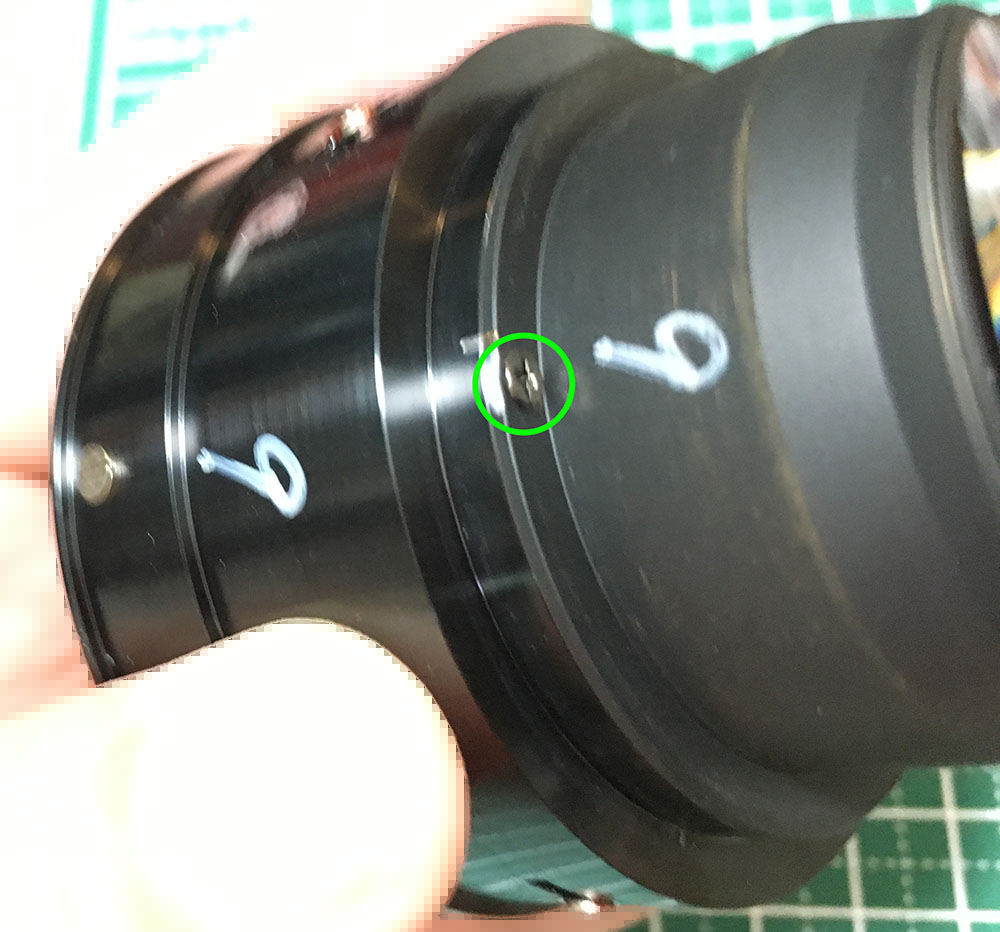
Extract these to remove the aperture ring. These can be tough to remove, heating them with a soldering bolt is essential so they won’t snap while you’re removing them.
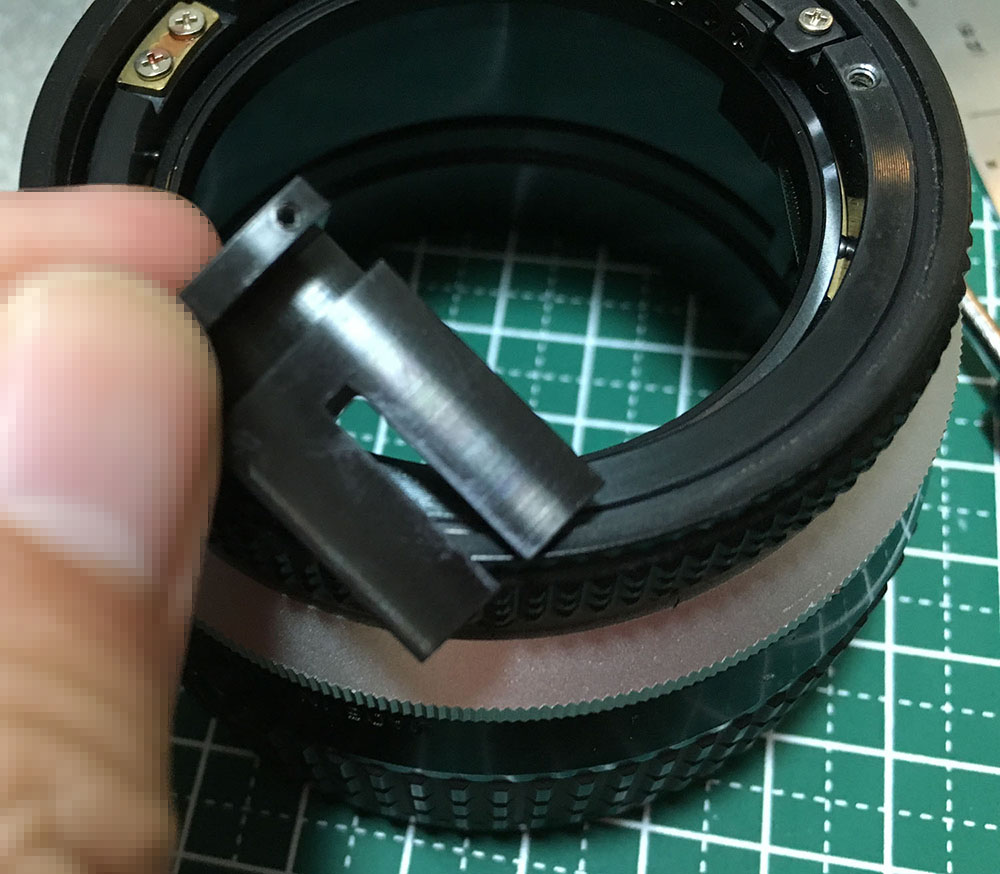
Carefully remove the aperture fork once the screws are gone. It couples the aperture ring to the iris so you’re able to control it from the outside. The slot at the middle couples to a pin at the objective’s casing, you should be able to slide the pin inside this slot when putting the objective back into the barrel.
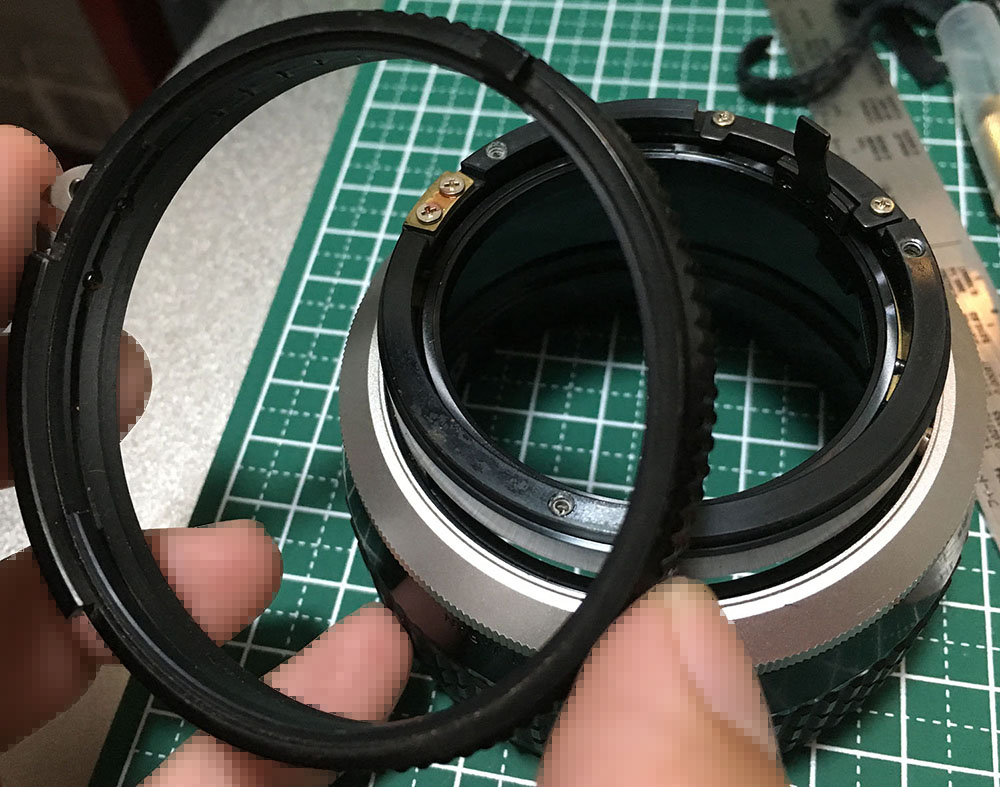
Remove the aperture ring.

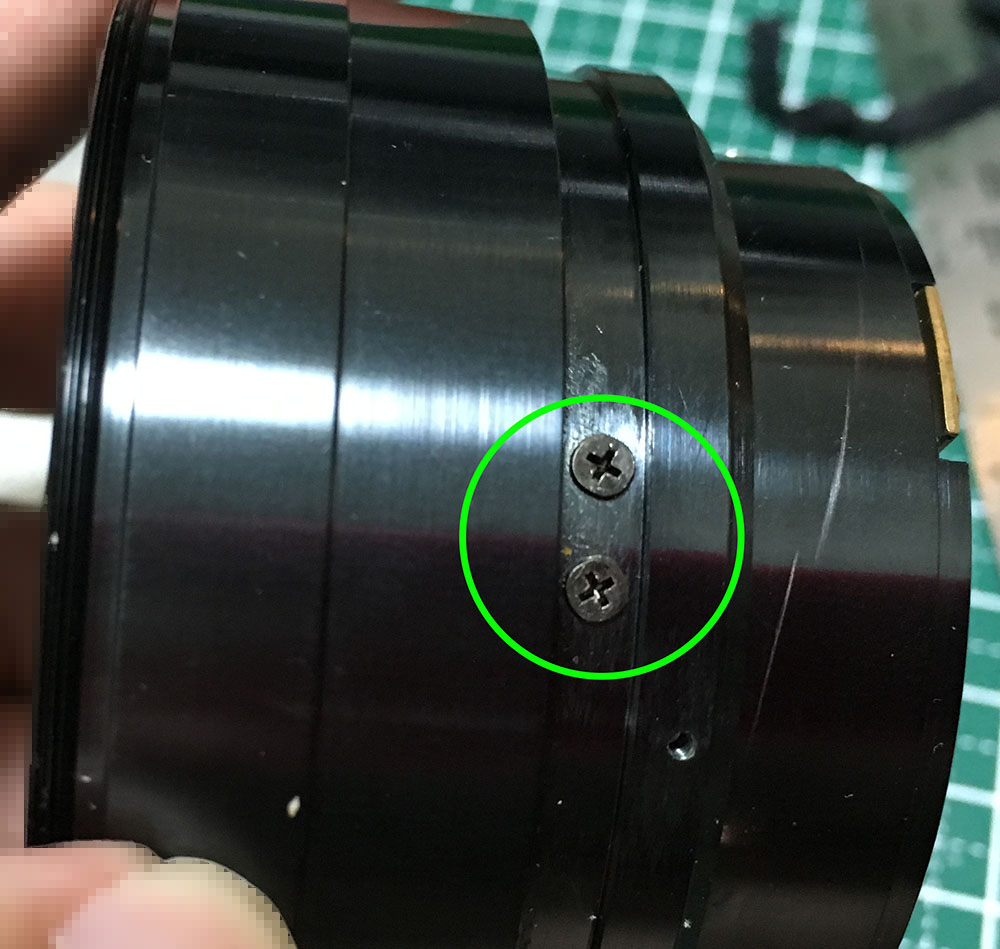
Carefully extract these. Use drivers that fit the head perfectly in order to prevent stripping these or damaging the surrounding metal.
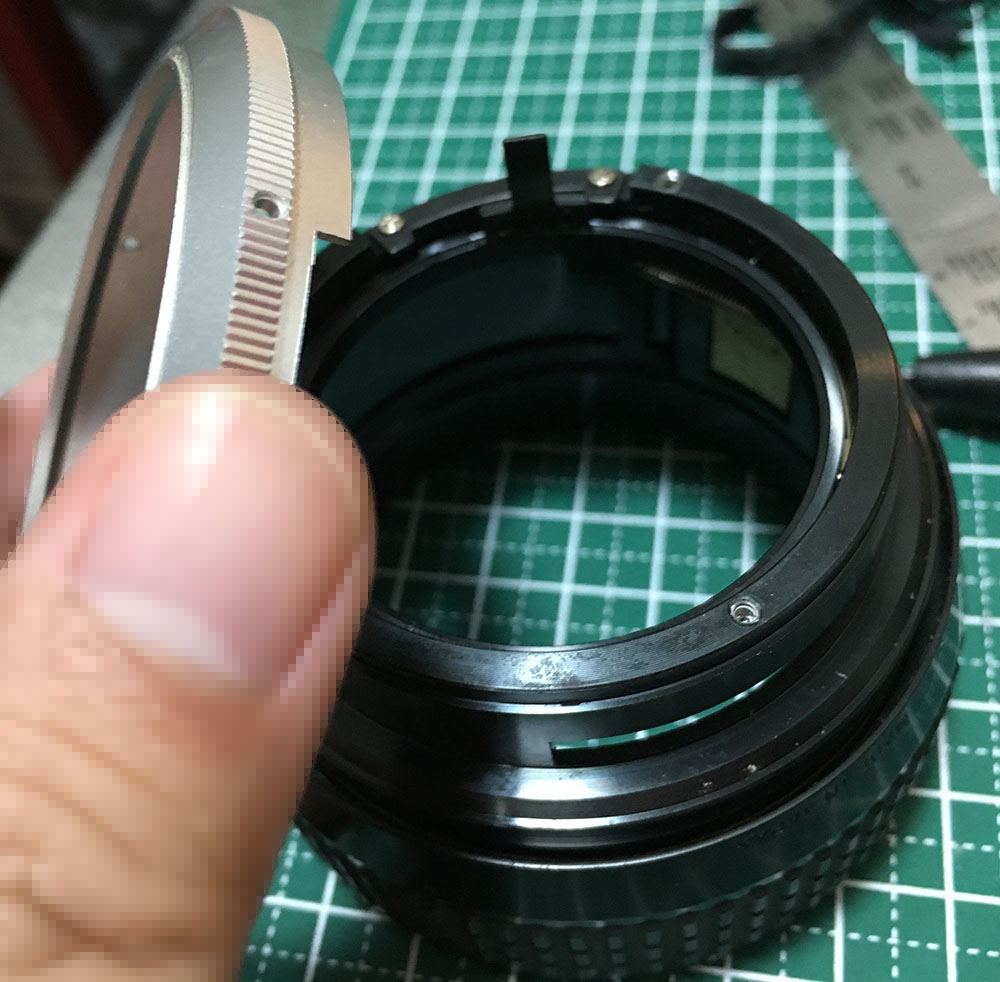
Carefully remove the grip. It also constrains the range of the focusing ring so take plenty of notes before you remove it so you’ll know how the focusing ring should be aligned at infinity.
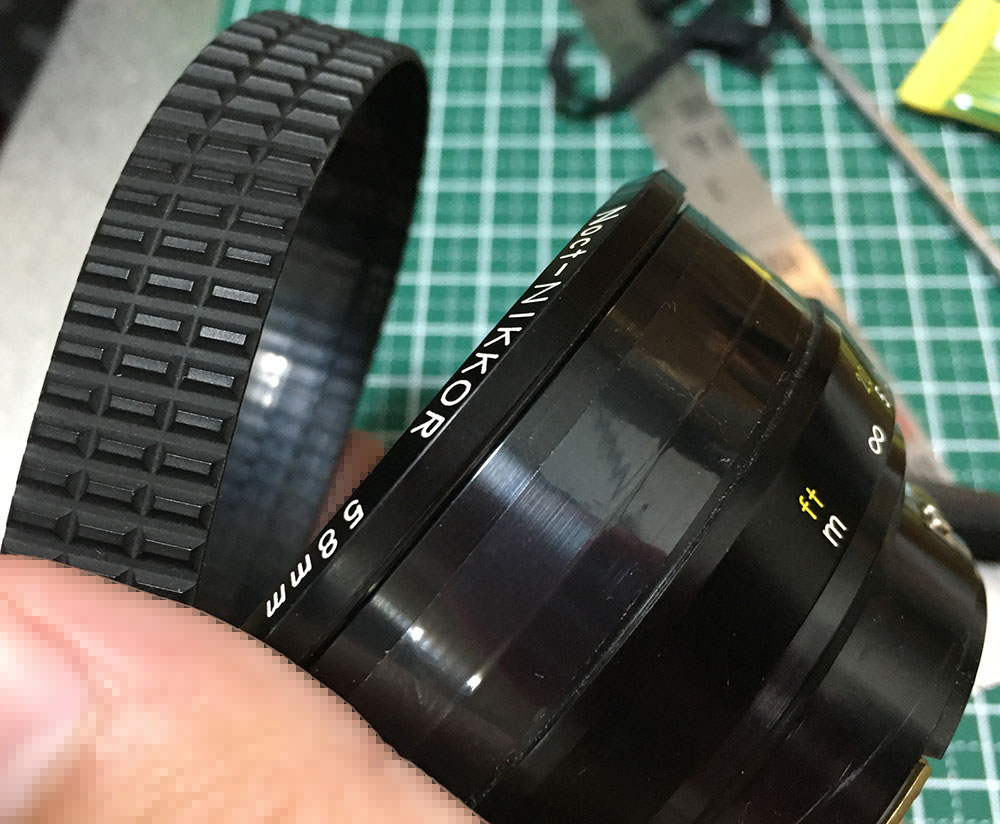
Carefully remove the rubber from the focusing ring. Don’t tear it, there are no replacement parts for this.
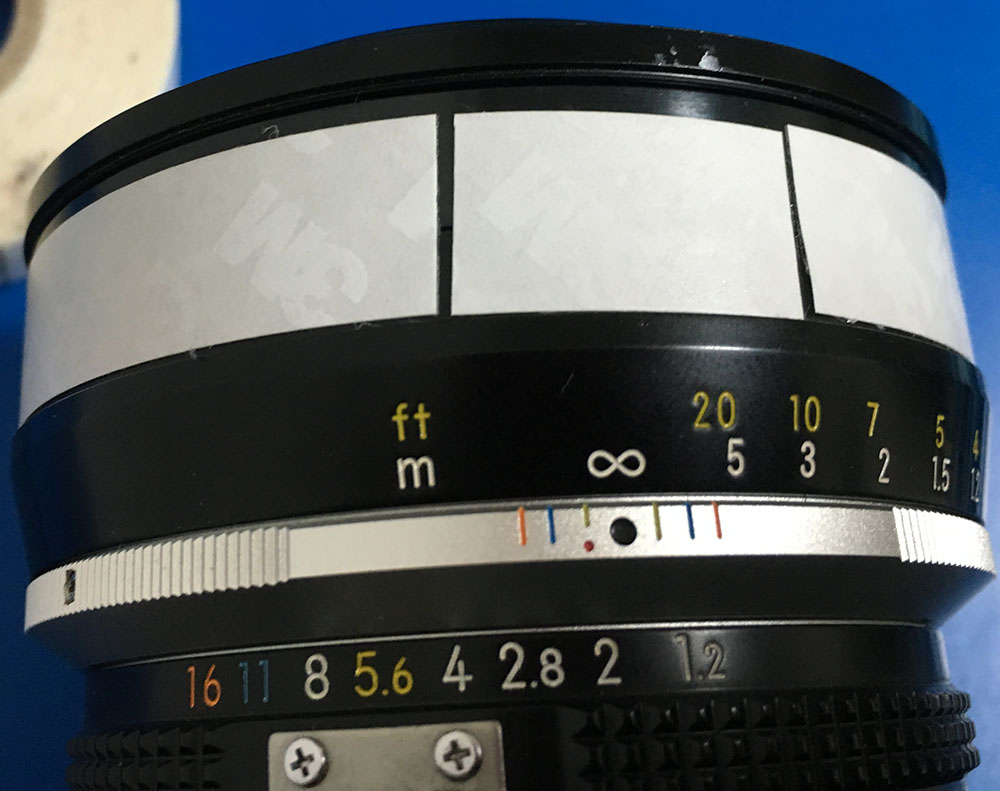
The distance scale is secured with tape. Peel it off to remove the distance scale but note its alignment first.
Carefully remove the distance scale.
Unscrew the bezel of the focusing ring. It can be difficult to remove, place a drop of alcohol to its threads, that should help soften its seal.
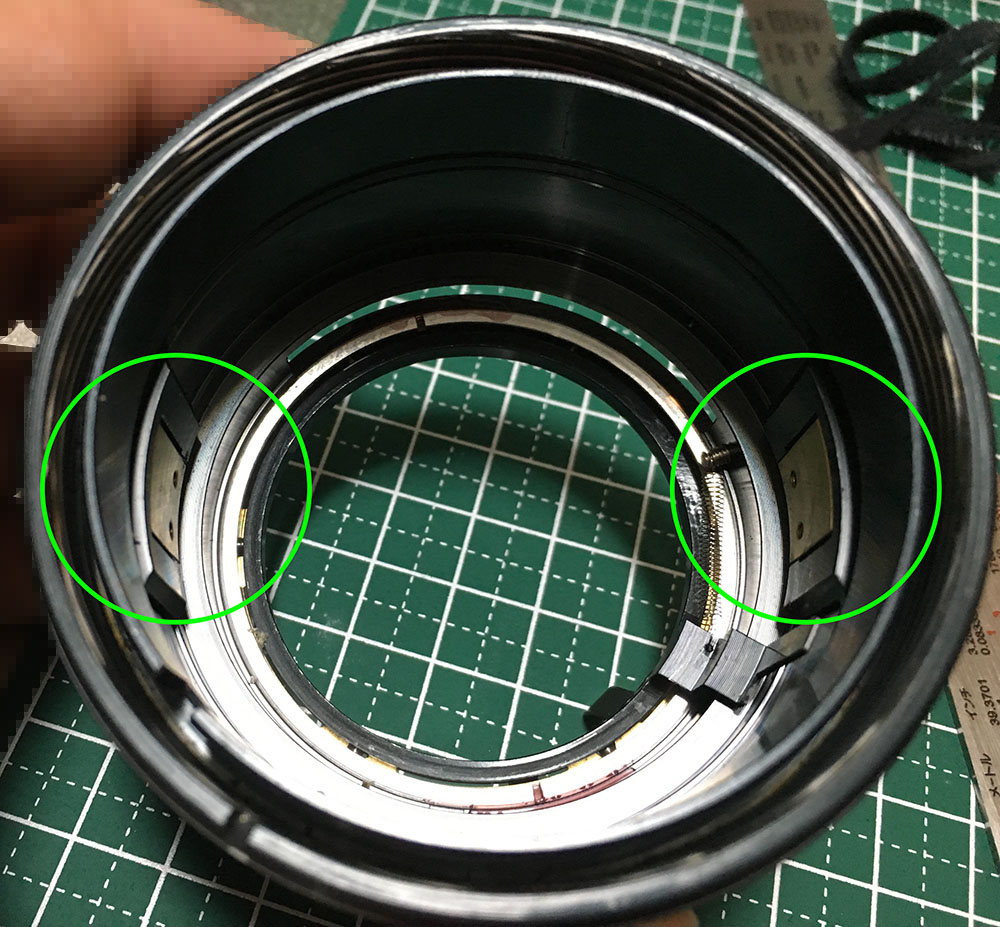
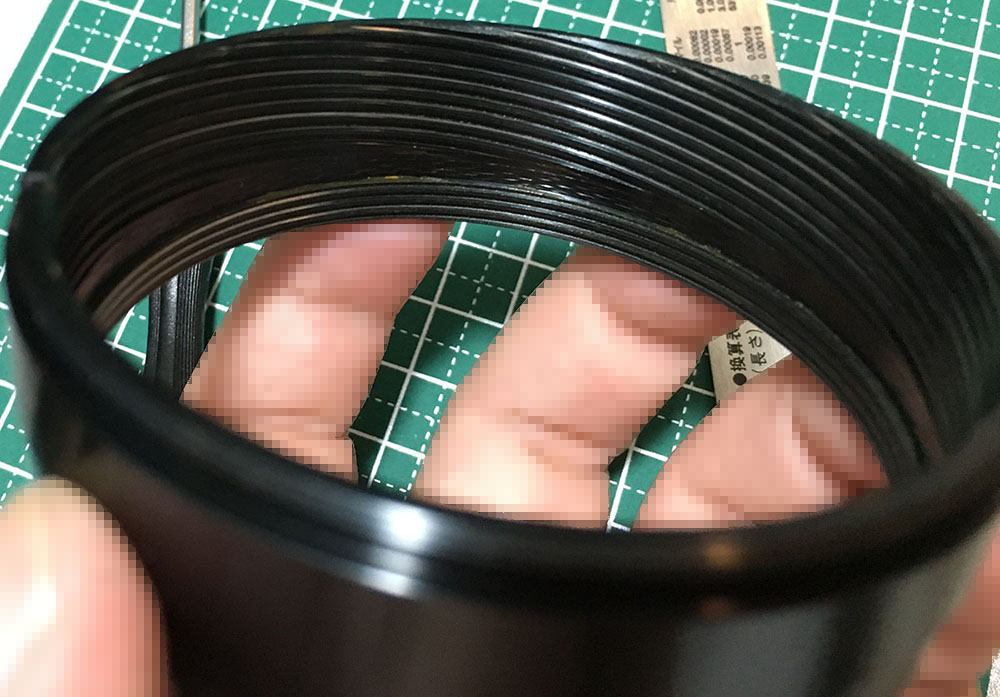
There’s a pair of helicoid keys. Note their positions before you remove them. These sync the helicoids so you’ll be able to extend-or-retract the barrel by turning the central helicoid.
Extract these to remove the keys. Note that they’re not symmetrical, the ones at the other side are different. It is important that you note where these came from so you’ll know how to put them back again later.

You won’t be able to separate the helicoids since the stop-down lever is in the way. Decouple the spring so you will be able to turn the helicoids without damaging anything. It’s a bit tricky, all you have to do is to rotate the helicoids until you get enough clearance.
Unlike most Nikkors, the helicoids were configured differently in this lens. Separate the upper helicoid, do not forget to mark where they parted so you’ll know where they should mate. Many people get stuck here because they forgot this step. Read my article on how to work with helicoids to prevent this from happening to you.
I made very shallow marks so I will know where these should mesh.
Notice that there are 2 threads milled into this helicoid instead of just one. The central helicoid is intricate, it can be confusing to put back so don’t forget to take plenty of notes before removing anything.
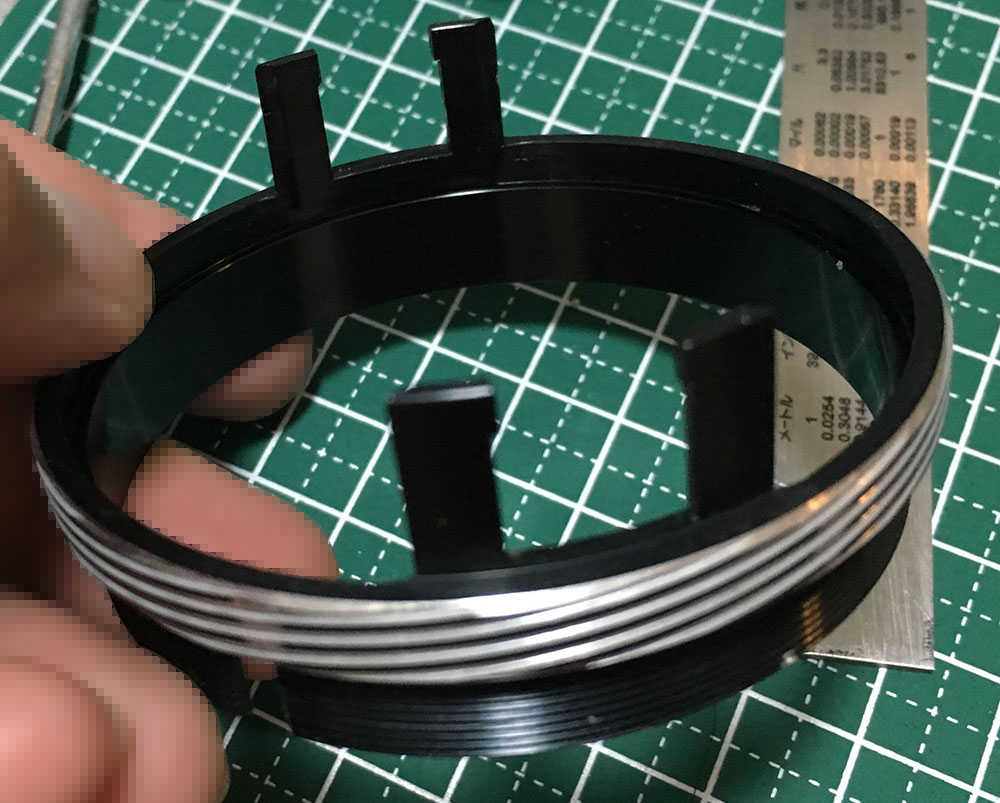
Carefully remove the upper helicoid. These guides couple to the helicoid key, never damage or warp them. It’s a delicate casting and these will snap if you’re not careful.
Clean everything very well and never leave any residue. Scrub the threads with detergent and hot water, that will remove the grease. Put the helicoids in an alcohol bath for a few hours, that will take care of the residue. I even use a toothpick to remove any stubborn dirt. Avoid applying too much grease on this as it may puddle-up and cause an even bigger mess later as it migrates to the iris mechanism. Grease with moderate-stiffness is the best choice for this, a light one will make it feel rough and a thick one will make it difficult to turn. Also apply a thin film on the helicoid keys’ edges to it glides smoothly on its rails.
Disassembly (Objective):
The optics looks clean apart from a few specs of dust so there’s no point in dismantling it. All I did was to open it and blow the dust away. In case you are curious, its construction is similar to the Nikkor 50mm f/1.2 Ai, read that article if the objective needs to be overhauled.
Extract these to open the objective.
The fit is tight and the screws were sealed with epoxy. Blow some air to remove any specs.
Clean the glass carefully. If your lens has fungus, read my article on how to clean lens fungus. Don’t use the solution at full-strength, thin it with distilled water. Don’t soak the elements in the solution for too long or it will dissolve the coatings. The cemented group is fragile so handle it with a lot of care.
Conclusion:
It has been my pleasure to present this article to you. You’ll never find anything like this anywhere on the net. It took me under 2 hours to service the barrel since it only has a few parts. Despite that, it was tricky to put it back since there are many interlocking-parts. Again, if your lens needs repair, send it to a trusted repairer. It is not something for a beginner to tackle with.
You are now left with the task of adjusting its focus. It’s simple, all you’ll need to do is adjust the focusing ring and you’re set. If you want to know more about adjusting a lens’ focus read my article on focus calibration. A lens like this is dependent on accurate focusing since the depth-of-field is so thin so you’ll need to get it right.
It’s now time to enjoy shooting with this legendary Nikkor. The best way to honor such an optic is to use it and show the world the amazing photos that you could take with it.
Thanks for following my work, if you liked this article please share this with your friends so it will get more views. This site earns around $1.10 a day, it’s totally reliant on views. You can also support this site, it helps me offset the cost of maintenance and hosting. You are also helping me purchase, process and scan film. This site promotes the use of film so we’re all in this together. See you again in the next article, Ric.
Help Support this Blog:
Maintaining this requires resources to operate. If you think that this site has helped you or you want to show your support by helping with the site’s upkeep, you can make a small donation to my paypal.com account at richardHaw888@gmail.com. Money isn’t my prime motivation for this blog and I believe that I have enough to run this but you can help me make this site (and the companion facebook page) grow.
Buy me a roll of film or a burger?
Thank you very much for your continued support!
$2.00
Helping support this site will ensure that this will be kept going as long as I have the time and energy for this. I would appreciate it if you just leave out your name or details like your country’s name or other information so that the donations will totally be anonymous. This is a labor of love and I intend to keep it that way for as long as I can. Ric.

Feb 18, 2017 @ 11:19:47
G’day Ric,
I have an 58mm f1.2 NOCT which has a broken rear lens element. Serial No. is 188180. It appears the clamp/glue gave way, probably from an unknown knock and the rear element fell out when the lens was being put onto my camera during a night time shoot. Found the broken element on the ground after not being able to focus.
Any chance you or any contacts may have damaged NOCT’s that still have a good rear element? Probably a long shot that one from another lens will work but I used this lens often on night shoots and it is worth repairing!
Thanks for an interesting article although I’m not about to dismember the lens.
Kind regards
Garry
Feb 18, 2017 @ 11:22:22
Hi, Garry!
Junk NOCTs are rare. These lenses are almost always very well taken cared of for obvious reasons. If you can, can you show me the extent of the damage and let’s see if we can glue that thing back together? I believe that the back is a single element and not a doublet. Ric.
Mar 30, 2017 @ 06:22:50
G’day Richard,
Sincere apologies as I have only just found you reply. Guess I need to tick the ‘notify via email’ box.
Here’s the image showing the extent of the damage…definitely unrepairable. I’ve looked at the rear elements of the 50 f1.2 and the 55 f1.2, but although they are very close there are differences.
Still keen to get this repaired if you locate anything or you know anyone at the Japanese Nikon lens factory.
Kind regards
Garry
ps. Appears I am not able to add the image..anyway the lens broke in half with big chunks knocked off each side.
Mar 31, 2017 @ 05:34:31
Hello, Garry!
Glad to hear from you again! I am not very optimistic about the transplant because there is a huge chance that the element will not jive well with the rest. I tried swapping elements on some of my lenses (even with identical models) and most of them simply doesn’t work. Your best option as of this moment is to look for a junk so you can transplant the whole objective. Junk NOCTs are still pricey by the way. Ric.
Mar 29, 2017 @ 23:54:16
Hello,
I have this lens. It was a gift from my dad. According to him, in his time he’s had to recover it from the bottom of a river. After that, back in 1984, he had it repaired, but he doesn’t know what was repaired exactly. All he knows is that it worked fine for him for years after.
It’s produced some great pictures for me. It’s a very interesting and a very different style, and I’ve really enjoyed using it. But since I’ve learned more about it and about photography in general, I’ve noticed that I can’t change the aperture. That seems like something I should have noticed right away, but I’m a completely self taught photographer and I didn’t start looking into aperture until I got this lens.
I’ve had this lens for a while now, and I’ve tried reading about it but there isn’t much out there about it and I end up just getting frustrated and shunning the lens for a while out of defeat. When I took it to our local camera shop, they were able to confirm that the aperture wasn’t changing when turning the aperture ring, but they had never seen this lens before and didn’t know what to tell me other than that.
I’m definitely not going to attempt disassembling this lens. But I’m also weary of sending it off to have it repaired with as precious of a lens as this is. So I’m not sure what to do about repairing it. I was just curious if you have any experience with dysfunctional aperture rings and what can be done about it? Or if I’m just going to have to live with this lens set at a mystery aperture until I’m experienced and brave enough to attempt disassembly and reassembly?
Thank you,
Steven
Mar 30, 2017 @ 02:43:29
That’s quite a story, Steve!
There can be many things that can go wrong with that but the easiest culprit is a lost screw. Look at my teardown and see if there is anything missing amd if the blades are still there. If the bearings are gone then you would need a donor lens. Use a torch and look at it and see. With the correct set of drivers, you can remove some parts of the lens enough for you to make a diagnosis. Ric
Apr 24, 2017 @ 16:14:01
Richard, I just acquired a NOCT and though the item is absolutely visibly perfect including the aperture ring with no scratches, fungus, haze, etc. I did notice a bit of shake/vibration when I hold ONLY the Focus Ring. If I hold both the focus ring and the outer ring of where the filter screws in, then nothing. Just wondering if there should be a very small amount of rattle? I mean, very small? Thanks.
Apr 24, 2017 @ 16:25:43
Hello, Vishal.
No, it should feel very solid. Ric.
Apr 24, 2017 @ 16:47:32
Richard, thank you for confirming. Do you think a lens element could be loose or something of that nature if there is a very small amount of shake/rattle? It is not a grinding kind of sound, but something does move it seem. Thank you.
Jul 17, 2017 @ 23:48:42
Hi Richard. Thank you for this blog. I had the courage to purchase a Noct with issues for a very reasonable price. After looking through it and using your blog as a guide I am now inclined to believe that the rear element may have been mounted the wrong way at some point during a repair. As I don’t have another Noct to compare to I was wondering how convex the outer part of the rear element is. The lens I have seems to be almost flat. I am having focus issue in that all shots at 1.2 have too much glow, very little contrast at the focus point. Also, when I tried to adjust the lens for infinity but the entire optical seems to be too far forward when I got the best focus. The ring that keeps the optical block in place is about 2mm too far forward. Thank you.
Jul 18, 2017 @ 00:01:41
Hello, Anthony. Glad this was useful for you. Check Mr. Mansurov’s png above, the rear element is the only ambiguous one. this part is secured very well to the housing so I doubt the repair guy messed around with this and the rear is also sealed if I remember it correctly. You can try and see if it was indeed tampered. If it’s not then the spacing of the elements are probably off. You will have to collimate this manually. Ric.
Jul 18, 2017 @ 15:38:07
Hi, Ric. Thank you for the reply. I think the lens was disassembled at some point. The rear element has a nick that was caused by a botched attempt at fixing the lens. From the inside, the retaining ring for the inner elements of the rear optical block seems to be thread-locked. It does seem the rear element is pretty much set with the rear metal housing it being mounted in reverse is a very low possibility. I am now inclined to try to disassemble the rear optical block and try setting everything back in place.
Jul 18, 2017 @ 16:35:55
Good luck and tell me what happened.
Dec 10, 2017 @ 11:10:10
Hi Ric, am so glad to have found your wonderful useful blog! Got my NOCT 2 month ago at about 1500US$ here in Germany. Even for an AI this is a good price I thought – the AIS are some 50% higher in price than AI usually.
But: The focus ring was not smooth running all the way through and even stuck sometimes, so I decided to turn it in to a local Nikon service point for revision. Cost me 180$ on top and ran better afterwards but still with some resistance mostly towards the 30cm focal length. The Nikon guy said “The new grease just has to run in” which I did not really believe. Now a month and a half later I am proved right – has not improved.
The resistance of the focus ring in the region below 1m is higher when turning to closer than the other direction. Also the resistance is very much orientation related: Portrait position high resistance and landscape orientation of the camera = much lower resistance. Also it is getting slightly better if you keep going back and forth but in the whole not quite easy to describe. But very annoying for sure…
Do you have any idea?
Still reluctant to open that lense – never done such thing before.
Thx Martin
Dec 10, 2017 @ 11:20:02
Hello, Martin.
In my experience it can be many things that can cause this. Once is that the helicoid threads needs to be cleaned VERY well. There might be some hardened old grease there that wasn’t removed. When I heard that the focusing is smooth depending on orientation it can only mean that the lens is not within mechanical tolerance. Meaning that the slots for the helicoid keys may not be perfectly straight or a lever inside is causing this and may need to be very lightly lubricated. I can try and fix that for you if you can wait because it’s too cold here now for me to do anything. Ric.
Nov 24, 2019 @ 21:23:10
Hi Ric,
I have been looking to buy my own copy of this wonderful lens. I found one for sale recently where the seller describes the focus ring as being a bit stiff, otherwise it looks in good condition. At first I dismissed this lens but then I came across your article in which you describe your focus ring as being “a bit heavy to turn” so now I’m thinking it might still be worth considering. I believe that the lens might have already been serviced so the “stiffness” is probably a feature of this particular example. In your experience with this and other AI-s lenses, do you think a lightly stiff focus ring is anything to worry about? Any information would be greatly appreciated.
Regards
Frank
Dec 21, 2019 @ 03:20:32
this lens benefits from a slightly thinner type of grease
Jan 29, 2020 @ 13:05:31
Hi! I got an AI Noct in December but returned it due to external cosmetic is not as descbribed (mint). However, it was very sharp. I bought an AI-S and cosmetic is really good outside however it’s NOT sharp! Do you think adjustments can be done so it will be sharp? I’m inclined to return this one again if there’s no chance this will be fixed 😦 THank you!
Jan 29, 2021 @ 14:47:11
Hi Ric,
I have a Noct with the rear element showing large visible cleaning marks. I am thinking the possibility of sending it to Germany for recoating. But I wonder if the rear glass can be taken apart. The recoating requires to take the rear glass apart from the housing. Thanks a lot for the insight.
Ken
Jun 25, 2022 @ 03:08:37
Hi Ric – Great article; thanks! Unfortunately, I stripped one of the bayonet screws when trying to disassemble my Noct 58/1.2 AI. I failed to dissolve the glue first, which is probably the reason. (I am using JIS screwdrivers.) How would you remove a stripped bayonet screw? And do you have any suggestions for finding a replacement screw? (Do all AI lenses use the same bayonet screws?) Thanks in advance!
Feb 09, 2023 @ 22:39:09
Hi Ric
Interesting to read this article. I have a 58mm/1.2 Ai. Bought it off e-bay and had a stiff focus. I got it serviced in Japan and the lens works fine except I now notice there is a very small “play” before the barrel moves. I must stress that the play is indeed very small. I do also have a 58mm/1.2Ai-S which does not have this play. I notice that the number of turns of the Ai version is more than the Ai-S version. Should I just leave it or do you think it can be corrected? Is it the sign of the helicoid being worn out?
Thanks