
Hello, everybody! I am currently busy studying Unreal Engine this holiday and weekend so I do not have a lot of time to write a lengthy post. My baby is also getting bigger and bigger and she now requires more attention as she is now capable of walking fast! Anyways, a couple of people have talked to me regarding today’s problem and this is how I solved mine.
Introduction:
Today’s topic is the Nikkor 50mm f/1.2 Ai-S. It’s Nikon’s fastest 50mm and it’s still being produced in 2019. It debuted in 1981 as an Ai-S update of Nikon’s first 50/1.2, the Nikkor 50mm f/1.2 Ai and it stayed in production since then. I sometimes wonder if there is an actual demand for this but I remember a few acquaintances who actually bought these in the past 10 years or so. It’s the only thing Nikon has in the ultra-fast normal lens class so I guess that it is one of the reasons why this lens is still being made and sold.

It’s perfect with the Nikon F4, it’s best-paired with a bigger camera since it is heavy. Handling is perfect and I wouldn’t ask for anything more. The bright, big glass is all that you’ll see when looking from the front. It’s a professional tool and it means business.
The optical formula is identical to the older Nikkor 50mm f/1.2 Ai which has a 7-elements-in-6-groups design. It’s amazing how Nikon achieved this using only 7 elements! This is a masterpiece of optical design if I may say so. This is something that’s not easy to achieve and what is even more surprising is we still end up with a small 52mm thread size. The barrel seems the similar to the older Nikkor 50mm f/1.2 Ai except for a few details, the iris now has a 9-bladed design instead of the old one’s 7-bladed design and the focus throw is now shorter compared to the older lens, which is a shame if you ask me.

It feels a bit off when paired with a smaller camera like the Nikon FE. All of the setup’s weight is concentrated at the front, making this front-heavy and the setup will tend to point to the ground when worn around your neck. If there’s one thing that I dislike about this it’s the rather short focus throw. It can be annoying to focus this lens accurately, you can get used to it but this is something that’s really personal.

Fortunately, mine is brand new, no fungus has been seen growing yet as of now. The specks of dust and debris are pretty big and can be seen with the naked eye. I suppose that these will not affect image quality but they will be visible in bokeh balls when underexposed. This is unacceptable so I’m going to open up mine to blow these nasty things away. If you have a dusty Nikkor 50mm f/1.2 Ai-S this is how you can clean the middle elements easily.
Let’s now see some pictures that were taken with this lens. Knowing how it performs will help you maximize its use since you’ll know how to avoid all of its weaknesses and exploit its strengths. There are many people in the net trash-talking about this but I’ll prove to you that this is one of Nikon’s better lenses in the following pictures.
I took the following set using a Nikon Z6. The photos were taken at different apertures from f/1.2, f/2, f/2.8, f/4 and f/5.6 (left-to-right). I chose these values since I imagine that these are the most common apertures that people will want to use this lens with. These are also the apertures wherein we see the most changes in this lens’ character and anything beyond this feels uniform to me or just not as interesting.


(Click to enlarge)
Vignetting can be observed wide-open and is quite dark but this is expected from a lens of this class. It improves considerably by f/2 and is almost gone by f/4. You’ll still see traces of it at f/5.6 which is a shame but at least it is not as bad as it was wide-open. Distortion is quite high for a modern 50mm lens and it’s of the usual barrel-type, the good news is it’s not complex and it can be easily fixed using software. The quality of the bokeh is exquisite, it’s a lot better than the Nikkor 55mm f/1.2 Ai but is not at the level of the legendary Noct-Nikkor 58mm f/1.2 Ai-S. It looks even wide-open with slight outlines or edging but it looks clean and pleasant over-all. The shape of the balls looks like lemons at the edges but that’s expected from a lens this fast. Stopping it down to f/2 will make it look angular due to the 9-bladed (straight) iris but it still looks nice. The bokeh balls look even now with not artifacts and you’re going to notice that the frame also cleans-up nicely. The quality of the bokeh looks great up until f/4 and then things start to look a bit off by f/5.6 but this still looks good as far as I am concerned, it’s just not as beautiful as it looks like at f/2.8, I think f/2.8 is the best aperture for this lens in terms of balance.

It has rather poor resistance to ghosts and the flare can cover the entire frame if you’re not careful. If you’re shooting in a club you will have to be mindful with the bright lights. Since the elements are huge the resulting ghosts are, too. They are only reflections of the elements within the barrel, this is one reason why lenses with less elements perform a lot better in terms of ghost-resistance.


(Click to enlarge)
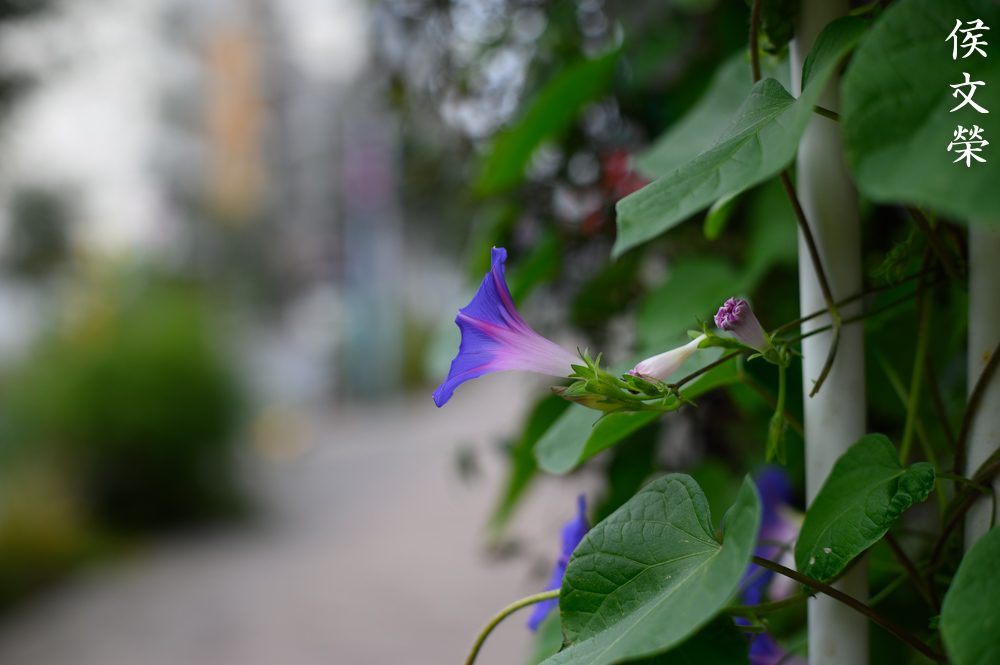
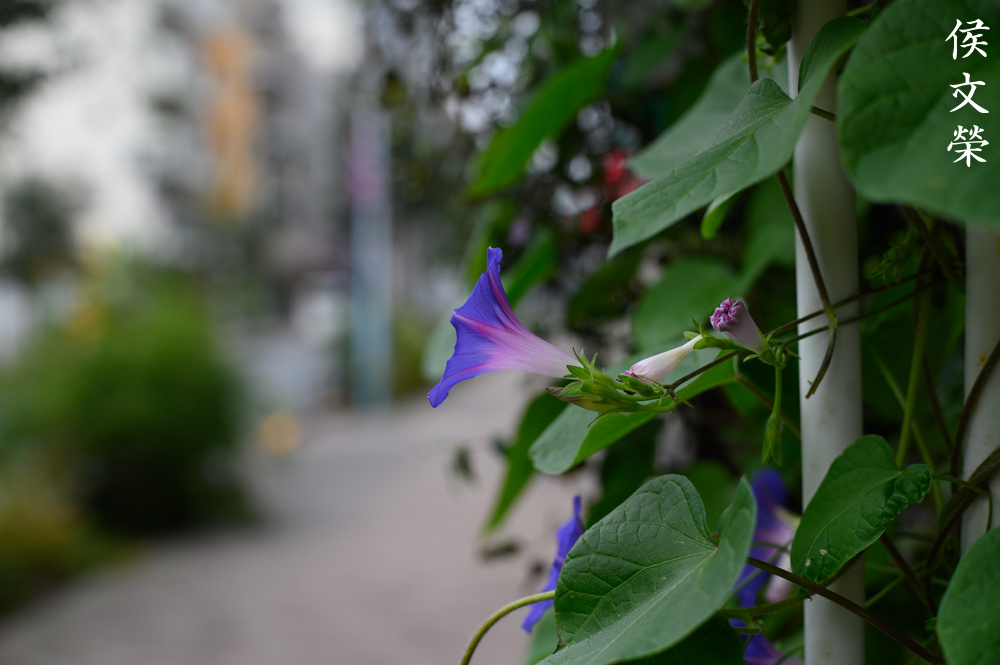
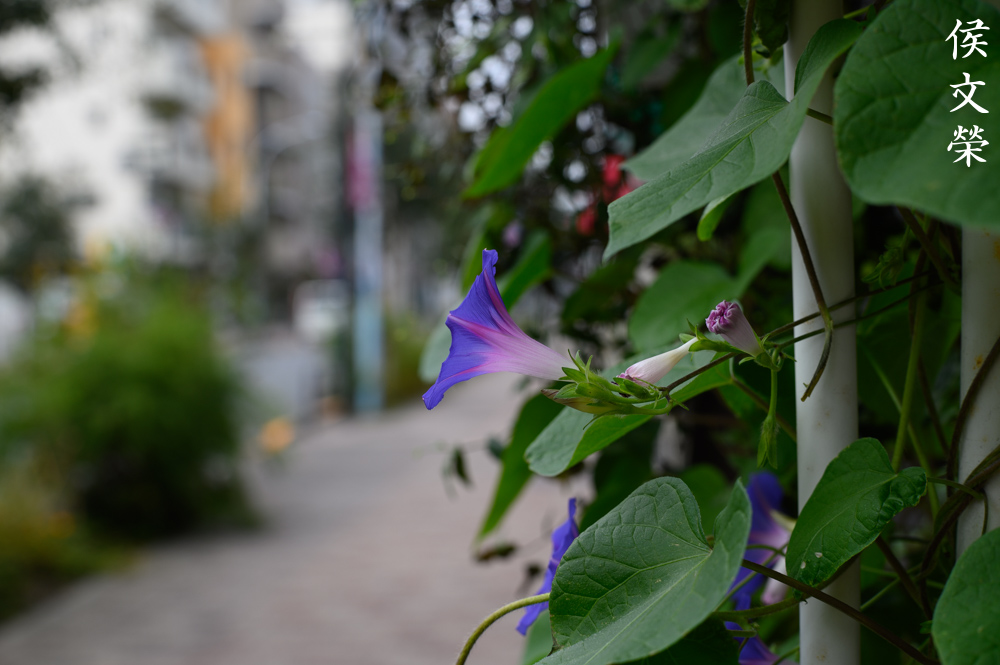
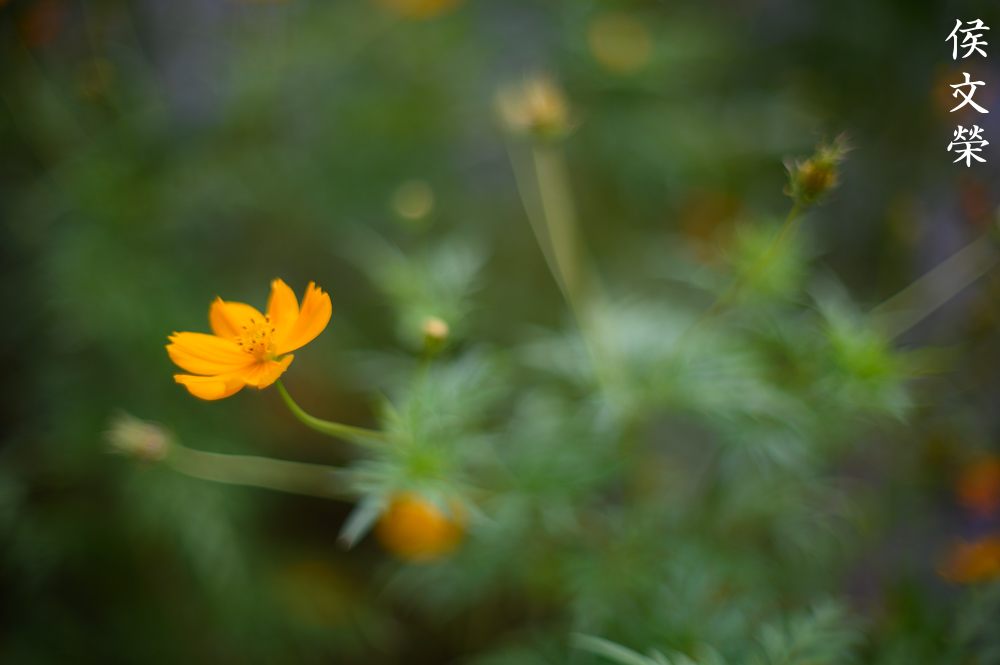
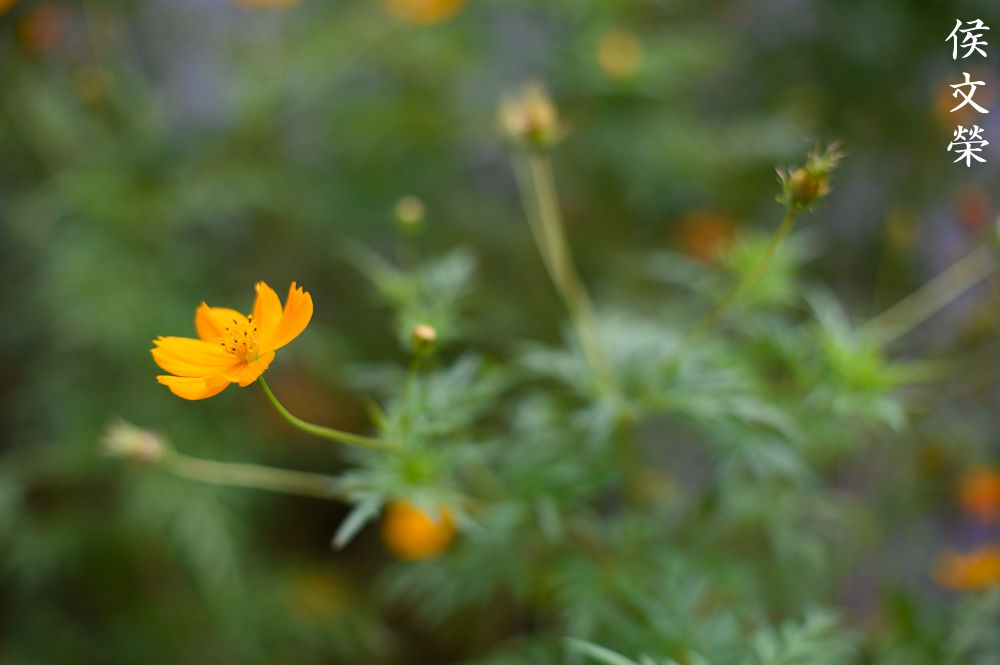
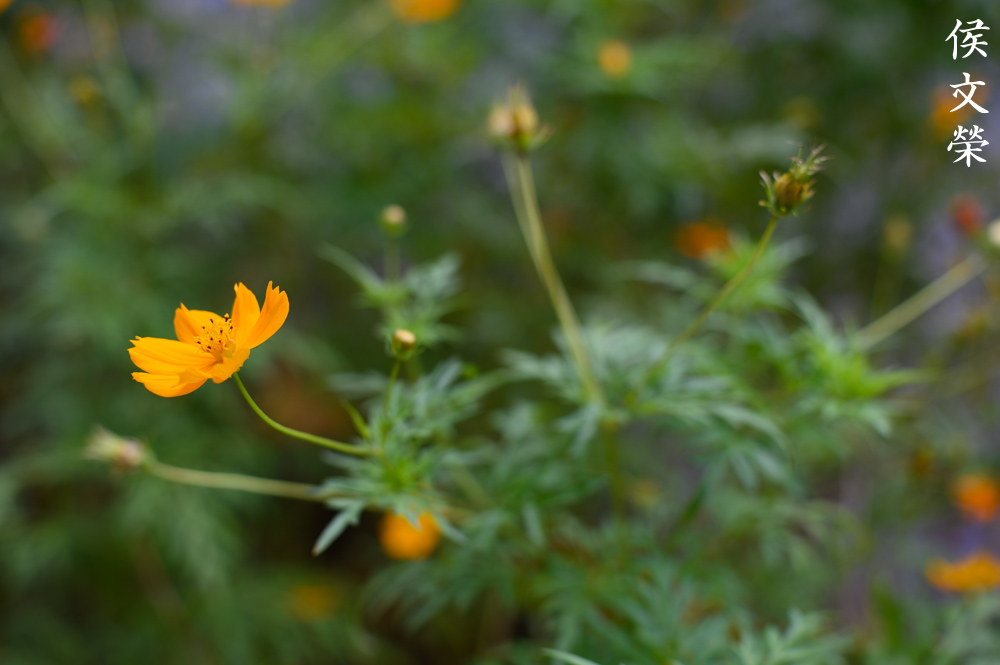
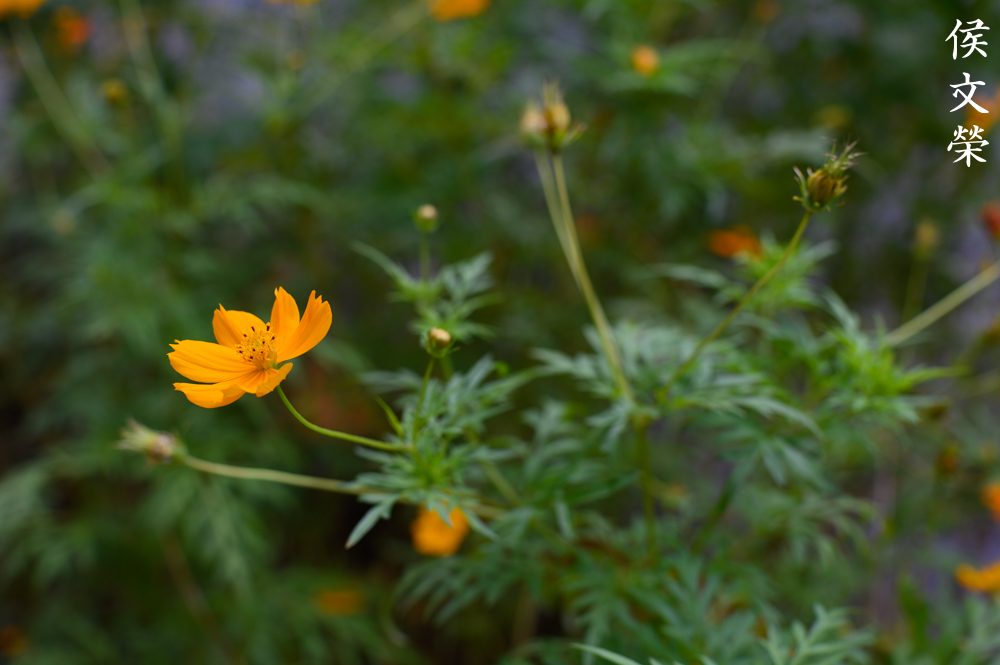
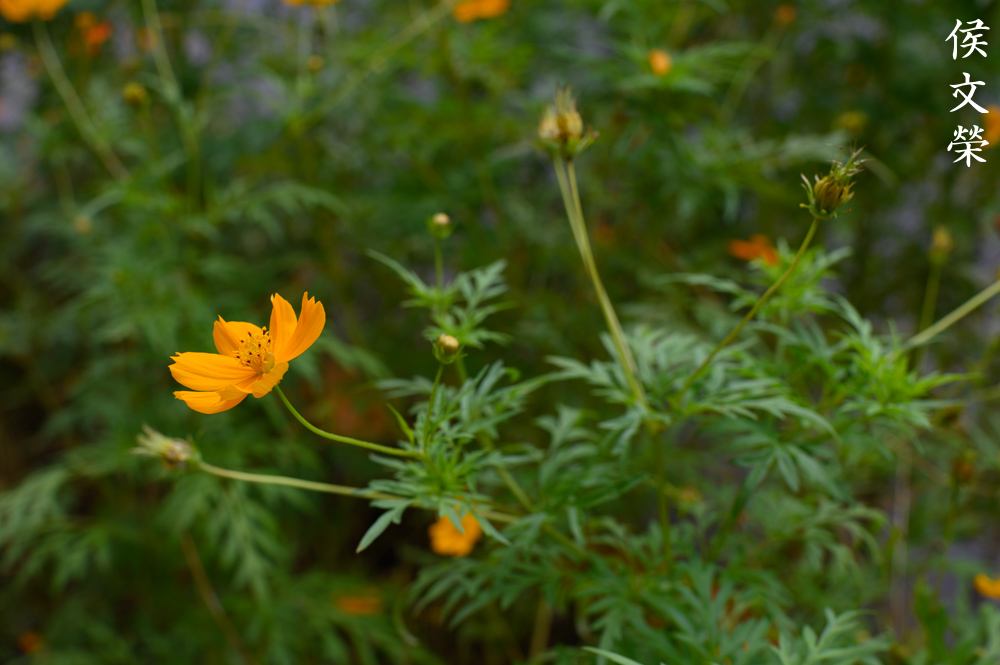
This focuses close at 0.5m which amplifies the lens’ shallow depth-of-field. It is amazing how you can use that effect creatively for jewelry photos, etc. At f/1.2 the center of the frame is sharp but everything is covered in spherical aberration and the resolution can’t support it so it looks soft (but really not). The corners lag by a stop as evident in the set with the orange flower. There is a dainty-look to the picture due to spherical aberration, this will be great for portraiture, giving your model that classic, dreamy look of old portraits. Stop it down to f/2 and things start to look clearer as spherical aberration is controlled better and the lens’ resolving power can support its sharpness at the center of the frame. The corners are still behind and it won’t look decent up until f/2.8 and beyond. The quality of the bokeh looks nicer at f/2 that it is wide-open. The center looks gorgeous at f/2.8 technical-wise, you can look at the flower and appreciate its details while the background sill remains soft. The details look even better as you reach f/4 where the performance is at its peak but the character of the bokeh begins to look a bit “clumpy” depending on what’s on your background. The corners begin to look much better since the wider depth-of-field helps get more things in-focus. You don’t want to go pass f/5.6 since there’s not a lot of point in doing so apart from getting more things in-focus. The character of the bokeh remains smooth in general but it is just not as good as it was at f/2.8. The performance of this lens is better at further distances since the depth-of-field isn’t as shallow. You get the usual spherical aberration wide-open but everything looks great from f/2 on. Now, for subjects that are even further. Chromatic aberration can be observed in areas of high contrast wide-open. While this is also true at closer distances it’s more obvious when the sky is in the frame. Chromatic aberration won’t go away at f/2 and will only improve from f/2.8 and up.


(Click to enlarge)
I won’t be shooting architecture with this lens, the distortion can be rather strong depending on how you position the lines in your frame but don’t let this prevent you from using it in this manner. Just frame your photo so you have more area and you can just use software to fix the distortion for you. The distortion profile is simple so it’s easy to correct this in post.


Photos like this won’t make the distortion as obvious because there are no straight lines that are parallel to the edges of the frame and the brickwork don’t look uniform anyway. You will have less trouble with monuments unless you’re not shooting them from an angle.

The shallow depth-of-field helps isolate your subjects. You can use it to help you tell a story but over-doing it can make your viewers dizzy.

Stopping it down a bit is the best way to use this if there’s enough light or if you need to render fine details.

The resulting picture looks clean, crisp and saturated at f/2.8 or f/4. There’s a beautiful 3-dimensional effect that you can get with this lens and this photo is proof of that.


(Click to enlarge)
Check these photos and see if you like what you see. There are times when the outline of the bokeh balls look more pronounced but this is dependent on the distance of the points-of-light. If this worries you then just shoot this at f/1.4 or f/2 if you want to be safe and that should take care of it. I like how exquisite things look, it has a “premium-look” to the photos that’s difficult to point a finger to. Is it the high resolution, the tonality or the clarity? Maybe it’s all of it combined.
Of course, we will also see how it performs in one of its most-used roles, journalism. While this lens was certainly designed for the lowlight photographers it’s also the favorite of many journalists back then because the very fast maximum aperture of f/1.2 will be enough to cover all situations that require a 50mm lens, from normal lighting conditions to shooting in near-darkness.

Protests can turn really violent within seconds, I can confirm that myself because I’ve witnessed many violent events myself. You do not want to bring an expensive lens with you to these events and get mugged or get your gear damaged but if you are provided for by a company then the equipment you use will most likely be insured.


(Click to enlarge)
One of the perks of shooting with older gear in such events is people will be more likely to be accommodating to you because your equipment does not look threatening compared to a big, black setup that most people associate professional journalists with. Using a manual lens also gives you the flexibility to quickly change your subject when needed, you do not have to fiddle with a joystick or focusing and recomposing just to get your shot. That split-second will sometimes make or break a story.
Let’s now see some photos that were taken using film. This lens was made to be shot with film so it’s best that we see some photos that were shot with it in order to help us better assess this lens. Film also has a unique look and it’s difficult to simulate it with digital due to film grain. Grain can help hide imperfections and that’s why we want to study some film photos. The next set was shot with Kodak Color Plus 200 with a Nikon F3.

The outlines of the bokeh balls aren’t as bad with film but it’s still there. It is not as distracting as grain helped mask it.

Film grain really helped make this shot look more special, giving you an old, vintage feel to you photos. A bit of spherical aberration on the skin makes it “glow” at the brighter parts.

Details look great, sharp and the contrast is superb. I think this was taken at f/2 or even wide-open the sun was starting to set.

Shooting a photo like this wide-open is not going to work because you won’t get your subjects in-focus unless their faces are all at the same plane. Even with stopping this down a bit I still missed the lady to the far-left.

There’s some weird-looking bokeh at the top-right quadrant but overall this picture looks nice, I specially like how this lens rendered her skin.

It’s difficult to focus this lens but you can get it with practice. The colors are rich and saturated even wide-open, just look at the eyes of the cat.

This was taken with the iris stopped-down at around f/2.8. I think that this is the best aperture to shoot this lens with because you get amazing sharpness and the background remains smooth.


(Click to enlarge)
Here are some more photos from that afternoon. I imagine that people will want to shoot this lens in less-than-ideal brightness due to its fast aperture but shooting this lens in bright situations also has merit because it’s easier to see what’s in-focus and your viewfinder is much brighter compared to a slower lens.
The following pictures were shot using Fujifilm Natura 1600 with the Nikon F4. I got them from the lab scanned and so the quality may not be the best, I suspect that these are just 6MP images and I lost plenty of details that were otherwise clear on the negatives.


(Click to enlarge)
Check the pictures above for some distortion-related samples. These should give you an idea as to how distortion looks like in real-world photos.

The lens is more than capable of producing sharp pictures. This was shot at f/2.8 or so, I love how the negative looks like under a loupe. It also produces nice sun-stars and I can’t believe that it did it at such a big aperture, I swear that I shot this at about f/2 – f/2.8.


(Click to enlarge)
It was difficult to focus this given that my subjects never stood-still for me, I was using a waist-level finder but you can take sharp pictures with this lens even wide-open or at least faster than f/2 or so. This is capable of producing 3D-like pictures and the rendering is really smooth and refined.

I was focusing on the noodles being shredded but the cook looked my way and smiled. It was a disaster since the framing and candid feel of this scene is now gone. If you look at the noodles and the board you can see just how nice and sharp this lens is. Look at the background, you will notice just how smooth everything is, the rendering is exquisite to say the least and this will make you want to shoot this wide-open despite the difficulty in focusing it. Framing and re-composing can also be tricky with this lens because of the paper-thin focus plane but that’s the best thing we can do if we want precise focusing when using a camera with a split-prism.


(Click to enlarge)
Here are some more examples, this lens just begs to be used at night. While sharpness is excellent, you will notice some chromatic aberration on white-colored objects that aren’t focused and just before or behind the focus plane and this gets less obvious as you stop it down beyond f/2 so if you absolutely want a clean picture then just shoot it from f/2. You can also use it creatively if you wish to do so as it adds that “dreaminess” factor to your pictures. This can also make the skin “glow” and will be nice for portraiture. People who complain about it just don’t know how to use this effect to their advantage. This is the reason why people shoot more and more with older lenses these days because these flaws bring so much to an image it makes them unique in some way.
That’s it for the introduction. This lens is superb and I highly recommend it to people who are in for a challenge. It’s not easy to use and there are lots of lemons out there with less-than-optimal performance wide-open. What I do to test this is to shoot these wide-open and at the closest focusing distance. I then focus on something shiny like the silver crown of a metal watch or that shiny chrome ring on many older lenses. If I can get a sliver of sharp details without chromatic aberration (at least not a lot) in the focused areas then it is a good lens. If all I see is a mushy mess of blurred features than that’s not worth keeping. This is even true with lenses that are brand-new, mine was like that and I had to pester Nikon to send it back to the factory because this lens was bought new. Just do this test when buying one and it’s best to get it from a shop where you can test it out first before you buy it. Buying this one online is not the best option as you can end up with a lemon and you cannot get any refund as this does not fall under defect.
Before We Begin:
If this is your first attempt at repairing a lens then I suggest that you check my previous posts regarding screws & drivers, grease and other things. Also read what I wrote about the tools that you’ll need to fix your Nikkors.
I suggest that you read these primers before you begin (for beginners):
- Essential tools
- Best practices 1
- Best practices 2
- Best practices 3
- Ai conversion
- Working withHelicoids
Reading these primers should lessen the chance of ruining your lens if you are a novice. Before opening up any lens, always look for other people who have done so in Youtube or the internet. Information is scarce, vague and scattered (that is why I started this) but you can still find some information if you search carefully.
I highly recommend that you read my working with helicoids post because this is very important and getting it wrong can ruin your day. If I can force you to read this, I would. It is that important!
For more advanced topics, you can read my fungus removal post as a start. This post has a lot of useful information and it will be beneficial for you to read this.
Dismantling (Partial):
Fortunately for us, we do not need any special tools to open this and blow away the dirt in the middle elements where it tends to accumulate. I’ll show you why this is the case later.

All we need are:
- small precision screwdriver (-)
- JIS screwdriver (+)
- bulb blower
- flashlight
- acetone/solvent
This is a simple routine because we don’t need to work on the focusing unit. All we need to do is access the objective (optical assembly) , open it and then close it again once we’re done.
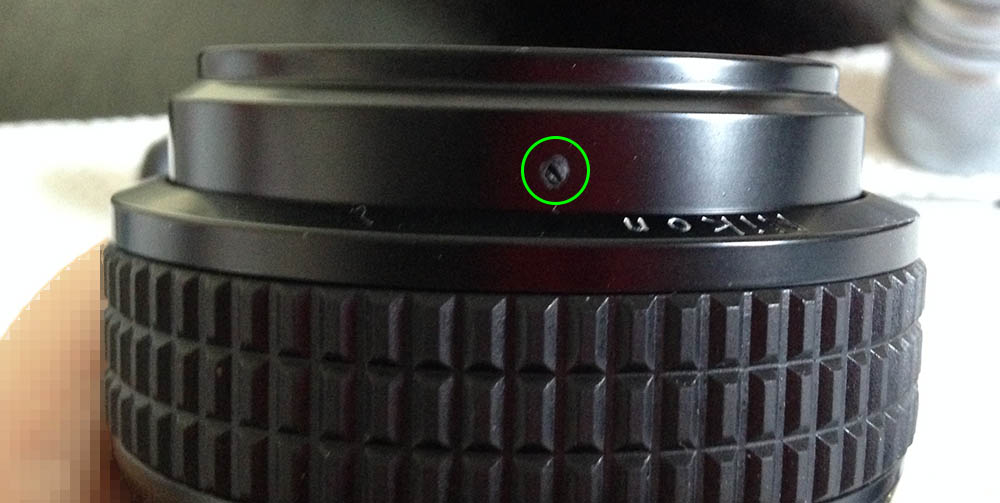
Turn the focusing ring until you see this set screw. Remove this and store it somewhere safe where you cannot misplace it. These are delicate and using the wrong driver or twisting from the wrong angle will ruin the slot!
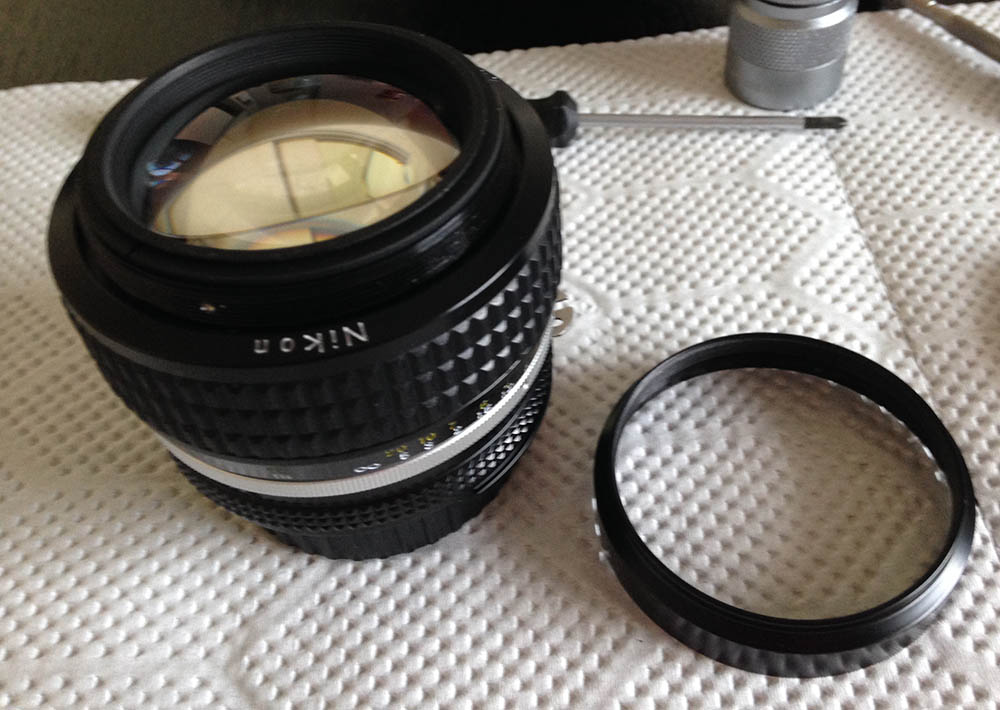
Once the set screw is removed, you can now remove the retaining ring/front ring from the rest of the lens. Be careful not to scratch the front element!
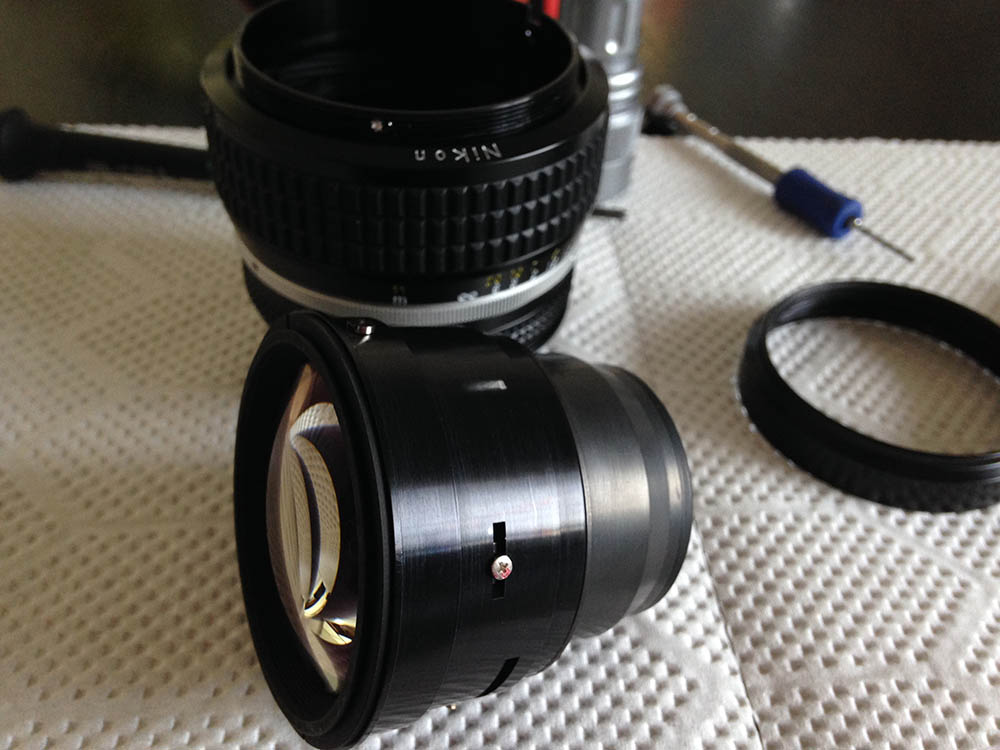
The objective can easily be pulled out from the lens barrel. Be careful not to drop this as they could free-fall into the floor due to their weight.
As you can see from this photo the hole in the iris assembly leads all the way to the glass inside. This is one of the causes for the dirt accumulating in the middle elements. Lenses back in the days weren’t weather-sealed, this thing only came about when camera makers start to incorporate electronics more and more into their products.
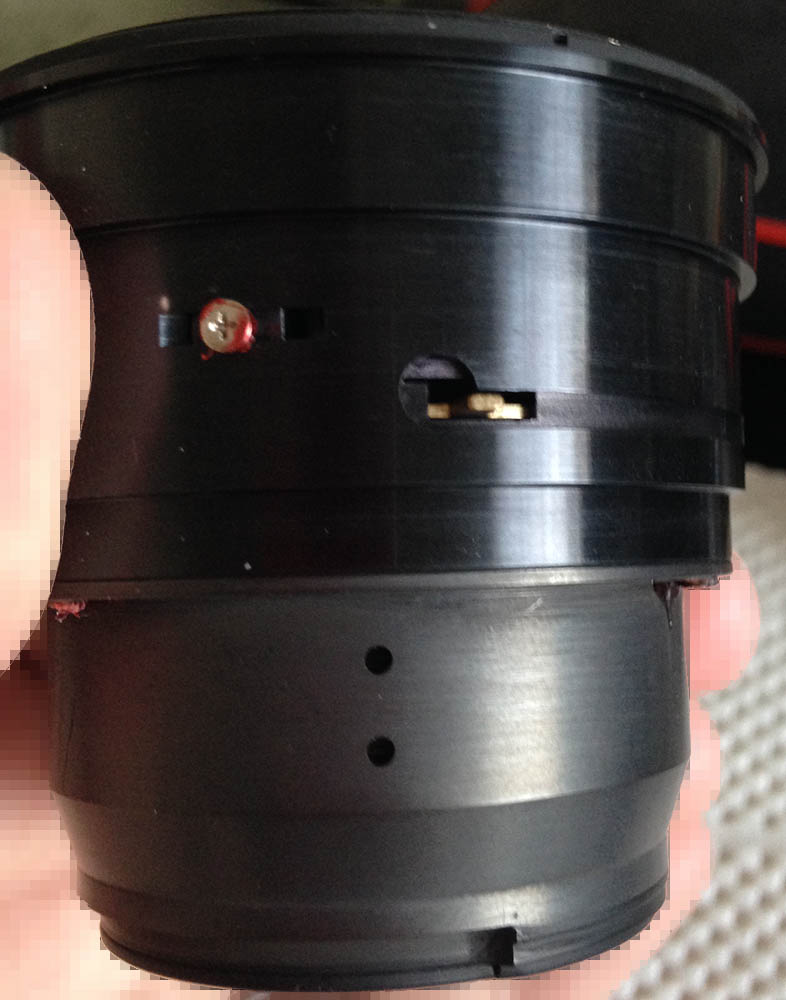
Unscrew the 3 screws to separate the front assembly from the rear assembly. It shouldn’t take a lot of effort to take them apart, if yours is stuck then just place a small drop of acetone into the seams and let capillary action take it into the threads. Wait for a couple of minutes to let it work and you should be able to separate these with no effort at all.
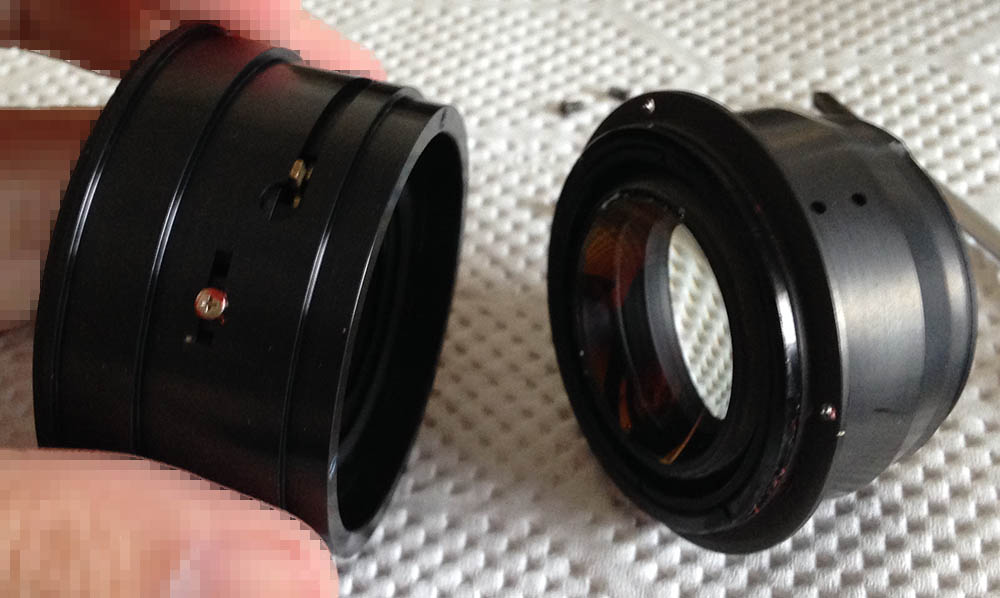
Simply blow the dirt away using the bulb blower and reassemble your lens once you are satisfied. A flashlight can help you see dusts better, just flash the lens from behind and look at the glass from an angle and they should easily be illuminated.
Conclusion:
This should be an easy fix, it took me less than 20 min. to do mine. Putting the objective back into the lens barrel will take you some time because the insides of this lens is cramped.
Be careful on the whole process as you don’t want to accidentally damage it. Just go about slowly and you’ll get there eventually. This is something that you might do on a regular basis (maintenance) so please be patient.
Thanks for reading this blog post and I hope that you have enjoyed reading this one even if this is shorter than my usual articles. See you all again next time, Ric.
Help Support this Blog:
Maintaining this blog requires money to operate. If you think that this site has helped you or you want to show your support by helping with the site’s upkeep, you can make a small donation to my paypal.com (richardHaw888@gmail.com). Money is not my prime motivation for this blog and I believe that I have enough to run this but you can help me make this site (and the companion facebook page) grow.
Buy me a roll of film or a burger?
Thank you very much for your continued support!
$2.00
Helping support this site will ensure that this will be kept going as long as I have the time and energy for this. I would appreciate it if you just leave out your name or details like your country’s name or other information so that the donations will totally be anonymous. This is a labor of love and I intend to keep it that way for as long as I can. Ric.

Feb 16, 2021 @ 19:18:55
Hi Richard, I just received a 50mm 1.2 AIS and there is a knocking sound when I move the lens around – it seems there is a little bit of movement between the focus ring and the lens barrel (although the focus feels perfect and smooth). Is this movement normal or do you think there is something loose?
Great blog by the way thanks!
Hugh, Wellington, N.Z.