
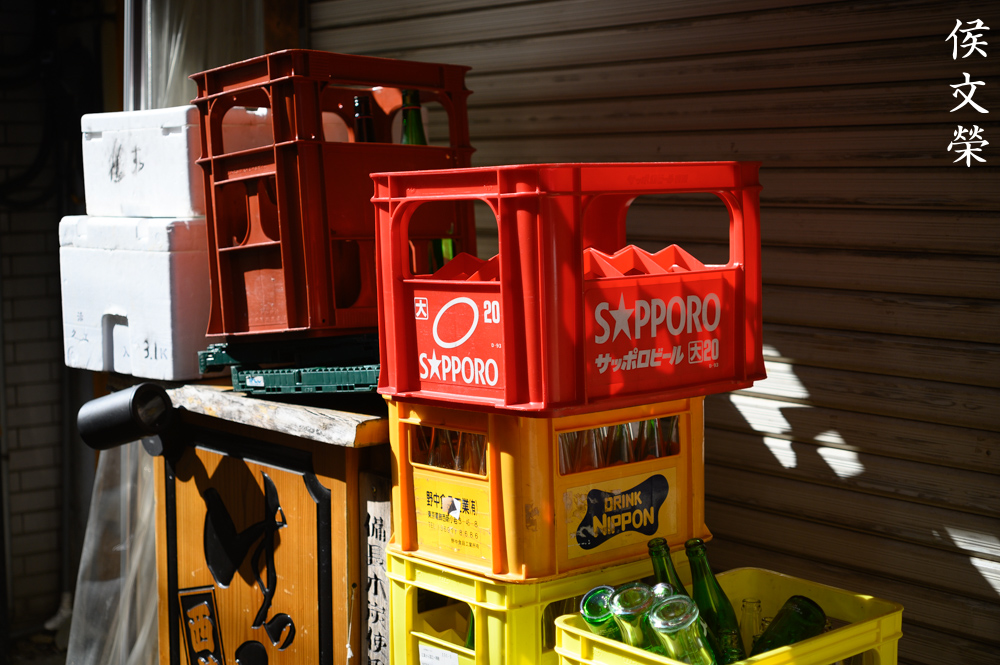
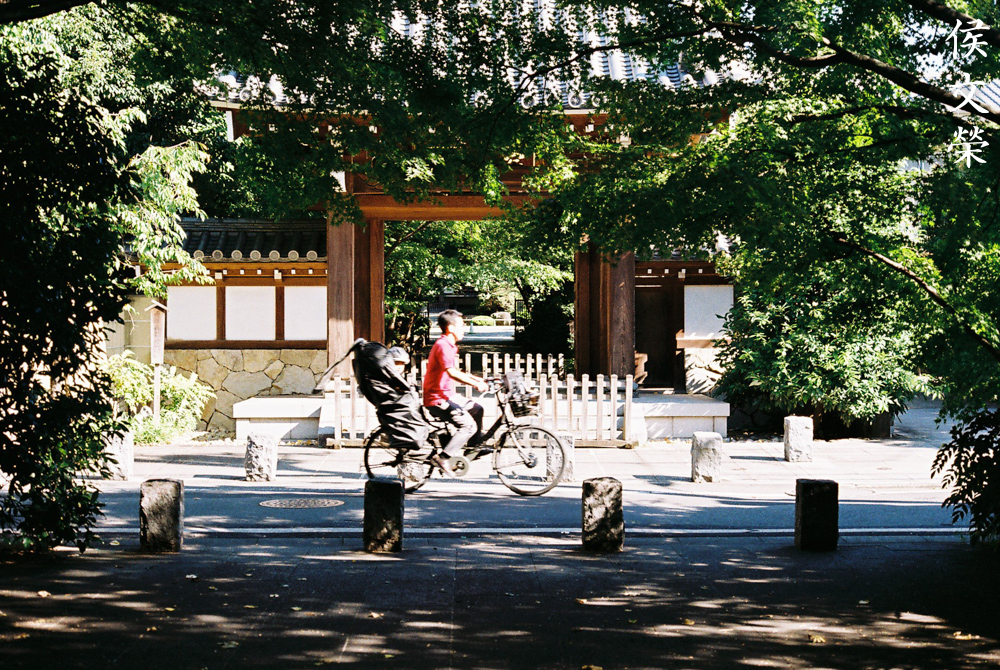
Hello, everybody! I like shooting with film. It’s inconvenient, unpredictable, expensive and unforgiving but it gives you memorable pictures that you’re not going to get with digital. It requires more skill to use compared to digital and it requires even more skill to use it properly. Many people ask me why I prefer to shoot film and I always find it hard to justify it, my only answer is usually short – “I love a challenge”. Sure, I can get instant review with digital but it doesn’t feel as satisfying and so the pictures that I made don’t have the same impact as my pictures that were taken with film which is memorable. The inconvenience of taking it makes it more precious and you’ll remember how you took that shot and why. Sometimes, a little bit of inconvenience is a good thing. Today, I will talk about an inconvenient lens to use. It is difficult to use properly but you are rewarded with nice pictures if you managed to nail a shot.
Introduction:
Today, we are going to discuss a very unusual, rare and historical lens. This is something that you do not see everyday and as a consequence there isn’t a lot of info on the net about this lens. Many people don’t even know that it exists. The Micro-Nikkor 5.5cm f/3.5 started the popular 55mm line of macro lenses. This lens line was so popular and practical that other manufacturers had to copy this idea and incorporate it into their own products and this all started with this lens.

This is a compact little lens by today’s standards but this was considered to be on the fat side when it debuted. The barrel had to be wide because it can extend to about 2x its length when fully extended. If you want to read more about this lens you can go to Matthew Lin’s great writeup here.
This lens debuted in 1961 and it was only produced until 1963. This makes it rare due to its really short production life. It was soon replaced by the more common Micro-Nikkor 55mm f/3.5 Auto which is a more practical lens and it can be produced easier than this. It went on to be one of the most successful macro lens design ever made.
The optical formula is of the classic 5-elements-in-4-groups that is similar to the optical design of the Micro-Nikkor 5cm f/3.5, that’s the first Micro-Nikkor and it was made for rangefinder cameras. The design had to be modified to make enough space behind the rear element to clear the swinging mirror of the Nikon F and so an additional 5mm was added to it. Its general design is so successful that it remained mostly similar until the 1980s. Any tweaks to it are generally minor and the scheme remained the same.

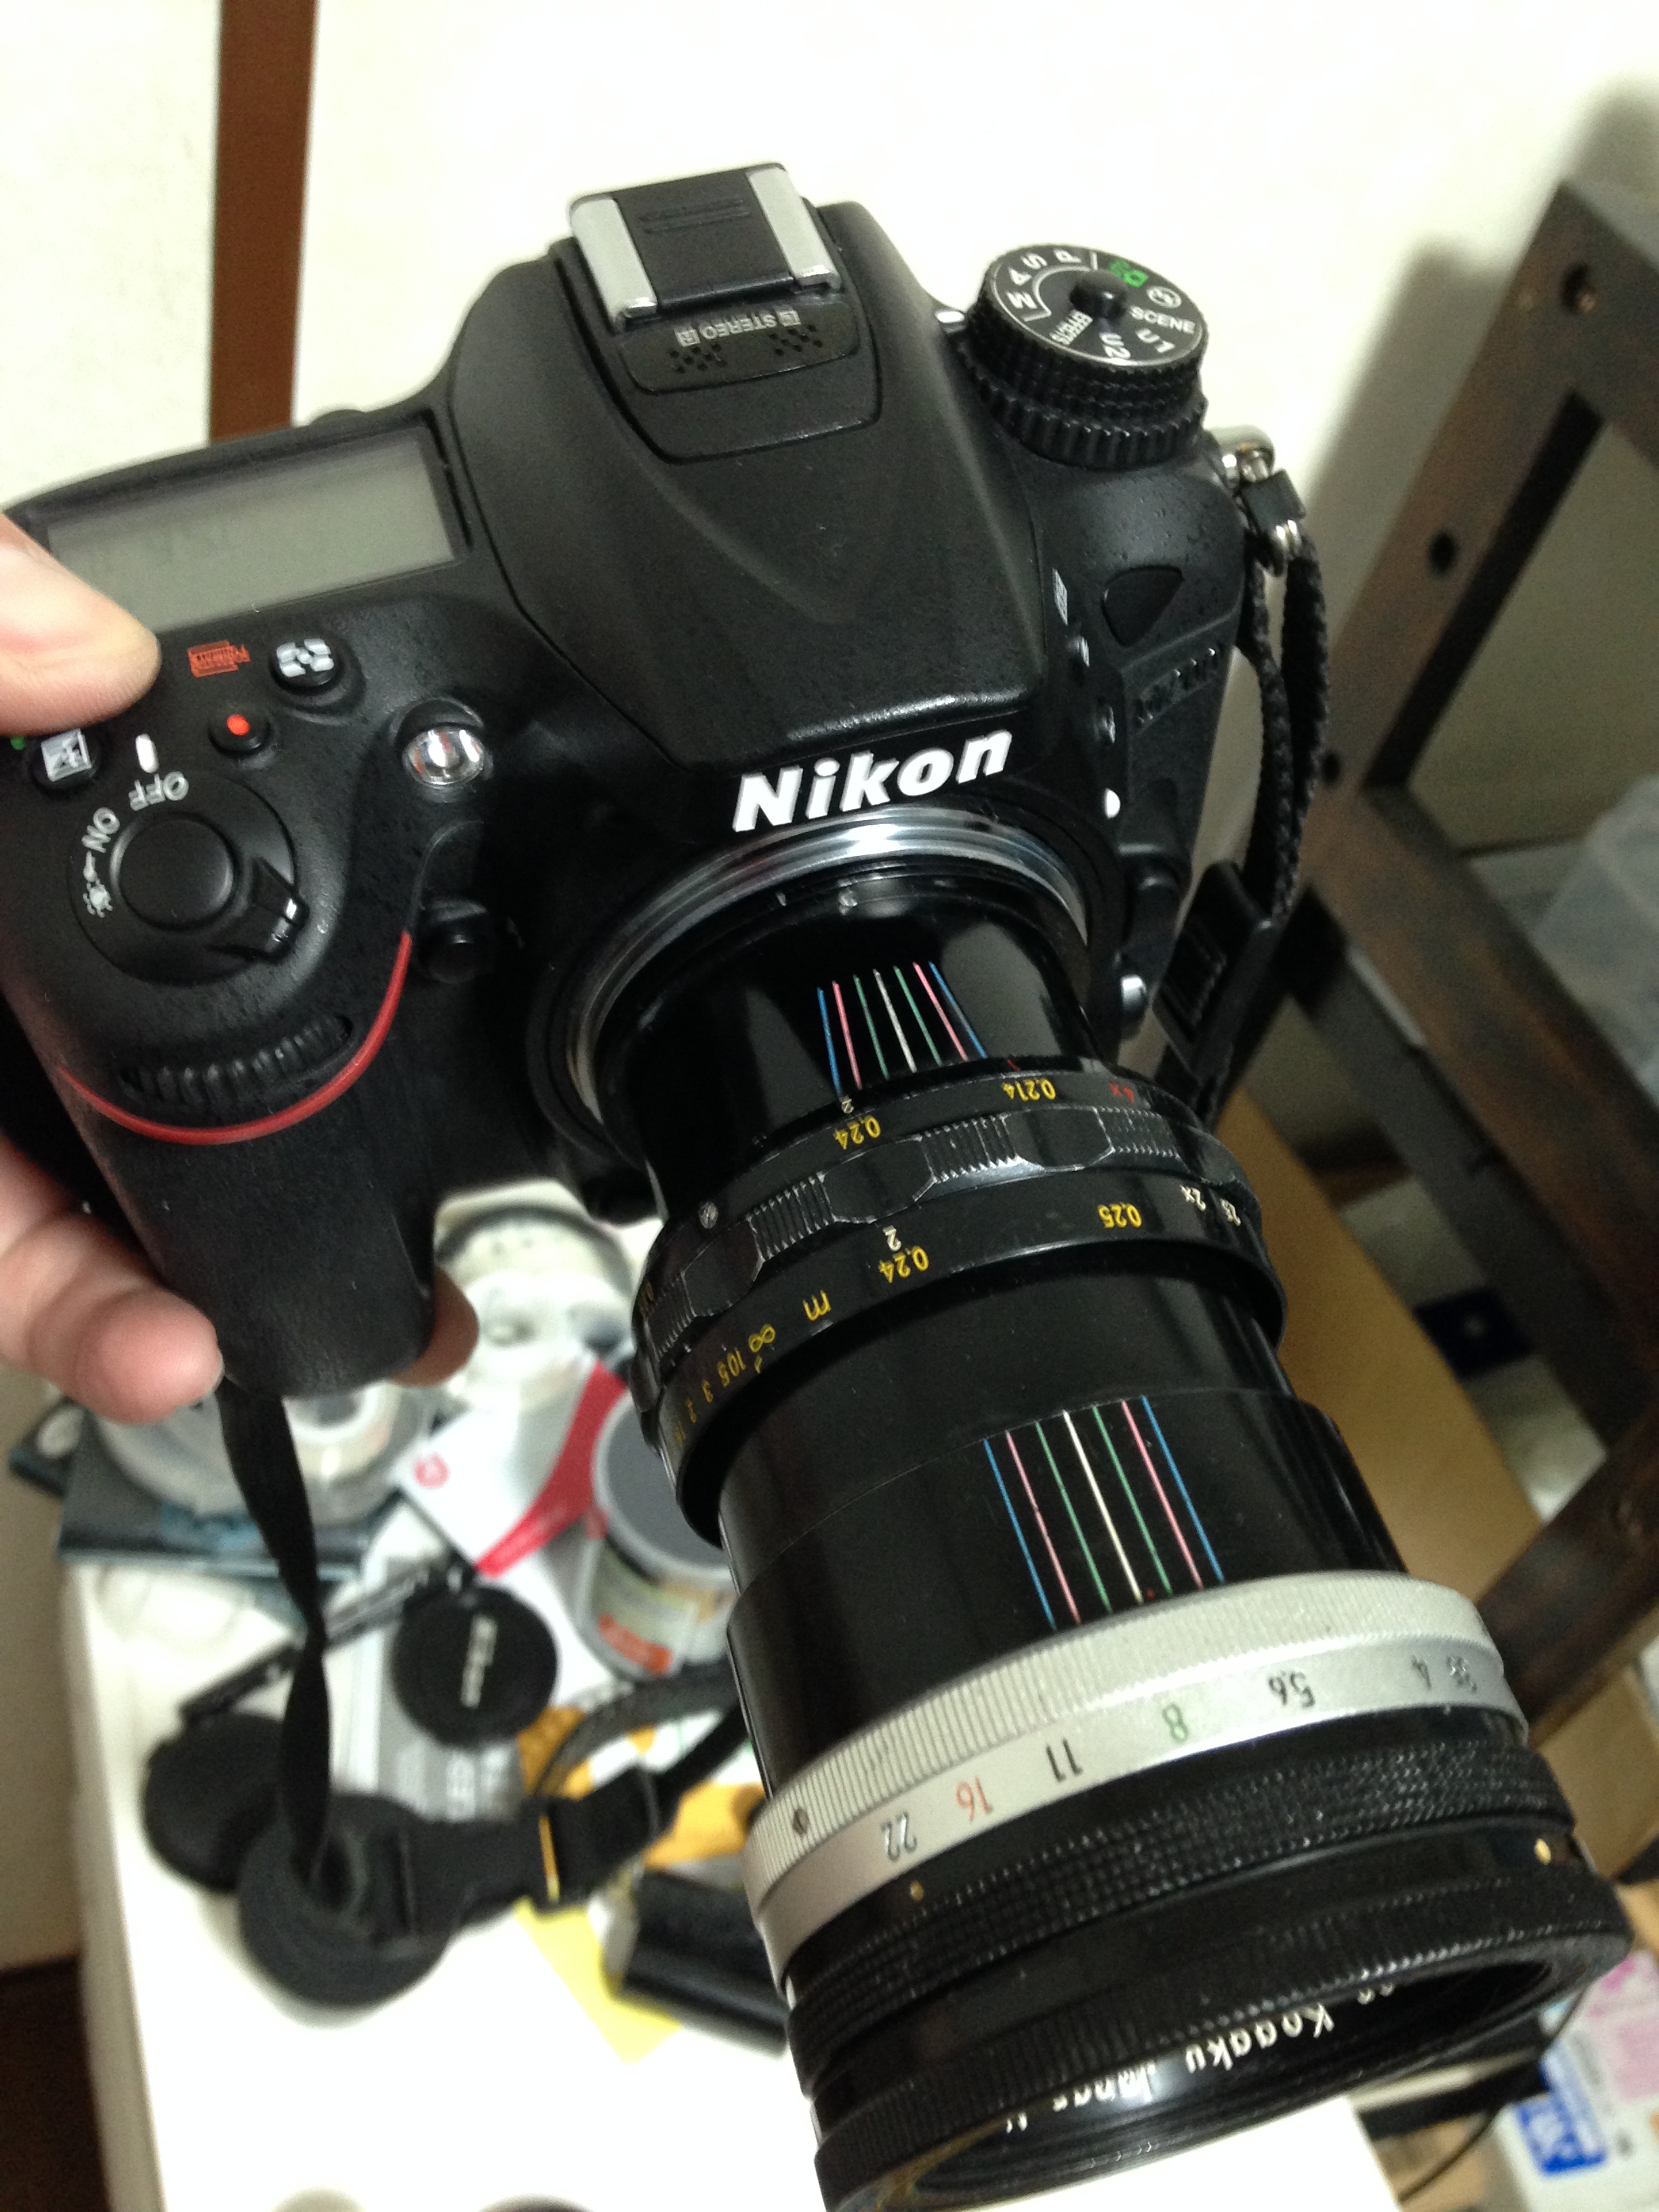
To get to 1:1 magnification natively without the help of extension rings, this lens has to extend this much. It looks impressive but I can tell you that the handling suffers a lot because of this feature. The camera is a Nikon D7200, this lens cannot be safely mounted to just any Nikon, the size of the bayonet has to be of the same size as that of the Nikon F’s or else the focusing ring is going to prevent you from focusing this to infinity. I will show you how this lens was modified to make it fit the Nikon D7200. You can only find this kind of information in this blog!

It mounts perfectly with most manual-focus Nikons. Most later Nikons won’t allow you to mount this lens because the throat of the bayonet mount is just a sliver of a millimeter wider.

To use this lens you first set the desired aperture and then you stop it down manually before you press the shutter. This is a lot of work even for studio and this is the reason why this had a short production life.
The Micro-Nikkor 55mm f/3.5 Auto will only focus down to 1:2 magnification without the M-rings but its handling has been improved considerably. Only during the mid-1980s with the introduction of the AF-Micro-Nikkor 55mm f/2.8 will we see a lens from this lineage regain the ability to focus back to 1:1 magnification without the help of extension rings or other attachments.
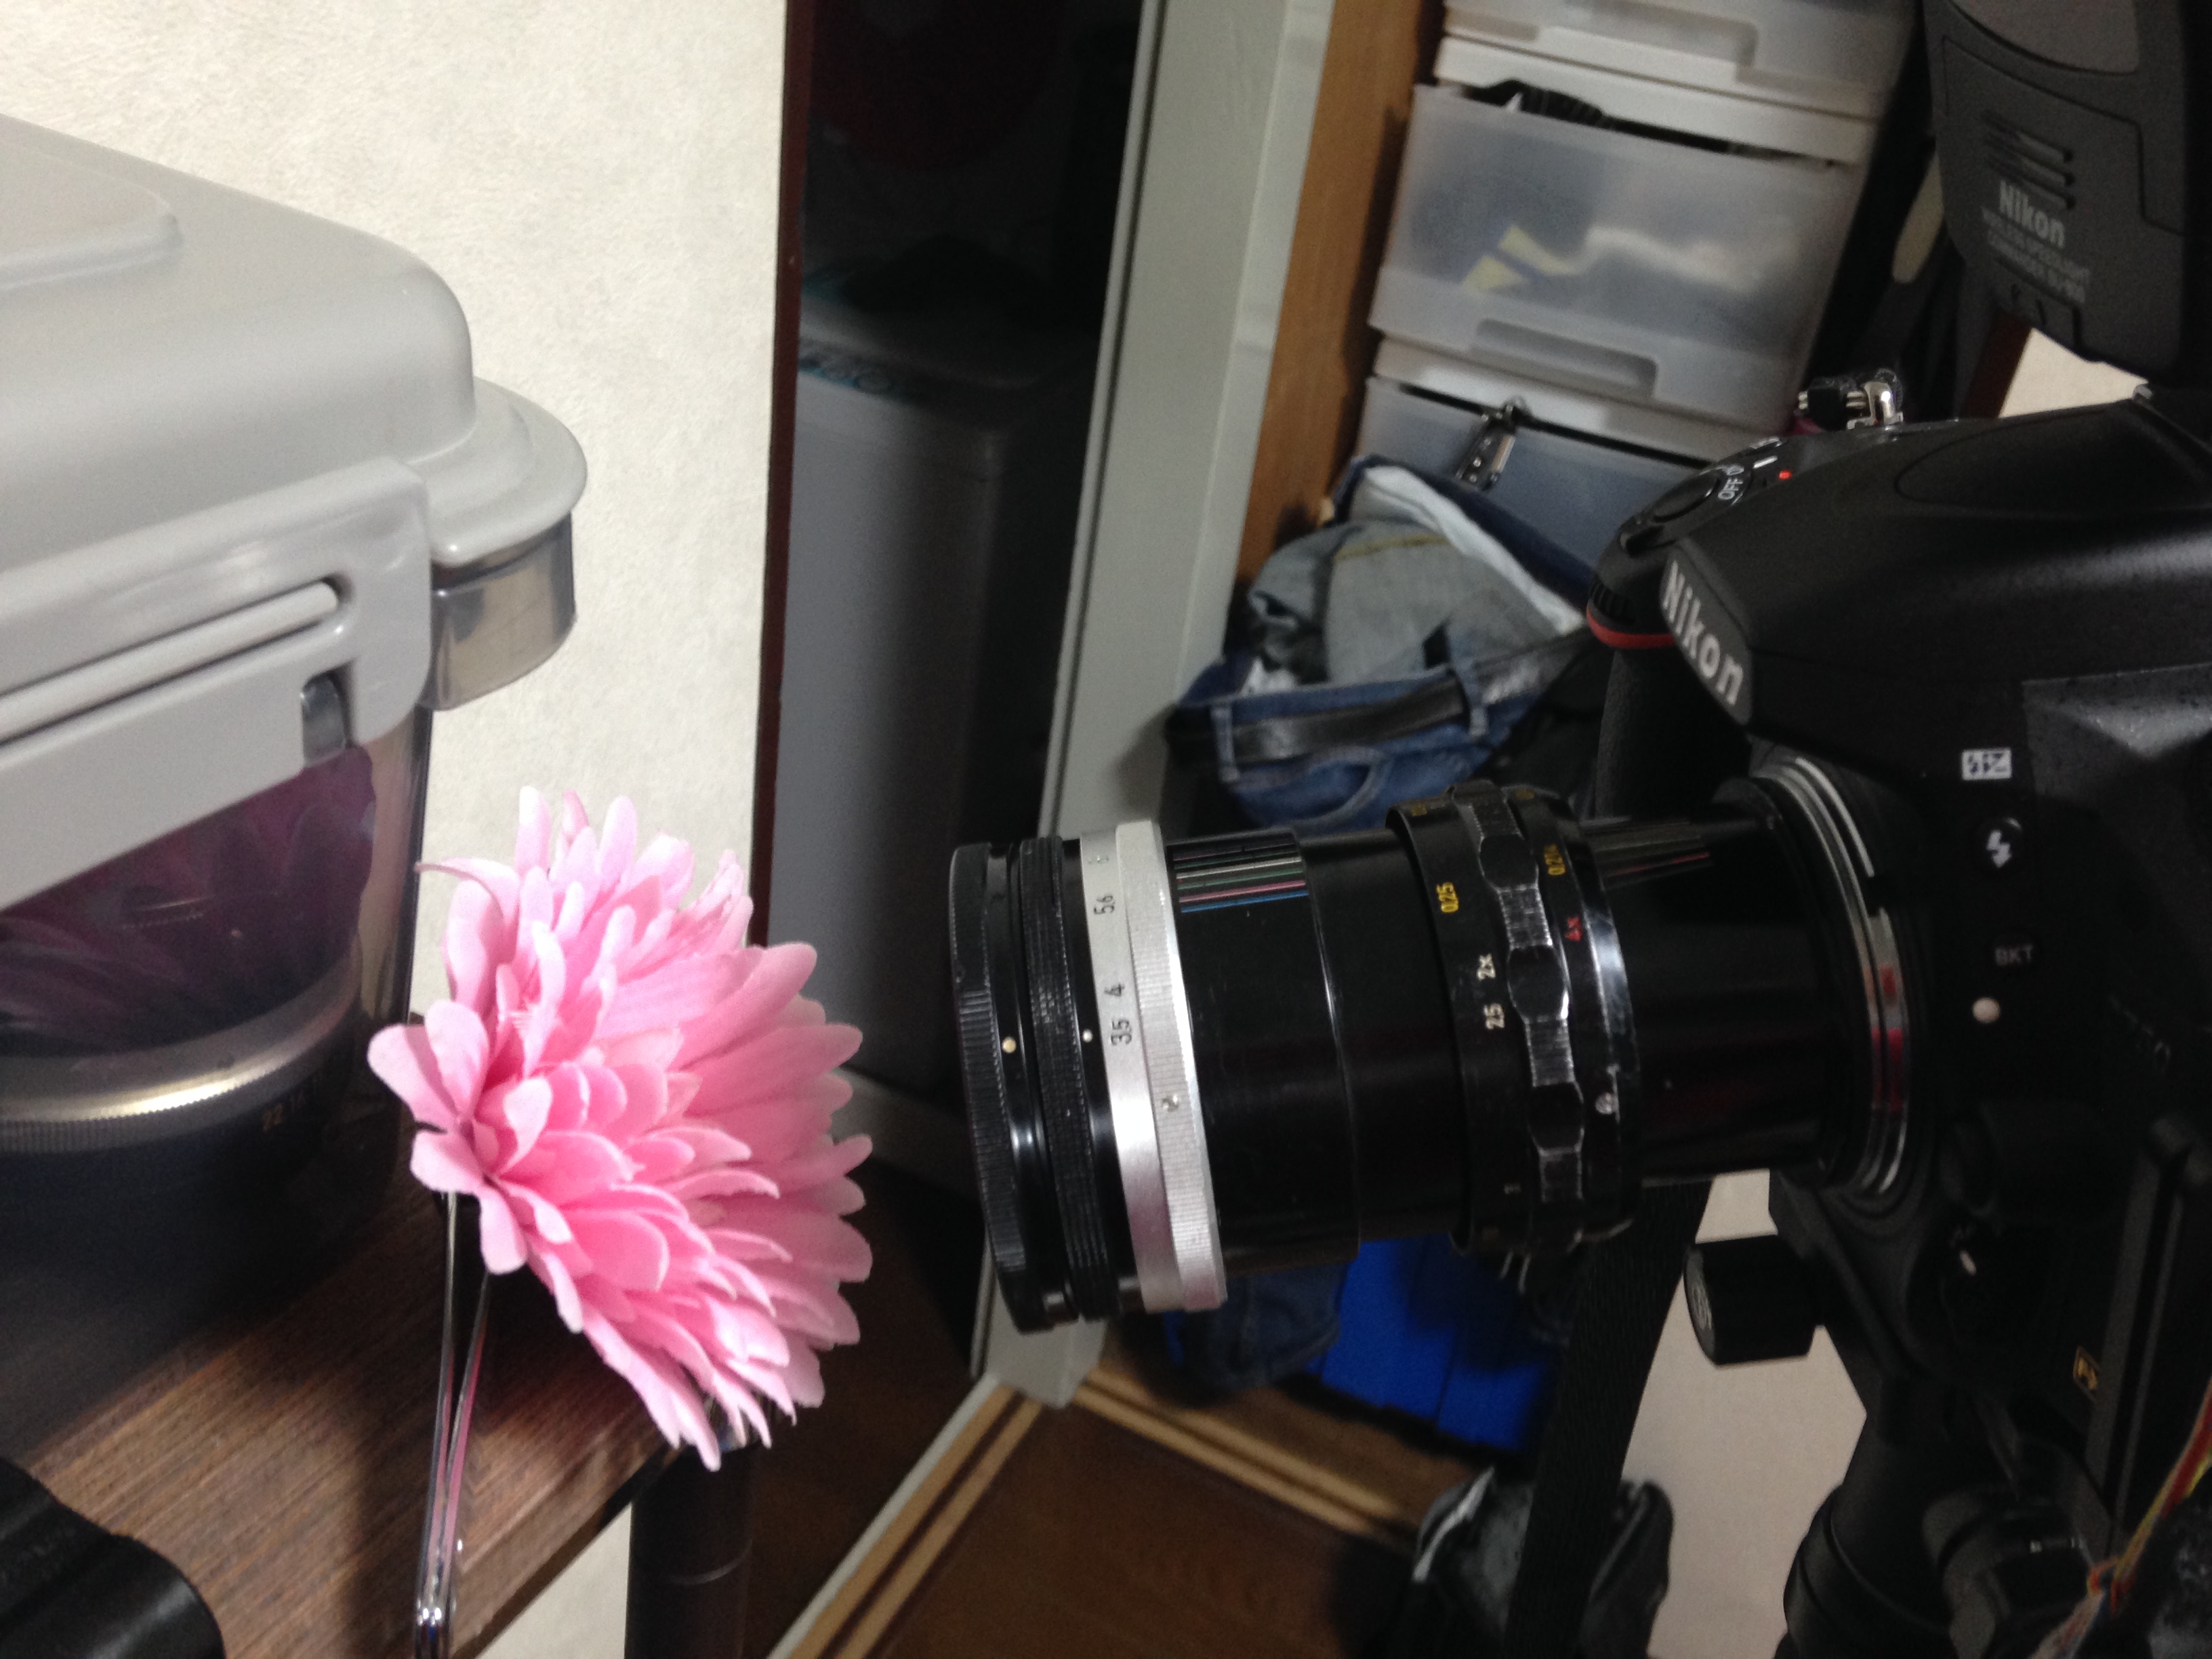
This is how close you need to be in order to focus down to 1:1. This is close to useless for shooting bugs in the field or anything with ambient lighting as you’ll get in the way of the light source. Using strobes or LEDs will help you illuminate your subject.
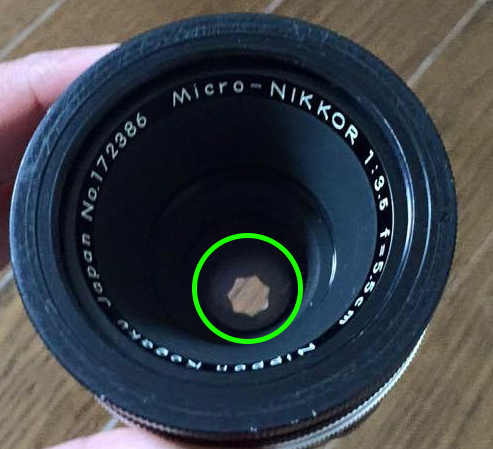
Notice that the shape of the iris is not round but star-shaped. It will create some interesting bokeh balls. Here is an article on how to work with preset-type irises and there are videos there. Read the link for more information.

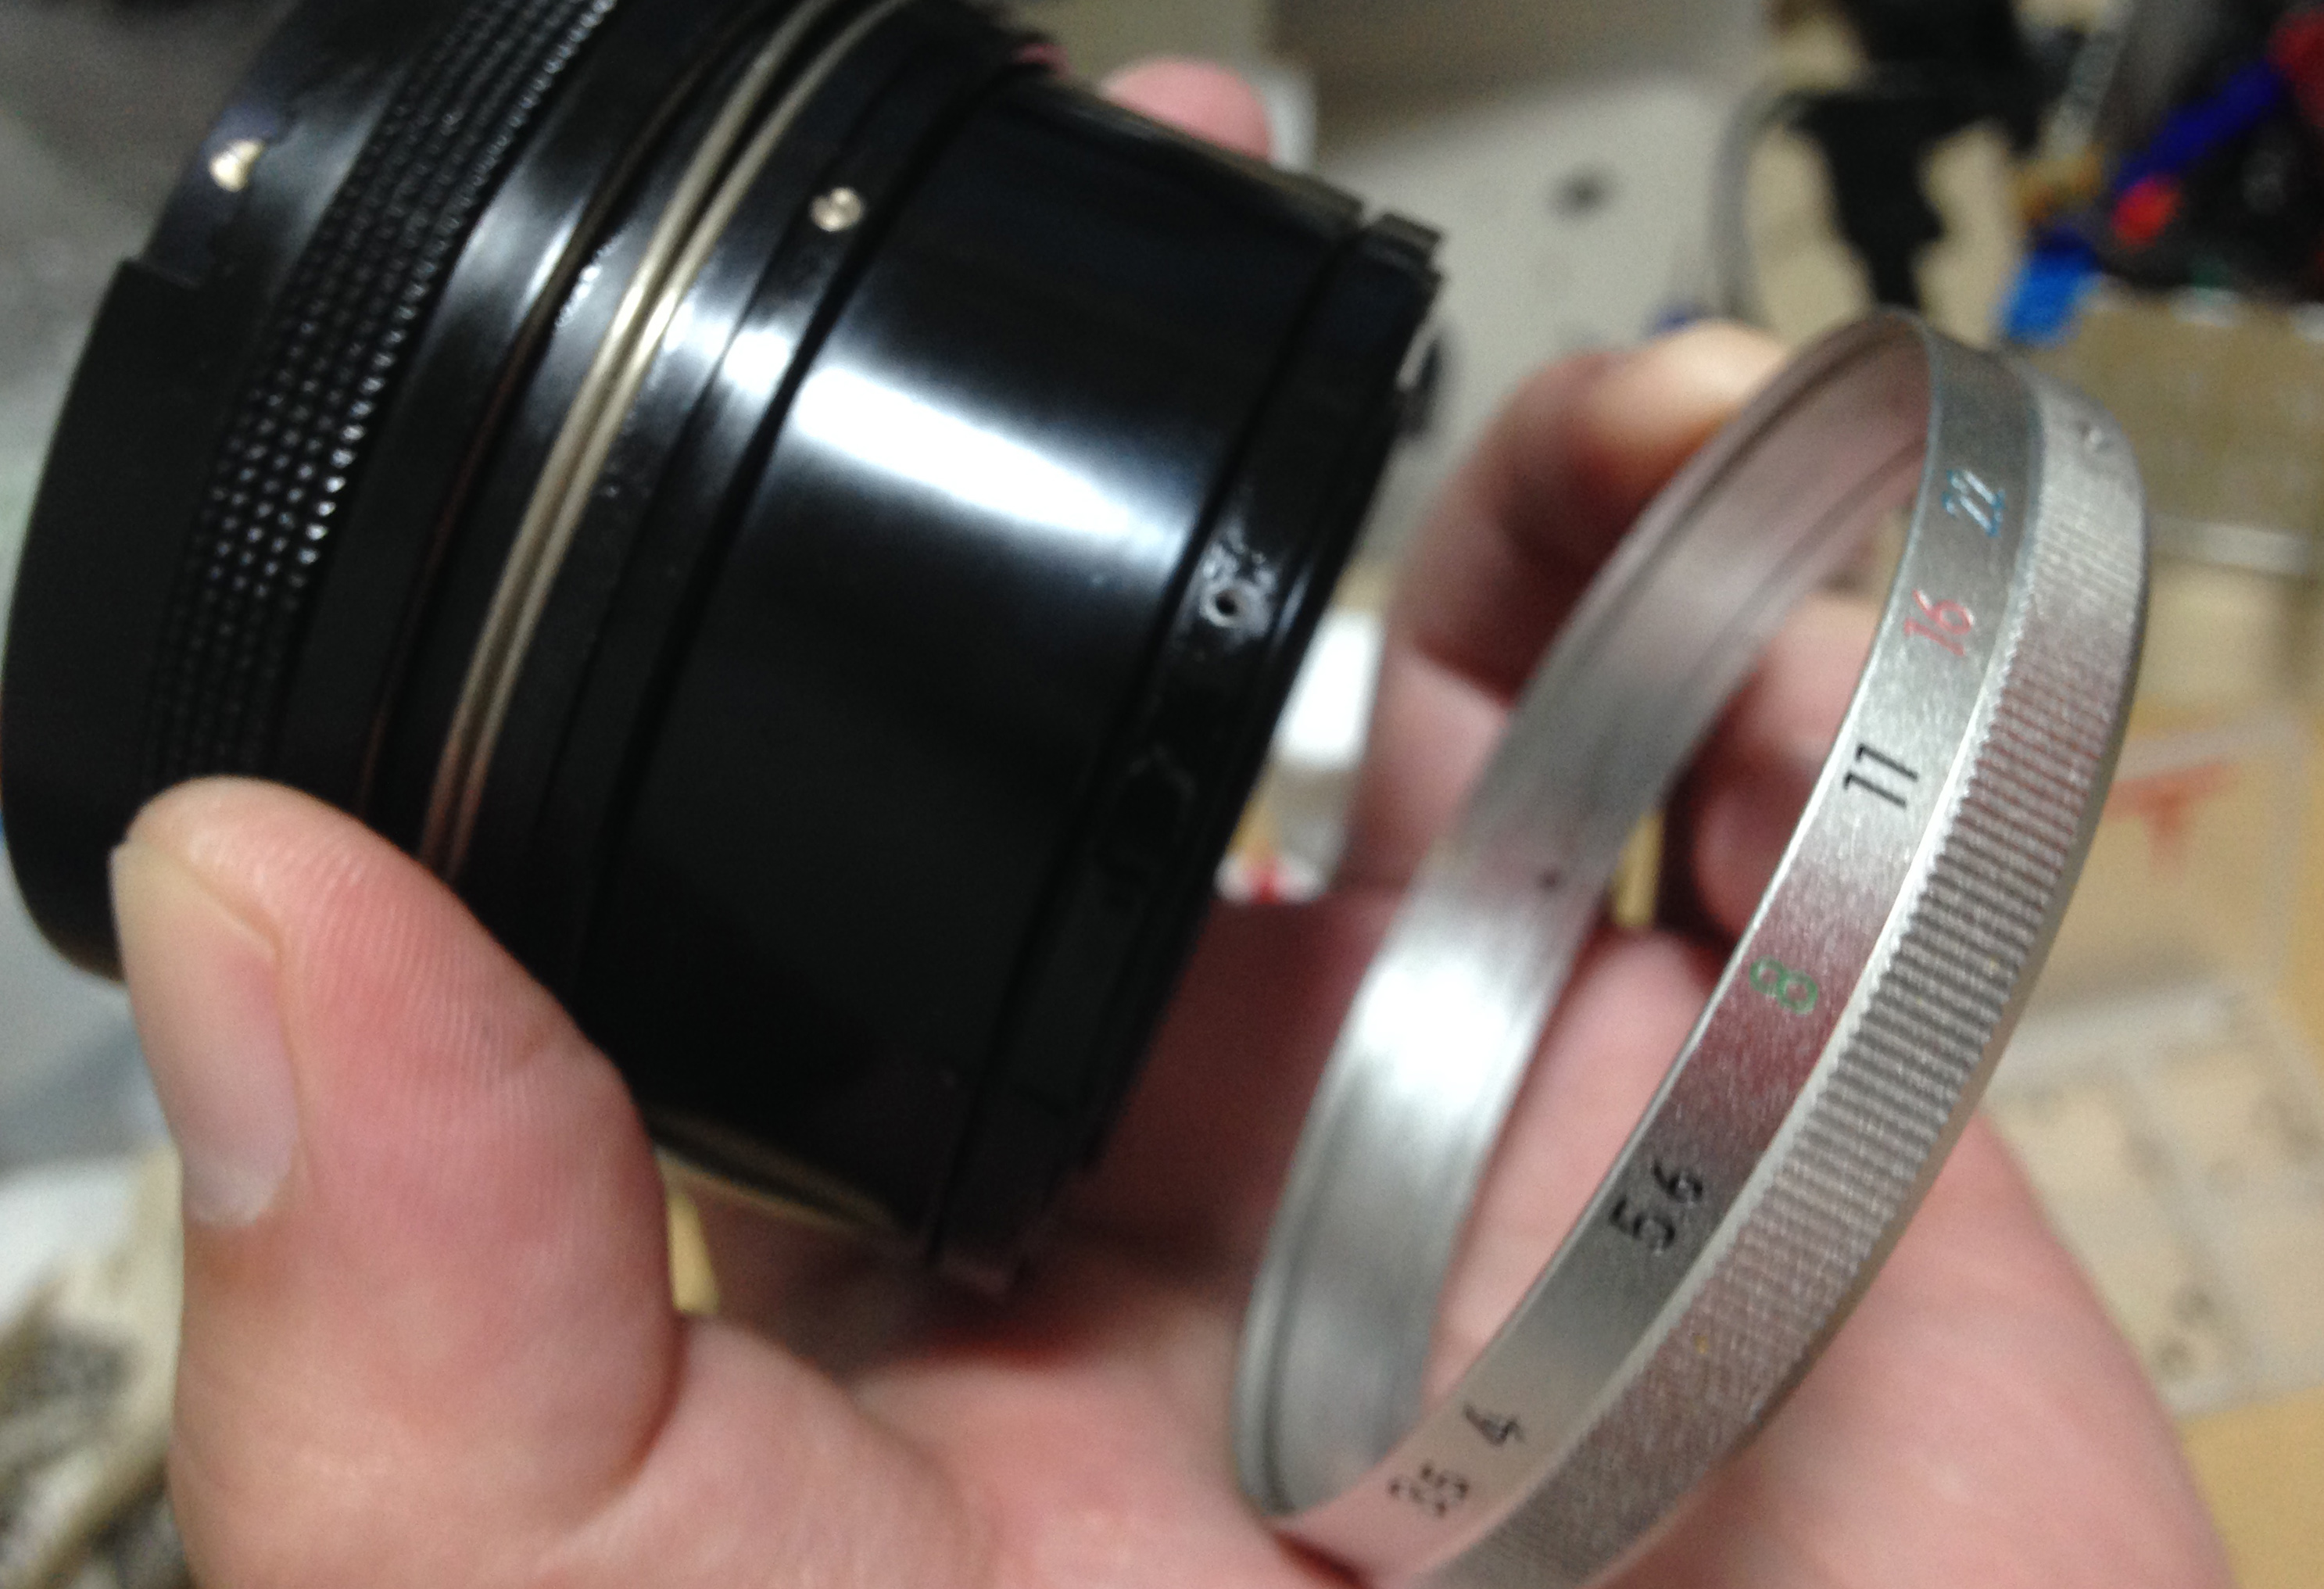
This lens also comes in 2 minor versions. One with a raised filter thread (far right) and the original one with the flush filter thread (left and middle). The differences are minor so it should not matter.
Knowing how your lens works is key to maximizing it. You will know how to avoid its weaknesses and exploit its strengths. I do not pixel-peep, all my conclusions are based on my impressions of the pictures that I take so don’t take my word as the ultimate truth.
The next sets of photos were taken from f/3.5, f/5.6 and f/8. Since this has an older preset-type iris it’s difficult to precisely control the iris when shooting with it hand-held so the photos that were supposed to be taken at f/5.6 may be actually be f/6.3 or whatever. The exposure between-shots is weird since these were taken with a Nikon Z6 so the it bases the exposure off from what the sensor captures unlike a DSLR which always meters the scene while the iris is set wide-open (unless metering stopped-down).


(Click to enlarge)
Flaring, ghosts and other artifacts related to coating is terrible, it’s an older Nikkor so that probably explains a lot. There’s an ugly flare wide-open and the there’s and ugly blue blob in the frame. Stopping it down to f/5.6 helps a lot in reducing flare but the blob becomes less-diffused. The blob won’t go away as you stop the lens down to f/8 as expected but it gets a bit smaller. It reminds me of other Nikkors made around the same period like the unusual Nikkor-T 10.5cm f/4.
It’s surprising to see some distortion because I was expecting this to have no measurable distortion at all (at least seen by the naked eye). There’s a bit of barrel distortion and I consider this to be quite high for a macro lens but it’s tolerable if you’re thinking of this as a normal lens. Vignetting can be seen if you shoot this wide-open but it’s not an issue by f/5.6, it’s not bad at all since the falloff is rather smooth and the corners don’t get too-dark.


(Click to enlarge)
Let’s see how it performs at closer distances. I can’t shoot at 1:1 but the first and second rows are close to that. It looks nice wide-open but not as sharp as later macro lenses. The resolution is nice for its time, you can see how it can render fine details even wide-open. You’ll see chromatic aberration at the areas just outside of what’s in-focus which is a shame because the later Micro-Nikkors are much better at controlling this if I recall it correctly. The colors look great wide-open, saturation and contrast is amazing. By f/5.6, it’s able to resolve even more fine details as the resolution improves and you’re going to get more things in-focus due to the deeper depth-of-field. It’s sharp and it can now match the later Micro-Nikkors at this aperture. Things look a lot better by f/8 and f/11 (not shown). You’ll want to use it from f/8 to f/11 if you want absolute perfection but it’s about 1-stop behind the performance of the later Micro-Nikkors. This isn’t a bad thing, it’s just that the later lenses were made to a higher standard and used better technology and design. The benefit of using newer coatings alone is a big deal. The quality of the bokeh remains smooth throughout the range, it has a tendency to render clumpy-looking details at times but is otherwise smooth thanks to the preset iris.


(Click to enlarge)
The optical performance is just as good in further distances as they are with the closer macro ranges. The resolving power of this lens is great and you’ll get very good details in your frame even wide-open. The rendering is good, there’s something about this lens and how it renders a scene that make this special. It certainly has that vintage-feel to the photos it takes. Saturation is nice and the contrast is more than adequate.

This was taken at f/8 and was cropped at the center. Notice how beautiful its details are and how sharp they were rendered. The transition from what is in-focus to what’s not is so smooth you won’t even notice it. The photo looks very natural in the sense that it looks like a real photograph instead of what we’re used to seeing today which looks more like something that was made by a computer software.
Let us now see some pictures that were taken with film. This lens was made for use with film so we should judge it with its intended medium. Film has a unique look that’s difficult to simulate with digital because grain is different from the ordered-array of a sensor. It looks more organic and it can hide or amplify some qualities of a lens, this is the reason why we want to observe how this lens performs with it. The next sets of photos were taken with my Nikon F loaded with Kodak Color Plus 200.

I think this was taken at f/8. This is handy for use as a standard lens in case you left your 50/1.8 at home, just don’t forget to turn the preset iris to close it before you take your shot. I love how beautiful the picture looks despite it being a bit under-exposed in the shadow areas.
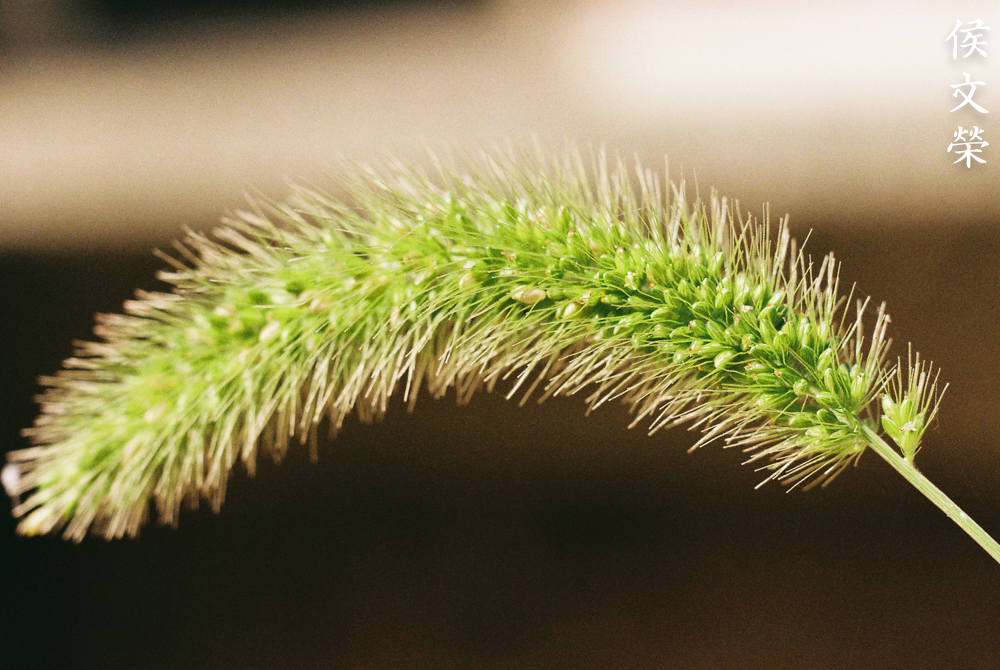
The resolving power of this lens is very good as expected from a macro lens. Look at the fine details, you can literally see every detail of the seeds in the focused areas.

It’s difficult to use this lens when shooting with available light because you will have to get really close to your subjects at higher magnifications.

The bokeh quality isn’t that bad but it’s not as smooth as what many modern macro lenses are capable of. I am going to change my topic, this photo looks so crisp I thought I shot this with a DSLR. This is how high the resolution of this lens is, it even makes cheap film look as crisp as digital photos.


(Click to enlarge)
Here’s the rest of the set. I like how this lens performs with film, I’m amazed at how nice the pictures turned out despite me using a cheap film. These are great examples illustrating how good the optics are despite its age. If you’re a film shooter then you have a bonus because the pictures look great with it so long as you got your focus right.
This lens is something that’s best left to the collectors. If you want a cheap, practical and better-handling lens, get the Micro-Nikkor-P 55mm f/3.5 Auto instead but make sure that you get the M-ring with it. It’s a more useful lens for daily use because having an actuating-iris is a big deal for taking photos of little things. You don’t want to open-close the iris while shooting, this will budge your setup and will just frustrate you. A better option still is the new Micro-Nikkor 55mm f/2.8 Ai-S, this lens is still being made new today and its faster aperture will make your view look brighter specially closer distances. If you have money to spare, just buy the AF-Micro-Nikkor 55mm f/2.8 or the AF-Micro-Nikkor 60mm f/2.8D. Both lenses have AF and they’re both capable of achieving 1:1 magnification on their own. There are many choices these days and choosing a macro lens is easier today than it was many years ago.
Before We Begin:
If this is your first attempt at repairing a lens then I suggest that you check my previous posts regarding screws & drivers, grease and other things. Also read what I wrote about the tools that you’ll need to fix your Nikkors.
I suggest that you read these primers before you begin (for beginners):
Reading these primers should lessen the chance of ruining your lens if you are a novice. Before opening up any lens, always look for other people who have done so in Youtube or the internet. Information is scarce, vague and scattered (that is why I started this) but you can still find some information if you search carefully.
I highly recommend that you read my working with helicoids post because this is very important and getting it wrong can ruin your day. If I can force you to read this, I would. It is that important!
For more advanced topics, you can read my fungus removal post as a start. This post has a lot of useful information and it will be beneficial for you to read this.
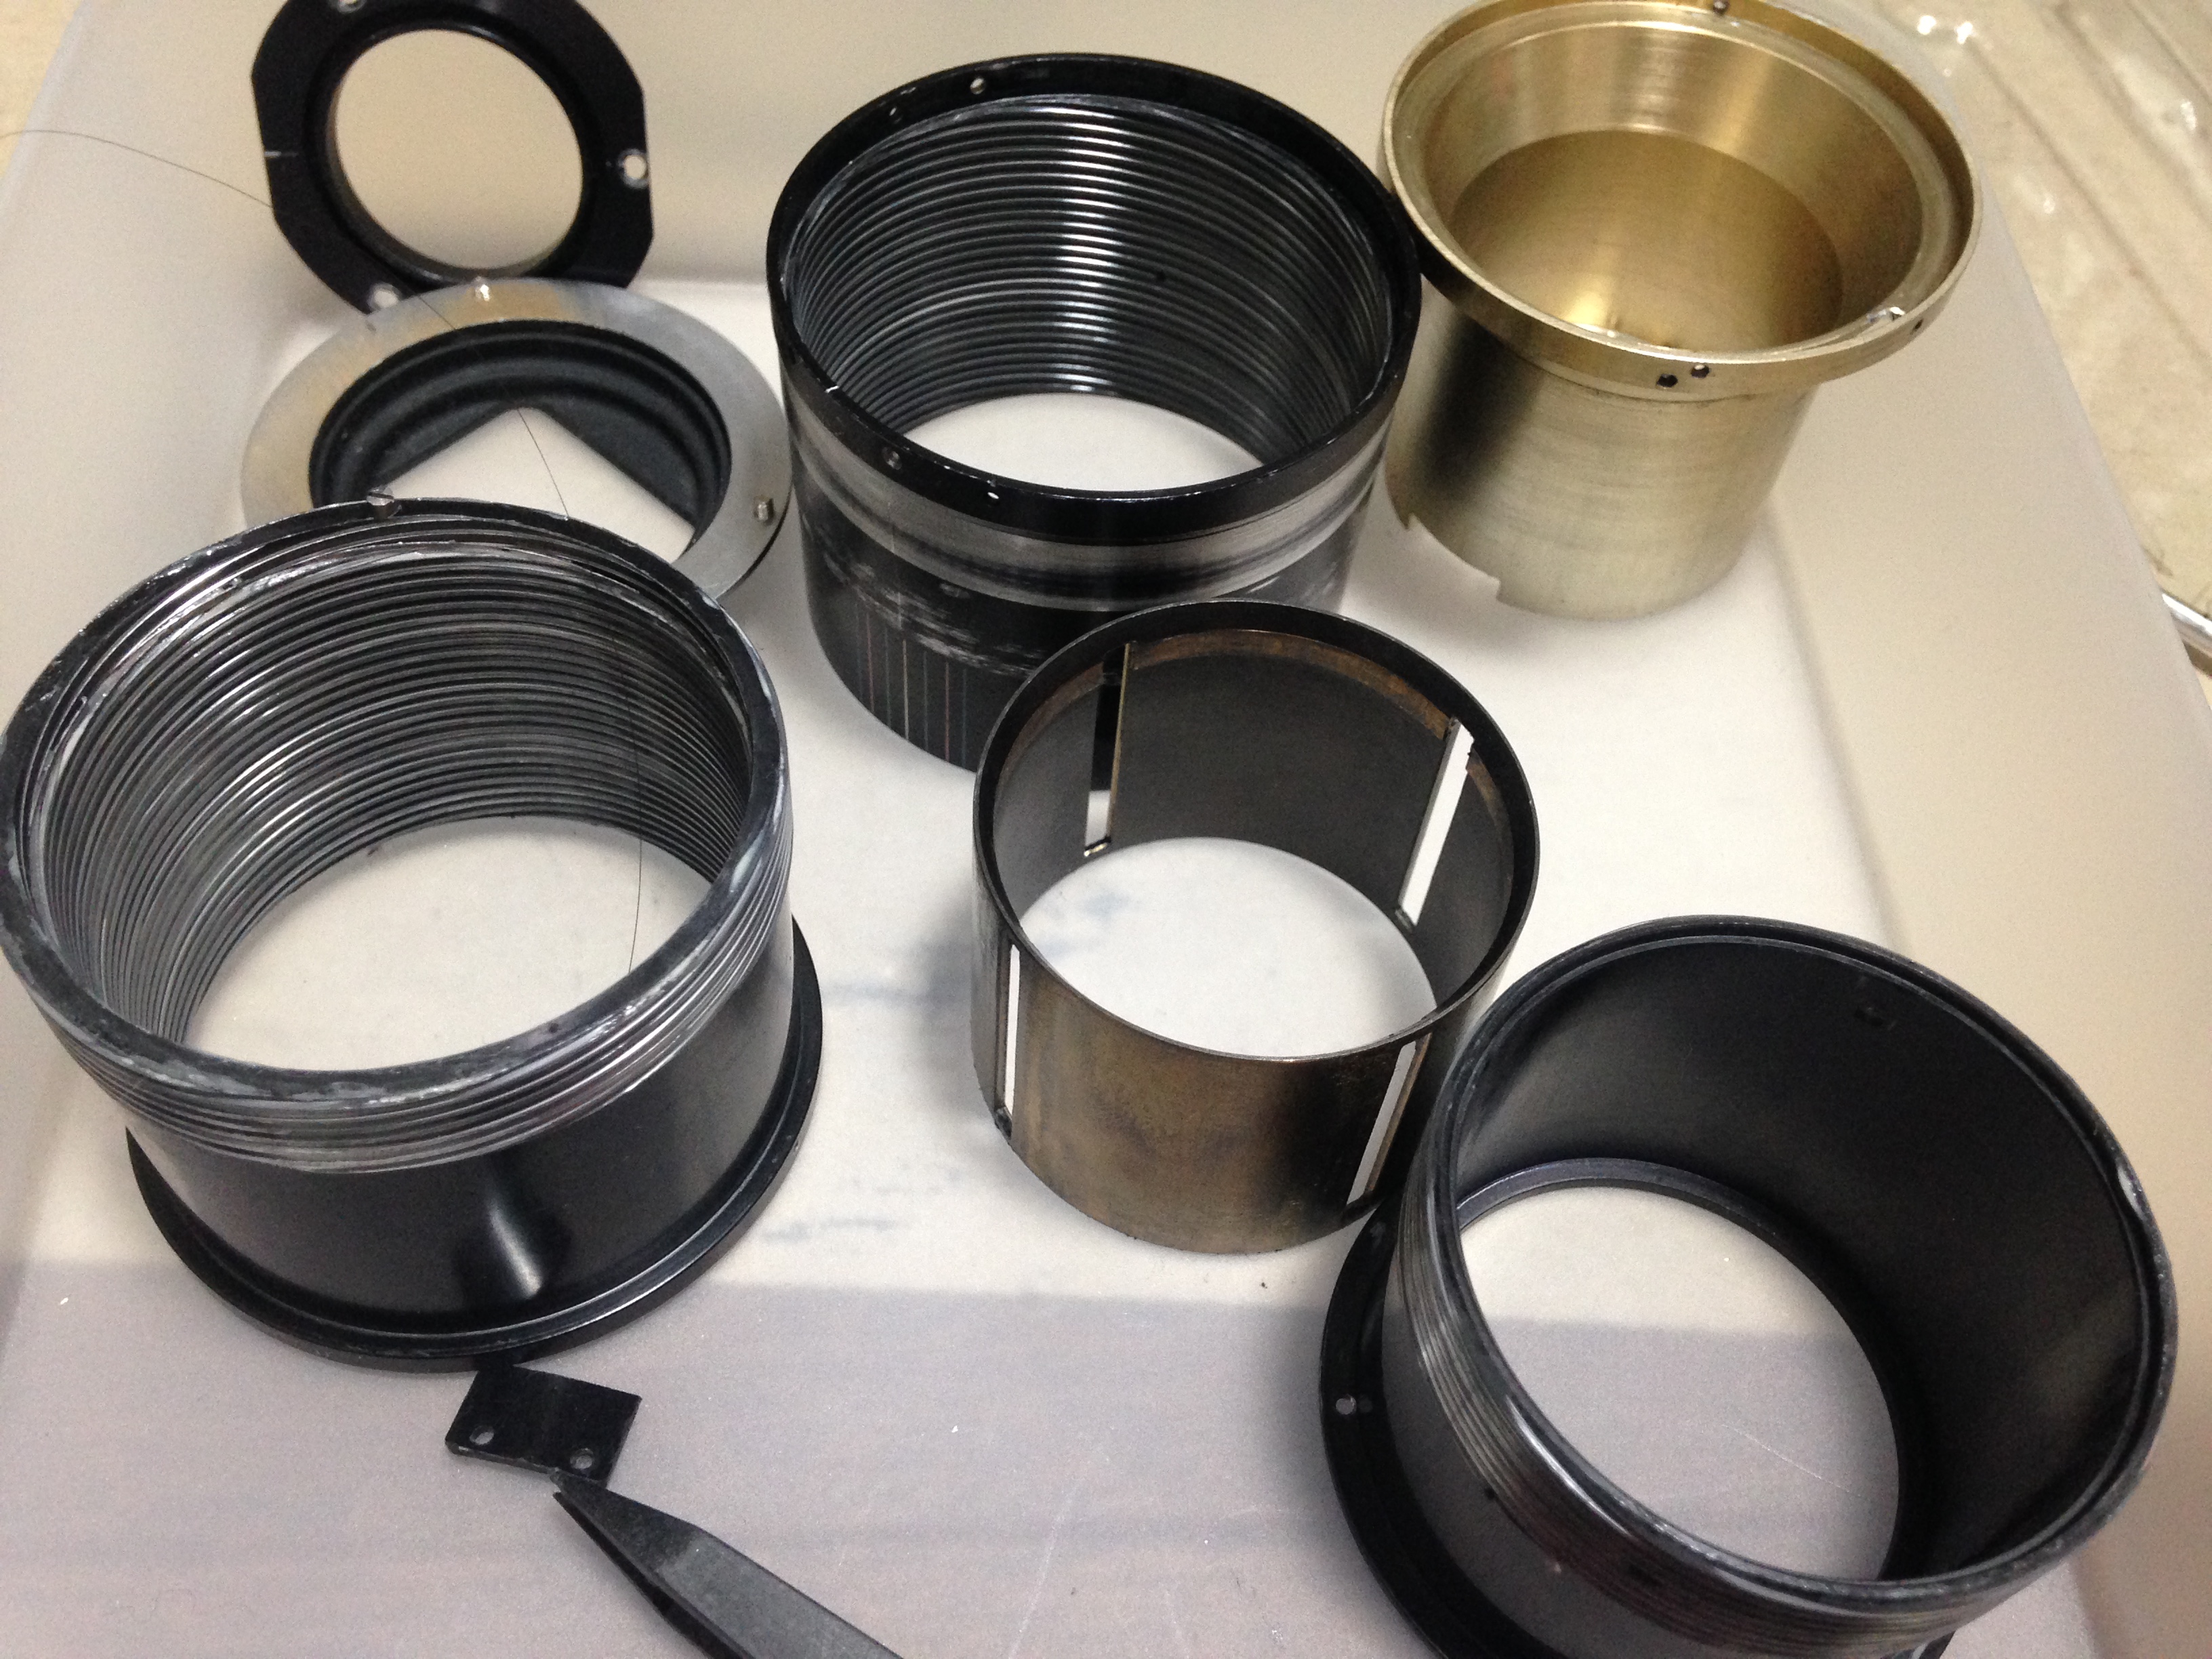
Disassembly (Main Barrel):
Dismantling this lens is pretty easy once you know how it should be done. It took me a plenty of hours to figure out how to dismantle this thing because I cannot find any information on the net on how to go about doing it.
The lens can be separated into 2 main parts:
- Focusing unit (main barrel)
- Objective (optical block) and the front barrel
This is very odd and you will find a lot of unorthodox engineering as far as manual focus F-mount Nikkors are concerned. It’s a bridge between the past S-mount Nikkors to the newer F-mount Nikkors so this is an interesting lens.
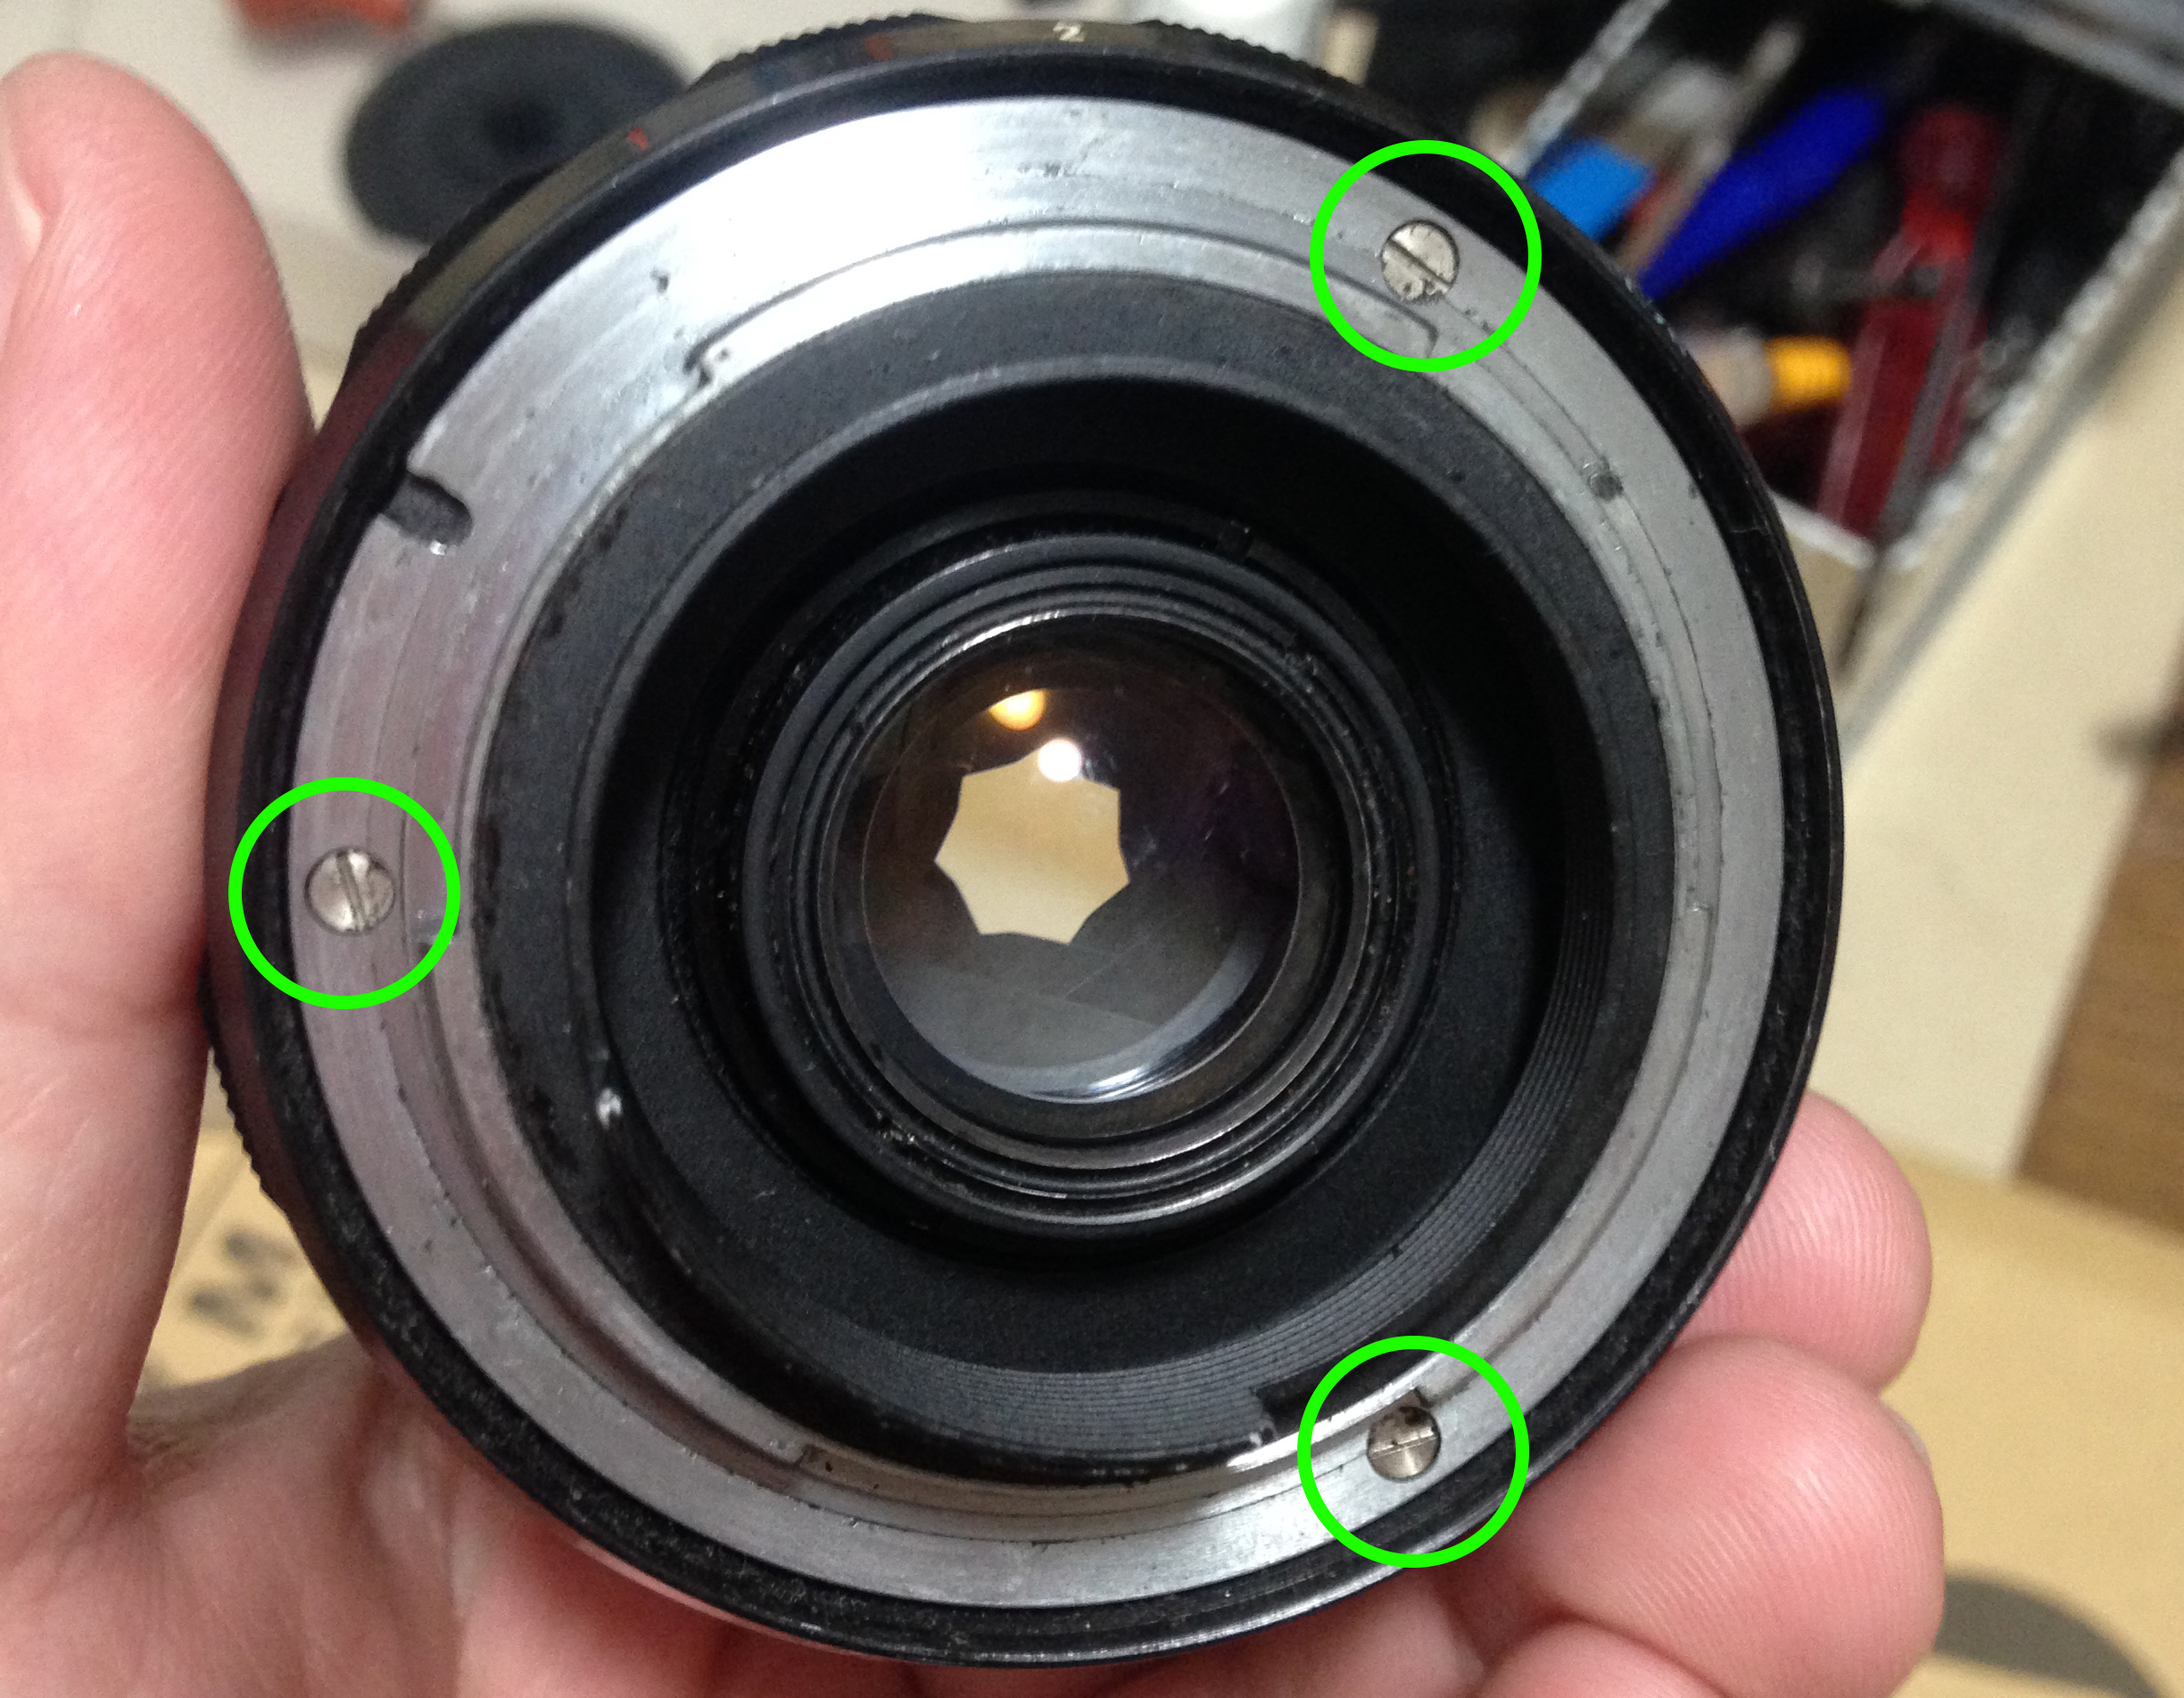
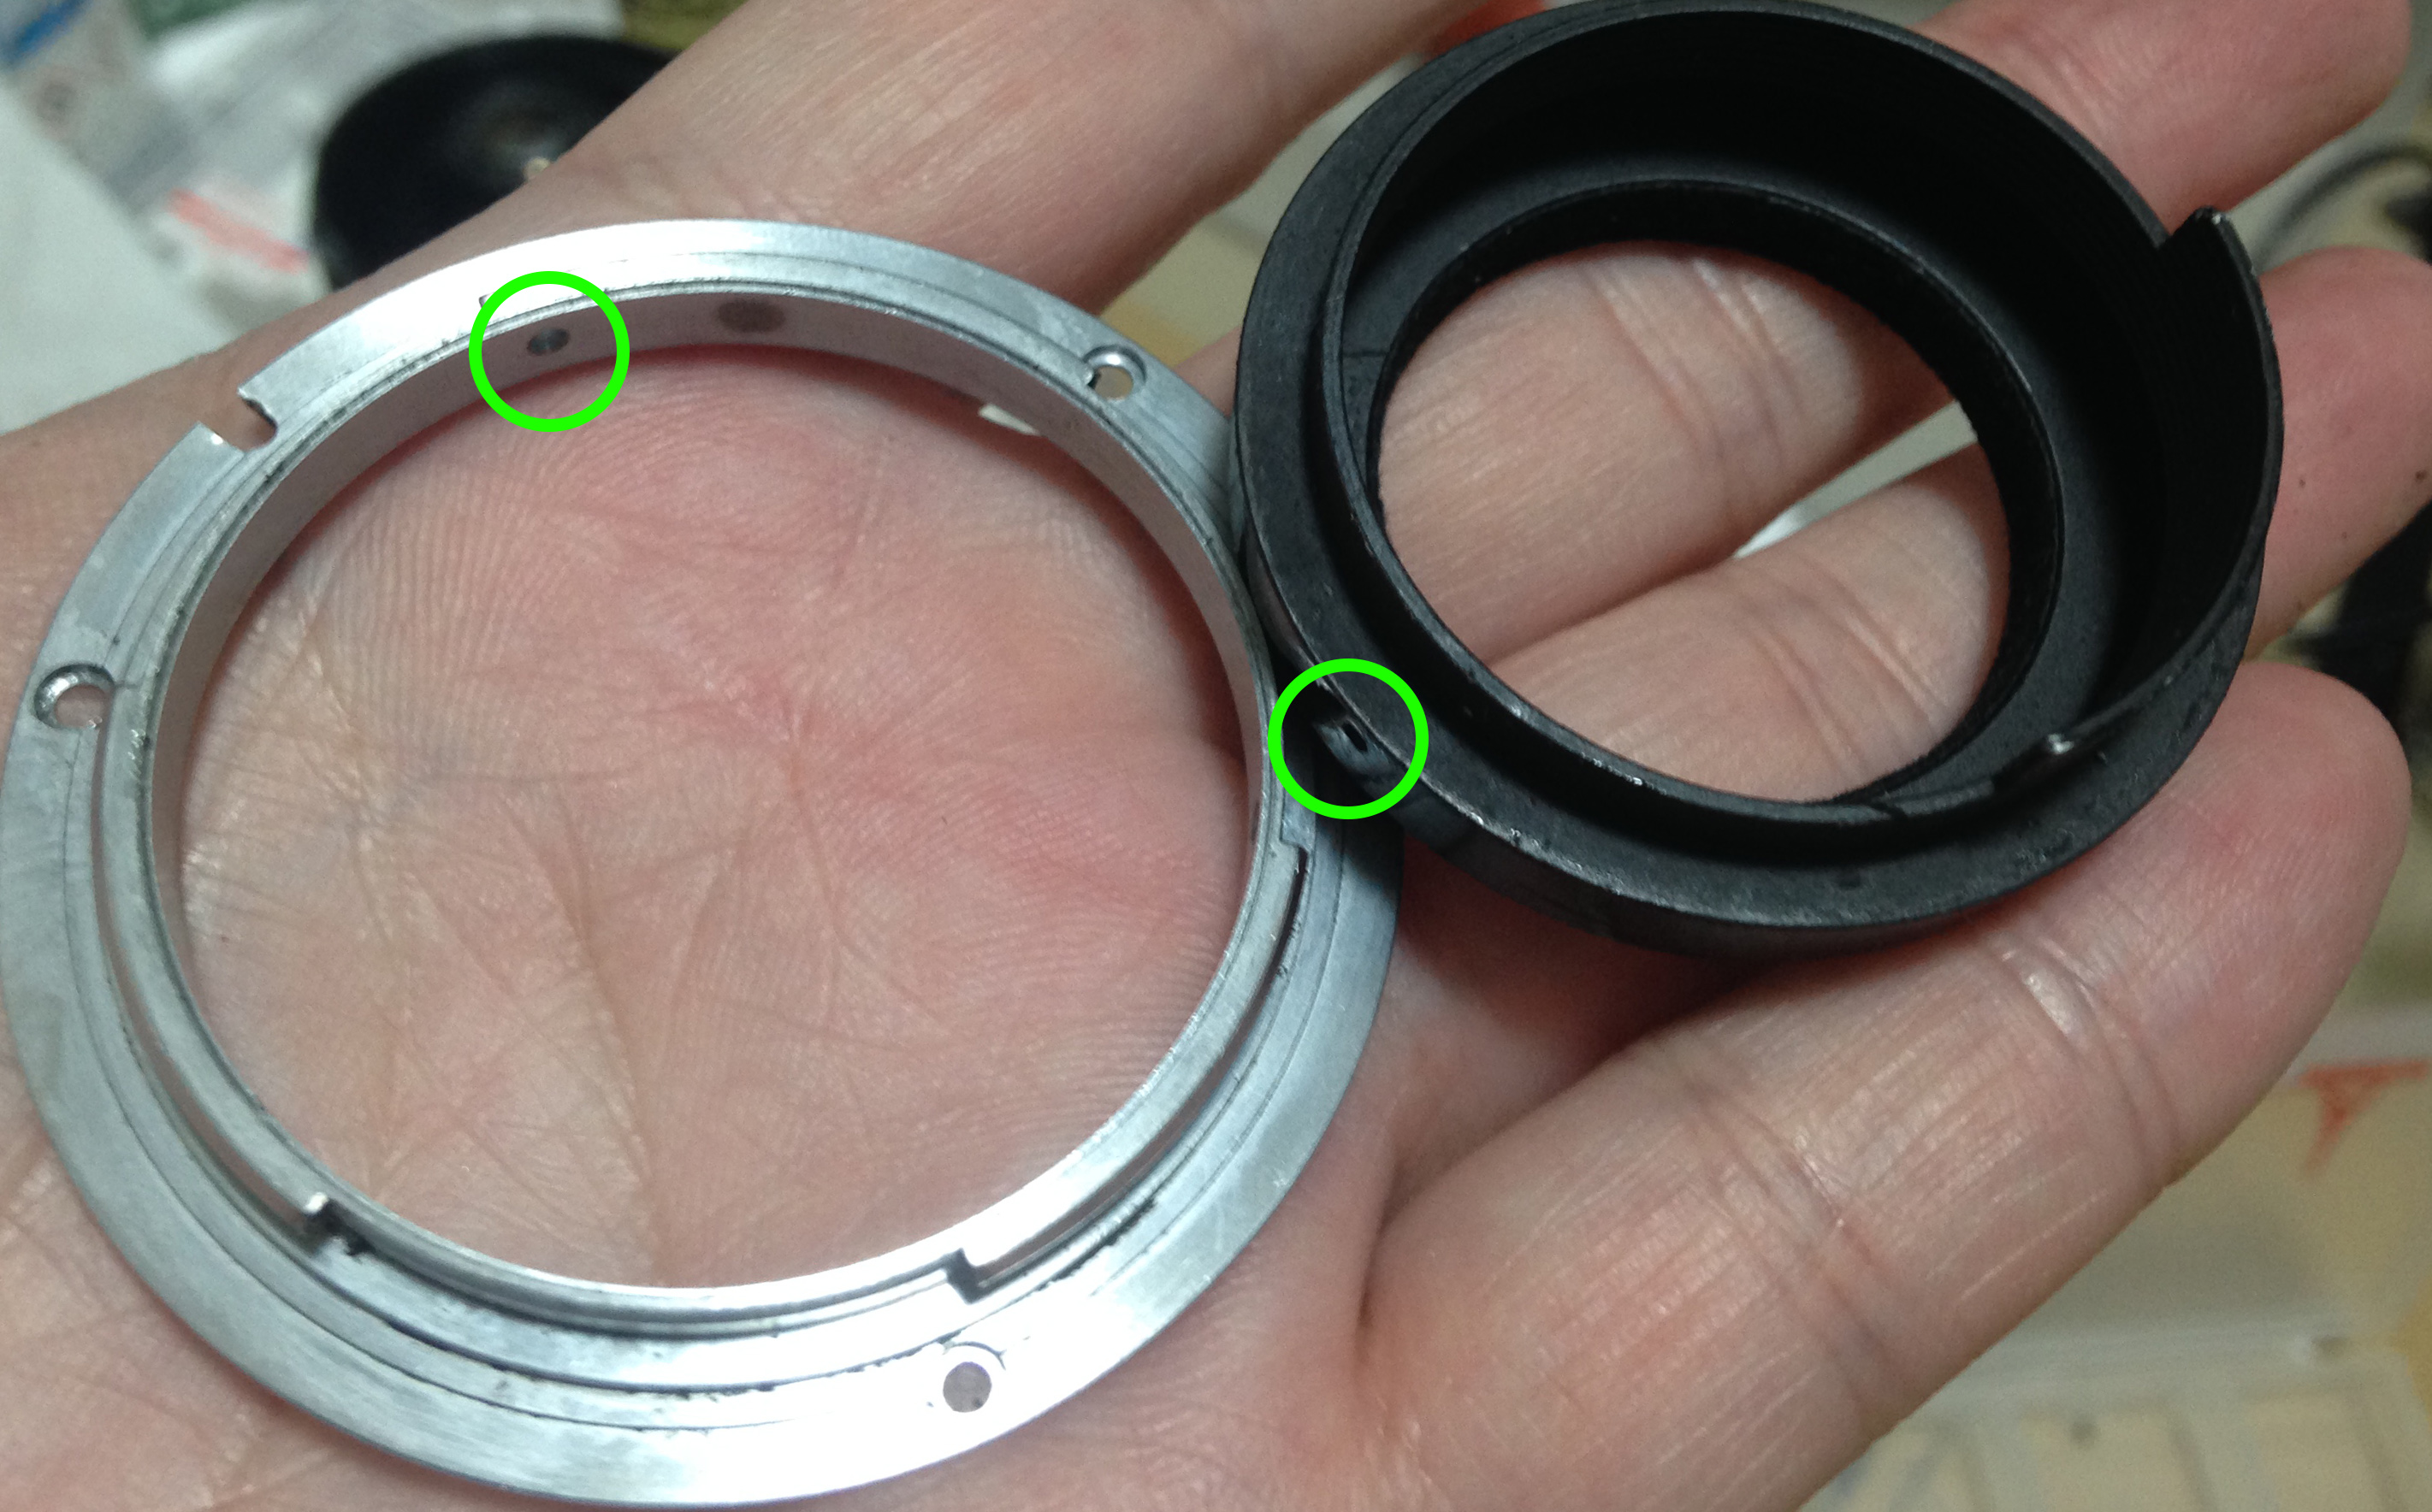
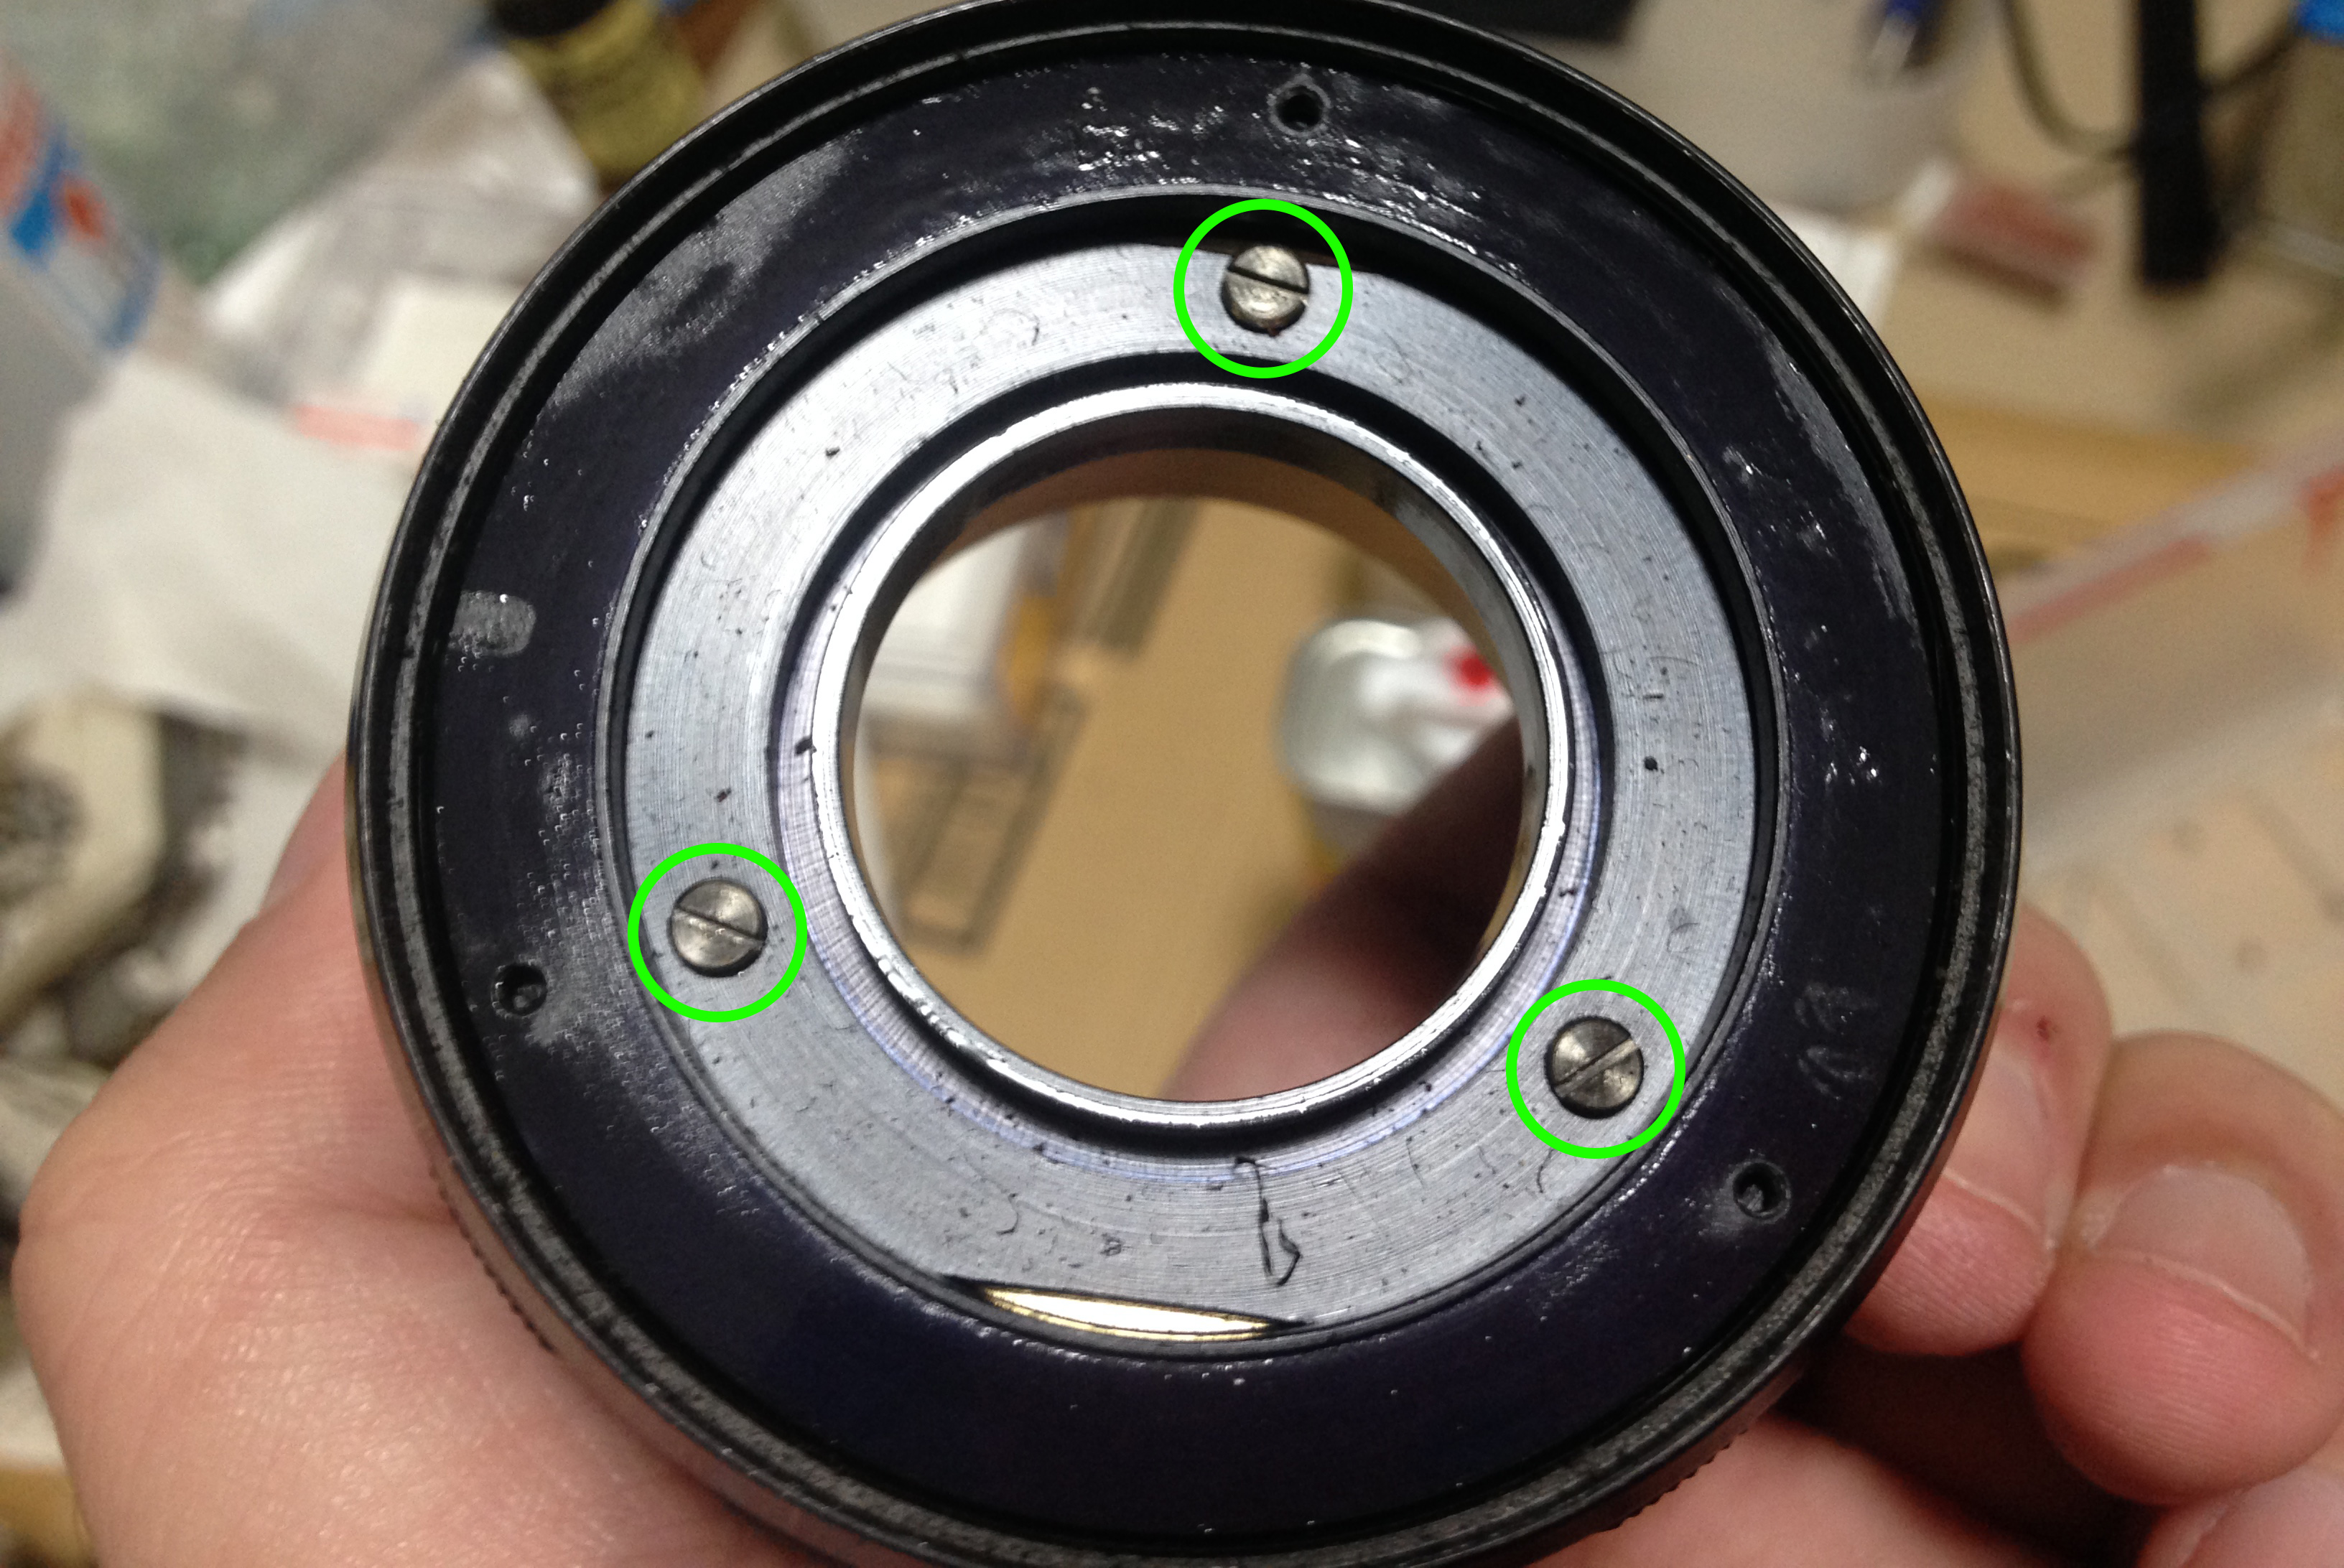
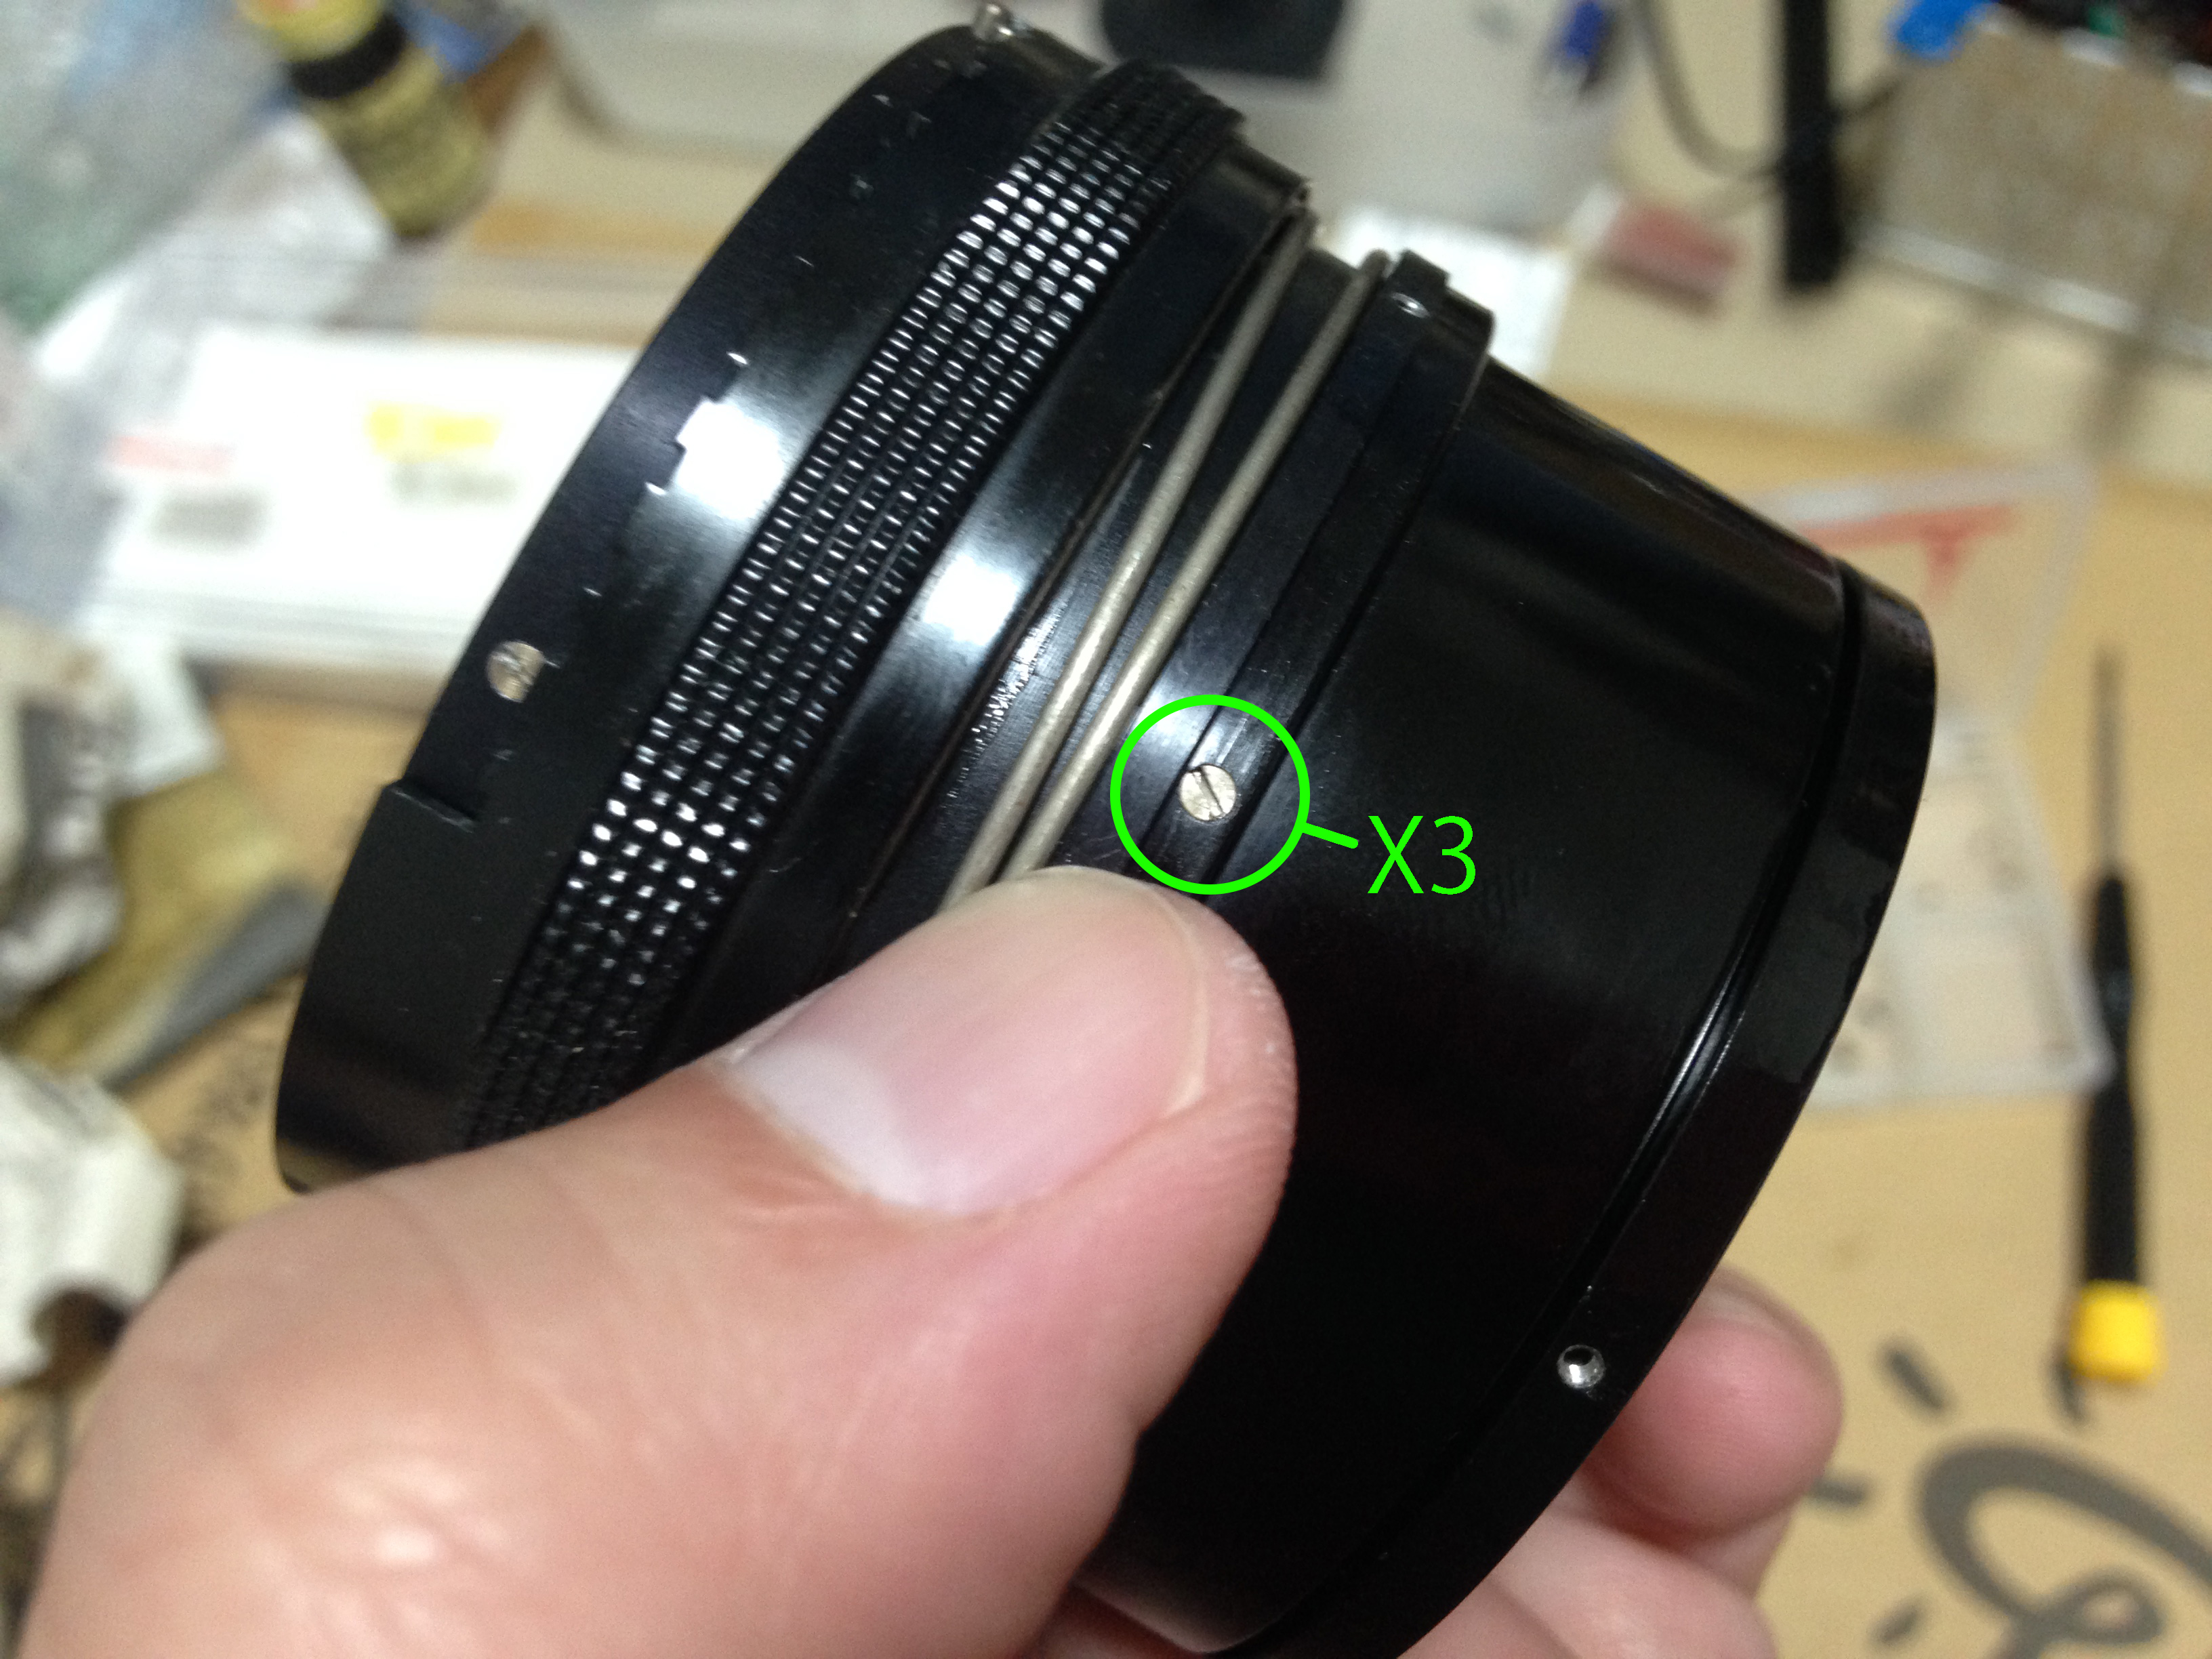
First, remove the 3 bayonet mount screws.
Once the screws are off the bayonet should easily come off. As you can see from this photo the grease has migrated into places where it shouldn’t. This is a sign that this lens was poorly stored and should be overhauled as soon as possible.
This step is unnecessary for the usual grease replacement but if you want to do a thorough job then you can remove the rear baffles by extracting these screws that secure it to the bayonet mount. There is felt in the baffles so be careful not to ruin it.
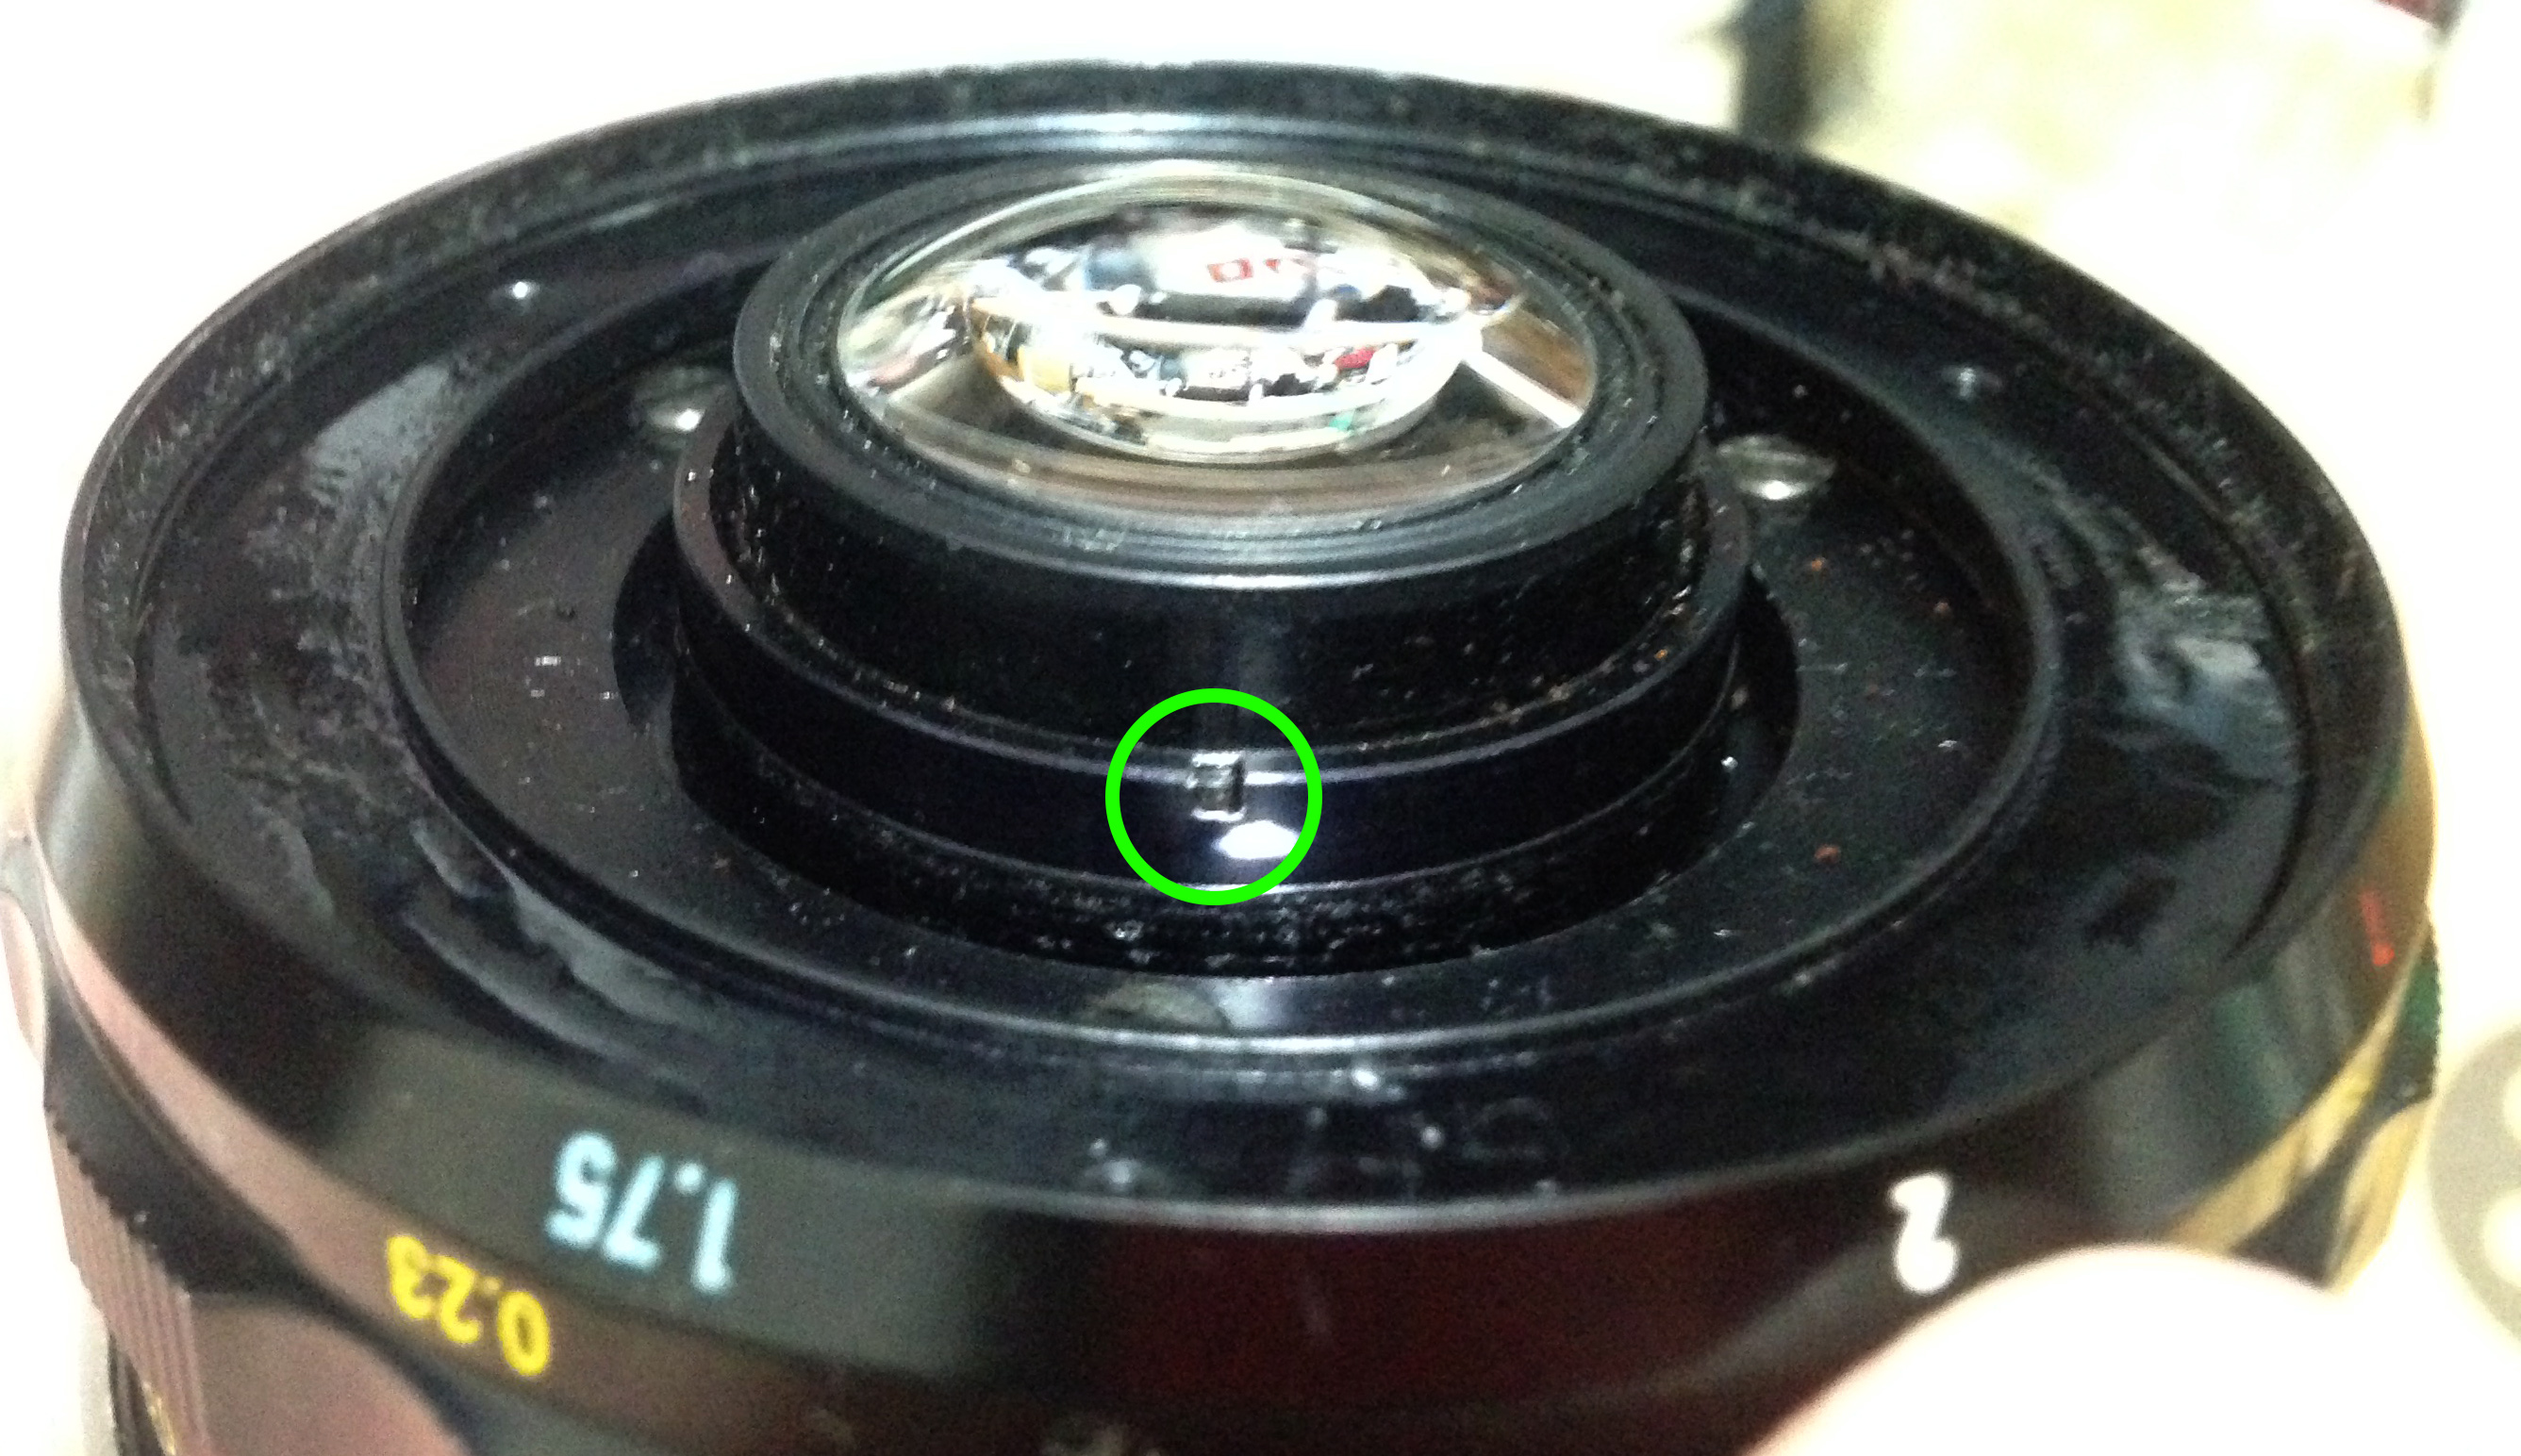
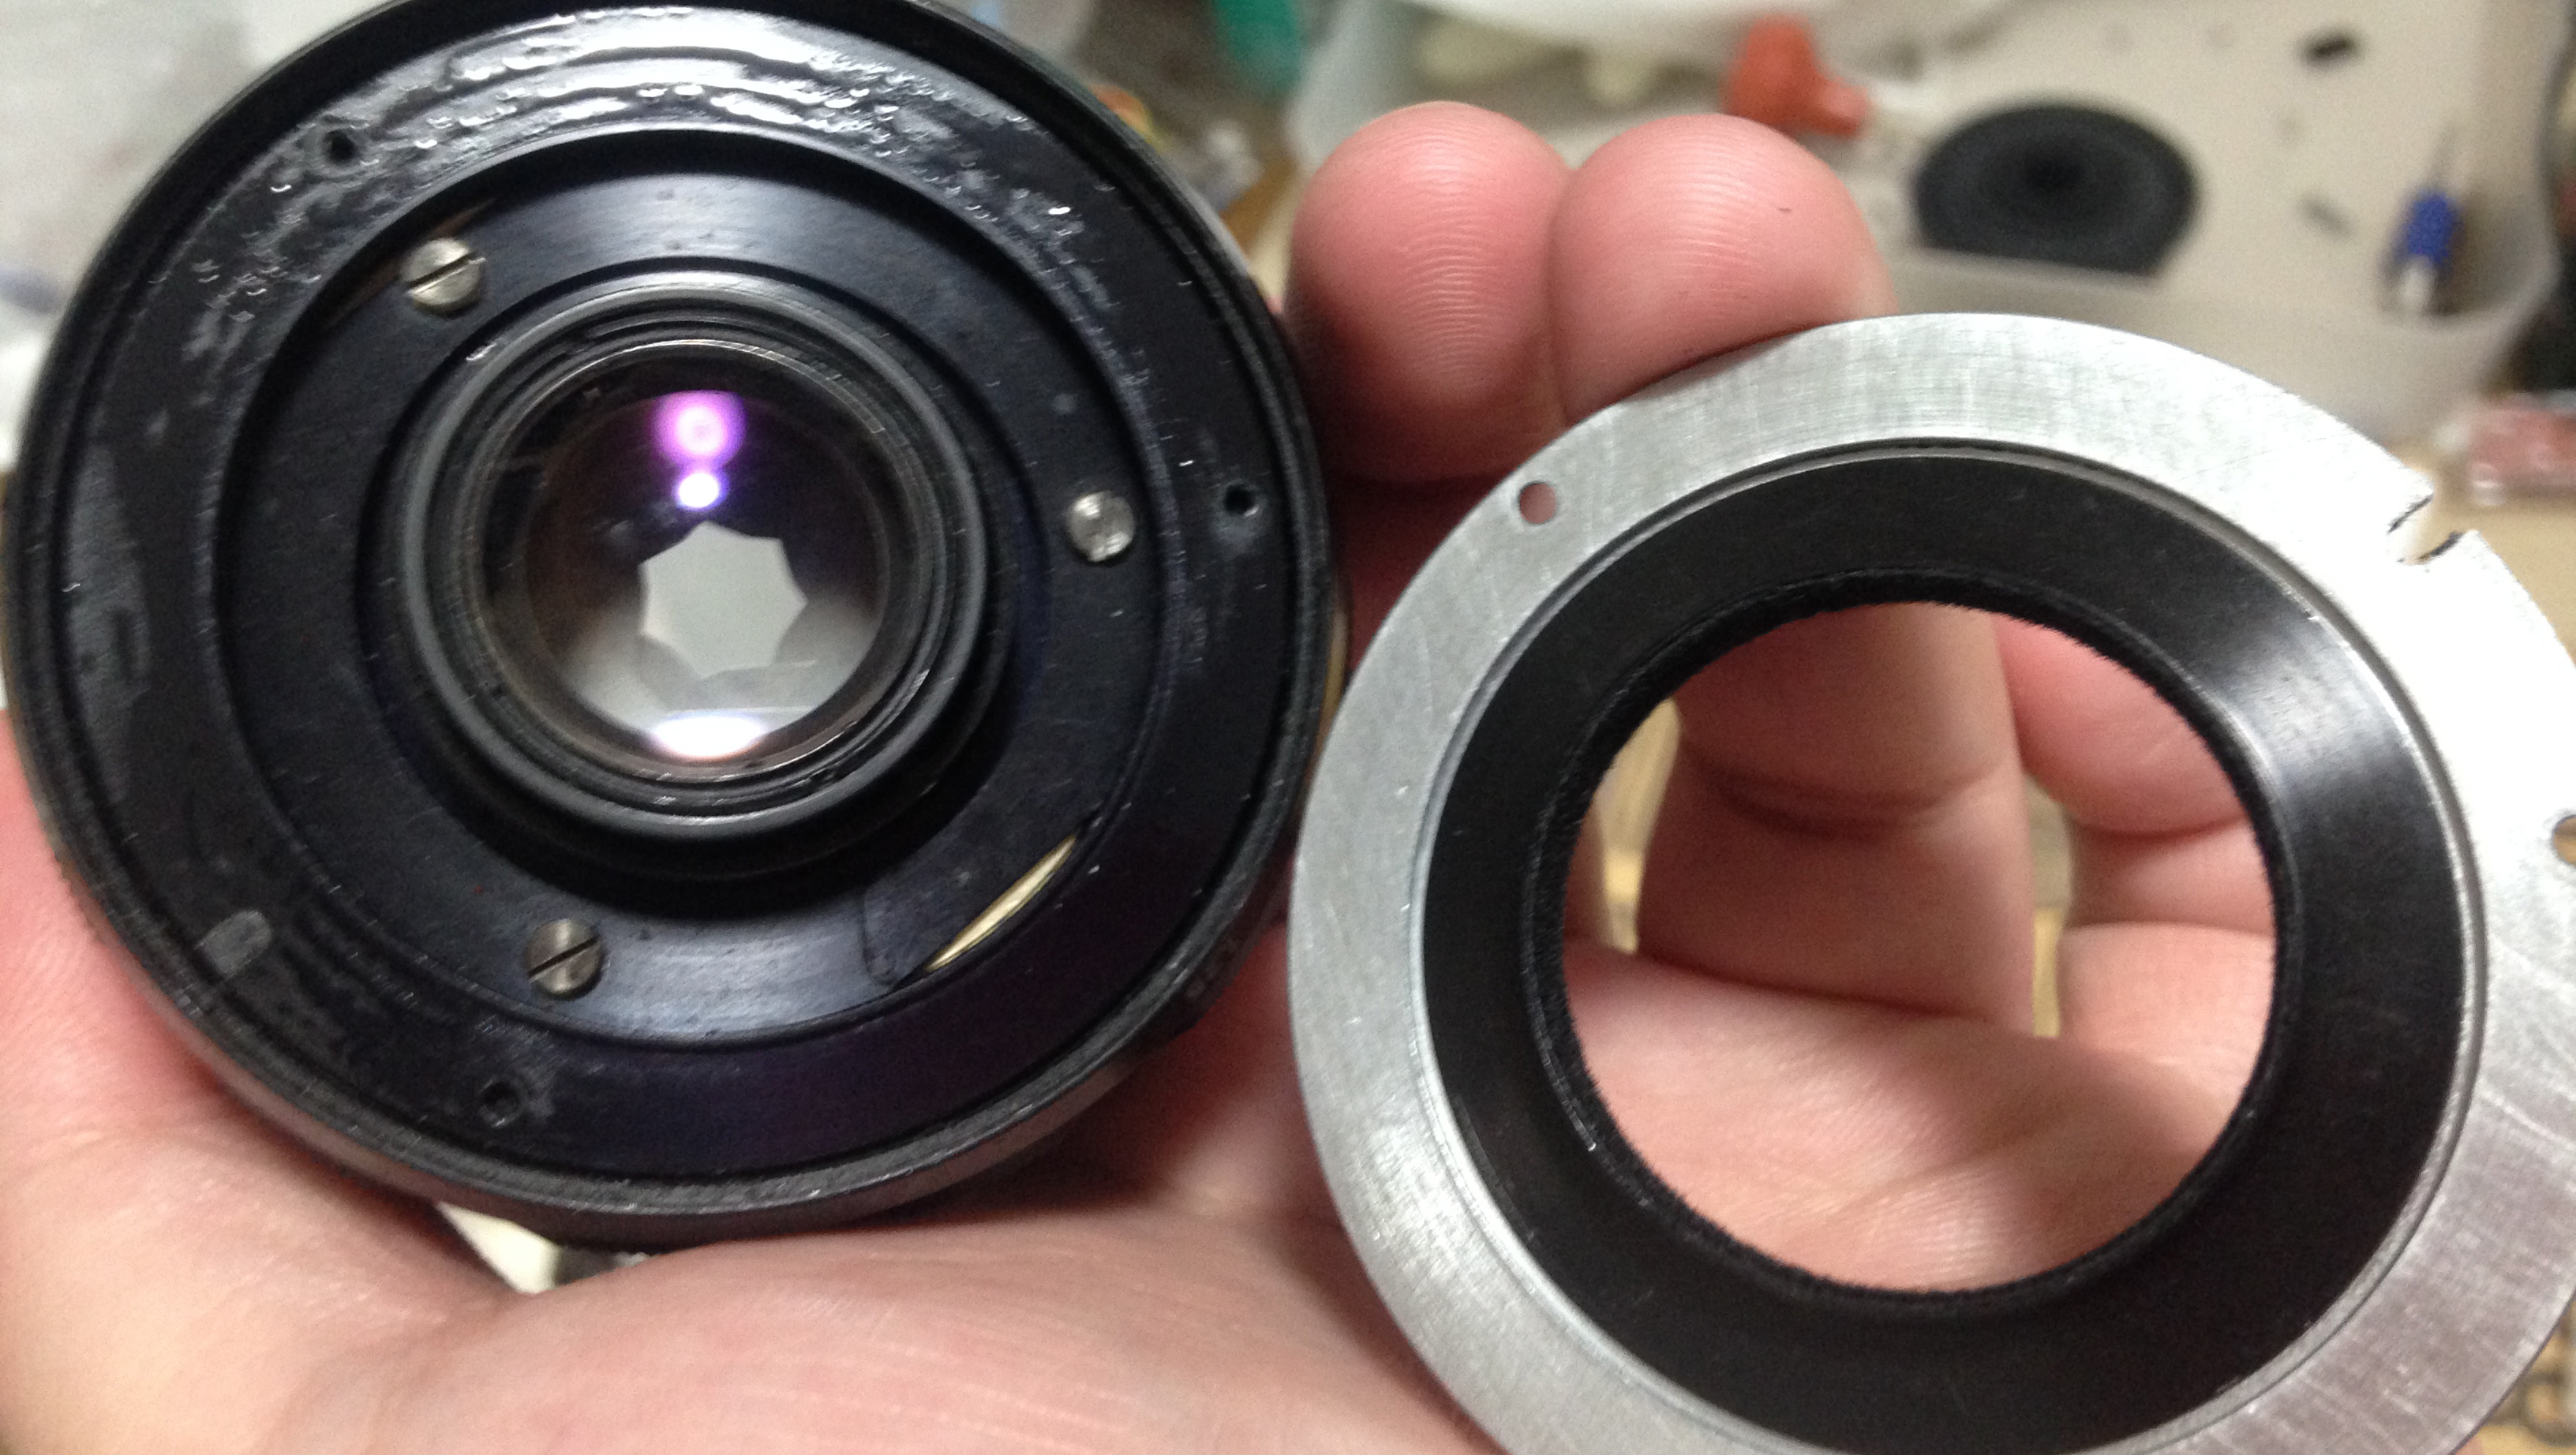
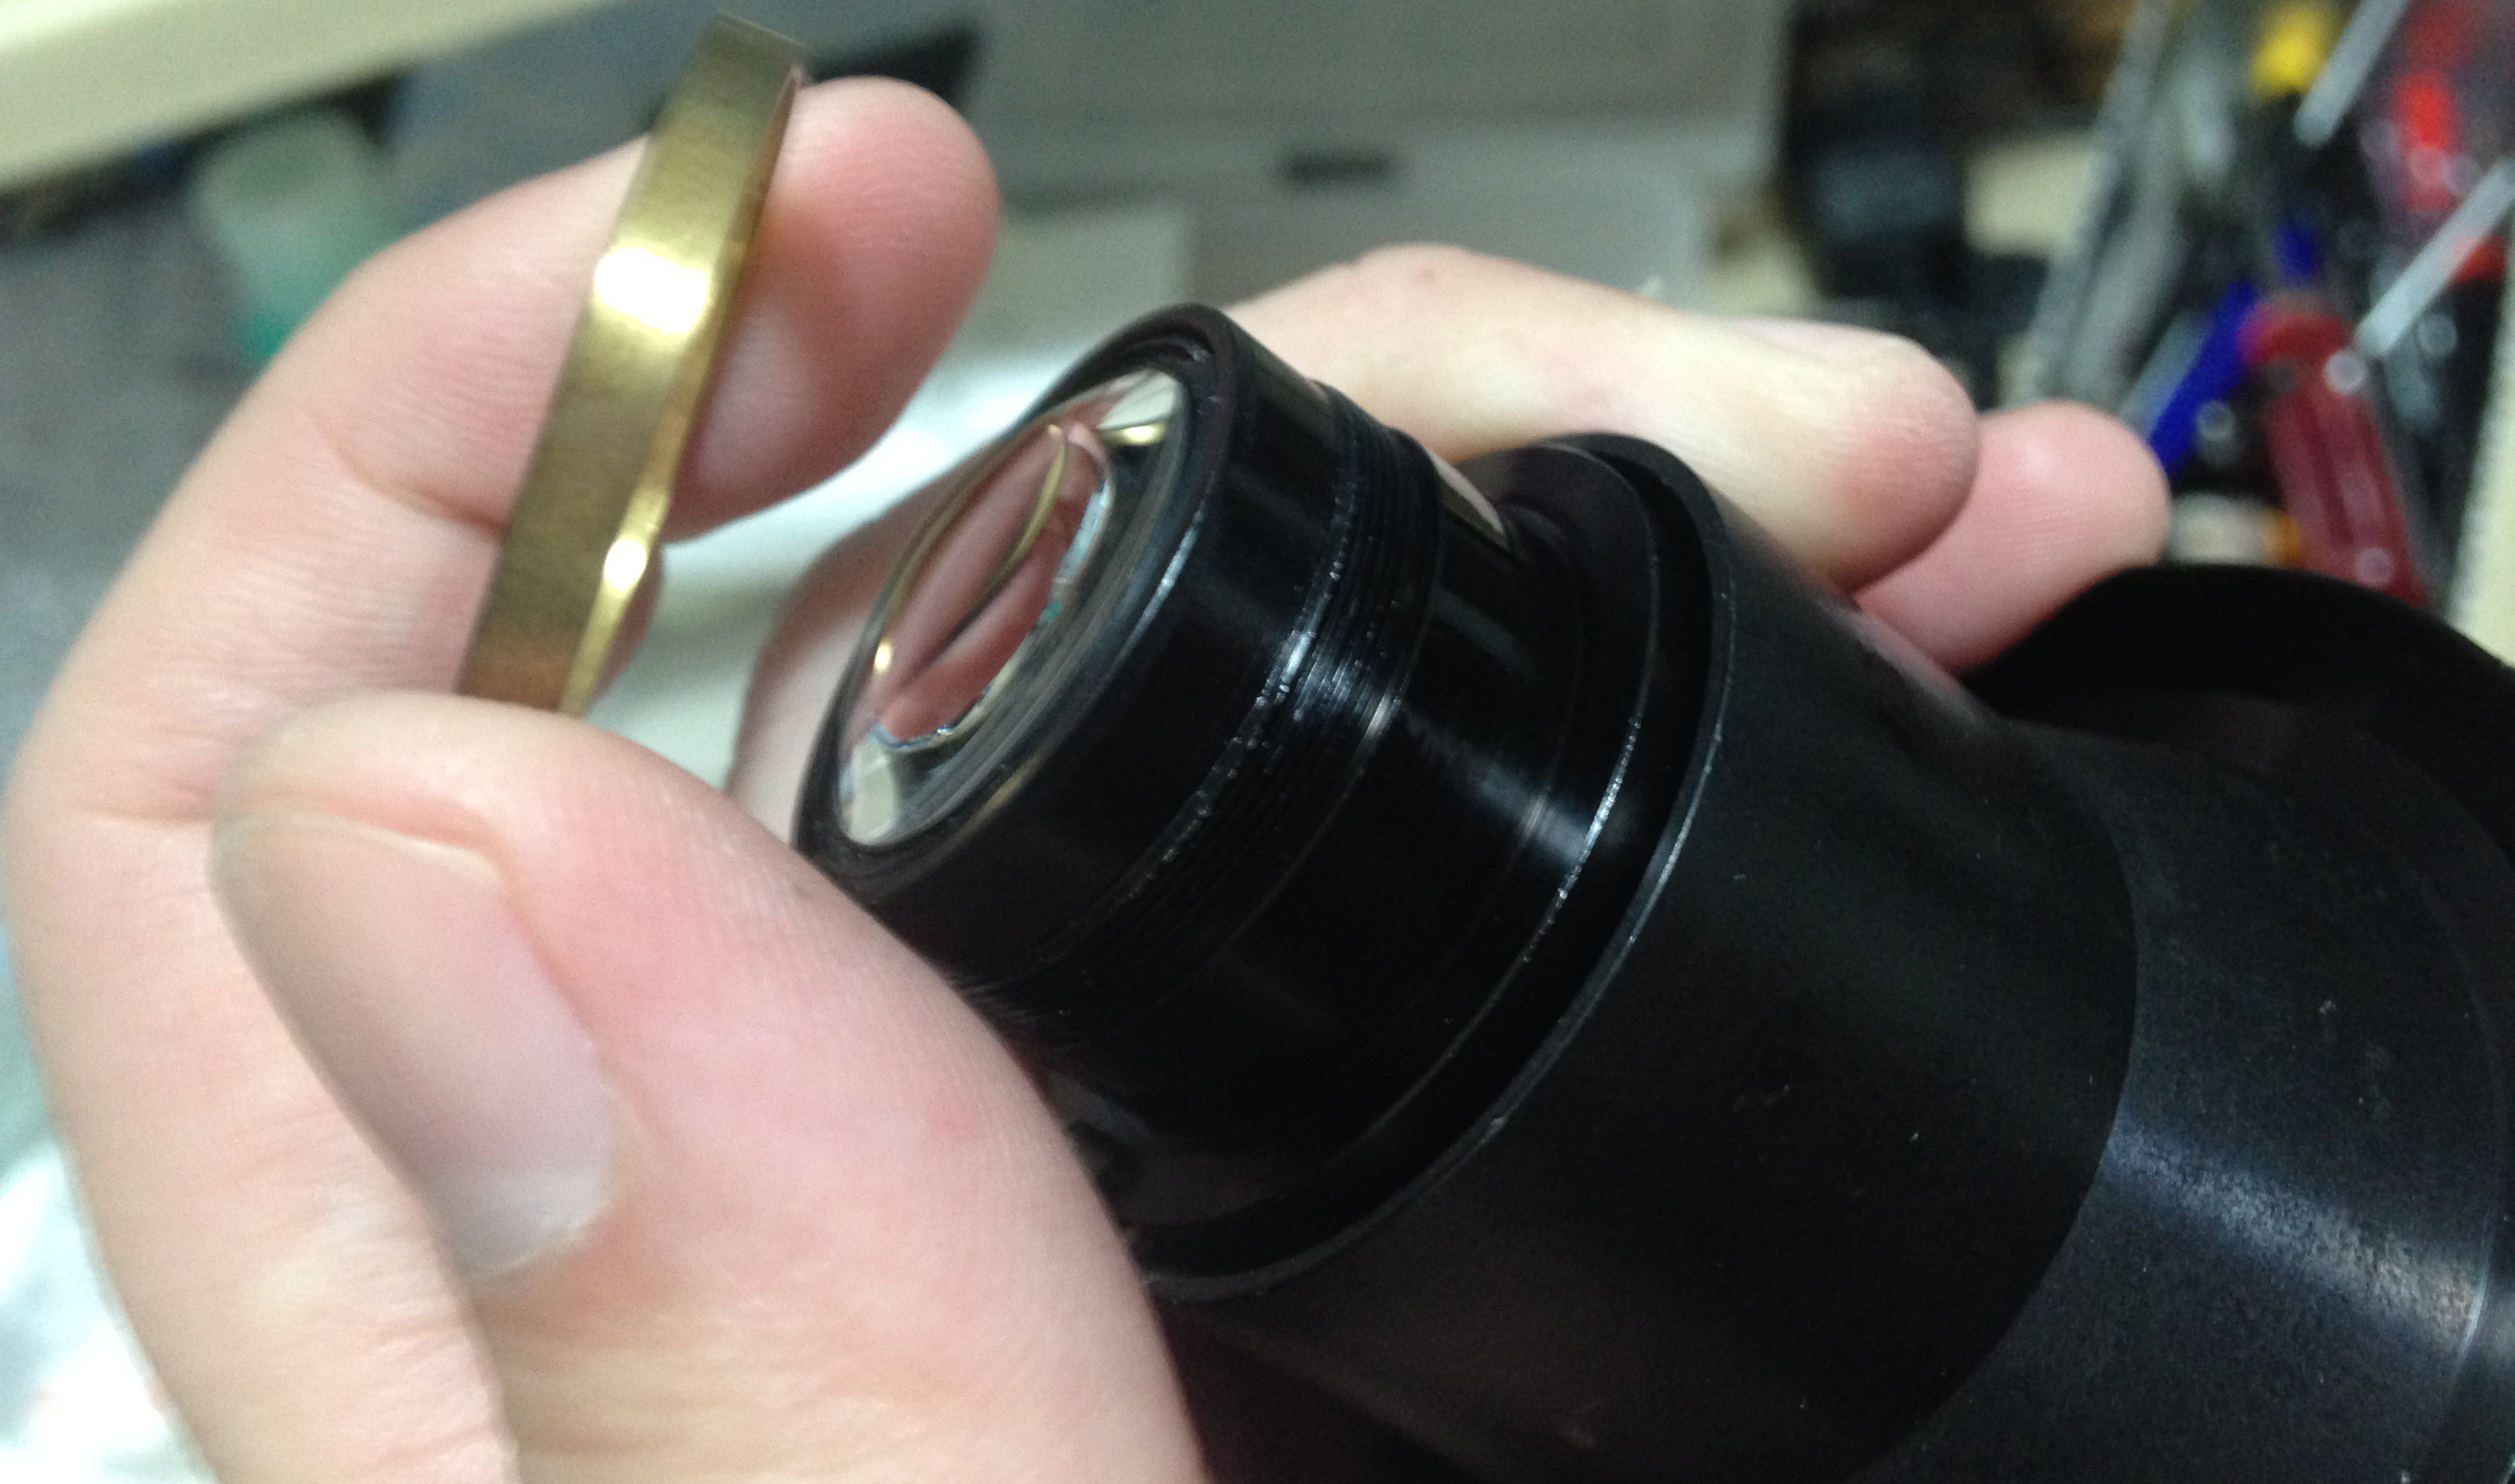
This metal retention ring is the only thing that holds the objective to the rest of barrel. If you can see the slots in the picture then that should give you a good idea on how to remove this.
Use the flat side of a lens spanner and carefully unscrew this metal ring and be sure not to scratch the exposed element. Any damage on it will show up on the resulting image.
Once that metal ring is gone, the objective and the rest of the front assembly should slide out effortlessly. Be sure not to drop it accidentally as it is heavy enough to free-fall to the floor.
This brass ring is responsible for adjusting the this lens’ focus and help keep the objective in place. Do not lose it as it is unique to this lens.
Store the objective to protect it from accidents and contaminants. Now that the objective is gone you can safely work on the rest of the barrel.
To separate the helicoids you should first remove this plate by unscrewing these. This plate is where the objective is seated and it is a very important part of the lens because it keeps 2 important things together.
Once the screws are gone, turn the barrel to the closest focusing distance to give it some space for you to maneuver the plate so you can pull it out of the barrel. Notice that the plate is clipped on both sides to facilitate this.
As seen from the picture, the clipped edges are essential for the plate to exit the tight opening of the rear barrel.
Once the plate is gone the helicoid keys are now exposed. These keys can be removed by extracting these screws. Each key is broken-in to their slots so I recommend that you mark one of the keys and its slot so that you will know which one should go where later.
Be careful when handling the helicoid keys as they are made of plastic. I am actually turned-off by this because I expect that Nikon should have known better by using metal ones on something as important as these.
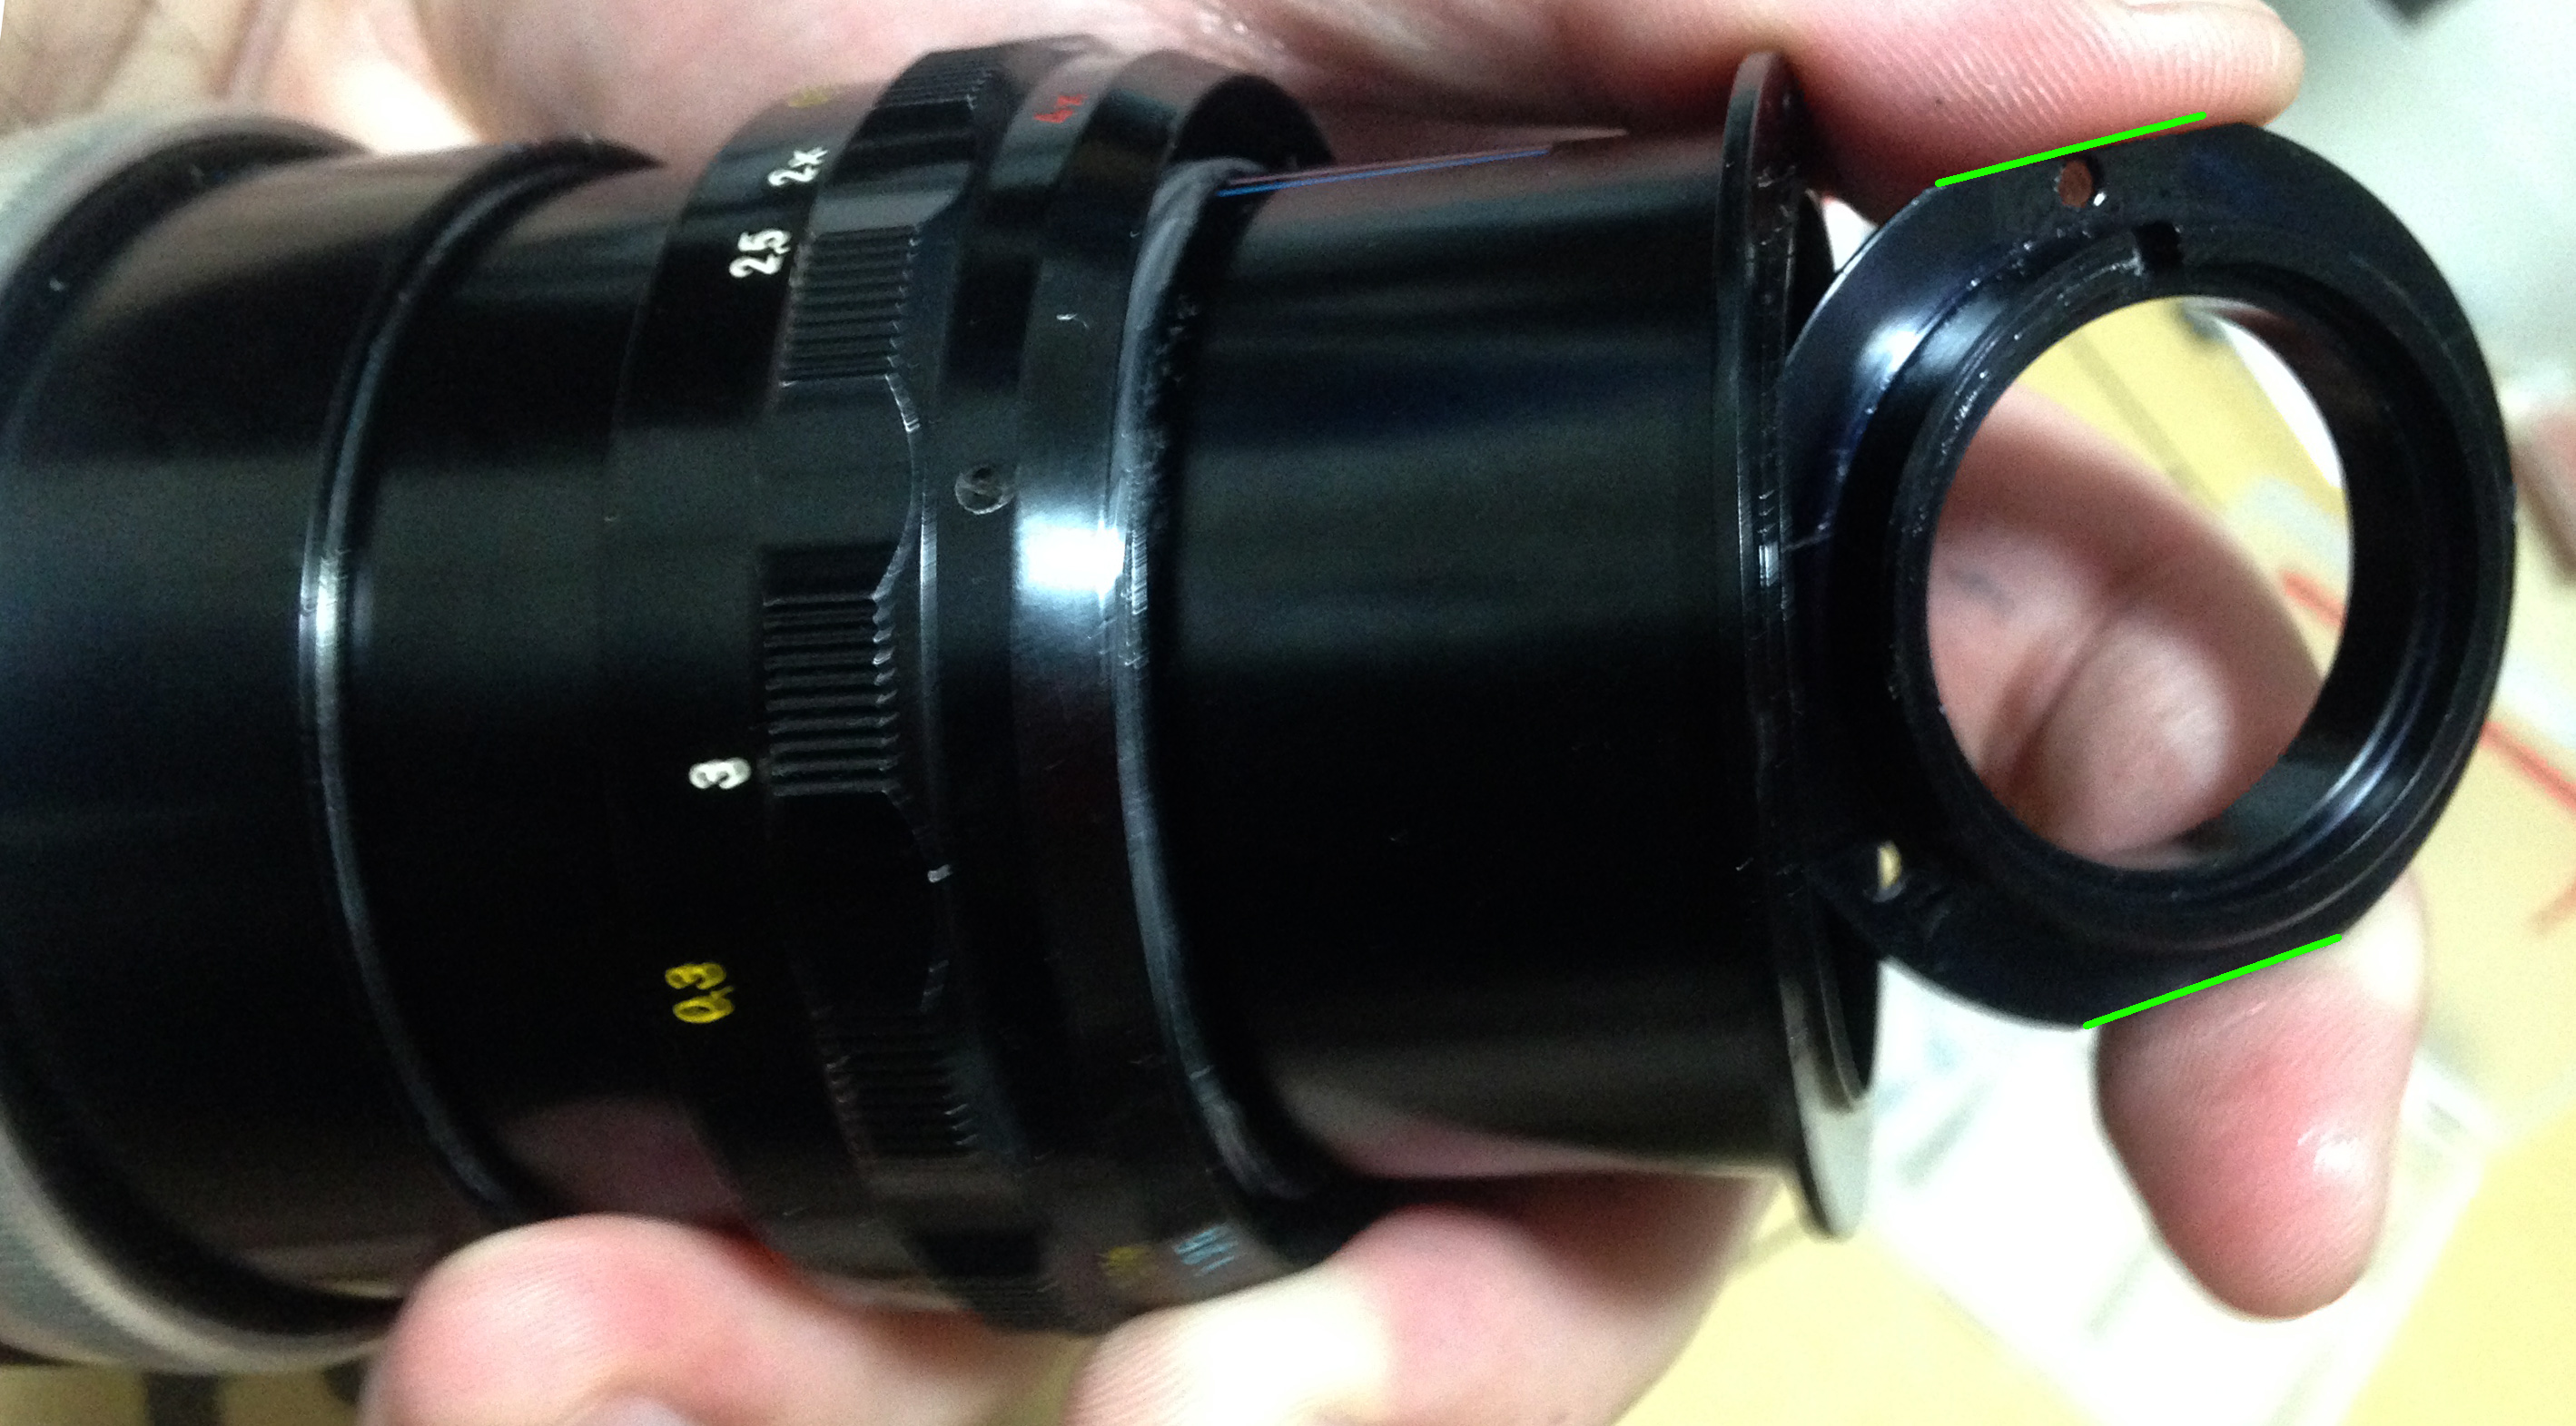
Things can get a bit confusing from this part on because you will have to go back and forth to disassemble this lens further.
To remove the chrome grip, extract its screws. Be careful not to scar it with your tools because it is made of a soft aluminum alloy.

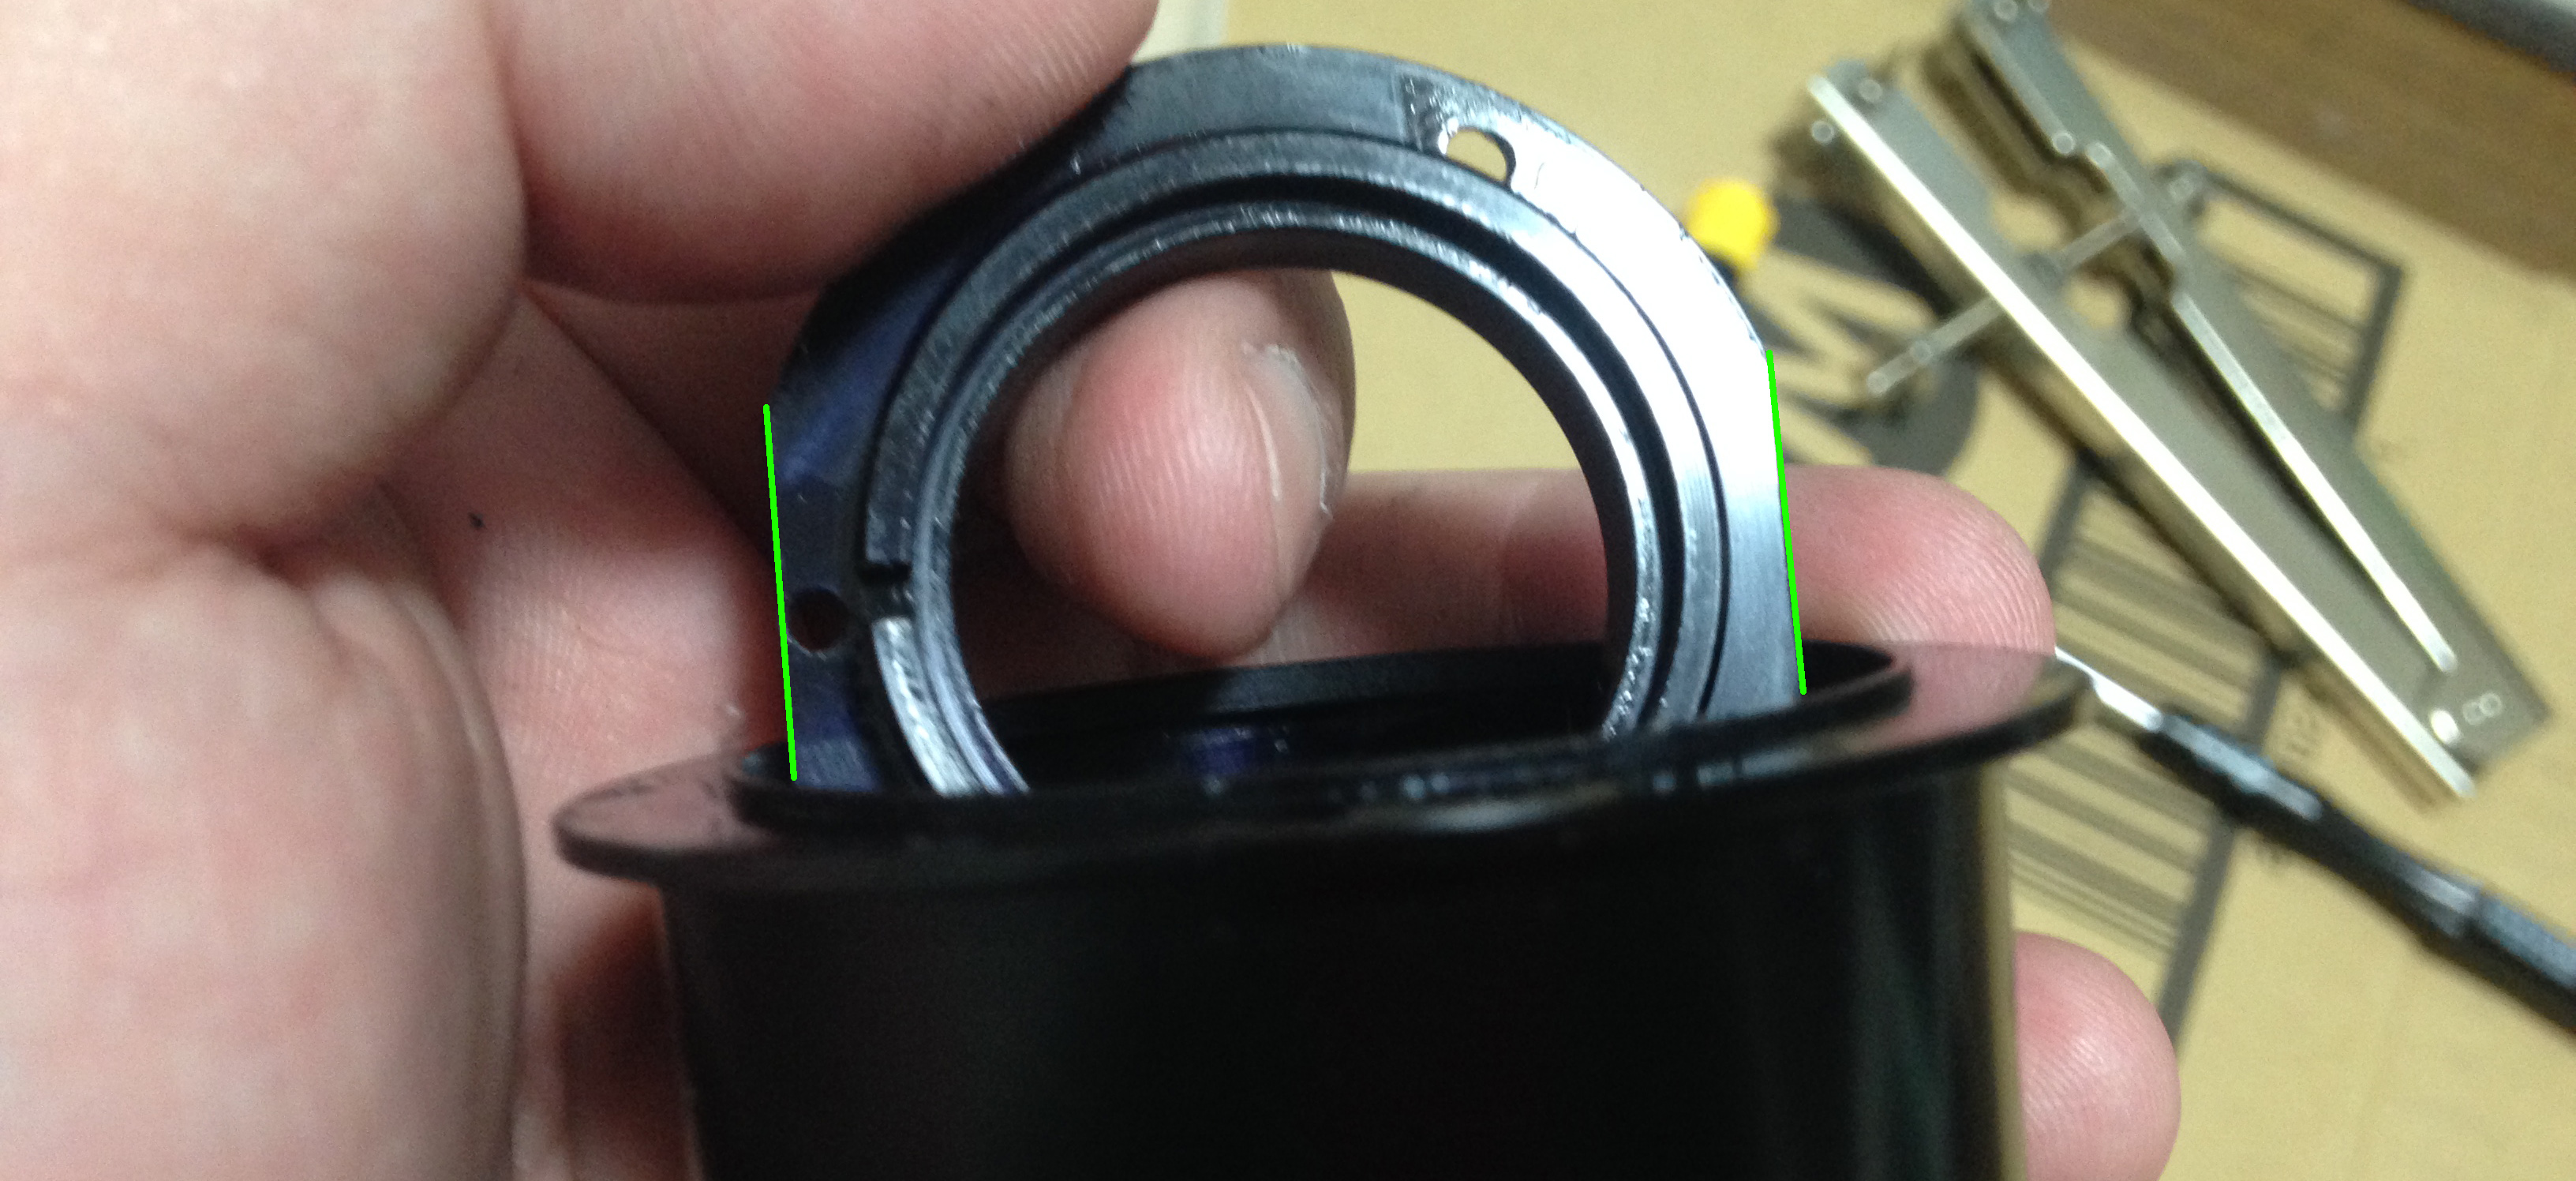
Once the screws are gone you can pull the chrome grip to reveal even more screws and the spring mechanism used for the preset aperture ring.

Of course, you cannot remove it because the focusing ring is in the way! To remove it, extract the screws that secure it to the lens barrel.
And off it goes.
The chrome grip can now be safely removed.
Next, remove the 3 screws that hold this ring down. This thick metal ring is responsible for keeping the large spring in-place.

Be careful when remove it as you don’t want the spring’s tension to release and cause anything to fly across the room.

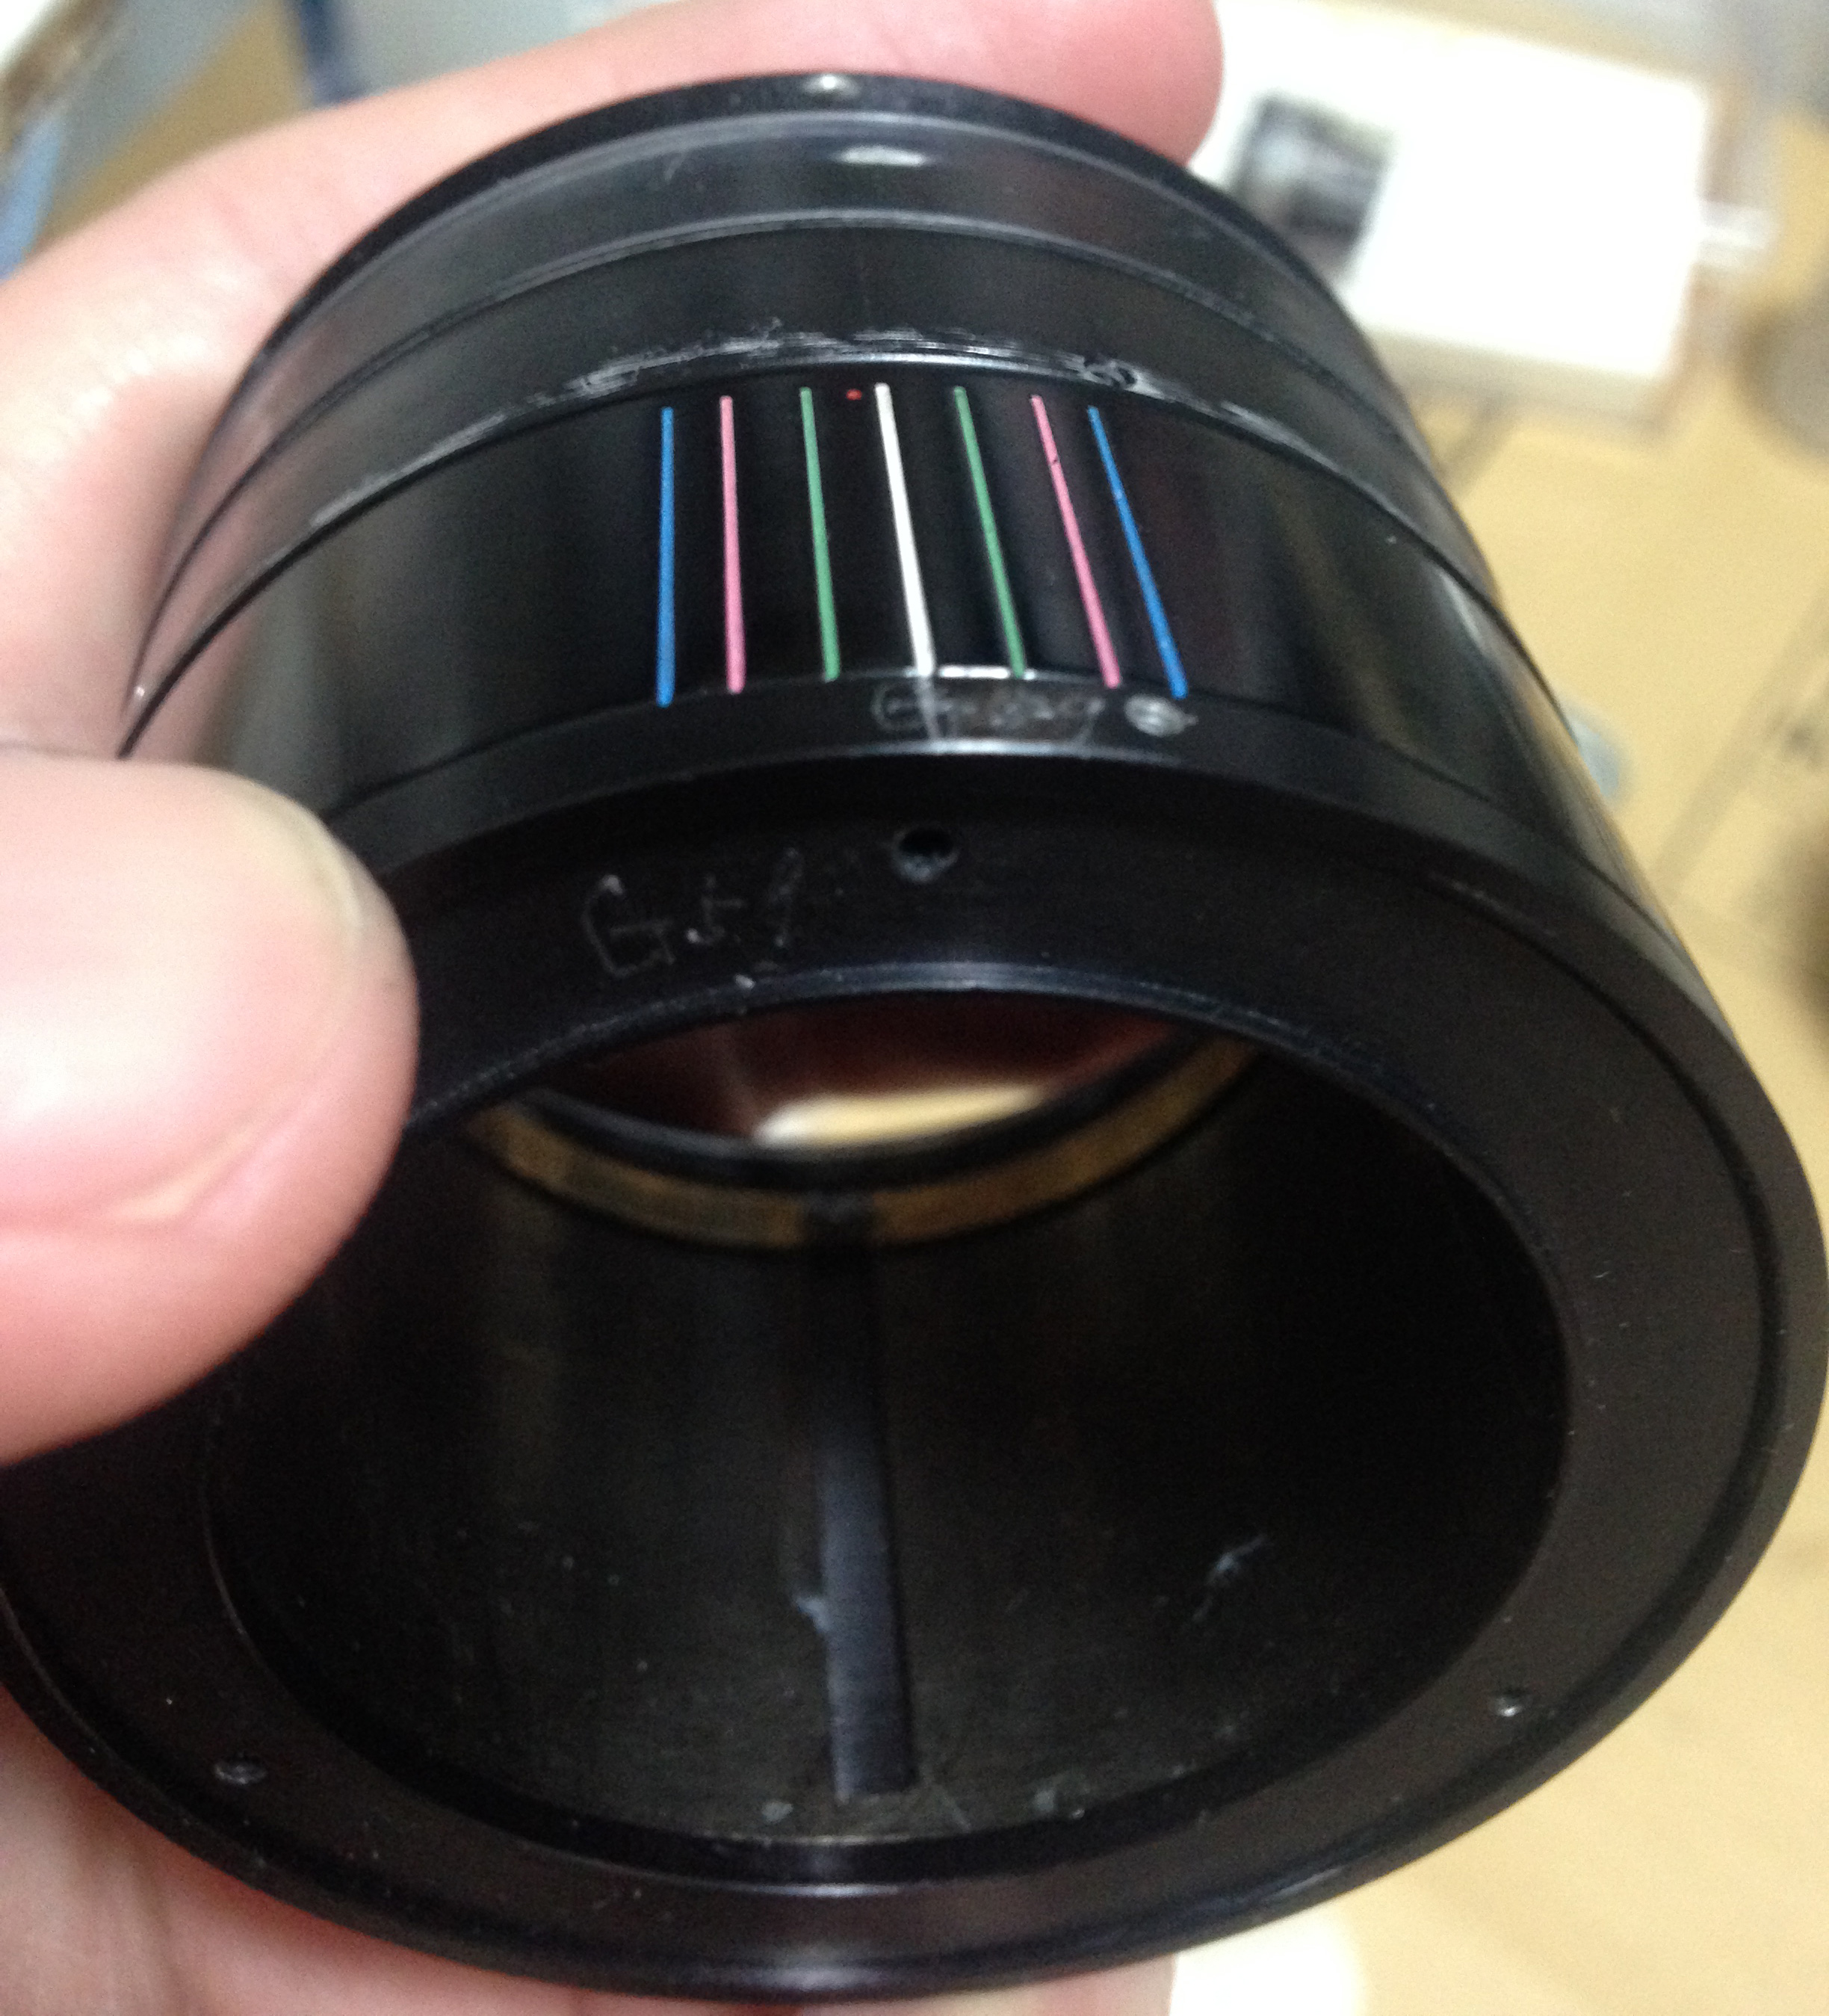
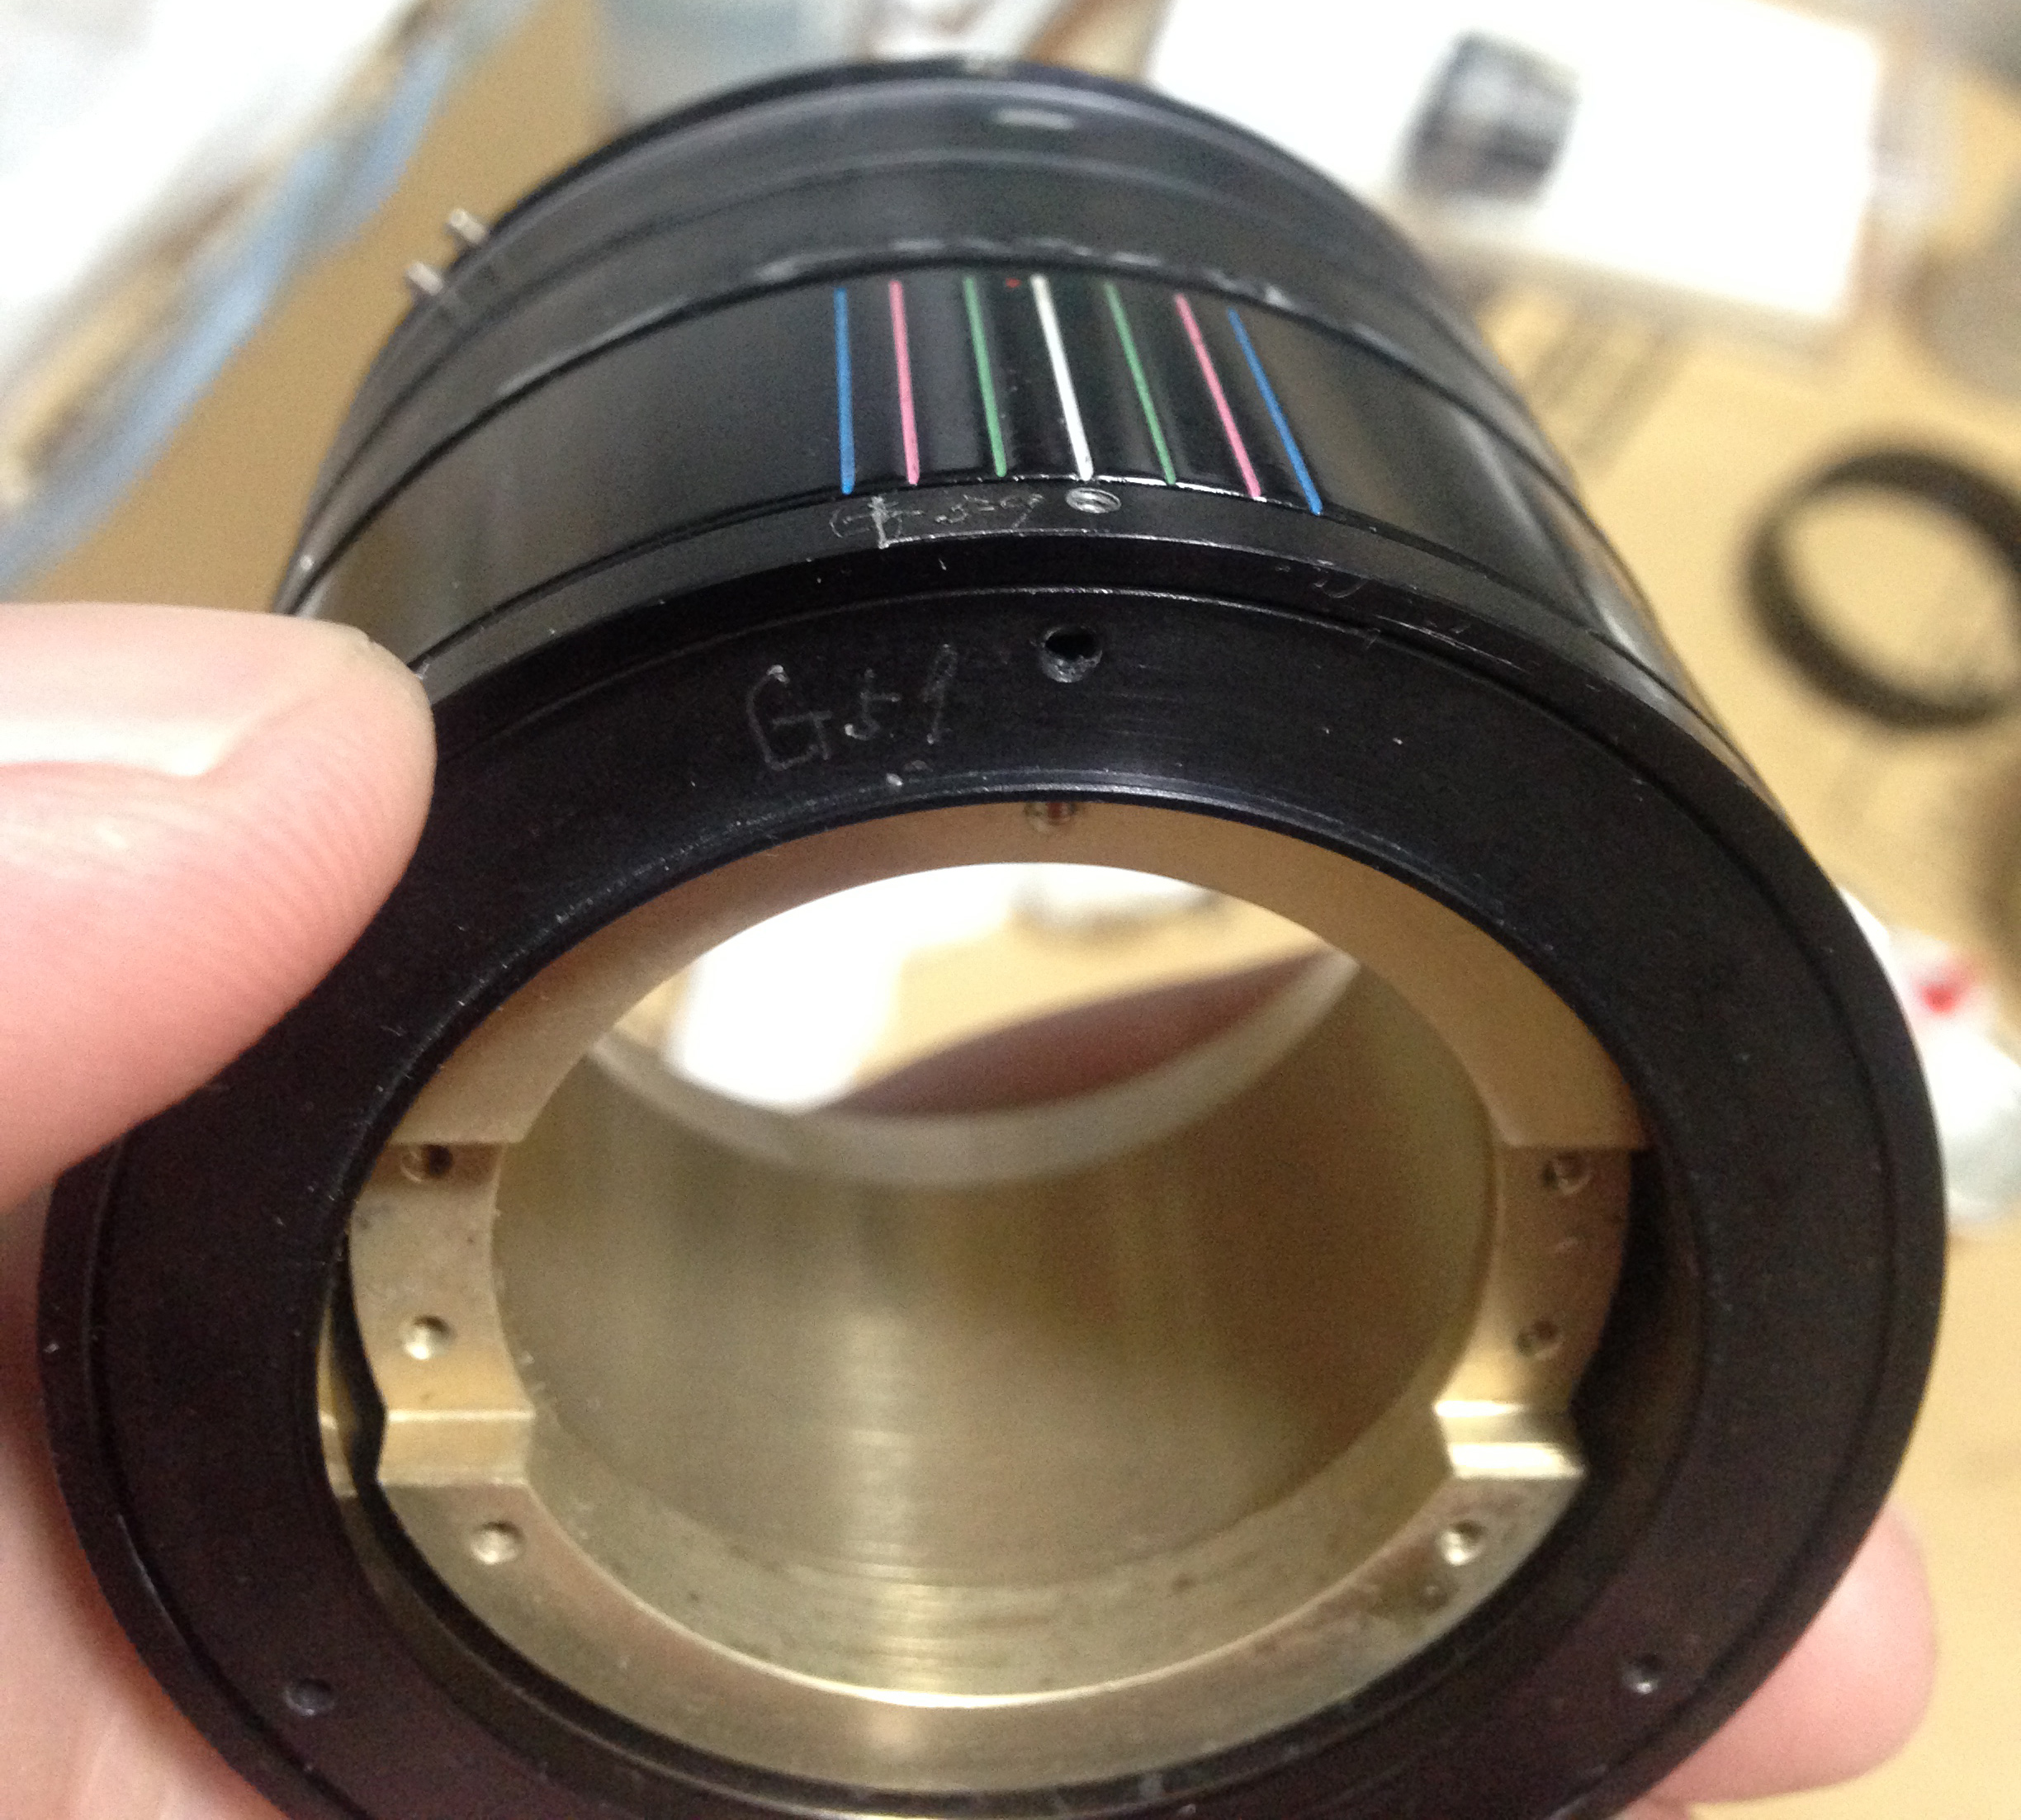
The preset aperture ring can now be safely removed. Notice the notches at the edge of the ring. Each notch corresponds to its own respective f-stop.
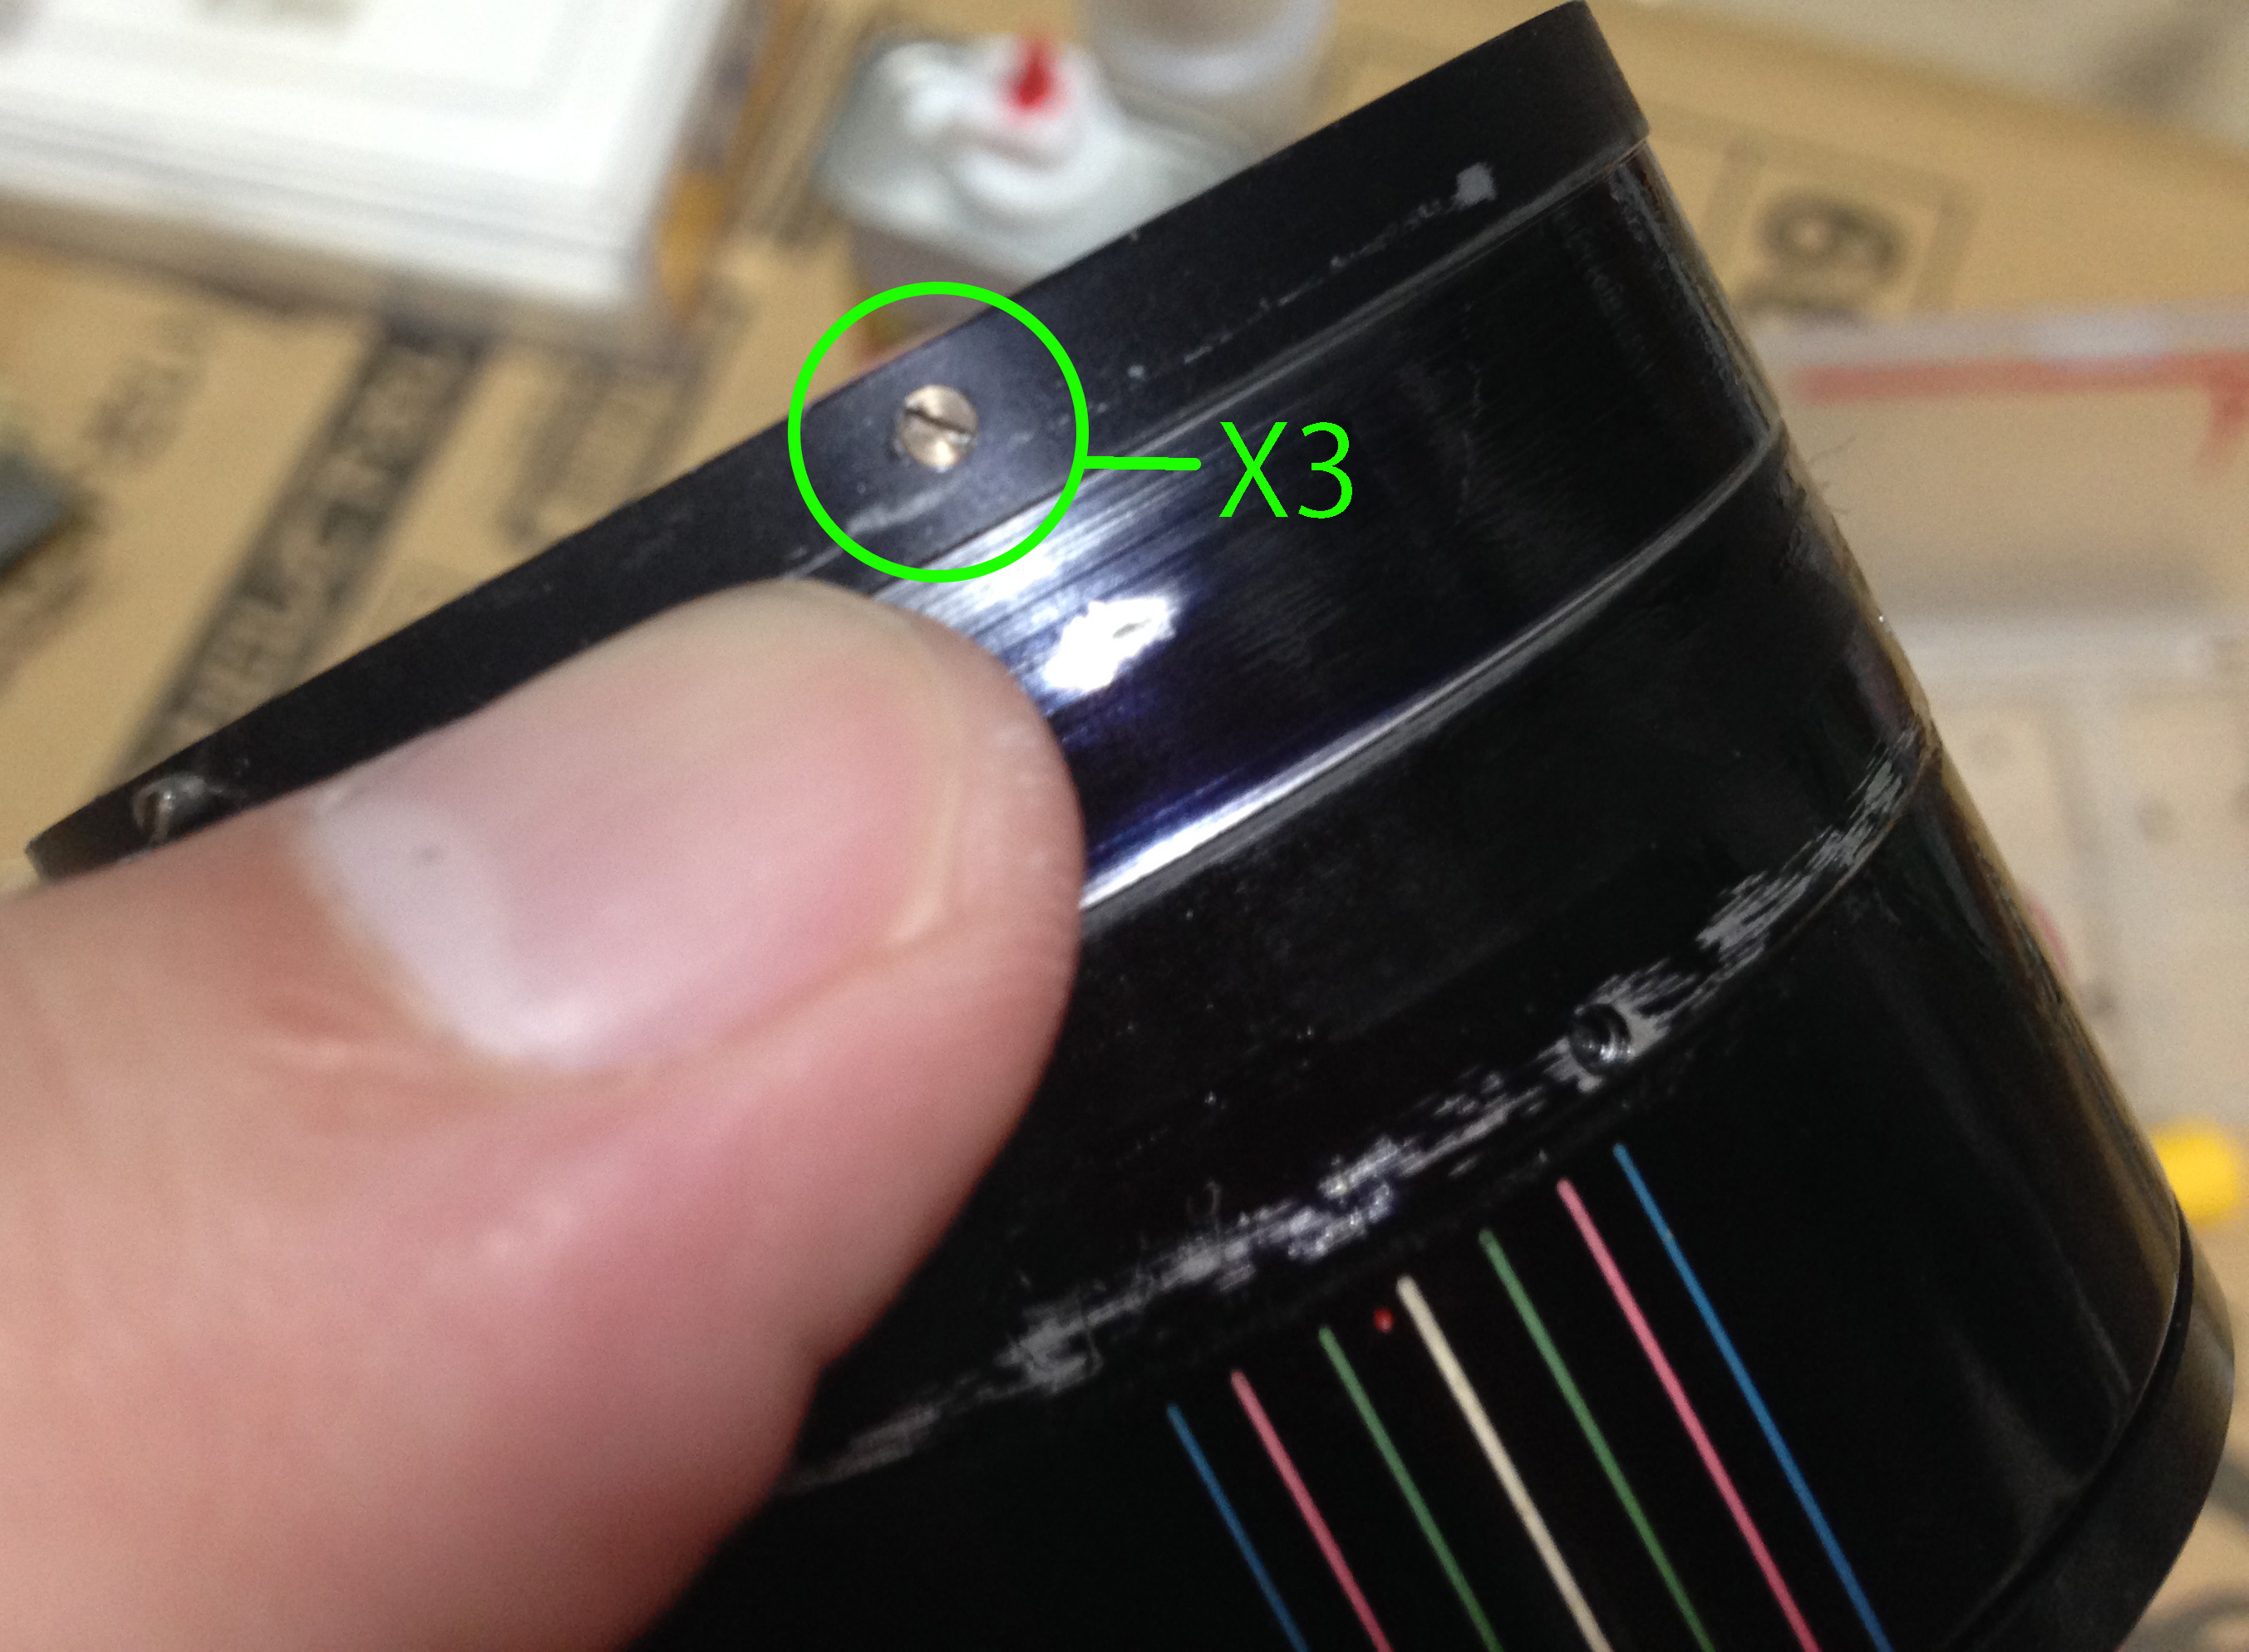
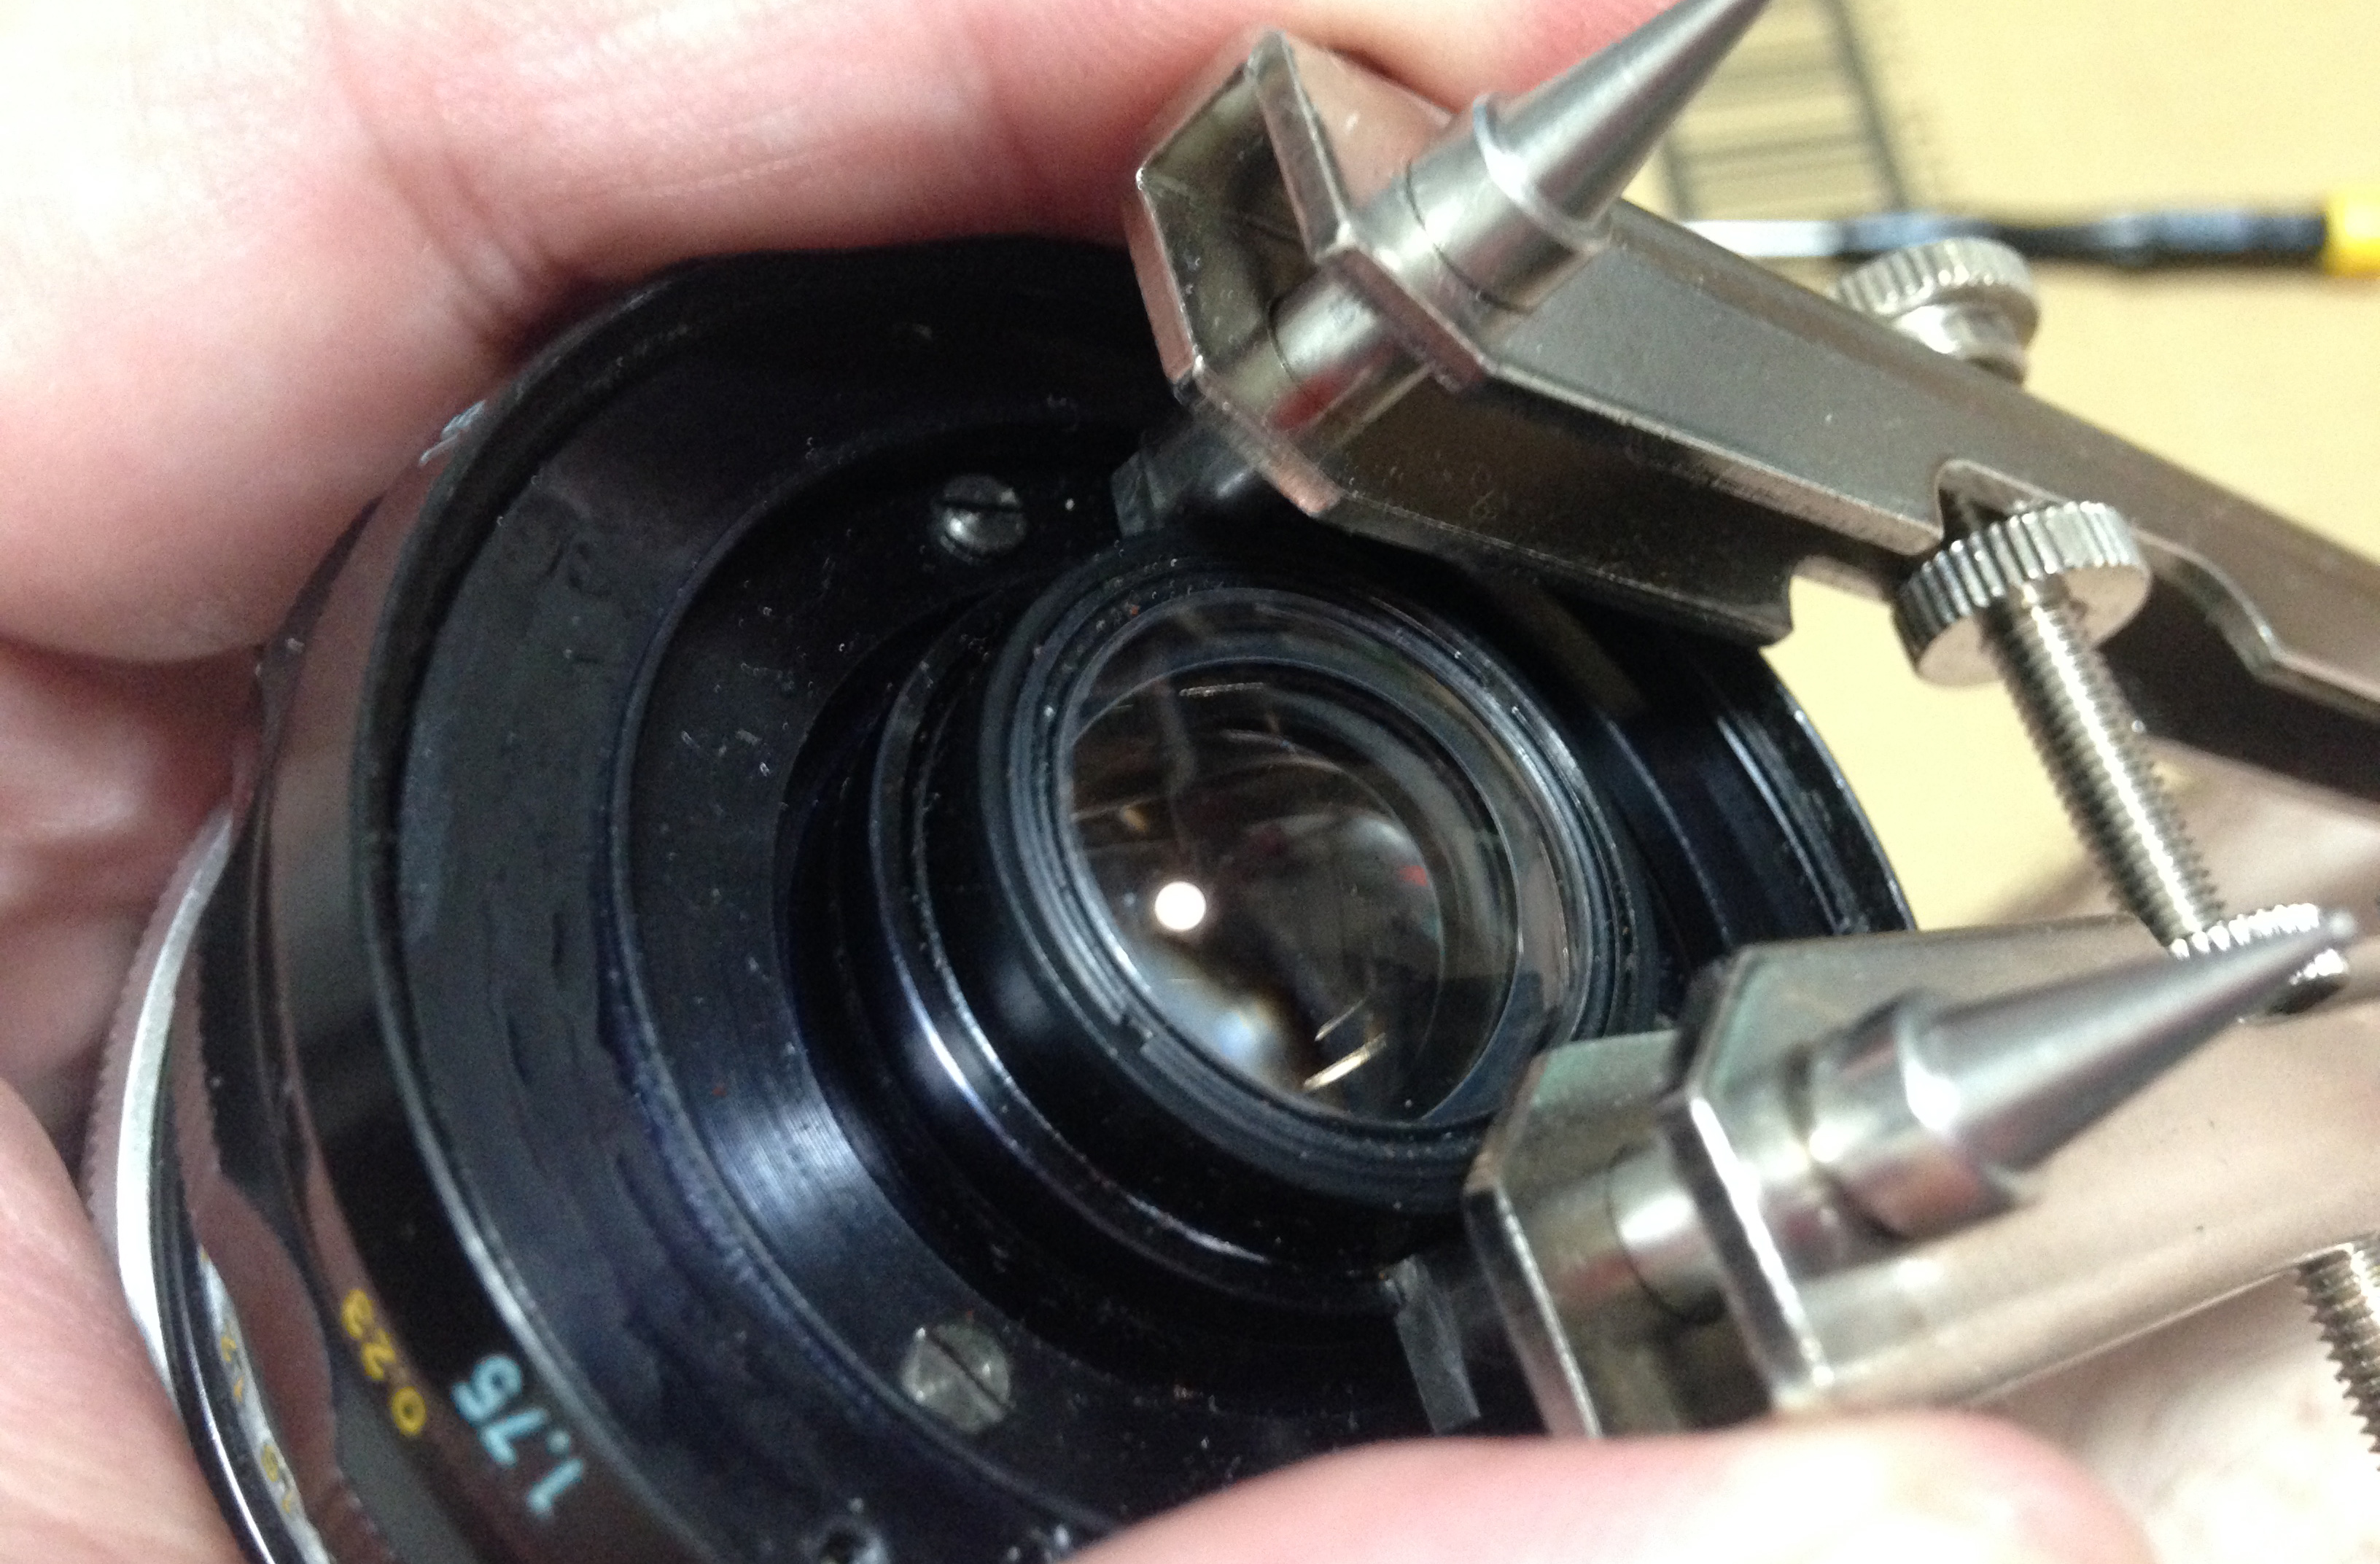
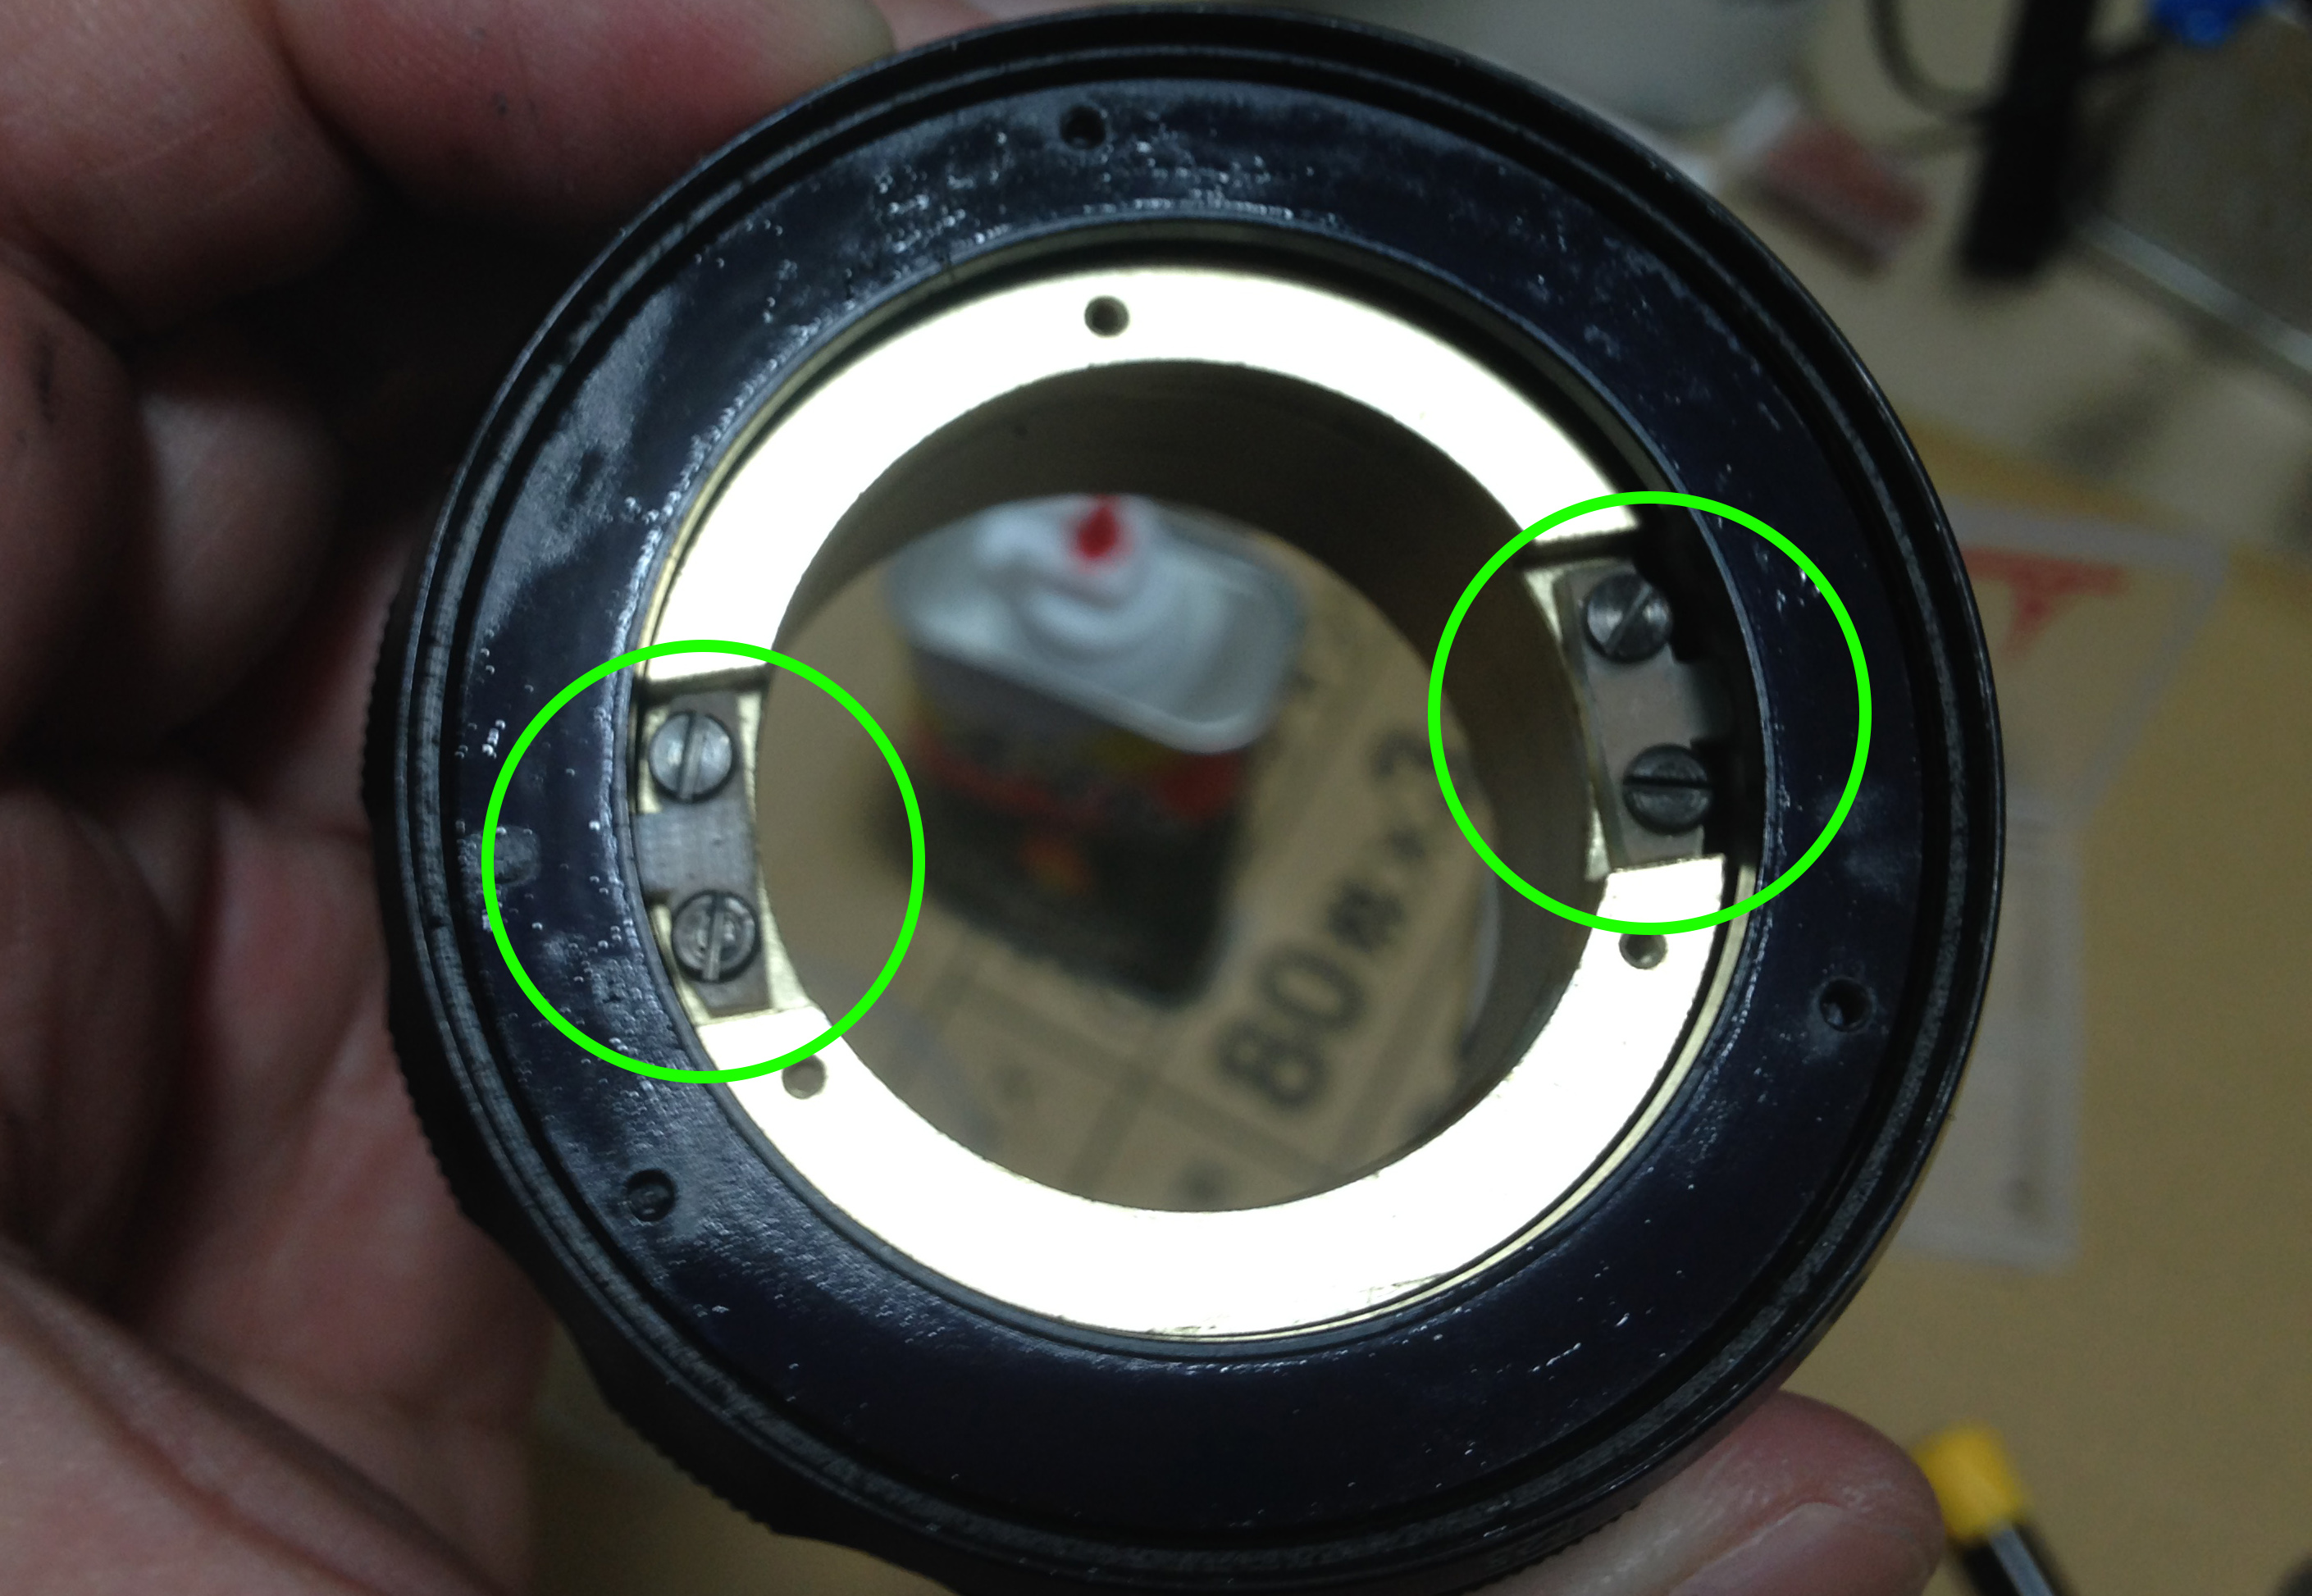
To remove that big brass cup, start by removing these screws.
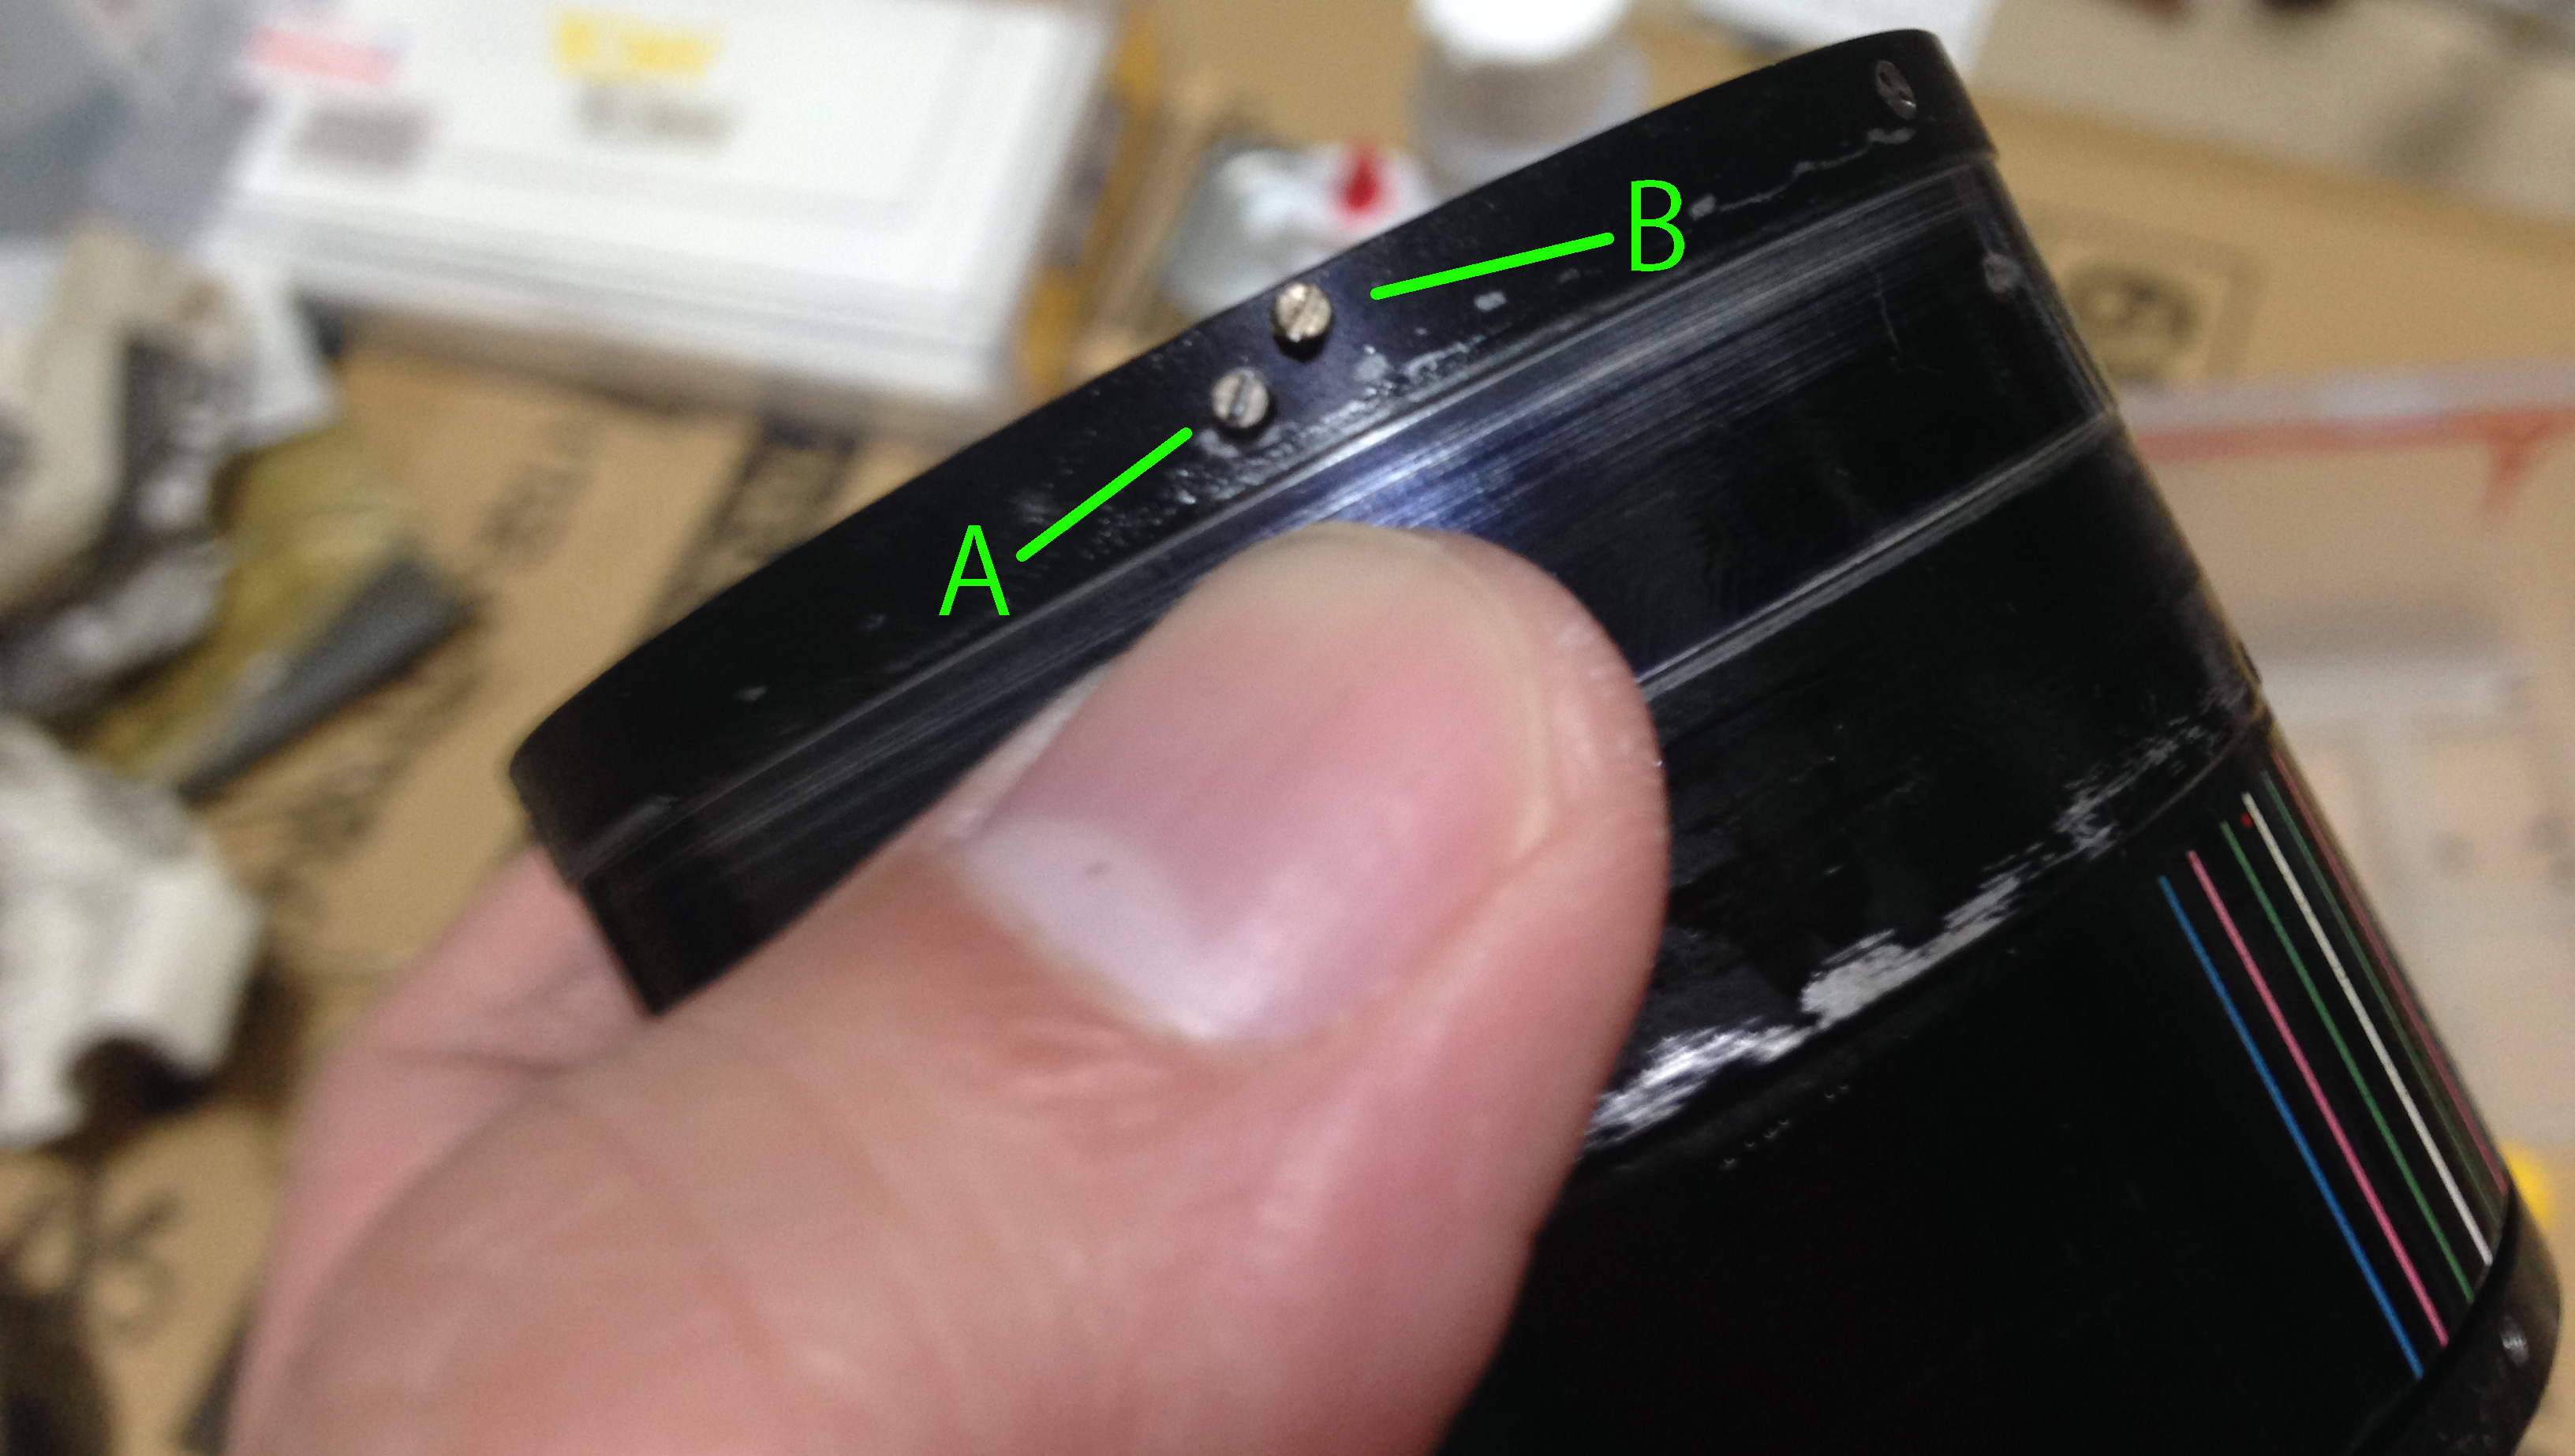
These pillar screws have to be carefully removed as well. These are delicate so use care when you unscrew them. Screw A is used to click the aperture in place, screw B is used as a stop for the aperture stop-down collar.

Now that all those 5 screws are gone you can now safely remove this huge brass inner cup.
You should probably have something like this by now.
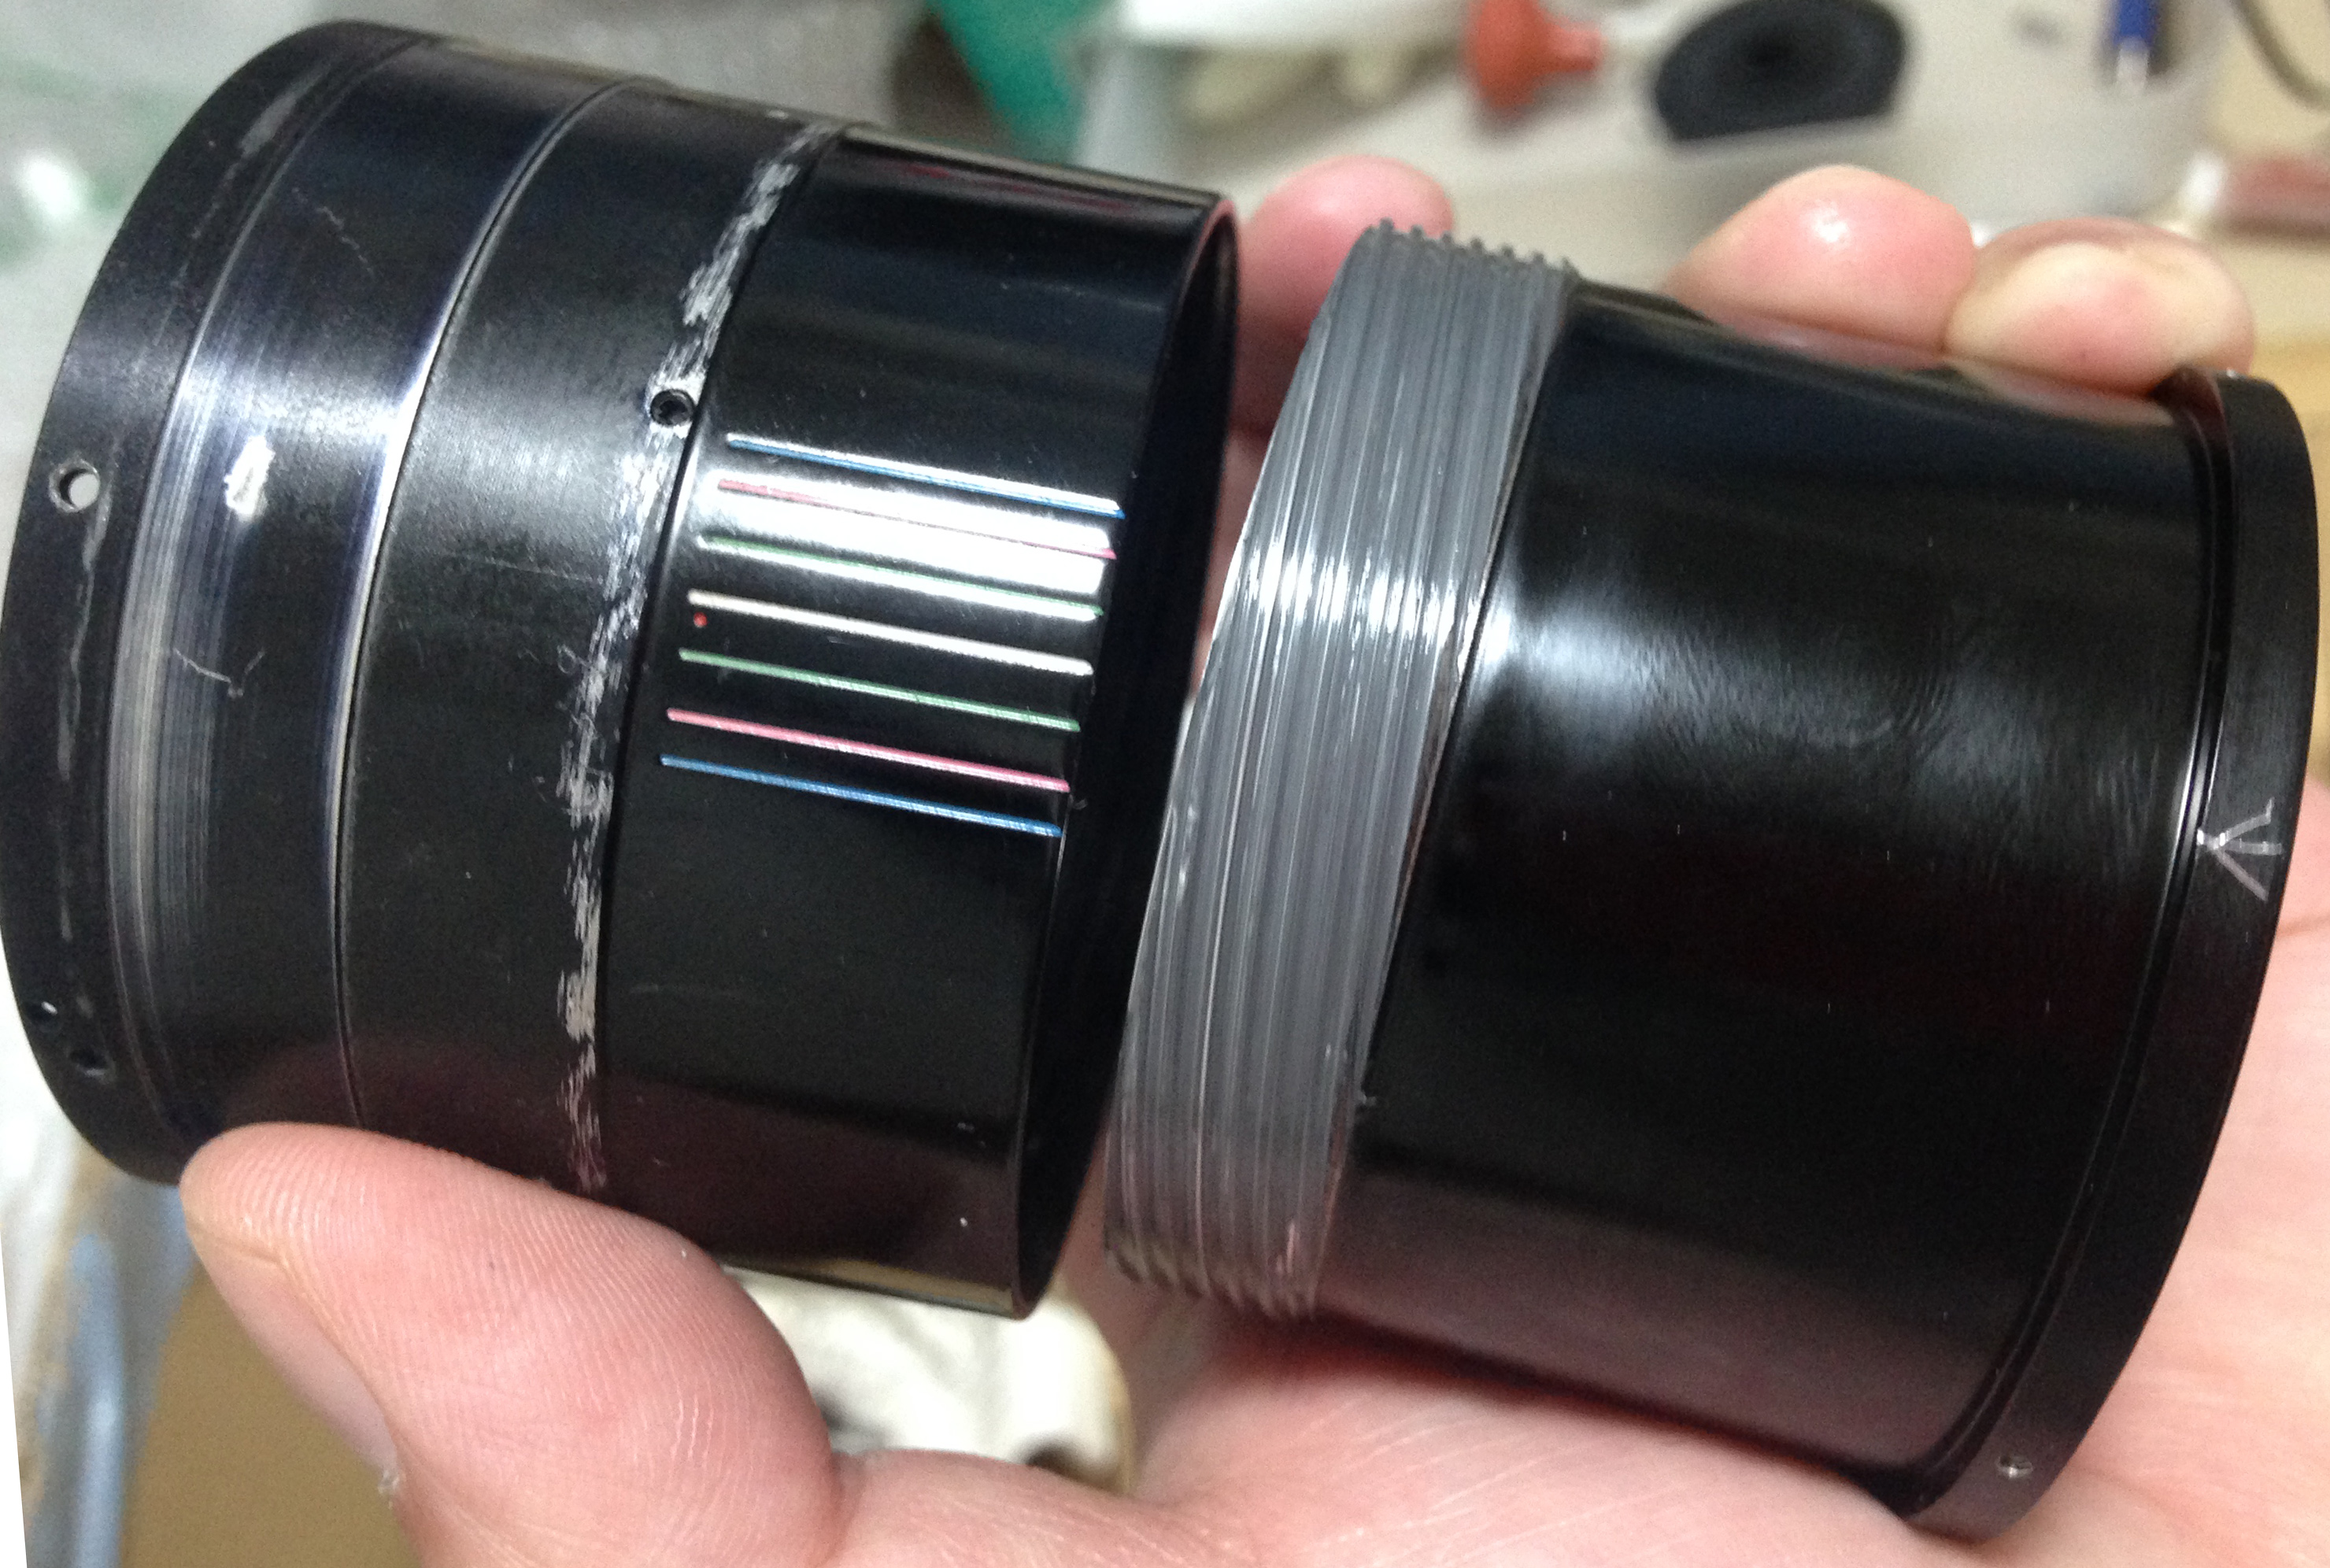
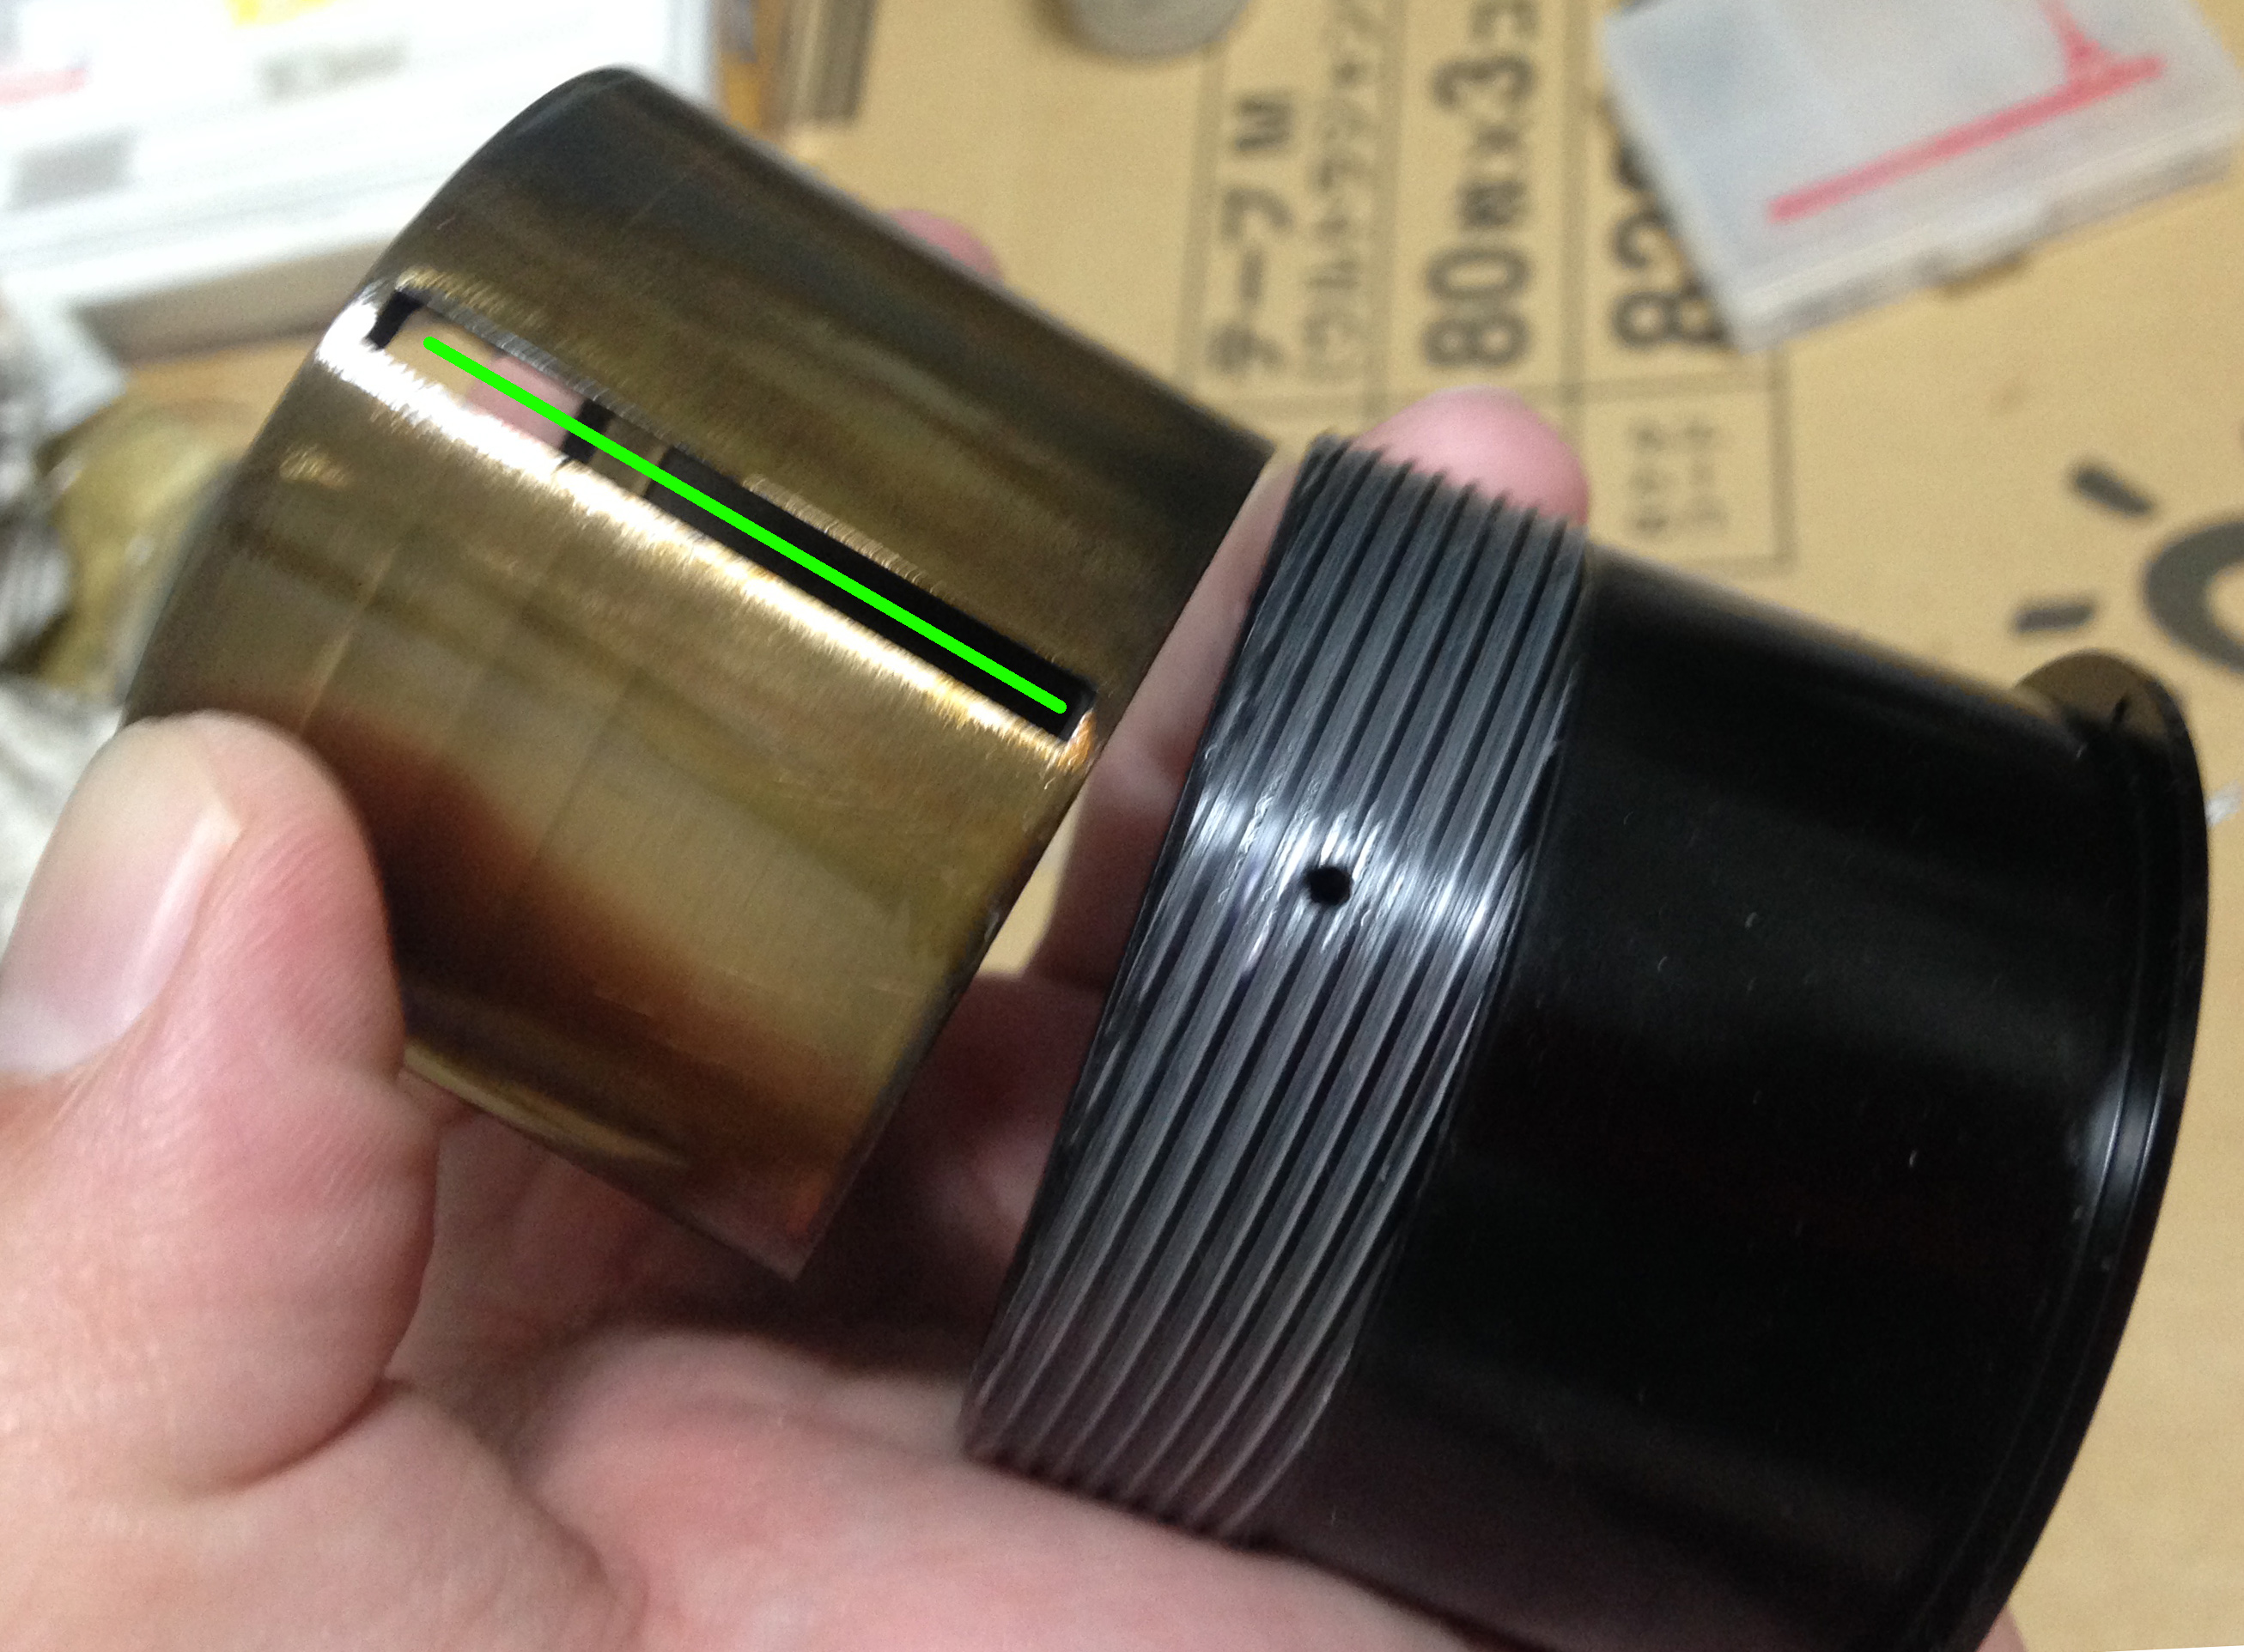
Start by removing the outer helicoid. Be sure to mark where they separate. Failure to do so will result in hours of agony trying to figure out where they should mate. To prevent any mistakes, read my article on how to work with helicoids.

Do the same for the inner helicoid.
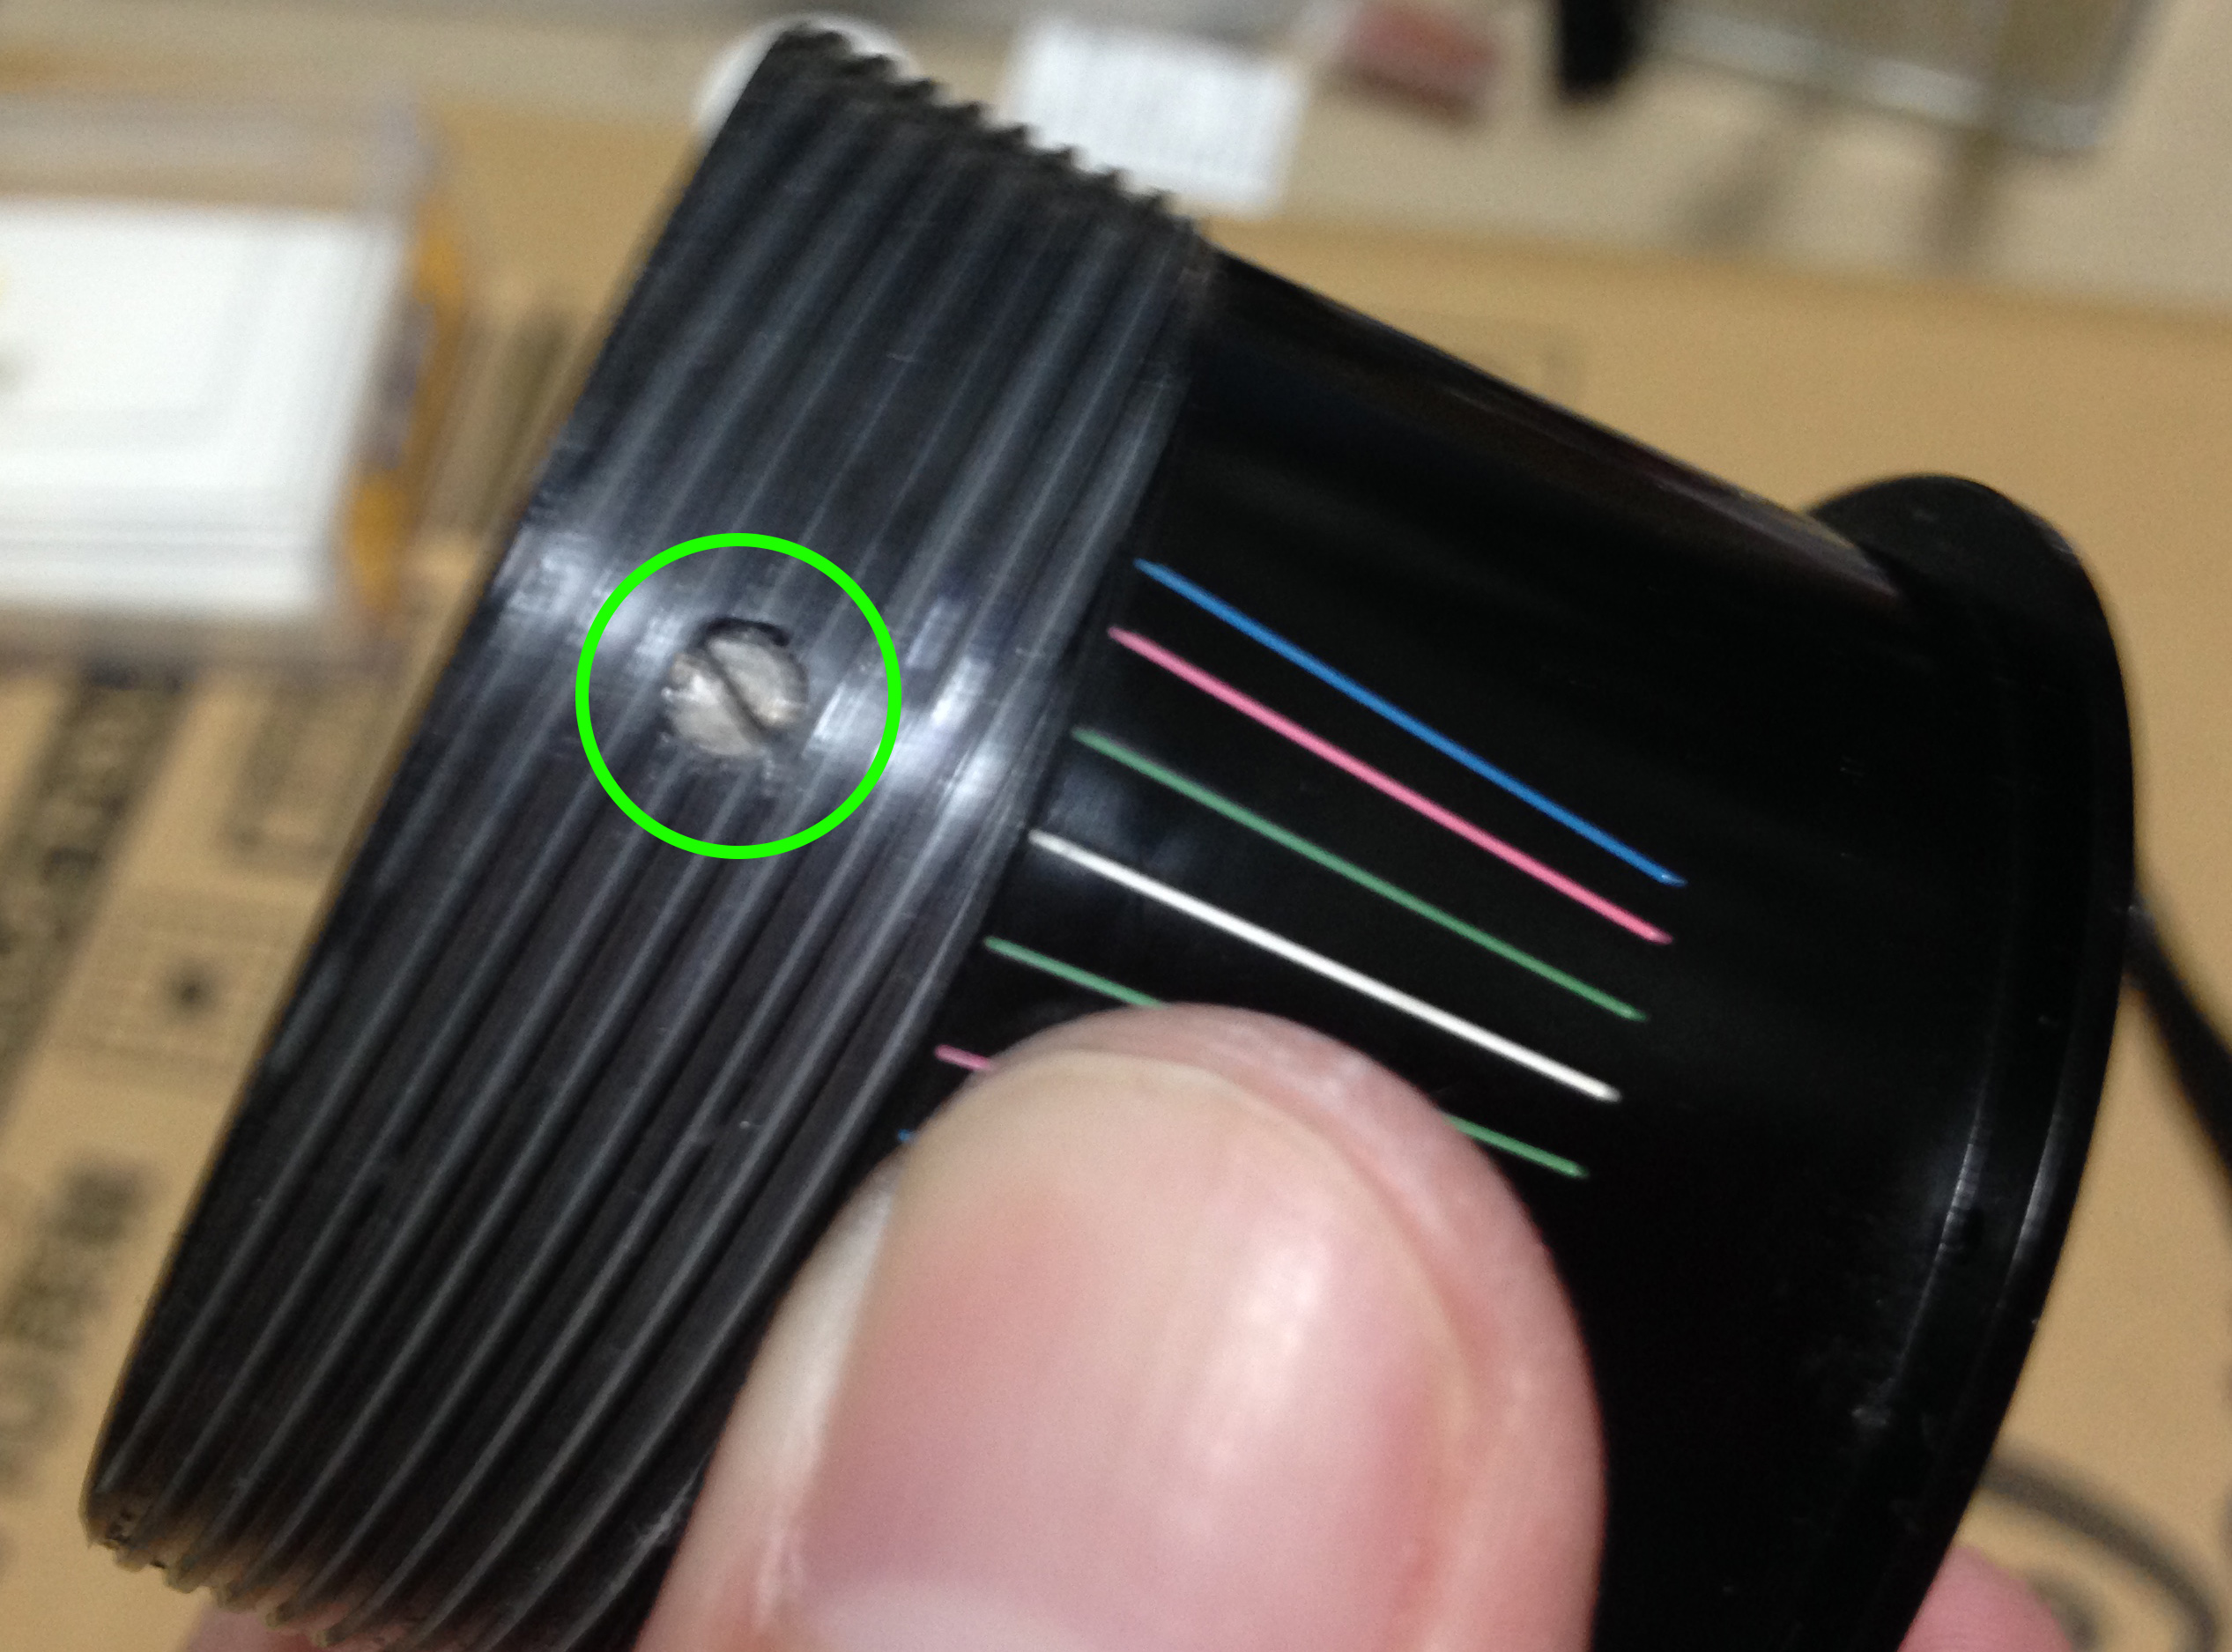
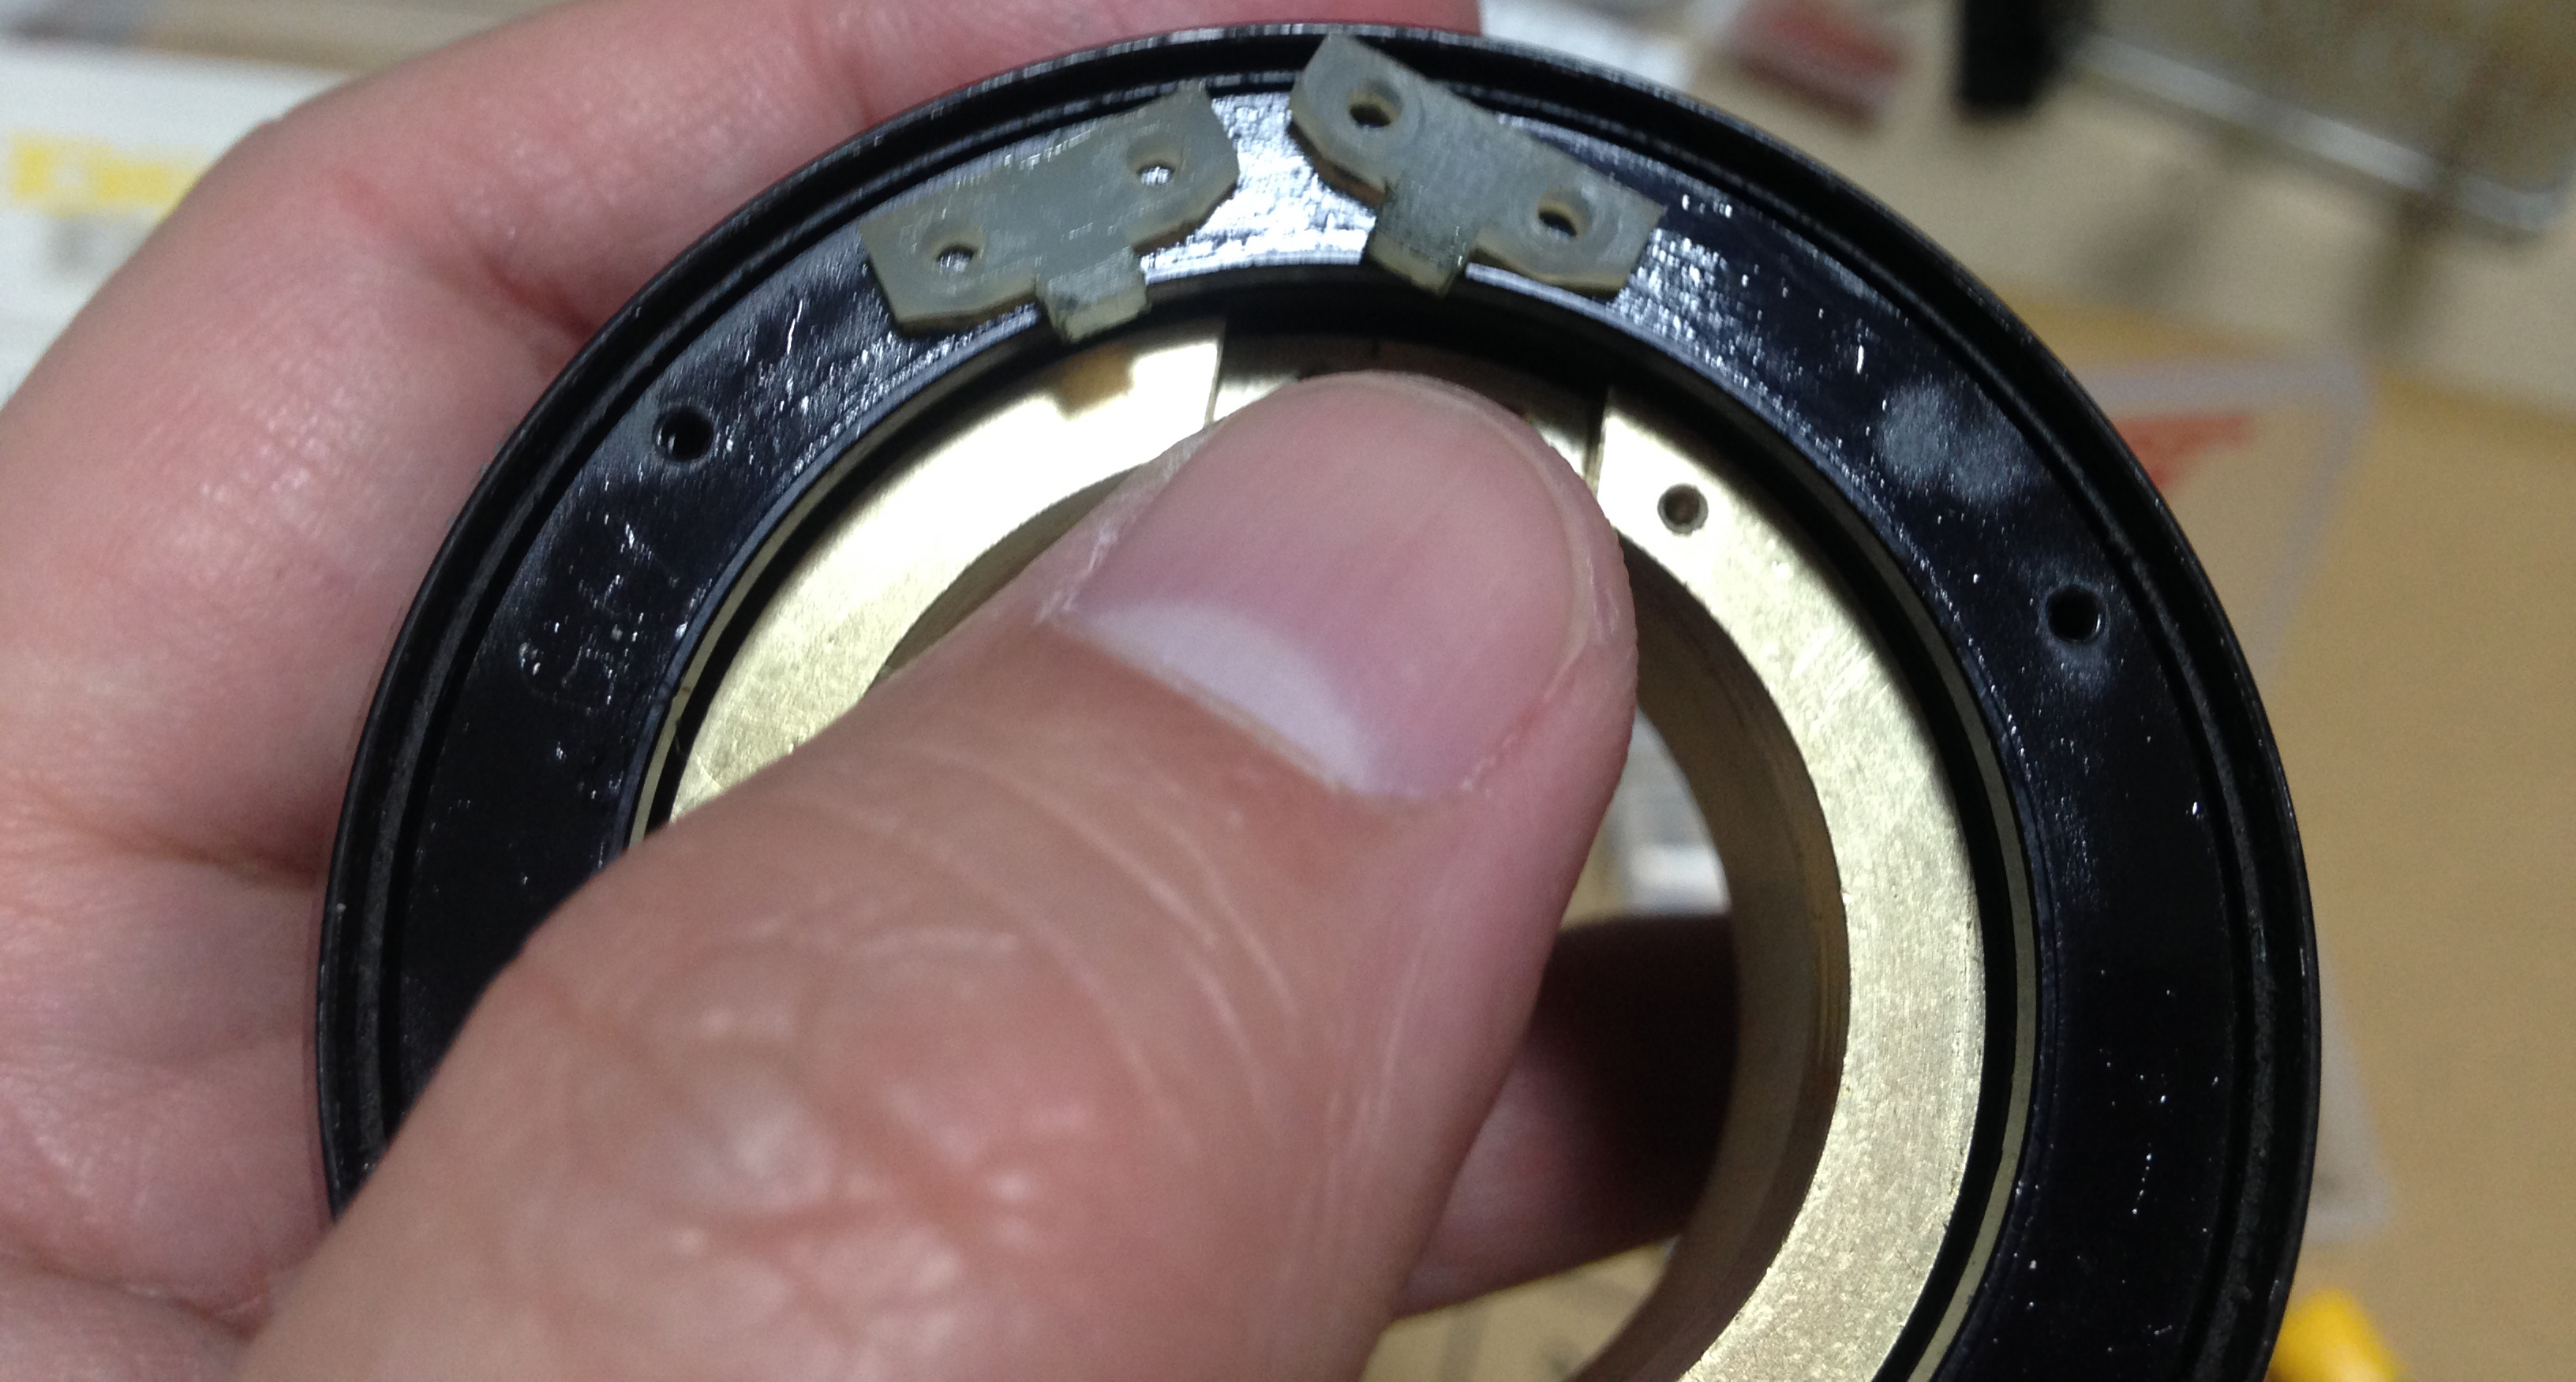
These screws are responsible for another set of keys inside the barrel. These screws are not interchangeable, you’ll see why later.
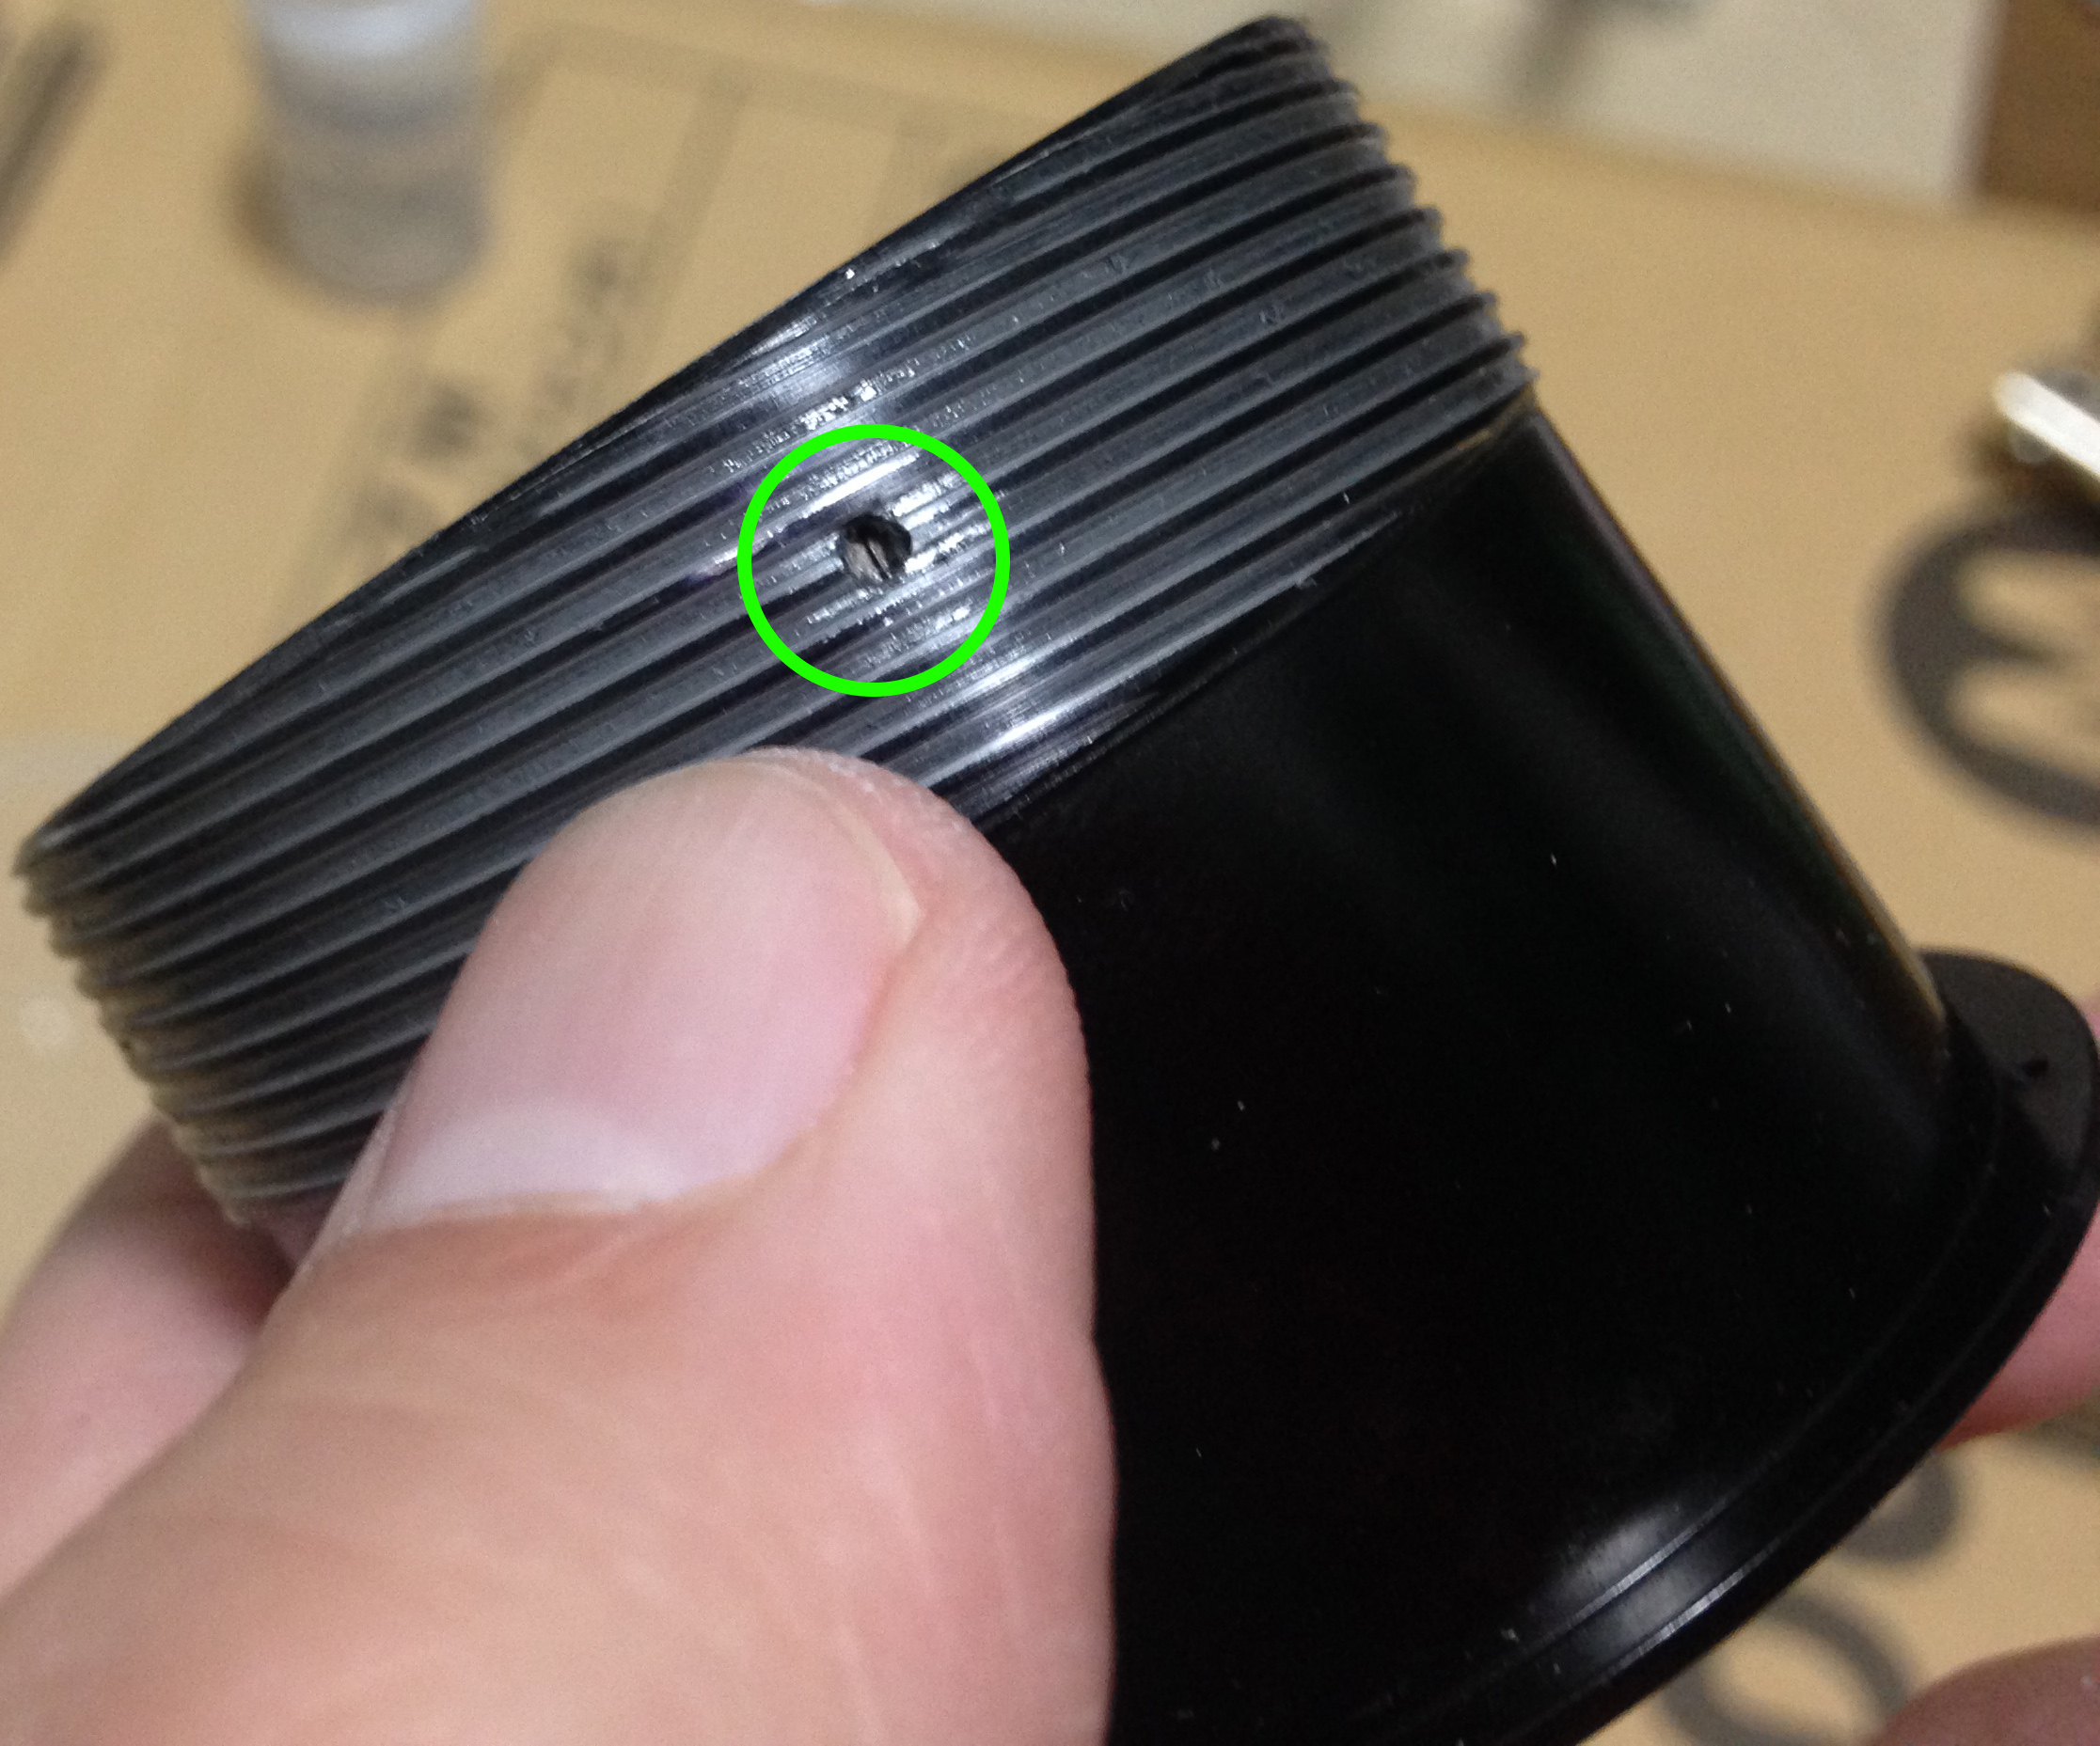
Here is the other one. Notice that this is smaller.
Removing the screws will also free the keys/nut under it. Sorry for the poor “macro” photo.
During reassembly, please do not forget to reassemble this before you apply any grease or you will have a messy time. Also, do not over-tighten these or you will have a squeaky lens. Just tighten it enough to the point that it feels secure and not wobbling about.
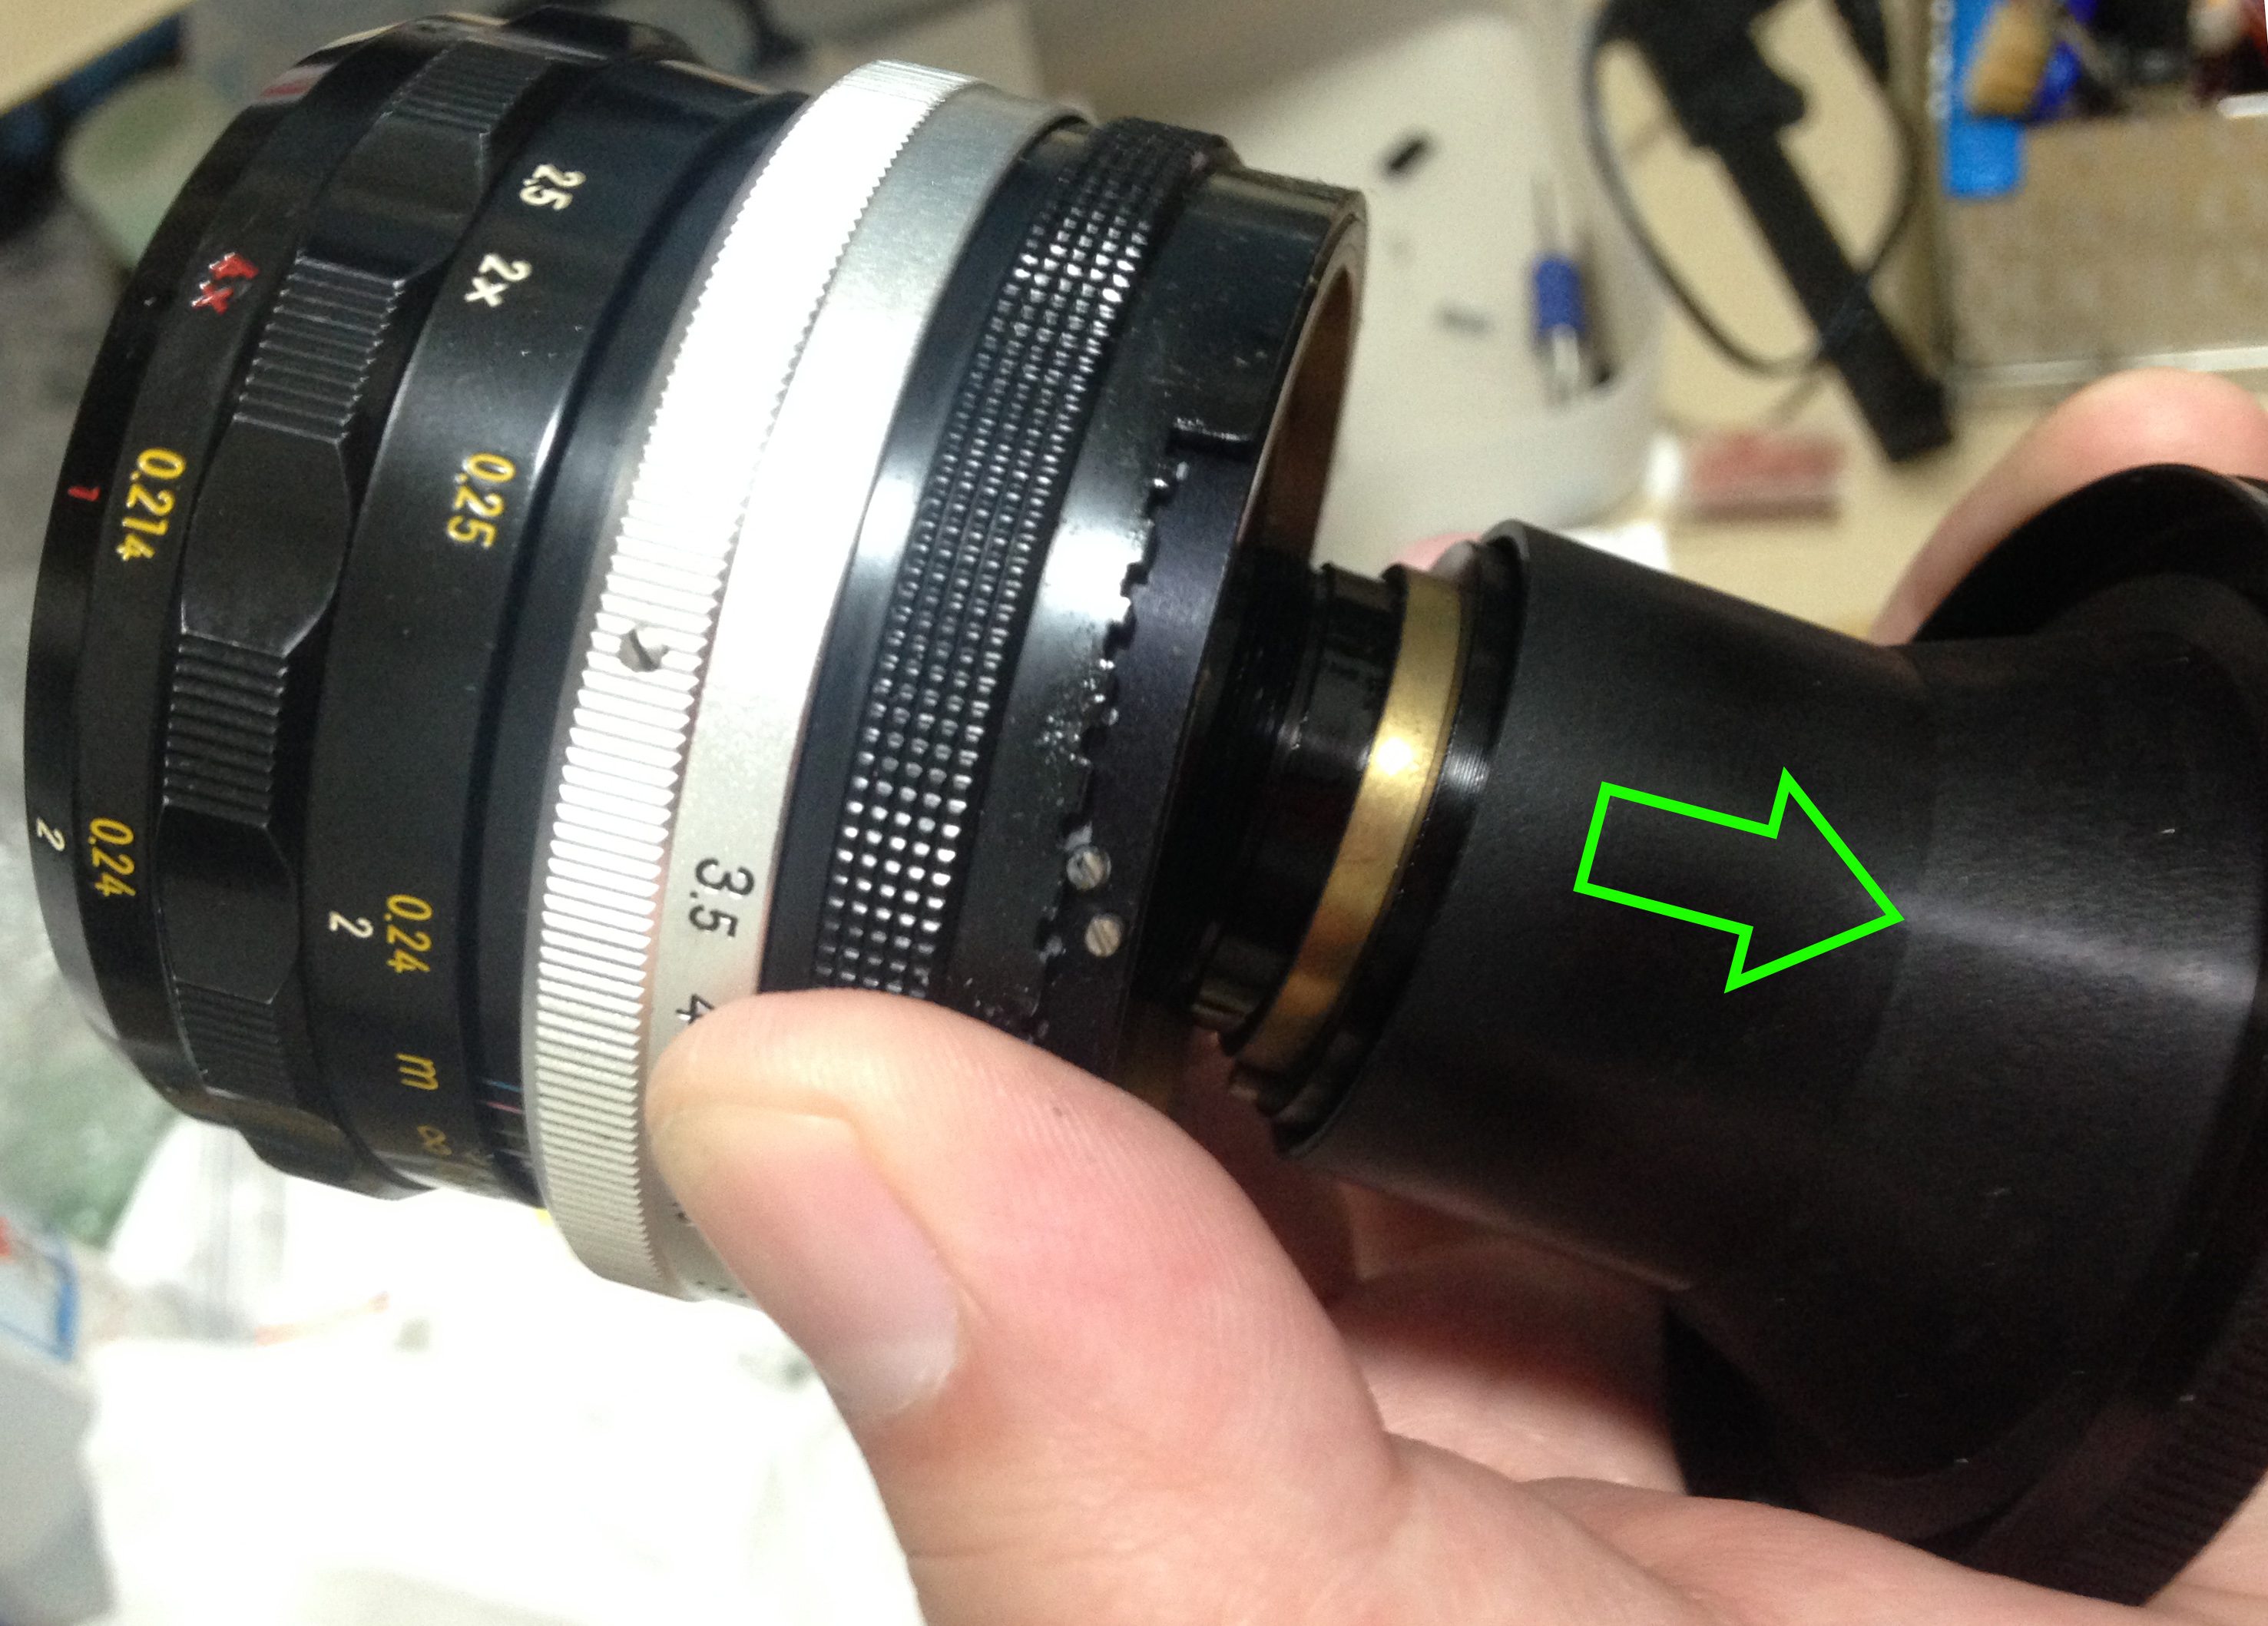
Now that the keys are gone, this brass coupler is now free to go. It enables the lens to extend to silly lengths (about 3x?) just to give you the ability to focus all the way down to 1:1 magnification. Grease the outer surface of this part later during reassembly. If this part is dry, this thing will rattle or shake as you zoom in and out.
Clean the helicoids well and make sure that you don’t leave any residue. It’s difficult to clean the helicoids since there’s lots of area for you to clean. The best choice for grease if to use one that’s not heavy because you will want to turn the helicoids as effortlessly as possible. A thick grease will make these more difficult to turn. Clean the helicoid keys carefully, don’t use solvents to clean them as it might melt them. Carefully wipe them with a moist rag and that should do the trick.
Disassembly (Objective):
The objective is easy to work with, it is similar to the Micro-Nikkor-P 55mm f/3.5 Auto’s, if you are familiar with that lens then this one should be simple for you.
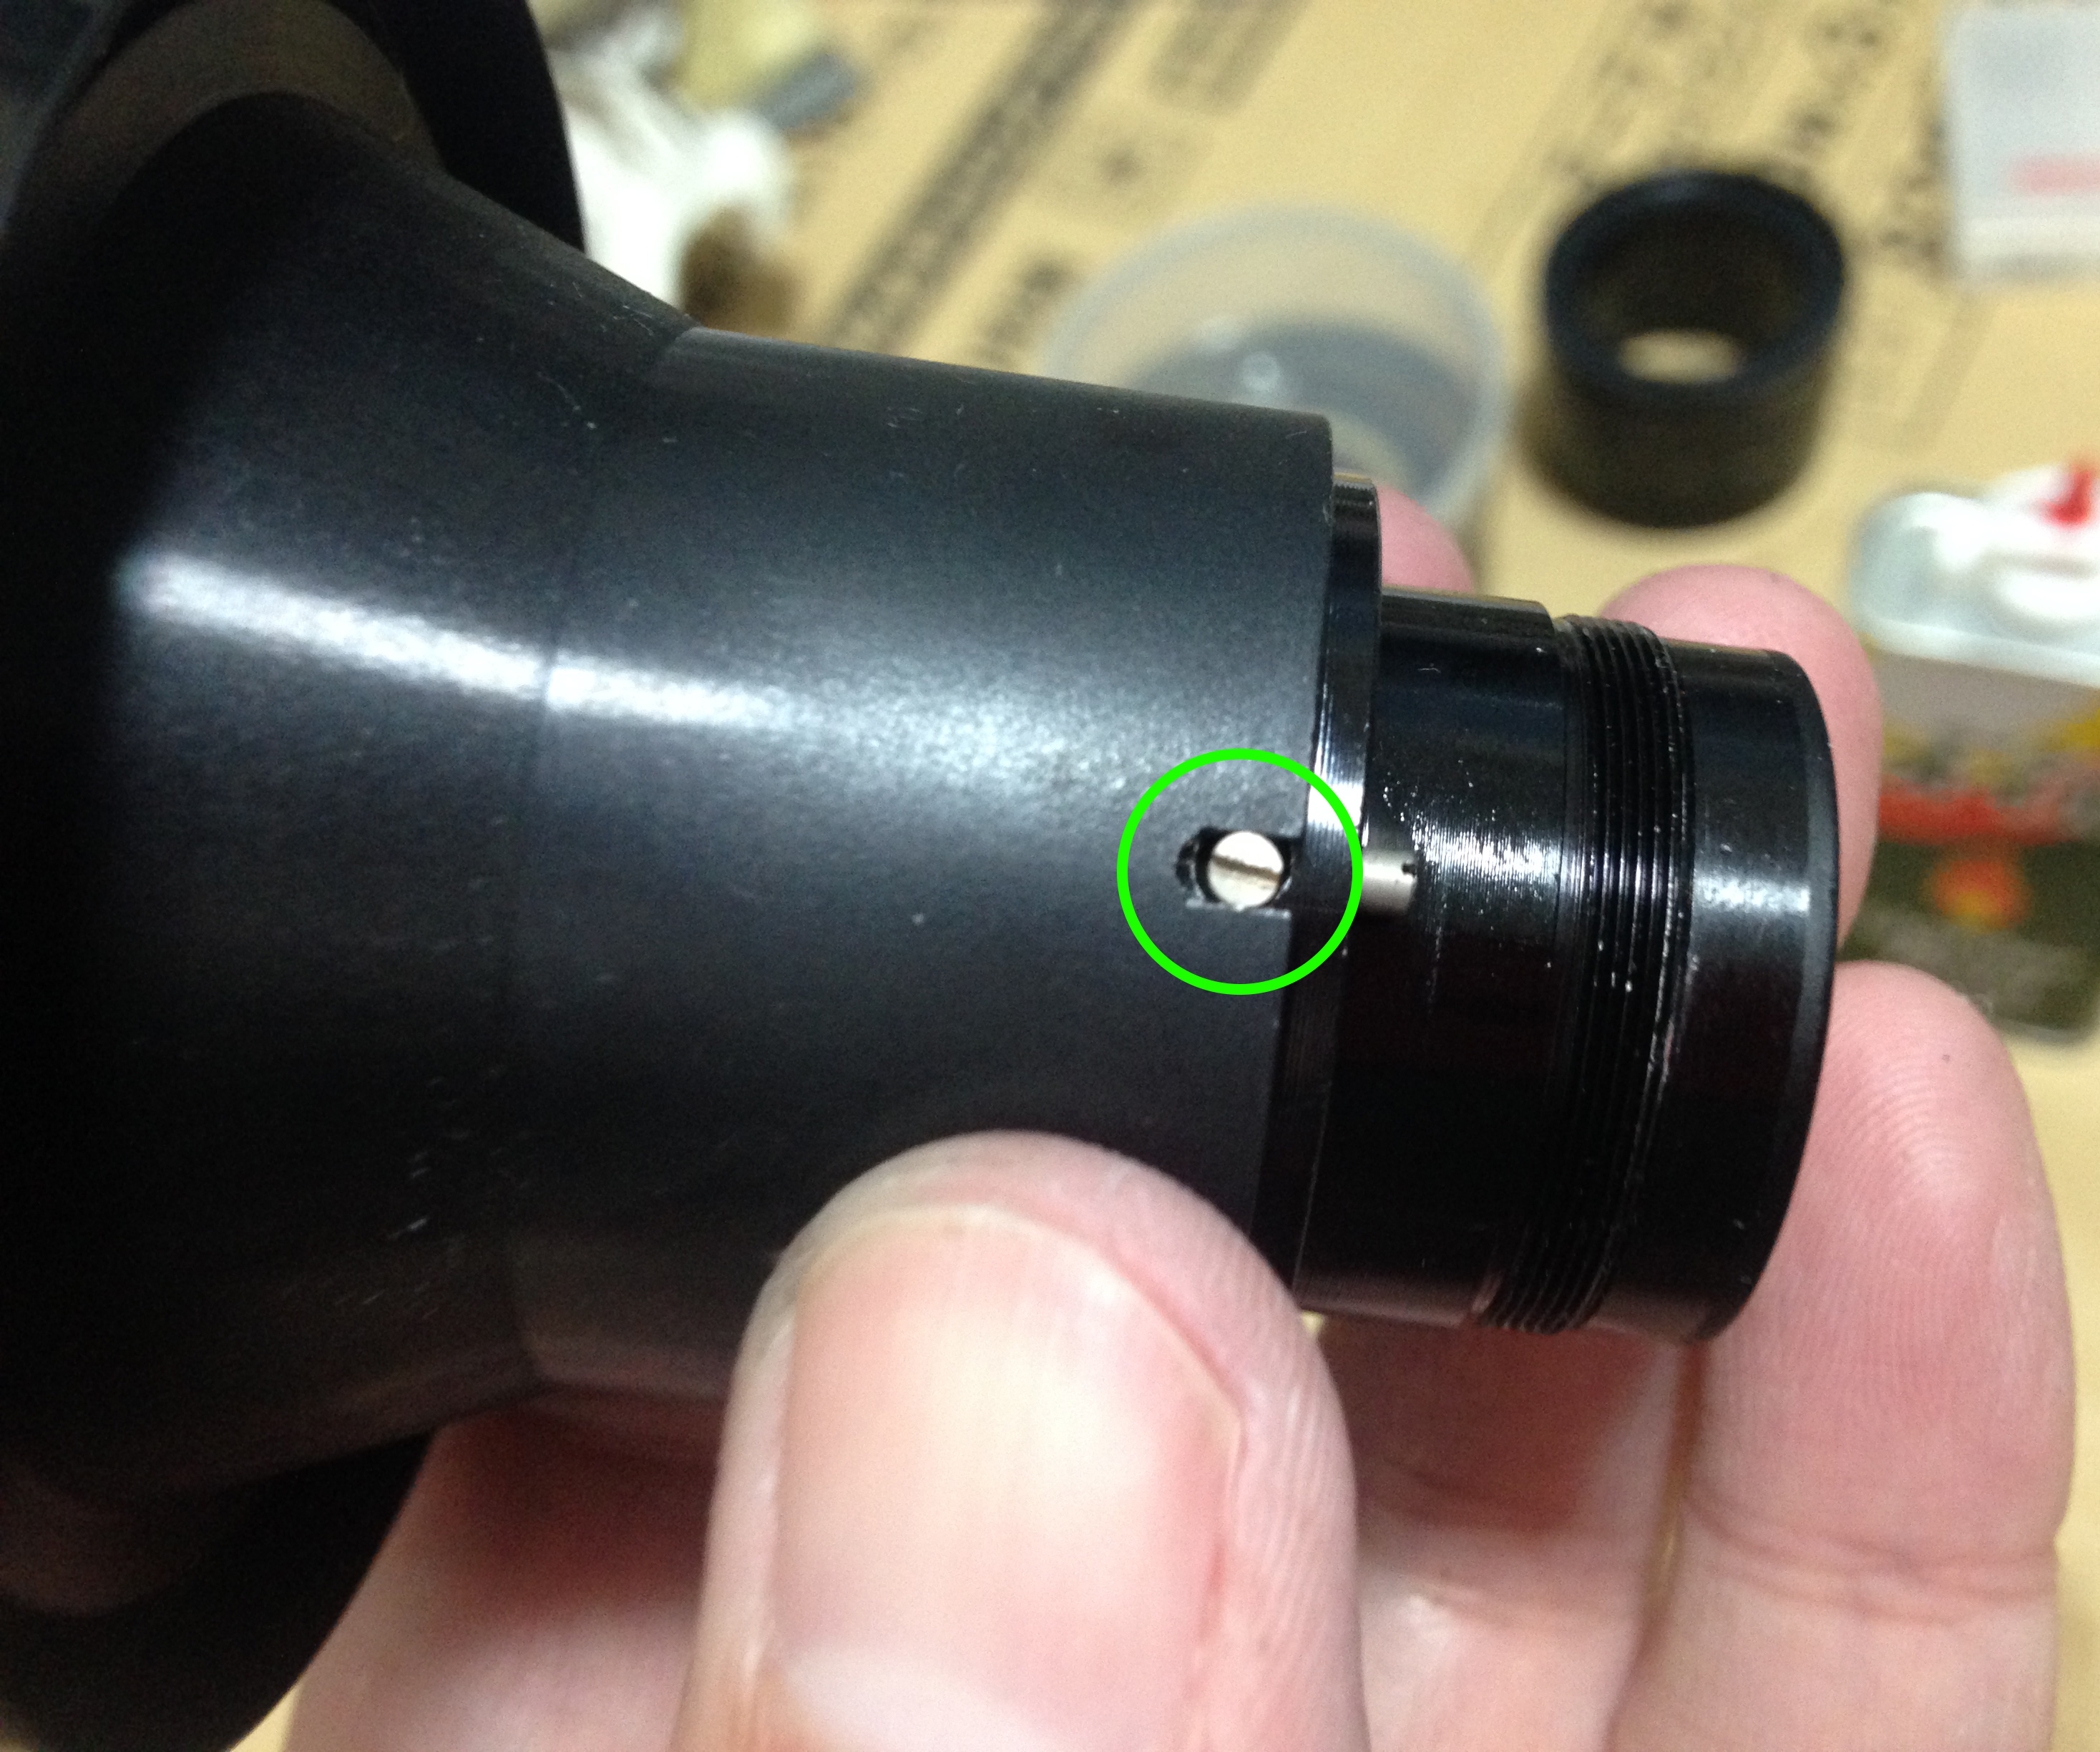
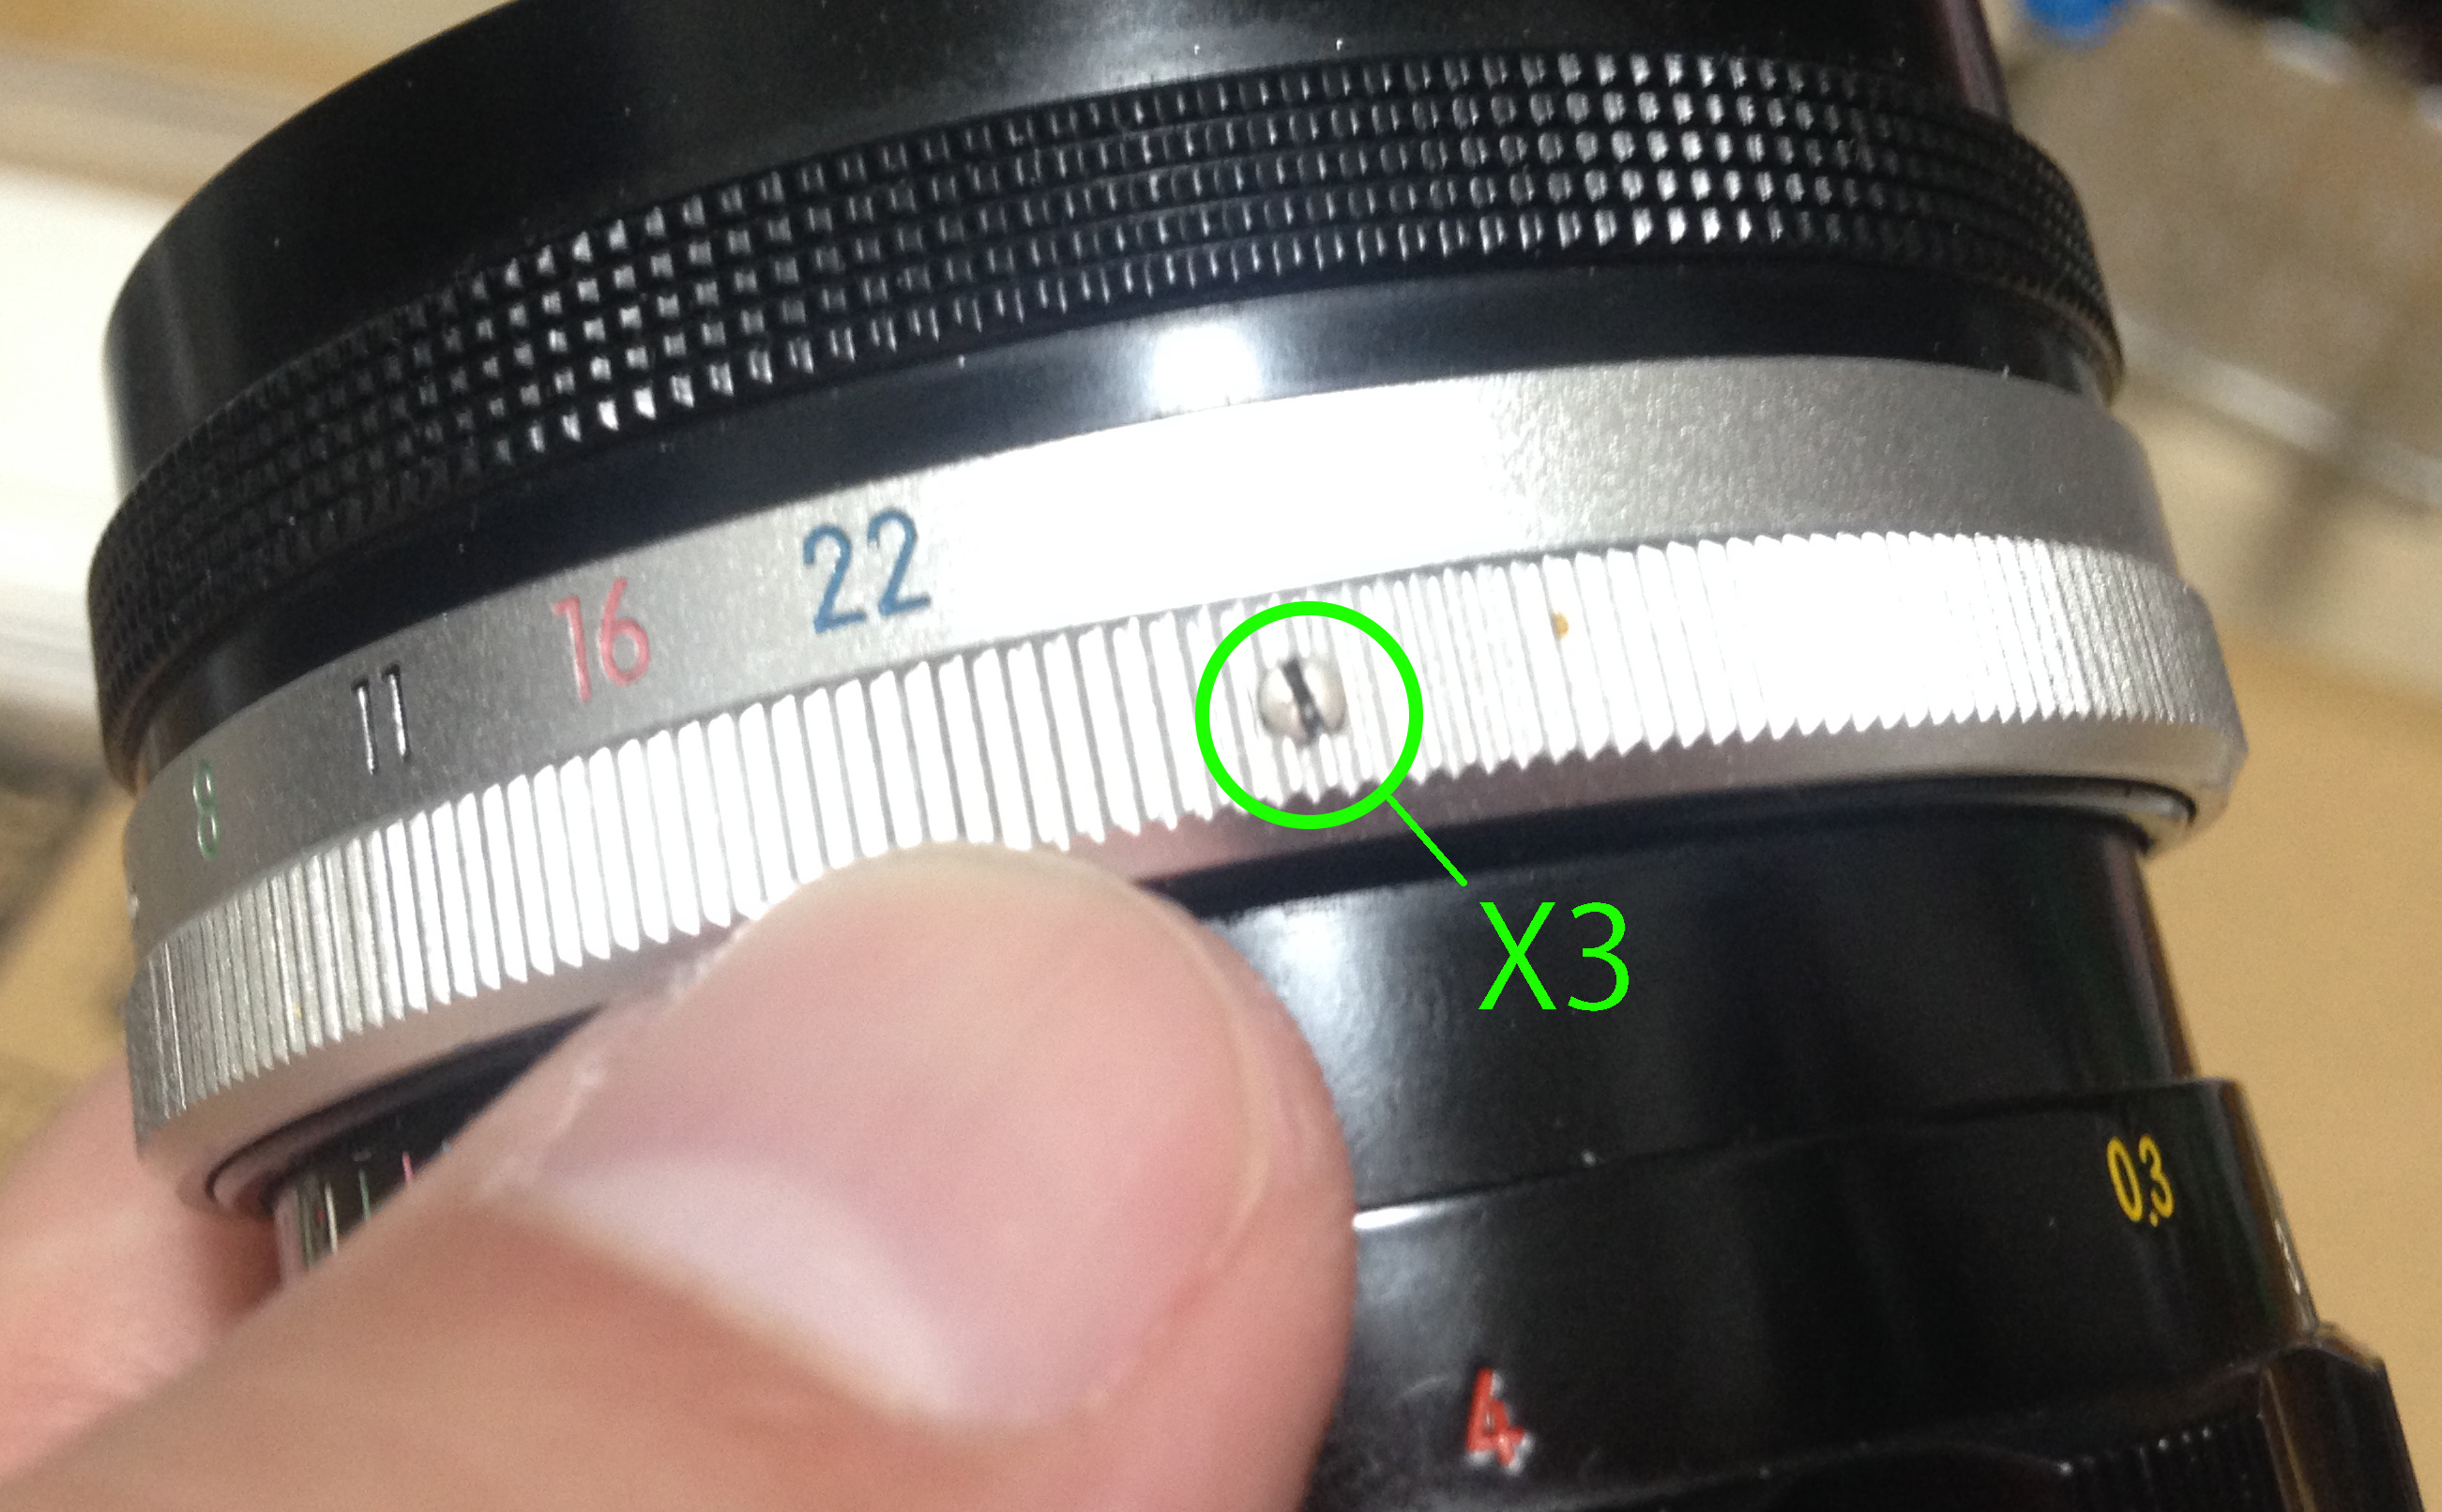
Start by removing this pillar screw. This screw is responsible for linking the front cone to the iris mechanism. Rotating the cone will open and close the iris. Be sure to mark the position of this thing so that you’ll know how much you should turn this cone in when you re-assemble this.
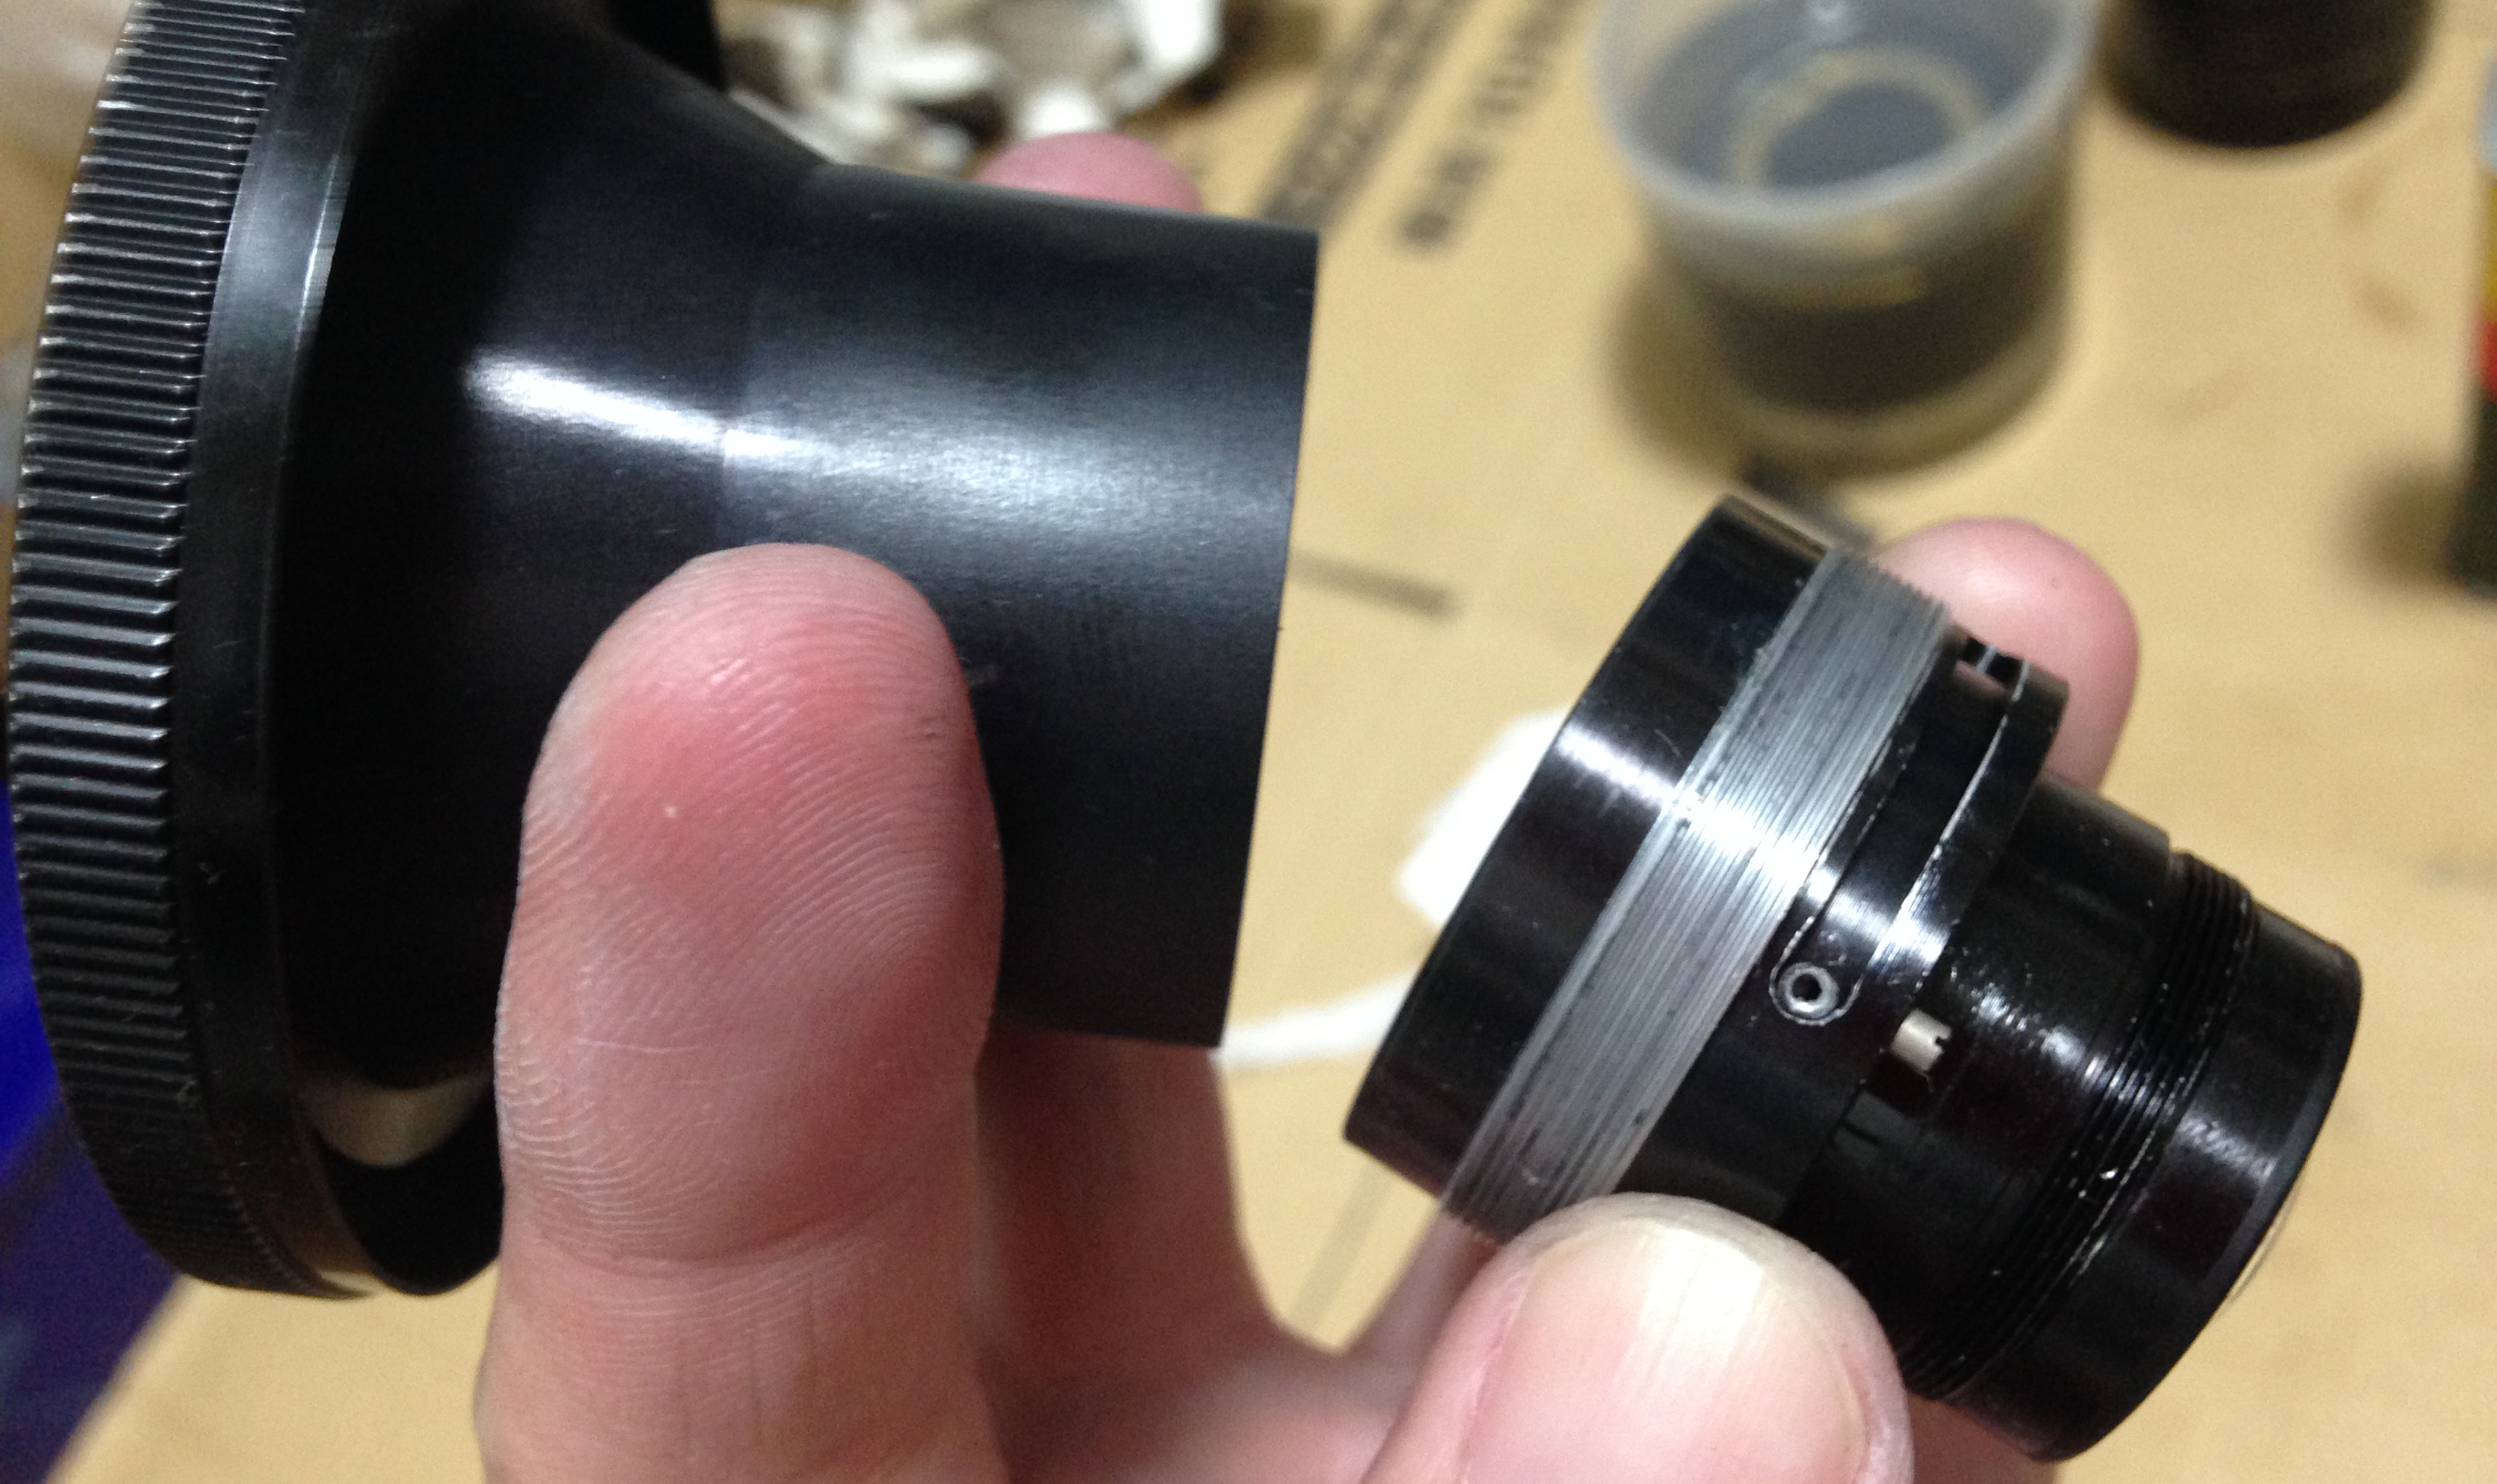
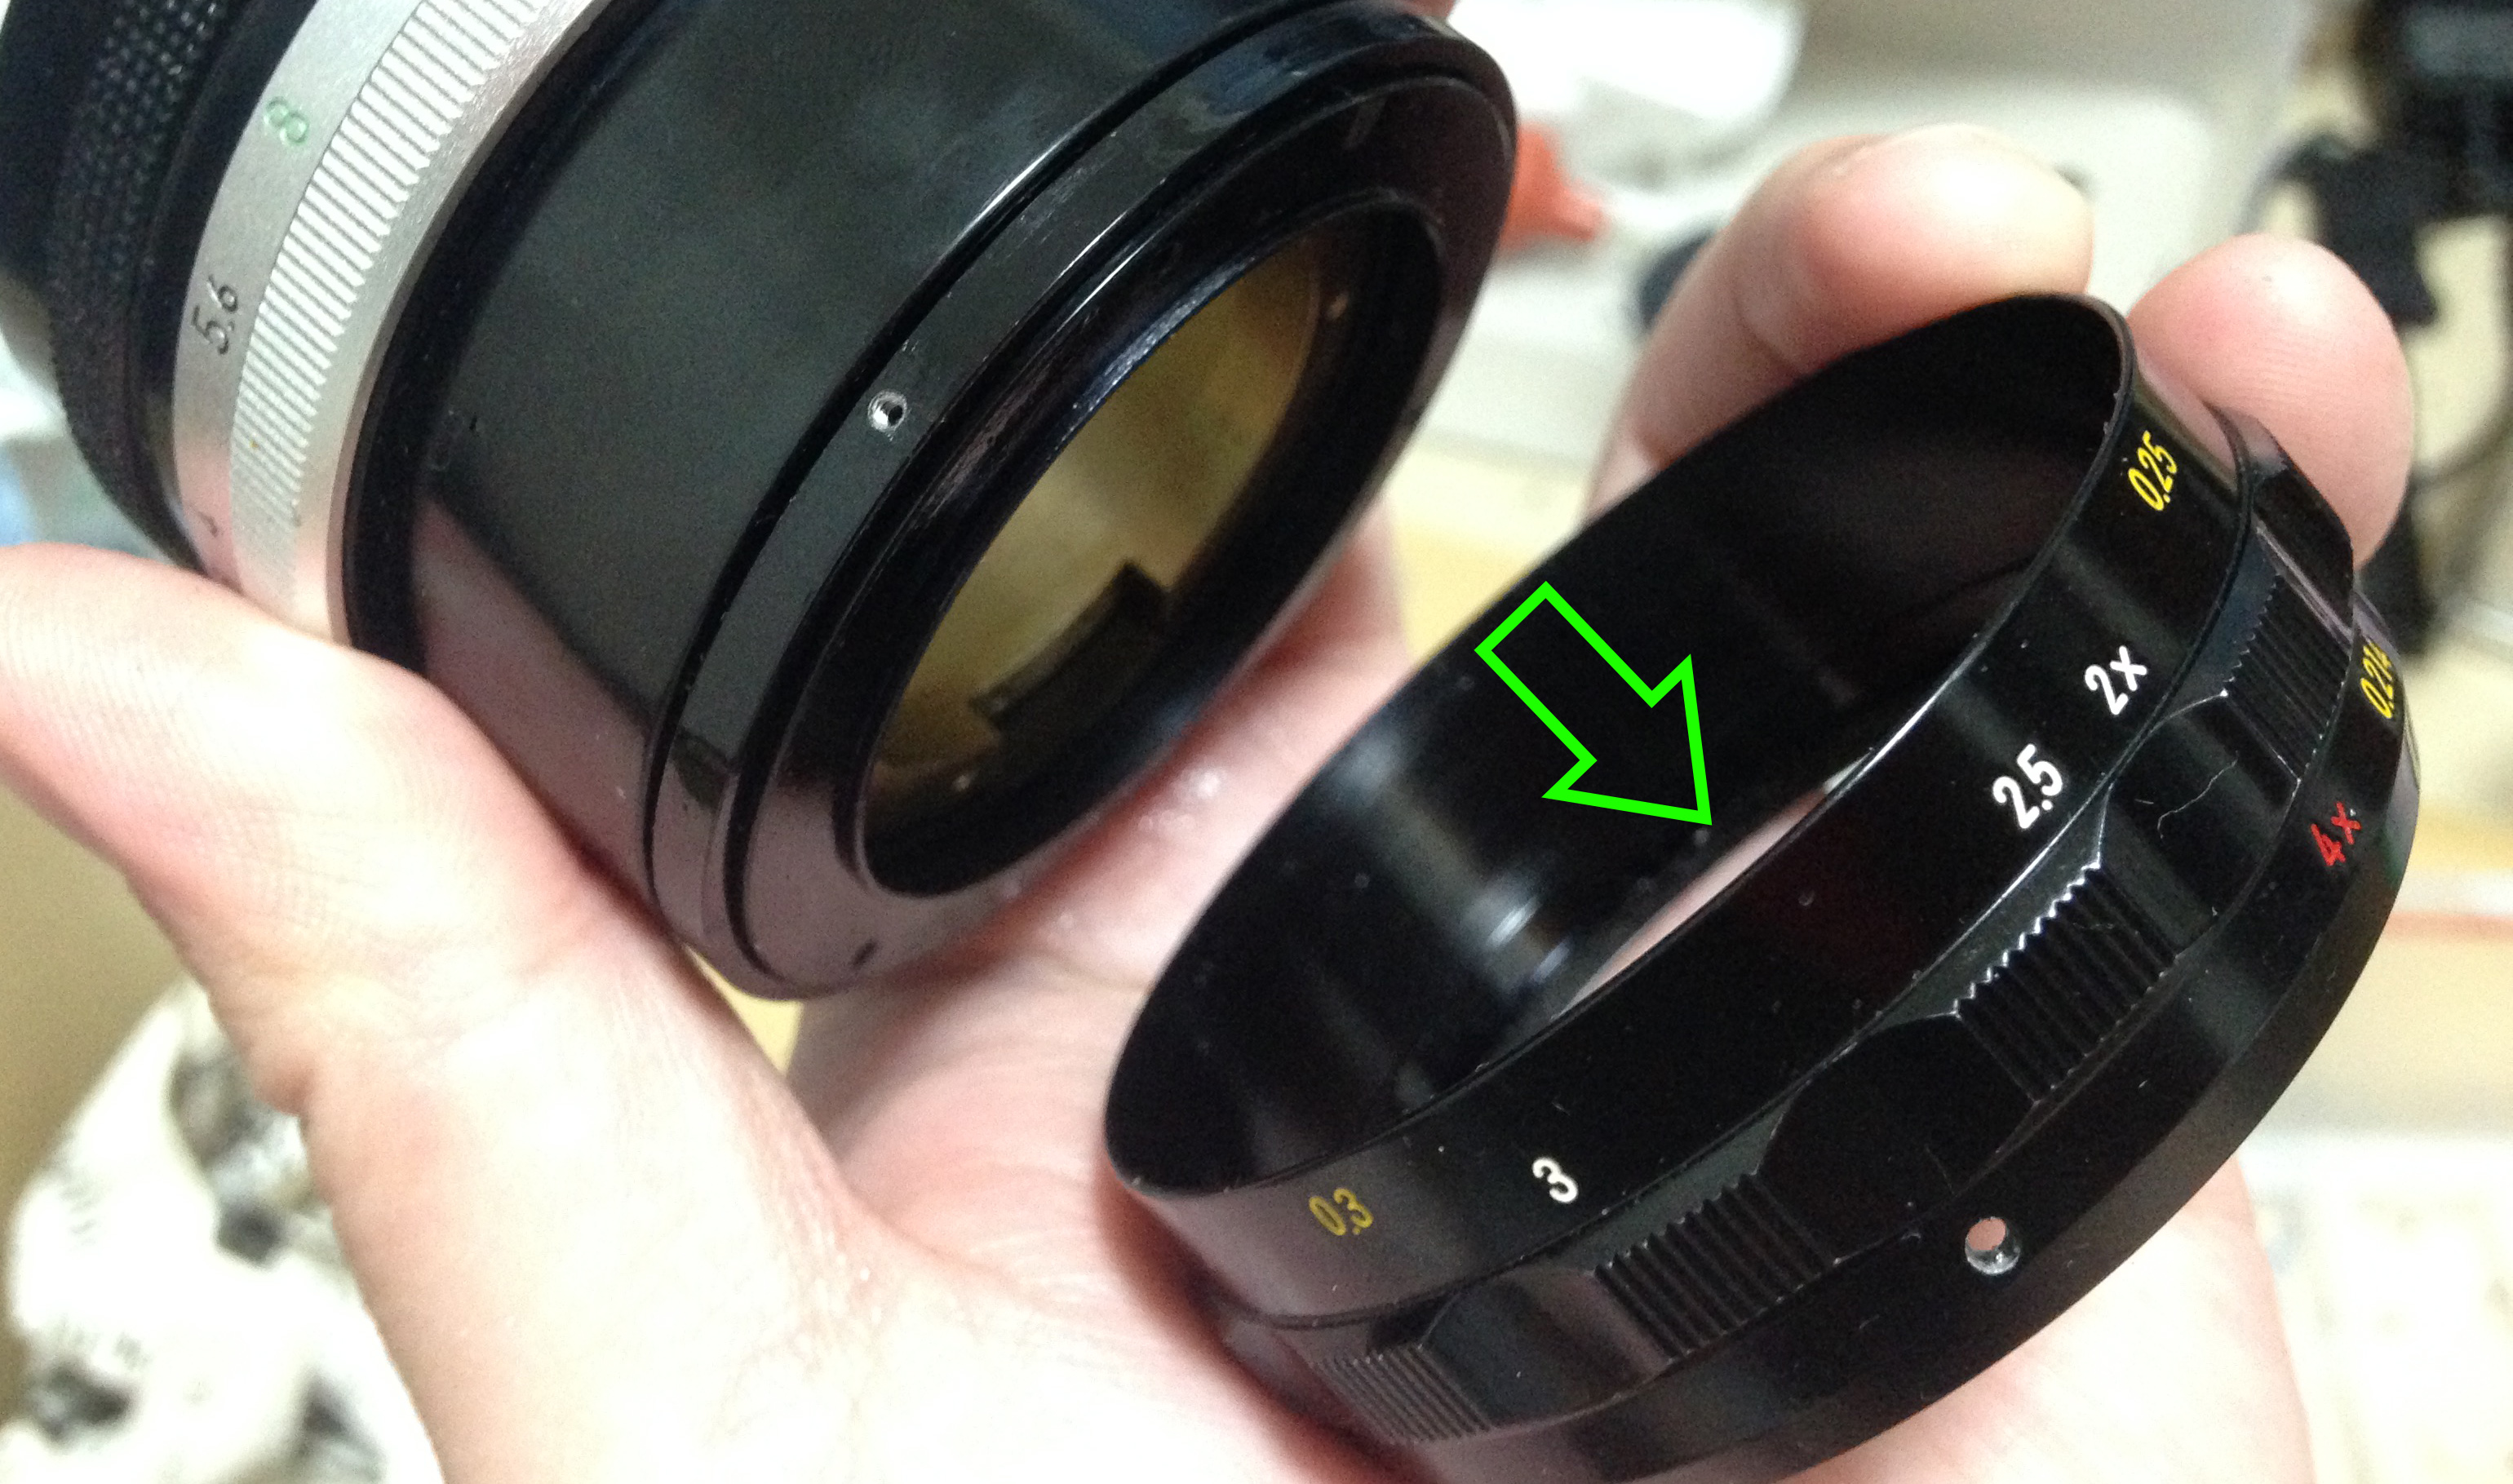
Once the screw is gone, simply unscrew the cone until it separates from the objective and be careful not to damage the fine threads accidentally. Grease this part lightly later.
Repairing the objective is easy but I will leave it here for now. If you want to see how it’s done, read part 2 of this article and I’ll walk you through it. This is the most important part of the lens and you should take care of it. Scratch this and your pictures will suffer specially if you look at the bokeh discs.
Conclusion:
This lens was a joy to service coming from somebody who collects Nikon’s 55mm line of lenses. It may take more time to service it because of the long and complicated parts of the lens but it’s worth it. You’ll need to be careful not to accidentally lubricate any part that does not need any grease such as the iris assembly. As you can see from the pictures, this lens has a tendency to become oily over time as grease migrates here and there. It’s unavoidable in some instances but you can minimize this by carefully applying grease to the parts that needs it. Don’t apply too much grease on the helicoids, a thin film of grease on each surface of the helicoids is more than enough.
This is how things should align when you re-assemble your helicoids.
With the brass cup attached this time.
Organize your screws properly since this lens has plenty of them, they also tend to look alike even if they’re not. This is most apparent on the screws located in the aperture ring assembly and spring mechanism.
The plastic helicoid keys also needs to be handled properly. Damaging these is something that you do not want and milling one from brass or aluminum is also not an option. There’s a valid reason why Nikon used plastics instead of metal and one of those is because they want to avoid excessive wear to the brass extension coupling inside the helicoids I assume.

This is an exceptional lens and an unusual one, too. Take a look at it now, it is shiny and clean! We’ve just extended its life by a few more decades.
I hope that you enjoyed this blog post and also please look forward to part 2 where we’ll discuss how to clean the iris and how to enable this to focus to infinity on modern Nikon cameras. Thank you again and as always, please feel free to share this post because this is the only in-depth guide available on the net for this unusual and rare lens. If you loved this article, please do us a favor and help support this blog, this will help make sure that this will continue because you’re helping me maintain this. Buying, developing and scanning film isn’t cheap and you’re help ensures that I can continue doing what I love and that’s to document Nikkors and Nikons for you. Thank you very much and see you again next time, Ric.
Help Support this Blog:
Maintaining this blog requires money to operate. If you think that this site has helped you or you want to show your support by helping with the site’s upkeep, you can make a small donation to my paypal.com (richardHaw888@gmail.com). Money is not my prime motivation for this blog and I believe that I have enough to run this but you can help me make this site (and the companion facebook page) grow.
Buy me a roll of film or a burger?
Thank you very much for your continued support!
$2.00
Helping support this site will ensure that this will be kept going as long as I have the time and energy for this. I would appreciate it if you just leave out your name or details like your country’s name or other information so that the donations will totally be anonymous. This is a labor of love and I intend to keep it that way for as long as I can. Ric.

May 15, 2016 @ 11:55:02
thanks very much 🙂
May 15, 2016 @ 11:59:38
Thanks Jan!!!
Apr 04, 2018 @ 08:38:42
Hi Richard, I am about to restore a Micro AI-s nikkor 55mm -/2,8. The focusing ring is very stiff, it is almost impossible to turn and adjust. I have read a lot about how to remove old grease, apply new grease on helix, and I was wondering if the S-30 grease available on micro-tools would fit. I want a focusing ring be smooth, silky that youp can move with two fingers. You advise and experience is most welcome. Cheers from Switzerland
Apr 04, 2018 @ 09:32:07
Hello.
S30 will be too thick for that. All of the helicoids working together will make it stiff. Use S10 but don’t use too much as my article states. Read my other articles on lensss with CRC to know more. Ric.
Apr 04, 2018 @ 09:38:29
Thank you, OK in this case I am going to buy S-10 instead. I know that is it not good to apply too much