
Hello, everybody! Do you remember Fast Times at Richmond High? It is one of my favorite movies when I was young not only because of the full-frontal but because my childhood crush Phoebe Cates stars in it. She has the perfect face if you ask me, someone that will only be rivaled by Jennifer Connelly in terms of beauty and perkiness. I love how Jennifer looks in The Labyrinth, it won’t be the same movie without her. As a youth, these 2 beauties had been my obsession and it’s difficult to choose which one is at the top of my heart. Recently, I found myself in a similar situation. I was always obsessed with a legendary Nikkor but it has a sibling that’s equally-seductive. It was a really difficult choice but fate has chosen it for me, I ended up with the Jennifer of the two. Maybe one day, Phoebe can be mine, too.
Introduction:
The Micro-Nikkor 5cm f/3.5 is the “mother” of all Micro-Nikkors, it is the lens that started it all. It debuted in 1956 and was sold to special clients, mainly in the scientific and industrial field where such a high-performing optic is a necessity for documenting things. The need for such a high-resolution optic was apparent when people tried to capture documents using the microfiche format because Japanese/Chinese characters are more complicated, they do not record very well with existing lenses so a better lens had to be designed and that need gave birth to this lens. Now, Nikon wasn’t the first to make an optic of this class, Carl Zeiss made a similar one a few years earlier, it is the Macro-Tessar 5cm f/3.5 that comes with the Contaprox set. You can say that Nikon was “inspired” by that idea and the result is this.

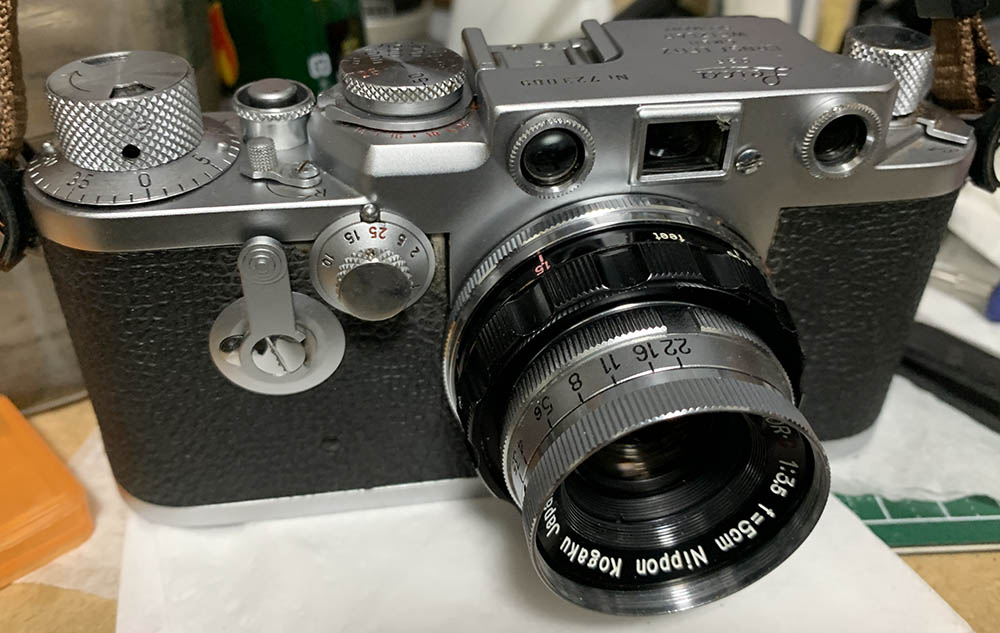
The lens showcased here is the version made for the Leica Thread Mount. It is unsure which one came first, the Nikon S-mount version or this one. Both versions can be used as “normal lenses” but only this is able to focus closer, down to around 1.5ft at which it’s decoupled from the camera’s rangefinder so you’ll have to focus with a special attachment. Both versions were made to be used with bellows for high-magnification photography. It’s impossible to focus with it at near 1:1 magnification using the rangefinder. You’ll only be able to do this reliably by looking-through the film aperture gate. It can only be used that way with a setup so forget about hand-holding this while you take photos of your tiny subjects.
The optical design is 5-elements-in-4-groups, it’s the first time that the world will see this design. If you thought that this sounds familiar to you then you are correct because that’s the classic design of all Micro-Nikkors of this lens class. The Micro-Nikkor 5.5cm f/3.5 that replaced this one has the same basic formula despite being modified a bit and the familiar Micro-Nikkor-P 55mm f/3.5 Auto shares the basic formula, too. This classic configuration won’t be replaced until the Micro-Nikkor 55mm f/2.8 Ai-S debuted in the 1980s. That’s really something if you ask me. While the optical formula was improved or modified throughout the years its basic design changed very little. That’s an amazing testimony to the genius of Wakimoto Zenji-san who is considered a legend in Japanese optics.
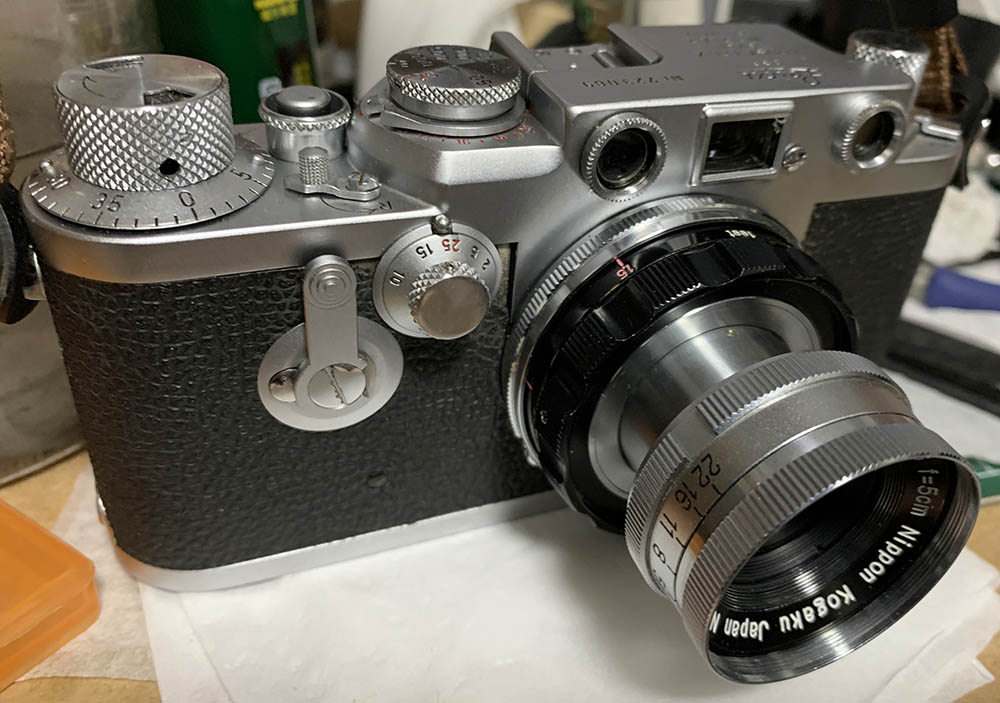
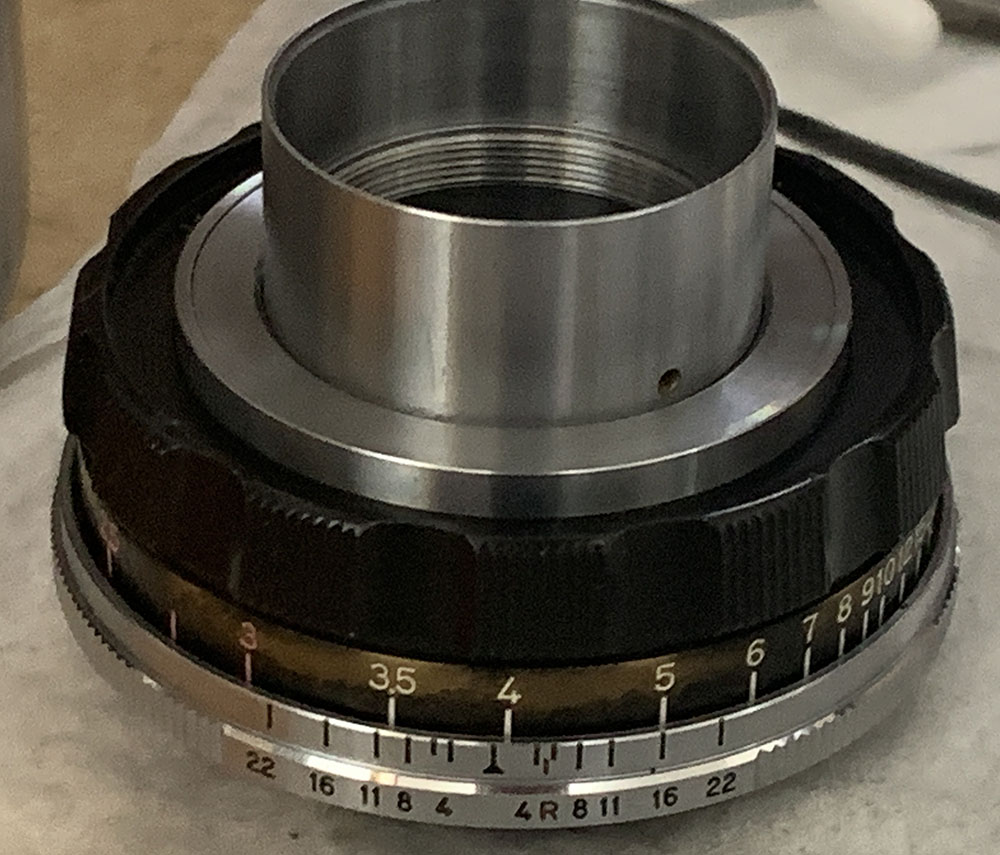
Like the Nikon S-mount version this one is collapsible, here it is extended. It should be collapsed when you use it with bellows. Handling is quite good, it has a fat focusing ring that you can turn easily and the aperture values can be easily-seen and set. It has click-stops which was quite new in its day. Lots of lenses in the 1950s don’t even have that feature.
This is how it looks like when you collapse it. It makes your setup compact. I love collapsible lenses because they can be stored easily. Notice that there’s a notch in the focusing ring, that is for mounting its rare, deep hood. That’s an important accessory, you’ll only be able to turn the aperture ring while it is collapse with that hood. The hood alone can cost a lot in the used market and I am looking for one right now.

This is how it looks like when you extend its focusing down to 1.5ft. You will not be able to get much magnification with it unless you use it with bellows or extension rings. It makes this useless for practical use as a macro lens on its own, you will only enjoy using it as a standard 50mm lens. The aperture can only be stopped-down to f/22 which is a shame because having f/32 will make this even more useful.
There is one curious detail about the Leica-mount version, the focusing ring has the new-style “hill-and-dale” that’s standard with early F-mount Nikkors from the 1960s. The other rangefinder Nikkors to have this new-style ring is the W-Nikkor 3.5cm f/1.8 for the Nikon S-mount and the latest version of the W-Nikkor 3.5cm f/2.5. I am not aware of any other rangefinder Nikkors that has this more-modern look for the focusing ring.
Knowing how your lens performs is the key to maximizing it. You will learn its strengths and flaws, with that you can exploit its strengths and avoid its weaknesses. This will help you determine when to use it or not. It also gives you a more-intimate connection with your gear which many photographers don’t have. I used a Nikon Z6 to take these photos, I shot these pictures from f/3.5, f/5.6 and f/8 from left-to-right. This was made for precise reproduction of documents so it will not exhibit much change as you change the aperture from its widest value. While that makes this boring in the artistic senses it’s not what this lens was made for so we should not consider that in judging it and its practicality in real-world use.


(Click to enlarge)
Vignetting is quite high specially at the far-corners and it can reach towards the center when shot wide-open. Stopping it down to f/5.6 helps a lot but it’s still visible and will only go away from f/8 onwards. Flaring can be an issue and it persists even if you stop the iris down. You’ll also get blobs when you have the sun within your frame. The quality of the bokeh is smooth which is a prerequisite of some kind for macro lenses. The discs look even but you’ll notice feint outlining when you shoot with it wide-open. Stop it down and it helps remove the outlining but it’s not really an issue worth mentioning. It’s interesting how it has serrated discs so you’ll get 7-sided discs that look like flowers. This “feature” will be inherited by the Micro-Nikkor 5.5cm f/3.5. It’s not an issue since this lens wasn’t designed for this anyway.

As expected, distortion is well-controlled. There aren’t any visible traces, it’s as-good-as-none. This is crucial since it was designed for reproduction, your documents should be reproduced faithfully. If you’re taking photos of coins and stamps this should be one of the most important things that you should consider when choosing a lens.


(Click to enlarge)
It’ sharp wide-open, the resolution is amazing and it’s sharp not only at the center but the corners look nearly as good even if you zoomed-into the far-corners of the frame. You’ll notice some spherical aberration and a little bit of chromatic aberration on difficult scenarios but it’s not bad at all with the former being more prominent. Stop the iris down to f/5.6 and it improves a lot but you’ll still see traces of spherical aberration on over-exposed parts of your photos. Sharpness increases even more since the resolution is better, it is performing at its peak or close to it in terms of sharpness at this aperture. The far-corners look great at f/5.6. Stopping it down to f/8 will give you even better performance specially at the corners now that vignetting is gone. The lens is performing at its absolute peak here and it will stay that way until its aperture is set to f/16 where you’ll begin to notice a slight drop in sharpness due to diffraction. I don’t have a photo here but it doesn’t look bad at all, it’s still quite decent. I have no idea how it performs at f/22. The only reason for stopping the iris down beyond f/5.6 is to get more depth-of-field specially for taking photos at high-magnification.

Please pardon the plastic flowers, focus your attention on the background. I love how smooth the bokeh quality is when it comes to focus transition and the rendering of the out-of-focus details. The plastic flowers look very sharp and there’s no obvious traces of chromatic aberration.

This is how bad flaring and internal reflections can be, this lens uses really-old coating technology from the 1950s so we can’t fault the optical design. It is best that you shoot it with a deep shade to help prevent this but it will not be helpful if you have bright light sources within or near the edges of your frame. I think this is the biggest weakness of this lens, performance-wise.

It render natural-looking photos with a lot of resolution. I love how it made the scene look so life-like in an artistic way. This is purely subjective, people can have different opinions about this picture.


(Click to enlarge)
Here are more photos that were under real-world settings. They are boring but at least it will give you an idea as to how this lens performs as a normal lens. It is the best-performing 50mm Nikkor from the rangefinder era. Your photos will look like they were shot with a Nikkor from the 1960s or later.
The following photos were taken with my Nikon Z6 and a Nikon SB-700. The pictures were mostly shot at f/11 for more depth-of-field. I used a Nikon FTZ with a cheap adapter and that served as an extension-ring of some sort. It’s better to have more extension to get higher-magnification but that is going to make things more difficult to me, even the slightest breeze can throw my focus off. I don’t usually shoot flowers but these are what’s available to me at the moment. Some of the pictures were cropped to near 1:1 pixel-size for checking its resolving power but some of the photos were left untouched.

Well, this photo is a bit under-exposed but it’s good for seeing small details on the white petals that would’ve been washed-out if we exposed this just a but more. It captured every detail of the petals and the tonality is amazing.

This photo looks great, the center looks pin-sharp at f/8. I have never used a lens from the 1950s that could do this.

Here’s another angle of the same flower, cropped to near 1:1 pixel-size. The pollen and the delicate details of the center was captured beautifully. This is a crop from the corner because I was curious to see how the corners look at f/11 and they look great, it doesn’t seem that diffraction took-away anything away from this photo.

Another tightly-cropped photo, it captured every detail of the tiny capsules beautifully. They appear like tiny hairs with my naked-eyes but they look a lot different in high-magnification.
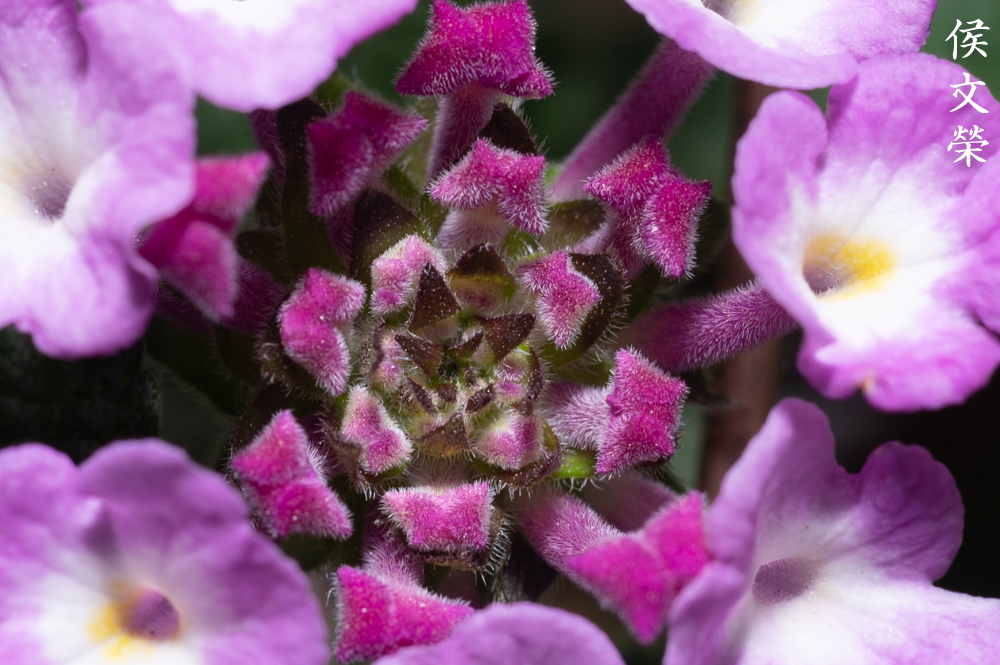
I’m most-impressed by this photo, just look at all the tiny hair. You can feel how velvety it is just by looking at this photo. I cropped this photo to almost 1:1 pixel-size and it looks like this won’t be out-resolved by the sensor of the Nikon Z6.

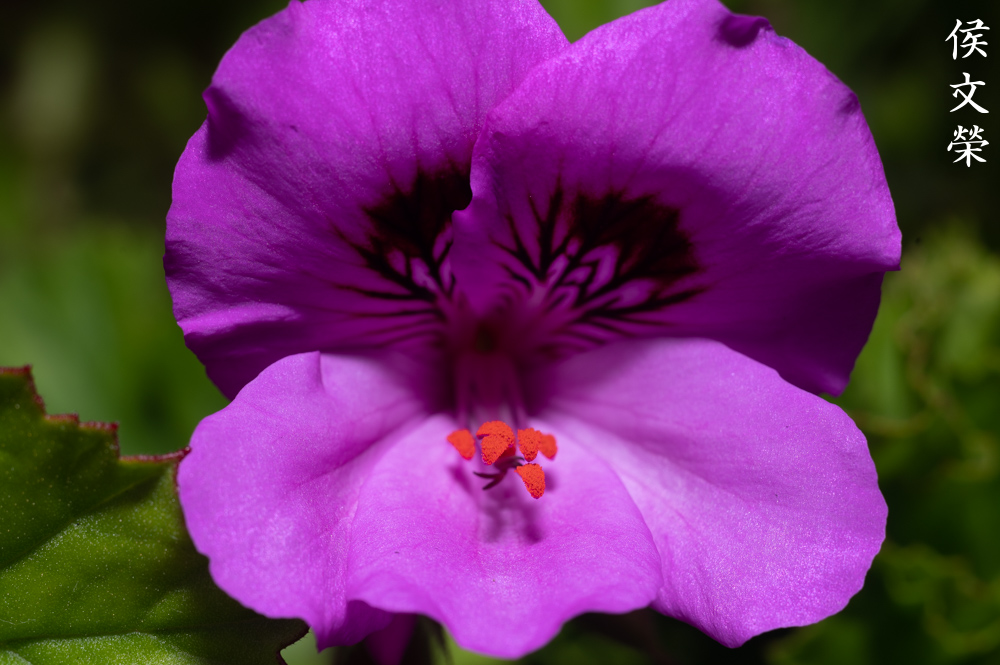
Here’s a tight-crop, this is an exquisite photo. The focus-transition is smooth and quite refined.

The resolving power of this lens is amazing, I can’t help but say that all the time. The subtle details of the petals look gorgeous, it’s as-if you’re in front of the flower itself.

Here’s a tight crop of the same photo. I didn’t even notice that there’s a bug in the flower until I zoomed-in. My test for a lens’ sharpness is how well it can resolve the individual lenses of an insect’s compound eyes. As you can see here, it’s able to resolve the details of the eyes. I wish I could’ve taken it with more extension, if only I knew.

Contrast and saturation is excellent and the tonality is beautiful. This is the best 1950s lens that I have in terms of image quality.


(Click to enlarge)
Here are more photos that I took that morning, click on them to observe the beautiful and delicate features of the flowers. Not only were they rendered sharp but this lens captured them in a natural manner so they look life-like. The droplets of water looks sharp, as-of the photos were cooked in post but I did nothing to the photos except down-sizing them and saved to JPEG.
How about some photos that were taken with film? Film has a unique look that’s difficult to simulate with a digital camera, thanks to film grain. This is why film’s look is different because the structure of film grain is natural, it’s not rigid like the ones you’ll find in a Bayer-type sensor array. Fujifilm made their X-trans sensors to be “different” but even that has its problems. There are no substitute to film and since this lens was to be used with film it’s best that we judge it with its intended medium. I took the close-ups with a Nikon F100, it has an adapter mounted to it, the extra distance between the mount and the film plane made this lens focus closer, acting like an extension tube. The rest were shot with a Leica IIIf which this lens was intended to be used with. The film that I used is Kodak Gold 200 for both cameras, most of these pictures were shot at f/8 but you’ll find some photos that were taken at f/5.6 and even wide-open in some cases, I’ll let you find which those are.

Well, this is over-exposed. I don’t think the Nikon SB-900 is useful when you use it with the Nikon F100, maybe a Nikon F6 will give you better results. Its resolving power is amazing and you’ll see every detail rendered beautifully such as the pollen. If this was shot with a finer-grained film we’ll be able to see even more details.

Stopping the iris down to f/8 will give you amazing photos. The leaves at the foreground looks lovely as they were blurred smoothly, some lenses will not perform evenly in terms of foreground and background blur characteristics and this lens is certainly not of them.

This photo has equal quantities of sharp and blurred details which makes it an interesting photo. You’re able to blur the background despite shooting it at a smaller aperture when you know how to position your subjects and the background.

Here’s another photo demonstrating the same effect but it’s less this time. It was taken around f/8 I think. I took this lantern because it’s round and close to a sphere in terms of geometry which makes it easy to observe how things transition from being focused to being blurred.

This photo is nice for demonstrating how smooth the focus transition is. You won’t get a “wall-of-focus” effect with it since the focus-transition is natural, not abrupt.

Here’s another photo demonstrating it. You will also observe slight traces of chromatic aberration in the over-blown part at the lower-left corner despite the iris stopped-down to around f/5.6 or f/8. I guess this is a difficult scene so it’s probably a good excuse.
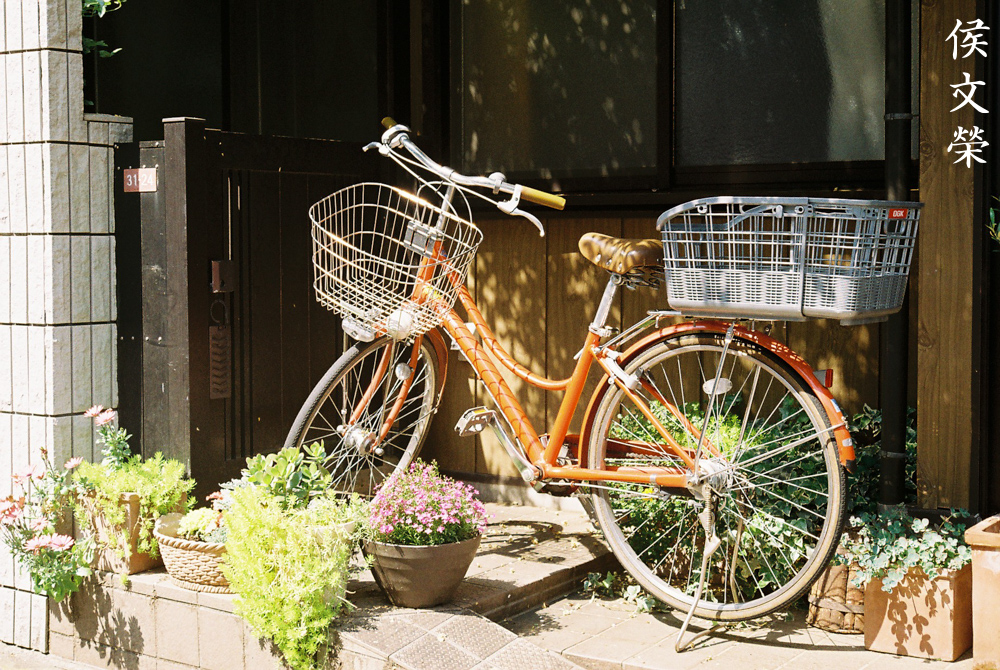
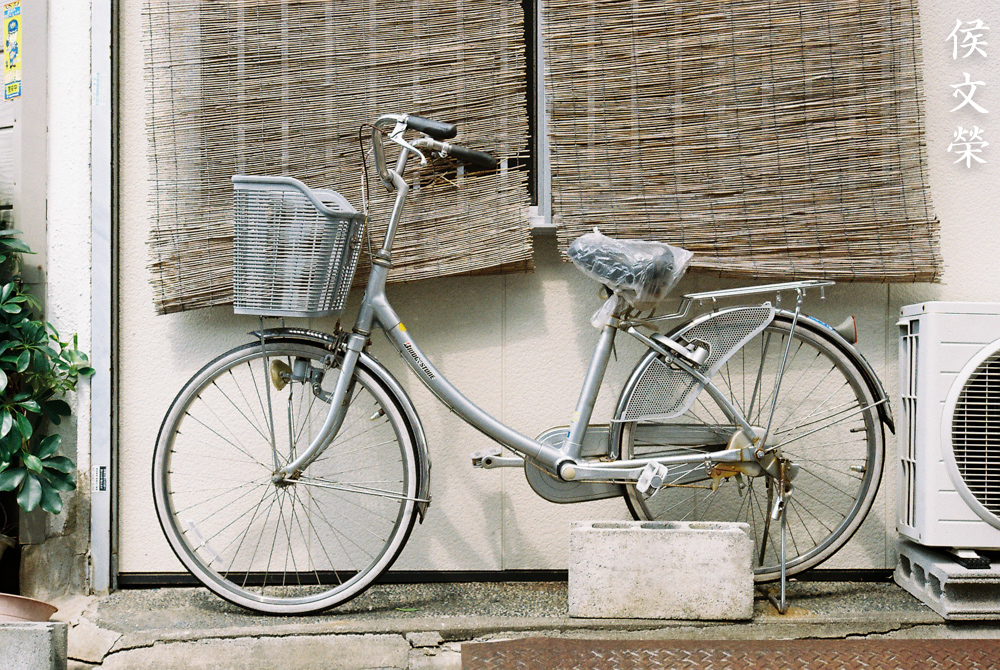
Spherical aberration can be easily observed in the front basket fo the bike. I can also see traces of chromatic aberration. I shoot shiny things to show if a lens performs poorly in this department. Since most, if not all of my photos that were shot with film were over-exposed we seem to see that more here compared to the photos that I took with my Nikon Z6.

This photo certainly has that “vintage-look” going on. Some people hate that while some people embrace it. I personally gravitate towards lenses that do this since I feel that it makes a photo more interesting to look at. This is why I prefer shooting older lenses, not only does it save me money, help protect the environment and make me look cool at the same time, it also help make my photos look more “unique” in some way.

This is a great walk-around lens for a stroll around downtown. You’re able to capture interesting scenes with great detail. If you are working in the art industry, tradition or digital, this lens will be great for taking references. Its ability to resolve fine details will be helpful in capturing textures and your photos won’t have any visible distortion, too. This is important when you’re repurposing photos for use in digital backgrounds.

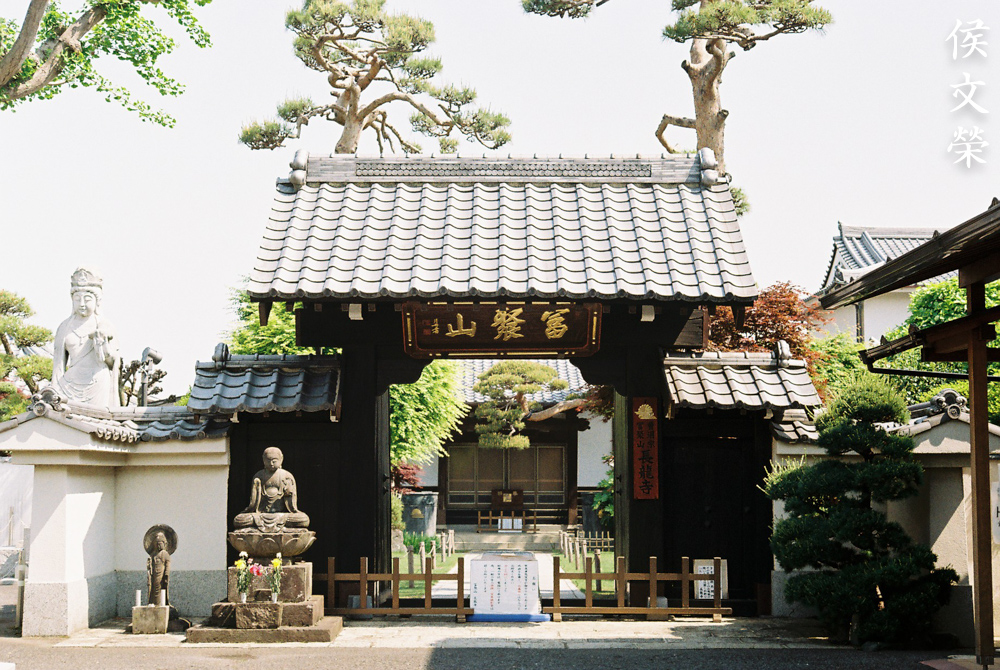
This is probably as close as you’ll get when using a Barnack-type Leica. You will need special attachments to focus closer with the Leica’s rangefinder. It can focus much-closer than this with the Leica but it will decouple from the camera’s rangefinder. Now, I am not sure with the part about using special attachments with your Leica but you’ll certainly need a ruler to help you do this and a stable base such as a heavy tripod. Do it the old way and measure the distance between the film plane and your subject.

Here’s another photo. I love how the bottles were rendered beautifully. The contrast looks nice and I bet that this would even be a better photo if only I exposed this scene properly.

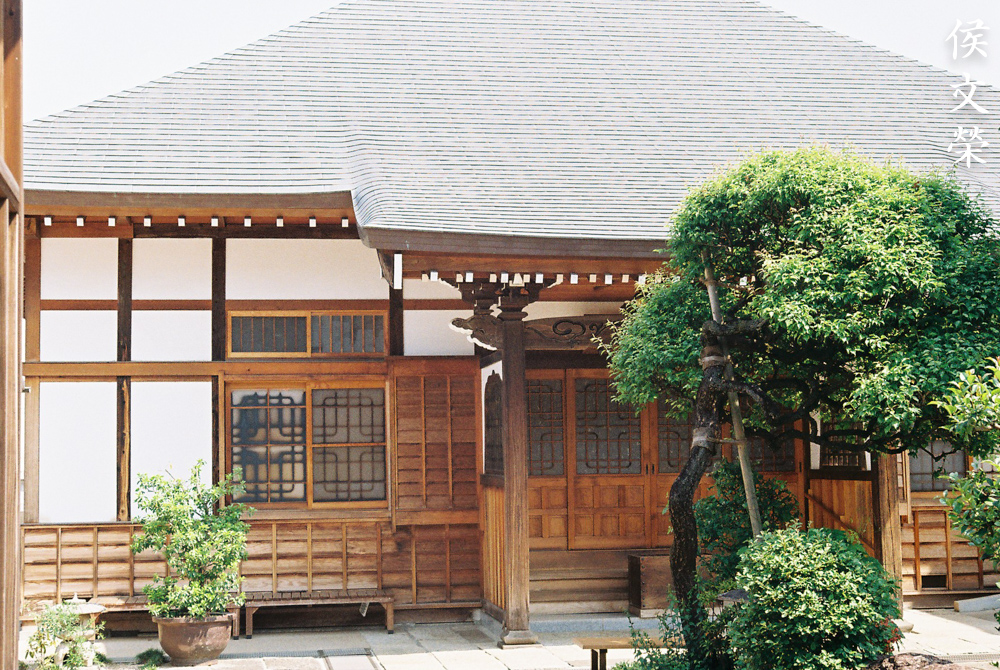
Sharpness is guaranteed even to the far-corners. I know that my framing is a bit slanted but what do I know.

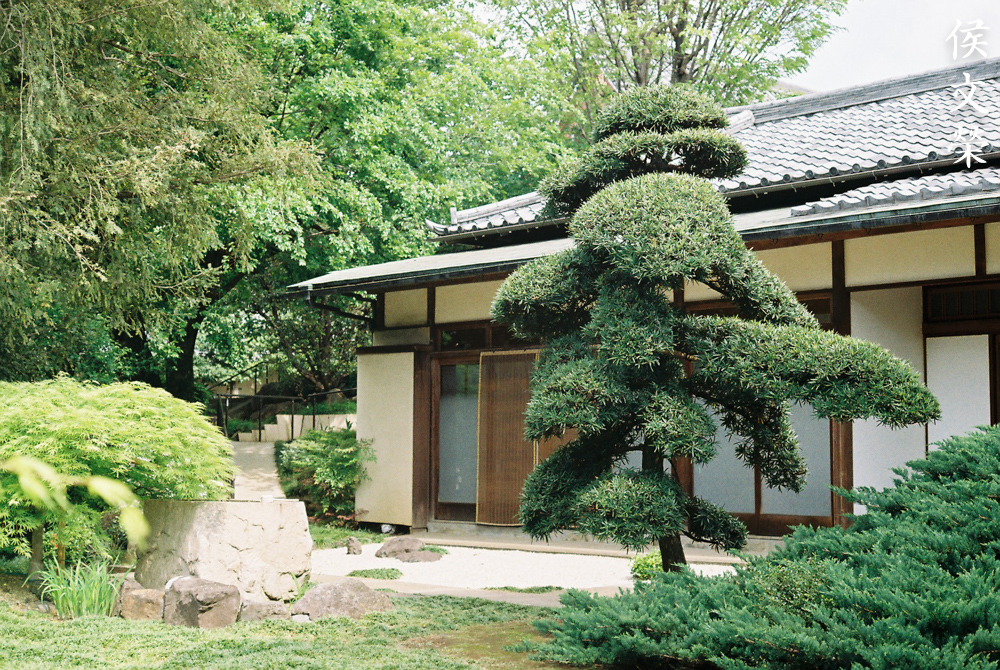
Keen-eyed readers will remember this sacred rope from my older review of the Voigtländer Color-Skopar 50mm f/2.5. Compare this photo with the one I took on that article and understand what I mean when I said that this takes natural-looking photos. Sharpness and other metrics don’t mean a lot if the lens can’t take pleasant-looking photos. Some people only see the numbers, I would rather judge a lens by the photos that it takes.


(Click to enlarge)
Here are plenty of photos for you to enjoy. There is a lack of information on this lens’ performance online so I hope that these will help give you an idea on how this performs with film. I personally loved using this as a standard lens, it gives me sharp photos but I personally prefer using the old, cheaper Nikkor-H•C 5cm f/2 for photos like these since the latter takes pictures with more “soul”, by that I mean imperfections which makes the pictures that it takes look more interesting. If James Brown was a lens he would be that.
I won’t recommend this for casual shooters, not only is this expensive but it should be in the possession of somebody who really loves Nikkors, like me. I also don’t see the point in owning one, you can get better options without its prohibitive price. Shooting high-magnification photos is not something that a rangefinder camera excels at, that falls into the realm of the SLR cameras. With that said, there’s nothing interesting about this apart from its history. I love how it performs but it’s not something that I will use on a daily basis. It is a precious, little gem and you don’t wear jewelry on every occasion.
Before We Begin:
If this is your first attempt at repairing a lens then I suggest that you check my previous posts regarding screws & drivers, grease and other things. Also read what I wrote about the tools that you’ll need to fix your Nikkors.
I suggest that you read these primers before you begin (for beginners):
Reading these primers should lessen the chance of ruining your lens if you are a novice. Before opening up any lens, always look for other people who have done so in Youtube or the internet. Information is scarce, vague and scattered (that is why I started this) but you can still find some information if you search carefully.
I highly recommend that you read my working with helicoids post because this is very important and getting it wrong can ruin your day. If I can force you to read this, I would. It is that important!
For more advanced topics, you can read my fungus removal post as a start. This post has a lot of useful information and it will be beneficial for you to read this.
Disassembly (Main Barrel):
The main barrel can be separated from the front barrel like most Nikkors of the same era. What’s unique about the main barrel of this lens is how it was designed to have prominent inner and outer barrels, it’s something that not a lot of LTM Nikkors have. With it comes complexity, by far this design has a much-more complicated design compared to the likes of the Nikkor-H•C 5cm f/2 for the Leica Thread Mount which is simply an objective housed inside of an extending tube. Compared to the Micro-Nikkor 5cm f/3.5 for the S-mount, this lens a proper main barrel to focus with so this takes more time to work on. With those said, I will never recommend this lens for beginners, this is a very valuable lens and should only be handled by qualified professionals. It is important to note that the age of this lens makes it delicate and using the right tools and having the right skills are mandatory. Experienced repairers will find this challenging as well and they should take plenty of notes just in case, some of the things here will only be repaired properly with the correct measurements which you will soon see.

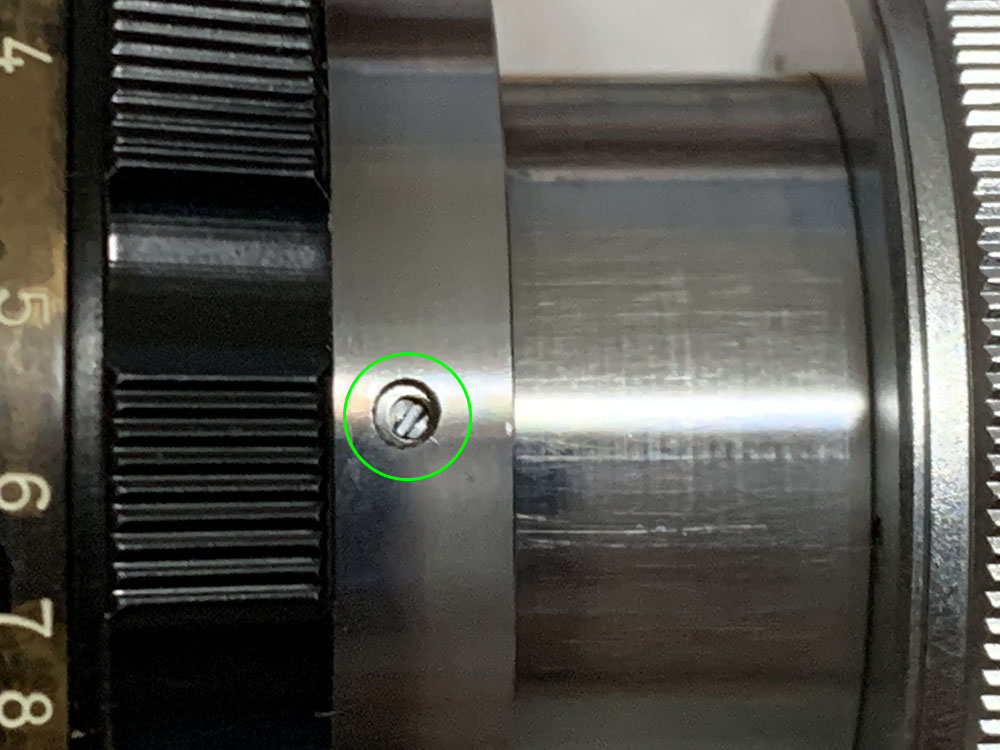
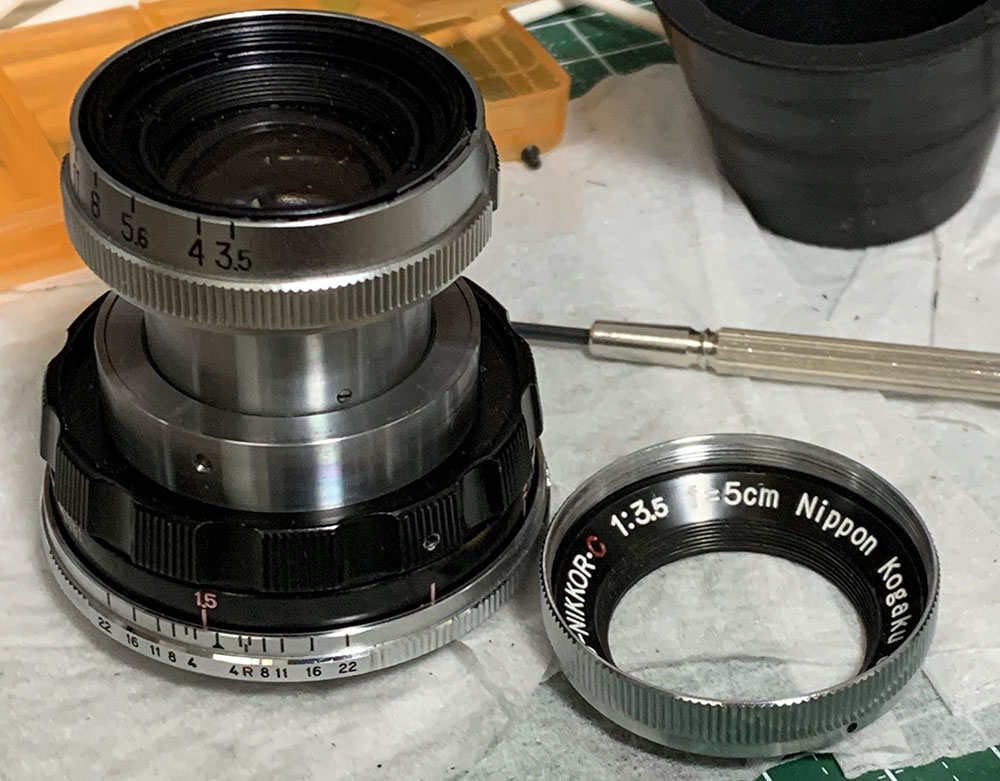
Extract this set screw carefully, use a driver that fits the head perfectly so it won’t get stripped or scarred.

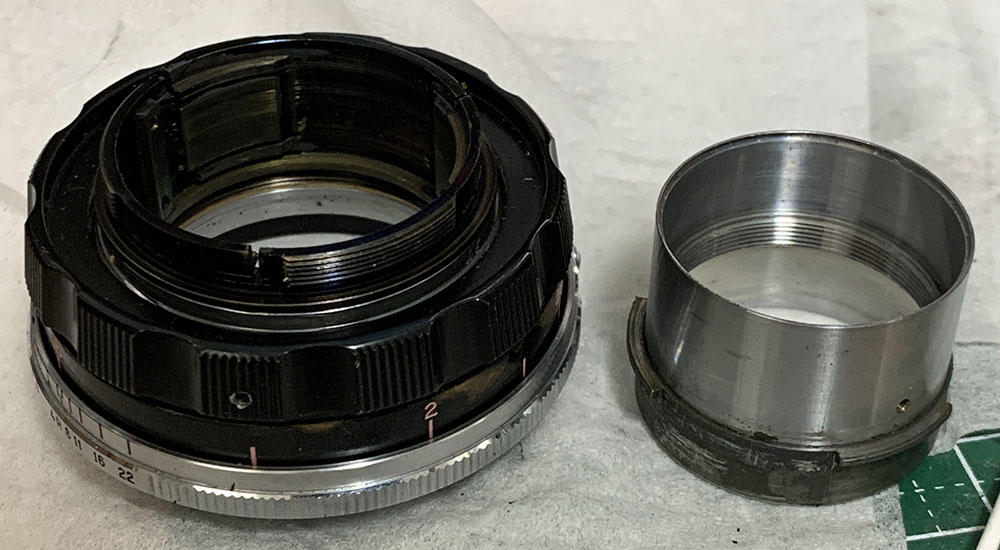
Once the screw is gone you can proceed to unscrewing the front assembly. I don’t remember how many turns it took me to remove it but you should be able to put this back again correctly, its screw should align with its hole. Be careful when putting the screw back so you won’t bore another hole. Set the front assembly aside and keep it in a secure place.

Go to its rear and unscrew this baffle. Use a rubber cup to remove it so you won’t damage its threads and slots.

Locate and extract this screw. This can be difficult to put back since the hole should align with cover when you put this back. You will know what I mean as we go along.
You can either pull the cover off or turn it like I did to locate this set screw. I extracted this carefully to prevent damaging the surrounding metal.

Pull the cover away and unscrew the inner ring. It can be tight because this is a really precise fit.
The collapsible tube can now be removed. The ring we just got rid of above secures this tube.

The focusing ring’s grip is secured by this set screw. Carefully extract this to unscrew the top part of the focusing ring.

Carefully unscrew the top part of the focusing ring. When you put this back later be sure that its screw aligns with the depression on the opposite side.

There are 3 of these that you should extract.

Extracting the screws will enable you to remove the focusing ring.

Locate and extract this tiny screw.

Once that screw is gone you can now remove the locking tube.

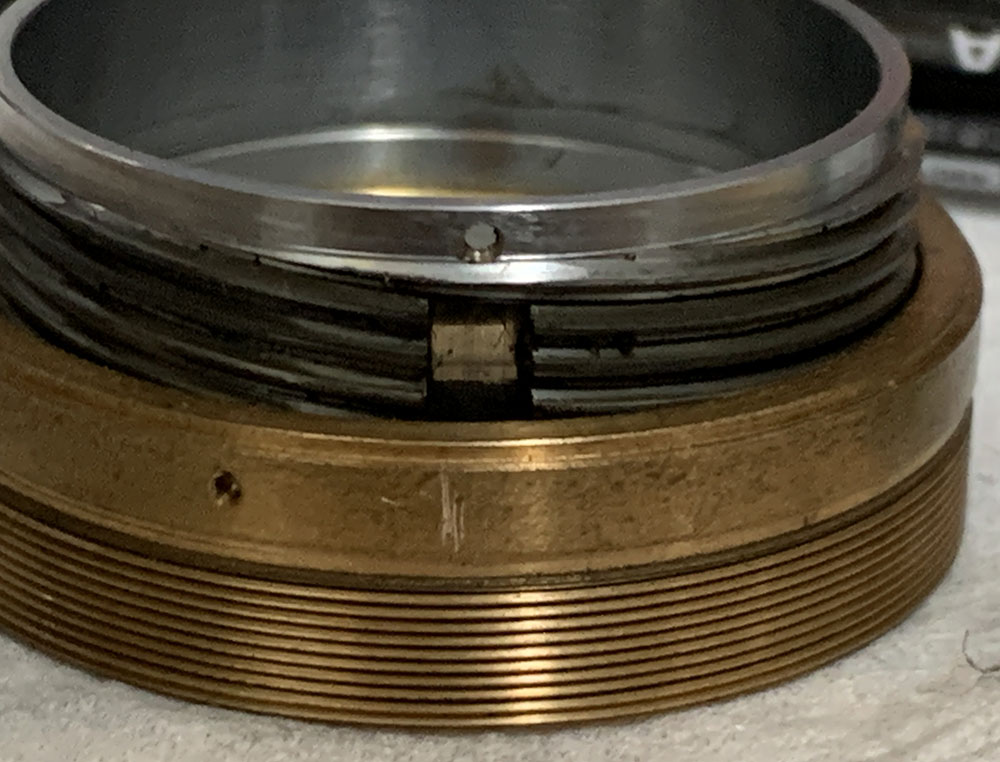
Turn the helicoid and collapse it until it won’t go any further. Take pictures and notes so you’ll know the approximate position.

What’s even better is to measure the exact height of the barrel at this point. This photo was invaluable when I was reassembling the main barrel.
This is the helicoid key. It looks like it was milled from the same piece as the lower barrel which means you can’t remove this thing. The only way to get the helicoids off is to turn them beyond their range and note how all of the helicoids separated. This is important since the helicoids should mesh in the correct manner or it’s no-good,

Separate the helicoids and note where they separated. Many beginners get stuck here because they don’t know how to service them. If you do not want to suffer the same problem, read my article on how to work with helicoids. I took the effort to write it all down to educate people so please read it.
Do the same for the inner helicoid and never forget to make a shallow mark so you’ll know how to put this back again.
Clean everything very well. Avoid using ultrasonic cleaners specially if you will use potent solutions. That will certainly lift the paint from the brass. It’s easy to lift the paint since there’s no anodized substrate for the paint to hold to. Brush the helicoids clean and make sure not to leave any residue. That’s easier said than done. The most frustrating part of this part is the helicoids and how they should mesh. Since you cannot mesh the helicoids and attach the helicoid key later, you should pay special attention as to how they mesh or you’ll reassemble them the wrong way and your lens won’t focus right. It is important not to use a heavy-type of grease for this lens and I will explain why later in this article.
Disassembly (Front Barrel):
The front barrel houses the objective and the iris mechanism so I’ll combine them here into one section. While the objective is simple and you should not take a long time servicing it the opposite can be said for the iris mechanism. That’s not because it’s complicated but it’s how it’s constructed. It took me a long time just to get the iris back in order.
I will not show you how to dismantle the objective because mine is clean, it has scratches but that’s about it. This is a very valuable lens, I don’t want to open anything up unnecessarily. With that said, there’s a cemented group in the lens’ formula and you should be very careful with using solvents. Avoid using alcohol or solvents to flush or flood anything here as that can find its way to the cemented group and cause an even bigger problem.
I don’t know what’s up, it seems that the front ring on my lens can be easily unscrewed from the rest of the assembly. There aren’t any screws to secure it at all, this felt odd. Disregard the fact that the front assembly is still stuck with the main barrel.

The front elements assembly can be removed using a rubber cup. I avoided using a lens spanner to prevent any damage to the front element. This is an expensive lens and I don’t want to damage this.

Extract these 3 screws to remove the cover of the aperture ring assembly.

Extract this screw carefully. It serves as a pin so it has a long stalk. This pin couples the aperture ring to the iris mechanism so turning it will also allow you to turn the iris mechanism inside.
There’s a set screw here to lock the retainer of the aperture ring. Extract the little screw and set it aside.

You can remove the aperture ring once you unscrewed its retainer off.

The rear elements assembly can now be removed.

You can dismantle the iris mechanism after you remove this brass ring. It’s easy to remove by using a needle to pick it off.

Carefully remove the rotator cup with your fingers. There’s a small notch at the lip of the cup, that’s where the pin of the aperture ring should fit.
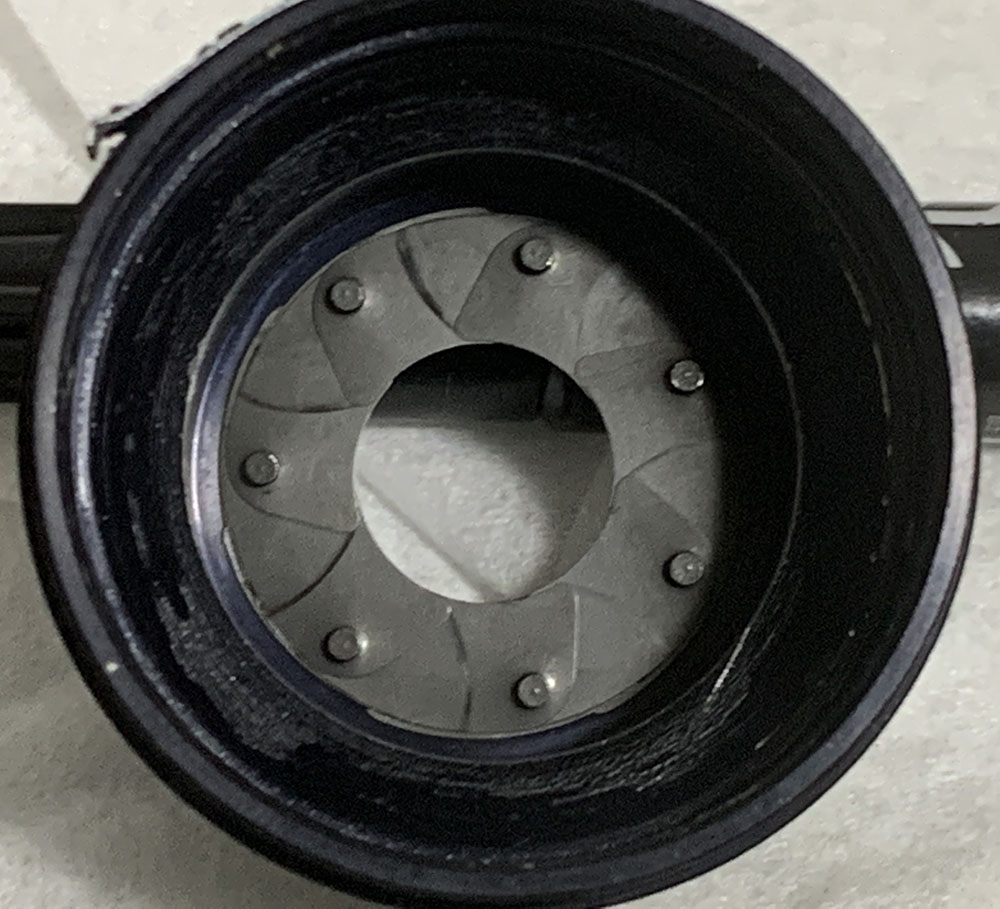
The iris is now accessible to you.
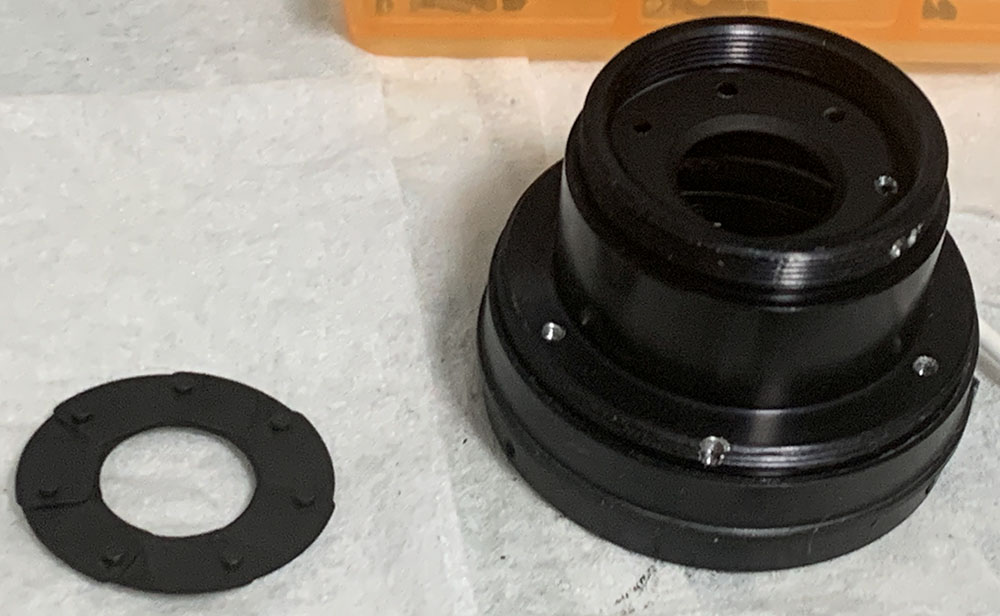
It’s easy to remove the iris leaves, simple drop them on a piece of soft paper or something that can cushion the fall. Mine came-off neatly because it was so oily. Handle this with utmost care so you won’t damage anything. This is an old lens so some of its parts can be brittle.

I cleaned everything thoroughly. Each leaf was wiped with lens tissue that’s saturated with naphtha. That should remove the grime and rust. These look clean but they’re actually rusty and wiping them revealed that.
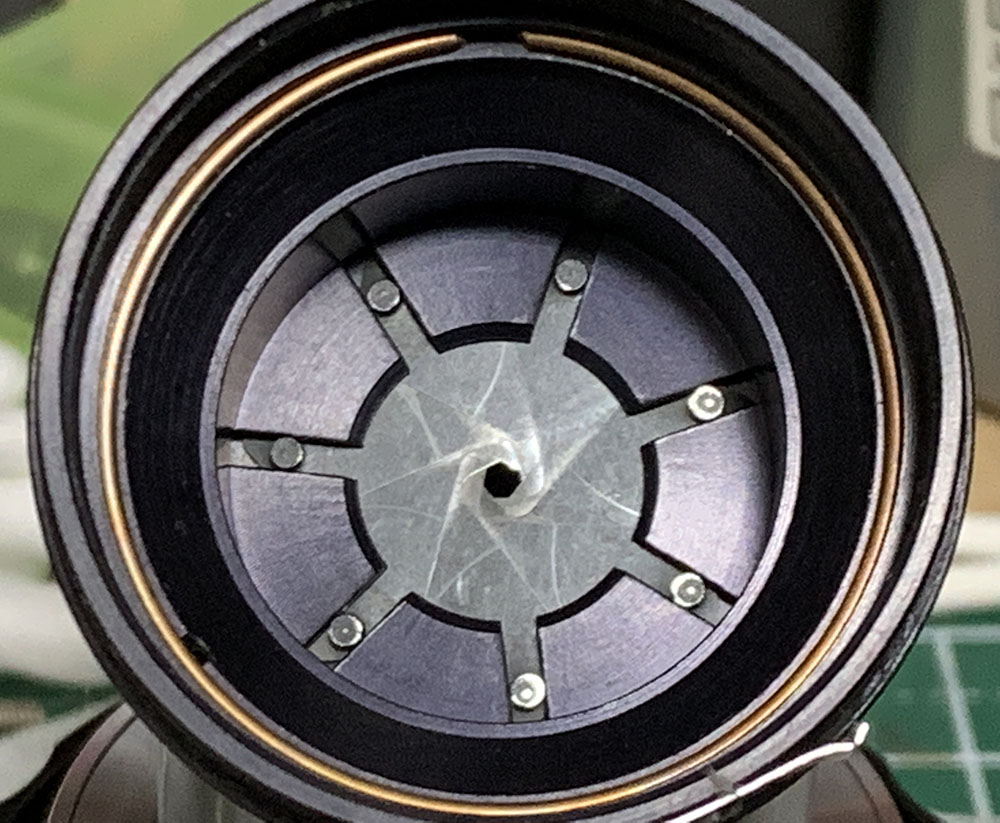
The iris is now clean. It took me a lot of time just to get this back, even those who have years of experience will be challenged by this, the housing of the iris mechanism is quite deep. If you want to learn more about this, read my article on how to repair preset-type irises.
That’s all for the front barrel. Don’t lubricate anything that’s close to the iris apart from the aperture ring and you won’t need a lot of grease for that. Oil and excess grease can migrate to the iris and you’ll find yourself cleaning it all-over-again when that happens. That’s something that I am not willing to go through ever again.
Conclusion:
It has been my dream to repair and present this legendary Nikkor to you. It is something that’s not really talked-about much anywhere on the net and I certainly never saw an article showing you how to repair one. This article is an important part of Nikon repair history, it was my pleasure to be the first one to document this for you.
The barrel is now clean. Avoid using thick grease for this, it benefits from a lighter type of grease. You don’t want to accidentally unscrew the lens while you turn the focusing ring, that’s dangerous.

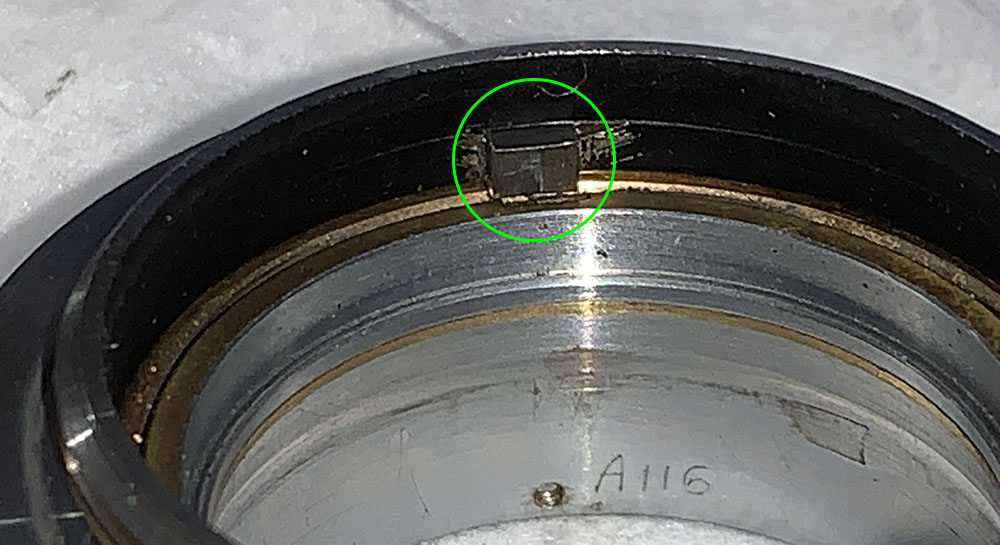
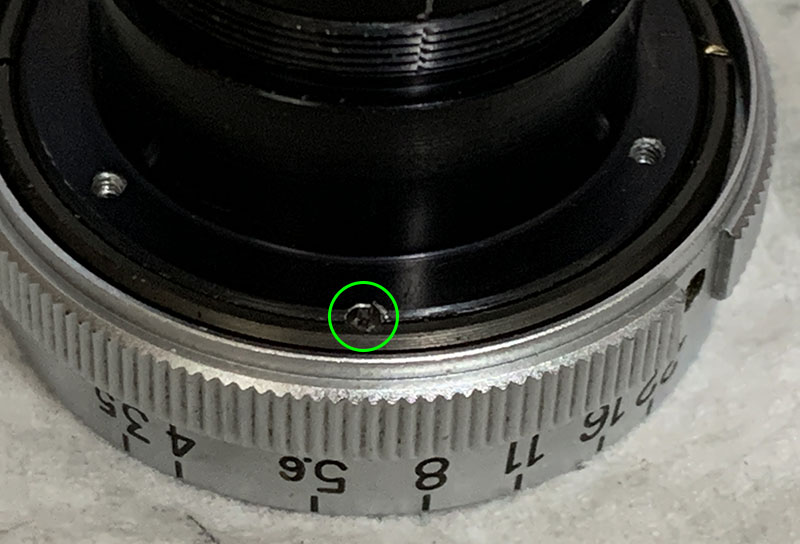
I am not sure what this hole is for. It doesn’t seem to be threaded on mine. I think that you use this to supply lacquer to help secure the front ring. Don’t forget to apply a very small amount of nail polish into this hole.

I thankfully didn’t have the need to dismantle the objective any further. The optics are clean but there’s a couple of scratches which should not affect the final image, I think.

It’s now clean and ready to take pictures. It’s a very lovely lens and it blends well with the aesthetics of a Leica IIIf.
Thank you very much for supporting my work and I hope that you enjoyed this. If you liked this, please share this with your friends. I earn $0.70 a day from views and clicks. You may also consider supporting this site, that will help me offset the cost of maintenance and hosting. That also helps me buy and process film for the reviews section. I intend to show you the best and you got the best! See you again in the next article, Ric.
Help Support this Blog:
Maintaining this blog requires money to operate. If you think that this site has helped you or you want to show your support by helping with the site’s upkeep, you can make a small donation to my paypal.com (richardHaw888@gmail.com). Money is not my prime motivation for this blog and I believe that I have enough to run this but you can help me make this site (and the companion facebook page) grow.
Leave me some tip?
Thank you very much for your continued support!
$2.00
Helping support this site will ensure that this will be kept going as long as I have the time and energy for this. I would appreciate it if you just leave out your name or details like your country’s name or other information so that the donations will totally be anonymous. This is a labor of love and I intend to keep it that way for as long as I can. Ric.

2 Comments (+add yours?)