
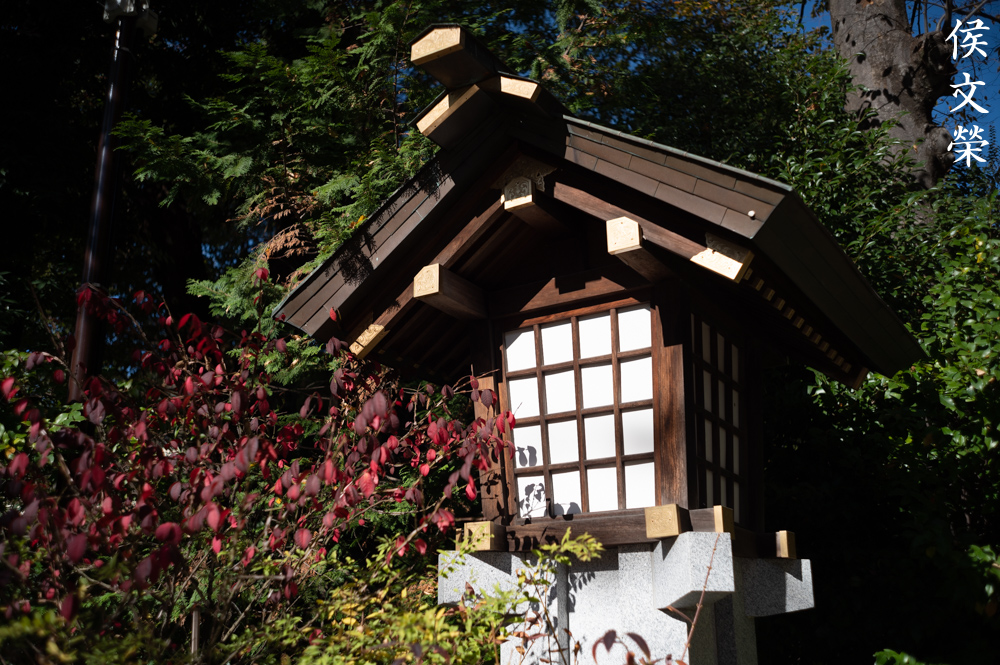
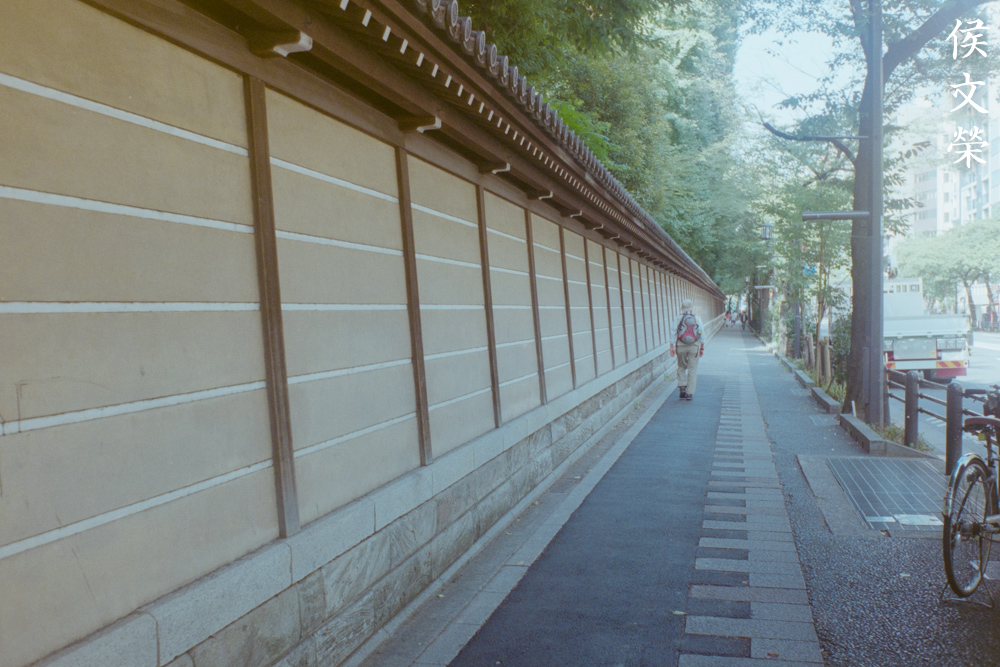
Hello, everybody! I’m looking forward to a nice bowl of Vietnamese noodles today. I like it a lot, the soup is clear, light and tasty thanks to herbs. This is a great treat for somebody who works to hard. It gives the nourishment that I need in order to keep my brain working. Today, we’re going to talk about an interesting lens that is also light, clear and satisfying. Come with me and let us know more about this amazing lens.
Introduction:
The W-Nikkor 3.5cm f/1.8 debuted in 1956, it was the fastest 35mm lens ever made. Most things that were introduced as the “world’s first” usually have a few issues with regards to design and operation but this one is an exception because Nikon got everything right. Its performance, style and handling are all excellent and it paved the way for future Nikkors in many ways.

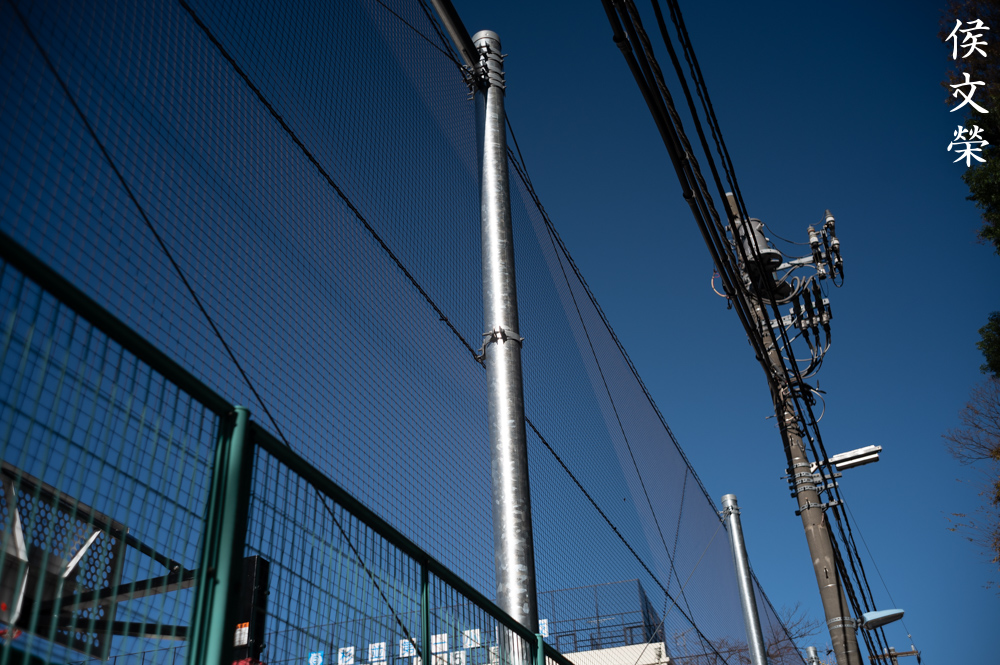
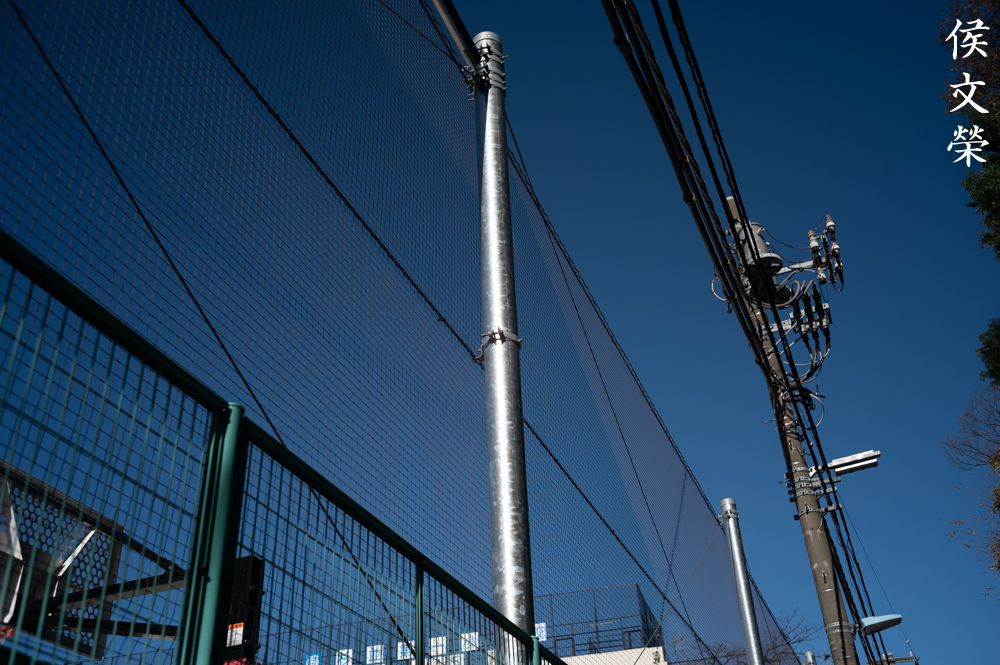
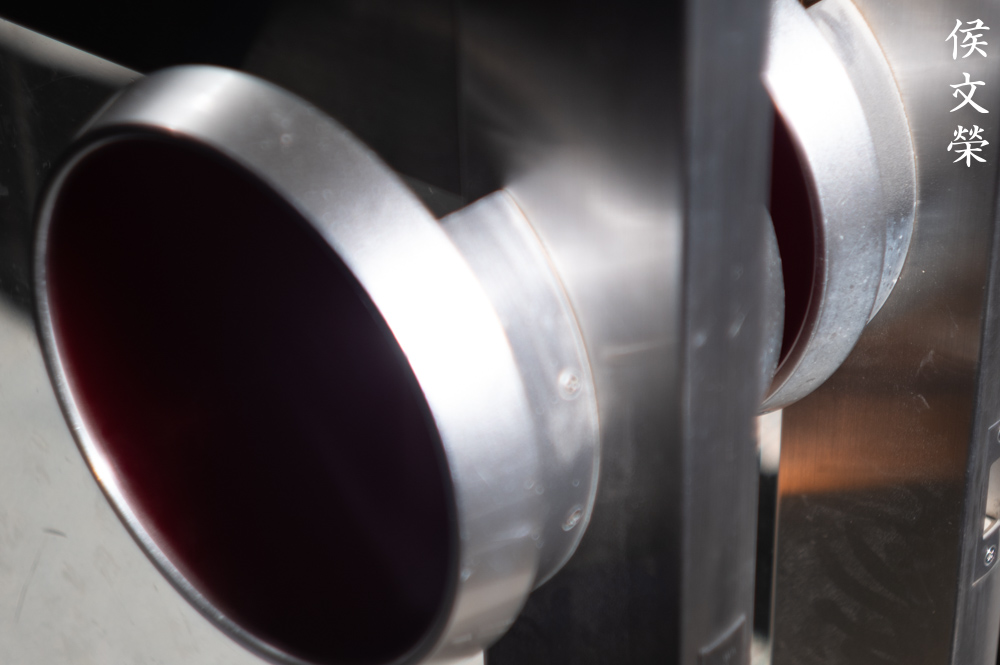
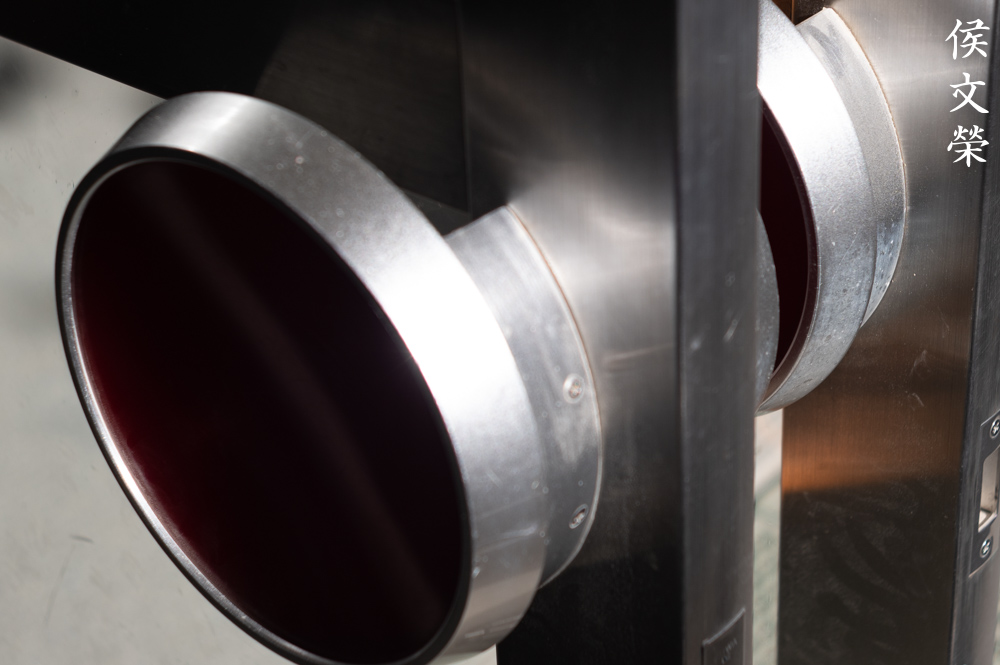
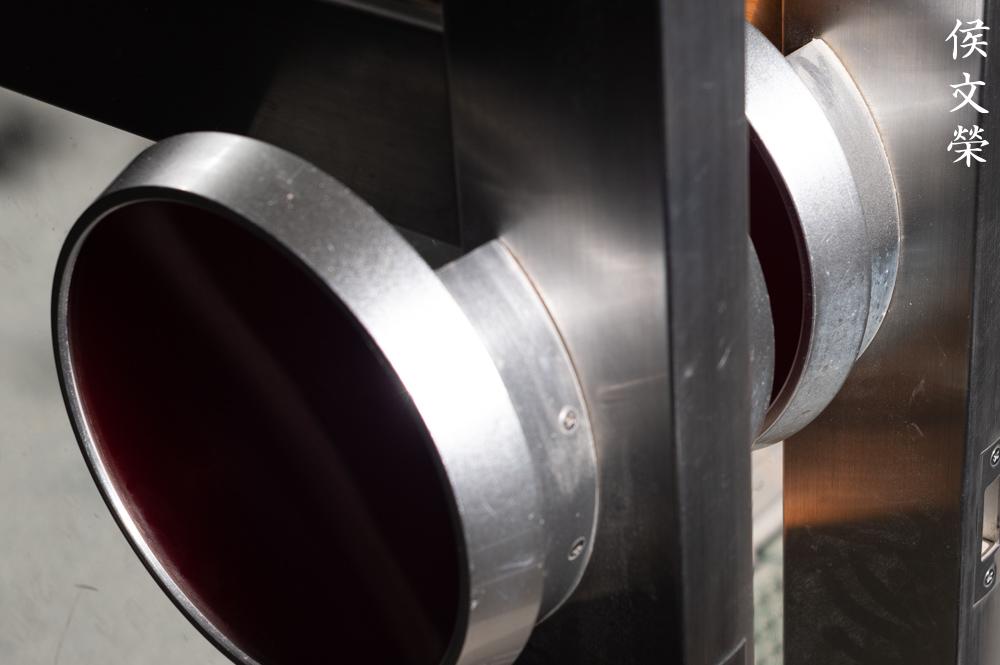
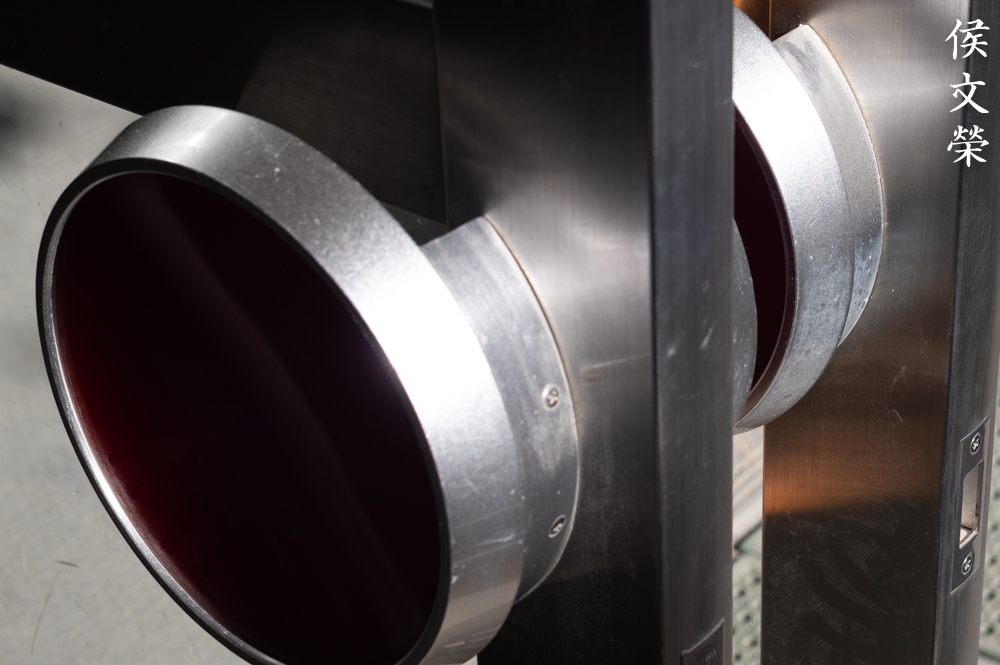
This is one of the first black Nikkors, it’s a sexy-looking lens. The style of the barrel looked really modern so it got carried-over to the F-mount Nikkors. It has a rather large filter size of 43mm since it has a large front element. It’s a bit of an oddity for Nikkors at that point.

It was revolutionary, it bested everything the Germans had at that time. It’s an amazing design consisting of 7-elements-in-5-groups which was based on the Xenotar or Gauss-type design. It has a big rear element compared to the front element which is unusual for a W-Nikkor. It’s said that this could have been capable of achieving an even-brighter maximum aperture of f/1.4 but vignetting was too-high so it was conservatively back-pedaled down to f/1.8 instead. We’ll never know the truth but it’s safe to assume that it does have a bit of credibility.
The genius behind this is Mr. Azuma Hideo, at the time he designed this, it’s common for W-Nikkors to have f/2.5 or f/3.5 maximum apertures and there was a need for a faster lens. When it did came out it surpassed everything, I even know of Leica photographers adapting these because they didn’t have any alternative or the LTM version of this lens is too expensive and rare. It’s worth noting that these aren’t cheap but they’re still cheaper compared to a Leica-made lens. These go for $700.00 these days but the LTM version starts around $1500.00. I got mine for a lot less because it was sold as junk. It was so cheap that it would be scandalous to mention here.

The key to its amazing performance is the huge rear element. The glass was made from an exotic mixture containing a radioactive material (La). That is why it could produce sharper photos since it’s able to correct aberrations. It also made the glass a bit more nutritious so fungi would grow easily. This is why you’ll see some sample of this lens with fungus damage at the rear. It’s ugly but it won’t affect your photos so long as it’s not serious. It was revived in 2005 together with the Nikon SP, it has a modified optical formula since it doesn’t have the radioactive rear element anymore.

The aperture numbers could be seen from the outside, this is so convenient unlike what the W-Nikkor 3.5cm f/3.5 has which was typical of many earlier W-Nikkors. This alone was a big change so succeeding W-Nikkors also have this treatment. It’s worth mentioning that it originally had a black-nose but the paint wasn’t durable so it flaked and the result is ugly so the silver-nose version became the standard one. The black-nose ones are rare.
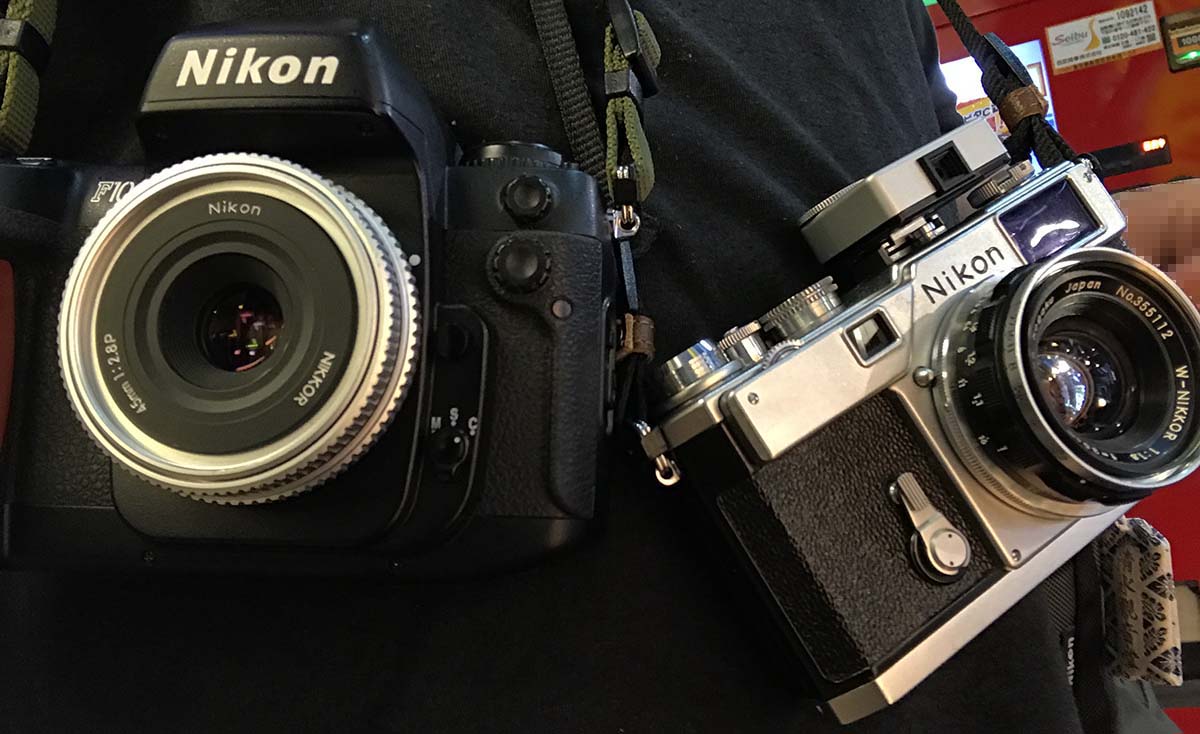
It’s a compact lens and it balances perfectly with my Nikon S3. Once you get one of these you’ll never want to use the slower alternatives. The handling is a lot better, too. If only it could focus closer than 0.9m, but that has more to do with how the mount was designed than the lens itself.

It’s trivial to adapt it with a mirrorless camera these days since it’s easier to find adapters for them. It’s tiny and it handles quite well with a Nikon Z6. It has a rotating front which makes it a bit inconvenient to turn the aperture ring, that’s the only thing I could complain about it.
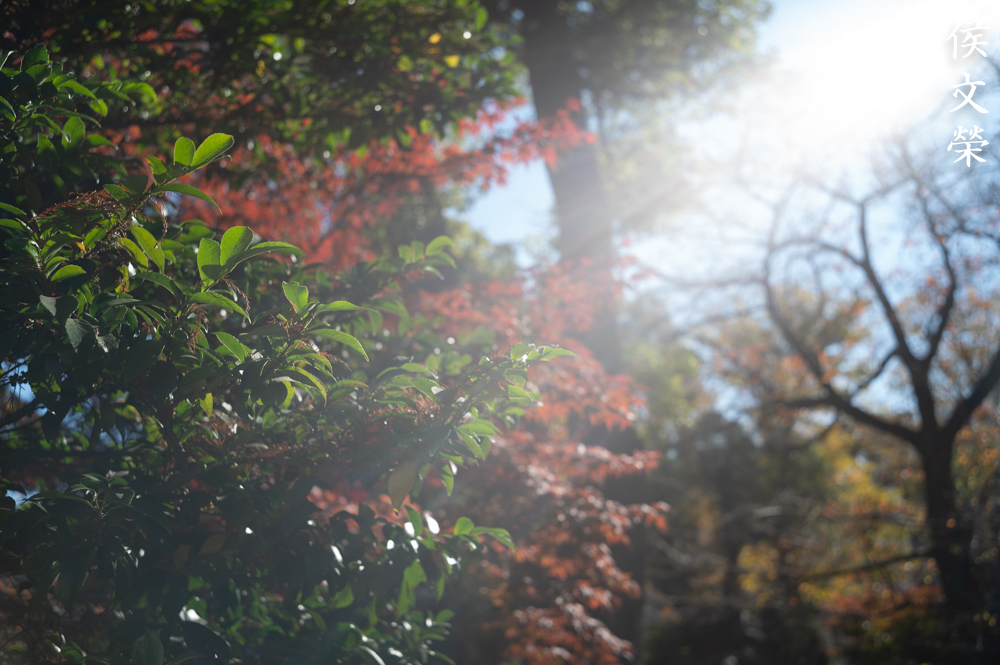
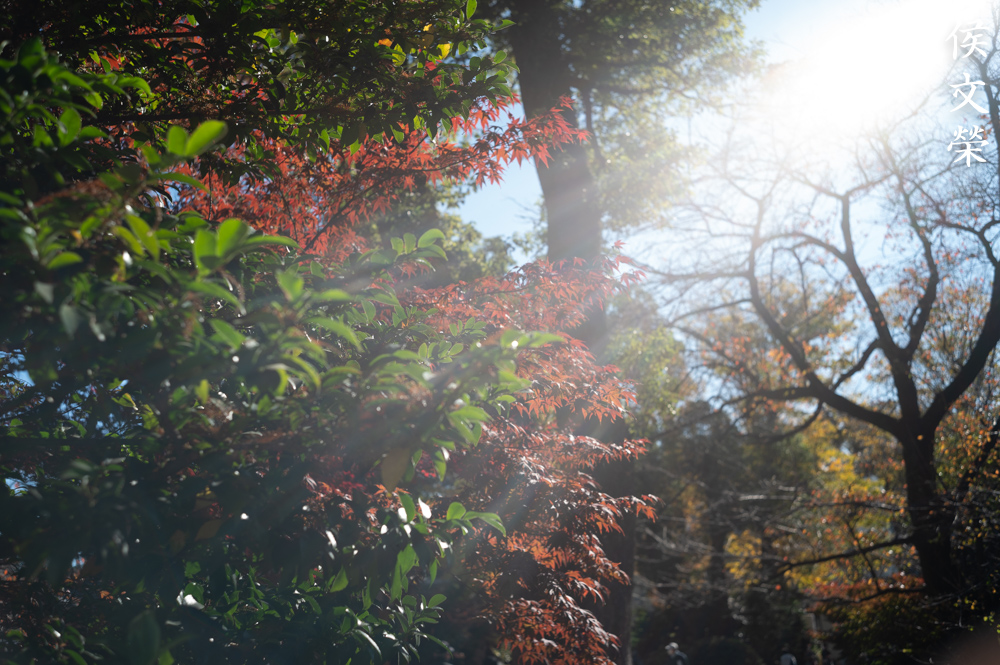
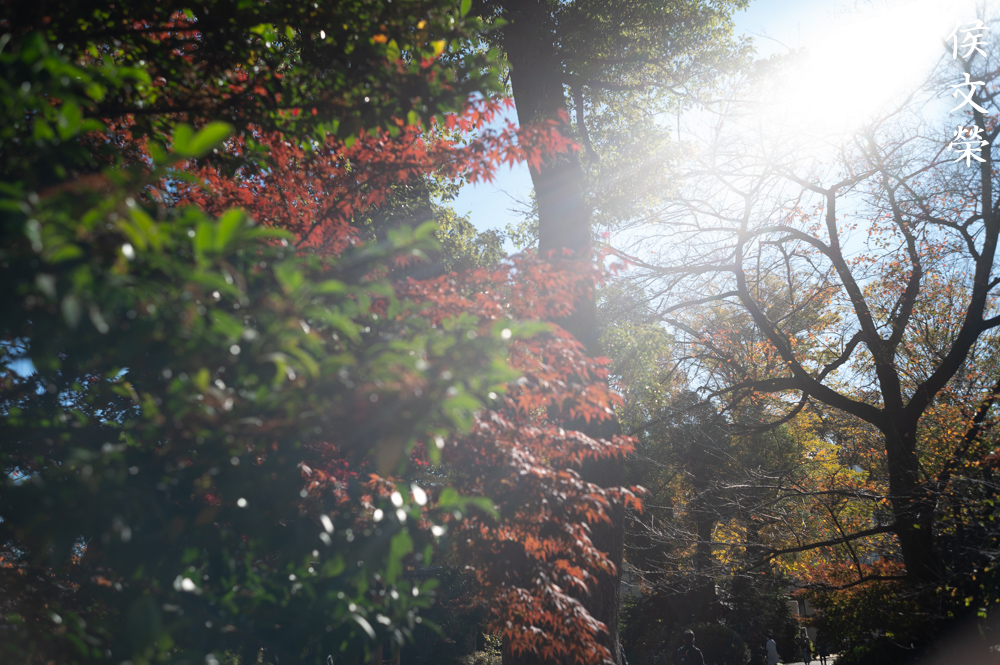
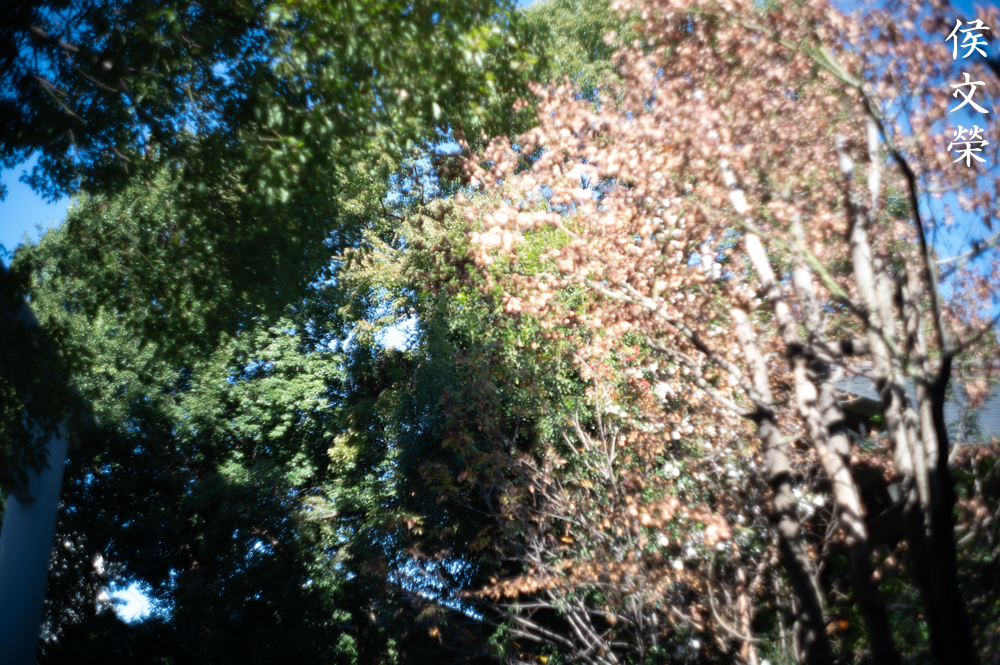
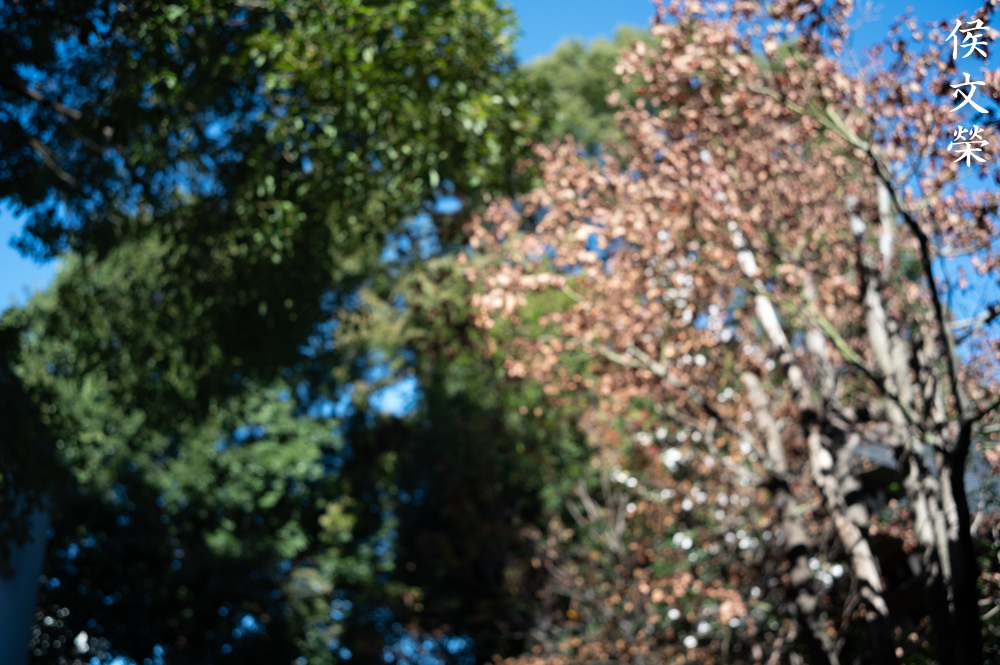
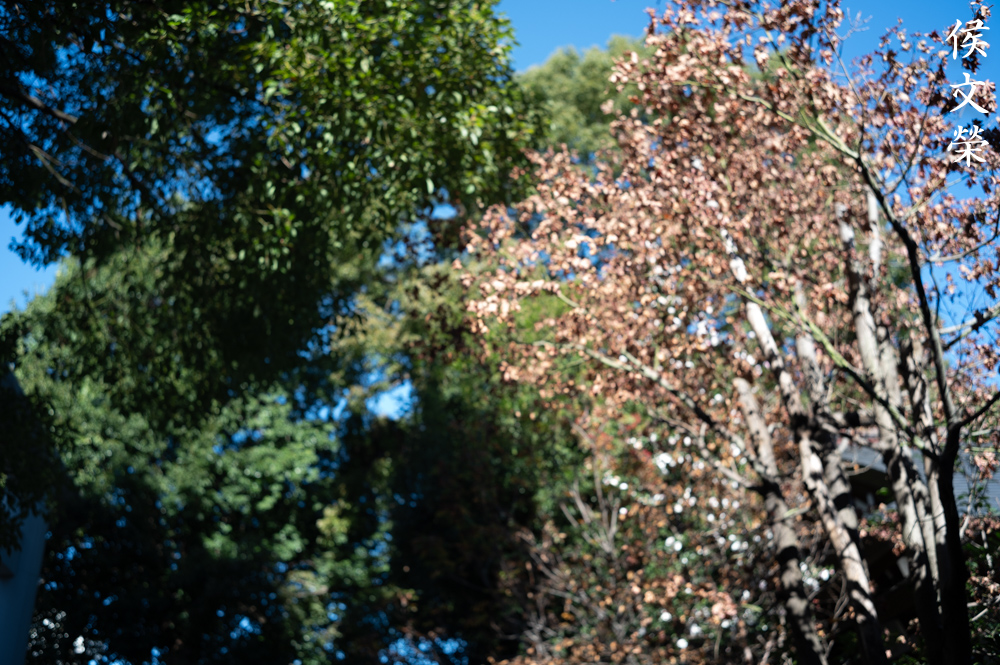
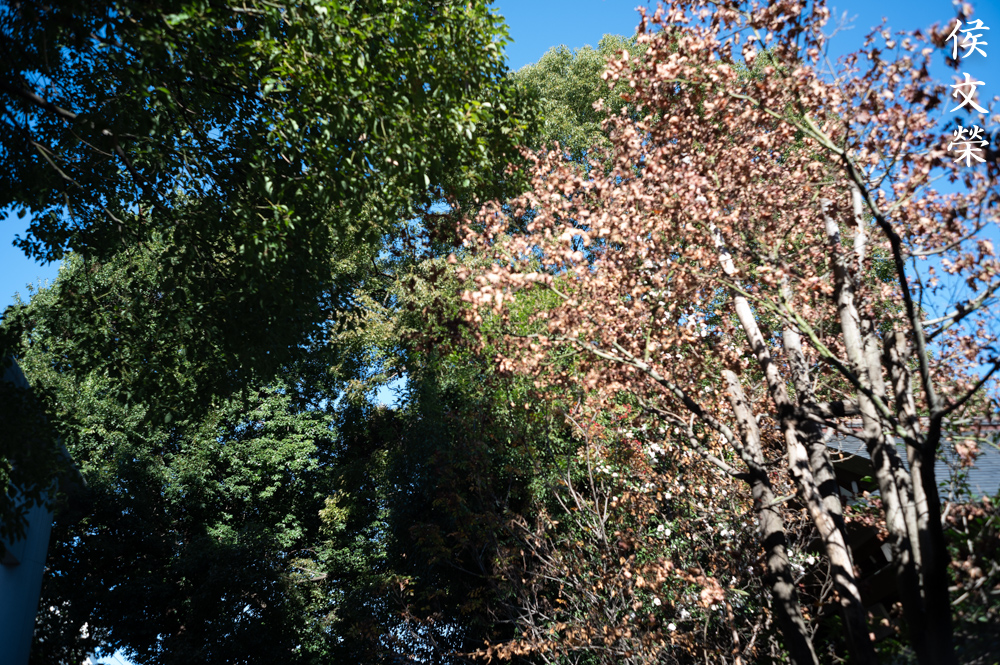
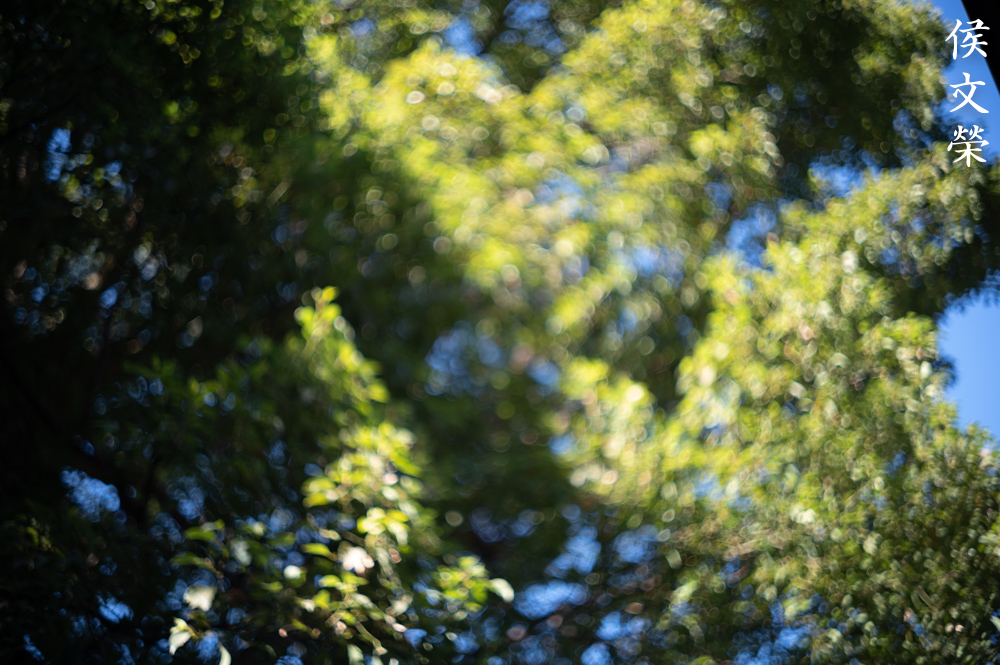
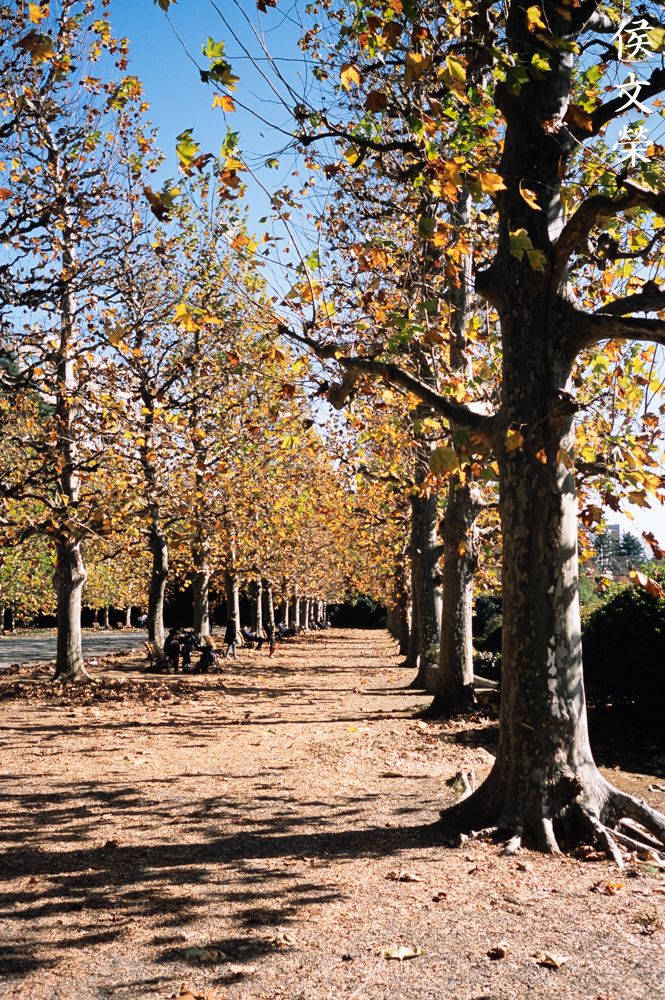
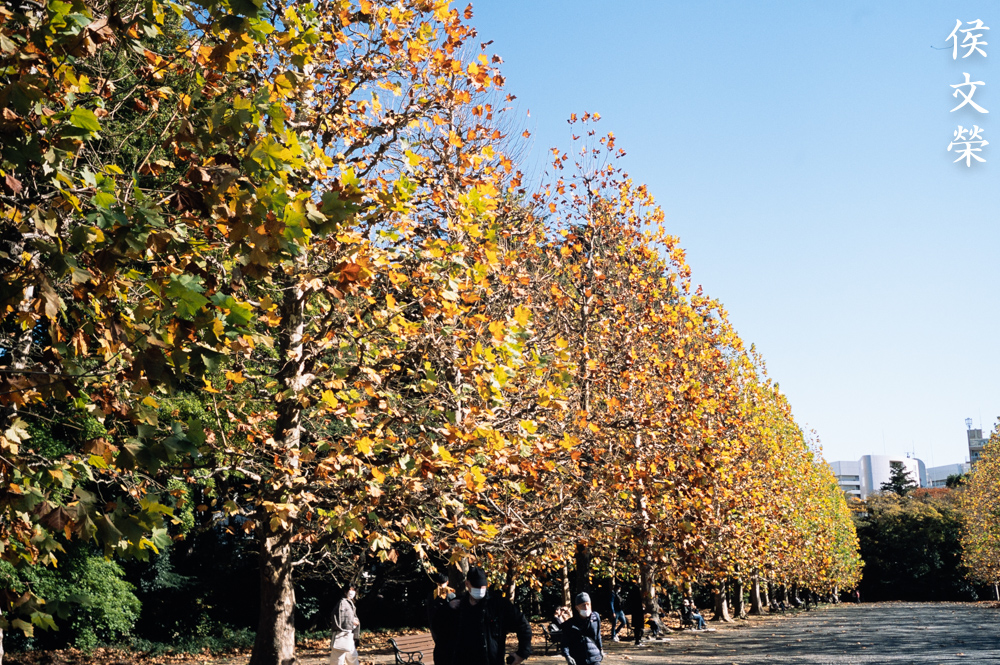
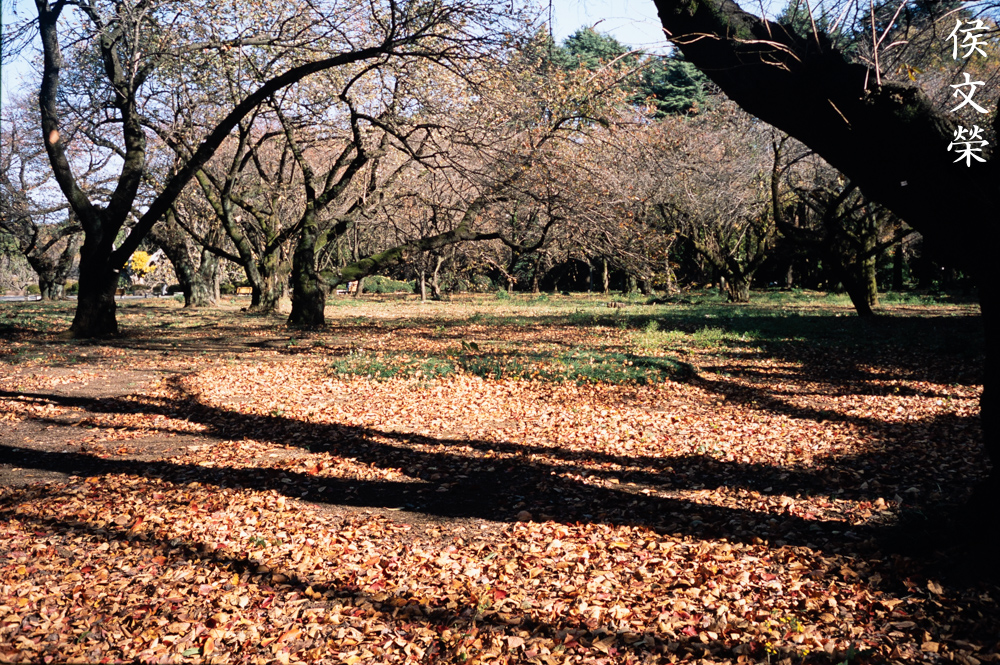
Learning how your lens performs is important so you could maximize it. It will give you knowledge about its strengths and weaknesses. You’ll know if it’s the right lens to bring to an assignment or not. The sample photos were shot from f/1.8, f/2.8, f/4 and f/5.6, we’ll see the most changes happen in these apertures and I assume that people would want to shoot with it using these values. These were shot with my Nikon Z6.


(Click to enlarge)
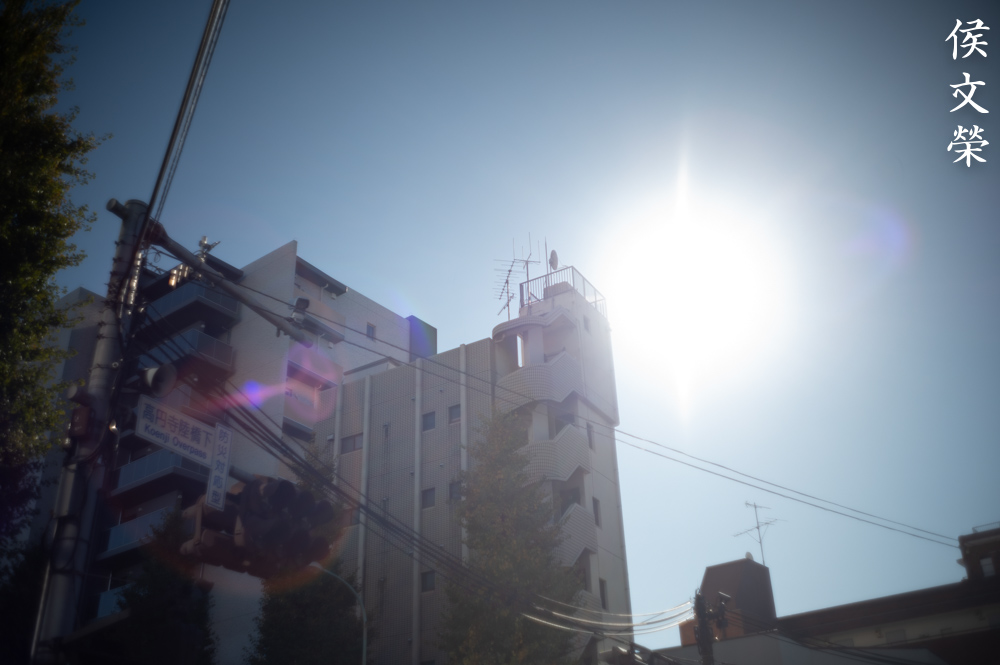
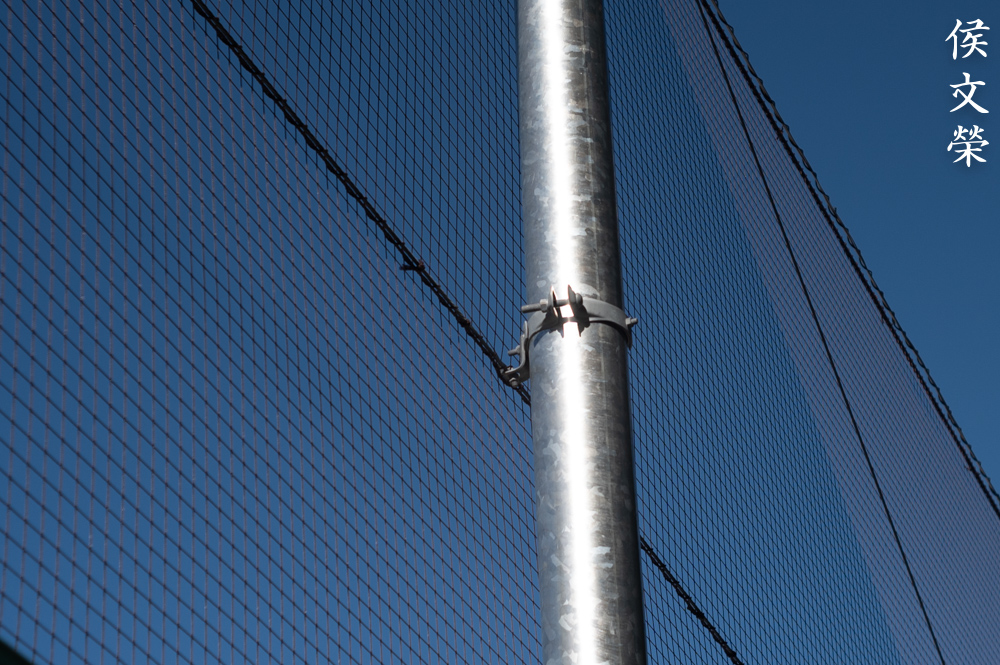
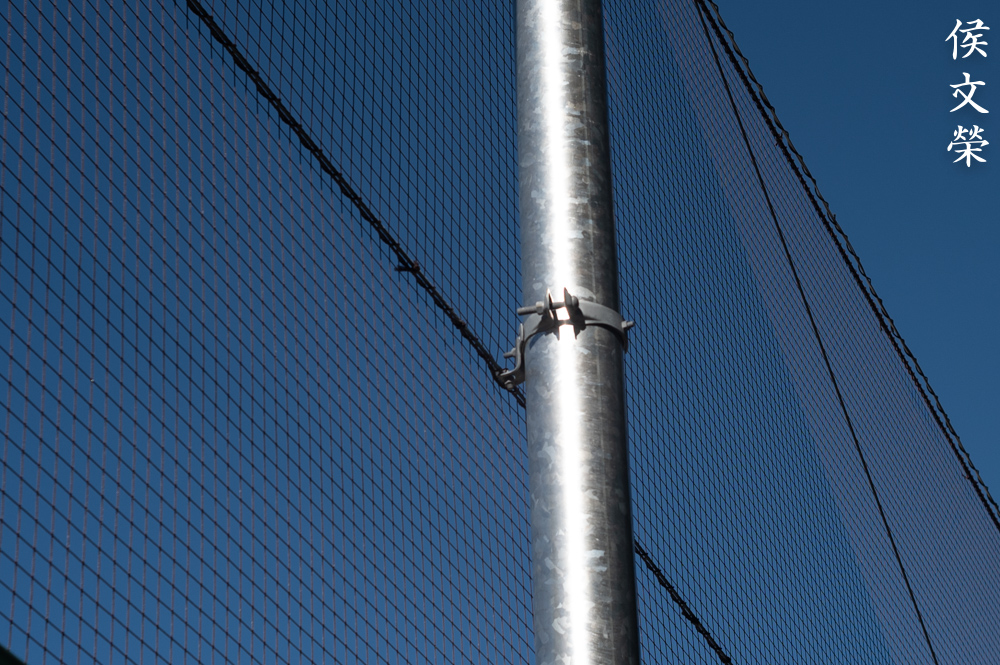
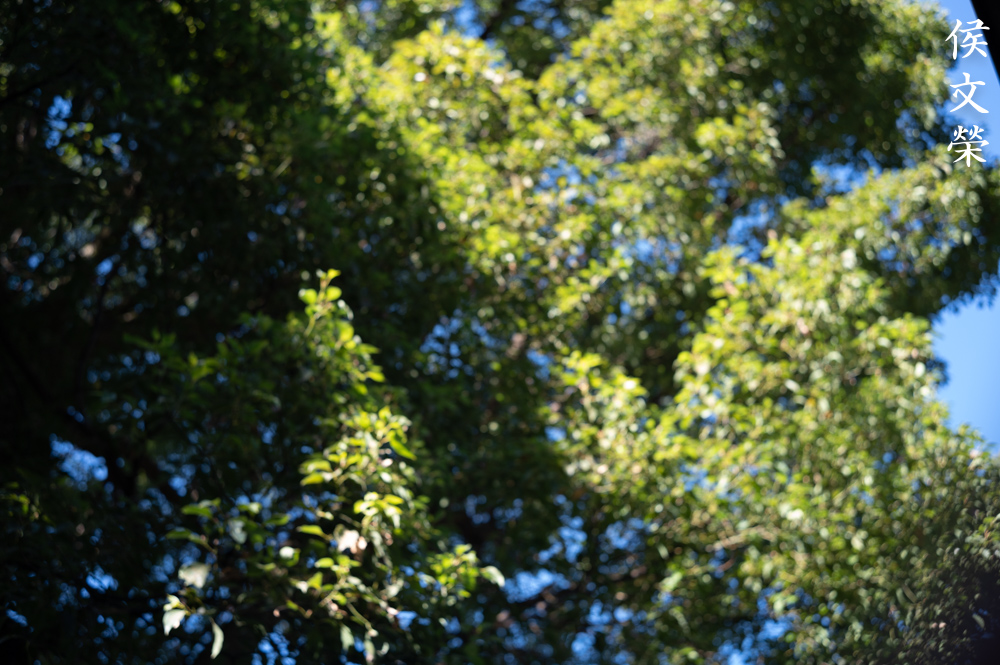
Vignetting is moderate wide-open. Stop the iris down to f/2.8 and you’ll only see traces of it and it’s gone from f/4 on. Distortion isn’t so bad. In fact, this is very good and I couldn’t notice much at all except for a gentle bulging effect found at the center. This is impressive for a wide-angle lens from the 1950s.

While distortion can be seen in this photo it’s not something that will create a nauseating effect, this is quite nice for a vintage Nikkor. This can be easily fixed in post since the profile isn’t complicated.


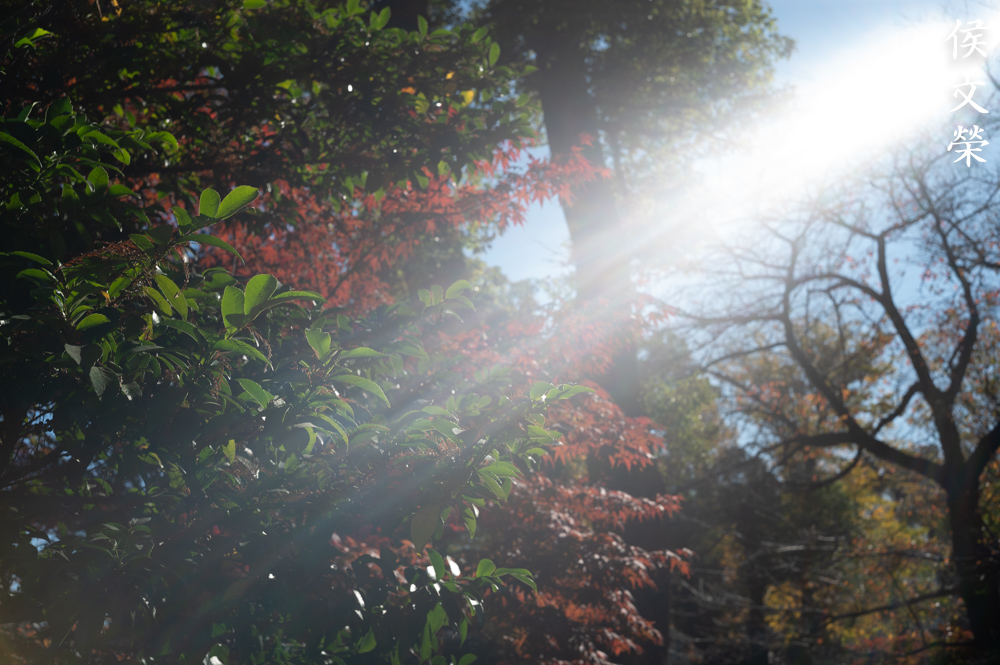


(Click to enlarge)
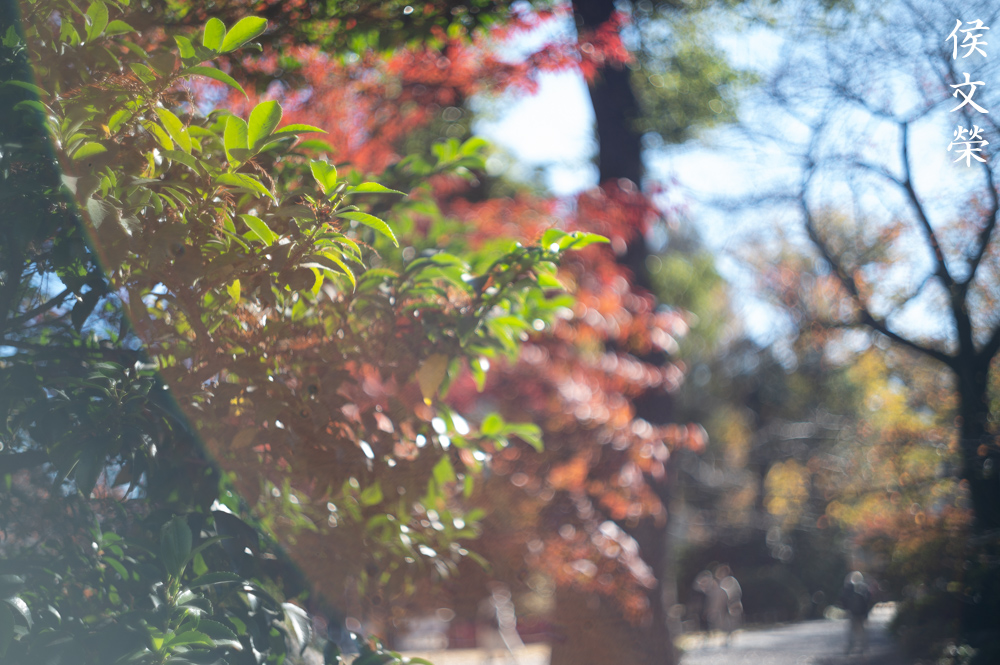
Ghosts and flares are quite terrible but this isn’t the fault of the design at all since its coatings are old. This is typical of many 1950s optics. Just be sure to avoid getting the sun anywhere near your frame.


(Click to enlarge)
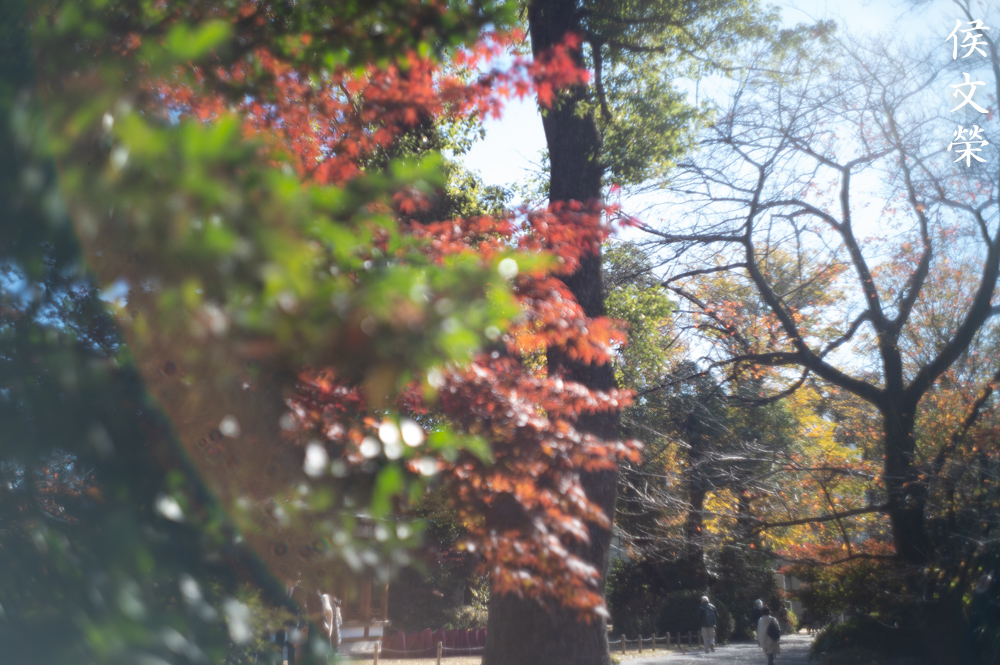
Chromatic aberration can be observed wide-open but it’s not terrible. It will not distract you and you won’t get it in real-world scenarios. It improves by f/2.8 and you won’t see any of it from f/4 onwards. Spherical aberration can be seen wide-open and it gives a nice glow to overblown areas. Overall, this lens controls both quite well even wide-open.


(Click to enlarge)
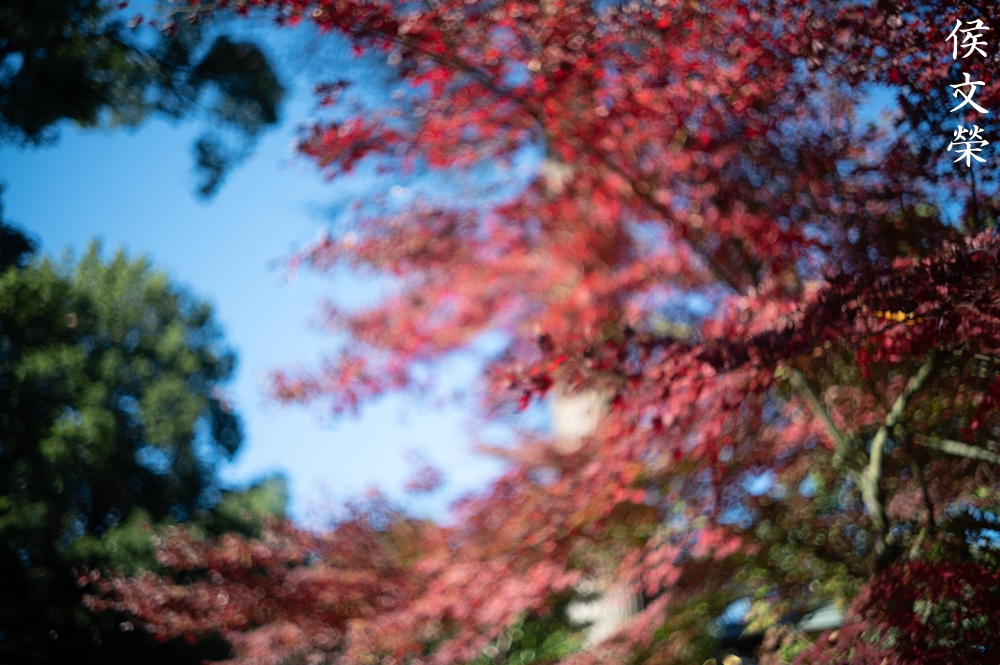
The character of the bokeh is generally smooth but the discs has outlines so it could produce some weird, rough-looking artifacts if you’re not careful. It also gives you a moderate “soap-bubble” effect which isn’t something that I like. Apart from that, it doesn’t perform any-worse than most vintage optics from the 1950s. It’s mediocre at best and distracting at worst.


(Click to enlarge)
Sharpness is quite good at the center wide-open but the corners don’t look as good. Resolution seems adequate as well at the center. This isn’t the case for shooting at distant objects on a sunny day, flare and optical aberrations will make your photo look blurry even at the center. Stopping the iris down to f/2.8 makes the center look a lot sharper and the corners now appear a lot better. Resolution also improves which is noticeable. The center is operating at peak-performance by f/4 and the corners look a lot better. The resolution improves marginally at the center but the corners benefits from it the most. You won’t see much changes at the center at f/5.6 but the corners improve a little bit more but it won’t look as good as the center and I doubt that they’ll ever reach the same level, they’re always a small step behind.
Coma is quite high at the far-corners of the frame wide-open. Stopping the iris down to f/2.8 will improve it drastically and it’s a non-issue from f/4 on.
These are quite impressive specially considering that it’s a 1950s lens. Using the lanthanum helps it correct aberrations which results in cleaner photos. I have never seen anything this good from the rangefinder era.
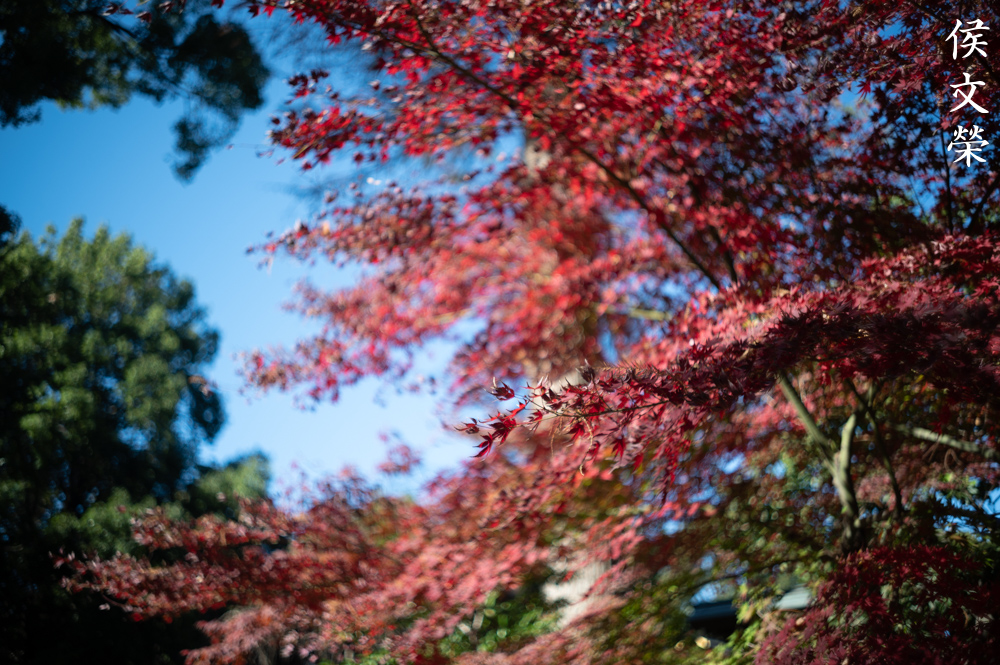
Despite having nice contrast when stopped-down the saturation is subdued a bit and it has a slight, bluish-tint. This is because it was made for shooting with monochrome film.

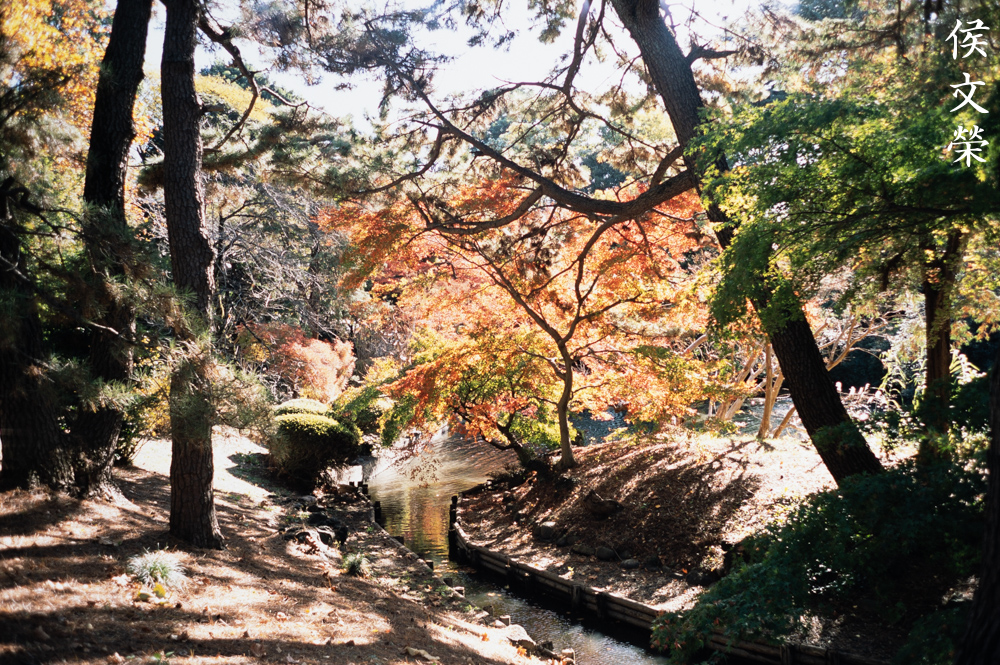
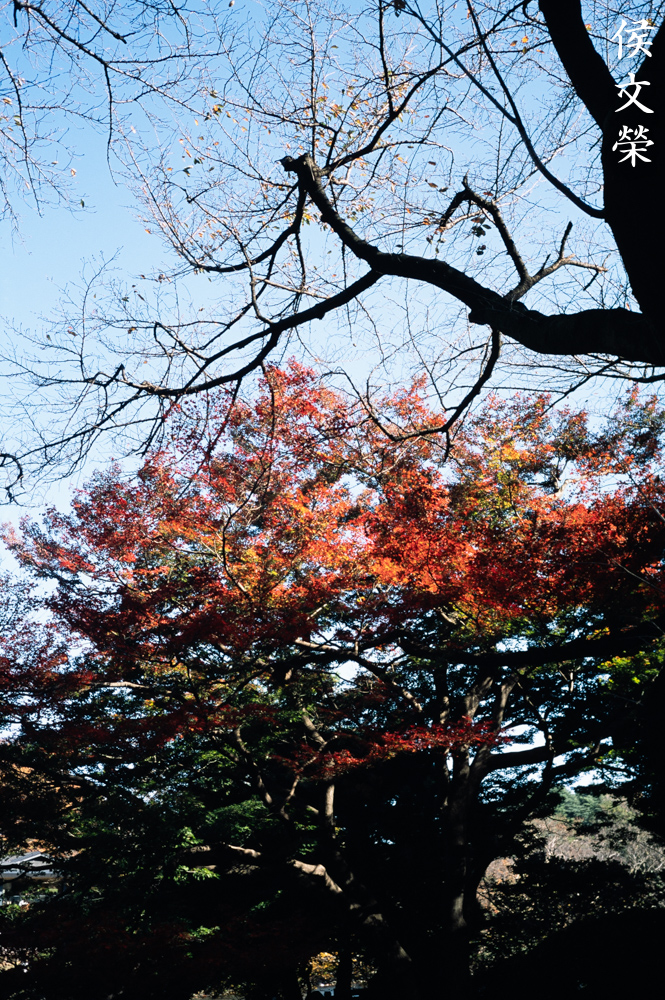
This was shot at f/5.6. It’s capable of giving you that “vintage-feel”. I love it’s tendency to give you a slight, muted saturation which helps make the scene look a little bit cooler, this can be corrected in post or with in-camera color-correction settings.


(Click to enlarge)
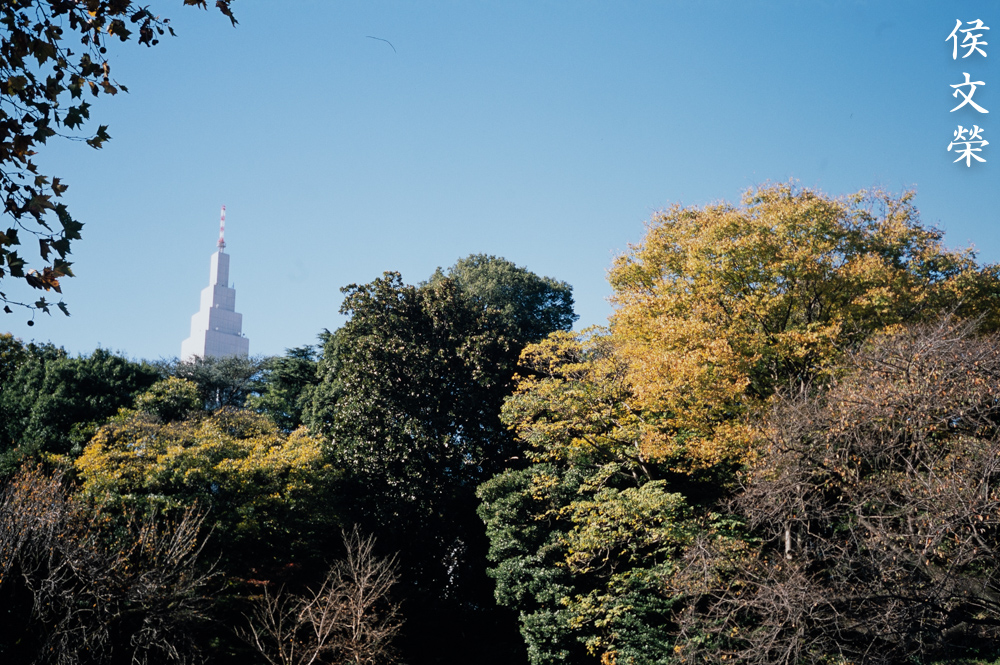
It’s a great lens for shooting on a sunny day but it’s also perfect for lowlight situations. This is Japan’s best wide-angle lens from the 1950s but it’s still a formidable lens today even when used with a modern, high-MP camera.
Here are more samples taken with my Sony α7 this time. These should give you more idea as to how it performs with a digital camera.
This was shot at its minimum focusing distance of 0.9m. Its bokeh quality is not the best but it’s not bad either. It could render weird-looking artifacts if you’re not careful, this is probably the worst sample that I got from it. Note the weird-looking discs at the blue car and the outlines at the foliage. You’ll also notice a huge blob covering half of the frame, that’s from the sun.


(Click to enlarge)
Here are more samples showing the effects of flare and ghosts. This isn’t the lens you’ll want to use in these kinds of scenarios. I could tolerate flare a bit but ghosts is something that I’ll never want in my photos.

Spherical aberration can be quite prominent, some people don’t like this but I really don’t care much since it makes my photos look more interesting. It’s what some people call the “Leica glow“, controlled or intentional use of this “feature” makes the skin of your subjects glow in the highlights. Most, if not all lenses these days don’t do this anymore which is a shame since they are mostly calculated for the charts and not for creative rendering.

(Click to enlarge)
It won’t focus any closer than 0.9m, that is because its helicoids are coupled to the one at the camera. It’s limiting its usefulness but you could add a few extension rings to help you focus closer. All you need is a couple of adapters and some 42mm extension tubes.


(Click to enlarge)
It performs really well when focused on closer distances. I love how it was able to render the background with a painterly-look.


(Click to enlarge)
Saturation is quite nice, it’s not too-high as to make your photos look off but it’s not muted too-much either. It’s quite sharp wide-open even on a modern high-MP sensor.
How about some photos that were shot with a cropped-sensor? Some people could only enjoy shooting with manual lenses on a cropped-sensor body. It’s also something that people may want to consider as a choice, too.


(Click to enlarge)
These were shot with a Sony NEX-5. The 1.5x crop-factor made it behave like a 52mm lens. This is not the best way to enjoy a legendary lens but that was all I had back then. The photo with the flowers looks disorienting, this is not something that I like but some people prefer this kind of look.
Let’s now see how it performs with film. It has a unique look that’s difficult to simulate with a digital camera because of grain. It can help mask a lens’ flaws or amplify them if you’re not careful. Since this lens was made for use with film it’s only fair that we judge it with its intended medium.


(Click to enlarge)
Shooting it with cheap film won’t give it any justice. Despite the poor choice it was able to produce nice, sharp results. It is capable of rendering unique-looking photos, I generally like how they look but it could be bad at times.

This was shot with Fujifilm Industrial 400. Despite not being a “fast” film it’s able to give me shutter-speeds that were quite reasonable even on lowlight situations. This is the reason why this lens was made, this enabled people to shoot photos that pushed the limits of their time. When I was young, ISO400 was considered to be a “fast” film, ISO100 was considered standard.
How about something more “premium”? I shot these with a Nikon S3 loaded with Fujifilm Provia 100. Most, if not all of the pictures were shot at smaller apertures.
Sharpness is quite good when used with fine-grained film.
It flares just as bad with film but not as terrible as with a digital camera. It’s acceptable to me in this case.

It appears that the blobs are better-controlled when used with film. It may be due to film being less-reflective compared to a digital sensor.
I’m not sure which aperture I took this with but you’ll see lots of chromatic aberration at the upper edge. Both lateral and longitudinal types are seen in this photo. This is the worst I could get as far as chromatic aberration goes.

Exposing the scene properly and avoiding huge differences in contrast will help prevent chromatic aberration from being seen in your photos.


(Click to enlarge)
Here are more phots that were shot with Fujifilm Provia 100. It’s a great lens for use with it since its sharpness will complement the film’s resolution. You should meter with it carefully since it’s not forgiving when it comes to it.
I highly recommend this lens to anybody who needs a fast 35mm lens for a Nikon S-mount or Contax bayonet mount camera. There’s no alternatives to it as far as I know for these mounts. Leica mount shooters have more things to choose from these days and they’re a lot cheaper, too. These are getting a lot more expensive these days so only people who could afford them could buy them. I was lucky to buy one for a very reasonable price because it was sold as junk. When looking for one of these be sure that there are no balsam separation signs and the glass and coating looks clean and clear. There may be oil in the iris which is tough to avoid since these are quite old. You could also purchase the reproduced model sold in 2005, I don’t know much about its performance to comment on it but I was told that these ones have more tendency to develop balsam separation problems because of a bad batch of optical cement used. The good thing is it won’t develop an yellowish-hue, it doesn’t have the radioactive lanthanum-infused rear group. Whichever you choose, makes sure that all rings operate smoothly. Happy hunting.
Before We Begin:
If this is your first attempt at repairing a lens then I suggest that you check my previous posts regarding screws & drivers, grease and other things. Also read what I wrote about the tools that you’ll need to fix your Nikkors.
I suggest that you read these primers before you begin (for beginners):
Reading these primers should lessen the chance of ruining your lens if you are a novice. Before opening up any lens, always look for other people who have done so in YouTube or the internet. Information is scarce, vague and scattered (that is why I started this) but you can still find some information if you search carefully.
I highly recommend that you read my working with helicoids post because this is very important and getting it wrong can ruin your day. If I can force you to read this, I would. It is that important!
For more advanced topics, you can read my fungus removal post as a start. This post has a lot of useful information and it will be beneficial for you to read this.
Disassembly (Lens Barrel) :
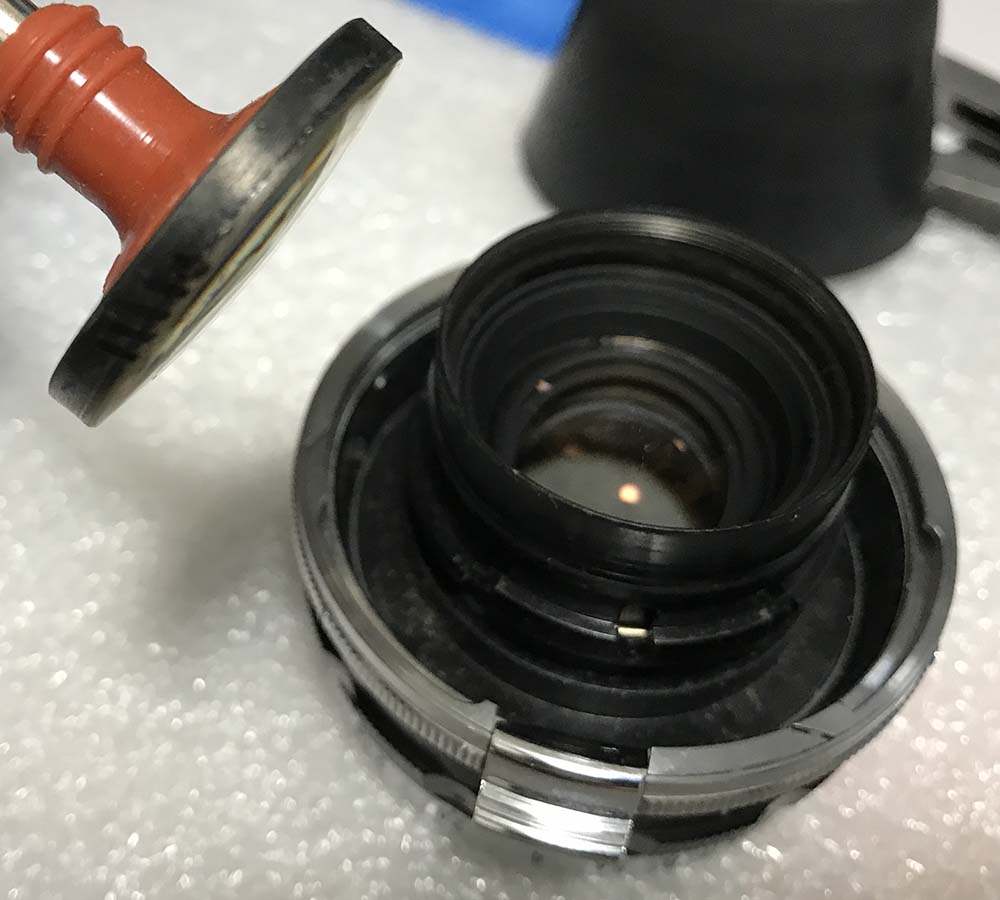
Just like most W-Nikkors it could be dismantled by unscrewing a ring at the rear. Unlike most W-Nikkors, it has a more complicated construction, you’ll have to remove a few more things first before you could separate its barrel from the objective. It’s a delicate project so it’s best left to real repairers. It’s not something that a beginner could repair successfully. These aren’t cheap so you don’t want to risk ruining it.
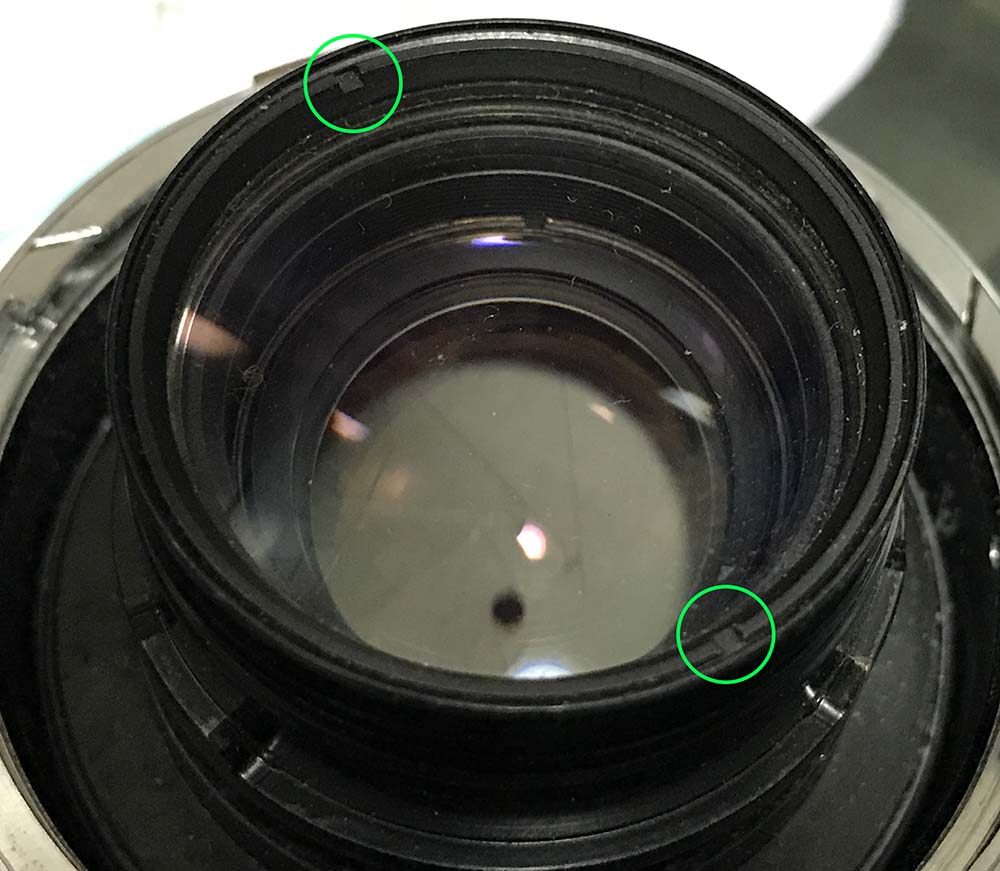
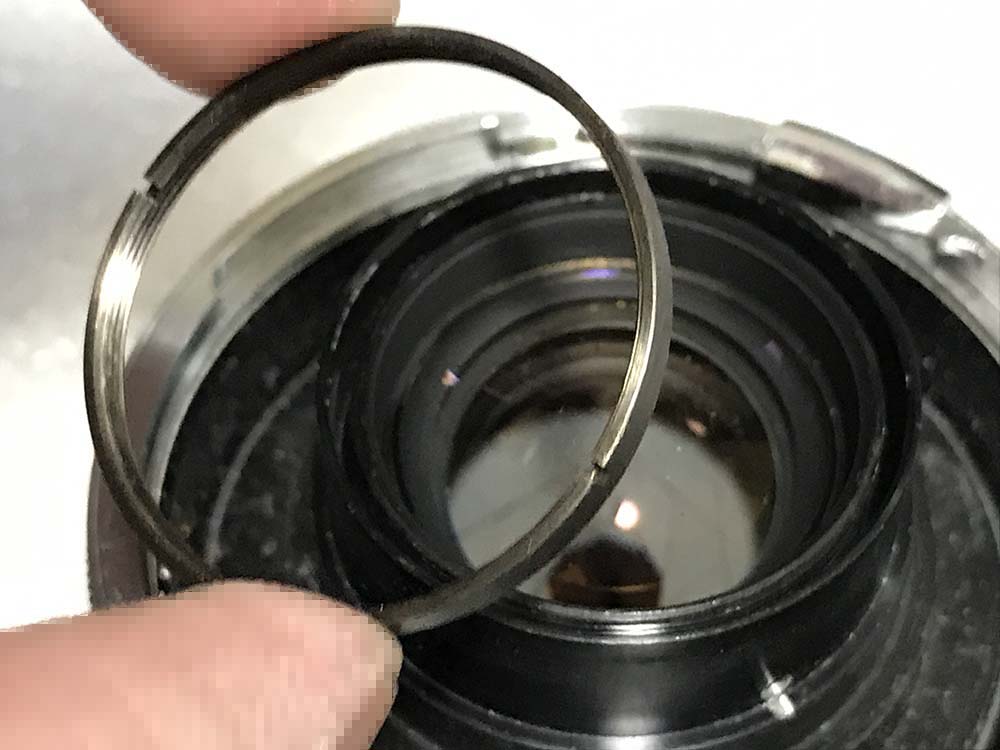
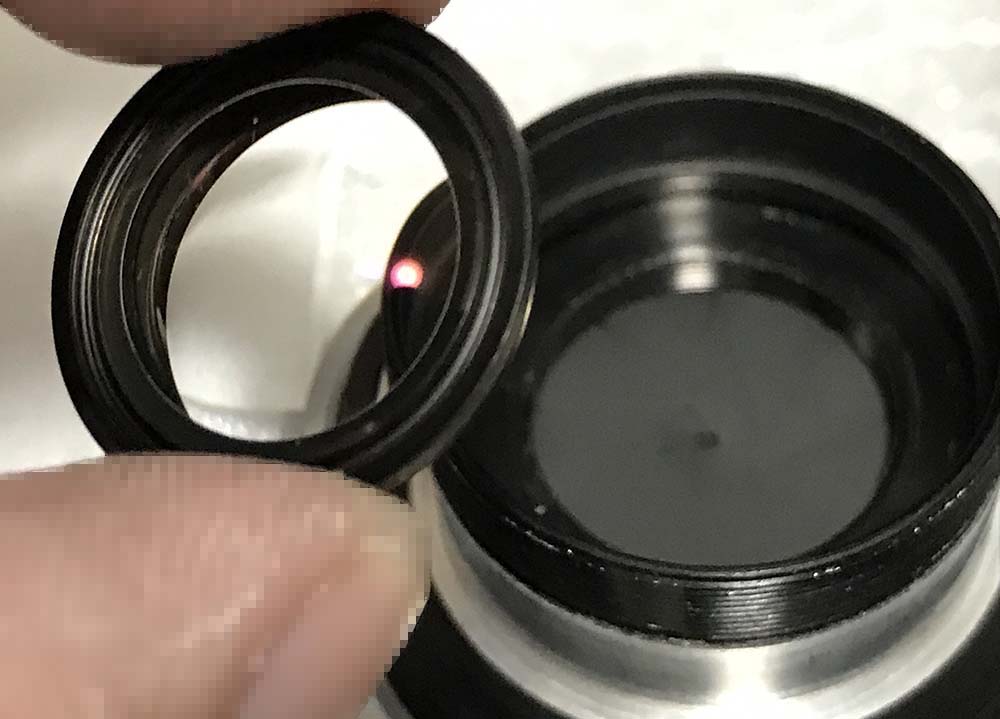
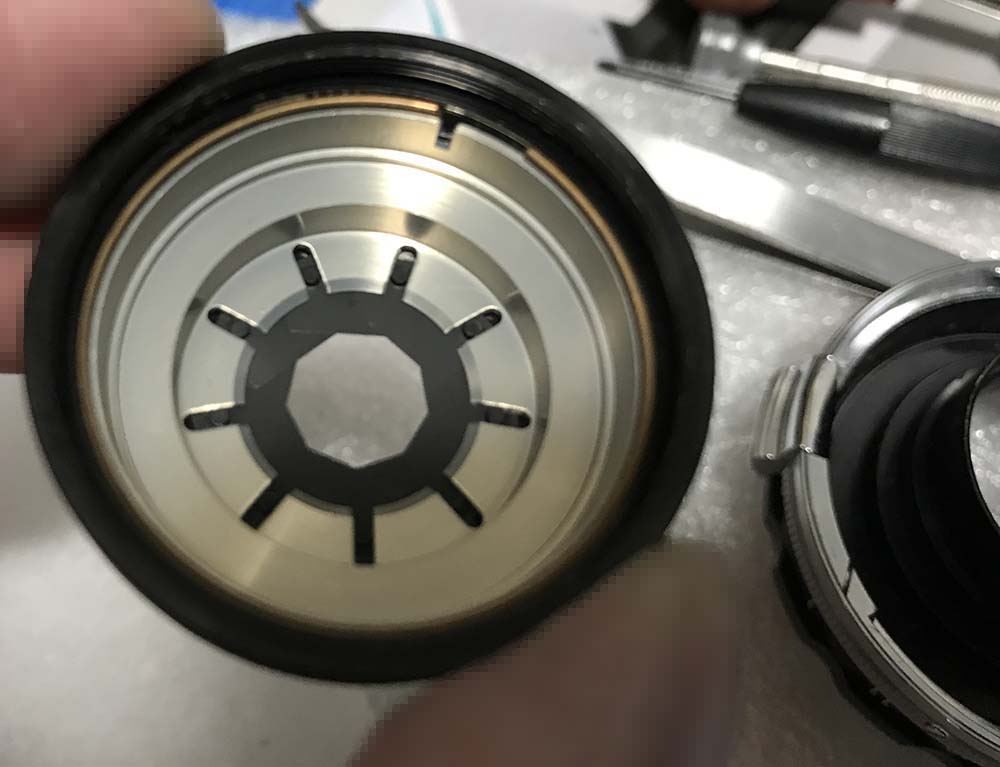
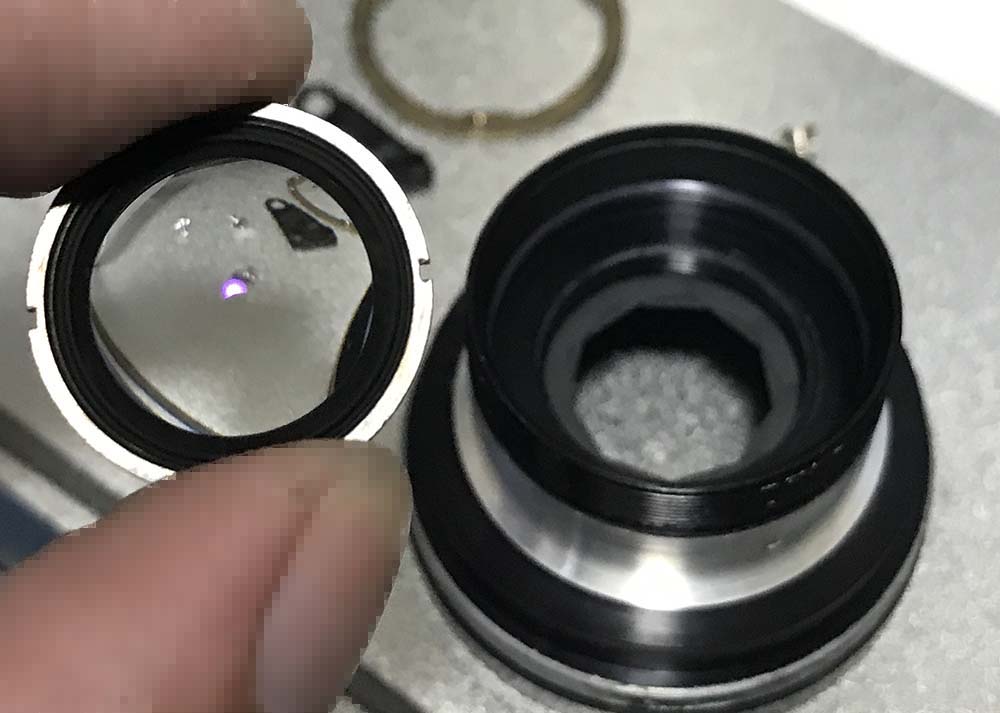
To be safe, remove the rear group first so you can store this in a safe place. I used a lens spanner to remove the retainer while being careful not to harm the precious rear element.
There are 2 rings here, one for securing the rear optics assembly and a ring around the outer surface to keep everything together, it’s the thinner one. It can be hard to see the thinner ring from this photo. The one circled here are the slots for the larger ring.
Carefully unscrew this ring, do this while the rear is facing-up so you won’t drop the rear group.
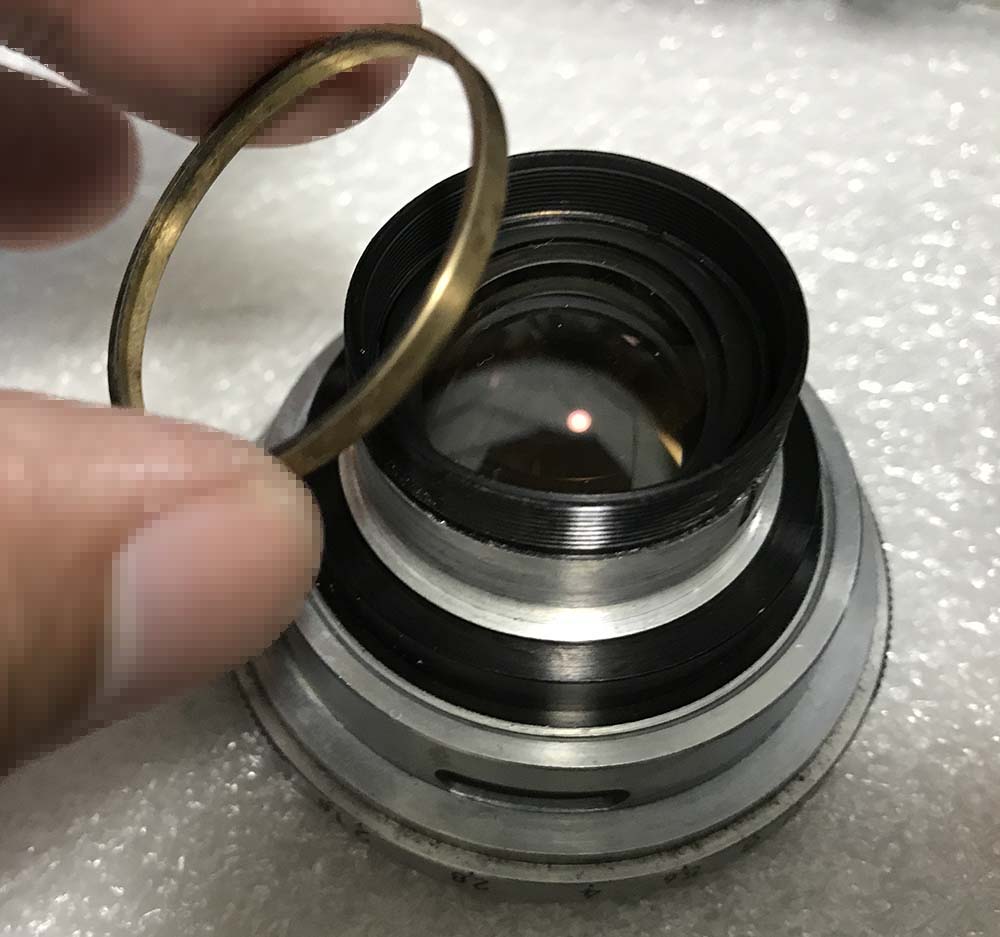
Extract the rear group with a lens sucker. It’s a cemented group so don’t use any solvents or alcohol here.
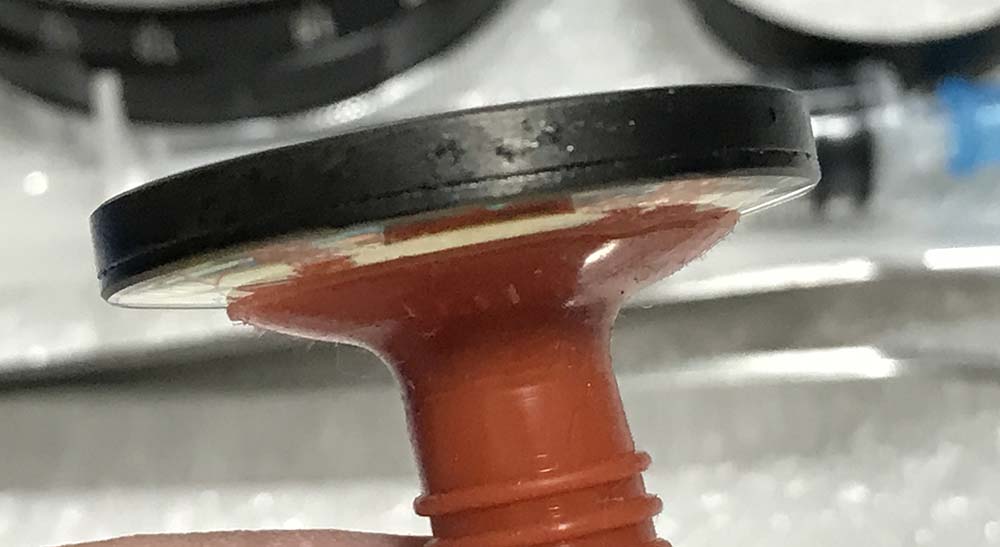
Be sure to note which side should be facing the front.
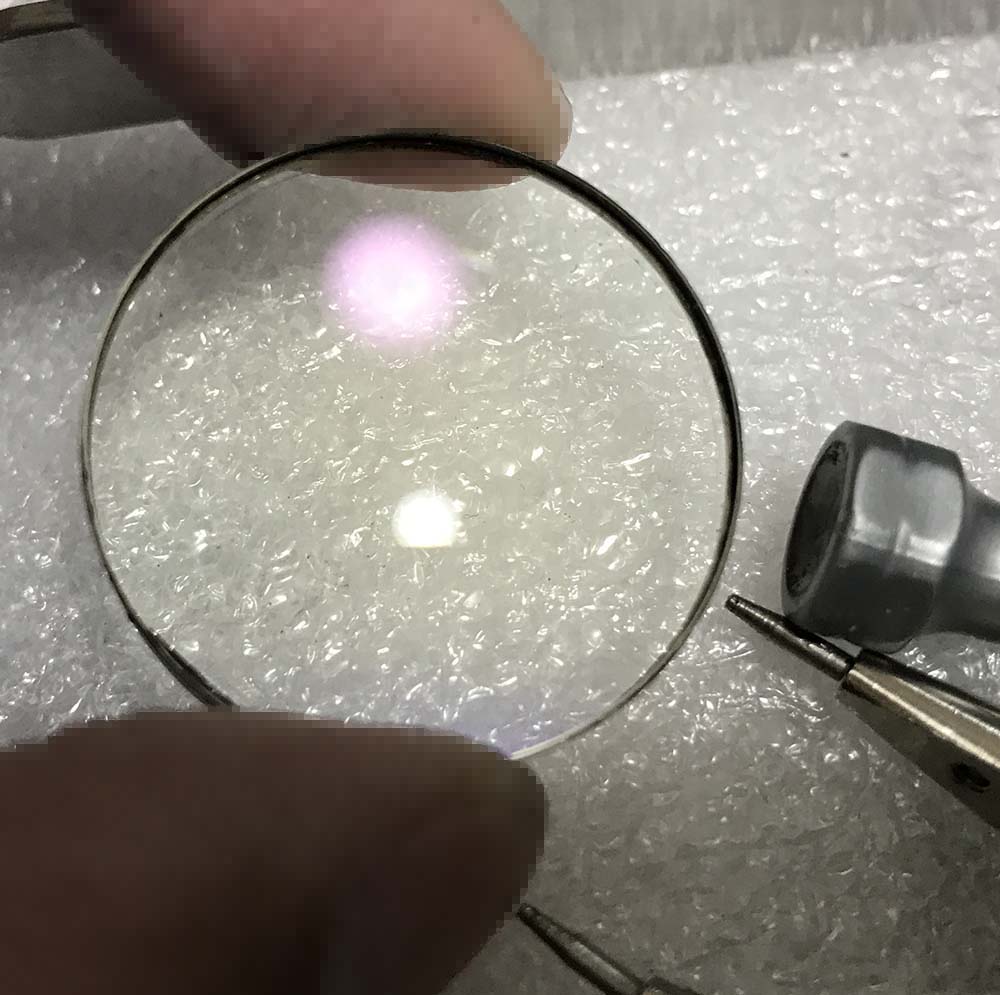
Lanthanum was used in the rear element, it’s slightly-radioactive. This turns yellow with time, some people will bleach this with sunlight. I won’t risk it, I would rather have a yellowish lens than one with balsam separation.
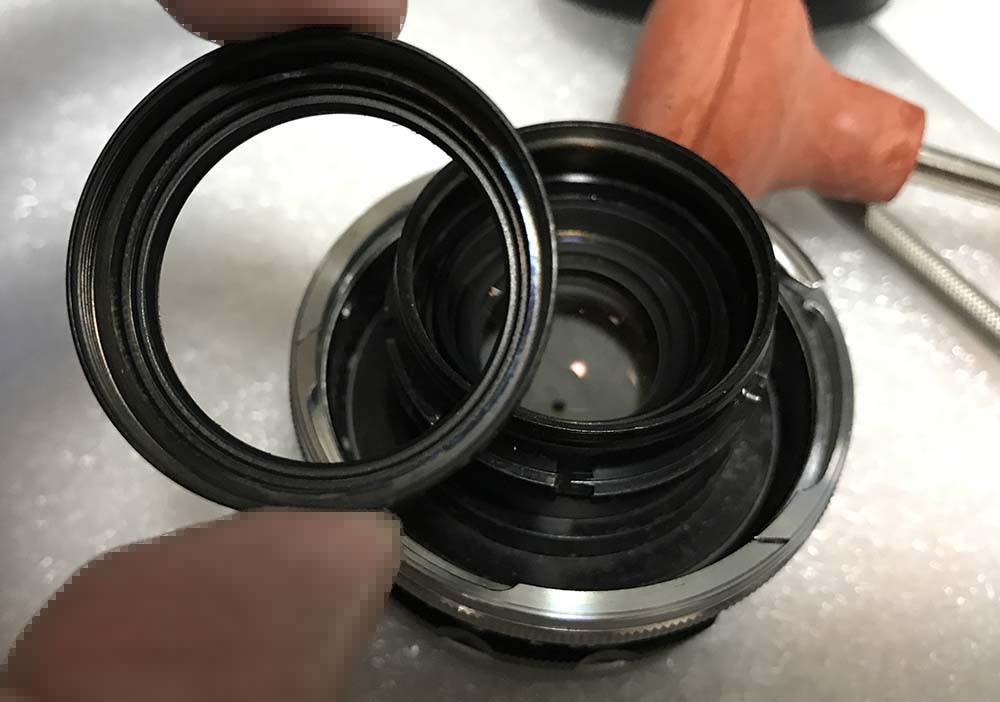
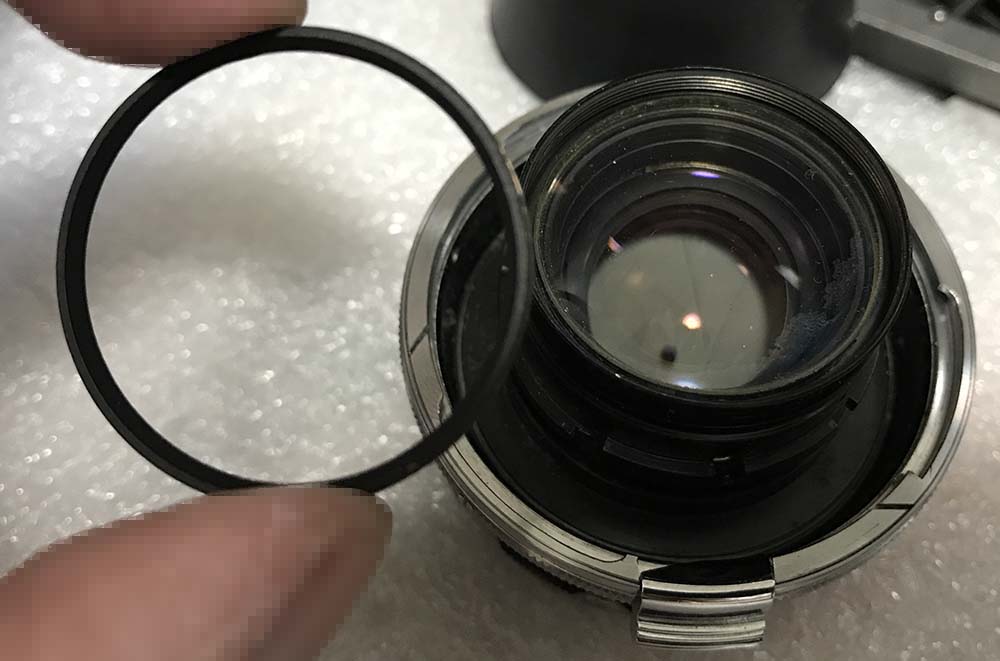
Remove the casing after unscrewing its retainer. I used a special tool to get it off while being careful not to damage the surrounding delicate threads. I don’t recall this very well but I think you could extract the rear assembly by simply unscrewing the thinner outer ring.
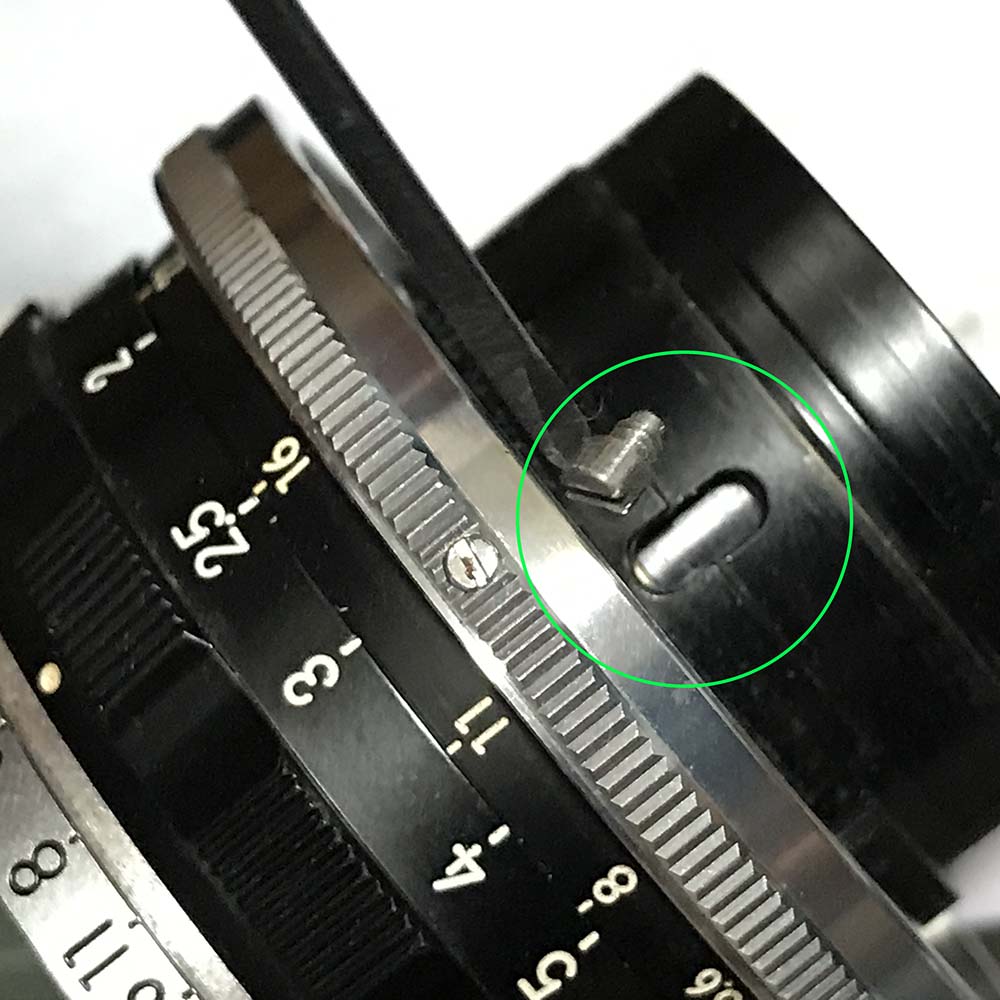
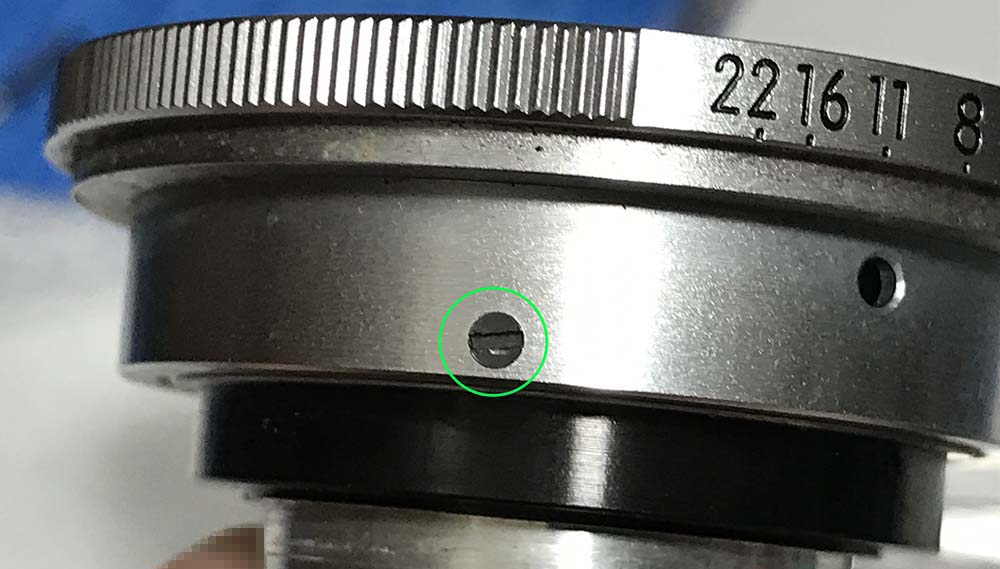
Extract this before removing the cam. This is troublesome to put back, it has to sit perfectly below the spring or it won’t be possible to settle it properly.
Before you extract this you will have take notes so you’ll know how to put it back again properly.
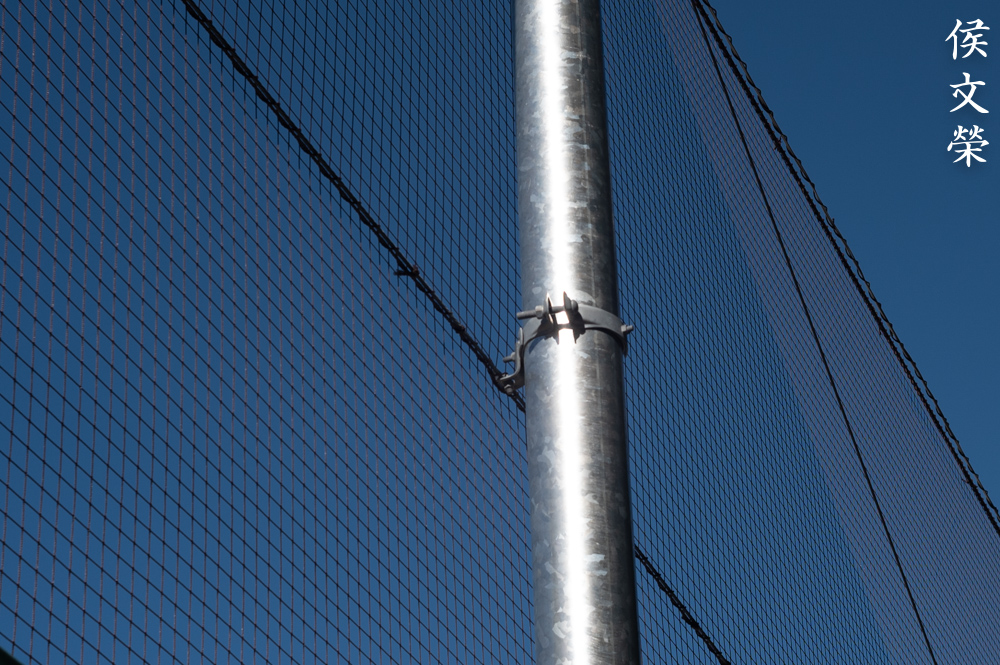
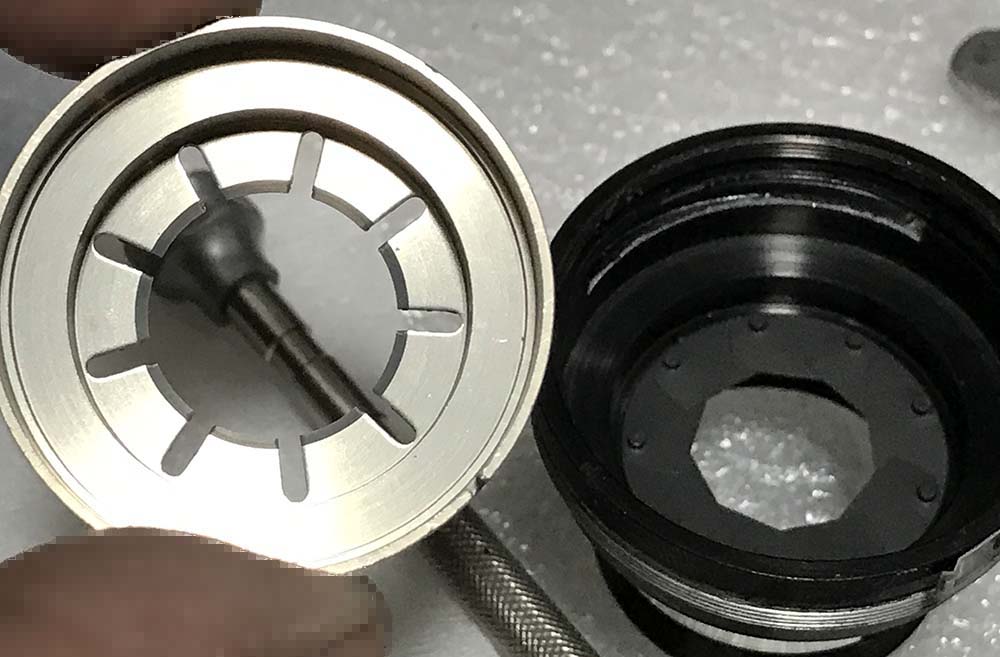
Carefully remove the cam/collar. It couples to the rangefinder at the camera so the lens could depress the rangefinder’s arm. It only moves in 1 axis. The design is usually simpler on other W-Nikkors but this has a large rear group so it has to accommodate it.
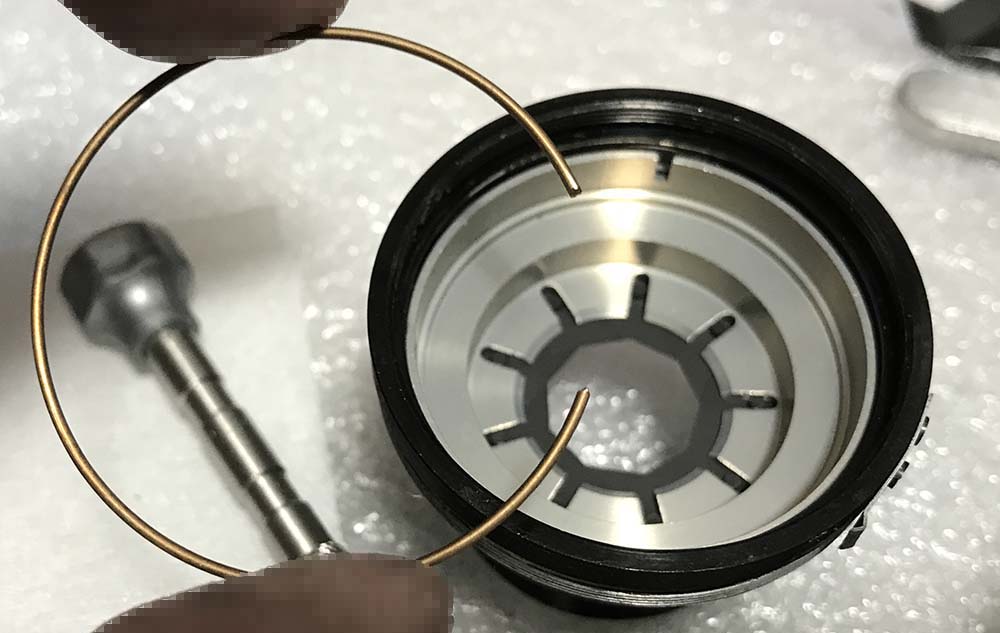
Remove the spring. If it’s rusty, clean it carefully. A thin film of grease is all that you’ll need to lubricate this.
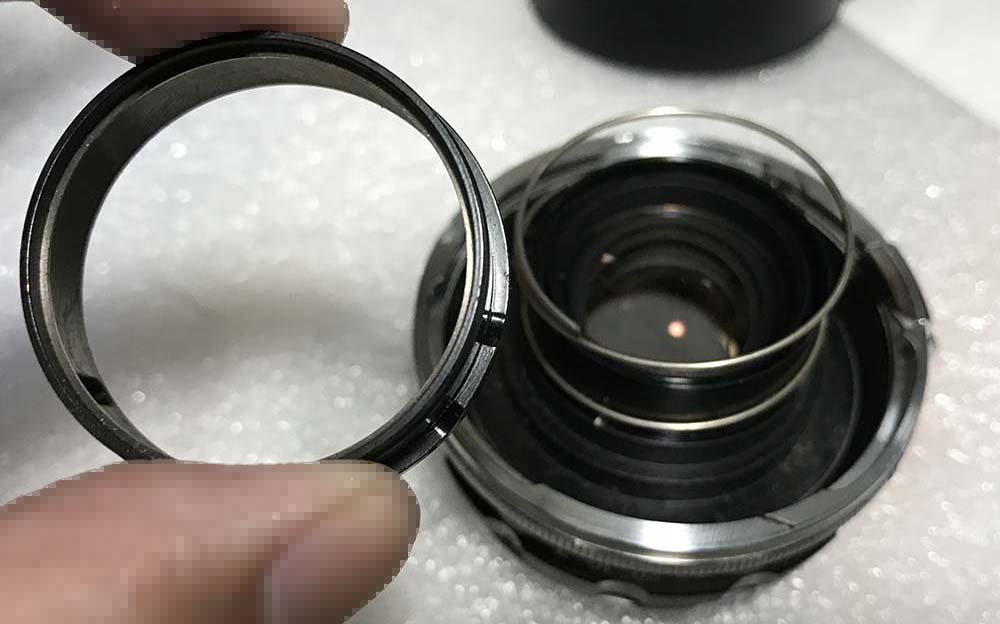
I used my special tool to extract this thin ring. It holds everything together, I will advise that you place the lens on top of a table with the rear facing up. I am always nervous when unscrewing this ring since it’s very ddelicate.
Carefully remove it and be sure not to drop the objective.

Simply lift the barrel from the objective.
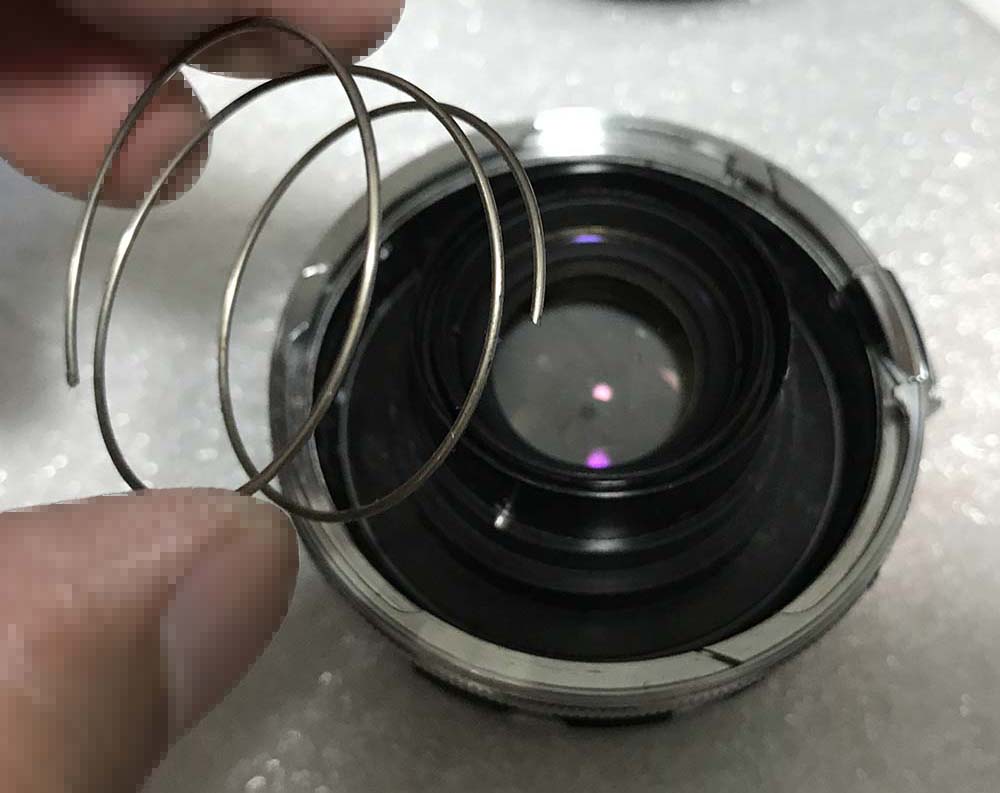
Be sure not to misplace or damage this shim, it’s used to adjust the focus.
Carefully extract these to remove the focusing ring.
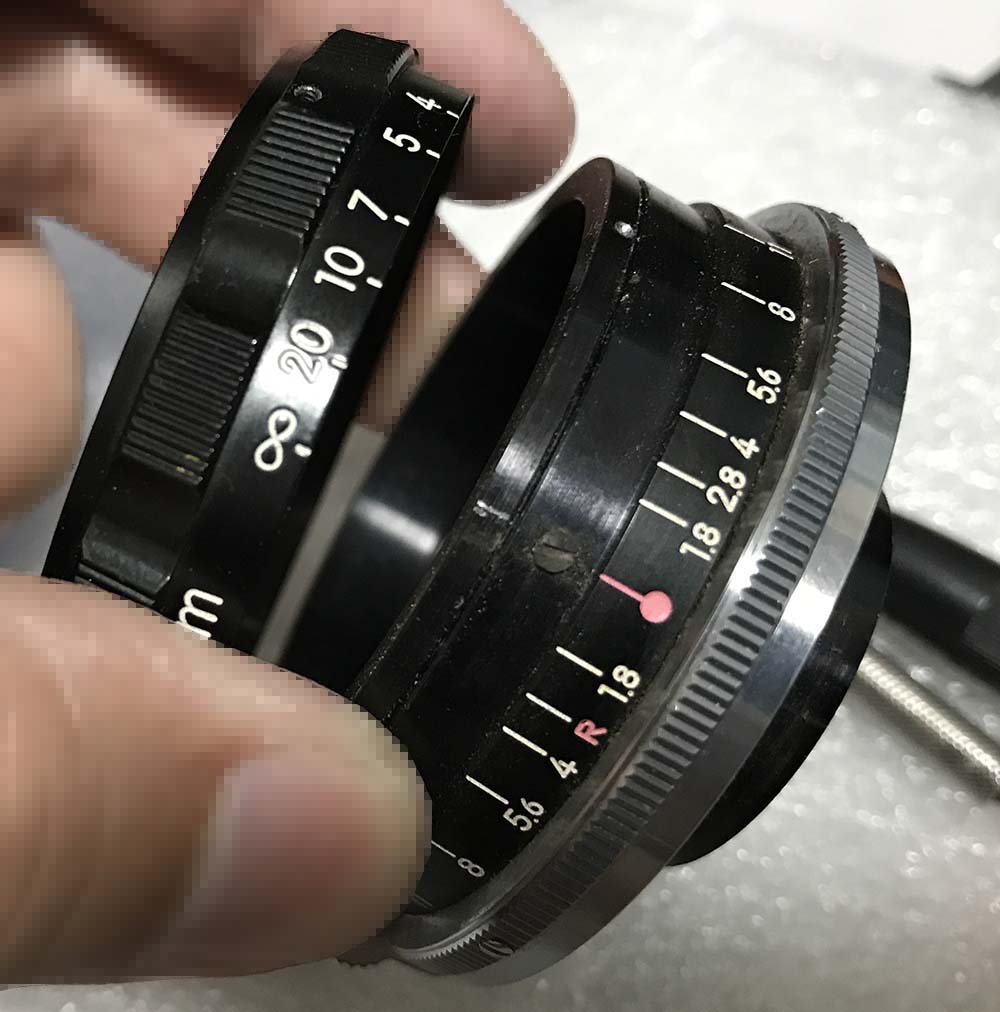
When removing the focusing ring be sure to note its position so you’ll know how to put this back again.
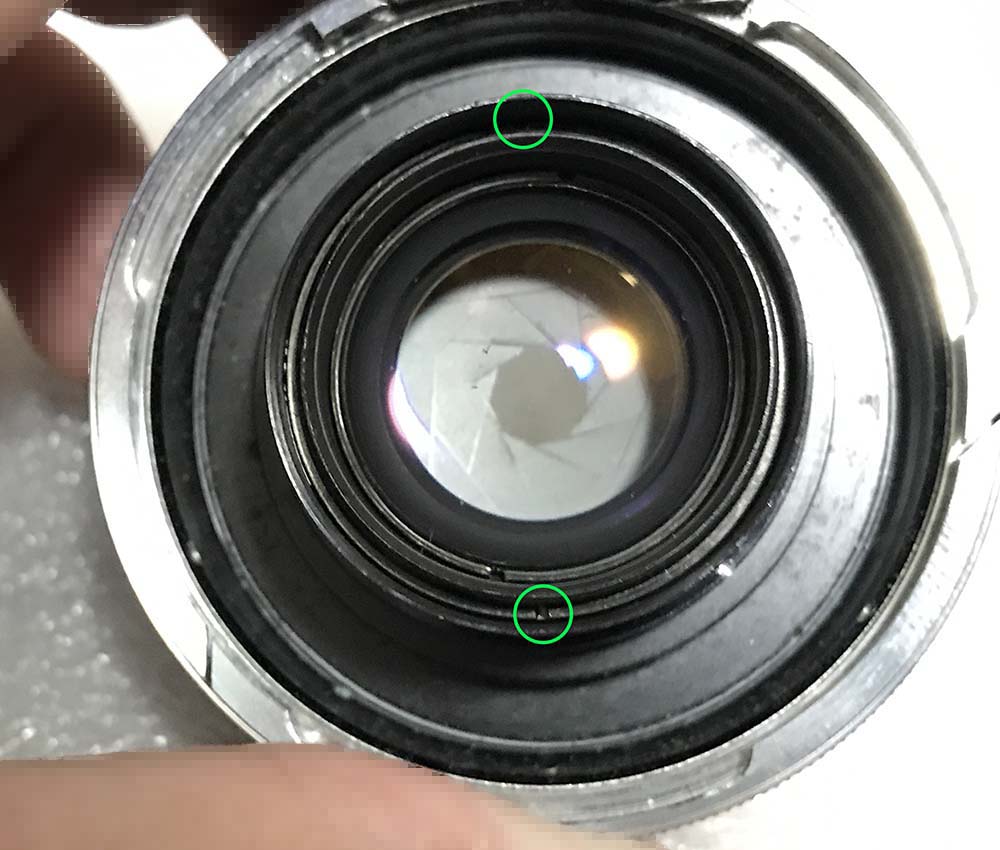
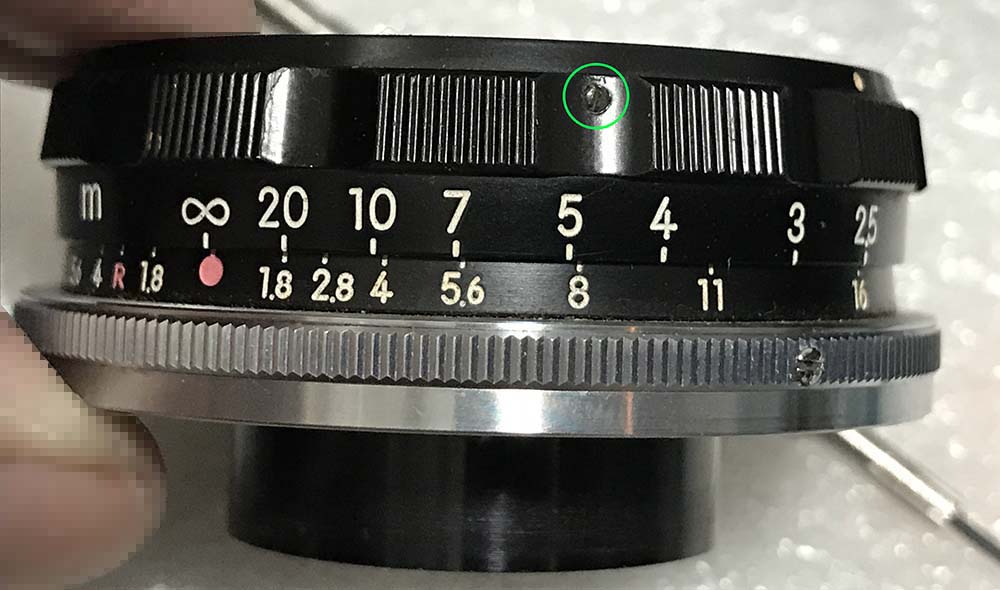
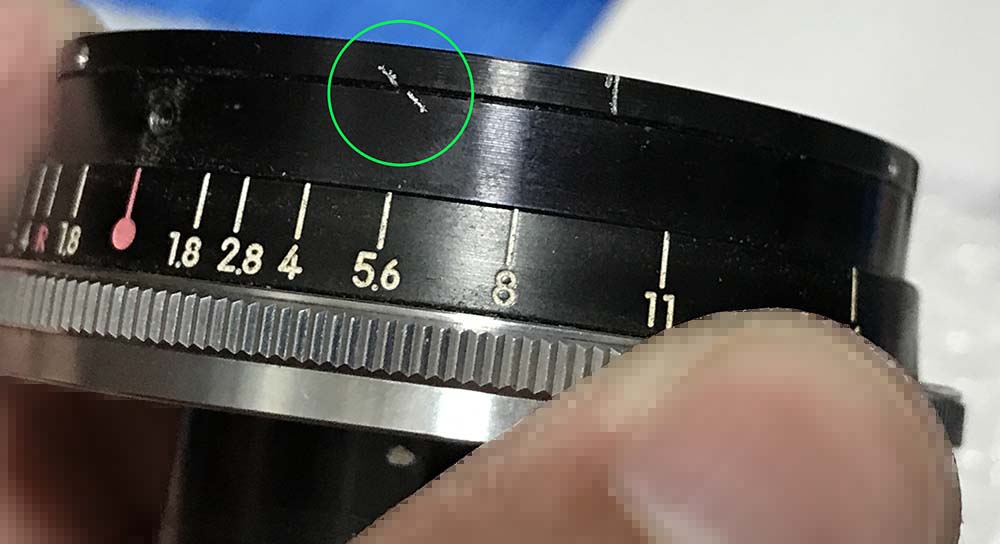
There is a line that was scratched at the inner helicoid, this means that this lens was serviced before. It serves as an alignment guide.

The mark corresponds to the infinity mark in the focusing scale. I should be able to reproduce this later. Don’t bother removing the screw underneath it since you’ll be able to dismantle the barrel without extracting it. It serves as a helicoid stop so you won’t be able to turn this beyond its range.
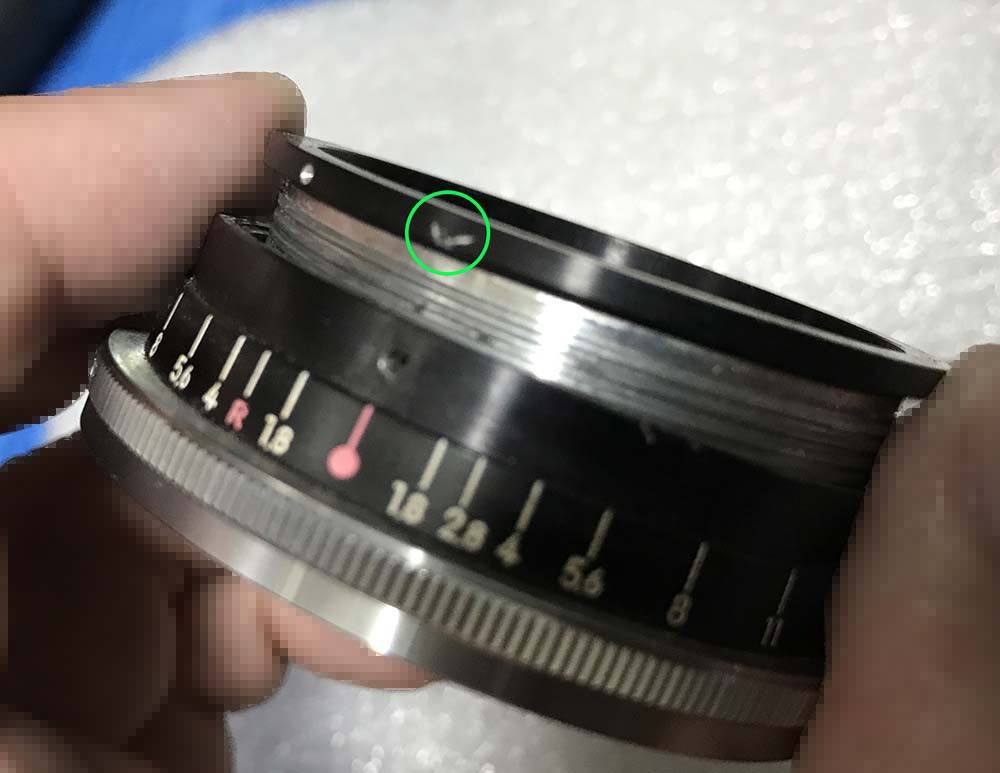
I also made a small diagonal scratch once the helicoids are collapsed. This is a key so I’ll know how if I got it right later during reassembly.
Separate the helicoids but never forget to mark where they separated. Many people forget to do this so they end up stuck. Read working with helicoids, it will show you how to do this the right way.
The threads of the helicoids are easily-damaged and has a tendency to feel a bit gritty. You’ll have to clean the threads well with a stiff-bristled brush and pick any stubborn dirt with a toothpick. What I usually do is apply a drop of polishing cream and exercise the helicoids. This simple procedure is called “lapping” and the proper way to do this is to use specialized compounds. It’s not something that a beginner should do since it’s easy to wear the threads. I clean the helicoids very well so that no residue is left before I dry them.
Dismantling the bayonet mount further isn’t a good idea unless you have to, I rarely do that myself. There’s no benefit to doing this apart from cleaning, repair or replacement. It can be difficult to put things back, too.
Use a thin-type of grease, never apply a thick one. Only apply a thin film so it won’t create a mess. A thin grease is beneficial so you could easily turn it using the focusing wheel of your camera. The gear-train easily be worn if it takes a lot of effort to turn it with the focusing wheel.
Disassembly (Objective):
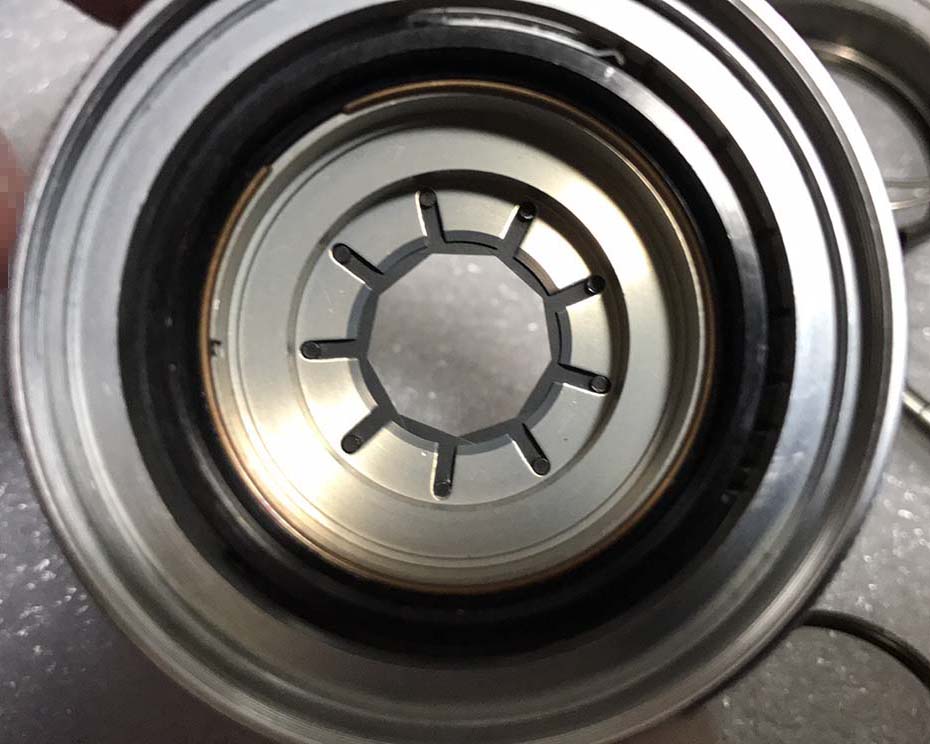
The objective and its construction is quite conventional but it’s scary to fix it since this is a rare optic. You’ll require special openers for this since some of the tubes have a small inner-diameter. Be extra-careful so you won’t scratch the glass or remove the coating.
This doublet is secured with a retainer. Extract this retainer with a pipe-key so you won’t scratch the glass, a lens spanner may be too-big for this job.

Carefully extract it with a lens sucker and don’t forget to note its direction.
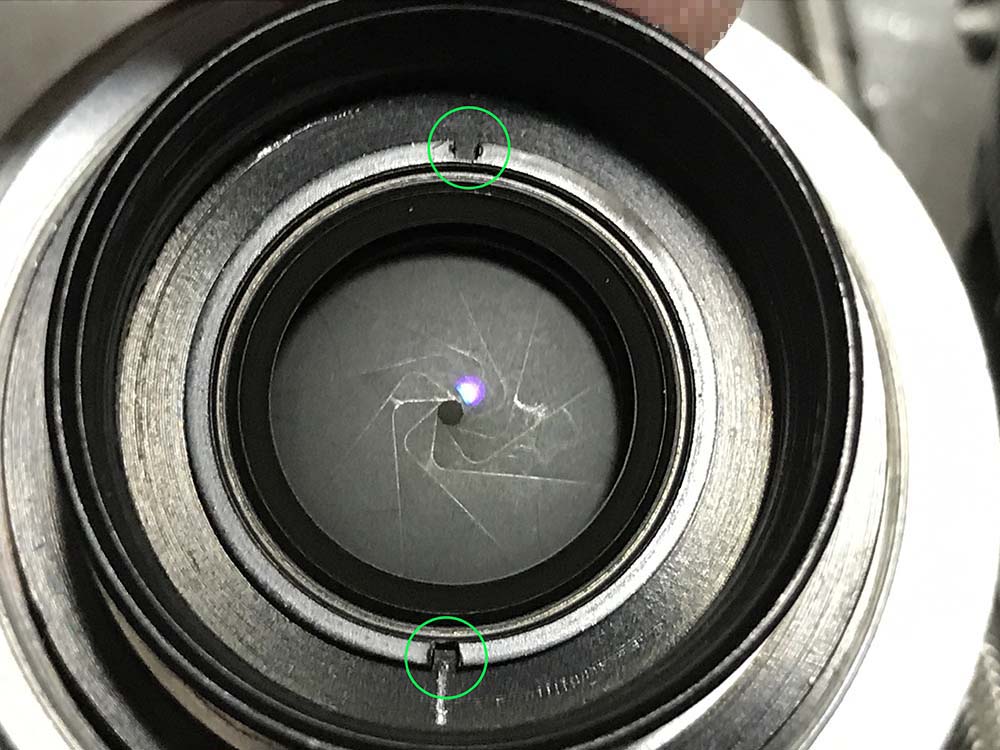
Use a pipe-key to unscrew this. There’s a mark here left by the previous guy so he’ll know how much to turn this during reassembly.
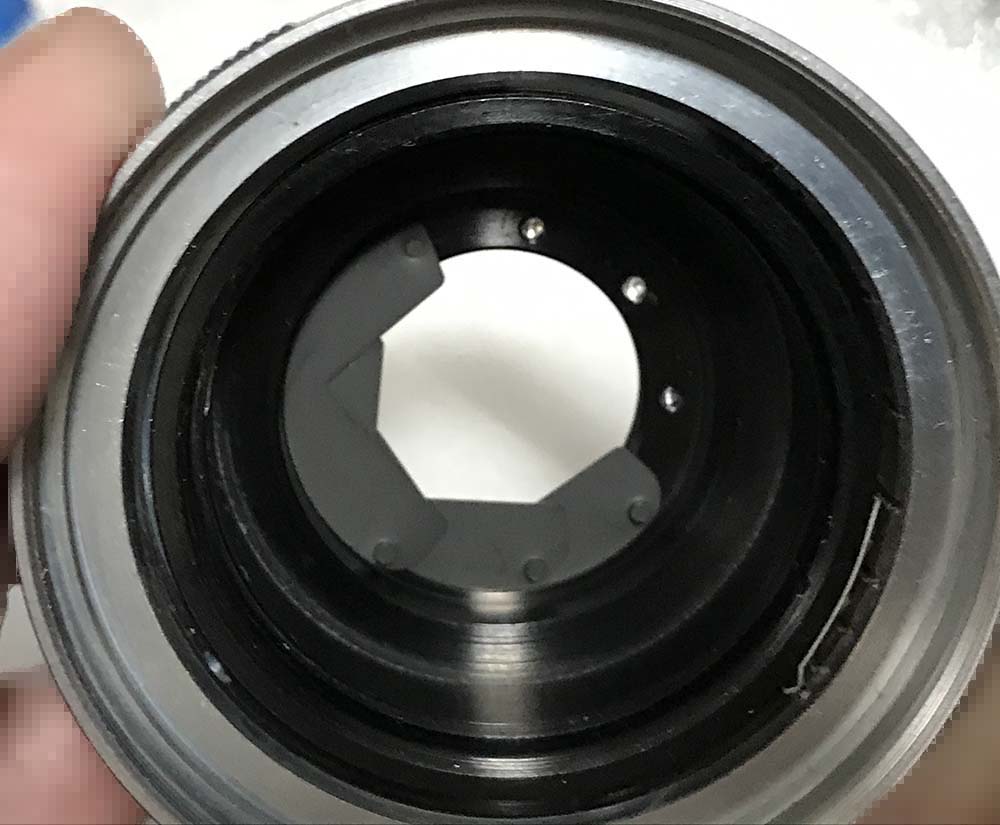
Extract it with a lens sucker. The iris is exposed, be careful not to damage it.

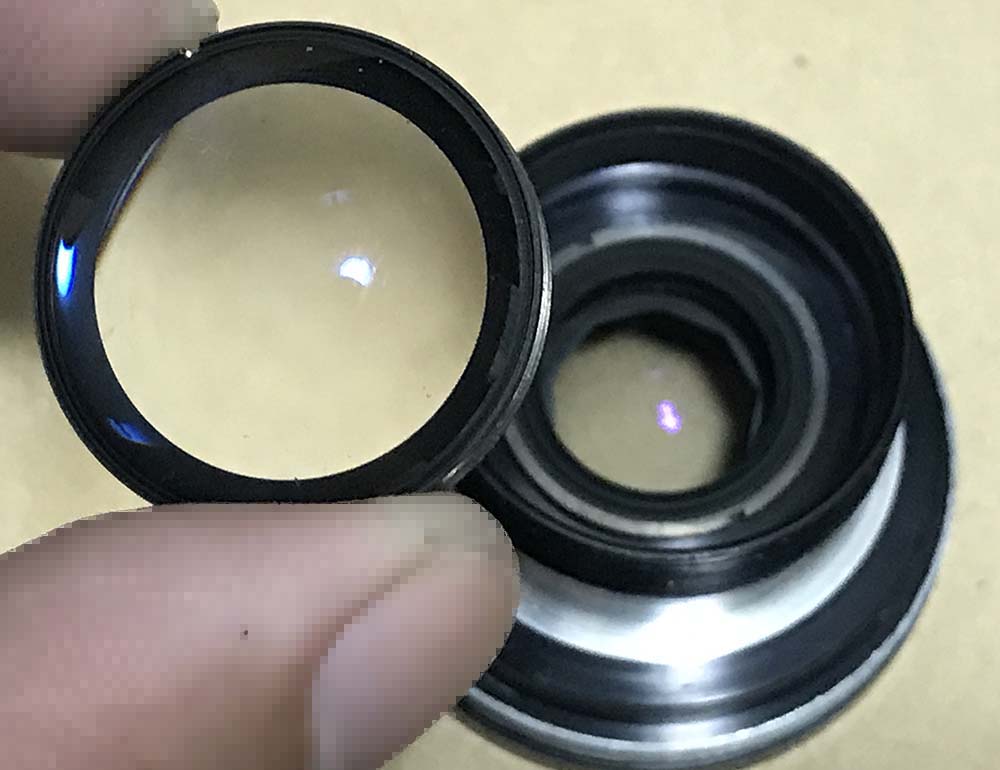
Use a rubber cup to remove the front assembly from the aperture ring. The inner diameter of the rubber cup should be greater than that of the element so it won’t scratch its surface.
The glass in the front assembly can be accessed by unscrewing the rear part off. This can be tight at times and a drop of alcohol will help but be sure not to flood this part with alcohol or solvents.
Extract this to remove the aperture ring but note its position before you do it. There’s a similar hole at the other side and it could confuse you later. The screw couples the aperture ring to the iris mechanism, it’s a delicate pin so it’s easy to damage. Handle it with care.
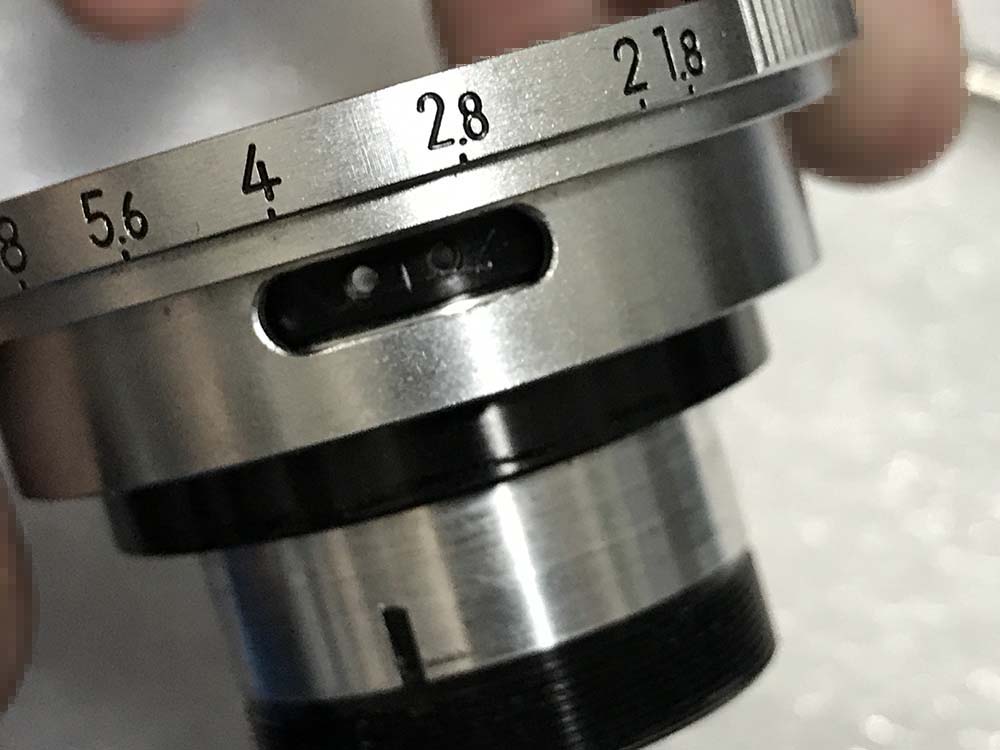
This isn’t necessary but it will make it easier to unscrew the aperture ring. I removed the spring here for the detent-clicks, I noted its position so I would know how to put it back properly. If the spring wasn’t installed properly it’s going to affect the positions of the numbers and it’s annoying to correct.
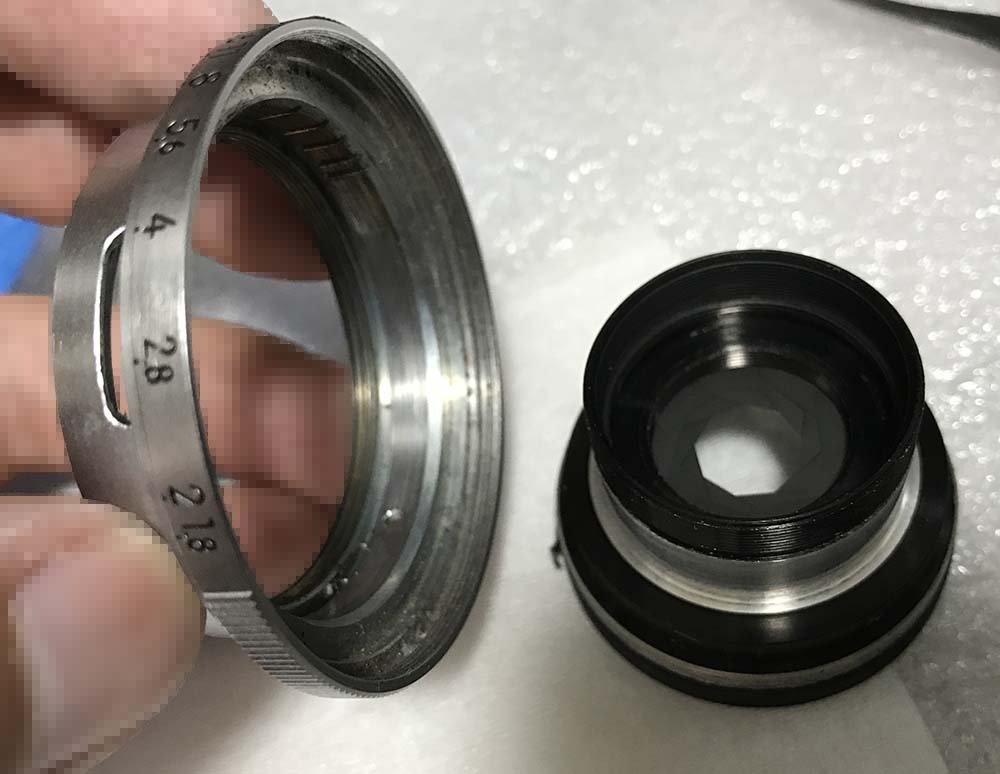
Unscrew the aperture ring once its screw is gone. Measuring its depth will be helpful in determining its proper position. Getting it wrong will make it impossible to attach its pin later.
Clean everything properly. Never apply grease to the aperture ring. In fact, the only part that you should lubricate here is the tip of the spring and you should only apply a thin film of grease on that part. If you want, you could apply some powdered graphite to the aperture ring’s thread to help make it smooth.
If your lens has fungus, read my article on fungus cleaning. Always thin the solution with distilled water, never use it at full-strength. It will damage the coating if you left it soaking for too long. Never soak cemented groups in the solution, too. Only wipe the fungus away with lens tissue saturated with the solution. Immediately wipe the solution off to prevent drying-marks or the solution will continue to work on your glass, etching them permanently.
Disassembly (Iris Mechanism):
The iris mechanism is quite conventional. It has a rotator cup with a collar that holds everything together. One thing that you should be careful with is the direction of the blades, note which side of the blade should go where. It is also important to know their direction. Carefully handle the blades using a tweezer and only handle them by their pins.
Removing the brass ring will enable you to separate the rotator cup. Extract it by positioning the open part over the slot and pick it out with a needle.
Be careful not to warp this or the iris won’t operate smoothly.
Pick the cup off with your fingers but don’t forget to note its orientation. Its alignment is important, putting it back the wrong way will damage the iris.
The iris is still in great-shape but I couldn’t leave everything to chance. Take a photo of the iris so you will know which direction the leaves should all be facing. It can be a bit difficult with this one since both ends of the blades are similar-looking but if you look closely, one end is rounder. Never forget this detail, putting one back facing the wrong way will damage them all.
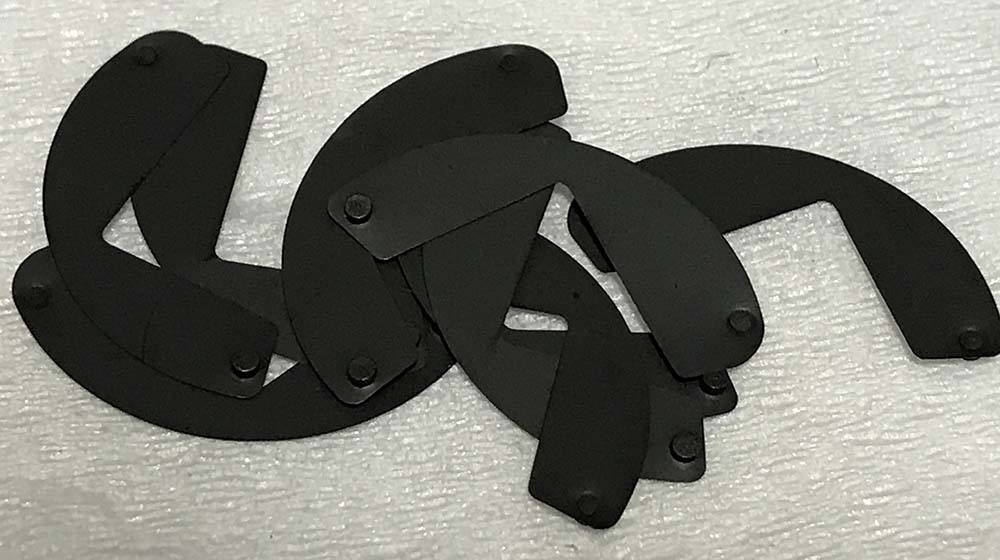
Carefully remove the blades. Wipe them all clean with lens tissue saturated with naphtha. Handle these carefully so you won’t damage anything.
This is the only way to clean the iris mechanism. Some people will flood the whole mechanism with solvents to clean it but that won’t solve anything. It may be good for a while but any dirt that’s deep-within the mechanism will stay hidden. Since you have gotten this far why not dismantle it completely if the iris is dirty or oily? It’s worth the trouble.
Conclusion:
This is not something that I will recommend to a beginner. It’s complicated construction and delicate nature makes it a job for a professional. This isn’t a cheap lens that someone should be working on without the right tools and skills. It took me a bit longer to service this since I was careful not to scratch or damage anything. This is not something that you could finish in 2 hours, servicing the helicoids alone will take 30 minutes.
I spent a lot of time figuring out how things should come-apart the first time I repaired one of these. I couldn’t find anything online, I hope that this helps somebody who’s about to repair one of these. Never use it as a repair guide, send it to a professional who’s known to be reliable.
Putting the iris back is always challenging. Read my article about preset iris blades to know more about it. There’s no easy way to do this.
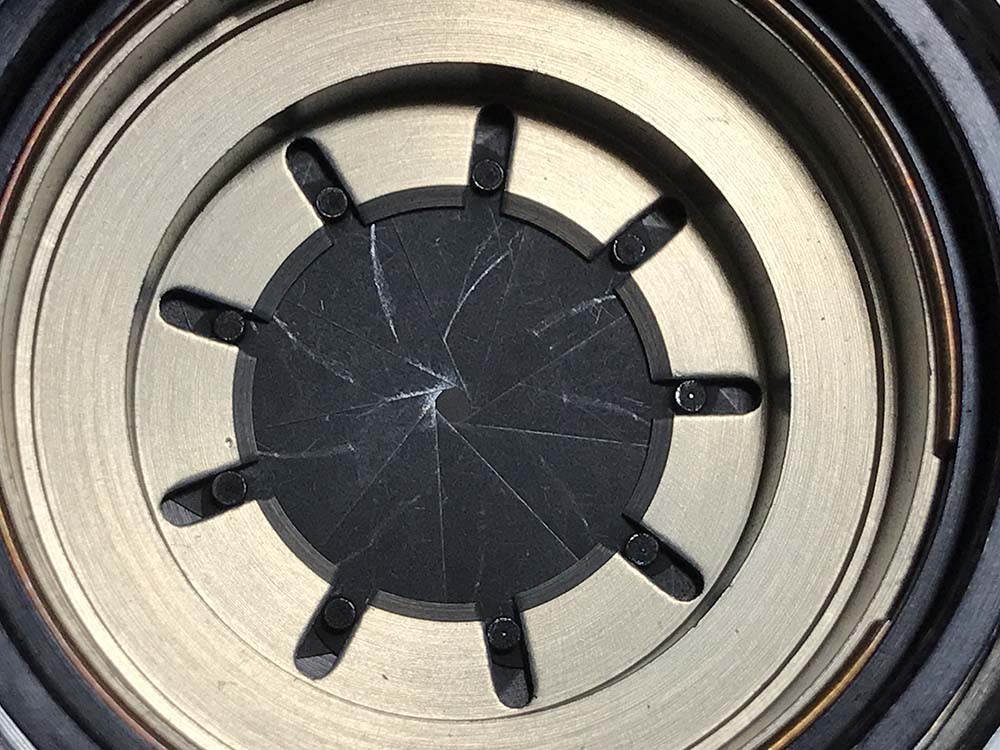
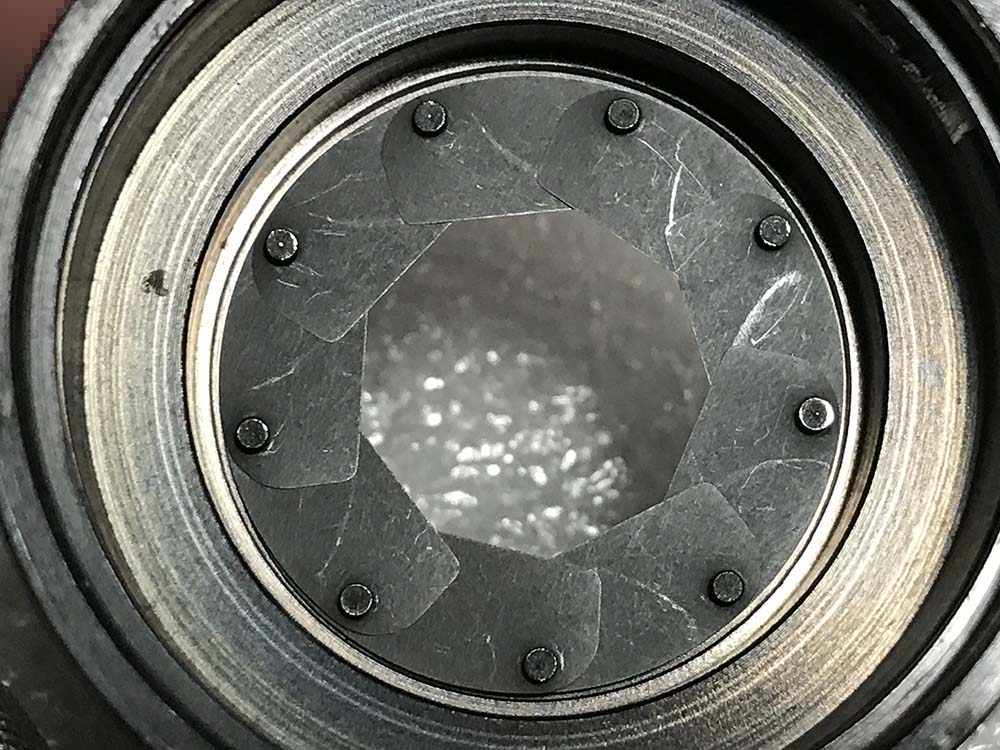
The iris now looks great after being rebuilt. The iris won’t open completely, this is how it’s supposed to be, don’t bother modifying it.
Reinstalling the central groups can be scary since they’re delicate. Carefully put them back together so you won’t damage anything.

It’s now time to enjoy the fruits of my labor. It’s the perfect lens to pair with a Nikkor-P•C 8.5cm f/2 since they compliment each other well. In case you’re wondering where I got the hood, it’s from my old Fujifilm X20. By the way, it is important to note that older lenses have a different filter-thread pitch, do not use modern accessories with them if you could help it as they will never screw-in perfectly so never force it if something feels off.
Thanks for following my work, if you liked this article please share this with your friends so it will get more views. This site earns around $0.30 a day, it’s totally reliant on views. You can also support this site, it helps me offset the cost of maintenance and hosting. You are also helping me purchase, process and scan film. This site promotes the use of film so we’re all in this together. See you again in the next article, Ric.
Help Support this Blog:
Maintaining this blog requires money to operate. If you think that this site has helped you or you want to show your support by helping with the site’s upkeep, you can make a small donation to my paypal.com (richardHaw888@gmail.com). Money is not my prime motivation for this blog and I believe that I have enough to run this but you can help me make this site (and the companion facebook page) grow.
Buy me a roll of film or a burger?
Thank you very much for your continued support!
$2.00
Helping support this site will ensure that this will be kept going as long as I have the time and energy for this. I would appreciate it if you just leave out your name or details like your country’s name or other information so that the donations will totally be anonymous. This is a labor of love and I intend to keep it that way for as long as I can. Ric.

Nov 21, 2017 @ 12:12:59
Super helpful, thank you very much!!!
Nov 23, 2017 @ 01:46:26
Thanks!
Nov 25, 2022 @ 21:18:04
Hi Richard, sorry to bother you, I have a question I would like to ask. When I shine a led light into my W-nikkor 3.5cm f1.8 at a specific angle, I see very fine white specks dotting the front element, the density of the white specks is not very high, but quite hard to see with the eye. My question is, is the front element glued in any way using optical cement? My fears it might be balsam separation. Or would it be haze?
Nov 30, 2022 @ 22:16:43
Thank you for mentioning the balsam issues with the 2005 edition. I would not expect that, and this saved me from buying a beautiful but flawed sample of that lens this week.
Sep 22, 2024 @ 23:51:19
Hello Richard,
I think the rear assembly dismantling procedure might have got a little out of sequence. I see in the photo where you take the screw out of the slot in the cam that the rear lens retainer you removed in the previous photo is still in place. Does this retainer just unscrew with some small filter wrenches, pushing the cam down to get one on the body of the objective perhaps? Do you have to remove the cam slot screw first? I don’t see anywhere where you could use your special tool to undo a retaining ring at this stage.
Regards