
Hello, everybody! I like listening to the oldies, I have the Beach Boys, Elvis, the Beatles and some other artists that kids these days haven’t even heard about. Their sound is clean, pure and fun without having to result to shock, sex and swearing. It takes me back to my childhood days when things are a lot simpler and filled with common-sense. Do you remember using a phone with a cord or even having to pay for it just to call for a few minutes? Your girlfriend is late to your appointment, all you can do is wait? These do not sound fun but I sometimes miss those days. Those hassles are great teachers because they taught us the value of patience, something that we do not have these days, we can hardly stay-still until we reach for our phones and check social media to see what Richard Haw has uploaded or if the models we are following has uploaded a new picture. Let me take you back a few decades as we talk about something really old, it’s one of Nikon’s original consumer lenses that was made in the immediate years after World War 2 and like the oldies, they are still a lot of fun for those who appreciate a good time while not having a lot of clutter to begin with.
Introduction:
The W-Nikkor 3.5cm f3.5 is a little gem, this is compact and unobtrusive so your subjects won’t be intimidated when you shoot them. This is also the cheapest 35mm lens as far as S-mount Nikkors go. It’s pricier siblings go for almost 2x the price for one of these and for that price, you get a faster f/2.5 or f/1.8 upgrade. Those do not really matter much to me so I am more than happy with it. This has a special place in every Nikon aficionado’s collection as it is historically-significant. It’s one of the few Nikkors sold together with their original series of cameras right after the war. You’re correct to say that this is like a mini time-machine as it takes you back several decades ago to the early years of Nikon each time you use it. It sounds like I’m tripping but I really do feel that way when using this as this connects me to Nikon’s rich heritage.

The design of this lens is so old that you have to change the aperture using a ring at the front of the lens. This is inconvenient but you will soon get used to it. It will prevent you from checking it often and that will leave you with more time to think about the shot. The really early version don’t even have aperture click-stops because they weren’t even the norm in those days. This is as old as it gets when it comes to 35mm Nikkors for the “kleinbild”, it’s the dinosaur of Nikkors!
This family of 35mm lenses is one the earliest model of Nikon’s 35mm lenses as it debuted at around the same time as Nikon’s first production consumer camera – the Nikon I in the late 40s (1948?). The design and ergonomics are ancient and the specs are nowhere near the standards of what we are used to these days. Nikon made faster 35mm Nikkors and they’re all very highly-regarded but I gravitated towards this for a few reasons, nostalgia and look.
The optical design is really simple, 4-elements-in-3-groups. The design was left the same in the lens’ production but the lens barrel went through a few minor cosmetic revisions. If you have a keen eye you’ll notice that my lens has no useable (or practical) filter ring attachment since the diameter of the threads are too small for most filters sold today and one of the updates was to add a useable filter ring attachment thread to it. The last version came in black. To me, that felt too “pedestrian” so I settled with chrome. I’m going to admit that my infatuation with shooting Nikon rangefinders has a lot to do with how good they look. To me, Leicas do not evoke the same emotions as Nikons do. Sure, the Leica M3 looks gorgeous but there’s something in Nikon (Contax) cameras that just wins my heart when I see and use them (like the one-hand camera operation).
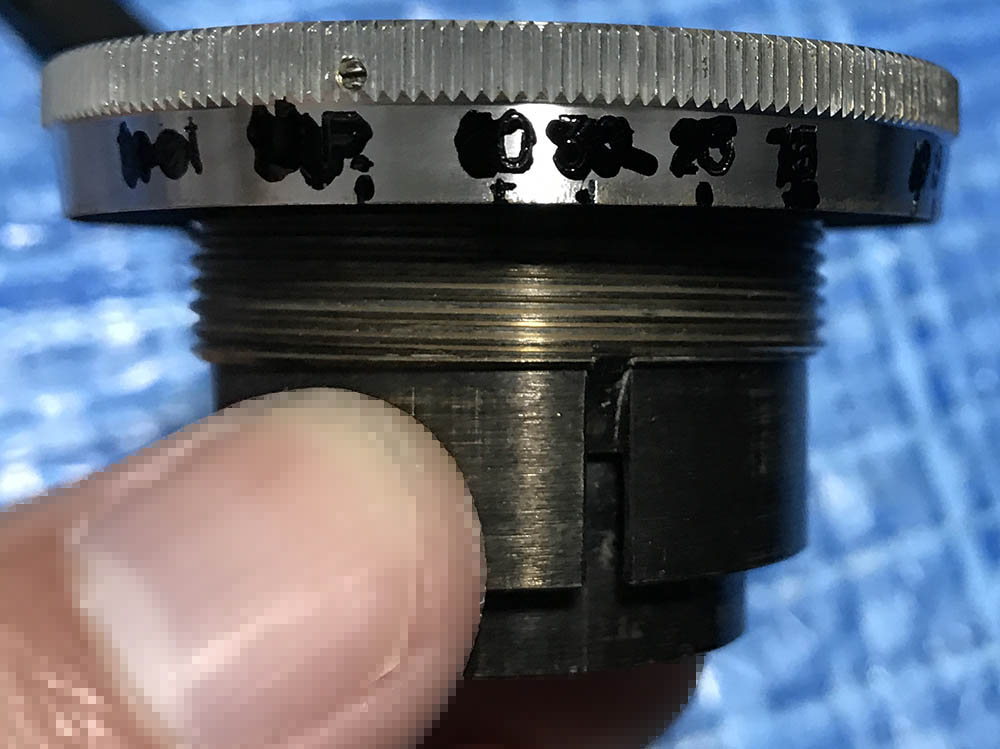
It has a red C engraved on the name ring that indicates that this is a coated lens. Now, its coatings are nowhere near what you would get from modern lenses but back in its day it’s a big deal specially if you compare this to what the other manufacturers were using. Nikon is really good with making their coatings tough as evident in the state that Nikkors lenses from the 1960s or earlier come these days. A reader told me that Nikon developed this during their war-time stint making coatings for submarines so the Japanese Navy can shoot a torpedo accurately aimed at my grandparents.

For cameras with no built-in 3.5cm (35mm) frame lines, Nikon made plenty of finders to help you frame your picture. These finders help with parallax-correction so they’re an essential part of the kit. Nikon made several finder types and it’s up to you to choose one that fits you but the most economical one is the zoom-finder since it has all of the common focal lengths from 35-135mm at your disposal, the down-side is that they’re big.

For cameras with 35mm frame lines, it’s optional to get the finders. I can tell you that it is more comfortable to view your frame with the finder because it’s uncluttered and it sits right on-top of the lens (or close to it) so your view is more natural just like what an SLR will give you. They are also helpful if you are right eye dominant.
Its handling leaves a lot to be desired but there’s a certain charm with using this old lens. You have to look-into the front of the lens to see your aperture properly and the focus throw is on the long side. The engraved numbers are also small, they are a little hard to see especially when the sun is reflecting off the shiny chrome. You’ll soon get the hang of it, it will feel natural to you. I don’t even need to look just to check my aperture since the aperture ring is now so smooth after the overhaul so I just flick it with my pinky finger and estimate the aperture value just by feel.
This lens underwent several changes throughout its production. While most of the variations look similar the last one looks more like to the W-Nikkor•C 3.5cm f/2.5 in terms of barrel design and it has black barrel. That’s all that is interesting about this lens, it’s as boring as it gets. The only version that will catch a collector’s eye is the one that I am about to show you.
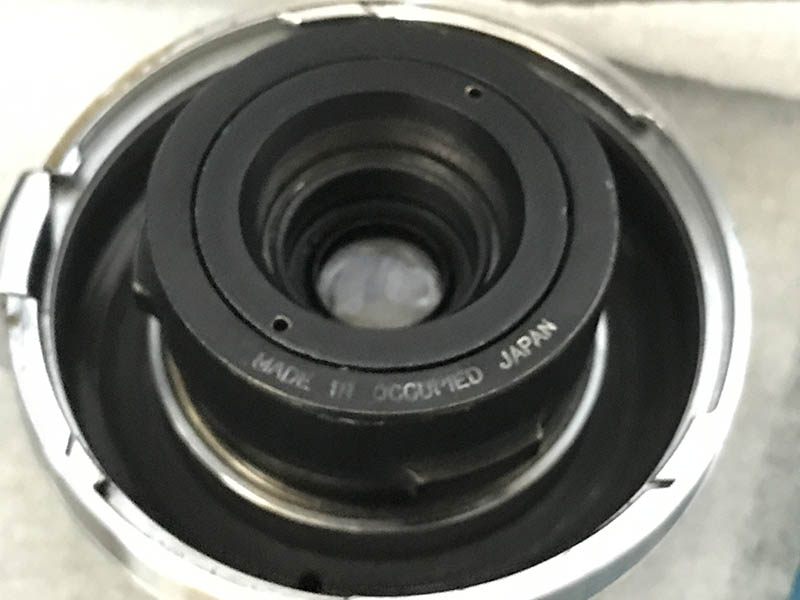
The earliest variant has “Made in Occupied Japan” or MIOJ engraved on the rear. The over-all construction feels quite crude, unrefined compared to the later ones. The iris blades were made of cheaper material, too.

The left one is the earlier variant, notice that the chrome isn’t as thick as the later ones. The engraved information is also much smaller.
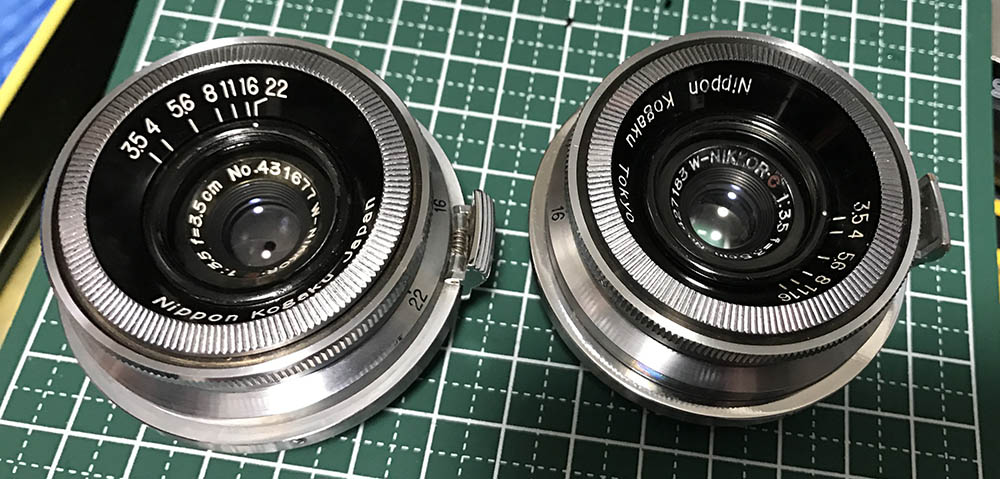
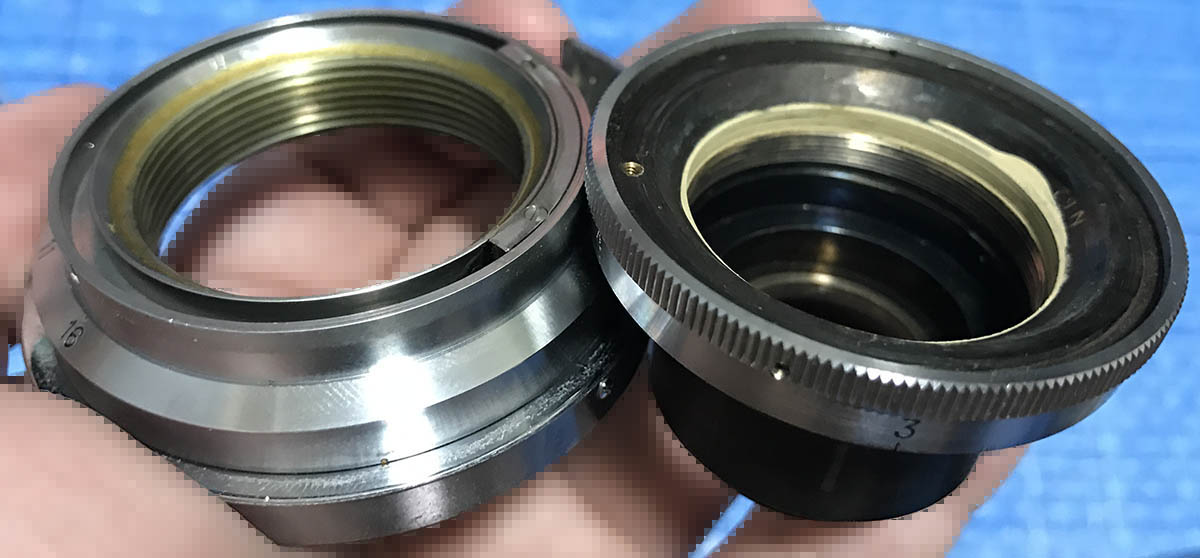
This is a comparison showing a later model with the one showcased in this article. The one to the right is an earlier version (but not MIOJ). Notice that it has Tokyo engraved instead of Japan on the mid-production version. You will also notice that the mid-production version can also stop-down to f/22.
The engraved numbers look a bit different, too. The mid-production model’s aperture ring also has click-stops on the aperture ring which makes it more easier to use.
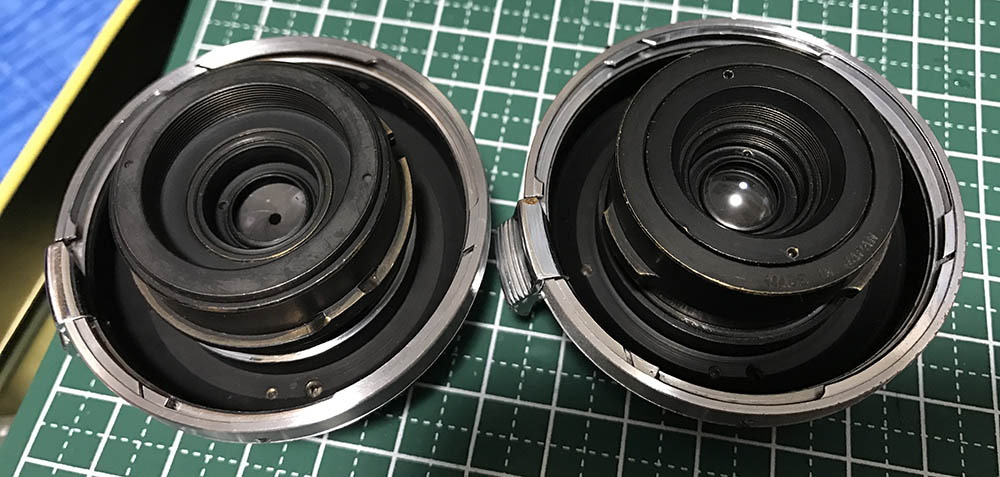
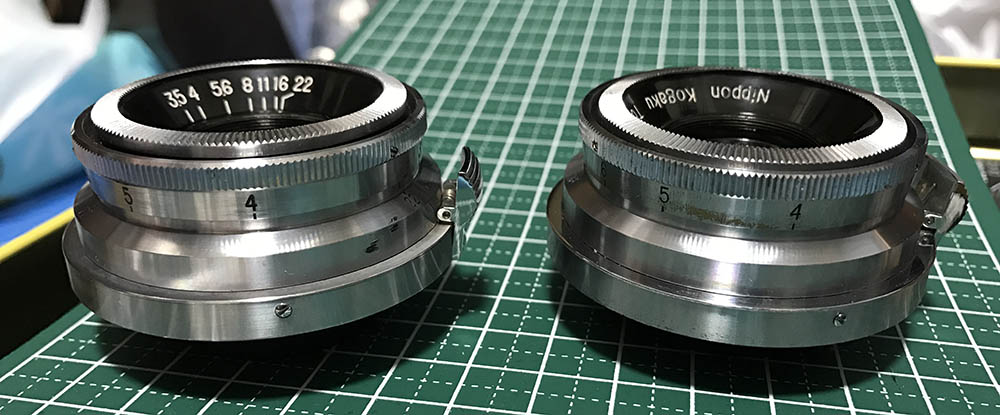
There are minor differences at the rear, too.
Apart from the variants mentioned above, this lens was also made in Leica Thread Mount (L39). The W-Nikkor•C 3.5cm f/3.5 LTM version is expensive, it usually costs $100 more than this version. They’re a bit rarer but they can be seen more often these days in the used market.
Let’s see how this lens performs. Knowing how a lens performs is important so you’ll know its strengths and weaknesses. You’ll know when to use it and when not to use it. The next sets of photos were taken with a Nikon Z6 and I stopped the iris down from f/3.5, f/5.6 and f/8 from left-to-right. You will see the most changes in its rendering with these apertures, I imagine that these are the most common apertures that people will use this with.


(Click to enlarge)
Vignetting is heavy wide-open and it improves by a bit by f/5.6. You will still see traces of it by f/8 which is a shame but it’s not as obvious. Ghosting and flare is a huge problem with this lens, the coating technology is really old. It is pathetic when compared to lenses these days but some people may like it. You’ll get an ugly blob when you shoot at the sun, too.
Sorry for the blurred photo. This should show you how much the distortion is with this lens. It’s not bad at all but it can be easily seen. The W-Nikkor•C 2.8cm f/3.5 is the best in this category, it has excellent distortion correction.


(Click to enlarge)
These were taken from its minimum focusing distance up to infinity. I then cropped the photos close to 1:1 so you can see the details closer. Wide-open, it’s a very sharp lens in the center and the resolution seems adequate so far. Shooting at shiny, overblown things will give you chromatic aberration. It’s not terrible at all but you can still see it. Spherical aberration is quite strong and it won’t go away even if you stop the iris down. Set the iris to f/5.6 and it begins to look much better at the center, sharpness increases and chromatic aberration is now better-controlled. Stopping this down to f/8 will give you near-peak performance at the center, the corners begin to look much better, too. It’s an excellent lens with good sharpness and contrast, it’s nice for use with black-and-white film as you will see later.
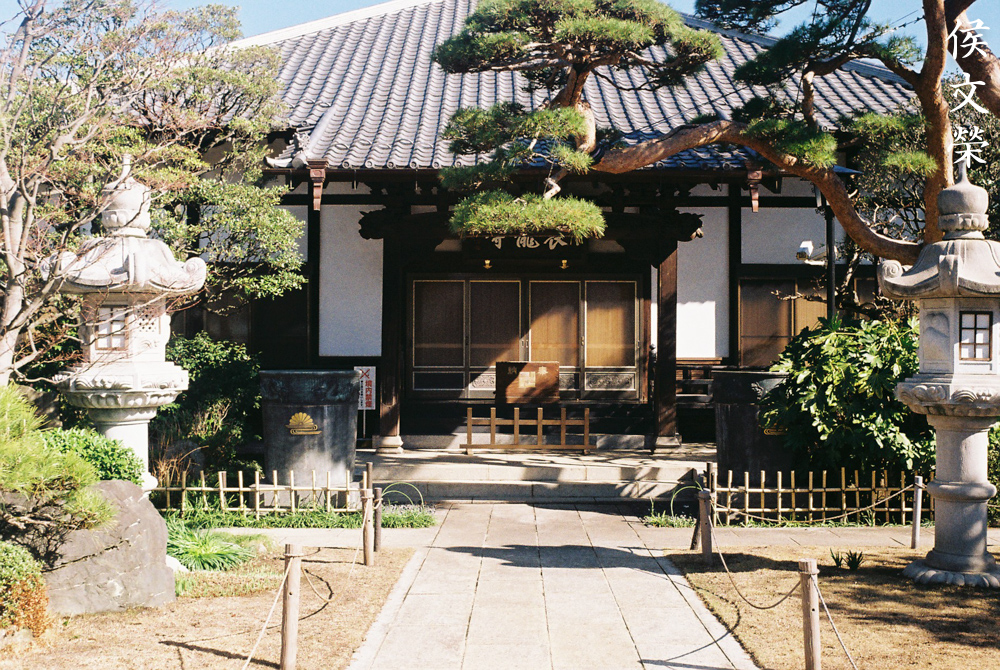
Let’s now see some photos that were taken with film. This was designed for use with film so it’s only fair that we judge it with its intended medium. The unique look that you get with film is due to grain, it looks different to noise which you get with a digital sensor. That is why it’s difficult to replicate the look of film with a digital camera. Film grain helps mask a lens’ flaws and it can also amplify them depending on circumstances. This is the reason why it’s important that we study this lens’ output with both. These photos were taken with Kodak Gold 200 using a Nikon S.

This lens produces sharp photos when stopped-down to f/11 or so. This is a nice lens for shooting on a sunny day.

This won’t focus closer than what’s allowed by the rangefinder so it’s tricky to take close-ups. This is as close as it gets, unfortunately. The good news is it’s sharp specially when stopped-down to f/8.
Chromatic aberration isn’t a problem when you stop the iris down. This lens has a nice rendering, it gives you great-looking photos that have that classic feel that some people love or hate. Distortion is obvious here but you’ll have to look close in order to notice it.

Making sure that your straight lines are far from the edges of the frame is a good way of avoiding distortion in your photos. You can even use this lens for shooting architecture if you’re conscious about this.

With a scene such as this where there’s several straight lines you’re able to see the effects of distortion easier. This is an indoor shot and it’s tricky just to keep things sharp. I took this with a shutter speed of 1/4s. This isn’t what you’ll want to use for taking indoor photos when using a slow film. This was shot with the camera resting on a tabletop.

This is a nice travel lens, it’s compact so your setup will fit inside a pouch. It is a cute lens and you’ll certainly attract some attention with it.

Stopping the iris down won’t help to alleviate flaring, that’s a coating issue. I would avoid shooting scenes like this or scenes with the sun in the frame. It is not only flare that’s the problem here but you’ll burn a hole in the shutter if you’re not careful.


(Click to enlarge)
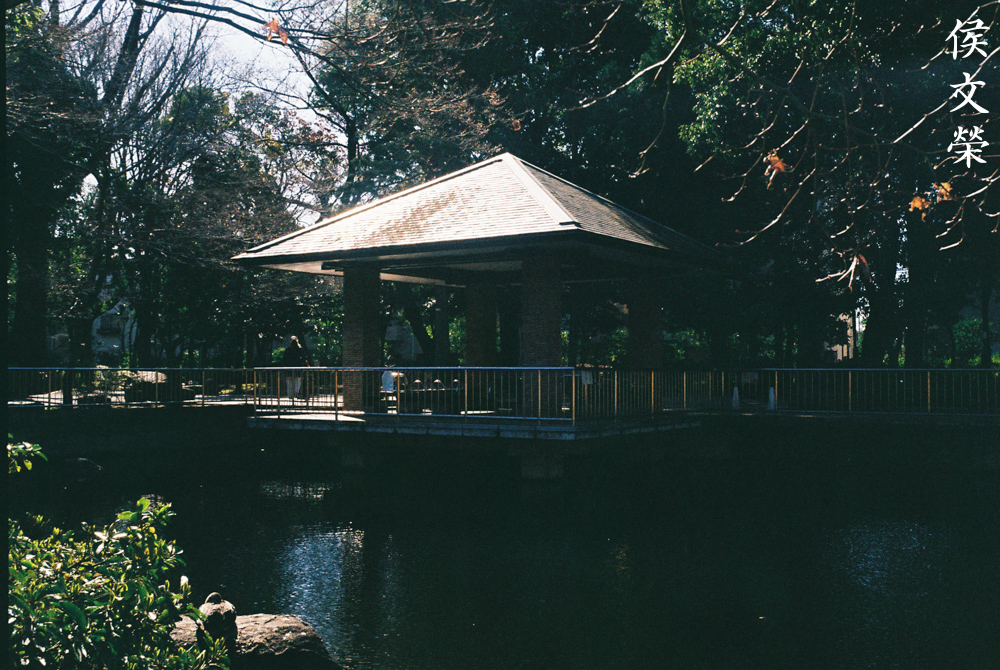
Here’s some more photos. I hope that these will give you a better idea as to how this lens performs when used with film. It’s a nice lens that’s great for a leisurely stroll around town on a sunny day.
How about some photos that were taken with Fujifilm Acros 100? For those of you who are curious about how this lens performs with black-and white film these should satisfy your itch. I processed these with Fujifilm Microfine so I get super-sharp photos. These were shot using my Nikon S2.


(Click to enlarge)
The usual use for this focal length is for shooting street photography and it matters less in this field. Most, if not all of the photos were shot with the iris stopped-down to around f/8 to f/16 so these are sharp but the picture of the lady shopping was shot wide-open if I recall it properly. Note that it’s sharp at f/3.5, it’s more than useable. I find this lens lacking in low light scenarios but that isn’t the point of owning an f/3.5 lens, economics is, it’s as good as it gets in the 1950s.
I recommend this lens to those who enjoy shooting with Nikon rangefinder cameras. It’s a nice lens for sunny days and the pictures look nice. This is an interesting lens despite all of its quirks, it’s akin to riding an old Volkswagen on a Sunday, it’s cumbersome but it’s a lot of fun. That’s the best way to put it since shooting with this lens is all about fun and nothing more. I you are a frequent shooter I would recommend the W-Nikkor•C 3.5cm f/2/5 instead, it is a more practical lens and the ergonomics are much better despite being a similar-looking lens. The brighter maximum aperture will be handy, too. It’s a bit more expensive but you get what you pay for. You can’t go wrong with either one and you can enjoy shooting with both. If you’re a collector then it has to be
Before We Begin:
If this is your first attempt at repairing a lens then I suggest that you check my previous posts regarding screws & drivers, grease and other things. Also read what I wrote about the tools that you’ll need to fix your Nikkors.
I suggest that you read these primers before you begin (for beginners):
Reading these primers should lessen the chance of ruining your lens if you are a novice. Before opening up any lens, always look for other people who have done so in Youtube or the internet. Information is scarce, vague and scattered (that is why I started this) but you can still find some information if you search carefully.
I highly recommend that you read my working with helicoids post because this is very important and getting it wrong can ruin your day. If I can force you to read this, I would. It is that important!
For more advanced topics, you can read my fungus removal post as a start. This post has a lot of useful information and it will be beneficial for you to read this.
Disassembly (Lens Barrel):
S-mount Nikkors are made differently from F-mount Nikkors. For somebody like me who work with the usual F-mount Nikkors on a regular basis this is a good opportunity to learn something different. This means emptying my cup and getting into unfamiliar territory.
The tools needed for repairing S-mount lenses are also a bit different apart from the usual cups and drivers. This will require some DIY to manufacture specials tools that’ll fit exactly with the parts that you would like to remove. Thankfully, you don’t need those to service this. A simple tip for figuring out if you need special tools is when your usual tools won’t fit into the part that you want to remove or if removing the part will damage something in the process. Think about it carefully and don’t brute force it. There is usually a clever gimmick that was implemented and all you need is to step back and study it carefully like a puzzle.
Be careful with using your drivers so you do not scar the beautiful stainless steel screws. Use drivers that fit properly, if you don’t have any, buy or file one down until it fits.

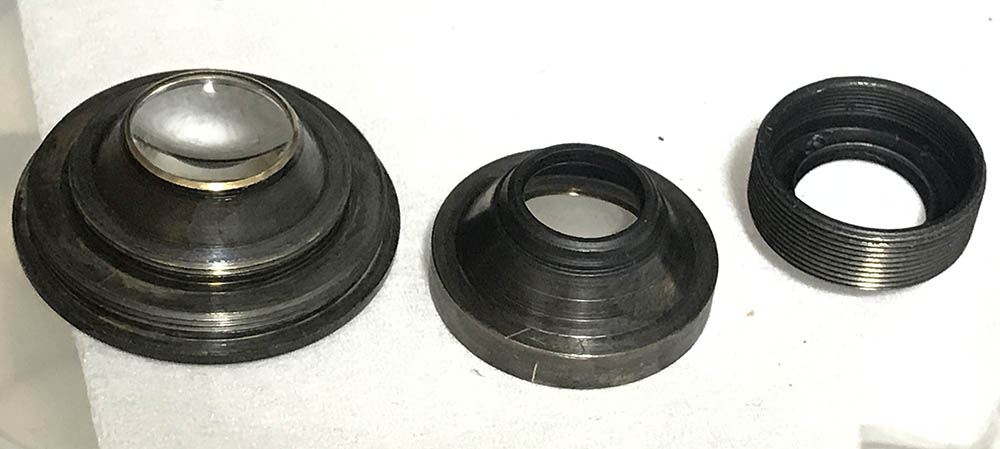
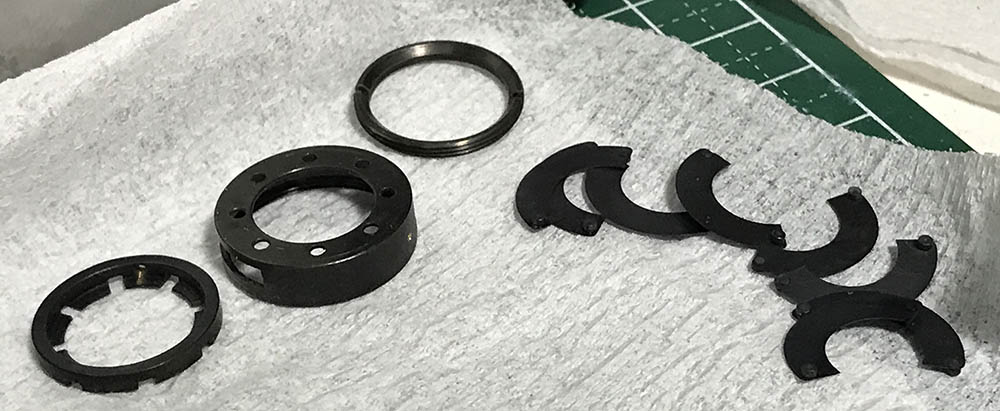
Get a rubber cup and unscrew the front elements assembly (along with the bezel) counter-clockwise. This part is used to sandwich the objective which is used to hold the lens together.

Extract the front elements assembly, take special care not to damage the tiny and delicate glass on the other end of it.

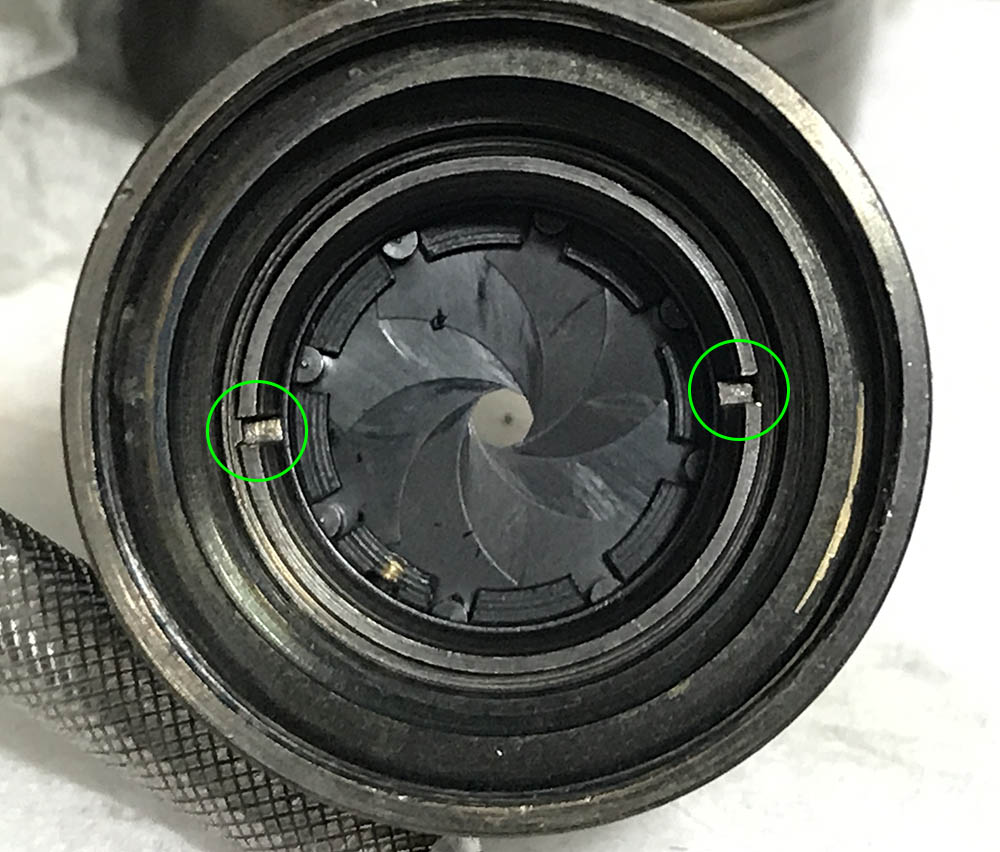
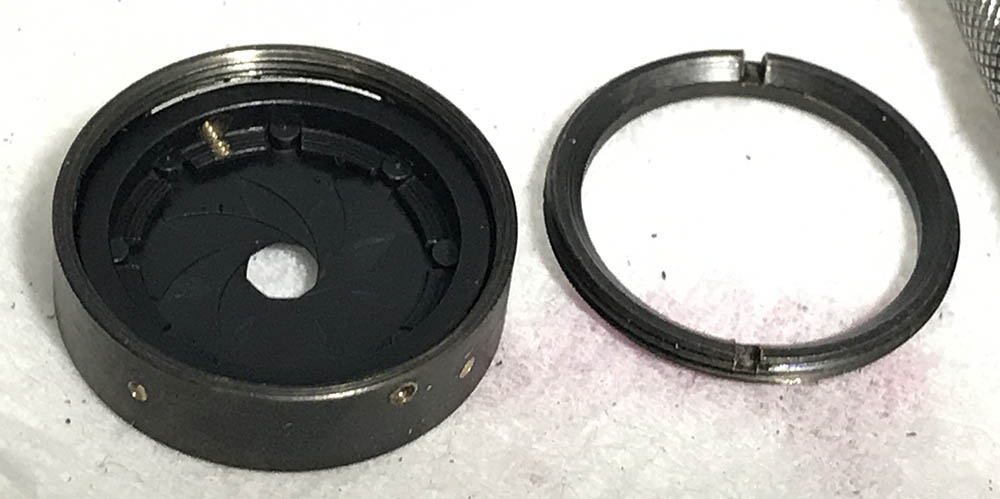
You’re now left with something like this. This is a good chance to blow some air into this part so you can get rid of any junk in the iris. Notice that it goes clockwise. Never wipe it while you go the other way, something might snag and damage it. These don’t actuate in high-speed like what automatic irises do, you open and close these manually. These are usually oily and it’s never okay to leave them like that. If yours is oily then it’s time for an overhaul. If you want to know how to repair these, read my article on how to work with this kind of iris mechanism.

Grease has migrated into the iris mechanism and it’s a sure-sign that this is on its way to deterioration. It’s good that I got to it just-in-time.

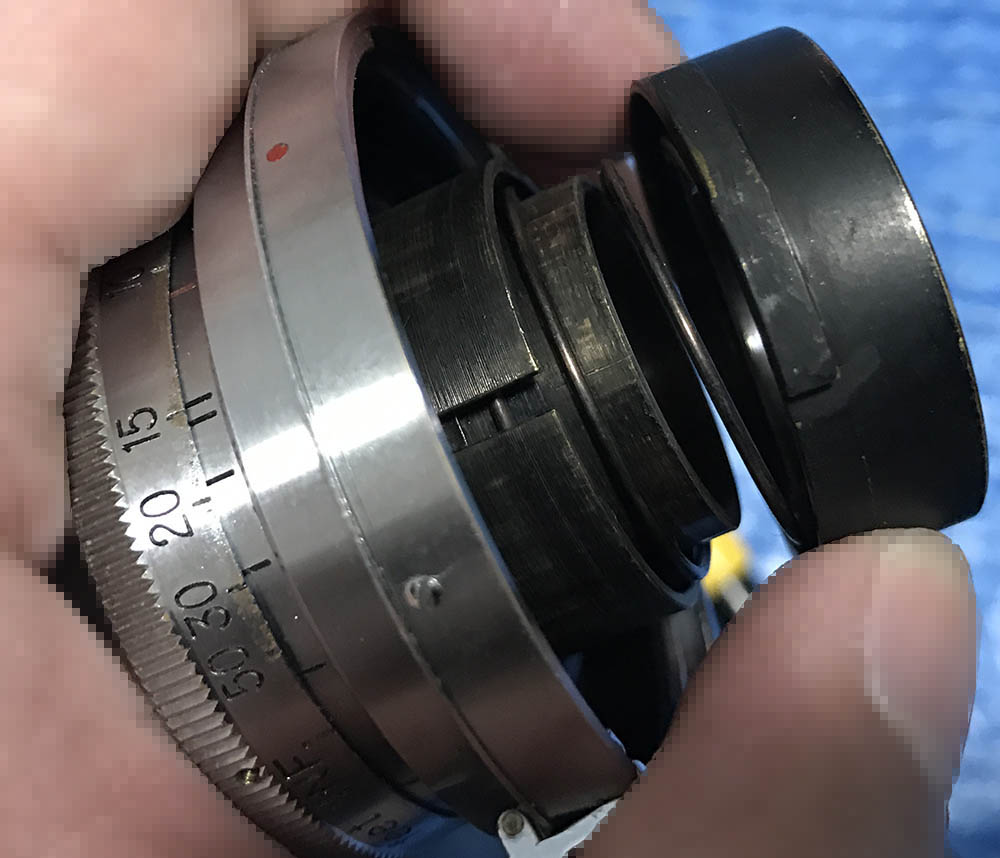
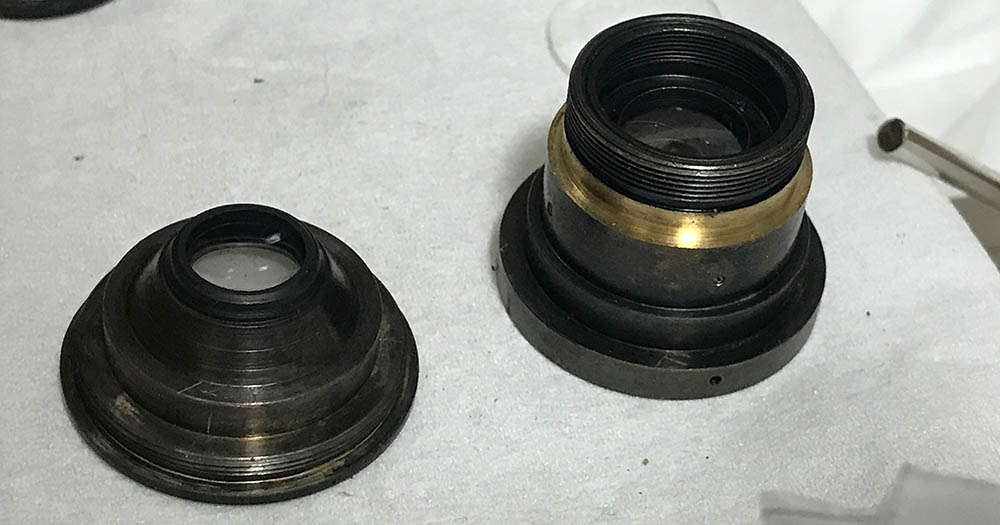
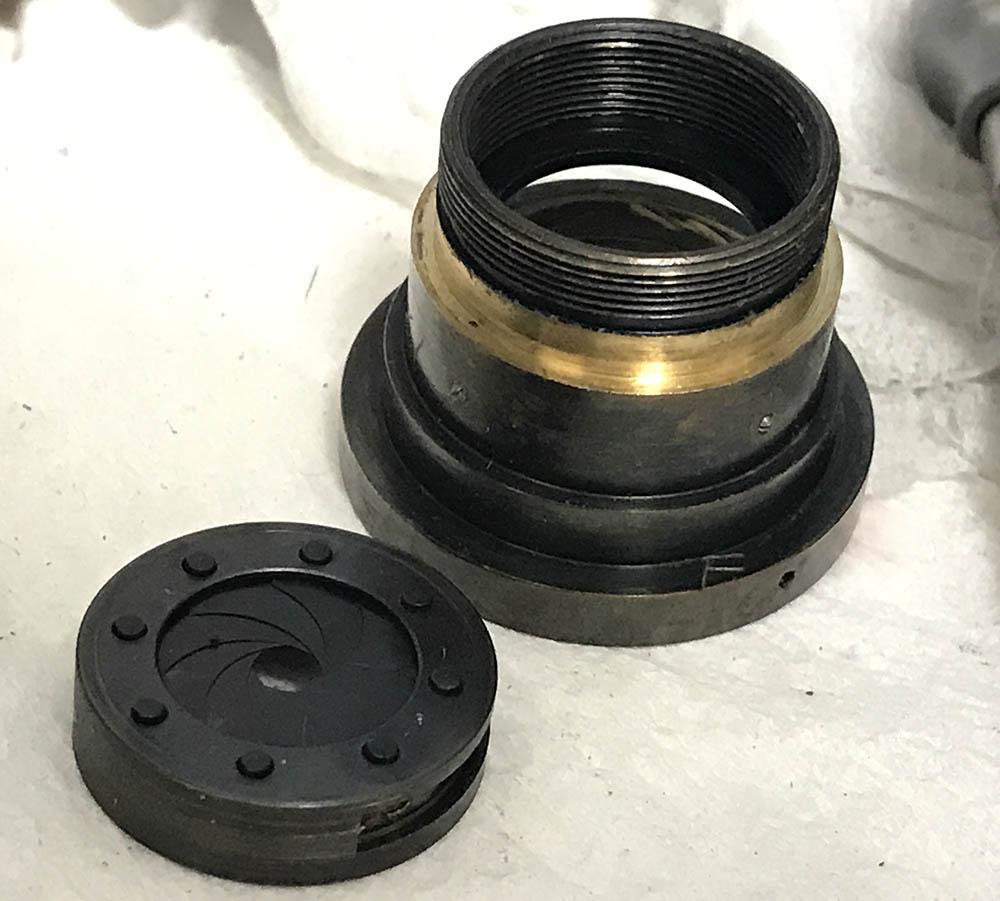
Most, if not all W-Nikkors can be separated by removing a collar at the back. It’s easy to remove, all you need is a lens spanner or a rubber cup.
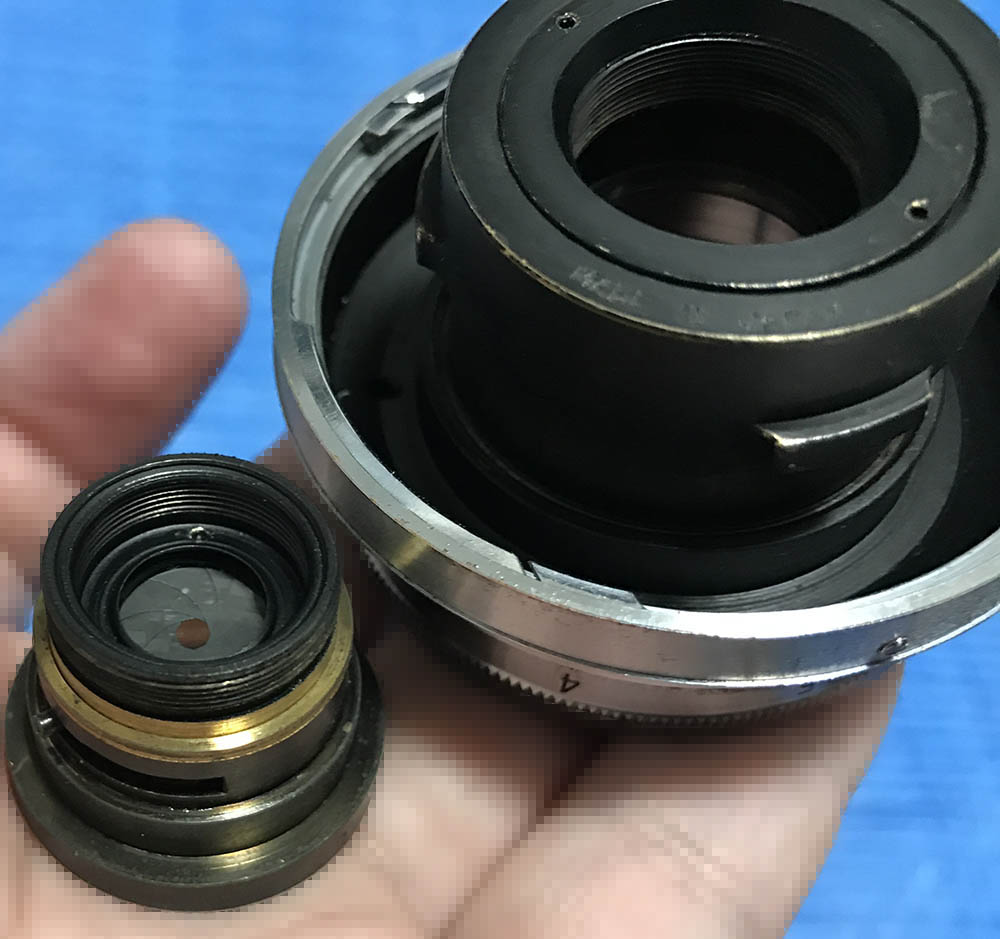
Carefully unscrew the objective off and keep it in a safe place. It’s heavy, it’s made from brass. It feels dense even though it’s just a tiny part compared to the rest of the lens.
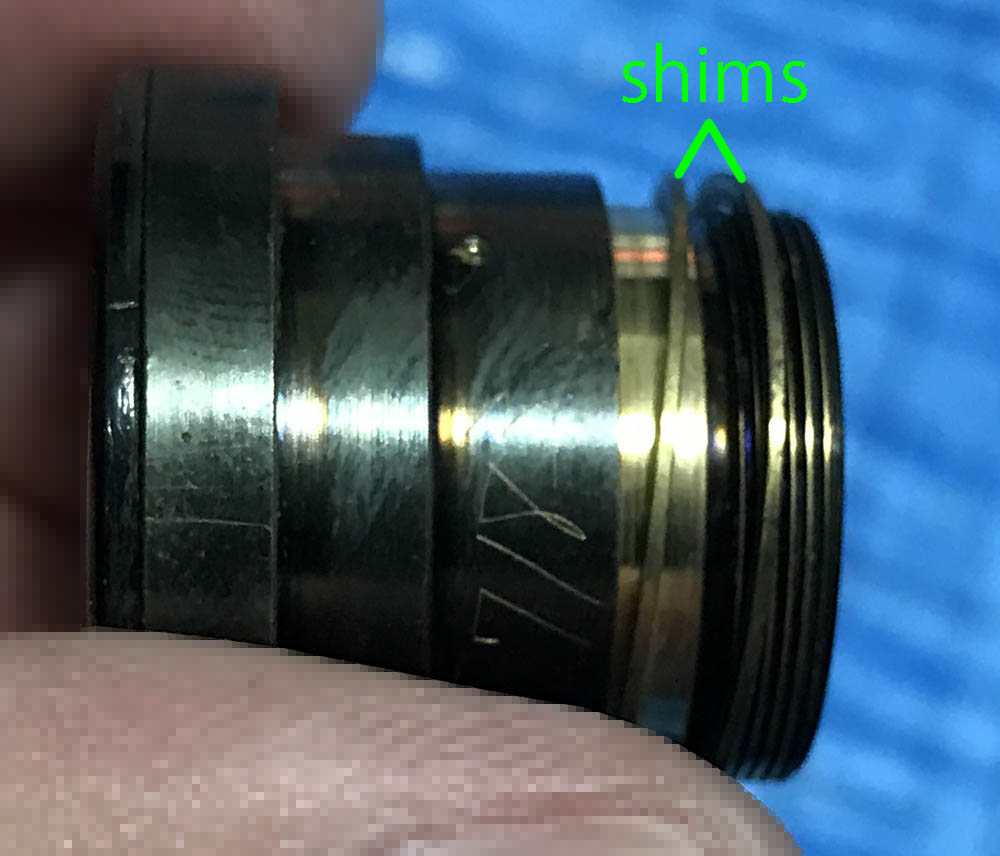
Be careful not to lose these shims. These are used to adjust the focus of your lens. It’s calibrated at the factory, each lens was individually adjusted at the for proper focus using a collimating machine, these were added to calibrate how much was needed for this to achieve a passing mark according to strict quality control rules.
You can now remove the rear parts of the lens. Notice that big spring? Make sure you are aware which side should face forward so you won’t put it back facing the wrong way.
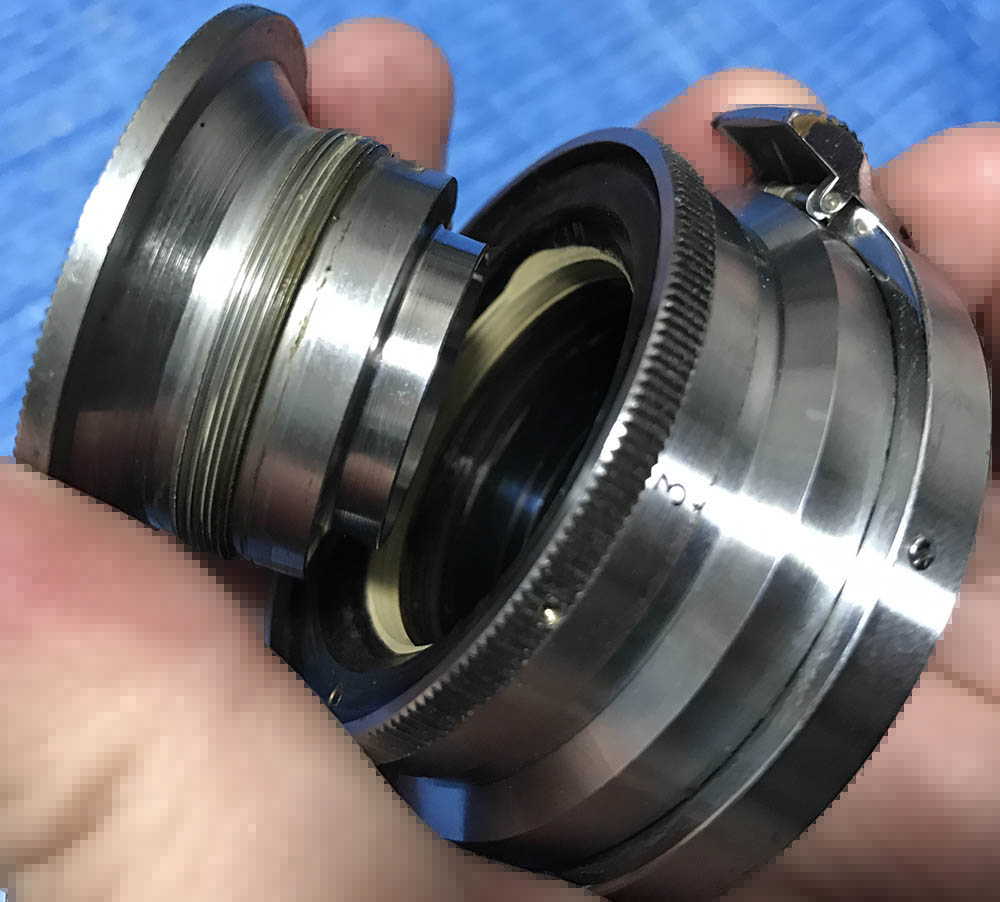
The aperture ring can then be screwed-off from the lens barrel. It’s not like a helicoid where you need to note where these separate. Be very careful not to damage the thread or it will feel rough or gritty each time you turn it.

The decades-old grease looks terrible. It hasn’t been serviced since the 1950s perhaps.

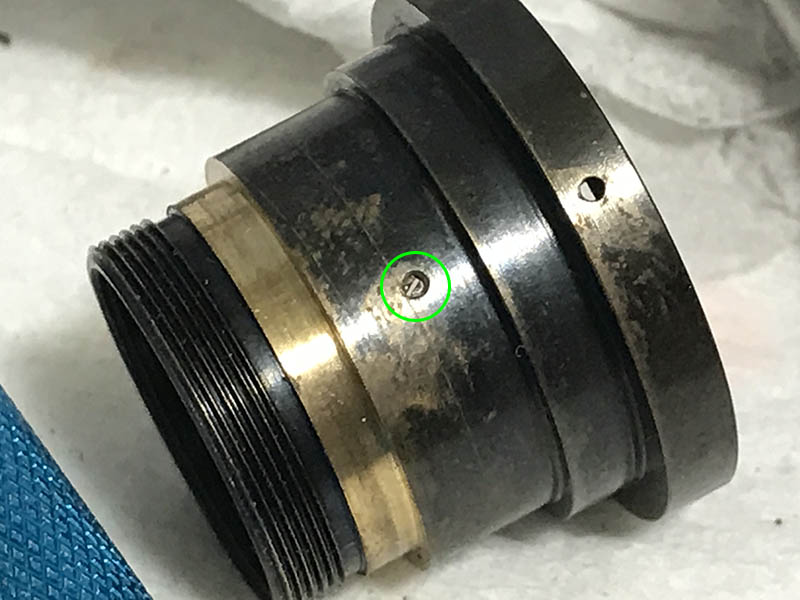
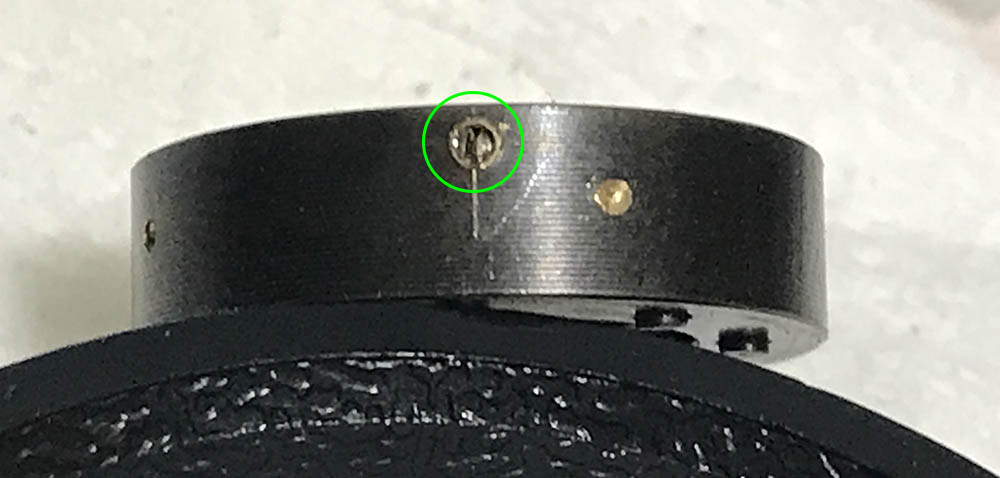
To remove the focusing ring you’ll have to extract this screw. This serves as a pin so that the focusing ring stays within its focusing range, removing this will allow it to be turned until it comes-off. Focus your lens until you see the screw’s head if you can’t see it. Be carful not to strip the head so use a driver that fits perfectly.
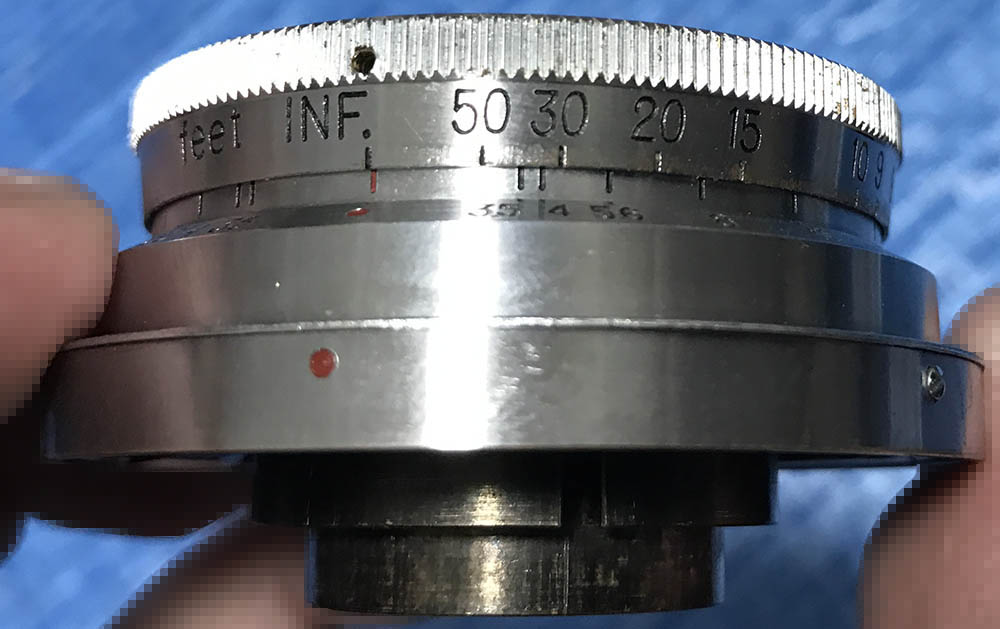
Before you remove the focusing ring take some notes, measure how much distance there is between the focusing ring and the rest of the barrel. If you want to be accurate, use a micrometer. Personally, I think a picture is more than enough.
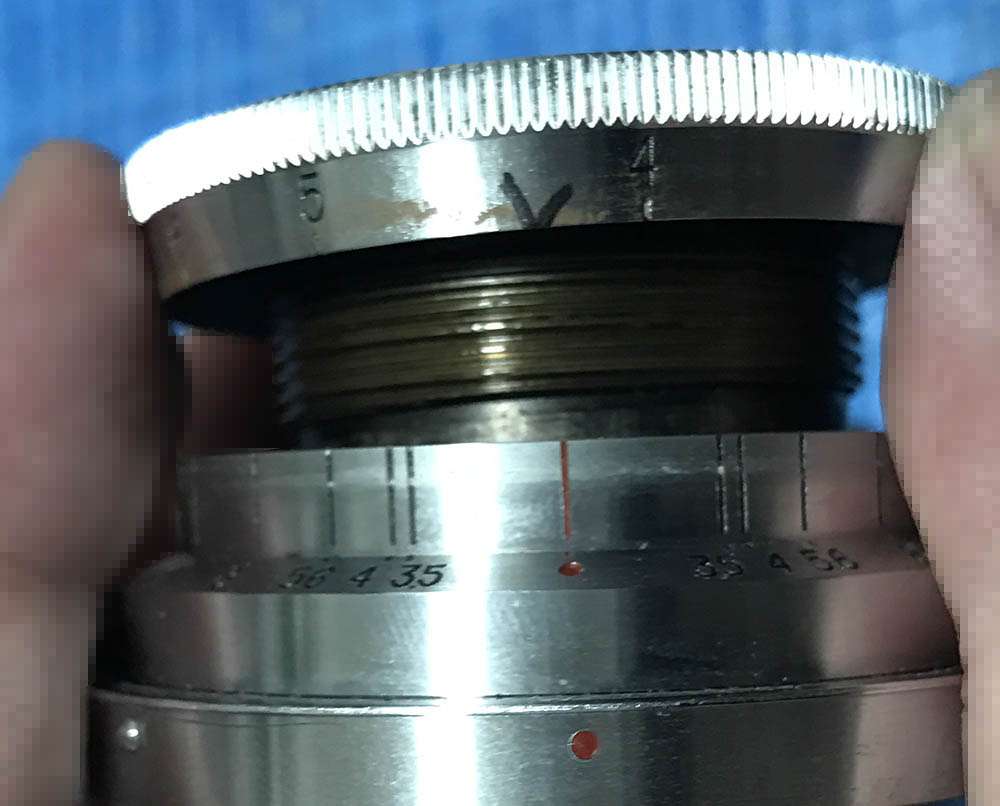
Do note where they separate, if you don’t then you are just asking for it. If I am not wrong, I counted 3 possible ways that this helicoid can mesh. Mine separated here, around this part near the 4ft mark in relation to the red line that denotes the centerline. I used a permanent marker to mark that spot so that I can just wipe the ink off later after reassembly. If you have never read my article on how to work with helicoids then read it before you proceed.
Time to give this a nice, thorough cleaning.

Here’s another view. You see that quarter-of-a-circle-shaped thing inside the lens barrel? That is where the pin that we removed from a few steps back is hitting against, it obstructs the pin’s way so that the focusing ring will not go beyond its range.
Interestingly, if you look at the focusing ring to the right you’ll find that the hole where the pin used to be coincides with the mark that we made noting the position where they separate.
Clean everything well and make sure that you brush the helicoids, too. This is important as you don’t want to leave any residue. Avoid applying plenty of grease on them as it will migrate towards the objective sooner or later. It is also important that you don’t apply something that’s too-thick or you will have a hard time turning the helicoid with the focusing-wheel. This is not a good thing because you will wear it and you won’t find replacements for it. Only apply a thin film of grease on the threads of the aperture ring, an even coat of thin grease is all that’s needed for it.
Disassembly (Objective):
The objective and the iris mechanism are simple enough so I combined the sections for them into one. As far as construction goes it’s similar to Nikkors of the same class and era. It’s simple to service for an experienced repairer but this one will frustrate a novice. There’s a high chance that most of these have the oily iris problem and the only way to fix that is to overhaul the iris completely. Doing it the easy is never a solution, you’re just cleaning what’s visible to you and leaving the bigger problem untouched and you’ll end up doing it the right way in the end.
Remove the front elements assembly by unscrewing it from the housing of the objective. The rear part is delicate so make sure not to scratch or chip its lips.
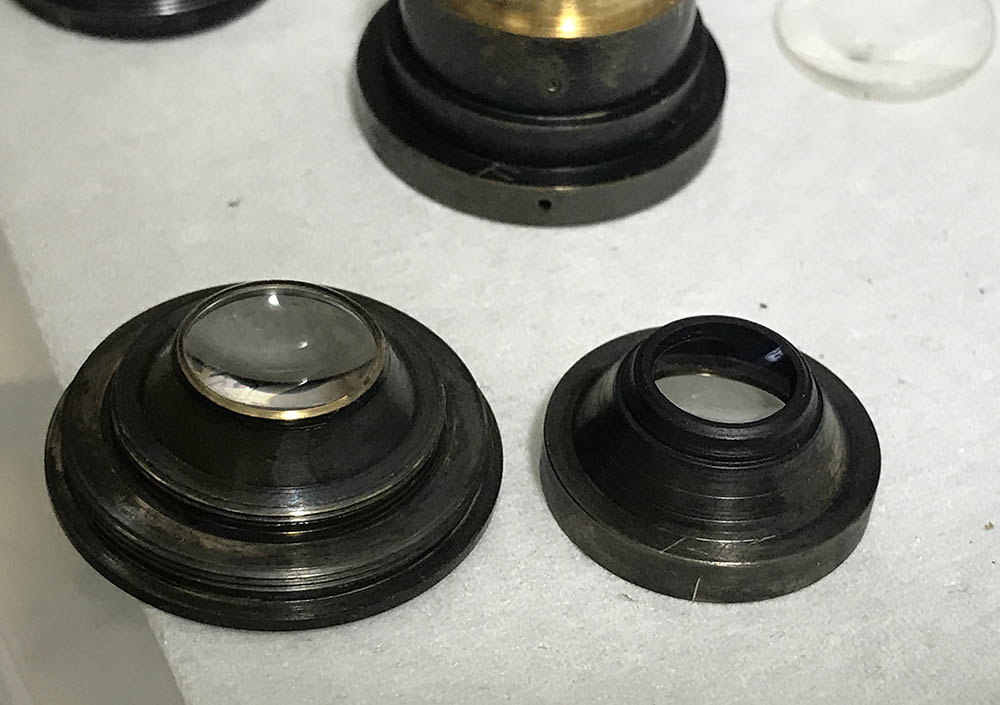
You can further open it by unscrewing the housing of the 2nd element. This is a sealed unit so don’t remove the element from its housing, the same goes for the 1st element, too.
The rear elements assembly consists of the 3rd and 4th elements. they were cemented into a single group so don’t use any alcohol near it. You can access the 2 holes with a pipe-key, a special tool used to remove things like this that are too-deep for lens spanners to access. This is a delicate job, don’t scratch the glass and use the proper tool. Alternatively, you can use a rubber cup, it should fit the lips but not touch the glass. If the friction is enough then you will be able to unscrew the 3rd group’s housing safely. If this is stuck, a little bit of alcohol supplied to the threads of the housing will help soften it up. It is important that you don’t flood this with alcohol, a small drop is enough.
These are all the optical parts and their respective housings. Carefully wipe the glass and make sure that you don’t scratch them.
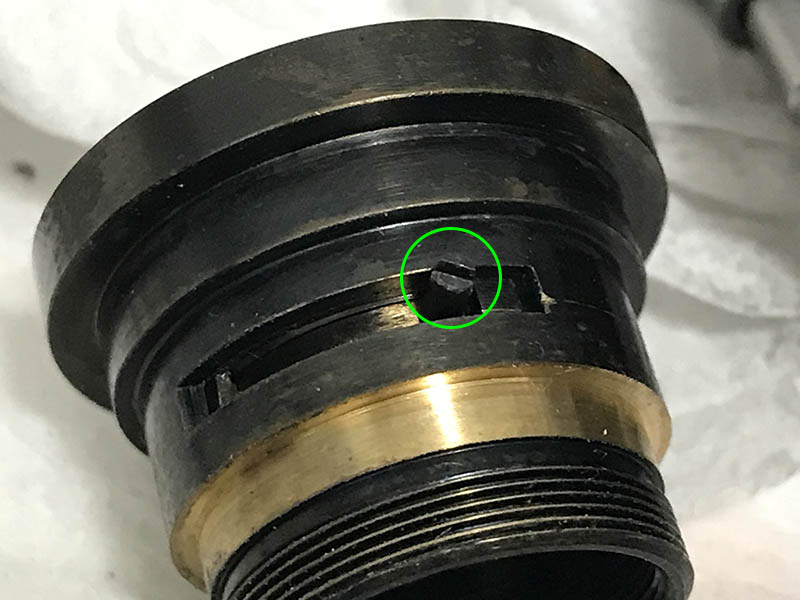
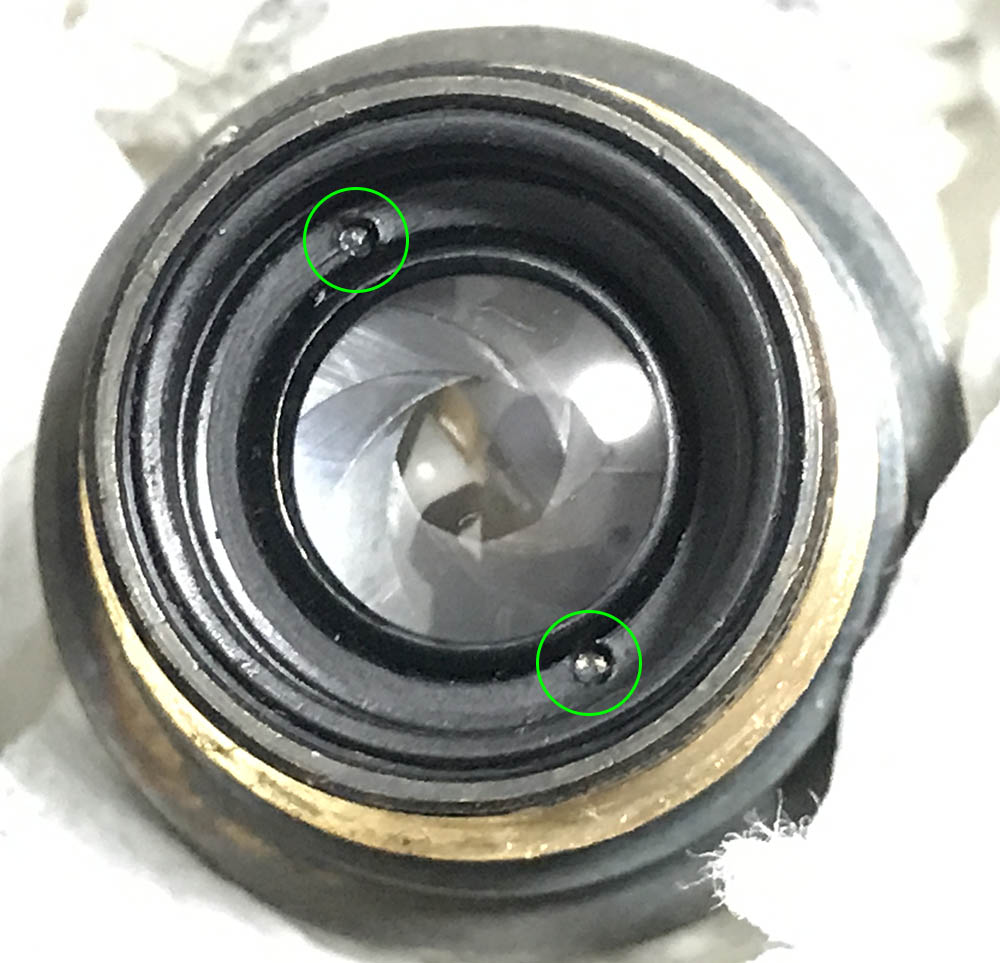
The iris mechanism is secured by a few things and one of them is this screw. This couples the iris mechanism to the aperture ring so you can adjust it. It is a delicate part, only use drivers that will fit the slot perfectly.
You may be tempted to remove this retainer now but don’t do anything to it, at least not now. This is being secured by a small screw that you can’t get to until several steps later.
This is the last thing that secures the iris mechanism. The iris mechanism is an adjustable assembly and this little screw secures it. It’s made from brass so it’s soft, be careful not to strip it.
Once all of those things are gone you can safely remove the iris mechanism as a single unit. It’s a compact, self-contained assembly. This reminds me of how Leica manufactures some of their irises in the pre-war era.
You now have access to this little screw. Carefully remove it and extract the retainer.
The retainer can now be safely removed.

The iris mechanism can now be dismantle to its bare components.
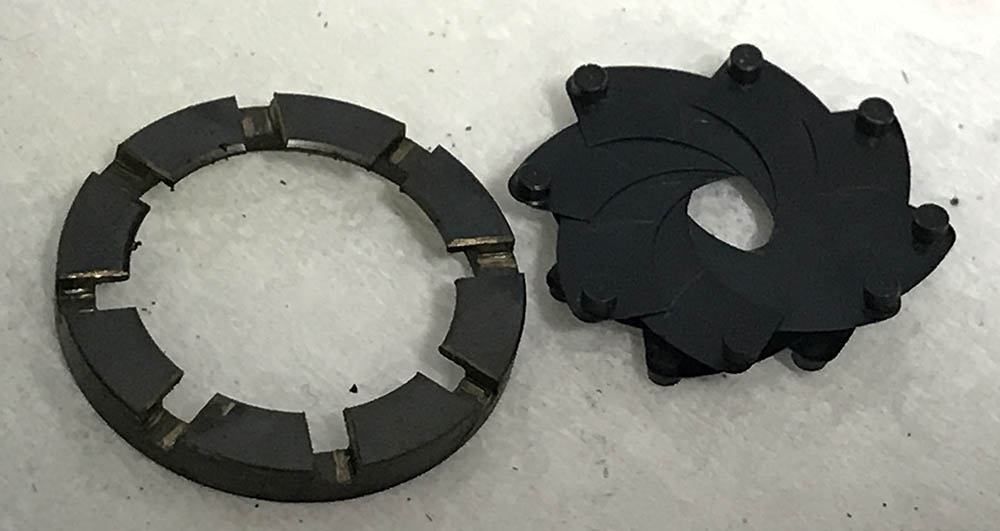
Notice that the iris came-off neatly as a whole, oil and dirt kept it together. I always make it a point to clean the iris mechanism thoroughly because this is the only way to do a proper job.
The iris mechanism was cleaned thoroughly, each blade was wiped using a sheet of lens tissue moistened with naphtha. You’ll be surprised at how the blades can be so rusty but you can’t see them with your eye. The tissue will have a slight or deep-amber stain after each wipe. Be careful not to warp or damage the blades in the process as they’re delicate. The pegs are delicate, I have had the misfortune of fabricating a replacement blade once. Read my article on how to fabricate iris blades to see my ordeal.

The whole assembly is now clean, it’s so clean that it looks new.
This is a delicate job that requires plenty of patience. The tiny iris is difficult to put back and it will frustrate the best of us sometimes. I’m used to doing this so it was peanuts for me. If you want to know more about repairing the iris mechanism, read my article on how to work with preset irises.
Conclusion:
I had lots of fun working on this lens, it took me under 2 hours because it is simple. I enjoyed seeing how well-made it is, nobody makes lenses like this today. You can use this as a puck or maim someone with it.
Time to restore the lettering. To know how I did this, read this article.

This is a handsome lens. It’s now shiny, people tend to gaze at its beauty. It’s a nice lens that’s fit for a well-dressed gentleman.

I fashioned a cap from a piece of scrap plastic. You will need special caps for this since you can’t get snap-on ones for these. It’s essential that you have it on or you’ll burn a hole through the cloth shutter.
That’s it for this article. This should help those who are into Nikon’s S-mount gear. Not only did we see some photos that were taken with it we also saw a near-complete teardown of this lens. I hope that you enjoyed this, if you did then please share this on social media. If you love my work and you want to see this blog continue to help people please consider supporting my work. It helps me maintain this humble blog, that helps me offset the cost of buying film and processing it. With that said, I thank you all for the support. That’s all for a good cause. Ric.
Help Support this Blog:
Maintaining this blog requires money to operate. If you think that this site has helped you or you want to show your support by helping with the site’s upkeep, you can make a small donation to my paypal.com (richardHaw888@gmail.com). Money is not my prime motivation for this blog and I believe that I have enough to run this but you can help me make this site (and the companion facebook page) grow.
Helping support this site will ensure that this will be kept going as long as I have the time and energy for this. I would appreciate it if you just leave out your name or details like your country’s name or other information so that the donations will totally be anonymous. This is a labor of love and I intend to keep it that way for as long as I can. Ric.

Apr 02, 2017 @ 19:26:16
Richard- Thankyou, you are right about there not being much on S-Mount lenses on the Internet. I have the same lens, and this is immensely helpful.
For users on Contax RF’s: use a thinner shim, by about 0.3mm~0.4mm, the reverse of using a Zeiss lens on a Nikon, I did this for a friend’s 3.5cm F2.5 S-Mount for him to use on a Contax IIa.