
Hello, everybody! Me and my family just got back from a Spanish fiesta and we had some Spanish food the whole afternoon. The Paella tasted familiar but it’s certainly not authentic because the ingredients and preparation has been altered to suit local tastes. I’m not saying that it’s bad or wrong, it’s just different! The good thing is we got to enjoy it in a different way and we saw how culture, circumstances and the economy can transform something so unique as the paella into something else. I am going to show you something similar today. An example of how Japan turned a German design into their own, added improvements that made it work in a different way.
Introduction:
The W-Nikkor.C 3.5cm f/3.5 was made in 2 different mounts, we’ll look at the one that was made in Leica Thread-Mount (LTM) in this post. For all intents and purposes, it is basically the same lens as the S-mount version except for the barrel. It even shares the same serial number block as the one made for the S-mount so Nikon sees these 2 versions as a single model, only made for two different mounts. This is a bit rarer compared to the S-mount version so they cost a bit more as a consequence. I have always wanted to own one of these for history’s sake and for using them with my Barnack-type cameras. This model is one of Nikon’s earliest lenses, it was made from the late 1940s to somewhere around the mid-1950s. There’s not a lot of data concerning it and its manufacturing details so it’s hard to date these lenses (LTM Nikkors).

It’s very compact but it feels dense when you hold it because the barrel was made using brass and plated with chrome. Imagine if it has a nickel base for the plating then it will end up being a bit heavier. They do not make lenses like this these days. The design is inspired by early Leica lens barrel designs while the optics reminds me of a Tessar. Nikon looked-up to Zeiss in its early years because Zeiss was the world’s best optics manufacturer in those days. Nikon outgrew this stage after a couple of years, their designs began to look unique and even bested whatever the Germans had at the time.
People who have been following me know that I love Zeiss Tessars. It is one of the most influential lens designs in history. Other manufacturers wanted to use this design for their own but it’s protected by patents. This all came to an end after the war, the occupying Allied powers made all German patents void outside of Germany, Japanese manufacturers and just about everyone else had a holiday reverse-engineering German products. This allowed for “cross-pollination” of designs and the resulting hybrids that we now came to love and hate depending on who you ask. This lens is an example, it allowed the Leica user to enjoy a lens with “Zeiss characteristics” in the form of this modified Tessar. It’s not the same as the real thing but it sure has some of its characteristics.

The objective shares the same design and looks identical to the one used on its cousin the W-Nikkor.C 3.5cm f/3.5. I can’t see any differences, it does not make any sense to make a new housing for the objective just because it will be housed in a different barrel.

Most, if not all Nikkors that were made in LTM were sold with the Japanese Barnack copies such as the Nicca 3S. I’m not sure if they were also sold with Leotax cameras but they seem to be sold with Niccas in the US as a kit. This was probably mandated by the importer but Nikon has a history of making lenses for the other Japanese camera manufacturers like Canon before they learned how to make lenses themselves. As far as Niccas are concerned, the type of Nikkors they were sold with dictates its model name in the US. This is how deep the relationship is between the manufacturer, distributor and the vendor is in this kind of setup.
Since this is basically the same lens as the W-Nikkor.C 3.5cm f/3.5 (S-mount), it’s a good idea to check out that article just to see how this lens performs. I won’t repeat what I said in that article as it won’t make sense for me to do so but I will post a few pictures that I took with this lens here in this article just to make this more interesting.
Attention: This lens has a damaged front element from years of abuse. This causes a hazy, diffused look to some of the pictures it makes when there’s a bright source of light or a bright spot in the frame. I’m too busy to polish it but please keep this in mind, it’s not an indicator of this lens’ performance. In fact, the photos I have in this article illustrates just how good this lens is, definitely more than just decent.

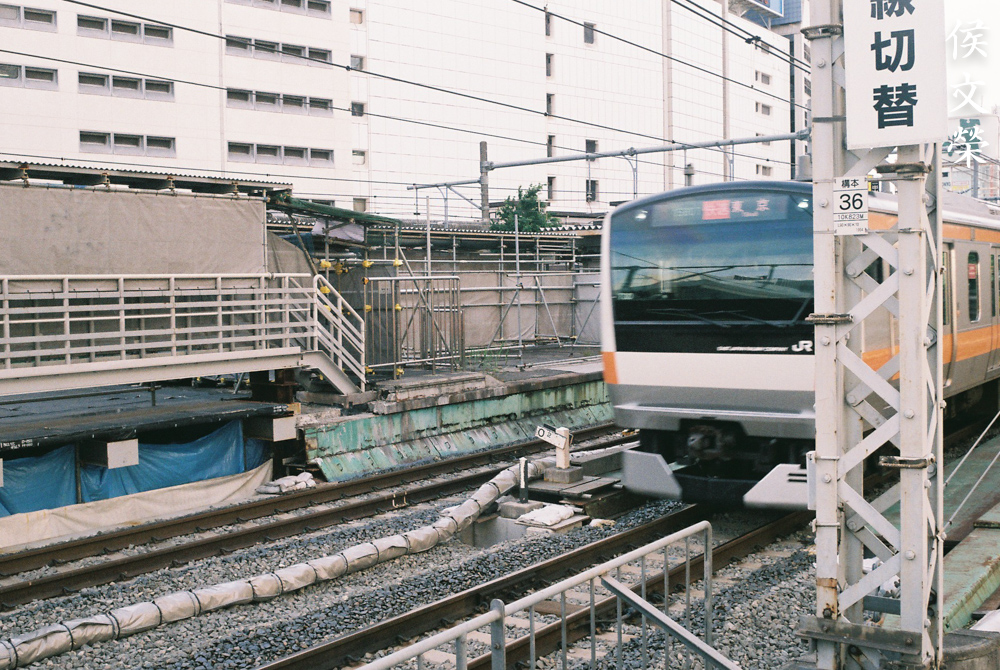
the 35mm focal length is popular for street photography. It is wide-enough, you can add more context just by adding more of the scene into your photo. This is a good tool, it forces you to get closer to your subjects as opposed to a 50mm lens where you are allowed to have a bit more distance between you and your subject.


(Click to enlarge)
This lens is handy for taking travel photos as it’s small and discreet. It’s light so you can wear your setup around your neck the whole day, it won’t make your neck hurt after a long day of walking.
Let’s now see some photos that were taken with film. Film has a unique feel since film grain is hard to simulate with a sensor. This lens was made to be used exclusively with film, it is only fair that we judge it using its intended medium. This set was taken with my Leica IIIf and Fujifilm Industrial 100. In case it doesn’t look obvious, I took most of the photos with the iris stopped-down.

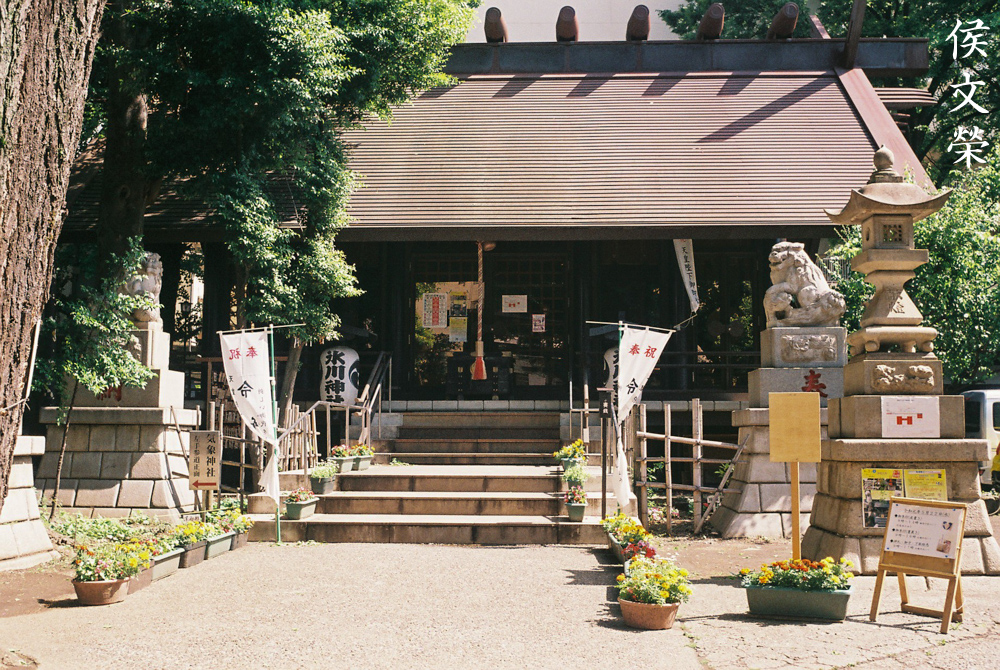
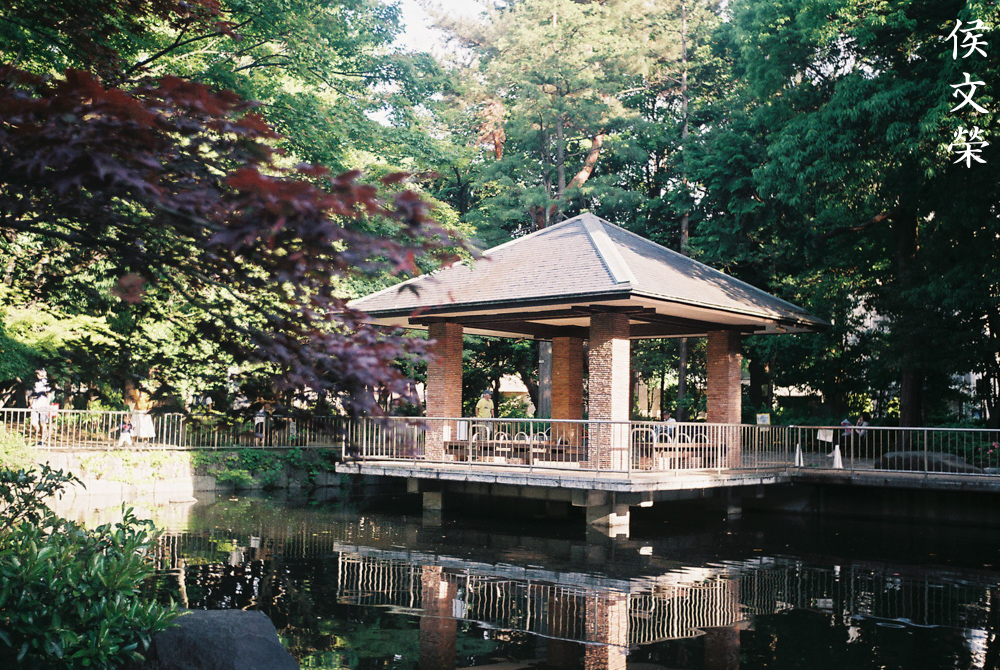
My little girl walking at the temple. This was taken at around f/8 or so. I love this lens a lot for these kinds of photos. It’s perfect for travel photography.
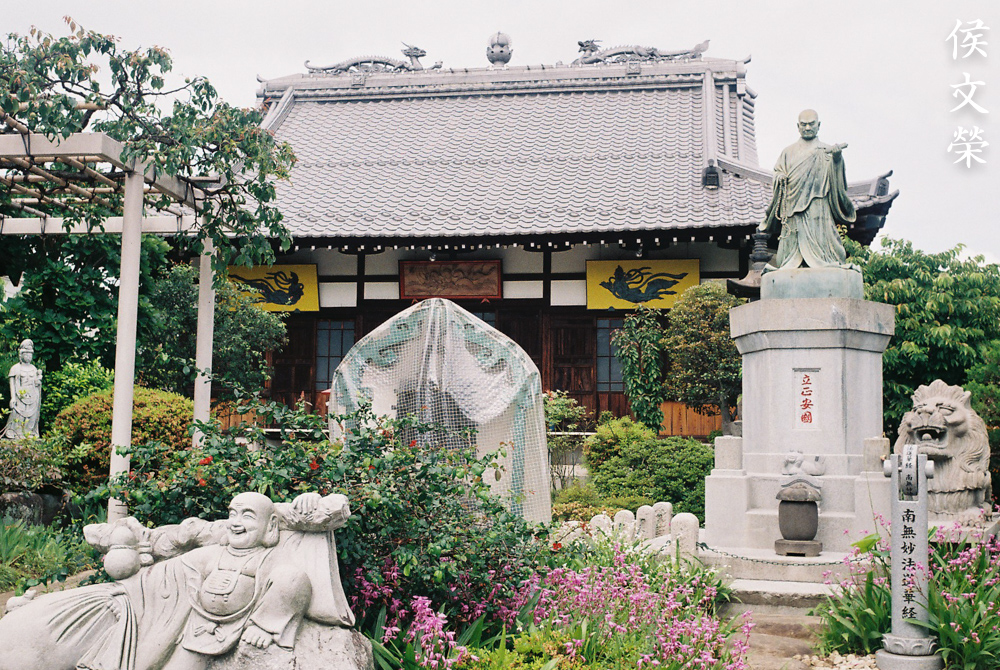
Stopped-down, this lens is able to resolve fine details but it’s not in-par with later lenses when it comes to resolving power.

This lens is sharp when you give it the right parameters to work with. It has a nice, vintage look to the photos it takes. This is nice if you want to capture period-correct photos, all you need is to use this with a film that can render like the stocks from 1950s.

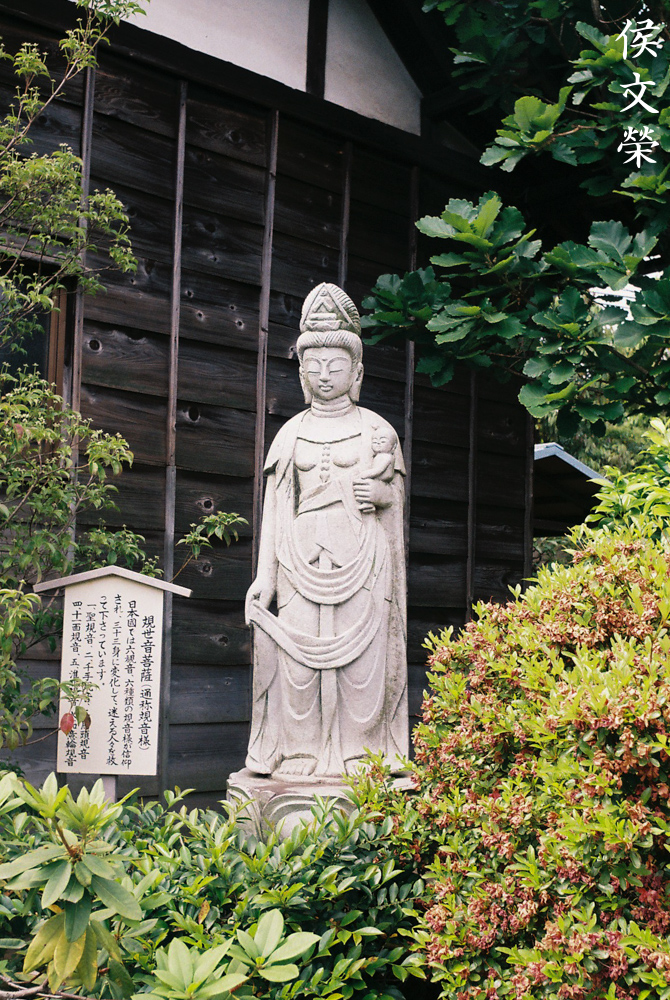
This was taken at f/11. You can see the curved lines caused by distortion, it’s mild but you can definitely see it if you look for it.

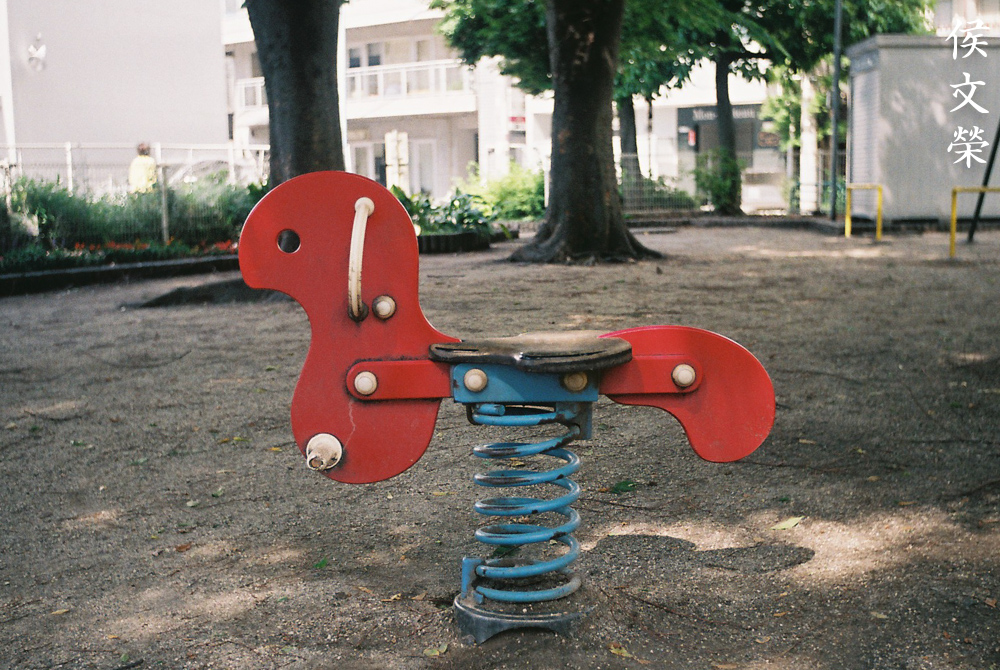
Optical aberrations make this lens special in today’s context. There are a lot of people who choose to shoot with vintage lenses because of this. You can see some flaring at the upper-right corner since the Sun is there. The bokeh quality looks kind of off but that’s to be expected from a slow, wide lens. It’s not the lens for something like this.


(Click to enlarge)
So, how do you like this lens? Do you think it’s a good lens to couple with your Barnack? I certainly love this lens a lot and I will certainly tell people to buy this lens so long as you get one that’s not damaged so you won’t get the same funky look in my pictures. If you’re looking for a cheaper alternative, a Russian Leica clone will be your best option. There’s no other alternative for the Nikon collector who wants to have everything. I hope that I gave you a good introduction on this lens, many people don’t even know about this and you don’t get to see a lot of information about this lens online.
Before We Begin:
If this is the first attempt at opening a lens then I suggest that you read my previous posts regarding screws & drivers, grease and other things. Please also read what I wrote about the tools that you will need in order to fix your Nikkors.
I highly suggest that you read these primers before you begin (for beginners):
Reading these primers should lessen the chance of ruining your lens if you are a novice. Before opening up any lens, always look for other people who have done so in Youtube or the internet. Information is scarce, vague and scattered (that is why I started this) but you can still find some information if you search carefully.
I highly recommend that you also read my working with helicoids post because this is very important and getting it wrong can ruin your day. If I can force you to read this, I would. It is that important!
For more advanced topics, you can read my fungus removal post as a start. This post has a lot of useful information here and there and it will be beneficial for you to read this.
Disassembly (Lens Barrel):
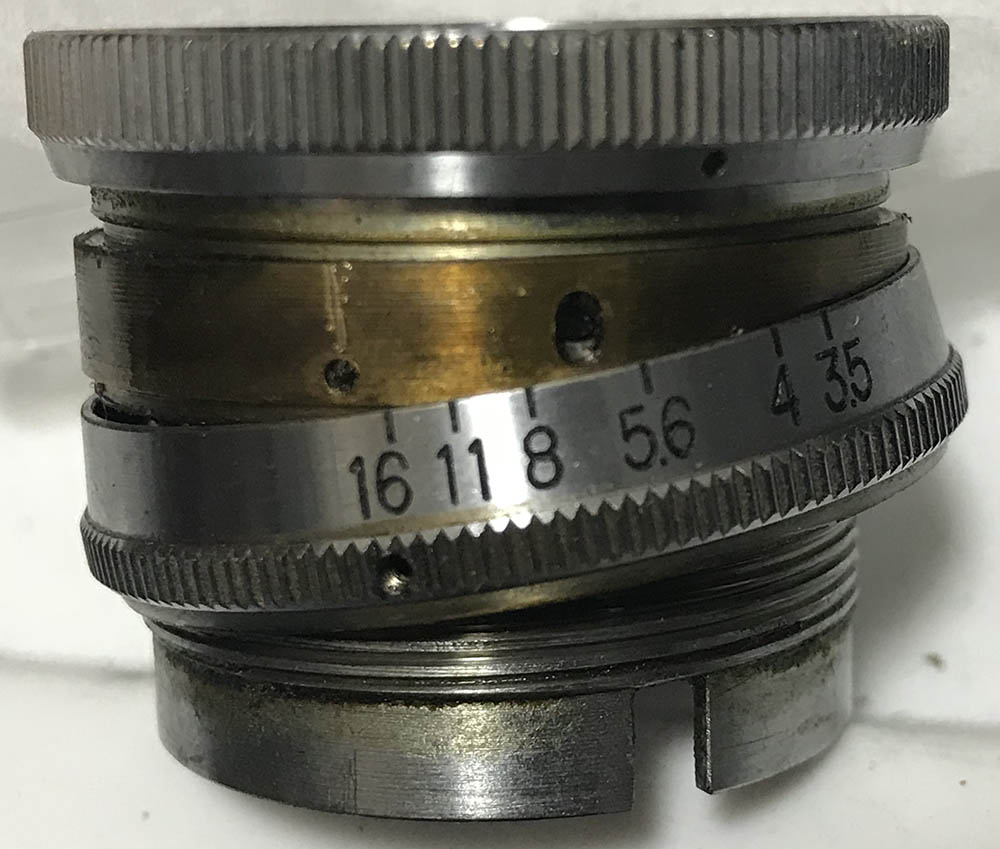
The lens barrel is typical for W-Nikkors made in LTM mount and shares many things in common with some pre-war Leica designs. It’s not difficult to dismantle it but for people who don’t have any experience with these kinds of lenses it can confuse them at first as they try to figure out how to open it. The good news is you won’t need any special tools to work on the lens barrel but you would want to take plenty of notes before you dismantle any part just to be safe. You can completely overhaul the lens barrel within an hour or so and that includes cleaning it down to the last assembly.

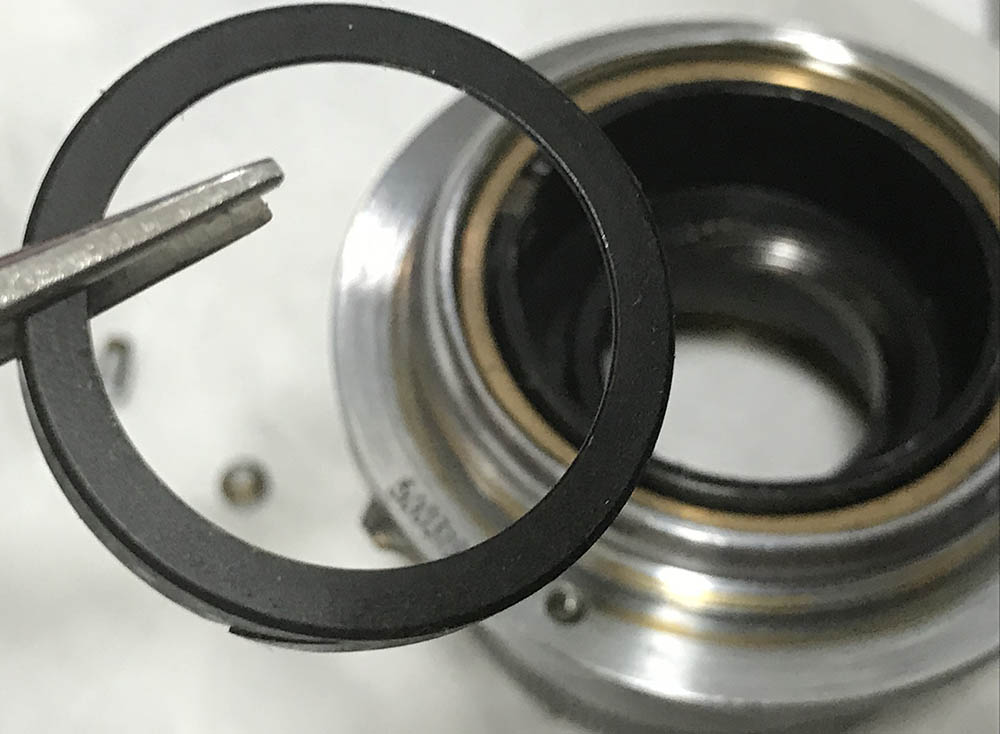
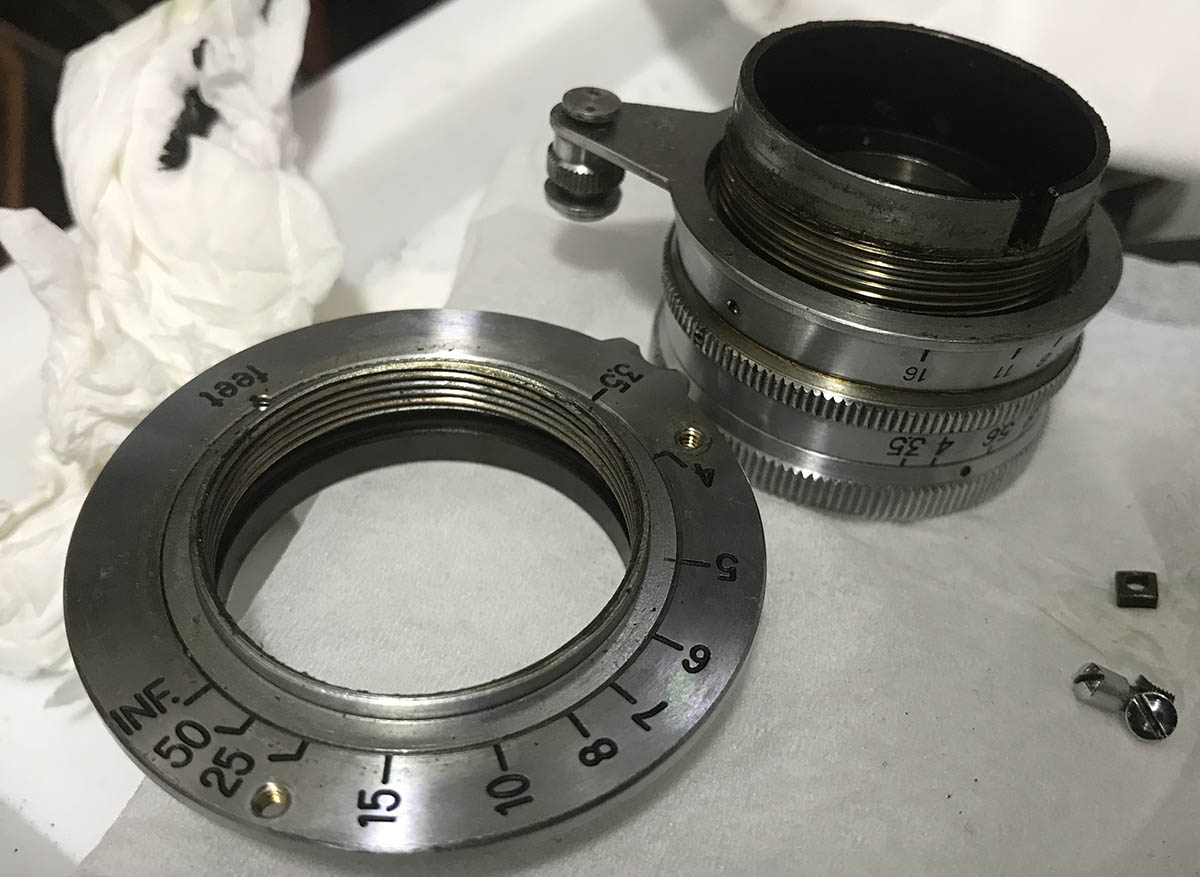
Just like most Nikkors that were made in the rangefinder-era, you can separate this lens into its main assemblies by unscrewing a collar (B). There’s another collar here (A) and it acts more like a baffle or a cosmetic ring to cover what’s underneath it. This collar can be removed by picking it out with your nails. It can be easily warped so be careful while you remove it. It’s only being secured by friction so this shouldn’t be difficult.

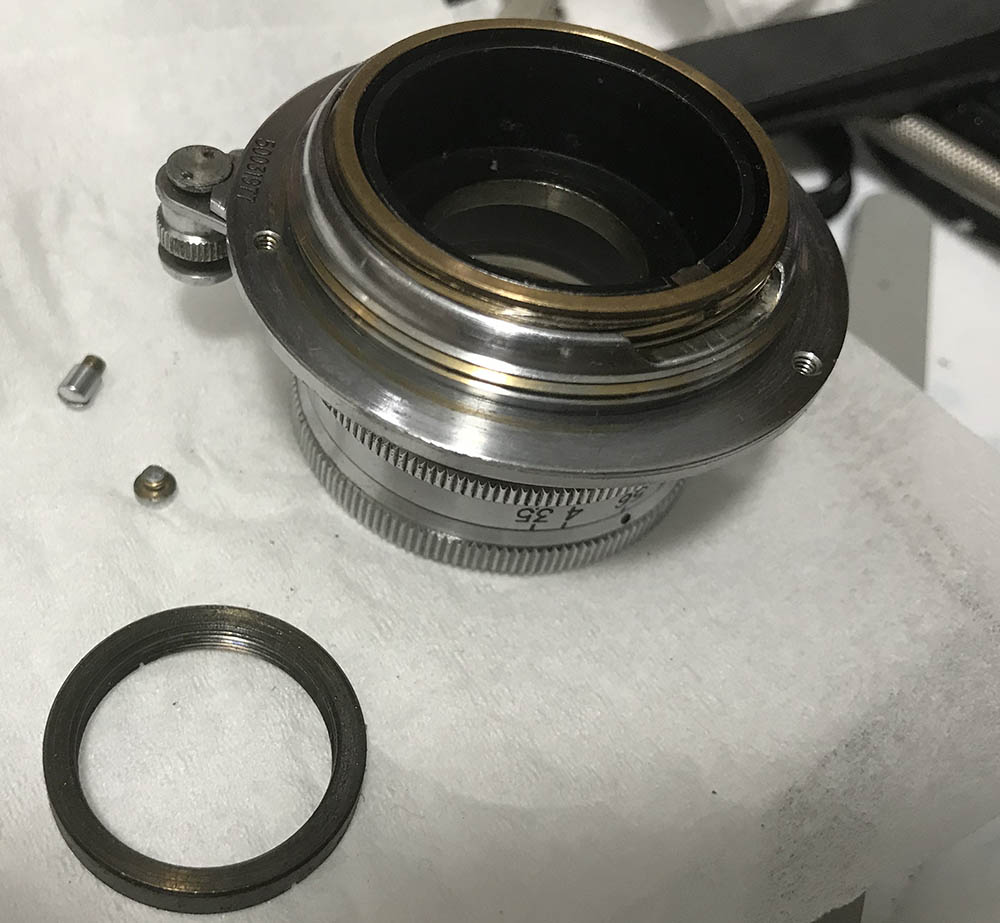
The objective can now be removed once the collar (B) is removed. Be careful not to drop it because the collar os the only thing that secures it. There should also be a brass spacer between the objective’s housing and where it sits inside the lens barrel and make sure it’s safe and never lose it.
You can remove the baffle earlier if you wish, it doesn’t matter if you remove it earlier or a few steps after this.


(Click to enlarge)
These 2 screws make sure that the you don’t focus the lens beyond its range by physically being in the way of the focusing ring. You don’t have to remove them in order to proceed, I wanted to clean this lens thoroughly so I removed them. These are easily lost so prevent that from happening by tightening them and secure their threads with lacquer. To make it permanent, you can also solder the other end with tin. Only apply a very small amount and that’s enough to take care of it.
Here’s where we’re at at the moment. I forgot to tell you this, before removing the screws you should take some measurements of the helicoids and the rangefinder coupling cam. Do with while the lens barrel is at infinity, this should help you later so you’ll know how much these things should extent into the barrel. Assuming that the previous guy who did this properly, this should give you a good starting point before calibrating. This will save you a lot of guessing later during reassembly and focus calibration.

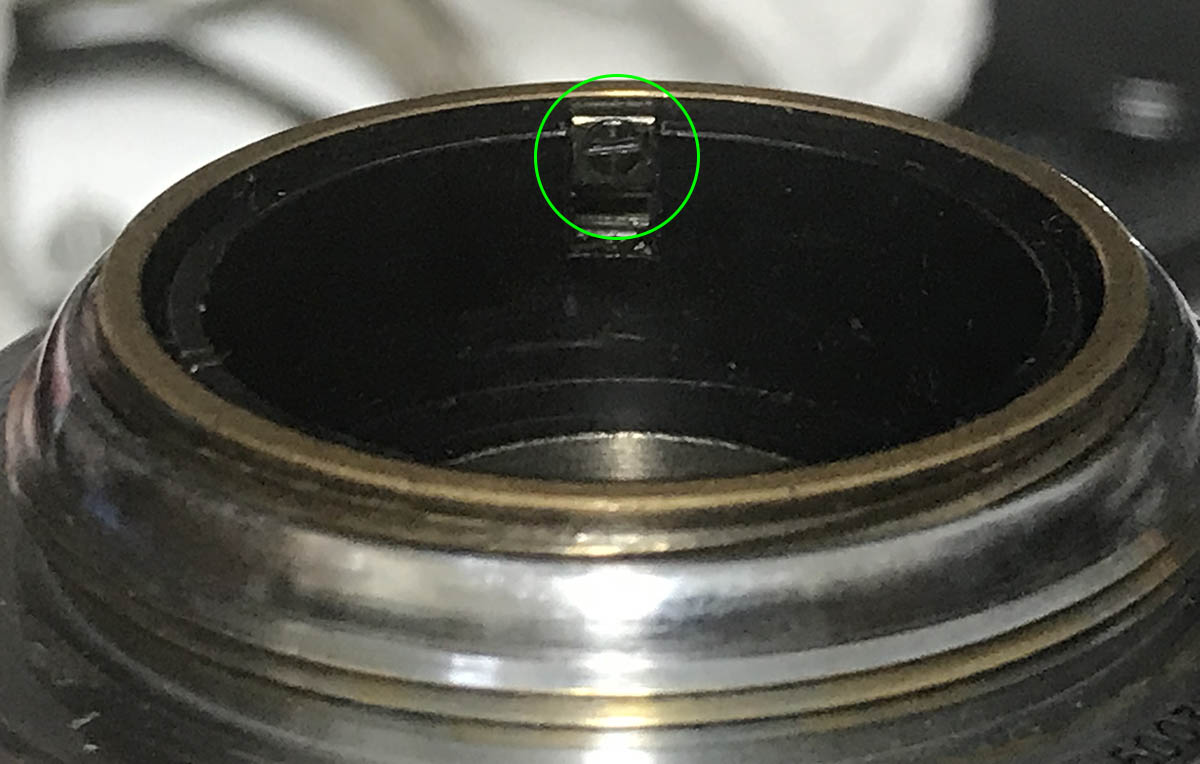
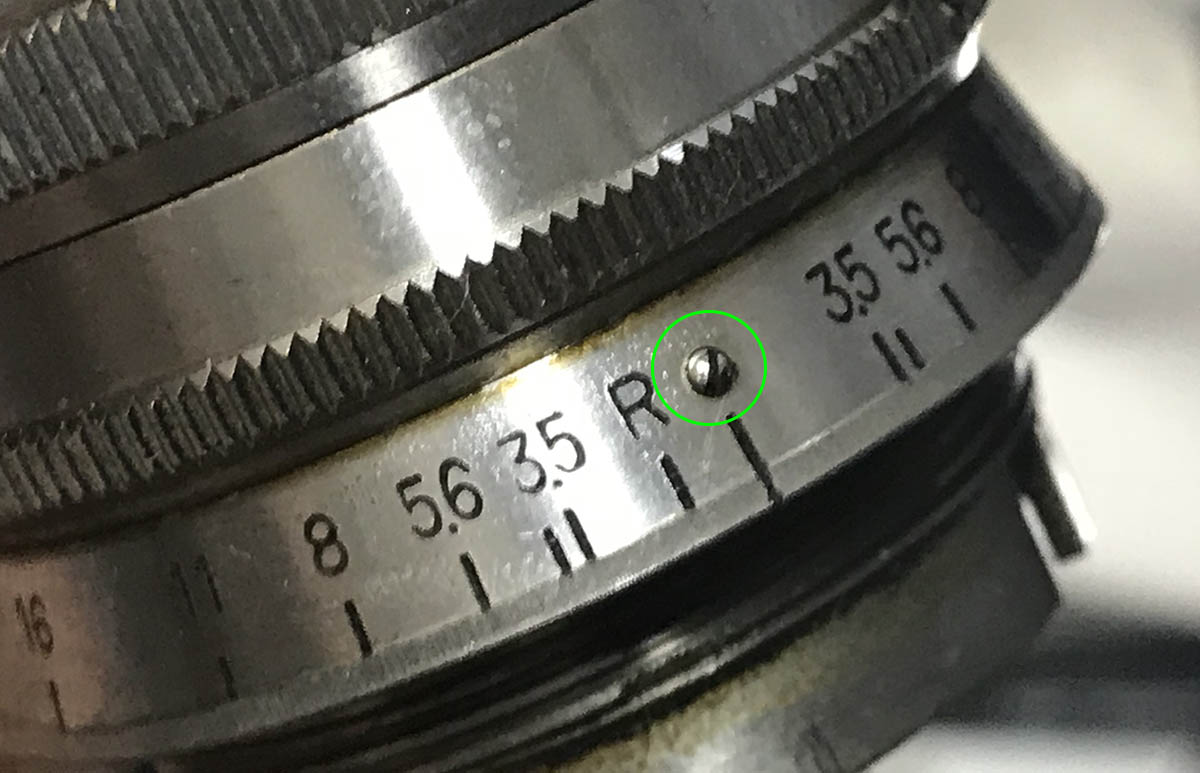
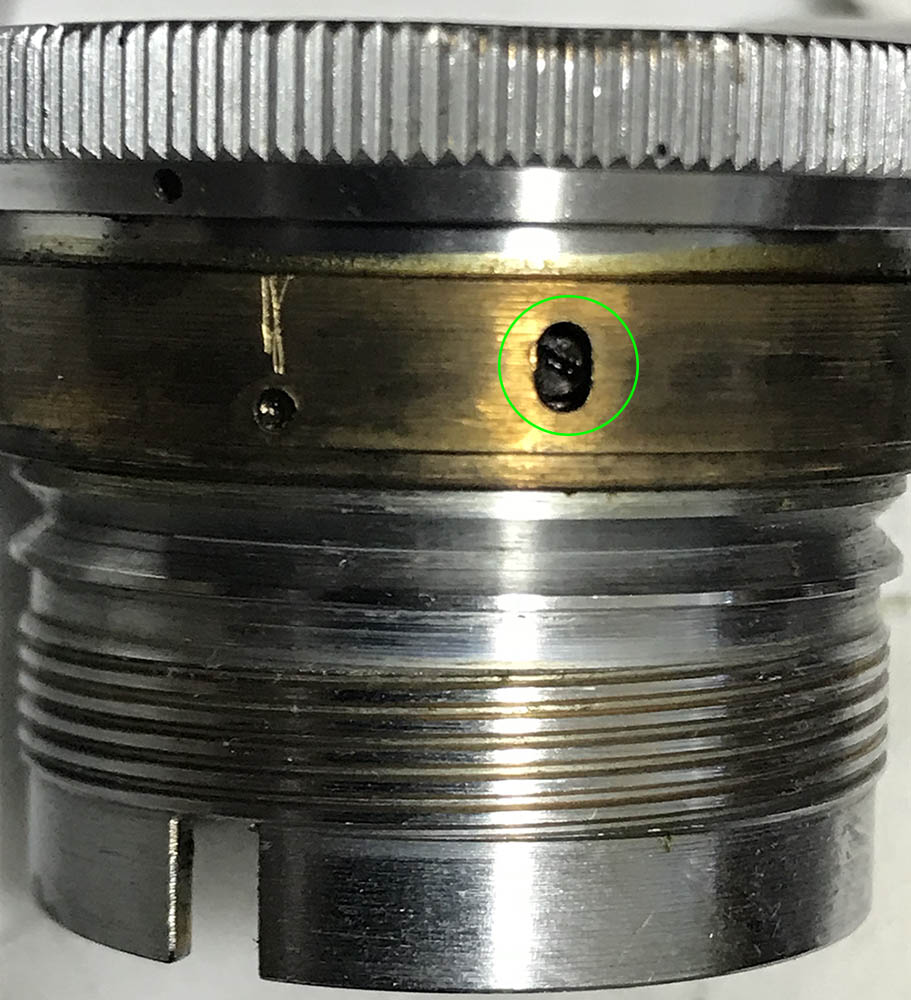
This lens has a cam at the rear that couples to the rangefinder’s lever inside the camera. This is a precise adjustment point so take plenty of notes and measurements before you dismantle it. Check this picture and you’ll see a small hole and it has the tip of a screw at its center. The tip of the screw should clear the threads of the helicoid so it doesn’t cacth it. Pay attention to this detail later when you re-assemble this part.
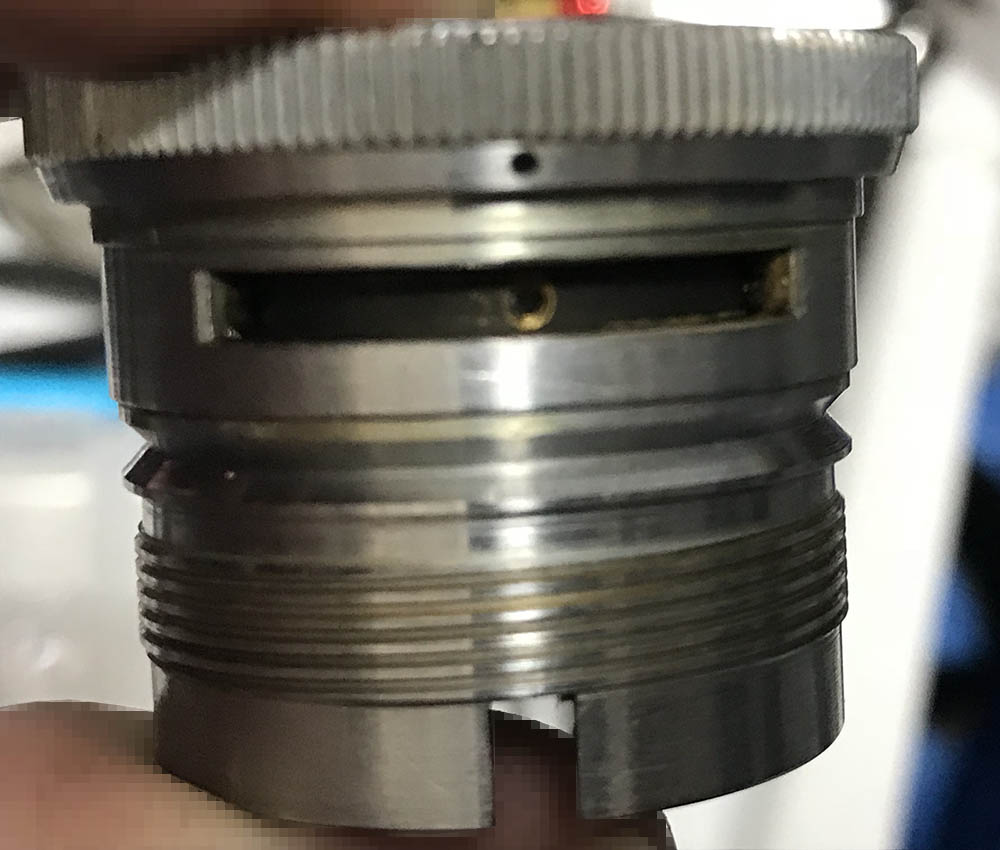
The other end should reveal this screw’s head. It secures a helicoid key, take not of how it is secured and make sure to note where the key should be facing. This isn’t symmetrical.
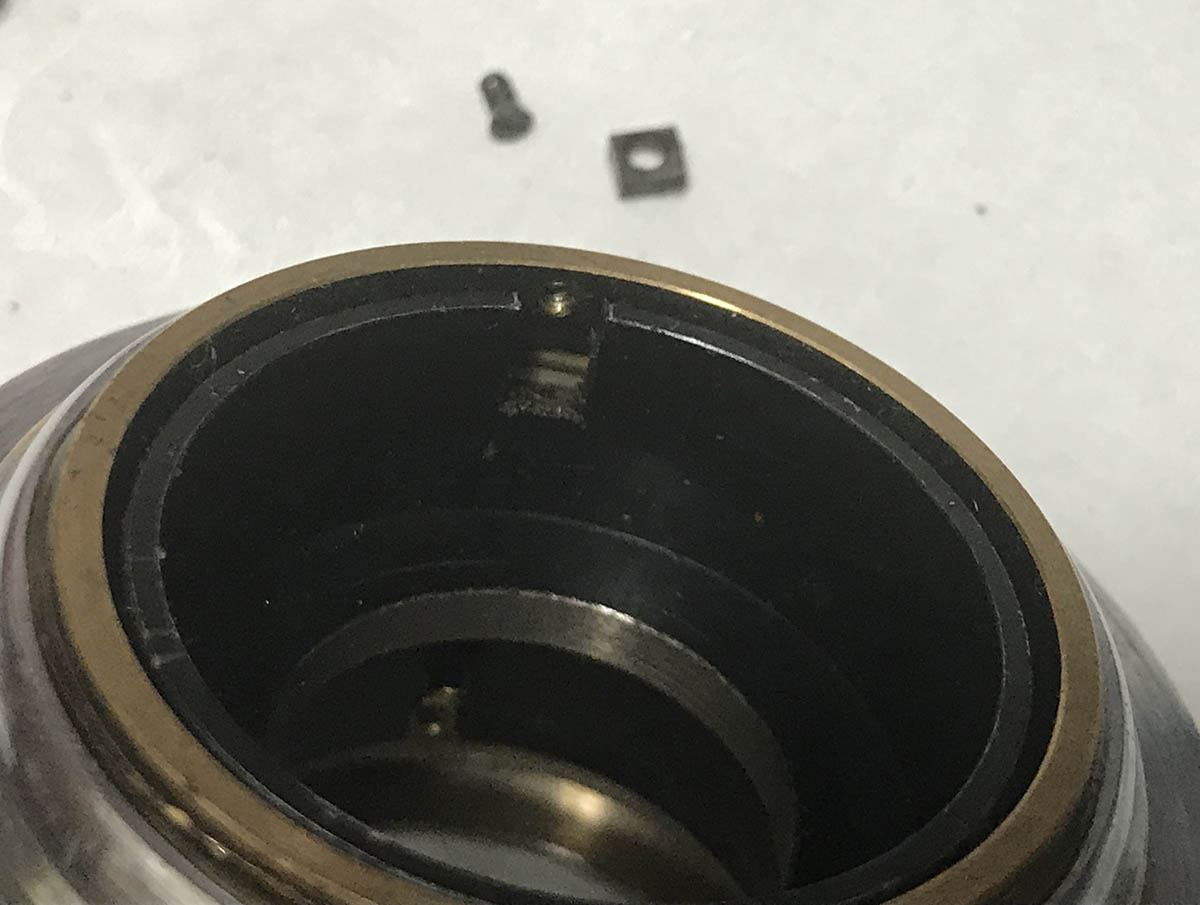
Removing the key will allow you to turn the cam until you unscrew it completely but we will wait a few more steps before we do that.
This is how far mine extended. Taking notes is very important, there’s no excuse for not doing it that these days because mobile phones are so adcanced.
This is the approximate position of where the helicoids separated. Always mark how and where the helicoids separated because this is also the same spot where they should mate. If you’re new to lens repairs please read my article on how to work with helicoids. Many beginners get stuck here so you don’t want to be in the same predicament.
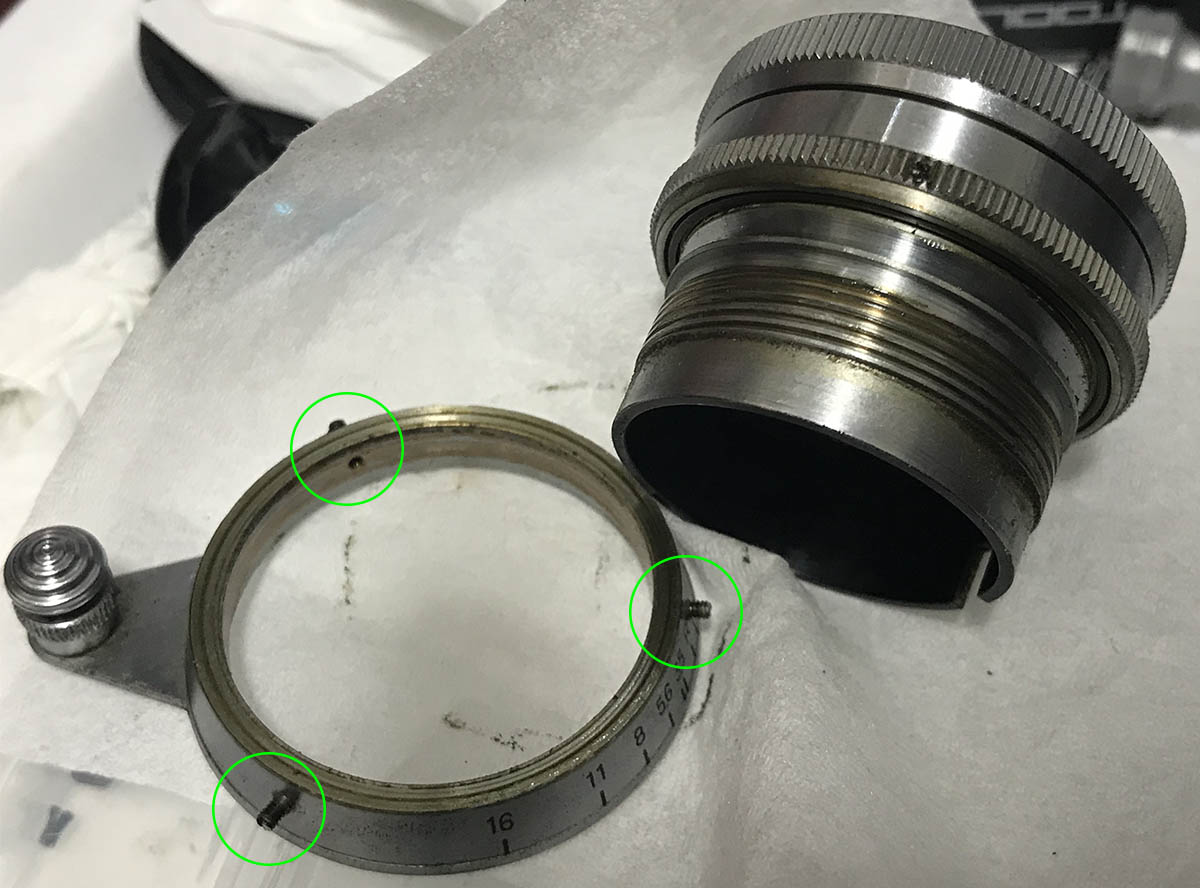
Here are the 2 halves of the lover barrel. One consists of the front part with the aperture ring, focusing ring and the inner helicoid. The other one consists of the mount, coupling cam and the outer helicoid. These are heavy and were milled from brass.

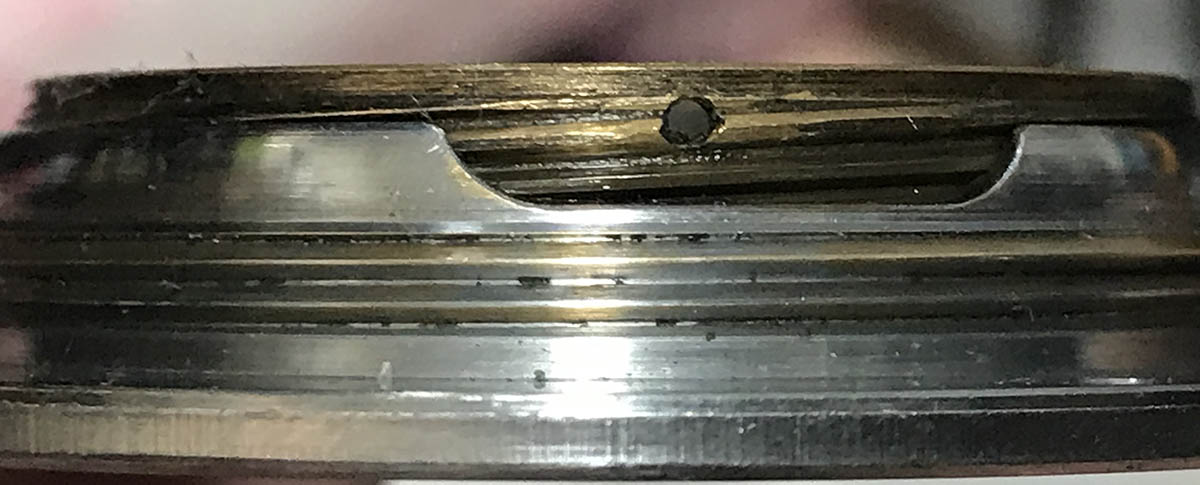
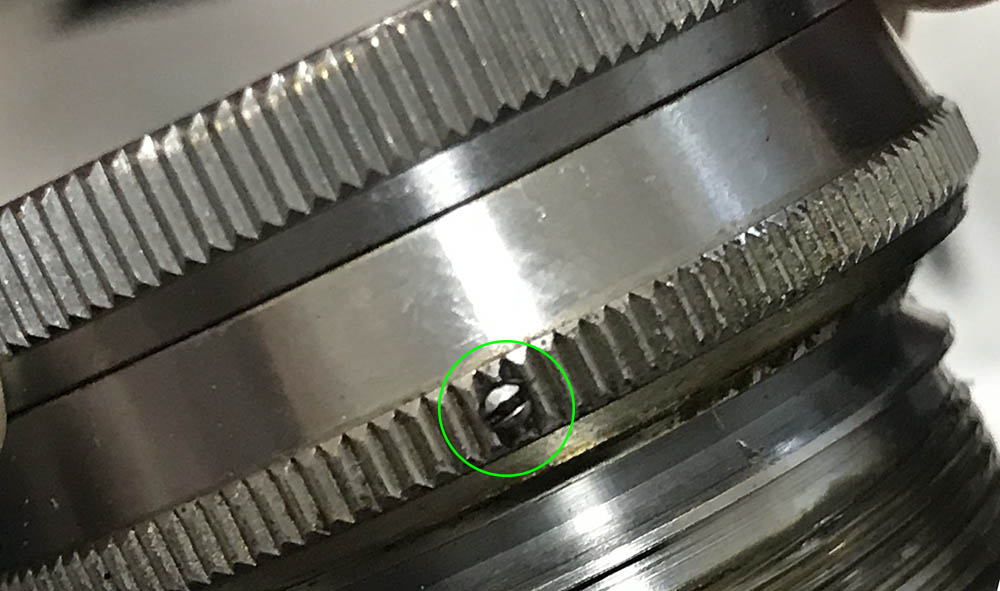
The outer helicoid is a separate piece that’s screwed to the mount and it’s being secured with a small set screw. Take note of its position and height before you remove it. This is a precision adjustment point and is critical for achieving proper focus.

Remove the set screw and you can unscrew the helicoid from the mount. It can be stuck due to caked grease or lacquer that was applied at the factory to prevent it from getting loose. Mine was this filthy when I opened it and yours may be just as dirty.

You can now remove the coupling cam. Well, you can actually remove it earlier but it’s a good idea to see how it works in relation to everything that’s why I told you to leave that there until this point.
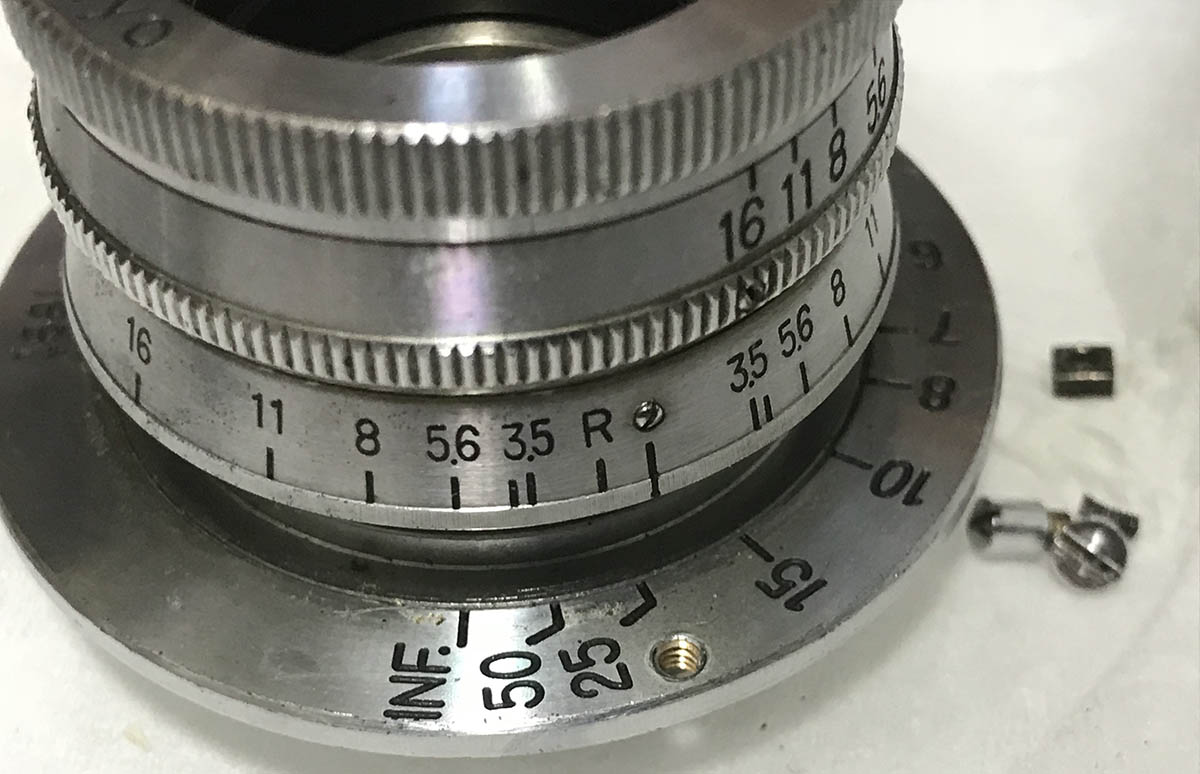
It’s now time to work on the other half. The focusing ring can be adjusted unlike many of Nikon’s earlier lenses. This is usually a trait of their cheaper lenses because the premium ones were filed-to-fit. Removing the focusing ring is easy, all you need to do is loosen the 3 screws around it but make sure that you took notes on its orientation before removing it so you’ll have a good starting point when putting it back. See how the oil has turned to a disgusting mess on my lens?
This is how long the 3 screws are. Just make sure that you have loosened them enough to clear the groove where they were sunked into. Do not bother dismantling the lock at the side of the focusing ring, the germs there will die in the alcohol bath anyway.
The aperture ring is similar to the focusing ring so do the same thing to remove it and do not forget to take notes before you begin removing it.
This is what’s underneath it. The aperture ring is secured to a collar that couples to the actual ring that turns the iris at the other side.
The collar can be removed by unscrewing this, make sure that you don’t damage it.
Here’s the inner ring at the other side. Note that the screw hole should be at the center of the slot so the screw that you last removed can move within it un-obstructed.

This inner ring can be unscrewed to remove it just like what you see here.
That’s it for the lens barrel. As you can see from my pictures it can get really filthy. This is an old lens with at least 65 years’ worth of dirt so lenses that are this dirty is common. Its lubricants spent the past couple of decades fermenting and nourishing germs so clean it very well with alcohol or other disinfectants. Fungus can also cause the finish to turn to a dull shade of silver when it’s allowed to stay there for decades. When cleaning the grease or oil from the helicoids make sure that you remove all of the gunk that has hardened in the threads. I use a very stiff brush to mechanically clean-away anything there. The brass helicoids can also get corroded or oxidized and if that happened the only option is to lap it using some metal polish. This is an advanced repair procedure and should only be for serious cases and done by an experienced repairer. You can easily remove more material than what you intended and you will never reverse that.
Disassembly (Objective):
The objective is simple and can be dismantled easily but its small size can make handling it a bit challenging for people with fat fingers like me. You can use a rubber glove to help you with your grip. Special tools are needed to get some of the things out because of their small size and it can be a bit scary even for the experienced repairman because one can get careless and cause an accident. I didn’t have to open the iris for this lens because the oil hasn’t contaminated it yet and any dirt I found in the iris was cleaned by wiping using a Q-tip and some naphtha. If you are new to repairing rangefinder lenses then please see my article on how to work with preset-type irises to know how to clean this kind of iris.
The front elements assembly can be unscrews from the objective’s housing. It’s a tight fit so you would want to use a soft rubber pad to help you grip it. You can also place a small drop of alcohol at the seams to help soften what ever is binding it.
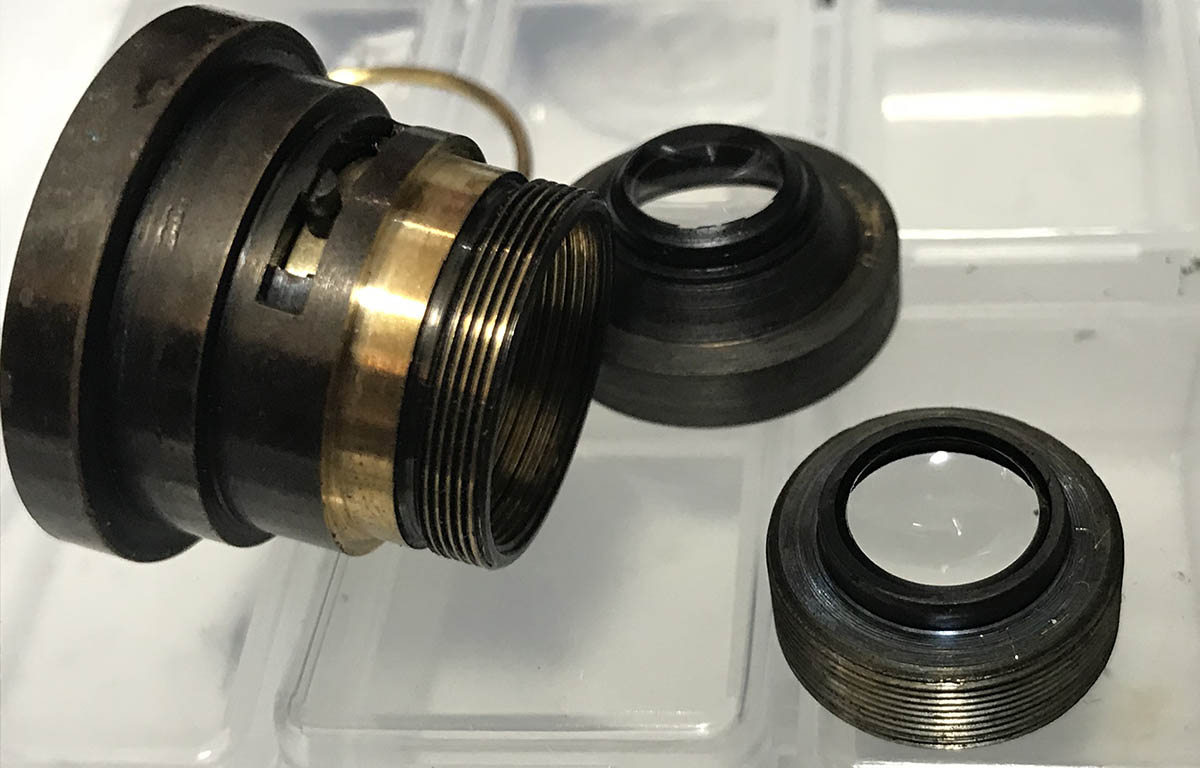
This is how everything looks like at this point, it’s a very small assembly and you should take care not to damage anything. I have a miniature pipe key that I use for small things like this, a lens spanner is too big to fit into the small space and can potentially harm the parts that you want to remove.

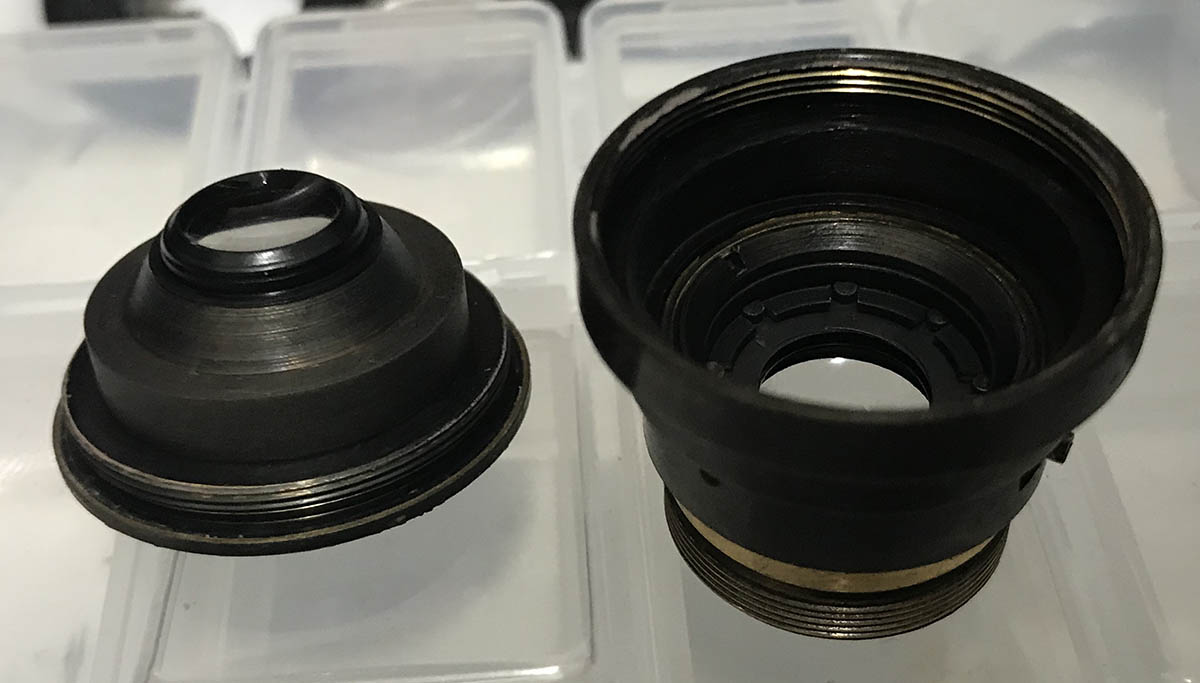
The front elements group’s housing can be separated like this so you can access both the 1st and 2nd element’s surfaces to clean them properly.
That’s all for the objective. Clean everything really well and make sure that you wiped all of the oily residue from it. The iris also has to be dismantled in order to be cleaned if that got oily. I was fortunate that mine doesn’t need to be cleaned.
Conclusion:
This lens took me about one hour or so to clean. I enjoyed working on this lens and I am glad that I repaired it before the problem got worse. I would have spent more time on it but I am too busy these days so I will probably get back to it this month again to polish its front element. I will detail that process and append this article when I get the chance.

Part of enjoying photography is enjoying good food while shooting. This picture is a good example showing just how small this setup can be. The bowl of noodles is several times bigger than the whole setup!
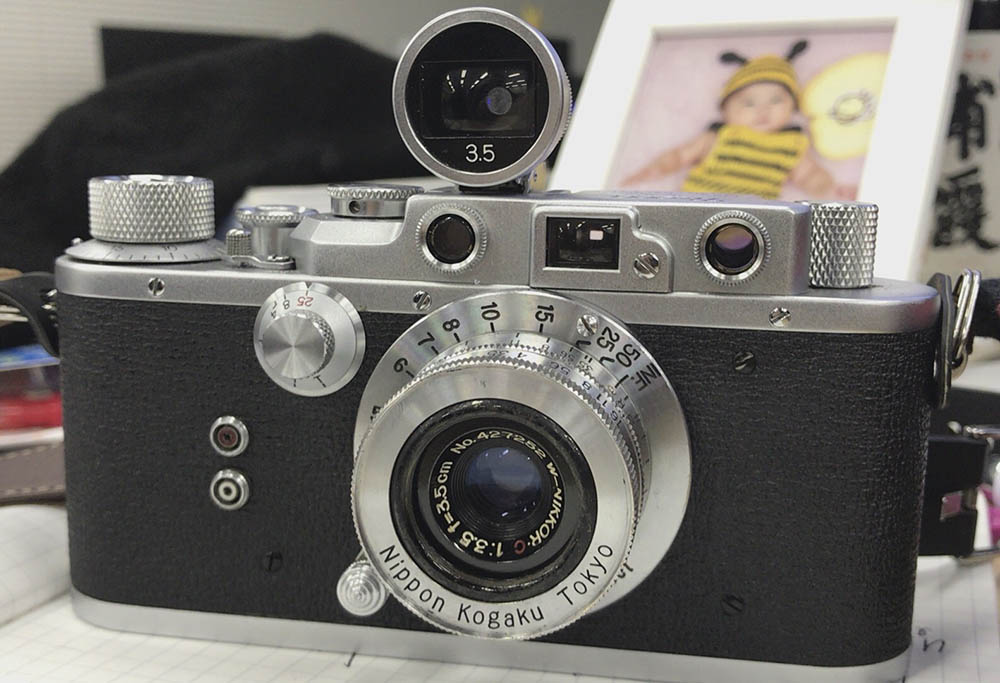
I love this lens a lot and it’s almost a permanent fixture to my Nicca 3S and Nicca Type-5. I have to use a separate finder for this because Barnack-type cameras usually only have a 50mm built-in finder that’s more akin to a peep-hole than a proper finder. A Canon 7 has frame lines from 35mm to 135mm and is the most-advanced Barnack clone when it came to features but it’s flimsy (and literally cheap) but that’s a story for another article!
That’s all for this article, it’s short but it offers plenty of information that’s absent on the internet. This is also important for repairs since nearly all W-Nikkors made in LTM share the same scheme and you can theoretically dismantle them all using this guide. See you again in the next article and as usual, please share this article if you enjoyed this. I would also like to ask a small favor from people who download the whole blog into their drive. I generally don’t mind you doing that but please navigate through my site as that will give my blog the means to support itself. I thank all of the people who pledged their support to our cause and you’re the only reason why I keep doing this despite the strain, pressure and stress. For that, I will dedicate my next camera repair article to you guys! You’ll only find that kind of information in this blog! I look forward to seeing you again in the next article and please look forward to my surprise for you this Christmas. Ric.
Help Support this Blog:
Maintaining this blog requires money to operate. If you think that this site has helped you or you want to show your support by helping with the site’s upkeep, you can make a small donation to my paypal.com (richardHaw888@gmail.com). Money is not my prime motivation for this blog and I believe that I have enough to run this but you can help me make this site (and the companion facebook page) grow.
Leave me some tip?
Thank you very much for your continued support!
$2.00
Helping support this site will ensure that this will be kept going as long as I have the time and energy for this. I would appreciate it if you just leave out your name or details like your country’s name or other information so that the donations will totally be anonymous. This is a labor of love and I intend to keep it that way for as long as I can. Ric.

4 Comments (+add yours?)