
Hello, everybody! We will tackle something different today, I would like to show you how to fabricate iris blades so you’ll know how these things were made. This is a delicate task that is best left to the advanced amateur or the professional repairman because it requires several special tools and a lot of practical know-how to achieve acceptable results. This is very troublesome, I would rather salvage parts from another lens than do this but this lens is a very valuable one and it’s a historic lens, too. It deserves to be restored and I will give it my best effort just to have it working perfectly again.
This is something you don’t see everyday, an article that teaches you how to fabricate intricate parts! It’s best to have the right tools to do this properly, I don’t want to invest too much money on this because all I wanted to make is a single blade. If I were to fabricate several ones then I would buy a press, a punch and some die-making tools so I can make accurate replicas.
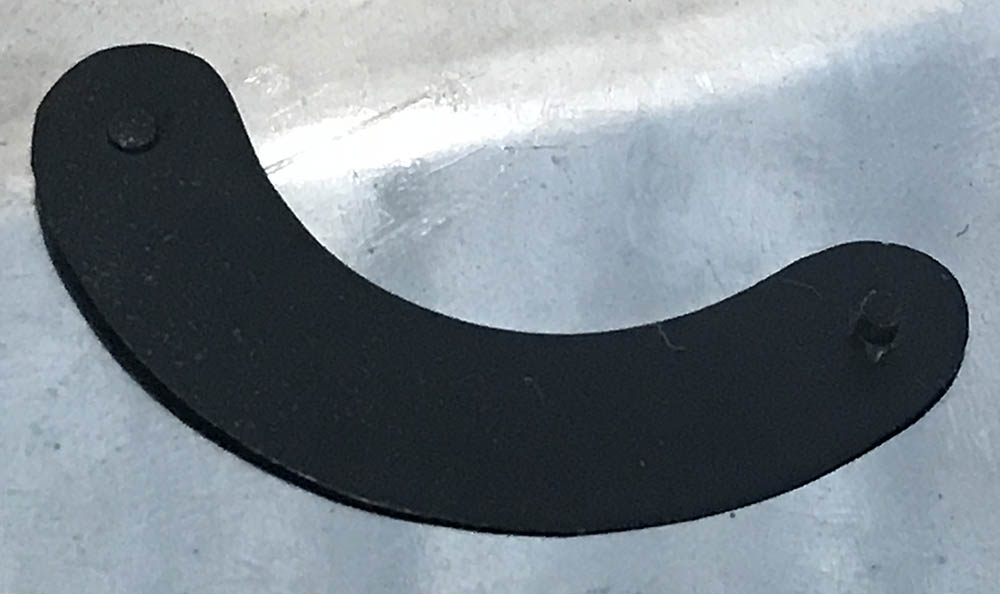
Fabrication (Blade):
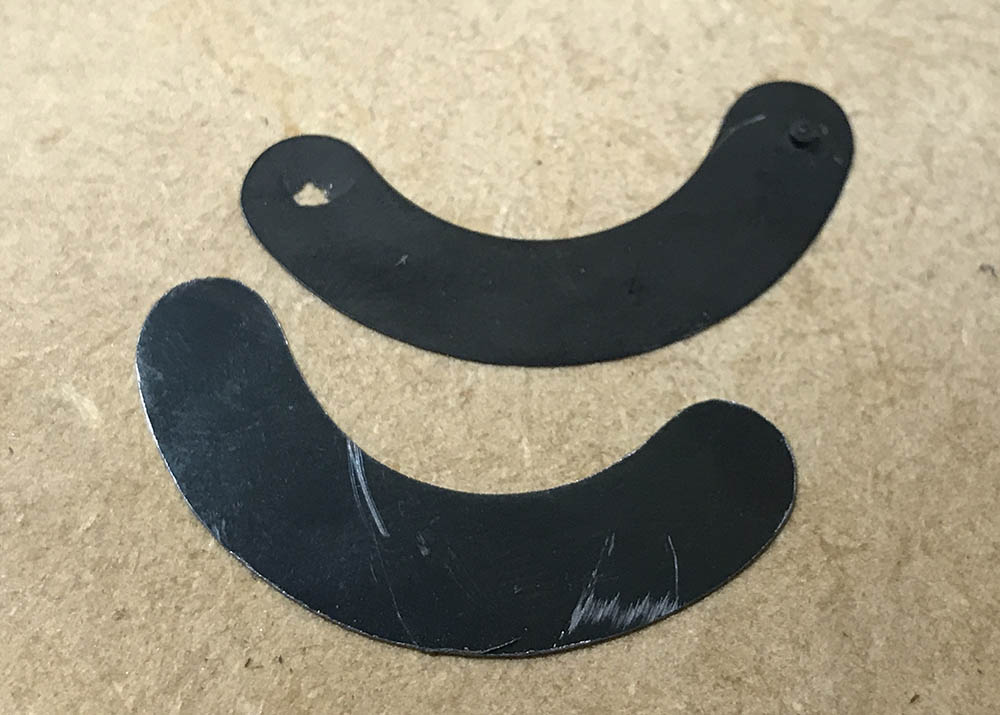
You will have to source the thinnest spring steel available to you. The ones I got are 0.09mm, the actual ones are 0.05mm. It’s not a lot of difference but it is important to get them to be as close as possible. Sanding and filing can be a good way to get them thinner but I will accept this for now since I cannot source the thinner ones easily and I don’t want to add additional cost just to order them online. Spring steel is the best material for this as it flexes so it won’t crack when you’re working on it.
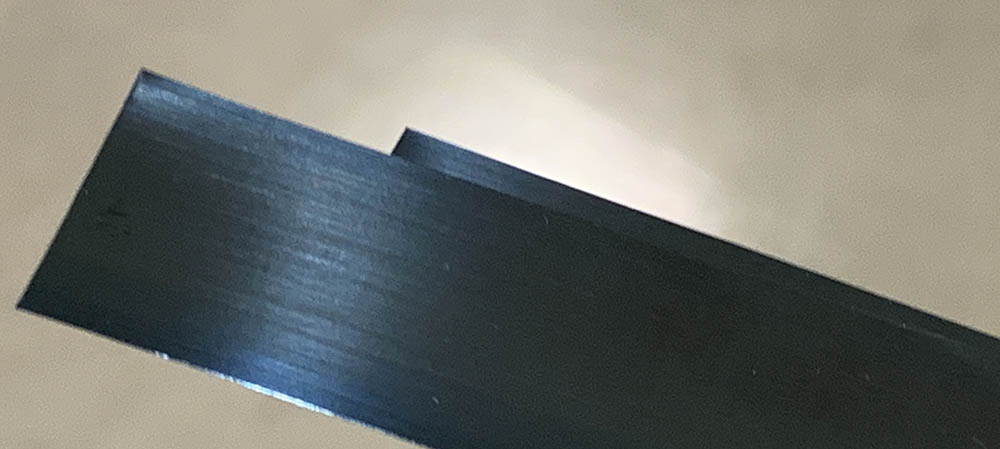
Cut a small piece that will cover the size of the blade from your stock.
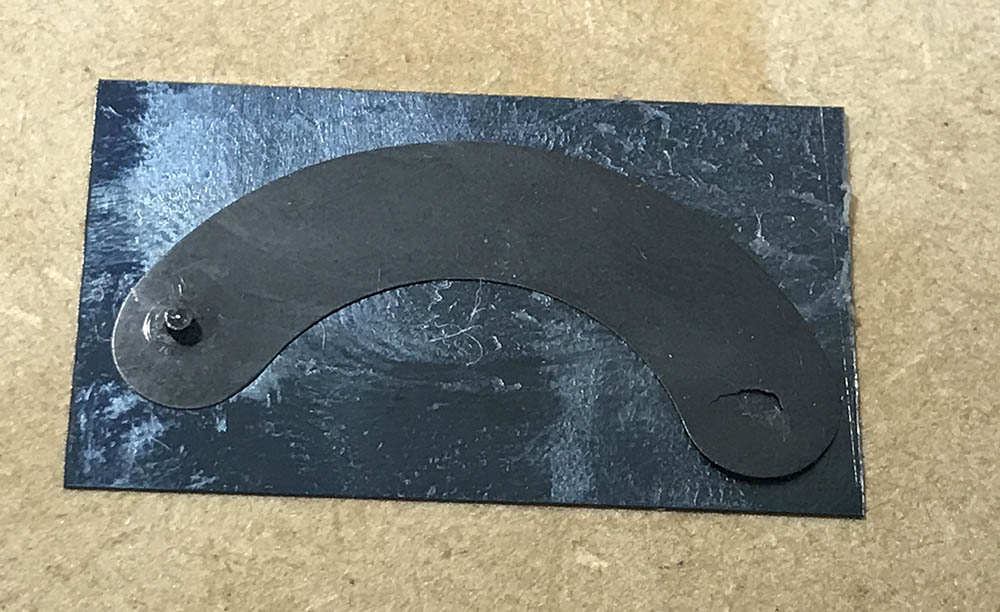
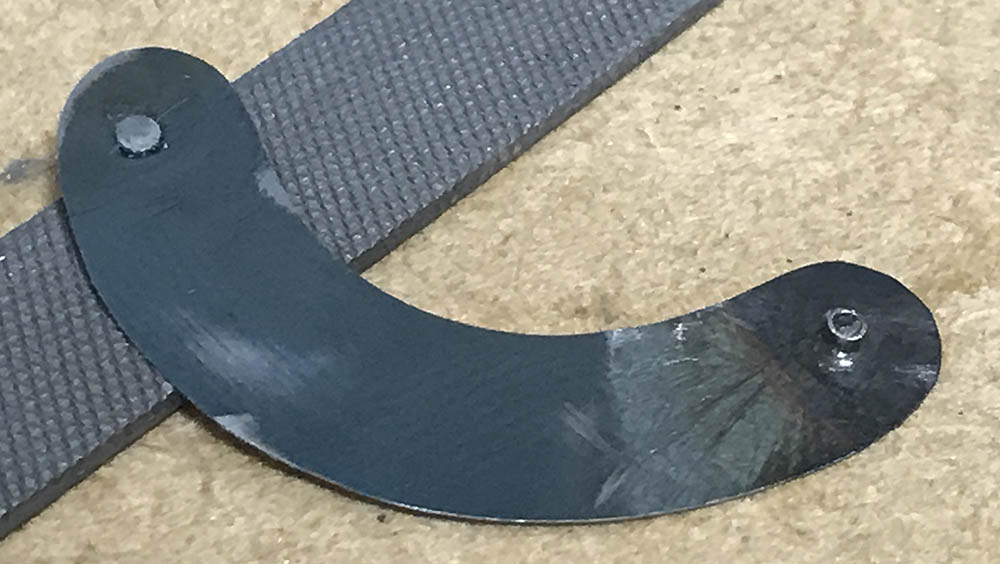
Lay the broken blade on the new material, cementing it to the stock helps a lot so it won’t move as you trace its shape on the new material. A scriber for engineers works best for this. It’s basically just a high-carbon steel point for scratching marks on the surface of metal.
Grind the new material to shape but not too-close. If you have to fabricate a lot of these, it’s best to clamp several layers with a vise and shape them as a single block. This will help ensure uniformity, your holes will also end up in the same place.
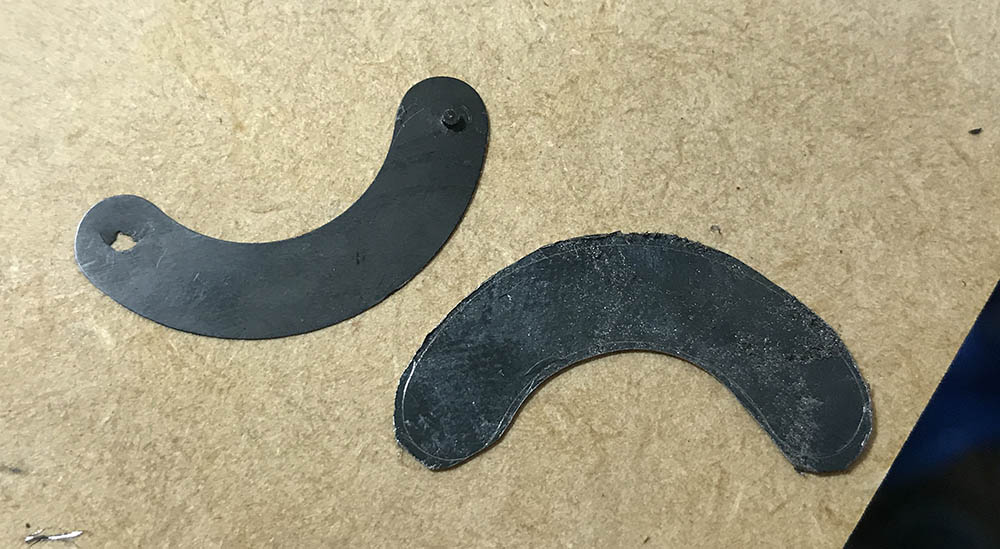
Grind or file the rest of the material so its shape is as close to the real one as possible, making sure that you don’t remove too much from the new blade. I used a motor tool with a grinding bit and a few types of files to shape them and smooth-out any rough parts.
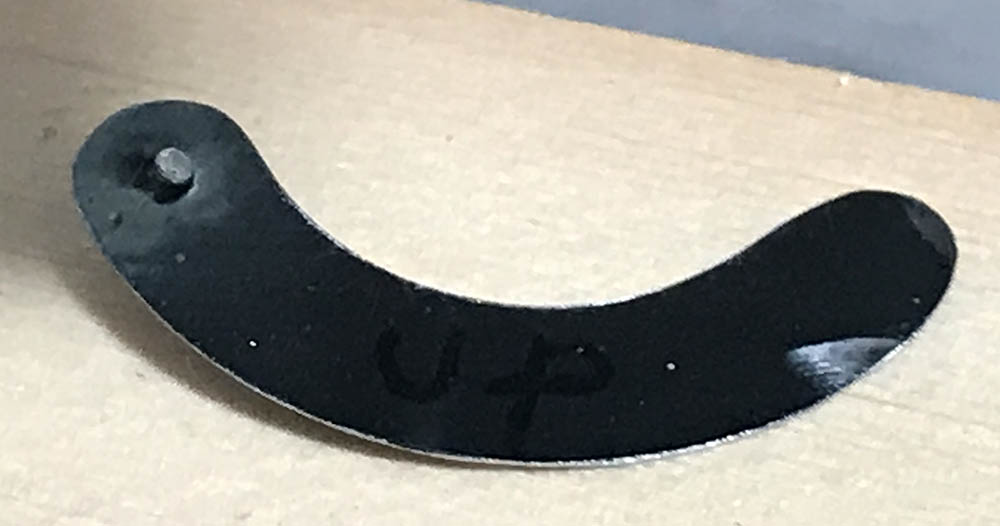
Getting the shape as close as possible is important so the new blade will not snag or damage the other ones. Leave the final sanding out for now because you will still shape it later as you make adjustments.
Fabrication (Pin):
The pegs are the most difficult part to fabricate because they are small and you need to fabricate them perfectly or they won’t work at all. Making them took the most time as I had to mill several ones and pick the best one I made from the batch. The pegs come in different styles but this one is the simplest type to make. It’s merely a metal pin securing a thin metal tube and peening the pins essentially turns them into miniature rivets. Some of the later types were made using a brass stud (hollow or solid) that you press or peen to the blades while some are simply hollow rods that were pressed-fit. These ones are the most difficult to fabricate because of the precision required. There is another type which is basically just the blade pressed at the holes to form a lip around them. These are great for really small blades as the lips aren’t tall and are shallow enough to fit into a miniature iris mechanism. You can see these used in smaller cinema lenses.
Luckily for me, this lens uses a preset-type iris so they will tolerate a little bit of slop. An automatic iris will require more precision to make them work as they have to be precise in order to actuate perfectly. I’ll only show you how to deal with the simpler type as this is the one that I had to fabricate.
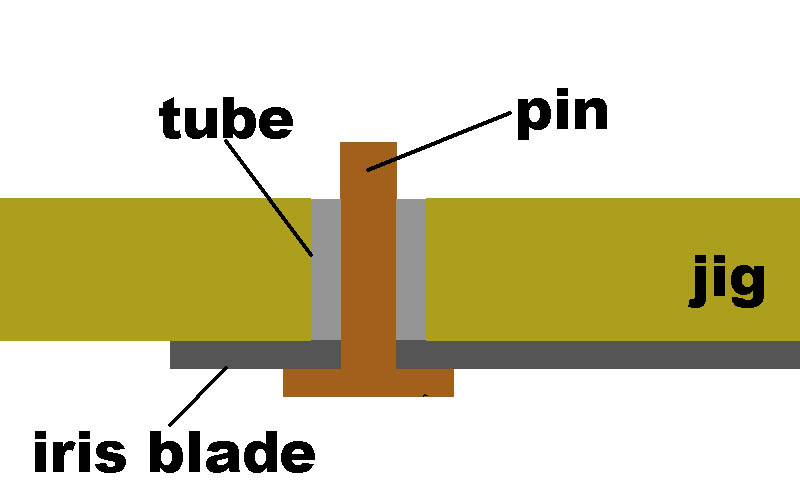
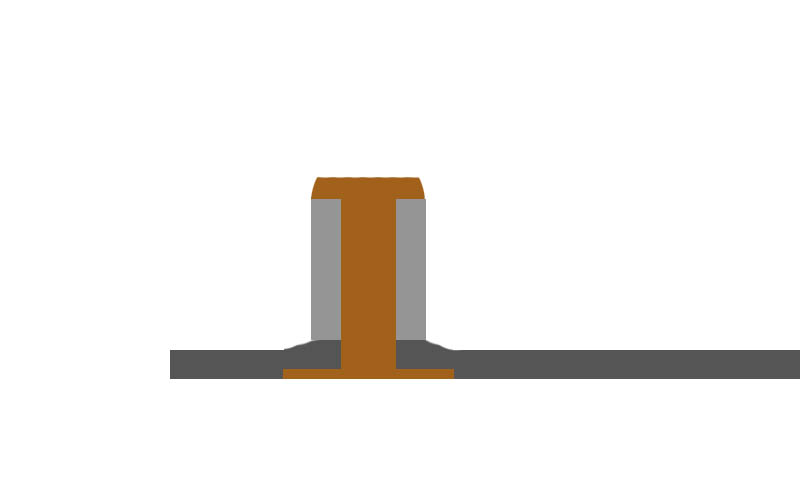
This is just a simple illustration of my plan. The “jig” is just a piece of brass I found in my scraps tin. It should roughly be the same size as the protruding part of the iris blade (peg). The peg consists of the pin and the tube which is just a small part that’s the same diameter as the peg of the original blade. It has a hole drilled to it and that’s where the parts of the peg should sit. Your pin should have a small length of extra material at the end.
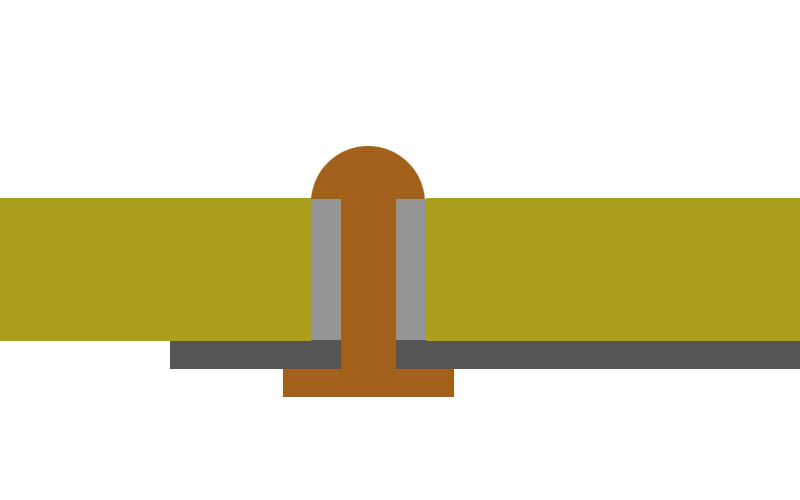
The crude “jig” is only there to make sure that everything is held in-place. It has to be made from metal and you’ll soon know why. Get a small hammer, whack the extra material of the pin to round the tip off. The jig makes sure that the pin and tube won’t get hammered out of shape and also to protect the delicate blade.
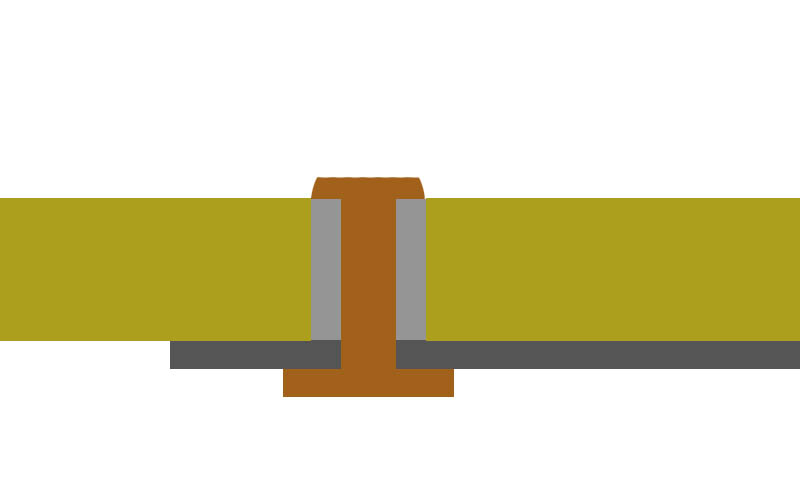
File the tip of the pin to remove the extra material while still leaving a bit of metal that’s enough to keep everything together.
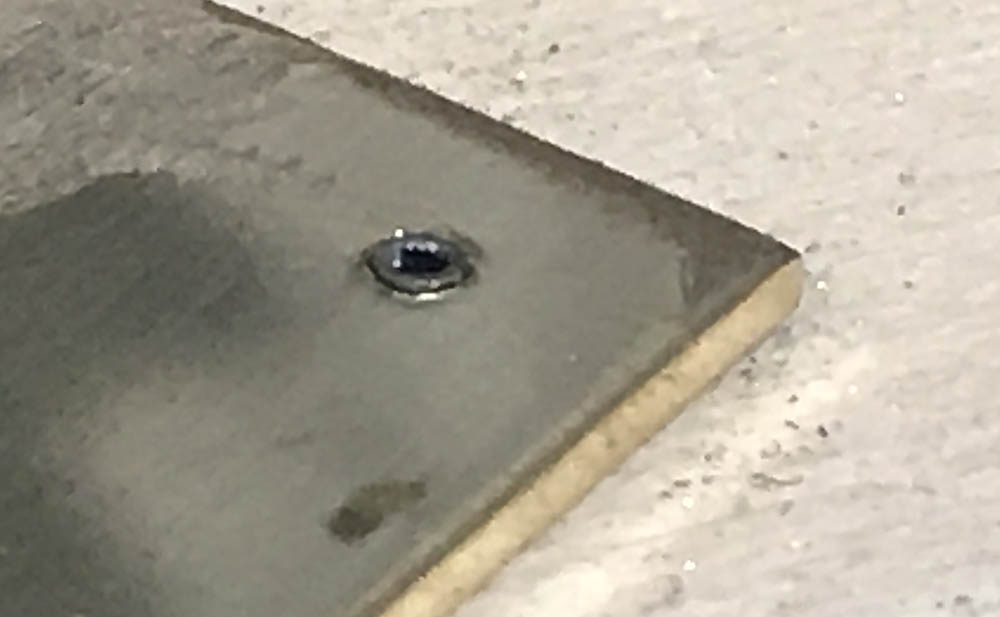
The broad-end of the pin is sticking-out and it should be flush with the new blade. To get this, hammer that end while the whole thing is still in the “jig” and that should help push it out, creating a dimple in the process. File and sand it so it’s flush but make sure not to remove too much.
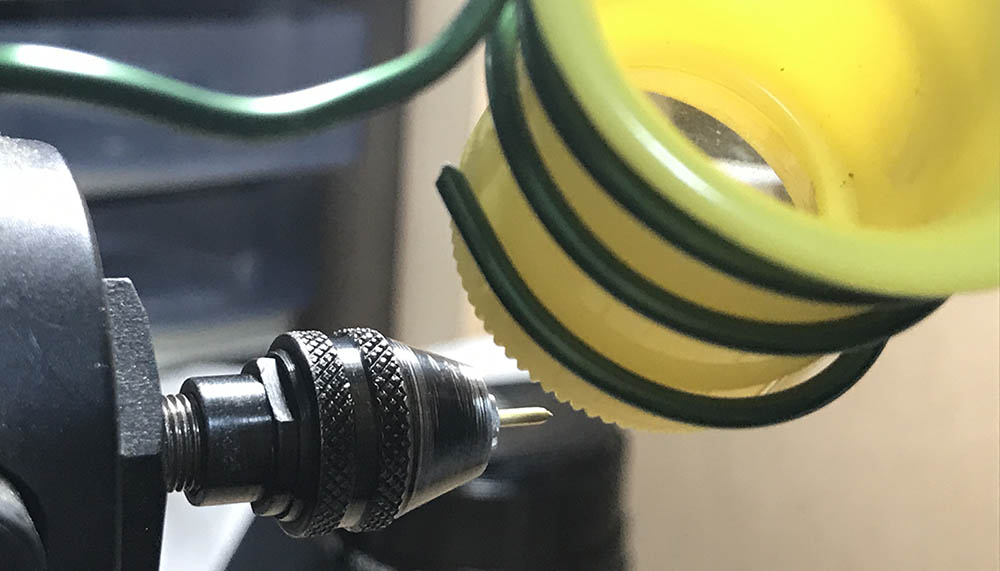
The pin can be created with a motor tool and some tools for jewelers like an expensive file that I use.
A loupe is handy to make sure that you’re doing a precise job. A micrometer is non-negotiable for this, if you don’t have one then forget about doing this. This is for a different type of iris but I am just showing you this so you will have an idea as to how to mill your pin.
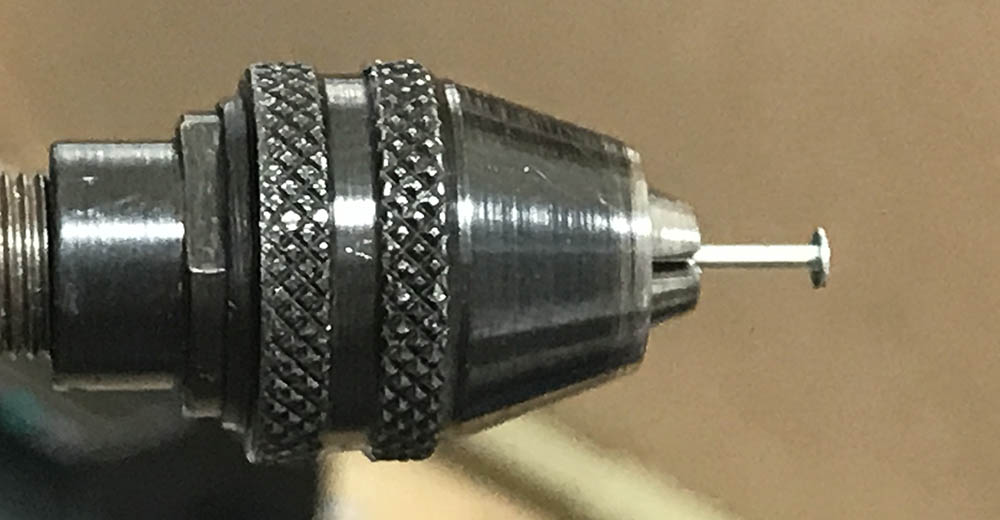
For this particular iris blade, a nail or push-pin will be better because it has a wide head. You can’t use them as-is and you will have to mill them so they will fit properly. The head is also too-thick and large so it had to be milled.

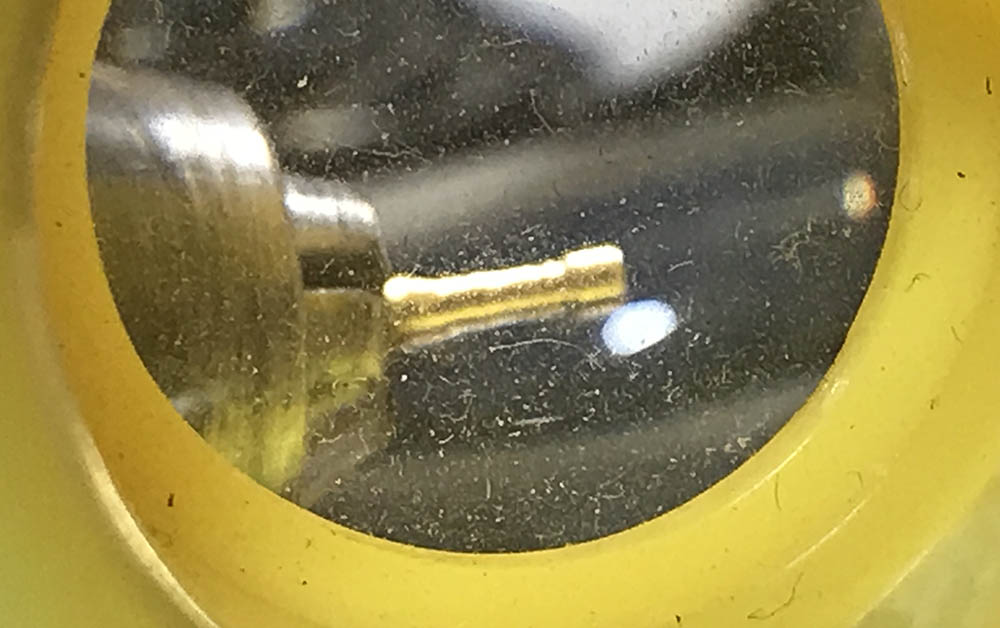
This is what I ended up with. The tube was made from a syringe needle. It’s of the perfect size and all I had to do was to fit the pin inside of it. The thing you see at the top is just a prototype milled from stainless steel.
Drill a hole on the new material for your pin to sit in and test and see if the pin and tube sits there perfectly.

The stock material for the pin can be precisely milled-to-shape using the jig.
Grind or file the extra material until it’s flush with the jig. Make sure that its ends are flush on both sides.
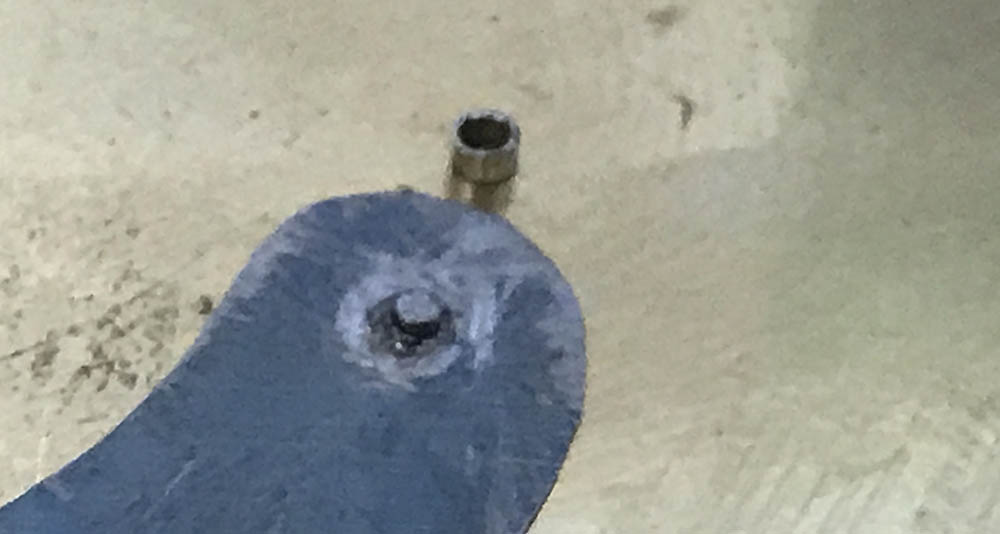
Time to see if things fit. This is the shorter one and the tube is just 0.5mm, it was annoying to fabricate this thing. Before you start peening these, be sure to mark which side of the iris should be facing up so you’ll know which side requires which peg and where the heads should be facing.
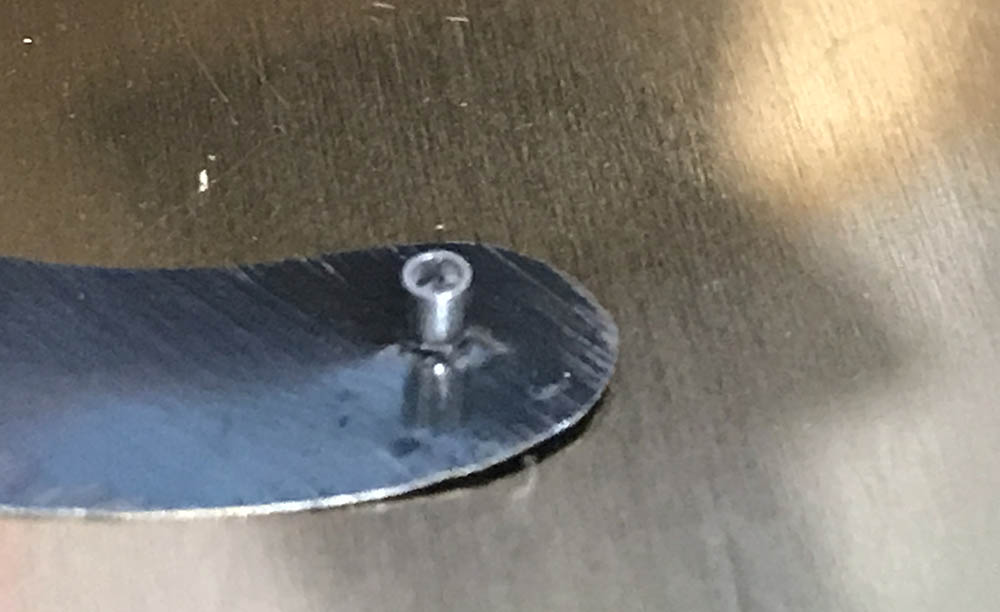
The longer one was easier, it’s around 0.8mm tall.
It will probably take you an hour to make these pins and tubes and you can even take the whole afternoon if you had to make more. Remember to cut a bit longer than you need because you can just snip the extra material using a flush-cutter. A flat tip is best when peening as the resulting head will also be flat or round when you mushroom it with a hammer. A pointed tip won’t do because you’ll only end up with a bent point rather than a nice, round or uniform head.
Fabrication (Fit):
Every time you reach a milestone, make sure that you test-fit your blade so you will know if any adjustments are needed. You will want to make these adjustments as soon as you find any errors.

Test the whole thing on the iris mechanism first to see if it fits.

Try and see if you can turn it effortlessly and then make another hole based on the new blade’s position on the mechanism.

It’s now time to install the pins, it’s hammer-time!
Temper the part that you just hammered with a torch.

This is how the dimple should look after initial grinding. Sand or file this to make it flush so it won’t scratch the other blades. To make sure that this will work properly, try and assemble the iris to see if it works and make smaller adjustments if things didn’t go well. I had to file this one again because the shape of the iris wasn’t round because this blade’s curve was too shallow.
A coat of black paint seals everything, you’re now done. For those who want to be fancy, you can even use epoxy or superglue to coat the broad-end, use a fine file to remove the excess adhesive. Putty won’t do unless it’s epoxy, it should be tough. Solder will also work as tin is also great for this but I don’t think it will stick to the parts and you’ll need special prep just to use it.
Don’t apply a thick coat of paint because you’ll just add additional thickness to your blade. Spray these in light, passing coats and wait for it to dry. Bake them if you want to, that will help make them dry faster and the result will be tougher.
Conclusion:
Fabricating this one blade took me the whole afternoon, it was fun but this is something that I would rather avoid doing if I can. This lens is valuable so I want to fix this as best as I can so all that effort was worth it.

Here’s the whole thing. The iris now works perfectly. Powdered graphite is a must for this kind of job, apply a generous amount on the blades, massage it by exercising the iris so the powder will be spread as even as possible. Blow the excess powder off and you’re done.
I hope that this article helped educate and entertain you. If you like to know more about these kinds of things, please tell me what you want to see next. I will see if I can find something in my notes or parts bin. If you love this one, please help me by sharing this at social media. Sharing this helps the site as it generates a few cents every couple of views. This helps me pay for hosting and other maintenance required to run this blog. Facebook has also blocked sharing posts and that happened to me once so I ended up in Facebook Jail, I hope that you can help me spread this one. If that happened, I will be forced to make this blog into a subscription-only page in order to pay the bills. That is something that I don’t want to do so please help me fight the algorithm. It is unfair to let a program decide which content is worth sharing or not. Ric.
Help Support this Blog:
Maintaining this blog requires money to operate. If you think that this site has helped you or you want to show your support by helping with the site’s upkeep, you can make a small donation to my paypal.com (richardHaw888@gmail.com). Money is not my prime motivation for this blog and I believe that I have enough to run this but you can help me make this site (and the companion facebook page) grow.
Leave me some tip?
Thank you very much for your continued support!
$2.00
Helping support this site will ensure that this will be kept going as long as I have the time and energy for this. I would appreciate it if you just leave out your name or details like your country’s name or other information so that the donations will totally be anonymous. This is a labor of love and I intend to keep it that way for as long as I can. Ric.

Aug 24, 2019 @ 04:24:04
Wonderful stuff, I’d be happy to subscribe if the idiots at Facebook mess you around. Best regards, Clare.
Dec 21, 2019 @ 03:41:10
Thank you, Clare! You’re such a wonderful person.
Sep 30, 2021 @ 17:18:24
Thank you for having made that public. For me as a professional movie gear servicer it is always interesting to learn about what others do. Today my first diaphragm blade lost a peg, beyond repair. Since the blades and especially the pegs are so tiny I rather seek another whole equal lens to either pull the diaphragm from it or to replace the broken example. It depends on the glass, of course. One cannot stress enough that big forces go through the blades, if they stick together or when the iris is closed too far.
Dec 23, 2023 @ 00:43:13
This is really top-level stuff. I admire the dedication and precision it took to do this project. I recently had to rebuild a 13-blade diaphragm in my 7Artisans 25mm f/0.95 because I was too hasty in my disassembly to diagnose sloppy focus travel. I am still surprised I was successful. It gave me confidence that I may be able to rebuild the diaphragm in my 1:2.9/50 M.O.G Trioplan. It has about the same number of blades, but is much more miniaturized and cramped (and some of the blades are slightly warped). Well, I got about 8 blades into it and realized I wouldn’t be able to fit more. My method was to tackle the easy ones first – it’s when the underlapping occurred that I realized I just didn’t have the skill necessary to anchor each additional blade deeper underneath the ones already in place. Do you have any tips or tricks that could make large-number diaphragm reconstructions more accessible? The Trioplan works just fine without the diaphragm, but the perfectionist in me hates to leave it less than 100% functional.