
Hello, everybody! Do you practice martial arts? If you do, then many of you dream of being a “blackbelt“. To be blackbelt, you will need to accomplish several feats as sanctioned by the organization you are part of. Being one brings prestige and a sense of expectation from other people. Your skill will also be tested by others to see if you are the real thing. Today, I will show you another “blackbelt“, and just like what the martial arts equivalent means, it’s one formidable lens with great performance and reputation. Please stay and read the whole article to know what this lens is.
Introduction:
Today, we’re going to show case the Nikkor-H•C 5cm f/2 (L39)! It’s the same lens as the Nikkor-H•C 5cm f/2 but it was made for use on cameras with the L39 (M39) lens mount. It has a 39mm thread that you can screw-in to your camera so it doesn’t come with a bayonet. The optical performance of this is identical to the Nikon S-mount version. Both were derivatives of the Sonnar, an old lens Zeiss design that offers good resistance to flare and is known to give nice, smooth bokeh. The old Sonnar design was protected under German law so Leica couldn’t make a derivative of it. When Germany lost World War 2, the patents were made void outside of Germany so other countries like Japan capitalized on this and made many Sonnar-type clones that are affordable and sometimes, even much better. It must be noted that Zeiss made some Sonnars in the L39 mount but they’re really expensive and rare so the only way a Leica shooter can source one for cheap is to purchase Russian or Japanese copies or adapt the Contax-mount ones to the mount of their choice. So, what’s unique with the Nikon version? Read on.

It’s a compact lens but it feels dense due to the brass components used. It’s also noticeably better-built compared to the other Zeiss-clones. The Nikon version is more refined, the machining looks better than the Russian ones, too. It’s a beautiful lens that will grab people’s attention.
This is the late version of the Nikkor-H•C 5cm f/2, both share the same optics with the Nikkor-H•C 5cm f/2 so read both articles to know more about its optical design.

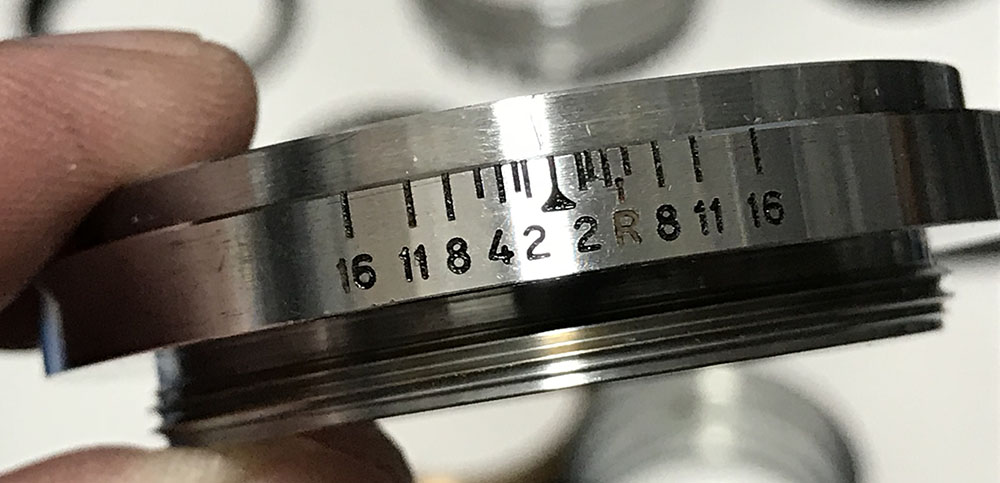
What is peculiar about this is that this can focus really close. The minimum focusing distance for it is 3.5ft but you can turn the aperture ring beyond it and it can focus down to about 1.5ft! These distances are in red noting that it has de-coupled from the rangefinder in the camera in “macro mode”. You mush use a special attachment for you to focus at these distances using the camera’s rangefinder. Handling is perfect as the front extends without turning unlike most older LTM lenses, it feels like using a modern lens to be honest.
This is how close it can focus when set to 1.5ft, there’s a click-stop that won’t allow you to turn any further unless you turn the ring beyond that. This is a nice touch since it will prevent any accidental turning of the focusing ring past its coupled distances.

The Nikkor-H•C 5cm f/2 was frequently bundled with the Nicca 3s as a set because Nicca doesn’t have the capability to manufacture their own lenses back then. This makes for a very nice walk-around setup, I enjoyed shooting with this setup a lot to be honest. This is the latter black-ringed version and it fetches a small premium over the all-chrome earlier version. This is just a cosmetic difference, the optical formula is identical. Maybe it was tweaked a bit throughout its production life but who knows?
Learning how to use your lens is important as this will help you maximize it and you’ll learn how to avoid its weaknesses. Since this has the exact optical design of the Nikkor-H•C 5cm f/2 in the Nikon S-mount, I suggest you go read that article, too. The even-earlier Nikkor-H•C 5cm f/2 (collapsible) version is similar to this and you can read that one, too. Reading them will help you in understanding the performance and history of this lens better.

The lens renders exquisitely on digital. Look how delicate the picture looks, it is sharp in the areas where it’s in-focus and then it gently transitions into the smooth out-of-focus areas. It’s a famous characteristic of Sonnar-type lenses but some people don’t like this, which I find odd.

The bokeh balls look smooth but with slight edge outlining. Flare and ghost-resistance is good. I shot with the Nikkor-H.C 5cm f/2 a lot in both Nikon and Leica mounts, It is not a bad performer if it comes to flare, the Sonnar was designed to have less air-to-glass surfaces to counter flaring and internal reflections in an age where most lenses weren’t coated, use a pre-war Leica to understand what I mean. As lens coatings became more commonly-used, this advantage of the Sonnar-type lenses becomes less and less exclusive. Sonnar-type lenses were not ideal for normal or shorter focal lengths for use with SLRs so it quickly went out of favor as its design requires it to be close to the film plane but it remained popular for longer focal lengths.


(Click to enlarge)
The pictures above were shot from f/2, f/2.8 and f/4 respectively. Wide-open, you can see that it is already sharp where in-focus. Contrast is already good but stopping the lens down to f/2.8 will make the center a lot sharper. By f/4, things improve even more, you’ll notice a big jump in resolution. By f/5.6, the center is now reaching its peak performance. Vignetting is obvious wide-open, it goes away by f/2.8, if that bothers you then you can alleviate it by over-exposing your photo a bit at f/2 to compensate for the darkening of the corners brought about by vignetting.


(Click to enlarge)
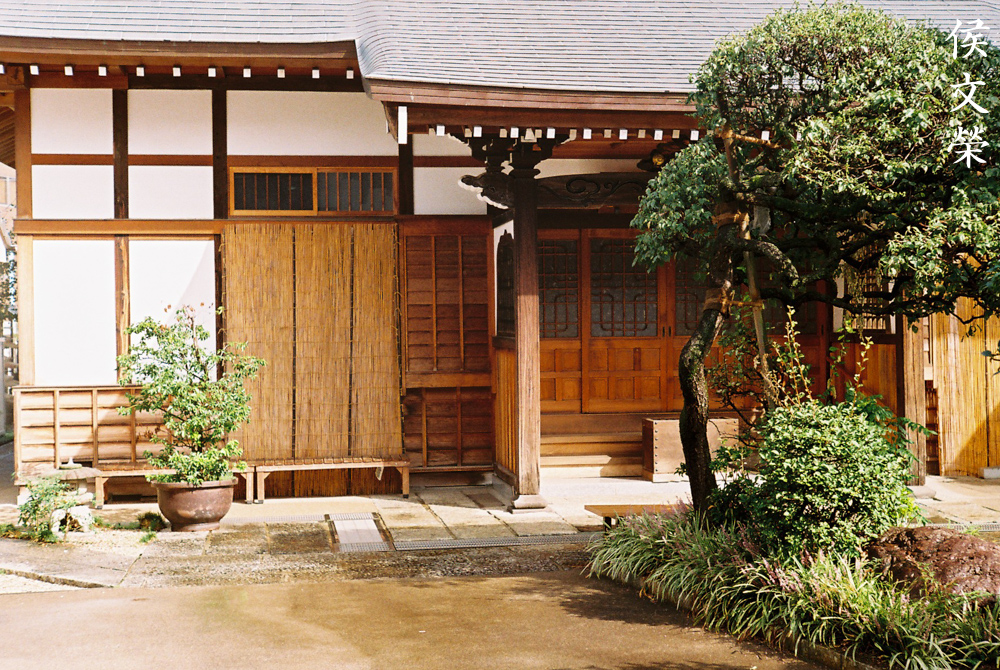
This set should give you an idea of how it performs in real-world use. These were mostly shot wide-open. Just look at how smooth it is! It certainly has that desirable “classic-look” to it. It even renders some of the scenes in a “painterly” way. Its bokeh looks nice and smooth, very typical of the Sonnar-type lenses but it can look bad in some situations where there’s a lot of high frequency details in the background such as foliage, pebbles and tree barks. If you want to see more, please head to the Nikkor-H.C 5cm f/2 article to see more pictures and commentaries as I consider that to be the more complete article when it comes to the performance of this lens.
Let’s now see some pictures that were taken with film. This lens was made during the film era and it’s only fair that we see some photos taken with it, that will give us a better idea on how this lens performs using its intended media. Film has a unique look that’s difficult to simulate using a digital sensor and that’s the reason why we still shoot with film. I took these with Kodak Color Plus 200 using my Leica IIIf.

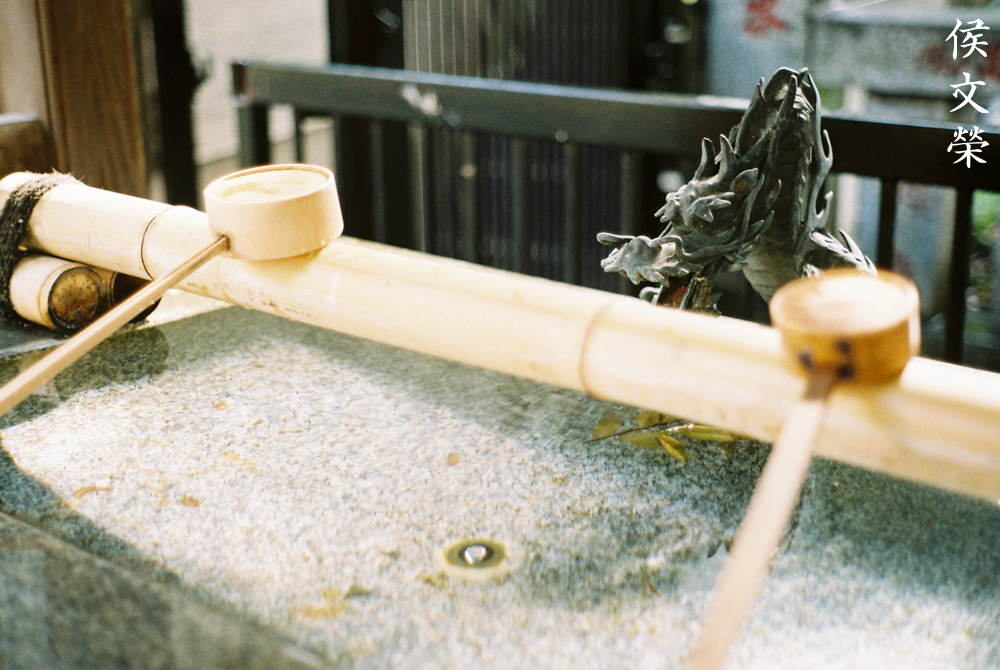
Great performance wide-open. You’ll notice a subtle “glow” around the subject that’s caused by spherical aberration. This is a “feature” of this lens and many other lenses from the same period.
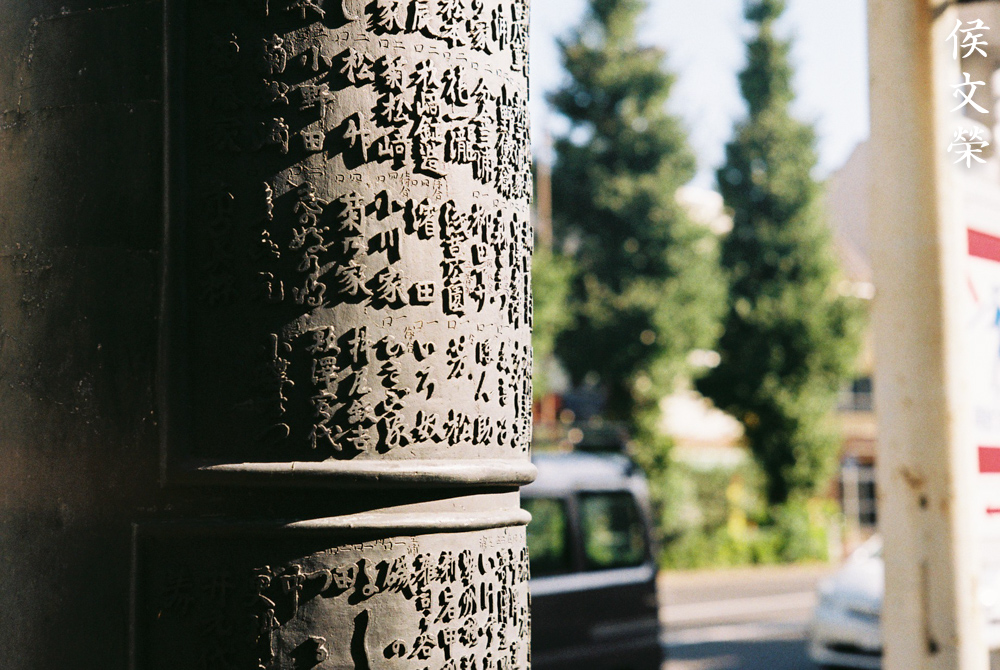
This was taken at the minimum focus distance, I think this was shot at f/8. It is really sharp at this aperture as evident by the sharp details on the pillar. Notice that the bokeh’s character looks kind of distracting at the background because it has foliage. This is not to say that this lens has poor bokeh quality but it just shows that some things will trigger this look if you’re not careful.


(Click to enlarge)
It’s an okay lens for shooting at night but you’ll want to use a faster film for these kinds of photos since f/2 won’t be enough if you’re shooting with a slow film.


(Click to enlarge)
This is a nice lens for travel photography, it’s compact and practical. You’re going to love this lens as its silhouette blends perfectly with your Leica and other LTM cameras. The pictures you get with film from this lens is amazing and that’s the best way to shoot with it.
That is all for the introduction. I wish to introduce you guys to Nikkors that were made with other mounts just to add some variety. We should appreciate all Nikkors in whatever mount they came with. Should we recommend this lens? Yes! They are getting cheaper these days, you can purchase one for less than $200 in recent years and in good-enough condition, too. Many Leica shooters enjoy shooting these, I don’t see any reason why you won’t, too. For many Leica owners who don’t have enough internal organs left to sell, this is the next-best-thing to a real Leica. It’s not made by blonde-haired and blue-eyed supermen but it still has enough pedigree and prestige. The secret is, it even outperforms many early Leicas. When you are looking for one, be sure that the iris is clean and dry. Check the glass very carefully, there should not be a sign of balsam separation, that’s the weakness of early Sonnars and its derivatives. Turn the focusing ring, it should not be seized at all, a little stiffness is acceptable, you will want to service it anyway. Lastly, many lenses of this age come with small cleaning marks on the front element, that’s normal. You may even find a few bubbles in the glass, too. That is also normal and it should not affect your images in any drastic way even when shooting with a smaller aperture. Happy hunting.
Before We Begin:
If this is your first attempt at repairing a lens, I suggest that you check my previous posts regarding screws & drivers, grease and other things. Also read what I wrote about the tools that you’ll need to fix Nikkors.
I suggest that you read these primers before you begin (for beginners):
- Essential tools
- Best practices 1
- Best practices 2
- Best practices 3
- Ai conversion
- Working with Helicoids
Reading these primers should lessen the chance of ruining your lens if you are a novice. Before opening up any lens, always look for other people who have done so in Youtube or elsewhere. Any information is scarce, vague and scattered (that is why I started this site) but you can still find some information if you search carefully.
I highly recommend that you read my working with helicoids post, this is very important and getting it wrong can ruin your day. If I can force you to read this, I would. It is that important!
For more advanced topics, you can read my fungus removal post as a start. This post has a lot of useful information and it will be beneficial for you to read this.
Disassembly (Lens Barrel):
The disassembly of the main barrel is typical of early screw-mount Leica. It’s easy to work with if you’re a repairman that’s familiar with older German or Russian lenses but it’s not something that I’ll recommend a total beginner to work with. Amateur repairmen with the proper tools and some experience will find this simple. It can be separated into two assemblies, the front and rear. The front assembly contains the optics and the iris assembly while the rear part is the focusing unit. This isn’t complicated to work with but there are some things that you should be careful with, just take plenty of notes and measurements before you remove anything.
When working with chrome lenses, it’s important to use drivers that will fit the slot of the screws perfectly. If your screwdriver does not fit properly there’s a big chance that you’ll ruin the head or scar the screw’s surrounding metal. This is going to make your lens ugly, we want to avoid this as much as possible. I own several sets of drivers just for this but there are times when I need to modify a driver by filing and sanding it so that it will perfectly fit a slot.

Typical of many older LTM Nikkors, this has a retaining ring that you can remove so you can separate the lens into its basic parts. Use a lens spanner and position the tips on the holes and unscrew it. As you can see, somebody else has worked on this.
It should come off easily like this. Don’t forget to place the lens on a flat surface with the rear facing up or else the front assembly will drop to the floor.

The focusing unit can now be lifted. Be careful while extracting it so you won’t scratch the rear element.
A brass shim is used to adjust the lens’ focus so don’t lose it. Put the front assembly in a safe place while you work with the focusing unit.

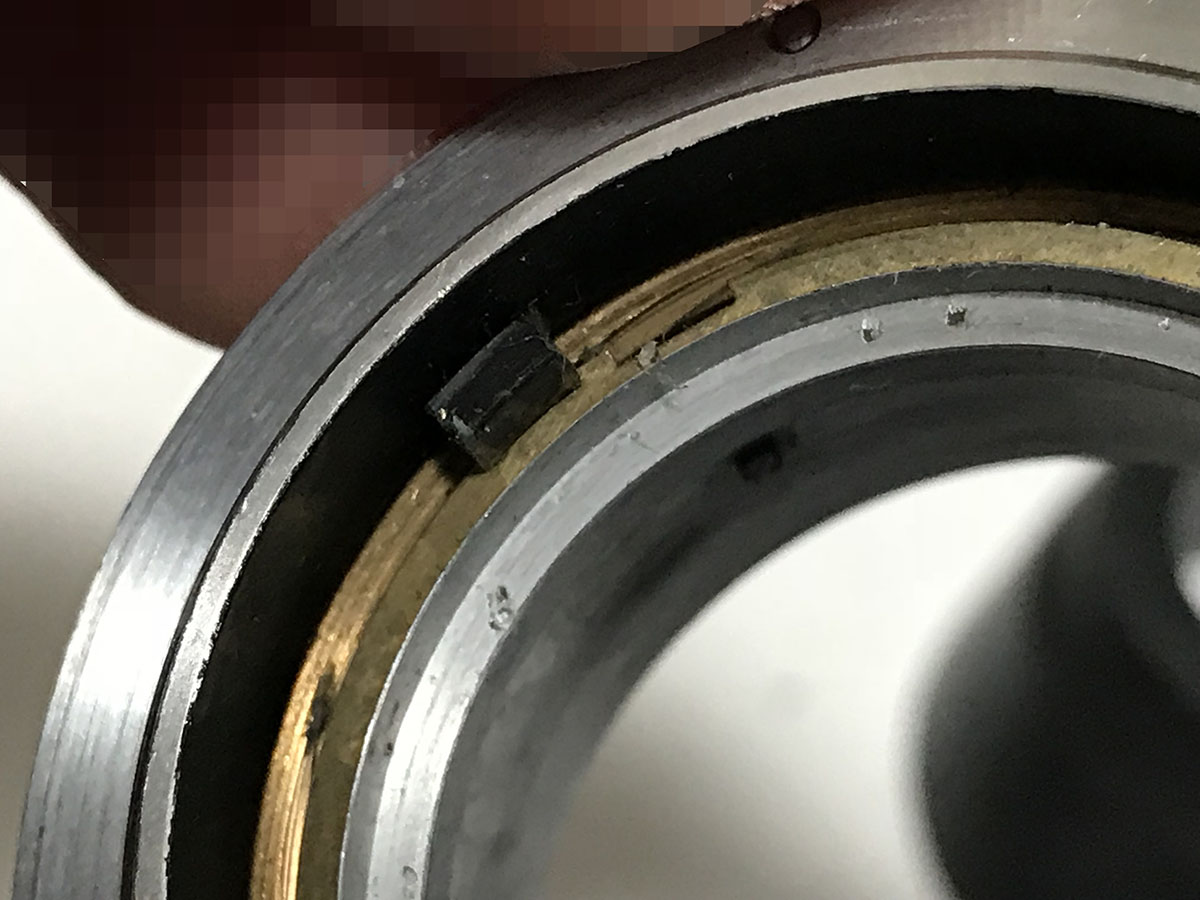
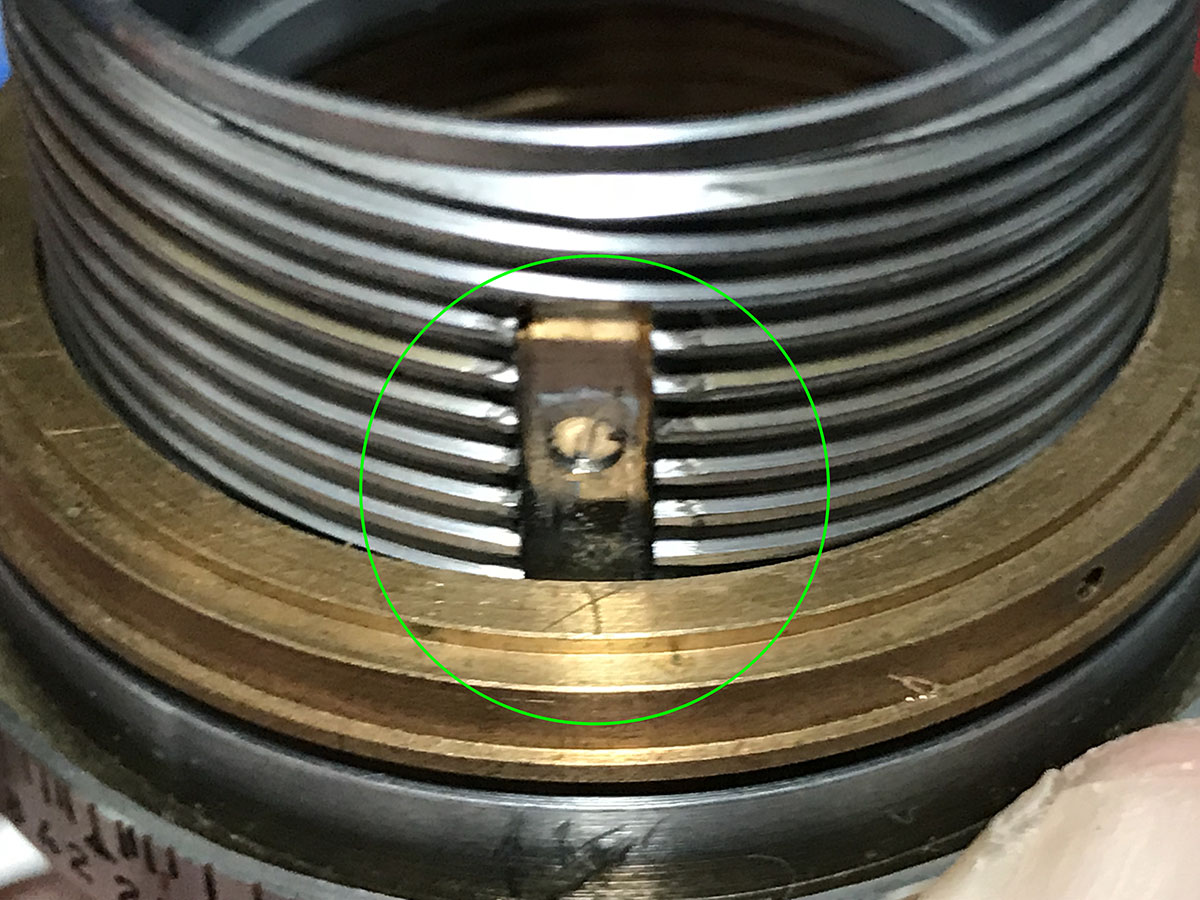
Carefully remove the spring by extracting these. Be careful while removing it, there’s a small bearing ball underneath.

It’s a good thing that the bearing ball on my lens was caked with old grease so it stopped it from falling to the ground. Make sure that you don’t lose this as it is responsible for giving you the clicking-action if you extend the lens barrel to focus closer.

Make sure that the lens barrel is set to infinity always while you work on it. This is useful so you will have a point of reference later when you reassemble the barrel. I always take my notes while the lens barrel is at infinity for this very reason.

To remove the focusing ring, extract these 3 screws. Make sure that you use a driver that’s a perfect fit.

The focusing ring can now be removed. Notice that I made a tiny scratch to help me in identifying which hole should be closest to the barrel’s midline.
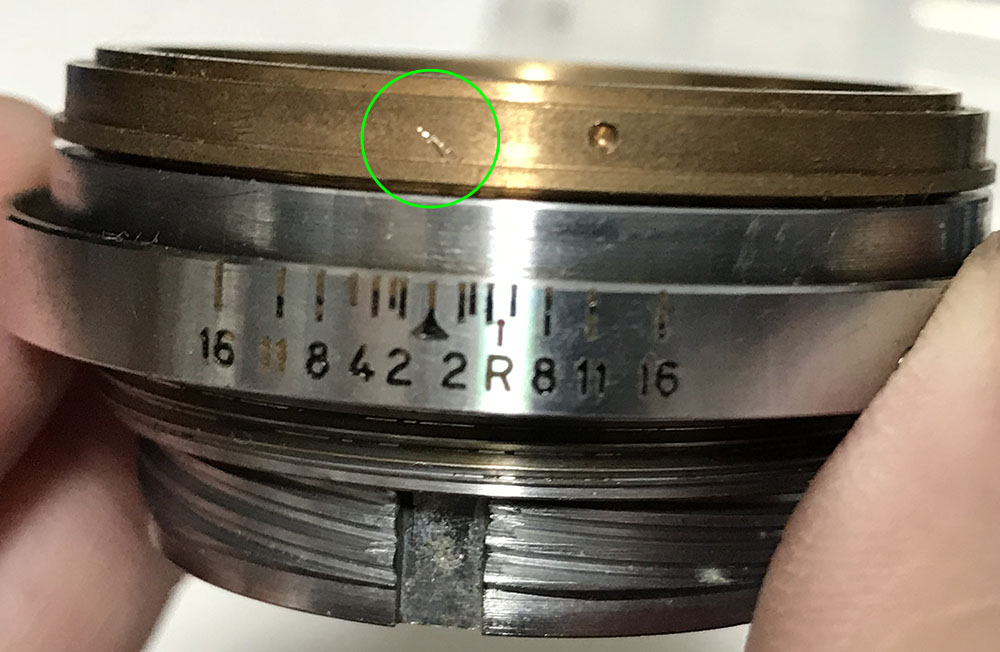
The brass helicoid has a fine thread, that can be tricky to put back correctly sometimes so I took as many notes as I could. I first collapsed the helicoids as far as I can and I made a small mark to remind me how far it went. When I put the lens back I should get the same result or else I got everything wrong and I will have to start all over again.

One important thing to do is to take note how far this channel extends. You can use a caliper to measure this or just take note of the position of the grooves. Scratching this is not a good idea because something else slides within the channel.
Here’s a photo of the inner surface of the barrel. Take as many photos as you could before disassembly, you only have one chance to do this.
The inner helicoid can now be separated. Notice that the previous guy who worked on this lens made a mark to note where these should mate. If you’re new to this, be sure to read my article on how to work with helicoids.

The central helicoid can now be separated. Again, the guy who worked on this made this mark. This will come in handy later.
The infinity lock can be disassembled by removing this screw.
The button can now be removed, be careful not to lose anything under it.

The bush comes off next.
Make sure that you don’t lose this tiny spring.
That’s it for the barrel. Be careful with the helicoids and mark where they parted. I won’t be responsible if you messed this up and end up with a box of spare parts. If you messed this up then guessing how the helicoids should line-up is not going to be easy because the central helicoid has a fine thread. There are also many small parts here and it feels more like working with a small clock than a lens.
Use a thin type of grease for the helicoids and don’t apply too much because the excess will find its way to the iris. Applying a thicker type of grease will just make this difficult to turn and focus. There is also the danger of it unscrewing from the mount if you turn it too much.
Disassembly (Objective):
The front assembly is the most complicated thing here. You will have to be careful with the glass because Sonnar-type lenses have lots of cemented surfaces. Solvent can be accidentally applied to the cemented parts and that can ruin the bond. Use the proper tool and don’t apply too much solvents and you should be fine.

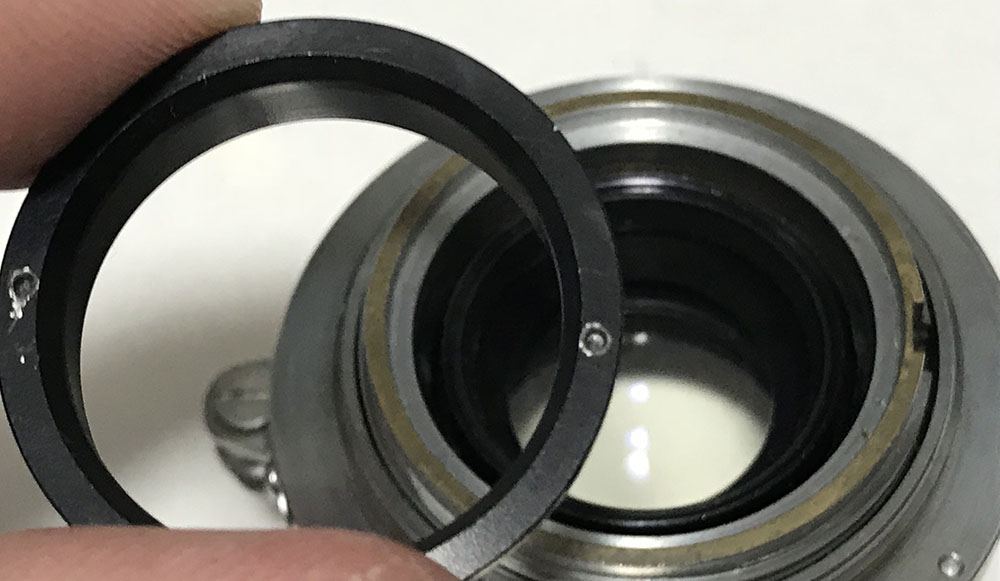
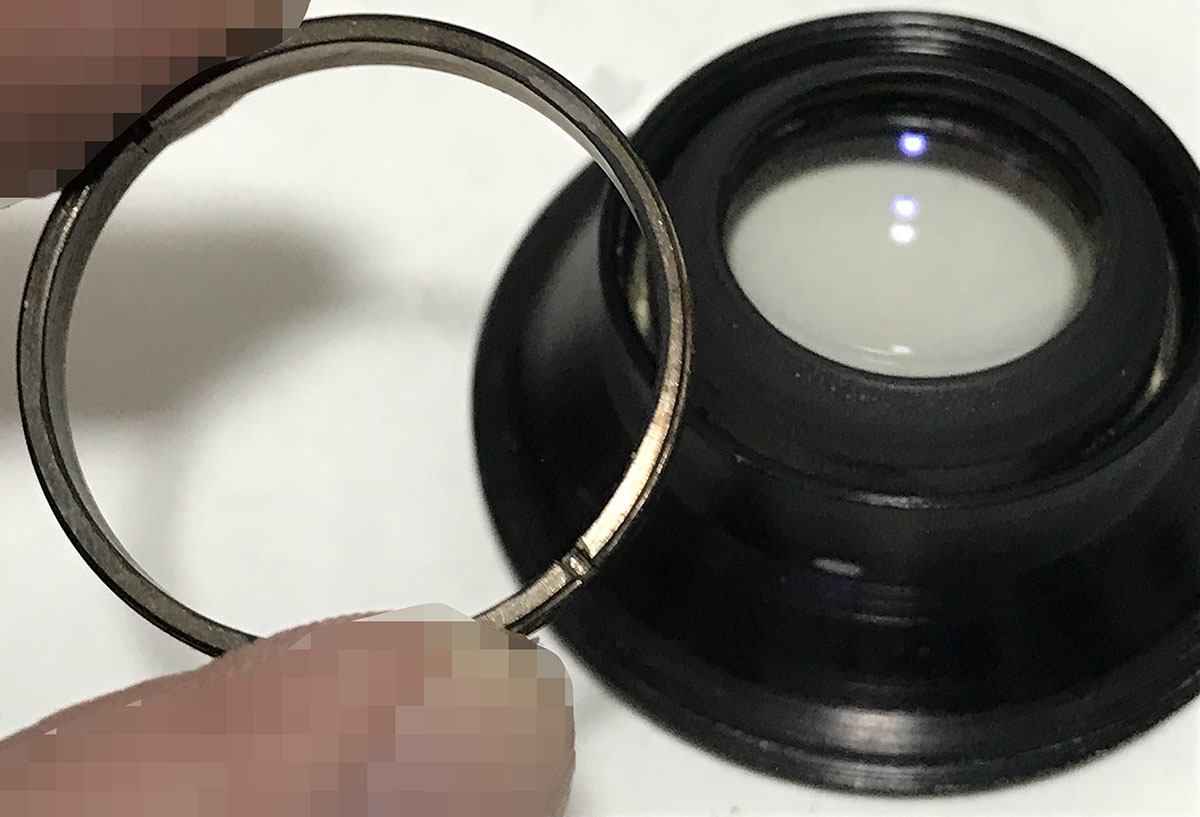
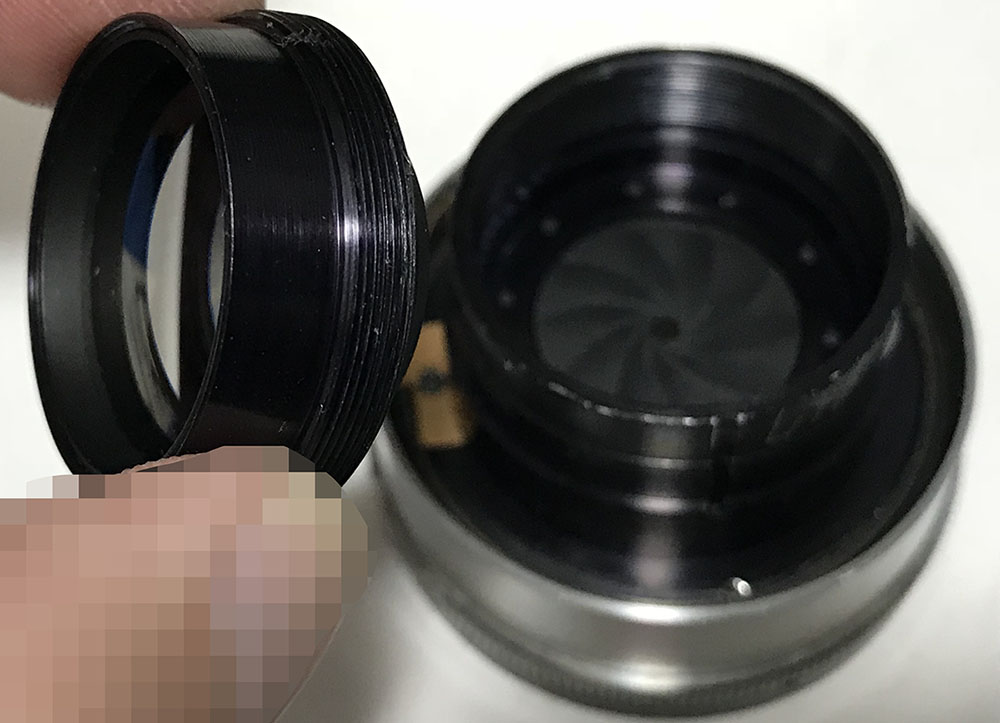
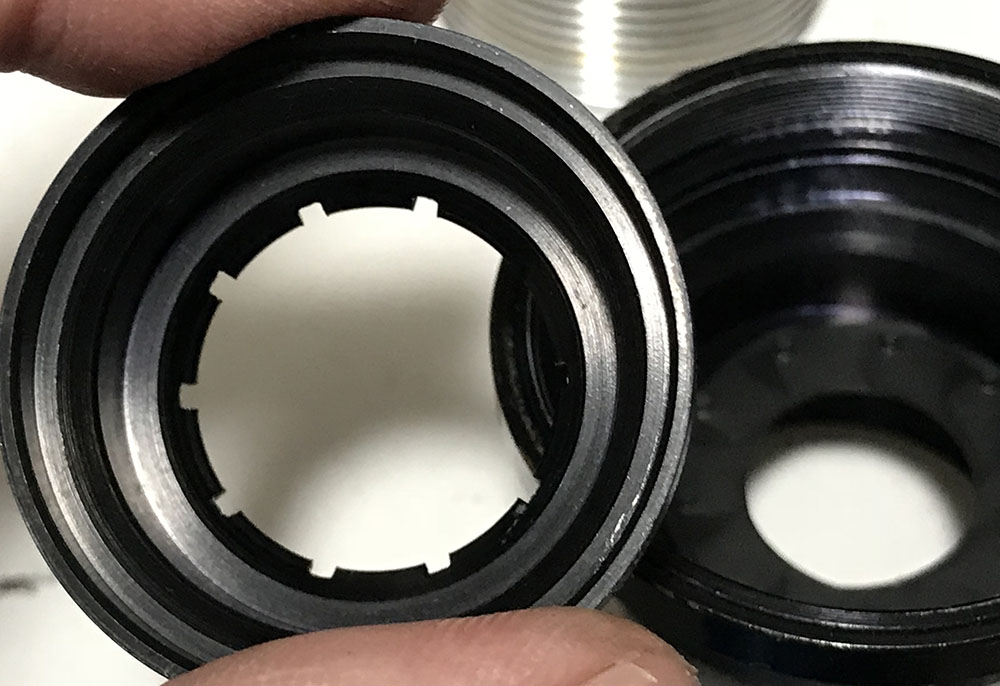
The front ring can be unscrewed just like this.

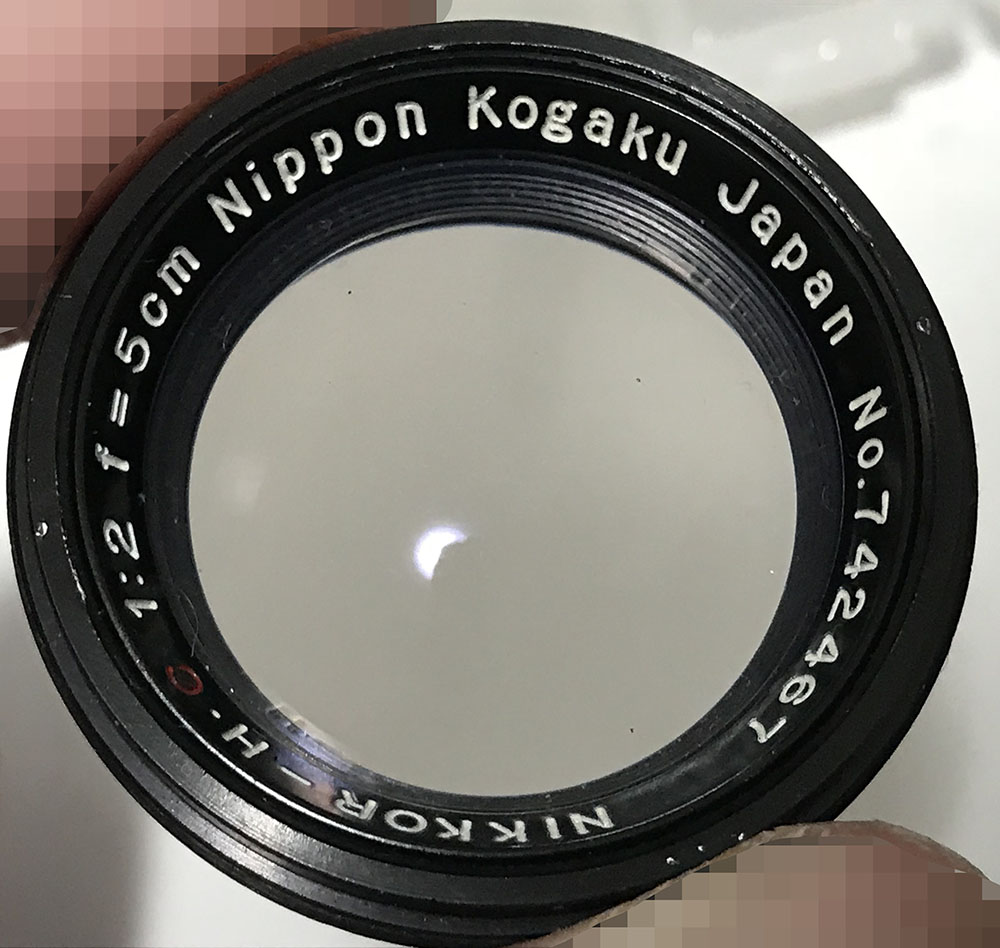
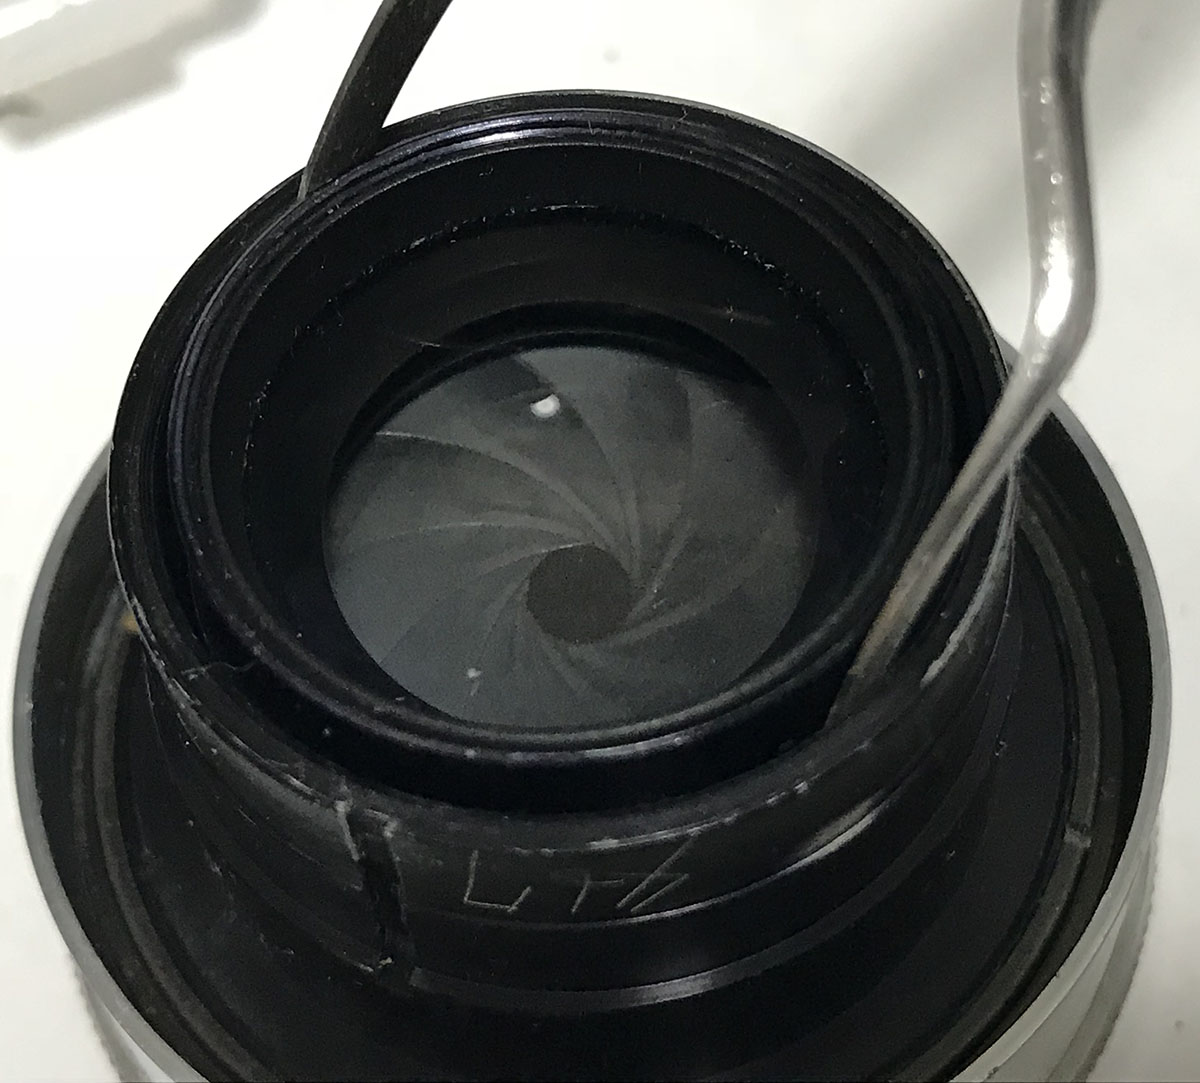
The front bezel (name ring) can be removed with a rubber cup. There are 2 small holes here, you can use a lens spanner but I used a rubber cup since it is soft so it will not leave any marks on the surface of the bezel. There is oil on the iris and we need to clean this as soon as possible!

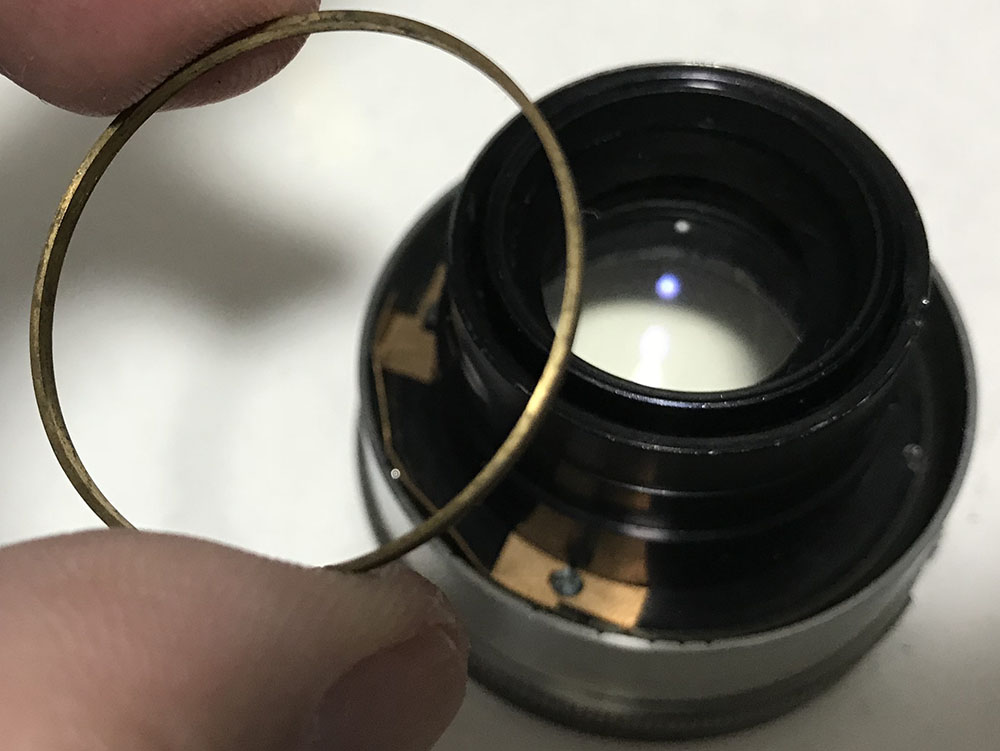
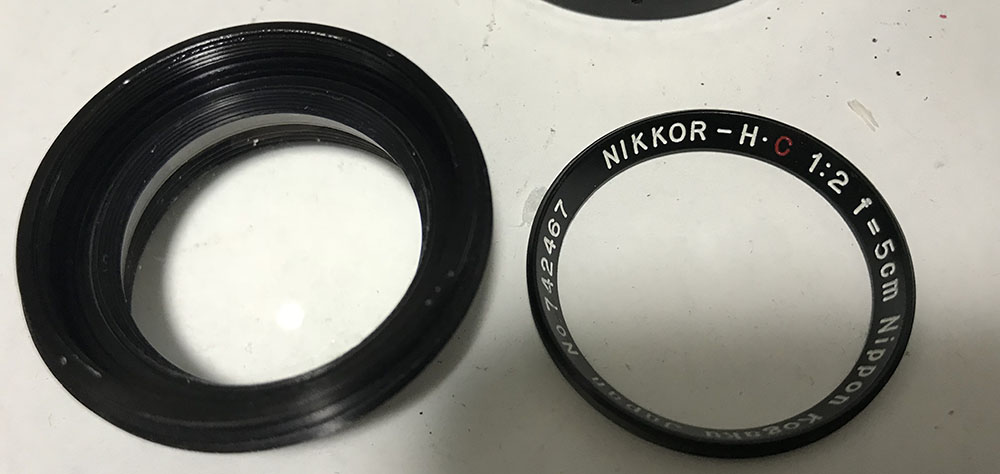
The front optical assembly is mounted to the bezel. Make sure that you do not scratch the glass at both ends of the front optical cell.

The front optical cell can be removed by carefully unscrewing this retainer. Carefully use a lens spanner to open this. If it’s sealed, use some alcohol and saturate the threads to soften the lacquer. Make sure that you don’t put too much alcohol since the 2nd and 3rd elements are cemented. Alcohol will damage the bond and result in cement separation.
The retention ring can be removed just like this. Only use the lens spanner to loosen the ring or tighten it then use your fingers to do the rest of the job.

The cemented triplet can now be removed using the lens sucker. It’s called a triplet as it’s composed of 3 separate elements that were cemented together into a single unit.
The bezel actually consists of 2 separate parts. Use a rubber cup to separate the bezel so you can remove the front element. You don’t need to do this if all you need is to clean the surfaces of the front element, it can be accessed anyway.
If the bezel is stuck, do that alcohol trick to soften the glue. Mine came off easily as it wasn’t glued at all.
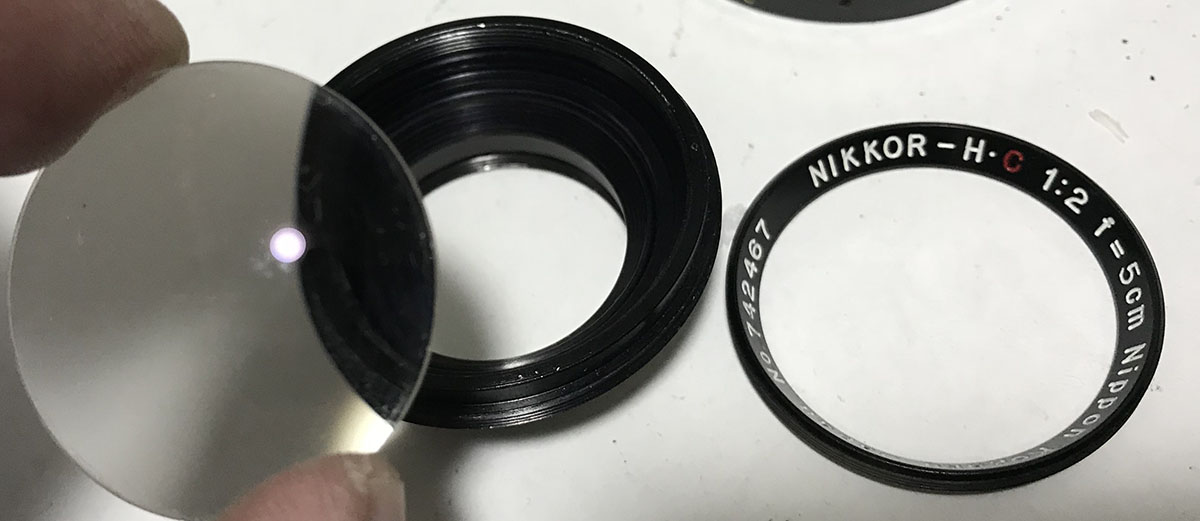
The front element can now be easily extracted.
The rear element can be removed by using a special tool called a “pipe key”. If you do not have it, you can make an alternative tool just like what I have here. If you have not seen it, read my article on how I made this cool tool by clicking on this link.
The rear optical cell can now be safely removed. Loosen the rear optical cell and use a lens sucker or your fingers to unscrew it off so you won’t scratch anything.
The glass is easy to clean since Sonnars have fewer air-to-glass surfaces. When cleaning the glass, make sure that you do not get solvent into the cemented elements. If yours is riddled with fungus, never soak the cemented elements in a bath. Saturate a Q-tip or lens tissue with your fungus cleaning solution and carefully wipe the fungus away. You should treat cemented lens groups with utmost care.
Disassembly (Iris Mechanism):
The iris mechanism is a bit more complicated since there are more parts in the assembly involved but it’s a lot easier to work on this than working on Zeiss lenses. It has a few adjustment points that you will have to be careful with and there are parts that are very small here that can be lost easily. Remember never to oil the iris or anything close to it except for the aperture ring’s thread. A very thin film of grease is all you need. If you put plenty of grease here then it will migrate easily to the iris.

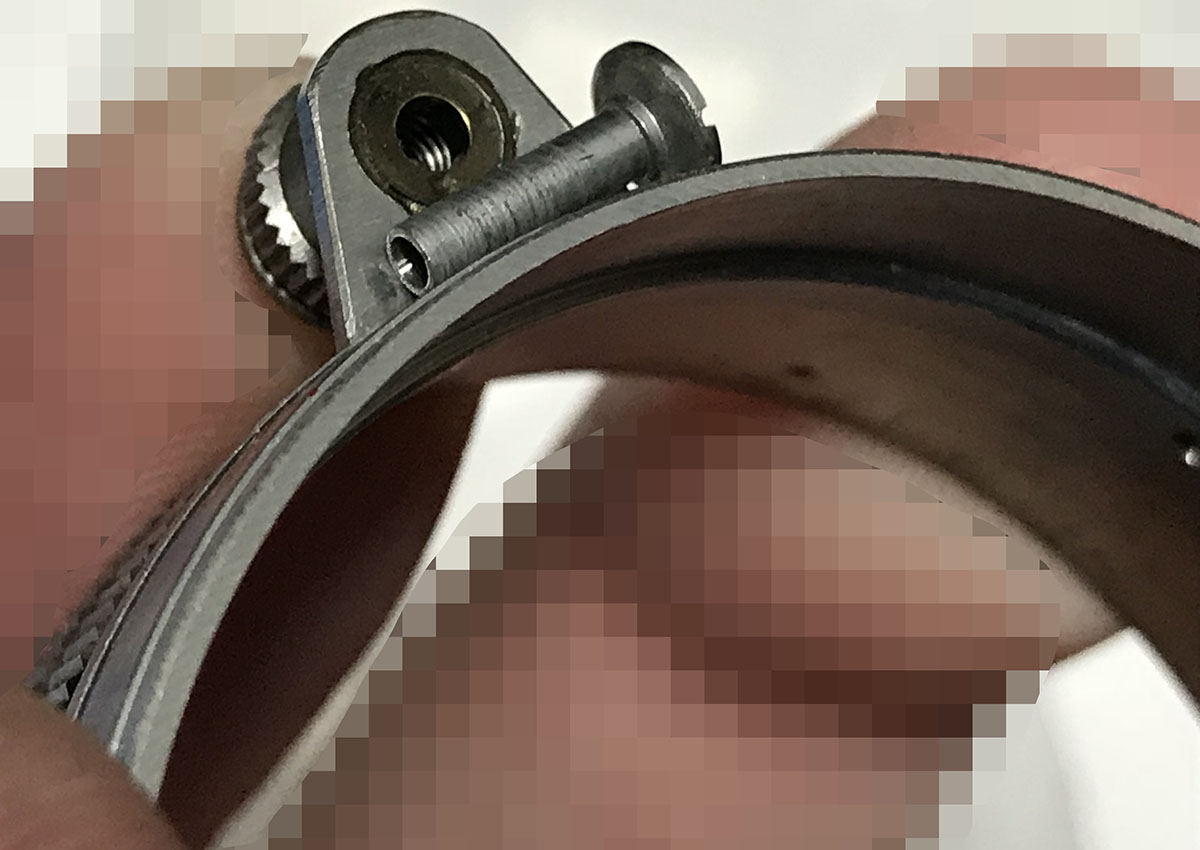
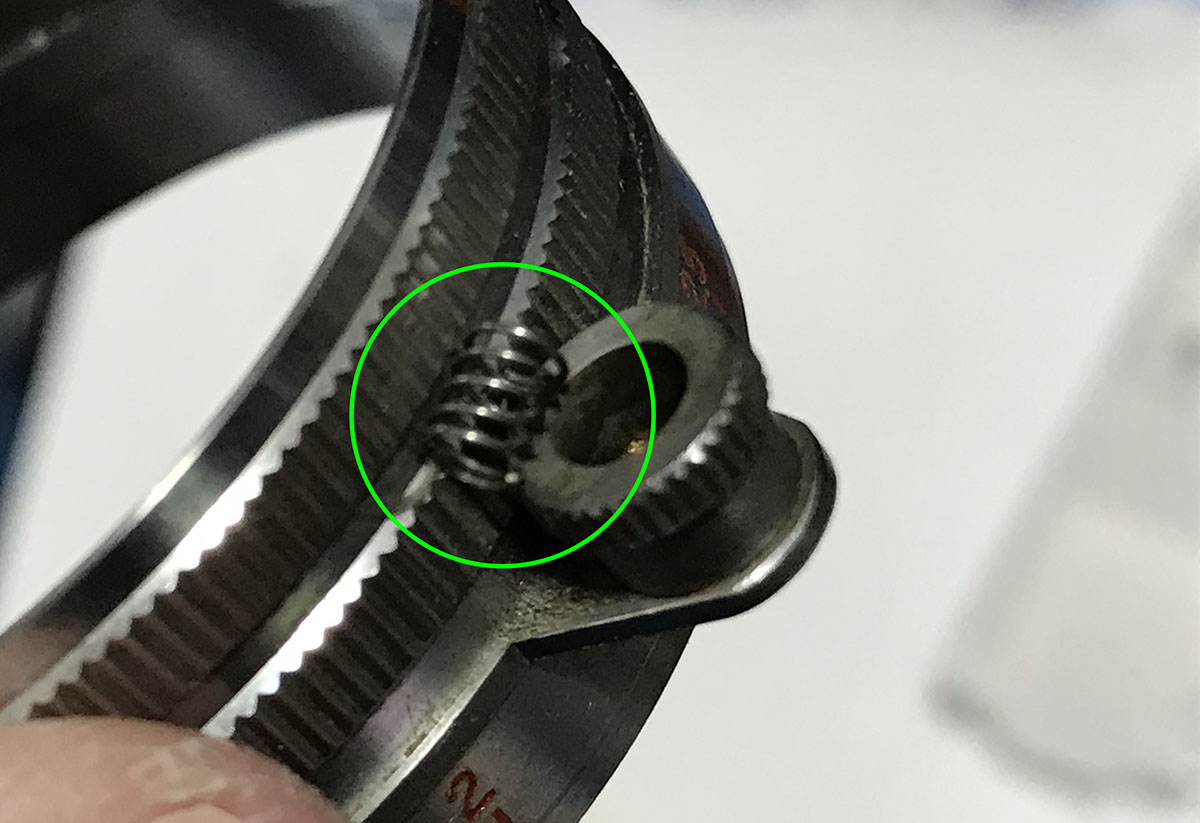
Before you can repair the iris, you must remove the aperture ring. To remove it, you must first remove the click-stop mechanism by removing these 2 screws. The spring can be adjusted so take note of its position before you remove it.
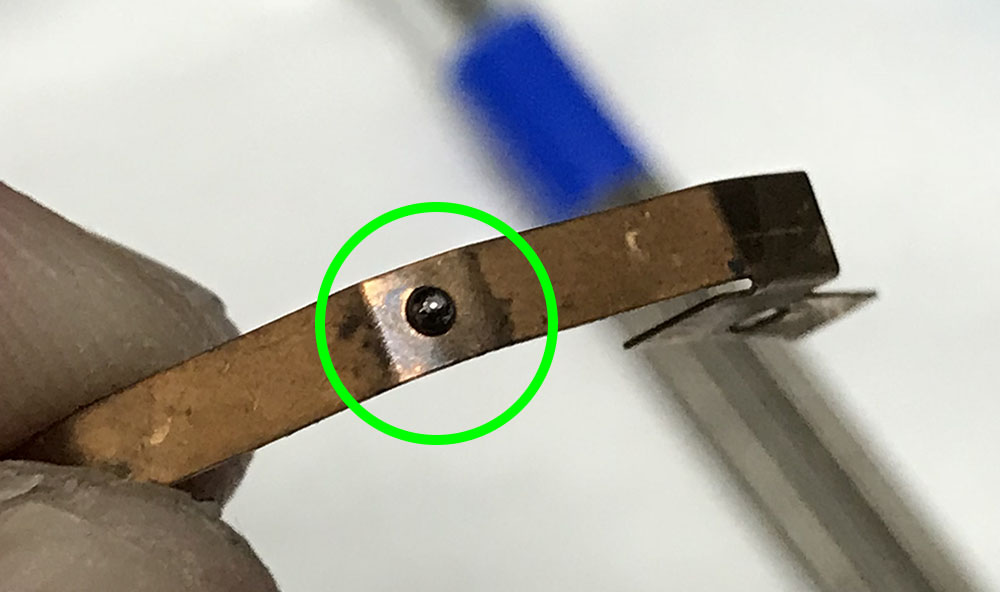
There’s a small bearing ball here that you never want to lose. It was stuck due to grease so it stayed there. Clean this properly if you can.
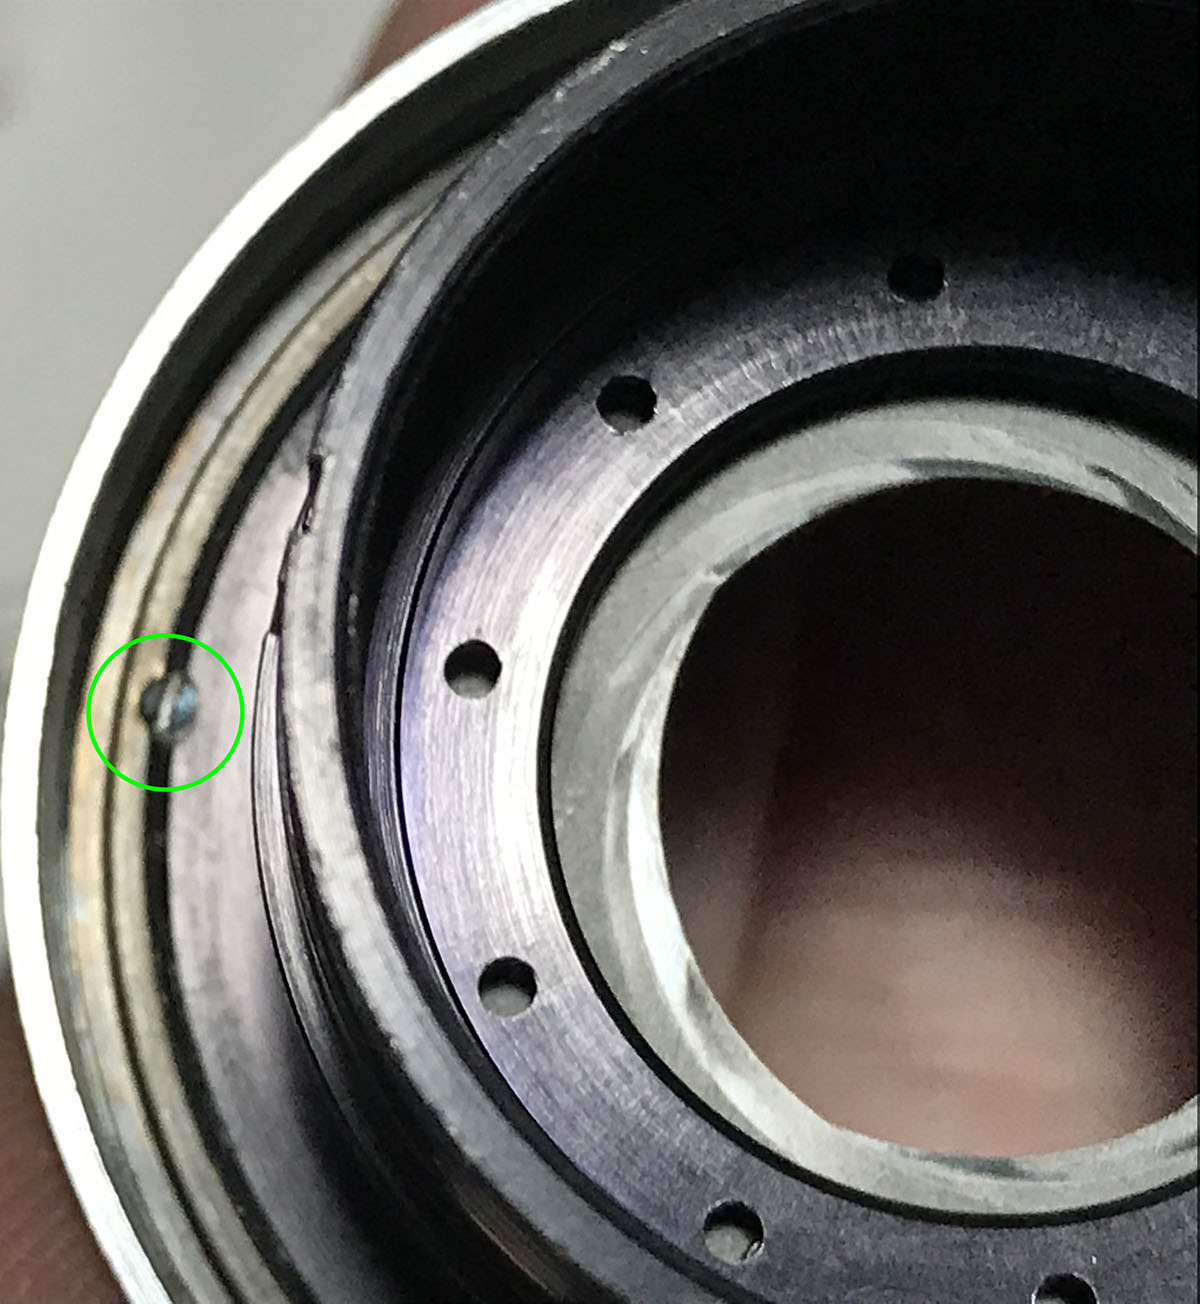
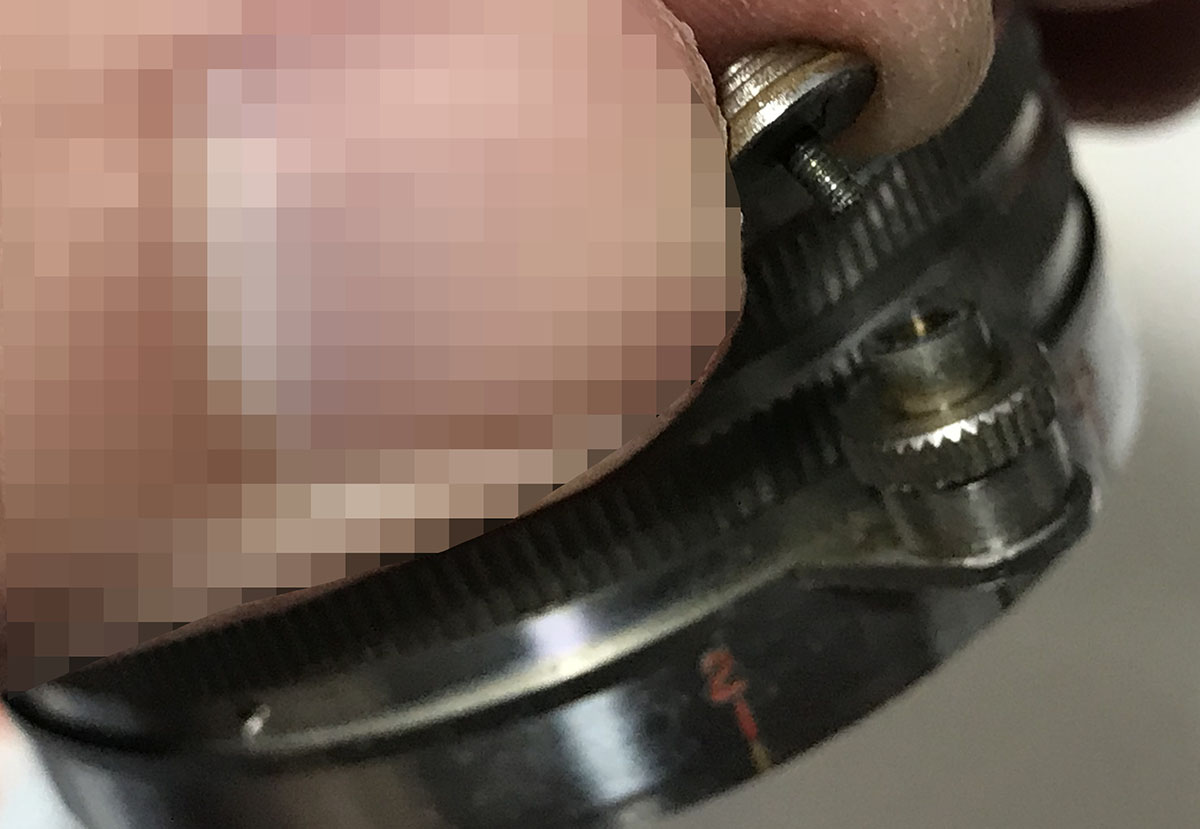
The aperture ring is secured by a ring. The ring is then secured by this small screw. It’s a small set screw so make sure that you don’t lose it.

Once the small screw is gone you can now unscrew this ring off. When putting this back it’s important to put it back properly or else the aperture ring will sit too high or too low. It is important that the set screw should be screwed properly in its hole.

The aperture ring can now be removed.

The iris mechanism is being secured by this brass ring. Carefully pick this ring off so it can be opened and make sure that you don’t damage anything here. I used a small dental pick with a sharp point to pick at the brass ring.

There is grease here for the aperture ring. Make sure that you don’t put a lot of grease here to prevent it from migrating to the iris. The screw in this picture has to be removed because it’s in the way. It couples the aperture ring to the iris’ cup inside the iris assembly’s housing.
The rotator cup can now be removed. Before removing it, make sure to note its position when the iris is wide-open. You will have to put it back the same way.

The iris is all gummed-up with oil. Make sure to take note which end of the blade should go where. The ends aren’t symmetrical, if you put these back the wrong way the iris will not work properly. There is also the possibility that you’ll permanently damage it.
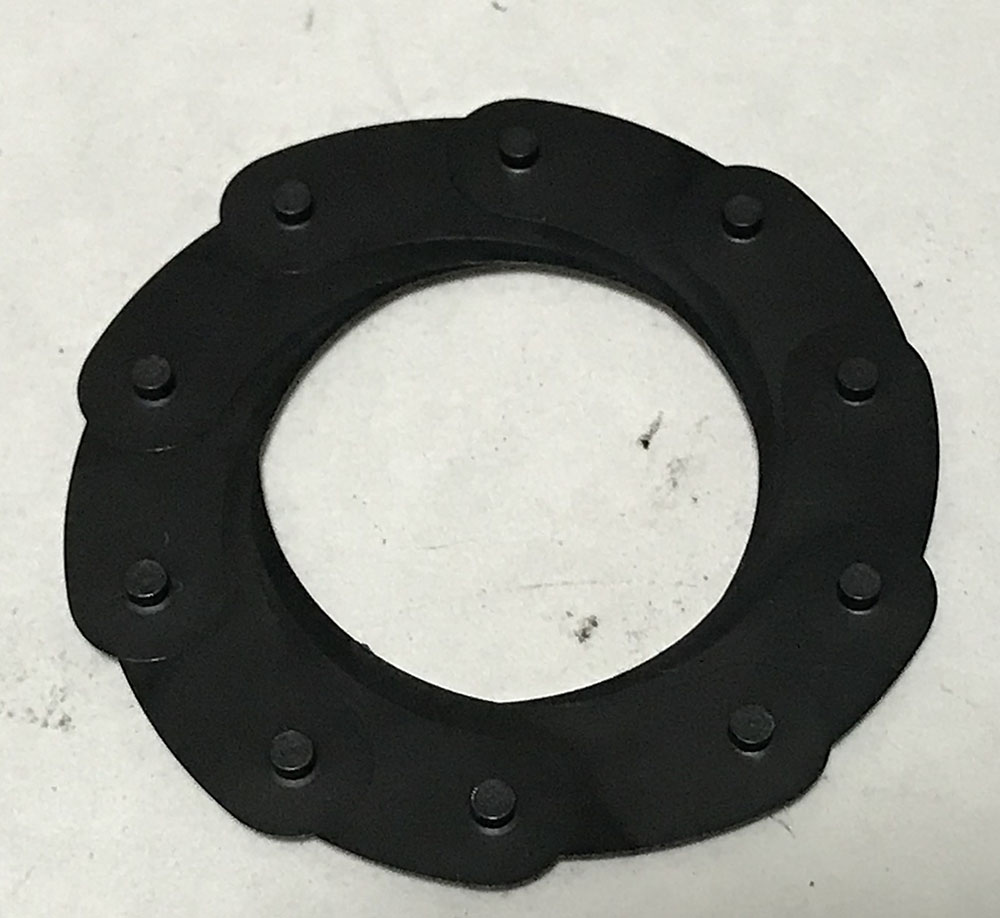
The iris was so oily that it came-off like this.
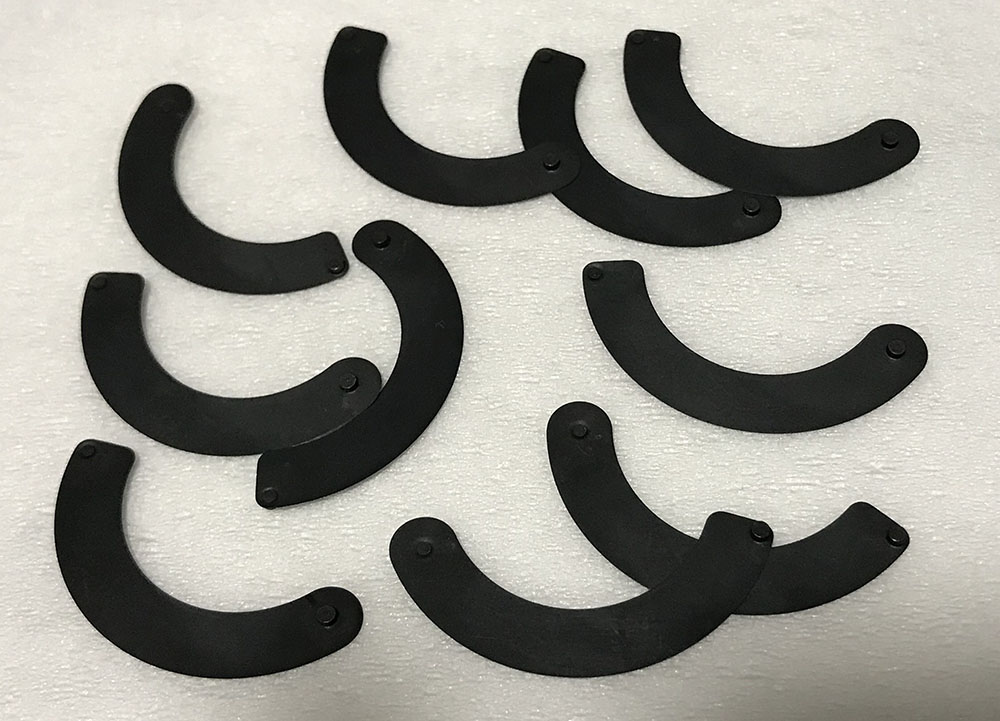
Each individual leaf was cleaned properly using naphtha. They can rust, if they are rusty soak it in naphtha with a drop of oil. Leave it overnight and wipe the oil and naphtha away with a soft lens tissue. be careful not to damage them, if you bent or warped one your iris won’t operate smoothly.

The iris was rebuilt carefully. The oil is gone and it’s now very clean! Rangefinder camera lenses have irises with interwoven blades and they’re more difficult to put back than the usual automatic iris lenses because they have more blades and they intersect. If you’re having trouble with this then read my guide on how to repair a preset-type iris.
The iris is now dry and clean! You never ever want to oil anything here and as we previously discussed, we only want a thin film of grease on the aperture ring’s threads. It’s the only place that requires lubrication.
Conclusion:
This was given a very thorough cleaning and it’s now really clean. I got this from a junk auction and the inner elements had what looked like tendrils. I was OK with that so I bought it thinking that I can clean that. I cleaned the inner elements and I was relieved to find out that the tendrils aren’t fungus damage but just some dirt from the iris. It was cleaned thoroughly and now everything looks very good. I just got rid of decades’ worth of dirt from this lens and it’s now worth more than the price that I got it for.
The engravings on the lens were all re-painted. They were worn so this had to be done. If you don’t know how to do this, read my article about lettering restoration.

The lens is now clean inside-and-out! It’s no longer a junk lens!

See how shiny it is? It looks gorgeous and it certainly feels very luxurious to hold in your hands. This will certainly out-live me and will exceed decades of use from now on. It just had a nice overhaul and if this lens could talk, it would say “thank you”.
I had so much fun working with this. It had the right amount of complexity to keep me entertained for the evening. I probably spent some 3-4 hours on this thing. I spent most of the time cleaning and repainting the engravings. The lens was really dirty when I got it that cleaning and polishing it just a bit brought out the shine in the chrome back again. It now looks stunning and is certainly a head-turner when I use it on my Nicca 3s.
I hope that you enjoyed this. I’m still sick with hay fever and it took several nights for me to write this. I wanted to introduce you to more Nikkors that were not made in Nikon’s native S-mount and F-mount. I’m hoping that I can generate interest in these old gems and I want to show people some really good and cheap alternatives to the over-the-top priced Leica lenses. See you guys next time and I hope that I will feel better next week so I can have the energy to write another article. Thanks for understanding, Ric.
Help Support this Blog:
Maintaining this blog requires money to operate. If you think that this site has helped you or you want to show your support by helping with the site’s upkeep, you can make a small donation to show your love at my paypal.com (richardHaw888@gmail.com). Money isn’t my prime motivation for this blog, I believe that I have enough to run this but you can help me make this site grow.
Buy me a roll of film or a burger?
Thank you very much for your continued support!
$2.00
Helping support this site will ensure that this will be kept going as long as I have the time and energy for this. I would appreciate it if you just leave out your name or details like your country’s name or other information so that the donations will totally be anonymous. This is a labor of love and I intend to keep it that way for as long as I can. Ric.

Sep 11, 2020 @ 06:16:41
Hi Richard! I don’t know if you will see this, but I have this lens (the all chrome version), and have an extremely hazy rear element which needs cleaning in order to be usable at all. It doesn’t seem like it is fungal. Is it possible to remove the rear element from the back, instead of having to disassemble the lens barrel and remove the iris assembly and front elements first, or is that the only way? I ask because I see some notches at the back that seem like they allow for unscrewing, but I do not currently have the correct tools to try this, and do not want to cause any damage.
I’ve never opened up a lens before, and am not planning to completely overhaul it, but I think cleaning this element should be manageable. The lens has sentimental value for me (my grandfather bought it on vacation in Japan in the 70s), and I would love to be able to use it on my a7ii.
Sep 13, 2020 @ 07:05:43
Update:
Problem solved! I used a pair of calipers to open up the rear of the lens, and had a good quality pair of small angled forceps that I was able to use as a pipe key to remove the rear element. Just a couple gentle wipes on the inside surface with a lens cleaning wipe and ~70 years of haze build-up is now completely gone.
Thank you so much for this website, it’s a truly wonderful resource!!
Feb 25, 2023 @ 19:31:07
Richard, thanks for this amazing tutorial. I just bought this lens, but missing the front ring with the filter threads. Any idea what the thread size is between the front ring and the black piece with threads that it attaches to?
Feb 29, 2024 @ 04:09:58
Hi Richard – love the coverage of this lens. I just got one in the 736xxx serial range, so a bit older than the one you show. Mine appears to be 40.5mm filter thread instead of 39mm. I’m playing with mine on a Leica M10-M using a vintage M39 to M mount Leica-made adapter.