
Hello, everybody! I recalled watching Alien and thought that movie changed everything about science fiction films forever. It is really a horror movie set in space. It’s a fresh take on the genre, one that made other films obsolete. It is Ridley Scott’s masterpiece and it never gets old even when viewed today. I wanted to become a VFX artist because of it and that got me into modeling. I started with scale models and did props for a short time before things went digital. Today, I will show you an epoch-making camera, something that lots of people consider to be the best representative of an era. It defined what a camera should be and you can still see its legacy today, alive-and-well.
Introduction:
The Nikon F needs no introduction, it’s Nikon’s claim-to-fame and the model that finished the dominance of rangefinder-coupled cameras in the 1960s. It can be seen everywhere covering weddings, wars, news, etc. It heralded the dawn of modern photography as we knew it, or so I thought. It was heavily-based on the Nikon SP’s platform but it was introduced later in 1959. It was sold until 1973, ending a production run of 14 years totaling 862,600 bodies. Its success owes to the fact that it’s tough, reliable and you can use it with a whole catalog of accessories and Nikkors. It’s so tough that you’ll find a junk Nikon F with its shutter still working (but not accurate) while some cameras from other brands won’t even allow you to cock it.
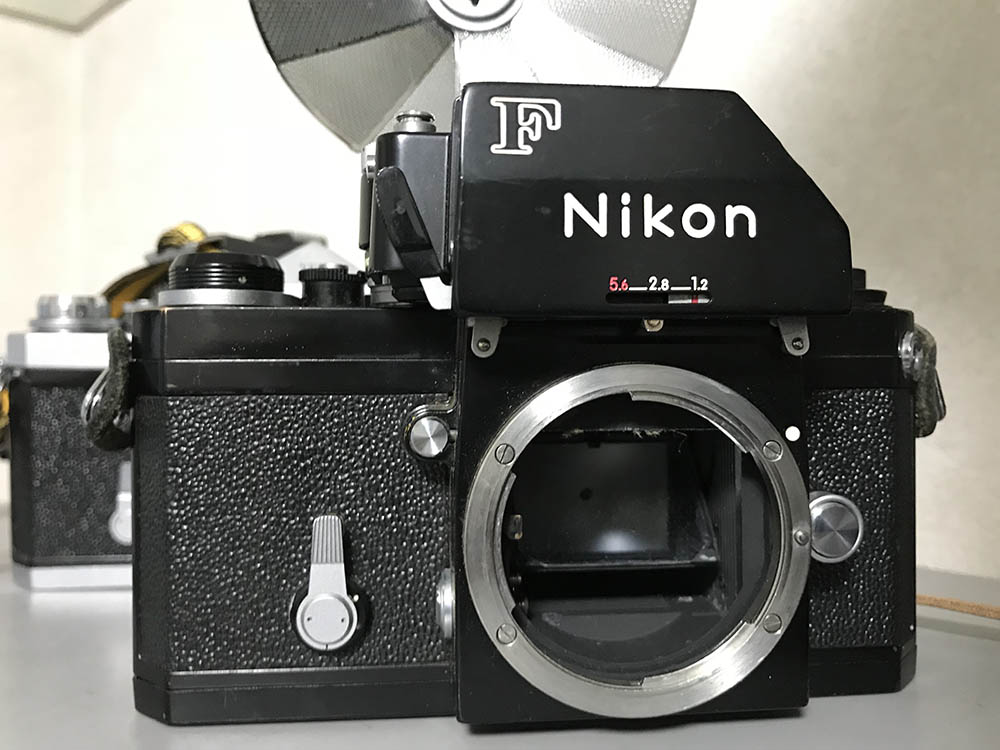
It was made in plenty of iterations, each iteration has something different. I love collecting them because of that. In fact, you could write a whole book if you document everything properly including what’s different inside of it. It can take nearly a lifetime to collect every variant. I’ll document some of the internal differences in this series, anything that’s outside of the camera will only be mentioned in-passing. By the way, this is my black Nikon F, “Tina“.
Many people speculate that majority of its parts can be swapped with ones from a Nikon SP, that’s not true. I measured and compared many of them, it is safe to say that they may look similar but the measurements are not. This is mostly a totally-different camera in the sense that many of the parts can’t be swapped between-models. However, you may find some of the parts that can be interchangeable and a junk Nikon F is a good place to hunt for parts for your broken Nikon SP or Nikon S3/S4. The most obvious difference is the addition of the mirror-box, the rewind-mechanism and the lens mount. The omission of a rangefinder mechanism in favor of a prism is another one. It’s easy to see these differences and some people will think that the body is just an elongated version of the venerable Nikon SP chassis but things are quite different inside despite being familiar.
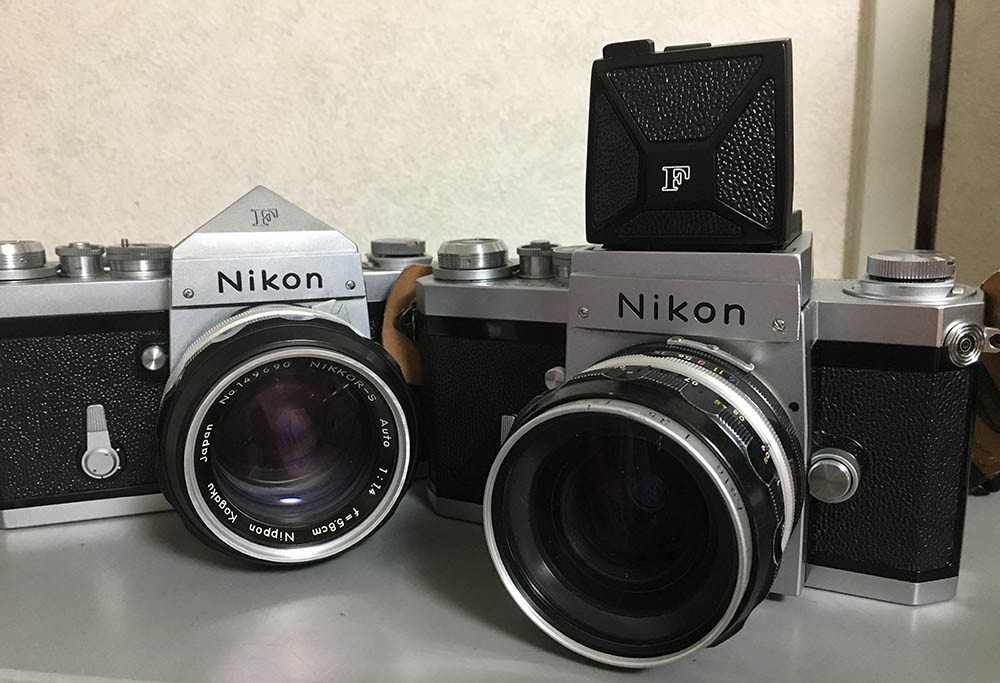
The ability to change prisms, screens and finders easily is one of the several reasons why the Nikon F was such a formidable camera in the 1960s. Others may have the same feature as well but it never did it as sexy as the Nikon F. You can also choose between many types of finders and find one that can fit the job perfectly and you can use no-finders at all and just peek-through the screen with your naked eyes if you choose to.
The Nikon F came with a new mount, it’s probably the largest for its time so it future-proofed the camera for several decades to come. The mount has to be large in order to mount larger lenses and accessories. You can’t mention the Nikon F without talking about the legendary Nikon F-mount, it’s where it all started.
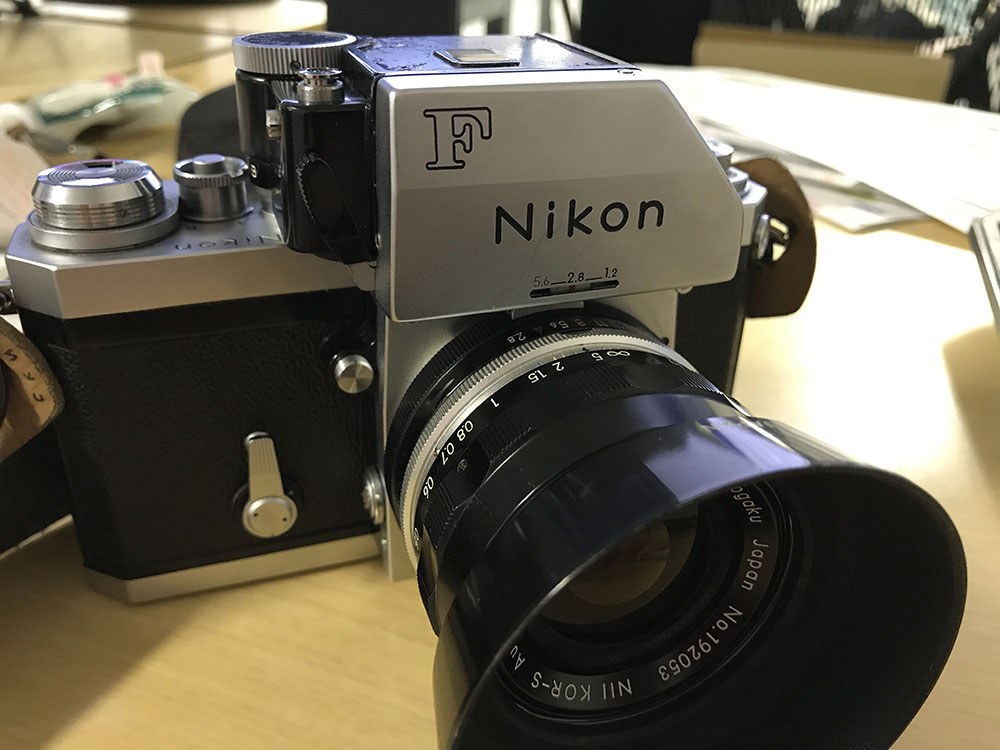
One of the most iconic finders is the Nikon F Photomic FTn finder, the last of all through-the-lens metered-prisms for the Nikon F. It looks ugly and it isn’t ergonomic to use at all but that was the best Nikon could give you until they rolled-out the Nikon F2, the former is a masterpiece but it does not have the raw sex appeal of the Nikon F.
You can find one for any price, from bargain ones to ones that will cost you a kidney, or more. They’re great for advanced amateurs and collectors will have a great time hunting for the many variations of this camera. If you’re contemplating on repairing one of these, do not. Give it to a real repairman, somebody who can give the camera a proper job. This is not something that you could fix without experience and tools and I will show you what I mean in the coming sections.
Before We Begin:
If this is your first attempt at repairing a lens then I suggest that you check my previous posts regarding screws & drivers, grease and other things. Also read what I wrote about the tools that you’ll need to fix your Nikkors.
I suggest that you read these primers before you begin (for beginners):
Reading these primers should lessen the chance of ruining your lens if you are a novice. Before opening up any lens, always look for other people who have done so in Youtube or the internet. Information is scarce, vague and scattered (that is why I started this) but you can still find some information if you search carefully.
I highly recommend that you read my working with helicoids post because this is very important and getting it wrong can ruin your day. If I can force you to read this, I would. It is that important!
For more advanced topics, you can read my fungus removal post as a start. This post has a lot of useful information and it will be beneficial for you to read this.
Tools:
Repairing a Nikon F or any camera isn’t as straight-forward as you think. It requires a lot of skill, patience and experience. You will also need tools that were specially made for servicing the Nikon F. It’s a commitment and you’ll have to find the time and resources just to service a single model properly. I will show you some of the tools that I use.
There are several tools that you’ll have to fabricate from scraps just so you’ll able to unscrew some of the special retainers found on the Nikon F. I always look for scrap metal and old screwdrivers and modify them as unique tools.

You will have to make special openers from scrap pipes and fittings to open some of the rings, these are just a few of them. I at least have 8-10 different openers that I use exclusively with the Nikon F.
A unique tool used for servicing the Nikon S2, Nikon S3/S4, Nikon SP and the Nikon F is the A/R ring opener. You will never service the mentioned models without it.
Apart from what’s shown here you’ll require a shutter-speed tester. Get the ones that have at least 2 separate sensors, one for each side of the aperture. Having 3 sensors is ideal but not necessary. Avoid buying ones that only has a single sensor and never even contemplate buying a sound-based one. This is a small investment for any DIY camera repairer, a professional will have the proper tools and that includes a real industrial-grade tester. Checking a camera’s flash-sync is easier, you’ll only require a powerful manual flash. A real flash-sync tester is overkill and only meant for professionals.
You’ll need several sizes of drivers, those that come in different widths and thicknesses. You can’t repair cameras with just a few of them, I have close to 20 of these and 12 or so are flat ones. Buy the best ones you can afford, tools are an investment and bad tools will lead to a bad job.
I didn’t even mention the lubricants that you’ll need. I use the best oils that I can buy, those used for repairing watches are the best. Nyoil is also good, it’s a fixture in any radio-controlled hobbyist’s repair kit. For grease I only use a tube of Tamiya’s molybdenum grease, a small tube will last you a long time. I only use this for metal-to-metal contact points, metal-to-plastic ones need a silicon-based grease. Some people don’t like molybdenum grease for several reasons but I like it a lot since it dries into a thin film of powder that’s really easy to clean. Silicon grease will last longer and maybe the better choice, it’s just that I didn’t get into the habit of using it.
Solvents are also mandatory and I will not cover them in this article since I already mentioned them in my repair fundamentals page.
Disassembly (Apron):
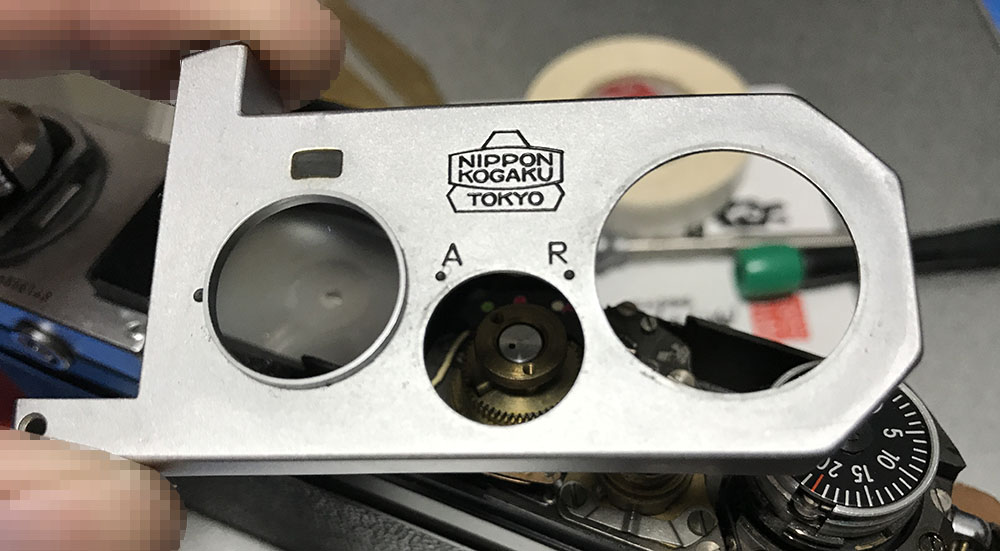
When doing any serious repairs with the Nikon F you’ll always want to start with removing the apron. It covers the bayonet mount so dust and light will not find their way inside the camera. It’s a prominent part of the camera so be careful not to scratch it.
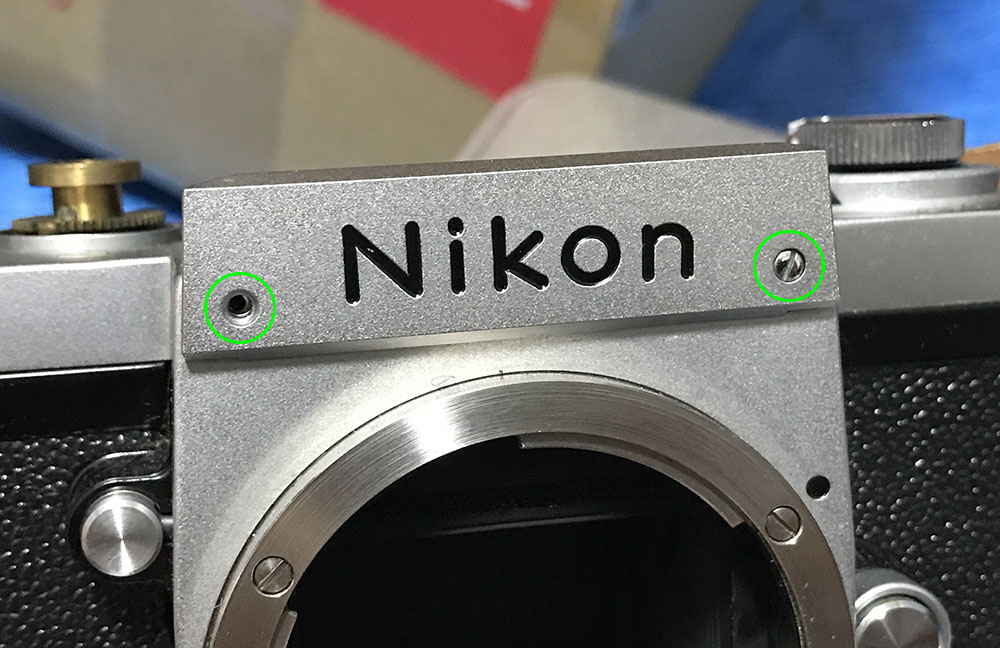
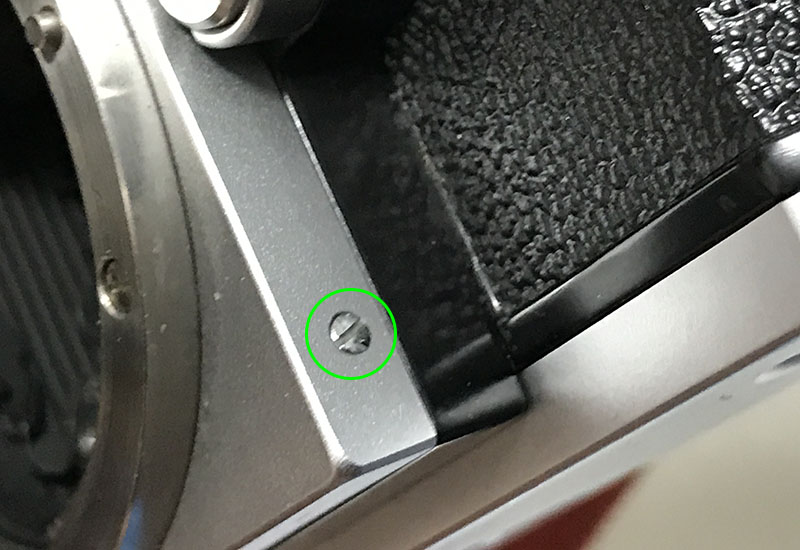
Extract these screws on the name-plate. These are sometimes glued and you can only remove them after saturating the rear of the plate with alcohol. It’s mandatory to wait for the alcohol to do its job before you remove the plate.
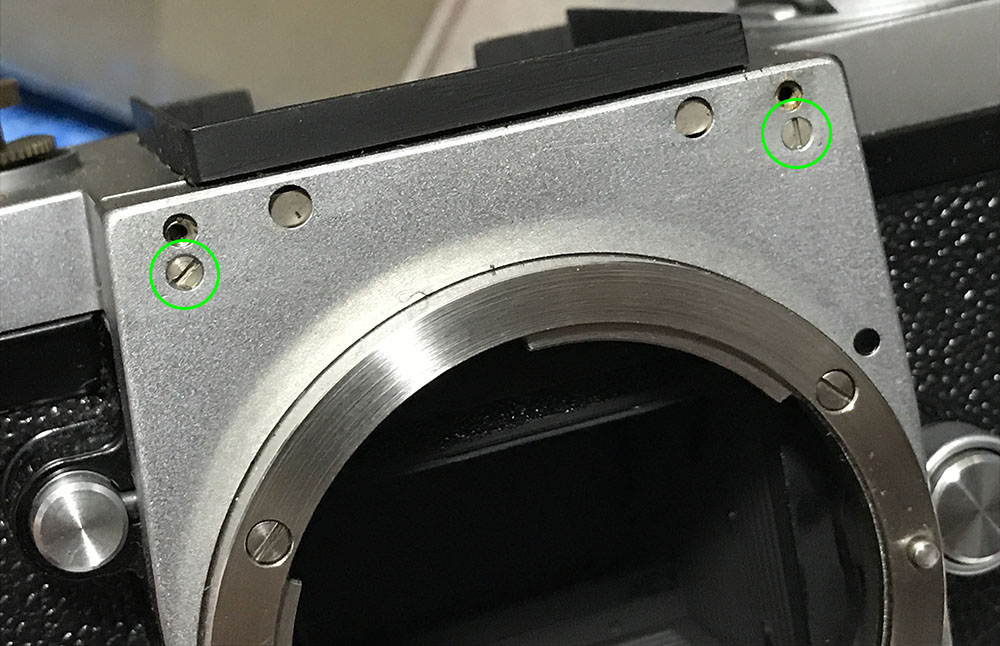
There are 2 more screws underneath the name-plate. Extract these and you can move on to the other ones. Do note that these screw-into a metal bar at the other side of the apron, putting that bar back during reassembly can be a bit of a pain at times so gluing the bar with a slow-setting cement will be a big help so you won’t have to align it as you screw these back.
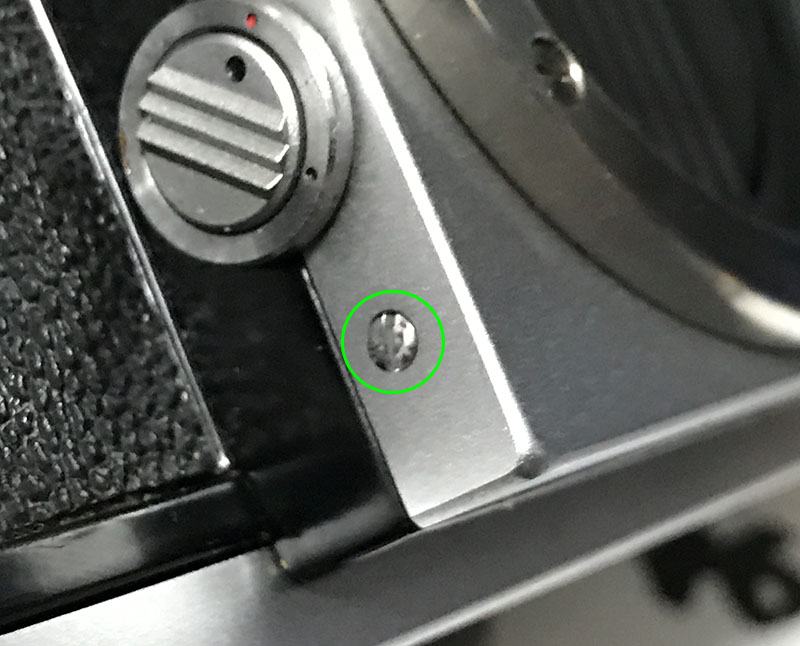
Carefully extract this.
Here’s another one.
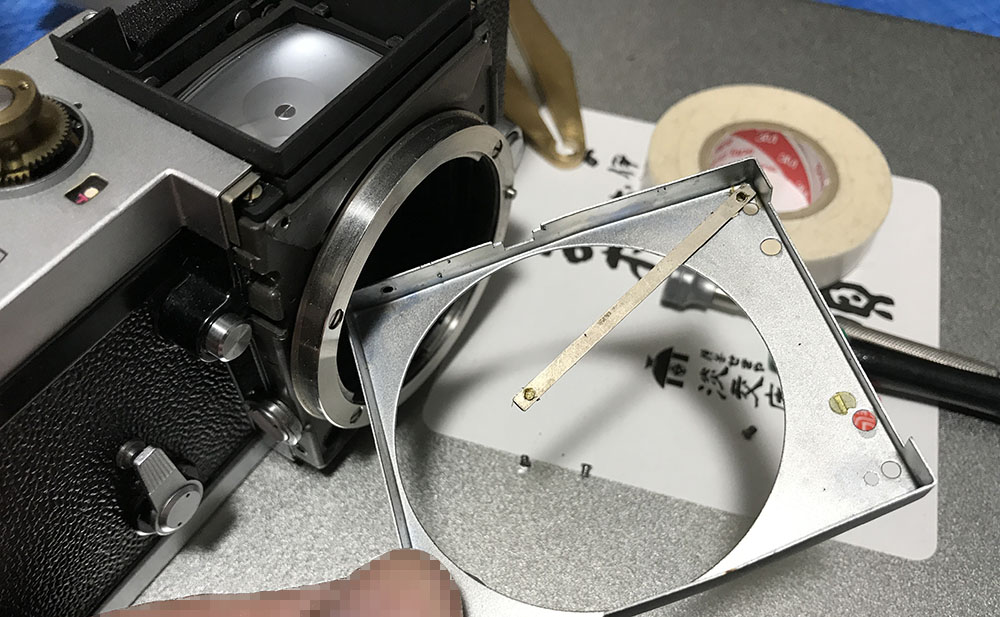
You can now safely remove the apron. Visible in the picture is the bar that I was referring to a few steps back.
Carefully clean the apron and scrub it really well, it can get very dirty and a lot of cameras even has traces of grease beneath this.
Disassembly (Top-Right Panel):
Nearly all repairs will have to involve removing the top-right panel, this is a standard procedure and veteran repairers familiar with Nikon film cameras should know the steps here by-heart. It looks complicated and beginners or novices will spend some time on this part but for experienced repairers this will only take 15 minutes tops.
This is a delicate part of the camera since it houses many of its vital parts. If you found one with damage in this area, skip it as it may have something in these parts that may need repair.
People who have been following my work may already be familiar with the steps here since I already covered the Nikon SP and the Nikon S3/S4 in their respective articles.
I will strongly advise that you take plenty of notes as you go so you will not get confused when it’s time to put things back together again. If something’s stuck do not force your way through it, apply some alcohol and wait for the solvent to dissolve whatever’s binding the part you want to remove.
Loosen these, you don’t have to remove them as they can be troublesome to put back.
Remove the film-counter guard and re-tighten its screws so they’re safe and won’t accidentally get lost.
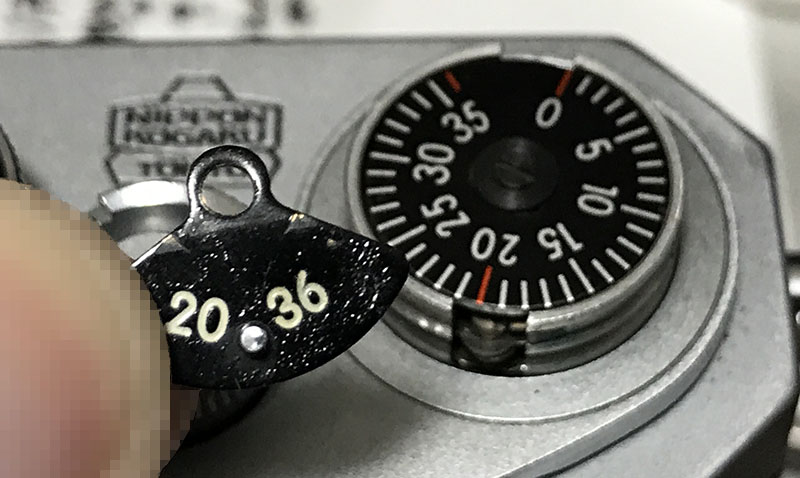
Remove the film-capacity indictor using your nails.
Carefully remove the cover of the advance-lever using a sharp knife so you won’t damage it.
Extract these to remove the advance-lever.
Turn it back-or-forth until you can remove it safely, its ears may be engaged to the slots of the film-advance mechanism’s housing.
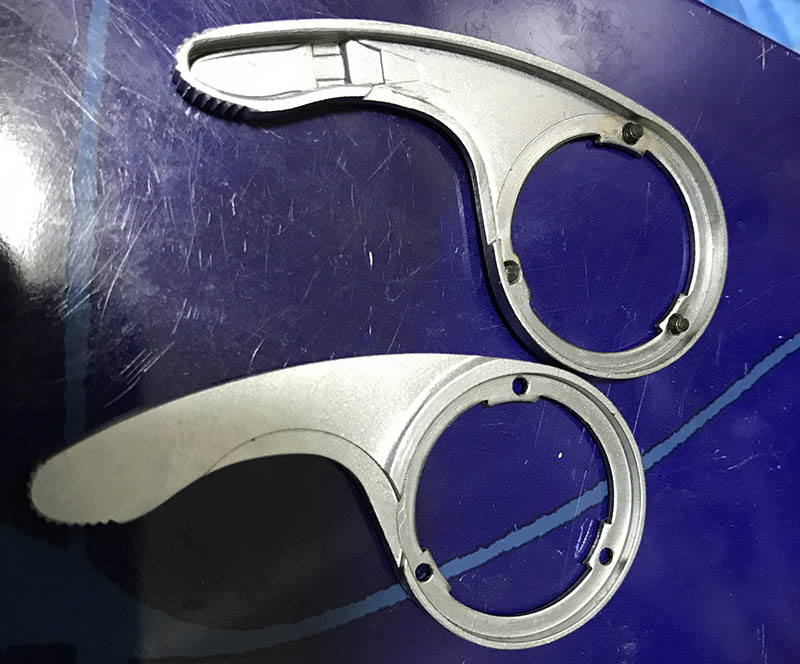
There are several types of levers for the Nikon F, shown here are the earlier and the most-common type of levers. The last production models have tips that were covered in plastic like the ones for the Nikon F2. The earliest ones are very rare, they were made differently from the ones you see here.
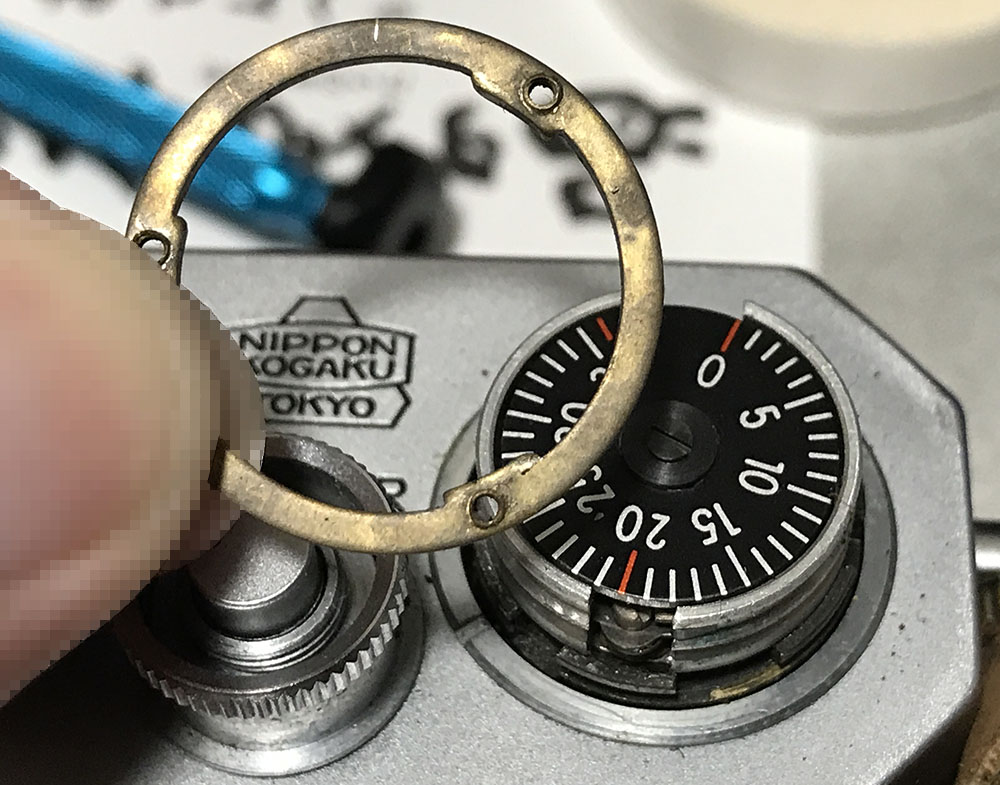
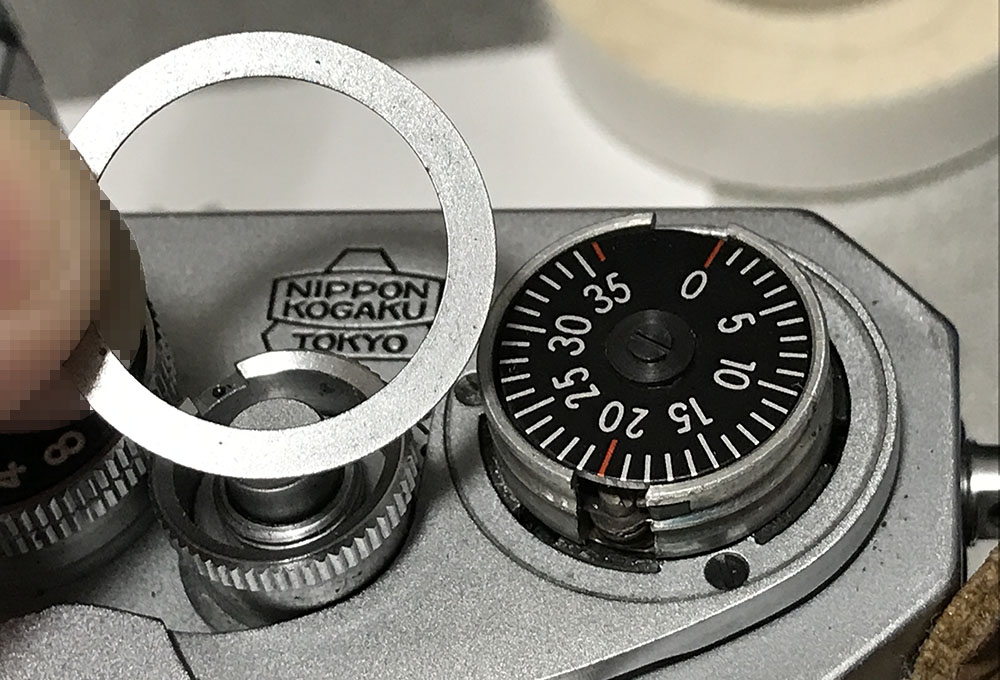
Do the same for the film-advance lever ring, don’t forget to note which side should be facing up.
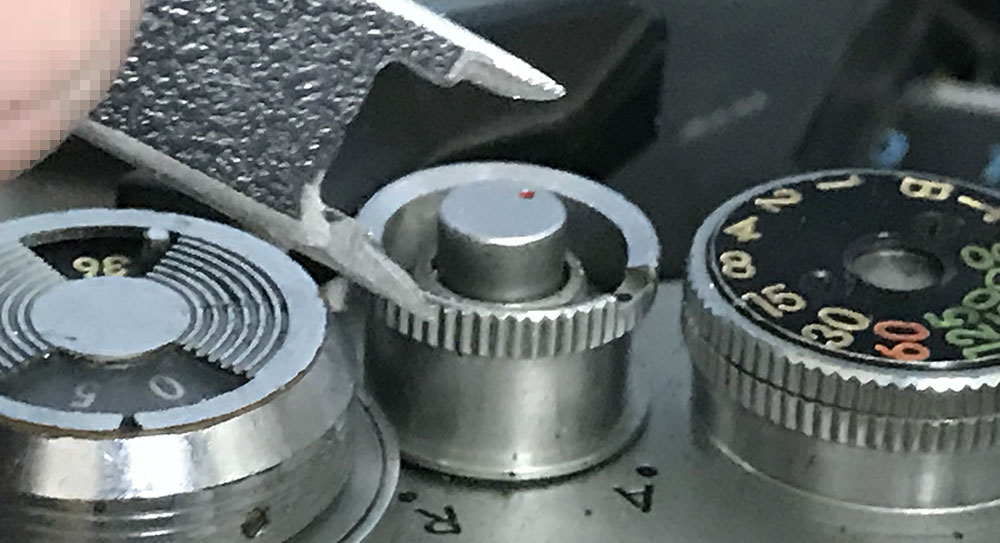
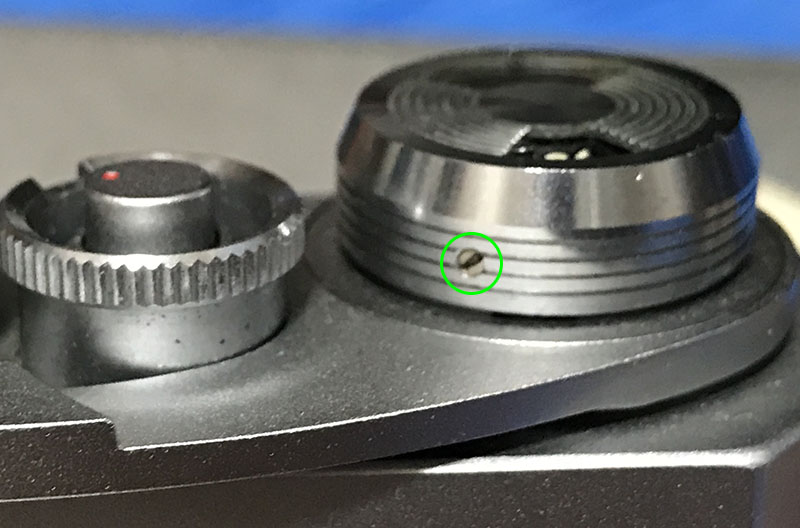
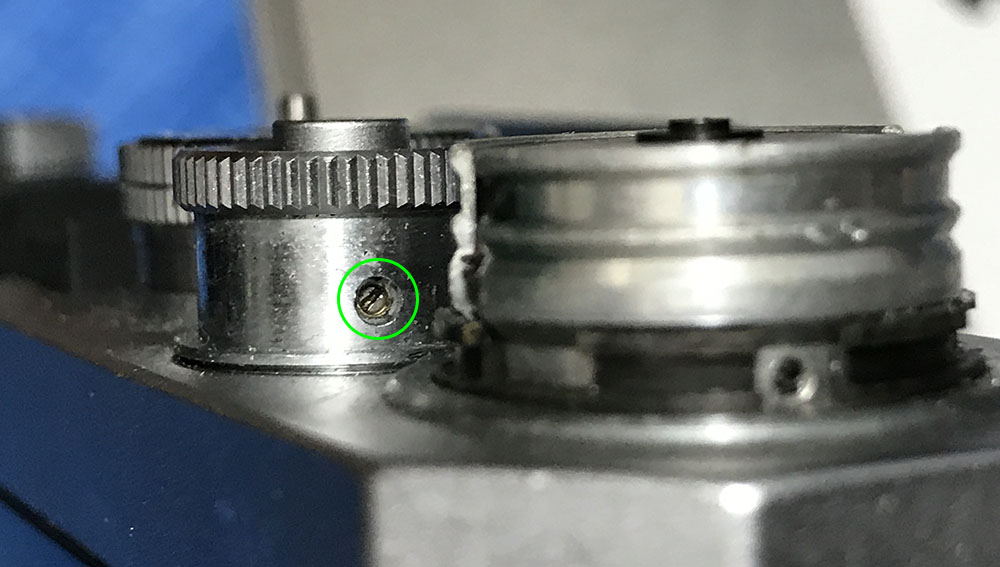
Carefully remove this retainer. I have a special tool just for this thing, make one from scrap piping so you won’t damage this. It’s a delicate part and the threads can be easily-damaged.
Putting this back can be tricky, its threads can be easily cross-threaded and you can ruin that quite easily.
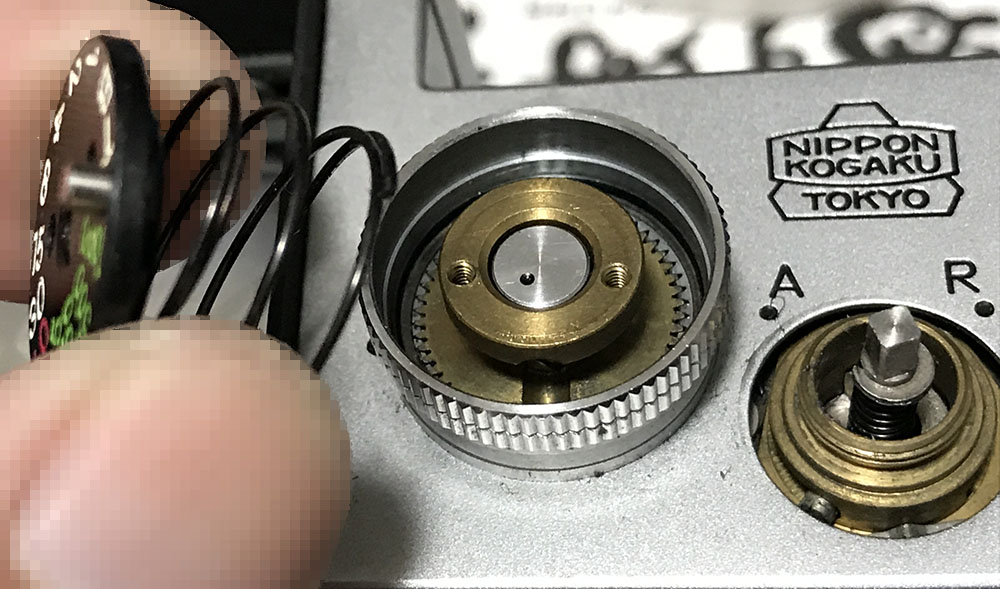
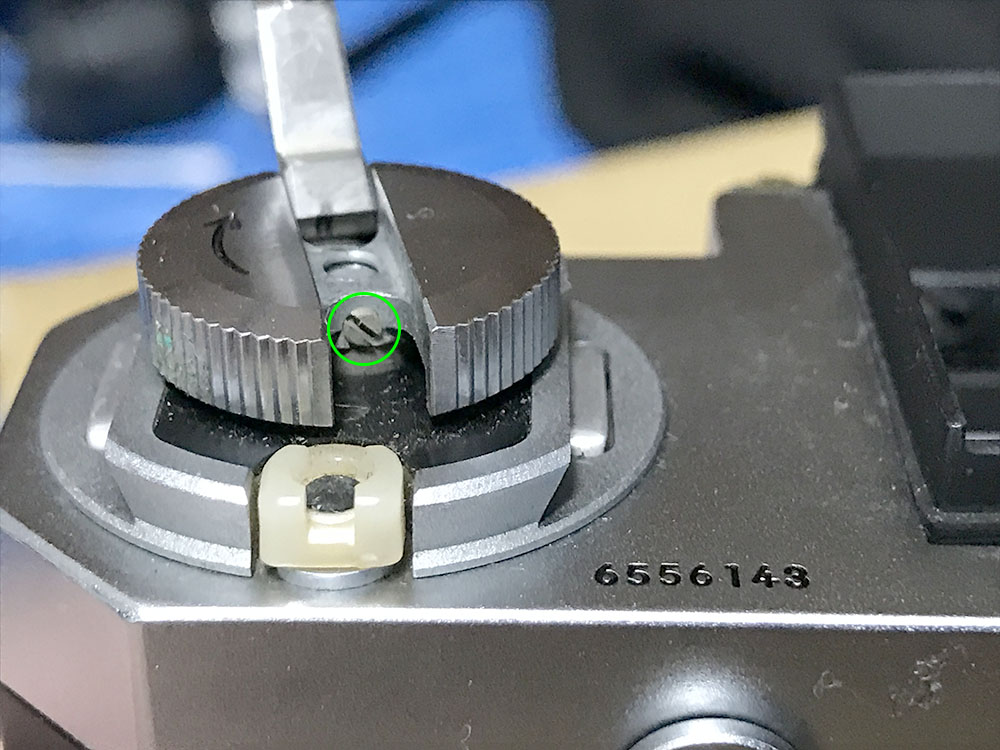
Turn the A/R ring mechanism until you’re able to see its screw. Extract this and store it in a safe place.
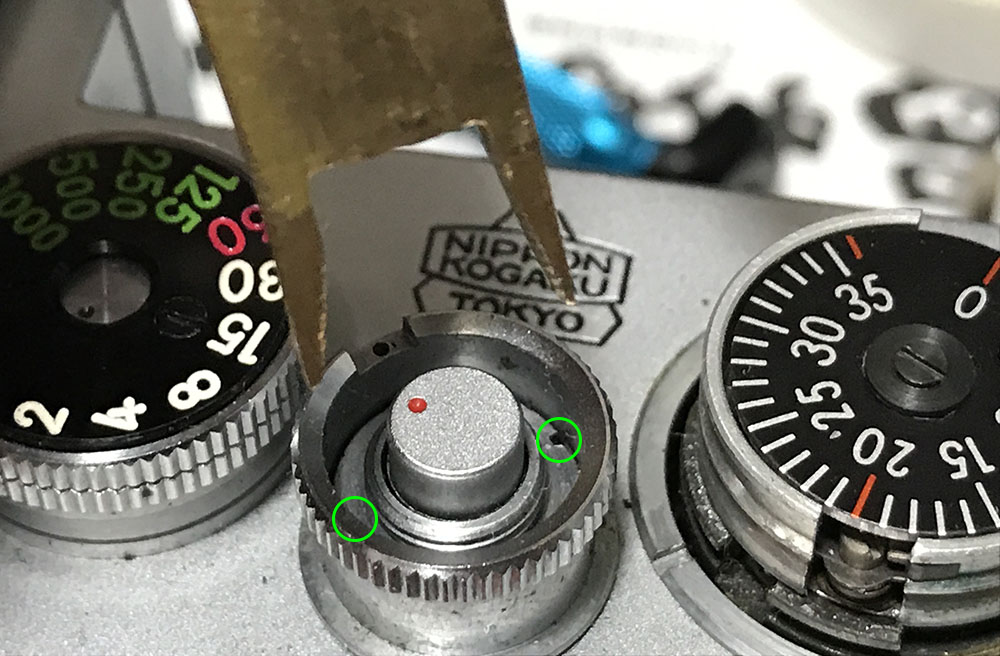
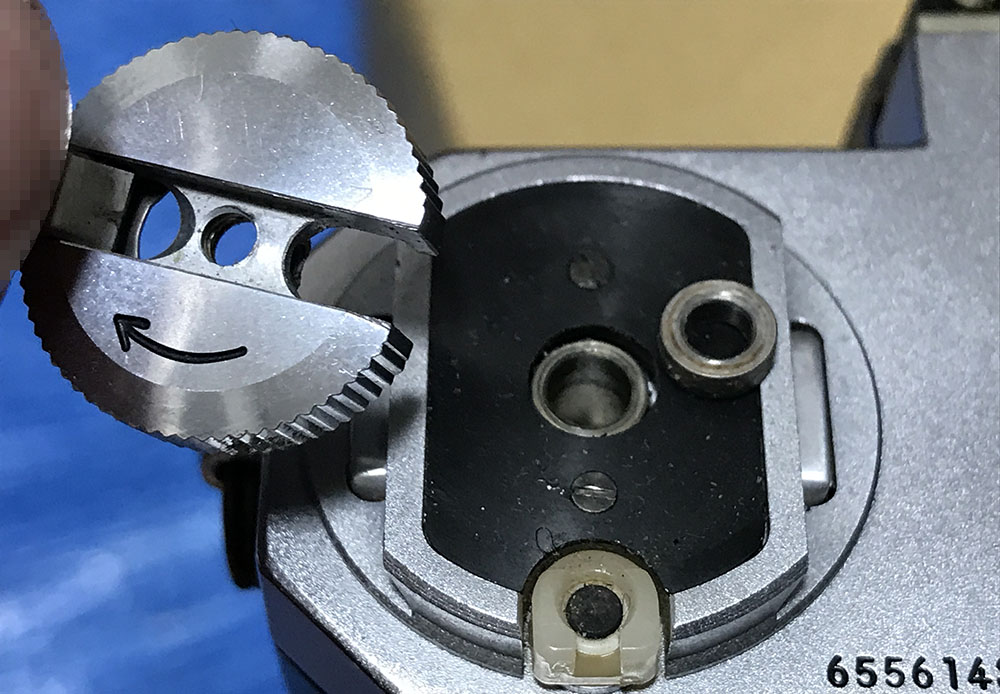
Once the set screw is gone you can remove the A/R ring. Fabricate your own A/R ring opener, it’s the only tool for the job.
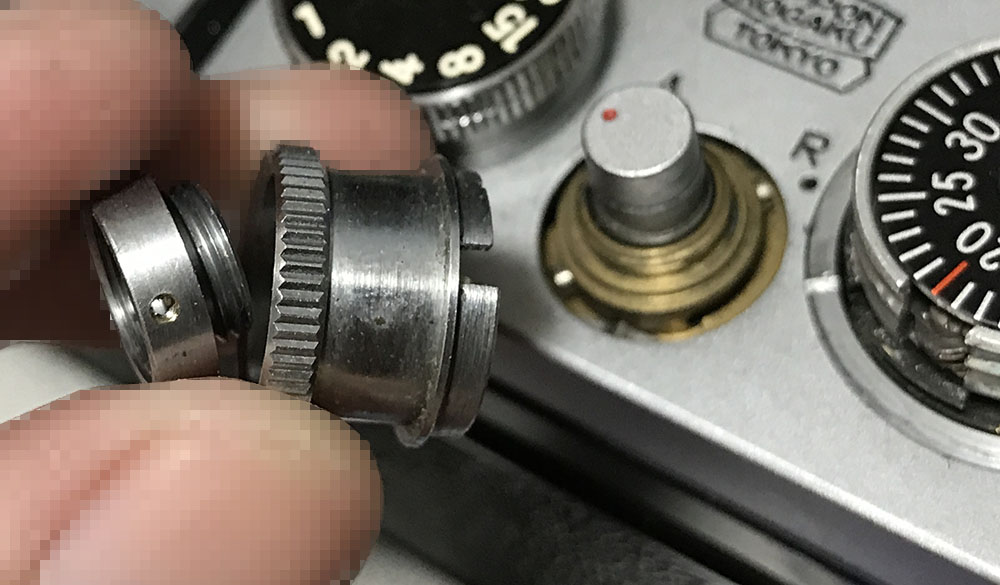
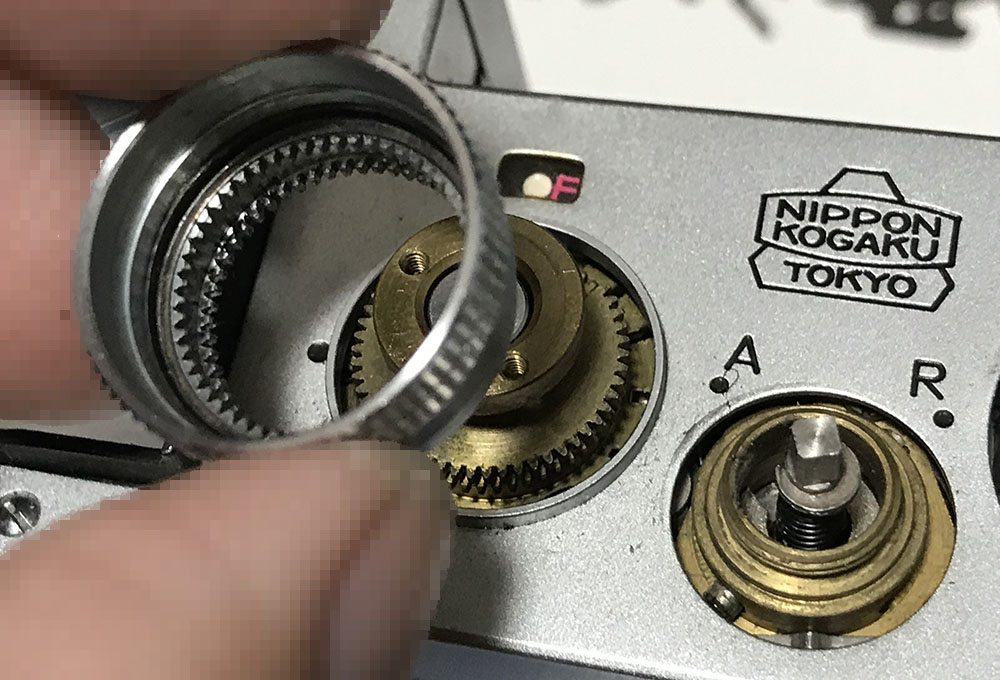
You can now remove the A/R ring and its crown.
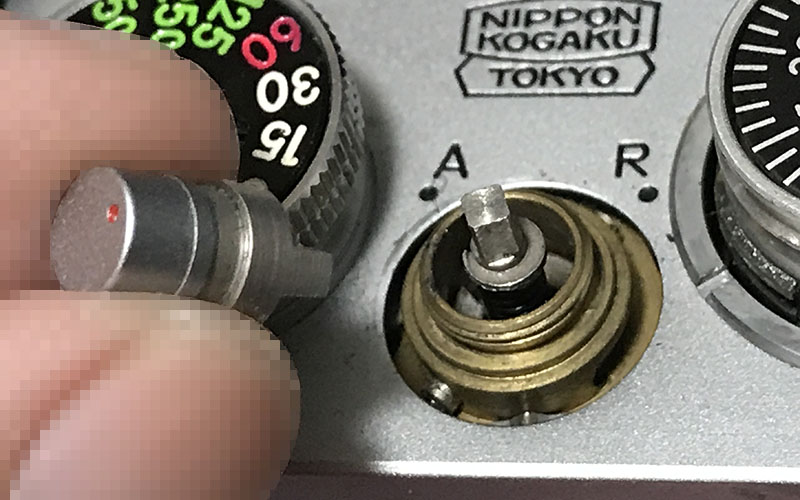
The plunger button can now be safely removed.
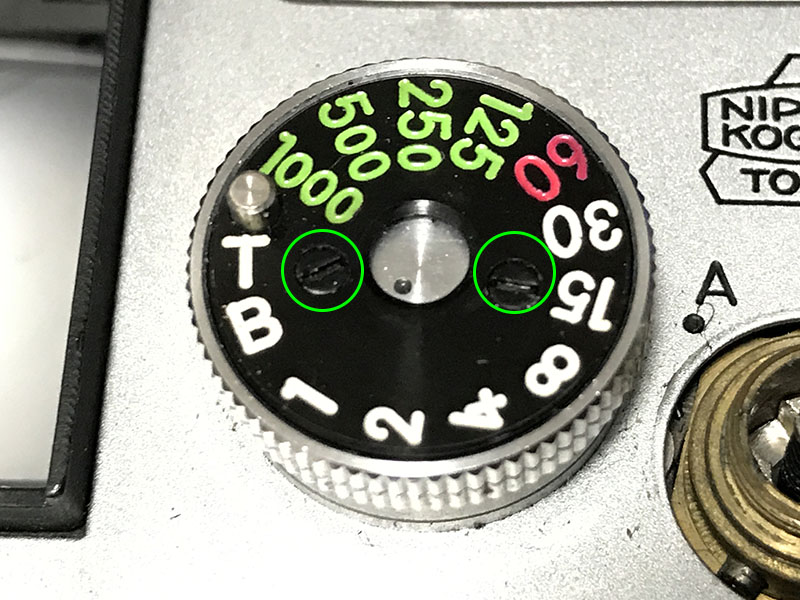
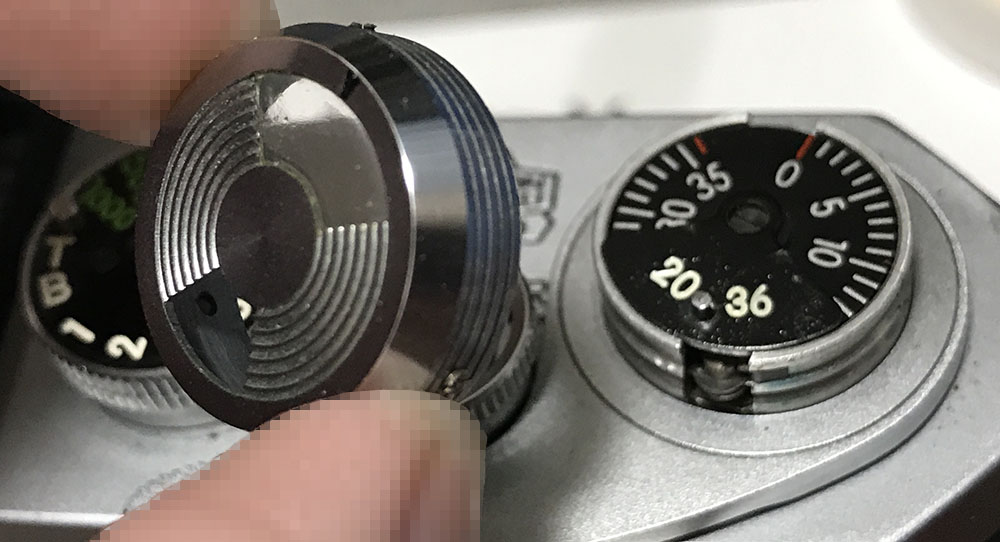
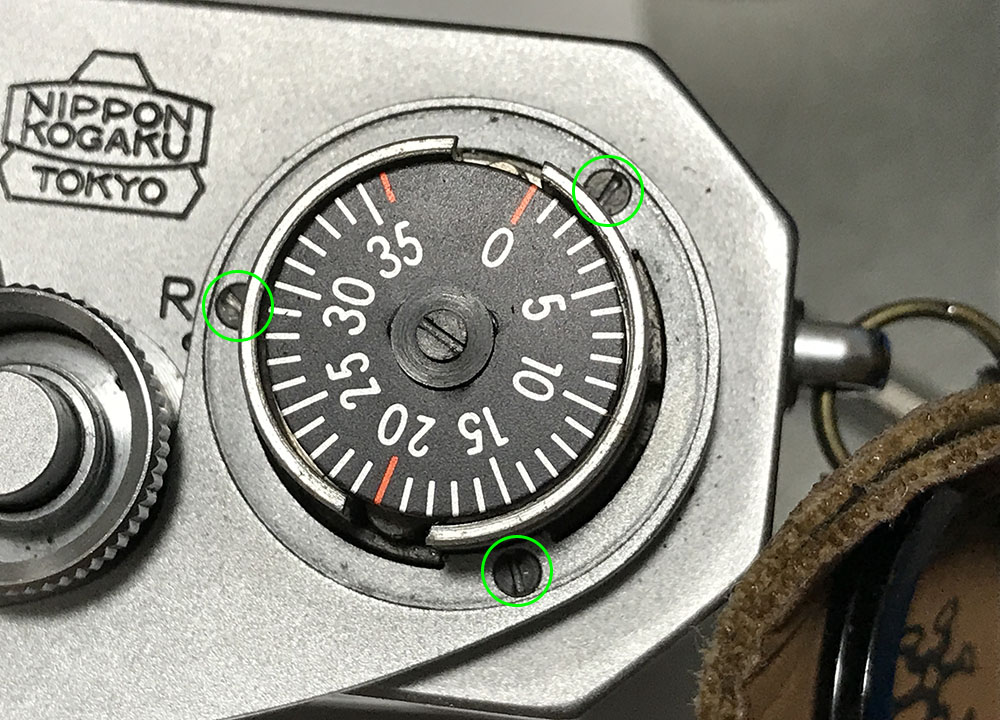
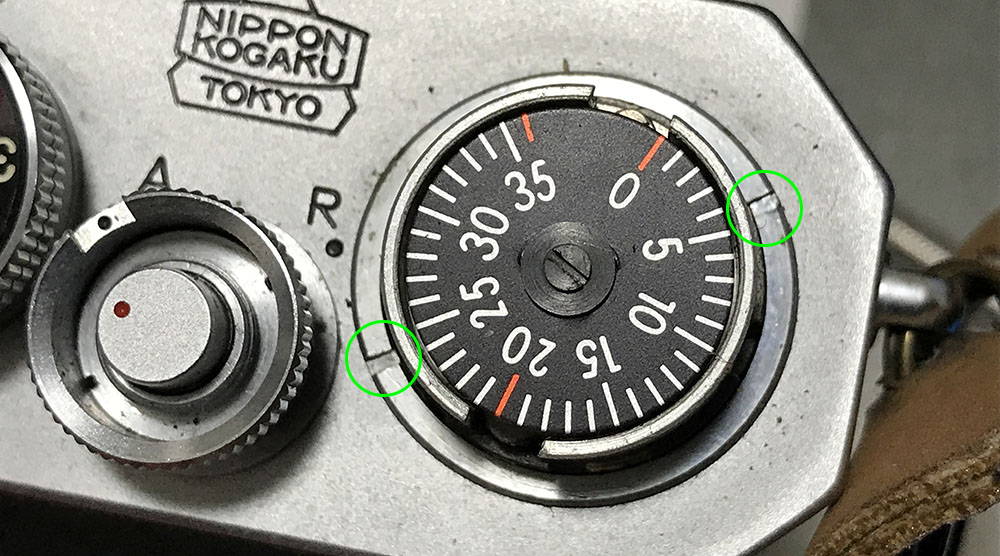
Carefully extract these screws to remove the speed-selector dial. The earlier models only have a single screw.
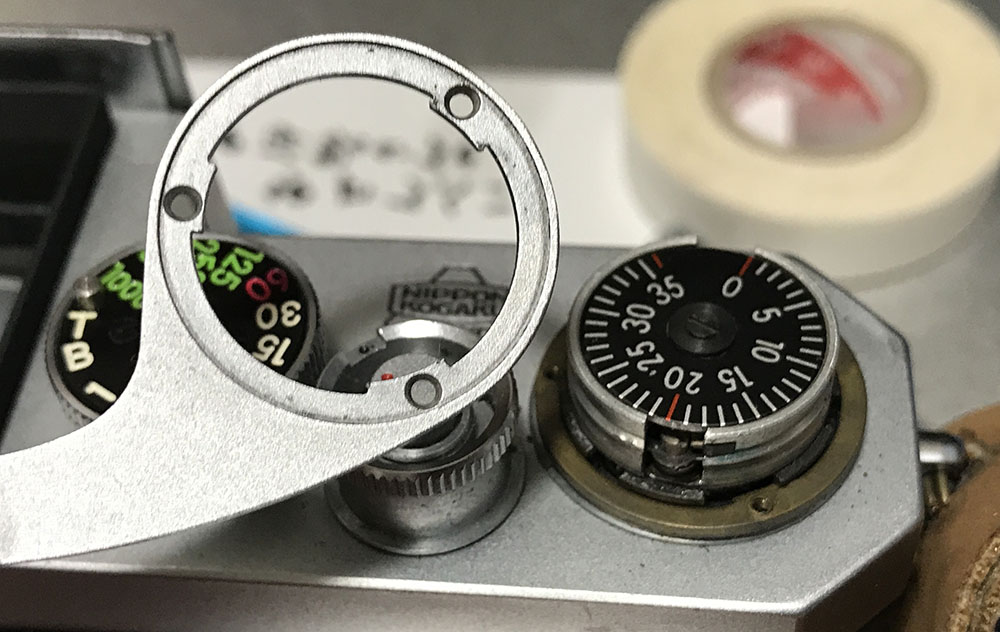
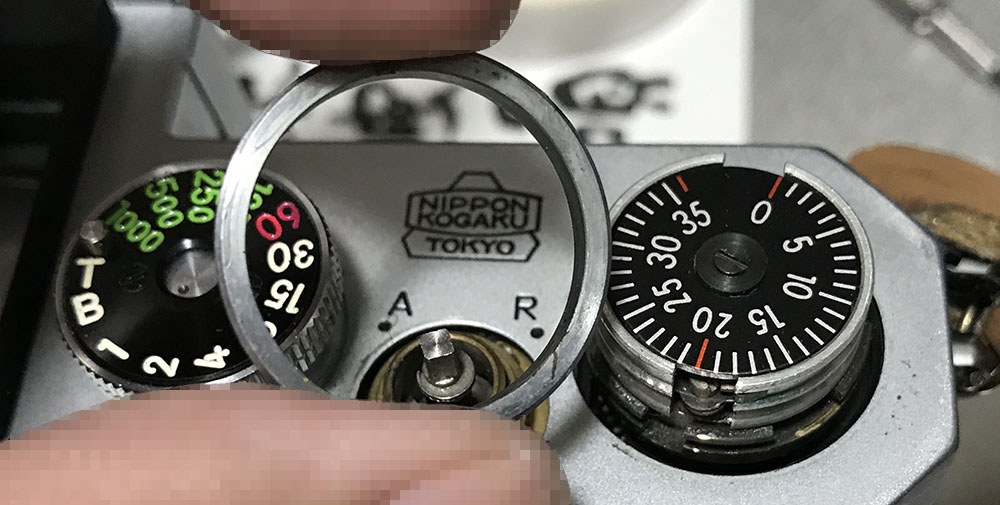
Carefully remove the dial and the spring.
The knurled dial can now be removed. There’s a small shim inside of it, this serves as a seat for the spring and it can be easily misplaced.
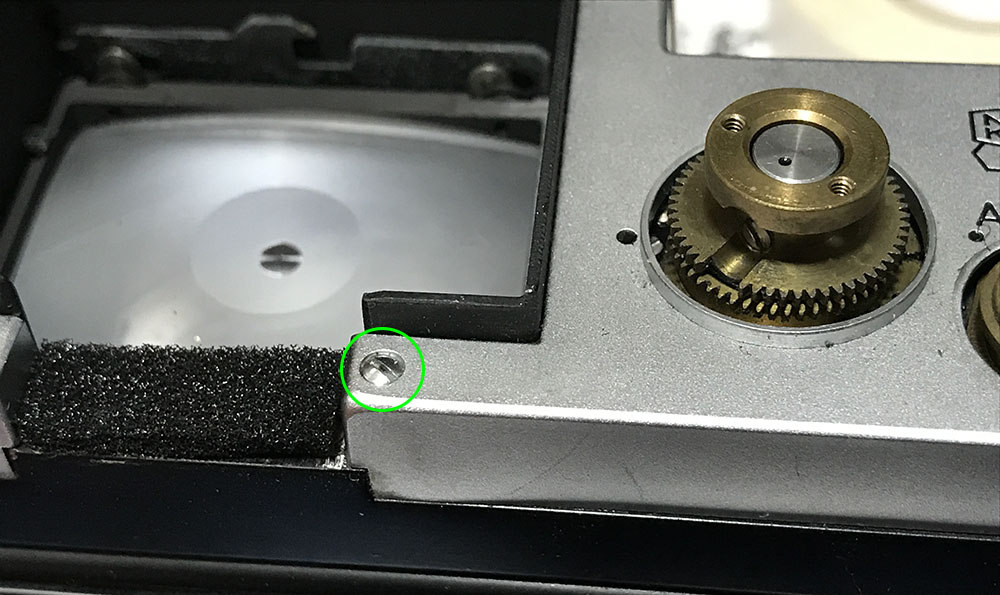
Extract this and keep it somewhere safe.
Once everything is gone you can now remove the whole panel.
Clean everything really well. Be careful when soaking the parts in alcohol, it can be dangerous if there are clear parts attached to it. Some of these parts were cemented and alcohol can dissolve the cement easily. Solvents should never be used, the clear parts can melt when you wipe them with solvents.
Scrub the painted lettering with a brush to remove gunk, you’ll be amazed at the results as the white paint will look white again.
Disassembly (Top-Left Panel):
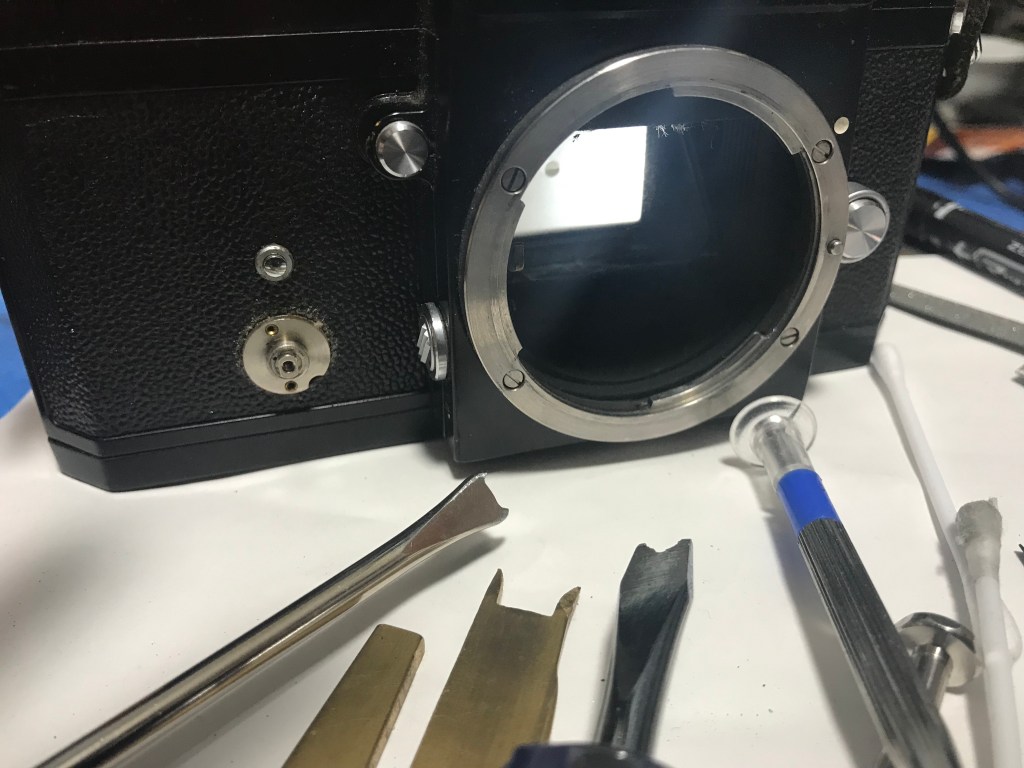
This part is usually left-alone if you don’t have to remove the mirror-box or do anything that’s connected to what’s underneath it but I usually remove it since all of my repairs involve cleaning the camera thoroughly. This can be a tough job since some of the parts here are sealed with cement such as the screws and cover. You’ll also need a special tool to remove the socket for the hot-shoe.
Loosen this so you can remove the rewind-crank.
Jam the fork with a chopstick and unscrew the rewind-crank. Be careful not to misplace any washers you may find under it.

Carefully remove the fork, take note of how things were positioned so you’ll be able to put things back in the same order again.
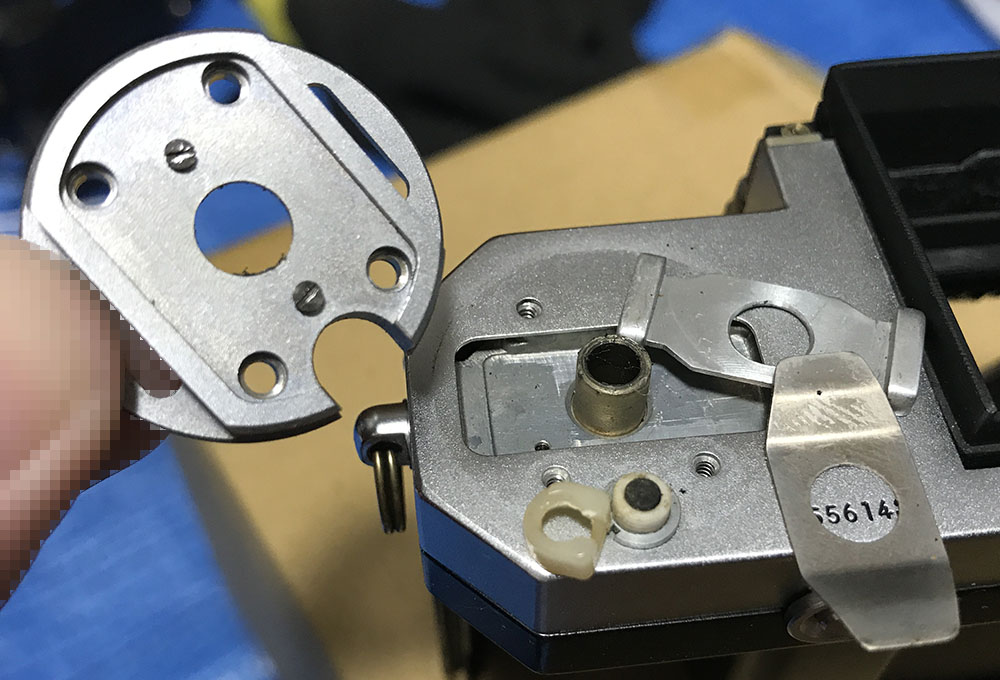
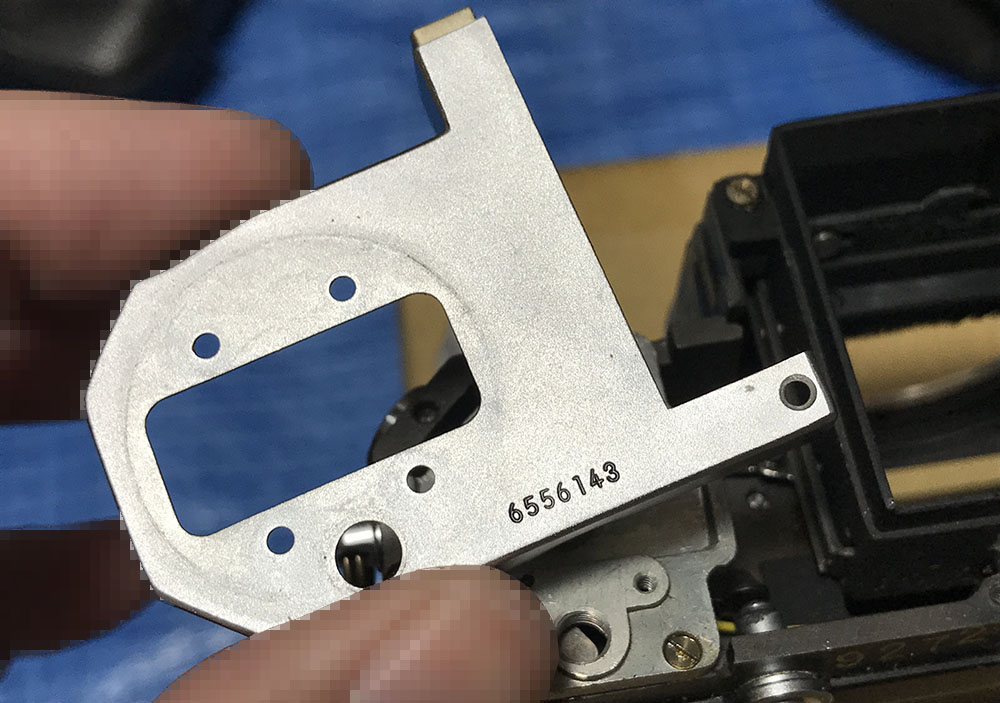
Extract the screws of the black cover and saturate it with lots of alcohol and wait for a couple of minutes before you remove it. It’s usually cemented and you can’t remove it until you’ve softened the seal. You’ll find 4 screws on the hot-shoe’s base which you should remove only after heating them carefully. I am careful when using heat so I won’t melt the plastic parts here. Remove the large metal base, the spring and the plastic insulator.
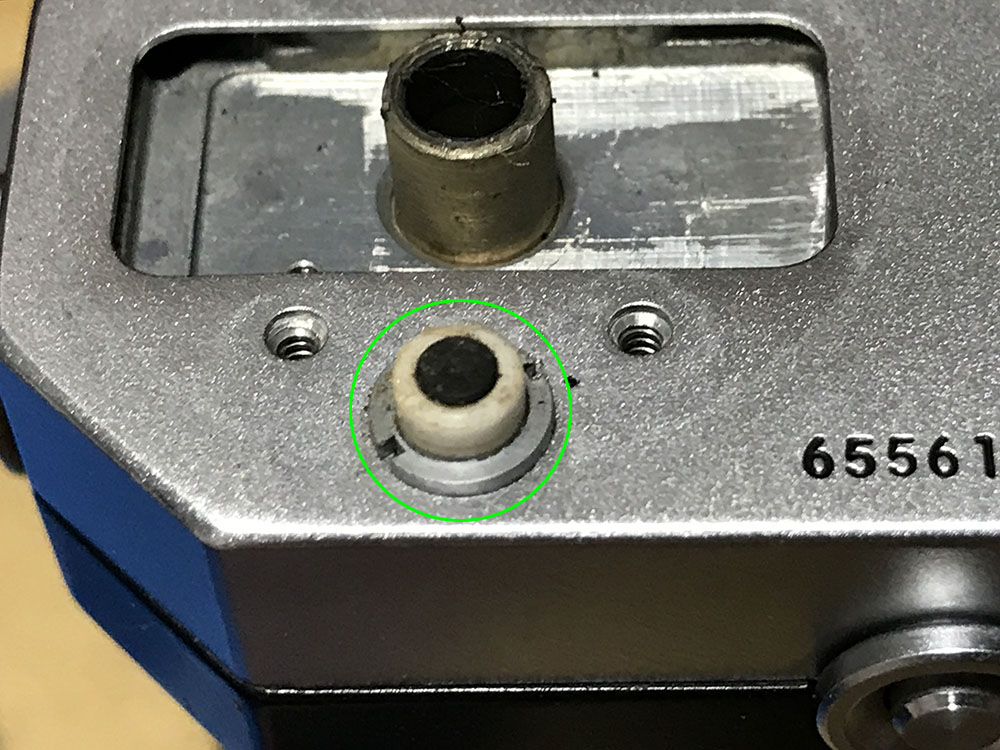
The terminal can only be removed with a special tool. It can be tough, these are usually sealed and there are times that these can get corroded, too. This part needs some attention since you can easily scratch the shiny metal here.
Carefully remove the panel from the camera’s body.
These can be tough to remove, I normally heat them to help me get them off without much effort.
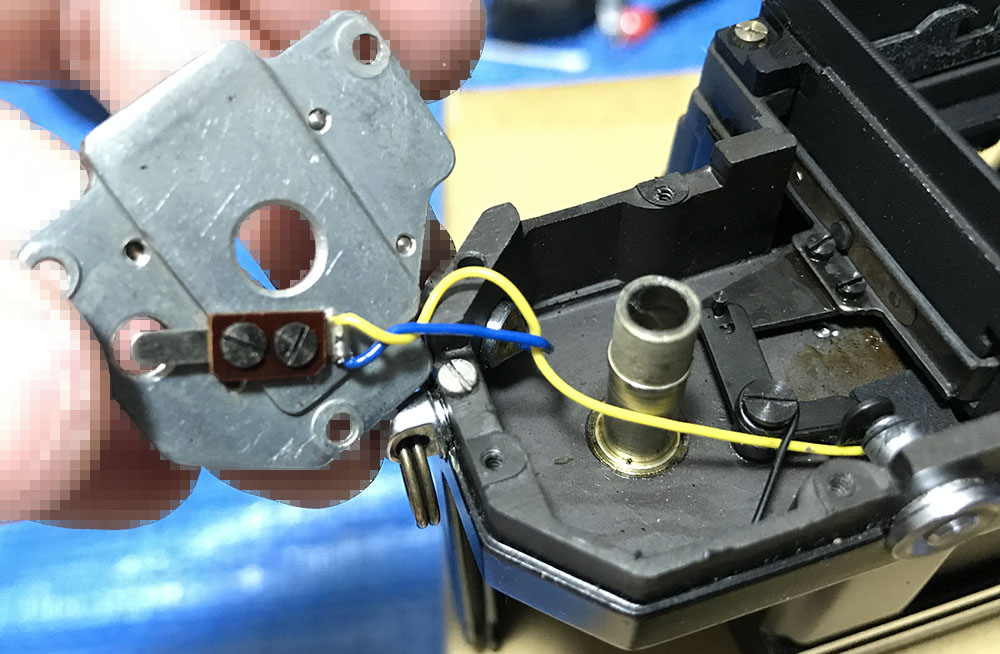
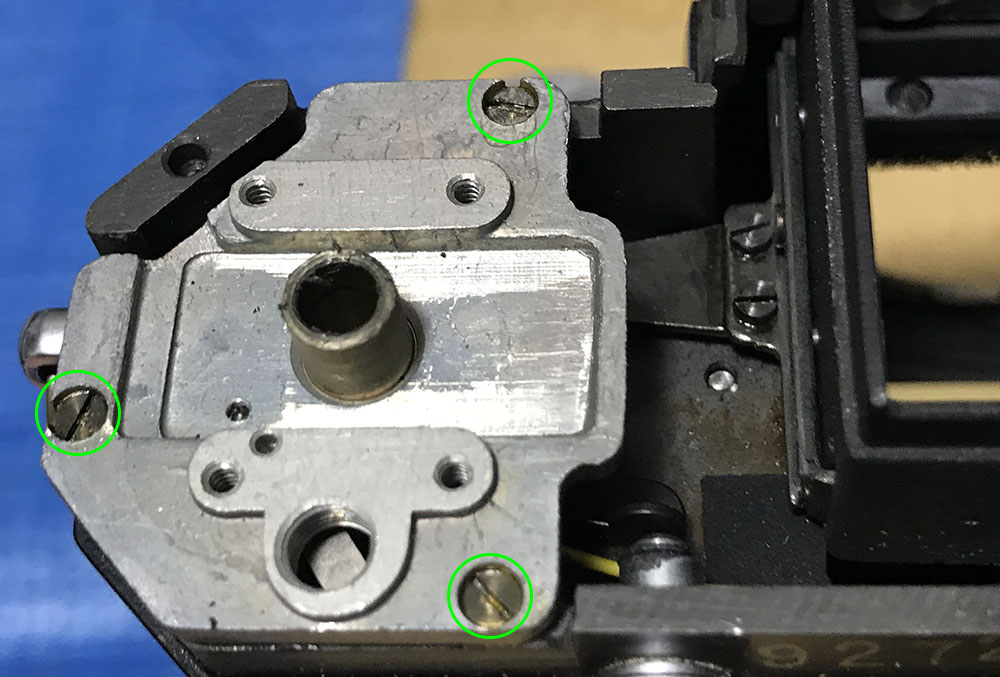
Unscrew the contacts so you can remove the baseplate.
Clean everything very well, specially the stem of the fork and its tube. You’ll often find these greasy and filthy from all those years of use and abuse. You can brush-away any rust that you find to make sure that everything is clean before you put them somewhere safe.
Conclusion:
This is just a warmup, nothing can be cleaned unless you removed the parts mentioned in this article. I usually take around 15 minutes to remove these but there are many times when it could take longer. Corroded cameras will take me more than 30 minutes to get to this point. It’s not something for you to rush and you should take your time. This is the reason why some people will refuse servicing a badly-worn camera. Corroded parts will take time to remove and dented parts will even take more and you may not even extract them safely with resorting to a motorized tool.
I’ll mention it again, it may look simple but there’s nothing simple about it, I have been repairing this model for a couple of years now and it took plenty of trial-and-error just to learn what I showed here and what you’re about to see in the whole series. If your camera needs to be repaired, send it to your repairman and make sure that he’s competent or familiar with this model. I have heard horror stories about butchered camera repairs, it’s not worth it.
That’s it for our new series. This is a very popular model, it has been talked-about and covered by many people but this is my take on the Nikon F. If you liked this article please share this with your friends. Please consider helping me keep my work alive by supporting it. Your help is vital, it’s helping us by offsetting the cost of hosting and maintenance, you are also helping me buy, process and promote film use. I believe that this site is unique and that’s all thanks to your support. See you guys again in the next article, Ric.
Help Support this Blog:
Maintaining this blog requires money to operate. If you think that this site has helped you or you want to show your support by helping with the site’s upkeep, you can make a small donation to my paypal.com (richardHaw888@gmail.com). Money is not my prime motivation for this blog and I believe that I have enough to run this but you can help me make this site (and the companion facebook page) grow.
Leave me some tip?
Thank you very much for your continued support!
$2.00
Helping support this site will ensure that this will be kept going as long as I have the time and energy for this. I would appreciate it if you just leave out your name or details like your country’s name or other information so that the donations will totally be anonymous. This is a labor of love and I intend to keep it that way for as long as I can. Ric.

May 07, 2020 @ 21:33:16
Hi Richard, speaking of things on screen, I’ve been watching Bosch (Amazon Prime), the detective series. In season three, the murder suspect is a movie director. In some scenes he is using a film camera that looks a lot like a Nicca Type III. However he has a lot of money … so possibly it is a Leica. I paused some of the scenes etc., but couldn’t quite make it out.
May 08, 2020 @ 11:42:18
Hi Richard, speaking of things on-screen, I’ve been watching the detective series ‘Bosch’. In series 3, the murder suspect is a famous film director. In some scenes, I noticed he was using a camera that looks like a Nicca Type III. However the character is wealthy so possibly it is a Leica.
May 08, 2020 @ 11:44:27
Sorry posted twice, feel free to delete! …. getting confused by this WordPress system
May 11, 2020 @ 19:53:30
Great tutorial! I recently bought a backup nikon F that has several issues (shutter speeds are off, bulb not working, advance lever not bouncing back) and I’m following your guide to service it. Looking forward to part 2!
Oct 11, 2020 @ 19:15:22
Hi there! I need to replace one of the two name plate screws on my Nikon F. Do you know the thread size by any chance?
Apr 25, 2023 @ 18:51:18
Do you service/repair Classic Nikon cameras professional?
If so where are you located and what is the usual turnaround time?
Thanks