
Hello, everybody! I recently saw a DeLorean while walking down the street. It’s the stock version but it sure turned a lot of heads, specially if one is a fan of the movie that made it famous. It’s a rare car, I do not imagine the owner driving it regularly. Maybe for picking-up chicks at some sci-fi convention is a good use for that, I suppose. Of course, the owner should bring it out at times to exercise it or the car will develop troubles from not being used. I do not own a DeLorean but there’s something that I own that I rarely use. It’s not expensive or rare, it’s just that I do not have a lot of practical use for it. Like the DeLorean, it’s also rather unusual in the sense that no modern Nikkor has the same feature that was incorporated in it and its immediate successors. Stay and read the whole article to know what this is.
Introduction:
The Fisheye-Nikkor 16mm f/3.5 Auto was sold from 1973 up to 1976 where it was updated as the Fisheye-Nikkor 16mm f/3.5 <N> and later as the Fisheye-Nikkor 16mm f/3.5 Ai which was sold until 1979. Before it, all Fisheye-Nikkors were of the circular-type. It means that the resulting projection is a circular-image instead of something that stretches across the whole film aperture. This is limiting in terms of creative use so I suspect that they were initially made for use by the scientific community. Most of the earlier versions do not allow you to view through-the-lens because they require the mirror to be locked in the up-position. This is the first practical model in the whole Fisheye-Nikkor family and it allowed many photographers to experiment with it as a creative tool.

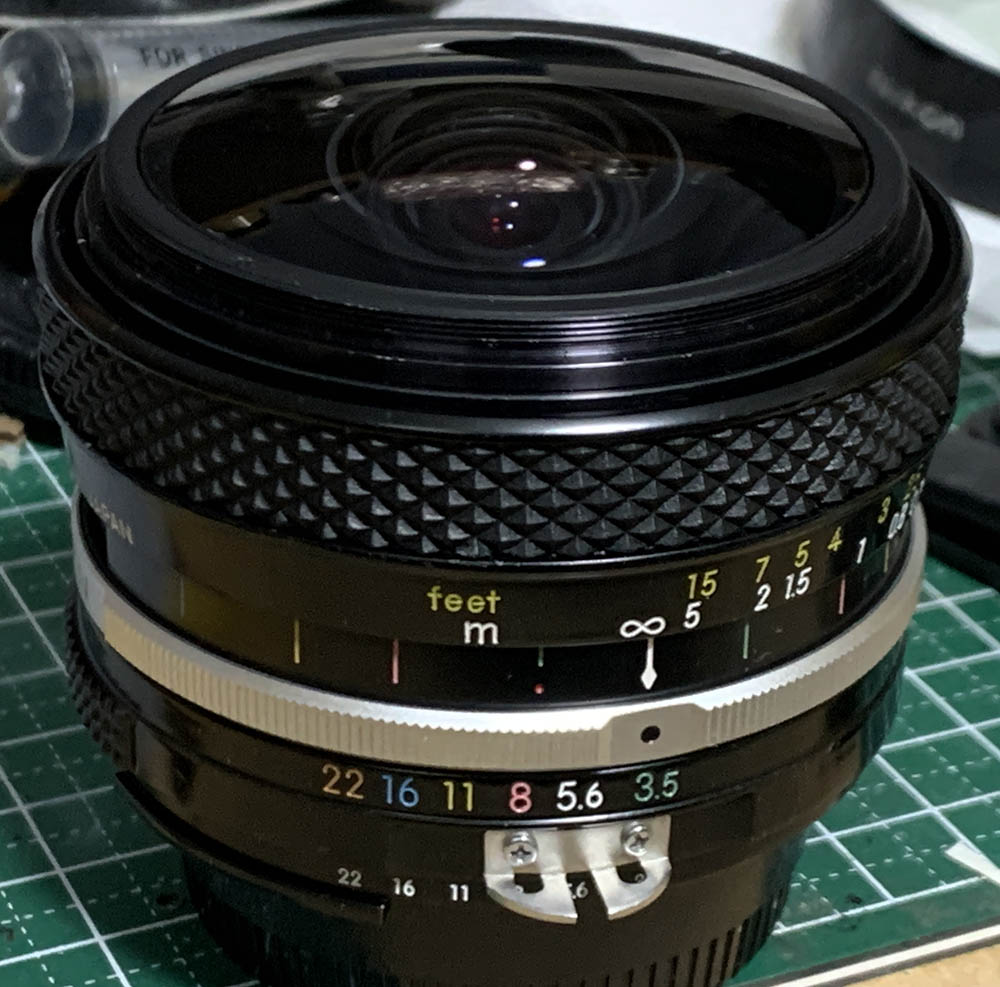
This is really a very beautiful lens. Its build quality is amazing, something that you don’t see much these days. It’s heavy despite being an odd-shaped and compact lens. Handling is standard, the focus-throw isn’t that short since you could focus really-close with this, up to about less than a foot or so. At this distance you could be easily-fooled because your subjects appears tiny in the viewfinder but it is actually really close to the tip of the lens. Keep this in mind to prevent any accidents.
It has an 8-elements-in-5-groups design, not that complicated if you ask me but don’t let that fool you because this wasn’t simple to manufacture and they were expensive back then. Unlike what we’re used to these days, this one has a 170° coverage instead of the now-standard 180°. It may be limiting to some but this was what Nikon could do back then and it was considered state-of-the-art in those days. Its successor, the Fisheye-Nikkor 16mm f/2.8 Ai-S will give you a true180° coverage plus an extra-stop’s worth of light. Many people prefer that one but some people stick to this old legend because the consensus is this one is the sharpest at the center.

It works great with a Nikon F3 since mine has the factory Ai-ring installed. Never use one without the Ai-ring on Nikons that don’t support it or you will damage your camera and the repairs won’t be cheap if that is even possible. This is a pre-Ai lens, if you don’t own one with an Ai-ring just use it with a Nikon F instead.

A Nikon Df will allow you to to safely mount pre-Ai lenses to it. This is still a nice lens for use with digital cameras despite its age and I had a great time shooting with it.

What makes this one special is it has a built-in array of filters. Since it was almost mandatory back then to shoot monochrome film with filters and there were no commercially available ones for these Nikon decided to install one within its barrel just like how the older Fisheye-Nikkors were made. Later ones will allow you to install special ones at the rear, those can easily get misplaced. You can also see that mine came with its special front cap.


(Click to enlarge)
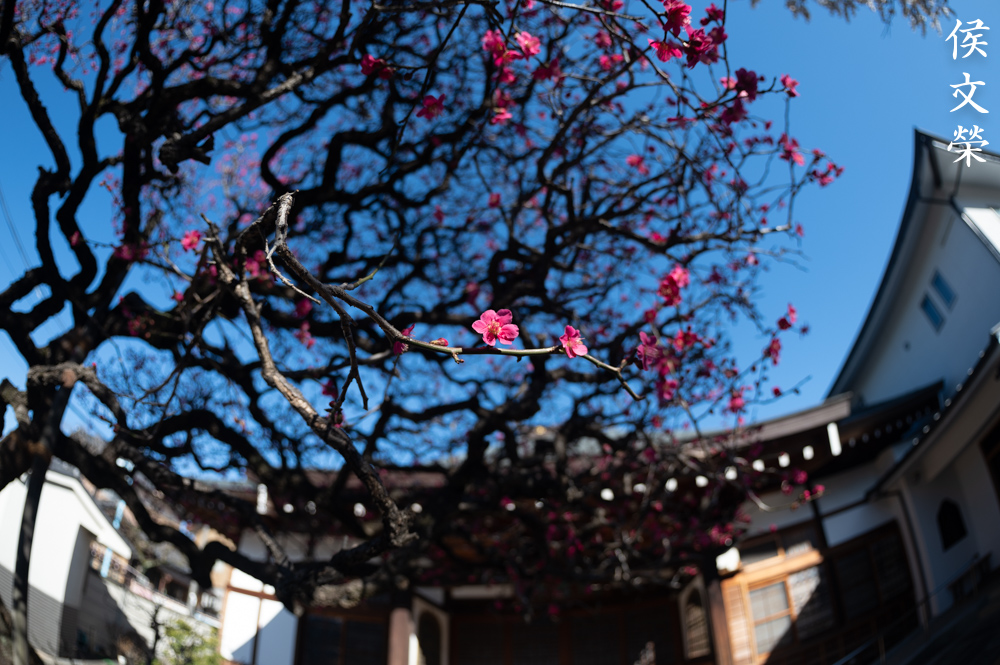
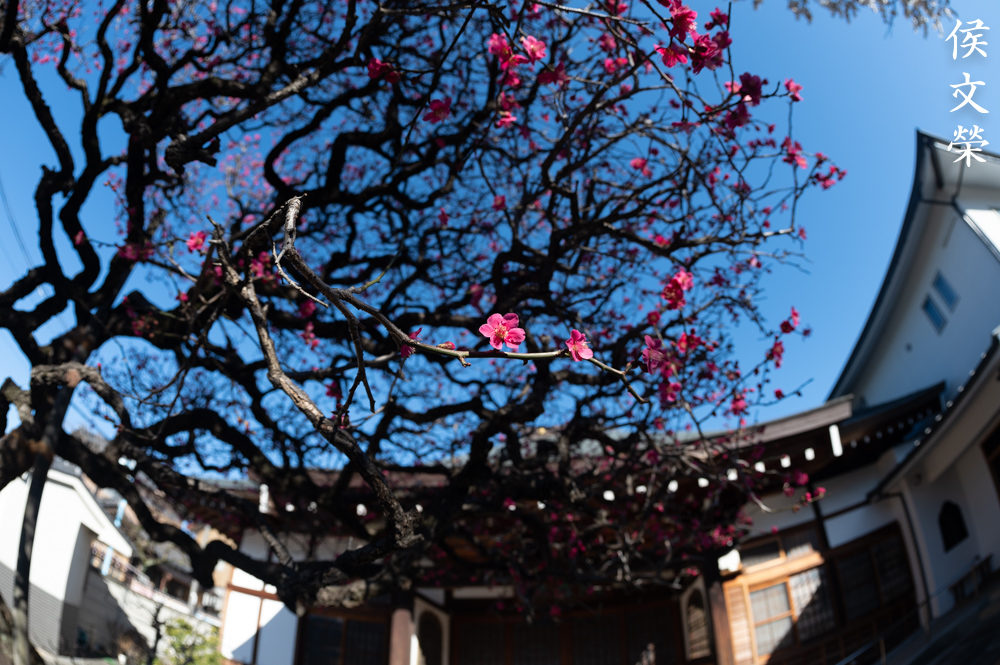
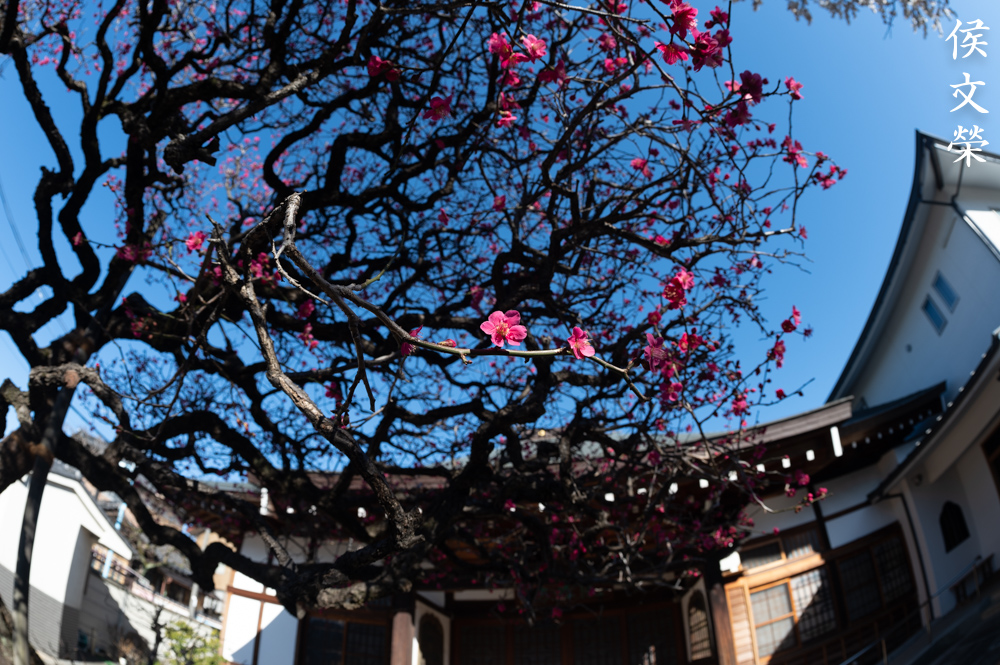
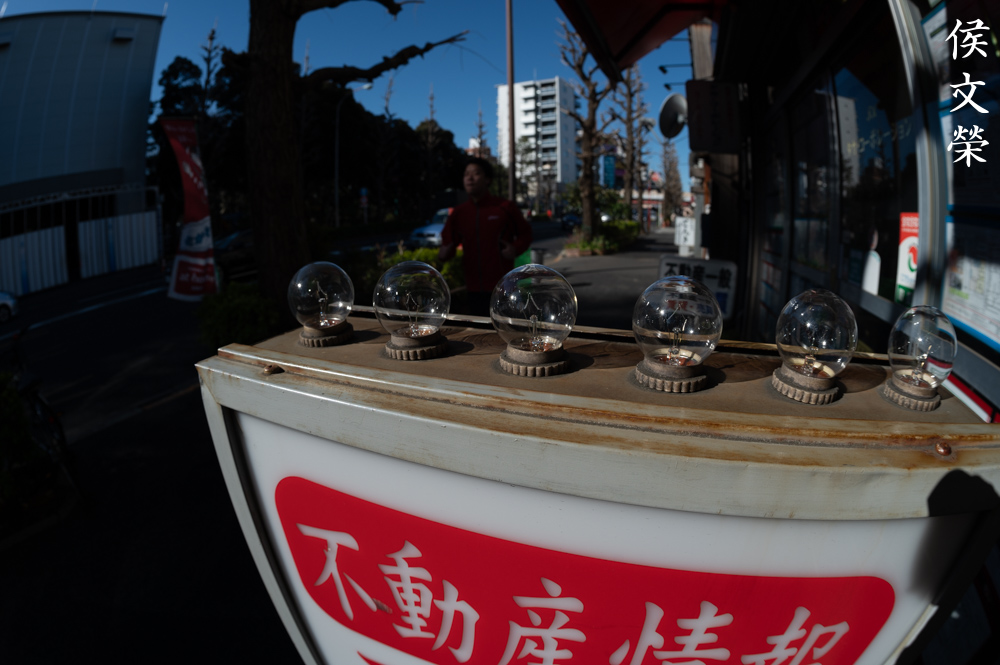
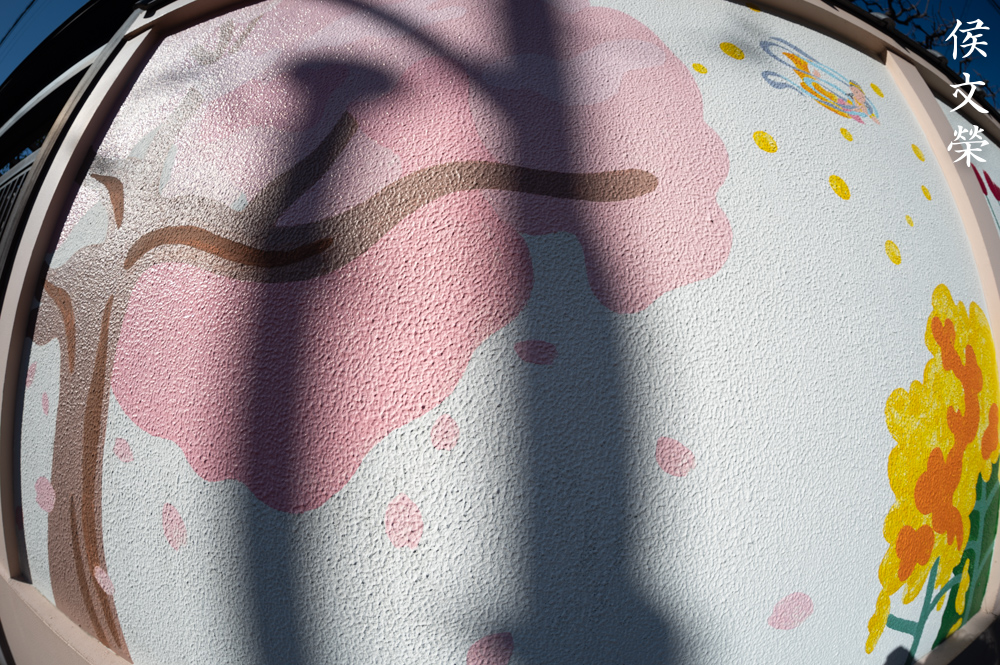
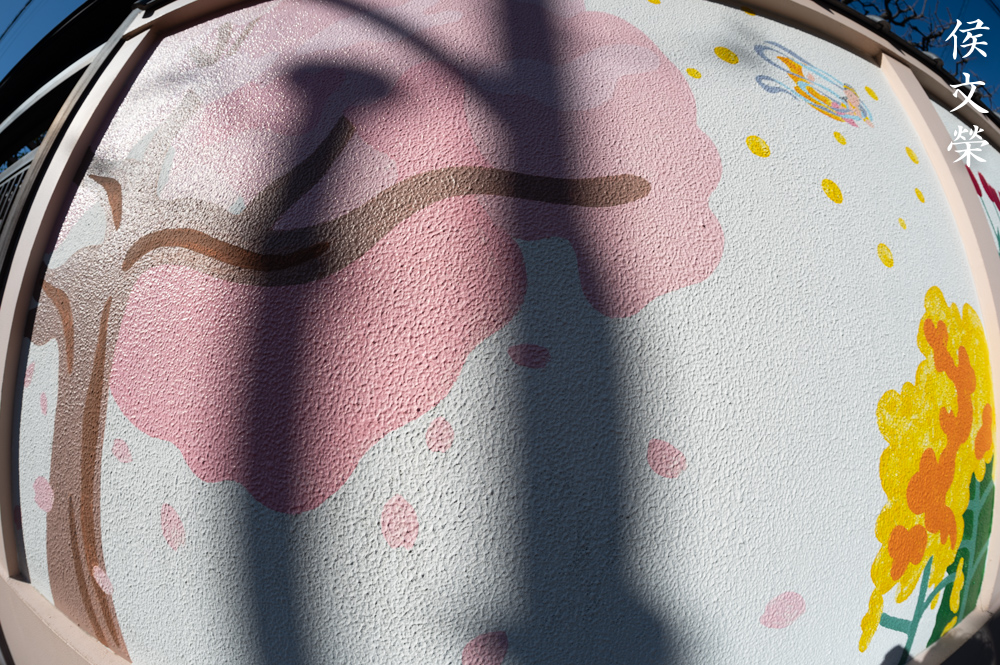
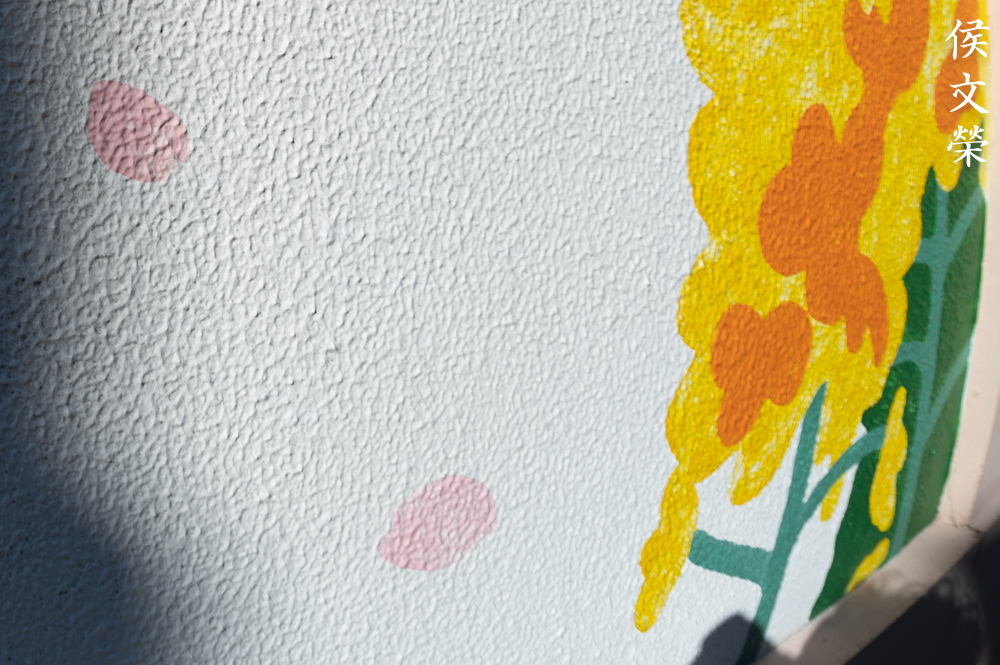
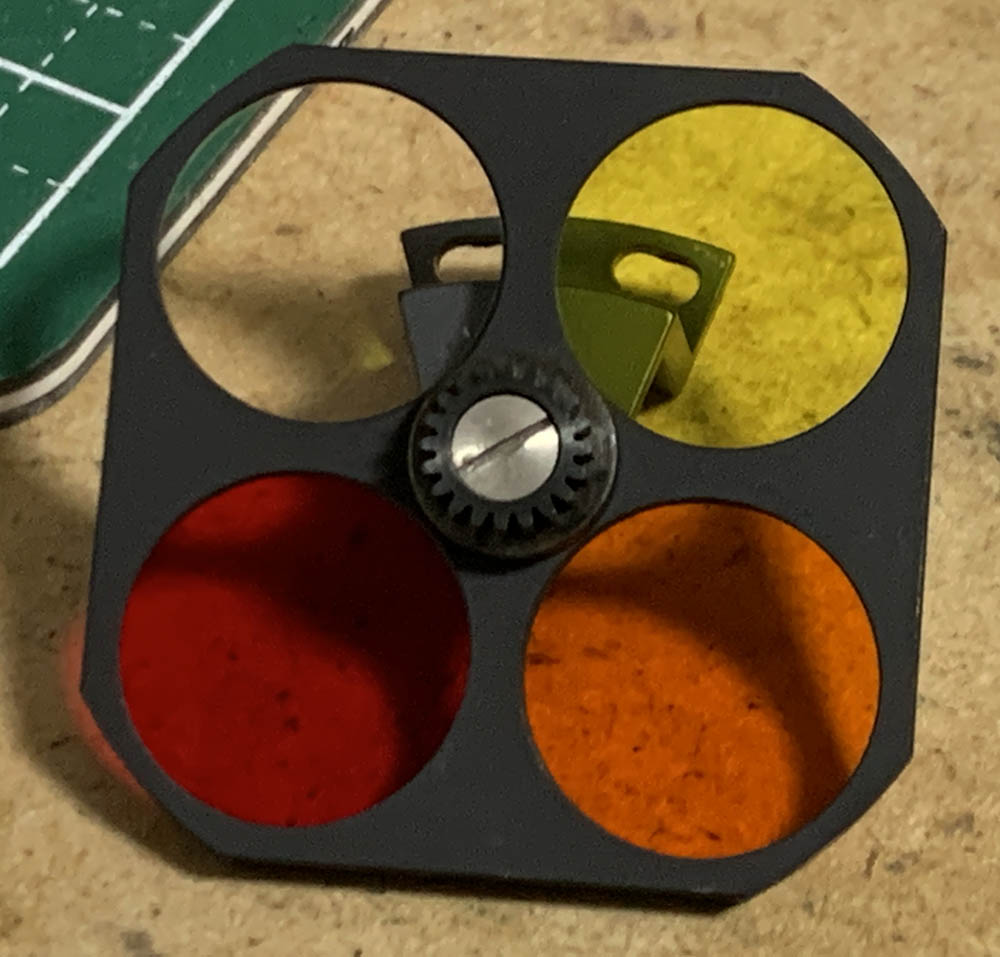
For those who are curious about how the built-in filters look like when used to shoot photos, these should give you a good idea. It is pointless to use them for shooting anything that’s not monochrome film because these were designed to alter the sky and clouds’ look. From left-to-right they are N (neutral), Y48, O56 and R60. The numbers represent how many nanometers it’s supposed to be which I assume to correspond wavelength. R60 shows the most dramatic effect, giving you really high contrast. These used to be a standard part of a photographer’s kit as later as my childhood when color film has already taken-over the amateur market. If you’re shooting with black-and-white film these filters are essential.
Learning how your lens performs is key to maximizing it. You will learn how to utilize its strengths and avoid its weaknesses. This knowledge helps in determining which lens to bring on an assignment. I shot these from f/3.5, f/5.6 and f/8 since these are the most common apertures that people would want to use it and we will see the most changes happen with these values. These photos were shot with a Nikon Z6, some of the photos were cropped close to 1:1 magnification so we can see the details better.

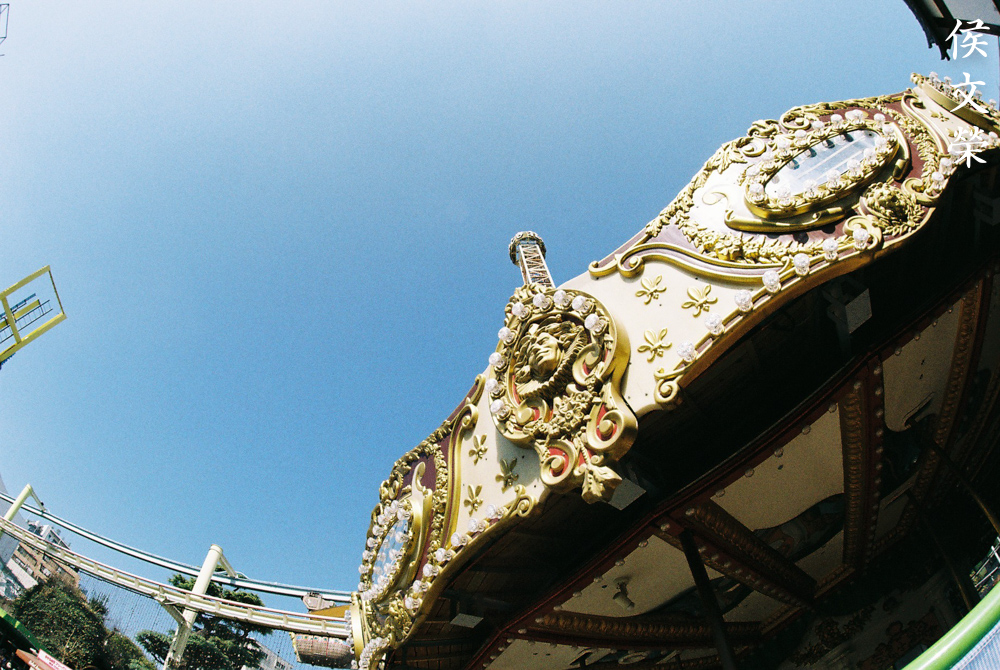
Well, there’s no point in observing how much distortion a fisheye lens has but this is how it look like.


(Click to enlarge)
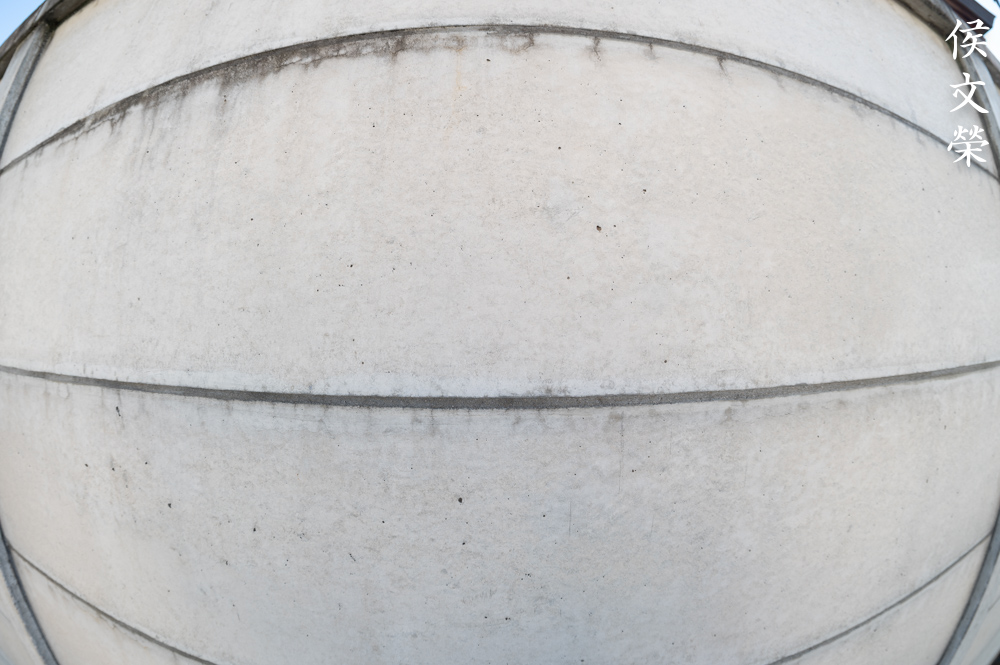
Vignetting is difficult to detect but it doesn’t mean that it isn’t there wide-open. Stop it down to f/5.6 and you won’t see much of it, I can only see traces of it and it appears to be gone by f/8. This doesn’t seem to be a problem with this lens and you can ignore it.


(Click to enlarge)
Fisheye lenses are usually quite-resistant to flare and ghosts since it’s expected to have the Sun within the frame. Flare-resistance is quite poor for a fisheye but that may be due to the balsam separation issue that mine has. It also has the tendency to produce blobs within your frame which aren’t prominent at larger apertures but they’re obvious when shooting at smaller apertures. What I found interesting was how it reflects the pattern of the sensor which you can see in some of the blobs if you look closer at my photos. It is possible to identify the Bayer-type pattern from it, something that I have never seen before. The extreme-magnification may be due to how wide the lens actually is, if my theory is correct then these were reflected from the front-element since that is where the image will render at its largest.

While nobody shoots fisheye lenses for their bokeh quality it’s essential that we examine it. The character is rather poor but it does not look ugly at all. You’ll notice some double-image in the twigs and some residual aberration in the objects that are further into the frame.


(Click to enlarge)
It’s resistant to chromatic aberration at the center but you’ll see some at the extremities where it’s weakest. Despite that you won’t see much of it there.


(Click to enlarge)
The center is quite sharp wide-open, the corners are not bad but they don’t look as good as the center. Stop the iris down to f/5.6 to make the center look sharper by a bit, it’s already quite good wide-open. You’ll see some improvement at the far-corners, they need that extra boost in performance. The center appears to improve some more at f/8, the biggest change could be seen at the corners. It is now possible to see smaller details rendered better. The improvements in sharpness and resolution are very subtle and you won’t notice much unless you view the photos with a large monitor. All I am saying is this lens is already quite good from the start and it only gets marginally better by stopping the iris down.

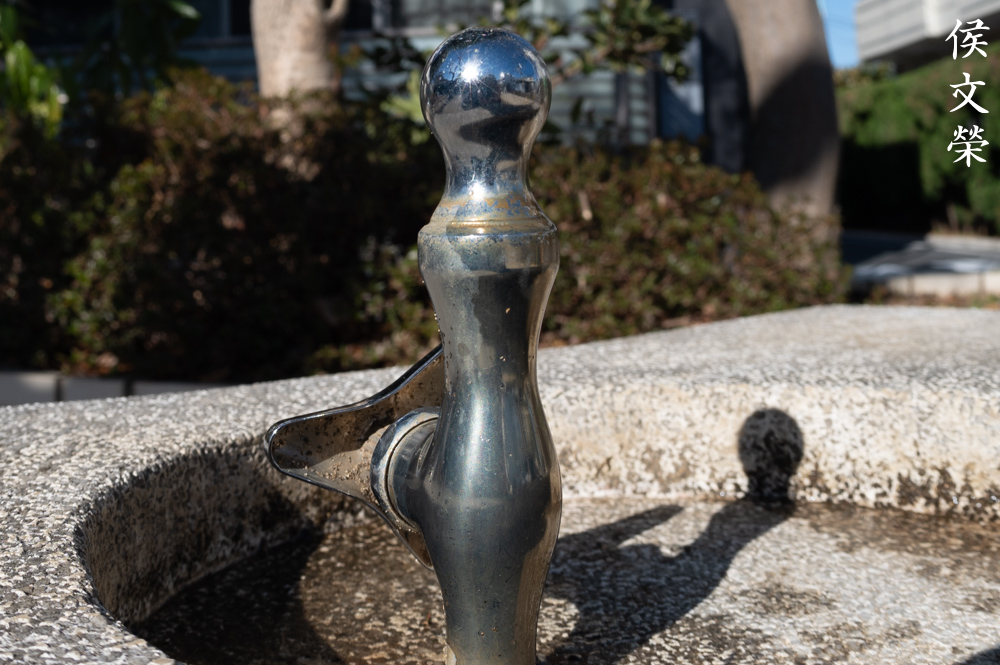
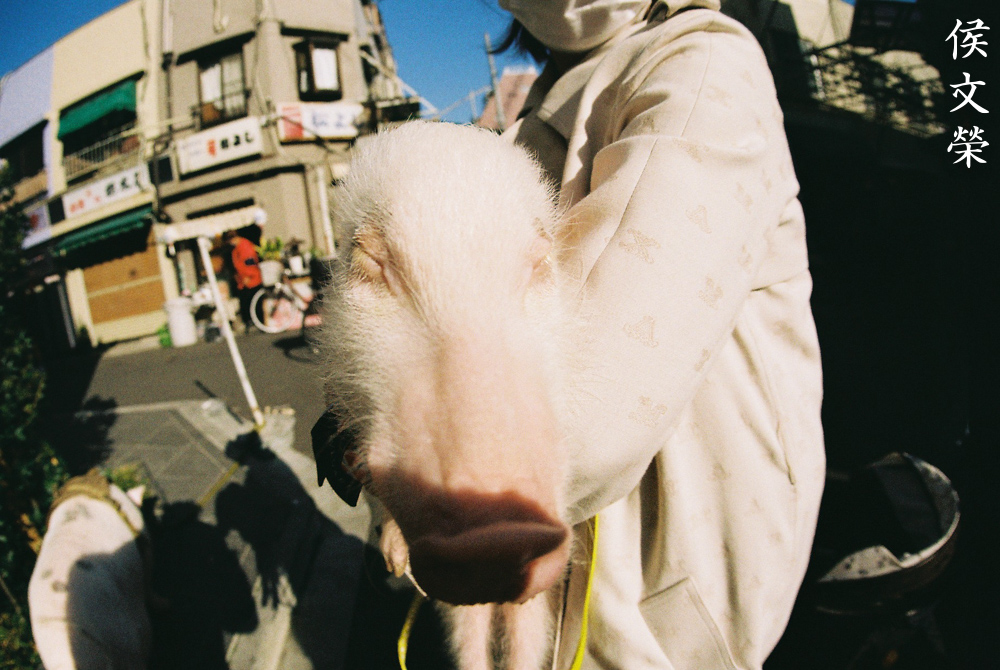
This is how close you could get to your subject, you won’t get high-magnification photos with it despite its ability to focus close. It simply too-wide and that prevents you from taking close-up photos with it.

Here’s a tight-crop of the center just to show you how sharp this is.

It’s a nice lens but application is rather limited. I had another Fisheye-Nikkor before which I owned for a long time and I didn’t use it much apart from taking funny photos at parties.

(Click to enlarge)
Many people consider this to be the sharpest Fisheye-Nikkor at the center, I haven’t tried the other ones but there’s no reason not to believe it because my results show that this is indeed a very sharp lens. A modern, high-MP sensor won’t out-resolve it, maybe it’s going to show some softness wide-open when I use this with a sensor that has more resolution but until then I will stick to what is shown in my tests.
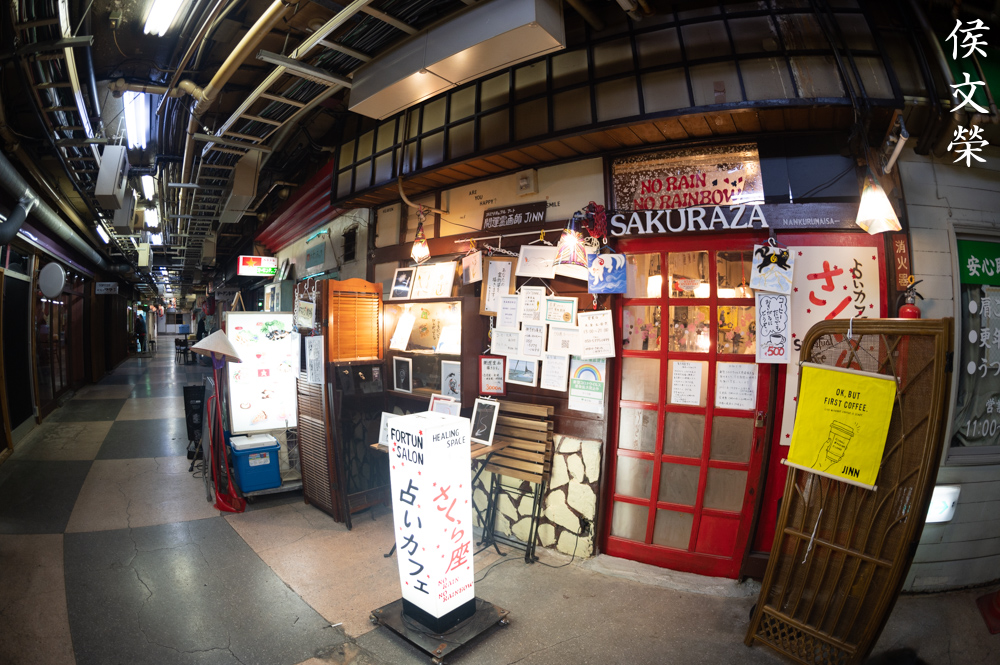
Let’s now check some film pictures. Film has a unique look that is hard to simulate with a digital camera thanks to grain. It reacts differently to light, this means that it could mask a lens’ flaws or amplify them. Since it was designed to be used with film, it’s best that we judge this using its intended medium. I shot these with a Nikon F3 loaded with Kodak Gold 200.

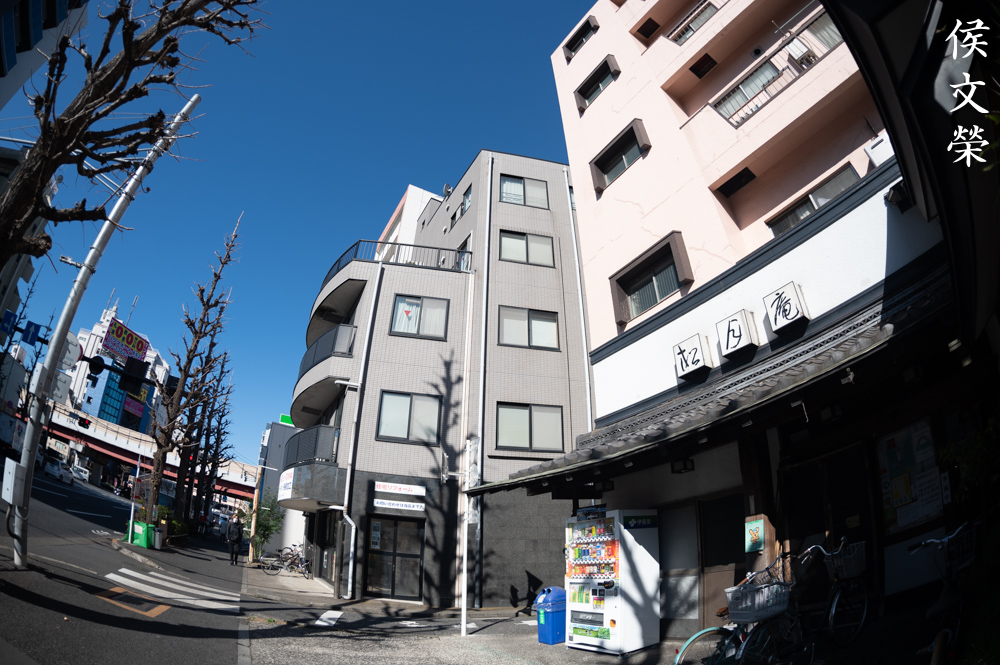
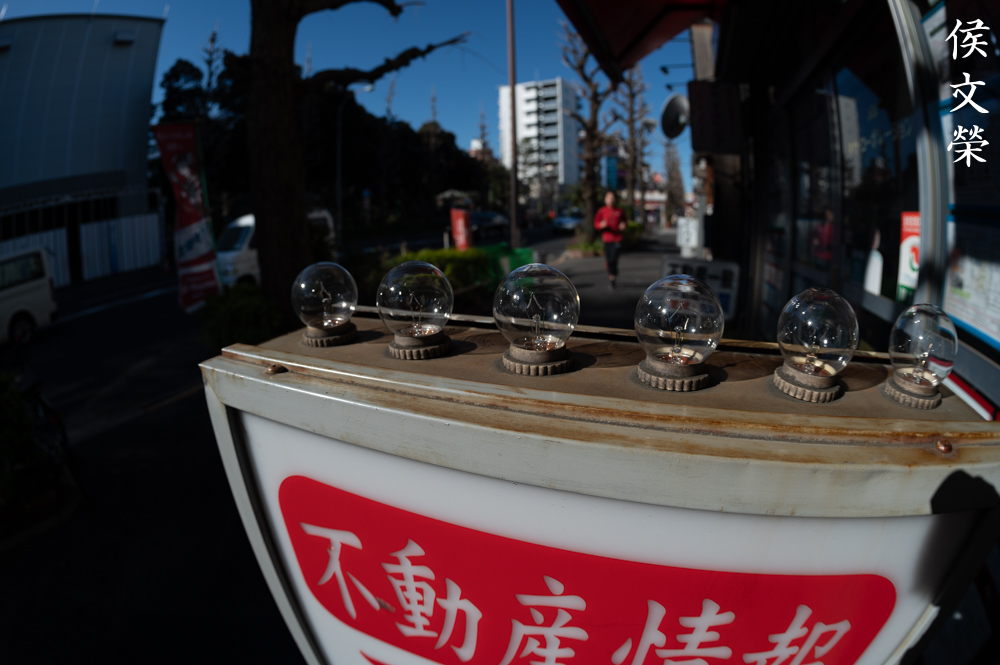
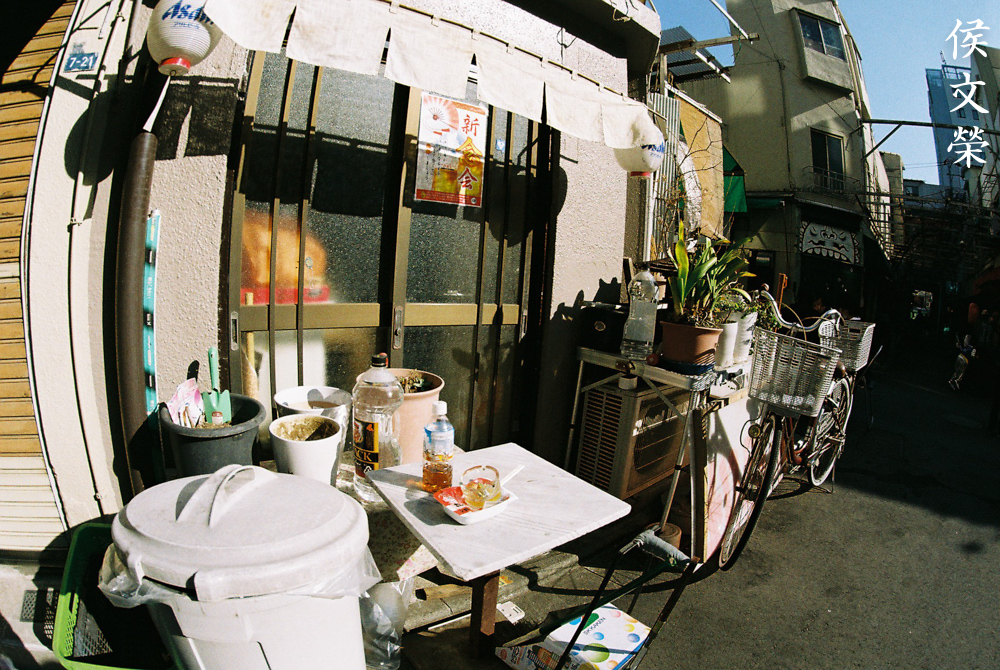
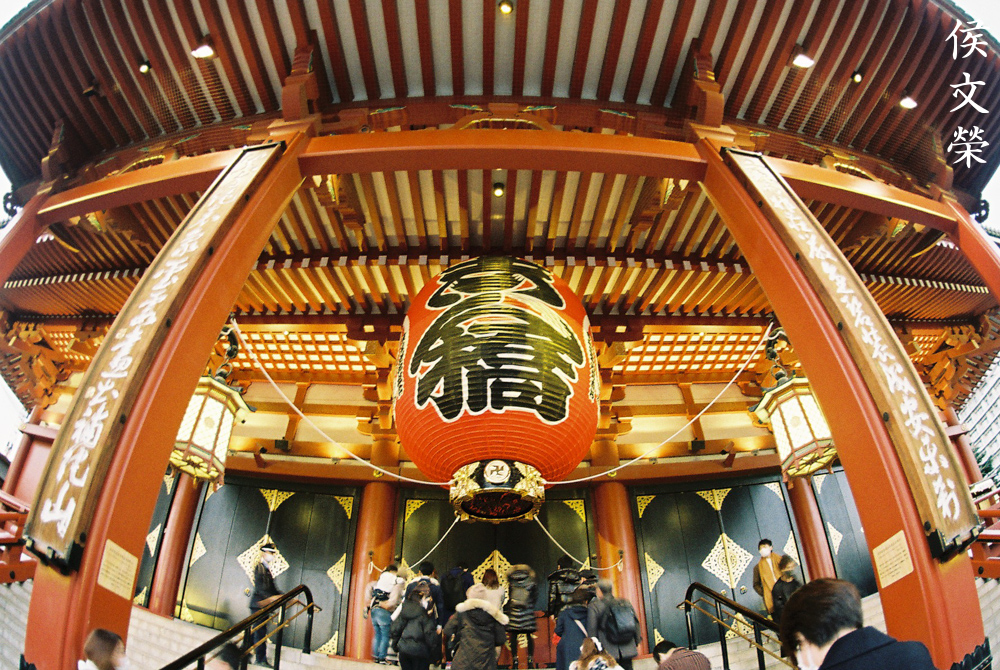
It can be difficult to meter with it since the coverage is just too-wide. Using a light-meter will help you get better exposure if your scene has areas of varying illumination such as this arcade. The flare at the corner comes from the Sun’s reflection.

It has a rather poor flare and ghosts-resistance for a Fisheye-Nikkor, this may be caused by the old, ineffective coating used on it.

You could use the flare creatively as an element if you wish, it helps give the impression of a really-bright day.

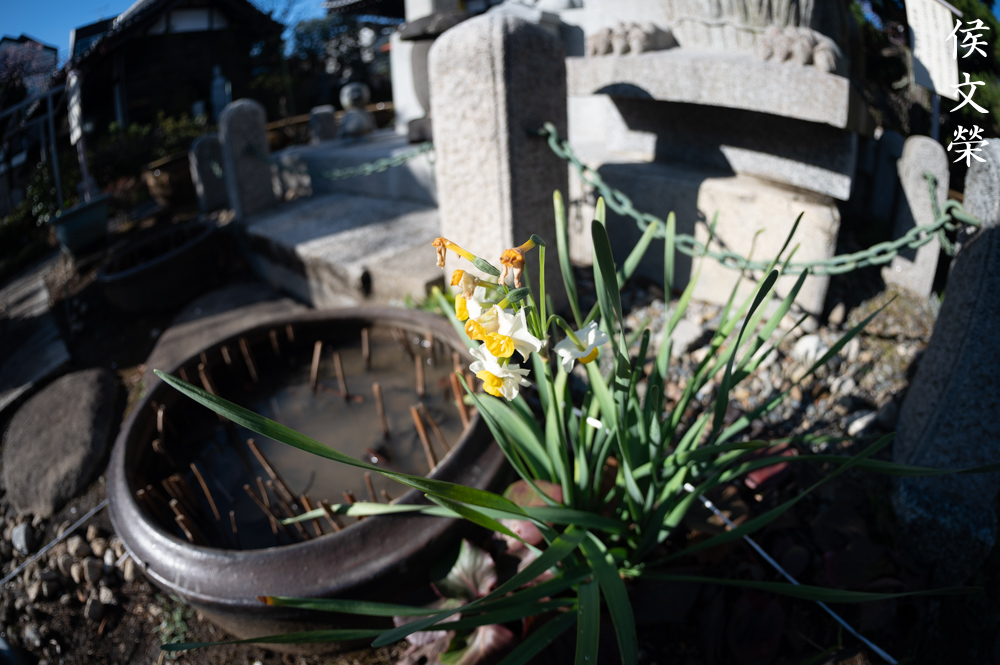
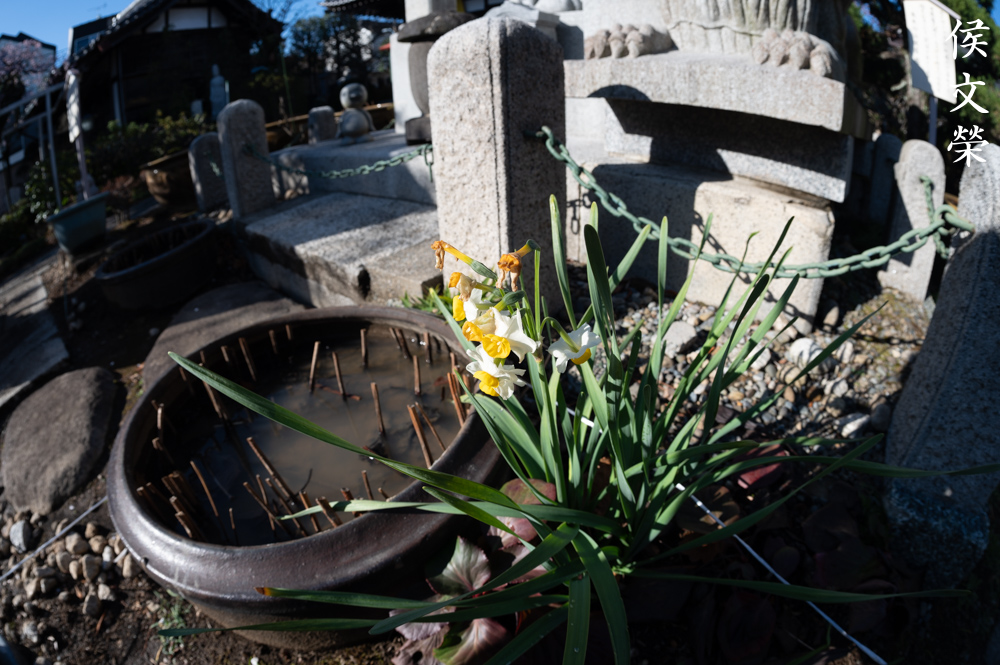
Flare can subdue contrast, making some parts of your scene look “muddy”. Underexposing may help somewhat but that won’t do if the important parts of your scene is somewhat dark like this pond. You’ll have to make a conscious decision in order to expose the subject properly and not merely rely on your camera’s built-in meter.

Sun-stars look nice, they’re well-defined and the rays appear long with a natural-look.

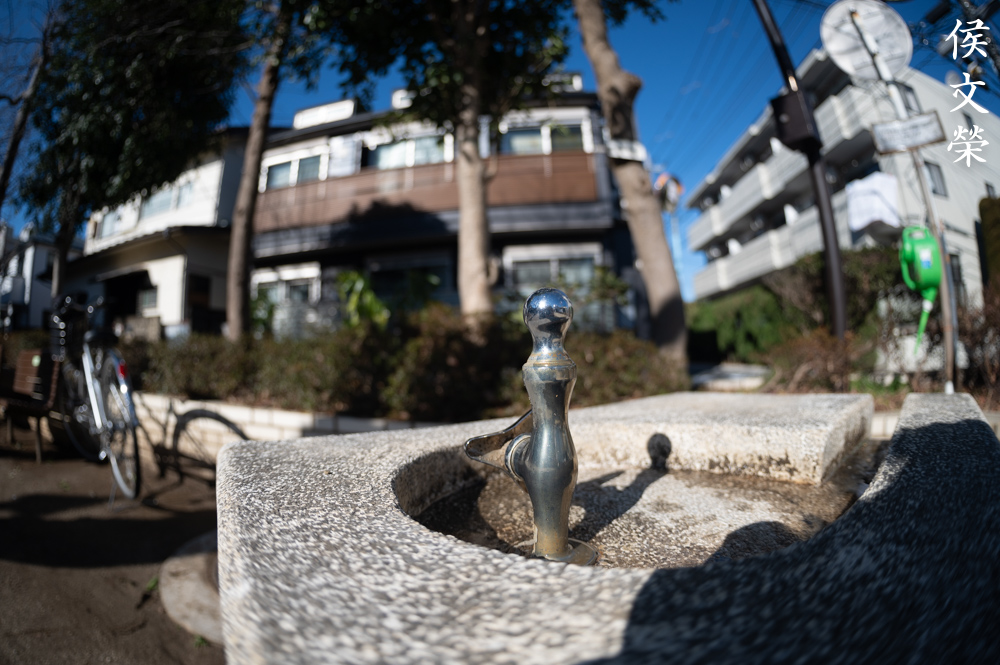
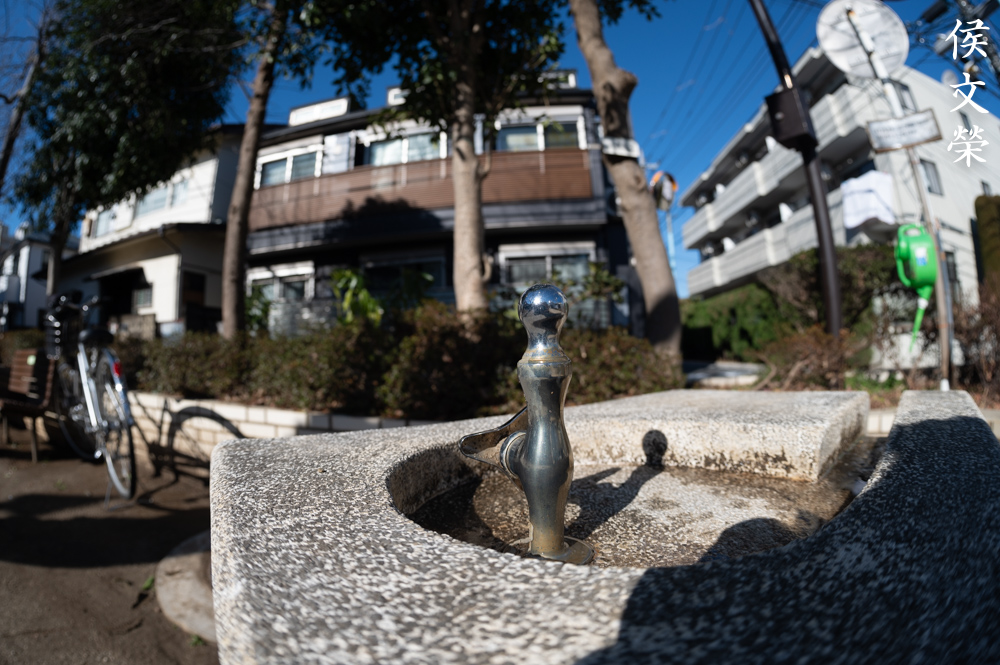
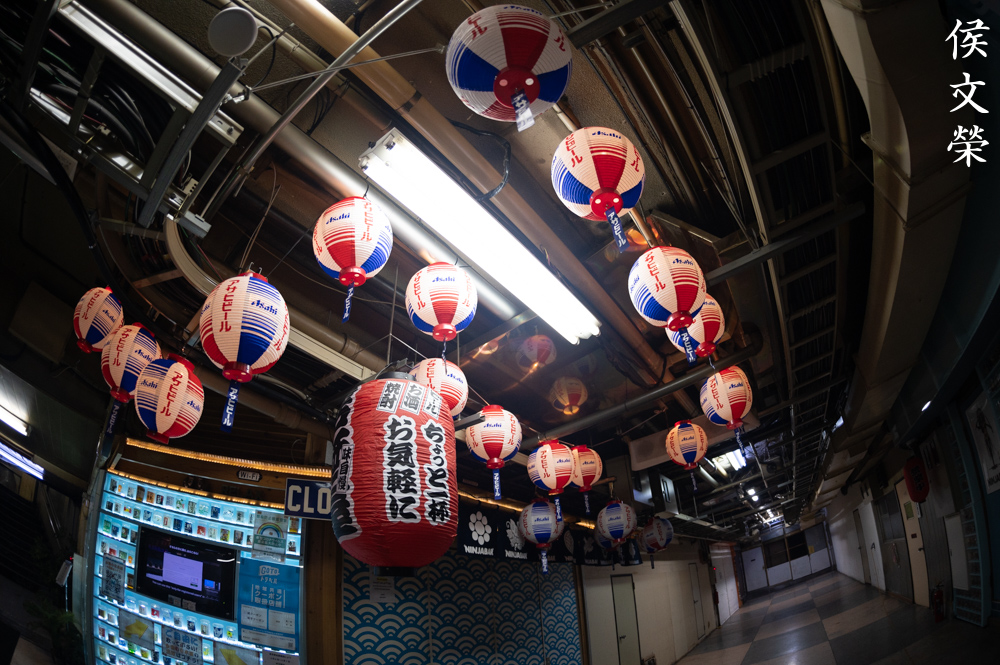
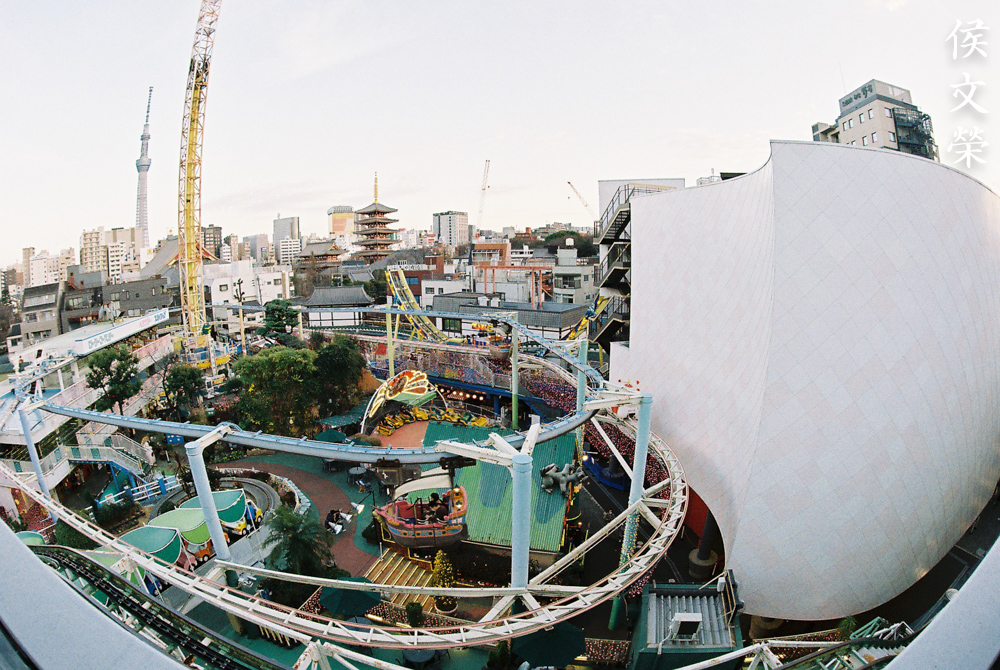
The only practical application for this that I could think is for shooting photos within tight spaces, making your scene appear large despite being cramped. Since the depth-of-field is unbelievably-wide it’s not difficult to focus with it using the distance scale alone and framing your shot without even looking through the viewfinder is also possible since you’re assured to get your subject inside of your frame due to its wide coverage.

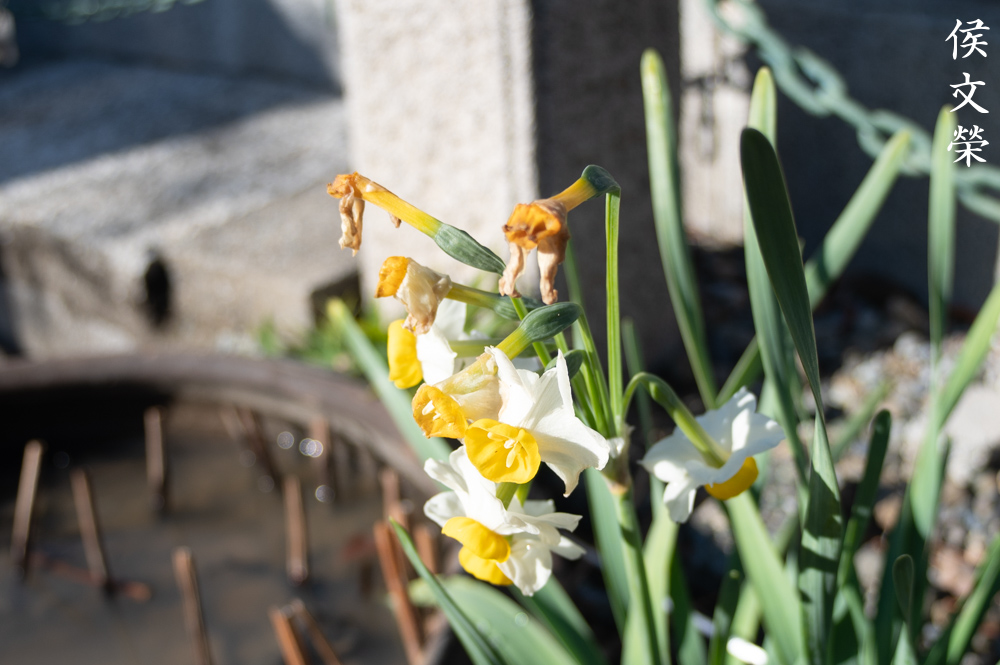
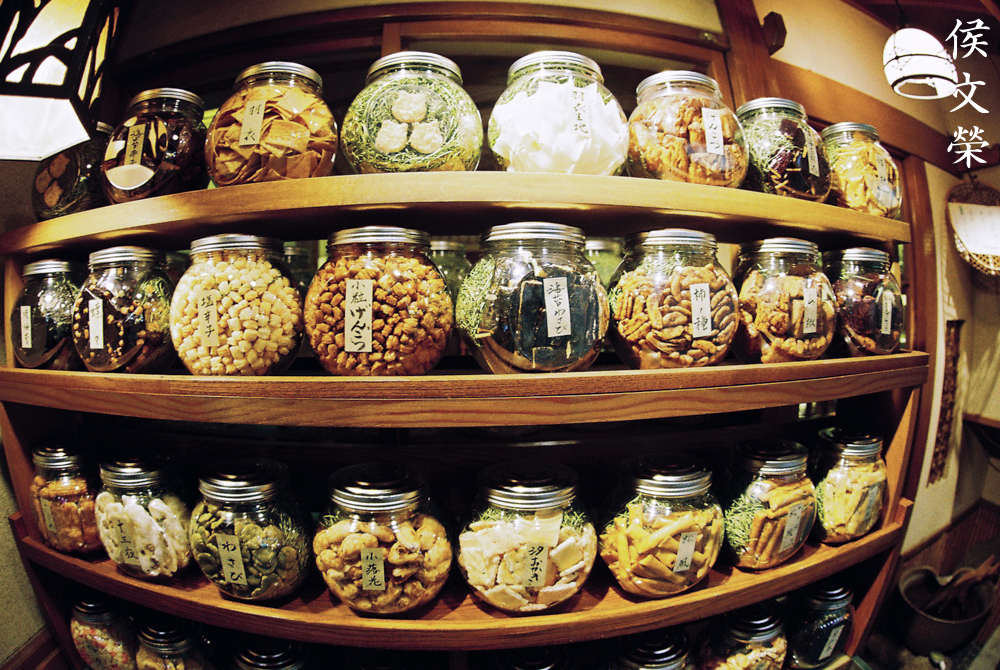
You’ll get photos with nice contrast if you don’t have anything that will trigger any flaring.

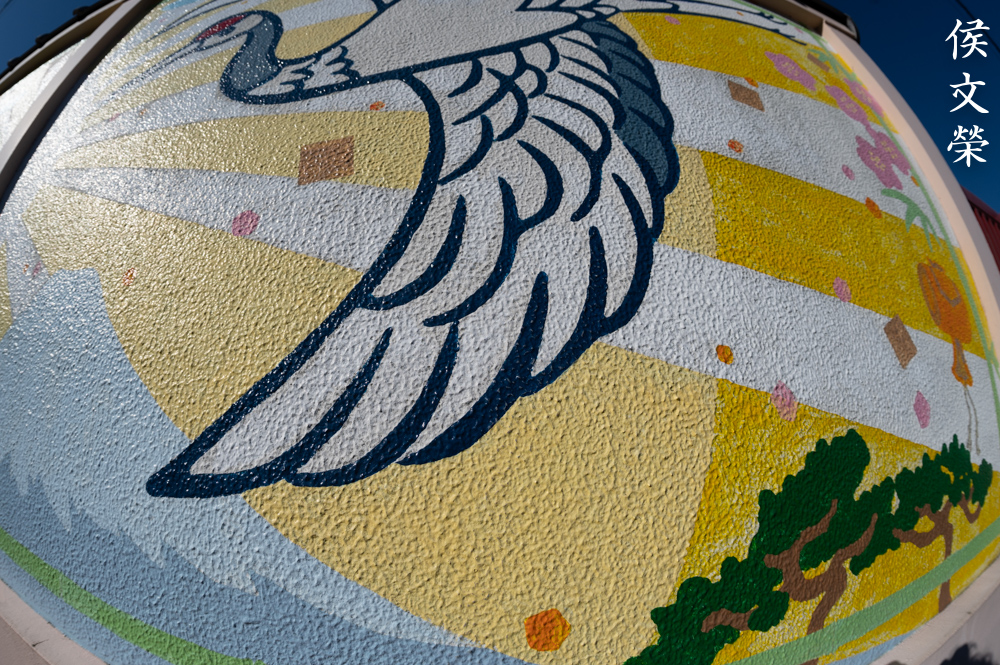
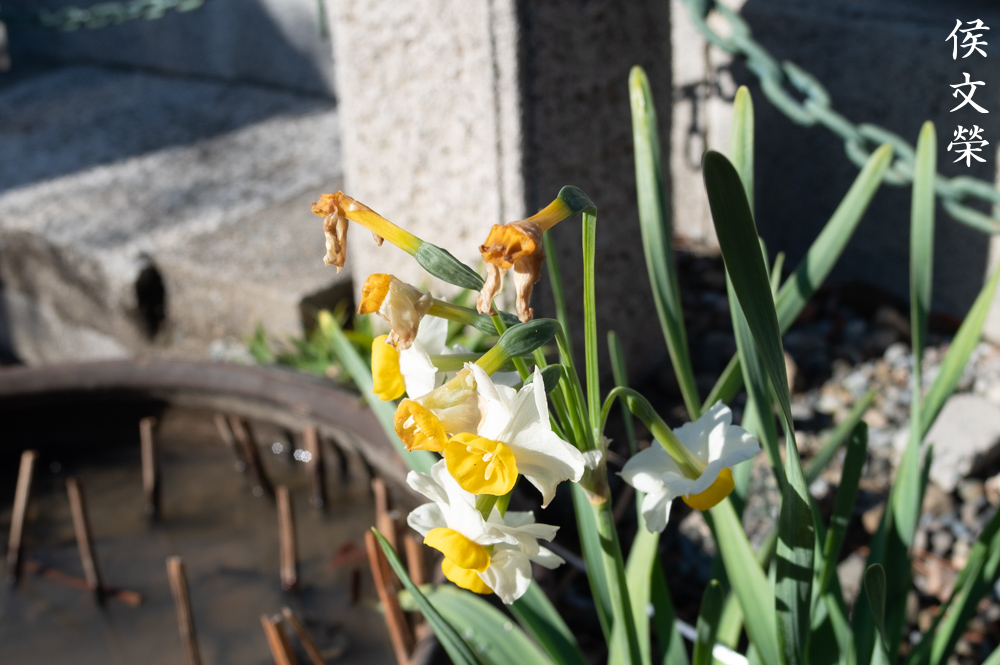
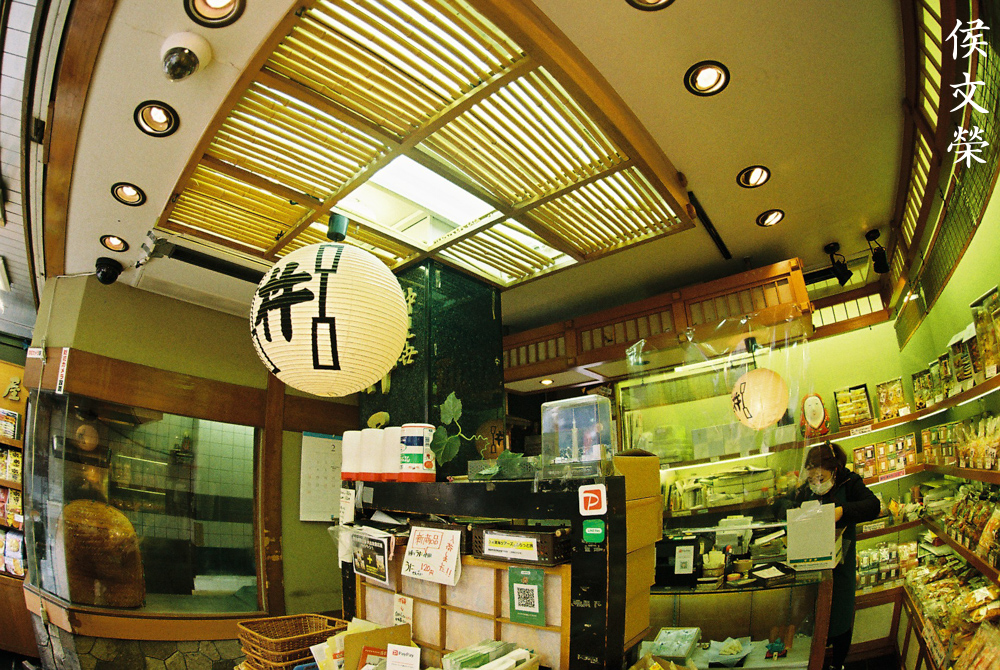
The short focal-length will enable you use speeds that are a lot slower than what you’re comfortable with. I shot this with 1/8s and I still have a sharp photo.

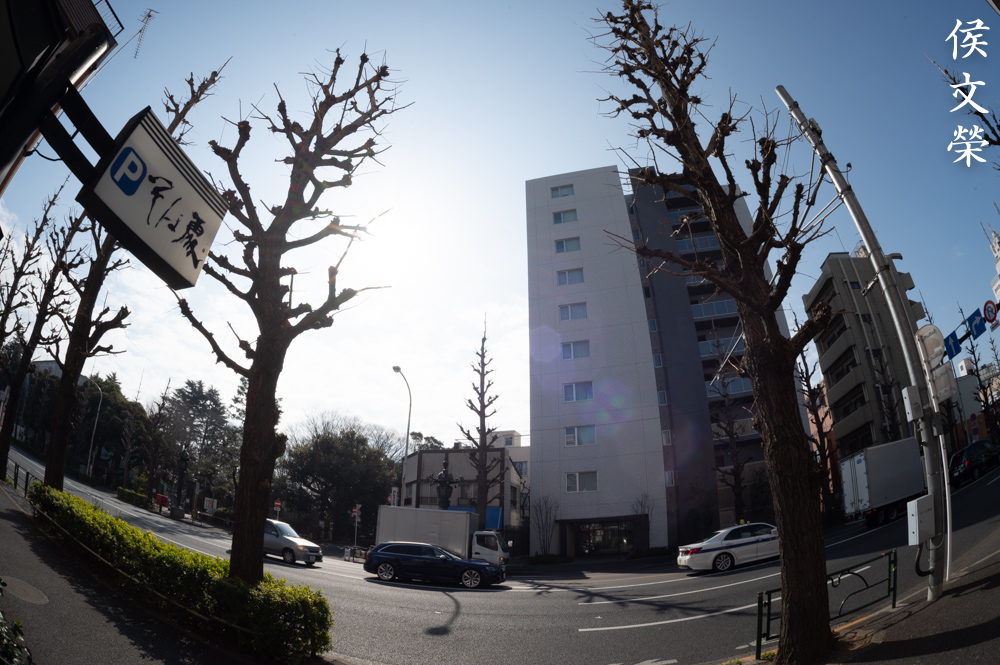
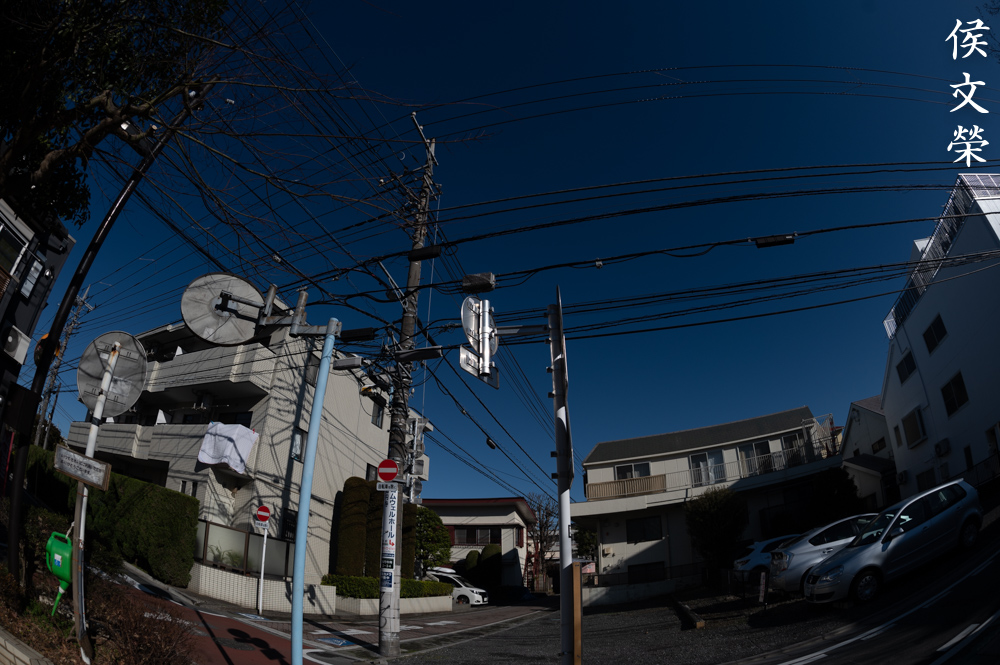
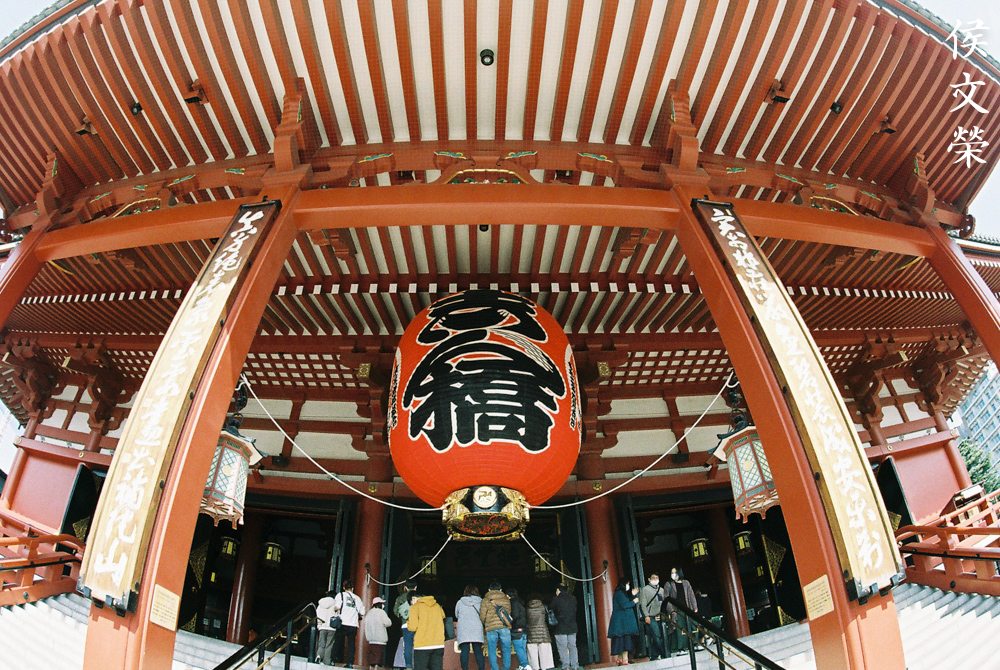
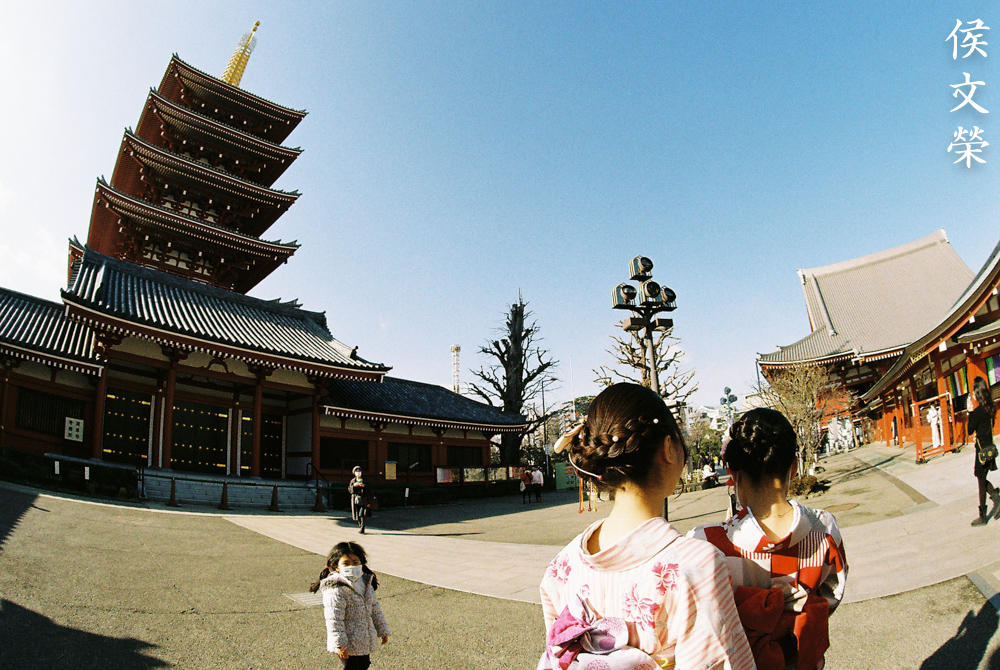
Of course, lines will never stay-straight with this kind of lens. I won’t use this for shooting architecture or art but don’t let me stop you from using this lens the way you see fit.

All of the pillars appear bowed as expected. You could fix this in post but you will lose so much of the photo that it won’t make a lot of sense in the end.


(Click to enlarge)
Here’s the rest of the roll. I enjoyed shooting with it a lot, I think that it performs better with film compared to digital. Since film is not as reflective compared to a sensor’s surface you’ll get less internal-reflections with it. I truly enjoyed shooting with it but this is not something that I would see myself shooting with regularly for obvious reasons.
This is a great lens but if you’re looking for a manual fisheye lens I would recommend the later ones since you’re going to get more coverage since they will cover 180° instead of this one’s 170°. The only reason for searching for this particular model is for its rare feature of having a built-in array of filters. If you are a collector this lens will also be very appealing for your collection, too. It is a nice lens but this is not something that people will want to use on a regular basis unless you have special reasons for it. These are a bit more expensive than the rest due to their novelty but I got mine for half the price due to a defect, mine has balsam separation in the rear group. It isn’t uncommon to find these with the mentioned issue so be careful when looking for these, the issue may not be obvious and may appear as some weak haze but in reality it’s much-worse once you access the affected group. Thankfully, mine is not that terrible and I would say that it’s sort of tolerable at this point. That may be the reason why I’m getting poor flare-resistance out of it but I won’t know until I have tested a good one together with this. When looking for one, be sure that all of the knobs and rings turn properly. The glass should be clean and clear, adjust the filters and make sure that it clicks accurately. The iris has to be dry and snappy when actuated, too. Having the dedicated hood is a nice touch as it’s difficult to buy one on its own. Be patient and you can get one for a reasonable price since the demand for these aren’t that high yet, happy hunting.
Before We Begin:
If this is your first attempt at repairing a lens then I suggest that you see my previous posts regarding screws & drivers, grease and other things. Also read what I wrote about the tools that you’ll need to fix your Nikkors.
I suggest that you read these primers before you begin (for beginners):
Reading these should lessen the chance of ruining your lens if you are a novice. Before opening up anything, always look for other people who have done so in YouTube or the internet. Information is scarce, vague and scattered (that is why I started this) but you can still find some information if you search carefully.
I highly recommend that you read my working with helicoids post because this is very important and getting it wrong can ruin your day. If I can force you to read this, I would. It is that important!
For more advanced topics, you can read my fungus removal post as a start. It has a lot of useful information, it will be beneficial for you to read this.
Disassembly:
This is a bit complicated to service since it has a lot of gimmicks going on. It’s also delicate so you’ll require the proper tools just to remove some of the parts here. Many Nikkors from this era were sealed with cement and even epoxy, heating the screws using a soldering bolt will help. The retainers should be treated with a drop of alcohol to loosen them, repeating the process if needed. The retainers were at times sealed with paint and that will require a different solvent to act on it. Be careful with solvents on this one, I will never flood anything since there’s a couple of cemented groups here and alcohol or solvents may damage the coatings. This is not a lens for a beginner, a professional is required to service such a lens since it requires special tools and experience to work on.

Extract the screws of the bayonet mount so you can remove it. Many people get stuck here because they don’t have the right tools and strip the screws. To prevent this from happening to you, read my post about how to remove bayonet screws. Follow my guide and that should help educate you on how its done and which drivers you should use.
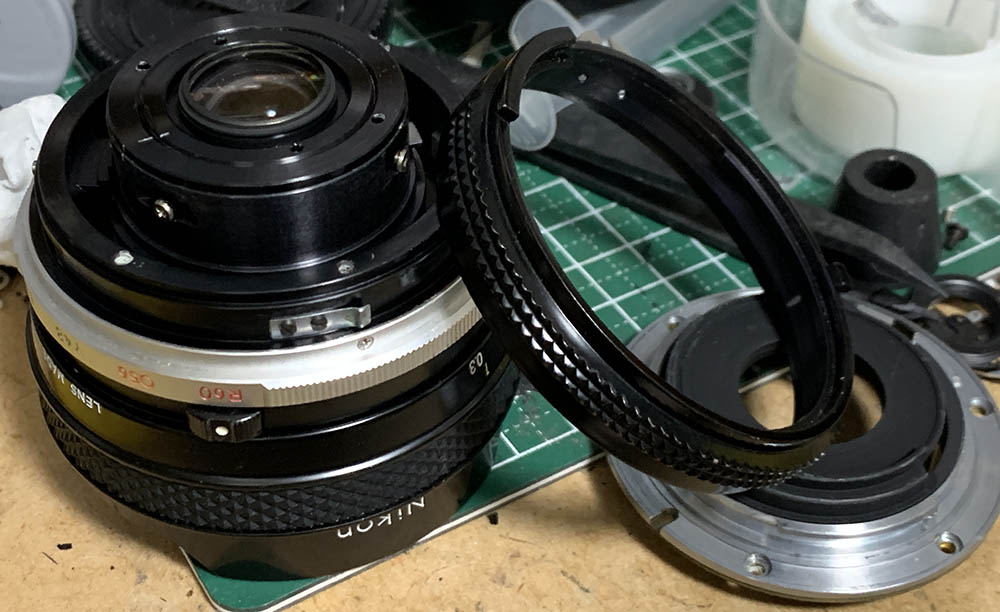
Remove the bayonet mount and the aperture ring. There’s a set of brass shims underneath the bayonet, these are used to adjust the focus of your lens so don’t lose any of them. even a 0.05mm shim will cause the lens to focus incorrectly by a huge margin since it has such a short travel.

Unscrew the rear optical block and keep it somewhere safe.

You could further dismantle it if you have to, do not dismantle these further since the groups were sealed to their housings. These are cemented groups so be careful handling them.

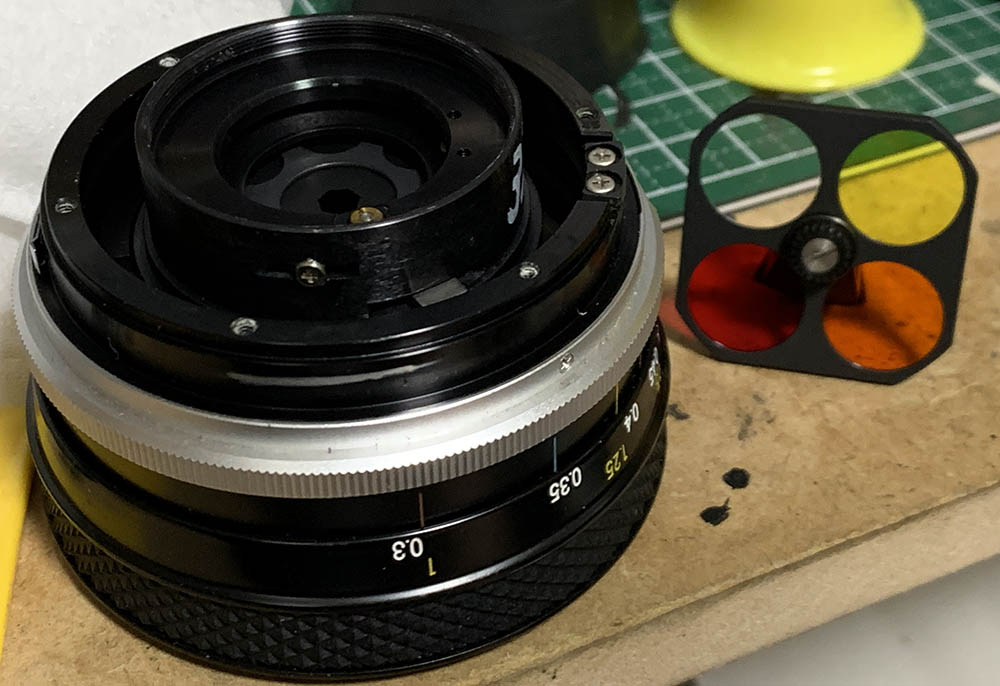
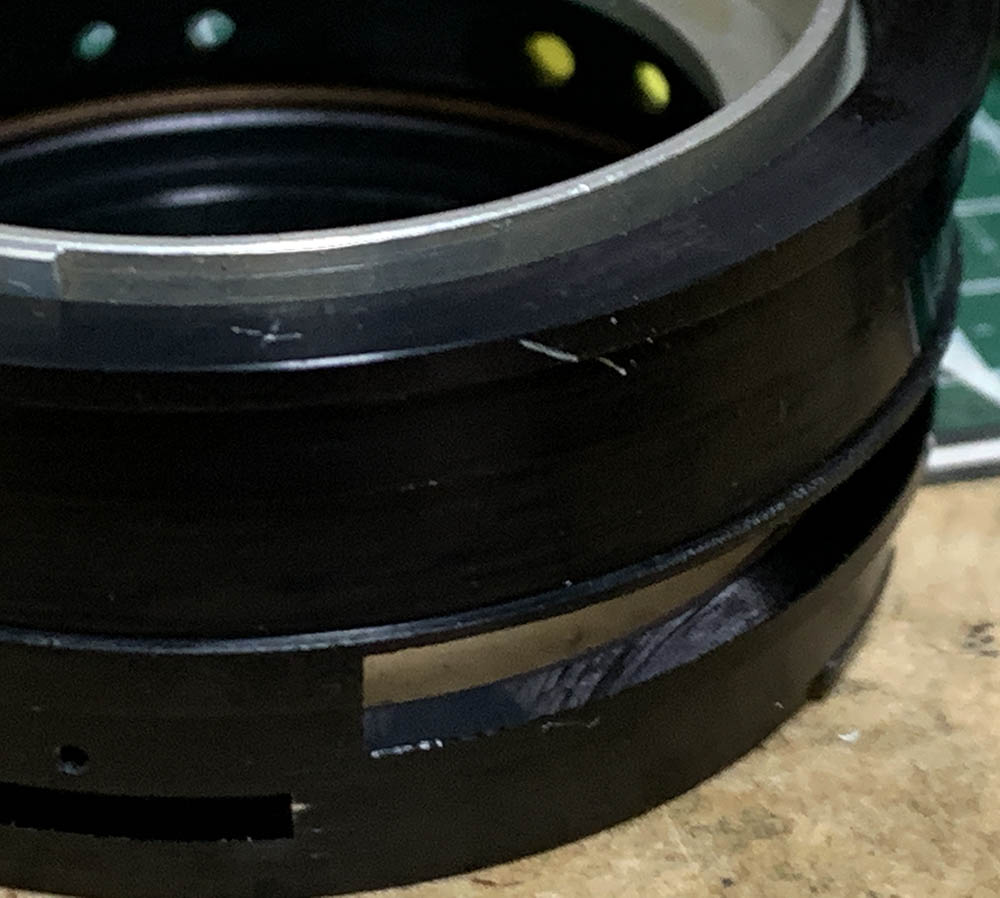
Carefully extract the front optical block with a good, sturdy lens spanner, a cheap Chinese one won’t do. It can be difficult to turn, it’s sealed with paint at the factory. If your hand slipped, you’ll scar the front element which is something nobody wants. Put a drop of alcohol on the threads to help soften the seal, it may help but not by much. The retainer here is for securing the hood, mine was stuck with the front optical block’s housing so turning it also loosened the retainer.

The retainer came-off first, I am not sure if it also secures the front optical block but I doubt it.

Unscrew the front optical block and store it in a safe place, be careful with the rear of the assembly as the glass is vulnerable.

Carefully remove the protector.
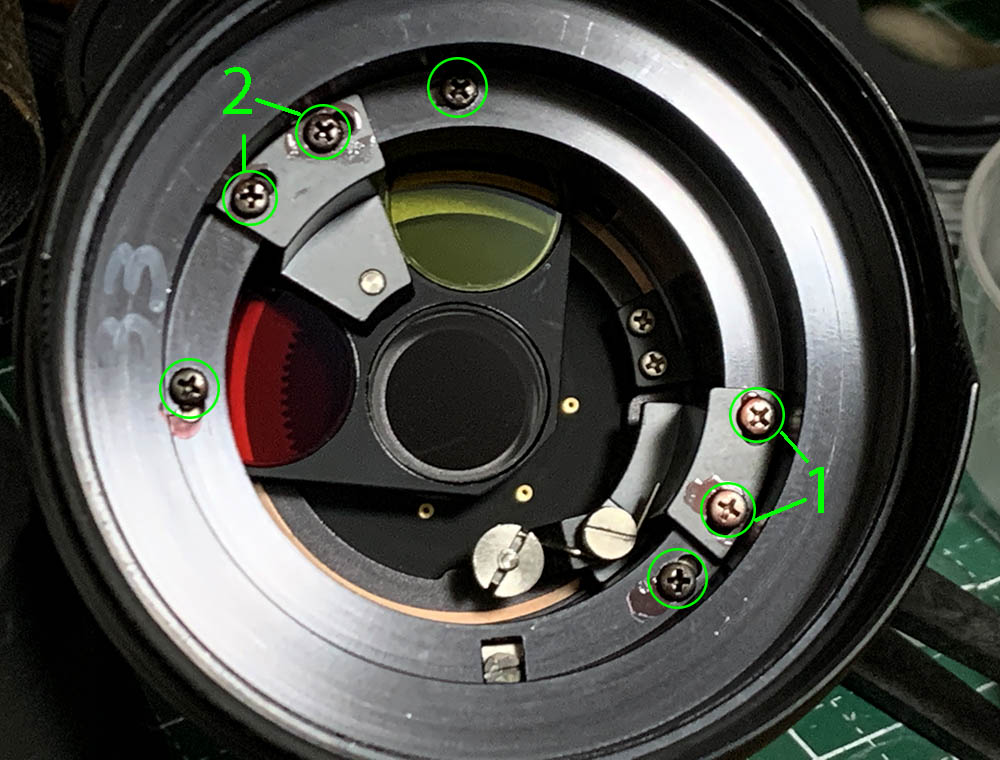
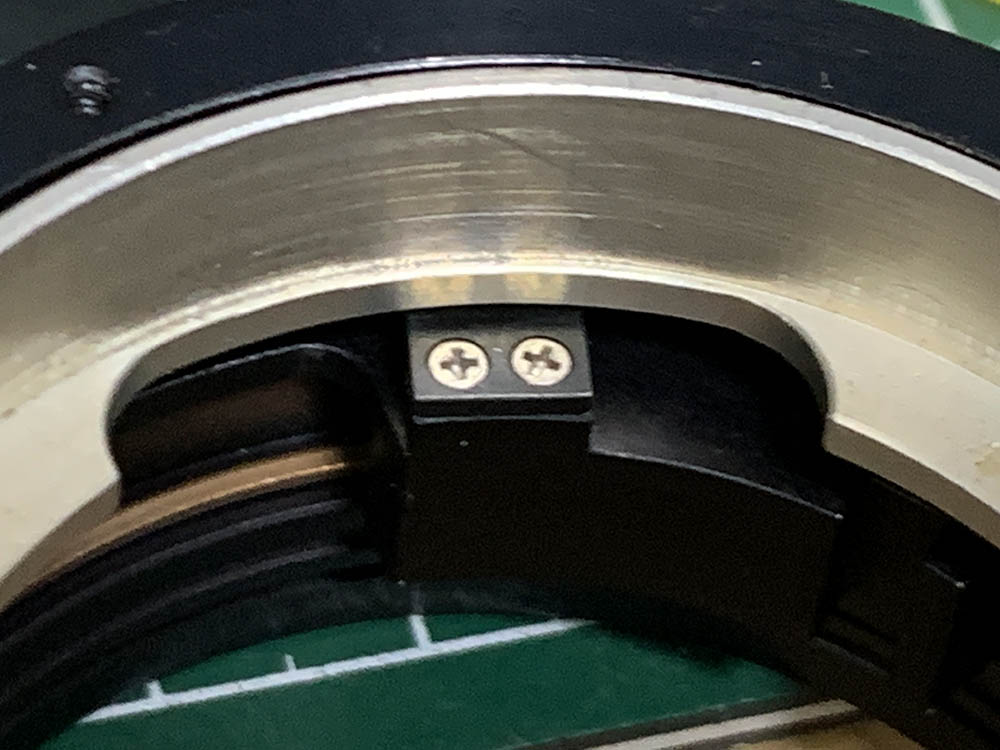
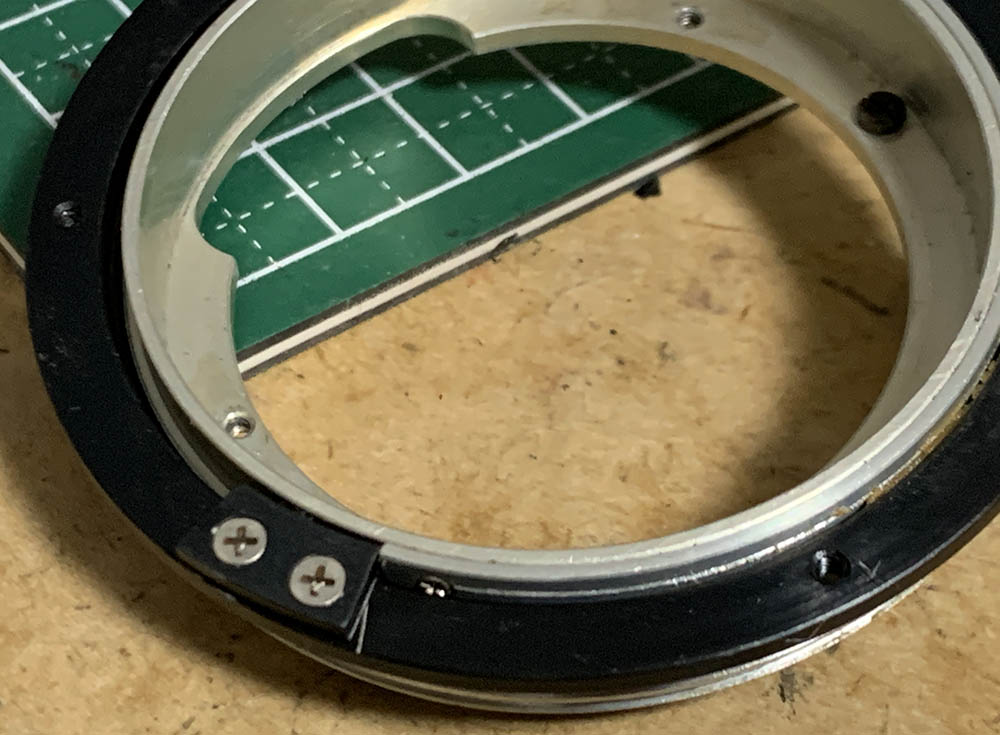
You can now access these screws. Before removing anything, mark the alignment and positions of the assemblies here so you will know how to put these back again later. Extract the screws of the detent mechanism first (#1) to remove it, the lever allows you to click the filters into place. Remove the screws of the carousel next (#2), be careful when removing this assembly to prevent doing any harm to it and the delicate filters. Both the carousel and detent mechanism are usually sealed so applying alcohol to them will help you remove them easier. Finally, extract the 3 screws to remove the housing of the objective.
Removing the carousel is a delicate task, the housing is made of metal but the filters themselves are made of thin sheet-glass.
Here’s a closer look, you should never dismantle this, mine shows signs of previous repair.

Now that the mechanisms are gone you can now remove the objective’s housing as nothing will get in its way. It’s a tight-fit and be careful when removing it, pushing it from the back is the easiest and safest way yo get it off.

The iris mechanism and the adjuster ring for the carousel sure looks complicated, it’s fortunate that I don’t have to dismantle them. The adjuster ring is secured by a brass clip and the iris mechanism is secured the usual way which consists of 3 screws holding it in place. It’s adjustable so take plenty of notes before you remove it.

Extract these to remove the focusing ring. It’s adjustable so you can align the numbers on the scale precisely to your focus. You can not adjust the focus by turning it, any adjustments made to it will only affect the alignment of the numbers on the distance scale.

Remove the focusing ring carefully.
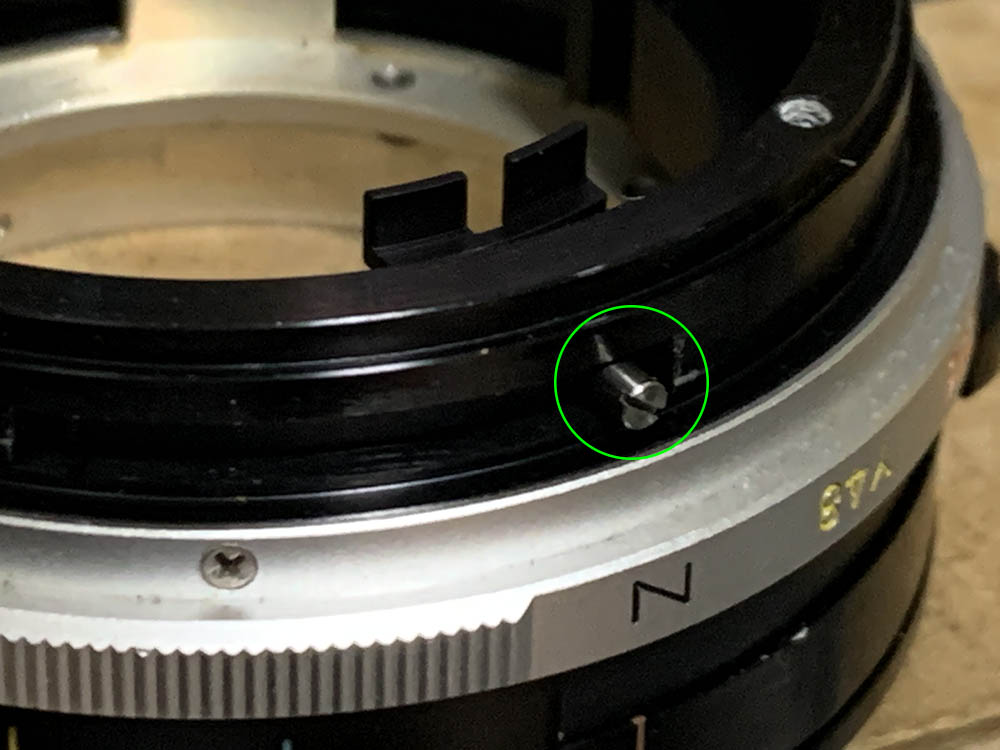
Extract this screw carefully. It couples the aperture ring to its fork so turning it will allow you to regulate the iris.
Carefully extract these to remove the lever used for selecting the colored filters.
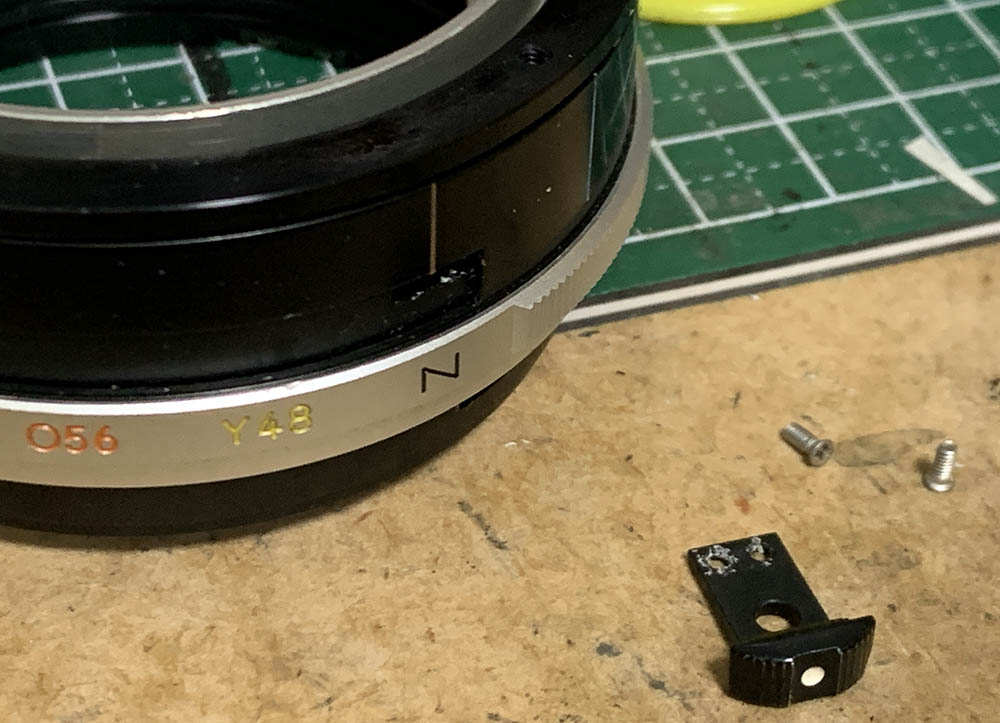
Set it aside and clean it carefully.

Now that the screw and lever is gone you can now remove the grip and the sleeve. Be careful not to lose a thin strip of metal here, it is used to cover the opening of the lever for adjusting the carousel. Without it, dirt and moisture could easily get into the barrel.
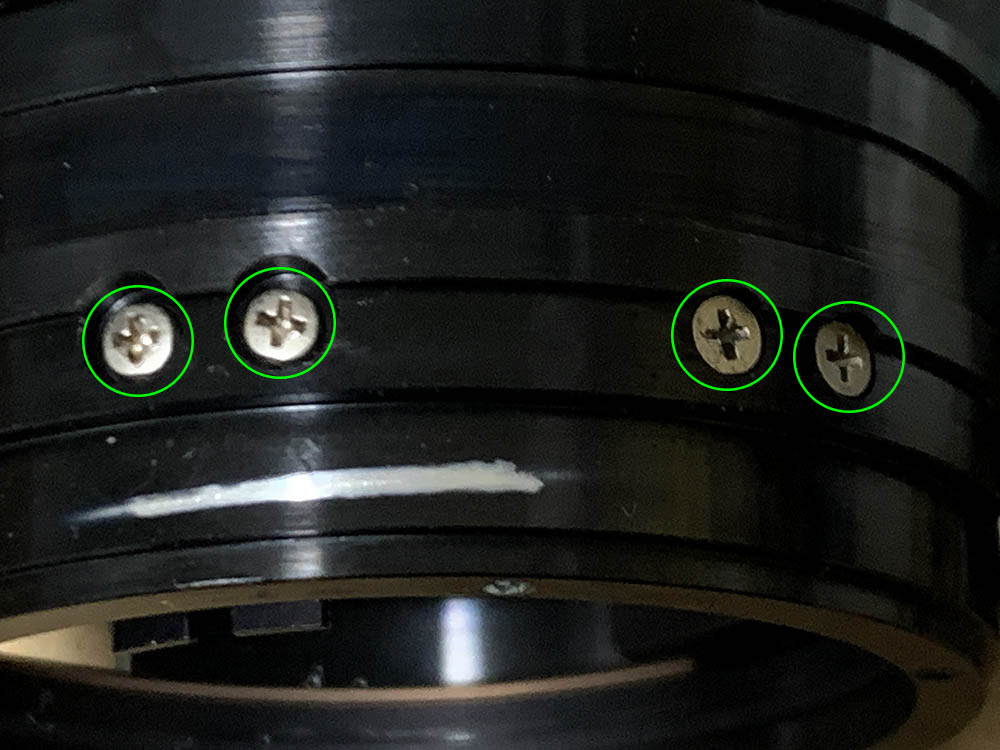
Carefully extract these to remove the guides of the helicoid. Note that they aren’t identical, one set is flush-headed while the other set is the usual pan-headed ones. Carefully remove the guides and don’t forget to note which one came from which side.
Now that the guides are gone you can turn the helicoids freely. Collapse it all-the-way and make a small diagonal mark. Be sure to reproduce this later so you will know if you have reassembled the helicoids properly.

Separate the central helicoid from the inner one. Don’t forget to note where they parted since this is also the same spot where they should mesh. People forget to do this and waste a lot of time later figuring how to put these back. To prevent this from happening to you, read my article on how to work with helicoids.

This is how the aperture fork and the carousel’s coupler ring look like. There are slots in both that should couple with small tabs at the objective’s housing’s outer part, be sure to align them properly when putting the objective back into the barrel.

Carefully release these brass rings to remove aperture fork (and its ring) and the coupler ring for the carousel.
Extract these screws so you could turn the inner helicoid to remove it. They secure a stop to prevent the helicoid from turning-pass its range.

Separate the central helicoid from the outer one and don’t forget to note the spot where they parted. There is a long strip of metal here, you can remove it if you want but do not forget to note its position before you do so.
Clean the parts thoroughly and do not leave any residue. I scrubbed the helicoids using a strong detergent and pickled them in an alcohol bath to remove grime and other hardened gunk. Only apply a thin film of grease to the helicoids, I used something that is a bit heavy since it has a short rack-travel. Do not lubricate anything that’s close to the iris mechanism. Putting excessive grease will lead to a bigger mess later and you’ll have to open the lens again for an overhaul.
The glass is clean on mine and the iris appears dry so I didn’t have to bother dismantling them. If your lens needs to be dismantled further, read my other repair articles so you’ll get hints on how to properly do it. If your lens has fungus, read my article on how to clean lens fungus, never use the solution at full-strength to prevent damaging the coatings. Thin it with distilled water and use lens tissue to wipe-away any fungus.
Conclusion:
This one took me less time than expected since the glass is clean. I did spend plenty of time trying to adjust its focus, I even made a new shim for it but unfortunately this lens isn’t that simple to adjust so reassemble it correctly to prevent wasting your time. The other owners of this lens also mentioned that it won’t focus accurately according to the distance scale and their results were similar to mine so I just accepted that Nikon may have intended it to work this way and just left it alone. Now that you have seen that this is not a simple lens to work with, send yours to a professional if it needs to be serviced. There are lots of poorly-repaired lenses out there so you don’t want to add yours to the pool.
For those of you who are wondering how the filter-array works, here is a short video of it in-action minus the detent-mechanism. It is an intricate mechanism that’s sturdy but do treat it delicately since damaging it will render your lens useless in terms of resale.
Here it is after the overhaul, it’s now shiny and clean again like it was new. All I have to do now is reinstall the protector and call it a day. I am glad that I found this despite having a balsam separation problem because I now own one for a reasonable price.
Thanks for following my work, if you liked this article please share this with your friends so it will get more views. This site earns around $0.50 a day, it’s totally reliant on views. You can also opt to support this site, it helps me offset the cost of maintenance and hosting. You’re also helping me purchase, process and scan film. This site promotes the use of film so we’re all in this together. See you again in the next article, Ric.
Help Support this Blog:
Maintaining this requires resources and a lot of time. If you think that it has helped you or you want to show your support by helping with the site’s upkeep, you can make a small donation to my paypal.com at richardHaw888@gmail.com. Money isn’t my prime motivation for this blog and I believe that I have enough to run this but you can help me make this site (and the companion facebook page) grow.
Buy me a roll of film or a burger?
Thank you very much for your continued support!
$2.00
Helping support this site will ensure that this will be kept going as long as I have the time and energy for this. I would appreciate it if you just leave out your name or details like your country’s name or other information so that the donations will totally be anonymous. This is a labor of love and I intend to keep it that way for as long as I can. Ric.
