
Hello, everybody! Do you believe in conspiracy theories? I don’t believe them myself as most of what’s being circulated are just nonsense. Conspiracy theories such as “Paul is dead” and “Elvis is still alive” are impossible to believe, Bigfoot is stretching it out too far. The Saddam Hussein sightings are justifiable before his demise since he was really a fugitive. I tend to be interested in the latter and things of the same nature since the probability of them being true is quite high. Of course, we are never short of these in the camera business. Today, I’ll show you one such thing and for all we know, it was real after all. That is if this is indeed the real thing. Read this article to find out what this phantom lens is. Is this real or an elaborate fake? Only you could decide, and like what the late great Jack Palance always said, “Believe it or not“.
Introduction:
The mythical Ai AF Zoom Nikkor ED 28-80mm f/2.8D (IF) was never produced. It was only seen once a few decades ago and was lost in collective memory until recently. Only 2 examples are known to exist and one of them arrived to me for servicing. I do not know much about this lens and I even made the name up but here it is, this thing is real. From what I know, this was supposed to be the replacement for the aging AF Zoom-Nikkor 35-70mm f/2.8D but that was officially replaced by the Ai AF-S Zoom Nikkor ED 28-70mm f/2.8D (IF) around 12 after the former’s debut. That is a long time for lenses from this class which usually see replacements after 5 or 6 years. So what happened during that long period? Well, this thing happened but it wasn’t produced. We do not know if it was due to the then-upcoming release of the Ai AF-S Zoom Nikkor ED 28-70mm f/2.8D (IF) or the management thought that this is not a “finished” product. Nobody knows but one thing I know is that it only gave Canon another bite at the marker because there was nothing Nikon had at the time to challenge the Canon EF28-70mm f/2.8L USM which was the best of its class.

It’s a rather long lens, approaching the size of the AF Zoom-Nikkor 80-200mm f/2.8 ED. This is because the front barrel is rigid. It’s a tough lens because of it unlike the Ai AF-S Zoom Nikkor ED 28-70mm f/2.8D (IF) which is more compact but its front barrel isn’t rigid and moves in-and-out when you zoom. It retains the fragile plastic A/M switch. The other details are standard for its time such as the crinkle-finish and the distance-scale window. It handles great as expected and the rings are easy to identify with your fingers.
DISCLAIMER:
There’s no official word on this lens’ existence. In fact, there’s no information about this at all. Just treat this article as a conspiracy theory or anything along that line. I will merely document this according to my experience using it and what I assume it to be. It’s not a real Nikkor unless Nikon says so, that’s why I added the word “alleged” to the title.
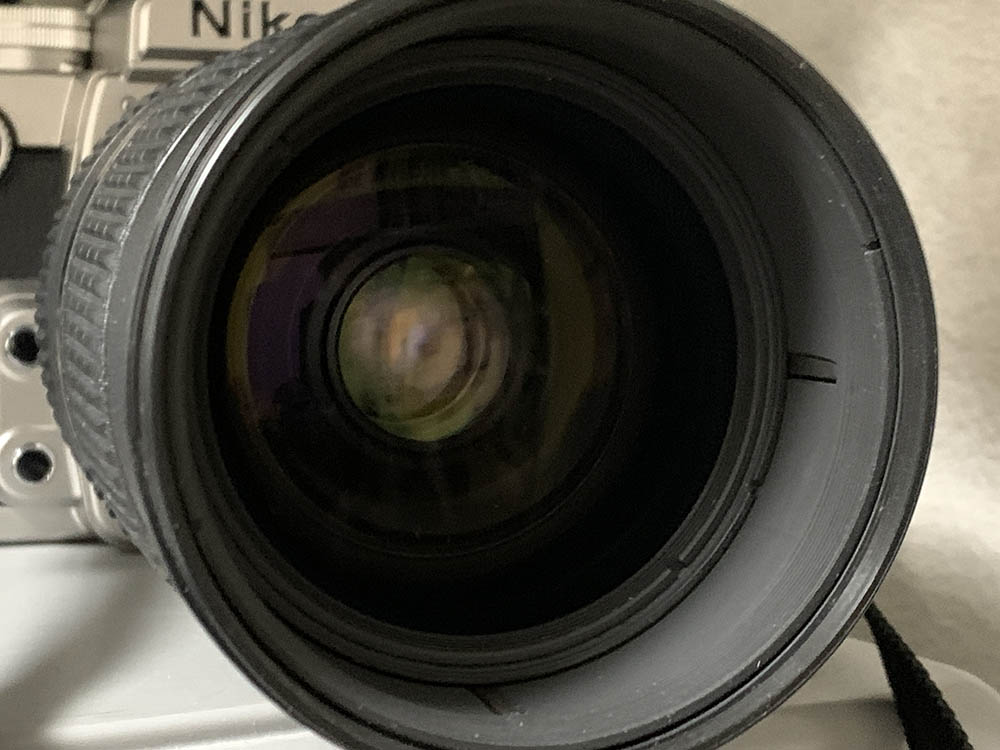
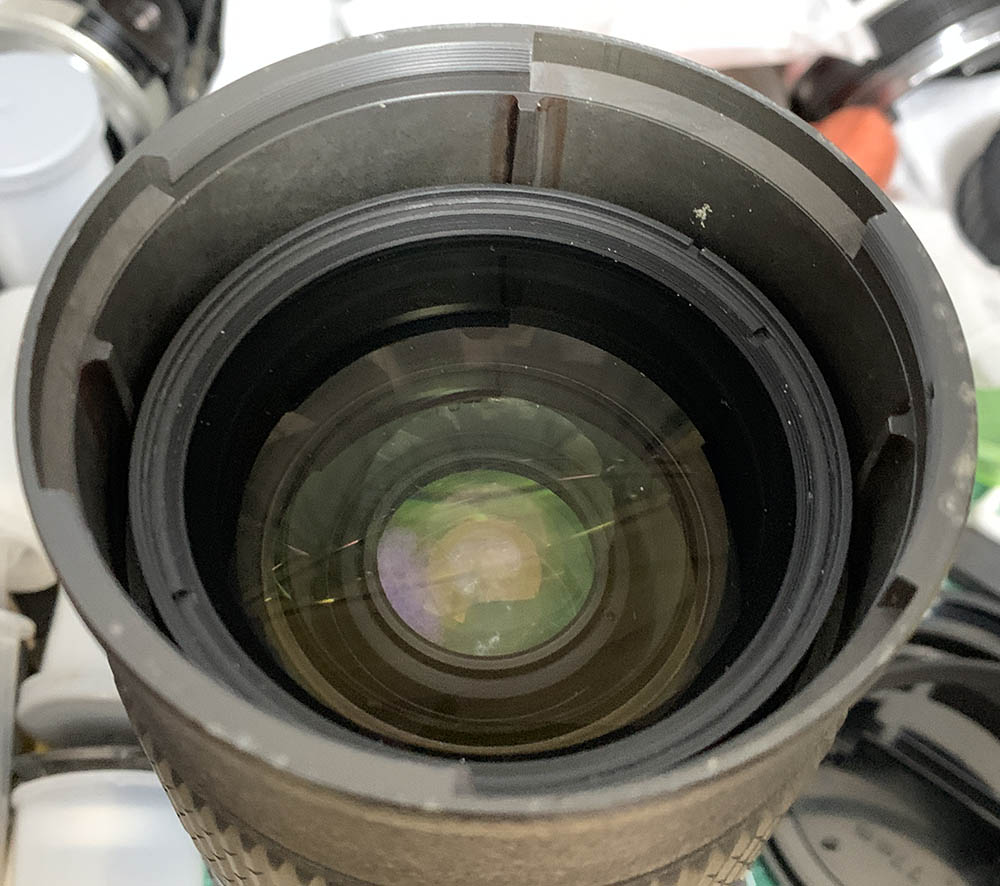
Nobody knows about its optical construction, my estimate is that it at least has 11 elements in its design. Unlike the old AF Zoom-Nikkor 35-70mm f/2.8D it has a large 77mm filter-size, which is now standard for lenses of this class. It employs ED glass, I know this because the nameplate says so. I don’t know if I could trust it but that’s what it says.

Here’s a closer look at the optics. I counted the reflections, there may be around 11 or 12 elements in this lens if I got it right.
Here are some of the details that I got from it.
- EXIF data: NIKON CORPORATION 28-80mm f/2.8D
- Weight: 1002g
- Length: 153mm
- Width: 81mm across
- Iris: 9-bladed (curved)

Here’s a closer look at the exquisite 9-bladed iris. This allows it to render pleasant-looking bokeh, some of the best I have seen in a lens from this class.
I know that I speak as if this is indeed a real Nikkor but just leave it at that since there’s no official word about it. All I can say is its construction is real in the sense that it isn’t something that was merely made in some small workshop. The internal parts fit well, it has electronics that were made properly despite the poor finish. Some people claim that this is fake, there are 2 known samples of the same model. I don’t think anybody has the ability to produce something like it at this level of craftsmanship.

Attaching a hood will make this even larger. It’s just as fat as the AF Zoom-Nikkor 80-200mm f/2.8 ED which is probably why this wasn’t produced. It’s a pity because this would have been a great lens. It focuses rather fast with the Nikon Df, it’s not going to be as fast as the Ai AF-S Zoom Nikkor ED 28-70mm f/2.8D (IF) but it’s certainly enough to track moving subjects easily.

(Click to enlarge)
What sets this apart from the Ai AF-S Zoom Nikkor ED 28-70mm f/2.8D (IF) and the older AF Zoom-Nikkor 35-70mm f/2.8D apart from the focal-range is it has a rigid barrel, the outer barrel’s dimensions stay the same while zooming, only the inner parts move. I prefer this since this makes for a tougher lens overall.
This is how fast the autofocus speed is. You could reliably track moving subjects, it’s adequate and not too-far from the Tokina 28-70 f/2.8 AT-X PRO in terms of speed. I’m not sure about accuracy, it seems to be spot-on but I get a couple of misses occasionally. The floating group seems to be in-charge of focusing since this is an IF design, this is very good since nothing moves outside of the main barrel.
Knowing how your lens performs is key to maximizing it. This knowledge will help you utilize its strengths and avoid its weaknesses. It also helps in determining which lens to bring on an assignment. I shot these from f/2.8, f/4, f/5.6 and f/8 since these are the more common apertures that people would want to use this with and we’ll be able to see the most changes happen with these values. These pictures were shot with my Nikon Df, some of the photos were cropped close to 1:1 magnification so we can see the details better.

(Click to enlarge)
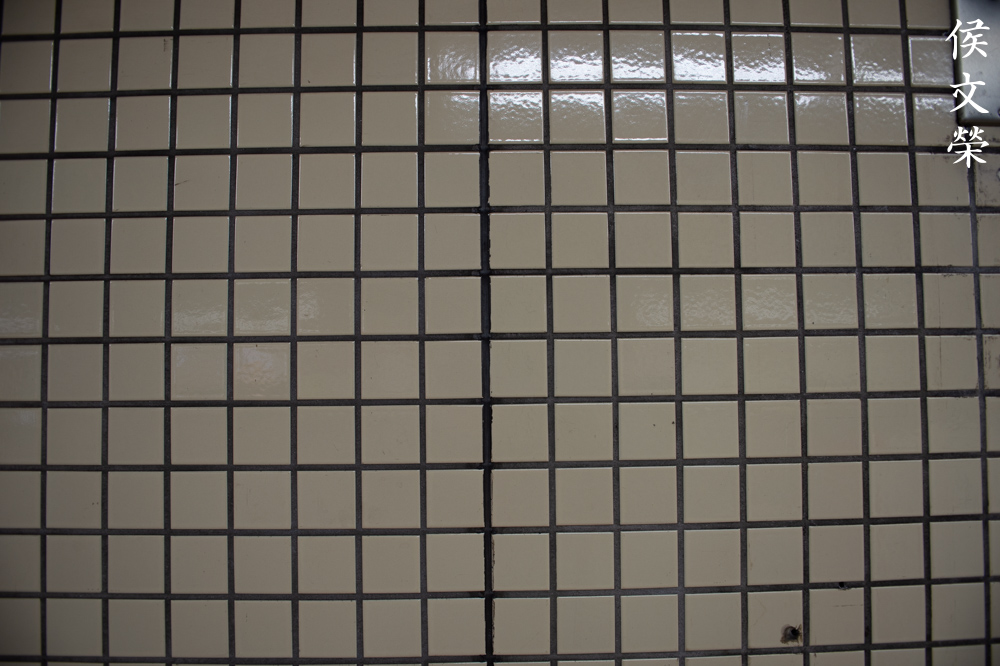
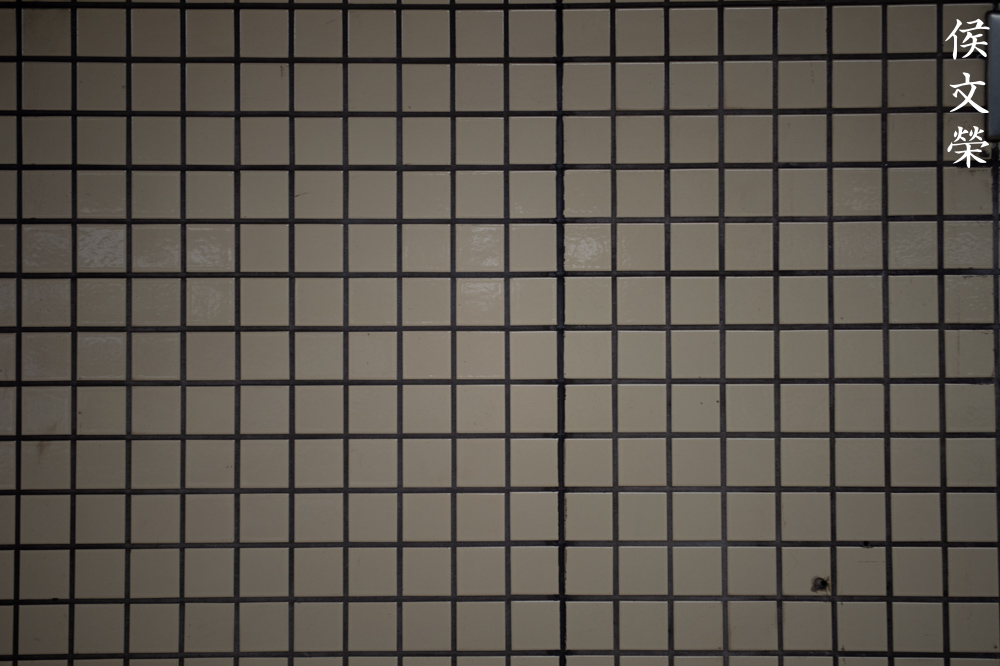
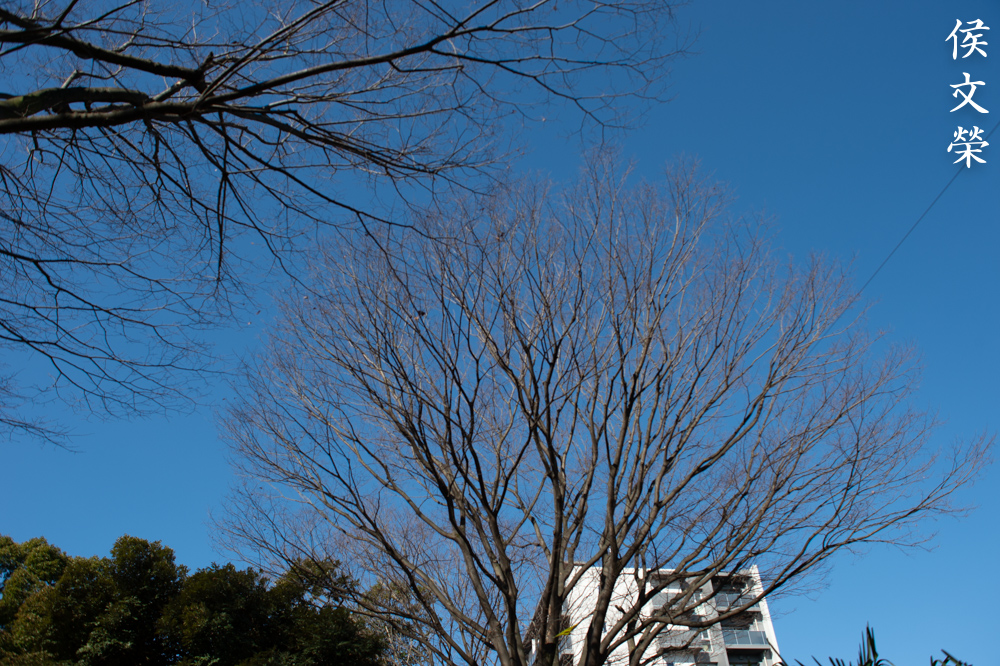
Distortion appears to be rather high on the wide-end but this is not something that looks unusual for a lens from this class. In fact, it looks quite good since some prime lenses have similar amounts. You won’t notice it much at around 45-50mm where things stay straight for the most part. You’ll get a shallow pincushion-type profile at 80mm as expected. Overall, I am impressed by how well it handled this as I was expecting it to be worse.


(Click to enlarge)
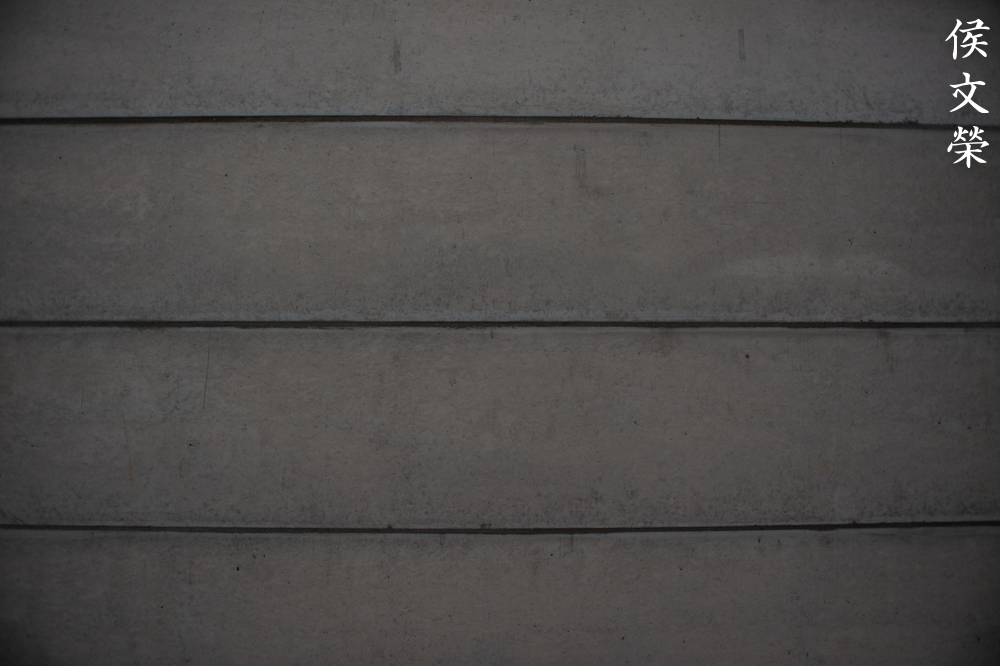
Vignetting is rather heavy wide-open where it looks worst at 80mm. You’ll see a big improvement by f/4 but it only begins to look brighter once you stop the iris down to f/5.6 where you’ll only see traces of it at the extremities. It’s gone once you reach f/8, your frame looks evenly-lit. Shoot with it using smaller apertures if you have the sky or any even-colored object as your background so you won’t get dark corners, unless you intended to use it creatively.


(Click to enlarge)
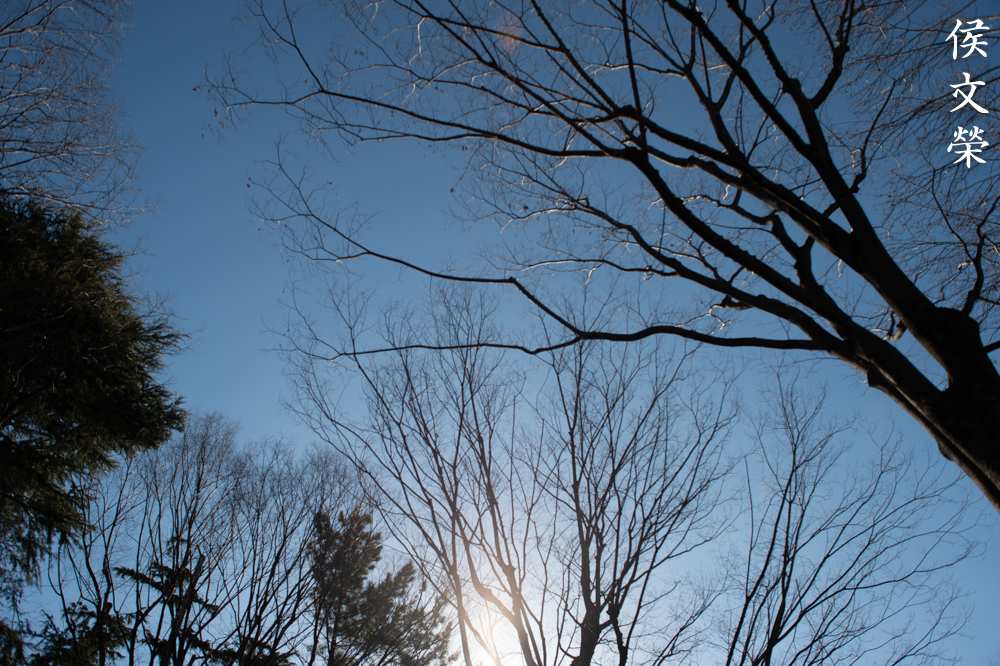
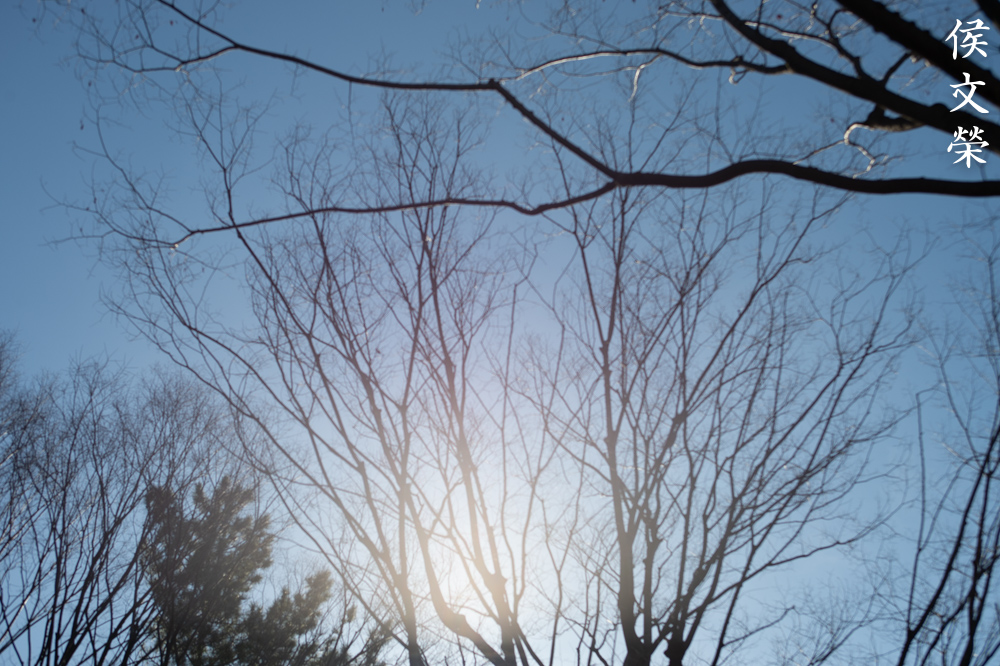
It has the tendency to flare badly but not if the Sun is within your frame where the flaring will affect just a portion of your frame. It becomes more of an issue when you position it at the edge of your frame or even outside of it, far from your photo. You could get a couple of blobs within your frame when shooting at the Sun, this is typical for a lens of its class and vintage. I think it performs a bit better here compared to its peers. It’s one-step better compared to the Ai AF-S Zoom Nikkor ED 28-70mm f/2.8D (IF) which is a bit interesting since I assume that the later lens should be better at this.


(Click to enlarge)
I can say that it flares terribly, attaching a hood probably won’t help much if the sun is at an angle. Flares and ghosts will affect it, the former is a bigger annoyance unless it’s something that you wanted.


(Click to enlarge)
Coma isn’t much of a problem unless you’re shooting at 80mm. It’s still tolerable by my standards, I suppose it’s better by f/5.6 and you should be able to render your point-lights beautifully.


(Click to enlarge)
The orbs look smooth and even when overexposed a bit, there’s no outlines even when shooting wide-open. Stop it down to f/4 to make it look better, I think this is the best aperture for a smooth rendering. However, you’ll begin to notice some grind-marks. It’s subtle but you’ll able to notice some concentric patterns forming in the orbs. It still looks nice by f/5.6 where the orbs begin to look more defined but you’ll also begin to notice the concentric patterns even more. The orbs appear “dirty” at the center by the point it reaches f/8 since the pattern now looks obvious. It would have scored much better if not for the disturbing patterns forming. This is rather sad because I liked how it performed in this set, the curved blades of the iris made sure that the orbs look great.


(Click to enlarge)
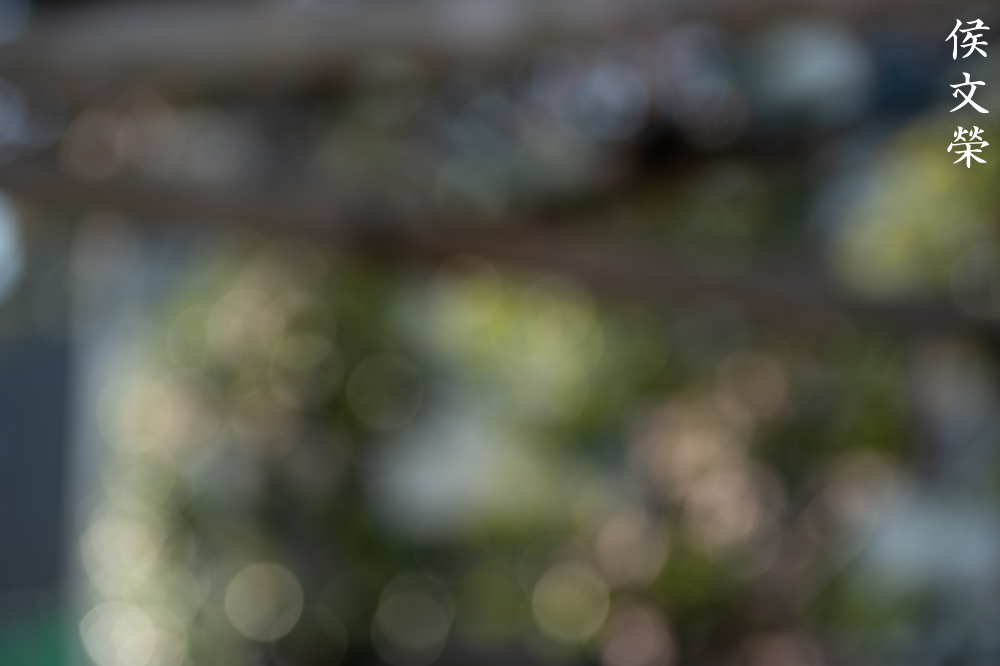
The character of the bokeh appears rather smooth from 50mm on, it looks the worst at the wide-end where you’ll see some double-line artifacts, making the blurred parts look unrefined or ugly. I can say that it’s mediocre at worst with a potential to be quite good when given the right variables.


(Click to enlarge)
Chromatic aberration is rather high wide-open in extreme cases and quite moderate in more normal situations. Backlit scenes and shiny objects with large differences in illumination and contrast will easily trigger them. Spherical aberration can be observed as well but it’s not much of a problem compared to the latter. Stop it down to f/4 to clean-off most of it, you’ll only see it prominently when the situation is severe. It’s controlled much better at f/5.6 where you will only see traces of it except in terrible situations where you’ll still be able to notice it. This isn’t an issue by the time it reaches f/8, you’ll only see traces of it in severe situations.


(Click to enlarge)
It’s rather sharp wide-open at the center, it looks great at 28mm and 50mm but 80mm looks a bit softer compared to the rest. You’ll notice some a bit of softness specially when shooting at closer distances due to the thin depth-of-field and spherical aberration. Its resolution seems adequate at the very least and good at best. The extremities don’t look good as expected. Stop it down to f/4 and it begins to exhibit better resolution. The center looks much better and you can notice it the most at the long-end. The corners shows some marginal improvement. The center is now performing at its peak by f/5.6, it’s very sharp and the resolution looks great. The extremities begin to look a lot better where you’ll notice a huge jump in performance. Stopping it down to f/8 isn’t going to make the center look any better, in fact, it already looks very good even at f/4. The extremities now look much better, they’re now much sharper and you’ll be able to render things in better detail. I can say that this lens performs best at 28mm and 50mm, performance drops once you get closer to 80mm which is the weakest part of the focal-range according to my simple tests. Overall, this is very sharp and I am satisfied with its performance. Newer lenses will out-perform it without any doubt but I think this lens can still hold its own in the hands of a skilled photographer.
Let’s now check some film pictures. Film has a unique look that is hard to simulate with a digital camera thanks to grain. It reacts differently to light, this means that it could mask a lens’ flaws or amplify them. Since it was designed to be used with film, it’s best that we judge this using its intended medium. I shot these with a Nikon F6 loaded with Kodak Gold 200.

I think it renders beautifully. It’s sharp and the transition from what’s sharp to what’s blurry is smooth. Contrast appears to be great as well so long as there’s nothing in the scene that triggers flaring.

Saturation looks natural, it’s not overdone and colors remain neutral.

This was shot at f/4, sharpness is more than adequate. The character of the bokeh looks pleasant, there’s nothing that makes it look rough despite having a background with many small details that could trigger ugly-looking blurs.

Here’s another look at how nice the focus-transition looks like. You won’t see a “wall-of-focus” here, the transition is gentle with a refined look to it.

Stopping the iris down will allow you to capture nice, sharp photos. Resolution appears to be great and you could render delicate details with it.

It has nice subject-isolation qualities but that’s expected at this focal length, I think this was shot at 80mm.

Its focal range is useful for reportage or environmental photos. This lens class is part of a journalist’s kit, a professional usually has one with him.

It’s also nice for lowlight photography since it performs nicely when shot wide-open. You don’t have to stop it down further to get sharp photos, allowing you to use faster speeds to prevent blurry photos.

Autofocus seems adequate in lowlight scenarios. There are cases where it will hunt but that has more to do with what camera you are using it with.

Contrast and saturation is very good, you’ll get a natural look that’s neither too-rich like what we’re used to seeing these days or an older-look like what a vintage lens gives. It truly is something that’s between old and modern in terms of performance.

I love how it renders colors very much. Vermillion won’t look off and the other colors were rendered faithfully.
This is not a lens for use with shooting architecture or art because of distortion at the wide-end. If you must, shoot it from 40mm to 50mm, that should help keep your lines straight.

Notice how the beam is curved since it’s closer to the top-edge of the frame. Avoid placing any straight lines close to the edges to prevent them from bowing.

Framing your straight lines diagonally will help negate the effects of distortion, it’s still there but it won’t be as obvious.
Flaring can be a problem for this lens and you’ll get blobs, too. This is typical for lenses from this class and vintage. The coating is better compared to the vintage ones but it is nothing compared what Nikon use these days.
You can use flares creatively if you wish, it could be treated as an element in your photo so long as it’s done skillfully.
It performs nicely when you stop it down and shoot at distant objects. It’s able to resolve small details. I occasionally shoot photos of buildings or landscape with this lens class just because it’s so convenient.


(Click to enlarge)
Here are more photos for you to look at. These will help give you an idea as to how it performs under different conditions. I think that it’s a really good lens, it’s such a pity that it wasn’t sold. I find it to be a very versatile lens that didn’t let me down. It really is a professional’s lens. There were times when I’d get disappointed with its flare-resistance but even the newer Ai AF-S Zoom Nikkor ED 28-70mm f/2.8D (IF) isn’t better at this. In fact, I found the latter one to be worse.
Sharpness with film is quite good, the details were rendered beautifully with great contrast despite using a cheap film with it. You will see some traces of chromatic aberration here but it’s really subtle, I’d imagine that it’s more obvious with a digital camera.
The effects of flaring is subdued with film but that doesn’t mean that it won’t affect it, how it looks like is just a bit different if you ask me. Outside of the area affected by flare, contrast and saturation remains rather good.

Focusing speed seems to be adequate as I was able to track this ape’s face without any problem. It was shot with a smaller aperture so its cloak doesn’t show traces of chromatic aberration.

Of course, it’s a nice lens for portraiture when shooting it using film. The 80mm focal length is ideal for portraiture, it would have been a lot better if it’s just a bit longer if you ask me.

It offers a nice perspective being neither too-short nor too-long, just the right amounts of foreshortening to make your subject look natural.

Despite being sharp it won’t render like stucco. Skin looks natural, supple and healthy with it, it gives you a good balance between softness and sharpness. Things that needs to look sharp look sharp while things that look delicate remain subtle.

It’s a bit tricky when shooting under harsh light but that’s less of a problem when shooting with film compared to a digital camera. I would prefer to use a reflector for these kinds of situations.

Just move into the shade in order to avoid getting harsh-looking shadows.

The wide-end is adequate for most kinds of photography, some will prefer a wider perspective but this is already an improvement, the older AF Zoom-Nikkor 35-70mm f/2.8D won’t give you anything this wide even if you tried unless you zoomed with your feet.

If this lens actually saw production I’m sure that it would have been a favorite lens of many journalists. Its practical specs will be a huge asset and its great performance makes this a great all-rounder.

It renders with a nice, subtle quality that is hard to pinpoint, maybe it’s just how the aberrations work together to present a pleasant photo or how beautiful the balance is between what’s sharp and what’s blurry. There’s a lot of things to love about this lens and its rendering.

The long-end gives you a flat-look thanks to the diminished effects of foreshortening. This will compress your frame further so it’s possible to present something with less “perspective”.
It’s also possible to get blobs using film just like with a digital camera, the only difference is it won’t look as bad.
Pincushion-type distortion can be observed at the wide-end, I don’t think it’s a problem at this level since this lens doesn’t have any disturbing amounts of it. In fact, it’s quite good for its class when it comes to handling distortion.

It’s a great lens for travel photography. Its practical focal-range will be so useful that this may be the only lens you’ll need to bring on a trip.


(Click to enlarge)
Here’s the rest of the roll, feel free to click on the thumbnails to see larger versions of the photos. I’m pleased with it, I think this is a good lens for shooting with both film and digital but if you were to let me chose between both mediums I’d certainly shoot film with it more since it just works a lot better with it according to my taste.
Good luck looking for one of these. If this was ever produced I will definitely recommend this to anyone. It’s a great alternative to the Ai AF-S Zoom Nikkor ED 28-70mm f/2.8D (IF) since it’s mostly-mechanical, this means that there’s less things to go wrong. It is built tougher and image quality isn’t bad, too. Since this is an alleged prototype, the build quality is a bit on the shabby-side but it’s a very well-made lens in terms of construction. I’d imagine that it would look better cosmetically inside-and-out if indeed this lens ever saw production. For many of us, owning one is just a dream. For me, I got to shoot and document it so I guess I had some really lucid wet-dream. For the rest of you, the Ai AF-S Zoom Nikkor ED 28-70mm f/2.8D (IF) will do. If you don’t have the cash, a Tokina 28-70 f/2.8 AT-X PRO is not a bad lens for the price. Just buy the latter and imagine that you’re shooting with this and that will probably satisfy your itch. For me, I will just shoot with the Tokina 28-70 f/2.8 AT-X PRO and reminisce the rare chance that I actually got to document this lens for you.
Before We Begin:
If this is your first attempt at repairing a lens then I suggest that you see my previous posts regarding screws & drivers, grease and other things. Also read what I wrote about the tools that you’ll need to fix your Nikkors.
I suggest that you read these primers before you begin (for beginners):
Reading these should lessen the chance of ruining your lens if you are a novice. Before opening up anything, always look for other people who have done so in YouTube or the internet. Information is scarce, vague and scattered (that is why I started this) but you can still find some information if you search carefully.
I highly recommend that you read my working with helicoids post because this is very important and getting it wrong can ruin your day. If I can force you to read this, I would. It is that important!
For more advanced topics, you can read my fungus removal post as a start. It has a lot of useful information, it will be beneficial for you to read this.
Disassembly:
Servicing the optics of this lens isn’t difficult at all as the optics could be easily-accessed without taking the whole thing apart. The iris mechanism is a different story and accessing it will require a major teardown. Since this is an autofocus lens you only need to service the parts that needs to be repaired and leave everything else alone. Be careful with the internals, static charge, magnets and moisture can easily brick this lens. Since there are no known information about this lens I had to figure out everything myself, it’s not difficult at all thanks to its clever construction but working on something so precious makes me nervous.

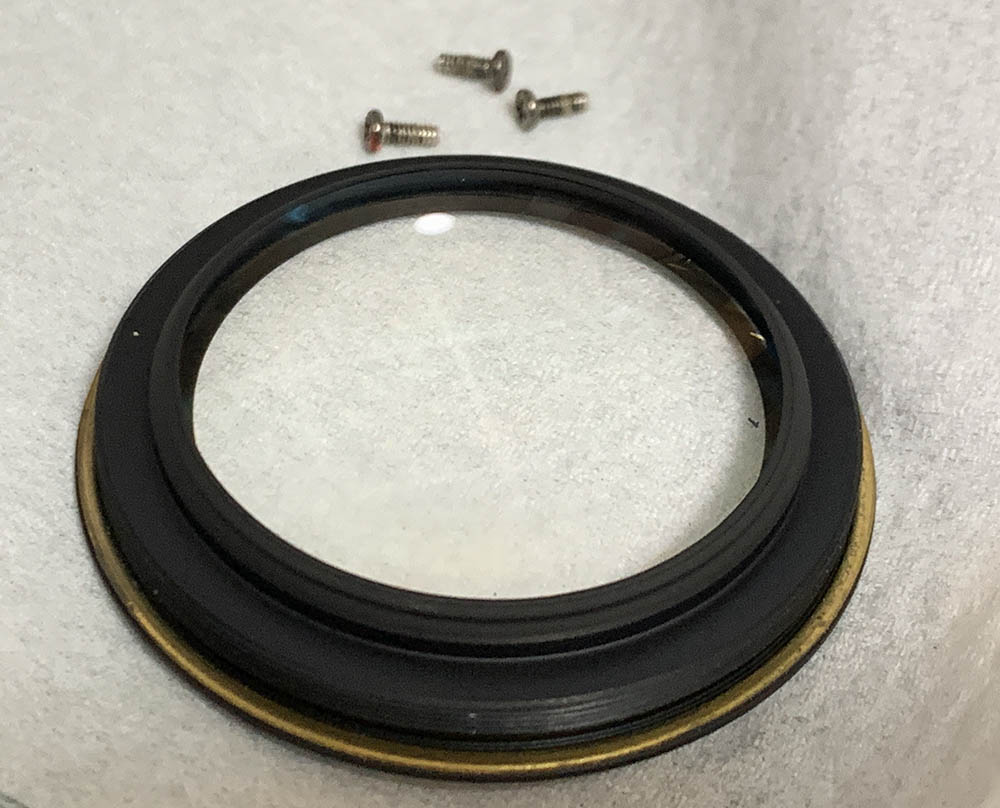
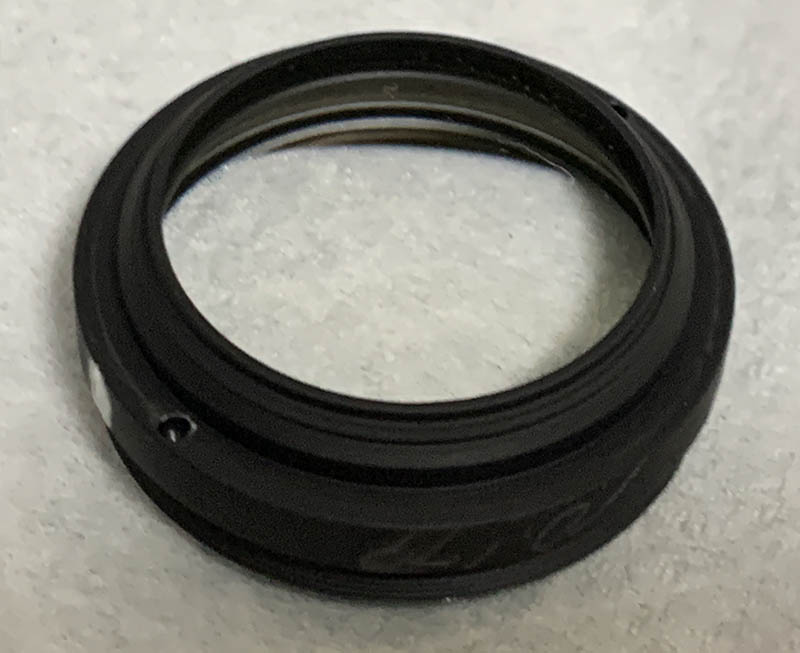
Locate and extract this set screw. It’s seated deep-within its hole and it’s sealed with paint. Carefully dissolve the seal and extract it.

The screw secures the front ring and the baffle. Unscrew the baffle found on the inner-side and the front ring can be removed next as the baffle is the one securing it, much like a retainer ring.
The front optics assembly is situated deep-inside the main barrel. Zoom the lens to bring it closer to the front and use a rubber cup to unscrew the whole assembly off. It may be tough to unscrew as the threads may be sealed so a drop of alcohol to its threads will help soften the seal.
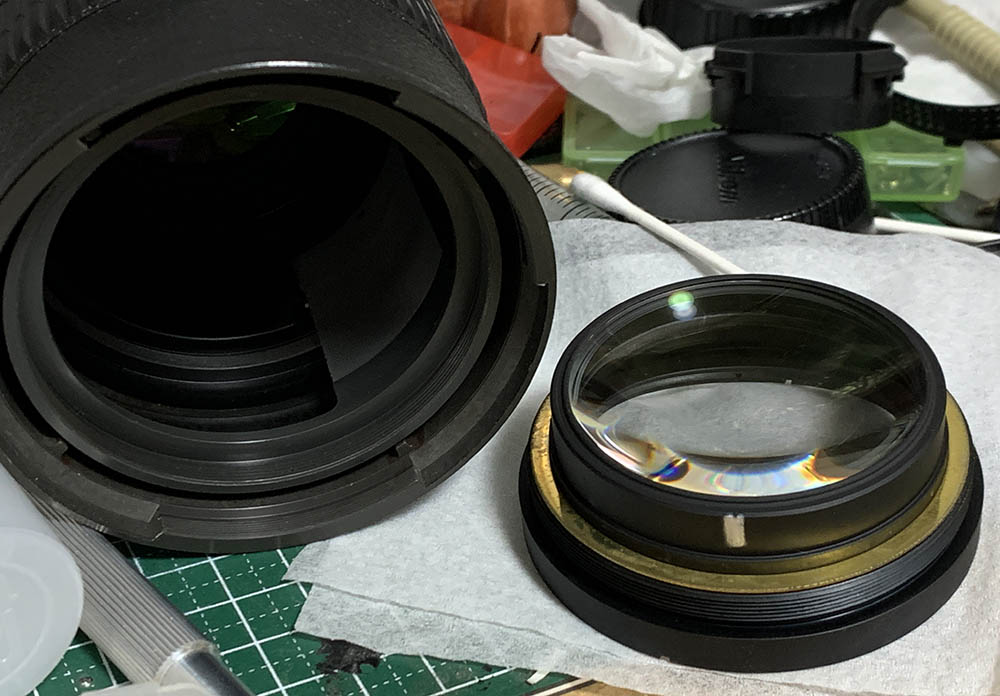
Unscrew the front optics assembly once the seal has softened. There’s a couple of brass shims underneath it, do not misplace these as they’re required for adjusting the front-focus.

You can now reach this floating group. It’s deep and a good set of lens spanner is needed to access it. Be careful when unscrewing it because it’s part of the focusing mechanism, you could accidentally bend something and that will cause an even bigger problem which can only be corrected by opening the lens more than what’s needed.
Extract it with a lens sucker once it’s loose.
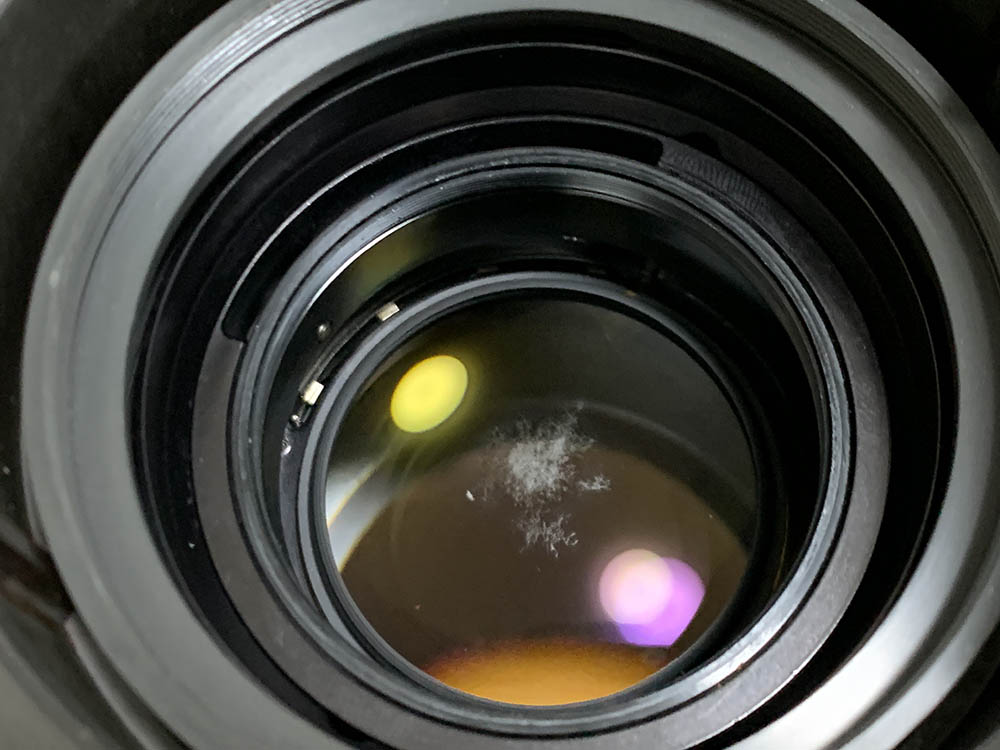
The fungus looks alive and well but we’ll take care of that later. This is the furthest you could go from the front without removing more than you should.

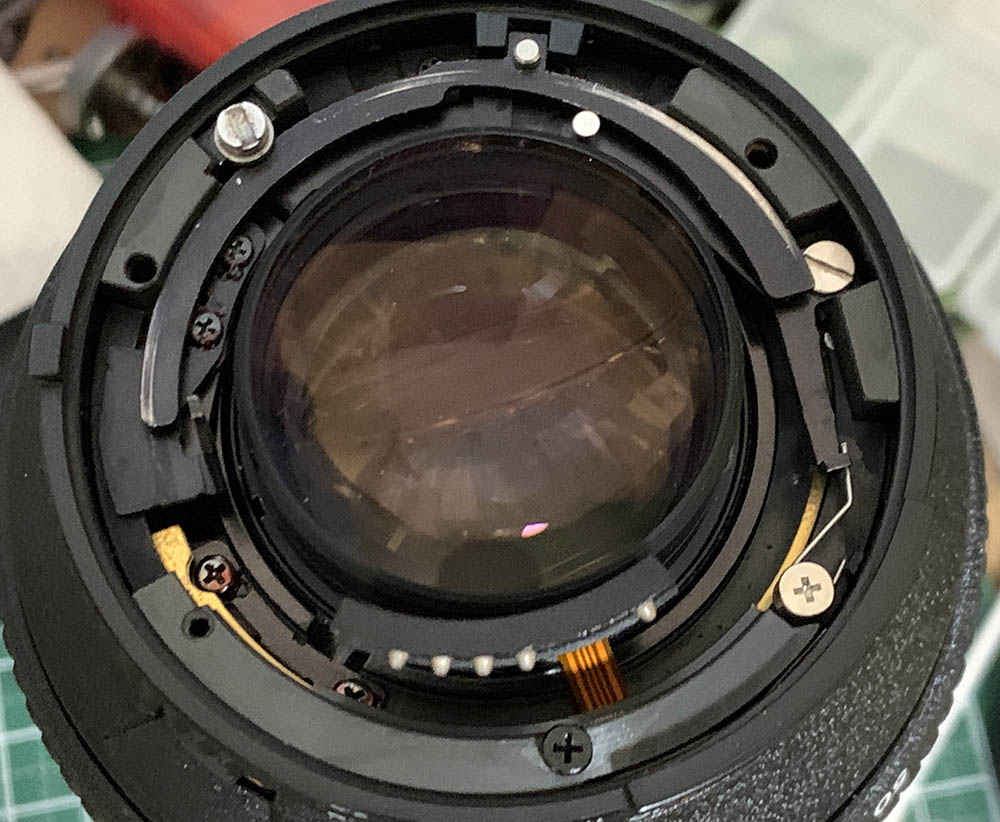
Extract these screws to remove the rear baffle. The (3) larger ones secure the baffle and the (2) smaller ones secure the electronic-block. Do not unscrew the one at the 6:00 position as that’s needed for preventing you from turning-past the bayonet’s range.

Extract the screws of the bayonet mount so you can remove it. Many people get stuck here because they don’t have the right tools and strip the screws. To prevent this from happening to you, read my post about how to remove bayonet screws. Follow my guide and that should help educate you on how its done and which drivers you should use.

Remove the rear baffle first before you remove the bayonet mount and be careful not to damage the contact-block.

Examine everything here before you go any further so you’ll know how to put things back again later. The ribbon is delicate, don’t damage it or the lens will be bricked and only function as a manual-lens.

Carefully remove the throat subassembly and don’t forget the order which they came-apart. The main shaft for the autofocus-drive may get caught so be careful when removing anything. Do not damage or misplace the shims, they are used for adjusting the read-focus.

Study everything carefully and note their alignments in relation to each other.

Zoom the lens to bring the rear optics assembly closer to you and unscrew it with your hands.

Carefully remove the housing and don’t misplace the shims.
Carefully remove the next group. It can only be accessed with a special tool, a lens spanner with multiple-bended necks.
The glass is clean on mine and the iris appears dry so I didn’t have to bother dismantling them. If your lens needs to be dismantled further, read my other repair articles so you’ll get hints on how to properly do it. If your lens has fungus, read my article on how to clean lens fungus, never use the solution at full-strength to prevent damaging the coatings. Thin it with distilled water and use lens tissue to wipe-away any fungus.
Conclusion:
I spent around an hour working on this with most of that time spent thinking how to access the parts here with minimal trauma. It’s fortunate that the lens disassembles rather easily so servicing the optics shouldn’t be a problem. I was initially afraid that this could take more effort to clean due to the extent of the fungus but I was relieved that everything came-apart beautifully. If your lens has to be serviced, send it to a professional. This is not something that anybody should be working on, good luck finding another one.

I disinfect the lens with my bogus fungus-killer that I bought online. Possibly a Chinese-fake so I blurred the logo, I don’t know if it actually works but since I bought this years ago might as well use it. I know it says “Made in Germany” but it’s very likely made in a factory somewhere in China as an unlicensed product.
The fungus is gone. There’s a few specs of dusts and fibers left inside, mostly from the threads and walls during reassembly. I left it as it is since I don’t want to open everything and clean it again. If this isn’t such a precious lens I would do what I usually do and remove any lint and dust from reassembly but I couldn’t gamble with this one, specially that it’s not mine.
I am actually surprised why Nikon didn’t produce this, the parts all looked so well-made with a little bit of un-refinement here and there hinting that this wasn’t meant for sale. Nikon could’ve just made this since they already went through all that trouble making molds, dies and jigs for it. It’s such a shame that we were all deprived of a potential classic. Nikon, please produce this lens.
Thank you very much to the kind person for entrusting this lens to me. It’s my honor to document and present this lens to you. This is what makes this site special, I am proud to be able to show you things that you won’t find anywhere else.
Thanks for following my work, if you liked this article please share this with your friends so it will get more views. This site earns around $0.50 a day, it’s totally reliant on views. You can also opt to support this site, it helps me offset the cost of maintenance and hosting. You’re also helping me purchase, process and scan film. This site promotes the use of film so we’re all in this together. See you again in the next article, Ric.
Help Support this Blog:
Maintaining this requires resources and a lot of time. If you think that it has helped you or you want to show your support by helping with the site’s upkeep, you can make a small donation to my paypal.com at richardHaw888@gmail.com. Money isn’t my prime motivation for this blog and I believe that I have enough to run this but you can help me make this site (and the companion facebook page) grow.
Buy me a roll of film or a burger?
Thank you very much for your continued support!
$2.00
Helping support this site will ensure that this will be kept going as long as I have the time and energy for this. I would appreciate it if you just leave out your name or details like your country’s name or other information so that the donations will totally be anonymous. This is a labor of love and I intend to keep it that way for as long as I can. Ric.

Mar 01, 2021 @ 18:37:45
Good Day Have you ever dissample Nikkor H 2.5 / 180? My lens had Grease in apertureblades and some in lens too?
how much is cost?
Thank you for answears. OP
Jun 27, 2026 @ 16:08:39
I really appreciate the teardown, it contains many valuable observations from someone who actually examined the lens.
However, I noticed an interesting contrast.
The introduction repeatedly emphasizes that nothing is officially known and that readers should treat the article as speculation. Yet later, many specific conclusions about Nikon’s intentions, product strategy, development timeline, and cancellation reasons are presented with much greater confidence than the available evidence seems to justify.
The article begins as careful documentation, but gradually shifts into a historical narrative. My only concern is that it becomes difficult for readers to distinguish between documented observations and informed hypotheses.
Those hypotheses may ultimately prove correct. I would simply appreciate a clearer distinction between what is directly supported by evidence and what is your own interpretation.