
Hello, everybody! Do you know “Ta-chan” (ターちゃん)? It is an old 1980s parody of Tarzan which was published in a weekly magazine for young adults. It’s toilet humor made it influential, breaking the barrier of what was considered acceptable back then. Many people consider it to be a real classic because of its shock-factor but younger people do not know about this masterpiece. It has now been relegated into a small corner as part of Japan’s subculture due to its scandalous nature. Many of us still remember it with fondness and we would like to share the blessing of reading “Ta-chan” to today’s youth. Today, I’ll share something that used to be popular back then but somehow became obscure due to the changing times. I believe that it’s still a relevant product today so long as you’re aware of its limitations. Read this article to find out what this is.
Introduction:
The Zoom-Nikkor 25-50mm f/4 Ai-S was sold from 1981 to 1985, a minor to the older Zoom-Nikkor 25-50mm f/4 Ai which in-turn replaced the Zoom-Nikkor 28-45mm f/4.5 Ai, an upgrade of the Zoom-Nikkor 28-45mm f/4.5K, Nikon’s first true wide-angle zoom. It retained a fixed maximum-aperture, a convenient feature that signifies that it’s made for professionals. It’s a beloved lens, many people consider this to be an excellent performer in its day. In fact, you can find people using these well into the 2000s because it’s really that good. Many people forgot about this since there are many excellent options these days that could go wider and faster.

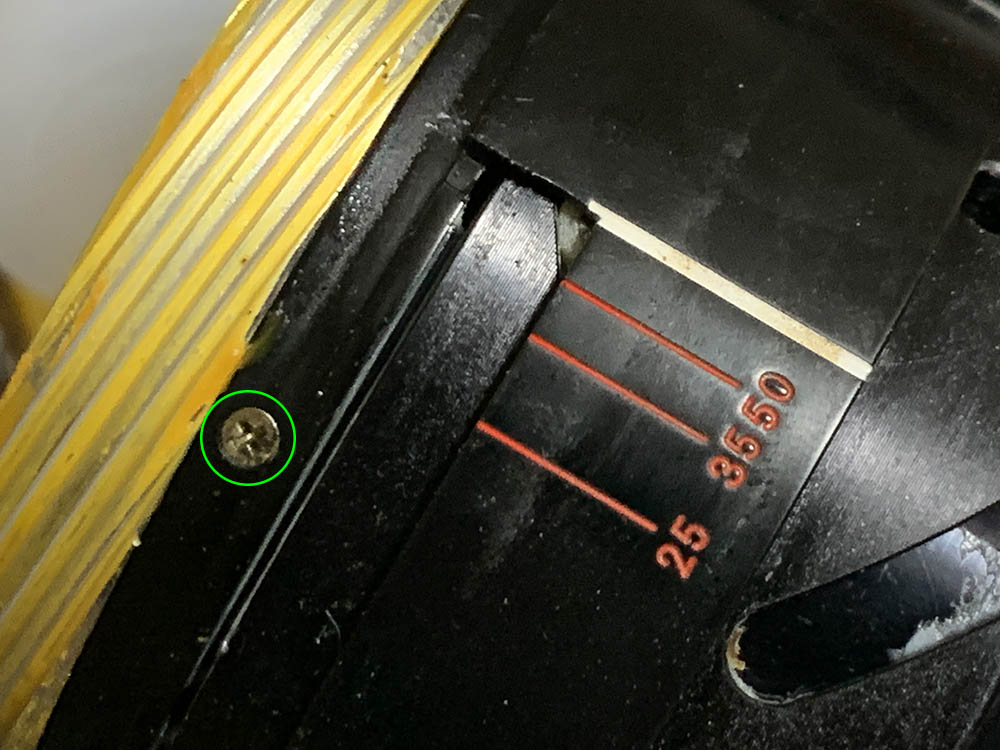
The build quality is rather good and it’s more like an Ai lens in this regard. It’s heavy but well-balanced when held, giving you the impression of a professional’s tool. It could survive a lot of punishment and was built to last like an old Mercedes-Benz 123. It has separate rings for focusing and zooming which is unusual for a lens of this vintage. I assume that this was originally made for use with a tripod for landscape photography so the 2-ring setup will be better since zoom-creep won’t be a problem. The old “pumper-zoom” style is better-suited for action photography where it’s more important to operate your lens quick using just a single hand. It doesn’t have a depth-of-field scale which is a shame. The red numbers you see here are for infrared photography.
It has an 11-elements-in-10-groups design. What’s notable about this is its simplicity wherein the design’s geometry is laid-out in a simple 2-group configuration, very efficient. To read more about the technical notes, go to this excellent article and learn about its innovative optical design.


(Click to enlarge)
The front optical block racks in-and-out as you zoom. The front barrel turns when you focus, this is going to be annoying if you’re shooting with polarizers or technical filters (the square ones) which are essential for landscape photography, I think it’s the biggest issue I have with its handling. It takes 72mm attachments, this is great because 77mm is the standard these days so all you’ll need to do is look for a step-up ring. This helps prevent your attachments from causing dark corners because they show-up in the frame and you also get the bonus of being able to use your existing 77mm attachment with it.

It’s great with the Nikon F3, this is period-correct and shooting with this setup gave me a better understanding of how it felt like in the days when these were the best that Nikon had. One thing that you should consider is using the correct type of screens for this, it works best with a coarse-matte screen. A split-prism type screen won’t be optimal as the center will turn dark if there’s not enough light.

Of course, it works great with modern cameras like the Nikon Df, too. It’s surprisingly good if you ask me and you’ll soon see why I said that in the coming section.
Learning how your lens performs is key to maximizing it. You will learn how to utilize its strengths and avoid its weaknesses. This knowledge helps in determining which lens to bring on an assignment. I shot these from f/4, f/5.6 and f/8 since these are the most common apertures that people would want to use it and we will see the most changes happen with these values. These photos were shot with a Nikon Df, some of the photos were cropped close to 1:1 magnification so we can see the details better.


(Click to enlarge)
Vignetting can be observed wide-open and it’s rather dark specially at the wide-end where it could reach 2-stop’s worth of light. It’s not as bad at 35mm and 50mm since the falloff is a lot shallower but it’s still quite dark. Stop it down to f/5.6 and the center looks a bit brighter which is most evident at the wide-end. There’s not a lot of improvement at 35mm but it does look a bit better at 50mm. You’ll still get dark corners by f/8 when shooting at the wide-end, 35mm doesn’t look a lot better and there’s marginal improvement at the long-end. This is rather pathetic since I’d expect this lens to perform decently in this test.


(Click to enlarge)
Distortion levels are kept rather low and it looks worst at the wide-end as expected but even then it’s not really bad. This reminds me more of a prime lens’ performance, it’s quite good for a zoom. The profile is a bit complex at the wide-end where the effect is most obvious, it gets better at 35mm and you’ll get a shallow pincushion-type profile at 50mm. Shooting at about 40mm will help keep your lines straight.


(Click to enlarge)
Flaring can be observed but it’s localized and won’t spread across the whole frame. It has the tendency to produce blobs and you’ll see more of them at the wider-end of the range. This is not bad at all for a zoom, I’ve seen worse even from modern lenses.


(Click to enlarge)
The character of the bokeh is quite bad at worst and it’s barely-mediocre at best. To be fair, you don’t shoot this lens for smooth and clean bokeh quality so this is acceptable in my opinion.


(Click to enlarge)
You’ll see chromatic aberration in areas of high-contrast when shooting wide-open in extreme cases. It gets a lot better by f/5.6 so you’ll only see traces of it at the edges but it’s still somewhat high when the situation is quite bad. You’re not going to see any of it by f/8, maybe a very small amount in terrible cases but that’s it.
Chromatic aberration is normally not an issue when you’re not taking photos just to show it, this means you won’t get to see much of it in real-world scenarios. In fact, I think it performs quite good here.


(Click to enlarge)
Sharpness is quite good at the center wide-open but it’s weakest at 50mm where you’ll see a bit of softness. The corners don’t look good at all as expected. Stopping it down to f/5.6 makes the center look a lot sharper specially at 50mm. The resolution is higher, it is now able to render details a lot better. The biggest changes can be seen at the extremities, they look surprisingly good for lens of this vintage. The center improves a bit more by the time you reach f/8, the resolution is very good and you’ll get really sharp details from it. The corners look much better, even the extremities look sharp. I am impressed by its performance in this set, it’s really nice and it just shows that this was intended to be a landscape photographer’s lens. These are some of the best photos I have seen from a zoom of this class and vintage.

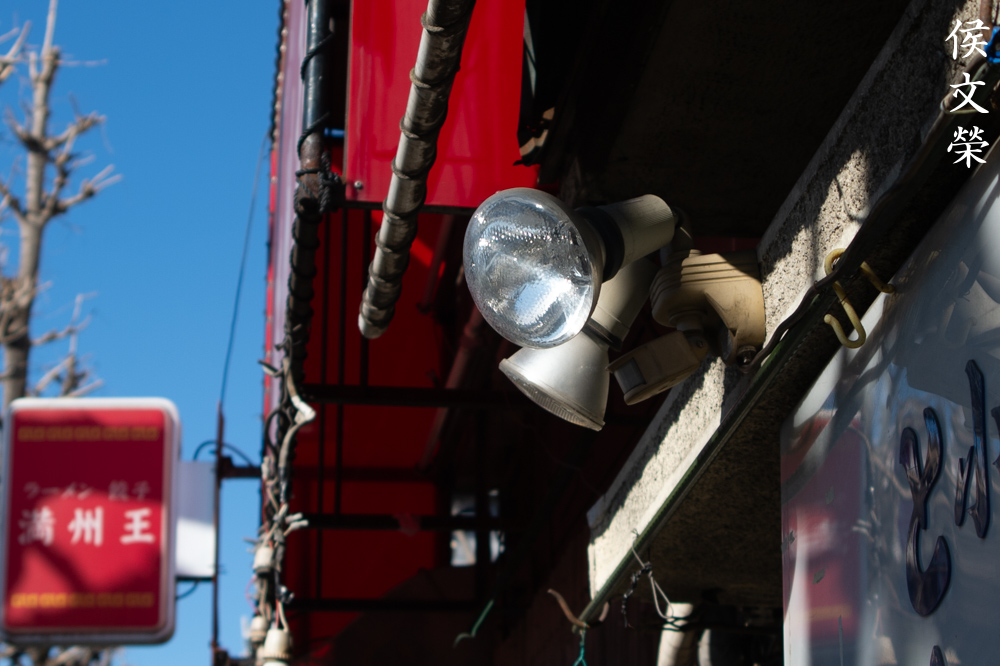
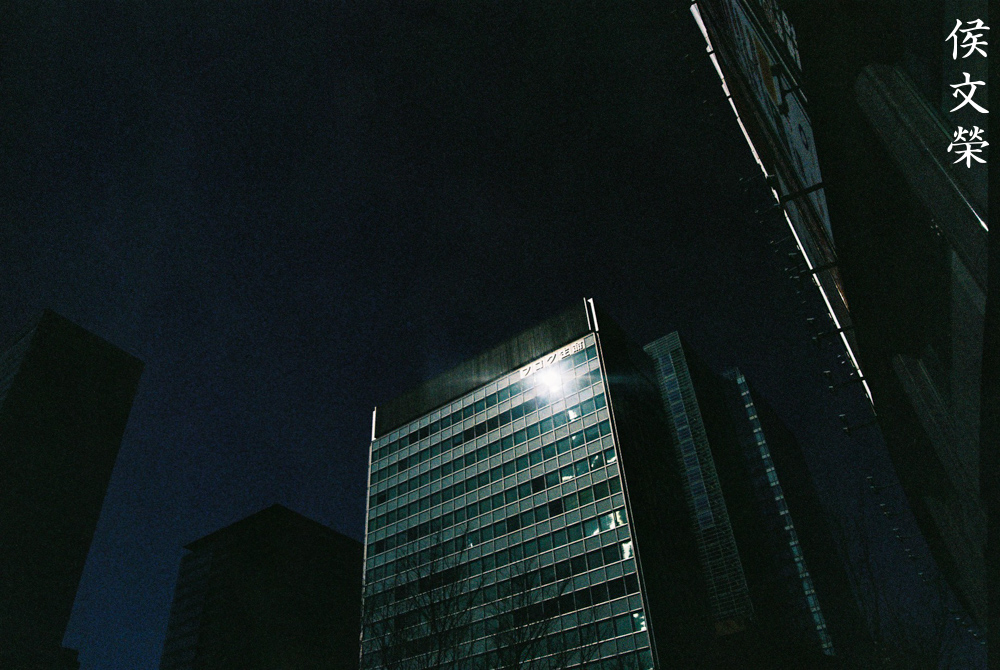
Shooting indoors could be a problem since f/4 isn’t going to be enough unless you pump your ISO higher.

This is not the lens for lowlight photography but modern digital cameras have great high-ISO performance so this is not much of a problem these days.

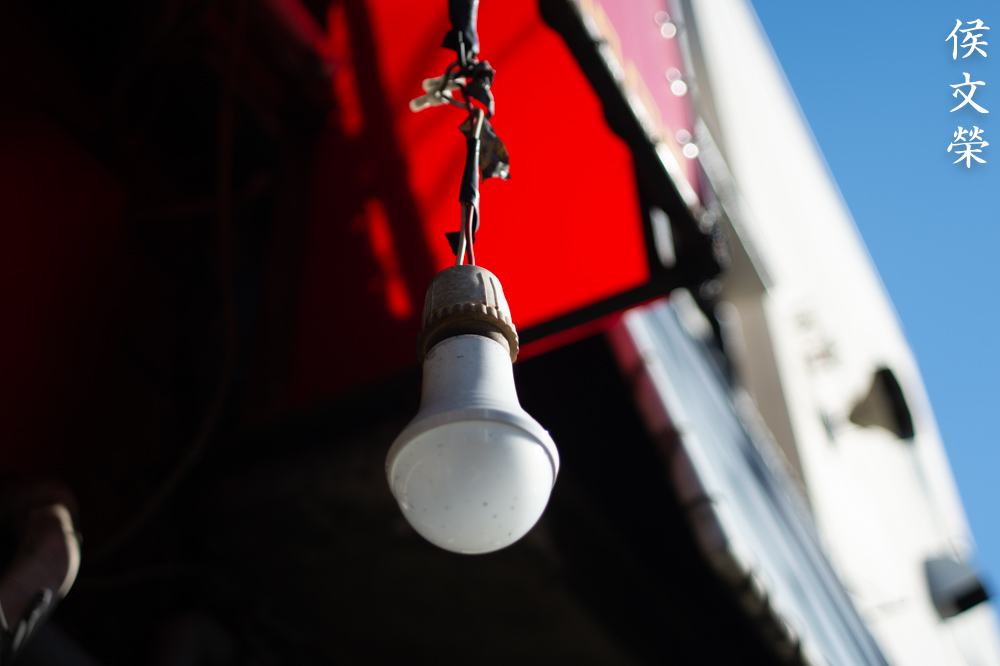
This was shot with a slow shutter-speed, I was able to take this photo with decent sharpness since 25mm allows me to use slower speeds, slower than what I am usually comfortable with in most cases.

It’s best to shoot this using a tripod if you don’t have enough light. You could also stop the iris down to get sharper results, this is a lens that’s meant to be used with a tripod if you ask me.


(Click to enlarge)
Here are more photos for you to observe, I think the biggest strength of this lens is its practical specs and its sharp image quality. I enjoyed shooting with it, maybe I should take some landscape photos next just to experience using this for its intended purpose. If you don’t have the cash but you need a zoom for shooting landscapes this lens is the one for you. Autofocus isn’t essential for these types of photos, shooting with the depth-of-field scale is something that you should master if you’re a landscape photographer. The bad news is this doesn’t have a depth-of-field scale at all, a very dumb decision if you ask me. An old manual-focus lens is going to be your best teacher and you use the money you saved for buying filters instead. I think this is the best way to use your money.
Let’s now check some film pictures. Film has a unique look that is hard to simulate with a digital camera thanks to grain. It reacts differently to light, this means that it could mask a lens’ flaws or amplify them. Since it was designed to be used with film, it’s best that we judge this using its intended medium. I shot these with a Nikon F3 loaded with Kodak Gold 200.

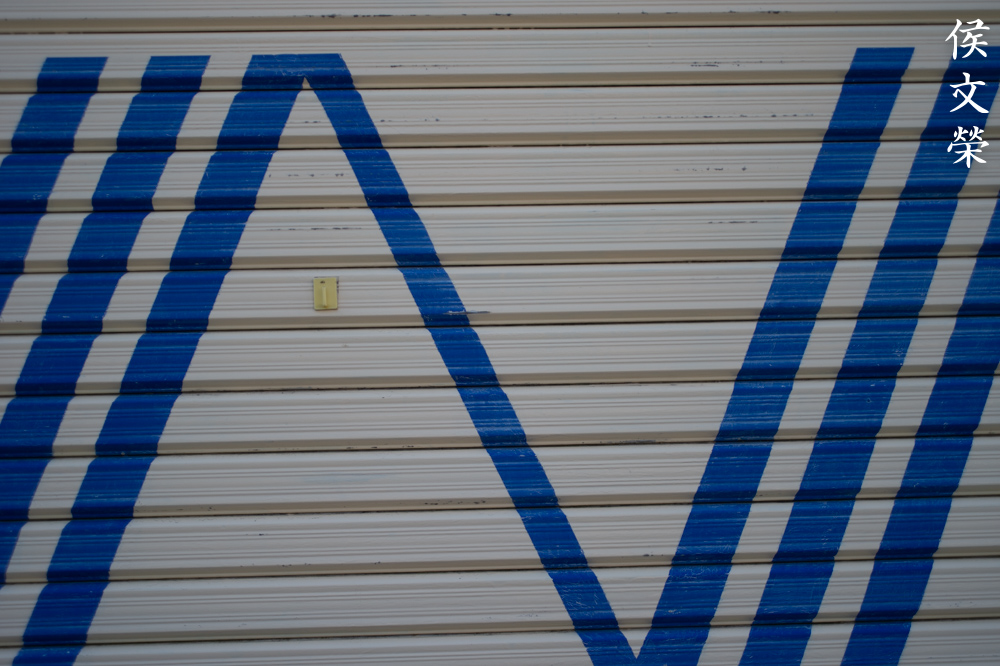
Distortion is worst at the wide-end but it’s not going to be obvious if you don’t have straight lines that are parallel to the edges of the frame. It’s still there, you can see the straight lines curve a bit.

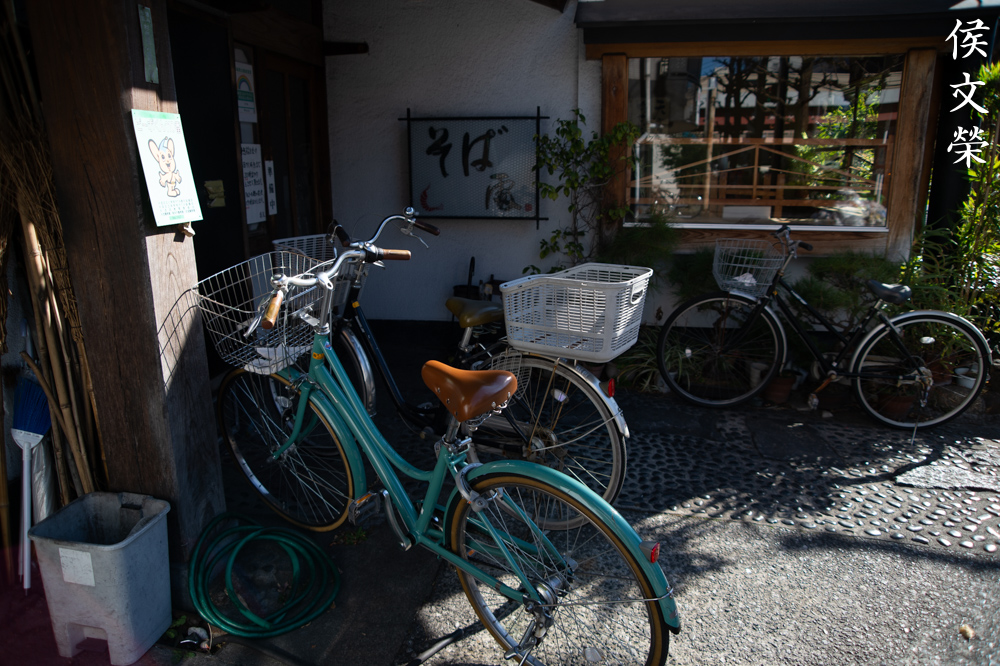
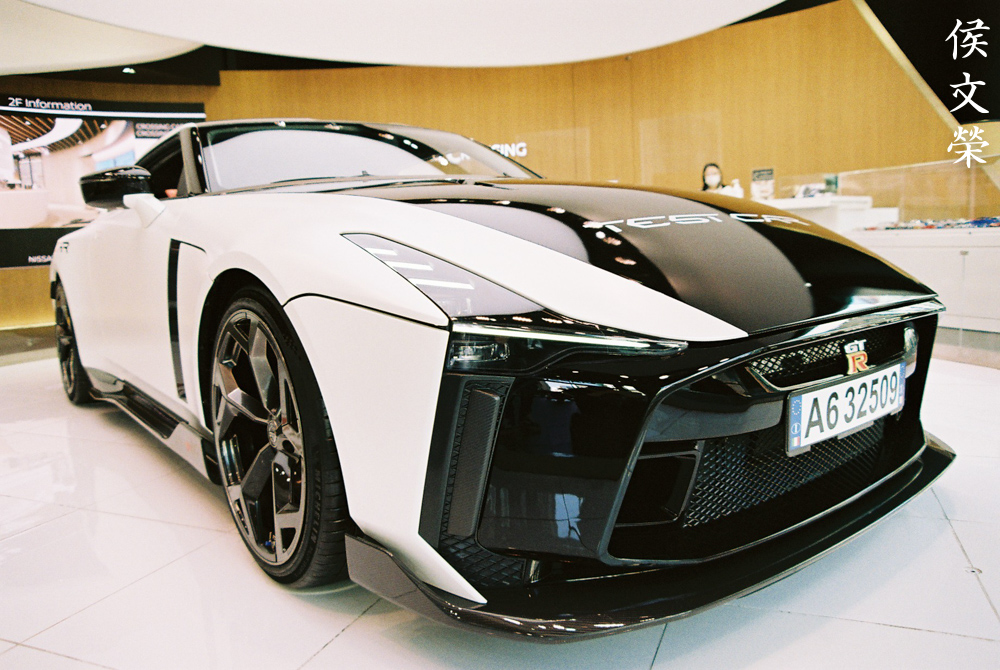
It’s surprisingly great for taking photos of cars. It’s sharp and its “slow” maximum-aperture is also a blessing because you won’t be tempted to shoot with it using a wider aperture because it’s technically impossible. This will allow you to get more things in-focus. The details appear sharp, clean and beautiful.

The wide-end is great for exaggerating your lines, this is great for taking photos of cars as it makes your photo look more dynamic or exciting, subtly suggesting motion despite having a stationary subject.

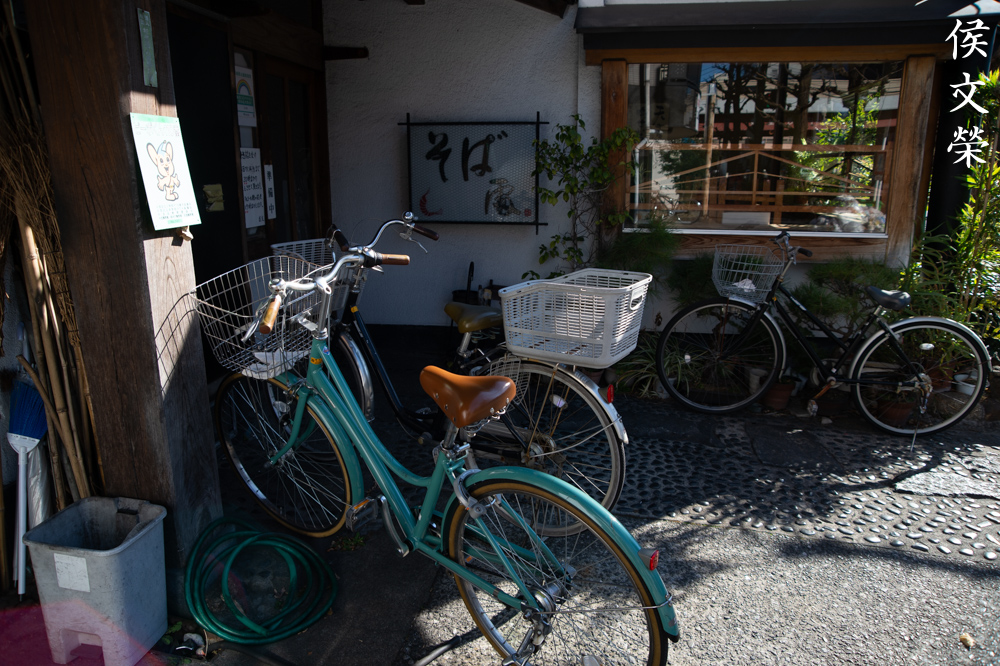
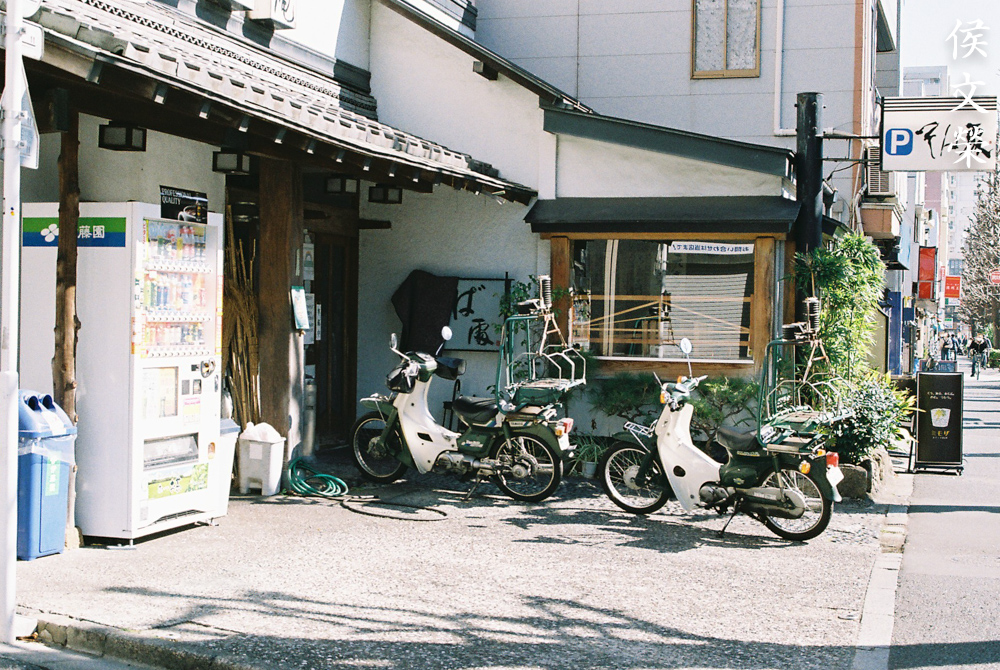
It’s also a great walkaround-lens, too. The long-end is useful for taking more “normal” photographs. I think this is a great lens for travel photography and reportage since the focal-range is very useful for these applications.

If you’re going for a vacation and you need to carry only one lens just consider this one and maybe bring a telephoto with you just in case. You could capture almost everything with those and you won’t have to burden yourself with extra weight.
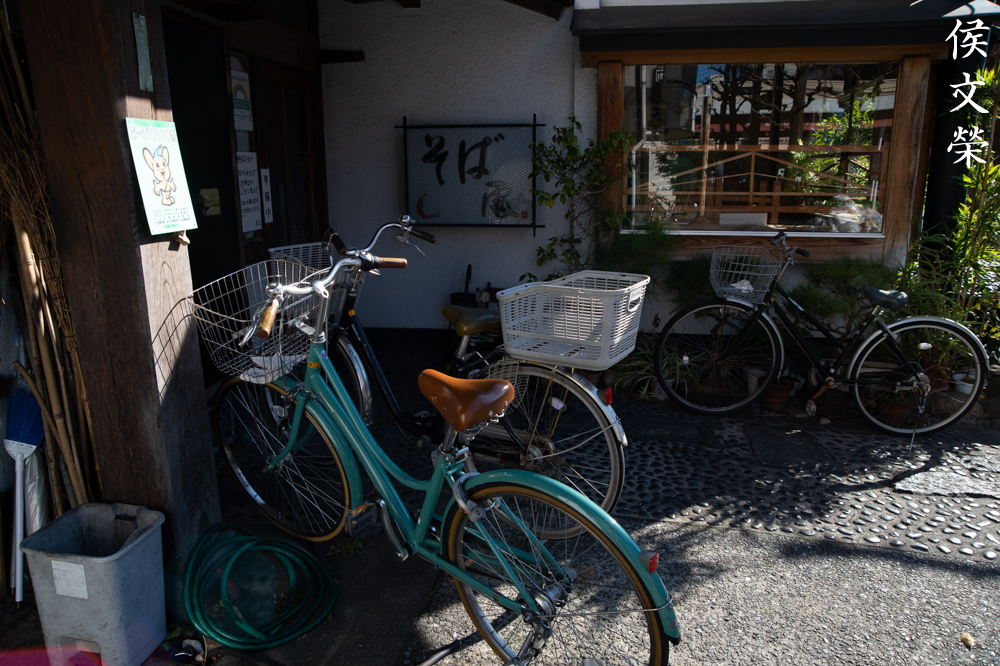
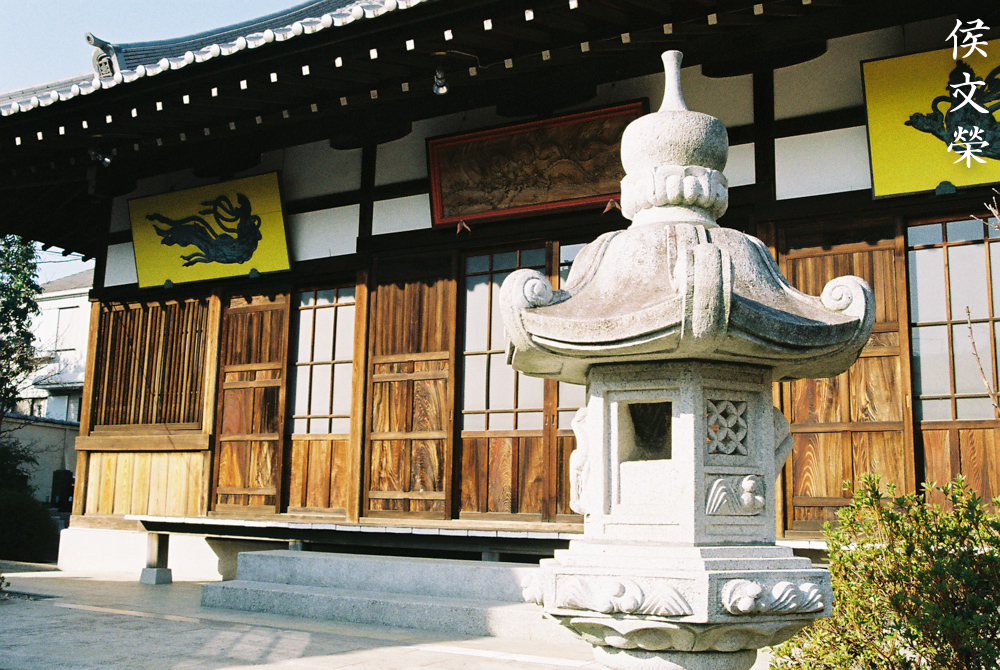
Flaring doesn’t seem so bad when shooting with film but that doesn’t mean that it’s not there, it’s just subdued a bit.


(Click to enlarge)
Here’s the rest of the set. It’s surprisingly good, you’ll be able to get great photos with it using film or a digital camera. I seriously think that you should consider this if all you do is just shooting for fun. It’s cheap these days and this offers great value in today’s economy.
I highly recommend this lens to everyone even if you’re a professional photographer if you couldn’t afford the latest lens. It’s great for a lot of things and its performance isn’t shabby either specially considering its age. This is the best option if you need to travel to a dangerous place to document stuff. Losing it won’t be as traumatic and it will survive professional use in the field. You won’t have to treat it like a baby, too. I remember how careful I was with my electronic lenses when I was shooting in remove villages, I was so scared of damaging my gear that I lost some great opportunities. If you’re looking for one, be sure that the iris is dry, when you actuate the stop-down lever, it should be snappy as well. An oily iris is a major repair for this lens since it sits deep-within the barrel. Operate the rings and be sure that they all turn properly and smoothly, the optics have to be clean and clear, too. You’ll find these in various conditions, usually quite rough since professionals used these. That’s a great opportunity to own one for very little money. These usually sell under $50.00 these days, I got mine for $10.00 just because it was sold as junk. Just be patient and you will get one for a reasonable price, happy hunting.
Before We Begin:
If this is your first attempt at repairing a lens then I suggest that you see my previous posts regarding screws & drivers, grease and other things. Also read what I wrote about the tools that you’ll need to fix your Nikkors.
I suggest that you read these primers before you begin (for beginners):
Reading these should lessen the chance of ruining your lens if you are a novice. Before opening up anything, always look for other people who have done so in YouTube or the internet. Information is scarce, vague and scattered (that is why I started this) but you can still find some information if you search carefully.
I highly recommend that you read my working with helicoids post because this is very important and getting it wrong can ruin your day. If I can force you to read this, I would. It is that important!
For more advanced topics, you can read my fungus removal post as a start. It has a lot of useful information, it will be beneficial for you to read this.
Disassembly (Lens Barrel):
The construction is more complicated compared to a prime lens. You can dismantle this in several ways but I will show you the sequence that made the most sense to me. You will have to be careful with it since it has 2 sets of helicoids, one for the focusing ring and another for the optics. These should be aligned carefully or the lens won’t focus properly. You should also be careful of the sealed screws, some of them were secured with epoxy and only heating them will allow you to extract them safely. This is not a lens for beginners, people who have experience repairing lenses will also find it challenging, too. If your lens needs to be fixed just send it to a professional repairer. Make sure he is legit because there are many bogus operators out there.

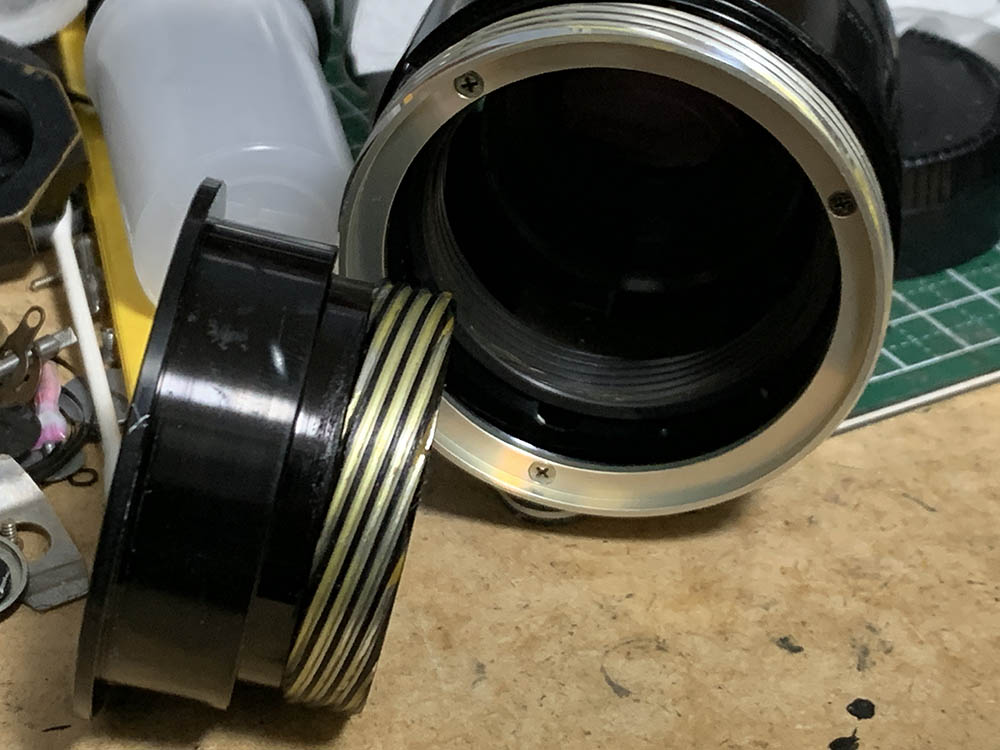
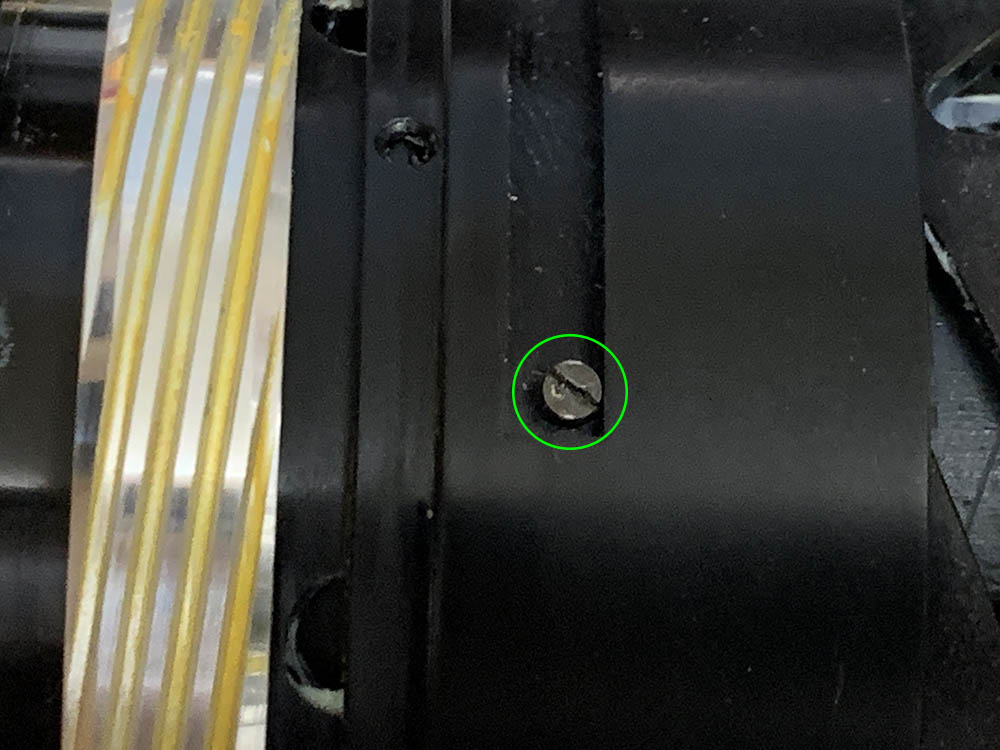
Locate and extract this screw. It’s usually sealed, placing a small drop of solvent will help dissolve the seal.

Unscrew the front optical block with a rubber tool and carefully separate it from the rest of the lens. Be careful not to damage the rear part of the assembly.

Unscrew the front ring and the baffle, clean everything well to kill any germs.

Carefully remove the rubber part of the grip, be sure not to tear it while doing so. Peel-off the cover of the guide, it’s merely taped to the surface of the focusing ring.

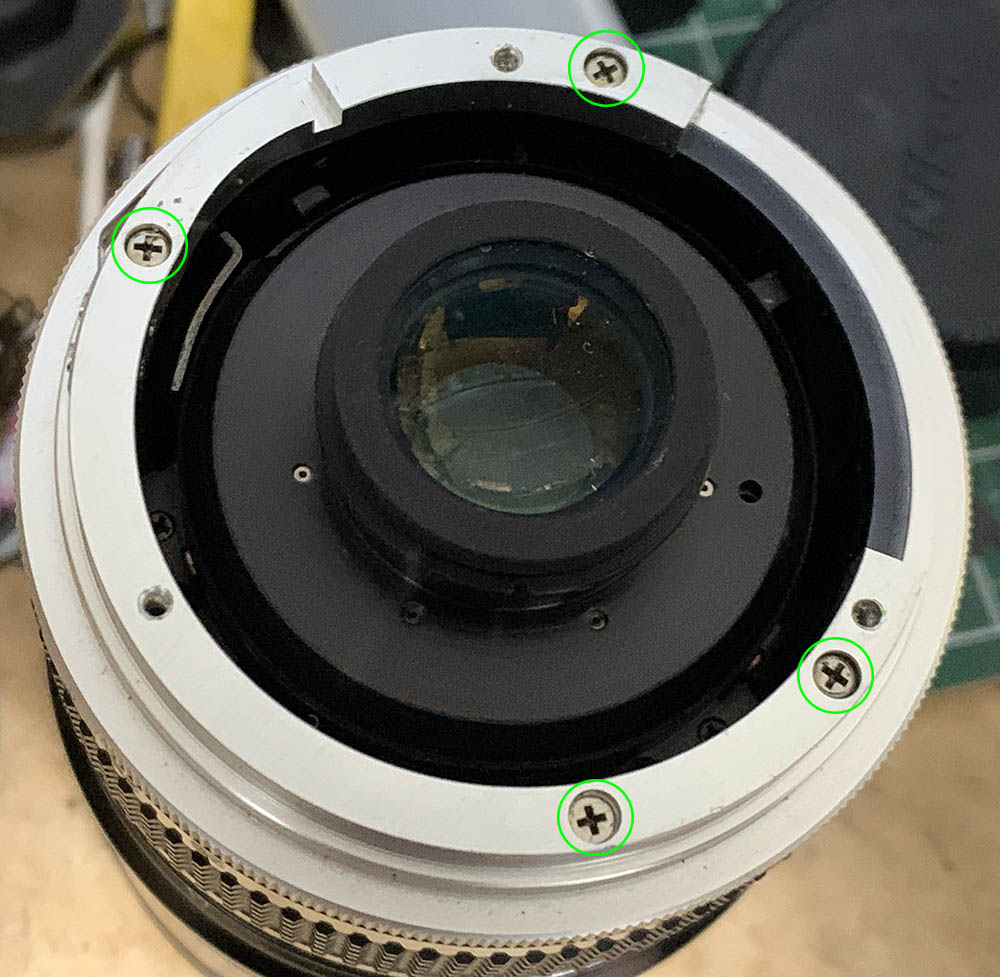
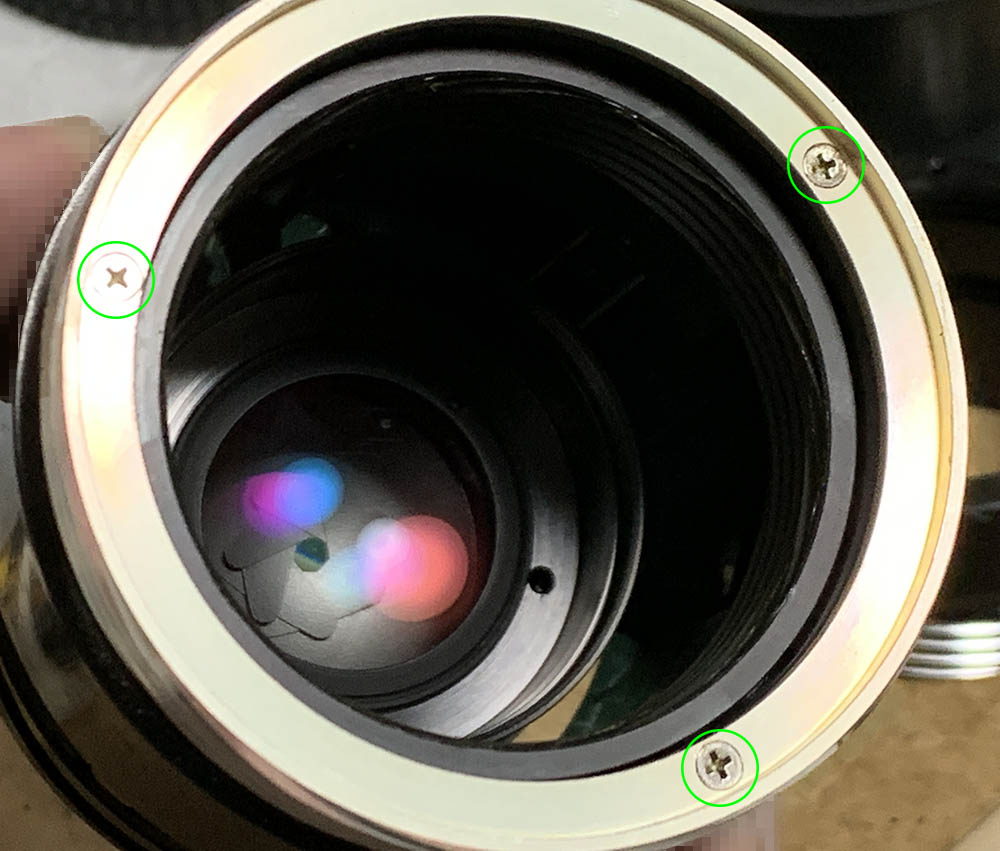
Extract the screws of the bayonet mount so you can remove it. Many people get stuck here because they don’t have the right tools and strip the screws. To prevent this from happening to you, read my post about how to remove bayonet screws. Follow my guide and that should help educate you on how its done and which drivers you should use.
Note that the screws are not all identical, some of them are shorter so don’t forget to note where these originally belong.
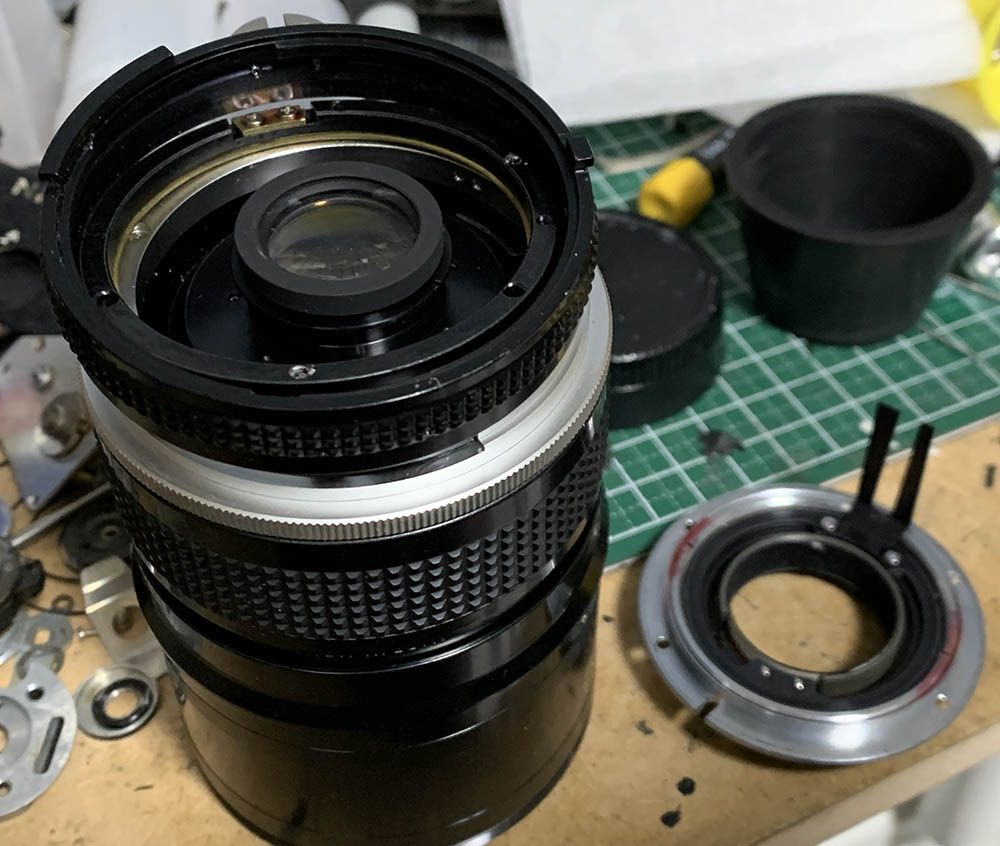
Remove the bayonet mount carefully so nothing will get caught.
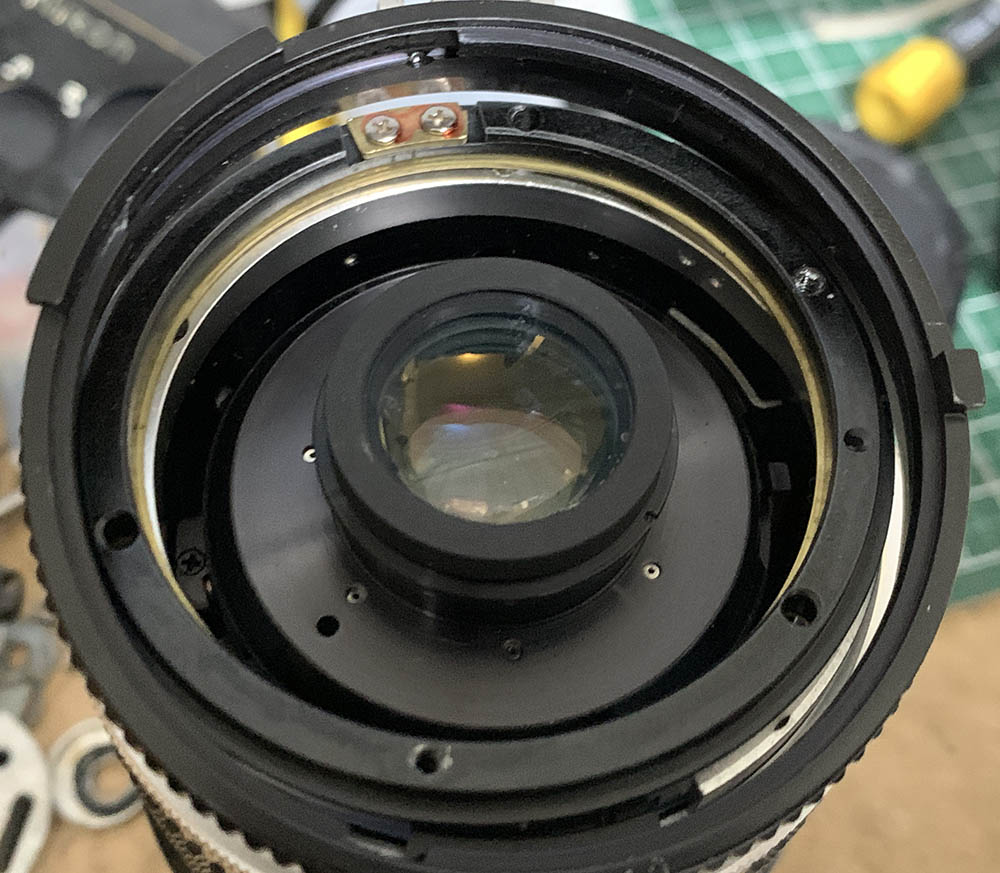
Carefully remove the aperture ring while making sure that the shims of the base are not disturbed.
Remove the base and its shims, do not misplace the shims because this is the only way you could adjust the rear-focus of this lens.
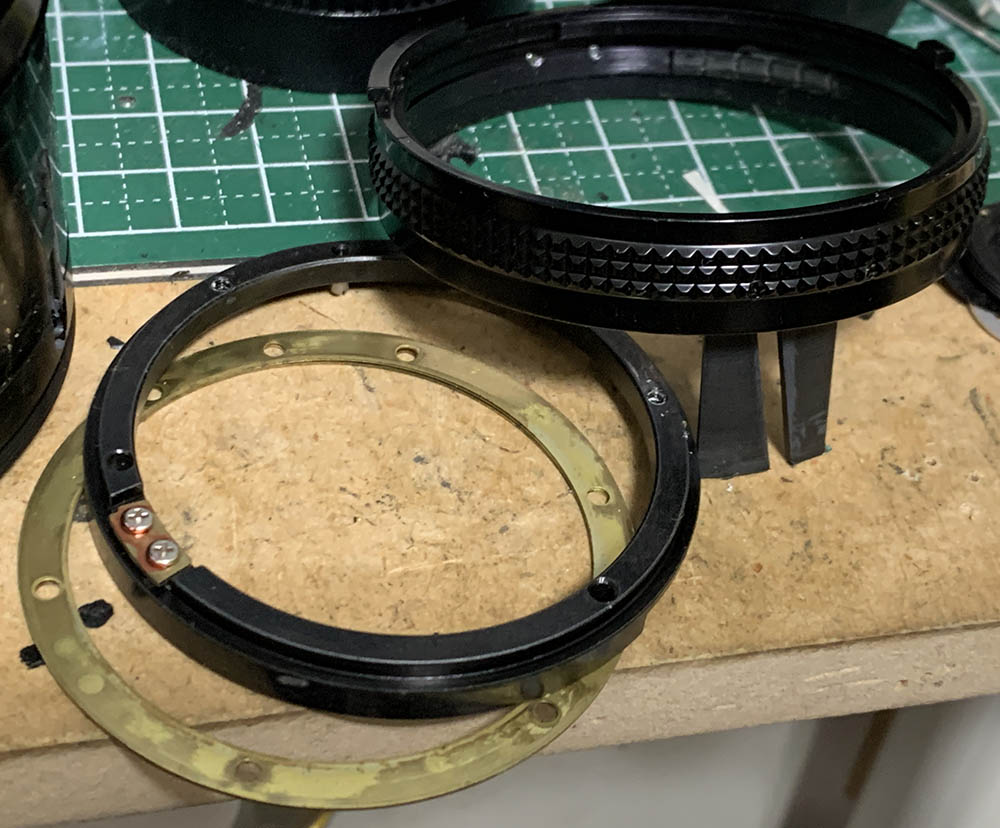
Carefully extract these to remove the grip.

While removing the grip you’ll notice that there’s a spring underneath it. Do not lose this spring, it makes sure that the zoom-ring is not going to wobble when you operate it.

Extract these to remove the collar.

The collar can now be removed.
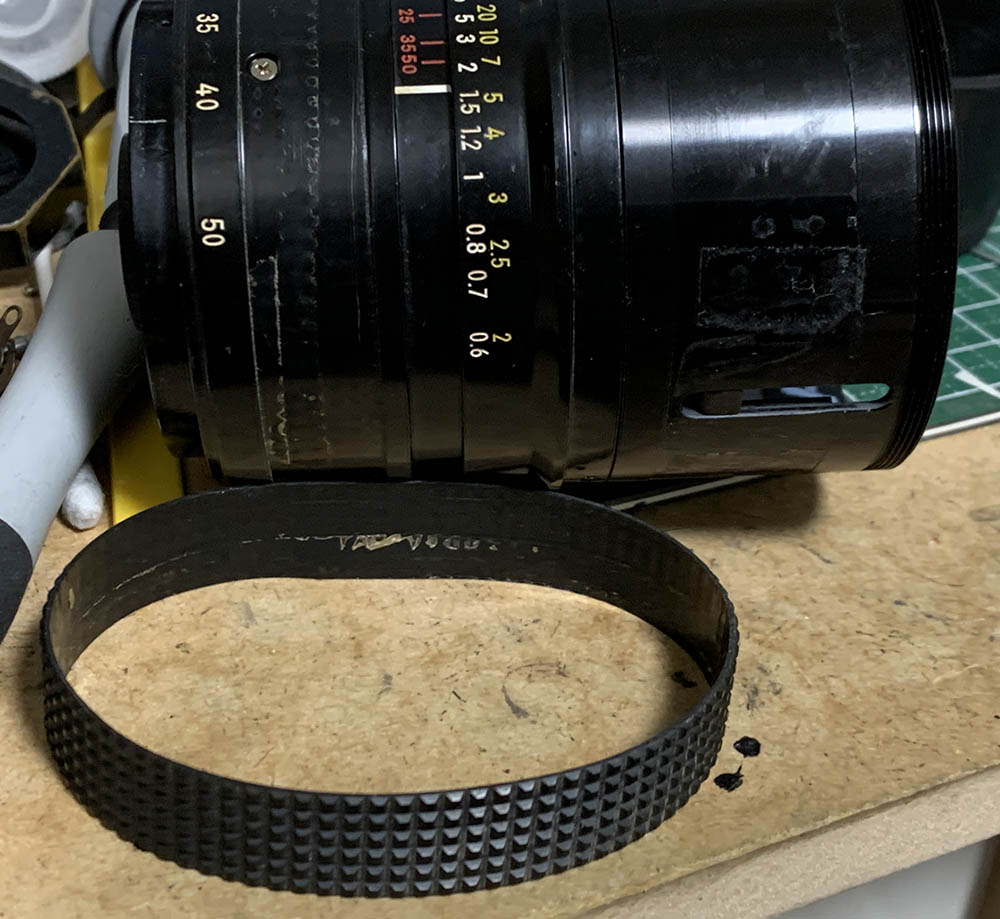
Carefully remove the rubber part of the zoom-ring. Run a thin, rounded rod underneath its whole circumference to lift it from the ring.

Extract these, you should heat these first before you remove them so you could safely extract them, These were sealed with epoxy and you could strip the screws if you’re not careful. One of these actually broke the tip of my driver.

Remove the zoom-ring, clean this and set it aside.
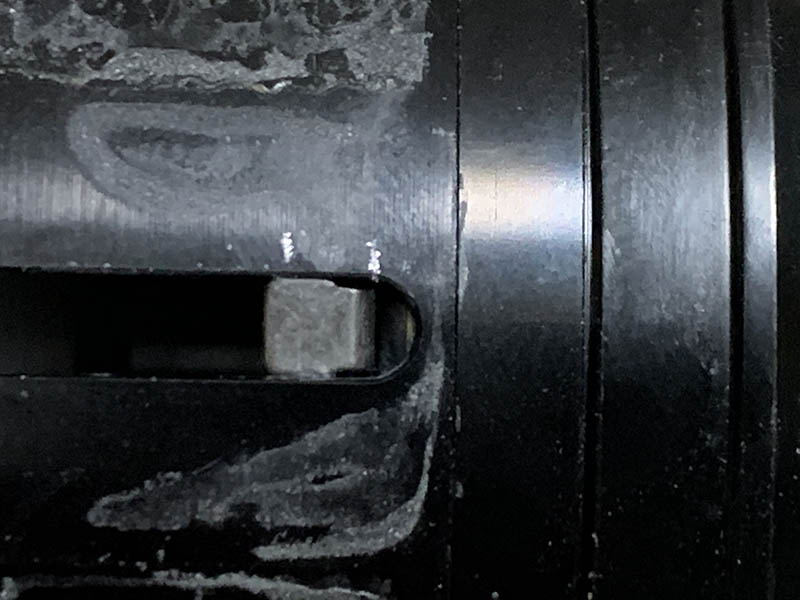
Focus it to infinity and mark the position of this key.

Note the position of the key before you extract these so you’ll be able to put it back properly again. This is where you could adjust the front-focus of the lens.

Extract these to remove the focusing ring.

Carefully unscrew the focusing ring from the rest of the lens and don’t forget where these parted since it’s a helicoid. Many people forget to do this so they get stuck, read my article on how to work with helicoids to learn how to do this properly. If you forgot to do this the lens won’t focus properly once you reassemble it.

I think there are 3 small screws here that you should extract.

Remove the distance scale and set it aside.
Separate the inner helicoid and don’t forget to note where it parted or you won’t be able to put this back properly again.
Extract these carefully.
Unscrew this guide-screw, too. You won’t be able to remove the sleeve yet since the helicoid is in the way, we’ll remove in the next step.
Carefully extract these to remove the helicoid but before doing so make a small mark so you’ll know its original alignment because there’s no way of knowing its original alignment without marking it.

Remove the helicoid and set it aside.

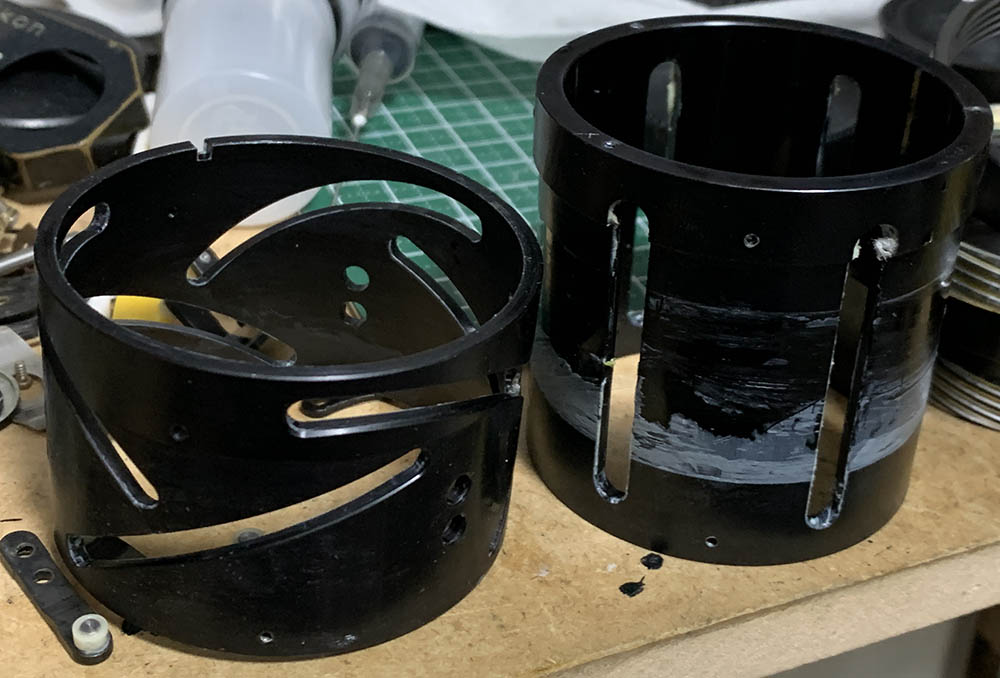
You can now finally remove the sleeve.
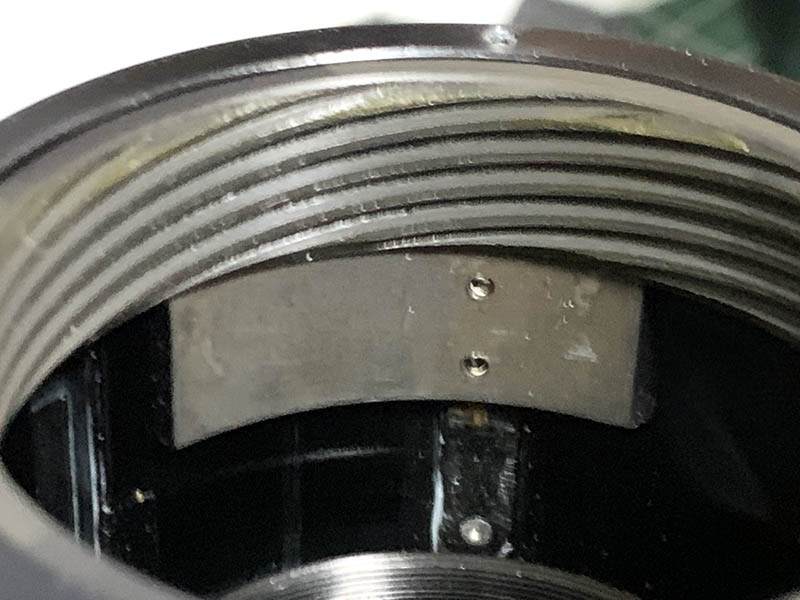
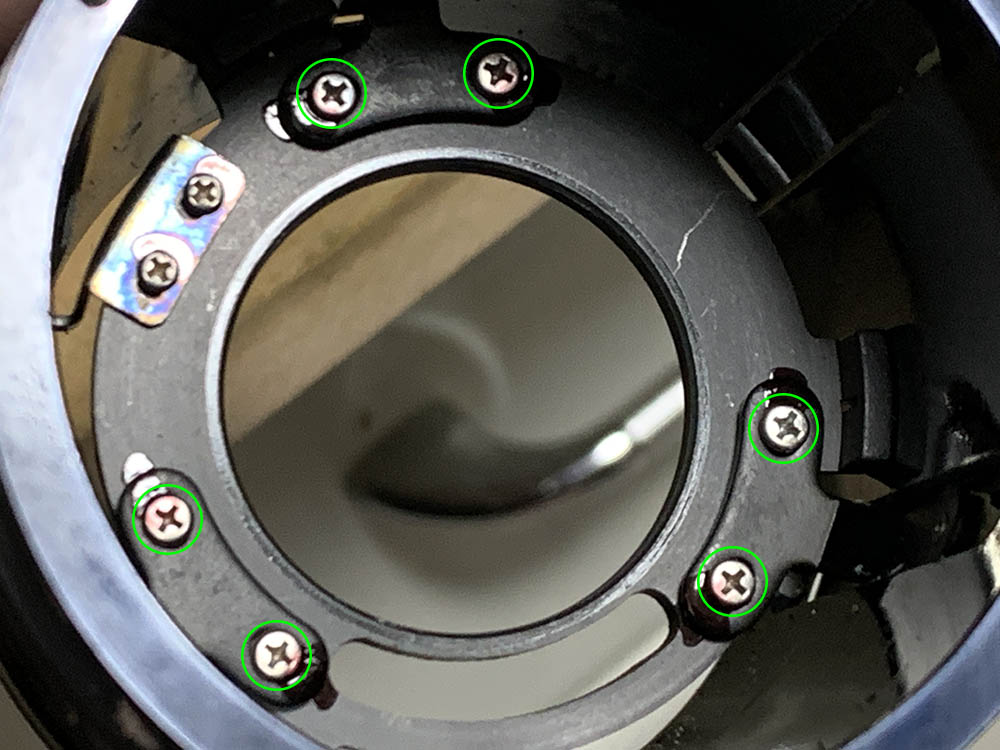
Looking at the inside of the barrel you’ll notice that the rollers were all fixed to a strip of metal which in turn are screwed to their abutments. I have never worked on any Nikkor that has this kind of construction, this may be done to save space. Shown here are the ones used for the floating mechanism’s basket.
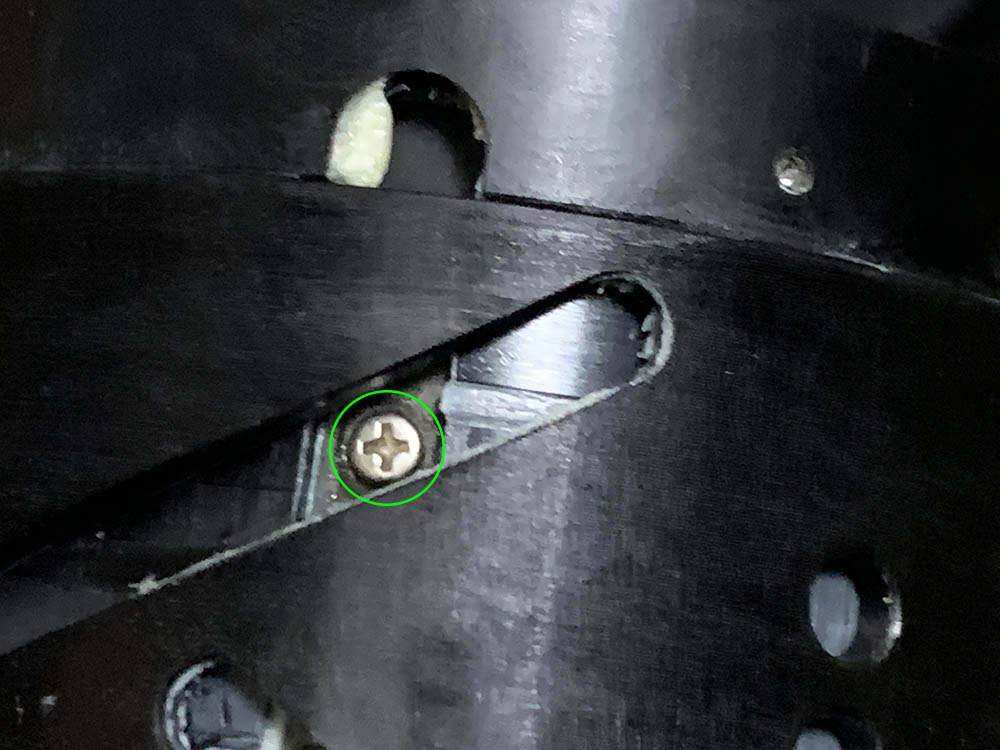
Locate and extract these screws carefully, there are 6 of these. When you unscrew a set of these be sure that the roller and its metal part won’t drop and settle on the glass as it will scratch the surface.

Carefully remove the basket but don’t forget to note its original alignment. Putting it back incorrectly will result in the helicoid not aligning properly when you reinstall it.
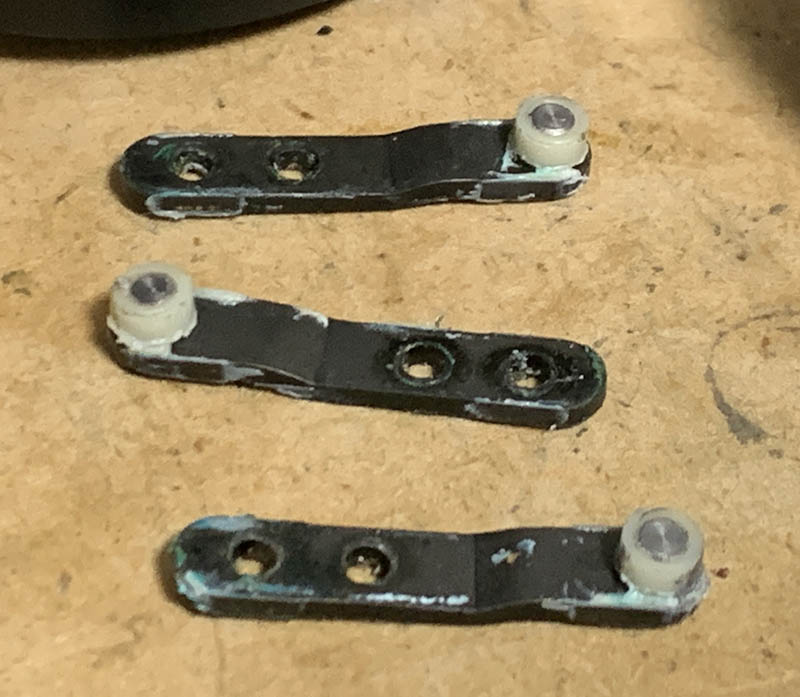
These are the 3 rollers for the floating mechanism. Clean these very well and don’t leave any residue.

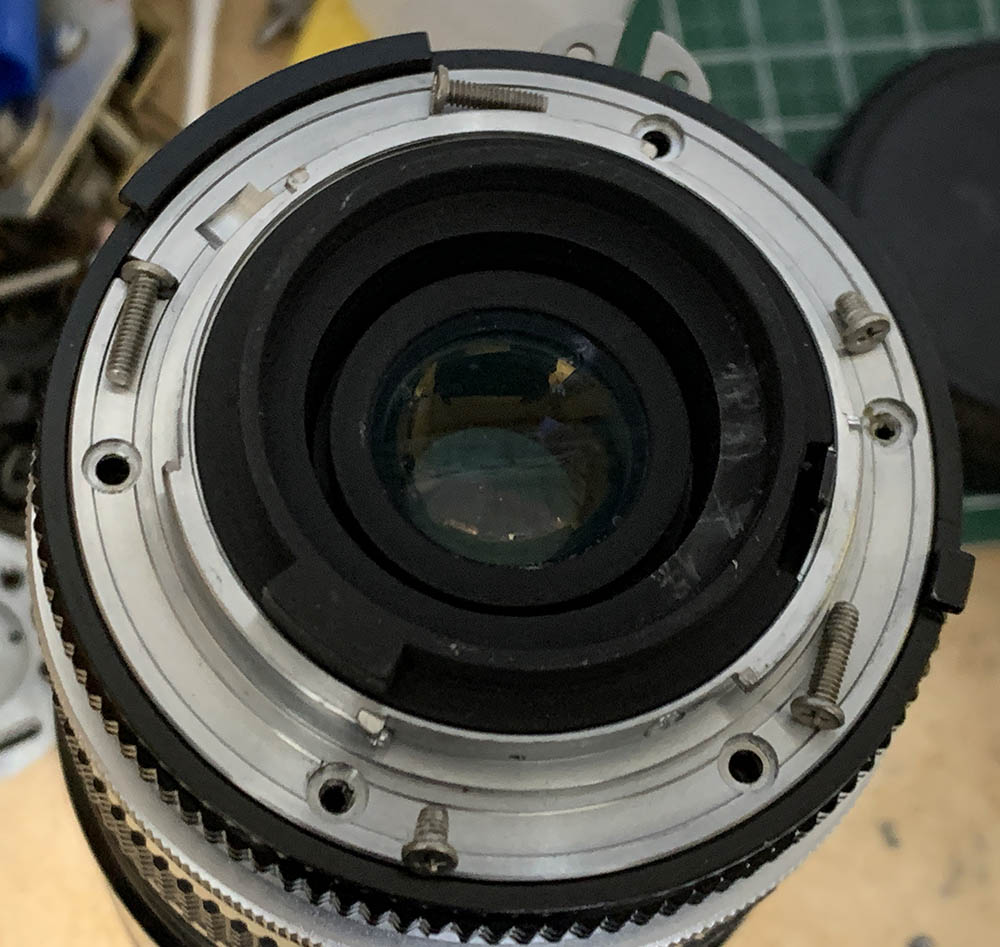
Note the original alignment of the rear optical block and unscrew these to remove the assembly. Extract these carefully with a long driver. Removing the rear optical block should be done earlier, as soon as you have access to it, not at this point.

Carefully remove the assembly, it houses the iris mechanism, too.
Use a lens spanner with long, curved bits to unscrew this assembly off.
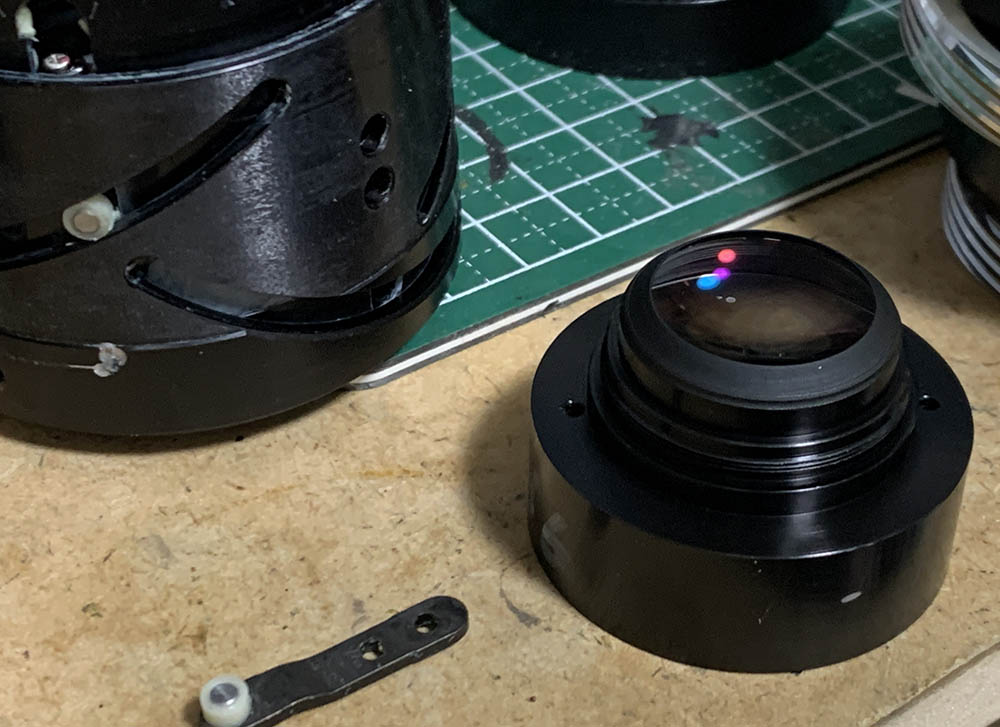
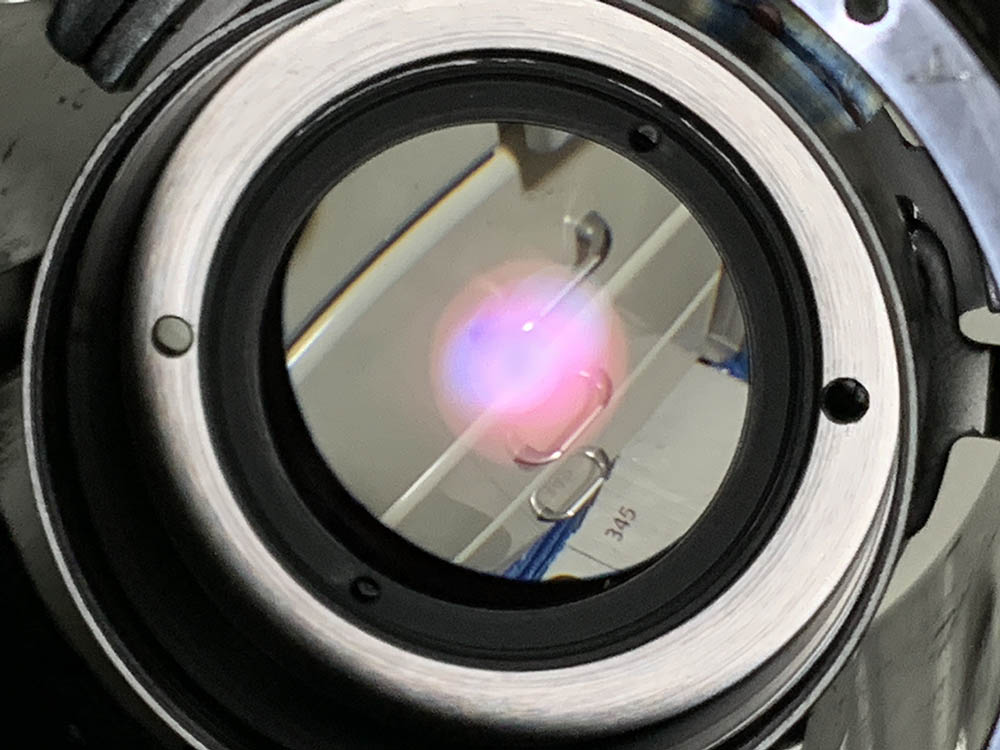
Carefully remove it and set it aside. You can remove the optics for cleaning only if it’s necessary, I left mine alone since it’s clean.
Extract these to remove the rear floating mechanism’s crucible but don’t forget to note its original alignment.
You can now dismantle cam once the rollers from the previous panel are gone. Putting the cam back incorrectly will result in your lens not being able to zoom properly so don’t forget to take plenty of notes so you’ll know how it should be aligned.
Clean the parts thoroughly, don’t leave any residue. I scrubbed the helicoids with a strong detergent and pickled them in an alcohol bath to remove grime and other hardened gunk. Only apply a thin film of grease to the helicoids, I used a thick grease because this is an older-type zoom which benefits from it. Most contact surfaces were lubricated with a very film of grease, enough to leave the surfaces coated but not so much as to create a mess like what you saw here. Just imagine it like the oily skin of your nose, applying more than that won’t benefit anything.
Disassembly (Optics):
The optics are simple to service since they’re all conventional. I didn’t service the front optical block because mine’s clean. The iris mechanism also functioned properly so there’s no need to dismantle it. Read my other articles if you need to service these, You will find many hints from them and just follow your notes so you’ll be able to put things back properly again.

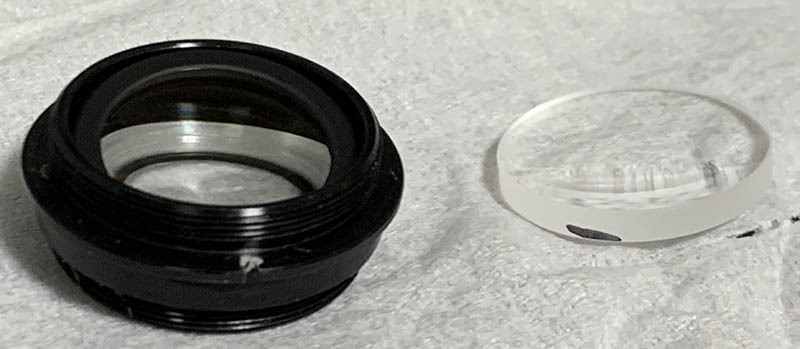
The rear optical block was dirty so it had to be dismantled completely. Unscrew it from the iris mechanism’s housing, this one was sealed with lacquer so I had to apply a drop of acetone to its threads. Never flood this part or anything near the optics with solvents because that will damage the coatings and cemented groups.

Unscrew the retainer to access the rear element.

Remove it with a lens sucker and never forget to note which side should be facing where. There’s a spacer underneath it which you should remove. Again, note its direction so you can put it back properly again later.
The 10th element can be removed with a lens sucker. Note that I drew a small mark so I’ll know which side faces where.

The 9th element is easy to remove.
Since the other groups are clean I only wiped the exposed surfaces since some of them were soiled with condensed grease. The oil and film created a thin coat which made them look foggy. It has to be removed as soon as possible to prevent the glass from being etched permanently, no amount of wiping will remove the etching.
Clean everything that’s accessible to you while you’re at it. If it has fungus, read my article on how to clean lens fungus. Dilute the solution with distilled water, using it at full-strength will etch the coating and the glass will get damaged. If it has an oily iris, wipe the blades with naphtha and lens tissue. Do not damage the blades and only handle them by their pins.
Conclusion:
It took me the whole night to repair this, it would’ve taken me longer if the optics or iris mechanism had to be serviced. I enjoyed working with it since its construction is quite different from many Zoom-Nikkors that I’ve worked on. One thing I noticed about it is the construction reminds me more of the older New-Nikkors and Ai-Nikkors instead of an Ai-S lens. It was made the old way and I did not find the usual adjustable parts that I’d typically find on an Ai-S zoom. I learned a lot from this, I’m happy to have repaired one of the best zooms that Nikon made in the past couple of decades.

The inner barrel has been serviced properly, it’s now very clean and it operates smoothly. You don’t need to apply a lot of grease to it in order to make it work smoothly, a very thin film goes a long way. I operated the inner barrel and made sure that everything is working properly before I proceed in order to prevent any problems later. I don’t want to open this up again later just to reassemble the inner barrel because I have misaligned something and go back-and-forth to make sure it works.
Thanks for following my work, if you liked this article please share this with your friends so it will get more views. This site earns around $0.50 a day, it’s totally reliant on views. You can also opt to support this site, it helps me offset the cost of maintenance and hosting. You’re also helping me purchase, process and scan film. This site promotes the use of film so we’re all in this together. See you again in the next article, Ric.
Help Support this Blog:
Maintaining this requires resources and a lot of time. If you think that it has helped you or you want to show your support by helping with the site’s upkeep, you can make a small donation to my paypal.com at richardHaw888@gmail.com. Money isn’t my prime motivation for this blog and I believe that I have enough to run this but you can help me make this site (and the companion facebook page) grow.
Buy me a roll of film or a burger?
Thank you very much for your continued support!
$2.00
Helping support this site will ensure that this will be kept going as long as I have the time and energy for this. I would appreciate it if you just leave out your name or details like your country’s name or other information so that the donations will totally be anonymous. This is a labor of love and I intend to keep it that way for as long as I can. Ric.

1 Comment (+add yours?)