
Hello, everybody! I sometimes like to visit flea-markets in order to look for bargains. You can occasionally see a couple of great deals but most of the stuff being sold are overpriced rubbish. There’s money in refuse some people say but that can go both-ways, too. Today, I will show you something that I occasionally see on my trips to the flea-market. Unlike the overpriced junks that I see these are usually being sold for very little money, it’s a great find if you could see one for sale under $20.00.
Introduction:
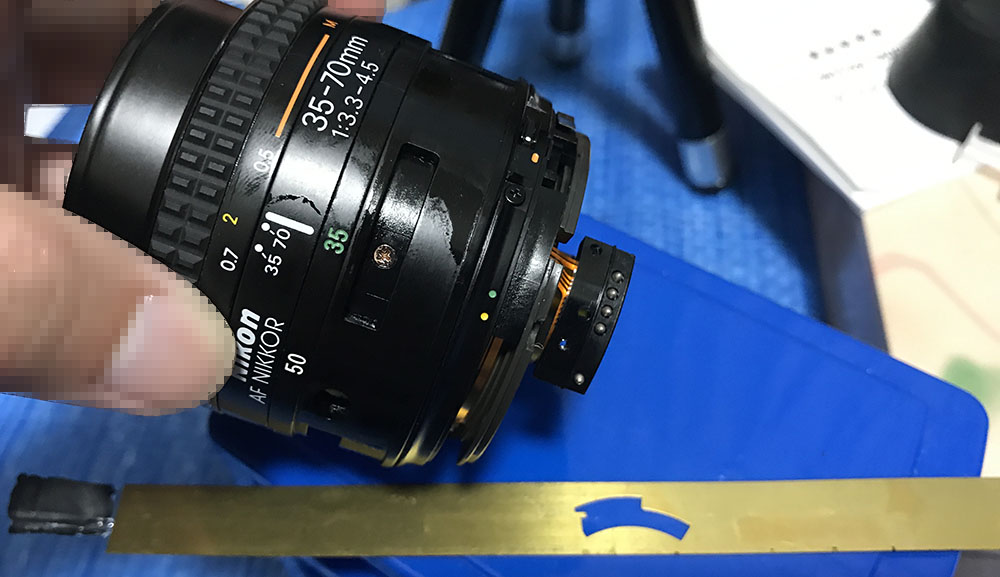
The Zoom-Nikkor 35-70mm f/3.3-4.5 AF (N) is an updated version of the Zoom-Nikkor 35-70mm f/3.3-4.5 AF. It’s made from 1989 to 1994 with the last batches made in Thailand. Many people were dismayed at the quality of many early autofocus Nikkors so a couple of them were upgraded with newer barrels and this is one of them. Despite all that, this lens didn’t receive the important D-chip that enables it to work better with speed-lights. I don’t know why this didn’t get that upgrade but I suspect that it may have to do with keeping costs down.

It feels a bit more “premium” compared to the Zoom-Nikkor 35-70mm f/3.3-4.5 AF. The focusing ring is broader and some of the parts feel a lot sturdier. It handles better as well thanks to the improved focusing ring. If you think that nobody cares about it since it’s an autofocus lens then you’re wrong because people still shoot with manual cameras at the time this was still being sold.
It has the same optics as the Zoom-Nikkor 35-70mm f/3.3-4.5 AF which got that from the older Zoom-Nikkor 35-70mm f/3.3-4.5 Ai-S. They all perform roughly the same which is good because the optics are quite impressive for a cheap, bottom-shelf lens. You’ll be able to take plenty of great photos with it. If you want to see how this performs, read both articles. I assume that they all perform in an identical way.
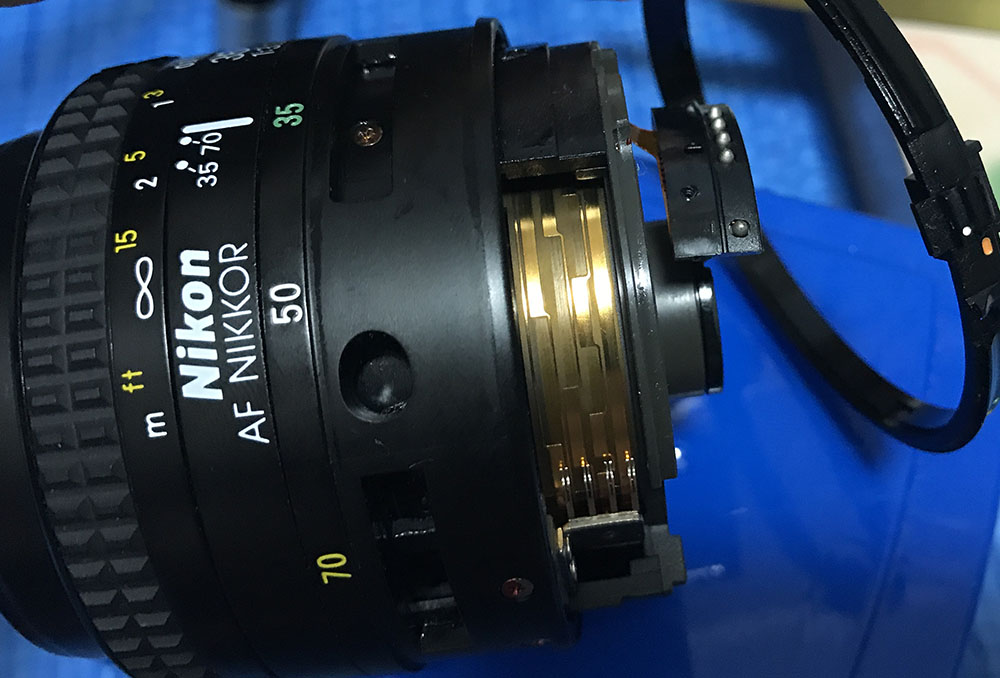
This is also one of the first Nikkors to be made in Thailand which some people have an aversion to. I don’t see that as anything negative because it made sure that its price was kept competitive. Despite that, it doesn’t feel cheap at all when you hold it. The improved focusing ring and the lock of the aperture ring made this feel a lot better compared to the older Zoom-Nikkor 35-70mm f/3.3-4.5 AF which feels a bit flimsy at times. The barrel is completely-new in terms of construction so that requires a separate repair article.
If you want to know how this lens performs read my article about the Zoom-Nikkor 35-70mm f/3.3-4.5 AF since the optics are the same. Any difference in performance should be attributed to sample variation, nothing more. Having said that, this is a nice lens, I think that this is still a nice option for FX but not so much for DX because the crop-factor will give you a resulting focal-range that is awkward to work with.
I highly recommend this lens for anybody looking for a cheap zoom. The older Zoom-Nikkor 35-70mm f/3.3-4.5 AF is also a great alternative and they’re a bit cheaper, too. There’s nothing cheap about their optical quality, these perform quite well for their class you will ask yourself why you would want to spend more for a premium lens. I could take great photos with it and so should you. When shopping for these make sure that the barrels all turn smoothly and the optics are clean and clear. The iris should be snappy, too. Since these were sold to amateurs you should check the condition thoroughly, they’re usually stored or used poorly. Follow my tips and you will be guaranteed with a nice lens that will last you several years. Happy hunting.
Before We Begin:
If this is your first attempt at repairing a lens then I suggest that you check my previous posts regarding screws & drivers, grease and other things. Also read what I wrote about the tools that you’ll need to fix your Nikkors.
I suggest that you read these primers before you begin (for beginners):
Reading these primers should lessen the chance of ruining your lens if you are a novice. Before opening up any lens, always look for other people who have done so in YouTube or the internet. Information is scarce, vague and scattered (that is why I started this) but you can still find some information if you search carefully.
I highly recommend that you read my working with helicoids post because this is very important and getting it wrong can ruin your day. If I can force you to read this, I would. It is that important!
For more advanced topics, you can read my fungus removal post as a start. It has lots of useful information, it will be beneficial for you to read this.
Disassembly:
I won’t be doing a complete teardown but we’ll get close. Servicing autofocus lenses isn’t the same as working on a manual lens, you only dismantle what you need unless it has terrible fungal growth. This isn’t difficult to service if you have the right tools but you’ll have to be careful with it since most of the parts are plastic. Don’t flood anything thinking that it will help dissolve the seals, you may actually dissolve something important. If your lens needs to be repaired, just buy a new one because these don’t cost much anyway.
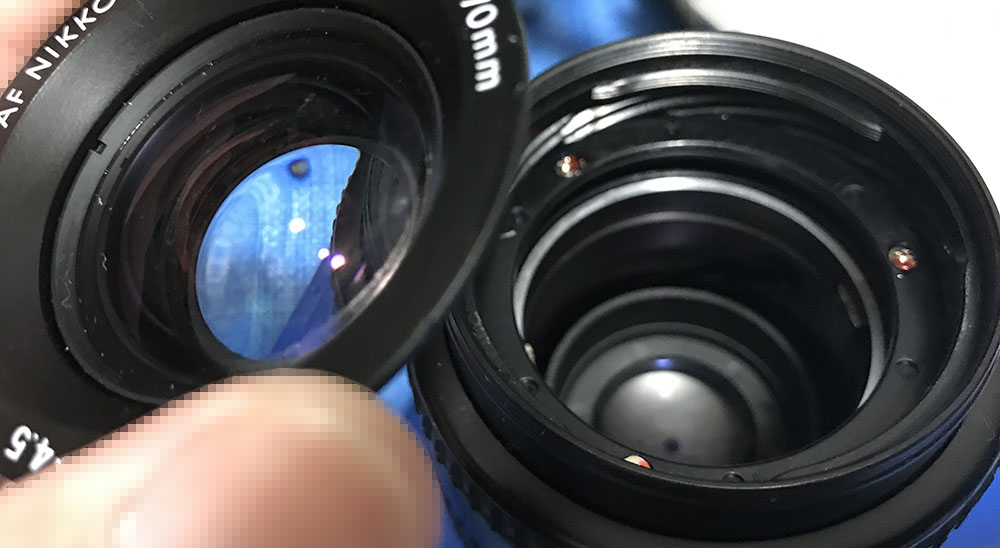
Unscrew the front optics assembly with a rubber tool. It may be a bit tough to remove, a drop of alcohol helps in softening the seal. Never flood this part since the alcohol will reach the helicoids. The front element can be removed by unscrewing its retainer off. Don’t bother removing the 2nd group as it’s sealed to its housing.

Carefully extract this with a special tool, you can reach it easier if you zoom the barrel.

Be careful when unscrewing or installing it since the threads are plastic, you could easily cross-thread it. The glass sealed so don’t bother removing it.

Carefully extract the small screws to remove the baffle. There’s a tall screw at the 6:00 position, it prevents the lens from turning-beyond the mount’s lock, damaging both the lens and the camera. Don’t forget to put it back properly later.

Extract the screws of the bayonet mount so you can remove it. Many people get stuck here because they don’t have the right tools and strip the screws. To prevent this from happening to you, read my article about how to remove bayonet screws. Follow my guide and that should help educate you on how its done and which drivers you should use.
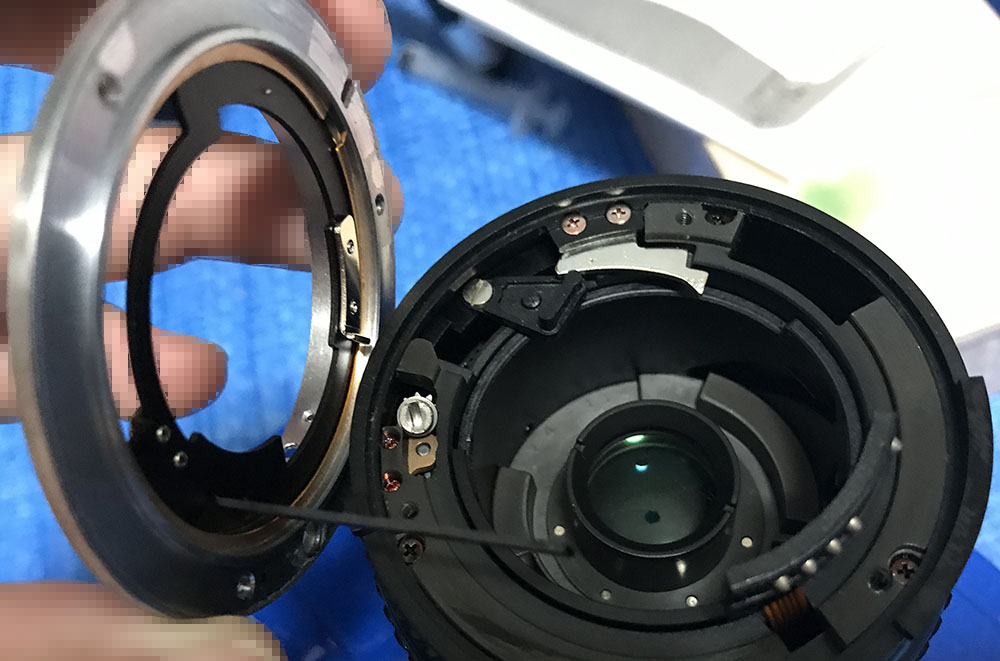
Remove the aperture ring. Note that it has a long lever which controls the iris mechanism. Be sure to put that back properly when it’s time to reassemble this.
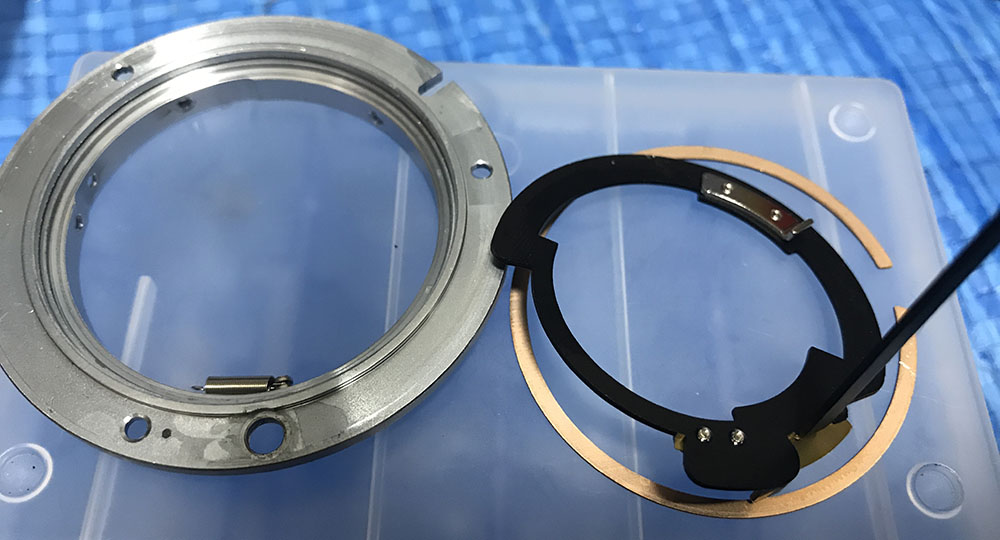
You can dismantle the bayonet mount assembly further if you wish but there’s no benefit in doing this unless it’s really filthy.
Remove the aperture ring, be careful not to lose this drive-screw.
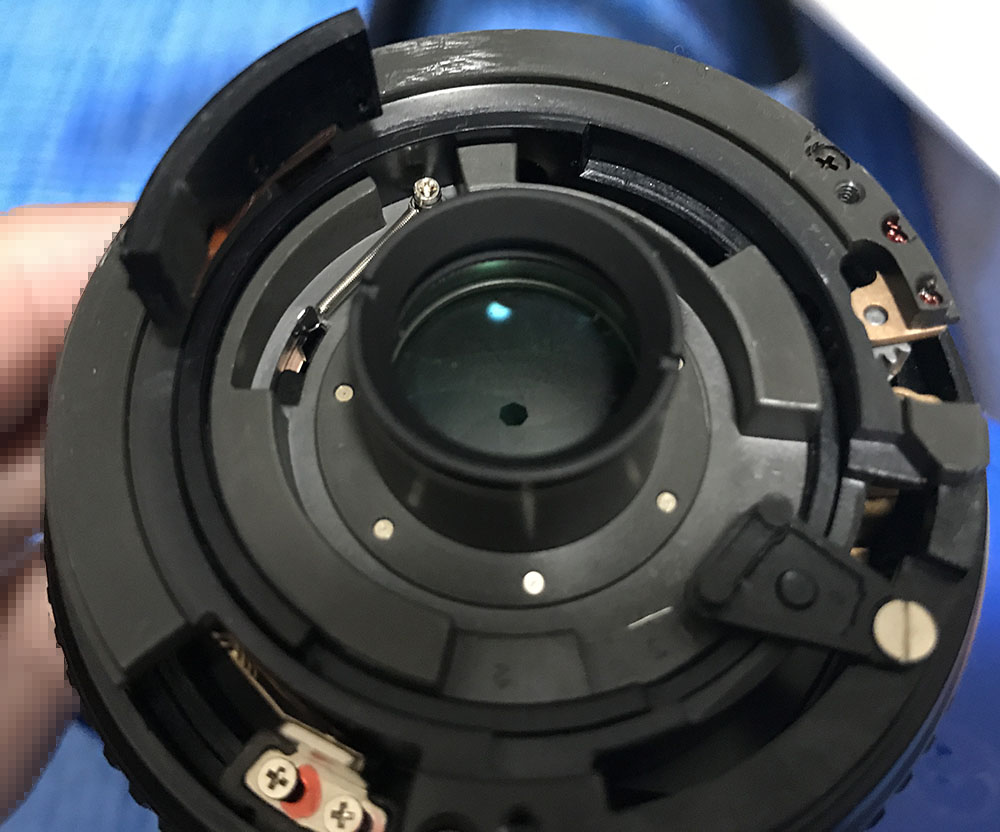
You can dismantle the rear optics assembly by unscrewing this collar. There are 2 groups here, there is a shim spacer between them so don’t forget to note all of their directions.
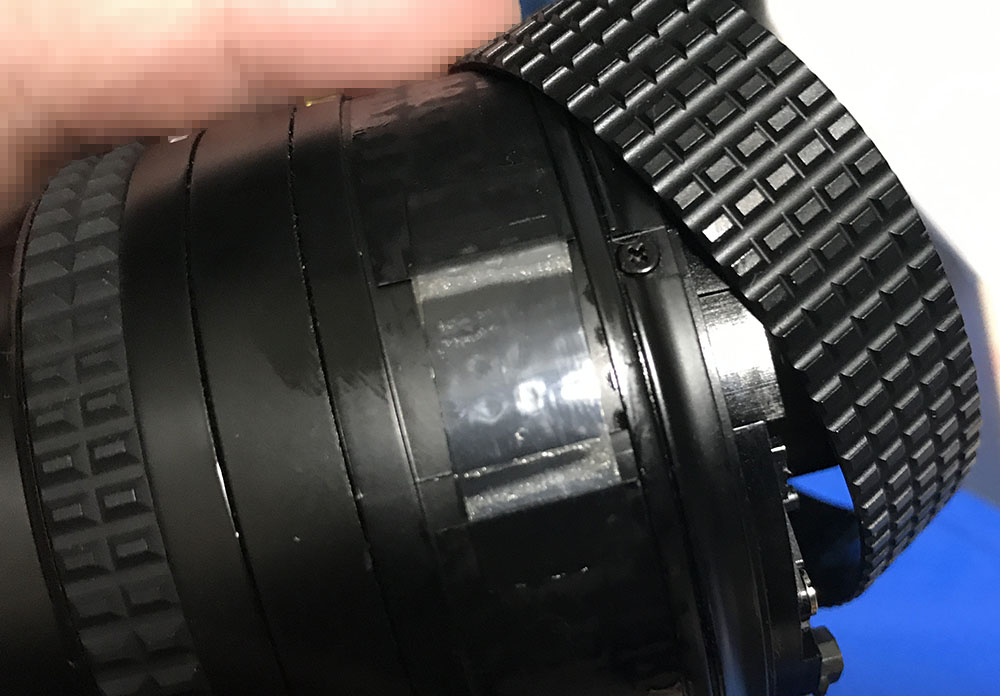
Carefully remove the rubber part of the focusing ring.
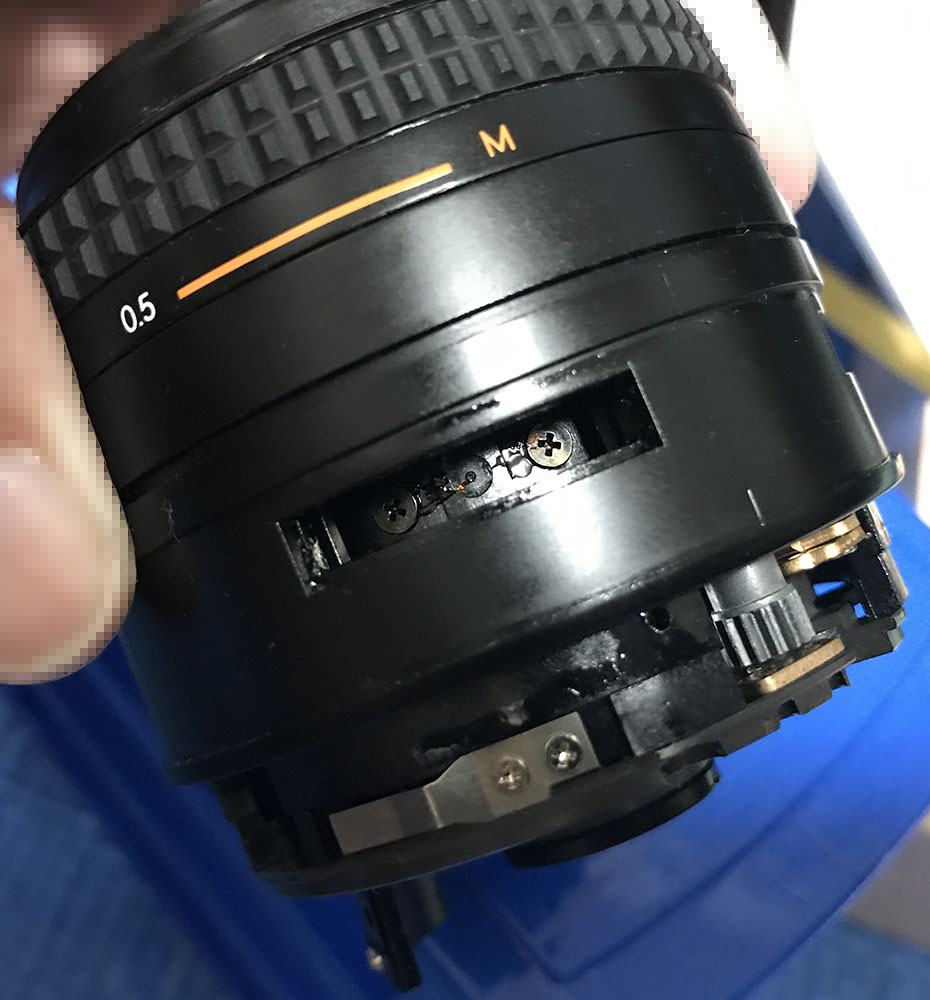
Remove the brass strip covering the access holes, it’s merely secured with a strip of tape.
Extract the screws of this ring to remove it, be careful not to misplace anything like the aperture ring’s lock. It has a small spring which can be misplaced easily.

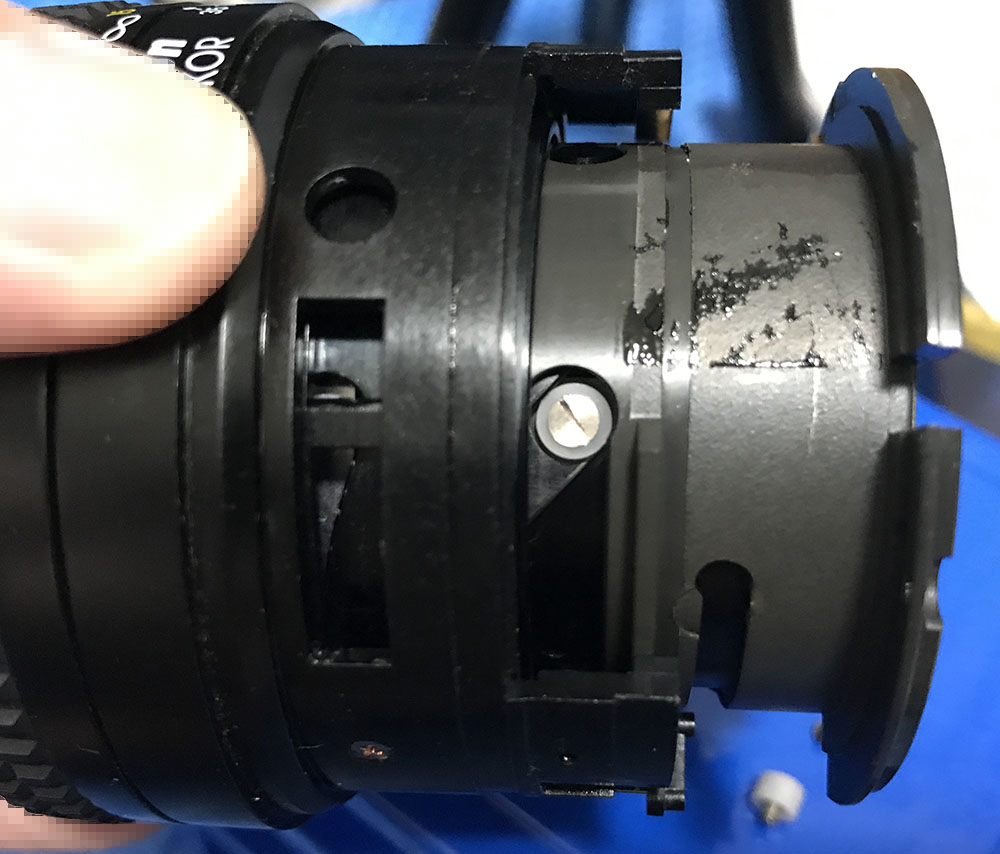
The brush is delicate, they can get bent easily and give you wrong zoom information. Mark its position before you remove it.
Remove this thing, it prevents the barrel from zooming-past its range.
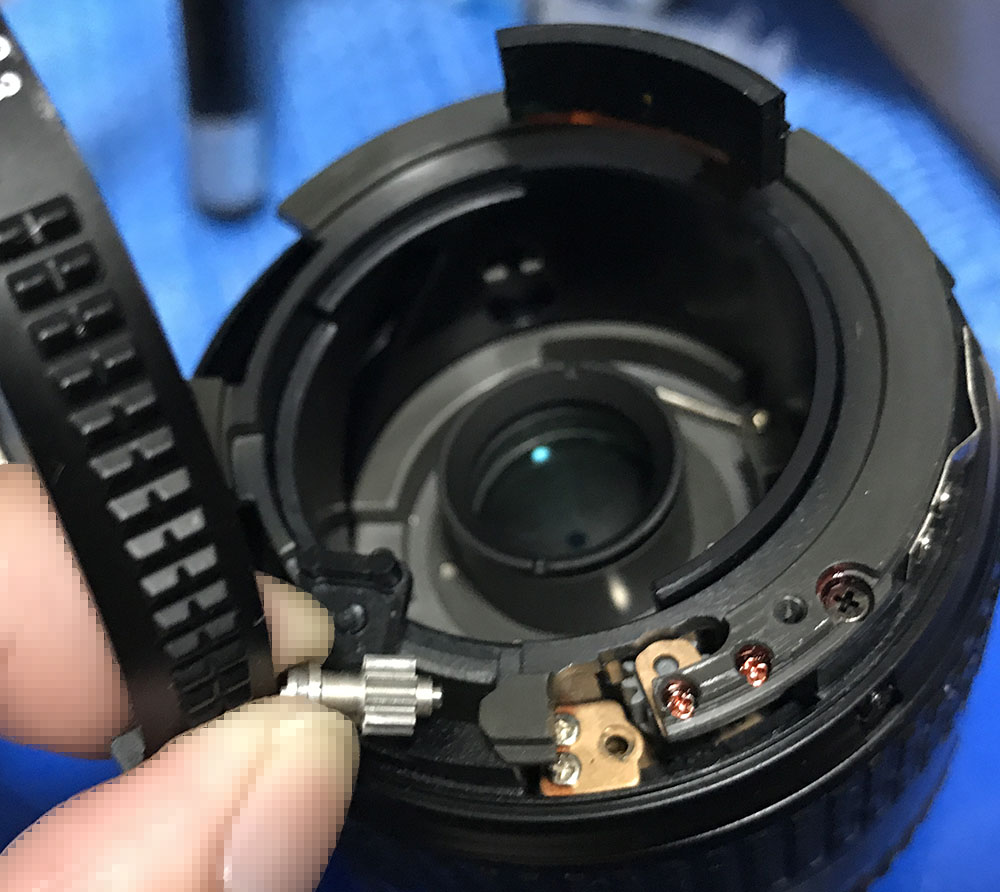
Extract these screws so you can remove the zoom ring.

Remove the zoom ring.
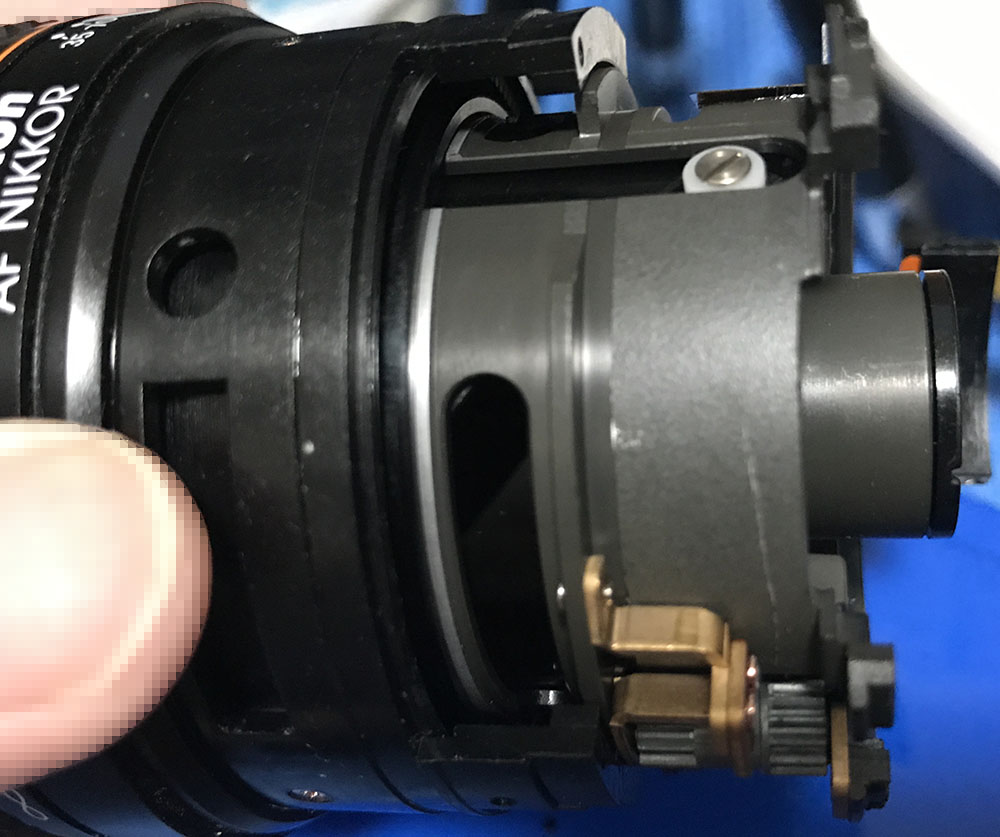
You can now access the gear-train of the focusing mechanism. If your lens won’t focus smoothly this is one of the things that you should check.

Mark the position of the spring before you remove it.

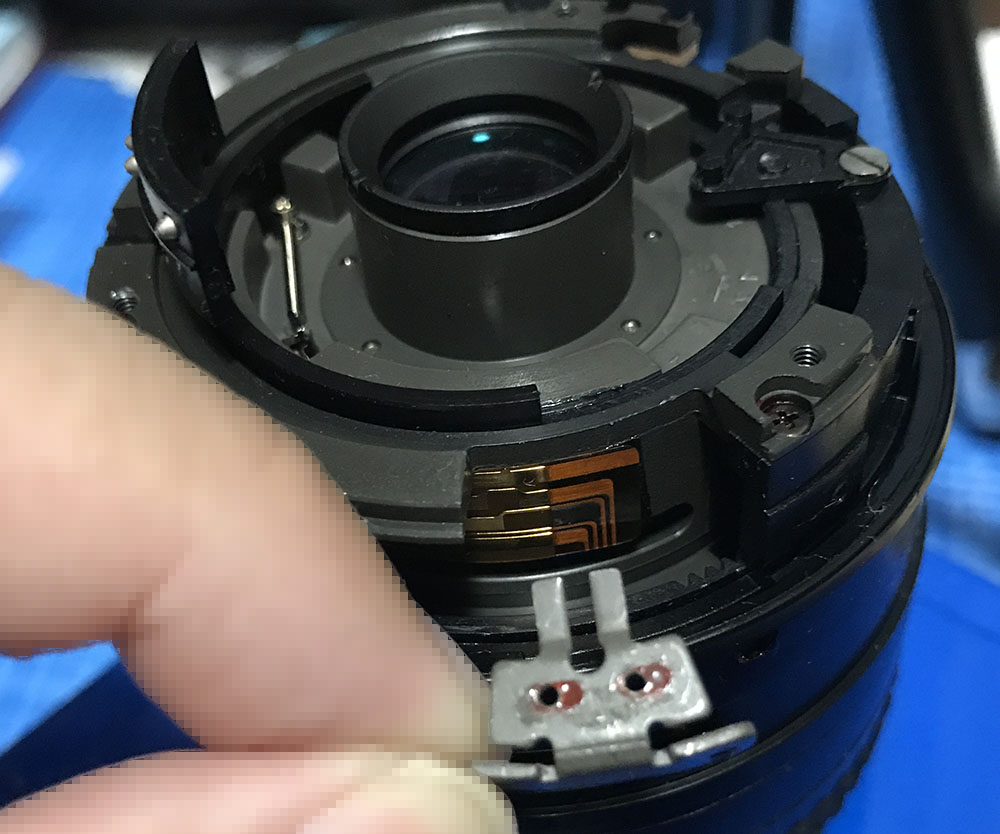
The FPC is secured with tape, remove it if you need to replace this part but be careful no note its position. You should be able to put this back properly or the lens won’t give you the correct zoom information.
Extract these rollers carefully in order to remove the floating mechanism.

Carefully remove it and wipe it clean. You can dismantle the iris if yours is dirty.
Clean everything properly, wipe the contacts of the brush well and make sure that they touch the brush. Don’t forget to flush the focusing the focusing mechanism’s transmission with naphtha, place a tiny small drop of oil at their pivots and grease the teeth with very-light grease. You normally won’t have to get this deep but here’s what you need to know if that’s necessary.
Conclusion:
These usually won’t take an hour to fix since their construction is simple and you don’t dismantle these to their bare components. It will only take time when the iris has to be serviced or the rear optics are dirty. This is a nice exercise for those who want to unwind after a long day’s work.
Thanks for following my work, if you liked this article please share this with your friends so it will get more views. This site earns around $0.50 a day, it’s totally reliant on views. You can also opt to support this site, it helps me offset the cost of maintenance and hosting. You’re also helping me purchase, process and scan film. This site promotes the use of film so we’re all in this together. See you again in the next article, Ric.
Help Support this Blog:
Maintaining this blog requires money to operate. If you think that this site has helped you or you want to show your support by helping with the site’s upkeep, you can make a small donation to my paypal.com (richardHaw888@gmail.com). Money is not my prime motivation for this blog and I believe that I have enough to run this but you can help me make this site (and the companion facebook page) grow.
Buy me a roll of film or a burger?
Thank you very much for your continued support!
$2.00
Helping support this site will ensure that this will be kept going as long as I have the time and energy for this. I would appreciate it if you just leave out your name or details like your country’s name or other information so that the donations will totally be anonymous. This is a labor of love and I intend to keep it that way for as long as I can. Ric.

Jun 10, 2023 @ 23:06:30
I used one of these little 35-70 lenses as a manual focus lens on a Nikon F3. The optical quality was excellent, especially considering the modest price.