
Hello, everybody! I was watching some old basketball matches and I saw a familiar face, Muggsy Bogues. He’s tiny by NBA standards, certainly not the typical player in this league. I always admired him since he held his own in a game dominated by giants. He showed determination and drive, that was his biggest asset and that made him very entertaining to watch. There were many people who were surprised back then at his performance and he was and still is an inspiration for a lot of people who play ball. Today, I will show you a lens that’s tiny but it packs a huge punch. It’s unassuming and people poo-poo’d it on the internet but I’ll demonstrate just how nice it is specially considering its humble origins as a “kit-lens”.
Introduction:
The Zoom-Nikkor 35-70mm f/3.3-4.5 Ai-S was made from 1984-2005. It’s what Nikon had to counter what its competitors were making at the time. It was a time when cheap, compact and competitive zoom-lenses were replacing the normal 50mm prime lens as part of a beginner’s kit. They have to be cheap, small and good in order to attract would-be photographers. Consider these as entry-level drugs to photography the same way as 18-55mm zooms were for photographers from the mid-2000s up to this day.

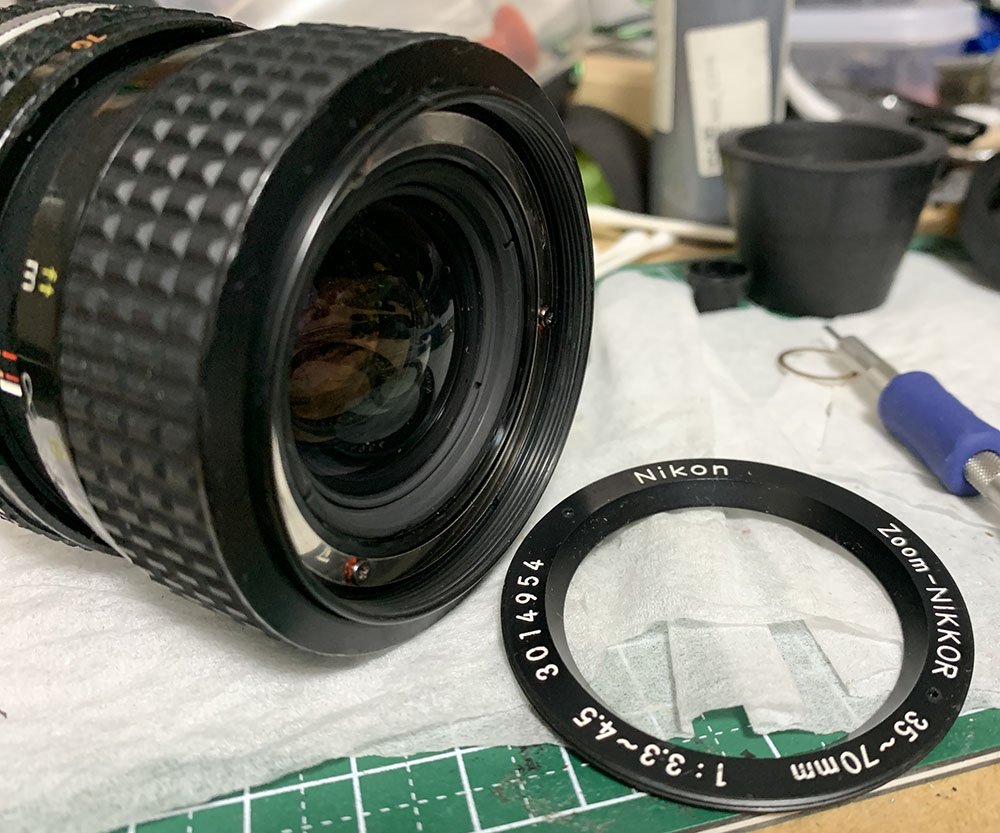
This is a really cheap-looking Nikkor, even the grip is plastic. Despite that, it can handle a lot of abuse as you can see from my sample. I got this for a low price because of its condition. I wouldn’t bother with it if it costs more. This is one of the bottom-shelf Nikkors that were made for the budget-conscious. Many people confuse this with the Zoom-Nikkor 35-70mm f/3.5-4.8 Ai-S, the names sound similar and they look nearly-identical, too. The latter is what many people use to reference with this lens, they may have been confused, too. And that also contributes to this lens’ bad reputation.
It has a simple optical formula consisting of 8-elements-in-7-groups. It’s not as complicated as most zooms from the same era since it had to be cheap. It has a decent optical performance bordering on good depending on who you ask, don’t believe what people say about this lens since it’s quite good for its class and you should also consider that it was made for lower standards.
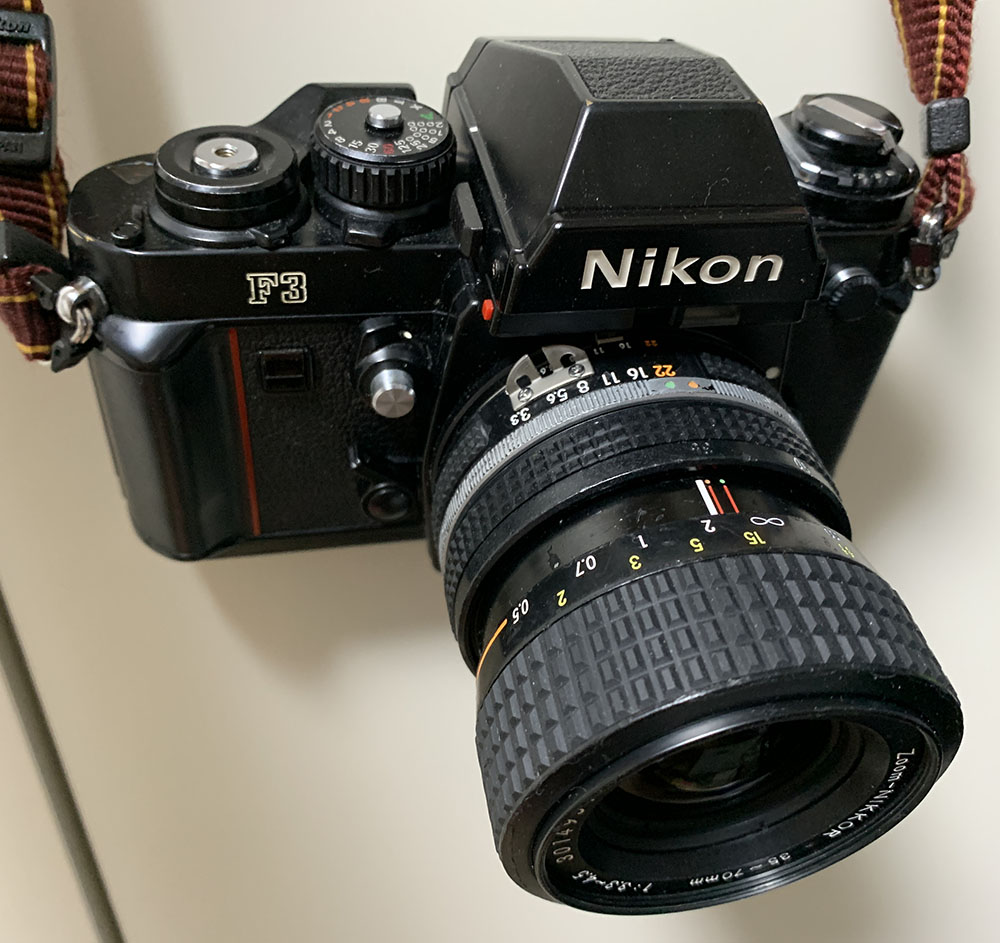
A mis-match! A Nikon F3 certainly deserves something better. It’s a compact lens, its light as it has plenty of plastic parts. Handling is fine but it can be a bit confusing to your hands specially if you try turning the aperture ring or the zoom-ring since both of them are situated really close to each other. It’s annoying but it can’t be helped. The focusing ring is quite broad and is easy to grip. It has a short focus-throw which is handy for some situations and it has that macro-mode gimmick that many zooms of the same era have. This feature is very handy and you will find yourself using it quite often. With it, you’re able to focus to almost 1ft which will give you good magnification. It is great for taking detail shots as you’ll soon see in this article.
Knowing how your lens performs is key to maximizing it. You’ll know how to exploit its strengths and avoid its weaknesses. This knowledge will help you decide if a lens stays in the cabinet or not. The following sets of photos were taken from f/3.3 (f/4.5), f/5.6 and f/8 from left-to-right. These are what I assume to be the most common apertures where people would want to use this lens with. I shot these with a Nikon Df.


(Click to enlarge)
Vignetting is quite heavy wide-open, specially at 35mm, it’s moderate when set to 50mm and is quite decent at 75mm. It improves by f/5.6 and it’s not as obvious at f/8 but it won’t really go away at 35mm. Distortion is terrible, it’s worst at 35mm where the profile is complex, it’s not as bad at 50mm but it’s still visible, 70mm is quite good. This is surprising since I would expect this to perform better at 50mm but the long-end is a lot better. From these, I can say that this lens performs best at 75mm, could it be that this is the starting-point for this optical design? I am not a lens engineer but I can imagine that a design for a zoom lens should start at one focal length.
It’s quite resistant to flaring and ghosts, at least on an overcast day. I did not expect this to perform this well since the sun was visible in the sky that day and zooms generally perform poorly in this condition.


(Click to enlarge)
Chromatic aberration is present wide-open but it’s not bad at all. Stopping it down to f/5.6 eliminates much of it but you’ll still see it. You won’t see much of it by f/8, some traces of it will still be present but in negligible amounts. If it bothers you, focus-breathing is terrible. Somebody also mentioned that it also has the tendency to shift-focus on some samples, a sign that it had been repaired or probably poor quality-control.


(Click to enlarge)
The character of the bokeh is quite bad but only if you have variables in the scene that will trigger it. It’s generally decent on real-world photos so you’re assured that it will give you nice photos if you know how to avoid the things that will make this lens render ugly out-of-focus details.


(Click to enlarge)
It’s surprisingly sharp, my expectations were not that high for this lens so it certainly exceeded my preconceived ideas of it. Wide-open, it renders sharp and the contrast is quite good but the resolution is lacking. Some spherical aberration can be observed at 35mm but that’s all. Stopping it down to f/5.6 will help boost its resolution so it could now support its sharpness. If you’re looking for nice, crisp details at the center then stopping it down to f/8 is the only way to do it. The corners look better, too. From what I can see, this lens performs better at the long-end.
Its ability to take close-ups is a big asset. I love this feature a lot and you will be addicted to it. You will soon find yourself taking close-ups more with this lens than anything.
Here’s an example of terrible bokeh quality on a real-world scenario. This is not so much of a problem for the beginning photographer which is its target market but people who demand more will find this unacceptable.

Its quite sharp and the contrast is also good even wide-open. It’s a nice lens, it’s just that people who review it didn’t put this lens in the right context, it’s not something that will rival a professional zoom in terms of performance, it was made for another demographic.

you can take nice photos with this lens, don’t believe what people say. Use it to your liking and just enjoy it for what it is.

It’s going to be a problem when shooting at low-light situations but cameras these days have good high-ISO performance so you can shoot at ISO3200 to your heart’s content.

It’s a very practical lens with very practical specs. Its versatility and size are the key to its success. You can use it for any occasion so long as you know its limits and just work within its parameters.

Street and travel photography will be your main use for this lens. If I were to go on a vacation on a dangerous country, this lens will be the first one I’ll get from my cabinet. It’s inexpensive but it performs quite well. It won’t be the best lens in terms of image quality but it gets the job done.


(Click to enlarge)
Here are more photos for you to enjoy. I really enjoyed using it, it was a big surprise since I was thinking that it would perform poorly but it did well. It certainly is an asset with the right photographer if his expectations are not high. It really fulfilled its job for its target market, the new photographer.
Let’s now see some photos that were taken with film. I love using film, it has a unique look that’s difficult to simulate with a digital camera. Film grain is special, it can help hide a lens’ flaws or amplify them. It reacts differently to light, giving you a unique look that a digital camera won’t be able to yield. It is also good to observe how this lens performs with it since it was designed to be used with it, it’s only fair that we judge this with its intended medium. I took these photos with a Nikon F3 loaded with Kodak Gold 200.

This lens has a macro-mode gimmick which I find very useful. It’s handy for a lot of situations and you won’t get tired using it. The rendering is smooth, I like how it didn’t produce any clumpy-looking artifacts in the bokeh. Sure, it is not perfect but it’s still quite good considering its nature.

It’s a sharp lens when used with film. It has enough resolution to produce a nice, sharp photo at nearly every focal length.

The rendering is quite nice when set to its minimum focusing distance. The point-of-focus is sharp and the background blur’s character is smooth. It has a good, balanced look.

The foliage at the back doesn’t look so bad but it could be better.

It has a surprisingly-good rendering. The focus-transition is smooth and it’s nice to see how refined the rendering is despite it being a cheap lens. I took this with the iris stopped-down a bit.
The resolving power of this lens is quite god with film when you stop-down the iris even for a bit. You’re able to get sharp photos from it with little to no effort at all.

Distortion may be a bit of a problem but it’s going to be obvious on pictures like this. I won’t be using this lens for taking architecture at all. It’s nice as a travel lens since its specs are practical.


(Click to enlarge)
Here are some more photos that I took with film. Click on them and inspect them for yourself. I love this lens a lot, specially when using it with film. It’s a nice, compact lens that’s the perfect travel companion so long as you have a fast-enough film loaded on your camera.
This is a really good lens for its class. Its performance is better then most of the bog-standard Zoom-Nikkors made from the 1980s and earlier. It’s handy for a lot of tasks and its compact dimensions makes this a great choice for a travel lens. Despite all these you will find better options specially ones with AF and they’re cheaper, too. The prices for these vary a lot, some will cost a lot while some will be cheaper than your last meal. This will depend on the condition of the lens and who’s selling. If you found one that’s reasonable, I will advise you to just get it. It’s really not worth buying one for a lot of cash since these will even be cheaper in the coming years. I won’t recommend it to collectors as they actually have no value. Despite all this it is a wonderful lens that I actually enjoyed shooting with. The even-cheaper Nikon 36-72mm f/3.5 Series-E is a good contender, it’s good but it doesn’t render quite as nice as this if I remember it correctly. For many, that lens is more than adequate, its maximum aperture does not change when you change your focal length. Please consider my thoughts on these two when you’re thing of buying any of them, my opinions will help you make a better decision.
Before We Begin:
If this is your first attempt at repairing a lens then I suggest that you check my previous posts regarding screws & drivers, grease and other things. Also read what I wrote about the tools that you’ll need to fix your Nikkors.
I suggest that you read these primers before you begin (for beginners):
Reading these primers should lessen the chance of ruining your lens if you are a novice. Before opening up any lens, always look for other people who have done so in Youtube or the internet. Information is scarce, vague and scattered (that is why I started this) but you can still find some information if you search carefully.
I highly recommend that you read my working with helicoids post because this is very important and getting it wrong can ruin your day. If I can force you to read this, I would. It is that important!
For more advanced topics, you can read my fungus removal post as a start. This post has a lot of useful information and it will be beneficial for you to read this.
Disassembly (Lens Barrel):
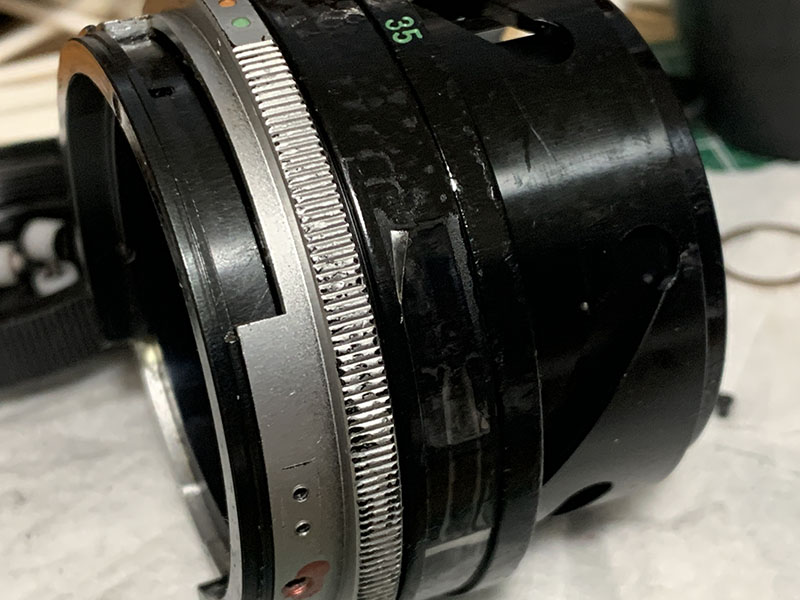
The lens barrel itself isn’t hard to tear-down as far as zooms are concerned. It has fewer parts since it’s a bottom-shelf lens. Despite that, it’s still difficult for a beginner to work with and you’ll require some experience in order to dismantle this correctly. You will require special tools, too. Some parts were made of plastic and using a metal tool may not be the best option. Speaking of plastic parts, it’s best that you avoid using strong solvents like MEK, even acetone is something that you shouldn’t even consider. Since this is a zoom, it is best that you take your time to note every detail before you remove any part so you’ll know how to put it back.
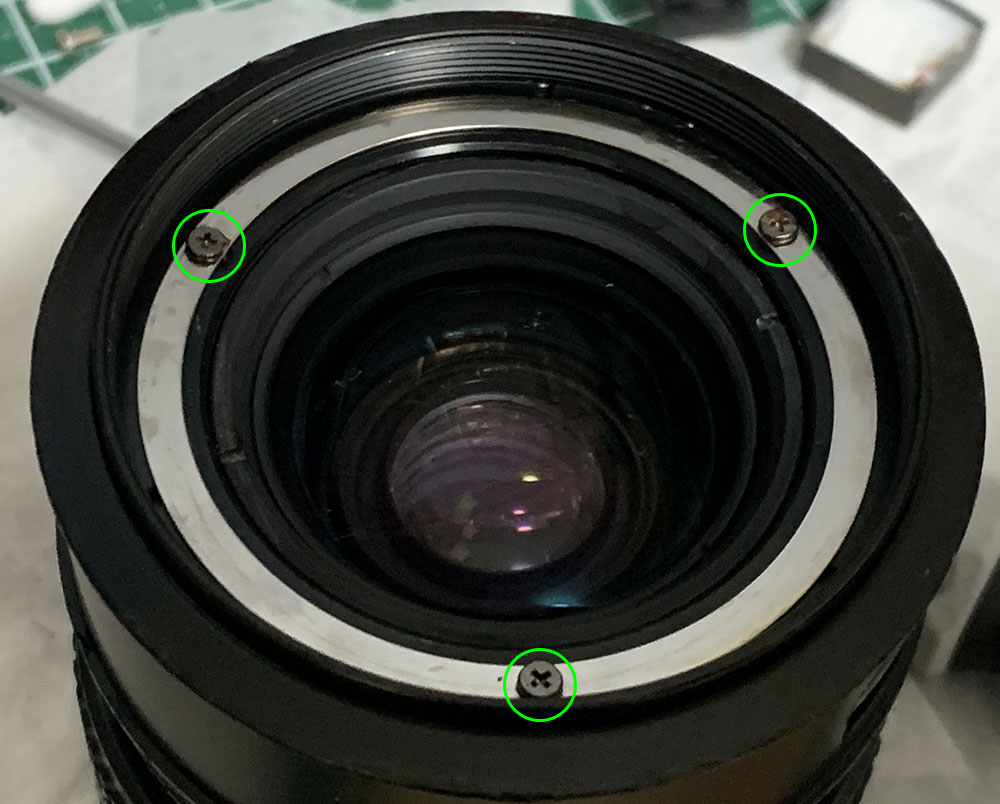
The bezel can be removed by a rubber cup. I found dimples on it for a lens spanner but I wouldn’t recommend using a metal tool on this. If this is stuck apply a few drops of alcohol on the threads and let that soften the seals.
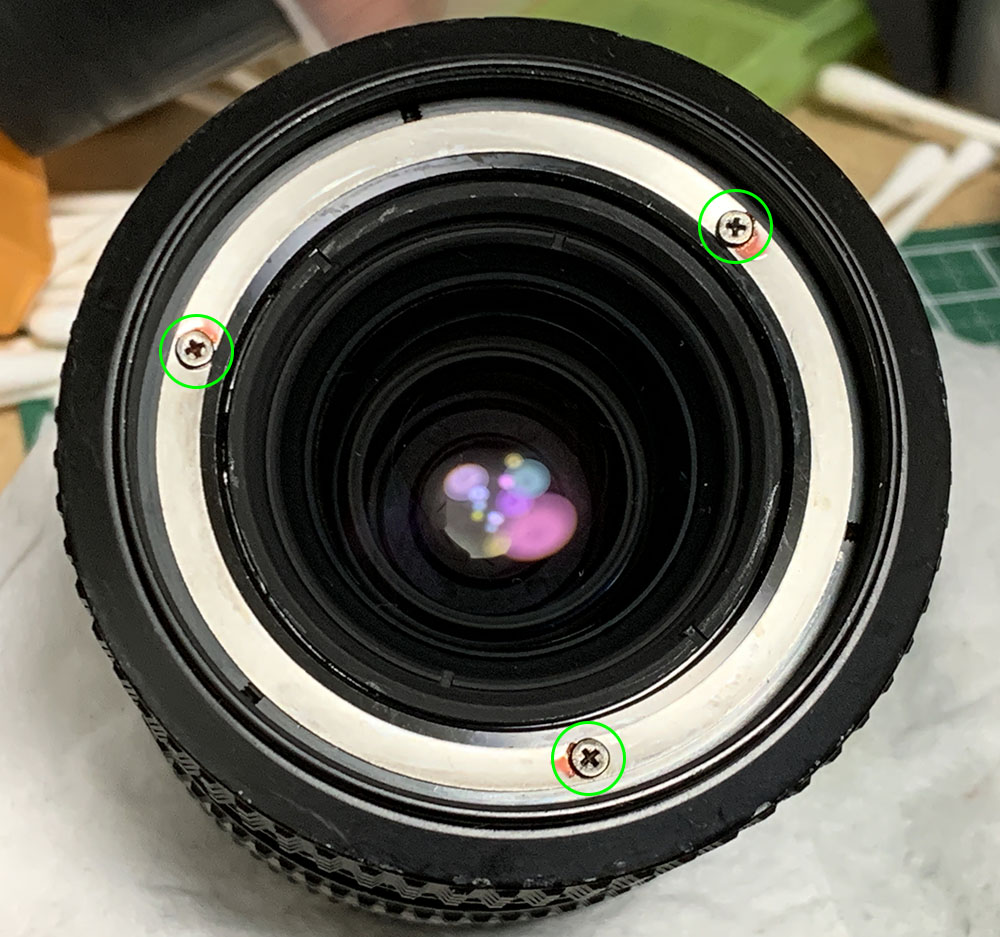
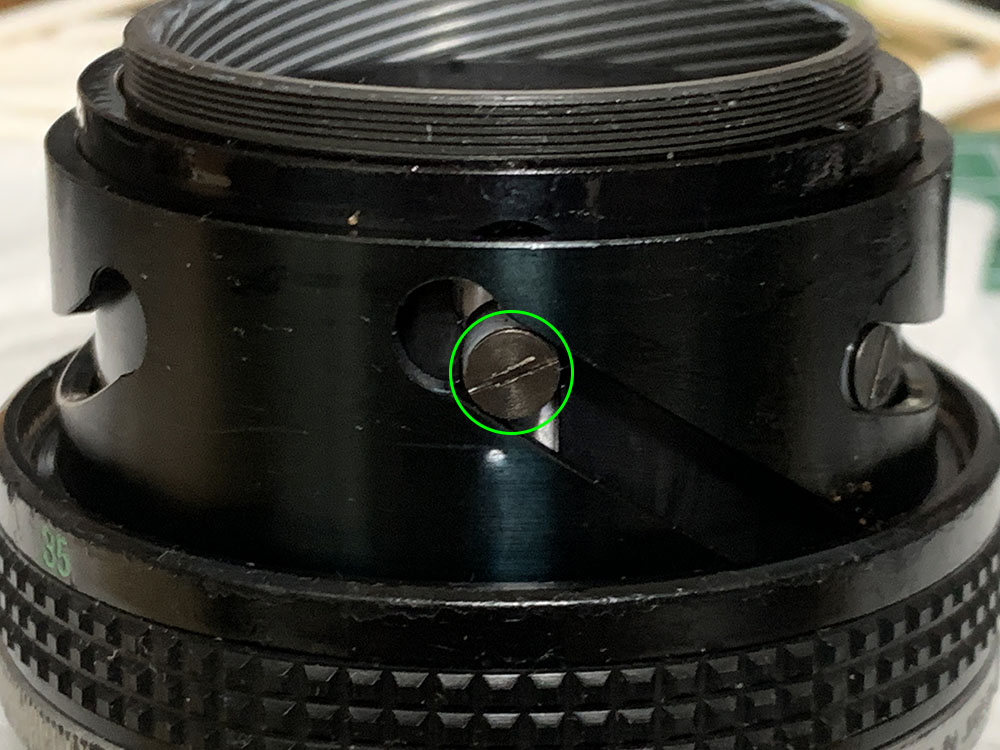
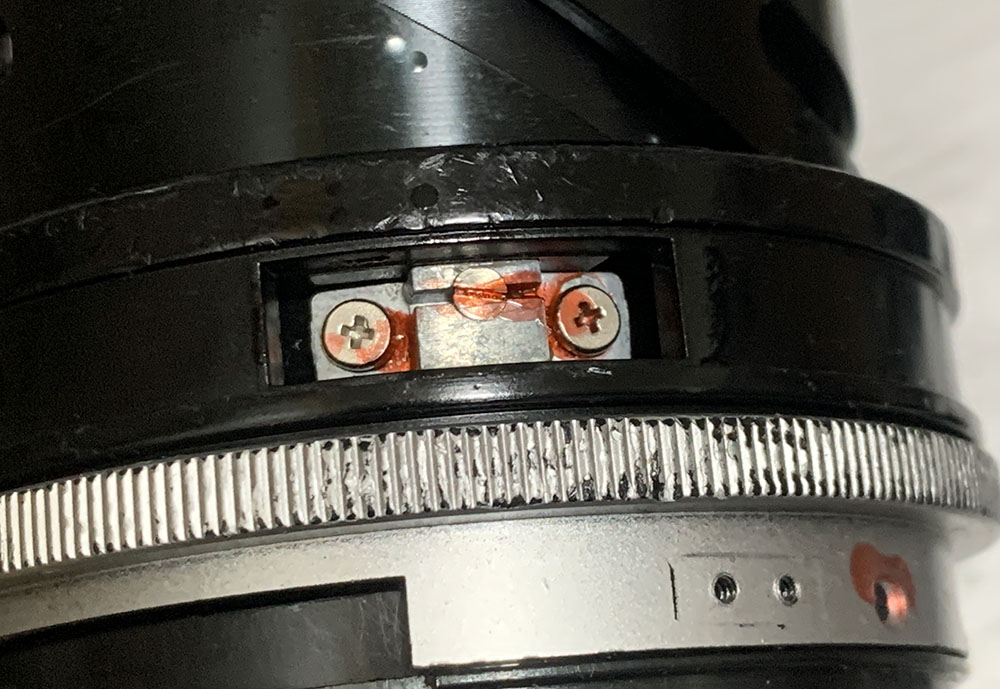
Extract these to remove the ring. It secures the focusing ring to the barrel, it also allows you to adjust your lens’ focus when you loosen it.
This is how it looks like when you remove it. Note that there are red seals at the holes, that’s used to secure the screws so they won’t accidentally move. I am also aware that Nikon repairers use these as indicators if something was tampered with.
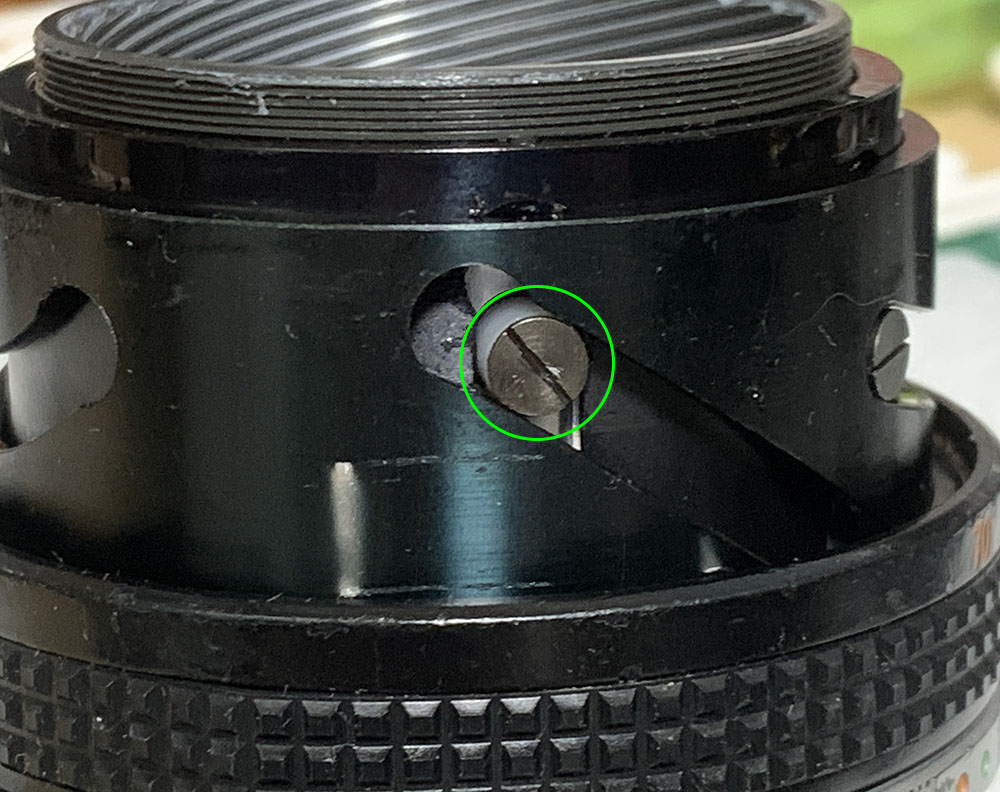
Remove the focusing ring carefully so you won’t turn the helicoid because it is important for you to mark this spot. This mark will help you identify the alignment of the helicoid with the barrel’s centerline.
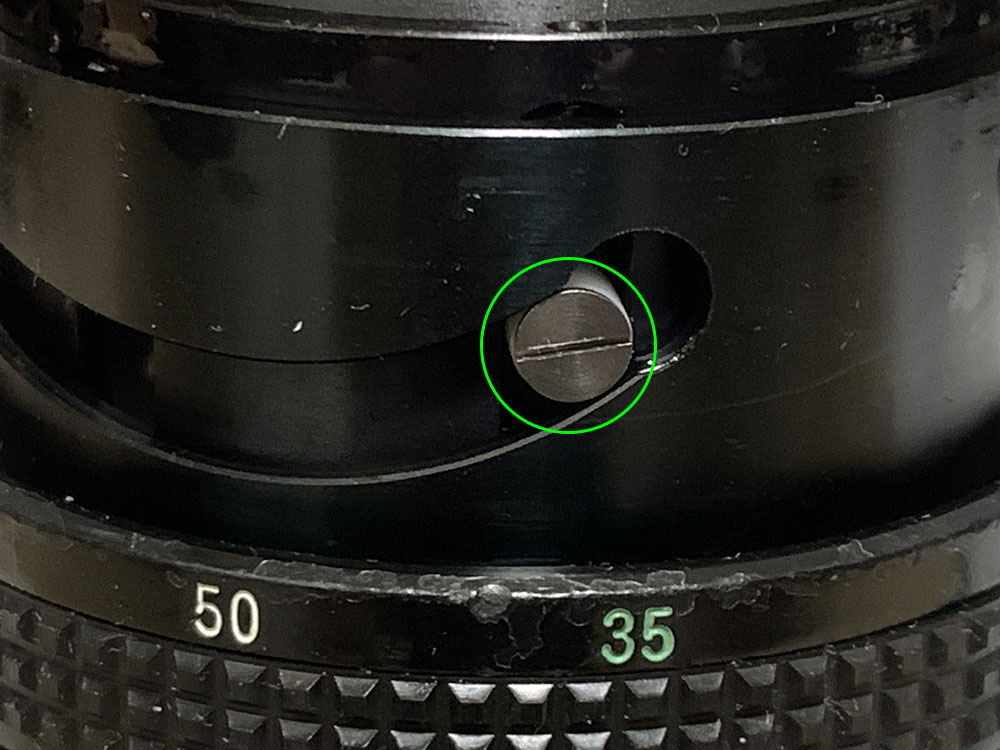
Separate the helicoid from the barrel and don’t forget to mark where these separated since this is also where they should mate. Many people forget this and they end up getting stuck since they don’t know how to put things back. Please read my article on how to work with helicoids. This will teach you the basics of working with them so you won’t get stuck.
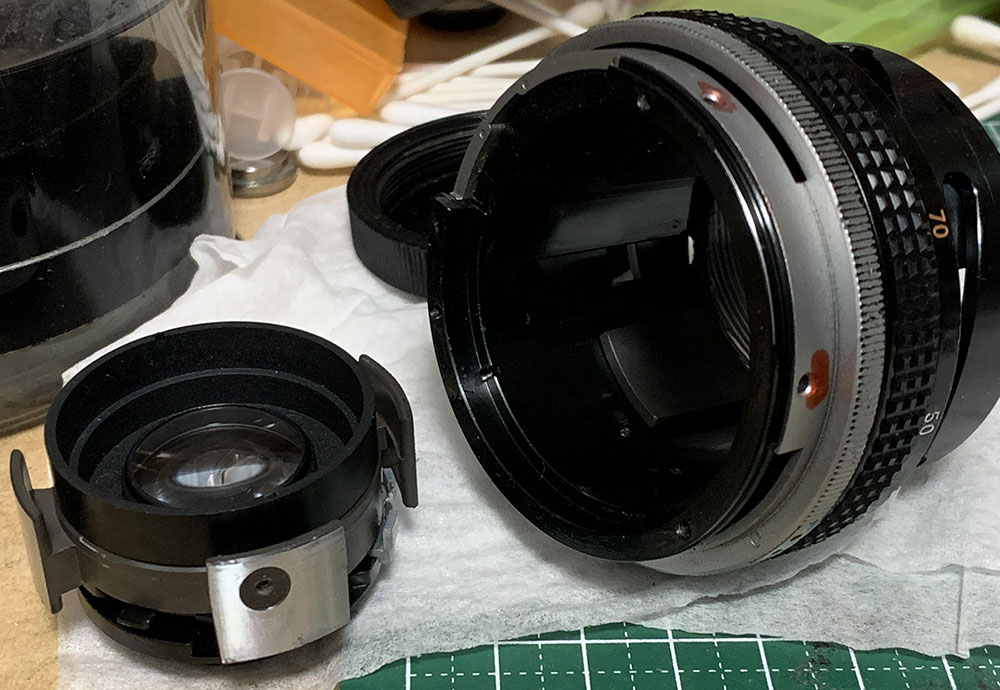
Use a lens spanner and carefully remove the front elements assembly. Use a bit of alcohol to soften the seals first, apply a few drops on the threads, that will help make things easier once the seals are dissolved.
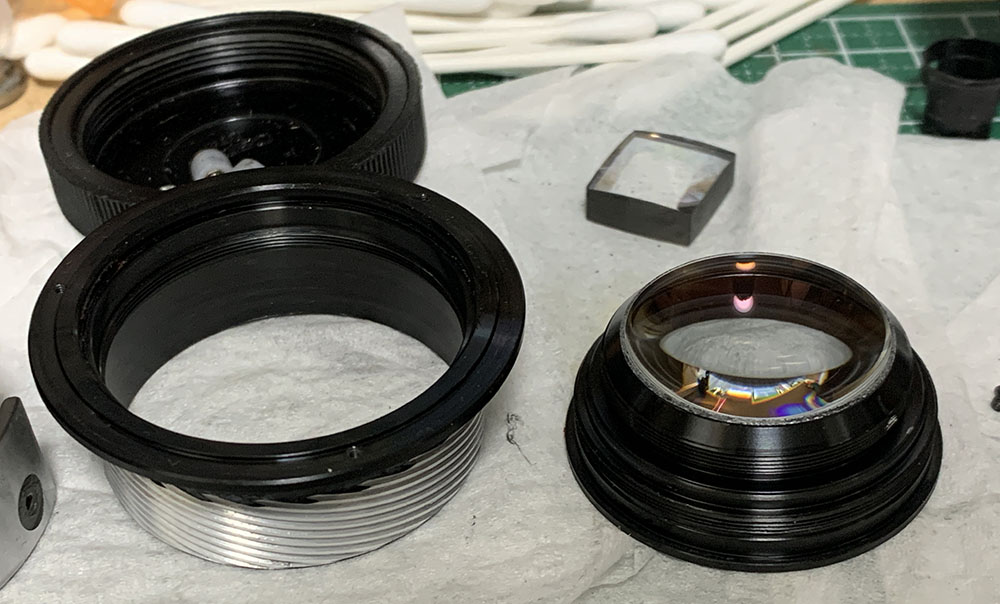
Store the front elements assembly in a safe place so you can work with the rest of the barrel without having to worry about it.
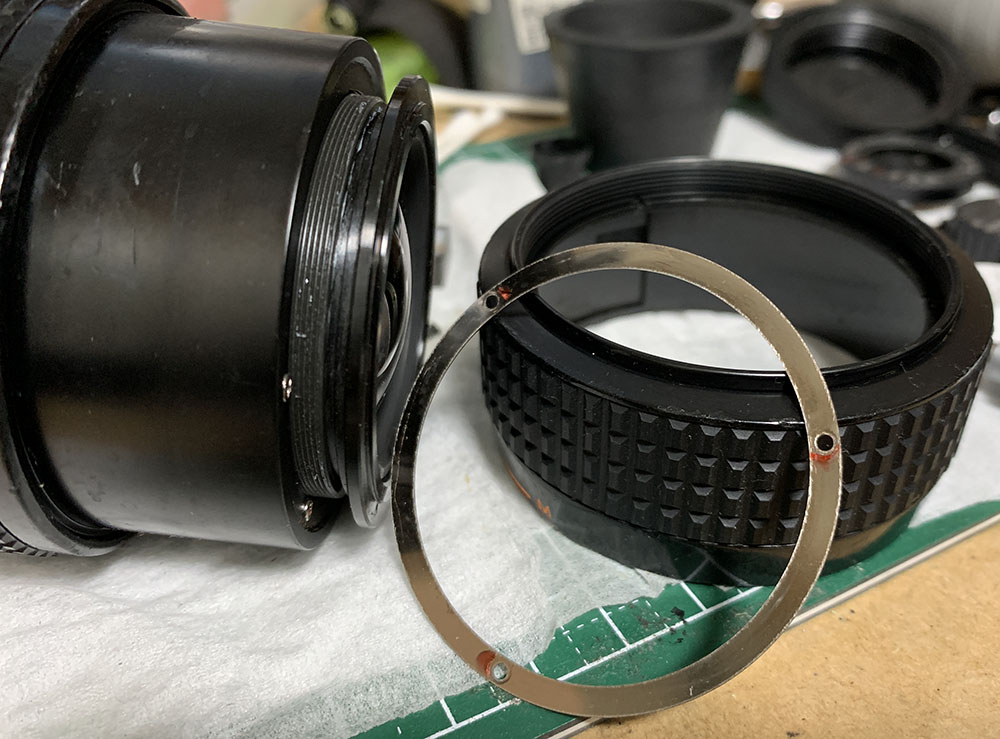
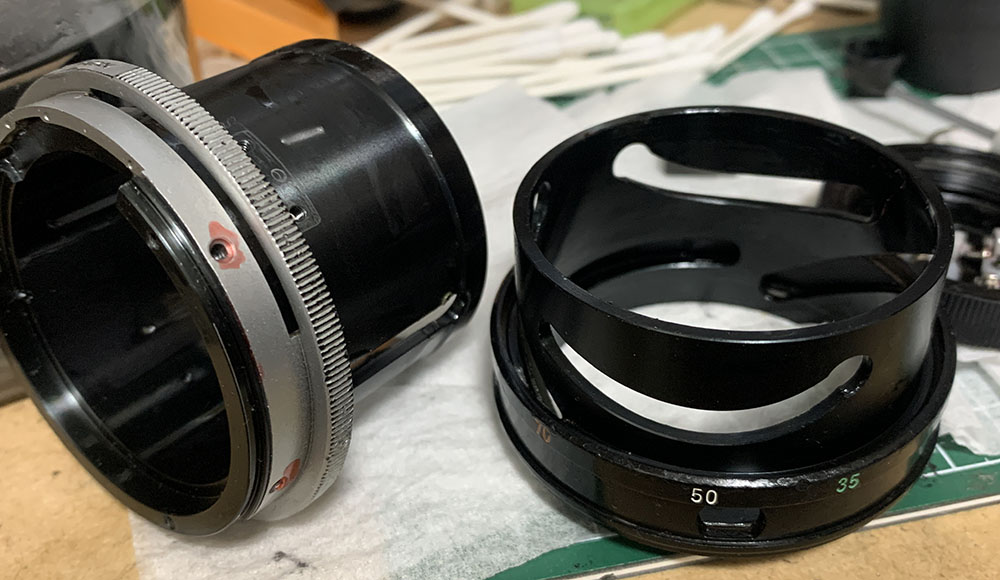
You can remove the sleeve by extracting these.
Remove the sleeve and clean it properly to remove any dirt.
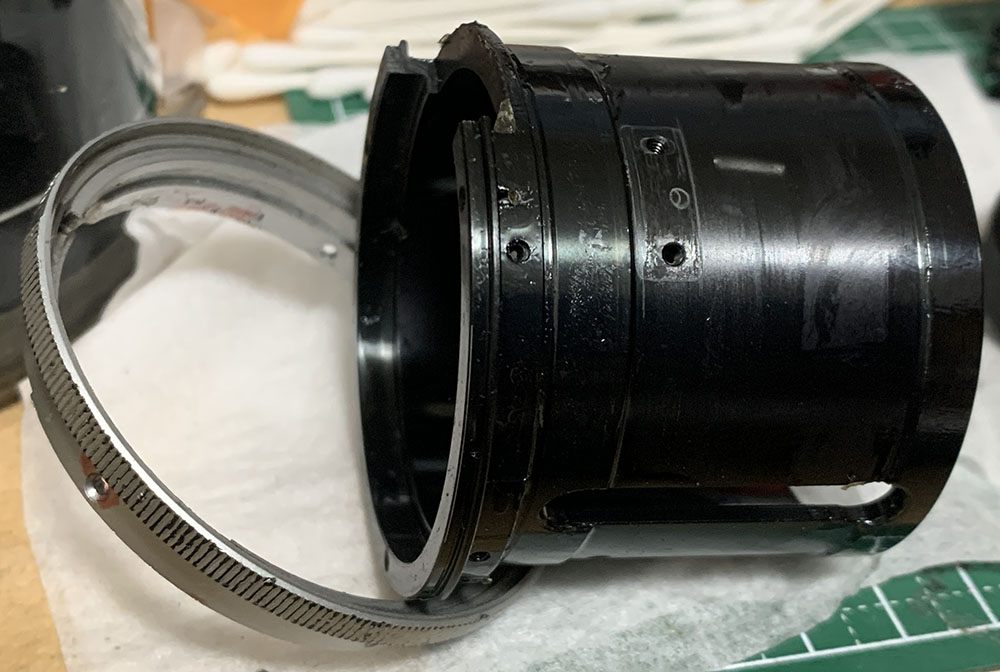
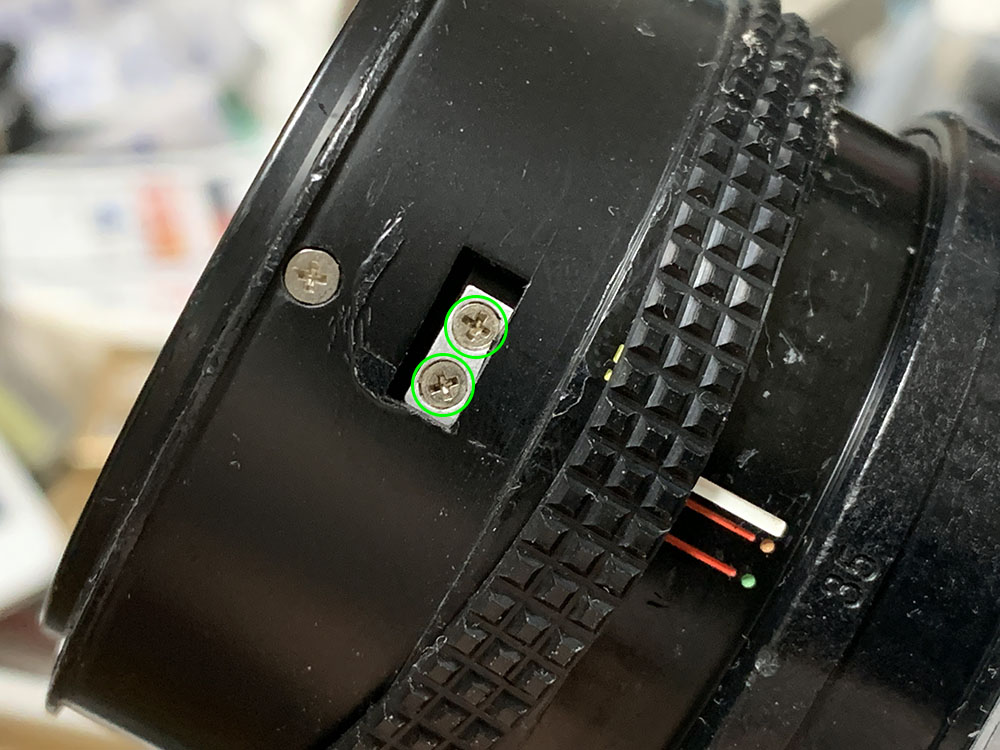
The bayonet mount can be removed easily. Be careful with the screws, these are special JIS screws so you’ll need special JIS drivers. Many get stuck here because they strip the heads of the screws. To prevent this from happening, read my article on how to remove bayonet screws.

The aperture ring can be easily removed. Be careful not to bend the tongue, it has to be straight in order to slide smoothly with the fork on the aperture mechanism.


(Click to enlarge)
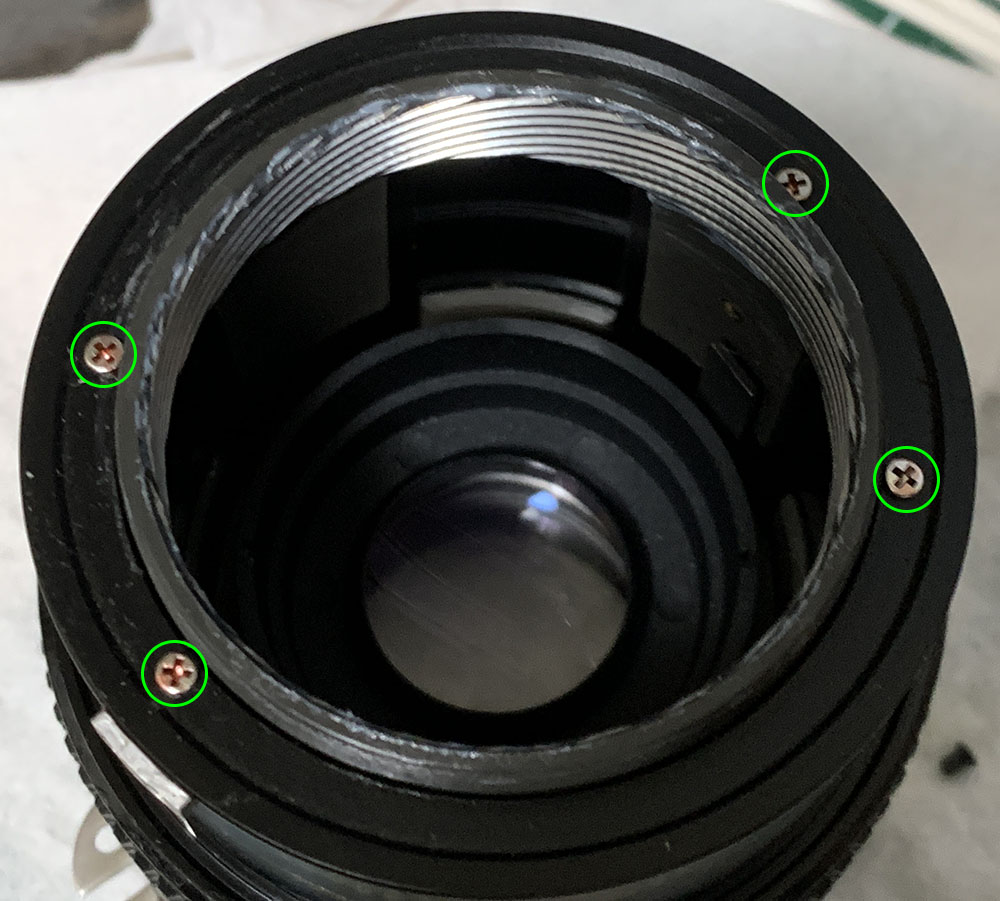
Carefully extract these rollers, some of them can be tough to remove. You’re going to need a soldering bolt to remove some of these, heat the rear of the rollers then unscrew them while they’re hot. Stripping these are easy and it is best to go about it carefully. Don’t forget to note which roller should go to which hole so taking plenty of notes will help you a lot, take lots of pictures and notes of how the barrels should align before you remove these rollers.

Note that some of the rollers are shorter than the rest.

Carefully remove this part and don’t forget to note its alignment.
Store it in a safe place.

Here’s another one. Again, don’t forget to note its alignment.
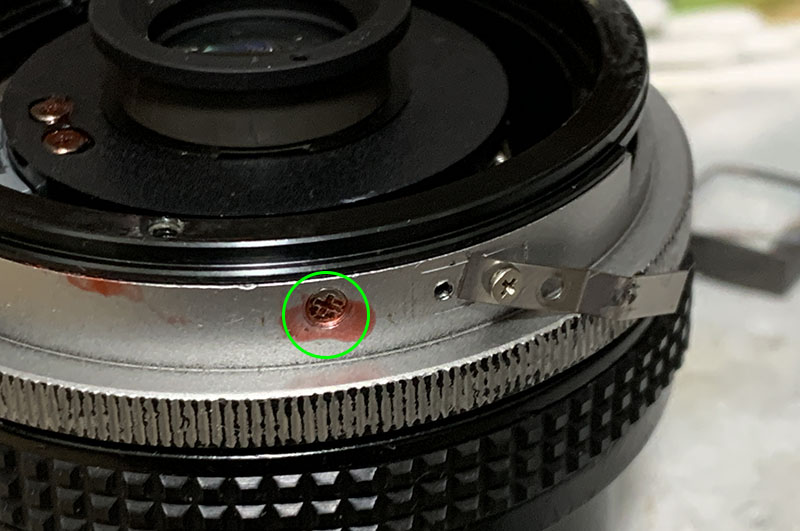
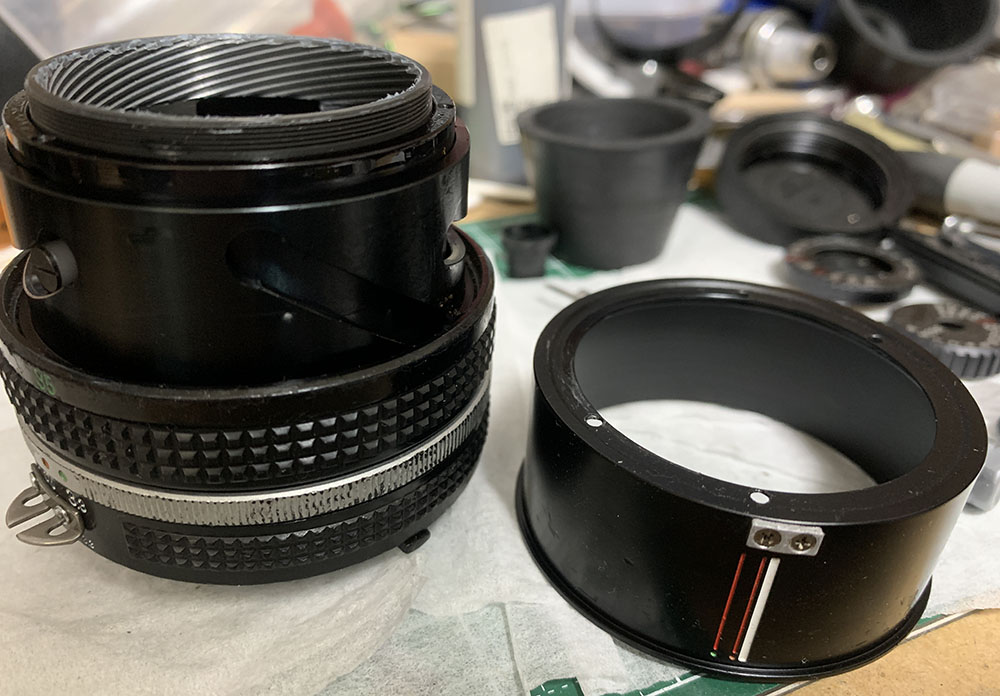
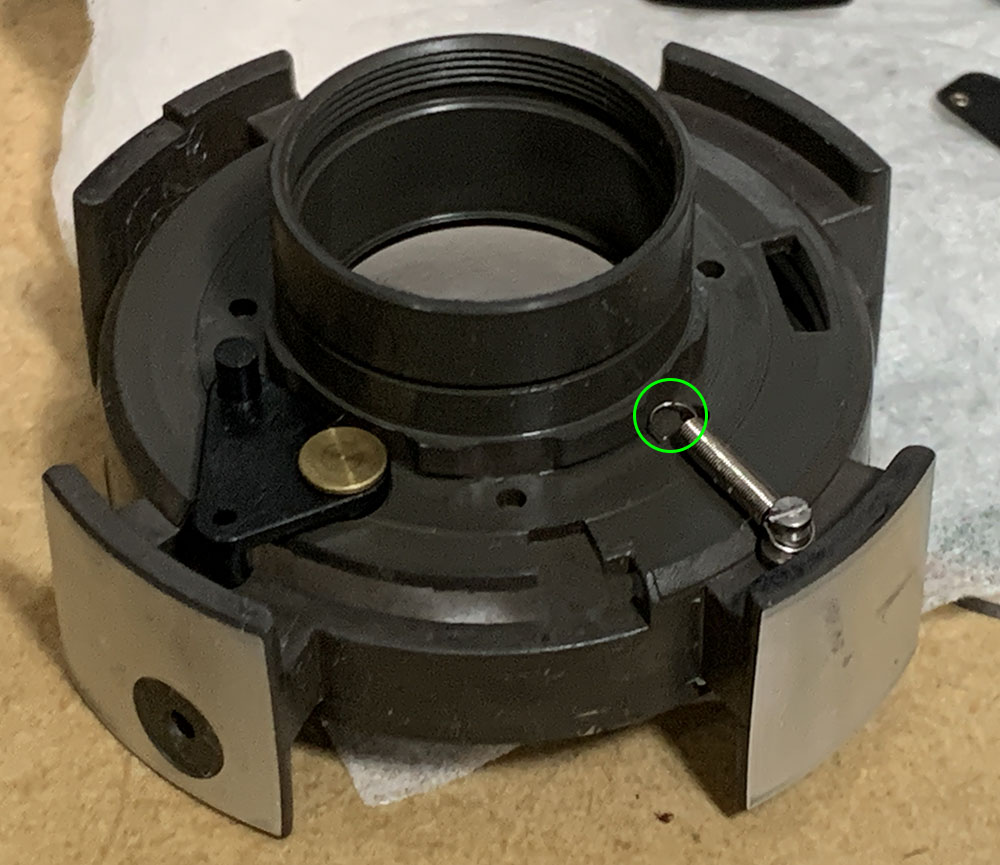
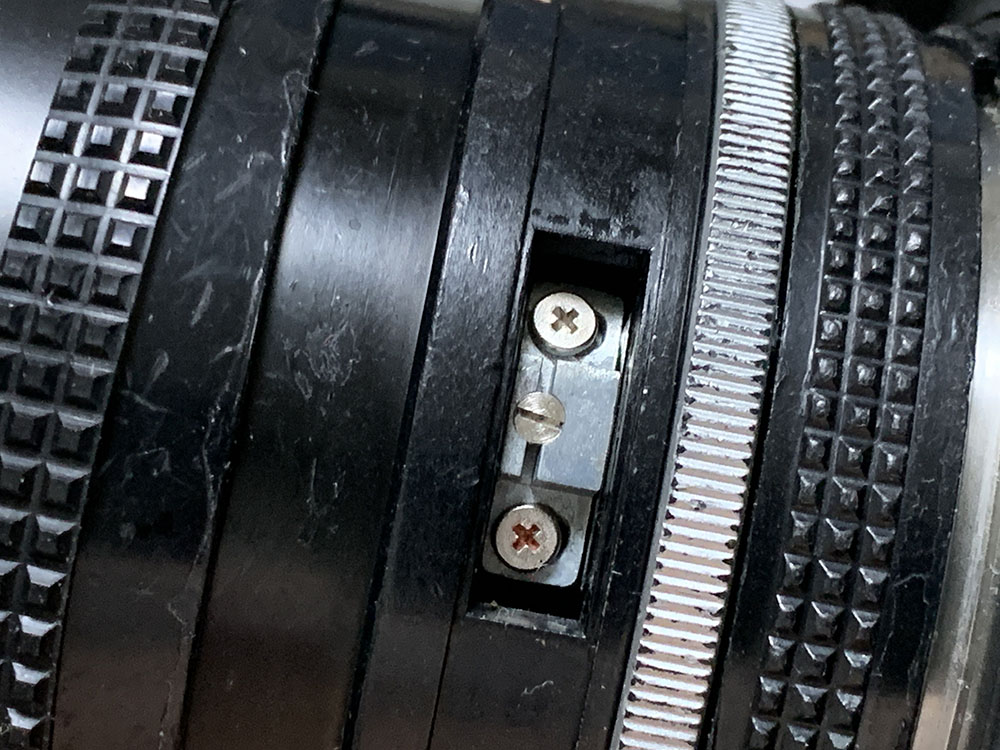
Extract all of these screws, one of them is underneath the spring.
You can’t remove the plastic grip yet at this point, unfortunately.
Remove this brass strip so you an access the lugs underneath. Removing the rubber grip is easy but you should be careful with it so you won’t tear it.
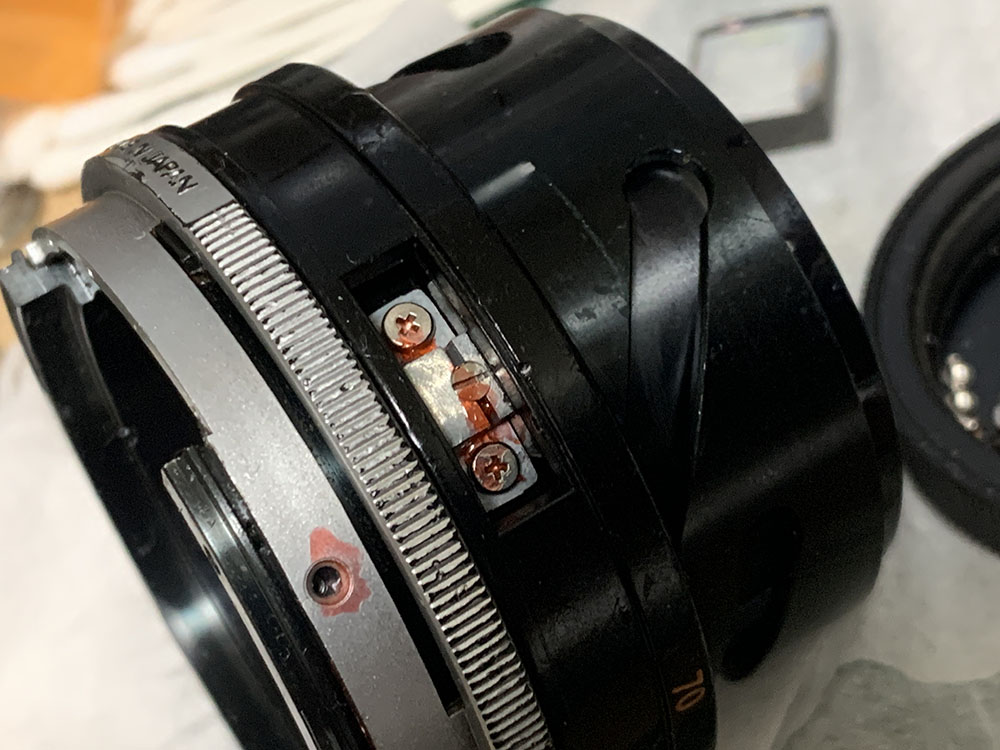
There are 2 lugs here that adjusts the height of the barrel, here’s one.
Dissolve the seals before you remove any of these and don’t adjust the little screw at the center. Don’t forget to note which lug should come from which port.

Carefully remove and clean the lugs before you put them back.
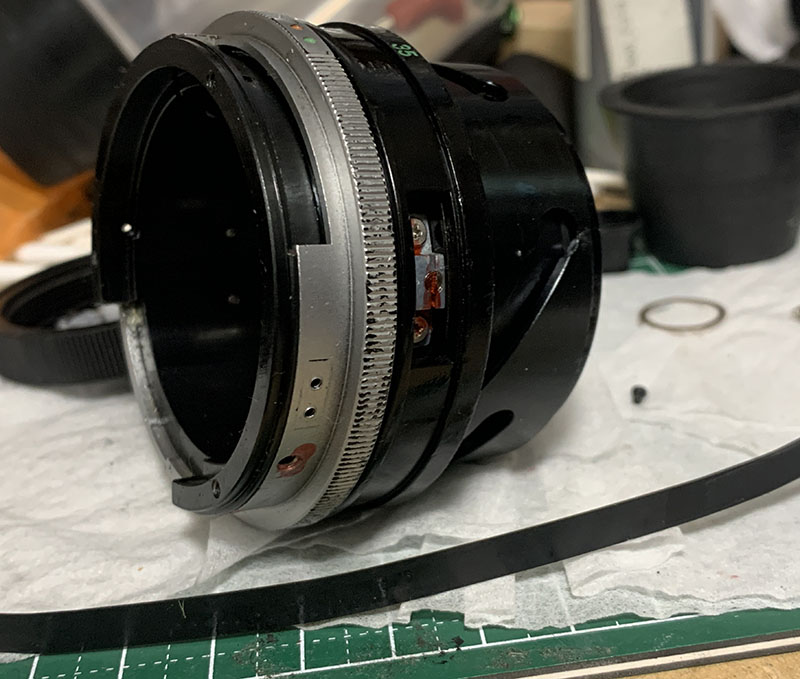
Once the lugs have been removed you can now remove the barrel.
You can finally remove the grip.
Clean everything well and make sure that you don’t leave any residues. This lens benefits from a grease with more resistance. The only parts that you’re going to lubricate are the helicoids and the cams. You only need to apply an even, thin film of grease on the cams, lugs, rollers and tubes. Never apply a lot of grease, it will become a mess in no-time.
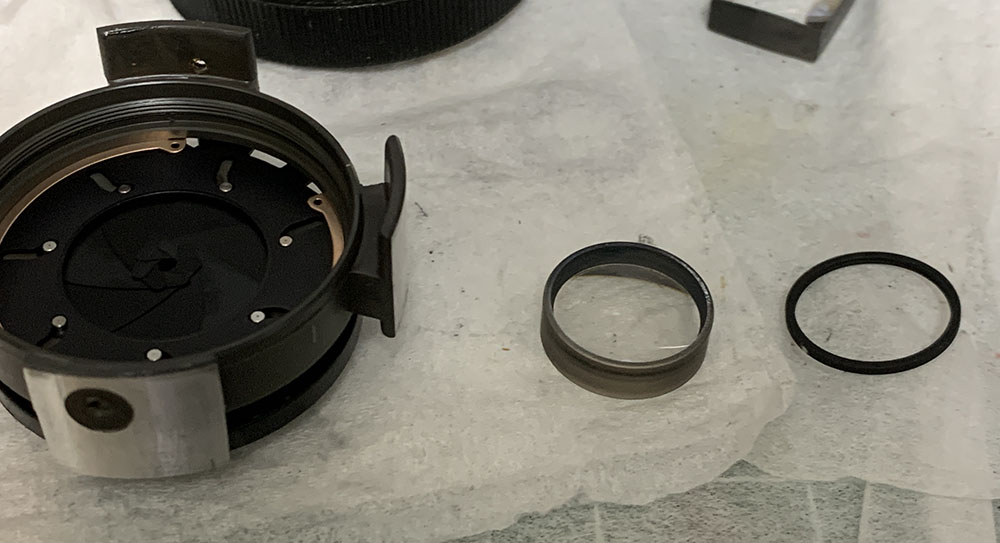
Disassembly (Objective):
The objective is simple and only has a few parts, the iris mechanism is also a part of the whole thing so I’ll condense them into a single section. Be careful when using solvents here, even alcohol. You don’t want to melt anything. It’s important to note how some of the parts were aligned or positioned, there’s a few parts here that will allow you to adjust the geometry of the optics and you will want to avoid putting things back in the wrong way.

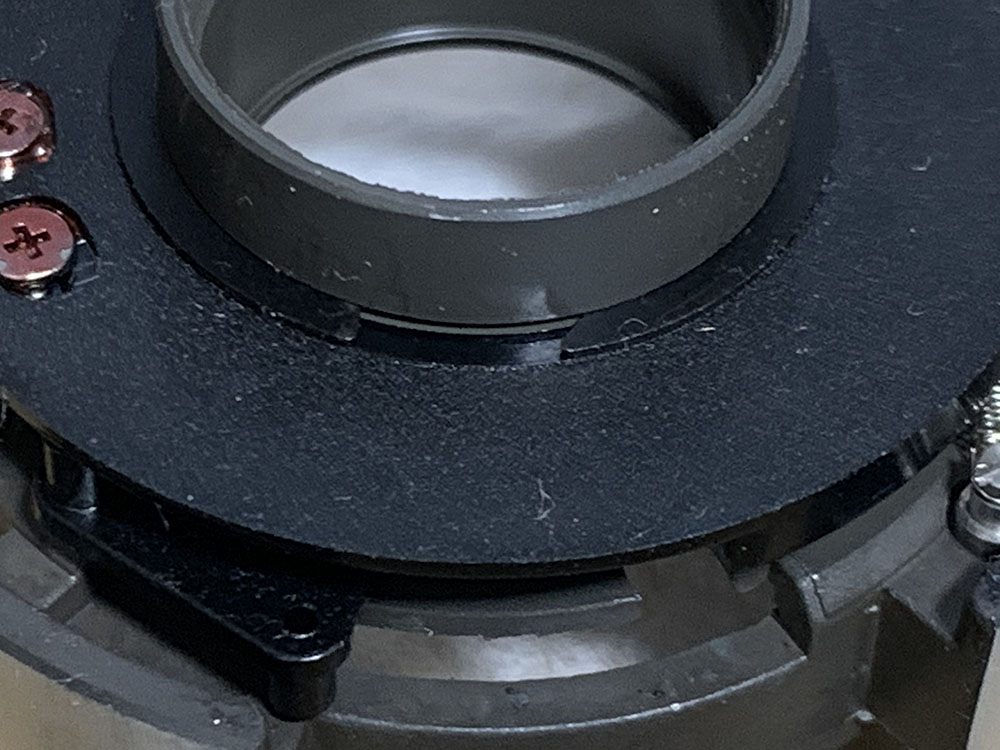
Carefully remove this plastic cup with a lens spanner. It’s easy to damage it so be careful with it. Cross-threading it is easy and never use solvents on it. This is an adjustable part so you’ll want to note its alignment and depth. It’s crucial that you get this right.
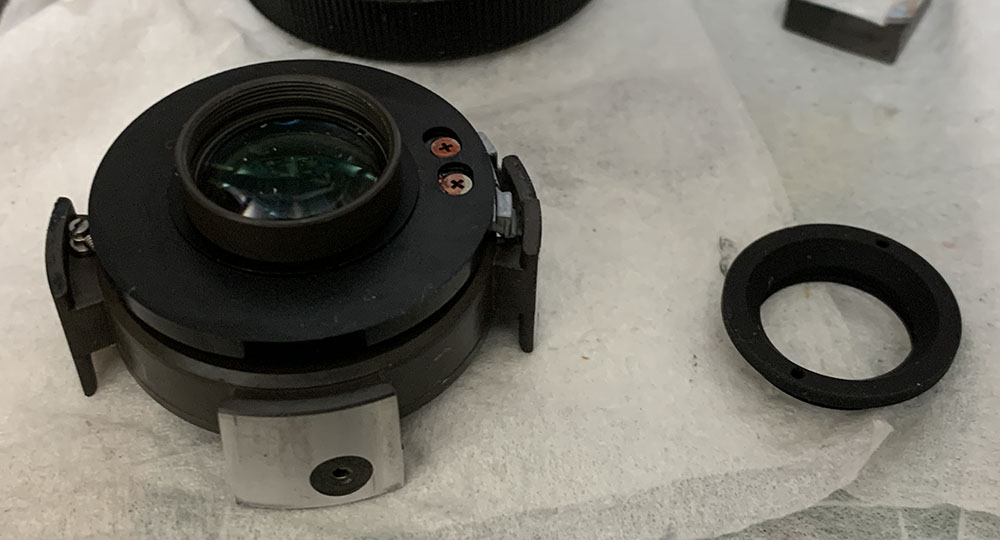
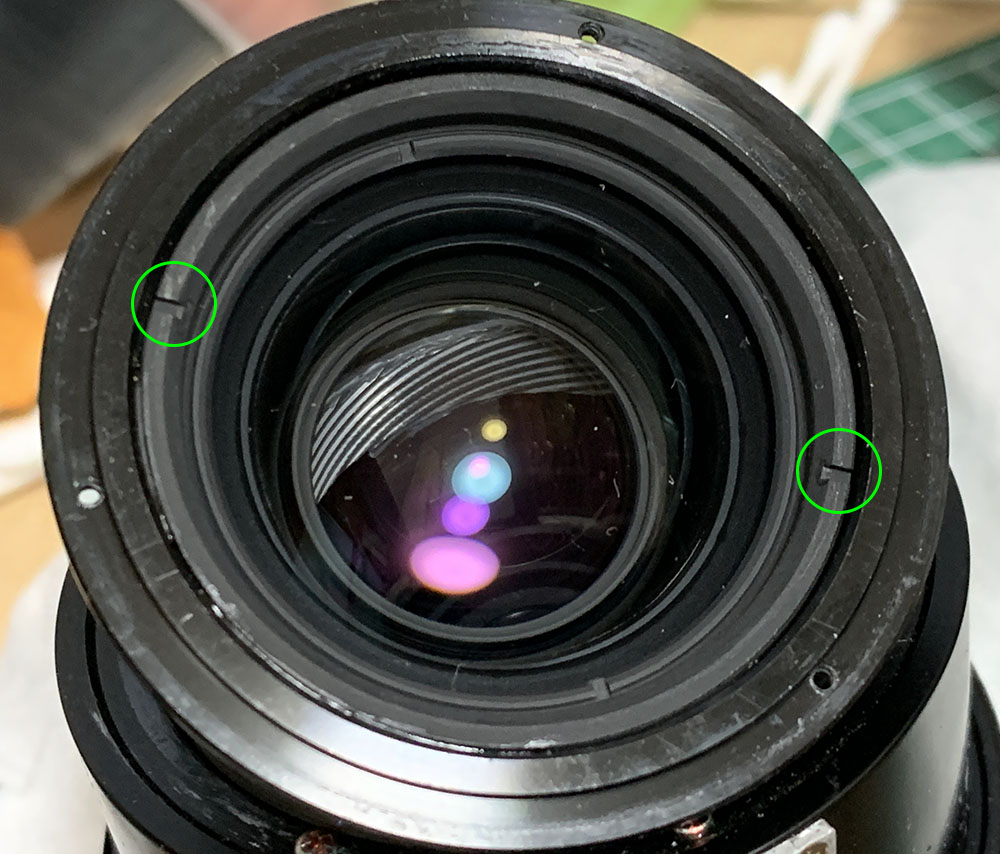
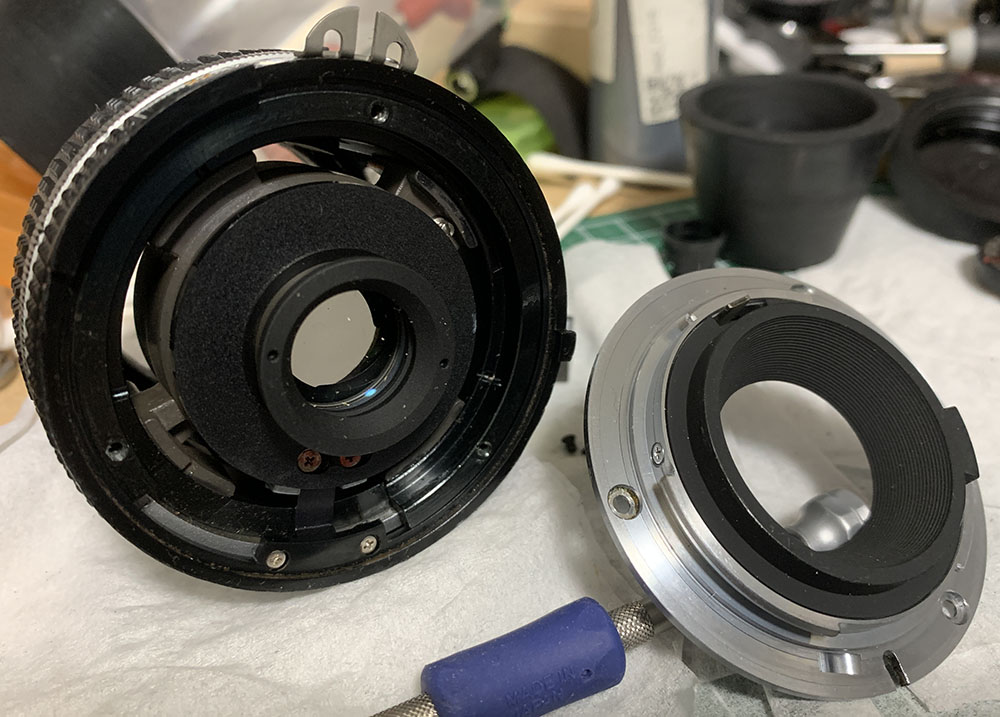
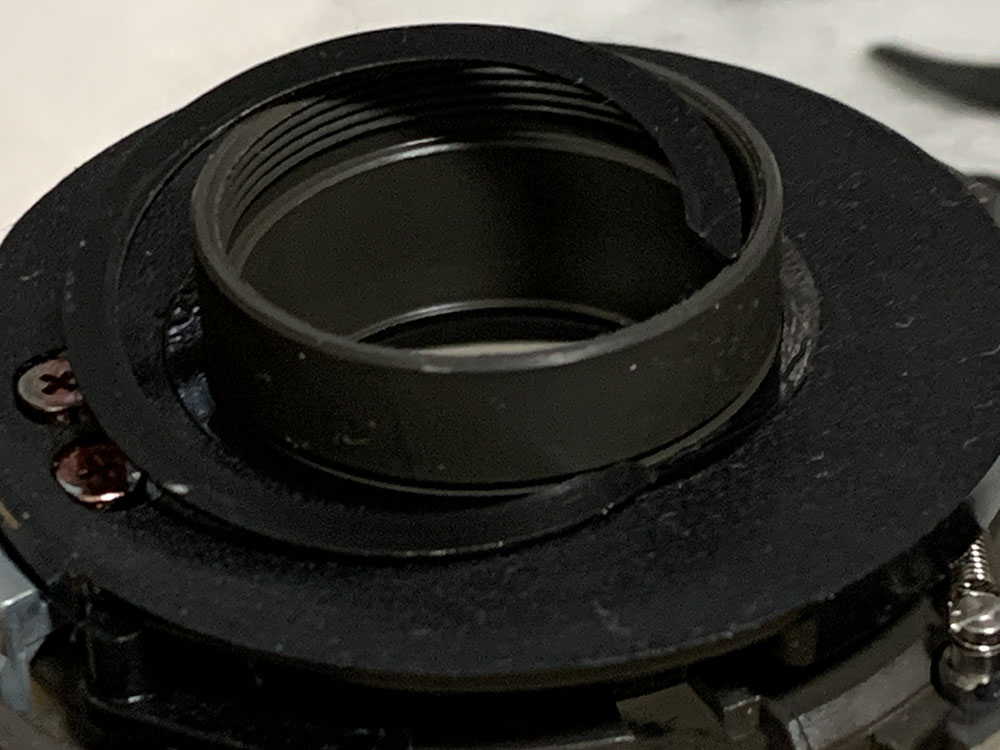
Unscrew this collar so you can remove the rear elements.
Don’t forget to note the direction of the elements by drawing a dot along the forward edge of the elements. There’s a spacer here so you should also note its direction. Never put any elements back facing the wrong way.
The regulator can be dismantled once you remove this clip. This is not easy to remove and you will need a special tool for it.
Carefully remove it without warping it.
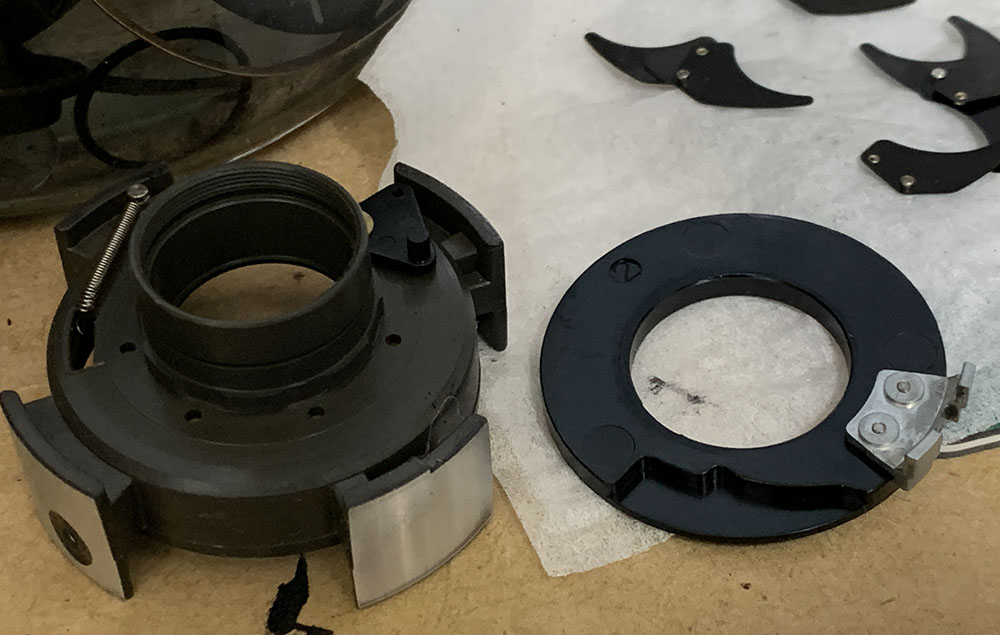
You can now remove the regulator ring.
Decouple this spring
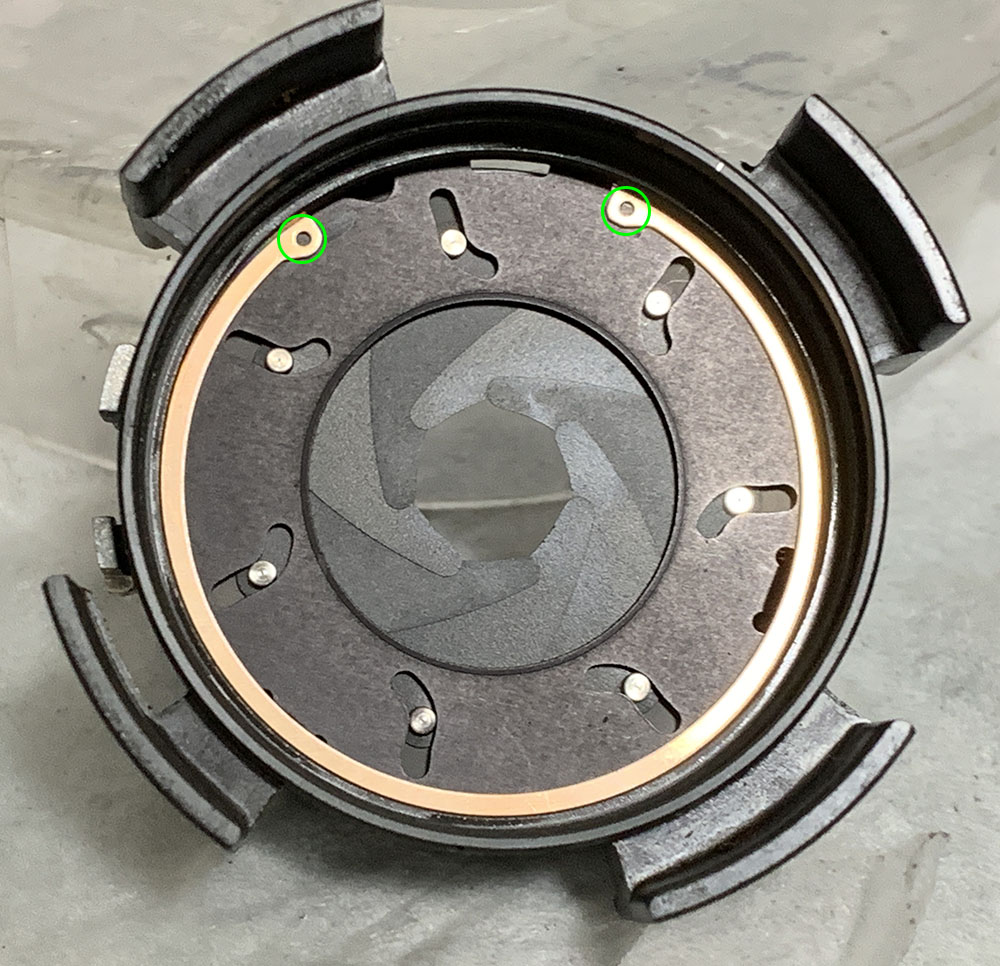
There iris can be taken-apart by removing this clip.
Carefully remove the clip so you can get to the iris. You don’t want to bend it or anything in the iris or it won’t work properly.

Extract the blades and set them aside.
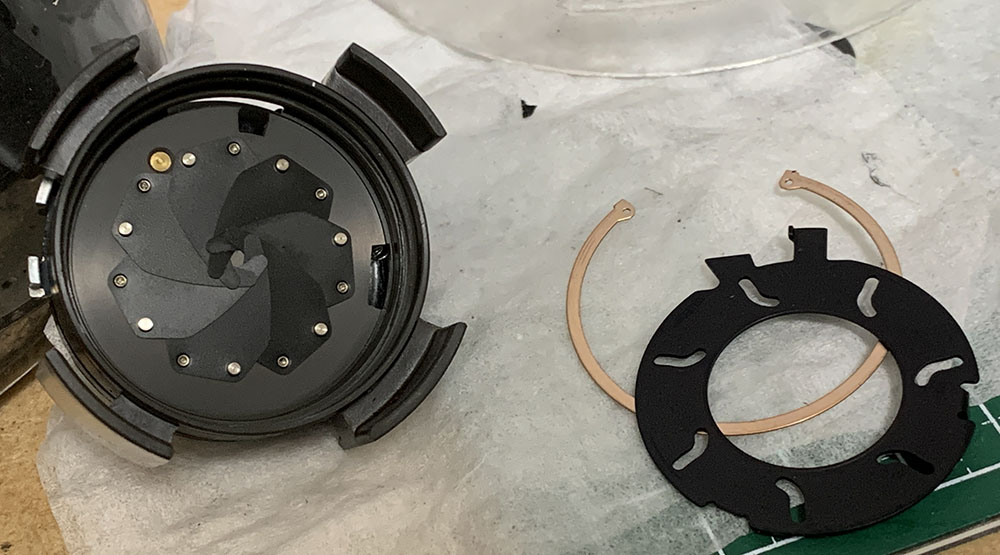
Clean everything very well. Don’t attempt to remove some of the glass from their housings since some of them were sealed permanently. I didn’t have to clean any fungus from my lens but if you have to, read my article on how to clean fungus from your lens. Remember not to over-do it, specially with this lens. This is a cheap lens and the coatings may get damaged. Use a mild and watered-down solution and it should be safe.
Conclusion:
I enjoyed repairing this little zoom. It took me a few hours to finish it, I did not expect that I would spend more time with it but cleaning the parts is an exercise in itself. Since some of the parts were made of plastic I used warm water and detergent to clean them. Reassembling it isn’t difficult at all but it took more time since I had to adjust it afterwards.
Reassemble your lens but don’t put the bezel and rubber parts back, you’re going to adjust the focus and I’ll show you how you can do this without any special equipment. Read my article on how to adjust your lens’ focus. That is a special article for helping people adjust lenses on a DIY setting.
This adjusts the focusing ring, don’t ever bother with it and just leave it be.
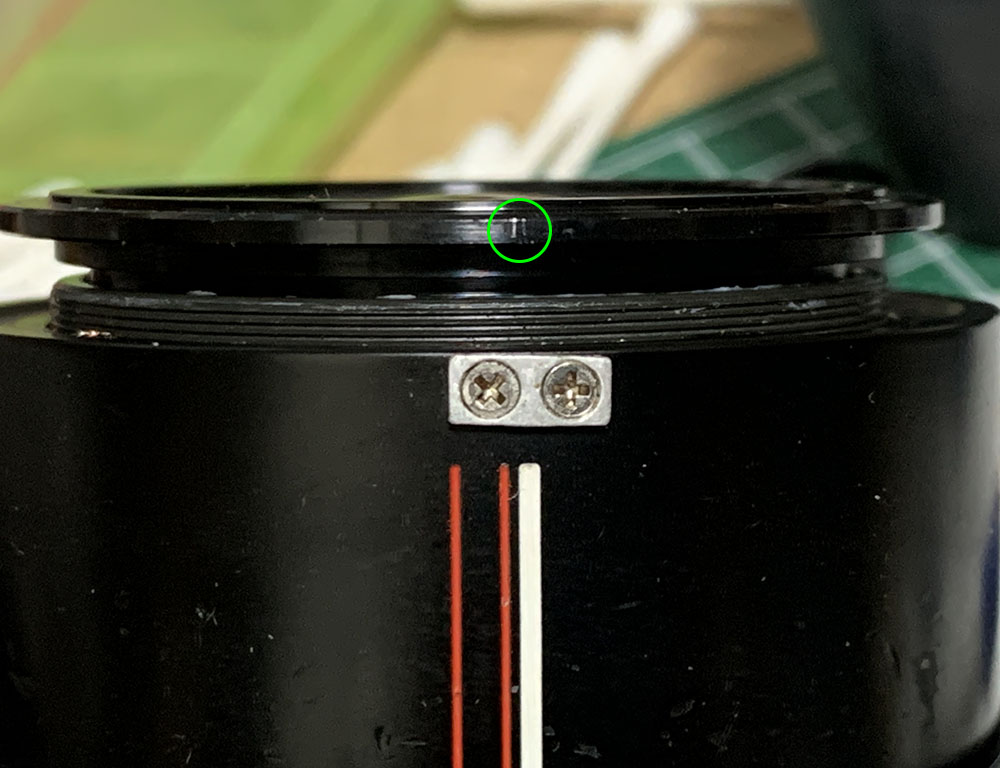
Loosen these and set your focal length to 70mm and turn its front assembly until you get critical focus at 70mm at infinity. Once you’re satisfied, be sure to tighten these again only after confirming that the infinity symbol is right at the center of the white line.
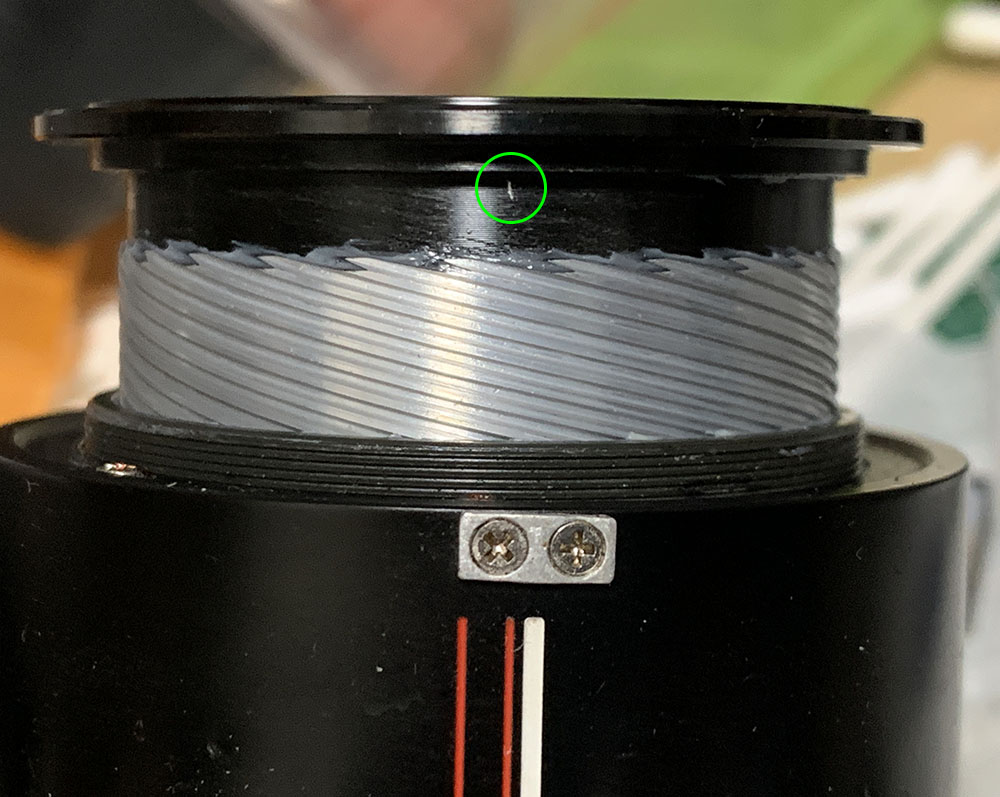
Loosen these lugs and then change the focal length to 35mm. You will notice that the focus is off, pull the whole front barrel forward until you get it right at infinity. Tighten the screws of the lugs and check your focus at 70mm. It’s going to be a bit off so adjust it again and check your focus at 35mm. This is a tedious process which will require some back-and-forth adjustments. This is a necessary step since this is a zoom.
Once you are happy with everything, finish everything by reassembling all of the parts back and clean-away any mess.
Thank you very much for following my work. If you liked this article, share it with your friends at social media. Every view counts, I earn $0.2 a day for that. You an also consider supporting my work. That ensures that this blog stays up and help educate, entertain and train people in the future. It helps me offset the cost of maintenance and you also help me purchase, develop and scan film. This blog promotes the use of film and you’re helping me do the community a big service. Thank you again and see you nest time, Ric.
Help Support this Blog:
Maintaining this blog requires money to operate. If you think that this site has helped you or you want to show your support by helping with the site’s upkeep, you can make a small donation to my paypal.com (richardHaw888@gmail.com). Money is not my prime motivation for this blog and I believe that I have enough to run this but you can help me make this site (and the companion facebook page) grow.
Leave me some tip?
Thank you very much for your continued support!
$2.00
Helping support this site will ensure that this will be kept going as long as I have the time and energy for this. I would appreciate it if you just leave out your name or details like your country’s name or other information so that the donations will totally be anonymous. This is a labor of love and I intend to keep it that way for as long as I can. Ric.

Dec 28, 2024 @ 14:28:41
It may be helpful to note the aperture ‘block’ can be slid out once the cams in the straight slots are removed.