
Hello, everybody! I’m pretty busy these days practicing programming. I am one of those people who prefer to use a simple text editor to code instead of using the latest code editors since I believe in good foundations. All the new and convenient features mean nothing if your fundamentals are weak. The simple ways will hone your discipline so I end up writing cleaner code. This can be translated to just about anything including photography. I like using older gear because it helps me focus and think before I click the shutter. I’m going to show you something today, it’s down-to-earth and it will teach you a lot about patience if you’re a new photographer. These don’t cost much as well and they’re great for students or people who are on tight budget.
Introduction:
The Nikon 36-72mm f/3.5 Series-E was sold from 1981-1985, quite short for a production zoom by Nikon’s standard. It was designed to be a portable and cheap companion to the Nikon EM which was marketed towards the lower-end of the market segment, by that Nikon meant the amateurs, students and women. Yes, you heard me right, Nikon and the rest of the world back then thought that women enjoyed small, light and easy-to-use setups. This would have caused a controversy these days but that was the late 1970s. This lens was quite popular since it was sold to be cheap at a time when zooms were rather expensive and served a specialty market unlike today where it is the most common type of lens due to their convenience.
It offers a good range for practical photography, its f/3.5 maximum aperture is adequate in most cases but indoor photography will be challenging if you are shooting with film. It’s a nice lens to use with a Nikon F3 but I believe it deserves to be paired with a better lens, it was Nikon’s flagship camera.
The optical formula is quite simple, 8-elements-in-8-groups. It’s remarkable that there’s no cemented groups in the design. Maybe this decision came to be to keep the cost of production down? Everything about Series-E lenses is about keeping cost down while still maintaining a reasonable performance. This is difficult to balance and the most obvious place to go cheap is the lens barrel and internal mechanisms where plastic parts replaced metals parts. I don’t like how they feel in the hands but you can’t complain too much since majority of the lenses today were made of plastic anyway. This caused a big issue back then when people were so used to Nikon’s build quality and so it was decided not to use the Nikkor trade-name for the Series-E lenses. Cheap as they are, this line of lenses served their purpose very well and went-on to become favorites of many photographers up to this day.
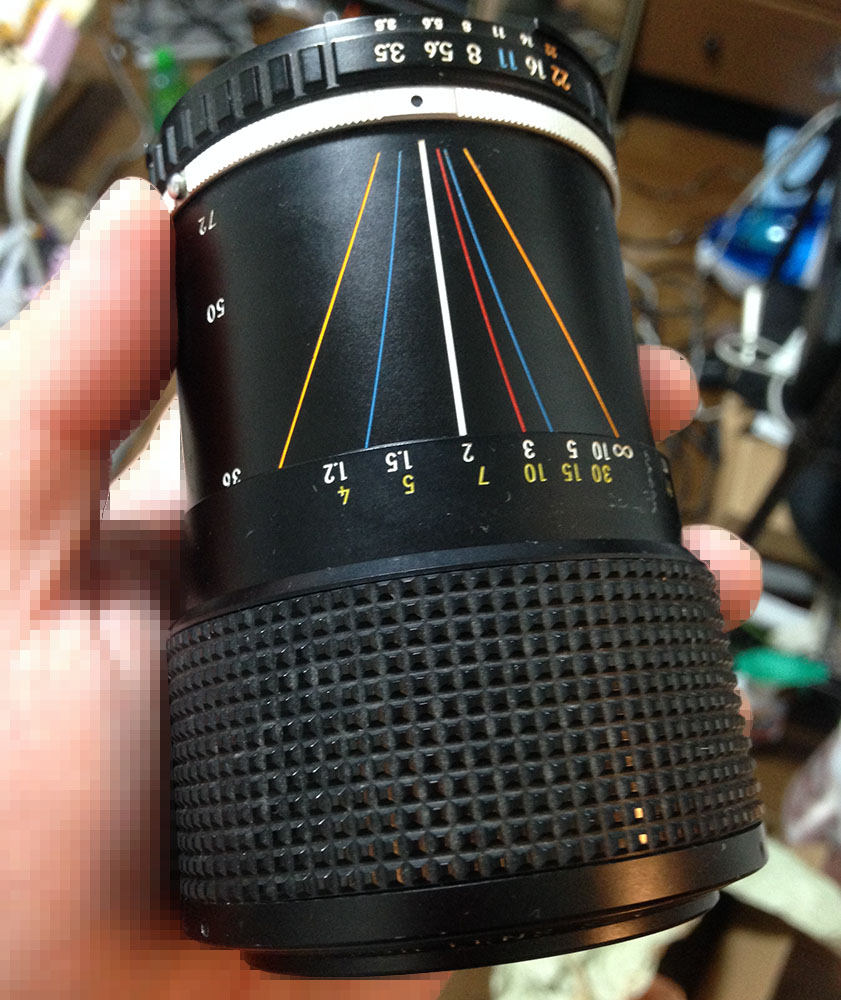
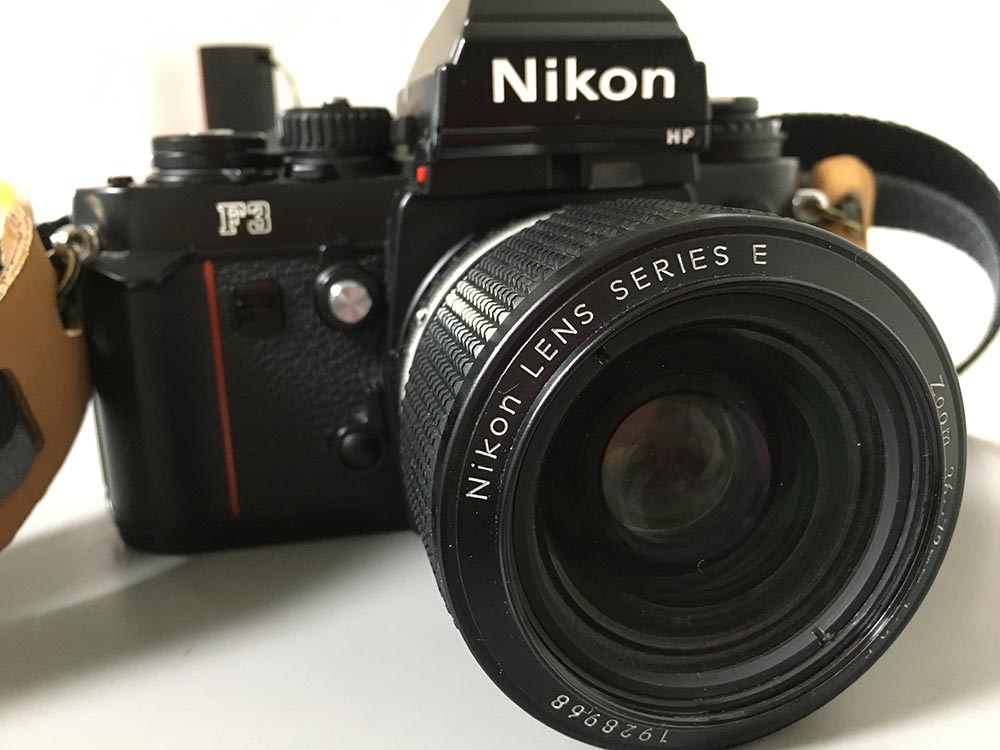
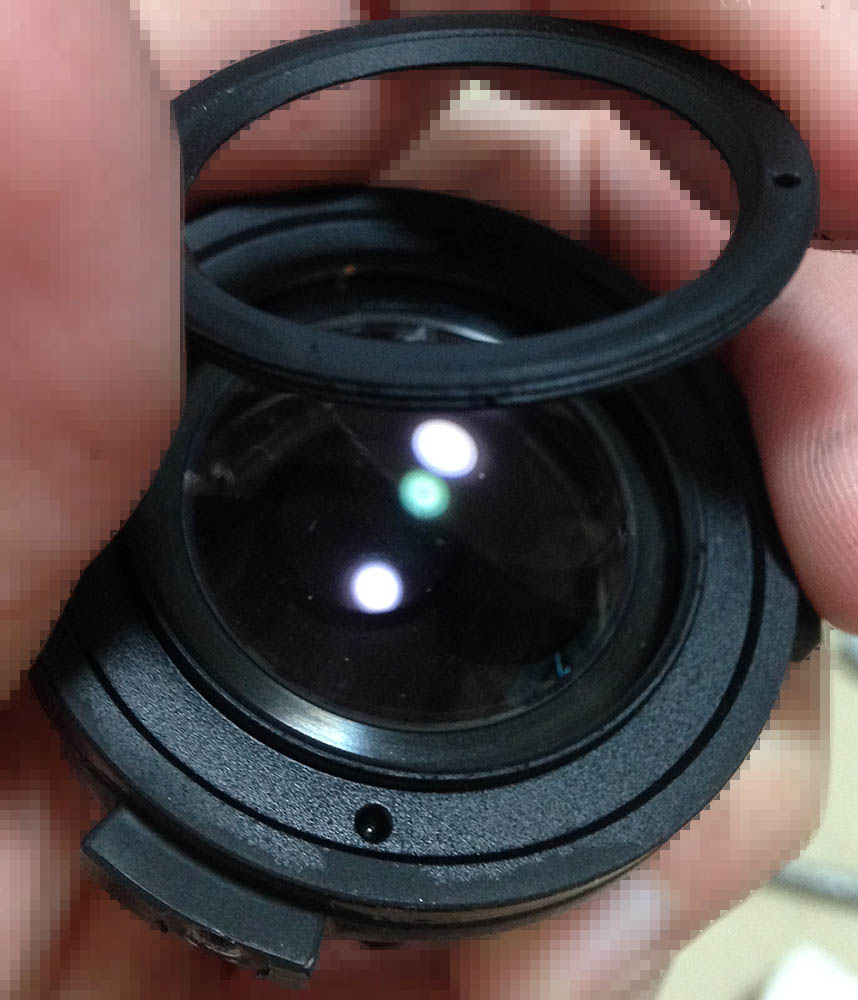
I got this lens for very little money since it was filthy as you can see here. It has a beautiful but useful depth-of-field scale engraved on the sleeve, there are also numbers indicating the focal length, too. What’s annoying about it is the very short focus-throw, some people may like it but I don’t. If this is a bit longer then it would be great. I don’t know why it was designed like this but there’s certainly a reason for this.
Many people swear by this lens if you read reviews but the opinion is quite divided since there are some who think that this lens performs poorly. We’ll clear it all here in this article but do note that my sample was bought from a junk shop for very little money, a can of beer would cost me more!
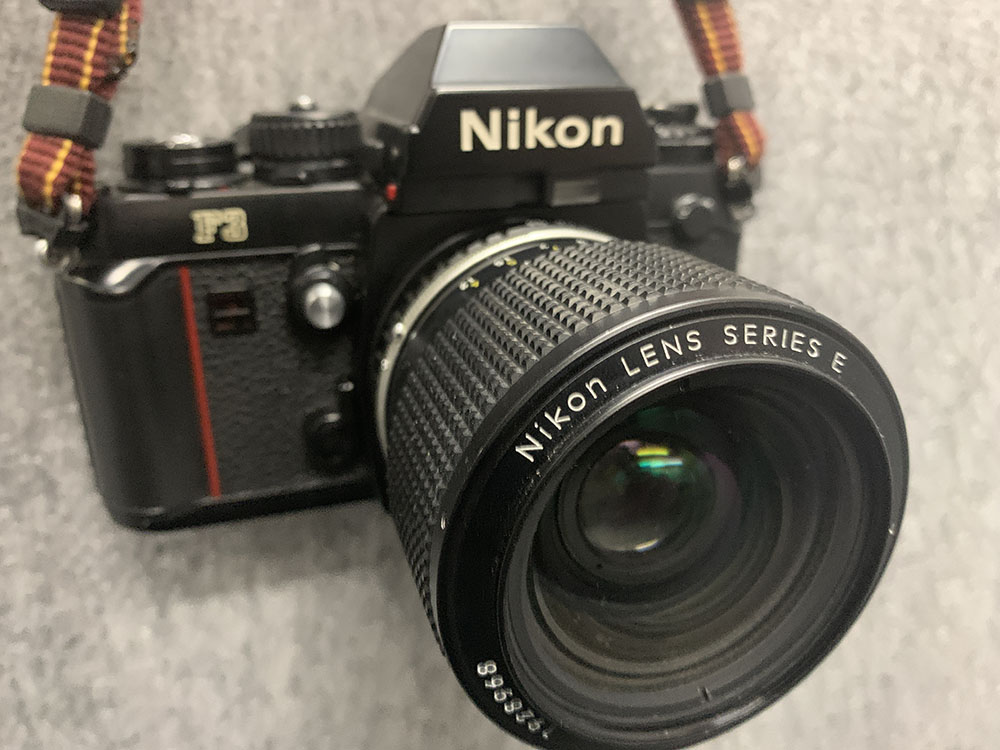
Handling is quite nice since I prefer the push-pull pumper-zooms, they help me focus and zoom at the same time with one hand. It feels flimsy because some of the parts were made from plastic and it’s quite light. Its weight is a big factor that keeps this lens popular among people who love classic lenses which keeps the demand for these things high. It works nicely with modern Nikons since it is an Ai-S lens.
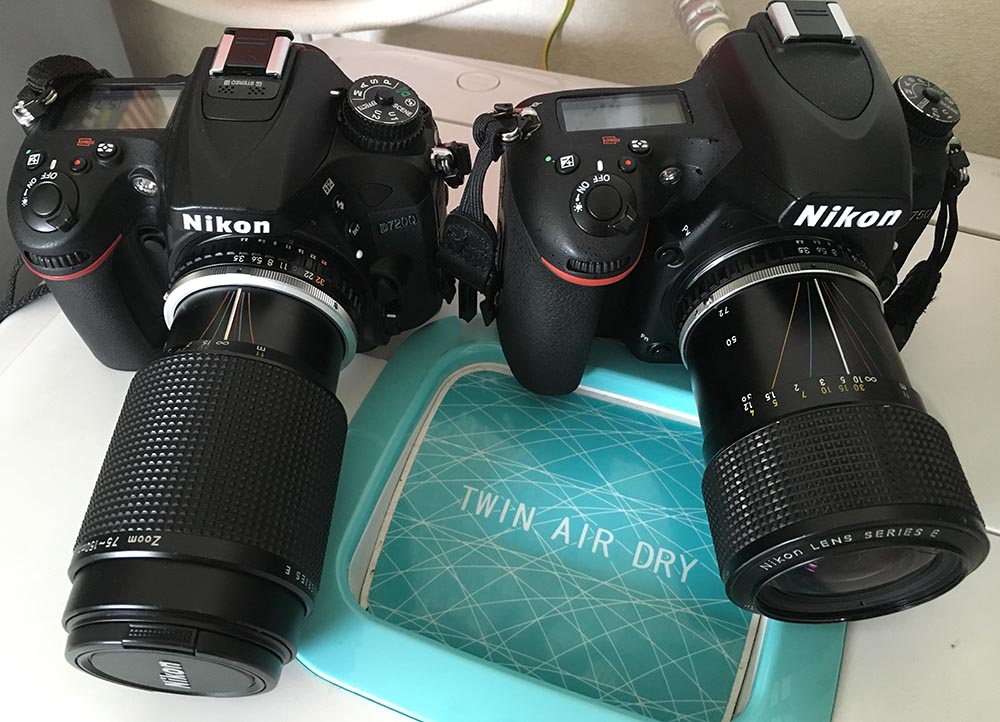
This is best-paired with a Nikon 75-150mm f/3.5 Series-E, you’ll cover all the important focal lengths for taking just about anything with this pair. You’ll only need a wider lens to complete your kit but you this is enough for most tasks. There are 3 zooms in the Series-E line and the one featured here is the worst of the lot in terms of performance.
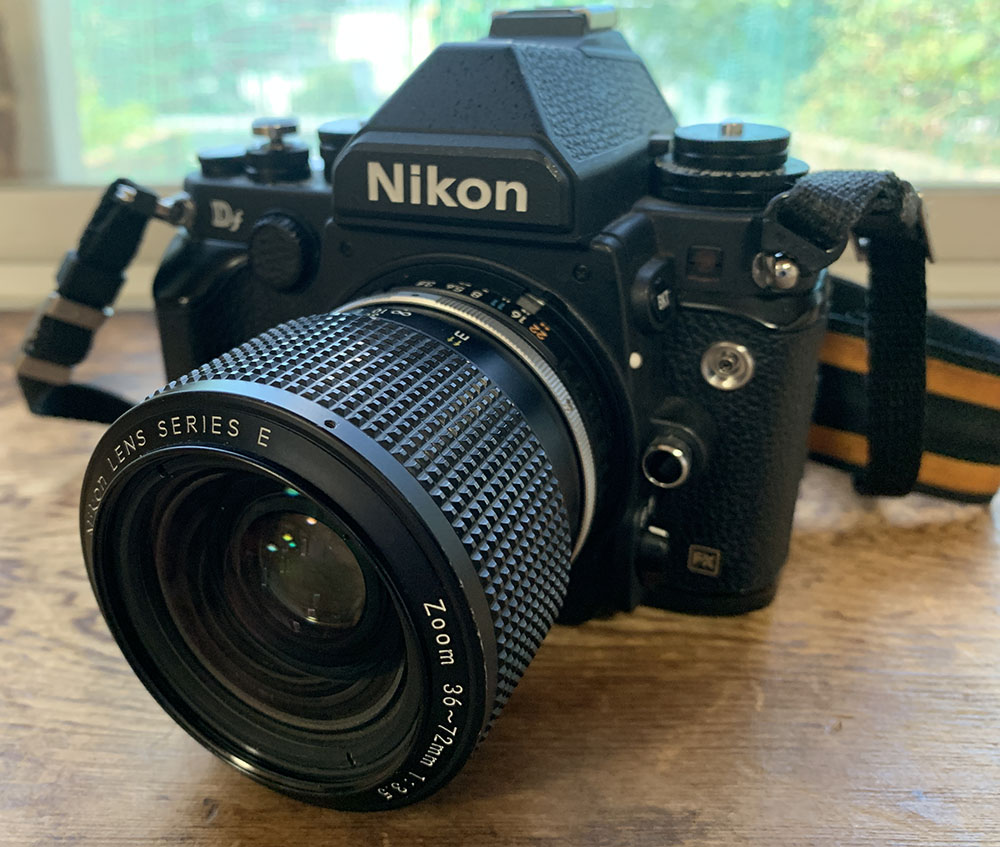
Knowing how a lens performs is key to maximizing its use. You’ll know how to exploit its strengths and avoid its weaknesses. This is more important for lenses that have less-than-stellar performance such as this and you’ll learn when to use it and when to leave this at home. I took the following series of photos from f/3.5, f/5.6 and f/8 where we will see the most changes happen. I assume that these are the most common apertures for taking photos with it, you’ll also see the most changes happen here. I shot these using a Nikon Df.


(Click to enlarge)
Probably not the best examples to show vignetting. I actually couldn’t tell if it’s good or bad from these photos so I apologize. From what I could see, it’s not a bad performer and vignetting seems to be a minor issue with this lens even wide-open. This is surprising since zoom lenses tend to perform badly at one end when it comes to vignetting wide-open but it doesn’t seem to be a big issue at all for this lens.
(Click to enlarge)
The distortion profile is quite strong at the wide-end but is rather straight at the other end. I can say that this lens performs better at the long-end, you’ll soon see why in the sample photos later.


(Click to enlarge)
It’s quite resistant to ghosts, which is quite good and the resulting sun-stars look quite organic. This is probably the only good thing I can say about this lens and you’ll soon see why.
The sad part is this lens has a tendency to show veiling flare and you’ll see it cover the whole frame, robbing the photo of sharpness and contrast.

Use this with its dedicated lens hood. Having the sun at the periphery of the frame or even far from it will cause veiling flare to cover the frame. In this photo, the sun is nowhere near the frame but is directly above me and that was enough to cause this. The condition of the coating on my sample can be one reason but I didn’t expect it to perform this poorly here.


(Click to enlarge)
Here are some photos showing how the quality of the bokeh is when shot at different distances and focal lengths. I don’t expect this to perform well but I wasn’t expecting this to perform this poor at all.
(Click to enlarge)
One of the weakest traits of this lens is how poor it renders the out-of-focus elements in your scene, even on real-world scenarios. This lens has some of the worst bokeh renderings that I have seen from Nikon. It’s at the bottom of the list and I won’t be using this for portraiture at all.
Here’s another example of how poor the bokeh quality is. The good thing is your eyes are focused on the subject instead of the background but this isn’t the case all the time and the blurred parts of your photo can be distracting.
Foreground blur doesn’t look so bad in this photo at all. What’s not looking good is the amount of artifacts at the foliage and branches at the back, they look terrible to put it lightly.

The spheres look dirty with strong edge artifacts. You won’t see it unless you zoom-into the photo. This looks rather cheap but the good news is this won’t be as obvious when shot with film as you’ll see in this article’s film section.
The character of the bokeh looks rather disturbing in this photo, it’s ugly. It’s unacceptable to me, it looks very distracting.


(Click to enlarge)
Chromatic aberration doesn’t seem so bad here in this set. In fact, it doesn’t look so bad but it looks terrible in real-world situations which is not what I expected as you will soon see in the following photos.
Spherical aberration is quite strong, the bright sun made the paper look like glowing panels. This is ugly, I was quite disappointed when I saw this. Your eyes may not see it but this photo looks quite blurry due to the glow.
Chromatic aberration can be observed in the foliage and the roof. It’s quite strong, I’m not sure if I stopped the iris down here but from my experience with this, chromatic aberration won’t really go away even at f/8 on difficult cases like this one.
The leaves were rendered poorly, with a cheap look that’s made worse by a disturbing glow caused by optical aberrations.


(Click to enlarge)
The only good thing I can say about this lens is it has decent-performance at the center wide-open. It’s not great but it’s acceptable for most situations. It improves by f/5.6 as expected and looks a lot better by f/8. Having said that, it didn’t impress me at all and it’s acceptable at best. This is probably fine if you’re an amateur or you’re just out to enjoy and take photos. This isn’t the lens that you will want to use if you’re joining a competition.
Let’s now see some photos that were taken under real-world scenarios. You should just enjoy shooting with your lens instead of worrying about tests or scores. My tests aren’t scientific anyway and I judge a lens more by utility or the value that I get from it in terms of shooting experience, etc.

The focal range is quite useful for travel photography and you will get lots of nice photos from this so long as you know how to use it. The rendering is quite nice if you enjoy the “vintage-look”, some people hate it but not me.

This lens isn’t fast-enough under the shade but with today’s sensors and the high-ISO performance you’re able to get from them this isn’t a problem. The lens is more-than-capable of handling situations like this once you dial the sensitivity above ISO 800.

Distortion isn’t noticeable when you know how to position the lines in your scene. Just avoid placing straight lines parallel to the edges of your frame if you can help it.

Indoor photography is not this lens’ best strength so prepare to shoot using a lower shutter speed along with a higher ISO speed.

Apart from its terrible bokeh quality this has poor corners performance. It’s important to shoot with this stopped-down if the corners matter to you. It’s ugly and this photo will be rejected by your editor if you’re a professional.

Stopping this lens down will give you decent center-performance. Note the poor rendering of the pebbles, it has a high-frequency so the details do not render nicely if a lens has poor bokeh quality.
The foliage at the background looks bad but it’s not obvious when viewed at this size. I also noticed some chromatic aberration at the roof but it’s not at all that bad since I stopped the iris down to around f/8 here, I think.


(Click to enlarge)
Here are more photos for you to look at. They look decent but these will not pass if you’re a professional, they are good-enough for amateurs which is a good thing since this is the target market for this lens anyway. Don’t let that prevent you from taking nice photos with it, if you’re at the right place and at the right moment, your composition and the context of the photo will be the deciding factor if your photo will get published or not and this lens will help you get it due to its useful focal range.
Let’s now see some photos that were shot with film. Film has a unique look that’s difficult to replicate with a digital camera thanks to grain. It can help hide imperfections and artifacts, too. That’s because film reacts differently to light and it’s less-reflective compared to a sensor, light won’t reflect back to the rear element of the lens and cause unwanted artifacts. I used a Nikon F4 loaded with Kodak Ultramax 400.

This is a nice lens when used with film, I like how it renders with film over digital. If you love shooting with film then this lens will provide you with a lot of nice keepers so long as you know how to maximize it.

Shooting indoors with not enough light will be challenging even with a fast film, I consider ISO400 to be decently-fast but you won’t get the most from it unless you shoot with a lens that’s faster than f/2 for cases like this. Note the high amount of distortion that’s apparent in the sign of the shop.

The character of the bokeh isn’t as bad with film as it is on digital. Grain will help mask much of the harshness but it’s still mediocre at best. Sharpness is nice when you stop this lens down and the corners look acceptable. I think I shot at f/8 or so, if the corners matter to you then you should stop the iris to something smaller than f/5.6 to get corners that don’t look terrible.

Here’s another example. The character of the bokeh went from trash to just acceptable when shot with film, this would’ve looked terrible with a digital camera.

Indoor photography will be a challenge even with an ISO 400 film. This was shot with a slow shutter speed of around 1/30s or so.
This is quite a mediocre lens wide-open when used with film but do not let that prevent you from enjoying it. It has adequate resolving-power when it is used with cheaper film but finer-grained ones will easily show that this is lacking in resolution wide-open.


(Click to enlarge)
This performed much better with film, as expected. Many older lenses don’t perform well with a digital camera since the sensor will out-resolve them. It is also worth noting that grain can help mask poor bokeh quality up to some extent. This is most apparent with lenses of moderate speed. Do not take my statement as something definitive, I’m merely sharing my observations with you based on my experience using old lenses. From these photos you can be sure that this is still worth considering if you’re going to mainly use shoot it with film. Just enjoy it and take plenty of great photos to show your friends over a nice pint of craft beer.
I won’t recommend this lens, there are many Nikkors out there that’s able to beat this in terms of performance and value, some even have AF. The image quality isn’t great but it’s not bad either, the only reason for getting one is to either complete your collection or to play with a cheap manual lens and by cheap, I was referring to the build quality and not the price. Despite all the negatives that I mentioned, I enjoyed using this lens because of its practical specs and handling. I prefer the push-pull configuration, it enables me to do quick changes in focus and zoom at the same time with one hand. There are people who dislike this but many older photographers prefer this over what is considered to be normal these days which is the 2-ring style. The latter is more stable at the cost of convenience and speed. Before buying one, make sure that the optics are clean and the iris isn’t oily. These were sold as cheap lenses back then and many of the people who bought these weren’t thinking of taking care of these so there are many in terrible shape for sale. If you’re looking for a nice performer at this price range then consider hunting for a nice sample of the Zoom-Nikkor 35-70mm f/3.3-4.5 Ai-S. That lens is amazing, its performed much better than I anticipated which is the opposite of what I can say about the lens featured in this article.
Before We Begin:
If this is your first attempt at repairing a lens then I suggest that you check my previous posts regarding screws & drivers, grease and other things. Also read what I wrote about the tools that you’ll need to fix your Nikkors.
I suggest that you read these primers before you begin (for beginners):
Reading these primers should lessen the chance of ruining your lens if you are a novice. Before opening up any lens, always look for other people who have done so in Youtube or the internet. Information is scarce, vague and scattered (that is why I started this) but you can still find some information if you search carefully.
I highly recommend that you read my working with helicoids post because this is very important and getting it wrong can ruin your day. If I can force you to read this, I would. It is that important!
For more advanced topics, you can read my fungus removal post as a start. This post has a lot of useful information and it will be beneficial for you to read this.
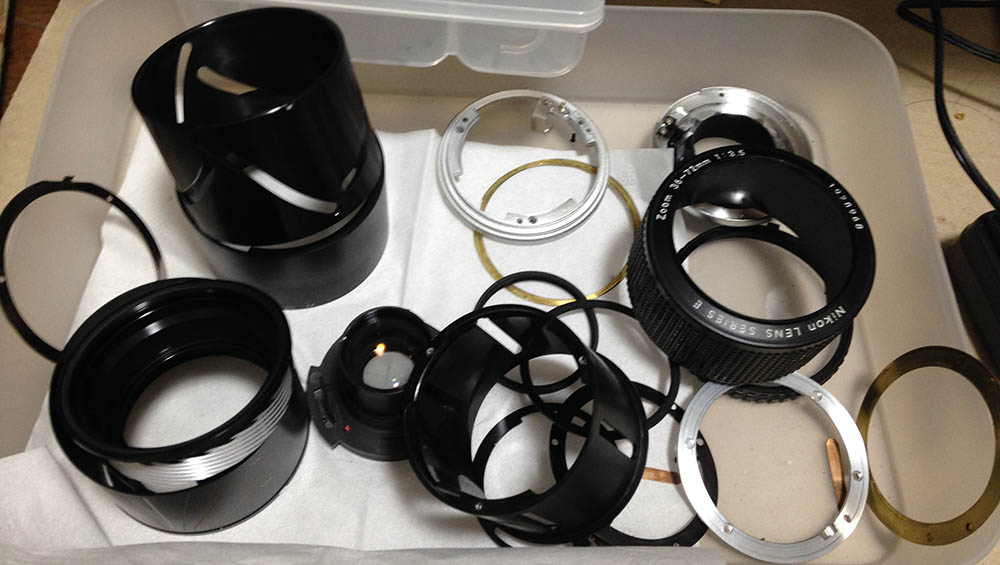
Disassembly (Main Barrel):
Since this is a zoom the construction is a lot more complicated compared to a prime lens. You couldn’t simply separate the objective from the barrel. The sequence of how you should dismantle this is important so you should pay attention to a lot of small details and take plenty of notes as you go. It’s not a difficult lens to overhaul compared to other zooms but it will still take some time to do it properly. There’s nothing much to pay attention here except for the alignments of some parts. Be sure to remember which screw came from which hole since they’re not always identical and the parts they’re attached to aren’t identical, too.
This lens is best left to the professional repairman to tackle. If you are new to lens repair just skip this one until you have acquired the right skills, this will require some special tools to service properly.
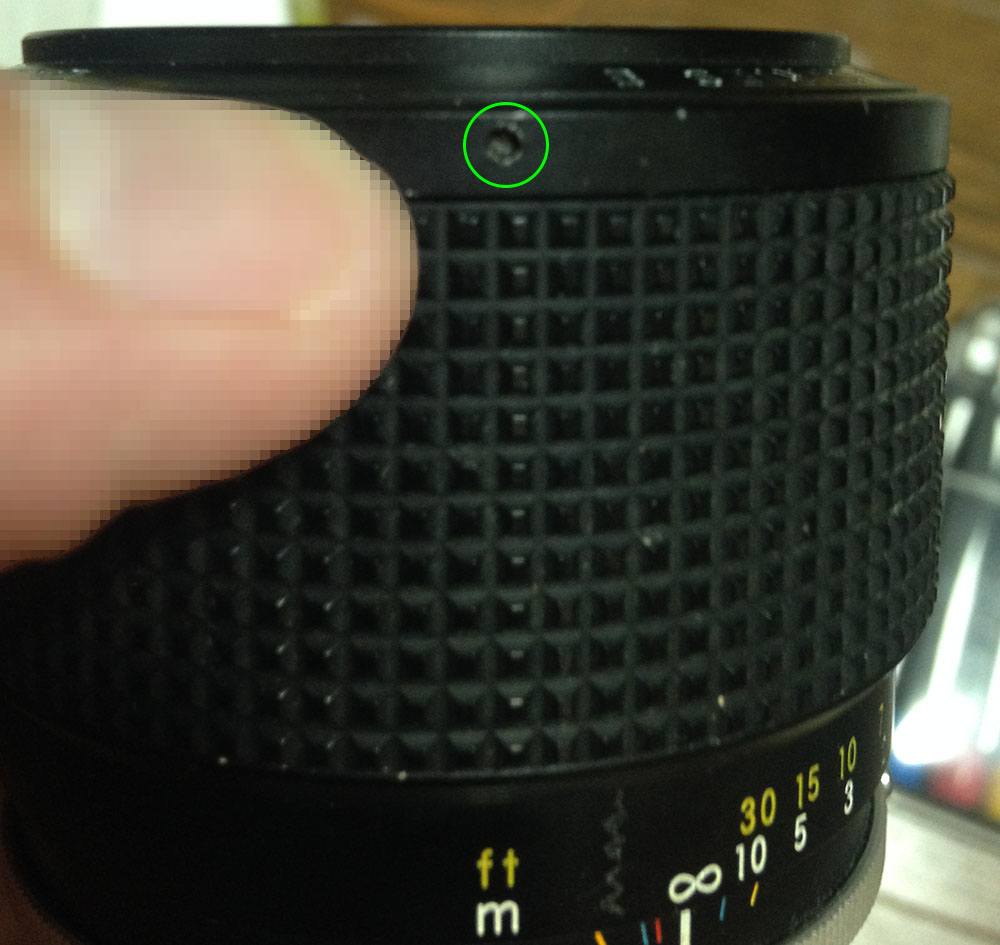
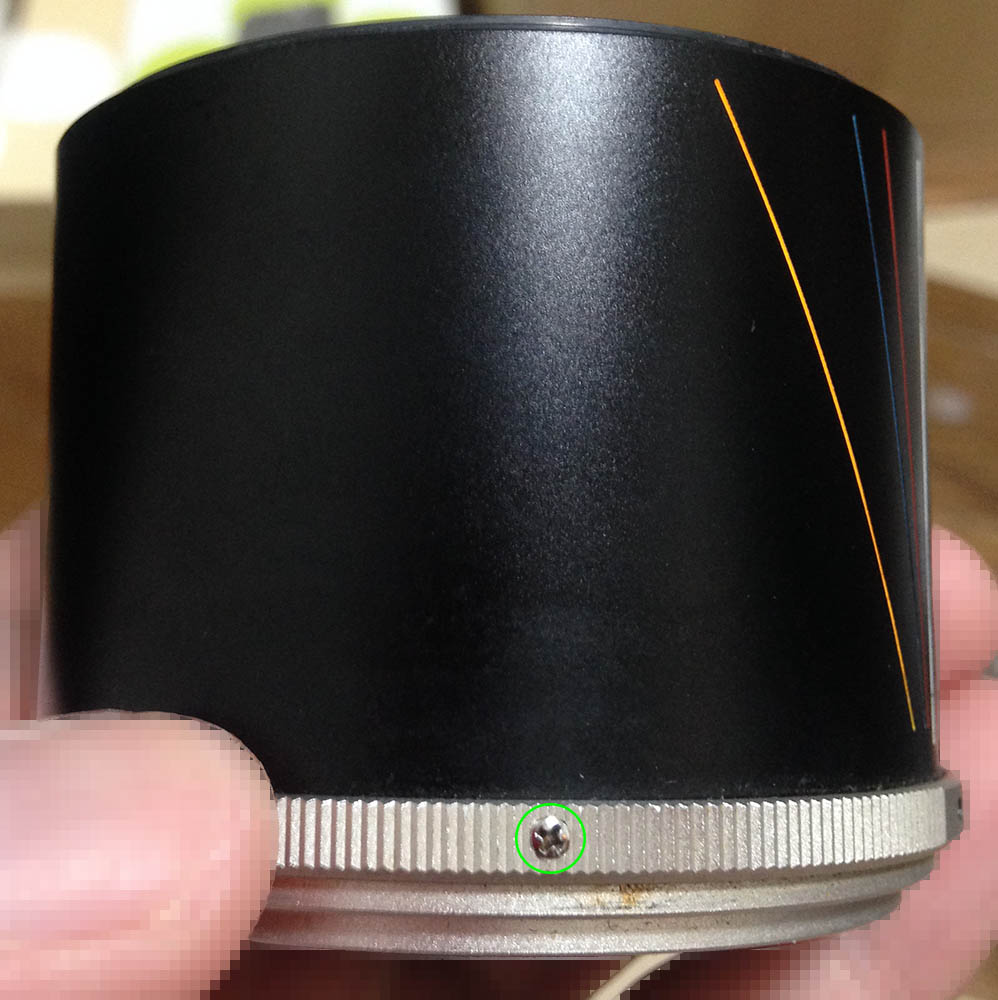
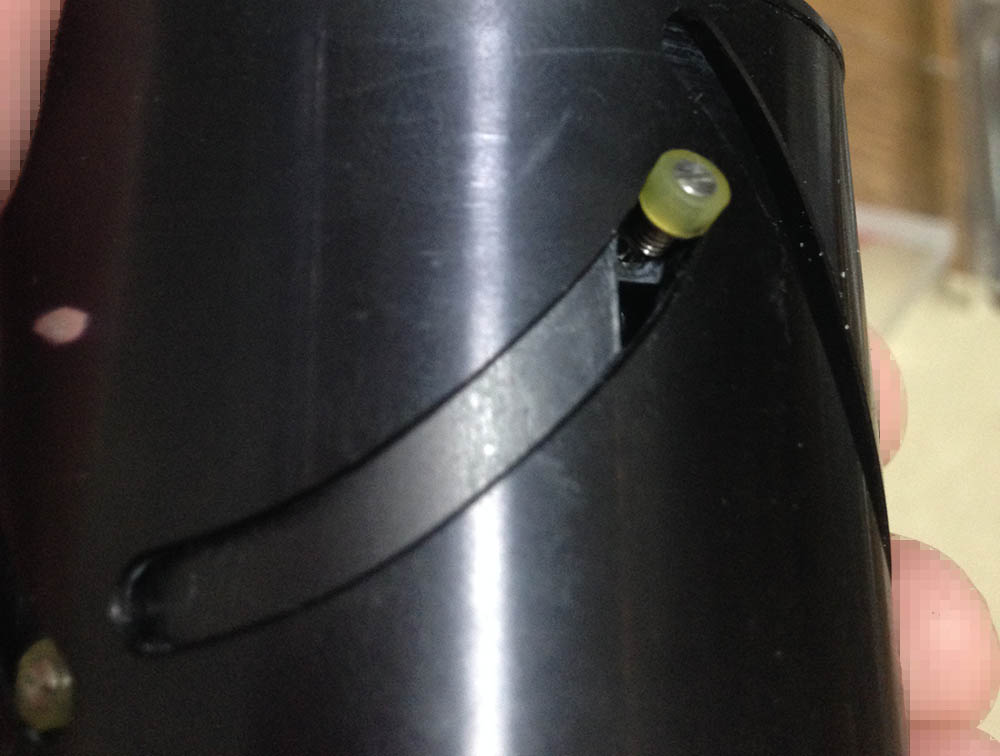
Locate and extract these, I am not sure if there’s only one. It can be difficult to remove since it’s usually sealed, if yours is stuck, drop some solvent into the hole to help soften the seal up.
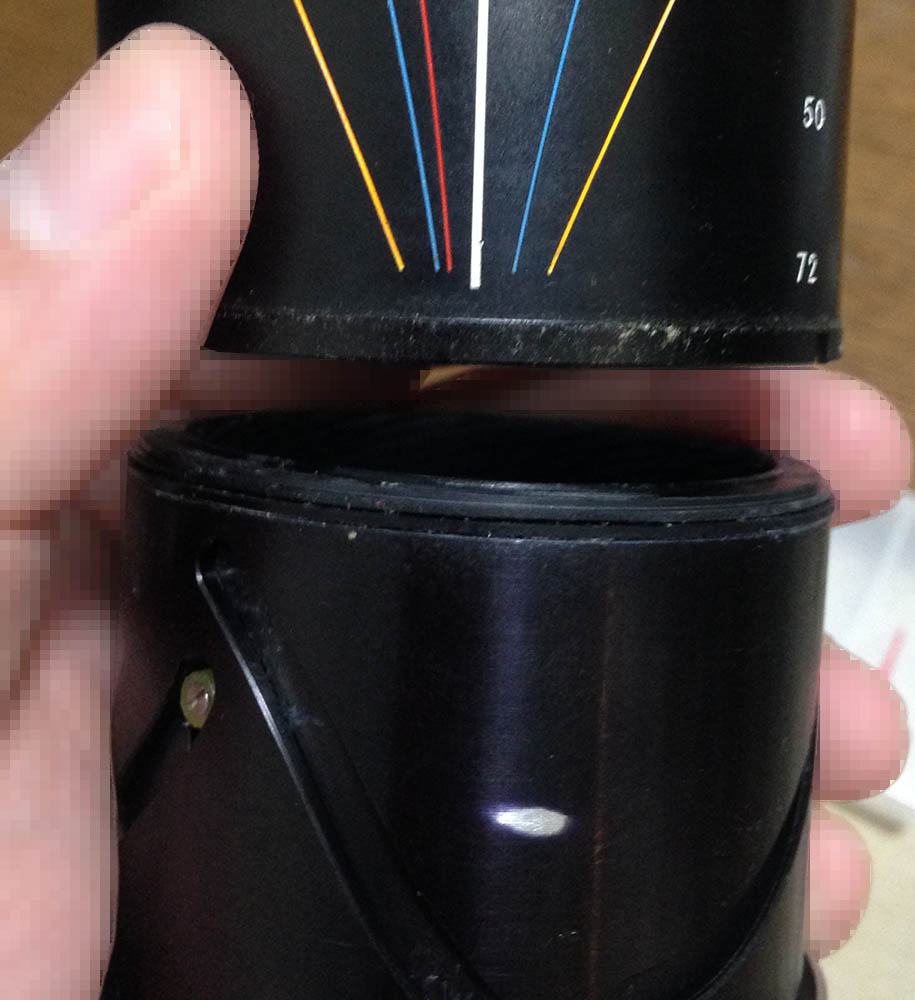
Carefully remove the barrel, be sure not to disturb the front assembly and its helicoid.
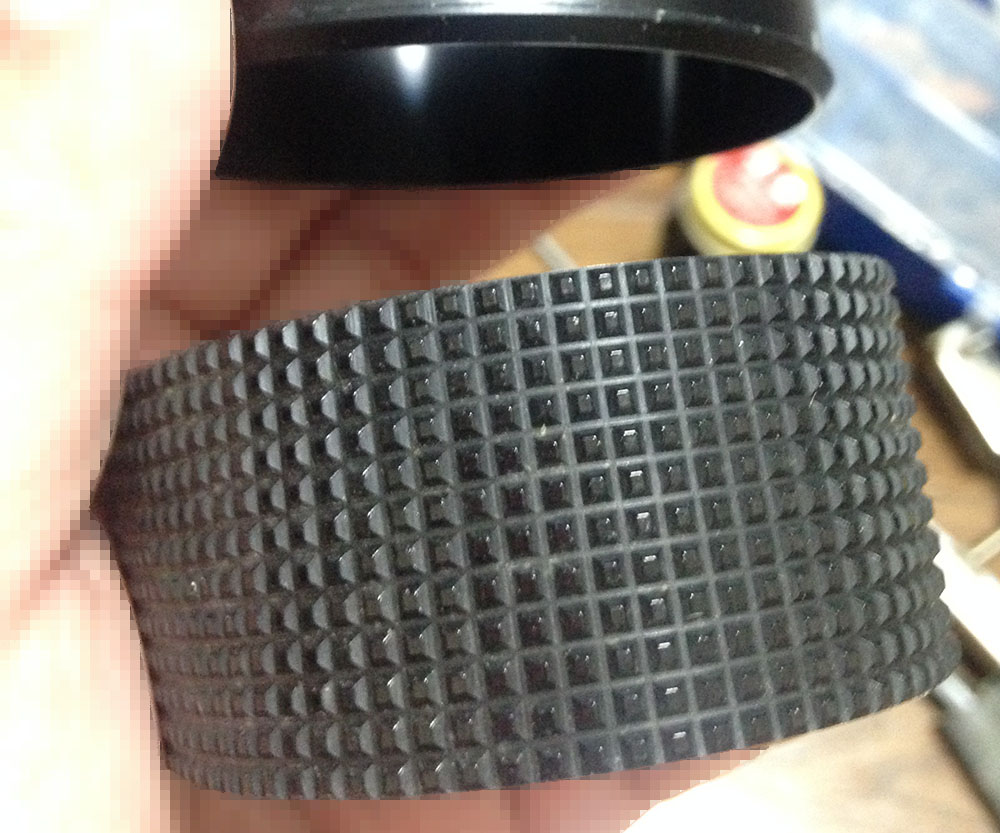
You can remove the rubber grip from the barrel by carefully running a thin rod underneath it to lift it from the cement. Be careful not to tear this, it can be brittle so it won’t flex much.
Separate the front assembly and make sure to note where it separates. This is a helicoid so you should note where they part since this is also where the helicoids should mesh, too. Many people get stuck here since they forgot to take notes, to prevent this from happening to you, read my work about how to service helicoids. Follow my guide and you should be fine.

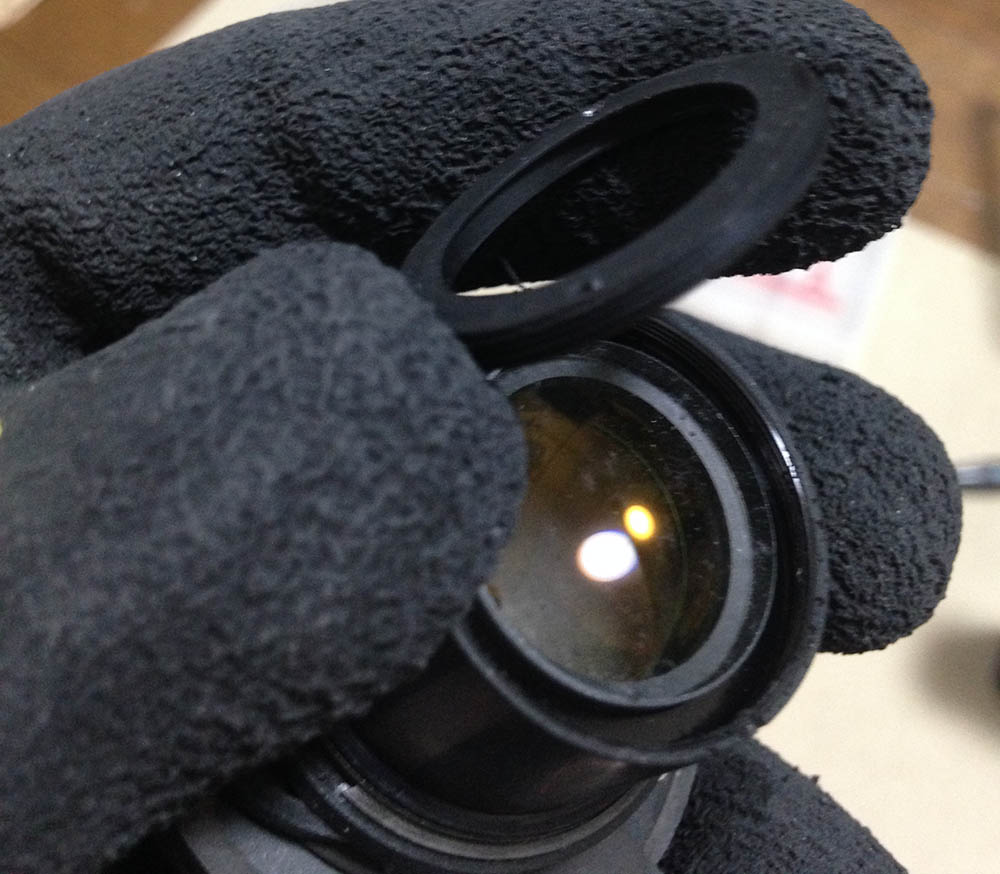
Extract these so you can remove this ring. Don’t forget to note its position, it should be reinstalled properly or you won’t be able to focus this properly. It limits the focus range via a pin.
Carefully remove it and clean this ring very well.

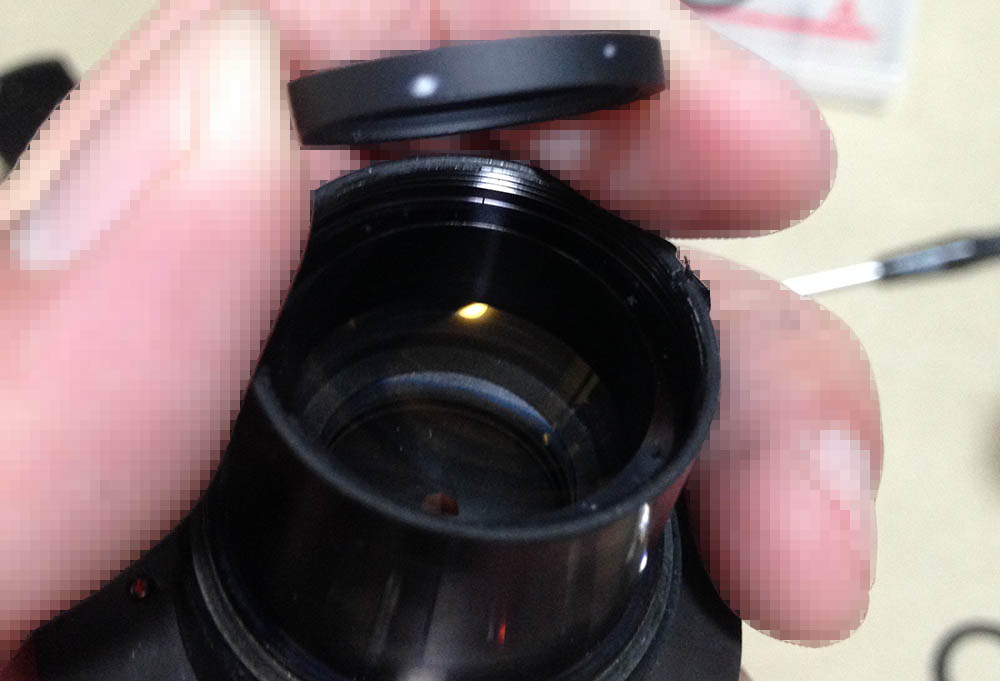
Remove the focusing scale and be sure to note its proper position so you can put this back properly again later.
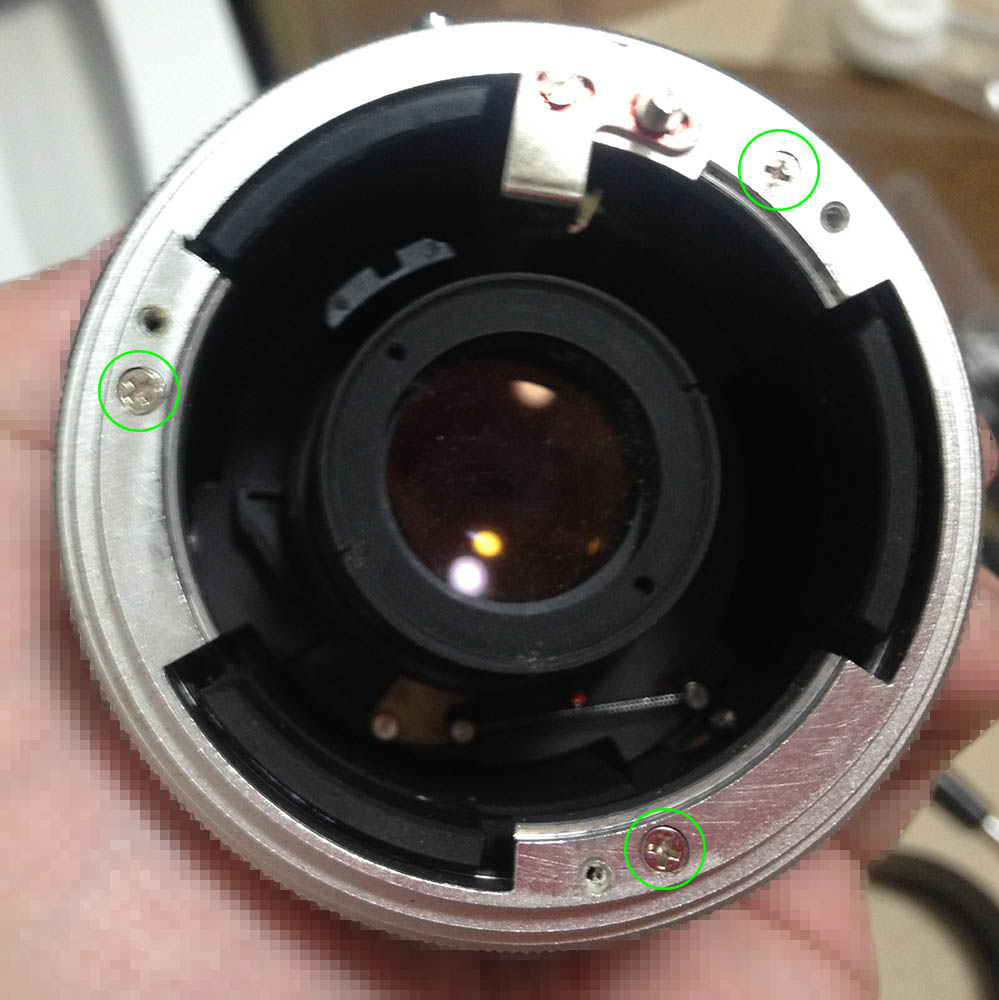
Carefully extract the screws of the bayonet mount. Many people strip these because they’re not using the right tools or techniques. My article on how to remove bayonet screws should show you how this is properly done. You can remove the parts but be careful about their position so you’ll know how to put them back again during reassembly.
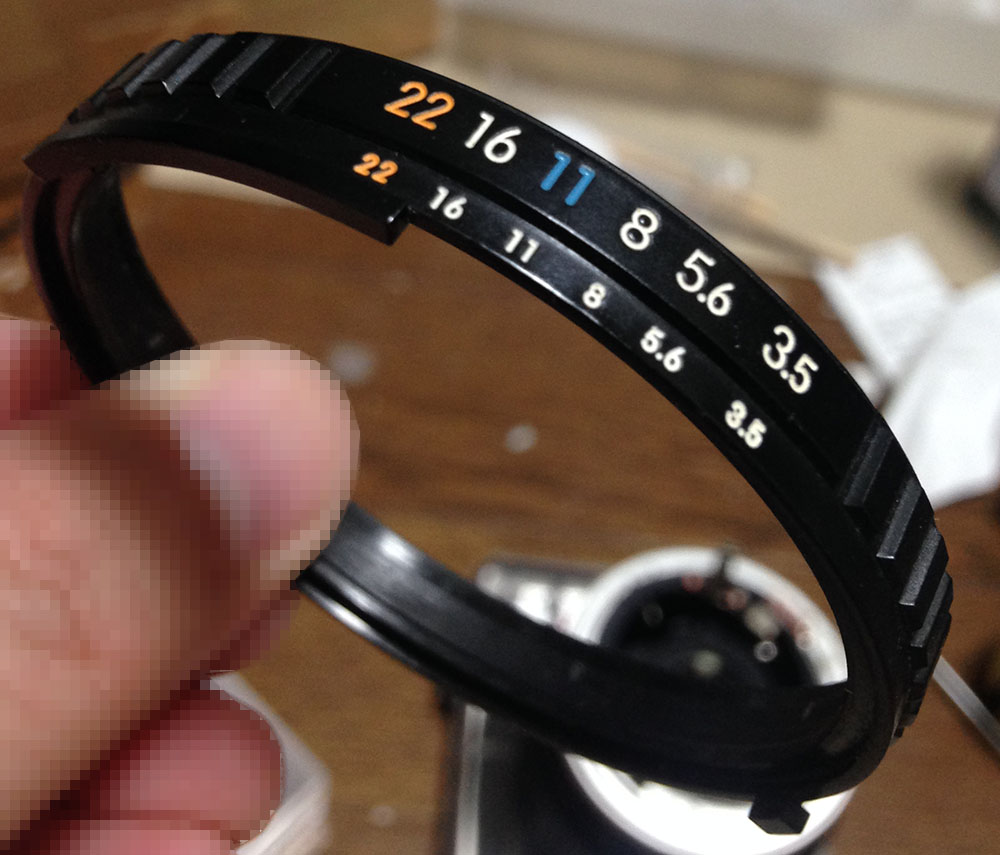
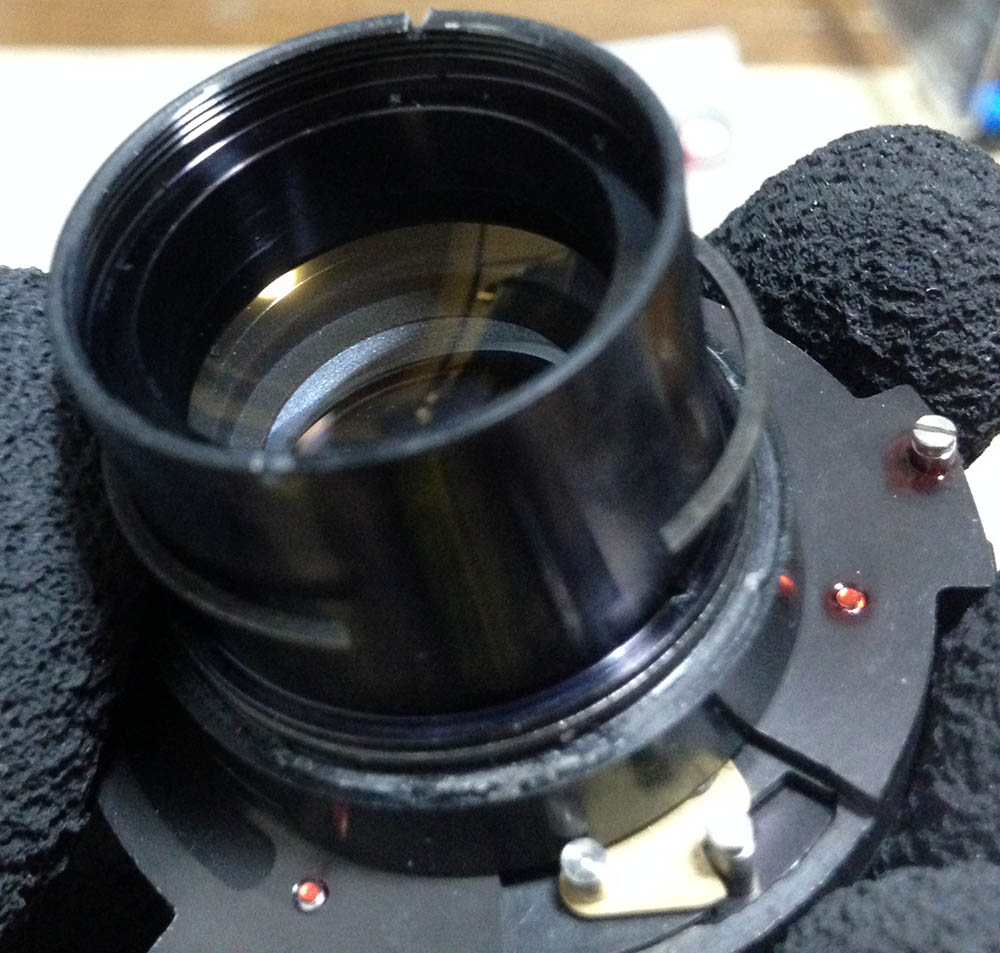
The aperture ring is made from plastic so don’t use strong solvents or else it will melt and look ugly.

Study how the mechanisms work before you remove anything so you’ll get an understanding about how things work.
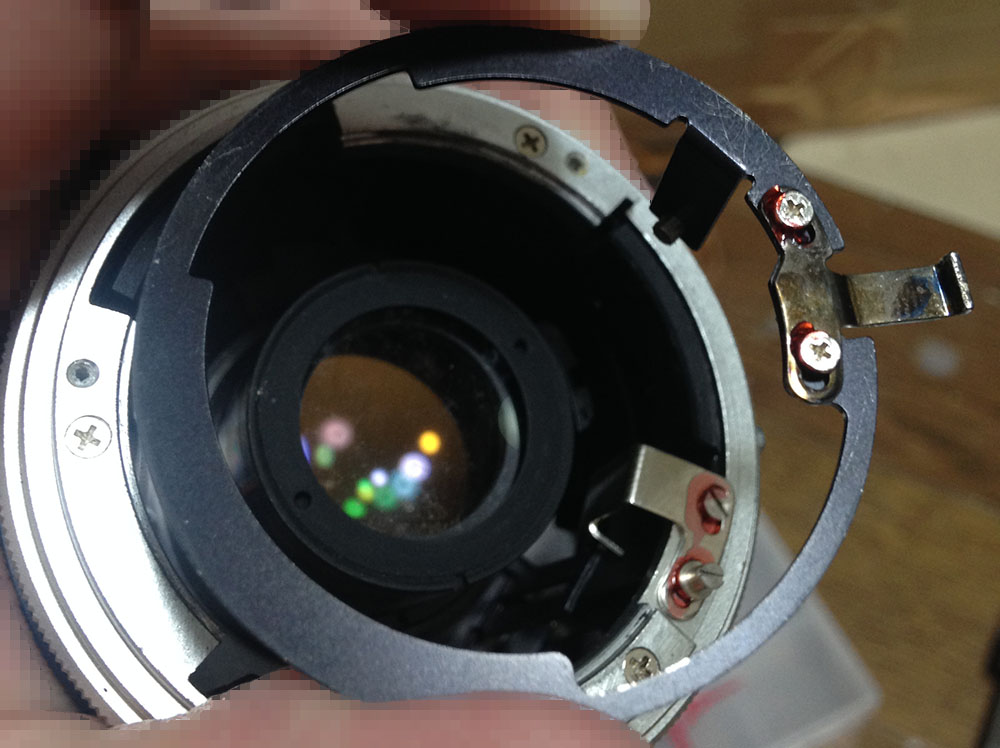
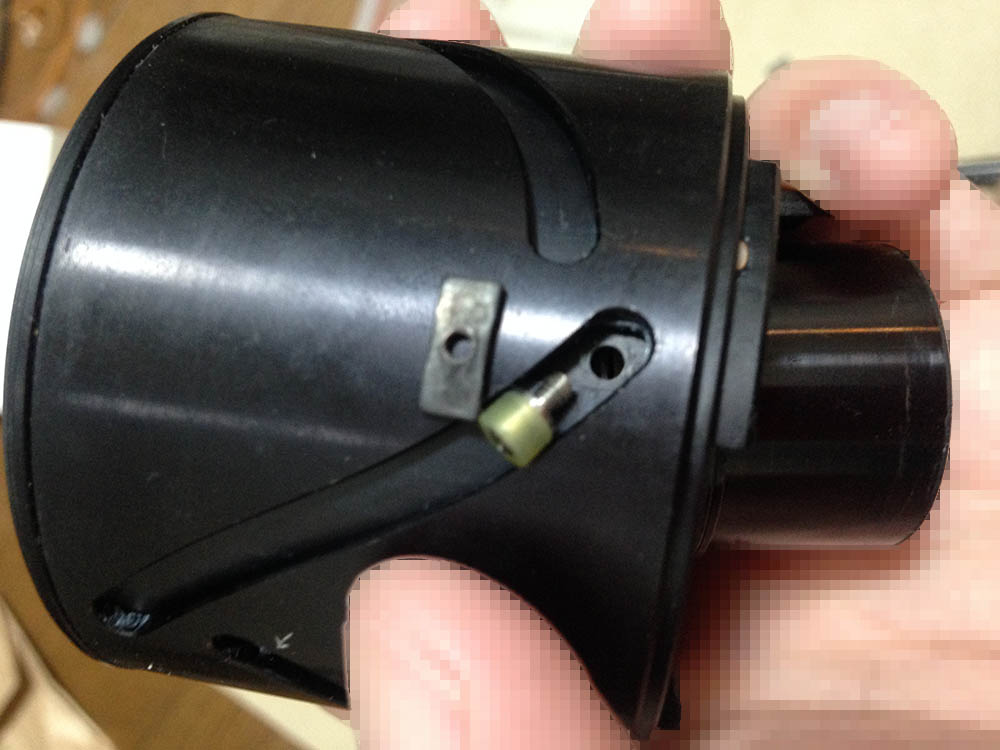
Carefully remove the aperture regulator, make sure that you don’t bend the lever and its pin. That pin has to couple to the iris mechanism to control it.
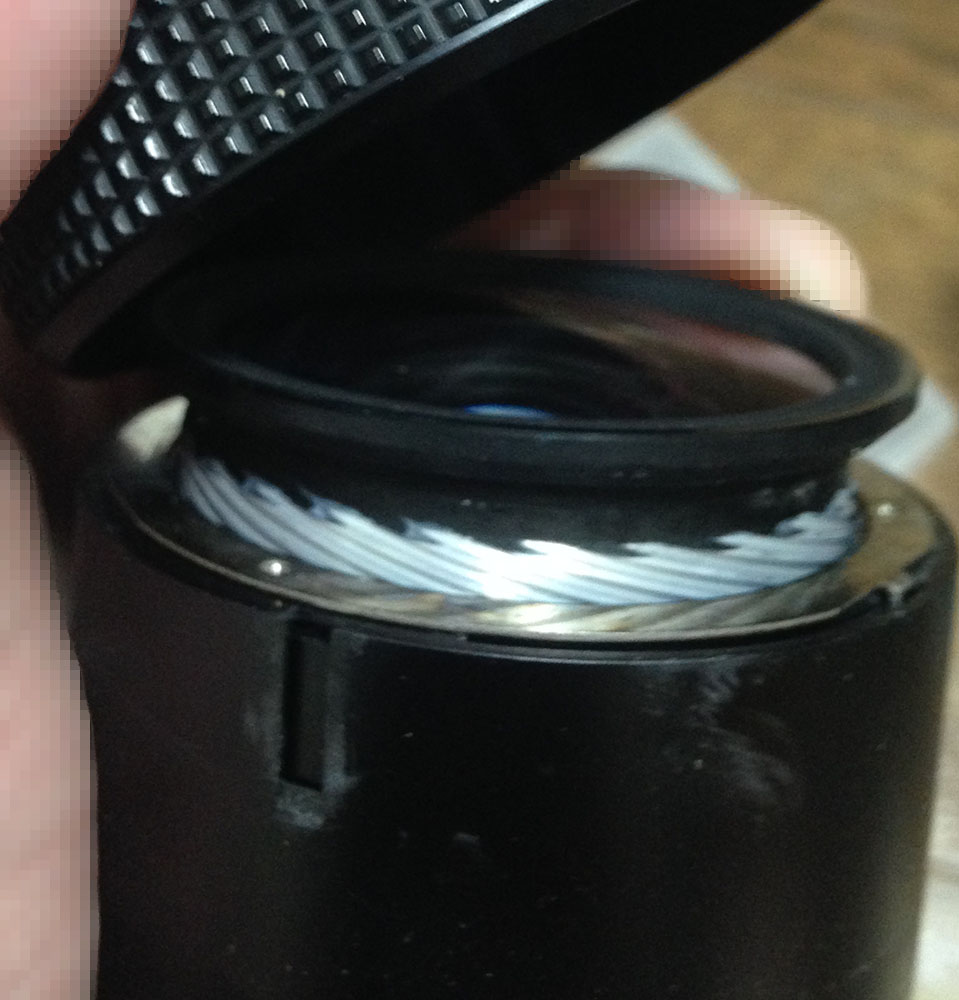
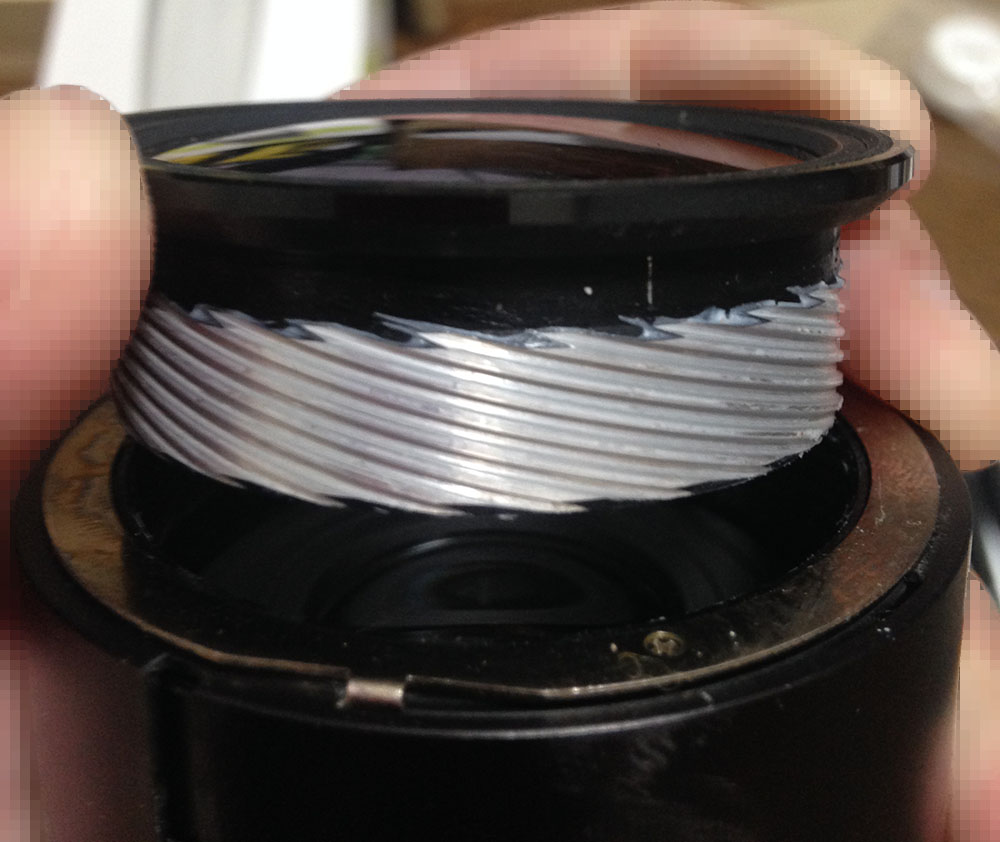
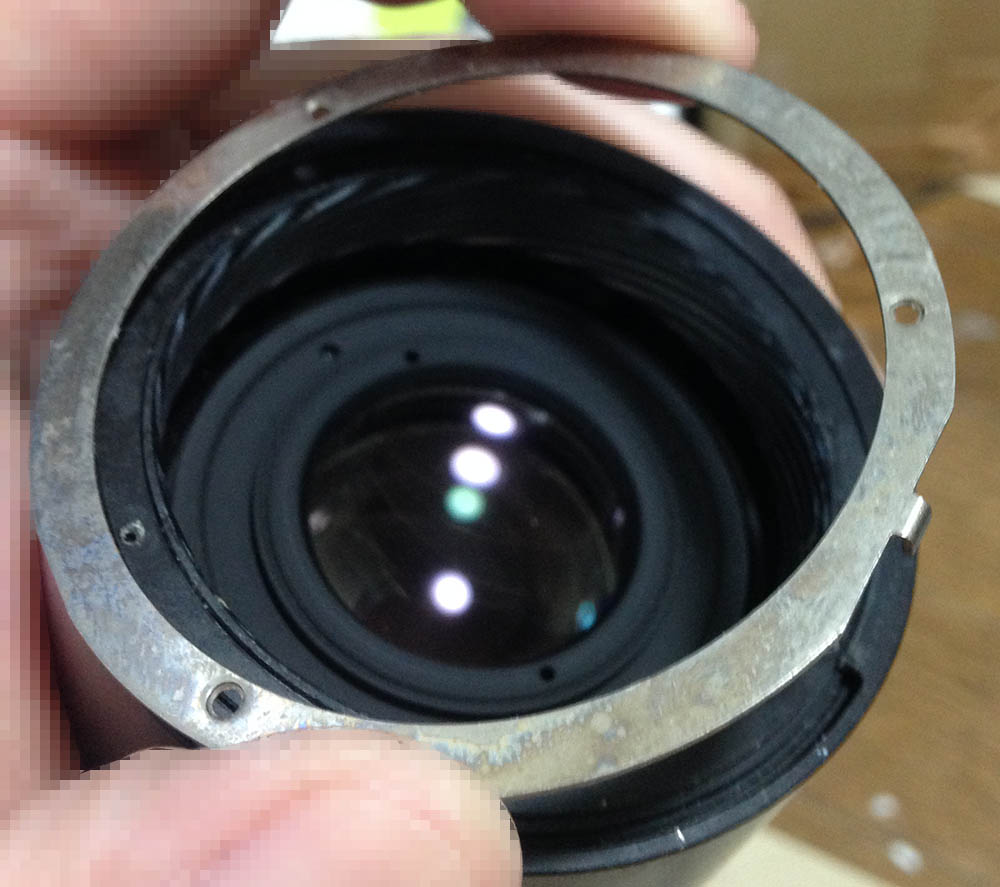
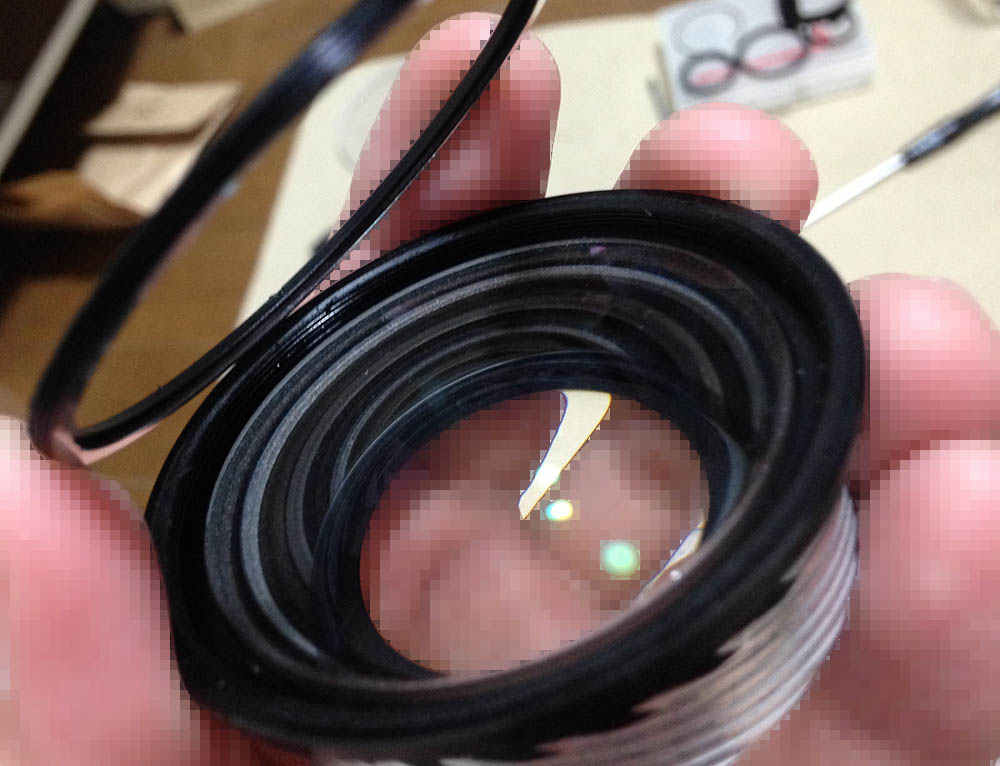
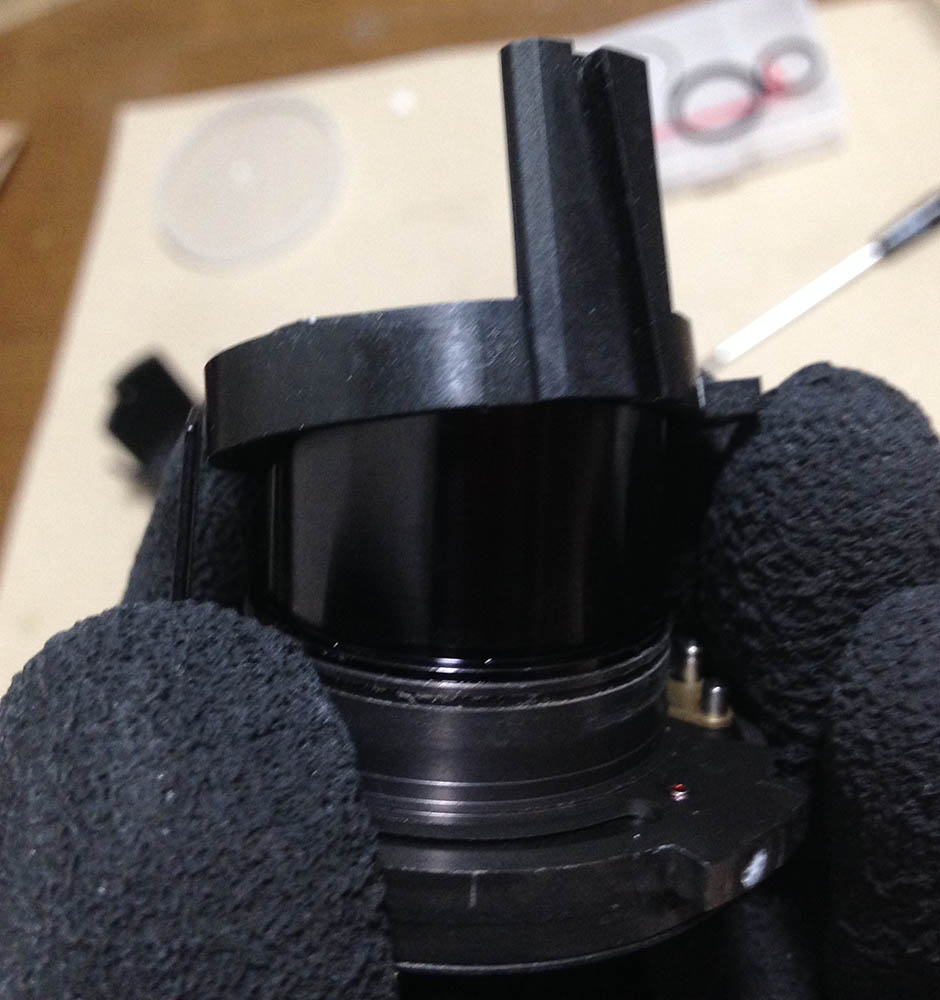
Carefully extract these so you can remove the sleeve.
The sleeve can now be removed. Clean its inner surface, it’s oily and there’s lots of dirt underneath it.
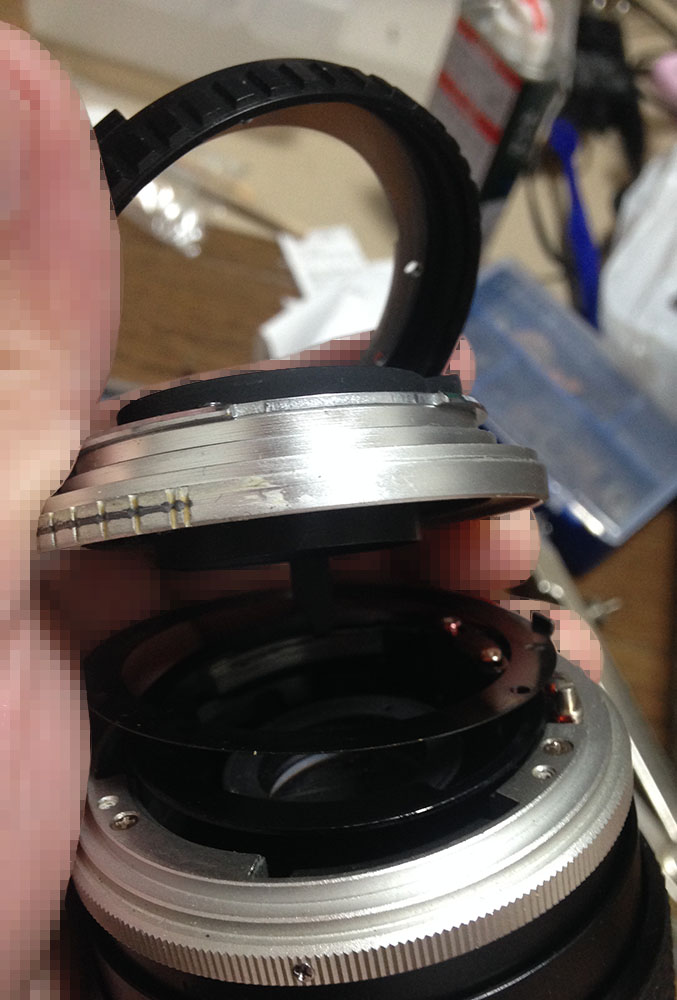
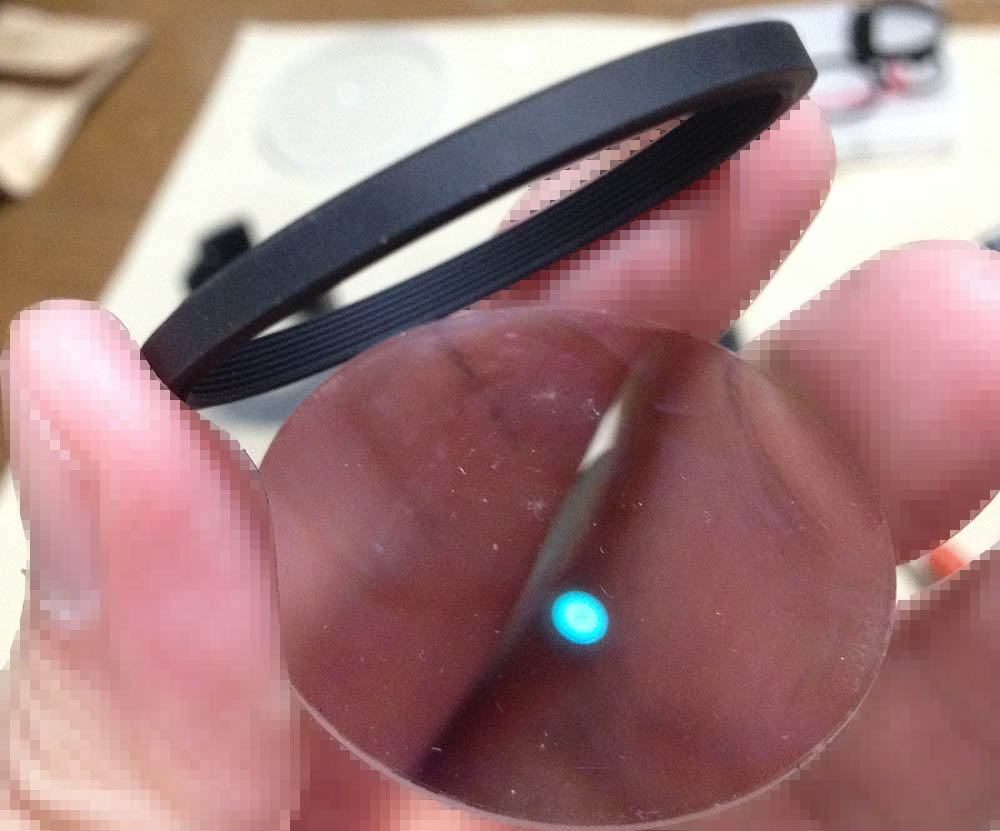
Carefully extract these to remove the grip.
Remove the grip and be sure not to warp the brass shim underneath it.
Like most zooms, this one has lots of rollers. Carefully remove them and do not use heat or solvents on these so you won’t damage the plastic parts.

Here’s another one. There’s a retainer underneath some of them, make sure that you note them in-pairs so you’ll know which one should be with what. I usually couple them back to make sure that I don’t misplace them.
Here’s another one with its accompanying abutment.

Removing the rollers will allow you to remove the floating mechanism. The springs on the legs of the housing has to be removed and cleaned properly. I always note the position of the floating mechanism so I will know how they should be oriented when it’s time to reassemble the lens.

You can now remove the inner floating assembly along with the iris. Be sure to note its orientation so you can put it back properly.

Carefully separate the inner barrels and cams. Clean everything properly so you won’t leave any residue that could contaminate the fresh grease.
Clean everything really well, scrub the greasy parts with a strong detergent and wash them clean. I usually soak the parts in an alcohol bath to remove any residue and wipe the parts clean. Be careful cleaning the plastic parts, if you scrubbed them too-much you can remove the paint. Solvents and even alcohol can craze the surface of the plastic parts and paint, too. The bushing of the rollers can be cleaned carefully by wiping them properly. Keep these parts dry until it’s time to reassemble the whole lens.
Disassembly (Objective):
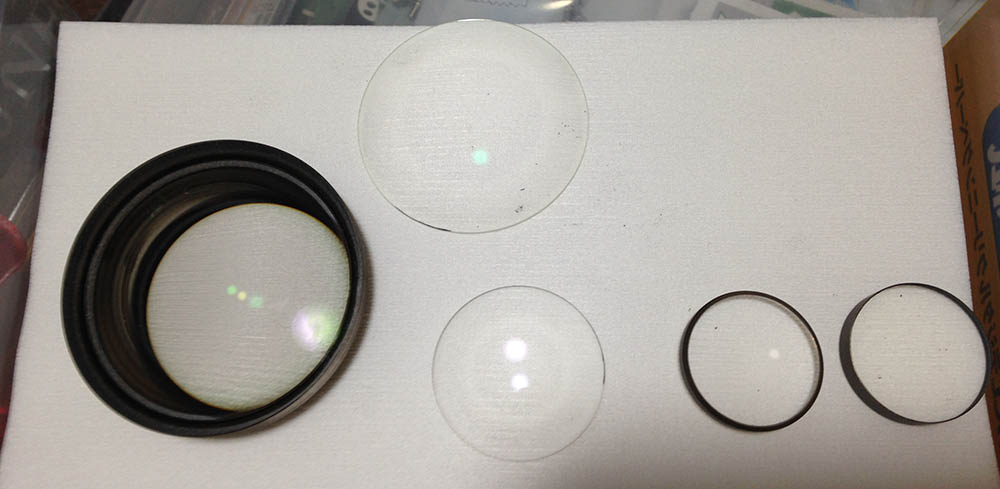
I didn’t have to clean the iris mechanism since it still looks clean, you won’t get any information on how to do that in this article but it’s simple so you’ll get it out without an problems. Read my previous articles and you’ll be fine. The elements are easy to access, most of them were merely held by a collar or retainer. If there’s anything that I’ll caution you about it’s the position of the rear elements. Take lots of notes on how deep each element sits within their housing, these were precisely adjusted at the factory so you will need to reproduce it as best as you can or the performance of the lens will suffer.
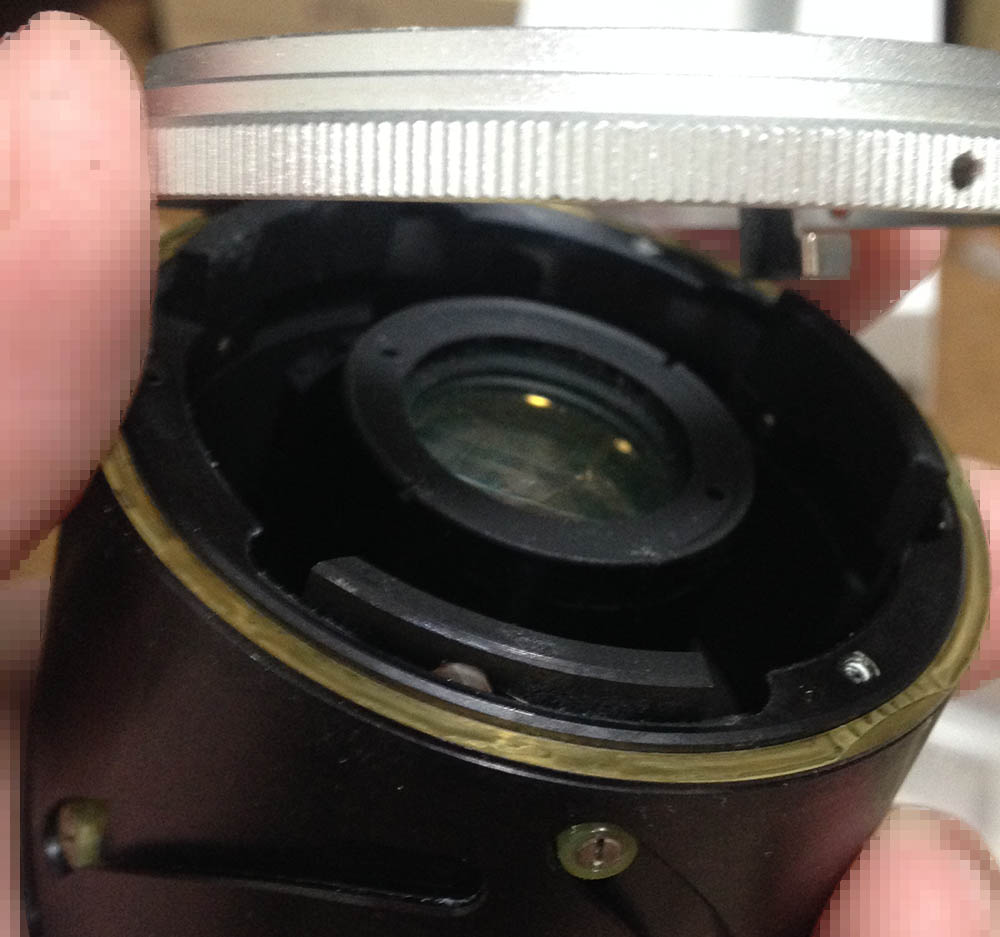
The front element can be removed by unscrewing its retainer. Place a small drop of alcohol on the threads to soften any seals and use a lens spanner to do the job. Just be careful not to slip and scratch the front element. You will get access to the 2nd element once you remove the front element which just sits on top of it.
There’s a spacer underneath, be sure to note which side is the front so you’ll know how to put this back again. You then have access to the 3rd element.
Carefully unscrew this retainer to get to this element.
The rear can be easily removed once its collar is unscrewed. A lens sucker is handy for removing this.
There’s a spacer underneath, note which side should be facing the front and don’t forget to put it back facing the right way or you’ll end up cracking the elements adjacent to it.
The iris regulator can be removed once you pried-out this ring. Clean all the gunk here and make sure that it’s clean.
Remove the iris regulator and clean it properly.
Make sure that you note which side should be facing the front, use a marker to draw a small dot on the walls of the elements to indicate which side faces the front so you’ll be able to put it back facing the right direction.
Clean the elements carefully, if your lens has fungus, read my article about removing lens fungus. Thin the solution so you won’t damage the coatings, it is not as tough as the ones found on most true-blue Nikkors and soaking the elements for too-long will etch the elements. Avoid lubricating anything that is near the iris mechanism, oil may contaminate the iris and create a bigger problem in the future and you will have to open the lens again to fix it.
Conclusion:
This was a fun lens to service, it’s simple and there aren’t a lot of parts but it is challenging enough to entertain an advanced amateur. I got this lens for a small sum, a can of beer costs even more so I got the most out of my money.
Now that the parts are clean it’s time to reassemble the lens. You can adjust the focus by loosening the screws of the focusing ring and then turning the front element. Once you are happy, tighten the screws and do more tests. If you are new to this, read my article on how to adjust your lens’ focus. There are plenty of tips there to help you get the job done.
Thanks for following my work. If you loved this article, please share this so your friends will know the joy of shooting with old lenses and film. You can also help support this blog by making a small contribution, it helps me keep this site alive by helping me pay for its maintenance. You’re also helping me pay for the film and developing cost, this site promotes the use of film so it’s all for a greater cause. Thank you again and see you in the next article, Ric.
Help Support this Blog:
Maintaining this blog requires money to operate. If you think that this site has helped you or you want to show your support by helping with the site’s upkeep, you can make a small donation to my paypal.com (richardHaw888@gmail.com). Money is not my prime motivation for this blog and I believe that I have enough to run this but you can help me make this site (and the companion facebook page) grow.
Leave me some tip?
Thank you very much for your continued support!
$2.00
Helping support this site will ensure that this will be kept going as long as I have the time and energy for this. I would appreciate it if you just leave out your name or details like your country’s name or other information so that the donations will totally be anonymous. This is a labor of love and I intend to keep it that way for as long as I can. Ric.

2 Comments (+add yours?)