
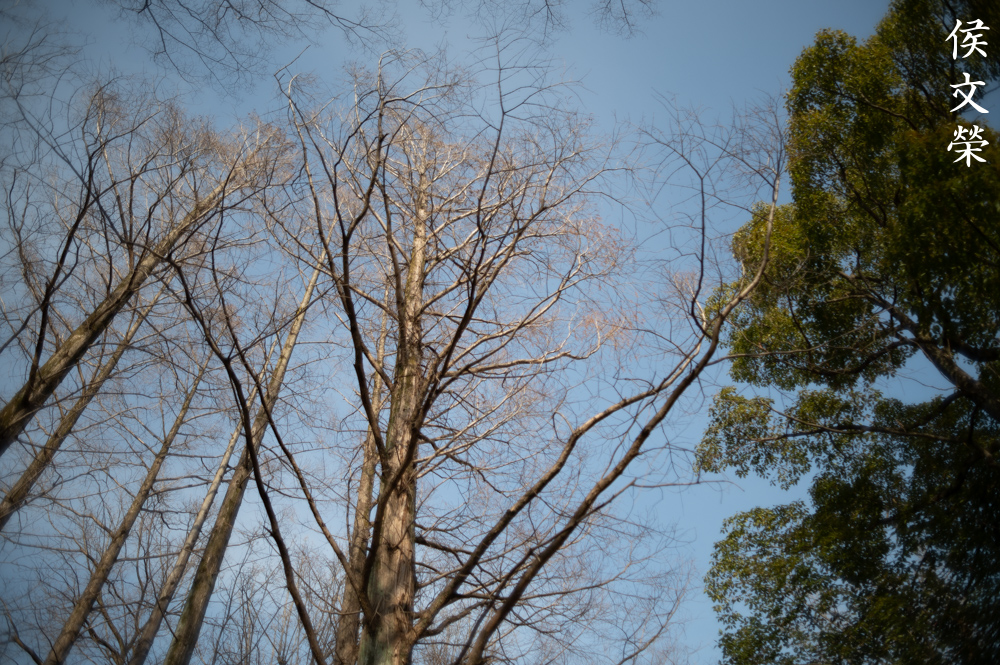
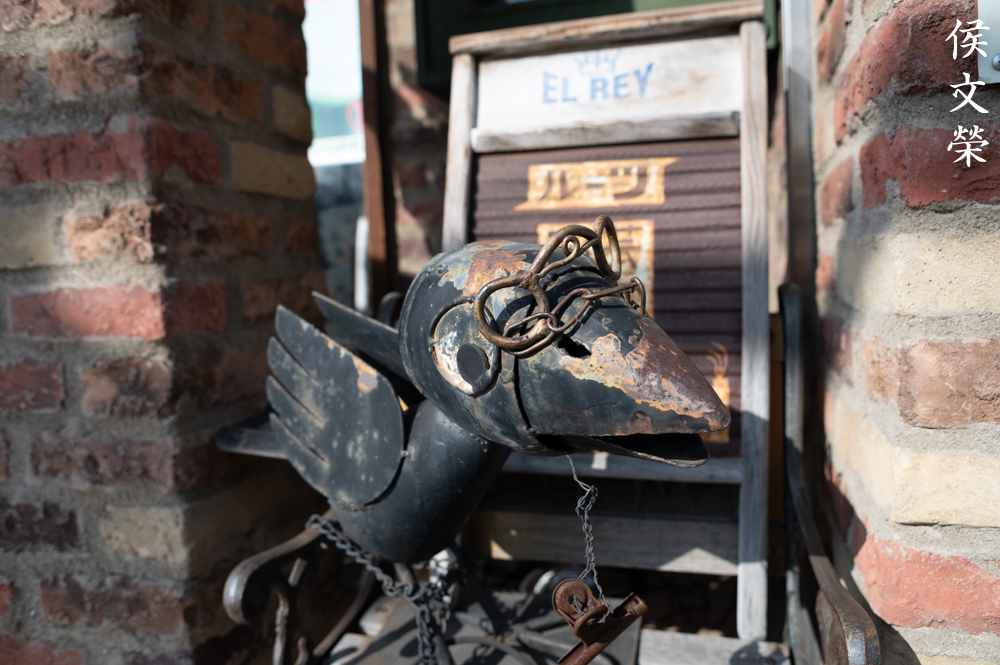
Hello, everybody! It’s still early but it’s already dark outside. This is normal for this time of the year as the Sun sets earlier than it usually does. This means that there’s less time for me to take nice photos in daylight but it won’t prevent me from shooting at the dark since night-time urban photography is something that I am known for, at least I imagine myself to be famous for that. You’ll need fast lenses in order to shoot at lowlight, many of which aren’t cheap, specially if you’re talking about wider lenses. Today, I’ll show you one such lens that has fascinated me and it’s my pleasure to present to you one of Nikon’s more useful lens for shooting in the dark. Read this article to find out what this lens is.
Introduction:
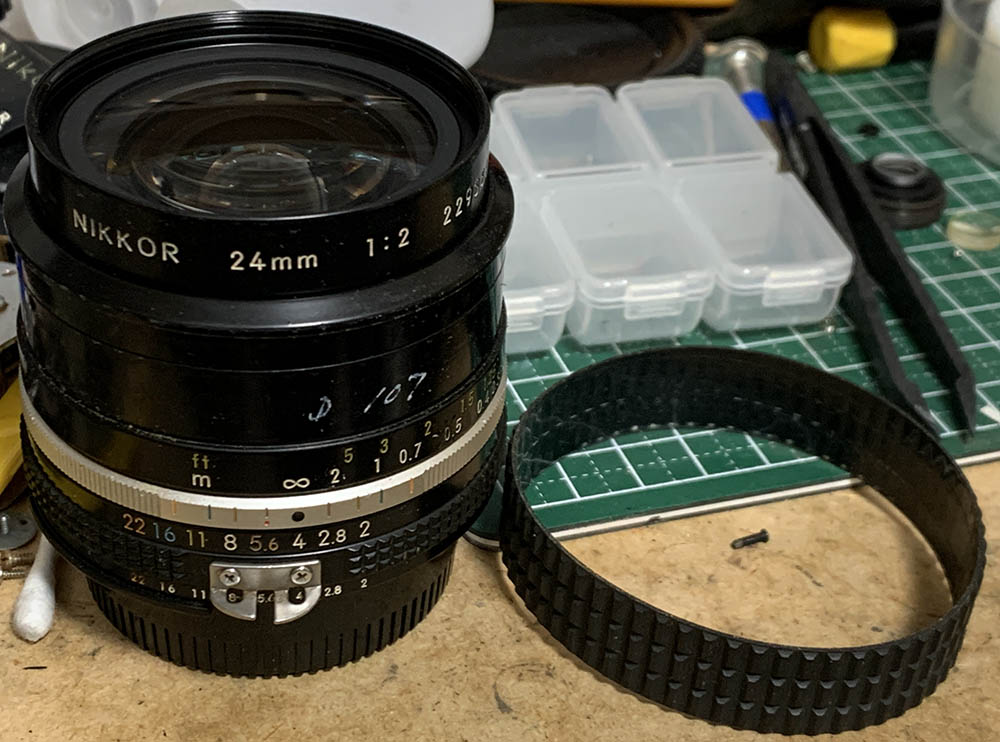
The Nikkor 24mm f/2 Ai-S was sold from 1981 to 2005, quite a long time for a Nikkor. It succeeded the older Nikkor 24mm f/2 Ai, an amazing lens that began this class of lenses and it was sold from 1977 to 1981 where it was replaced by this lens. There was an initiative to upgrade or replace every Nikkor around that time to the then-new Ai-S standard, that’s the reason this lens came to be. It’s a great lens and it offered something that proved to be quite useful, a fast maximum-aperture which is uncommon for lenses in this category. This lens class allowed new creative expressions and a way to shoot with faster-speeds in lowlight situations. It was an amazing lens but it came at a cost and that’s the reason why not many people owned one, preferring the cheaper but slower ones instead.

It has a compact barrel with a wide front element which still accepts 52mm filters. The focus-throw is rather short which is typical of many wide-angle Nikkors of its time. It’s well-built but the older Nikkor 24mm f/2 Ai is a lot tougher. The Nikon Df works great with it, both are compact so they match each other perfectly.
Like its predecessor it has a complex 11-elements-in-10-groups design which it inherited. This allowed it to gather enough light to be able to shoot at f/2 but this is just its nominal speed as you’ll soon see why. To make the package even more desirable it also has CRC implemented, allowing it to perform better at closer distances specially near the corners where the advantage is easier to see. It was a marvel of its time that’s why the optical formula remained the same for decades until this lens class was retired in 2005. It is the last of its class but it was replaced with newer lenses that are even faster and also perform a lot better wide-open.

Of course, it’s perfect with any film Nikon such as this Nikon F3. It handles very well with it, enabling you to use this setup in the most natural manner. I believe that it should be shot with film in order to appreciate it more.

It’s a nice companion to the Nikon Z6, the setup is compact and light, enabling you to carry it all-day without discomfort. It’s good to know that it could perform quite well with modern high-MP sensors which you’ll soon see in the following section.
There’s no shortage of people comparing this to the cheaper Nikkor 24mm f/2.8 Ai-S saying that the latter performs better. If you’re curious about how that lens performs be sure to read my review of that lens. My stance is this was made for a different purpose so it should be thought of as a different lens to some extent. Maybe the cheaper lens works for some but there will be times when this lens is the only answer to your creative needs, specially for videographers. While the statements are all valid you should not think too much of them because only you will decide if this one works for what you envisioned.
Learning how your lens performs is key to maximizing its. You’ll learn how to utilize its strengths and avoid its weaknesses. This knowledge helps in determining which lens to bring on an assignment. I shot these from f/2, f/2.8, f/4 and f/5.6 since these are the most common apertures that people would want to use this and we’ll see the most changes happen with these values. These photos were shot with my Nikon Z6, some of the photos were cropped close to 1:1 magnification so we can see the details better.


(Click to enlarge)
Vignetting isn’t obvious wide-open just because it spreads to the center, covering the entire frame and you’ll get some dark corners as usual. Stop it down to f/2.8 and the frame gets a lot brighter with only the corners exhibiting some darkness. It gets even better by the time it gets to f/4 where only the extremities show a bit of darkness. You’ll still see traces of it even by f/5.6, maybe it looks better at f/8? This can lead to inaccurate metering if you’re metering with it from the largest aperture, you’ll get overexposure so it is best to compensate for it.


(Click to enlarge)
Distortion is kind of high but not as bad compared to similar lenses, I was actually expecting to see more. The profile is a little bit complicated since the falloff isn’t shallow. I wouldn’t worry about it at this level and you could easily hide it by not positioning any straight lines close the edges of your frame.
(Click to enlarge)
I won’t say that it’s resistant to flare and ghosts, you’ll get a couple of blobs in your frame at worst. They appear as undefined orbs at wider apertures and they start to take shape at smaller apertures. The good thing is they aren’t distracting at all, it seems that the coating is doing a great job at controlling it. You won’t get it to flare much which I think is impressive or at least it won’t fill your frame like what some older wide lenses tend to do.

I was expecting that coma would be horrible and I wasn’t disappointed. Even without zooming-in you could see how the elongated the point-lights look, they take the shape of peapods.

Here’s a crop of one of the corners. It usually looks worst around the extremities but you don’t need to go too-far from the center to see this happen.


(Click to enlarge)
It looks the worst wide-open as expected, stopping it down to f/2.8 won’t help much at all. It begins to look more acceptable at f/4 but the point-lights still looks elongated. Stopping it down to f/5.6 will make it look somewhat round.


(Click to enlarge)
Mine appears to be well-corrected for chromatic aberration, I don’t get to see any even at wide-open apertures, maybe just a slight hint but that’s it. You won’t see it that much in real-world photos but I suspect that you’ll get some of it when shooting twigs with a bright sky as the background.

(Click to enlarge)
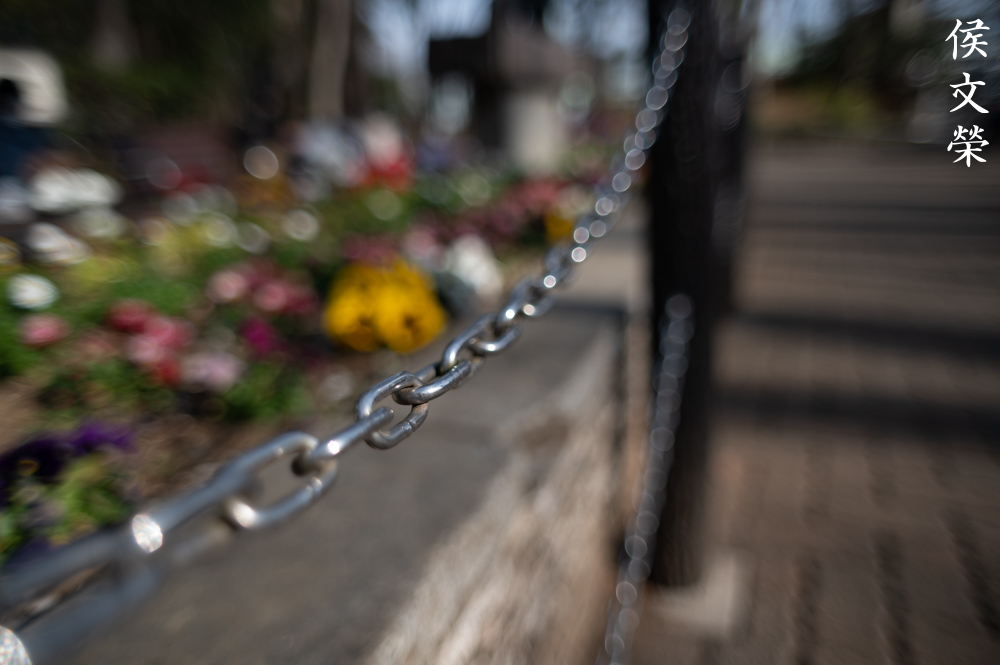
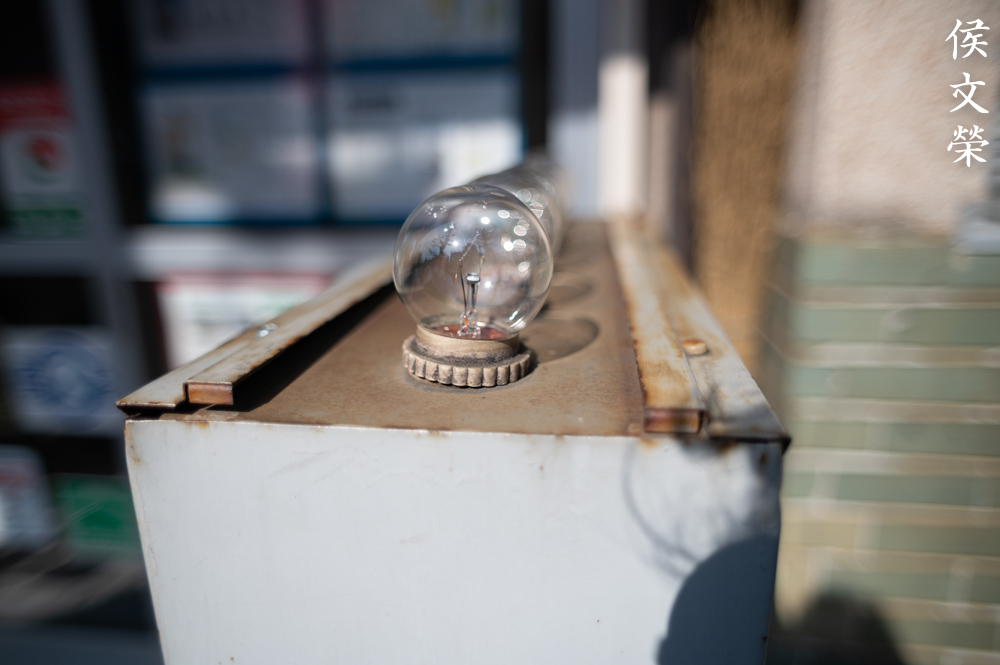
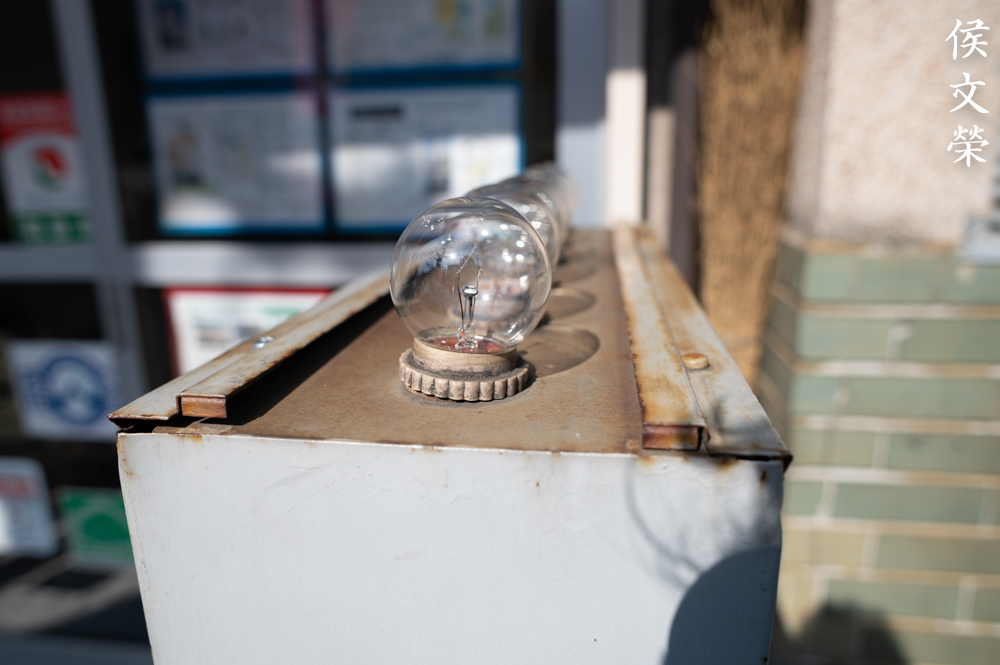
The character of its bokeh ranges from smooth to ugly depending on the distance and aperture you’re shooting at. Stopping the iris down to f/4 helps give it the smoothest look it could achieve while shooting wide-open will give you a nauseating-look that could disorient your viewers.


(Click to enlarge)
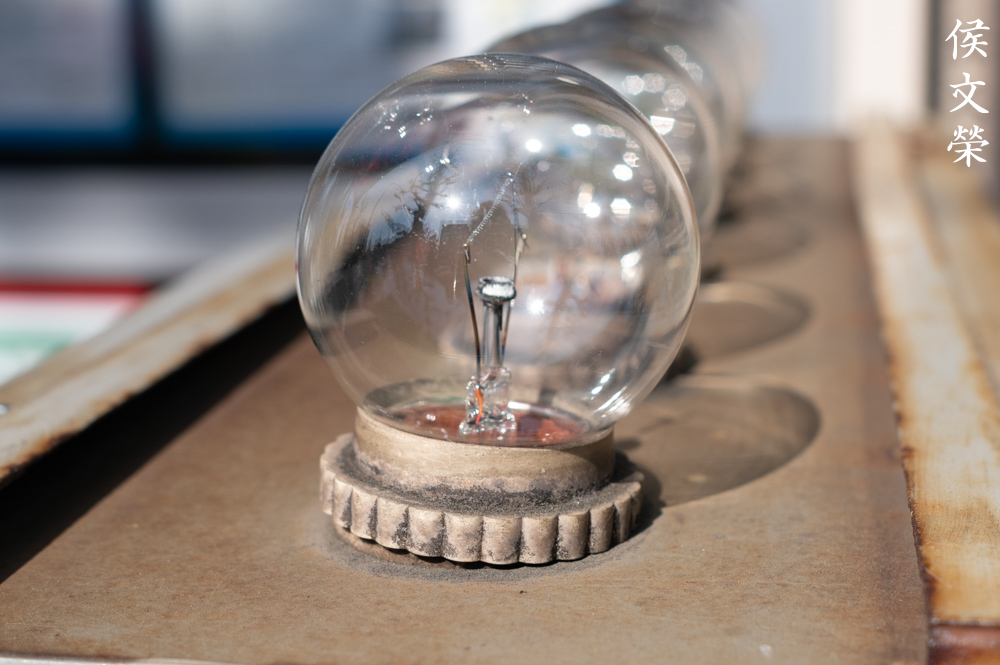
The center looks quite decent wide-open, it’s a bit soft but definitely not rubbish as some people would claim it to be. Most of what makes it appear soft can be attributed to the thin depth-of-field, spherical aberration and moderate flare but it’s quite good if you’re going to ask me. Just give it the right variables and avoid bright objects to make it appear sharp. The corners on the other hand do not look good and it won’t look any better until about f/5.6 and on. Resolution seems adequate at the center but it’s weak and is no-good at the extremities. Stop the iris down to f/2.8 and the center looks a lot better due to a modest improvement in resolution. The far-corners still look shabby. Set it to f/4 and you’ll see that the center is now operating near its peak, the extremities begin to look a lot better for the first time but still rather blurry. The center looks gorgeous at f/5.6 and the corners look acceptable even if you’re looking at the far-corners. Notice that it looks quite dark wide-open, about a stop’s worth in my estimate, be careful with this since it will fool your meter and you’ll end up with slightly-overexposed photos when you stop it down. This won’t be a problem if you are shooting with a mirrorless camera, it’s going to be an issue when shooting with an SLR since it will meter with it wide-open. It is important that you compensate your exposure to be safe specially when you’re shooting with film. At least that’s the theory, look at my film photos, they seem to look well-exposed. What’s causing this is the coverage of the vignetting as it reaches to the center of the frame. My lens performs better at closer distances and the performance drops as you focus closer infinity.
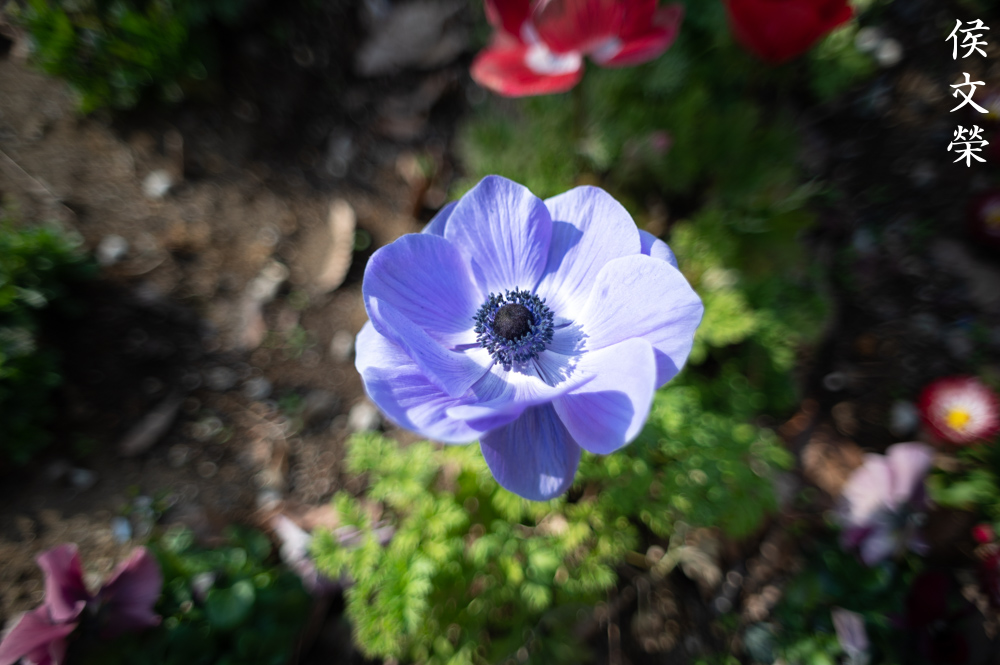
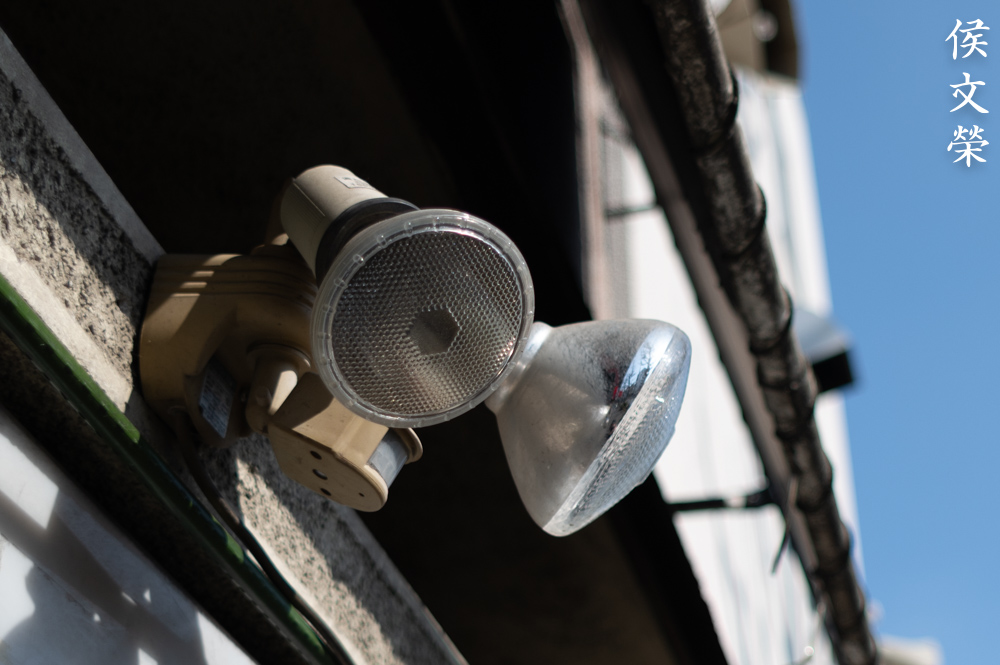
This is how close you could get with it. Despite not looking like much the tip of my lens is actually less than a foot from the flower so the depth-of-field is quite shallow. The character of the bokeh looks rather rough but that is not what this lens is for anyway.

This is how it looks like when cropped near 1:1, it actually looks a lot sharper on my monitor to the point that I could see its pollen rendered in adequate detail. Spherical aberration makes it appear softer than it actually is which is a shame.

It renders with a “dreamy” character wide-open, perfect for taking photos that suggest a delicate-feel. This makes it a great lens for taking closeups of babies and maybe even jewelry.

It’s adequately-sharp at more moderate distances even when shot wide-open. I’d say that it’s not bad at all or maybe I just got a nice copy.

Its wide-aperture makes it ideal for lowlight photography, this is what you’re actually paying for and the main reason why this lens exists. The Nikkor 24mm f/2.8 Ai-S sure is a lot cheaper and will definitely be enough for most cases but it won’t give you an extra-stop’s worth of light when you needed it, a useful feature when shooting with film. Also worth observing here is how smudgy the corners look when shooting wide-open, this is due to coma and a general lack of resolving power.
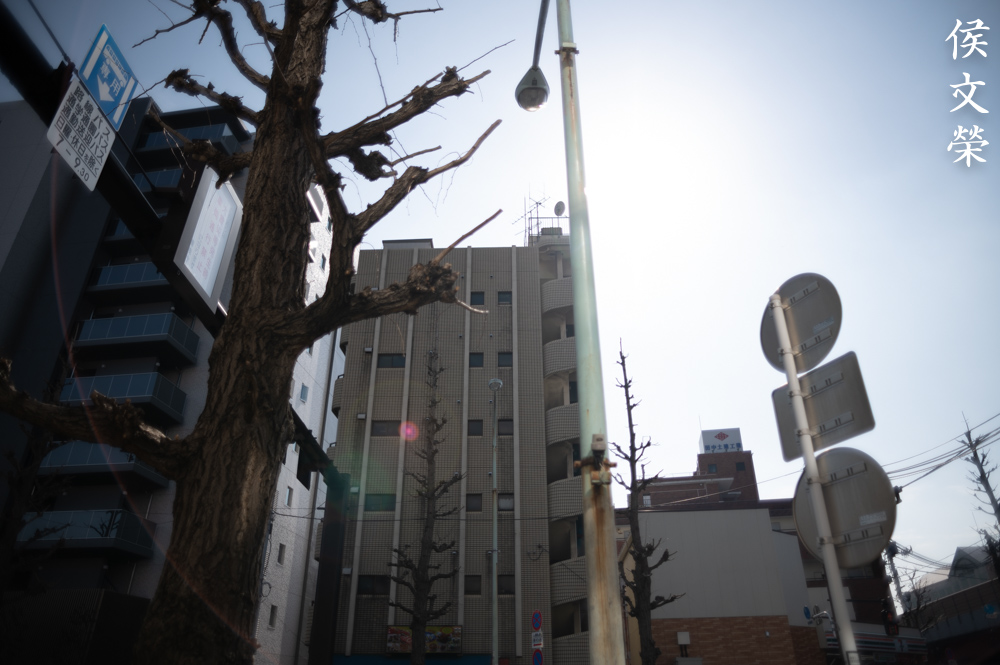
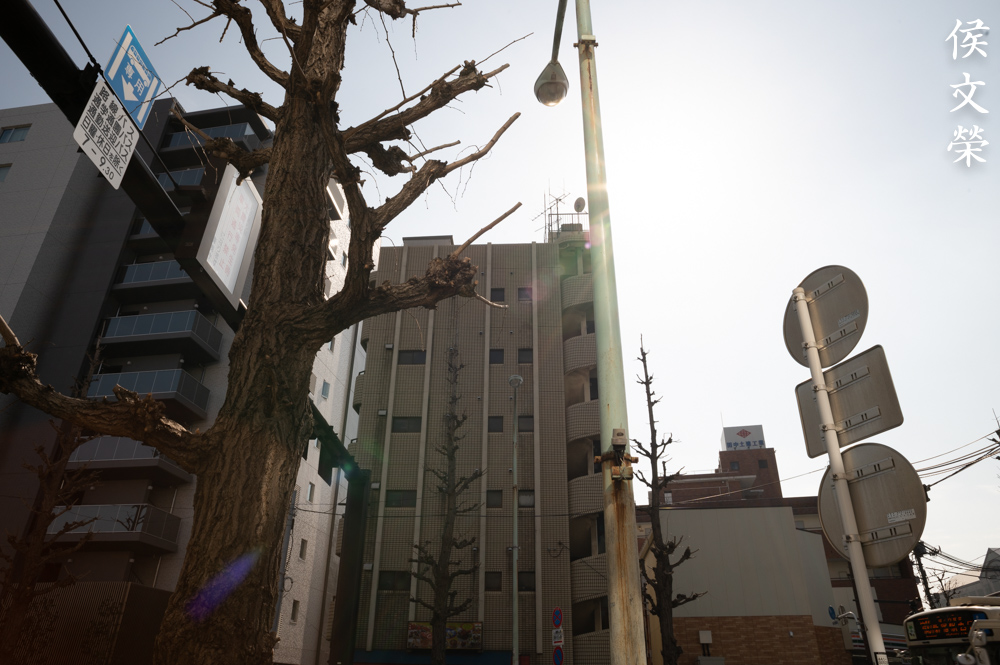
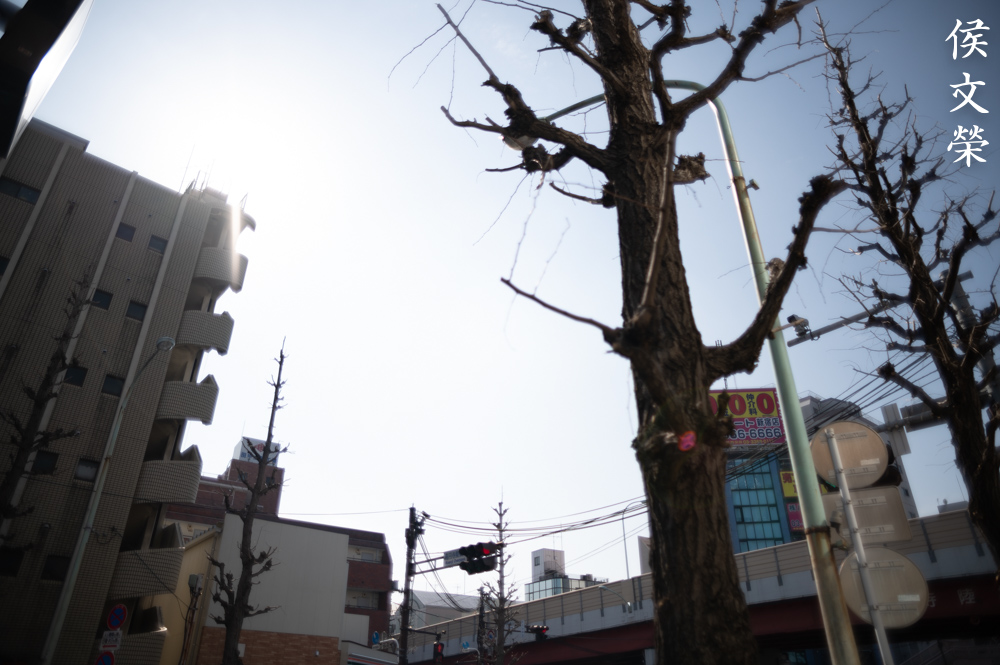
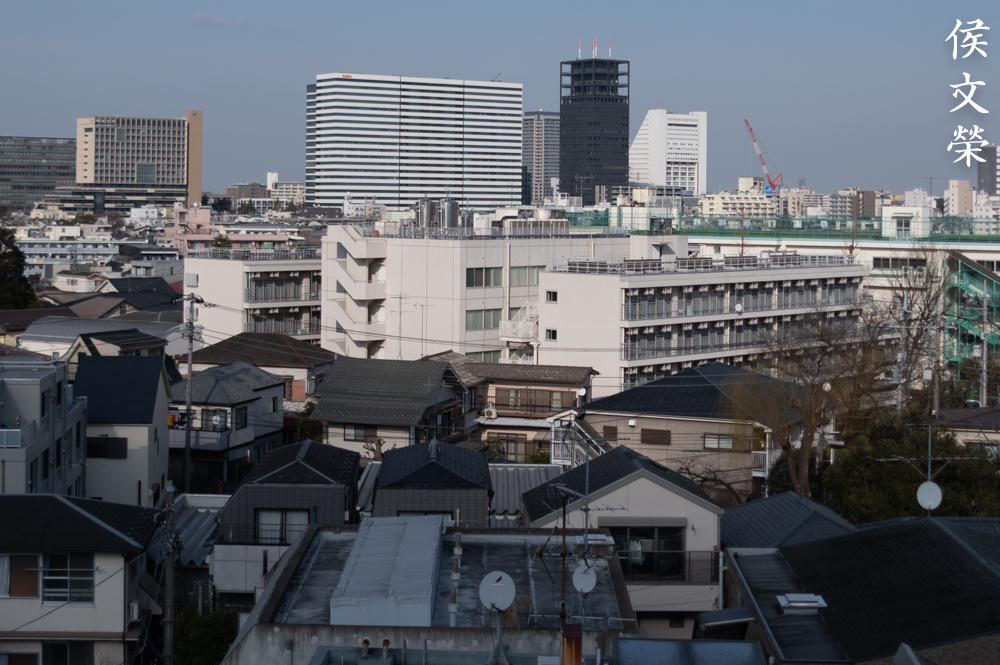
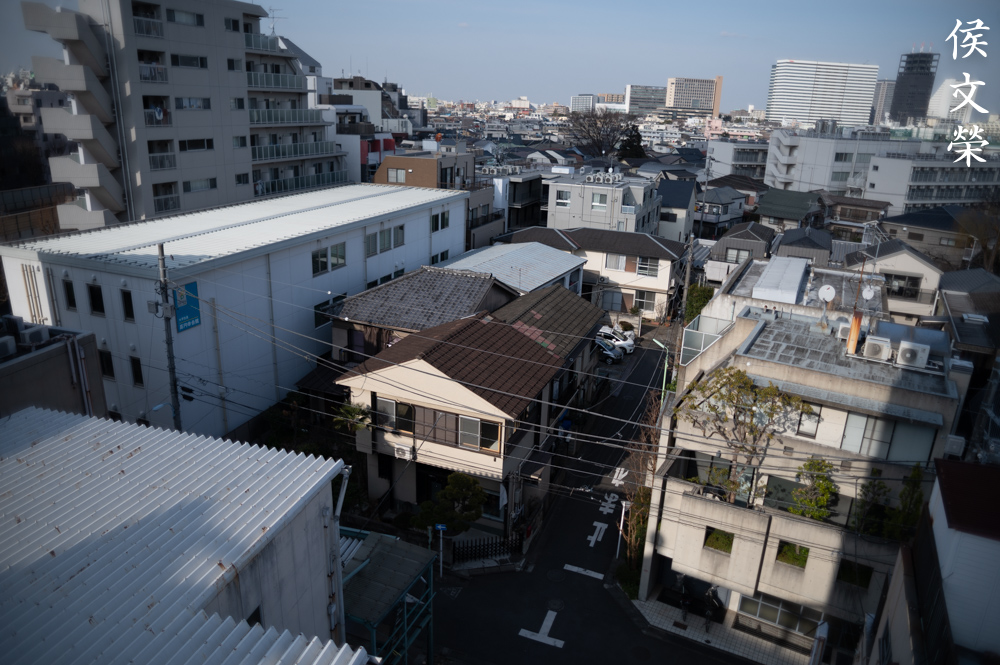
Of course, shooting with a 24mm also means that you can get a lot more things inside your frame. Unlike the other photos in here I took this with my Nikon Df.


(Click to enlarge)
I enjoyed shooting with it a lot, I think it’s a great lens despite the negative reputation it has as being “soft” wide-open. Just make sure that you expose your shot properly and avoid things that will trigger spherical aberration when shooting wide-open and you’ll definitely get nice, sharp centers when shooting at wider apertures. This is a unique lens judging from my experience with it and a Nikkor 24mm f/2.8 Ai-S won’t be able to give you a similar effect. They’re different tools made for different purposes, one is used for artistic expression while the other one is more practical.
Let’s now check some film photos. Film has a unique look that is hard to simulate with a digital camera thanks to grain. It reacts differently to light, this means that it could mask a lens’ flaws or amplify them. Since it was designed to be used with film, it’s best that we judge this using its intended medium. I shot these with a Nikon F3 loaded with Kodak Gold 200.

I wouldn’t use this for street photography since it’s too-wide for it but it’s nice for reportage if your scene calls for it. A wide frame will allow you to capture more things and that means having multiple things happening in your photo at the same time.

Even angling your straight lines won’t be enough at times as evident by the curved signage. It helps that the scene is rustic so this doesn’t look out-of-place.

I wouldn’t use this for taking photos of architecture and art where lines have to be straight.

Stopping it down to smaller apertures will allow you to capture nice, sharp photos with film. It has that “vintage-look” which some people like.

The effects of distortion won’t be obvious in a busy scene such as this where there’s no straight line that runs across the frame. It’s a good thing to be aware of if you have no choice but to use this lens.

The bright maximum aperture is what makes this lens special. It allows you to use faster speeds when you have a slow film, this is a big deal when shooting with film but not so much when shooting with a modern digital camera since high-ISO performance will be a lot better compared to the grainy-looking high-ISO films that were available back then.

I love how it could render nice, sharp details, this is a premium lens and it should be able to perform at a premium level.


(Click to enlarge)
Here’s the rest of the roll. I enjoyed shooting with it, this is a versatile lens and I highly recommend this for people who love taking photos with film. It allows me to shoot with an extra-stop’s worth of light, something that many people do not appreciate today. It’s only something that a film photographer will appreciate.
I will only recommend this lens to those who know what they’re looking for because of the price but if you could get one for a nice price then never let that chance slip. This is a great lens that will serve you well for decades to come so long as you take care of it. There’s not a lot of alternatives to it except for the older Nikkor 24mm f/2 Ai or any of the faster and more expensive versions but I really think that this lens has a unique place in Nikkor-land. Videographers will love this lens as it brings plenty of value and you’re also going to be open to more creative expressions because of what it could do. If you can’t afford it, the Nikkor 24mm f/2.8 Ai-S is a good choice, too. Despite being slower it could do most of what this lens could offer, it’s only when you need that extra attribute to make your creative vision come true is where this lens comes into the picture. When looking for one be sure to test it well, it has CRC implemented and that can get misaligned, causing blurry photos when shot at closer distances. Turn the rings and be sure that they all operate properly. The iris has to be dry and snappy when actuated, if it has an oily iris then that requires a major repair. Its glass has to be clean and clear, too. You could buy the Nikon HK-2 for it but it really doesn’t do much apart from guarding the front element from your fingers. As for the price, these usually go north of $250.00 in fair condition, I got mine for not a lot of money, it was dirty and the grease was dry so it was sold as junk. Just wait and you can find one that matches your budget, happy hunting.
Before We Begin:
If this is your first attempt at repairing a lens then I suggest that you see my previous posts regarding screws & drivers, grease and other things. Also read what I wrote about the tools that you’ll need to fix your Nikkors.
I suggest that you read these primers before you begin (for beginners):
- Essential tools
- Best practices 1
- Best practices 2
- Best practices 3
- Ai conversion
- Working with Helicoids
Reading these should lessen the chance of ruining your lens if you are a novice. Before opening up anything, always look for other people who have done so in YouTube or the internet. Information is scarce, vague and scattered (that is why I started this) but you can still find some information if you search carefully.
I highly recommend that you read my working with helicoids post because this is very important and getting it wrong can ruin your day. If I can force you to read this, I would. It is that important!
For more advanced topics, you can read my fungus removal post as a start. It has a lot of useful information, it will be beneficial for you to read this.
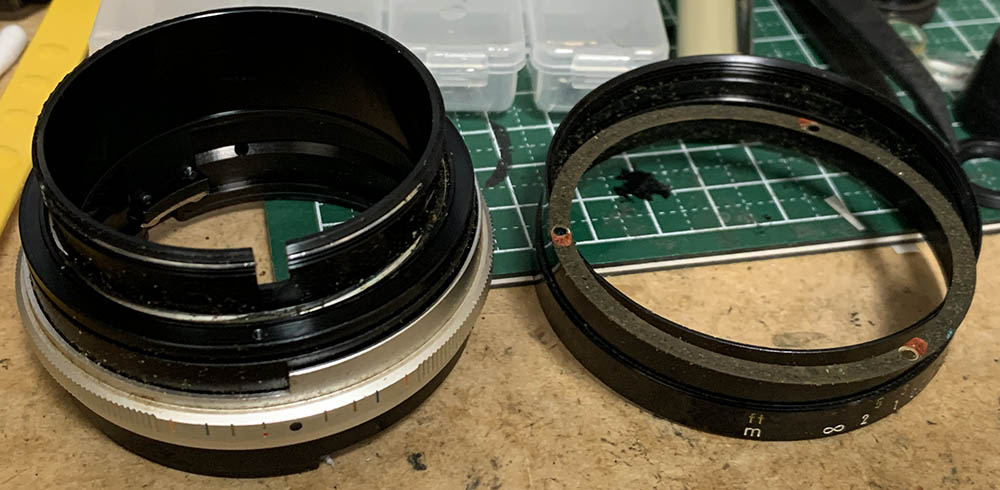
Disassembly (Lens Barrel):
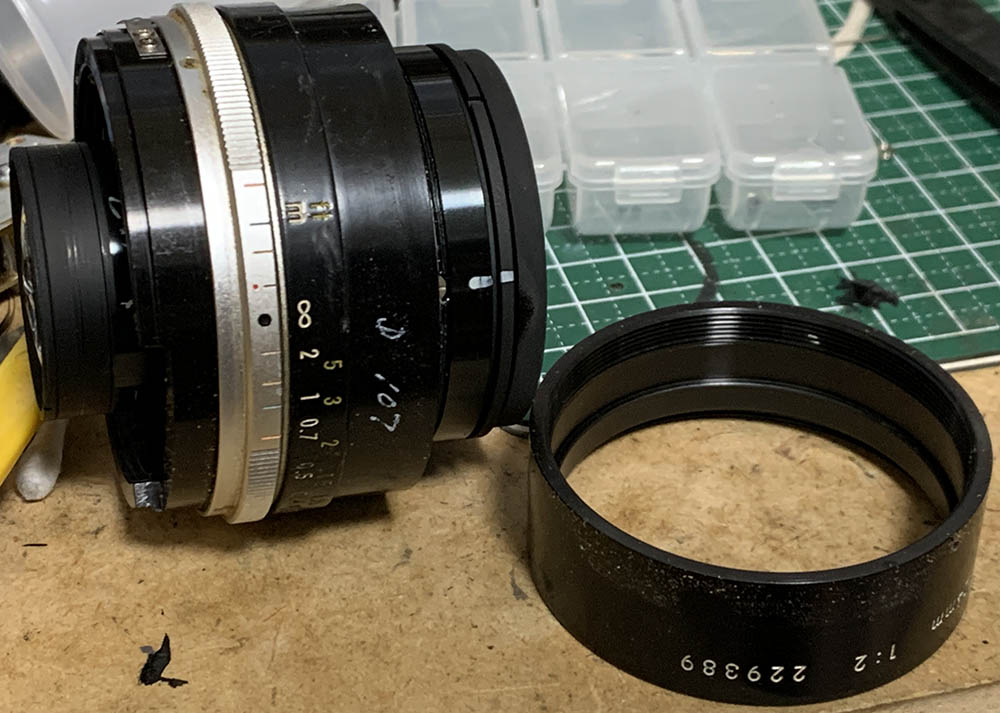
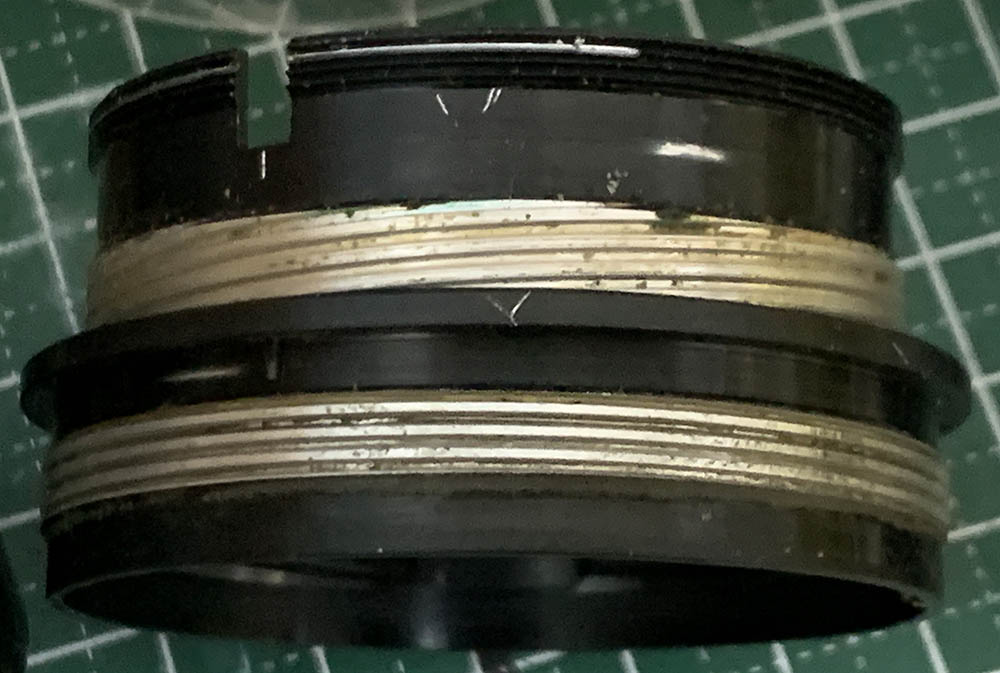
This is not an easy lens to service since it has CRC implemented so the barrel construction is a lot more complicated but luckily it is not as difficult as I thought and I’ll show you the proper way to deal with it. Like most Nikkors you could remove its objective from the rest of the barrel early-on but we will take a small detour since we need to document a few things before we proceed. It’s not something that I will recommend a beginner to work with, an advanced amateur or professional repairer should not have any problems with it as long as my notes were followed. You’ll need drivers of the right type and sizes to work on it, a lens spanner is mandatory and a set of rubber cups will be essential for servicing the objective.
Carefully remove the rubber grip by running a thin, round rod underneath its whole circumference to lift it from the cement. Make sure to be careful so you won’t tear it.
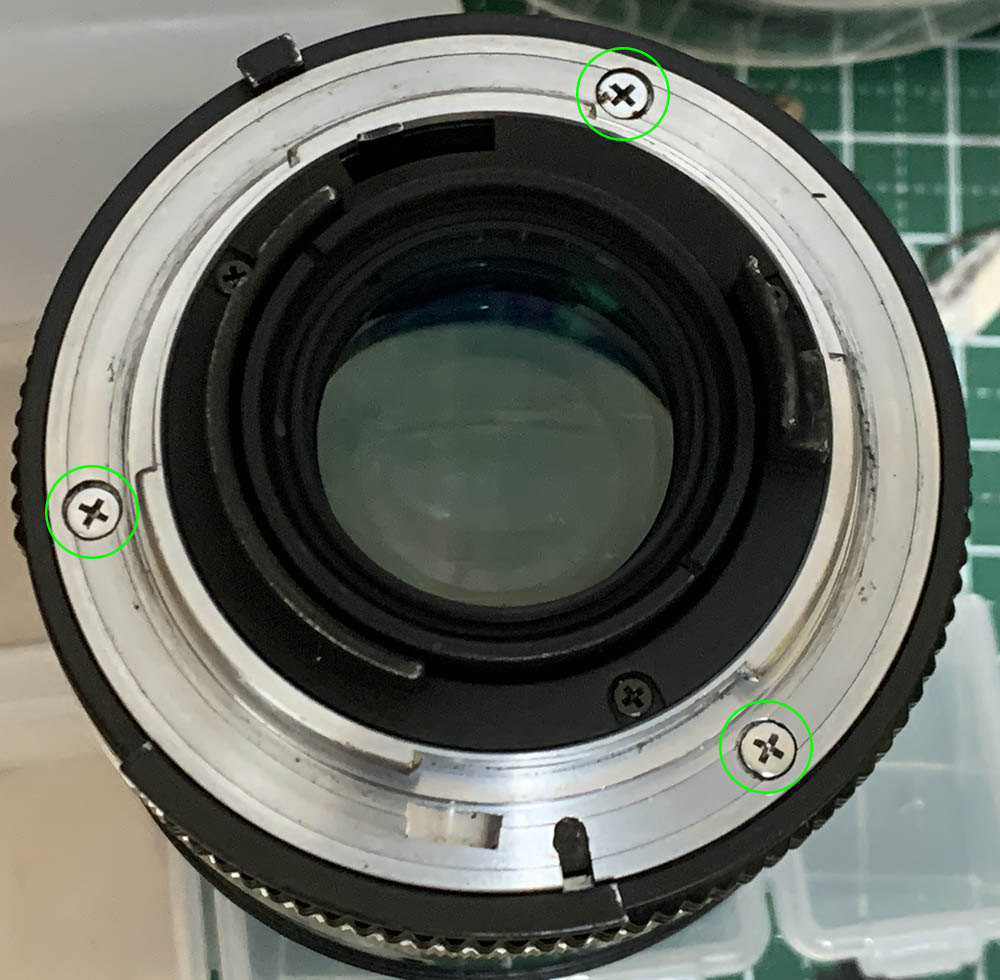
Extract the screws of the bayonet mount so you can remove it. Many people get stuck here because they don’t have the right tools and strip the screws. To prevent this from happening to you, read my post about how to remove bayonet screws. Follow my guide and that should help educate you on how its done and which drivers you should use.
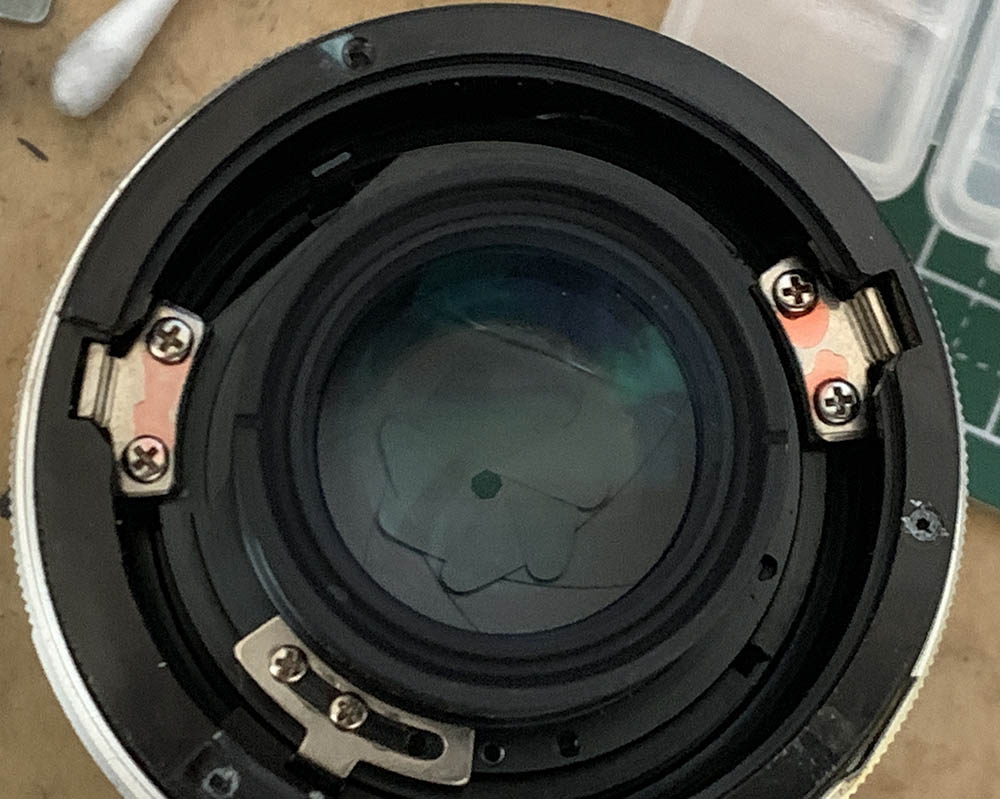
Carefully remove the bayonet mount and examine how the regulator mechanism works and how things were attached.
This is how the ring should sit, its tab should be situated nicely inside the slot of the aperture ring. Never dismantle it further as it was adjusted precisely at the factory.

Carefully remove the aperture ring and the regulator.
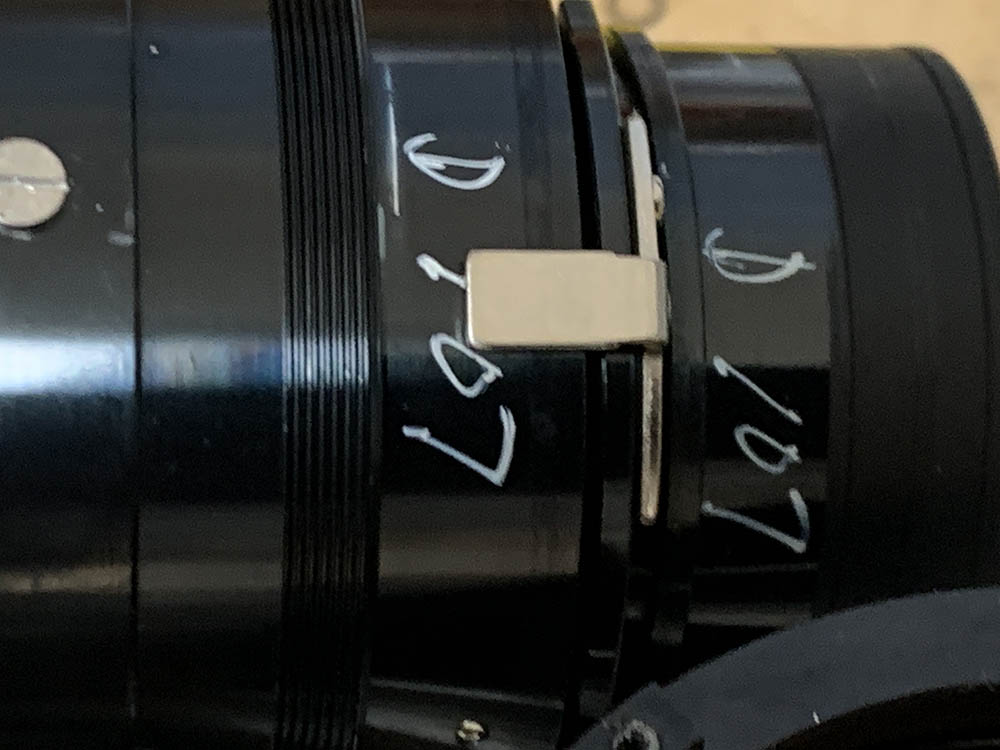
With the lens focused to infinity, inspect everything and note their alignments. Take plenty of notes so you’ll know how to put all of them back properly.
Take plenty of notes as to how the helicoid keys are positioned, how deep they should be and don’t forget to take notes on how the key of the CRC mechanism is aligned, you should be able to put these back properly later again.
This is how mine looked.
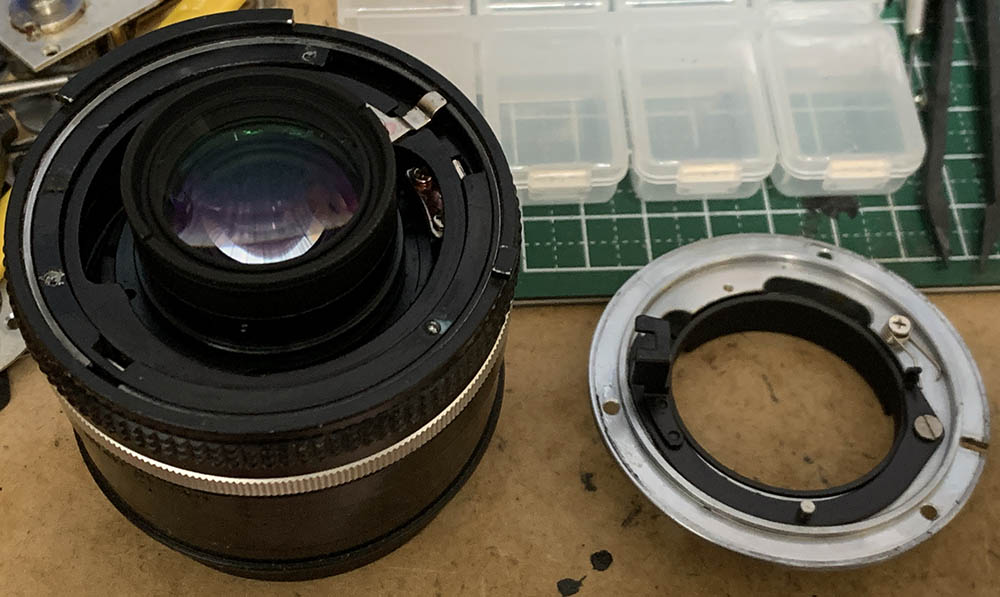
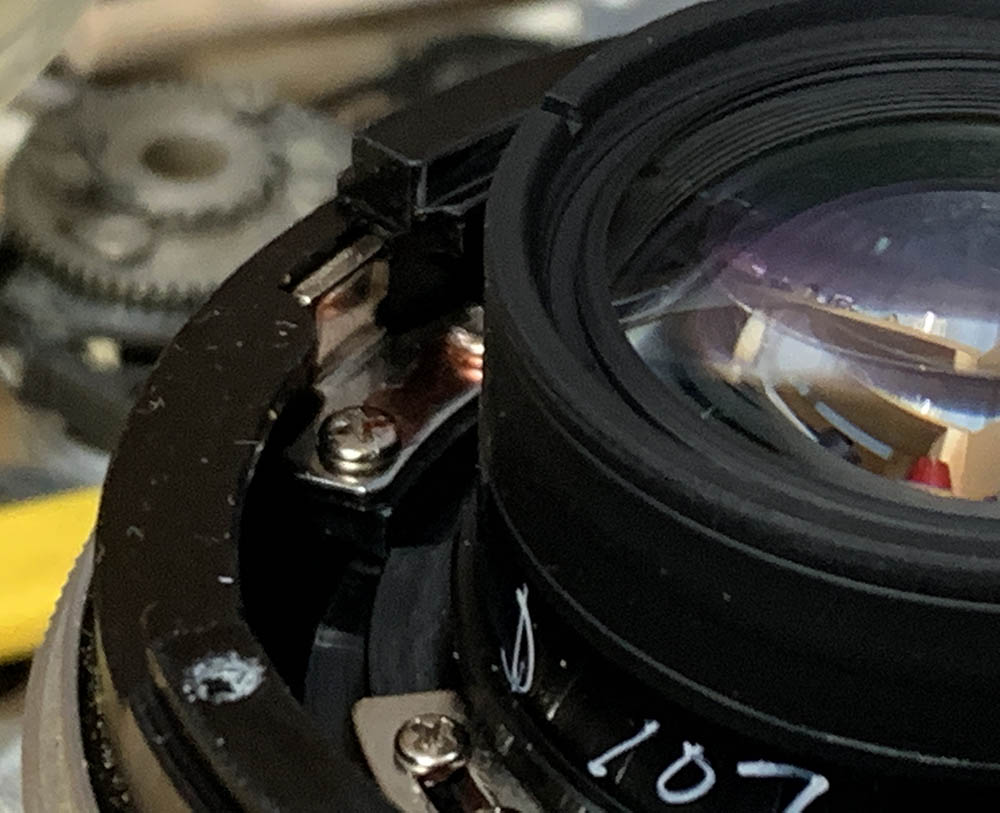
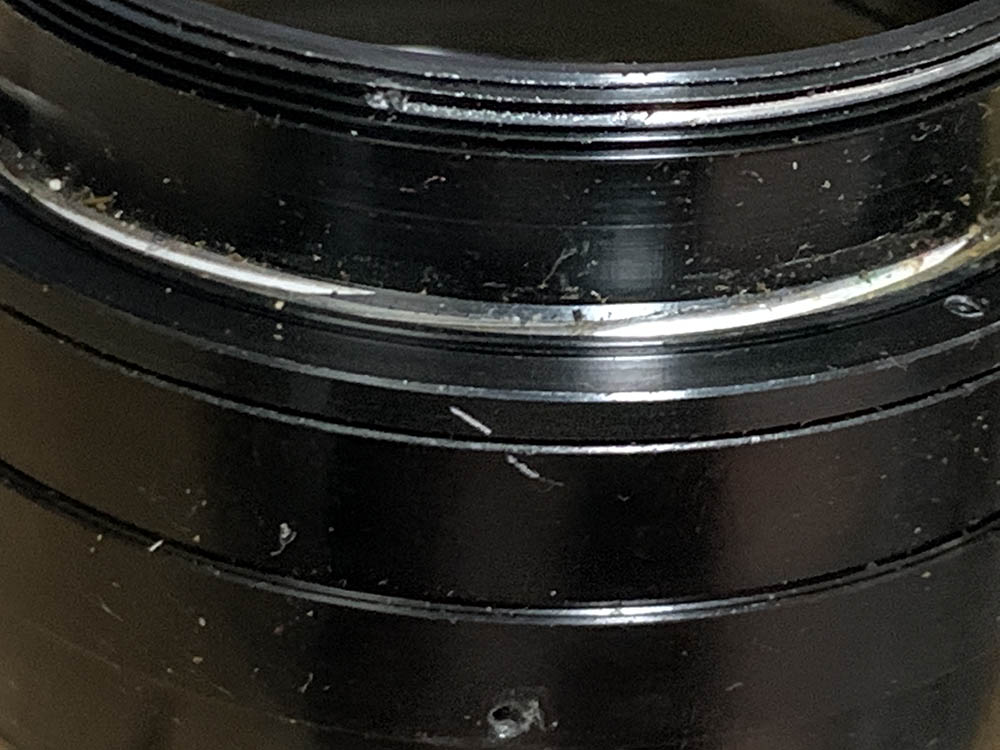
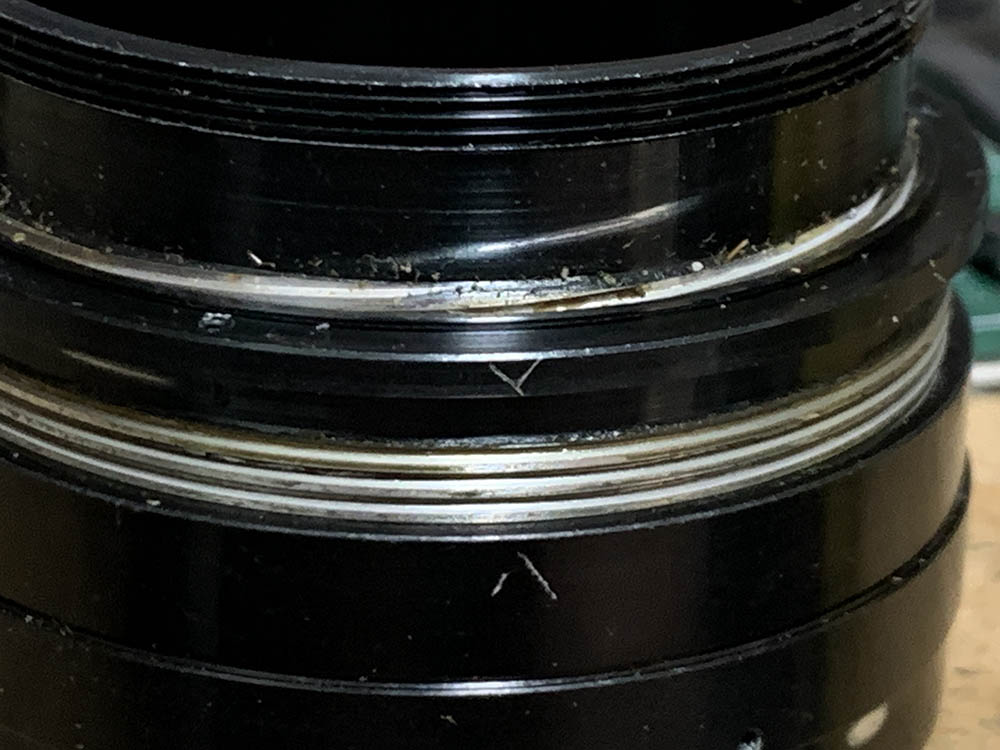
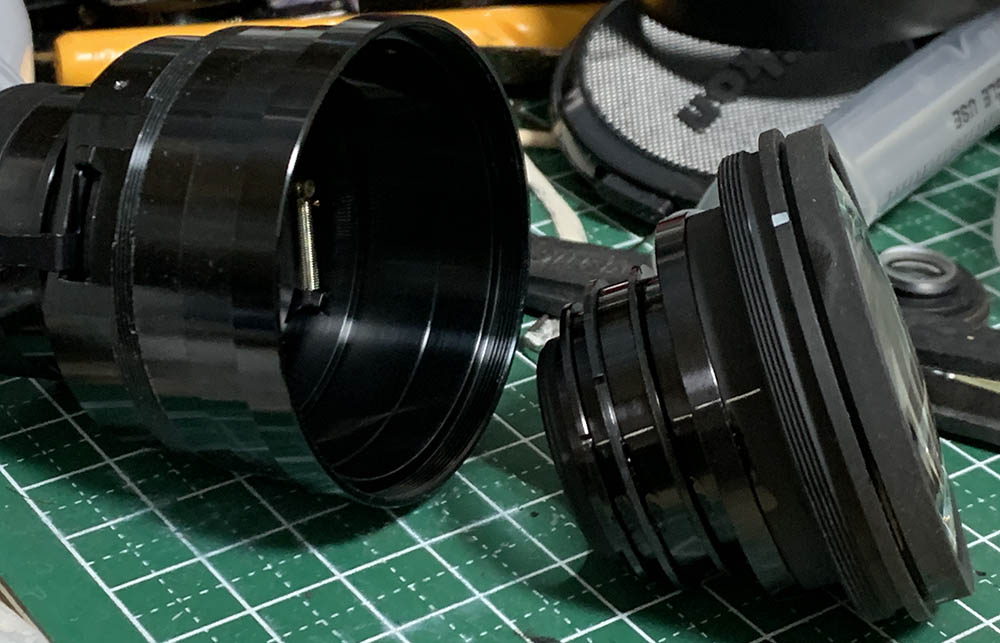
After documenting the CRC mechanism’s alignments you could now proceed to removing the objective. Unscrew the bezel of the focusing ring, it’s usually sealed so a few drops of acetone should help you dissolve the seal. Be careful when unscrewing this, it’s kind of tight. Turning the focusing ring too much will bend the CRC mechanism’s key and you don’t want that to happen.
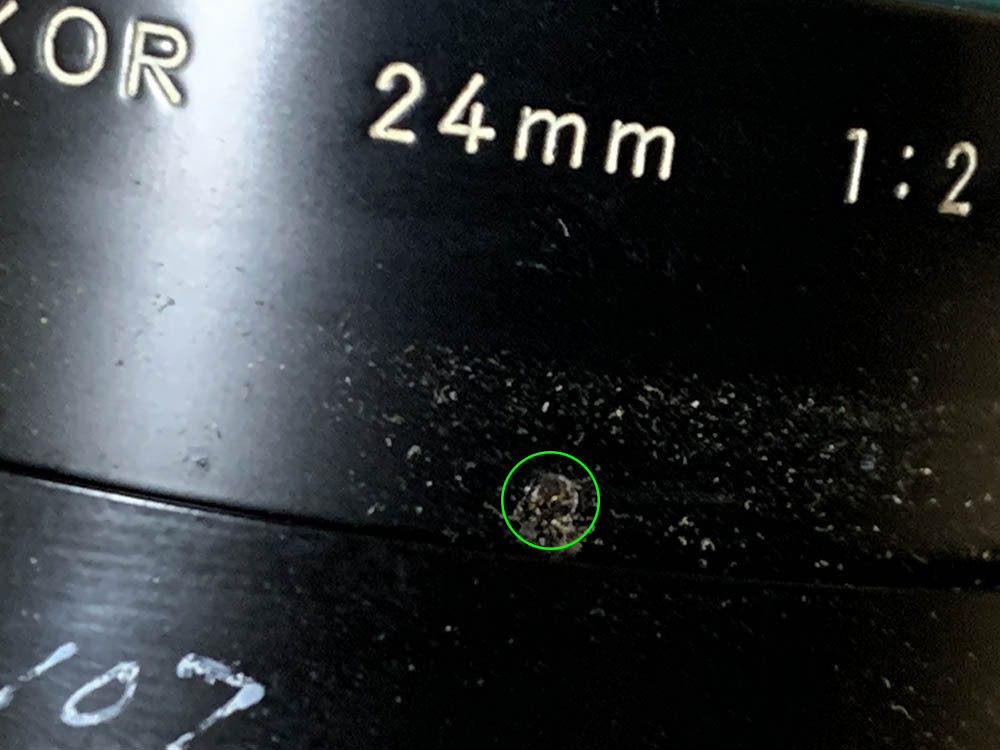
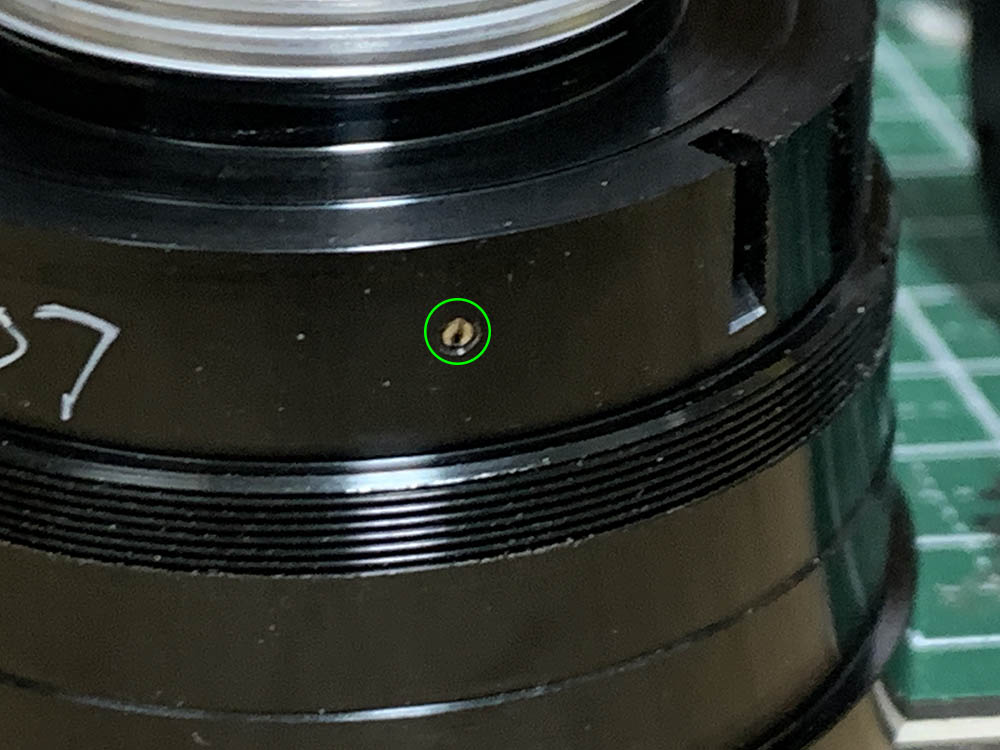
Locate and extract this tiny set screw from the front barrel.
Unscrew the front barrel until it’s removed.
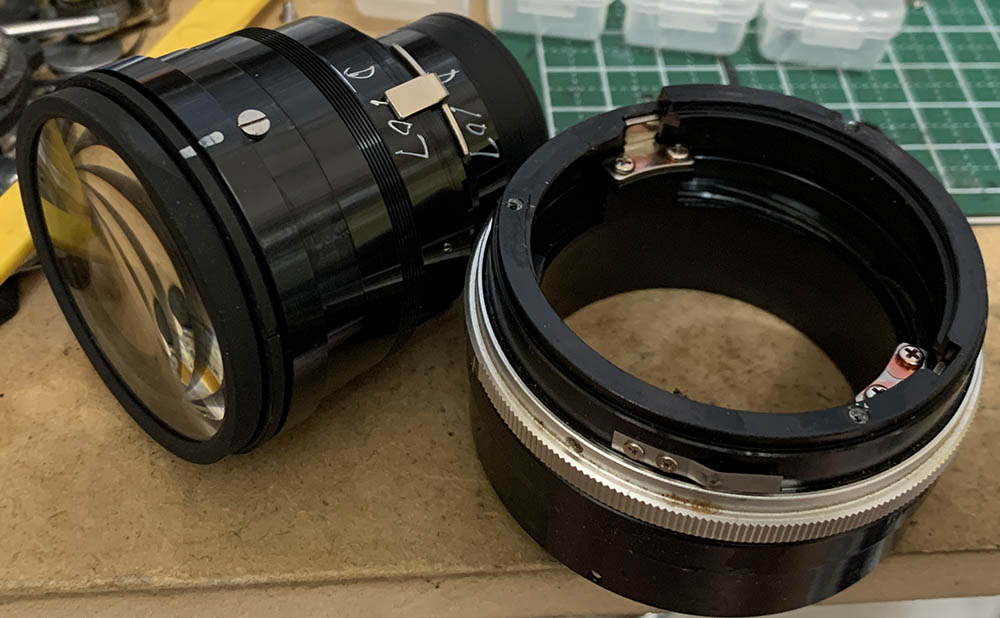
With the barrel still turned to infinity, carefully pull the objective off, be sure not to disturb the alignment of the CRC mechanism.
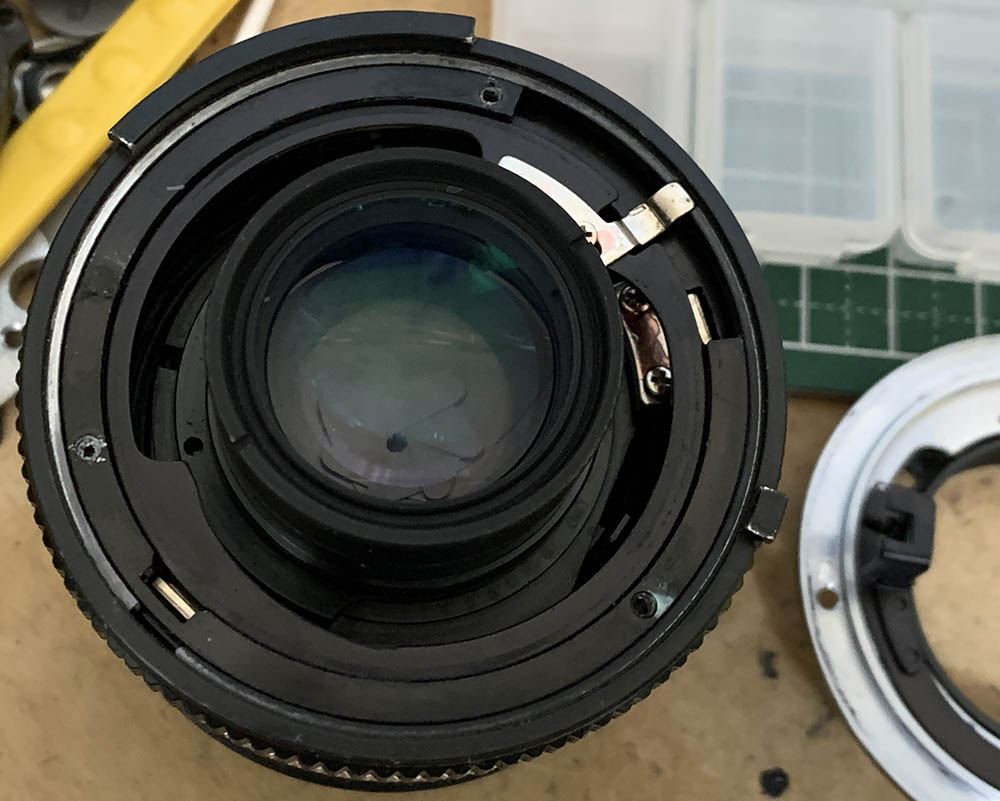
Document the key’s position and how deep the CRC’s housing is screwed to the objective’s casing.
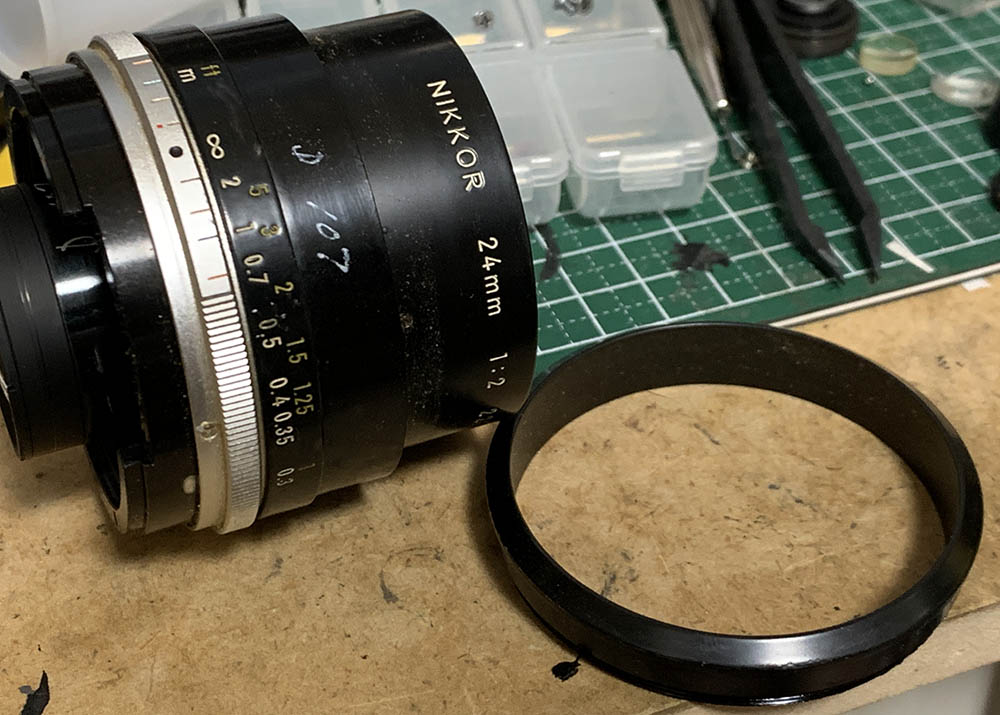
Unscrew these to remove the focusing ring. This is also the place where you could adjust the lens’ focus.
Remove the focusing ring and set it aside.

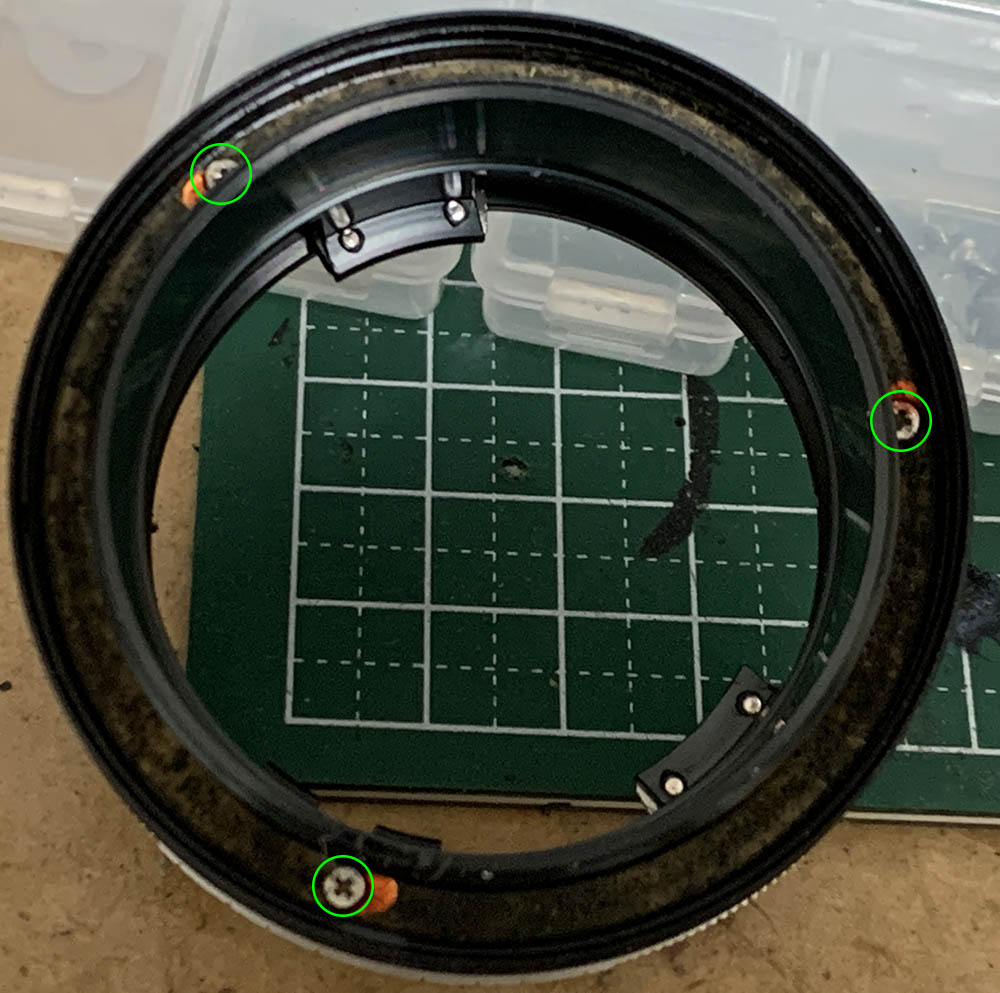
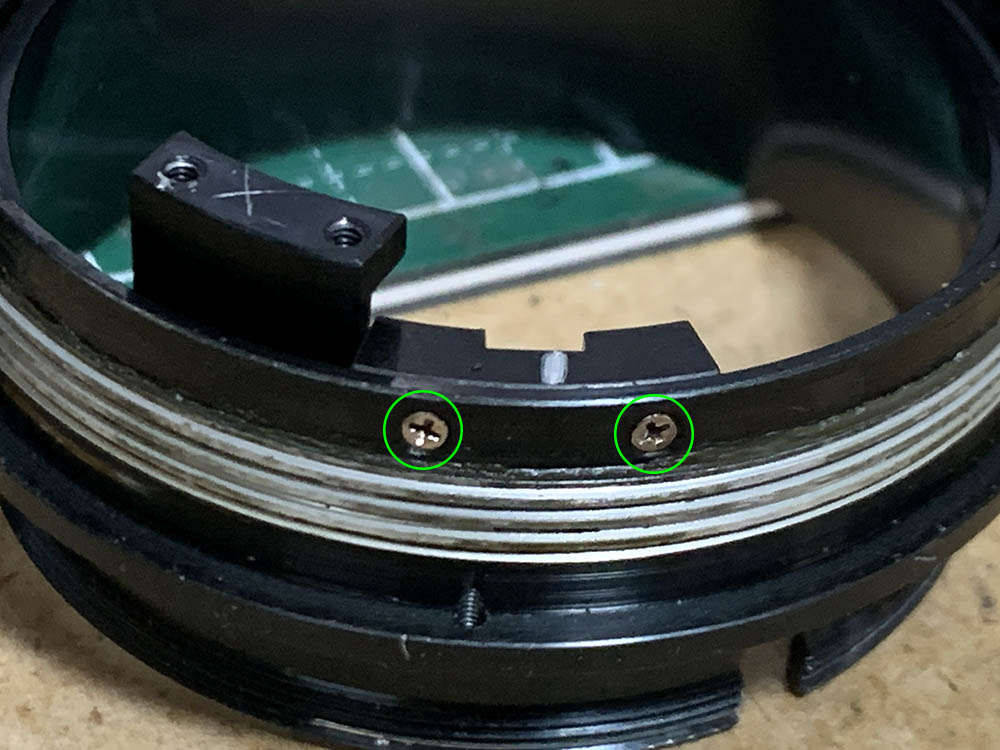
Carefully extract the screws of the grip to remove it. Use drivers that fit perfectly to prevent scarring the surrounding metal. It has a raised part that limits the range of the focusing ring.

It has a pair of helicoid keys, carefully extract their screws to remove them.
Now that the helicoid keys are gone you can turn the helicoids beyond their range. Collapse them and make a small scratch, you should be able to replicate this later so you’ll know if you’ve reassembled this correctly.
Separate the central helicoid from the outer one. Don’t forget to note where they parted since this is also the same spot where they should mesh. People forget to do this and waste a lot of time later figuring how to put these back. To prevent this from happening to you, read my article on how to work with helicoids.
Carefully remove the guide for the CRC mechanism’s key and don’t forget which way it should be facing. Don’t forget to reinstall it before you put the whole assembly back since there’s no way to access it once the helicoids have been reassembled.
Separate the inner helicoid from the central one and don’t forget to note the spot where they parted.
Clean the parts thoroughly and do not leave any residue. I scrubbed the helicoids using a strong detergent and pickled them in an alcohol bath to remove grime and other hardened gunk. Only apply a thin film of grease to the helicoids, I used something that is a bit heavy because it has a short focus-throw. Do not lubricate anything that’s close to the iris mechanism apart from the helicoids of the CRC mechanism, even with that, a thin film of light-grease is sufficient. Putting excessive grease will lead to a bigger mess later and you’ll have to open the lens again for an overhaul.
Disassembly (Objective):
Mine’s still clean so I didn’t have to dismantle the optics, apart from a few oily surfaces the lens is actually quite clean. The iris is also clean so I left it alone. If you need to give it a thorough cleaning just read my other lens repair articles to help give you a few hints on how to service yours.
Carefully unscrew the front optical block from the housing of the objective. A small drop of alcohol will help soften the seal of the thread, never flood this with solvents or alcohol.

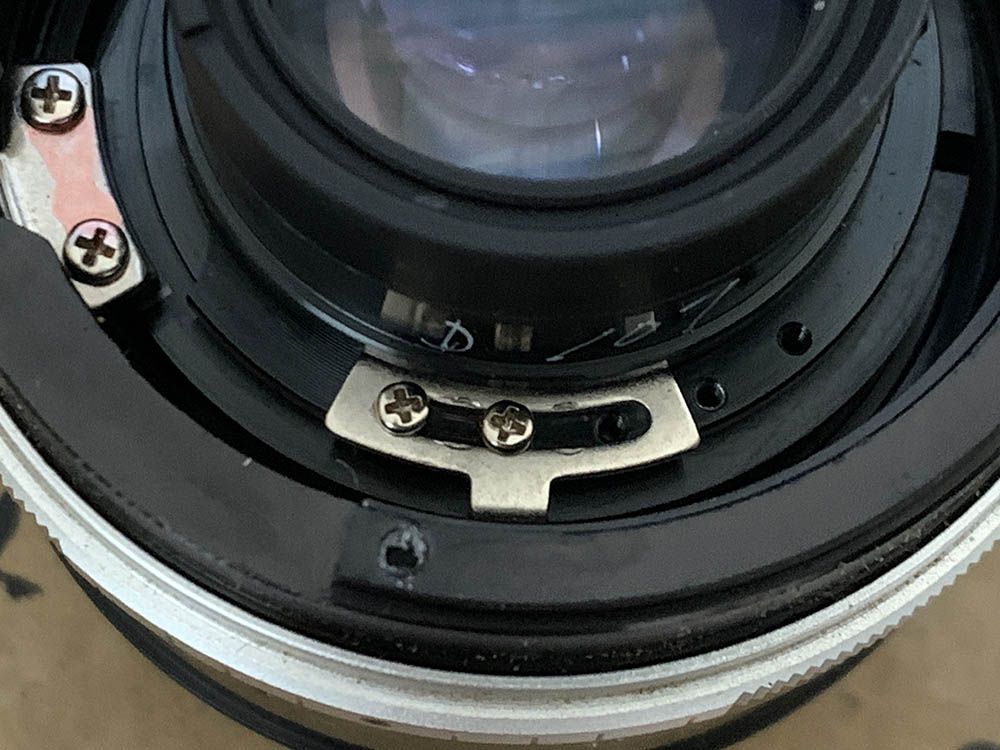
Turn the CRC mechanism until you couldn’t collapse it further and make a small mark so you’ll know hot it should be aligned. It’s important to get this right later. Make small marks so you’ll know how the key is attached and remove the key by extracting all of its screws.
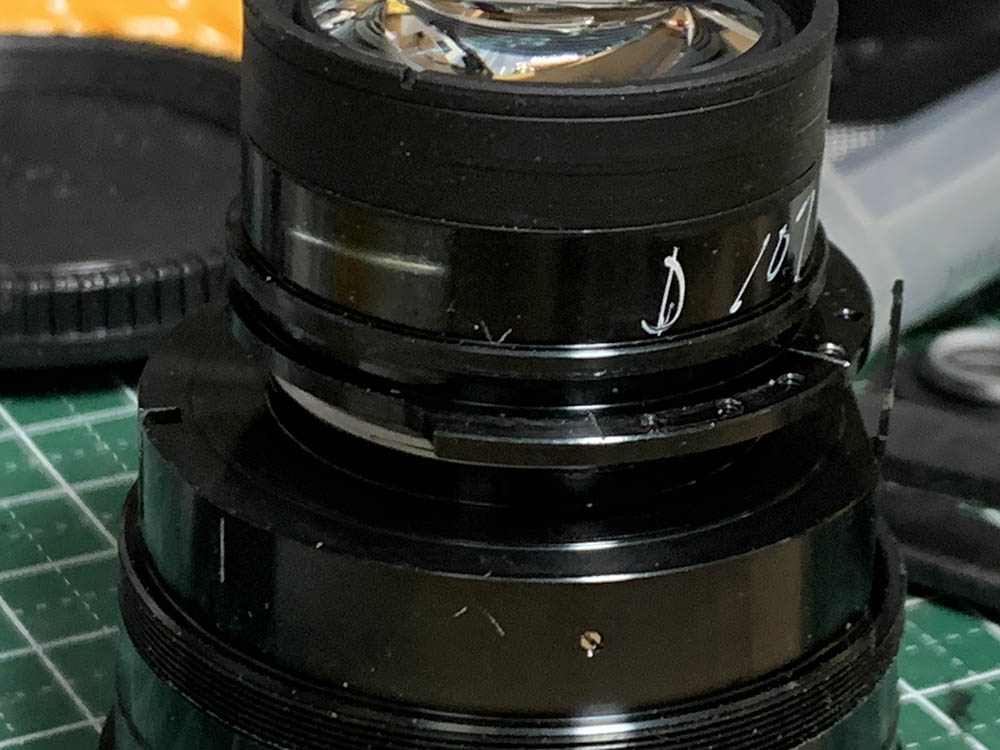
Carefully unscrew the CRC mechanism off and be sure to mark where it parted since it has its own set of helicoids.
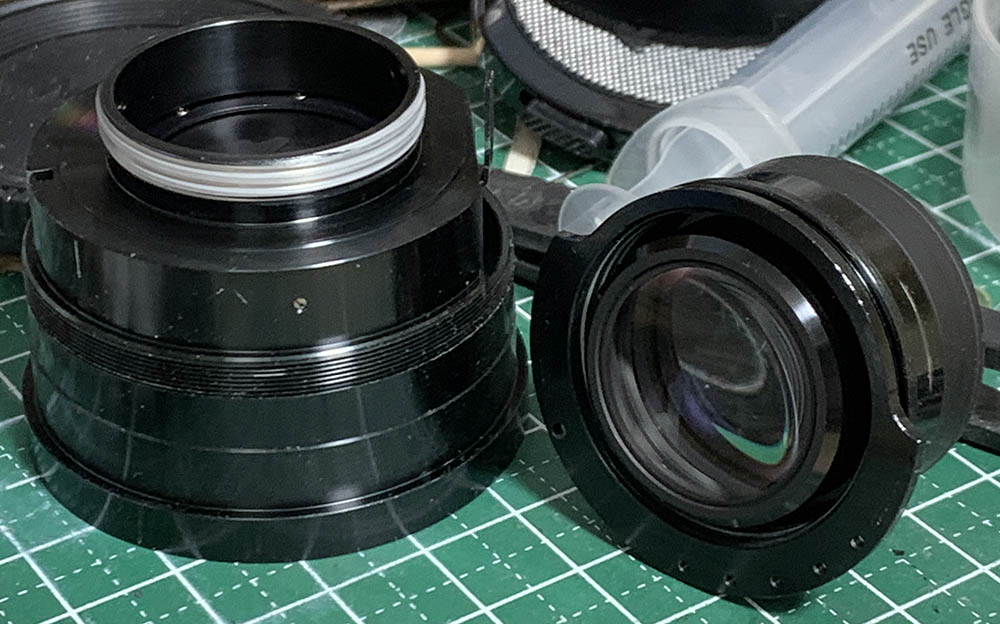
Separate it and set it aside. You can dismantle if further if you have to, mine’s clean so I just left it alone. All I had to do was wipe the glass to remove condensed oil from the surface of the glass.

The iris mechanism appears to be clean so I left it alone. If yours is oily you will need to overhaul it but you should take plenty of notes so you’ll know how it’s been adjusted at the factory.
These set screws secure the iris mechanism, loosen them so you could remove the iris mechanism.
Clean everything that’s accessible to you while you’re at it. If your lens has fungus, read my article on how to clean lens fungus. Dilute the solution with distilled water, using it at full-strength will etch the coating and the glass will get damaged, too. If it has an oily iris problem, wipe the blades with naphtha and lens tissue. Do not damage the blades and only handle them by their pins.
Conclusion:
It took me a whole night to service this, it may have taken me more time if I had to clean the optics since that will involve cleaning the helicoids, too. Now that you have seen how complicated it is to work on I hope that you send your lens to a professional if it needs to be serviced. This is not a cheap lens so ruining one is not something that anybody wants. Before you reinstall everything back, be sure to read the next panel to know what has to be done.

Reassemble everything and leave the front part out so you could adjust the focus. Make sure that the objective won’t slide-off since the front barrel isn’t installed and nothing is securing it. Read my article on how to adjust a lens’ focus to know how it’s done using simple tools in a DIY setting. Finalize your adjustments by tightening the screws of the focusing ring.

It’s now time to celebrate another successful repair. I’m glad that I took the time to repair this one, now I am able to enjoy using it. I love this lens a lot and it certainly filled a gap in my collection.
Thanks for following my work, if you liked this article please share this with your friends so it will get more views. This site earns around $0.50 a day, it’s totally reliant on views. You can also support this site, it helps me offset the cost of maintenance and hosting. You are also helping me purchase, process and scan film. This site promotes the use of film so we’re all in this together. See you again in the next article, Ric.
Help Support this Blog:
Maintaining this requires resources and a lot of time. If you think that it has helped you or you want to show your support by helping with the site’s upkeep, you can make a small donation to my paypal.com at richardHaw888@gmail.com. Money isn’t my prime motivation for this blog and I believe that I have enough to run this but you can help me make this site (and the companion facebook page) grow.
Buy me a roll of film or a burger?
Thank you very much for your continued support!
$2.00
Helping support this site will ensure that this will be kept going as long as I have the time and energy for this. I would appreciate it if you just leave out your name or details like your country’s name or other information so that the donations will totally be anonymous. This is a labor of love and I intend to keep it that way for as long as I can. Ric.

Feb 18, 2021 @ 19:18:15
Thanks for this article about one of my favourite Nikkors, Richard! I have always loved the 24mm focal-length, and my first camera setup was an FE + AI-converted Nikkor 24/2.8 N. When I could afford it, I upgraded to an FE2 and an AIS 24/2 (my first non-used Nikons!). I used it mostly for night-time/urban street-photography (I was living in Copenhagen at the time, which gave me lots of great opportunities for that sort of thing). I agree it’s soft in the corners, and later when I started to “listen” too much to other people’s opinions, I began to regret that I hadn’t gone for a 24/2.8 or 28/2, both of which had much better reputations. But I still have my AIS 24/2, and use it more than all of my other Nikkors combined. It has a certain “look” which I can spot immediately in photos taken with it. It’s a tough lens too: Has survived several incidents which destroyed the hood or front filter, not to mention a lot of Rock Festivals. I will never sell mine!
Feb 28, 2021 @ 01:57:51
I enjoyed your article on this lens and your enthusiasm which I should also share with the previous commentor. It was originally designed as a photojournalist lens to isolate your subject from the background. It was supposed to have minimal distortion and low light fall off for a 24 mm lens. I compared it to a 24 f1.4 lens in a camera store and could not see much difference at F2 an F 2.8 considering the cost of the 1.4 lens it is a bargain. A website called momentcorp.com reviews this lens and has a picture of a candle maker and it is very sharp with a nice Bokeh . The Bokeh is nice when the background is not too far from the subject. Although your examples of the lightbulbs and a simple background seem to show nice Bokeh I thought. I noticed you didn’t take many pictures of people close up that’s where I think this one’s really shines. I also enjoy your comments on Nikon gear.
Dec 03, 2022 @ 06:06:43
Thank you for this in-depth explanation. My AI-only version focus ring is extremely stiff. Contemplating home repair as it is a paperweight right now anyway. Hope I do it right.