
Hello, everybody! I just had a few beers tonight, I love Asahi beer since it tasted a bit like San Miguel, but more refined. It’s smooth on the throat and it doesn’t have a bad after-taste. I like beer a lot but I am more of a din guy. It’s rare that I’d crave for beer but I used to drink this by-the-gallon. In China way-back 17 years ago I downed 2 boxes of Tsing-Tao by myself. That’s when I represented my country in a cultural/sporting event. I enjoy a pint if that suits me, the yummy amber liquid is hard to resist specially if it’s ice-cold. I have something that I would like to show you today, something with a great amber hue to it, it’s difficult to resist, too. It’s something that a lot of people in the Nikon collectors’ circle crave for because of its special characteristics. Please enjoy a nice, cold beer with me while reading more about this.
Introduction:
The Nikkor-N 35mm f/1.4 Auto is a legendary lens in its own right. This goes by the name of “Atomic-Nikkor” or “Atom-lens” within Nikkor collectors since it has thorium-infused glass. It’s also the first Nikkor to incorporate the best of what Nikon could give it at that time, those are: CRC, Nikon’s latest multicoating formula, a 9-bladed iris and of course, the radioactive glass. This was the best in its day when it debuted in 1970 and photographers, scientists and whoever had the money wanted one. It allowed people to shoot stars, nightclubs and do scientific research like they never did. All of these sound like tall-tales but it really was a game-changer back in its day. NASA even sent some of these to space and they were modified to survive extreme conditions.
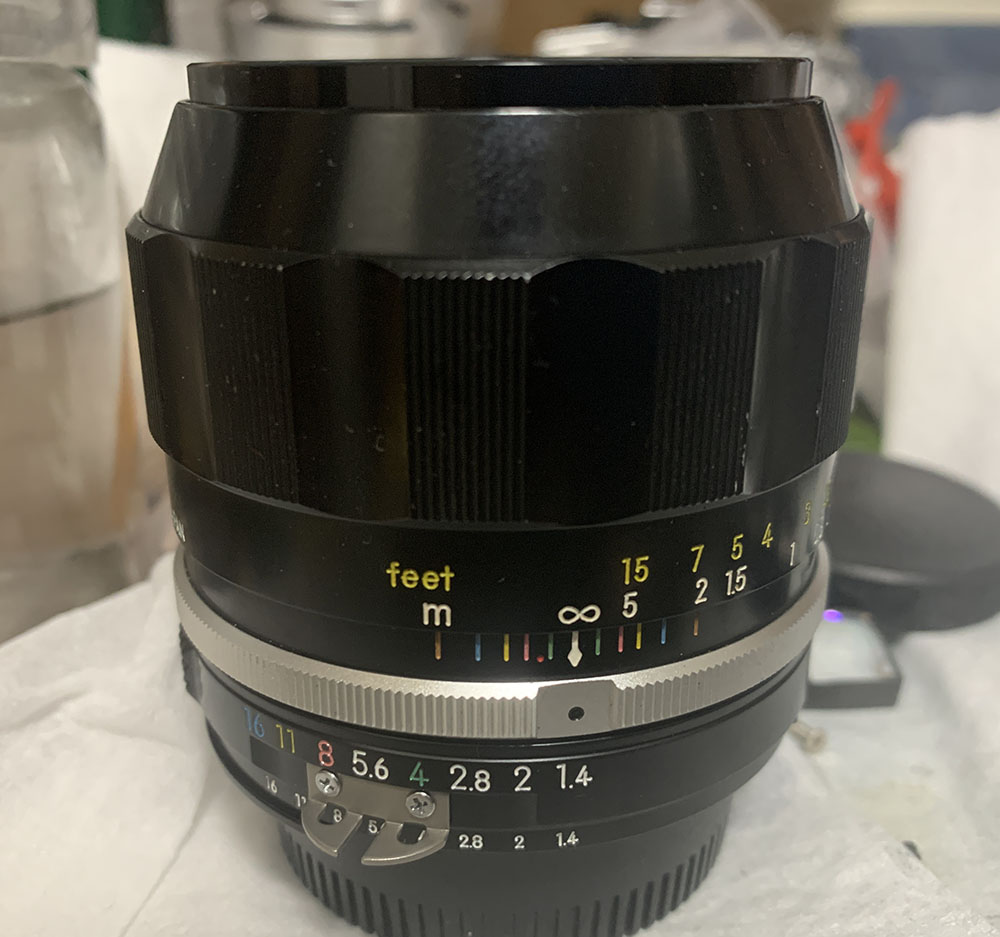
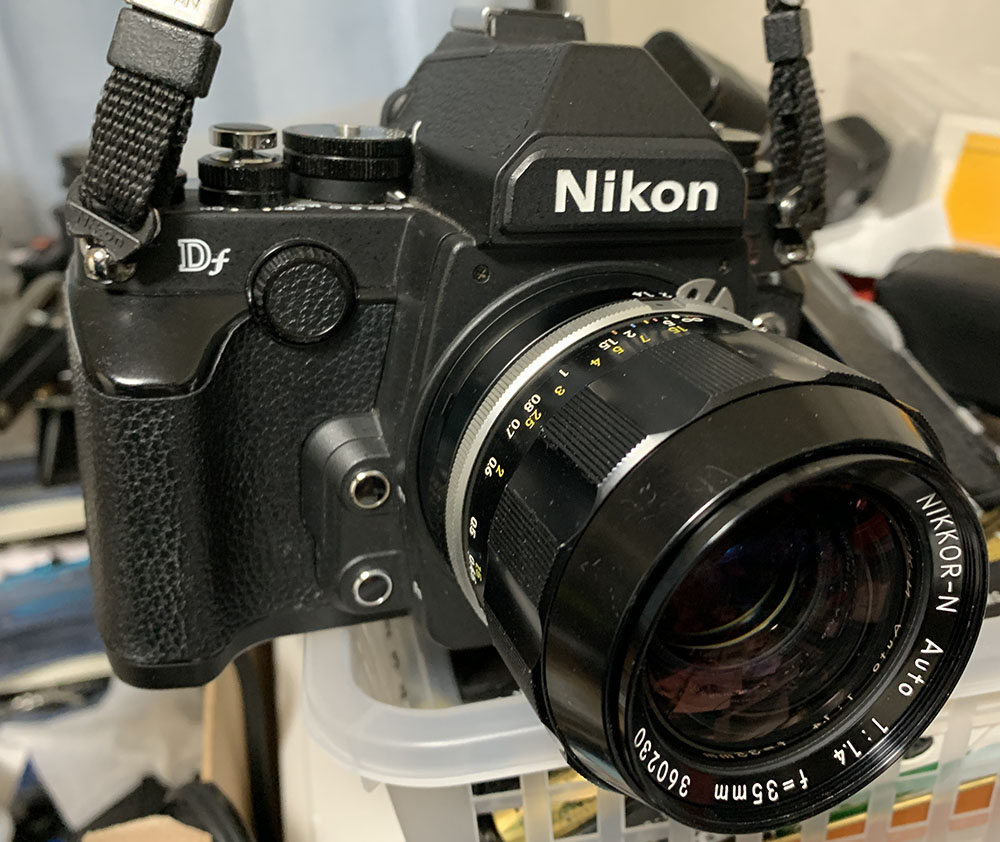
The barrel looks gorgeous with its all-black look. This has a factory-installed Ai-ring which will allow me to use it with a newer Nikon. It handles well and I love the all-metal focusing ring. It has a longer focus-throw as opposed to a Nikkor 35mm f/1.4 Ai-S which has a pathetic range. Some people like it longer while some don’t, it all depends on what you’re used to.
It has a complex 9-elements-in-7-groups design which gives it the amazing light-gathering abilities required for such a lens. It’s considered to be the pinnacle of its time when this was released 1970.
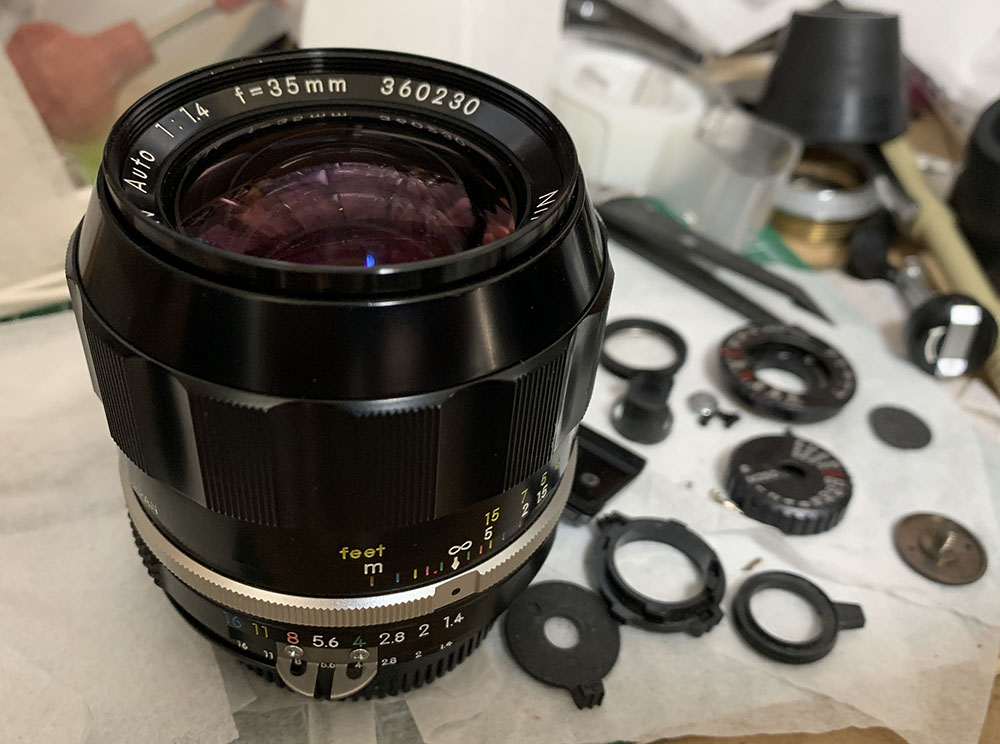
It’s rather large for its time and quite heavy as well. What is amazing is Nikon’s engineers worked overtime just so that we could use 52mm attachments with it. This small attention to details is what makes this a masterpiece, Nikon could have just sold this with a bigger filter size but they went extra just to give us the standard size. This is a nice touch and that’s why I love Nikon.
(Click to enlarge)
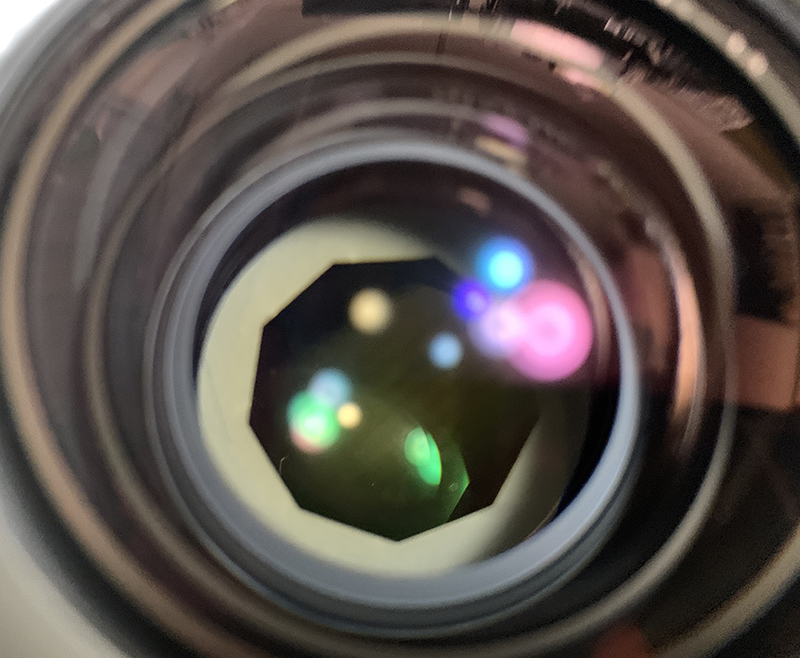
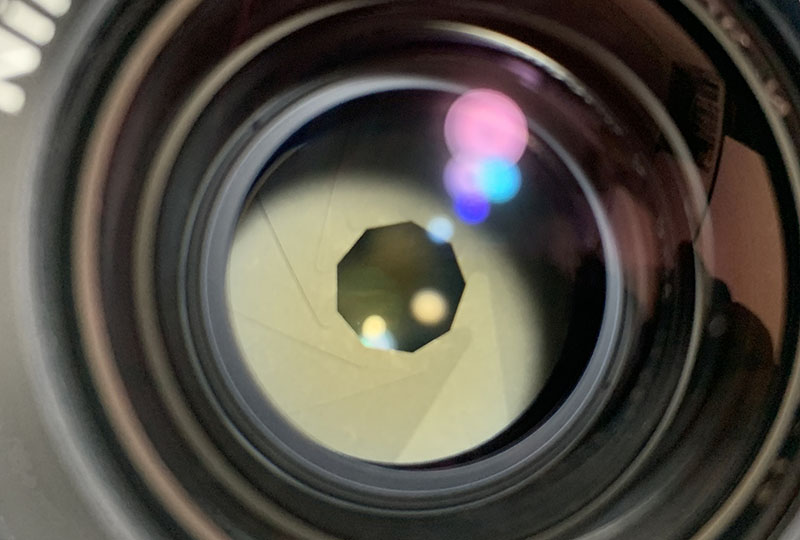
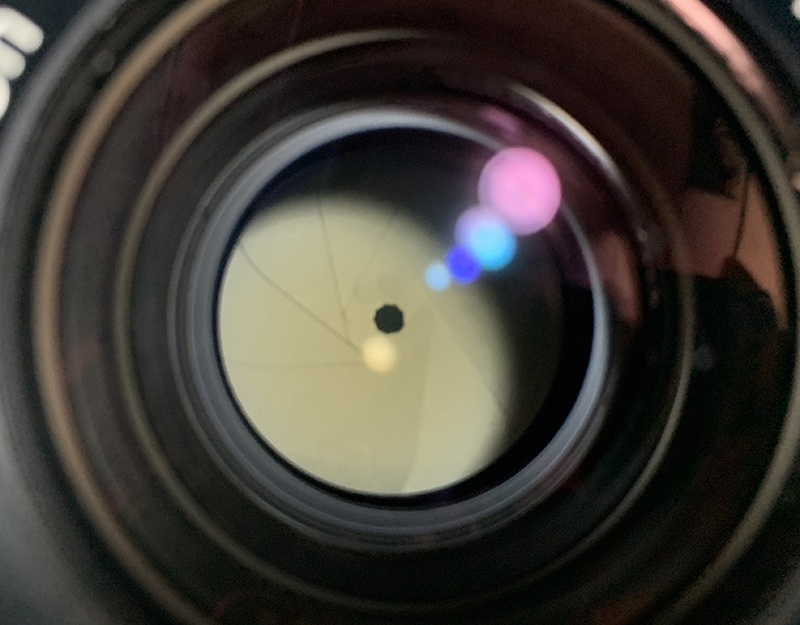
The real reason for buying this is the 9-bladed iris. Later versions only have 7-bladed ones so you should be diligent if looking for one. Only the earlier ones that fall within a certain serial number will have the coveted 9-bladed iris. It has a thorium-infused element which turns amber with age, this is what sets this apart from other Nikkors because it appears to have a higher concentration of radioactive thorium used in its recipe.
Going back to the iris, you won’t find them on later ones, even the New-Nikkor 35mm f/1.4 and the Nikkor 35mm f/1.4 Ai does not have it either but the Nikkor 35mm f/1.4 Ai-S has it, I do not know why this was reimplemented or why the others didn’t have it. There must be a reason, it’s probably related to budget or difficulty producing it reliably. If you’re curious as to which ones actually have it please refer to Roland Vink’s amazing site to help guide you.
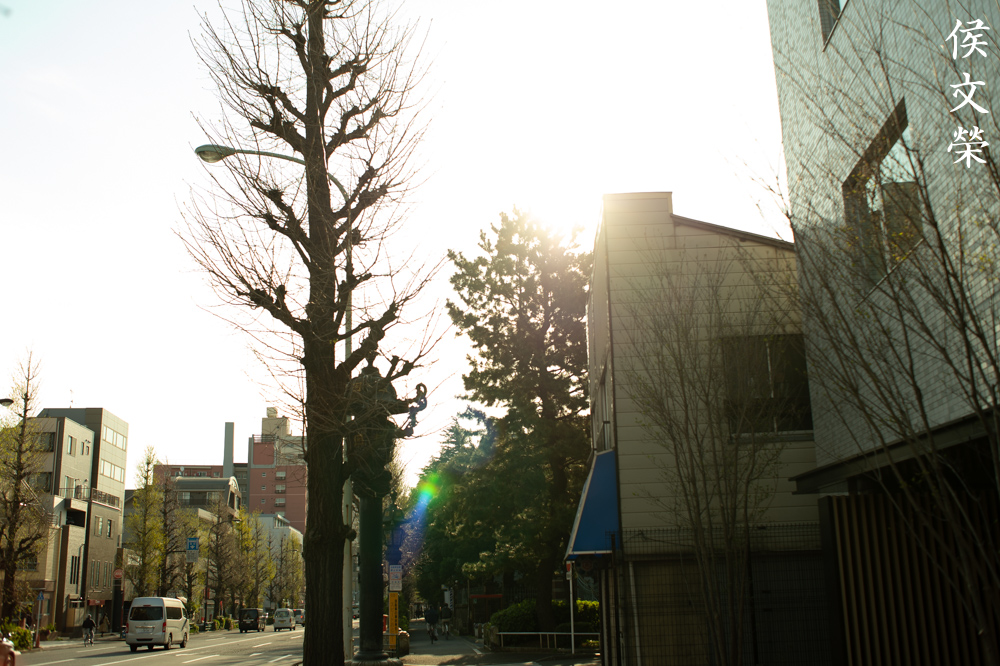
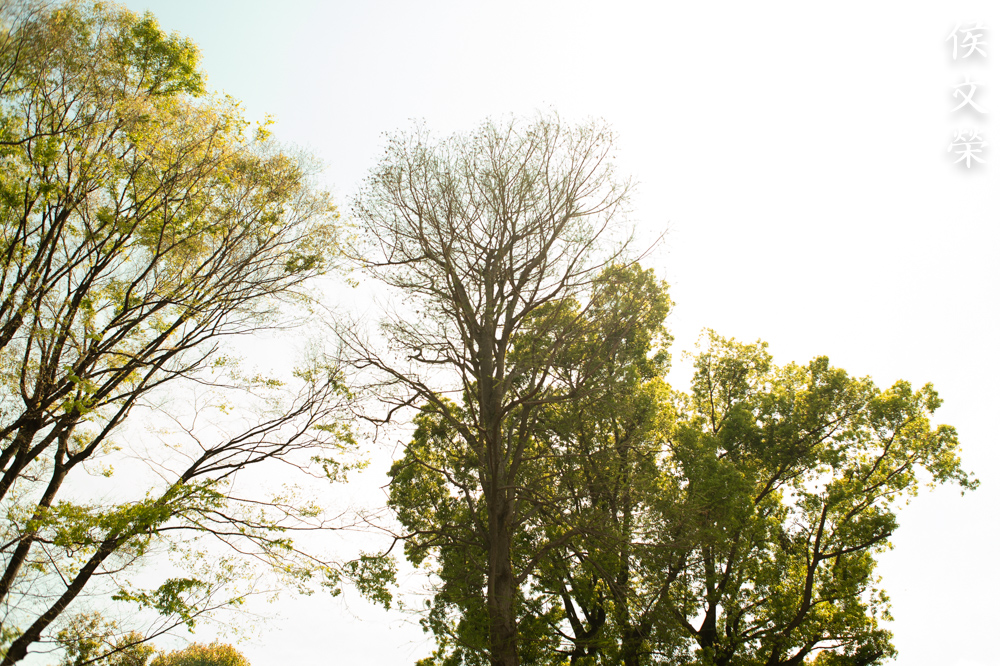
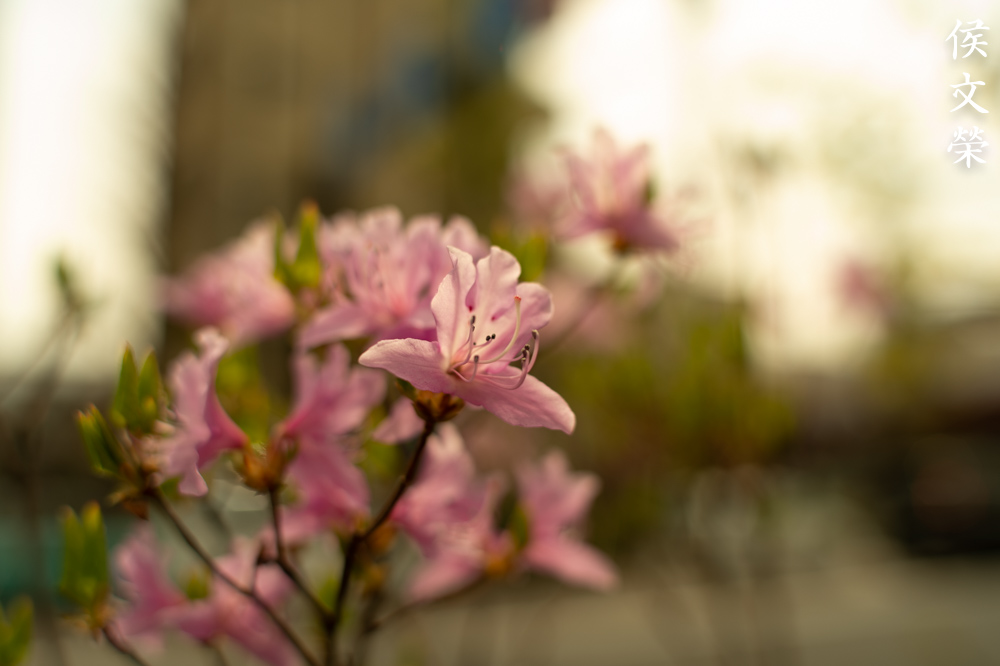
Learning how your lens performs is key to maximizing it, you’ll learn how to use its strengths and avoid its weaknesses. This knowledge will help in determining which lens to bring next time to a shoot, this also gives you a connection with your gear because you’ll know more about it. I shot these photos from f/1.4, f/2, f/2.8 and f/4 from left-to-right, you’ll see the most changes in its character within these apertures and I’d imagine that these are the most common values that people will use this with. If you do not use this lens for its ability to shoot at such a wide aperture you’re better-off using a slower one instead. I took these with my trusty Nikon Df.
I took these photos with the white-balanced set to daylight to simulate how it looks like when we’re shooting this with film. This isn’t a problem when it’s mounted to a digital camera, you can set the white-balance to auto and everything will be adjusted by the camera. Just ignore the fact that all of my photos have an amber hue if that bothers you.
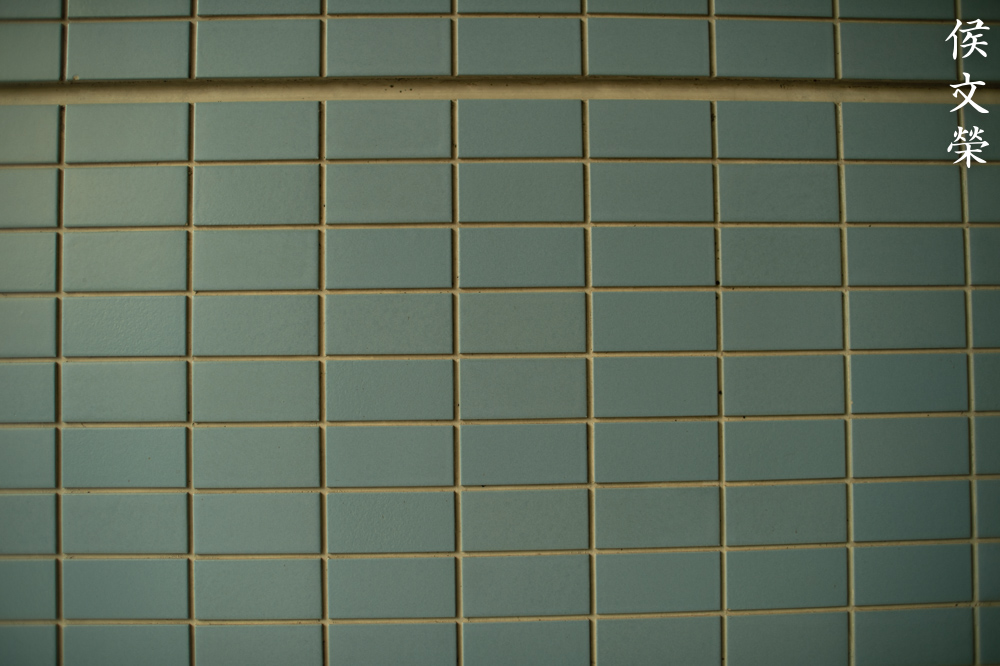
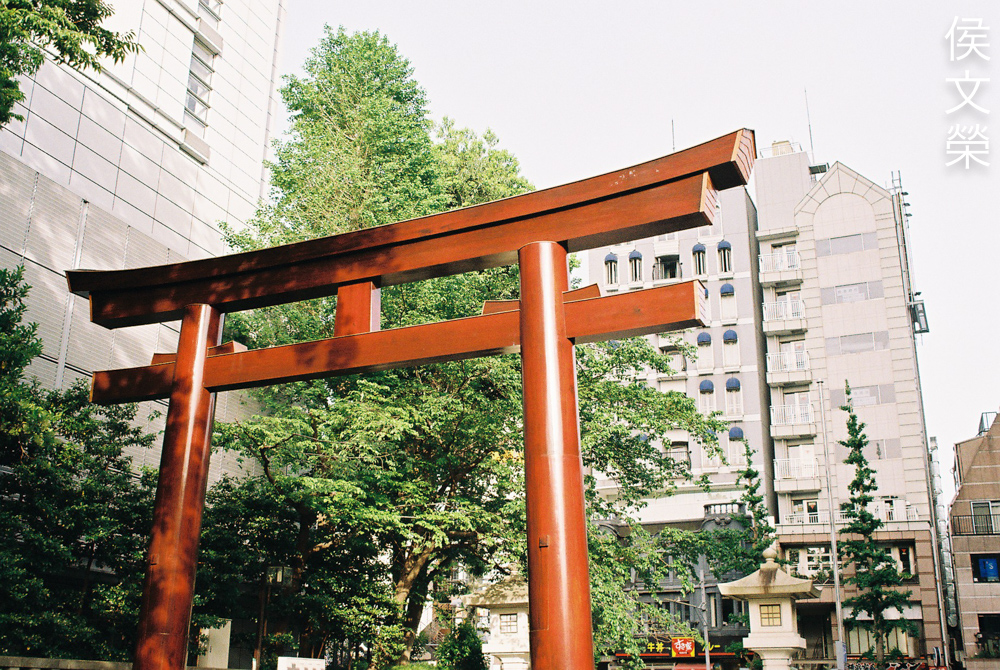
Distortion is quite pronounced, I would not use this for shooting architecture if I could help it. It’s not bad as the profile isn’t complex, fixing it is not a problem in post. Position any straight lines away from the edges so the curving won’t be as obvious.


(Click to enlarge)
Vignetting is quite heavy wide-open, it improves considerably by f/2 but it is still dark around the corners. Stopping the iris down from f/4 to f/5.6 helps a lot, you won’t notice much of it from here-on but you’ll still traces of it if you have an even-colored background such as the sky. I don’t think it will go away even if you stop it down to f/8 but I can’t be sure of it.
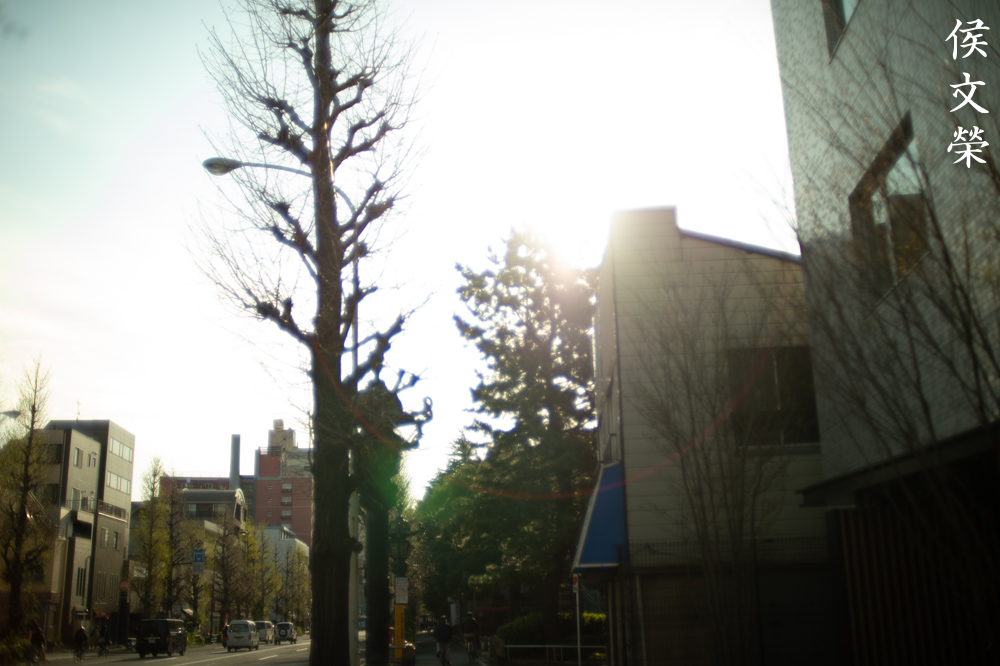
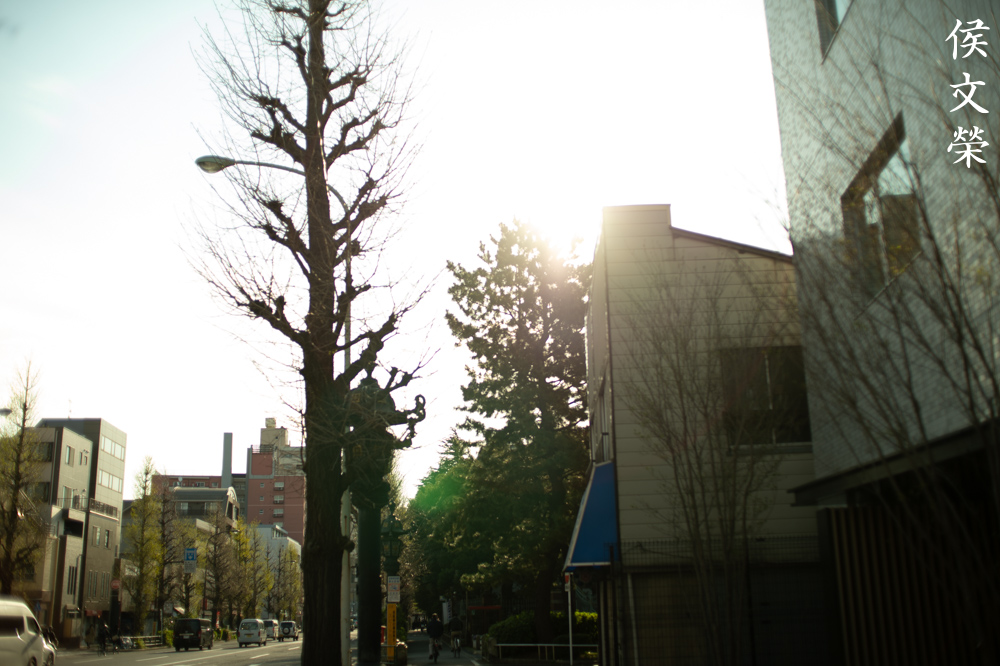
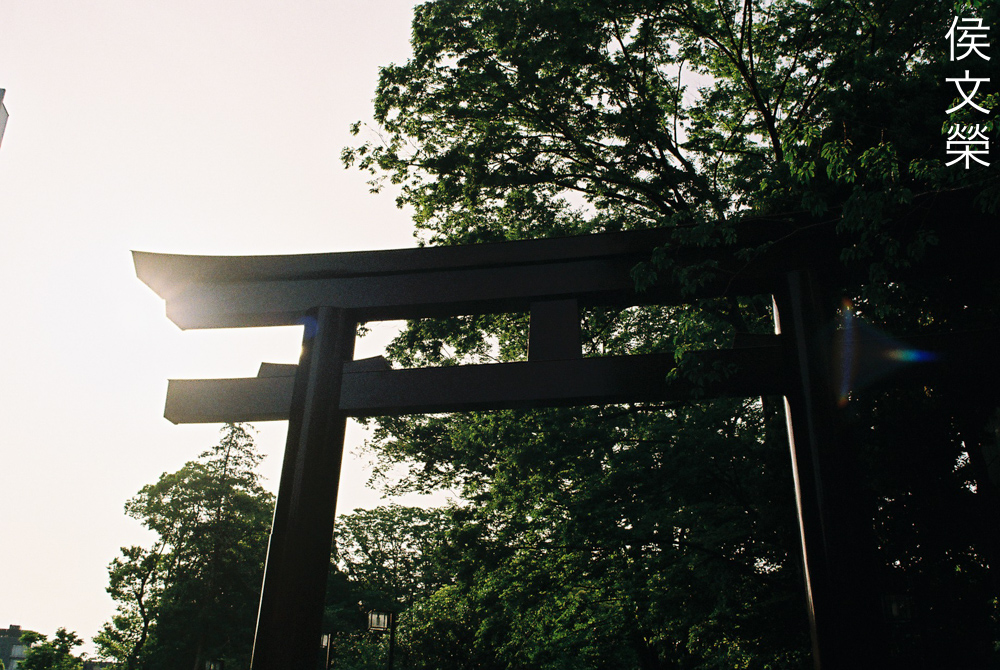
It can flare quite badly wide-open when you have the sun in your frame. It’s also prone to ghosts so you’ll get blobs in your scene. Stopping it down will help with the flare a bit but the blobs will look more-defined as the iris gets smaller. Internal reflections can form a ring, too. You won’t see much of it when you stop the iris down beyond f/2.8.

(Click to enlarge)
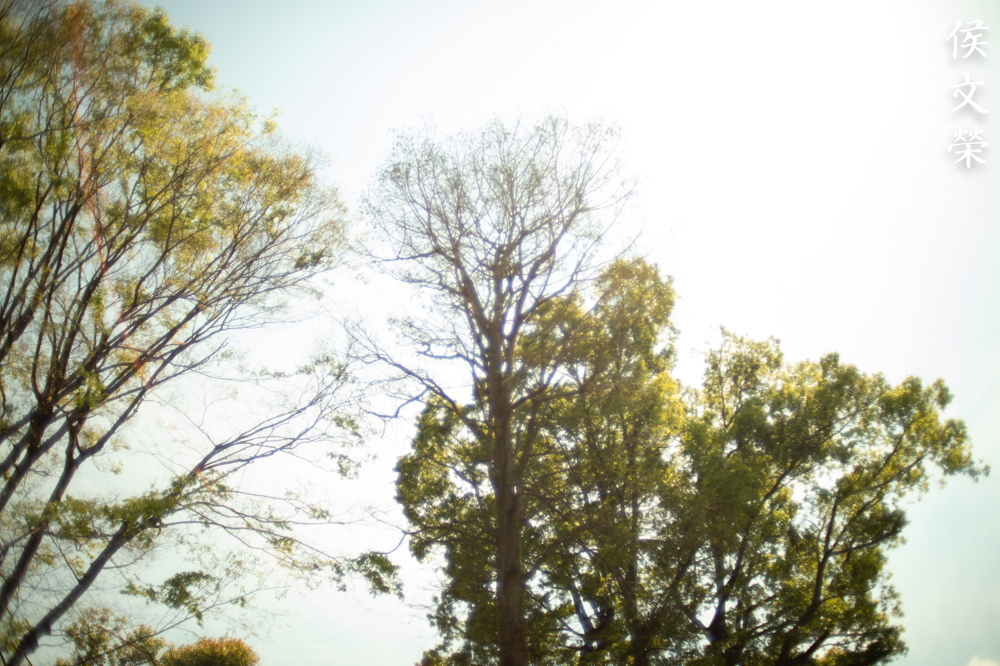
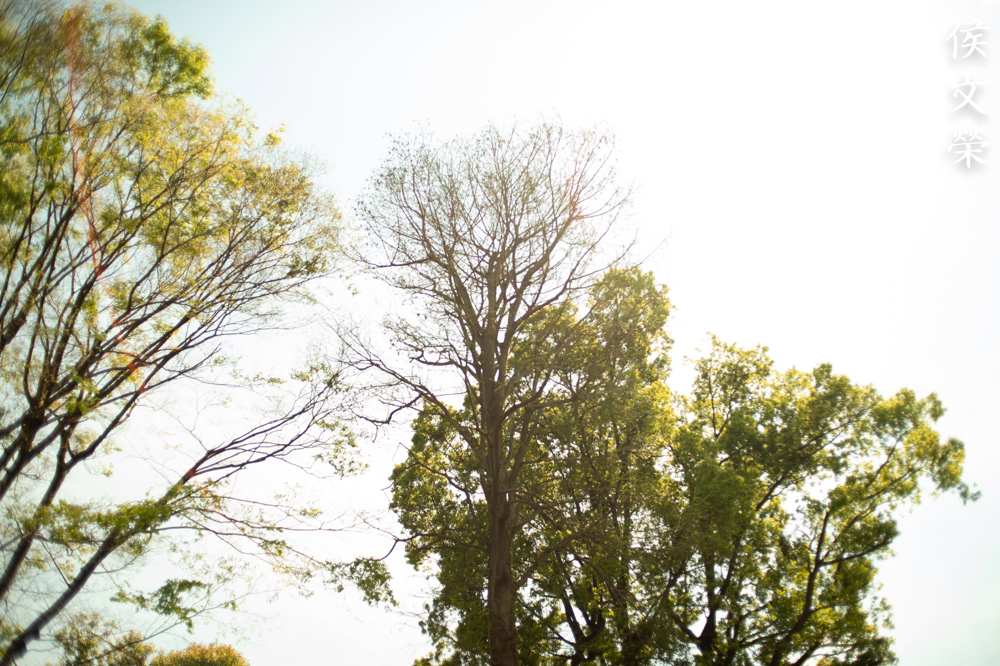
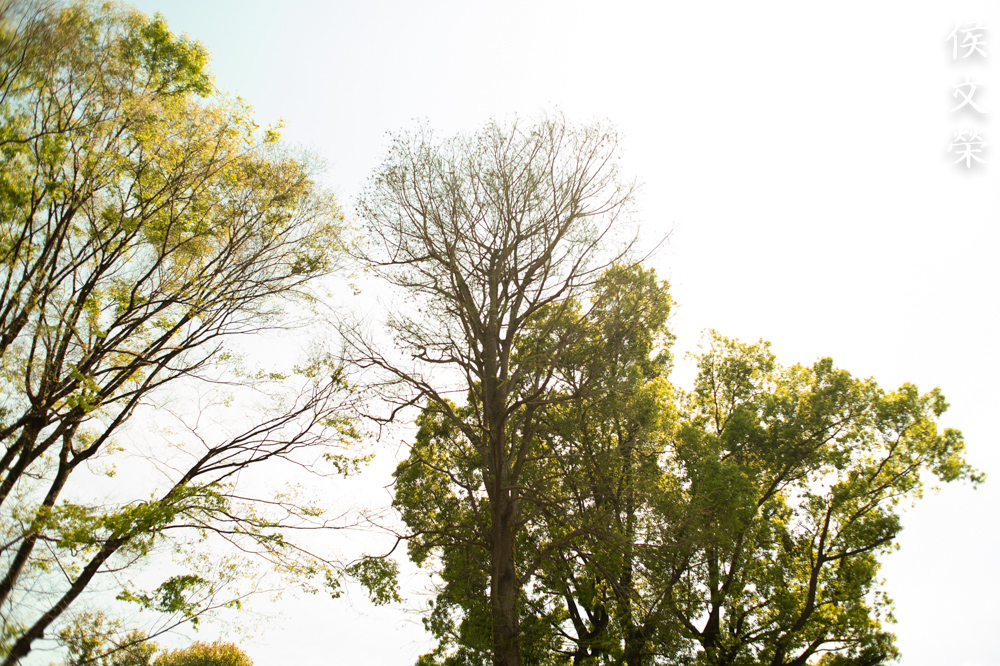
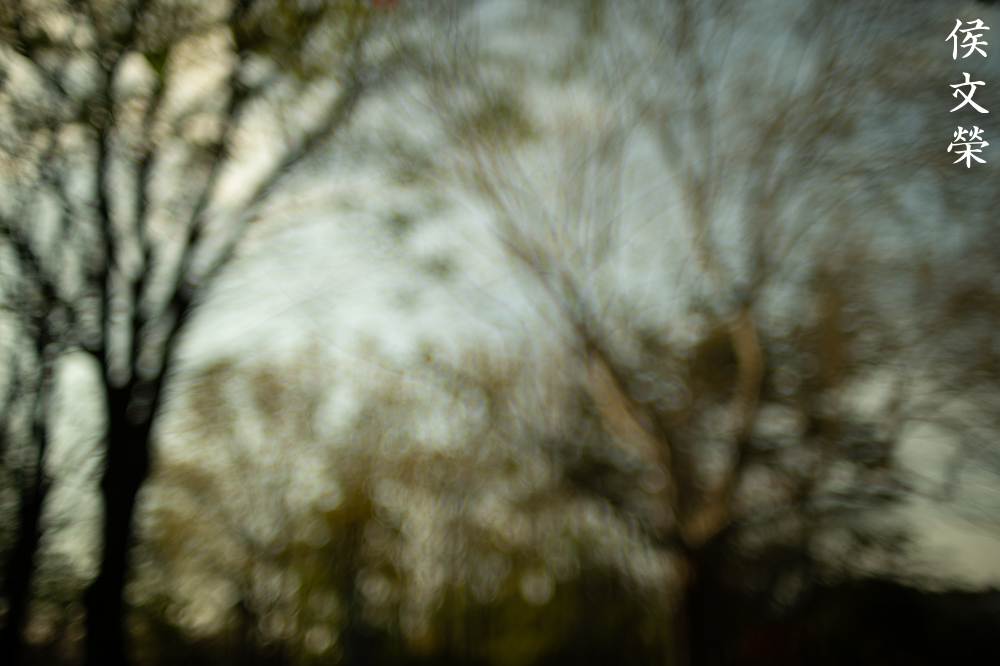
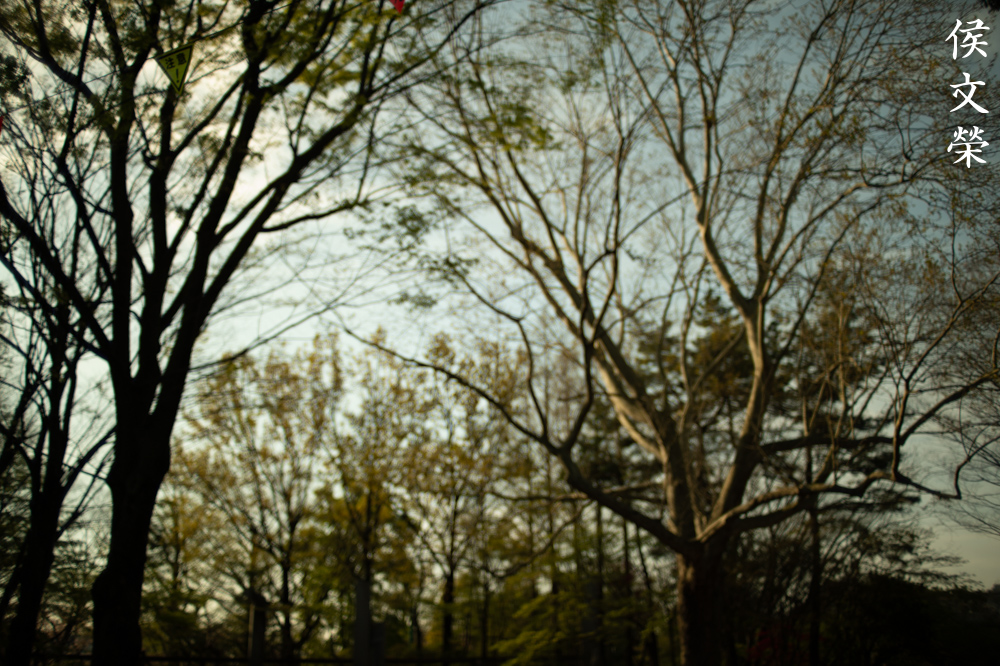
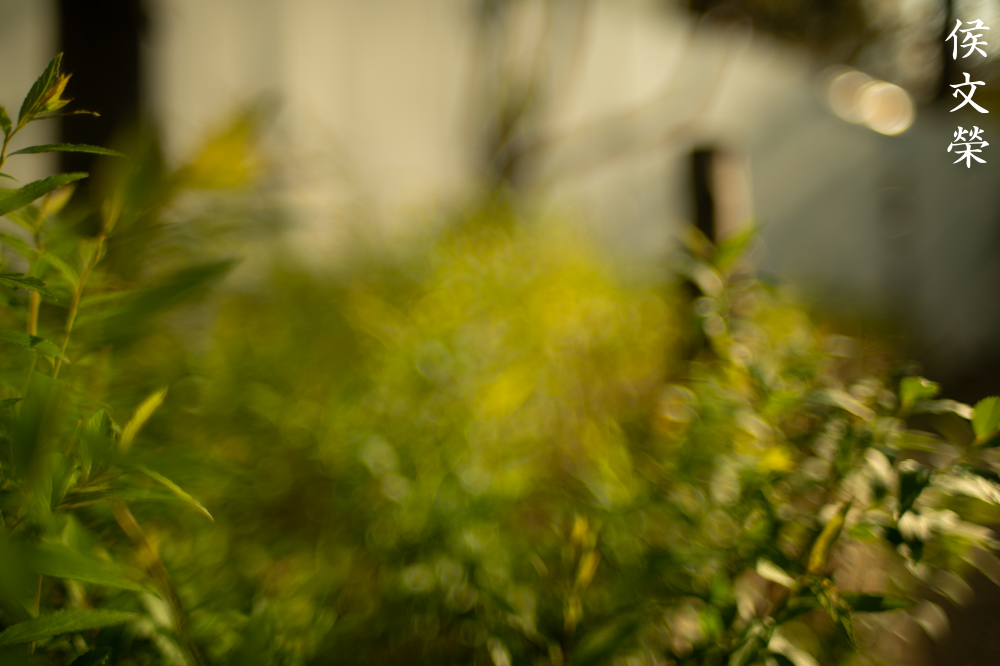
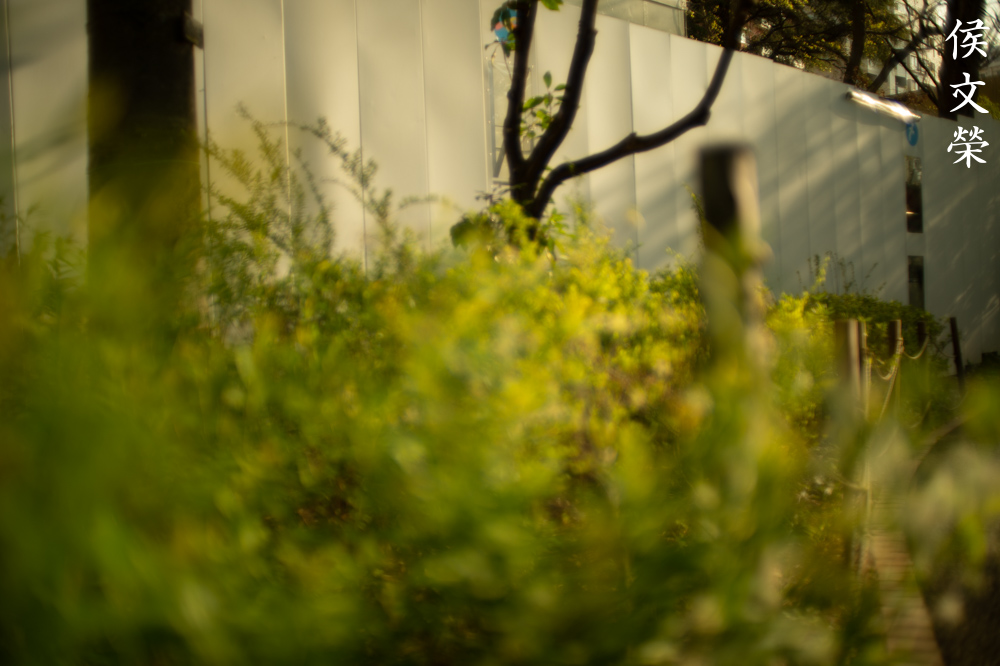
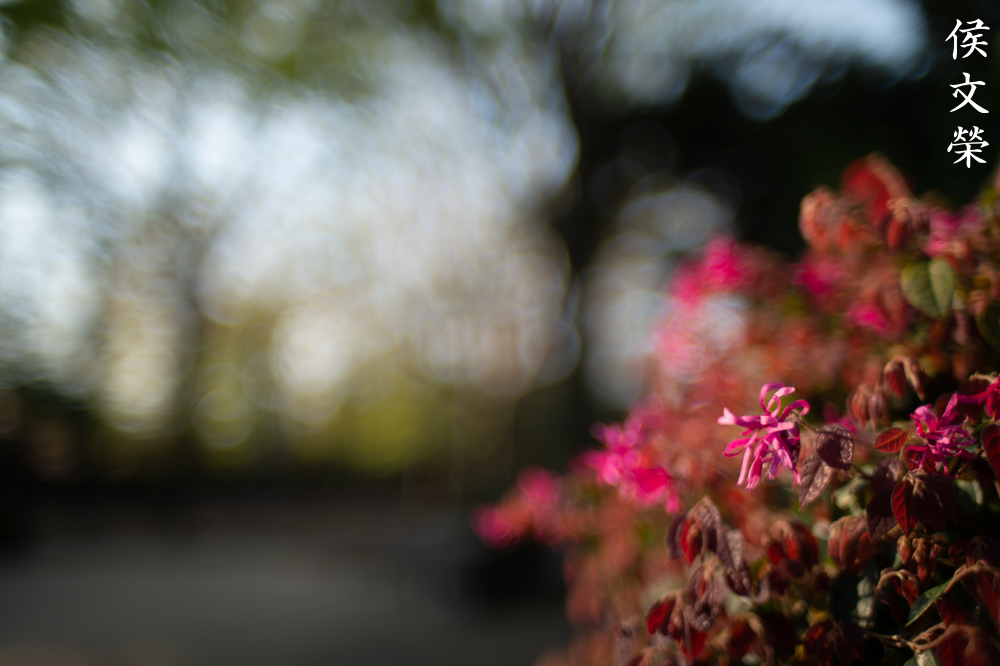
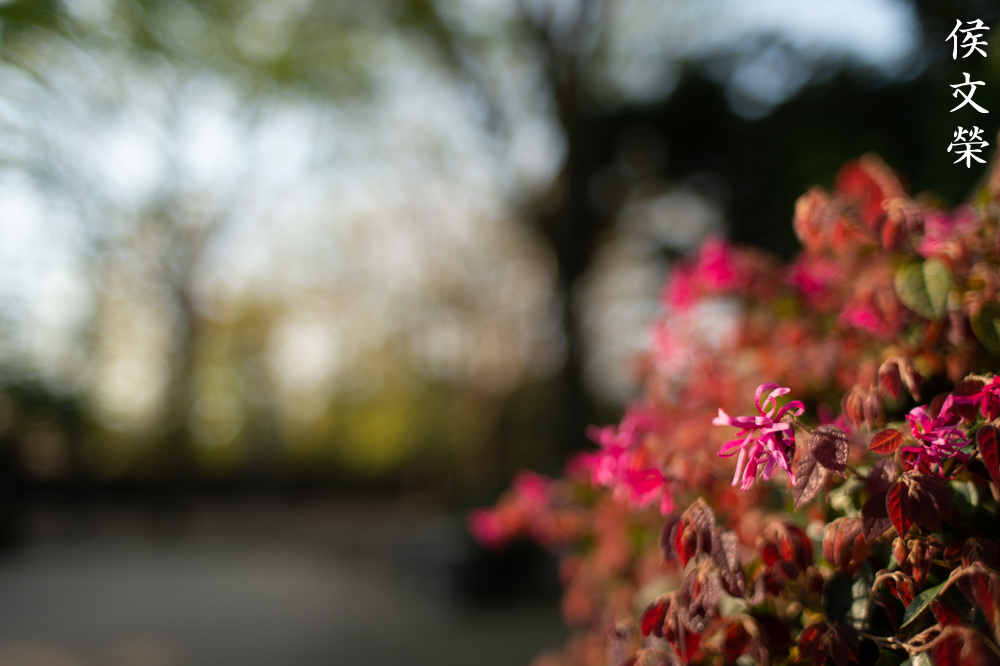
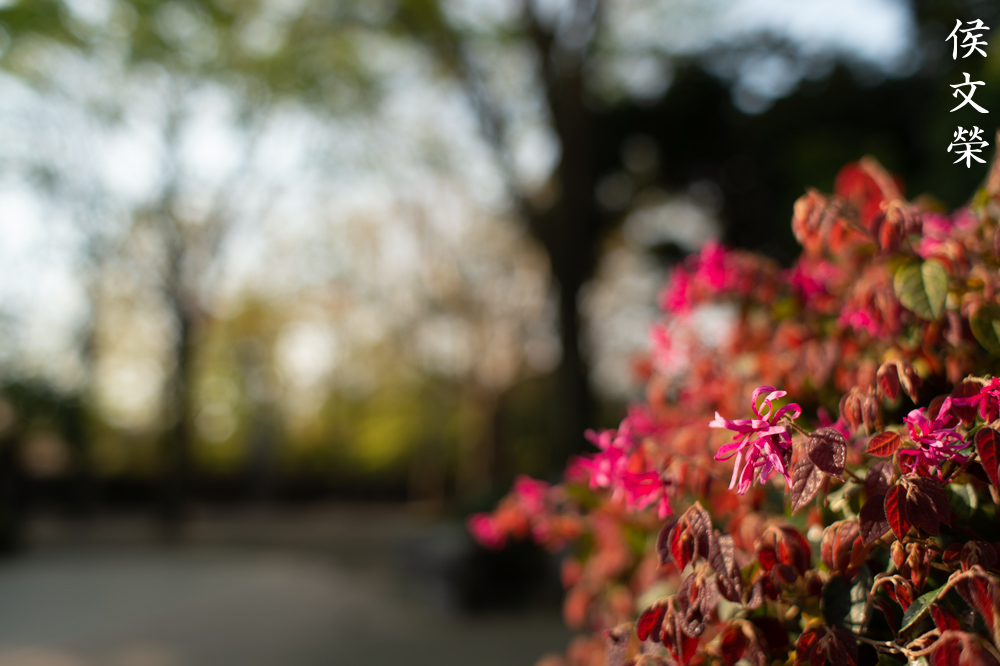
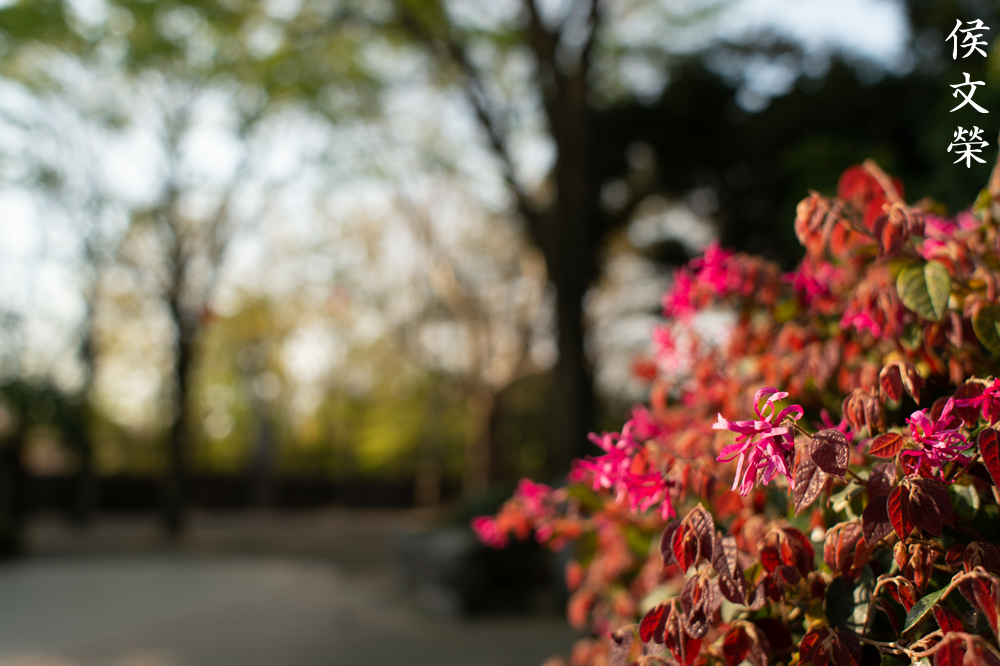
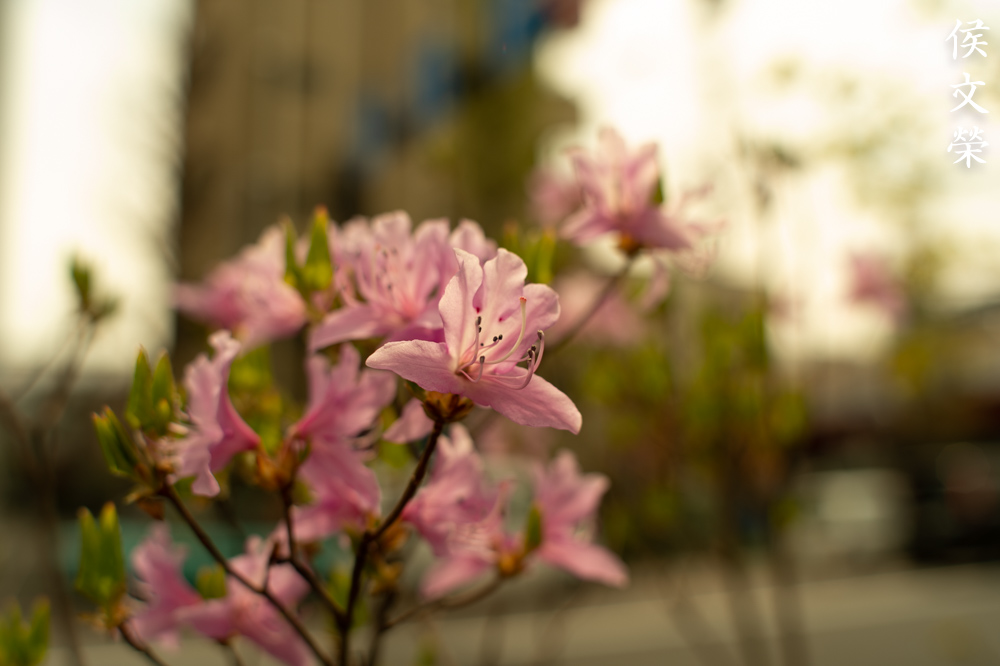
The character of the bokeh is rather good at closer focusing distances but it can look terrible at moderate distances as you can see in the 2nd set. It can look a bit unrefined at these distances specially if you have twigs or any lines in your background. They will render with “double-line bokeh” which I dislike. The good news is foliage seems to be rendered quite well and the character of the foreground blur looks good. In general it looks quite nice, all the ugly things can be easily avoided when you’re aware of what’s in your frame. Its nice 9-sided iris helps in keeping the bokeh quality rather smooth specially when it is stopped-down to awkward values where the background border on being blurry and half-focused. In my observation, these apertures tend to produce unsightly bokeh characteristics since the blurry parts are neither smooth nor defined, you’ll end up with clumpy-looking details on lenses with terrible bokeh quality. Outlining of the discs can be observed wide-open, it will start to look even by f/2.


(Click to enlarge)
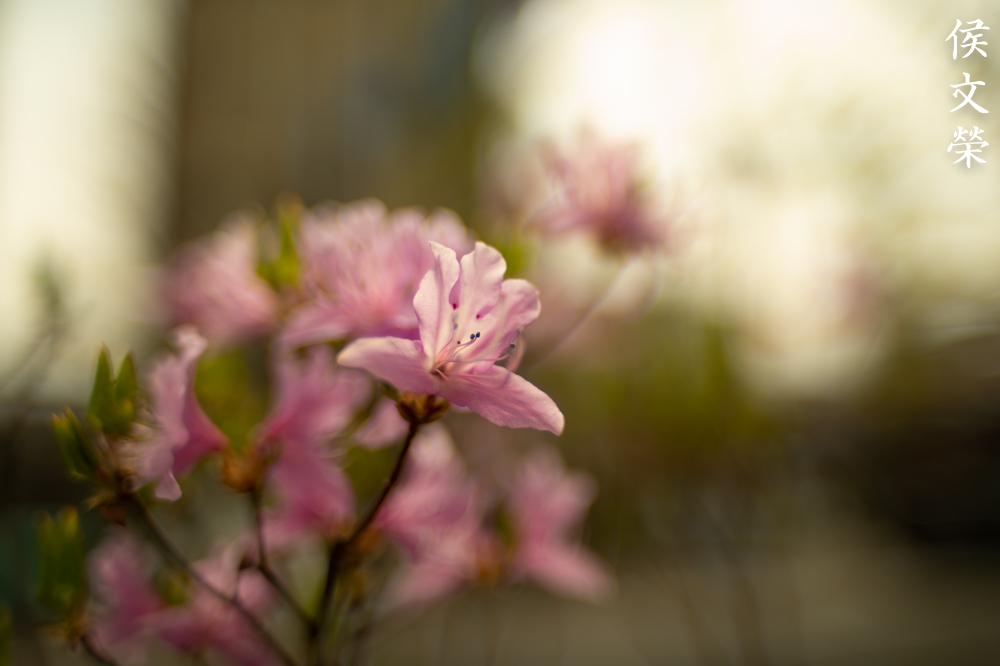
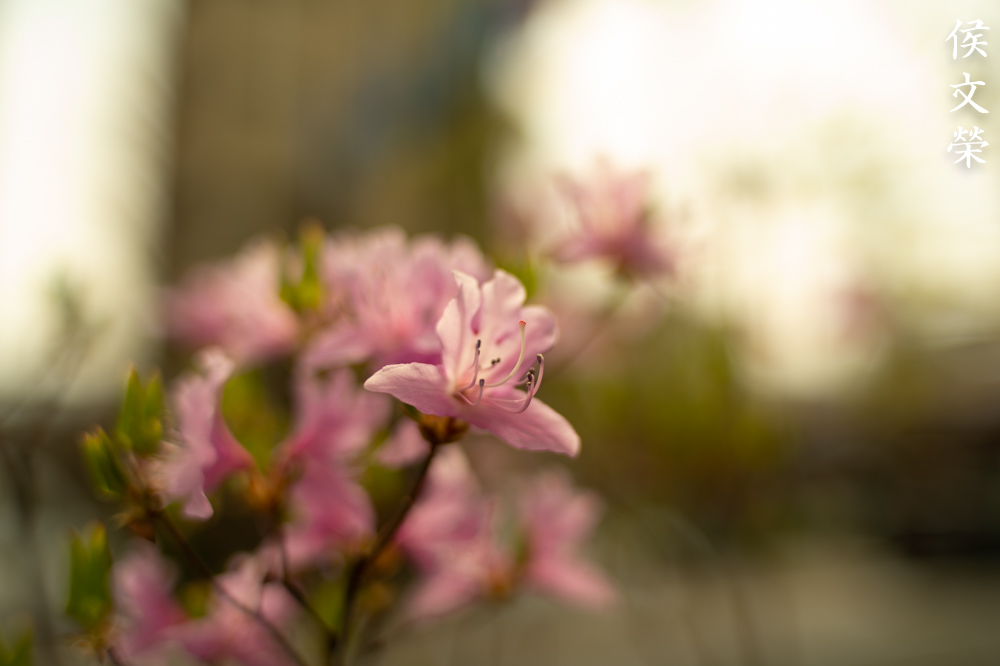
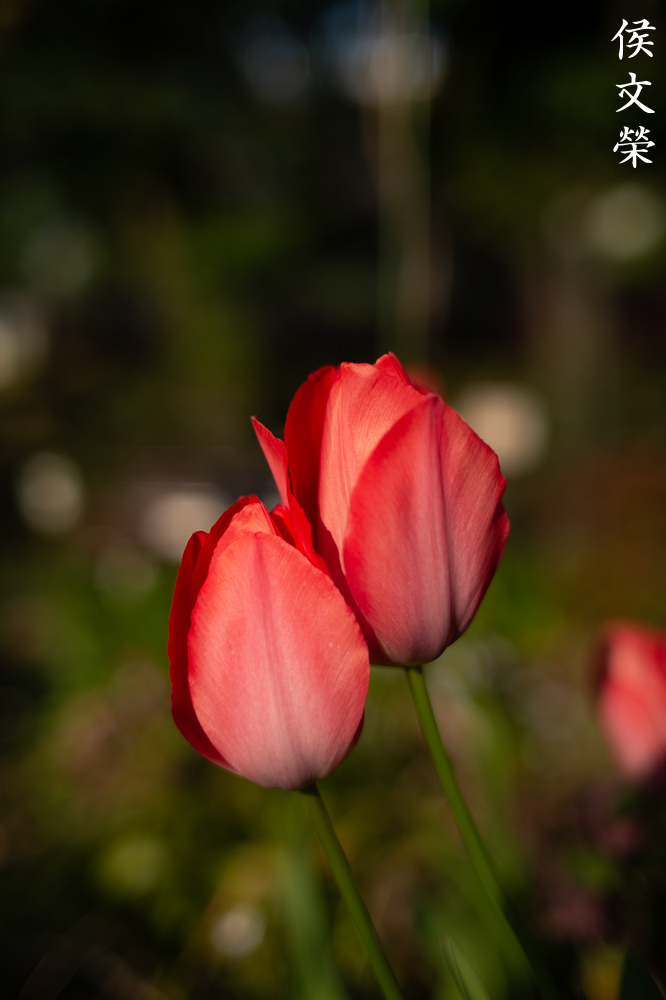
Sharpness isn’t bad at f/1.4 but it looks worse because of excessive spherical aberration and astigmatism. It does give your photos a dreamy-like quality which you can use to your advantage. Stopping it down to f/2 can give you amazing results as the resolution starts to improve. Spherical aberration is a lot better-controlled but it still retains some of that “magic look” which can be a good thing. Things start to look really good at f/2.8, the center looks exquisite and you’ll get really sharp details since the resolution could now support it. You are going to get peak sharpness at the center by f/4. The only reason to stop the iris down further is to get better corners or more depth-of-field. This performs great at infinity or anywhere close to that at f/2 but the corners won’t look good until you’ve stopped it down to at least f/4. It performs equally well throughout its focus-range, this is good news since it was once a favorite of scientists and astro-photographers. I don’t have any samples here but coma looks terrible, it improves when you stop it down to f/2.8 but I’ll avoid shooting stars with this at anything wider than that.

It’s actually quite sharp even wide-open but you won’t appreciate this because of spherical aberration and astigmatism. It does give you dreamy-looking photos so it’s up to you on how you’ll want to play with it.
This is how thin the depth-of-field is when shooting wide-open, it can be difficult to focus specially at closer distances.

This picture should give you a better idea of how sharp it is wide-open. This isn’t bad at all specially if you do not have a lot of spherical aberration making your photos look like they were shot with a “glow filter” installed.
Chromatic aberration can be seen wide-open. It’s easy to avoid this, stop-down the iris to f/2 and you won’t see much of it from there on. It doesn’t look terrible at all like some cheap zoom-lenses tend to do, it could even help make your photos look more natural. This statement is debatable and it depends on who you talk to.

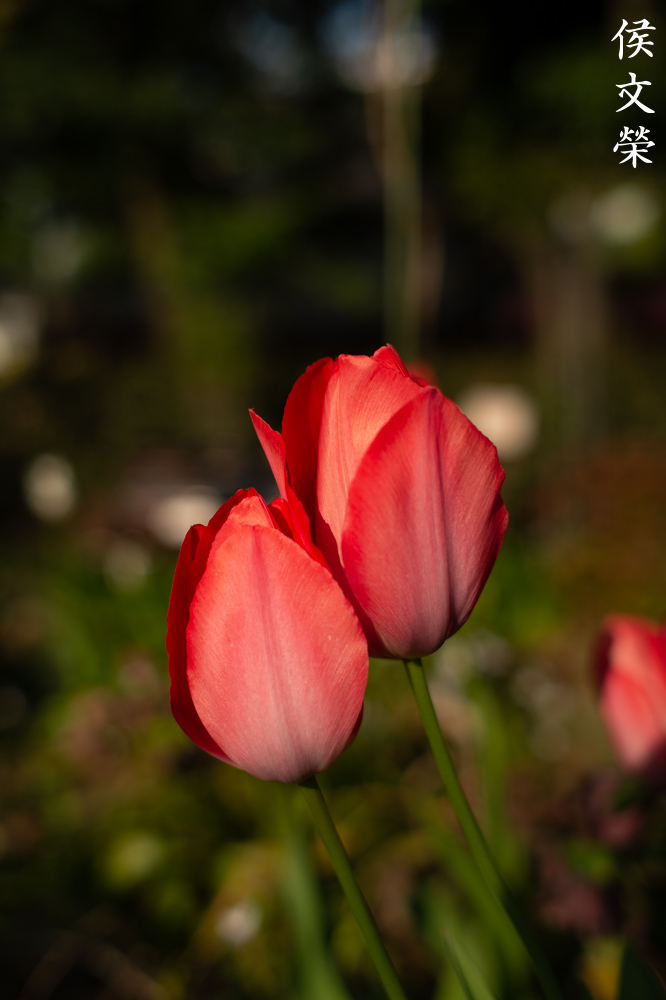
The focus-transition is smooth so you won’t get a “wall-of-focus” like what a lot of modern lenses tend to do. It helps make your photos look natural. You can get the background blurred like this even if this is a wide lens, it’s handy if you need to isolate your subjects.

Spherical aberration and astigmatism can be observed easily in this photo. I will shoot this with f/4 if this were to be an important photo, I just wanted to show you how it looks like in real-world scenarios.
You can deal with the distortion by positioning your straight lines away and far from the edges. I use this trick a lot on lenses with terrible distortion, it’s something that you will learn as you get deeper into photography.
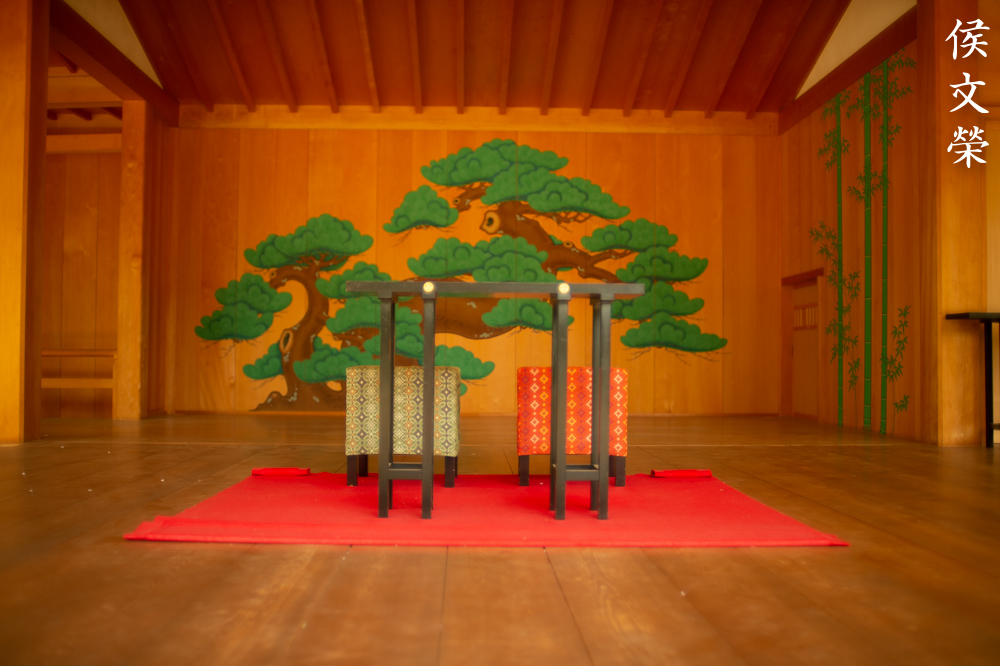
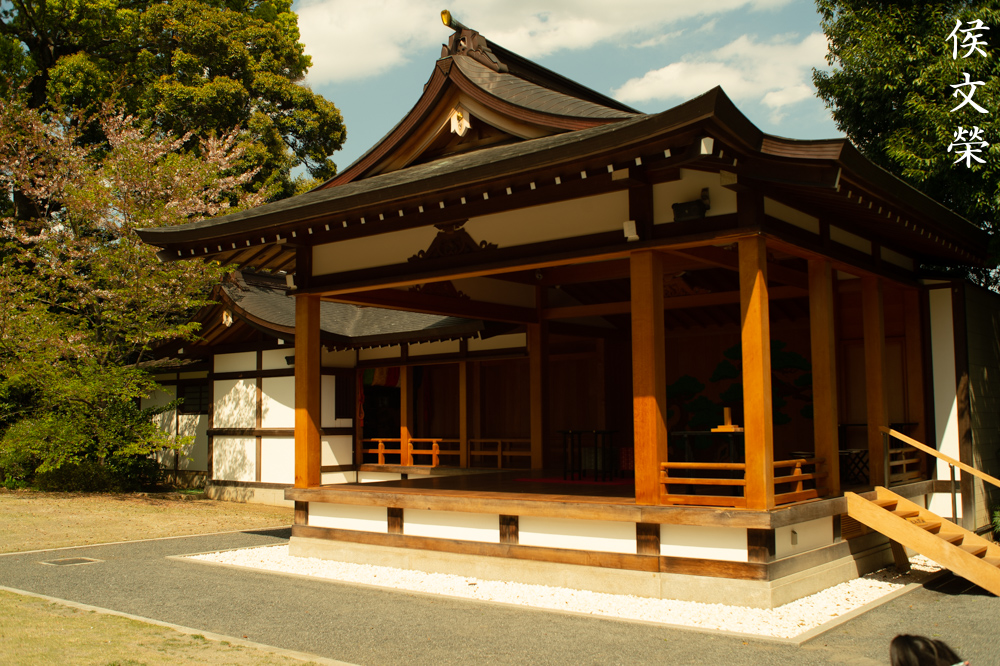
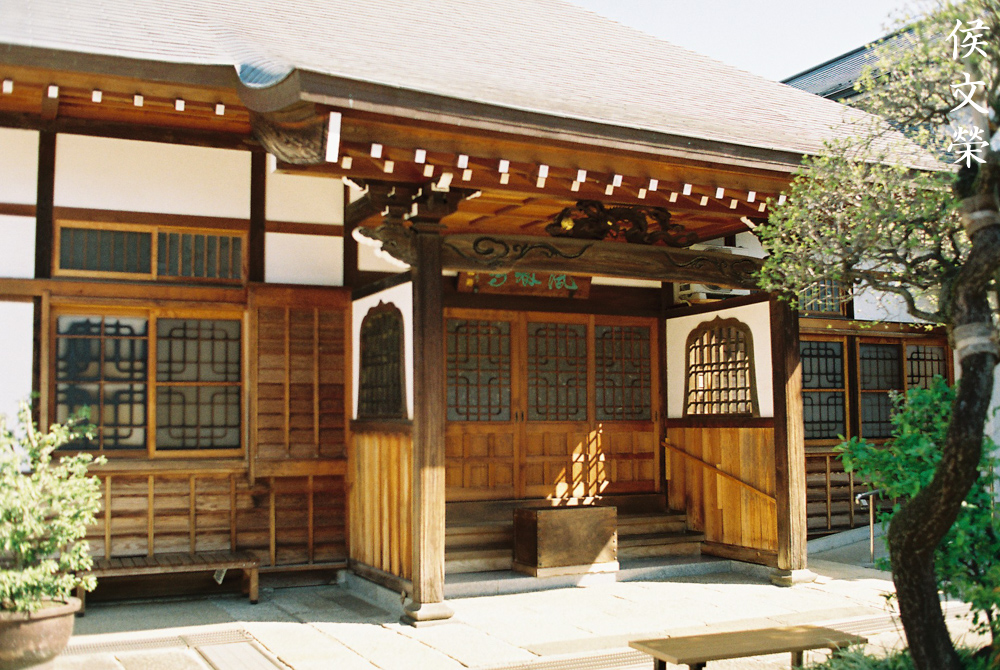
Here’s another angle of the theater’s stage. You’ll notice the outer pillars are bowed-out slightly but that’s about it.

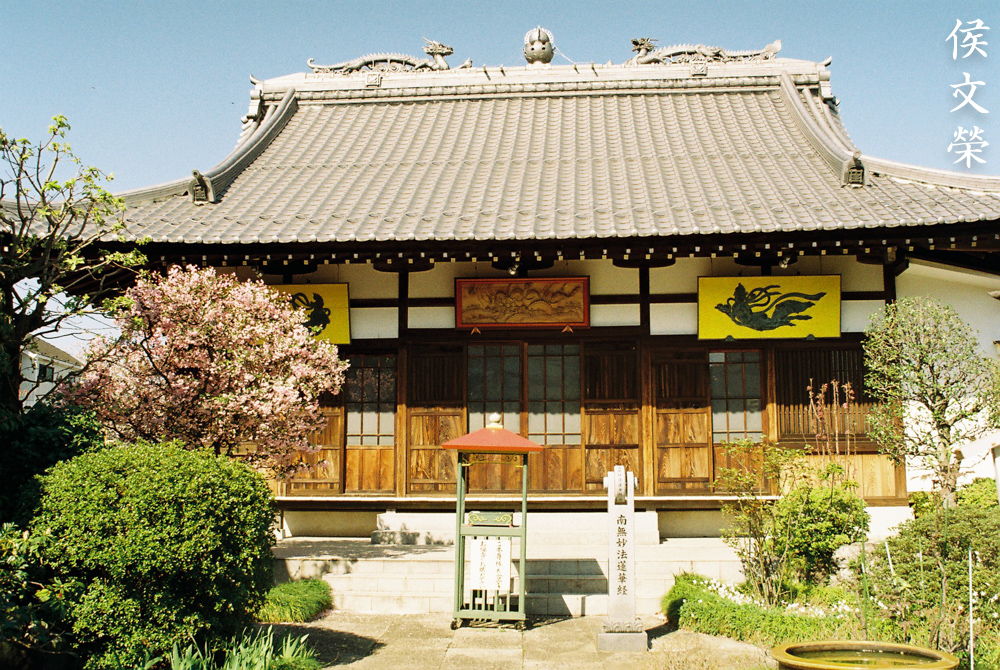
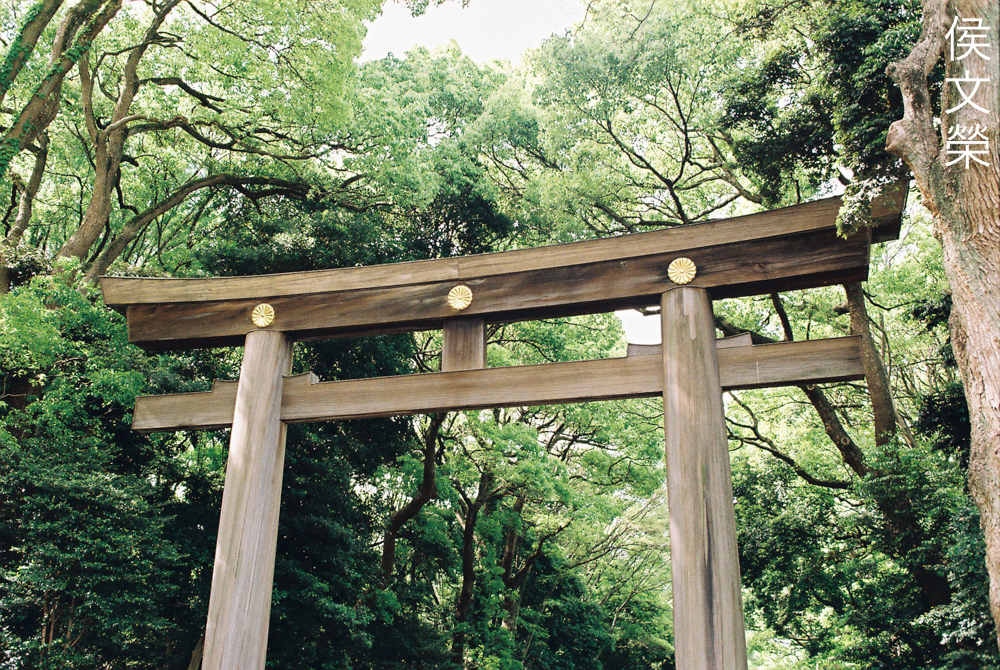
Well, this doesn’t look so bad despite having lots of straight lines parallel to the edges of the frame.
This photo should make the distortion look more obvious but it’s not bad at all. Look carefully and you’ll notice it but it doesn’t stick-out much.

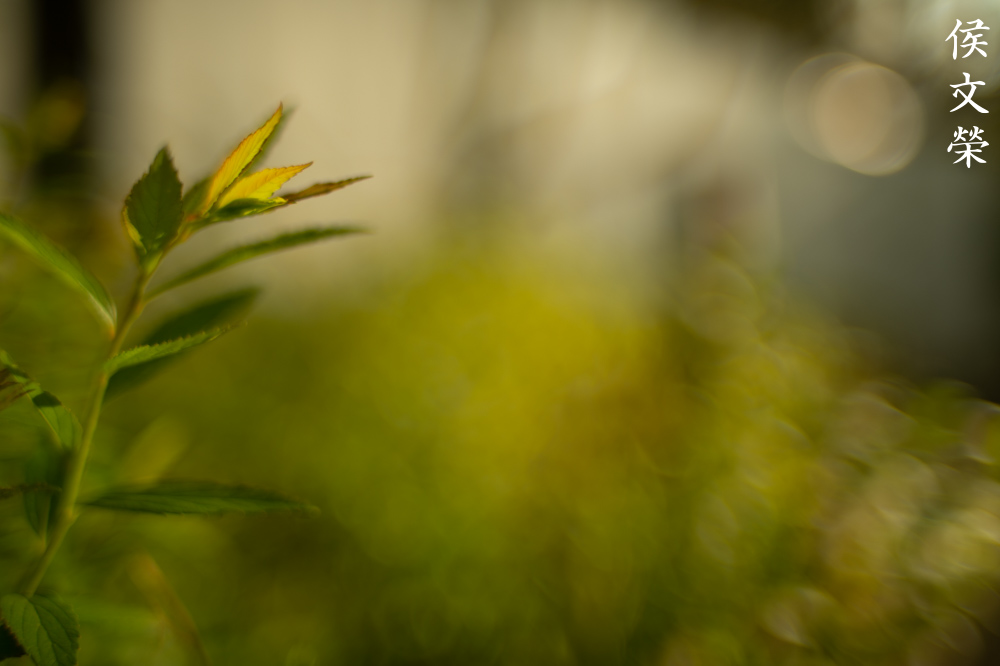
The foreground-blur characteristics is just as good as the background-blur. I love how the quality of the bokeh is when there’s nothing in your scene that could trigger any nasty-looking artifacts. Chromatic aberration is prominent but it’s a given since the parts at the top of the frame are overblown. It goes without saying that astigmatism goes along with it.


(Click to enlarge)
Here are more photos for you to enjoy. This is a nice lens, I love shooting it a lot. This can give you amazing photos so long as you know how to workaround its weaknesses or use them to your creative advantage. If you can see it that way then there’s nothing stopping you from taking great photos with it.
How does the amber-hue affect pictures that were taken with film? I took these with a daylight-balanced film to show you how it looks like. Film has a unique look that’s difficult to simulate using a digital camera, this is due to grain and how silver reacts to light. Grain has an organic structure, it’s different from the rigid-looking noise that digital sensors produce. It helps masks flaws and could even amplify them. Emulsion is not as reflective so you could get less internal reflections with it. This was designed for use with film so it’s only fair that we judge it with its intended medium. I used Kodak Gold 200 for the photos and the camera that I used is a Nikon F100.
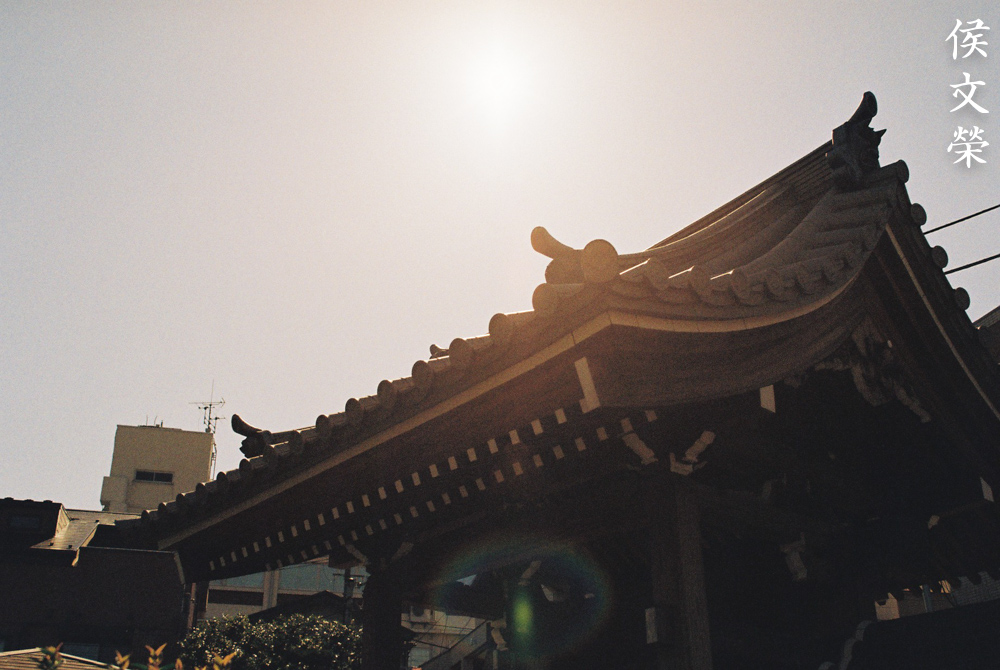
This is how bad flare can be on a real-world scenario, you’ll get a blob in the frame even if you’re using a hood or the sun is outside of the frame. You are also going to see that ring form somewhere in the frame, too.
Here’s another one. Flaring and ghosts can be a problem for photos like this so re-angle your shot so the blobs won’t be visible. Flare can be accepted at times but I’d prefer not to have any blobs at all.
Here’s a nice photo taken at the minimum focusing distance. It’s somewhat overblown, this is going to look better if it was underexposed this by 1/3 of a stop.

The ability to focus close is great, wedding photographers can use this to take photos of the rings or the cake. This is a very handy feature, I find myself using this quite a lot. It’s not really high-magnification but it’s still better than nothing.

Here’s a photo of a Tara, I took this at f/2 to get more depth-of-field. It’s a tiny statuette so I’ll need every millimeter of focus I could get. Since it has plenty of small details stopping the iris down a bit helps.
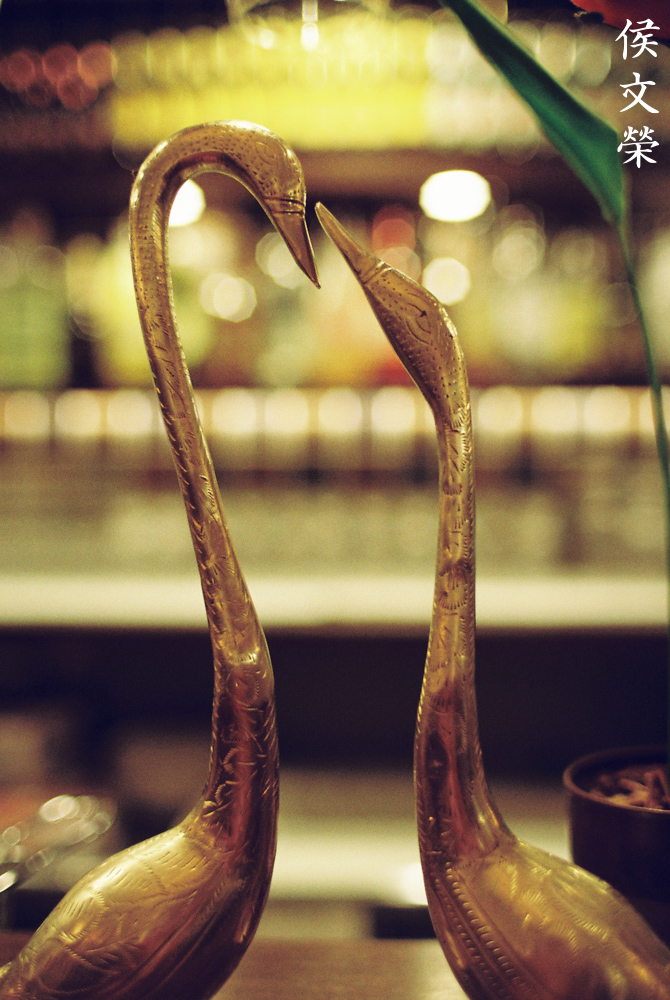
Here’s another one that I shot at f/2, if I took it wide-open I won’t be able to render the brass swans cleanly. Spherical aberration can be seen but in smaller amounts compared to shooting this wide-open. You can stop this down to f/1.8 if you want to have just a bit more of that glow yet get more of the benefits of stopping the iris down to f/2.
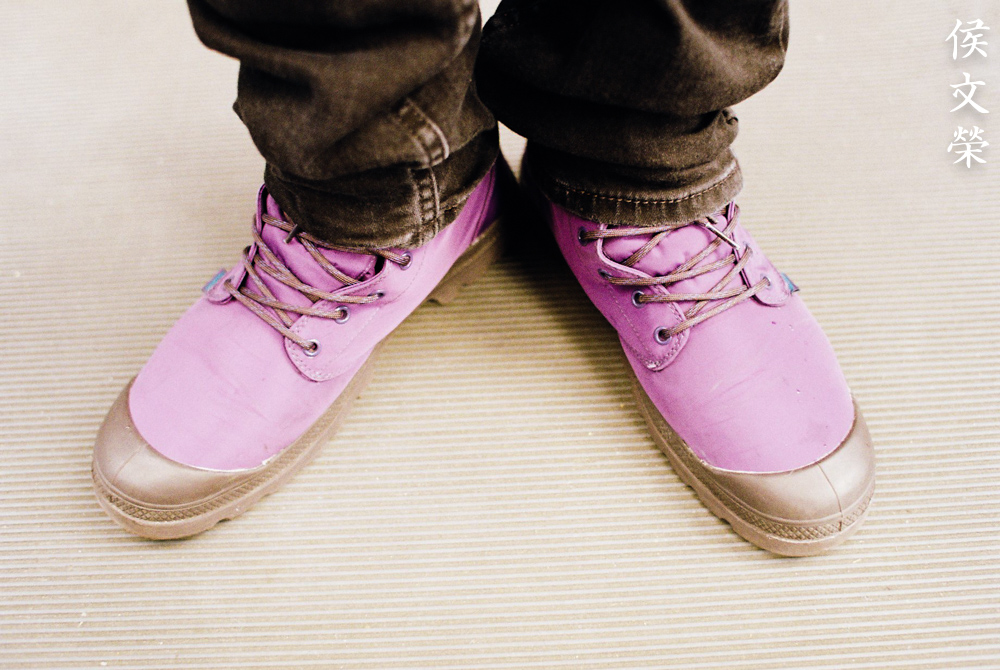
This is not a good use for a 35mm lens. If you want to make a hipster project about people’s shoes you’d benefit more from a 50mm lens.

This is a very sharp photo, the focus transition is smooth but background is kind of ugly. This was probably taken at f/4 or f/5.6, those values can render in a funny way since it’s in-between blurry and well-defined. You can avoid it by either stopping the iris down more to f/8 or opening it wider. You’re background is just as important as your subjects.
Distortion can be easily seen here. This isn’t what you’ll want to use when taking pictures with straight lines parallel to the frame’s edges.
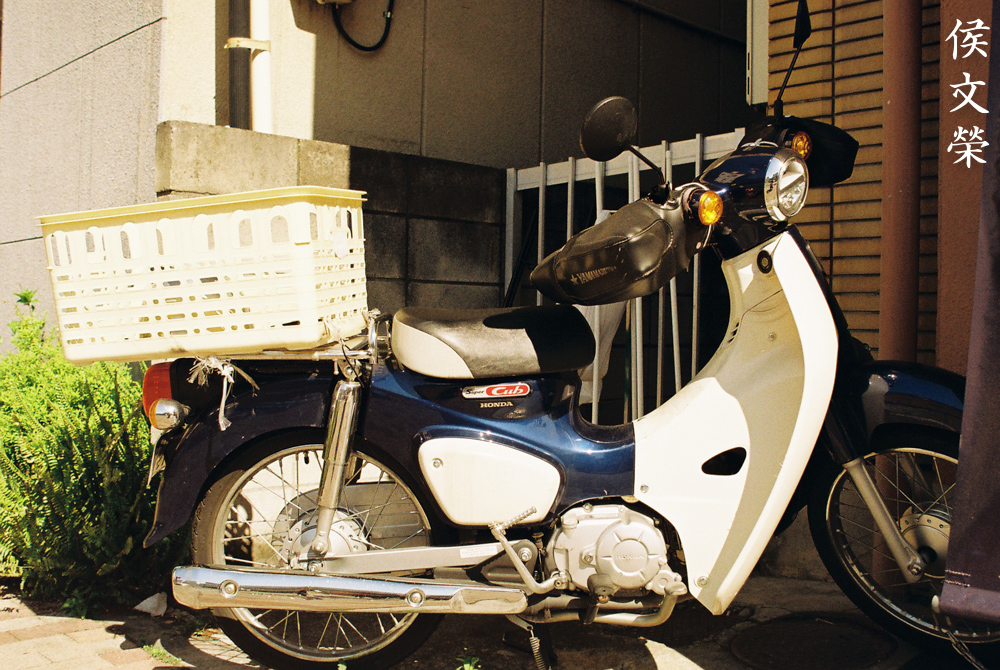
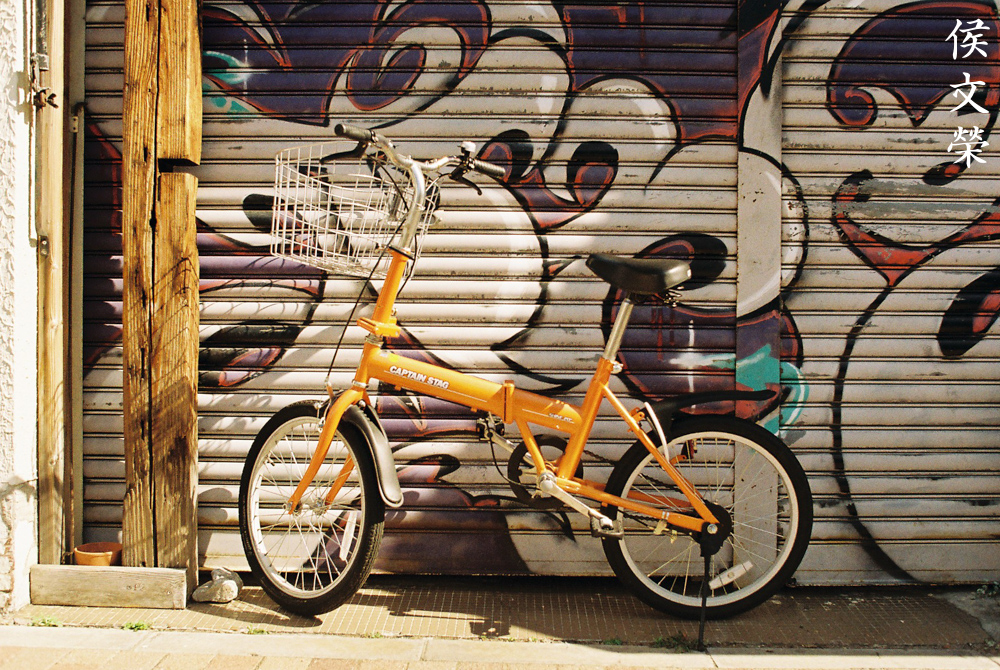
You can feel the distortion here, too. The good part is your attention is fixed at the Honda Cub so you won’t notice how bent the pipe look towards the far-right of the frame.

Framing your straight lines closer to the center helps a lot, you can be assured that they’ll stay straighter compared to positioning them closer to the edges.
If I were shooting on a sunny day then the Nikkor 35mm f/2 Ai is going to be the better choice. It’s more compact and quite sharp when stopped-down to small apertures like f/8.


(Click to enlarge)
Here are more pictures for you to enjoy. It’s excellent with film but its amber-tint can turn some people off. I personally wouldn’t use this to shoot film photos unless I have a blue filter installed because my photos look like they have some sepia filter applied to them. Modifying the color in post isn’t easy at all unless you took the photo with a digital camera and process all of your photos using the RAW files.
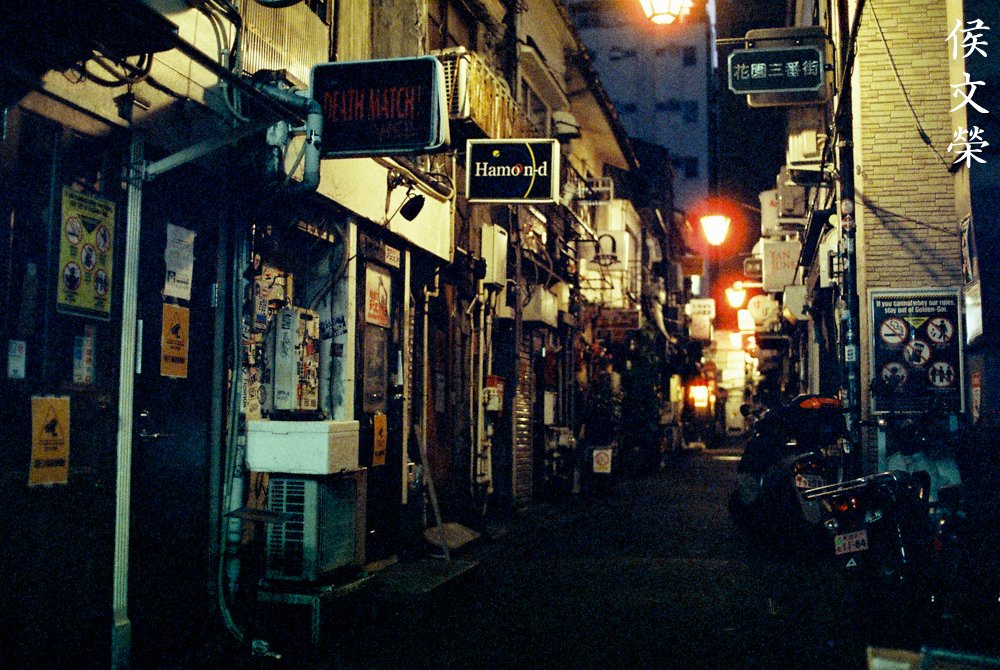
How about some photos taken with a high-speed film? I shot these using a roll of Cinestill 800T, it’s made with a bluish cast to balance-out the effects of tungsten lighting, making photos look less-yellowish. Let’s observe how it offsets the yellowish tint of this lens. It took these with my Nikon FM3A and I used my trusty Minolta Spotmeter F to help give me better exposures in lowlight situations.

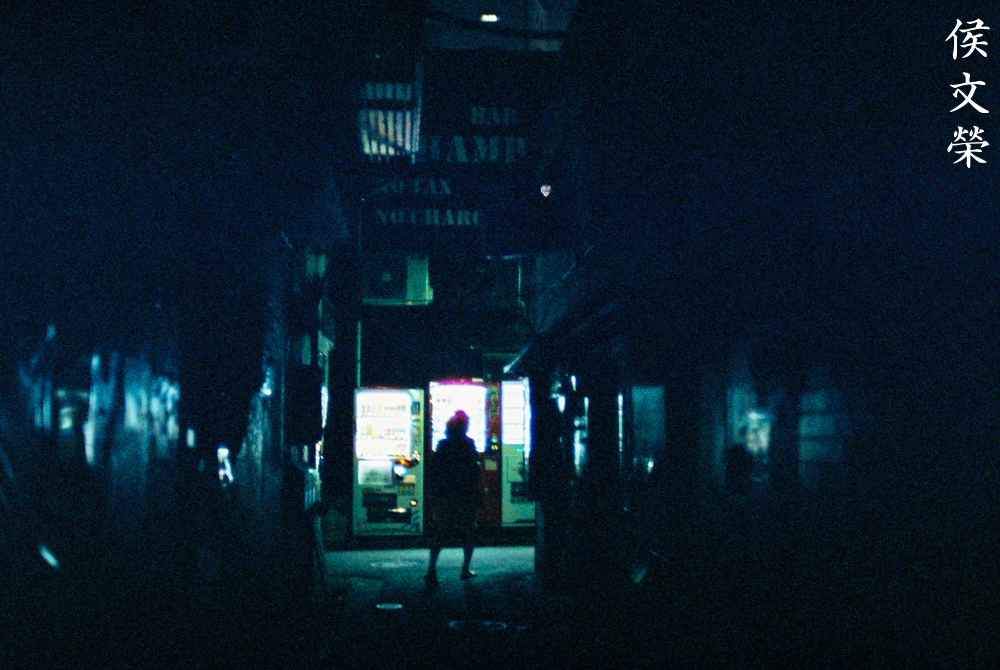
In varied lighting you won’t see the yellowish-hue so much, it is subdued by the tungsten-balanced nature of Cinestill 800T.

It’s most prominent in scenes where most of the lighting are of yellowish or reddish color which obviously amplifies the yellowish-tint of this lens. This film won’t help much since the color of the ambient lighting will negate it.

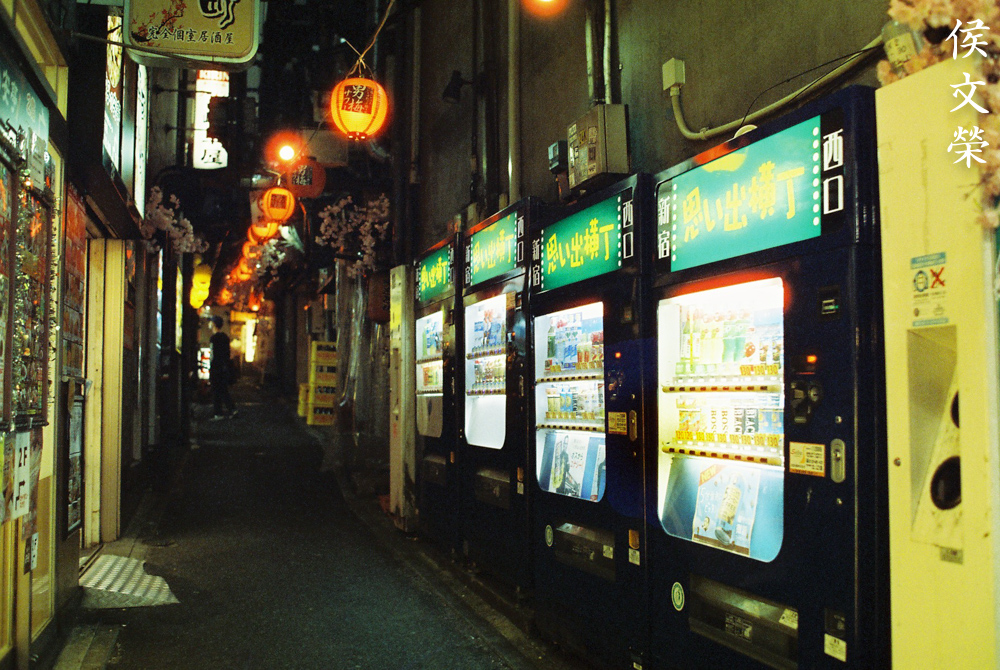
This is not so bad but it’s still a bit too yellowish for my taste.
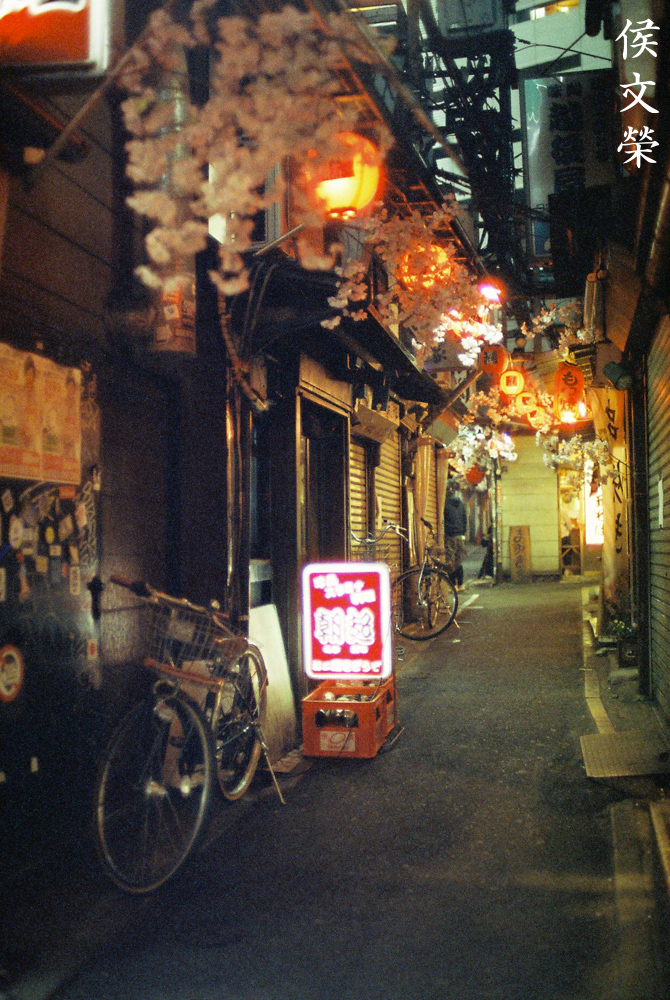
It’s a shame that this lens has a yellowish-tint, this would have been a better picture if the white-balance looks more-neutral.

This film is fine-grained so it could support the sharpness of this lens. I took this at a smaller aperture, probably around f/2.8.
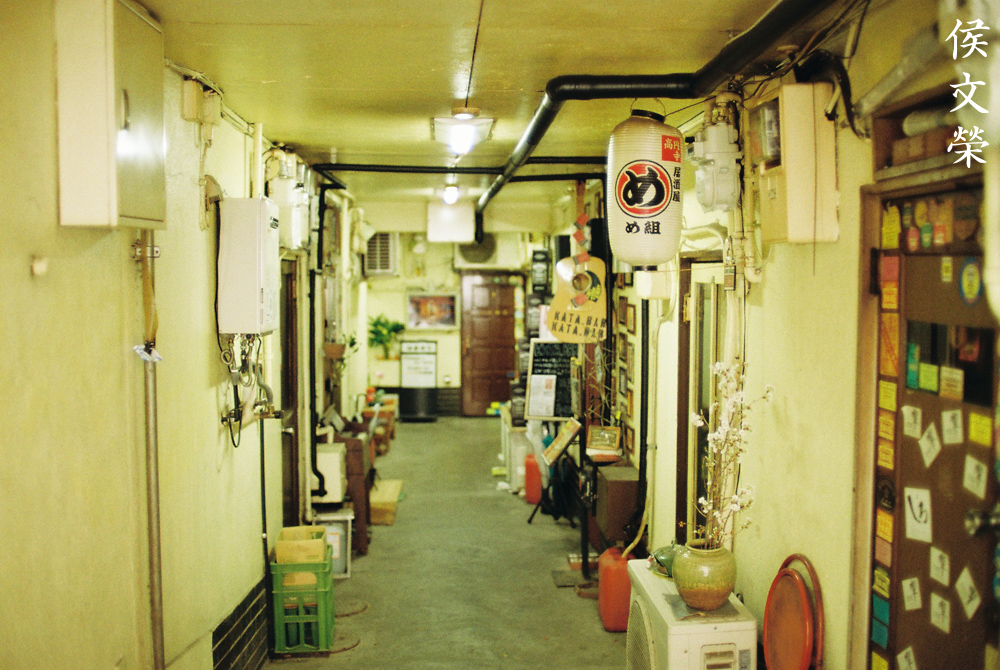
Distortion can be seen here, just look at the accordion door and you can see the lines curve slightly.
This is great for lowlight photography, it’s useable wide-open but it is best shot from f/2 according to my experience.

This lens is perfect for shots like this but I just hope that I had a cool-filter with me at that time.
It’s amazing how thin the depth-of-field is despite it being a wide-lens. Your background can be blurred to this extent which you can use for creating an interesting effect or help you tell a story.
This is a lovely scene, the sharpness of this lens complements the fineness of Cinestill 800T’s grain.


(Click to enlarge)
Cinestill 800T’s halation helps mask spherical aberration, it’s not going to remove it entirely. It subdues the latter a bit so you won’t get that distinct blooming from spherical aberration. I don’t know if its just me but spherical aberration is not as prominent with my film photos compared to the ones shot with a digital camera, do you see that as well? I don’t have an explanation for this except that this lens was made for film so it only makes sense that it should perform better with film.
Here’s an update, I have bleached my lens using this method. I took a couple of shots with it to see any improvements. I shot these with the same Kodak stock that I’ve used previously in order to be somewhat consistent.
It appears that the yellowing has been subdued to a certain degree but you will still notice it. I’d like you to check the characteristics of the bokeh. I don’t like how it looks in this photo, this means that you should be careful with what you have in the background. Stopping the iris down may help clean the look a bit but that’s all.

At least I am more confident using this when shooting people, skin looks more normal now but still slightly yellowish.

The yellowing is more obvious in the shade. Treating the lens helps bleach it to a certain point but that will never make it render colors as neutral as it once did.
At least the yellowing helps make foliage look better in the shade. Vermillion looks more orange than it should which I don’t like.
Shooting in a sunny afternoon will result in a warm-look where the slight yellowing after bleaching the lens helps a bit, it helps give the impression that your scene is hotter than it actually is. The opposite is true when shooting early in the morning since you’ll get bluish-light from the sky.


(Click to enlarge)
My photos now look more normal despite having a slightly-yellow cast. This is much stronger than what many call the “Sigma Yellow“, a warm-cast created when using lenses made by that manufacturer from a certain time period. I’m not completely happy with the results but if this is all I could do then so be it.
I can’t recommend this one since the Nikkor 35mm f/1.4 Ai-S is a better lens. It has better coatings, non-amber glass, a more-modern feel and a you’ll also get a shorter focus-throw for quick-focusing. The only reason to get this is for its 9-bladed iris, that’s only for hardcore Nikkor fans or collectors. The focus-throw is longer, too. That may appeal to those who shoot videos but I really don’t see much benefit from it. The price for a good one is not cheap, specially for those with the coveted 9-bladed iris. For the going rate just add a little bit more and you can buy the Nikkor 35mm f/1.4 Ai-S instead. This is more for collectors to be honest. I do not see anybody using this as an everyday-carry. It’s not practical and I do not think this will out-perform the Nikkor 35mm f/1.4 Ai-S. The Nikkor 35mm f/1.4 Ai-S also has a 9-bladed iris which the later-serial Nikkor-N 35mm f/1.4 Auto and New-Nikkor 35mm f/1.4 (also the Nikkor 35mm f/1.4 Ai) don’t. To make things a bit more tough for this, you will have to look for ones with the factory-installed Ai-ring, that will cost you a small premium. Without it, this lens won’t be able to be safely mounted on a newer Nikon because of the Ai-coupling tab unless you have the Nikon FM, Nikon F3, Nikon F4, Nikon Df or Nikons that will enable you to use non-Ai Nikkors. It is a magnificent lens but this is best left to those who know what they really want.
Before We Begin:
If this is your first attempt at repairing a lens then I suggest that you check my previous posts regarding screws & drivers, grease and other things. Also read what I wrote about the tools that you’ll need to fix your Nikkors.
I suggest that you read these primers before you begin (for beginners):
Reading these primers should lessen the chance of ruining your lens if you are a novice. Before opening up any lens, always look for other people who have done so in Youtube or the internet. Information is scarce, vague and scattered (that is why I started this) but you can still find some information if you search carefully.
I highly recommend that you read my working with helicoids post because this is very important and getting it wrong can ruin your day. If I can force you to read this, I would. It is that important!
For more advanced topics, you can read my fungus removal post as a start. This post has a lot of useful information and it will be beneficial for you to read this.
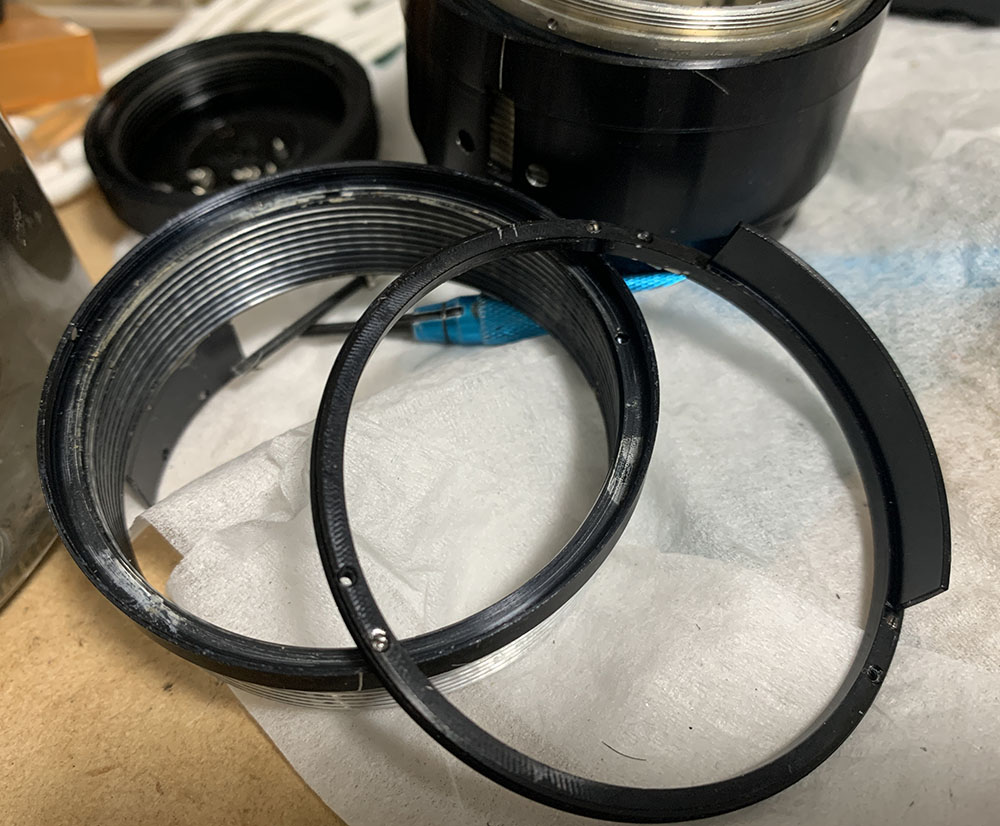
Disassembly (Main Barrel):
The main barrel is a lot more complicated than your usual Nikkor prime, its lower-half has to house a few more things in order to facilitate CRC. There’s a couple of things that you should be aware and I will show you what these are in the coming steps.
This lens isn’t for beginners to repair, any Nikkor that has CRC isn’t. If you’re itching to repair this yourself and you do not have the right tools and skills, skip it. Send it to a real repairer who’s familiar with Nikkors. If you couldn’t find anyone who’s good with Nikkors then find one who’s reputable-enough with other brands and show this article to him so it will help him repair it.
You’ll need special tools to open some of the parts here and you’ll also need several screwdrivers of various sizes. A set of rubber cups will also be great for opening retainers. One important thing that I’ll mention is Nikkors from this era tend to have their screws and rings sealed with lacquer and even a substance that’s similar to epoxy. This can be annoying and you’ll strip and damage the lens if you’re not careful. I usually heat the screws up or apply a drop of alcohol on them to soften the seals up. That works with lacquer but the tougher ones will require heat or stronger stuff like MEK to work. Mark and take photos before you remove anything so you’ll know how to put the parts back again later during reassembly.
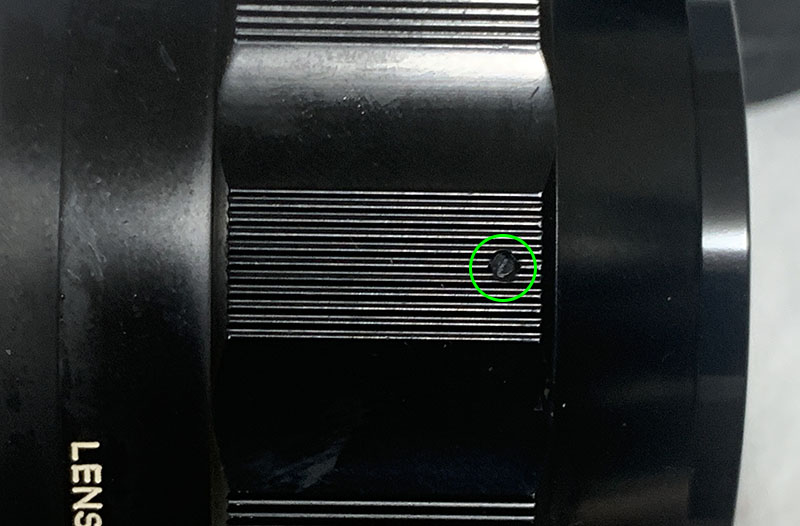
Locate and extract this so you can remove the front of the focusing ring. It’s a bit difficult to remove and you may need to apply solvents to it since these are usually sealed.
Unscrew the front part of the focusing ring. If it won’t turn, apply solvent or alcohol on its threads and wait for it to work on it before you try it again.
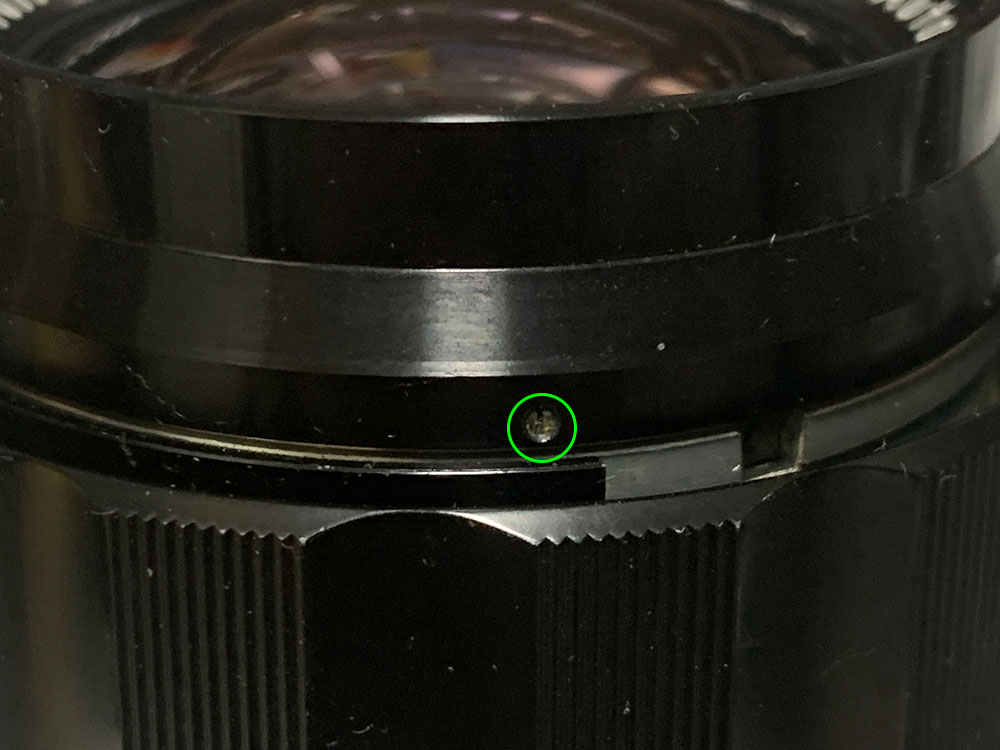
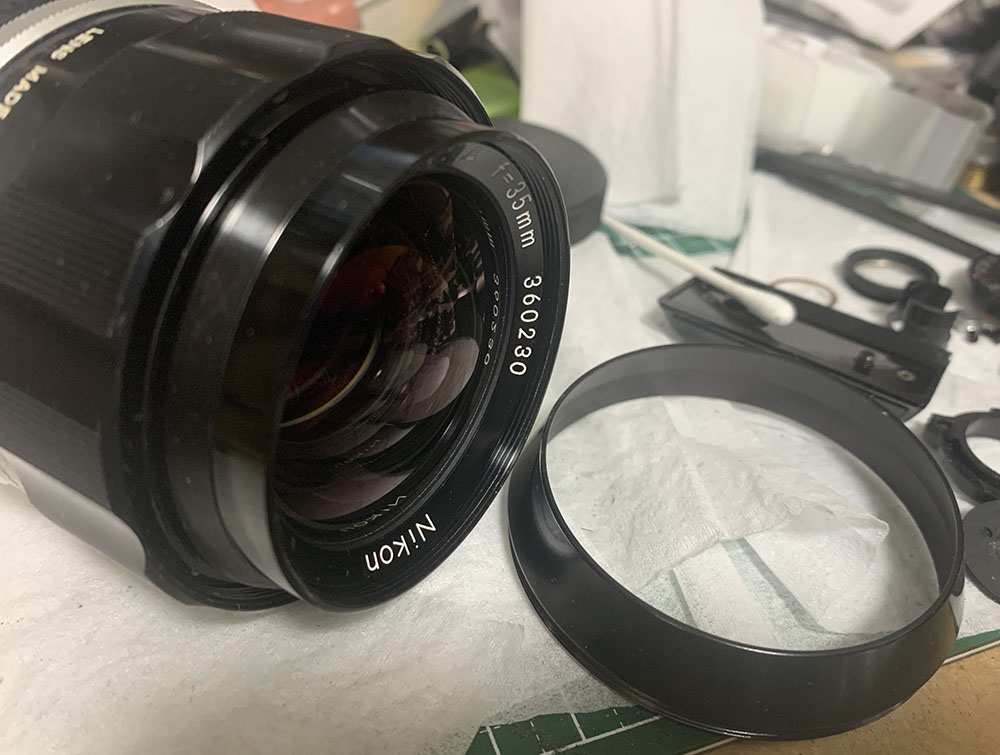
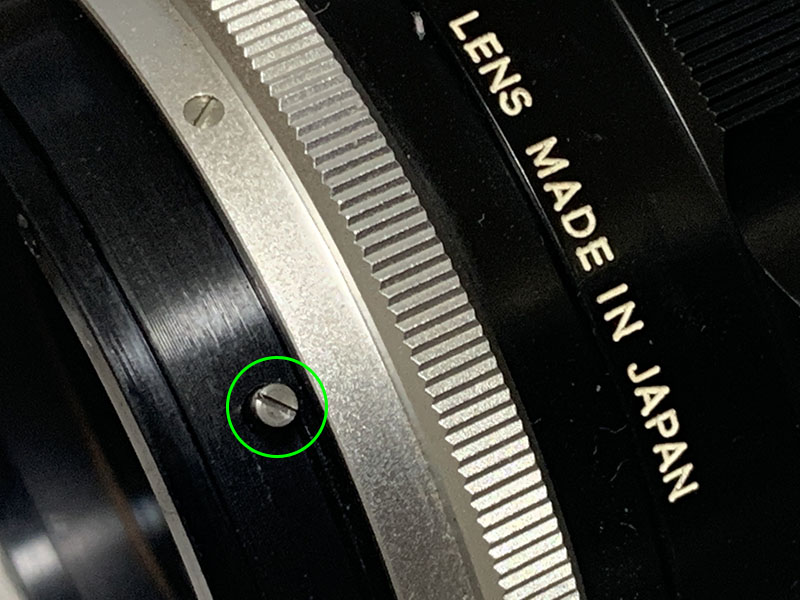
Locate and loosen this, you may have to turn the focusing ring to access this screw. It secures the front barrel which in turn secures the objective. Once it is loose, turn the focusing ring to infinity and unscrew the front barrel. You have to turn the focusing ring to infinity so you’ll have a point-of-reference, you’ll know what I mean in the next couple of steps.
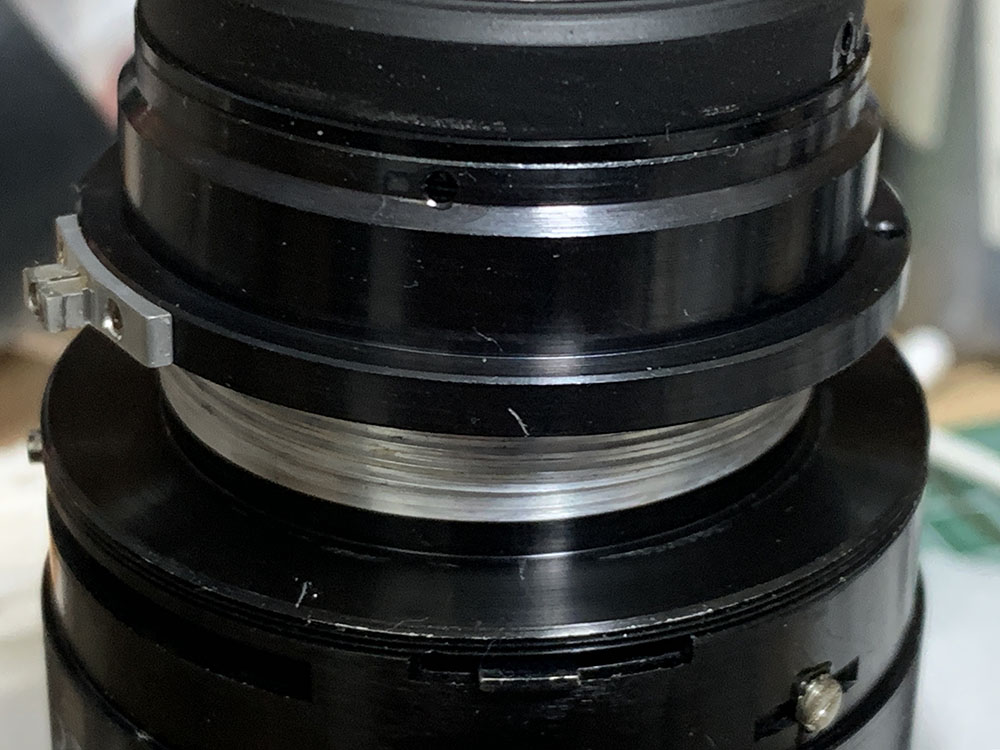
Carefully pull the objective off from the main barrel while focusing ring is at infinity. This way, you won’t disturb the configuration of the CRC unit and it can be easily documented.
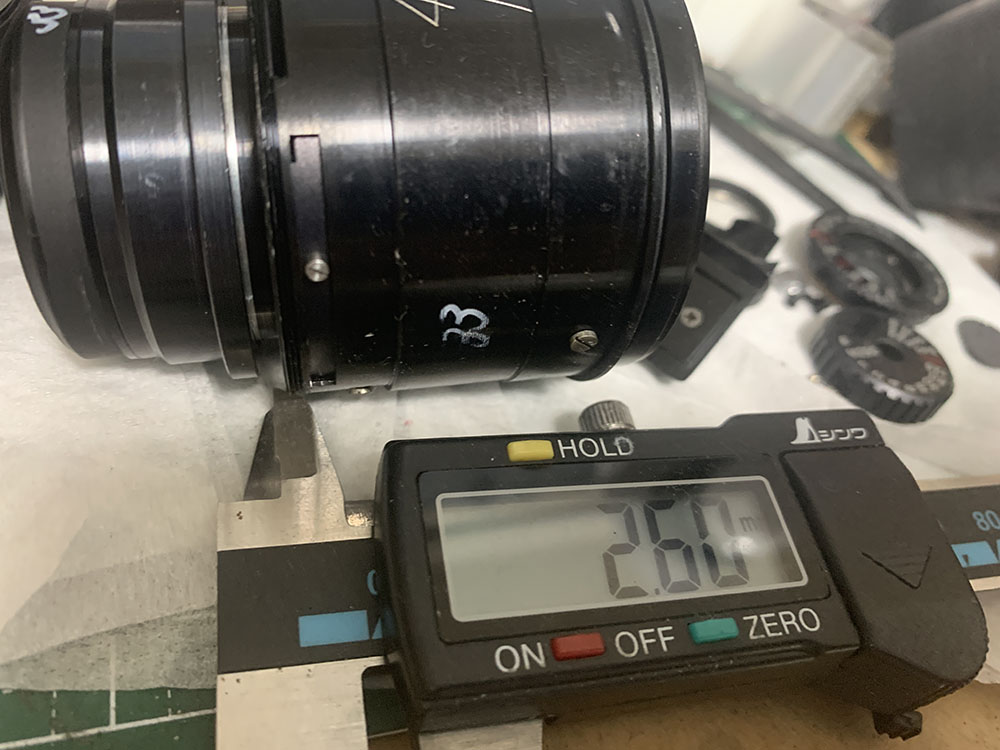
Grab a micrometer and measure the gap between the CRC group and barrel of the objective. This is how it should roughly be when the focusing ring is at infinity, you should be able to reproduce this later when you reassemble it.
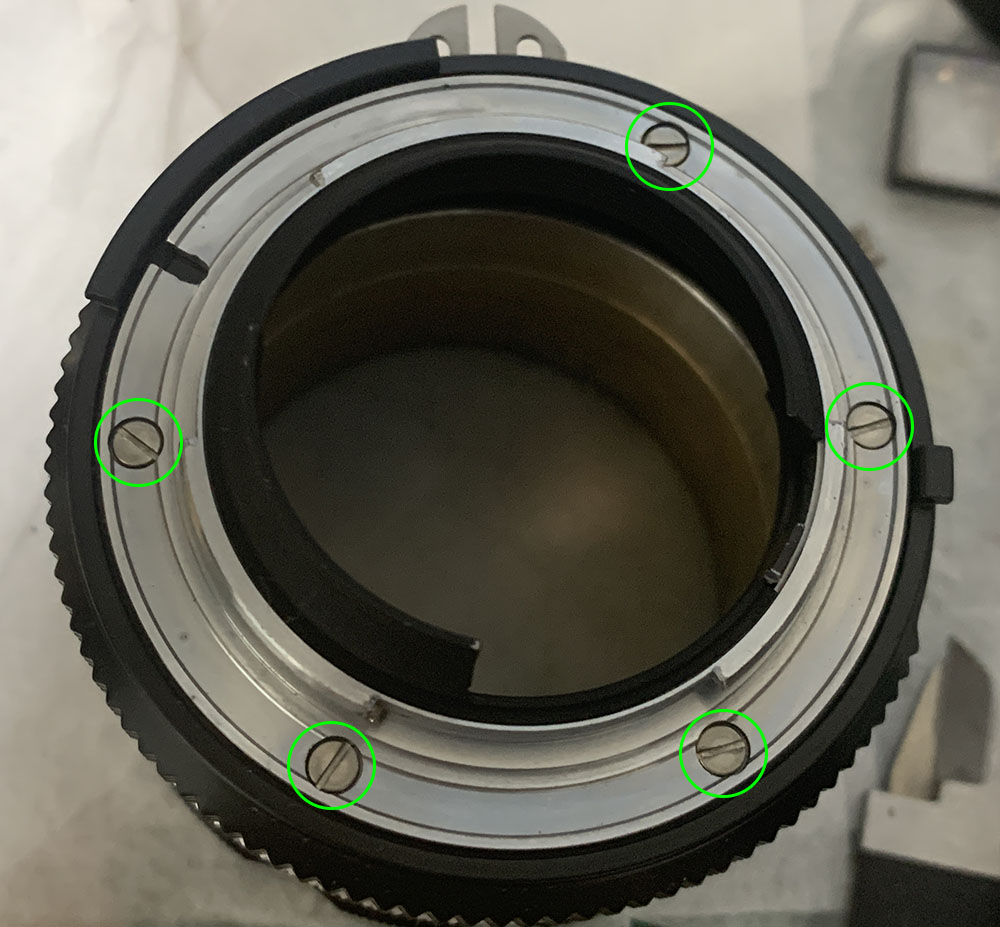
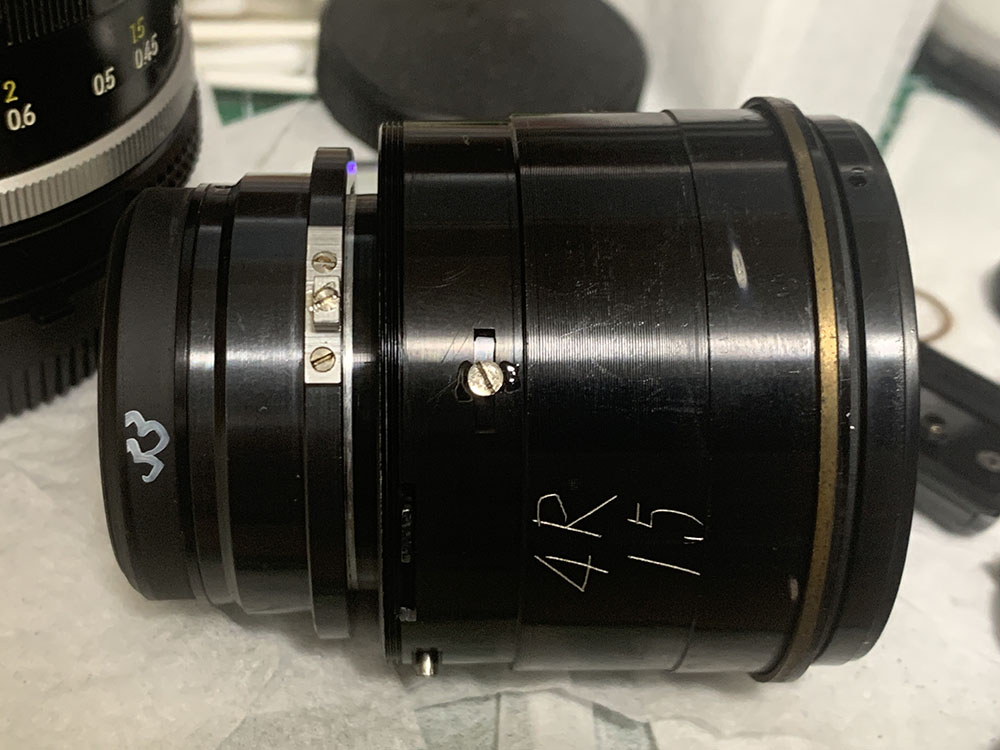
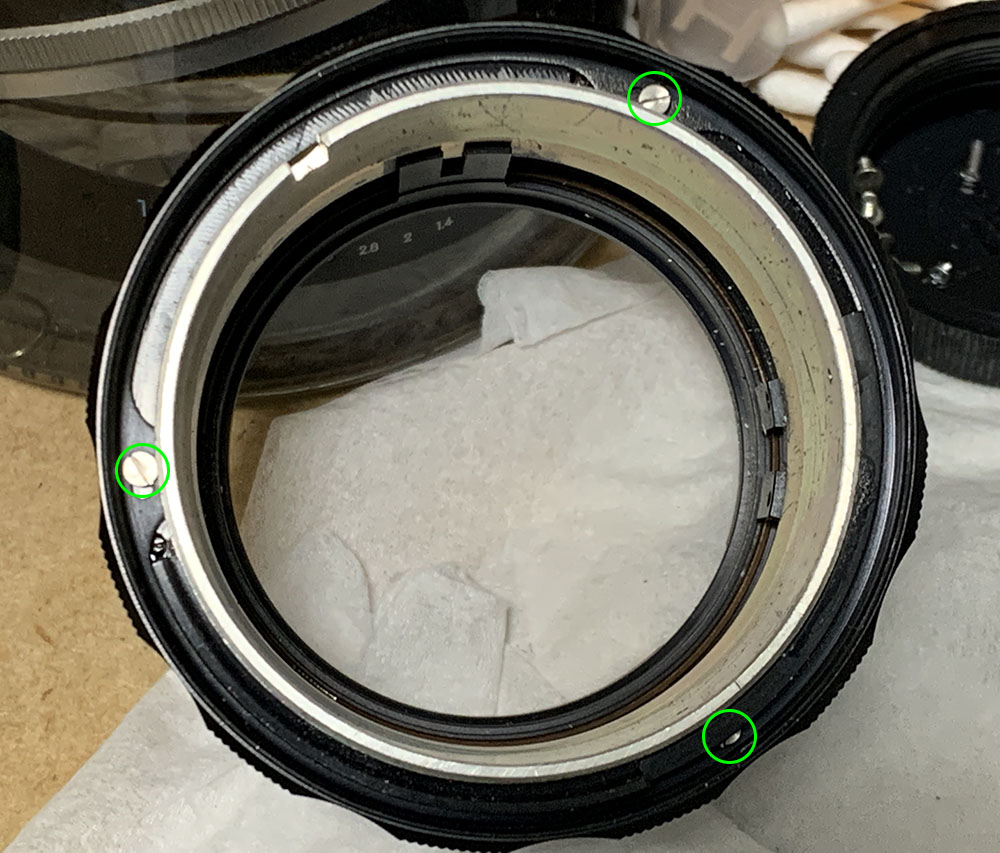
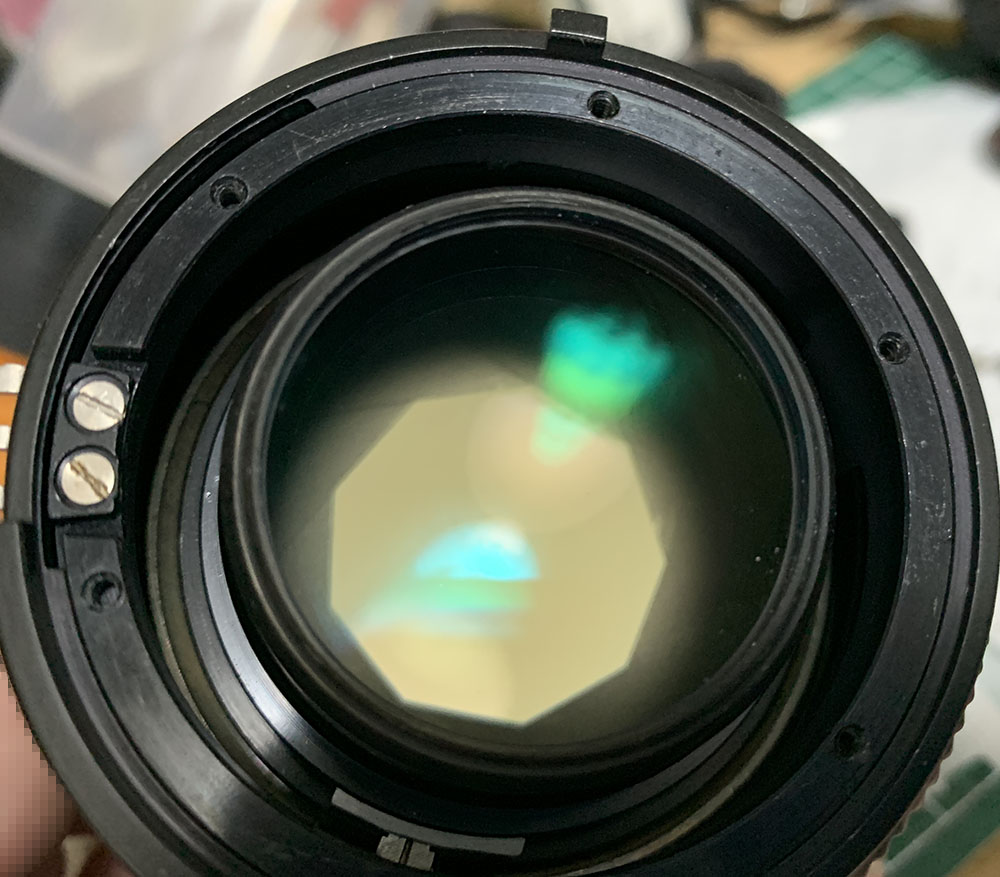
Carefully extract these. You should heat these well before you remove them or saturate them with alcohol first. Nikkors from this era are known to have plenty of glue used on their screws and this is one of them. If you’re new to lens repair, read my article on how to remove bayonet screws. Many people get stuck here because they stripped the heads of these because they aren’t using the right tools or may not have the right skill. Read and follow what I said in my article and you should be fine.
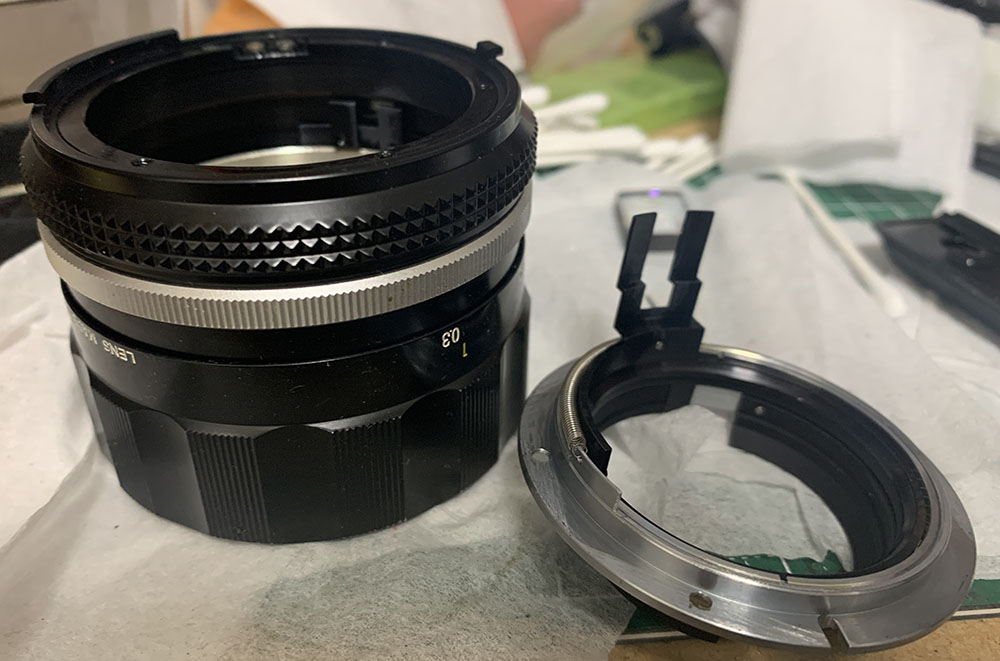
Once the screws are gone you can easily remove the lens mount. There’s no parts that will snag since the objective is gone and you can safely remove it without worrying about anything.
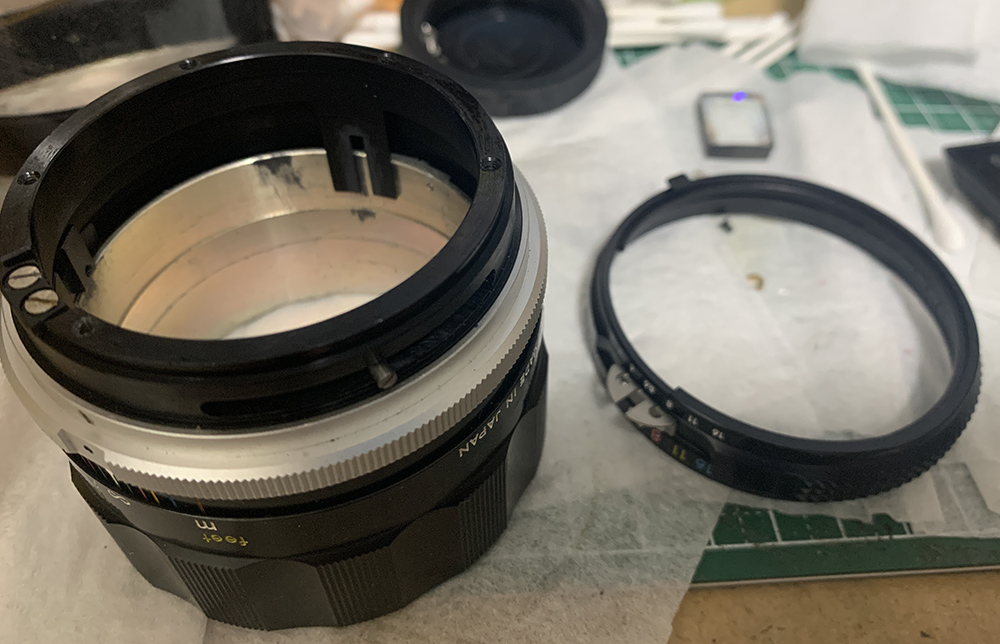
The aperture ring comes-off next.
This is the aperture fork, it couples to the iris mechanism. There’s traces of grease here, something that I will never do. If I had to apply grease here I’d only apply a very thin film so any excess grease won’t migrate to the iris.
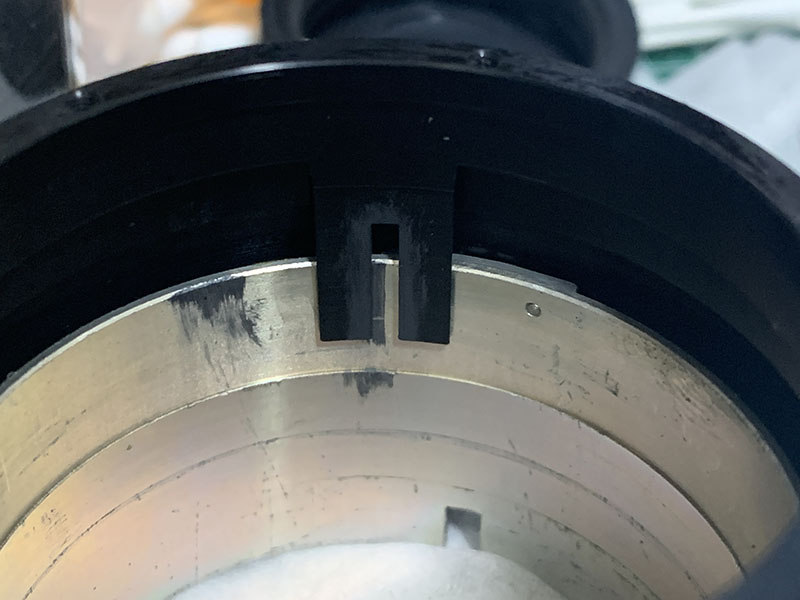
This is the fork for the CRC mechanism, it also has traces of grease. A small amount of grease is sufficient to lubricate this, you really need a thin film of grease for this to be honest.
Extract this, it serves as a pin to couple the aperture ring to its fork, turning the former will allow you to control the iris mechanism because of this link. It can be brittle so be careful when you remove it.
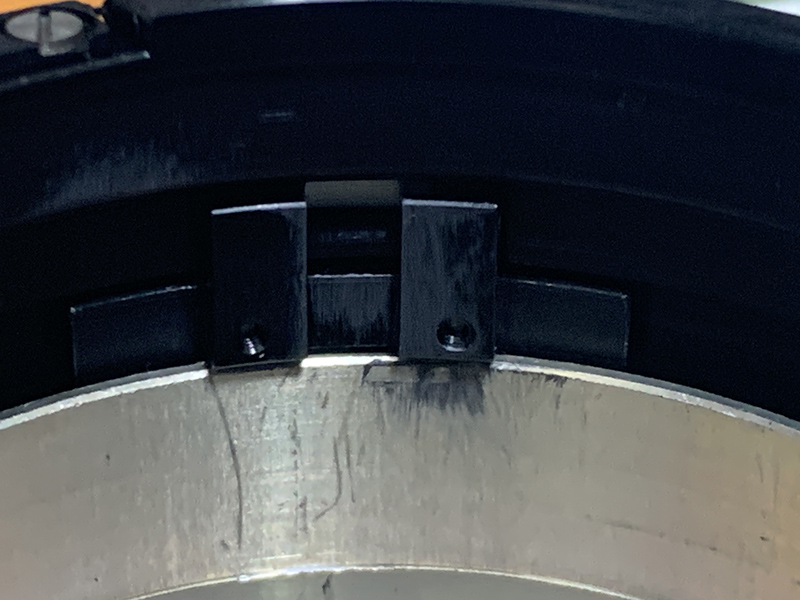
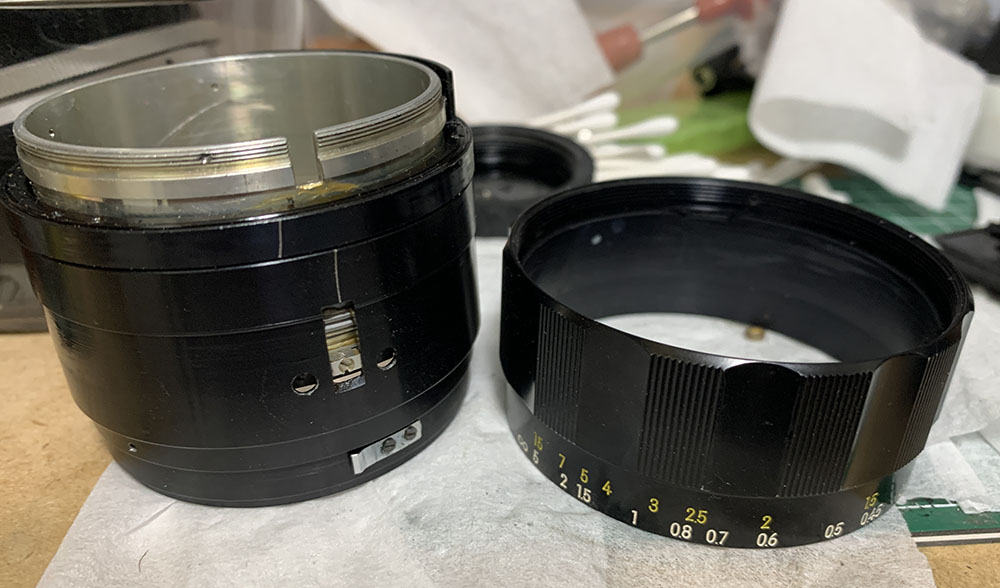
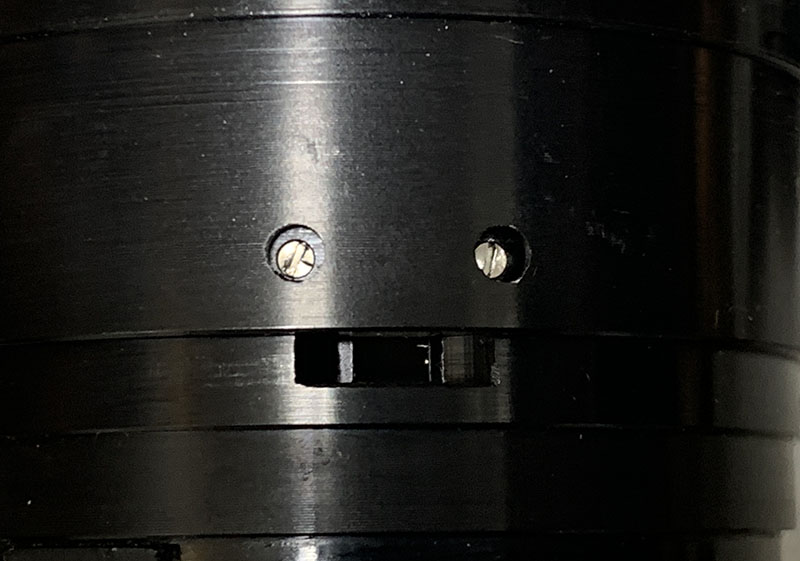
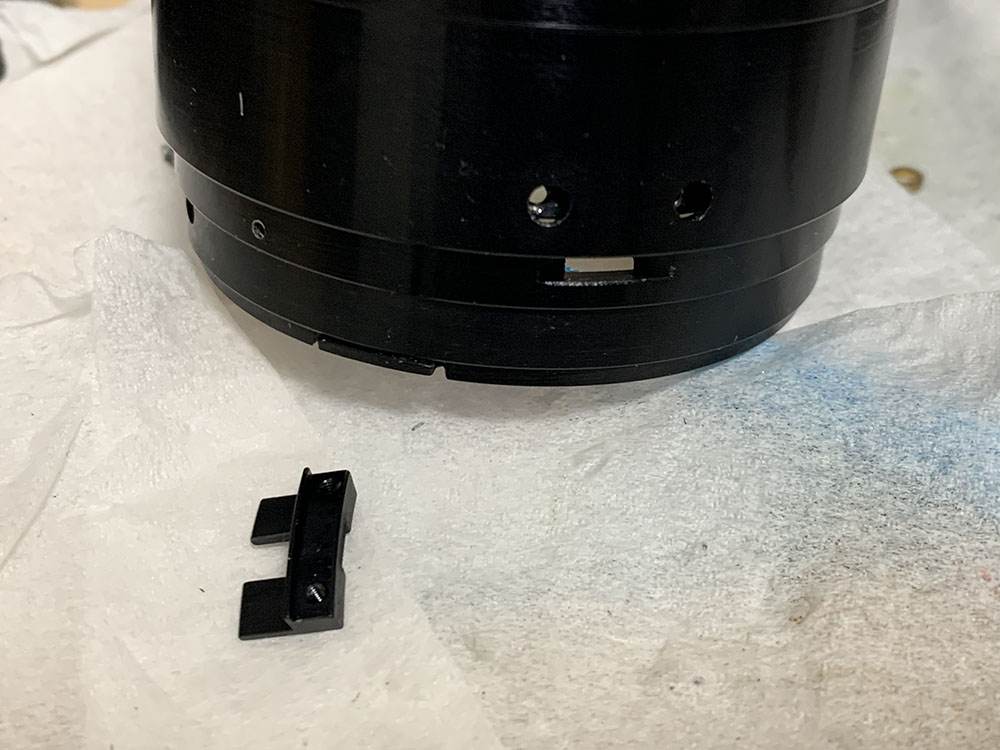
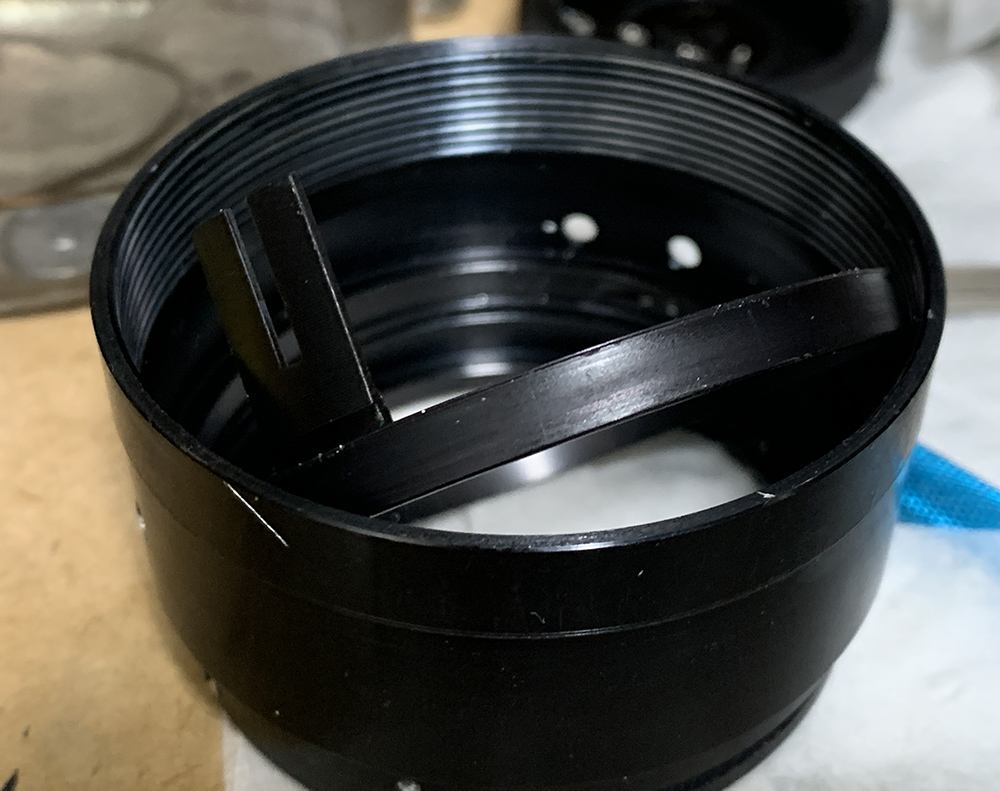
Extract the screws of the metal grip so you can remove it. The depth-of-field scale should come-off with it as it’s glued to it. These are sometimes glued, it can be annoying when that happens and you’ll have to apply alcohol to this before you remove it.
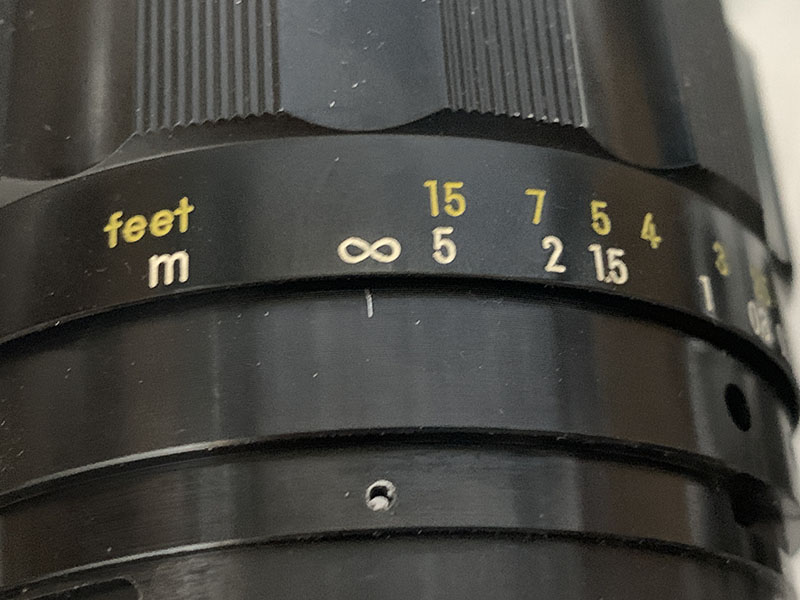
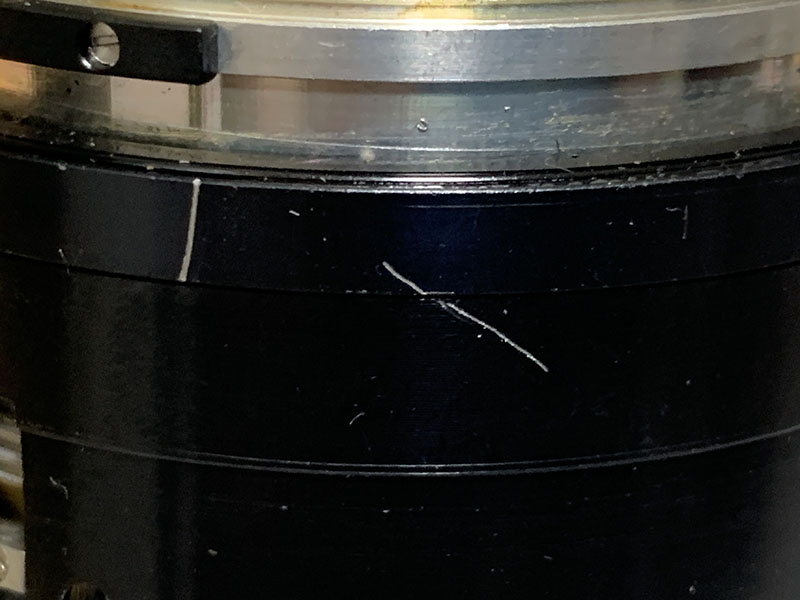
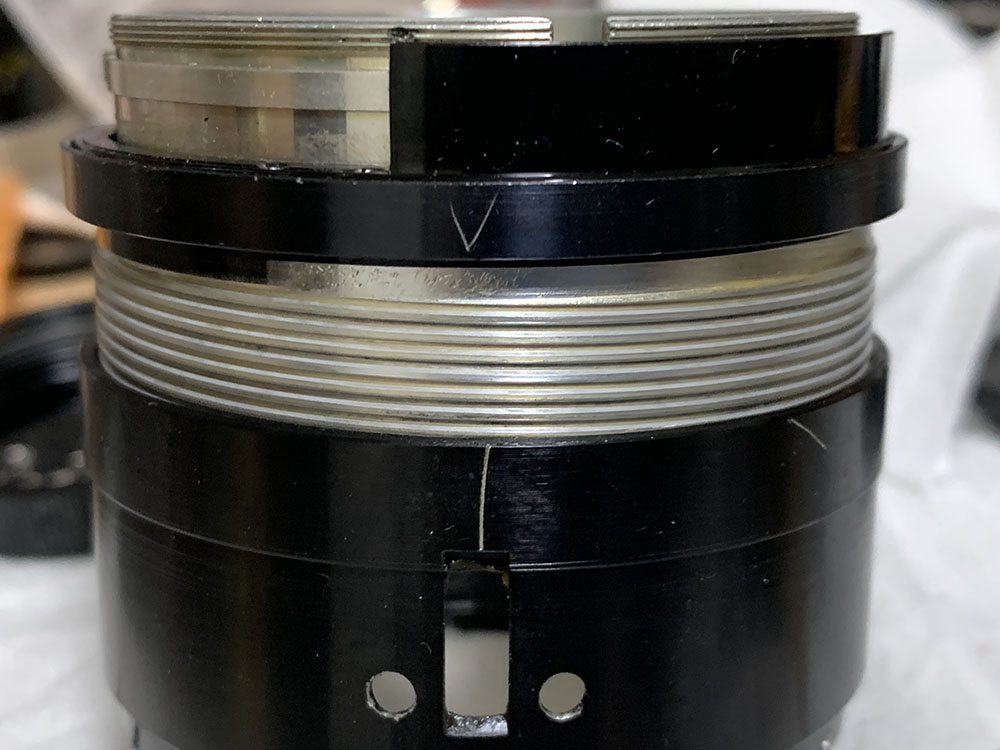
I carefully made a small scratch so I will know know the midline of the lens is. This is also where the center of the infinity symbol should roughly be.
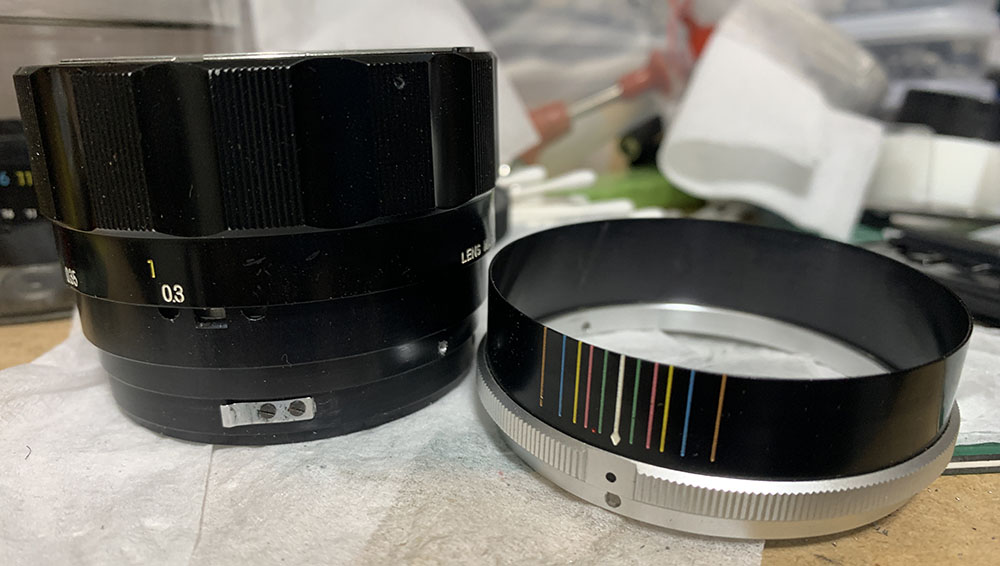
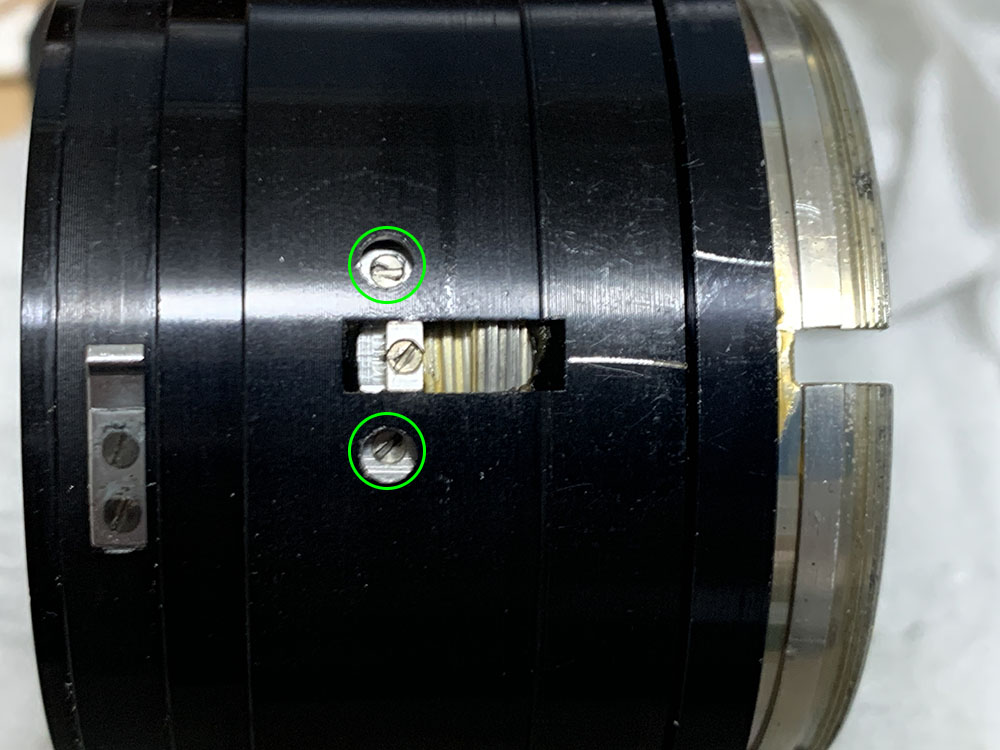
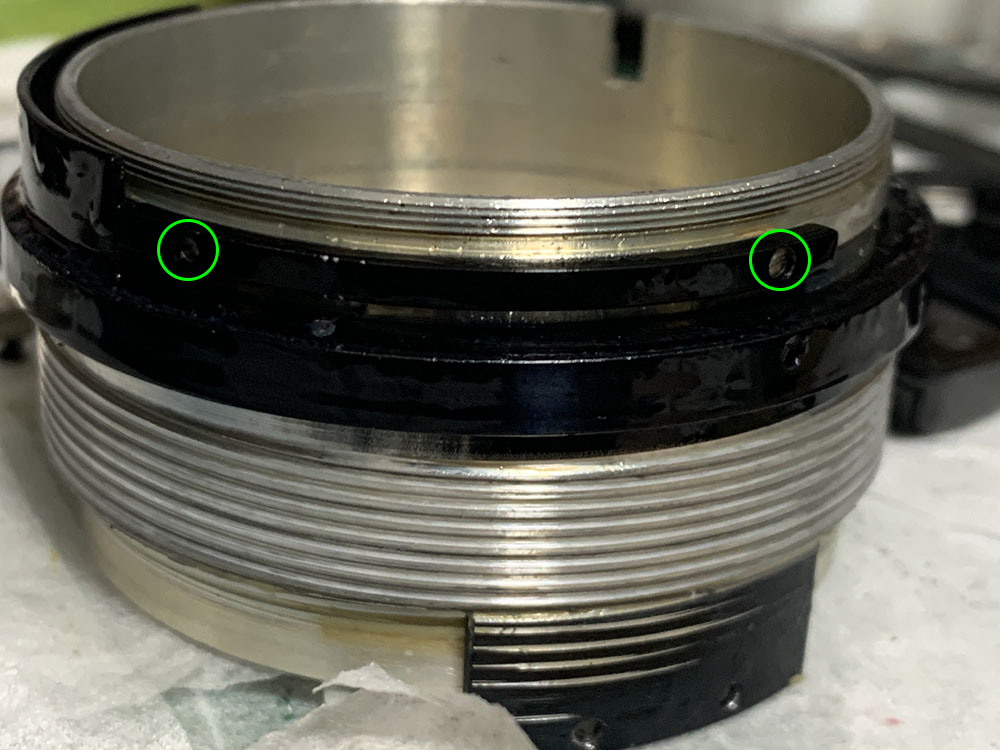
Extract these so you can remove the focusing ring. These are usually sealed with lacquer or cement and alcohol will be very handy here.
The focusing ring should come-off easily.
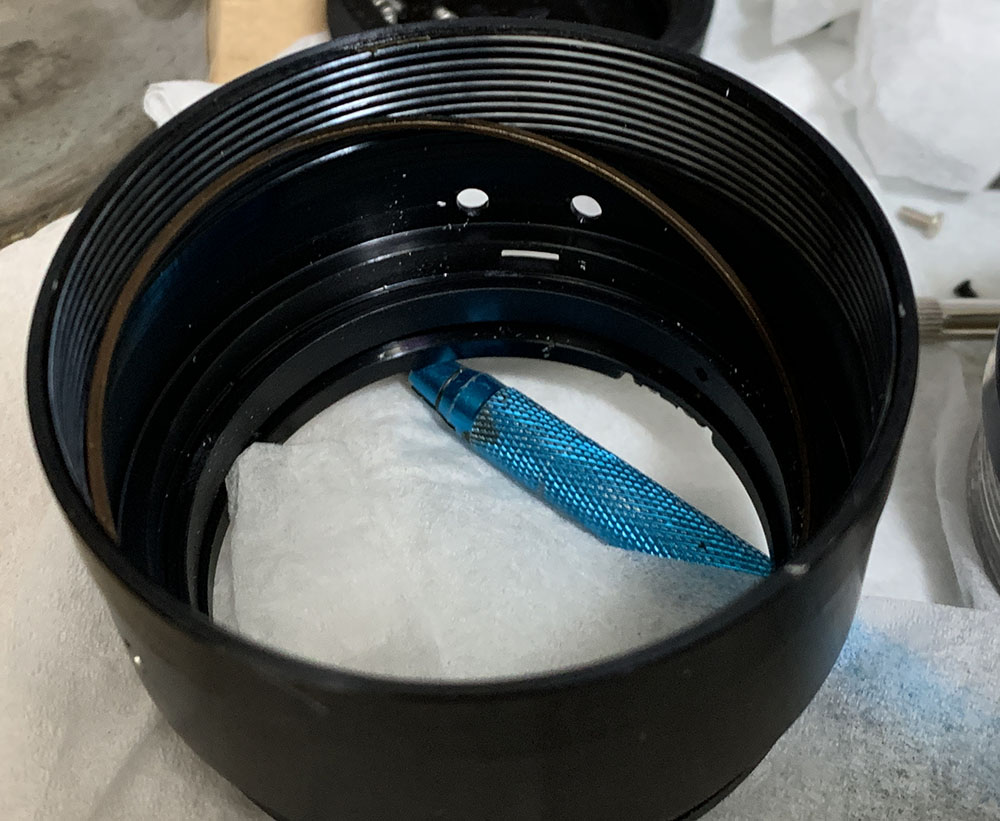
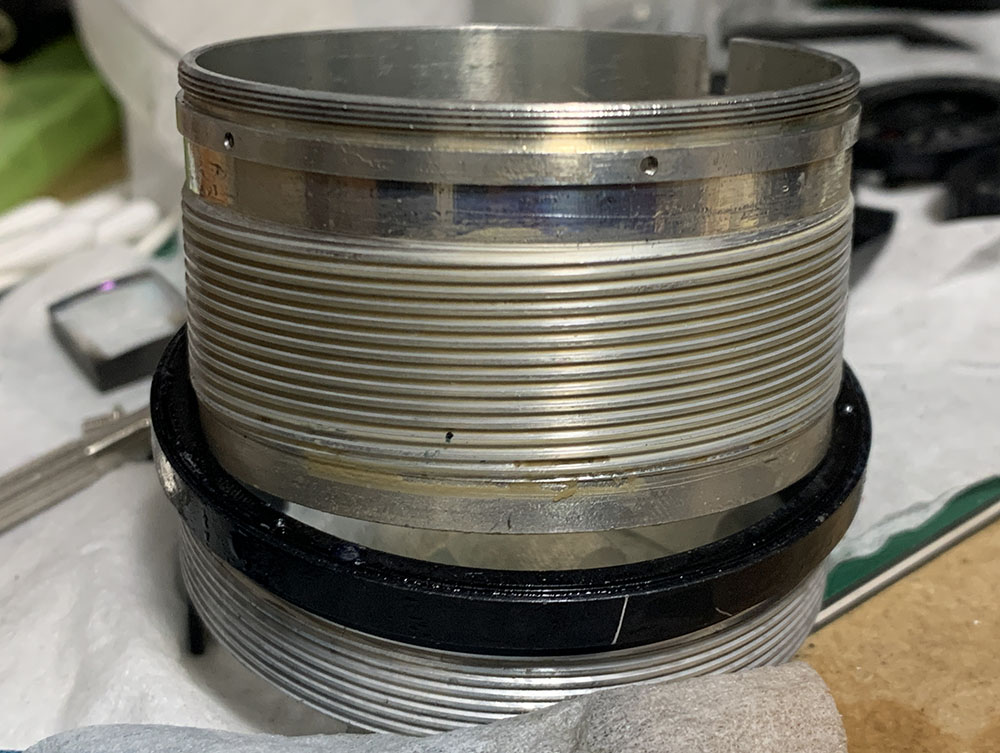
Locate and extract these so you can remove the helicoid key. The key is used for syncing the helicoids so they’ll turn at the same rate, enabling the barrel to extend or retract. These screws are usually cemented, apply heat through the other side to soften the thread-locking compound before you extract the little screws.
Once the helicoid key is gone you can turn the helicoids however you want. Collapse the central helicoid until it won’t go any-further, make a diagonal mark, you should be able to reproduce this later.
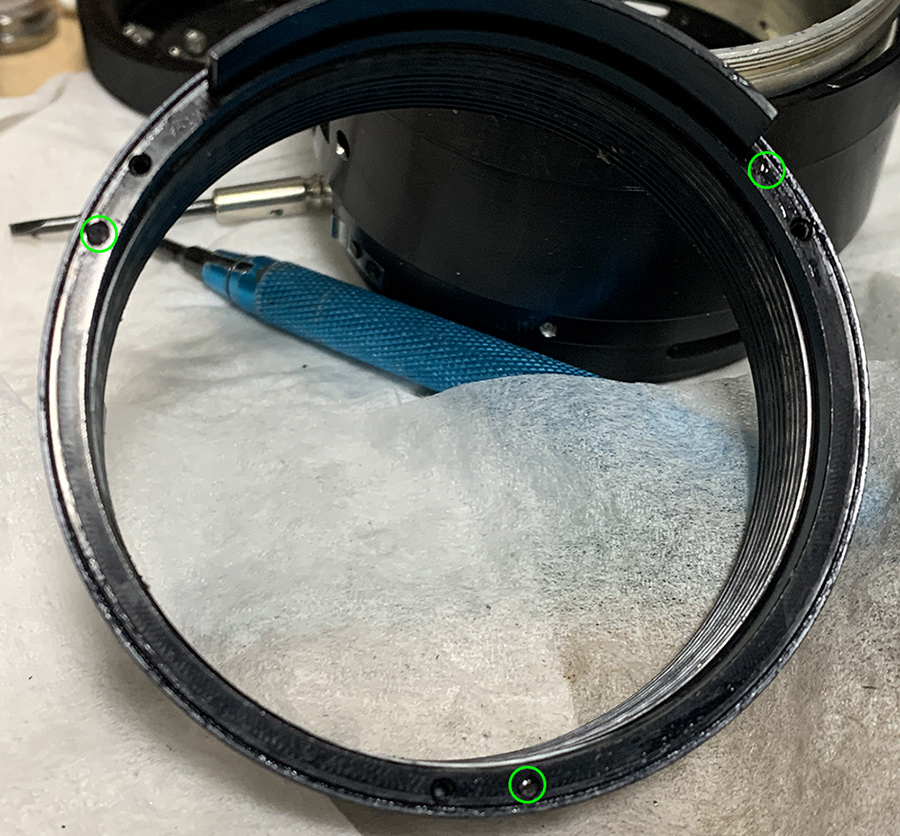
Locate and extract these so you can remove the fork of the CRC mechanism. I remember that these were glued, too.
Remove the fork and clean it well.
You can now separate the central helicoid from the outer one. Do not forget to mark where they separated since this is also the same place where these should mesh. Many people don’t do this and they get stuck. Read my article about working with helicoids so you’ll learn the basics of helicoid repair.
Now’s the time to take the lower barrel apart. Remove this brass ring so you can remove the aperture fork and its rail.
Remove this and clean everything really well.
This is the helicoid stop, it constrains the helicoid to within the focus range. Note which side should be facing-up and then extract these to remove it. It’s annoying but these screws were also glued.
With the helicoid stop gone you can now separate the inner helicoid. Never forget to mark where these separated like how you did with the one before.
These screws secure the focus-adjuster ring. The ring and these screws are all sealed, pickle the whole assembly in alcohol for a night and get back to it the next day. Once the seals have been dissolved, loosen these to remove the ring but before you do that, take notes or make some marks so you’ll know how to put this back again later.
Pickling this overnight in alcohol sure softened-up the seals and you’re able to remove it safely. The threads are easily-damaged so be careful when you reassemble this so you won’t cross-thread it.
Clean everything really well and don’t leave any residue. Scrub everything well and soak them in an alcohol bath to remove stubborn dirt. I applied a thicker-type of grease which was a mistake, this benefits from a lighter-type of grease since it has a longer focus-throw.
Conclusion:
I didn’t have to clean the objective so I left that part out. If you’re curious as to how its done, read my article on the Nikkor 35mm f/1.4 Ai-S, it should be a bit similar to this and you can use.
I enjoyed working with this lens, it wasn’t an easy task but it isn’t a difficult lens to service either. I didn’t have to clean the objective so I did not spend a lot of time with it. If I ever get to repair one with an oily iris problem then I will update this with more photos of the objective’s repair.
Don’t forget to note how the CRC group separates, it has a helicoid so you’re going to need to treat it like one.
Putting the objective back can be challenging because you’ll have to align it properly, the easiest way to do this is to put the lens mount back after all of the objective is reinstalled, if you do it like this you’ll be able to see how the CRC mechanism couples to its fork. Putting the lens mount back won’t be an easy task but it still beats lowering the objective down the main barrel with no idea where and how things should align.
It’s now time to adjust its focus. Reassemble everything but don’t install the cover of the focusing ring, this way you’ll be able to access the screws of the focus-adjuster ring and calibrate your lens. Read my article on adjusting the focus of your lens to know how I do it in a DIY setting. This is easy to adjust, it’s a wide-lens so you can get away with minor offsets, just be sure that it’s perfectly-focused at infinity and you’re good.
Thanks for following my work. I was asked a few days ago as to where I get the time to update my blog, my answer was I sacrifice a lot. By that I meant I was giving-up a lot of my life-force to this site since it’s the only thing that will be left for everybody when I am gone. If you liked my work, share this with your friends. Every view and click counts, I earn less than $0.90 a day from that. You can also consider supporting this site, it helps me offset the cost of hosting it. You’re also helping me purchase, scan and process film. I am proud to say that this site is unique and that’s all thanks to your support that I am able to show film photos and document repairs for everyone. This is becoming the best site for anything about classic Nikons, I could never do it without your help. Thank you again and see you in the next article, Ric.
Help Support this Blog:
Maintaining this blog requires money to operate. If you think that this site has helped you or you want to show your support by helping with the site’s upkeep, you can make a small donation to my paypal.com (richardHaw888@gmail.com). Money is not my prime motivation for this blog and I believe that I have enough to run this but you can help me make this site (and the companion facebook page) grow.
Buy me a roll of film or a burger?
Thank you very much for your continued support!
$2.00
Helping support this site will ensure that this will be kept going as long as I have the time and energy for this. I would appreciate it if you just leave out your name or details like your country’s name or other information so that the donations will totally be anonymous. This is a labor of love and I intend to keep it that way for as long as I can. Ric.

May 10, 2020 @ 00:42:47
I picked up one a bit rougher than yours that was sold cheap because of the yellowed glass. It’s not too hard to clear the glass back up. I tried to do it with sunlight at first but where I am it’s stays cloudy most of the time (about a weeks worth of good sunlight will do it). But I actually found that using a white led lamp was faster after someone suggested that. I had a small reading spot lamp that was led and it finished it up in about a day or so.
Dec 02, 2020 @ 23:35:07
Thank you for sharing this! I will try to clean mine with a LED light too 🙂
Very nice read too! Cheers guys!
Apr 27, 2021 @ 13:18:03
CRC is short for Close Range Correction, where a few rear elements move as the lens is focused closer to improve close-up performance. It has nothing to do with the lens coatings. Nikon’s first multicoatings were called NIC, Nikon Integrated Coating, and later SIC Super Integrated Coating.
Jan 02, 2025 @ 15:29:36
Hello everyone. It might not be impossible to further bleach this Nikon lens. Since I can do this without much limitation, I attempted the procedure continuously, 24/7, for almost three months using a small LED light (the well-known IKEA one) on two Konica 35-100mm f/2.8 lenses (1970s glass).To my knowledge, these heavy lenses don’t contain any radioactive glass, but they still yellow over time. Nonetheless, the process worked. When you proceed for such a long period, the only solution is to put a non UV filter on the front. Currently, I’m trying the same with this thorium Nikon lens. Significant progress was noticeable after two weeks, but it’s not finished yet. It will take more time.