
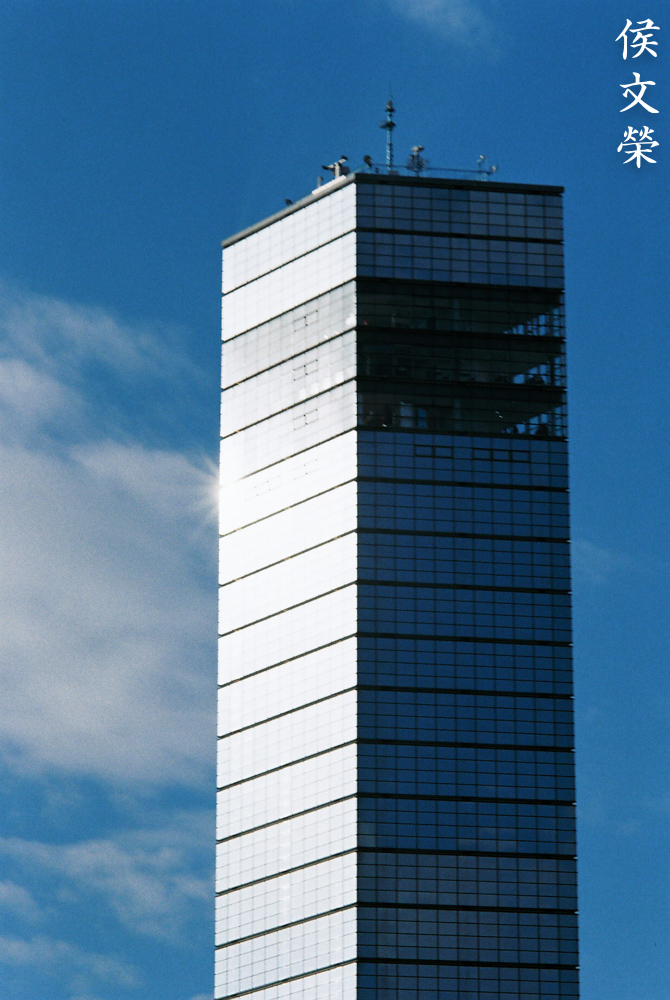
Hello, everybody! Do you remember the movie Oliver Twist? It’s based on a novel of the same name about an unfortunate little boy. I’ve never read the novel but I sure remembered the movie, one line sang by Mr. Bumble is an ear-worm – “Boy for sale!”. It’s sang while Mr. Bumble was trying to sell-off Oliver for being a “greedy boy”, it just shows how much he’d like to sell the boy away and thus, “the boy that nobody wanted”. It must be tough being in a state where nobody wanted you but the story had a twist at the end which gave Oliver Twist a bit of redemption. Today, I’ll show you a lens that no one wanted until collectors realize what it is but despite that, it’s still something that’s not special-enough to attract a following.
Introduction:
The New-Nikkor 135mm f/2.8 was sold for a short time from 1975 to 1976. It os merely a refresh of the venerable Nikkor-Q 135m f/2.8 Auto with updates to its main barrel so it will look more-modern, with updated aesthetics that made it look in-line with the New-Nikkor style. It was soon replaced by the later New-Nikkor 135mm f/2.8 which has a totally-new optical design and is a completely-new lens compared to this one. This is a rare lens but this isn’t valuable at all because around 34,200 lenses were made. If you’re familiar with the Nikkor-Q 135m f/2.8 Auto then this one will make you feel at-home since the handling is similar and it inherited the latter’s optical formula. It’s a nice lens for portraiture just like the Nikkor-Q 135m f/2.8 Auto. If you want a period-correct lens for your Nikon F2 then this is it.

Compared to the Nikkor-Q 135m f/2.8 Auto it looks quite boring. It lacks that sex appeal of the older lens that made it a favorite of many people. There’s a small difference that might mean a lot to some people and that’s its discreet look, the lack of shiny accents makes this lens less-noticeable so if you need to be discreet like a paparazzi then that’s going to be a big deal.
Nikon has been refreshing their lenses for all of its history and this is one of those instances. Just like the Nikkor-Q 135m f/2.8 Auto it retains the built-in hood which is one of the defining features of the 135/2.8 family of Nikkors. I like this a lot since I don’t have to bring an extra accessory just to protect its front element from dirt, fingers and stray-light. It’s quite a hefty lens like its predecessor which makes it feel macho to use.
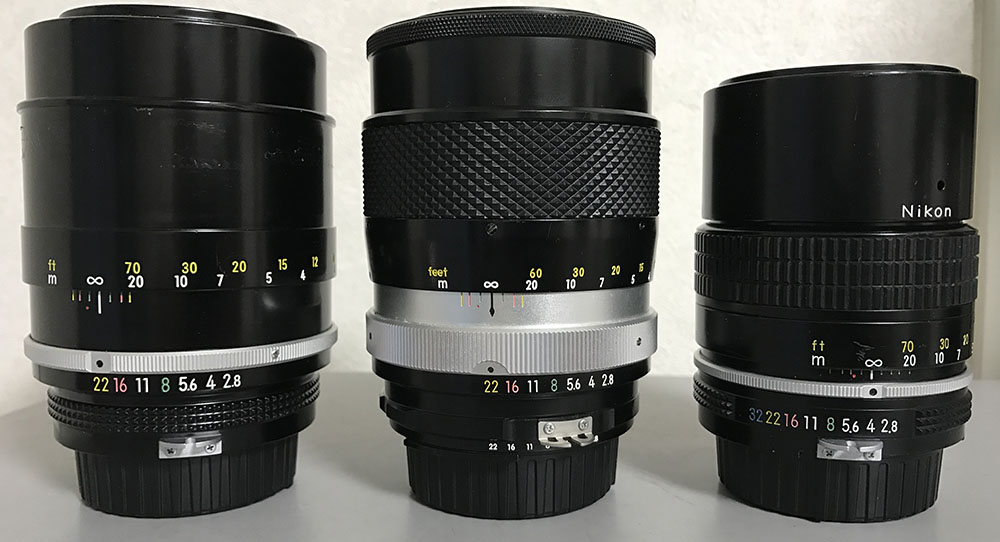
Here it is together with the Nikkor-Q 135m f/2.8 Auto and the second model of the New-Nikkor 135m f/2.8. Its dimensions are nearly-identical to the old Nikkor-Q 135m f/2.8 Auto but they don’t share the same factory-supplied Ai-ring. In fact, I’m not even sure if there are any interchangeable parts. There may be some things that are common between the 2 models but do not take my word for it.
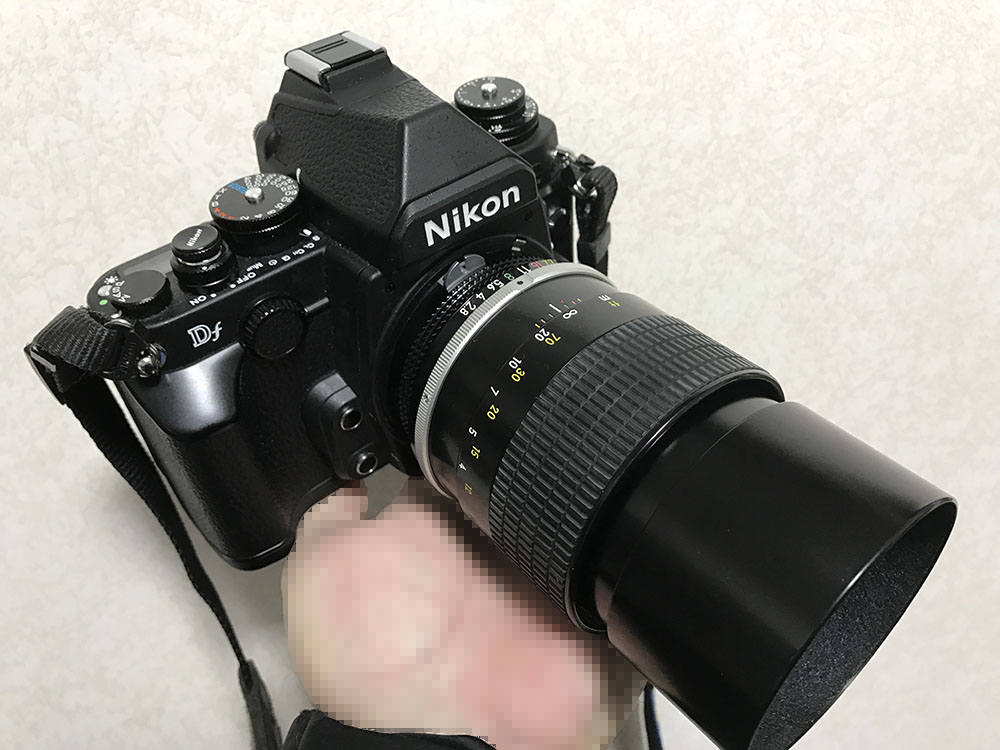
It’s a handsome lens but you’ll only be able to use it with older Nikons or the newer ones that will allow you to flip the Ai-coupling tab such as a Nikon F3 or Nikon F4. The Nikon Df is a special camera which will allow you to mount it and mirrorless cameras won’t have a problem with it with cheap adapters that won’t couple with it. You can find a factory supplied Ai-ring for this but it’s going to cost you a bit more.

This is the perfect combination, it’s heavy and it could strain your neck but it is the most satisfying way to shoot this lens. I love using this with vintage Nikons, everything about this setup felt just-right.
Knowing how your lens performs is key to maximizing it. You’ll know how to utilize its strength and avoid its weaknesses. You’ll know when to use this or when to just leave it inside the cabinet.
Since this is just a cosmetic upgrade of the Nikkor-Q 135m f/2.8 Auto I advise that you go and look at that article for more relevant information there. The photos here were shot with a Nikon Z6. These were taken from f/2.8, f/4 and f/5.6 where you will see the most changes happen in terms of performance. I also imagine that these are the most common apertures that people would like to use this lens with.


(Click to enlarge)
It’s quite sharp wide-open but chromatic aberration can be observed and it is quite bad. Resolution is not quite good but it’s not bad either. Stopping the iris down to f/4 helps a lot, the center now looks much better. By f/5.6 you’re able to notice that the center is now performing at its peak and the corners now look a lot better but it’s still lagging a bit compared to the center. Look at the last set, it’s just a tight-crop of the center. View it to observe how this performs on subjects that are further-into the frame.


(Click to enlarge)
Of course, the character and quality of the bokeh is exceptional. This is the reason why you should shoot with this lens, it’s unbeatable here. It’s really impressive how such an old lens could still deliver. I know of a professional photographer who still uses one to take portraits.

This was shot wide-open if I am not mistaken. The details look nice despite the thin depth-of-field. The rendering is lovely, it’s hard to believe that this was shot with a lens that was designed several decades ago.

This was shot at f/4, I think. Just take a look at the incredible isolation you’re able to get from this lens. Sharpness and resolution is quite nice, too. Do not underestimate this lens, its rendering is some of the best I’ve seen.

The 135mm focal length allows you to compress the frame in the Z-axis, the scene would have looked much more different if you shot this with a wider lens.

The rendering is quite exquisite, you only have 4 elements in the formula, it enables you to capture better tones since light isn’t filtered too-much. This is why this lens has such a strong following amongst people who know about it and its ability to take beautiful photos.

Stopping the iris down a bit helps eliminate optical aberrations so you can get clean, crisp photos. There’s residual spherical aberration in this picture but it’s not really that bad.

The twigs at the background would’ve been rendered poorly if this was shot using a lens with poorer bokeh quality. I use twigs and foliage to test for this and this lens performed as-expected.

It’s amazing how well this lens holds-up even with today’s high-MP sensors if you stop the iris down a bit.
Let’s now see how it performs with film. Grain reacts differently to light, it’s the reason why it’s difficult to simulate it with a digital camera. It can help hide a lens’ flaws or amplify it depending on the scenario. This was made to be shot with film, it’s only fair that we assess it using its intended medium. I shot these with a Nikon F2 loaded with Kodak Color Plus 200.

It’s an amazing portrait lens. Its thin depth-of-field is nice but it can also be a problem when shooting multiple subjects. Stop the iris down so you’ll get your other subjects in-focus, I should have done that with this photo.

A telephoto will help give you the reach to take photos of nervous critters. I don’t think these will let me get close to them.


Shooting distant objects on a sunny day can be challenging as you will get a bluish hue, use a filter to counter this.


(Click to enlarge)
Here are more photos from that afternoon. If you want to see more photos, read my article of the Nikkor-Q 135mm f/2.8 Auto since it’s optically similar to this apart from the lesser coatings.
I won’t recommend buying this one, for a lot less money you can purchase a Nikkor-Q 135m f/2.8 Auto which is essentially the same lens. They are easier to find and ones with the factory Ai-ring won’t cost you much either. This is a lens for collectors who want to complete every model of the 135/2.8 family and show it off. It’s not even a valuable lens to begin with so there’s nothing special about this so it was forgotten by Nikkor historians, some aren’t even aware that this thing exists. It’s as boring as it gets, let’s just continue to the repair section.
Before We Begin:
If this is your first attempt at repairing a lens then I suggest that you check my previous posts regarding screws & drivers, grease and other things. Also read what I wrote about the tools that you’ll need to fix your Nikkors.
I suggest that you read these primers before you begin (for beginners):
Reading these primers should lessen the chance of ruining your lens if you are a novice. Before opening up any lens, always look for other people who have done so in Youtube or the internet. Information is scarce, vague and scattered (that is why I started this) but you can still find some information if you search carefully.
I highly recommend that you read my working with helicoids post because this is very important and getting it wrong can ruin your day. If I can force you to read this, I would. It is that important!
For more advanced topics, you can read my fungus removal post as a start. This post has a lot of useful information and it will be beneficial for you to read this.
Disassembly (Main Barrel):
If you’re familiar with the older Nikkor-Q 135mm f/2.8 Auto and specially its later versions you won’t have any problems with this. The later versions are similar to this in many ways but the earlier ones are different. This is easier to repair compared to other Nikkors but that doesn’t make it trouble-free. It has screws that were sealed or epoxied which will need special treatment to extract. I won’t recommend this to a complete beginner, a novice with a few lenses under his belt will be fine so long as procedures are followed. If your lens needs to be repaired but you don’t have the right tools or experience, it is better to send that to a competent repairman. If he isn’t familiar with this lens, share this article to him so he’ll have an easier time. One thing that I’d like to caution you with this lens is it has a big, heavy objective which can be accidentally dropped if you’re careless.

Locate and extract this, use the hole in the hood to access it. This secures the front ring, we won’t remove it now but it’s a good time to apply alcohol and acetone to the thread of the front ring to help soften the seal, by the time it’s soft you’re at the step where you need to remove it.
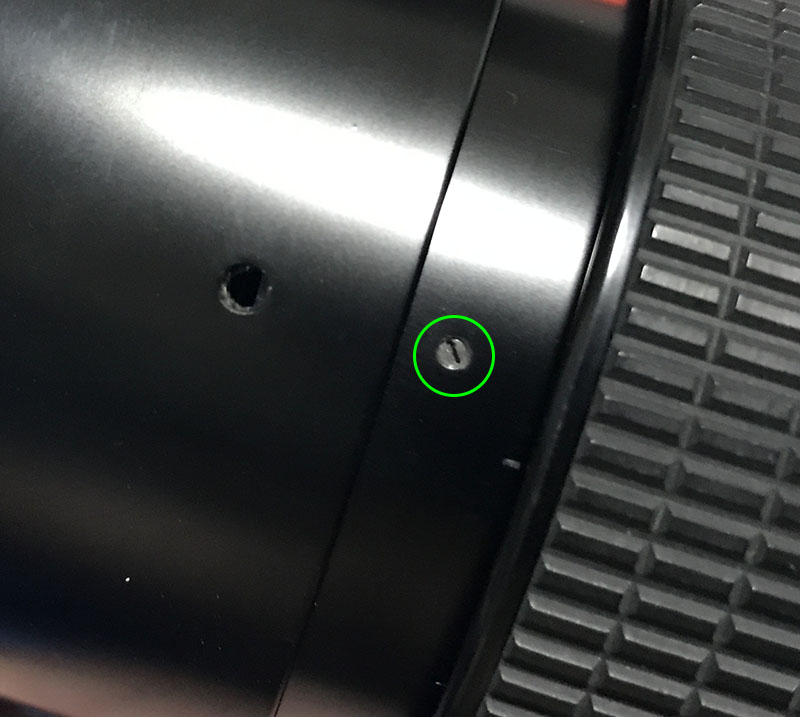
Here’s another one that you should remove, it secures the front barrel. This has to be put back correctly so you won’t ruin the threads underneath it.

I don’t think it’s sealed but you should not have any trouble removing it. Use a pair of rubber gloves to help you grip it but if it’s stuck, place alcohol to its threads via its screw hole to help you soften the seal.

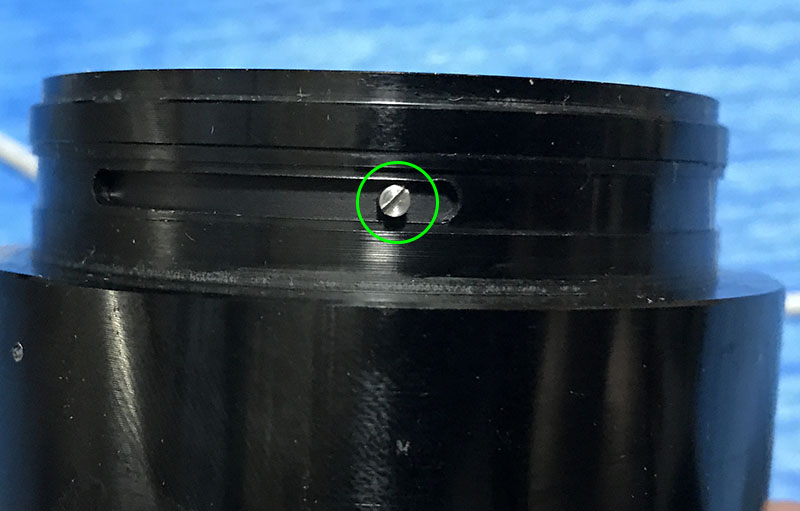
Loosen this little screw so you can turn the collar that secures the objective.

Unscrew the collar.
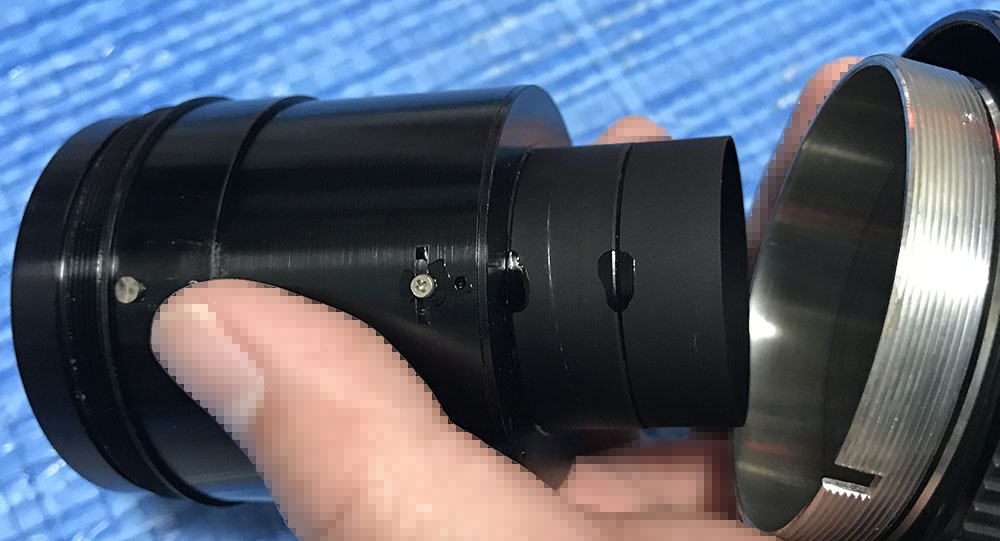
Pull-off the objective’s and store it in a safe place. This will help you work on the barrel without having to think about scratching anything.

The rubber grip can be removed by running a toothpick underneath it. That will lift it from its glue, be careful while you do it since these lenses are old. You can easily-tear it and that will lead to bigger problems.
There are 3 of these that you should extract in order to remove the focusing ring but before doing so you’ll need to document its position so you can put this thing back again properly. These screws were cemented, applying some alcohol is necessary before you extract these.

The focusing can be removed just like this. It may be stuck at times because it may be cemented so just be careful when removing it.

Extract these screws to remove the bayonet mount. These are tough, you’re going to need to heat these before you remove them. You risk stripping their heads and the only way to prevent that is to read what I wrote about how to extract bayonet screws. Follow my guidelines and use the correct drivers, do not think that you can just use any regular driver for these. You’ll require a proper JIS screwdriver for servicing Japanese equipment, slap anyone who says otherwise.

The bayonet mount can be easily removed once its screws were extracted.
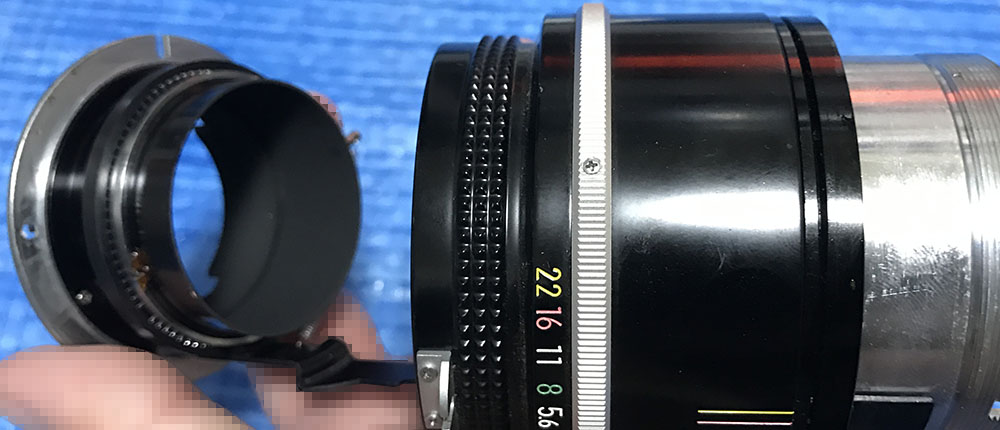
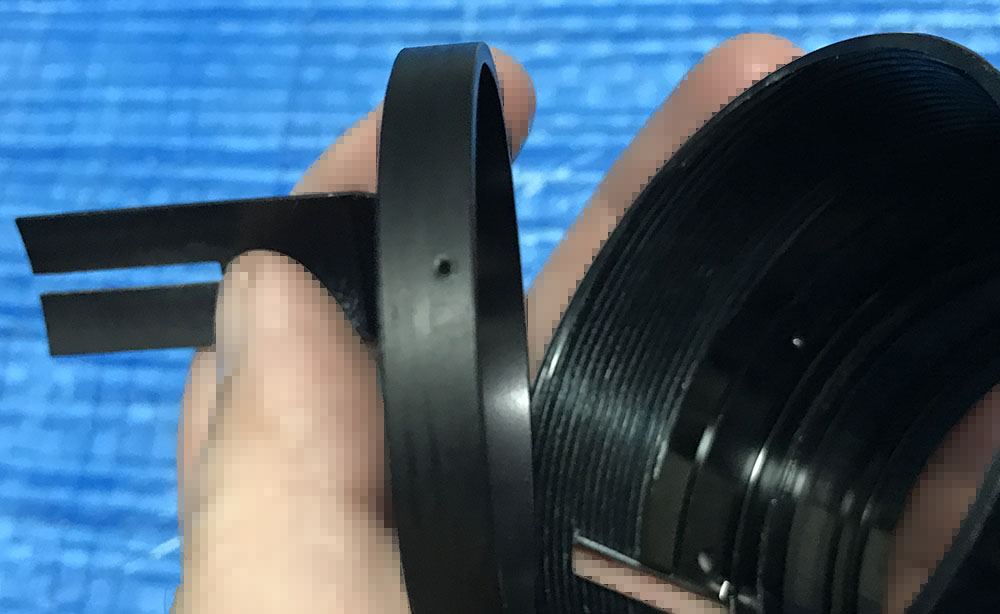
There’s a long stop-down lever attached to it so be careful when pulling this so you won’t bend it. The stop-down lever mechanism is intricate, it houses bearings, springs and levers which can be time-consuming to take-apart. It’s best left as-is unless you really need to service it.

The aperture ring can be easily removed once the bayonet mount is gone. It has to be cleaned properly to remove any germs and gunk.

The grip can be removed after extracting its screws.

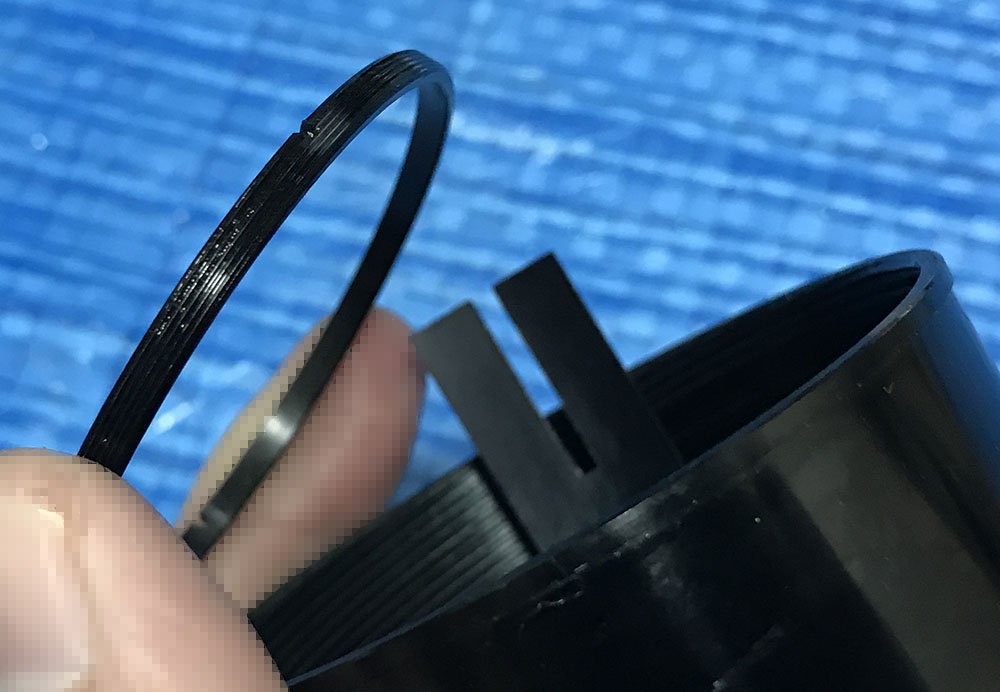
The depth-of-field scale can be removed along with it. Occasionally, you will find that these are tough to remove and that’s due to hardened grease, glue or paint. If that happens, just do the alcohol trick and that should help a lot. Inspect the inner barrel and note the position of everything. Note how all of the helicoids align when the barrel is turned to infinity since this will be an important point-of-reference for you during reassembly.

Locate and extract so you can remove the helicoid key. It prevents the main barrel from over-extending and it syncs the helicoids so they all at the same rate, allowing you to expand or contract the barrel.

Removing the helicoid key will allow you to separate the outer helicoids.

Collapse the central helicoid all-the-way and make a diagonal mark so you’ll know how things should be. You should reproduce this later or else you are going to take things apart again because the helicoids weren’t meshed in the proper way.

Separate the central helicoid from the outer one, note where they separated because this is also the same place where they should mesh. There are lots of people who get stuck here because they don’t know the process. Read my article on how to work with helicoids to prevent this from happening to you. Never message me about your helicoids, I will be of no-help for that.

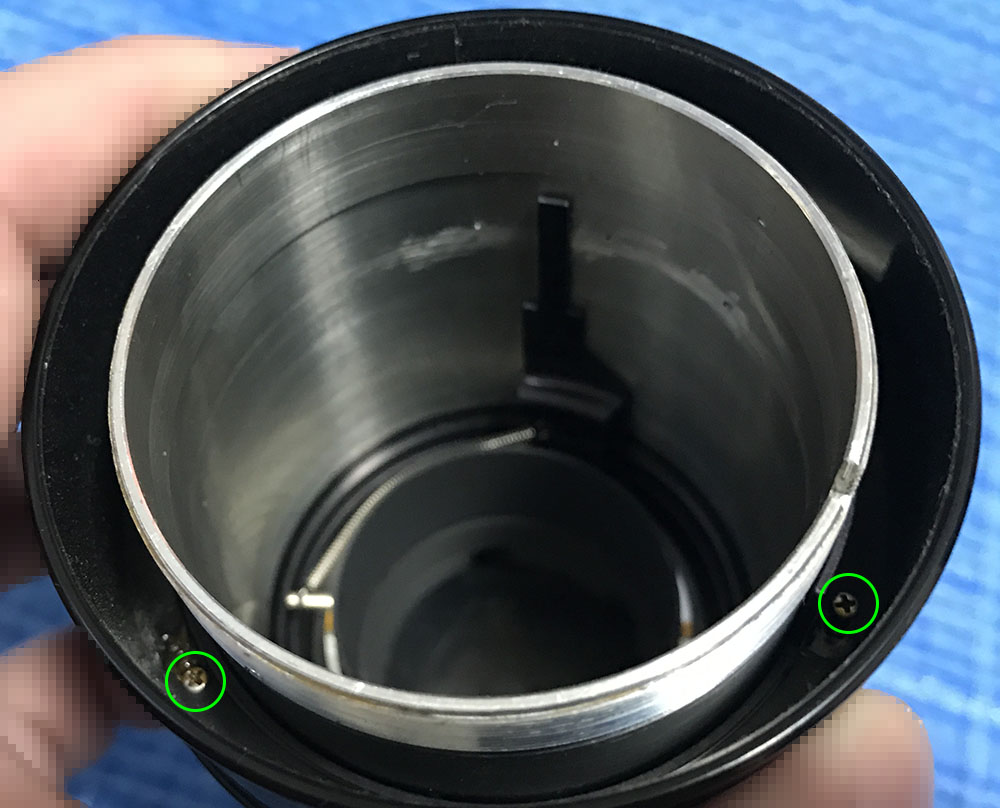
The helicoid stop is secured by these. The helicoid stop constrains the range of the helicoids so they won’t turn beyond the focusing range. Extract these so you can remove it but don’t forget to note which side should be facing up because you’ll have to put this back the right way later.

You can remove the focus adjuster ring by loosening these but before doing so you should note its alignment first so you’ll know how to put it back later properly. These rings are usually sealed with cement, the safest way to get it off is to saturate it with strong solvents like MEK. You should apply it until it is able to turn without any effort, it may even take you a day or more. Apply a couple of drops and repeat that procedure several times a day.
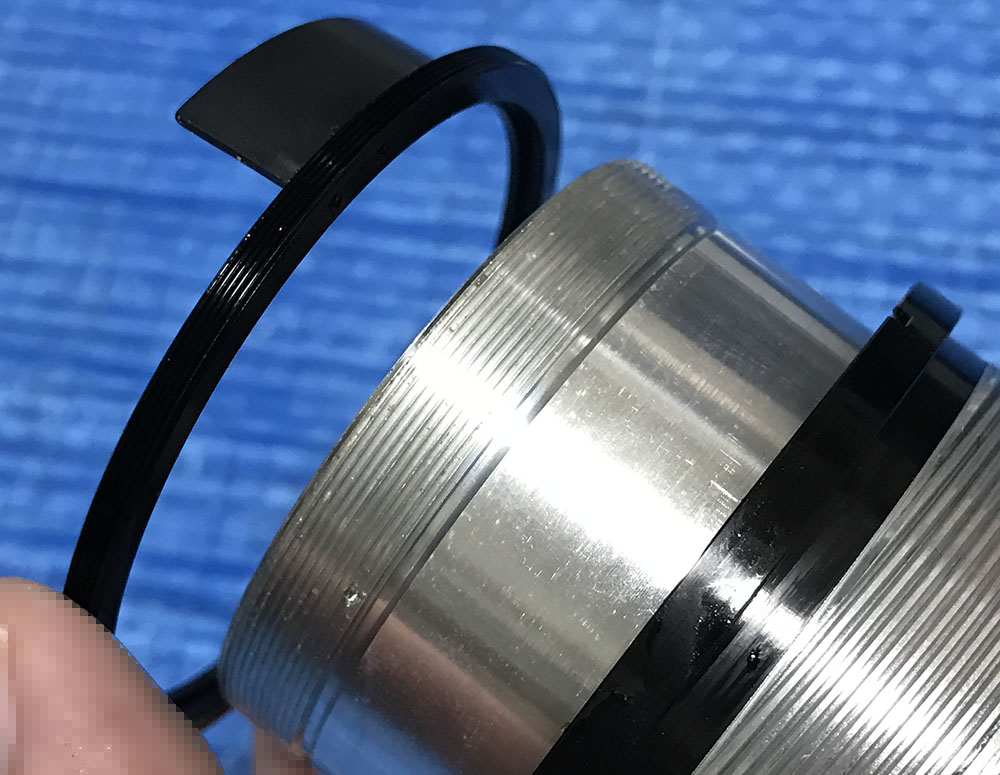
Carefully unscrew it. The threads are delicate so don’t cross-thread it or you will not be able to put this back again later.

Separate the inner helicoid and don’t forget to note where it separated.
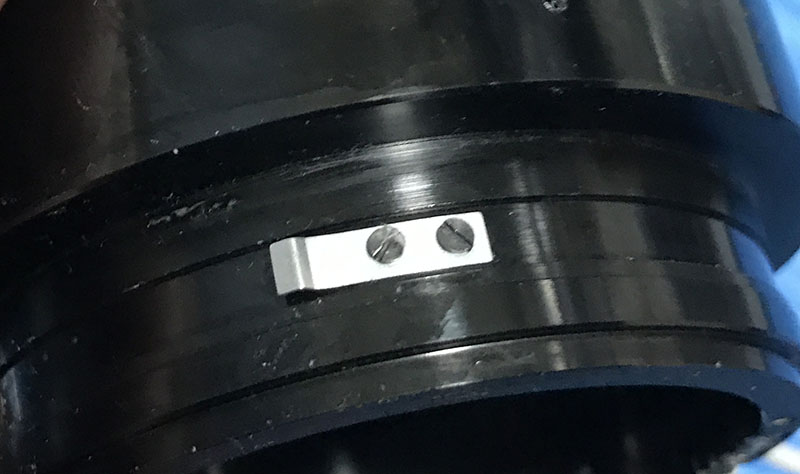
Extract this screw, it serves as a pin to couple the aperture ring to the iris. It enables the aperture ring to control the iris mechanism inside so turning it will close-or-open the iris.

This retainer secures the aperture fork and its ring. This is tough to remove and you should saturate it with MEK or heat it before you can unscrew it.
The threads here can be easily-damaged so be careful.
Remove the aperture fork and its ring, clean it very well.
You can also remove the detent spring but note its position first.
Clean everything very well and don’t leave residues. Scrub the helicoids and other parts very well and leave them in al alcohol bath to remove grease or any residual oils. The helicoids benefit from a lighter-type of grease because this lens a long focus-throw. Using a thick grease won’t help because you are only going to get tired turning the focusing ring and wear your lens.
Disassembly (Objective):
The objective is similar to the Nikkor-Q 135mm f/2.8 Auto but there are a few differences that you will notice specially if you’re familiar with the earliest versions of the Nikkor-Q 135mm f/2.8 Auto. Be careful when handling all the elements because most of them are quite large and you can drop the easily. Most of the rings here were sealed and you should apply alcohol to them to help you remove them safely.
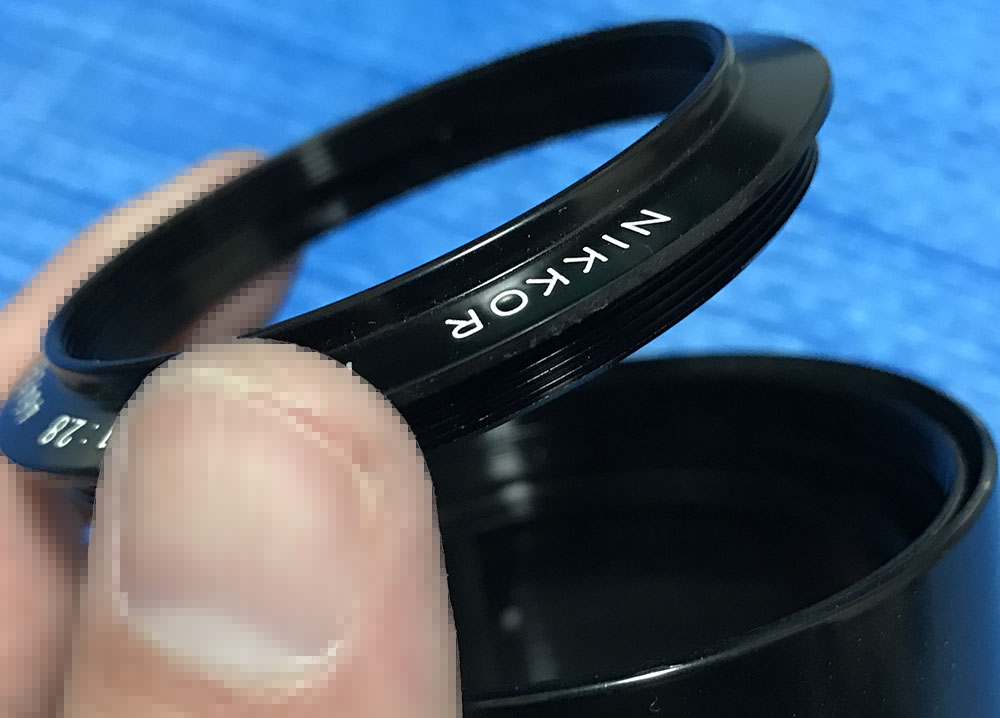
The front ring can be hard to remove as it’s usually sealed at the factory. It’s best to use MEK or acetone to soften the seals on its thread and that should help you remove it.

Once the front ring is gone you can remove the built-in hood. Clean it really well and replace the lining if you have to.

The front optical block can be easily unscrewed.

The 3rd element can be removed once its retainer in unscrewed.

Extract the 3rd element with your fingers.

The 2nd element is quite huge, a lens sucker may not be enough. I use a big suction cup for this, once that the iPhone repairers use. That’s the best way to remove it safely.

The front element is secured by its retainer. Applying alcohol will help with dissolving its seal, a drop is all you need and just wait for it to work. You’re going to need a lens spanner to remove it but be careful because if you slip you can scratch the front element.
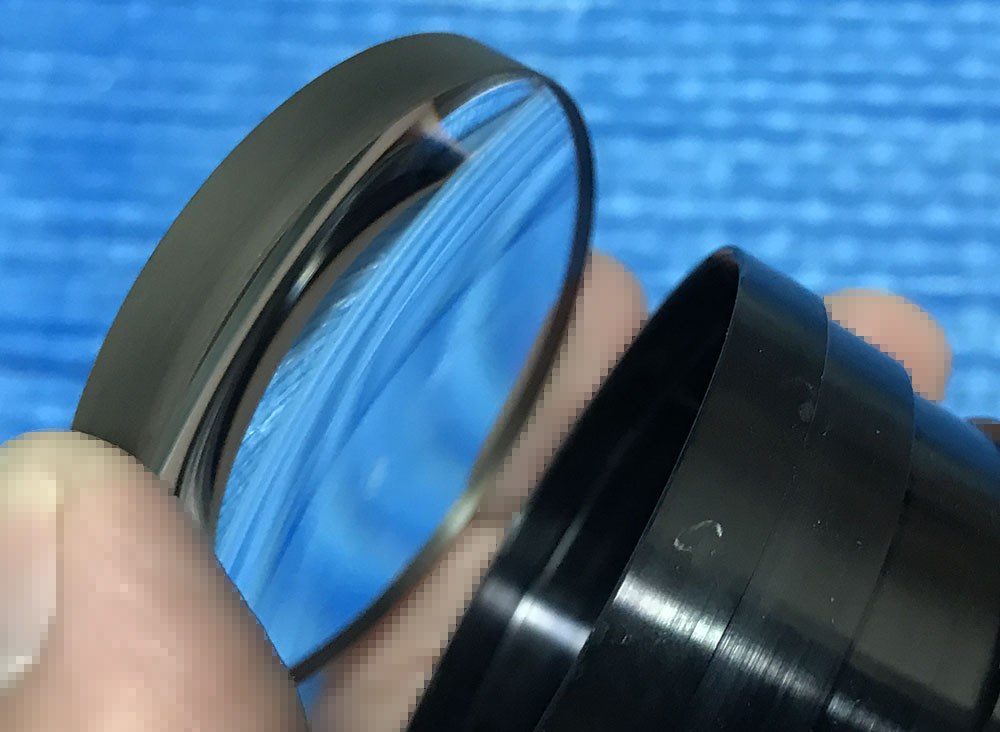
Extract the front element with a lens sucker and remove it with your hands as it’s quite heavy.

The rear optical block can be removed like this.

Accessing the rear element is easy, you simply unscrew this tube. These are usually sealed and applying alcohol to the threads should help.

The rear element can be extracted with a lens sucker. Note that I marked it with a permanent marker, that will help me determine which side is facing the front so I won’t put this back facing the wrong way later.

I cleaned everything really well and set them aside. If your lens has fungus, read my article on how to remove lens fungus, be careful with the solution, it can be very potent and can strip the coatings if you use it for too-long and it will certainly strip the black ink if you’re not careful.
Clean everything really well before you put things back together. The iris is clean so I did’t have to service it. If your lens has the oily iris problem, read my Nikkor-Q 135mm f/2.8 Auto article and that should help guide you. It has a similar-looking iris mechanism so that shouldn’t be a problem.
Conclusion:
This one took me 2-3 hours to service with most of that time spent cleaning the parts or just waiting for the solvents to soften the seals up. Otherwise, it is an easy lens to repair and it didn’t provide any challenge to me. An expert repairer should find this an easy job. I am always nervous when repairing a lens with large elements but that’s something that everybody feels and even the best in the business will feel the same, too. That’s the only thing I feel as I repair this lens.

Reassemble everything until you get to this point. Adjust the focus so you’re able to get an accurate focus at infinity which is very important with this. If you don’t know how to do this, read my article on adjusting a lens’ focus. It’s great for people repairing in a DIY setting.

Once you’re satisfied with your focus adjustments, tighten the screws of the focus adjuster ring and align the focusing ring so the infinity symbol is right at the center of the midline. Rebuild the rest of your lens and you’re done.
That’s all for today, this is a simple article since I didn’t have to take photos. Please share this with your friends if you loved this article, that will help a lot since I get roughly $0.30 a day from views and clicks. You can also think about supporting this site, it helps me offset the cost of maintenance and it also helps me purchase, develop and scan film. I promote shooting film, it’s something that I would like to see more people do. Thanks for following my work and see you again next time, Ric.
Help Support this Blog:
Maintaining this blog requires money to operate. If you think that this site has helped you or you want to show your support by helping with the site’s upkeep, you can make a small donation to my paypal.com (richardHaw888@gmail.com). Money is not my prime motivation for this blog and I believe that I have enough to run this but you can help me make this site (and the companion facebook page) grow.
Buy me a roll of film or a burger?
Thank you very much for your continued support!
$2.00
Helping support this site will ensure that this will be kept going as long as I have the time and energy for this. I would appreciate it if you just leave out your name or details like your country’s name or other information so that the donations will totally be anonymous. This is a labor of love and I intend to keep it that way for as long as I can. Ric.
