
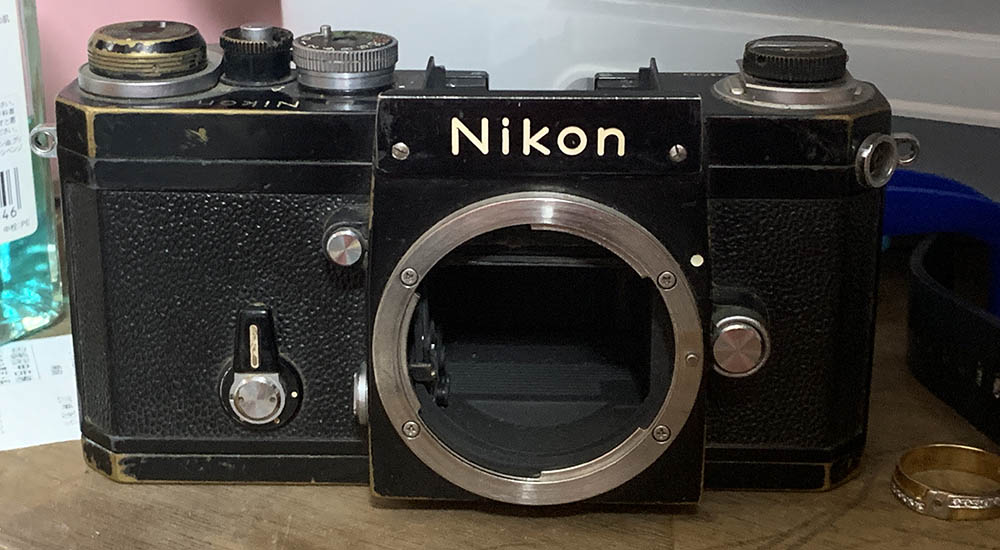
Hello, everybody! Do you remember Disney’s “Snow White“? There’s a scene there where the witch seeks confirmation of her beauty from an enchanted mirror. I found that deep, almost psychological. It’s an interesting scene, the witch can represent one’s ego seeking comfort from itself but the enchanted mirror said something which made her upset, that can represent insecurity. It’s like the mind is saying that there’s someone better. I never thought that a scene from a movie for children made during the pre-war years could be so profound. Speaking of mirrors, I will show you a magic mirror that never lies. It showed Japan, no, the world what the future is like. It’s the dawn of a new era and Nikon’s golden age where nobody could challenge her for 2-3 decades to come.
Introduction:
Before the Nikon F debuted SLR cameras were clumsy to use, the technology hadn’t matured yet so it became the template of what an SLR should be. The basic format stayed, you’ll see its influence to this day. Despite the ground-breaking design, Nikon did not pioneer the designs and mechanisms needed to create the Nikon F, much of its concepts were copied then improved from other manufacturers’ designs but it was Nikon who combined them all into a single, seamless design that worked together in harmony. It was a success and a lot of it can be attributed to its very reliable mirror-box which is very elegant in simplicity and function.

Not only is the Nikon F’s viewfinder large, offering 100% frame coverage, it also has 1:1 magnification which makes it easy for your eyes. You also have the option to change the focusing screen to whatever suits the situation. It’s something that made it a huge hit specially with sports photographers since it’s the first time something this elegant was made. It allows you to see what the lens sees and you can accurately frame your shot even with a telephoto lens that’s longer than 135mm, the limit for rangefinder-coupled cameras.
Like the Nikon SP where this camera’s chassis was based on, its film-counter automatically resets each time you open the back. This was something very convenient back then since older designs require you to set it yourself. This is something that we take for granted these days but it was something big in those days. The mechanisms involved for that are complicated but we’ll see how it works in this article.

This is an earlier version from the earlier batches, the earliest ones are not cheap so I only make-do with these. Maybe I will own one of those some day when a kind-hearted person will sell me one for a reasonable price. I’ll do a lot of documenting and measurements when that happens.
This is a beat-up sample of the last model, nicknamed “Apollo” by collectors. It has nothing to do with NASA’s space programs apart from its resemblance to the actual black Nikon F’s that went to space.
What you’re about to see from this point is only meant for your education. I didn’t write this article so it can be used as a repair manual. If your camera needs repair, send it to the people who know what to do. It’s not expensive at all to have the experts repair your camera. A good job usually costs $200 for a normal clean, lubricate and adjust course but it can go up to $400 if it needs parts replacements or other demanding repairs. That money will be a good investment since the camera will last longer and you’re also helping a person and his livelihood, ensuring that camera repair won’t be a forgotten art in the future.
Before We Begin:
If this is your first attempt at repairing a lens then I suggest that you check my previous posts regarding screws & drivers, grease and other things. Also read what I wrote about the tools that you’ll need to fix your Nikkors.
I suggest that you read these primers before you begin (for beginners):
Reading these primers should lessen the chance of ruining your lens if you are a novice. Before opening up any lens, always look for other people who have done so in Youtube or the internet. Information is scarce, vague and scattered (that is why I started this) but you can still find some information if you search carefully.
I highly recommend that you read my working with helicoids post because this is very important and getting it wrong can ruin your day. If I can force you to read this, I would. It is that important!
For more advanced topics, you can read my fungus removal post as a start. This post has a lot of useful information and it will be beneficial for you to read this.
Disassembly (Mirror-Box Mechanism):
Removing the mirror-box mechanism and front plate is something that you should do as part of your standard procedure when cleaning Nikon F’s. This is troublesome to do but there’s no other way around it. You’ll spend a lot of time doing this and you’ll need special tools to remove some of the parts. It’s even more time-consuming to put this back but an experienced repairman’s judgement makes things easier. Most of the screws and fittings here need a bit of solvent to soften them up and that takes a lot of time, too. Peeling the leatherette covers on both sides can also take time since you’ll need to apply alcohol to it and then apply some more as you go peeling them off. This is a repetitive and tedious process which I hate doing but it had to be done.
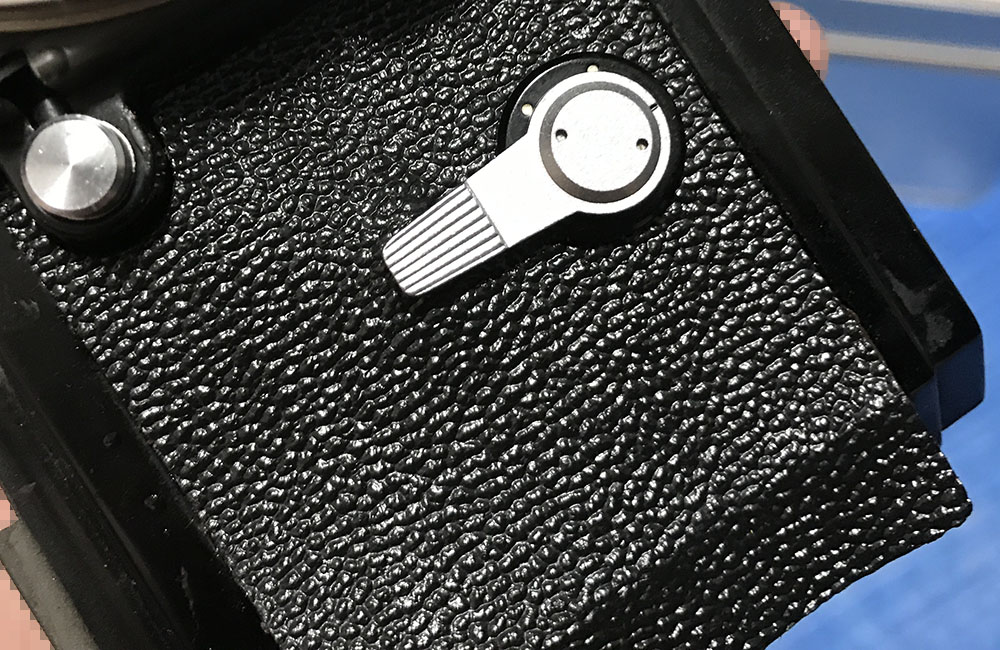
Removing the self-timer lever and its rings is where you’ll want to start. The leatherette can be removed by saturating the edges with alcohol and prying them carefully once the cement is soft. This may take some time so I usually begin with it and work on the other parts while waiting for the alcohol and cement to react. You can also do this for the other side, too.
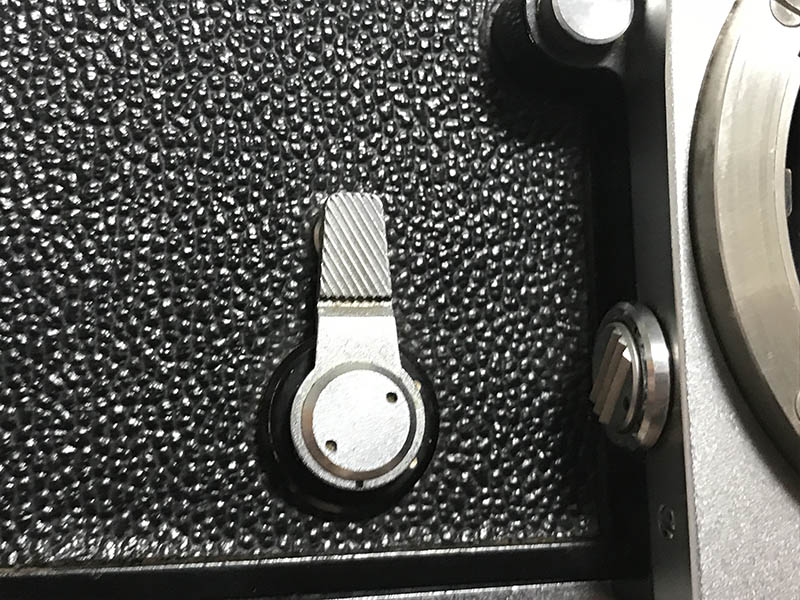
This is an example of an early self-timer lever, the earlier ones are difficult to find and will cost you more. Anything later than this is bog-standard and a lot cheaper.
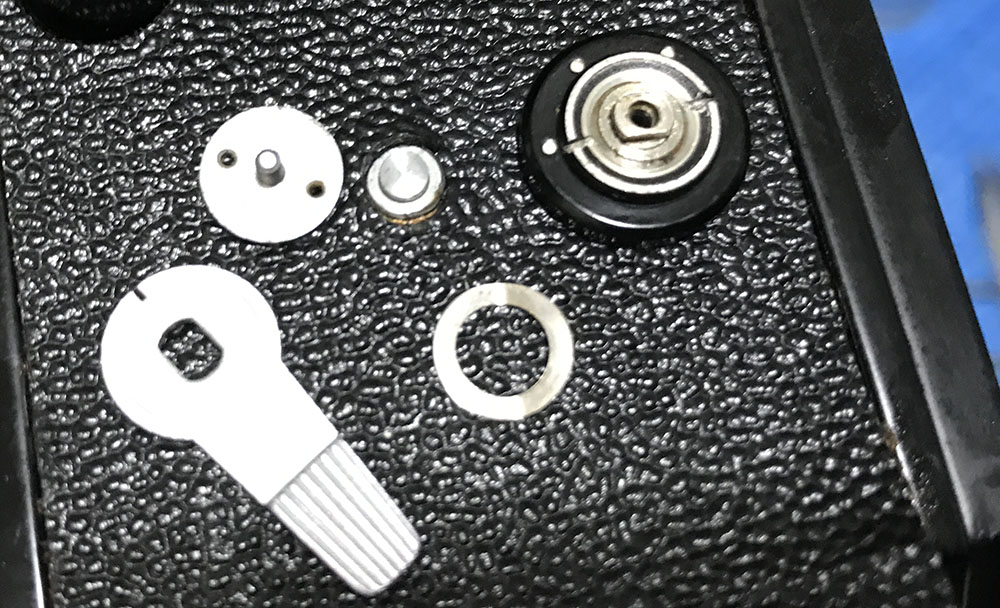
The self-timer lever assembly can be removed by unscrewing its cover. This is a delicate part and you’ll need special tools to remove it safely. You’ll need to fabricate your own opener made from brass rods that fit the holes of the cover perfectly so you won’t warp their shape. Be mindful of the spring, it’s small and it can be misplaced easily.

The rings can be removed with a special opener.

Once all of that is gone, peel the leatherette off carefully, applying alcohol as you go. Pull evenly so you won’t tear the leatherette.

Removing the leatherette on the other side is mandatory. You don’t need to remove the bayonet mount, I only did it to this camera because it’s filthy. It’s difficult to remove on later models since epoxy was used to secure it. You’re able to lift it by using a screwdriver and wedging it to the bayonet mount. It can be unnerving to remove it as you may warp it accidentally despite this being made from a tough-grade brass material.
The self-timer mechanism can be removed after extracting its screws at the corners of its front plate.
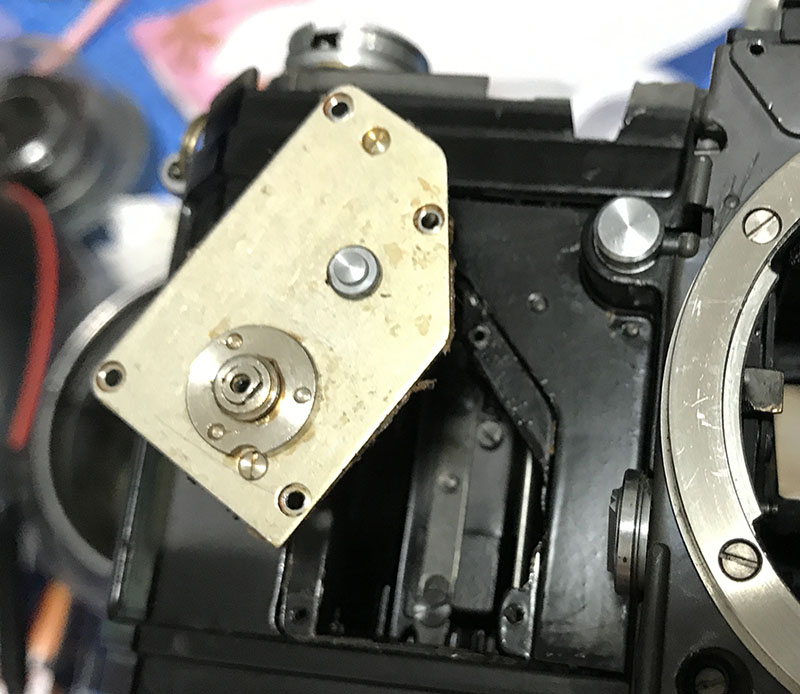
There’s nothing underneath it so you can safely remove it. Putting this back is a different story since you’ll have to align what’s underneath to a shaft, it has a slot there where self-timer mechanism’s trigger-arm should latch to.

Here’s the difference between the later version and an earlier one.

Here’s a closer look from the side.


(Click to enlarge)
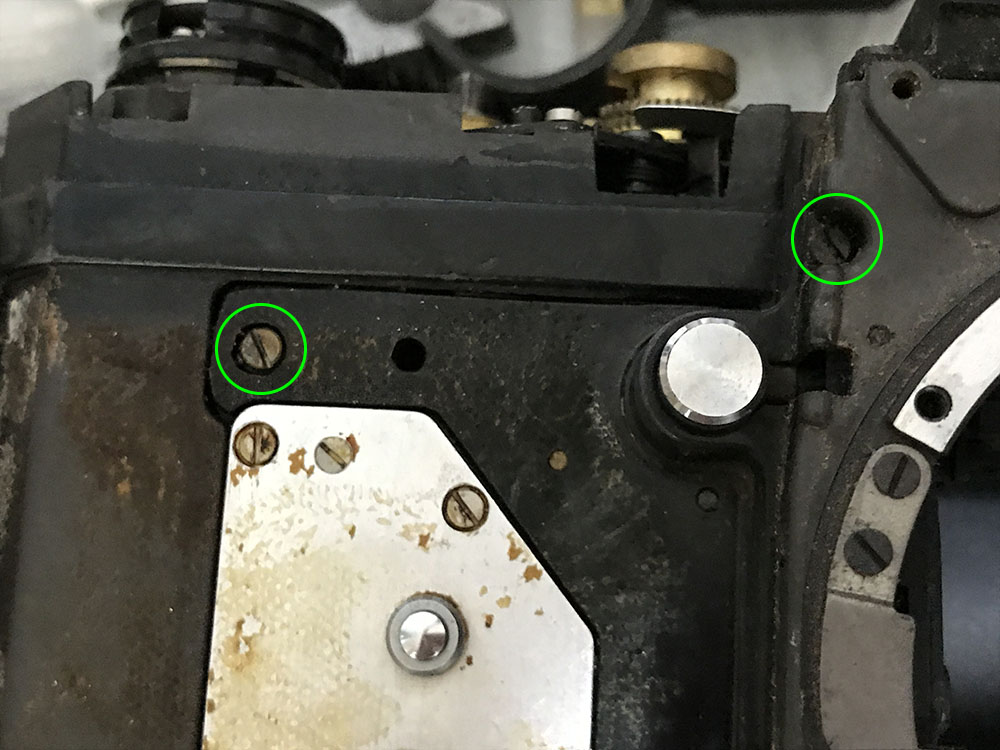
Extract these to remove the front plate. These screws were sealed so plenty of alcohol was needed to saturate and soften the seals up before I could do a safe job of removing the front plate. Do not forget to note where the screws should be so you’ll know how to put them back.

Extract these so you can remove the coupling of the prism’s locking crate. If you didn’t remove this then you can’t remove the front plate since this is in the way.

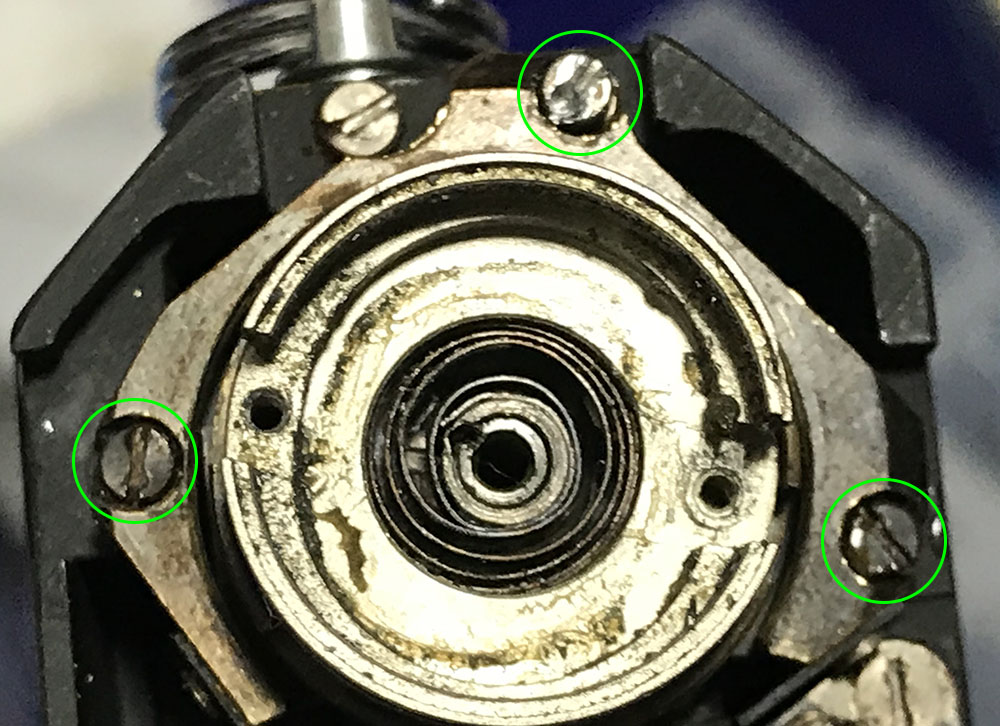
The front assembly can be removed safely at this point. This can be difficult to remove since cement and lacquer has been used to secure it so carefully pry this thing off with a screwdriver. Don’t force it, you may damage this. If that happens then you now have a junk camera. Visible in the picture are 2 screws that secure the mirror-box assembly to the front plate. Extract these and you can remove the mirror-box assembly easily, there may be more so go at it slowly. Separating the mirror-box assembly is easy but putting that back can be challenging since some of the levers need to couple with other opposing parts. You’ll need a lot of patience and a few tools to help you with that task.
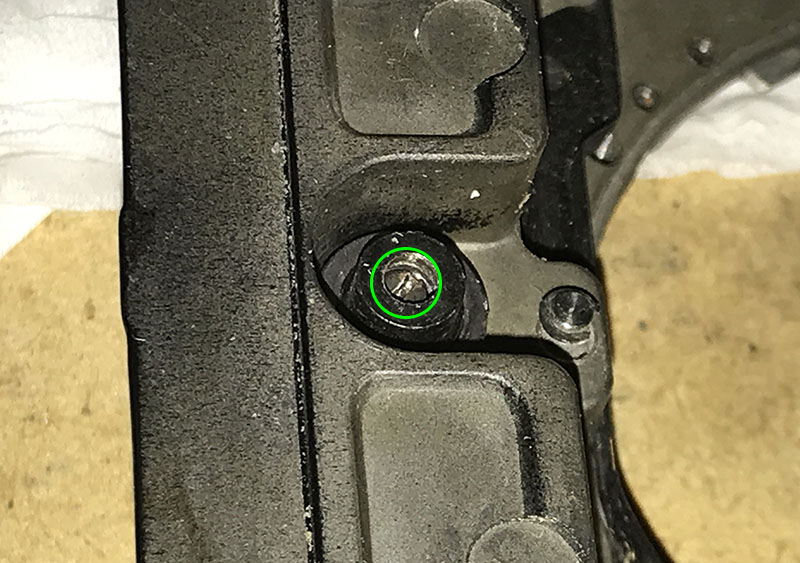
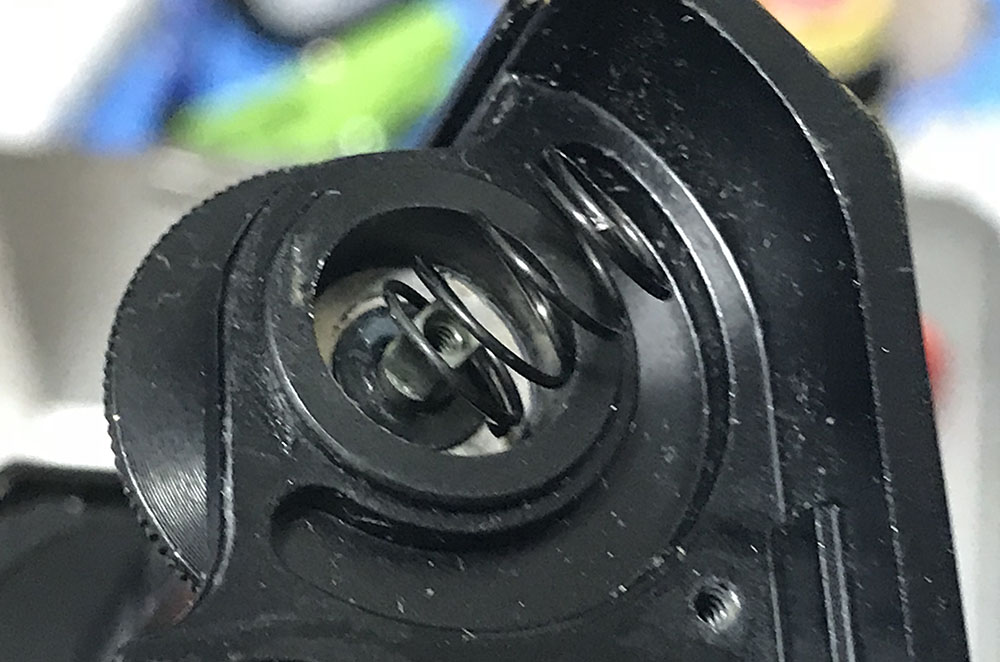
Press the button of the bayonet mount’s lock so this screw will be accessible and you can extract it easily. The other end is connected to the button, there is nothing to grip on the button since it’s smooth so a rubber sheet will help you grip it while you extract this screw, it’s actually a long shaft with a slot.
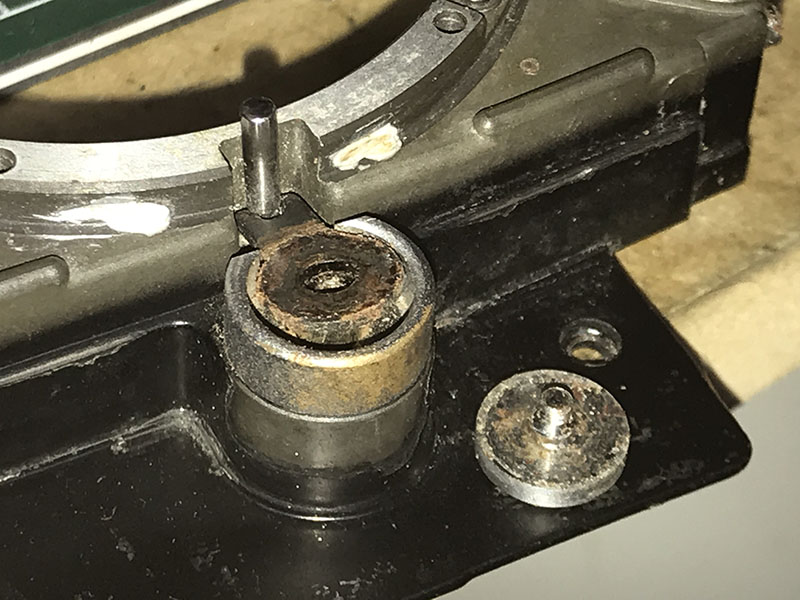
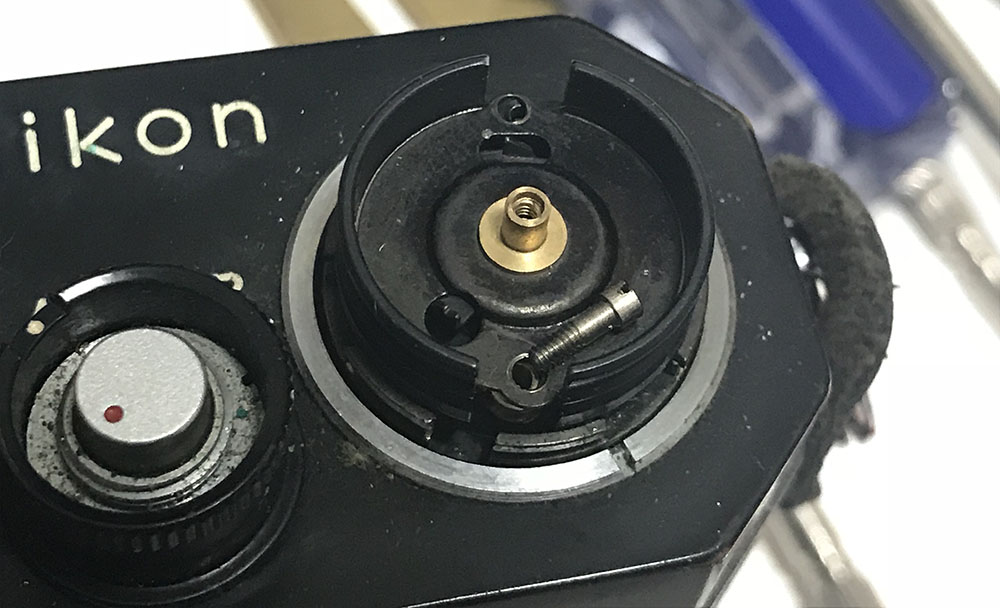
This is how it looks like when the shaft is gone. Notice how dirty in can get? I removed all of the rust here and made sure things are clean. You can see a few dried beads of epoxy in this photo, these are tough to remove and only a Dremel will get them off.

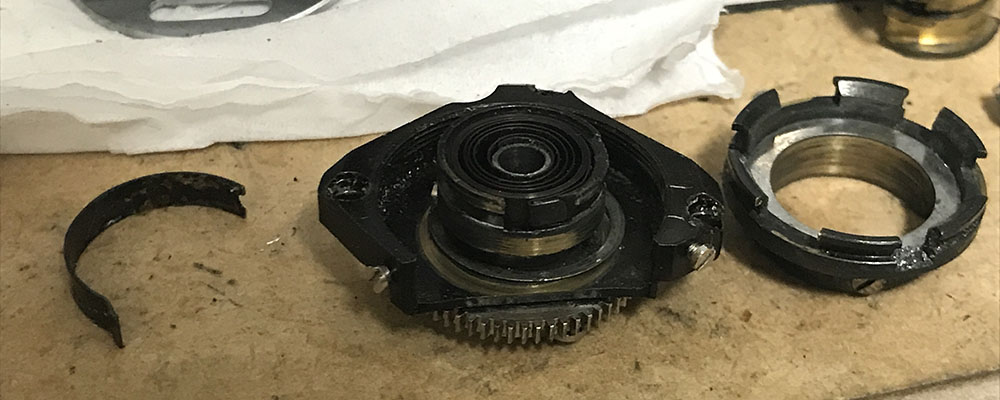
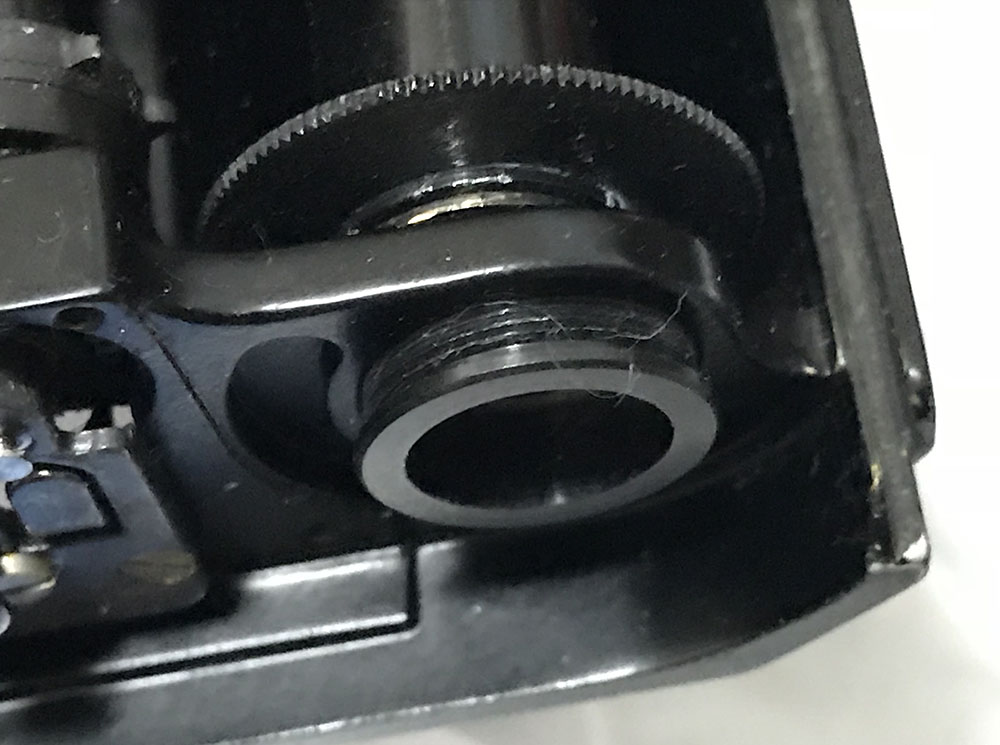
This is how the assembly looks like. The fork couples to the chromed-part, it is the shaft of the lock itself while the shaft with the spring is for the button. Clean everything well to make sure it’s free from germs.

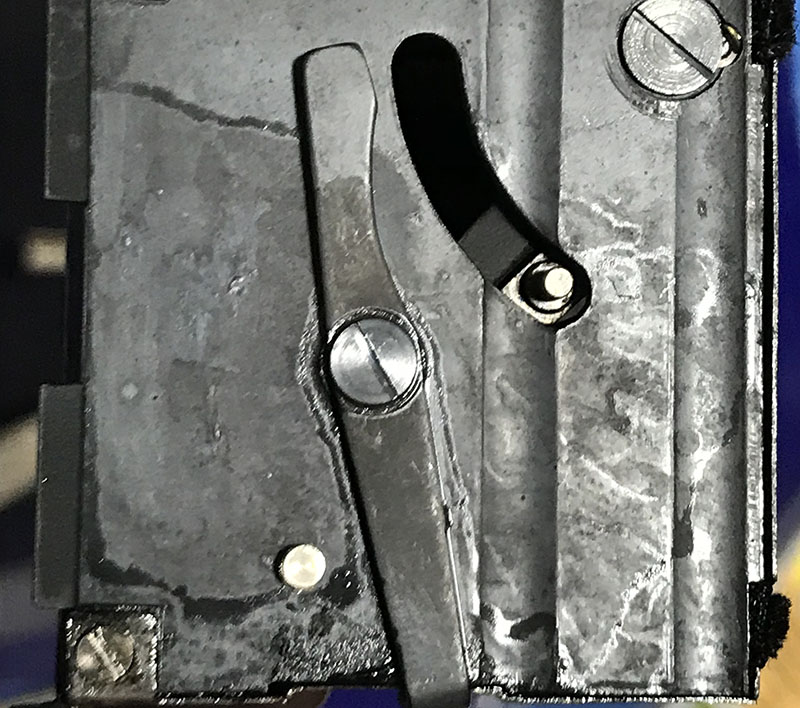
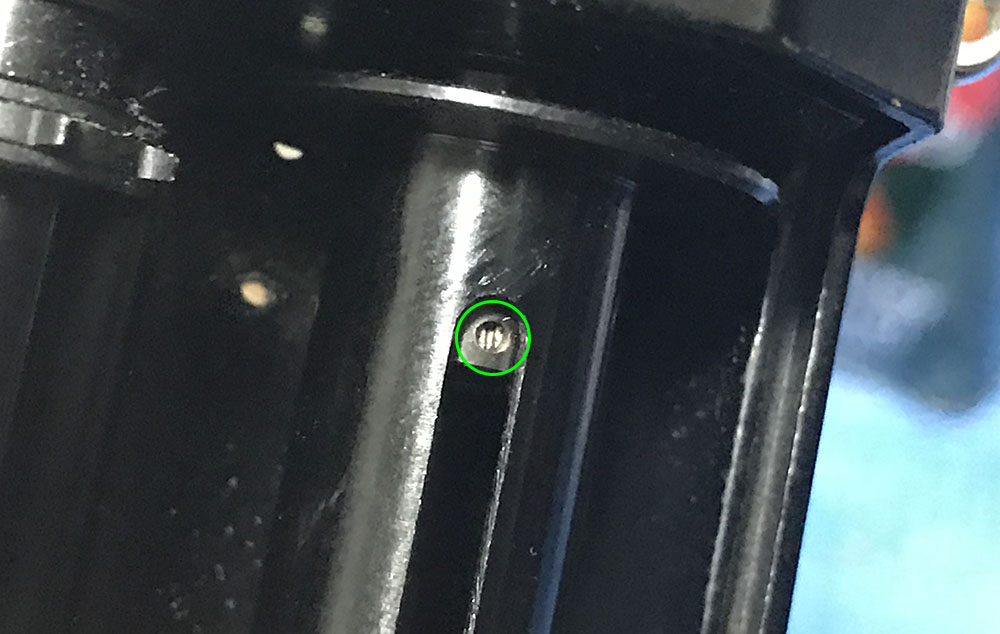
Carefully trace the edges of the depressor mechanism so you’ll know how to put this back again later. It can be adjusted so you can change how deep its travel will be before it triggers the shutter. Removing it is important so you can access this screw. Not only that, it’s easier to put the mirror-box back to the front panel without it which you’ll soon see when it’s time to reassemble the camera.
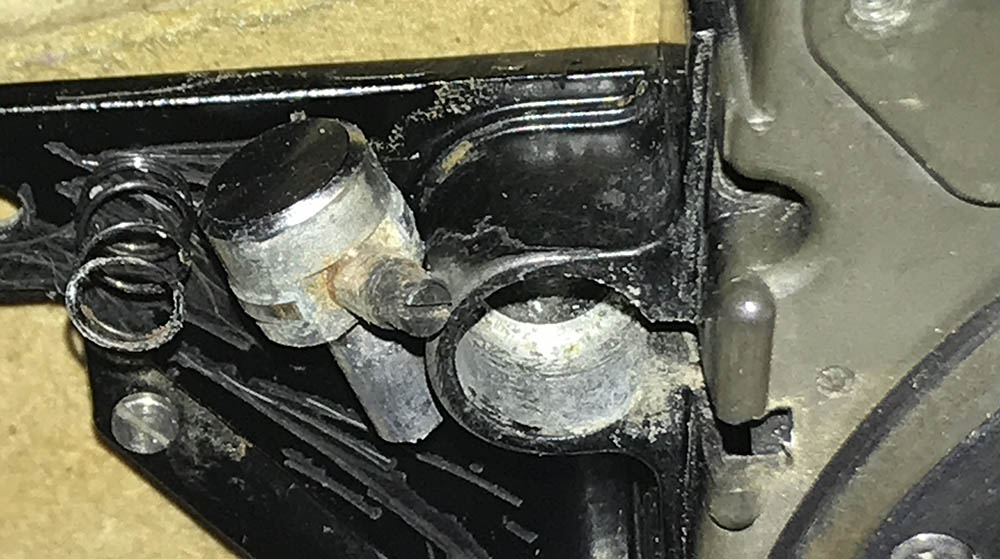
Unscrewing the back of the stop-down lever’s button will let remove it. This is a favorite hiding place for germs so it’s best to clean this part very well.

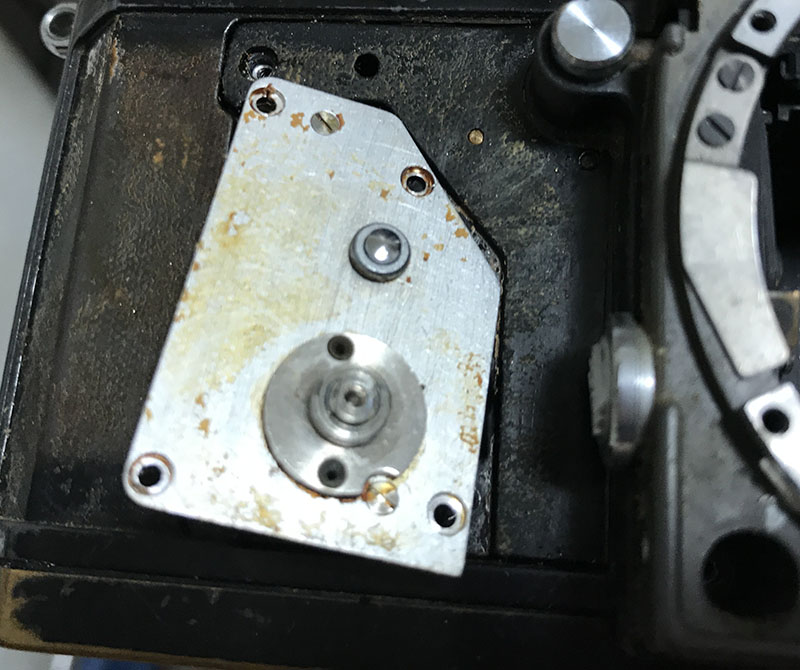
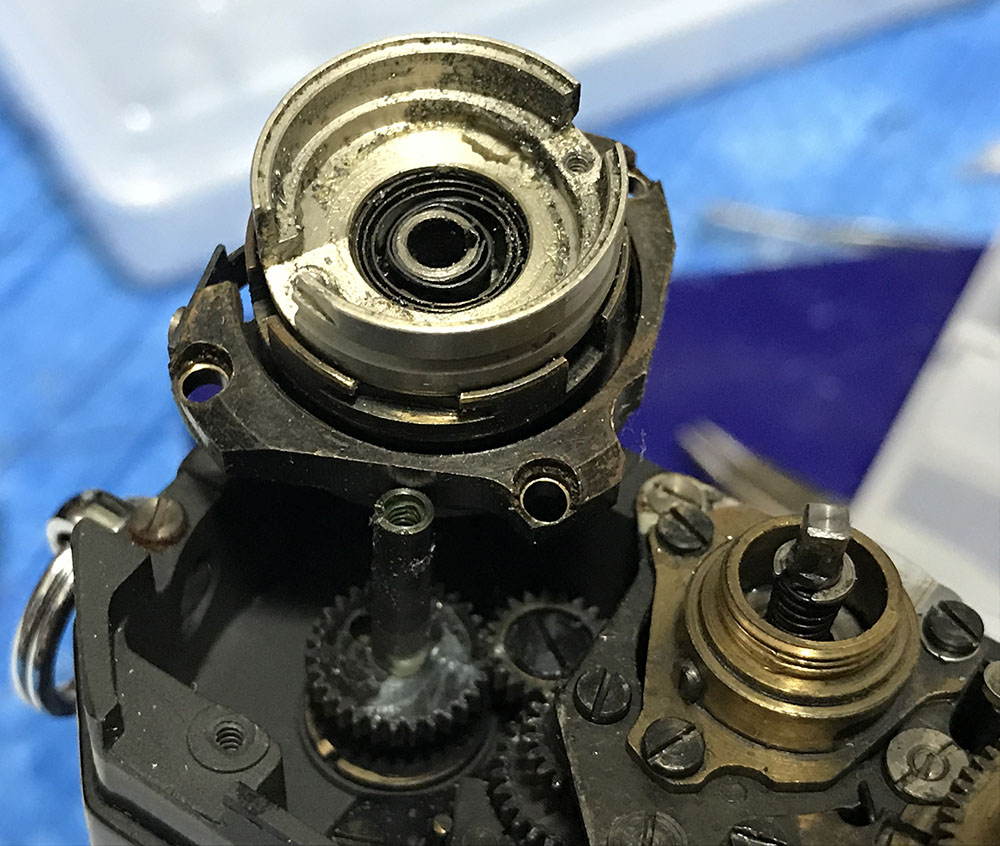
Let’s go back to the mirror-box assembly, examine how everything works. I have a video explaining how this works and I’ll share it in the last part. This is an odd example since it has characteristics of an earlier model but there’s a few things here that indicate that this is from a later batch. This may be a transitional model, I am only aware of 2 types and this is the first time I saw something like this.
This is how it looks like on the other side.

This is how it compares with the later model, notice that the later one has a simpler construction. Be careful when removing anything here since some of the parts here adjust the angle of the mirror so you don’t want to change anything. It can be frustrating to adjust the mirror’s angle but I’ll teach you how to do it in another article.

You can remove the bottom and back cover, there are 6 screws securing the thing to the whole assembly, 4 of them can be found under the felt strips.

If the mirror has to be replaced this is how you should do it. Extract this and locate the other one situated at the opposing side of the mirror-box. There’s a couple of parts that you have to remove in order to access the other one. I didn’t have a picture of that so just look for it yourself. These cover the pin, they can be tough to remove so you should be careful.

The pin can be removed by pushing it from one end and pulling it until it is off. You should be careful since there are 2 bushing here at either end of the mirror’s housing, don’t misplace these as they’re made to fit this perfectly.

The housing of the mirror can now be removed. Be careful while doing it, it has pins on either side that couples to some of the parts and you don’t want to warp anything here.
Clean all of the pivots by flushing them and apply a small amount of oil to the pivots after. Don’t apply too much oil as it will create a mess. When the mirror flaps it will send the oil everywhere. Only use the best-quality oil, it can be sourced from watch repair shops, a little pot will last years if you’re an amateur. I will show you which parts to grease later.
You usually won’t have to dismantle the mirror-box assembly further than what you see here. There are times when the whole thing needs to rebuilt, I carefully note everything so I’ll know how to put things back together again later. I have dismantled plenty of these so I know what to do but thankfully I don’t have to do that for each Nikon F that I overhaul. Clean everything, it’s important to keep all of the pivots clean. Flush everything with alcohol and some naphtha, pressurized air will be beneficial here. Be careful when you are repairing anything close to the mirror since it’s front-silvered meaning the reflective part is on top and not at the bottom. Scratching the reflective coating will result in an ugly view so wipe the mirror only after blowing its surface with pressurized air. Wiping it with both alcohol and naphtha is the best way to clean it, some stains will only react to a non-polar solvent. This is a controversial topic, some people don’t like using naphtha but it’s safe if you know how to handle it. It’s a staple of watch repair, it’s something that I grew-up using at the family’s watch repair shop.
Disassembly (Frame-Counter Mechanism):
You won’t have to fiddle with this on a normal basis but I usually clean this part since a clean one will make you smile each time you cock the shutter. I love how it feels when you crank the film-advance lever and you hear and feel the mechanisms work, you’ll instinctively know which part is working at that point. When you get to this level you can tell yourself that you have a deep and intimate connection with a camera model. This requires plenty of effort to overhaul and you’ll need special tools to remove things here. I use 2 special openers for this assembly alone. It’s time-consuming to put things back and the most annoying part is rewinding the springs. I spent a decade or more in a camera repair shop, this is something that I’m familiar with. It brings back memories of my childhood each time I do this.

The frame-counter dial can be removed once you extract this. Do not forget to note which side 0 should be facing and at what angle since this will be an important reference when you put this back. I remember that it will reset to its proper position but it’s better to be safe.

Removing it will uncoil its spring. Clean the spring carefully, it can be rusty at times. If you don’t know how to remove the dial, lift it on either side with 2 flat drivers and it should be easy to remove.

Here are 2 types of dials. The earlier one was engraved while the later one’s information were merely printed-on. Needless to say, I prefer the early one.

Extract these carefully. The short one merely secures the plate while the one that’s longer serves as a shaft for the rocker-plate underneath it.
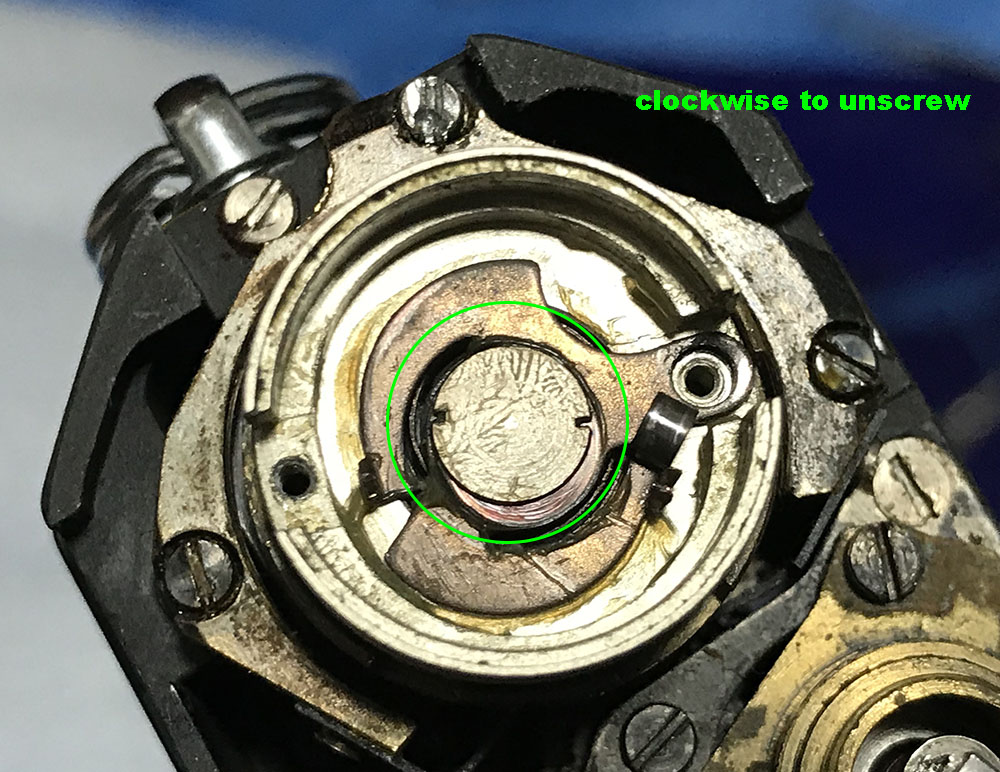
This is tricky to remove, you’ll need a special opener for this. It’s one of the annoying left-handed threads so turning it clockwise will unscrew it. There are several versions of this so you’ll need one for each variation.
The main housing is secured by these. Heating them will make them easy to extract, these were sealed with cement at the factory and it’s always a tough job extracting these without the help of alcohol or heat.
Remove the whole assembly and you can access what’s underneath it. This is usually very dirty, flushing it can be beneficial but only an overhaul will be satisfactory to my standards.

Observe the gear-train here. These things are usually clocked with grease, it is important to clean everything here to the best of your abilities so you can do a proper job. This camera looks like it had been serviced before since the grease on the main cog doesn’t look like the one Nikon used. Finding a dried patch of molybdenum grease is also an indicator that it has been repaired.

Turn the cup to locate these so you can extract them but be sure to note the orientation of the cup first so you’ll know how to put it back again later. It’s not a necessary step but doing this will enable you to do a better job.
Remove the cup and a spring underneath it. It locks the film-advance lever, without it you won’t be able to know if it’s in the rest position or not. Clean everything here with a little brush and alcohol as this part can get filthy.

This is the ratchet and its pawls, it enables you to successively advance the shutter without it going back when you partially charge the shutter. This is usually dirty but what you see here in unusually filthy.

Removing the spring is optional and only for the hardcore repairer.

With the spring gone you can now remove the collar and dismantle the cogs down to the last screw. The collar is being secured by this set screw which is tough to remove.
To make things more educational, here’s how it looks like on a later camera. While nothing much looks different here there are small differences under this thing which you’ll see on the next photo. Visible on the photo is the pin that turns the frame-counter dial each time you cock the shutter. It couples to the serrated part underneath the dial.

This is how it looks like on a later model. The earlier one has a flat surface, I had t make a different tool for this thing. The hole on the rocker plate’s arm is elongated so it moves in a complicated manner which enables it to move the dial. There’s a small brass tube here that you should never misplace.
Clean everything here. Soaking the parts overnight in a pot of naphtha and a bit of oil is beneficial to remove rust and dirt. Avoid cleaning these using a potent solution with an ultrasonic cleaner, you should only do it when all of the parts were stripped-down completely. Apply a small amount of oil to the pivots and grease the ratchet’s teeth. You won’t need lots of grease to do the job, a thin film is enough. Applying oil to the springs will help in preventing them from corroding, a thin film is all you’ll need and you can thin it using naphtha, too.
Disassembly (Take-Up Spool Assembly):
You normally won’t have to go this far, you can do a good job without doing this. I only reserve this step for really filthy cameras, I rarely do this myself. This is not an easy step to do since you’ll require special tools and there are some parts here that can be damaged quite easily if you’re not careful.

Start by measuring the height of the spool so you’ll know how to put it back again later. If you failed to reproduce this your film won’t be straight.

Carefully remove this cover.

Be careful not to lose the spring or any washer you may find here.

Extract this so you can remove the coupling collar for the Nikon F-36.
There’s another spring here.

You can now safely remove the main shaft of the spool.
This can be difficult to remove. There’s are holes underneath a washer here and you can use a special opener to remove it.
Avoid the temptation of removing these. The collar adjusts the height of the spool so you don’t want to modify it.

I have a special tool to jam the gear so it stays while I remove the tube that’s securing it to the spool.

Here’s how it’s removed. I have a special tool that can access the slots of the spring-loaded suspension adjuster. The key is to lock-on the slot and then a special tool is used to turn the main cog by jamming it. Don’t handle it with a metal tool to its teeth, you’ll damage the cog in no-time. The best way is to jam it using the hole for the main shaft of the spool. I need to mention that you should remove the bottom-cap of the spool in order for the tool to fit, it is absent on very late models, the bigger cap that we removed a few slides before has it integrated to it.
Clean everything very well and grease the parts here specially the hole for the main cog. Before you grease anything, use Q-tips to clean the holes and shafts. Use a grease that offers a bit more resistance but not too-much. The grease should be applied sparingly, excess grease will migrate to the spool and into your film.
Conclusion:
This may look like a major repair at this point but we’re just getting started, we have not touched the shutter mechanism and its selector yet. Removing the parts here is easy but putting things back is a different story. I repaired a couple of Nikon F’s by now so I know this camera quite well. If you’re not a repairer or merely a novice, skip this and leave it to the professionals. It’s not worth ruining a perfectly-serviceable camera. I hope this article shows how difficult it is to properly service a Nikon F. It takes me several nights, I usually spend most of that time cleaning everything. You can’t make money when you’re working like this, I certainly won’t accept a job and clean the camera to this level if I’m just going to get paid less than $400 for it. It’s not worth in unless I do this full-time.
In this video I will explain to you how the self-timer assembly works. This is an old design that didn’t change much since the Nikon SP debuted. It stayed fundamentally the same for more than a decade, I even suspect that the one on the Nikon F2 is similar to this (but not identical).
Here’s a brief explanation of the mirror-box mechanism and how it works. I will also show you which parts to lubricate.

Once properly serviced a Nikon F is a lovely camera to use, I prefer it over a Nikon F2 anytime. It’s the best Japanese camera of its time and it certainly is still a great camera today for hobbyists. A Nikkor-S 35mm f/2.8 Auto is a nice partner for it.
Thanks for following my work. Please share this with your friends, this site earns less than $0.70 a day from views and clicks so every visitor counts. It continues serving the community through your support, it helps me offset the cost of maintaining it. You’re also helping me buy, process and scan film for our reviews. This helps me promote the joy of film photography and it’s also helping the film industry, too. Thanks for your continued support and see you again in the next part of this series, Ric.
Help Support this Blog:
Maintaining this blog requires money to operate. If you think that this site has helped you or you want to show your support by helping with the site’s upkeep, you can make a small donation to my paypal.com (richardHaw888@gmail.com). Money is not my prime motivation for this blog and I believe that I have enough to run this but you can help me make this site (and the companion facebook page) grow.
Leave me some tip?
Thank you very much for your continued support!
$2.00
Helping support this site will ensure that this will be kept going as long as I have the time and energy for this. I would appreciate it if you just leave out your name or details like your country’s name or other information so that the donations will totally be anonymous. This is a labor of love and I intend to keep it that way for as long as I can. Ric.

Jul 07, 2021 @ 06:14:54
“Be careful when removing anything here since some of the parts here adjust the angle of the mirror so you don’t want to change anything. It can be frustrating to adjust the mirror’s angle but I’ll teach you how to do it in another article.”
On the mirror box section, you mentioned this. It seems that I might have a mirror that need adjustment since it won’t close to the top. could you help to point me to the right direction?
Oct 22, 2021 @ 13:38:03
I hope at some point to find a description or video of assembly of the mirror
box into the frame…so far its stumped me…
i did replace the release button assembly also and i assume it is the root
cause of my issues as nothing is working when assembled…
lots of videos on taking the F apart, but not one i can find putting it back
together…successfully !!!
thanks again
sid crandall
Jul 02, 2022 @ 21:49:53
Hi Richard, you do very nice work on rehabilitating the old classic film cameras, especially Nikons. You have mastered the art of describing your process.
I have three F2’s of which two chrome bodies are close to mint. I have disassembled my black F2 for a thorough cleaning, foam replacement and lubrication. I am having difficulty reseating the mirror box. I followed the procedures for the self timer boomerang right angle arm placement and made sure a lever on the mirror box slots correctly adjacent to a camera body lever. As I insert the mirror box, the mirror box spring tension lever seems to prevent the box from just dropping in place. If I force it and trigger the shutter, the mirror only partially returns to it’s static operating position. Any chance you would have a video of your procedure to install mirror box.