
Hello, everybody! In the coronavirus era we’re all scared about germs and what it can do to us if we are not careful. We should wash our hand well, if you went to the toilet, wash your hands first before touching your peter. It’s equally important to wash your hands after doing the deed, too. This helps in preventing the spread of germs. What really helps a lot is using masks as it prevents the spread of germs and you’ll inhale less of it, too. Hygiene is an important part of living, this goes for your cameras and lenses as well. They constantly get close to your face, whatever germs are there will reach your face and enter your body. Today, I’ll show you how I cleaned a camera so it won’t infect me with anything nasty. Old cameras can be health risks if they were used by somebody sick before it got to you. If it was stored in a cabinet for a long time then fungus or other things may have bred in it, too. This is a big risk that’s why people who love old gear like me should be very careful.
Introduction:
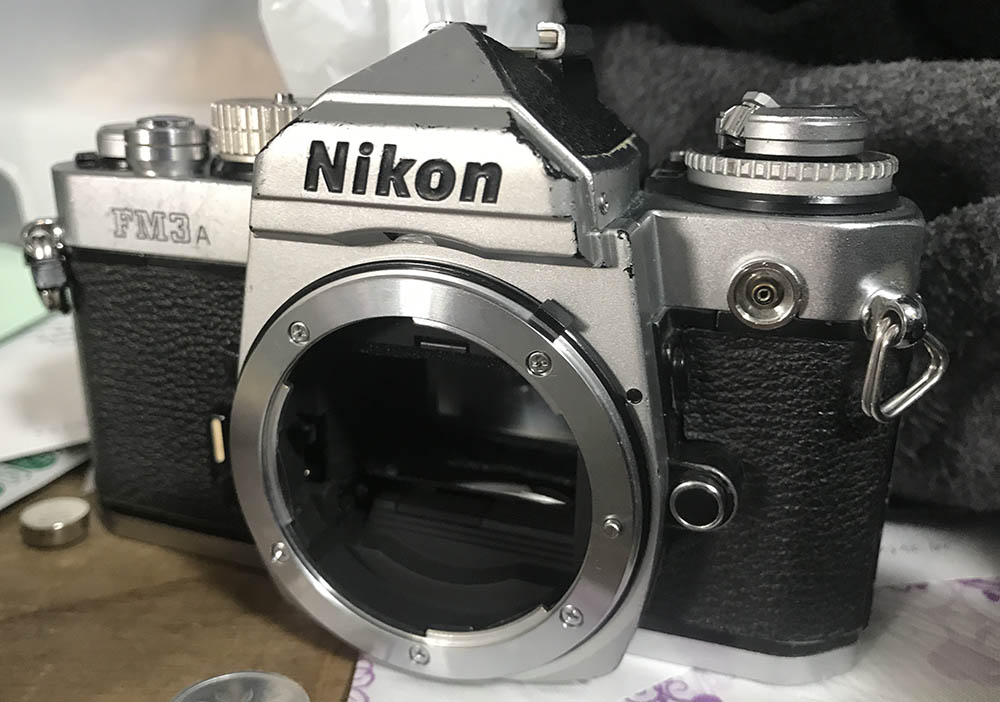
The Nikon FM3A was sold from 2001 to 2006. It’s a wonderful camera, it’s so advanced when it came out that nothing in Japan could match it. If you look at it, you’ll think that it’s nothing special because it looks like any other old, manual camera from the 1970s but the insides of the Nikon FM3A is modern and state-of-the-art. Nikon managed to combine an all-manual shutter with an electronic-override for aperture priority, this means that you can use the shutter with all the speeds available to you in manual mode if the batteries failed. Sure, the meter won’t work but you’ll still be able to shoot with it and you’ll have all of the speeds available to you unlike most electronic Nikons where you’re only able to use a single backup manual speed.
It has more things in common with a Nikon FE than a Nikon FM, even how it looks reminds you of the former. I don’t know why they named it the Nikon FM3A, maybe they’re referencing its all-manual shutter. The shutter is very advanced, it’s an electro-mechanical hybrid. Not only that but Nikon made it small enough to fit inside a tiny chassis.
The Nikon FM3A is the last-of-its-kind. It’s Nikon’s tribute to a by-gone era, it is a camera for romantics wanting to reminisce how it feels to shoot photos with film. Many people were actually surprised by Nikon’s decision because digital cameras were the talk-of-the-town when this came out. Many people still love and shoot film at the time and they’re the target market for this. It is a lovely camera a worthy last model for the venerable Nikon FM family.
For those who are wondering, the Nikon FM3A’s viewfinder is similar to the Nikon FE series’ display with a match-needle interface instead of the simple LED one found on the Nikon FMs. I prefer this since it enables me to have a look at the whole spectrum without having to guess how much light there is beyond what the simple LED interface shows. The down-side is the needle is difficult to see in lowlight while the LED is perfect for just about anything.
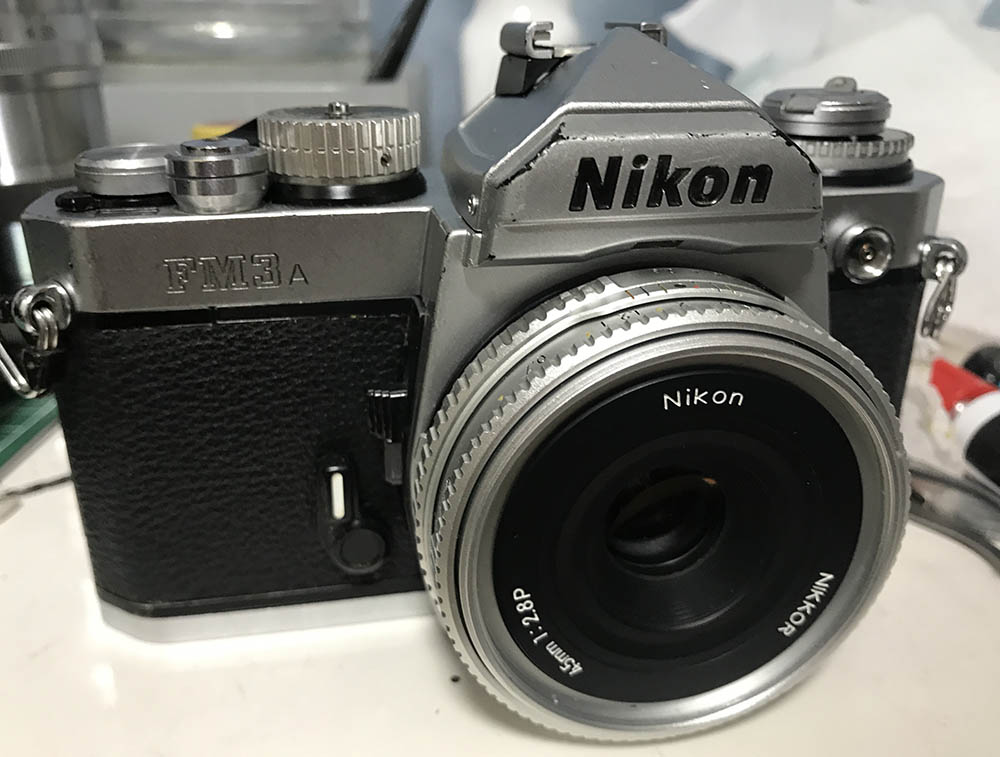
The Nikon FM3A was sold together with the Nikkor 45mm f/2.8P as a special set. They come with a special box containing all of their accessories, it’s not cheap back then and it’s certainly not getting any cheaper now. Clean, mint-condition sets can command a high price. This setup make for an excellent kit for travel and street photography. This captures the spirit and essence of “real photography”, you’ll realize that this is all you’ll ever need in order to take great photos and enjoy the process of taking them. It makes the photos even more-memorable because you remembered and enjoyed the process. I don’t recall having this feeling when using digital cameras, it’s very rare for me to feel the same despite all of my famous or published photo were taken with my old Nikon D700. By the way, before anybody corrects me, you could buy this camera alone without the Nikkor 45mm f/2.8P. The statement that I made earlier meant that this and the Nikkor 45mm f/2.8P were revealed at the same time and were meant to compliment each other.
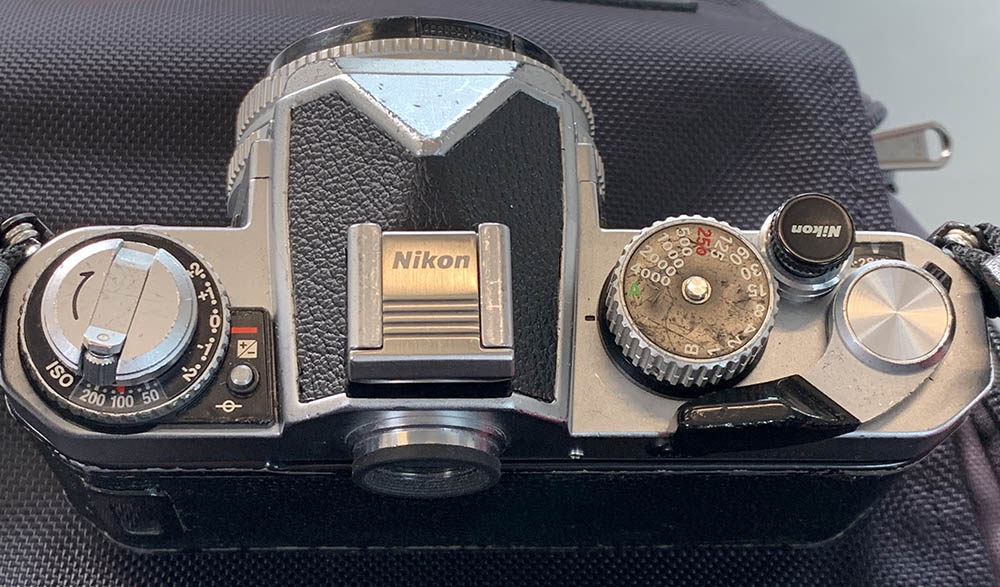
The layout of the top panel is clean, it’s similar to the Nikon FE series where you can set the shutter to A for aperture priority and the manual speeds are set manually with the dial. The difference is the Nikon FE’s manual speeds are all electronic except for a manual backup speed, this one is all-manual. The only electronically-controlled “speed” is A. This is revolutionary, it took a lot of development and money to produce something like this. This thing looks old but its internals are state-of-the-art.

I love this camera a lot because it’s small, using compact lenses such as this GN-Nikkor 45mm f/2.8 Auto and a compact, manual flash enables me to use this all-day without my neck hurting. Despite its compact build it’s robust, it can handle a beating as evident in the state of my camera. It has seen better days but it will still keep on going provided that I take good care of it.
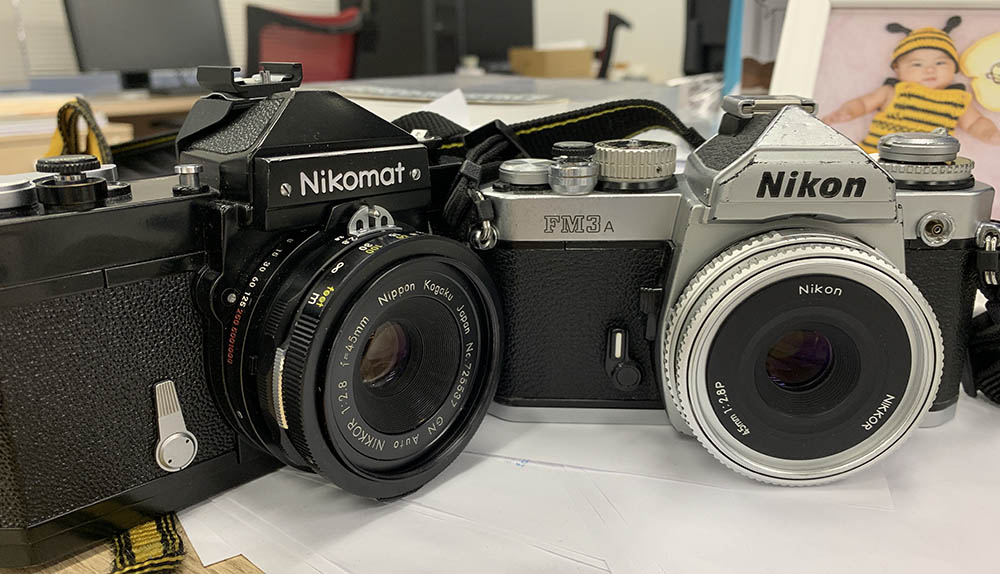
It’s so compact that it’s smaller than a Nikkormat FTn. This photo represents 2 generations of Nikons with a gap of around 40 years. They are both tough but the Nikkormat FTn could really take a beating. It’s one tough camera, it’s a worthy partner for the Nikon F.
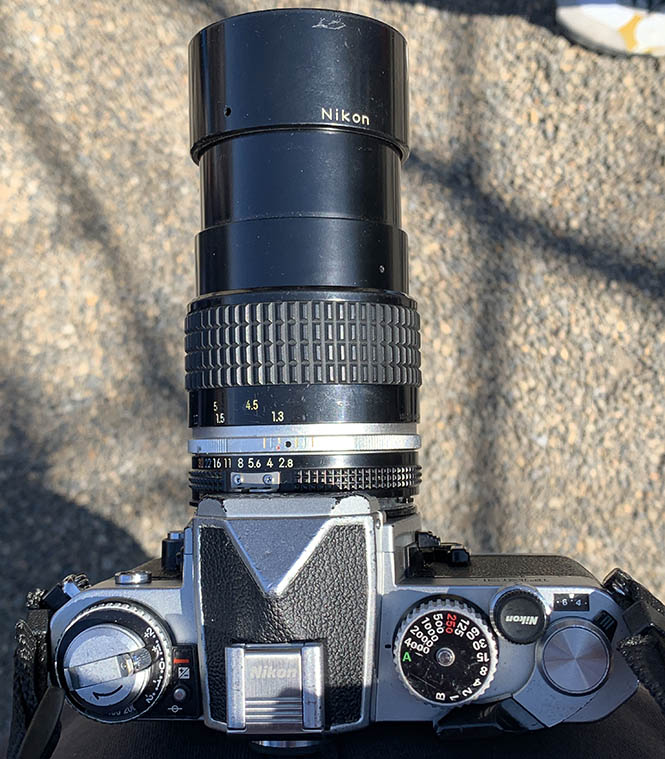
A longer lens such as the Nikkor 135mm f/2.8 Ai-S will make your setup a bit forward-heavy. This isn’t much of a problem so long as you hold your setup with both hands, adding stability.
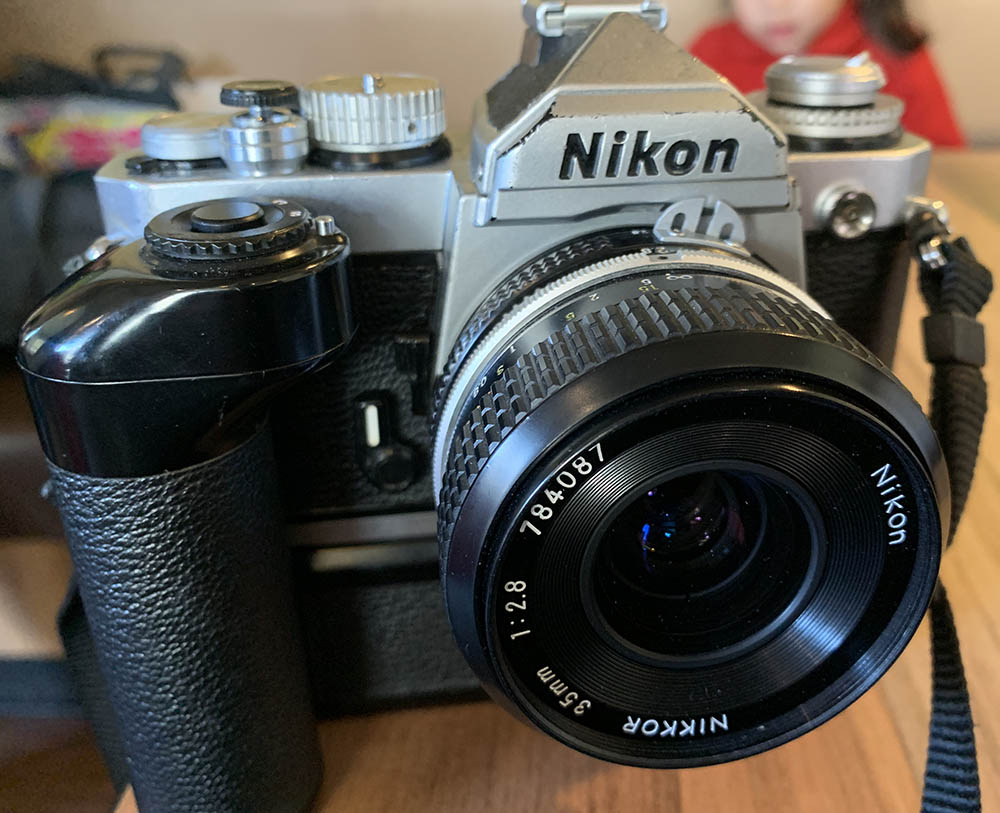
The Nikon MD-12 is a useful accessory, not only does it enable the camera to shoot faster and advance the frame automatically it also makes your setup a lot more stable. People with larger hands will benefit from it, too. Mounting a small lens with it such as the New-Nikkor 35mm f/2.8 is great, it makes the setup much-lighter and you can shoot with it all-day without straining your neck, that is if you don’t mount the Nikon MD-12 with it.
I can highly recommend this camera to anybody who needs a light, compact camera for travel. The price is quite high, almost approaching Leica-levels, I had to wait for a long time to get one for cheap and it came in the form of a junk camera that I had to clean inside-and-out but it’s worth it. If you do not have the cash to spend for one of these, consider getting a Nikon FE instead. They’re cheap and you won’t notice much of a difference in real-world use, that is until you need that 1/4000s maximum shutter speed. If that’s what’s needed then a Nikon FE2 will fit the bill. They’re all tough until the batteries run dry or the electronics dies. The Nikon FM2n is also a great choice but it’s manual-only. You’ll have to challenge yourself by changing the aperture and shutter-speeds faster to meter a scene. The Nikon FM3A combines both into a single camera and that’s why it’s so expensive. When buying one, check its meter to see if it works perfectly at all speeds. The needle should be stable, I would advise that you turn the ISO-selector dial and see if the meter reacts. All of the buttons should work such as the AE-L button. You should also look at the screen to make sure that it’s clear. This is a wonderful camera and it’s going to be relevant for many decades to come so long as there’s still film to use with it.
Before We Begin:
If this is your first attempt at repairing a lens then I suggest that you check my previous posts regarding screws & drivers, grease and other things. Also read what I wrote about the tools that you’ll need to fix your Nikkors.
I suggest that you read these primers before you begin (for beginners):
Reading these primers should lessen the chance of ruining your lens if you are a novice. Before opening up any lens, always look for other people who have done so in Youtube or the internet. Information is scarce, vague and scattered (that is why I started this) but you can still find some information if you search carefully.
I highly recommend that you read my working with helicoids post because this is very important and getting it wrong can ruin your day. If I can force you to read this, I would. It is that important!
For more advanced topics, you can read my fungus removal post as a start. This post has a lot of useful information and it will be beneficial for you to read this.
Disassembly:
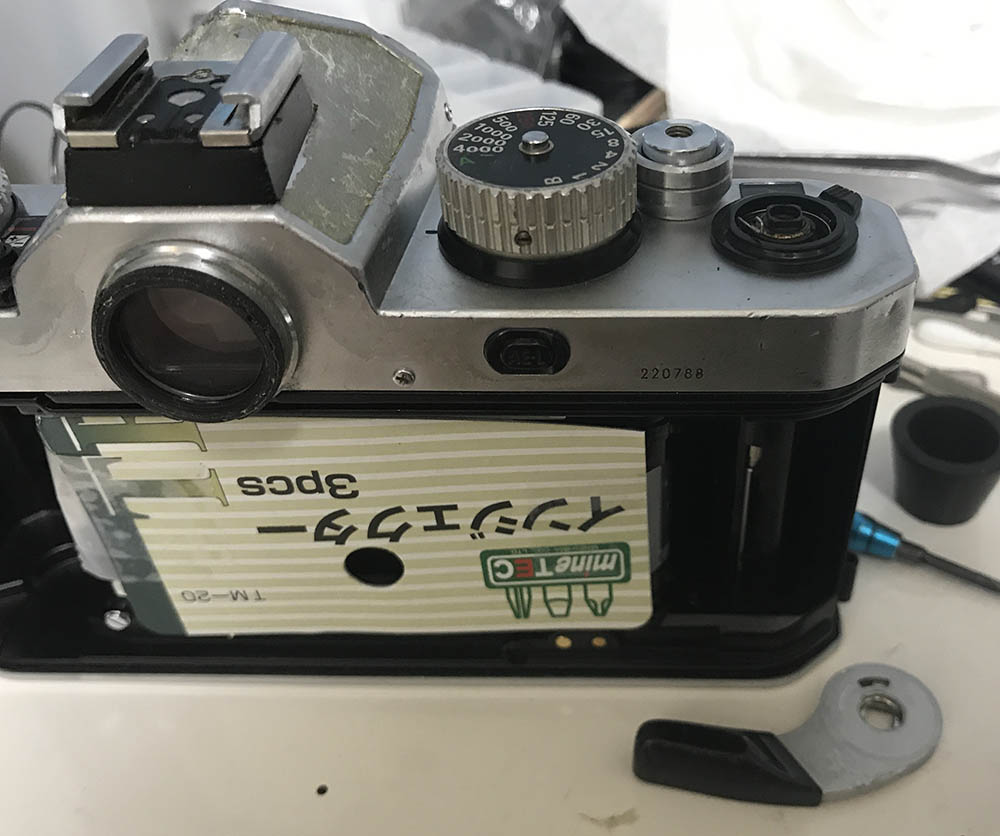
This really isn’t a repair article, it’s more like how I cleaned this camera just so I can use it safely. Using a filthy camera isn’t healthy, you can get sick and infect anybody who comes into contact with it. I usually do minor cleaning on my junk cameras but this one was so filthy I had to do a more thorough job. All I’m going to show you is how to dismantle this half-way in order for you to reach some of the more important mechanisms. You should never go any further than what I’m going to show you since this is a delicate camera with plenty of electronics that can easily get damaged or shorted. This isn’t a true “classic camera”, it’s a high-tech marvel in the guise of an old camera. You should treat it like a modern, all-electronic camera, by that I meant lots of care. If your camera needs servicing, send it to a competent repairer. It’s not something an amateur should tackle, somebody with no experience and tools should stay-clear of it. It is something that even the best repairers will find intimidating, one mistake and it’s bricked. Do not treat this article as a repair manual, it’s only for your entertainment and education.

As an SOP, I always cover the film aperture with a piece of cardboard just in case my finger slips. This is the best way to protect the shutter when you do not have the back cover installed.

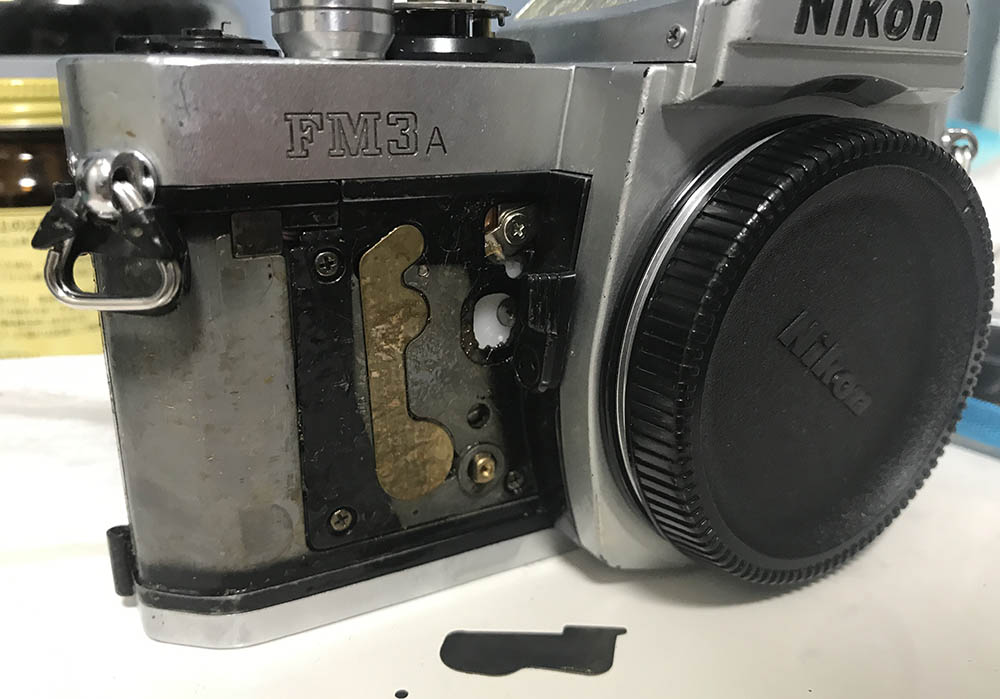
I removed the leatherette of the back cover because mine was filthy, it had to be brushed thoroughly to kill germs.
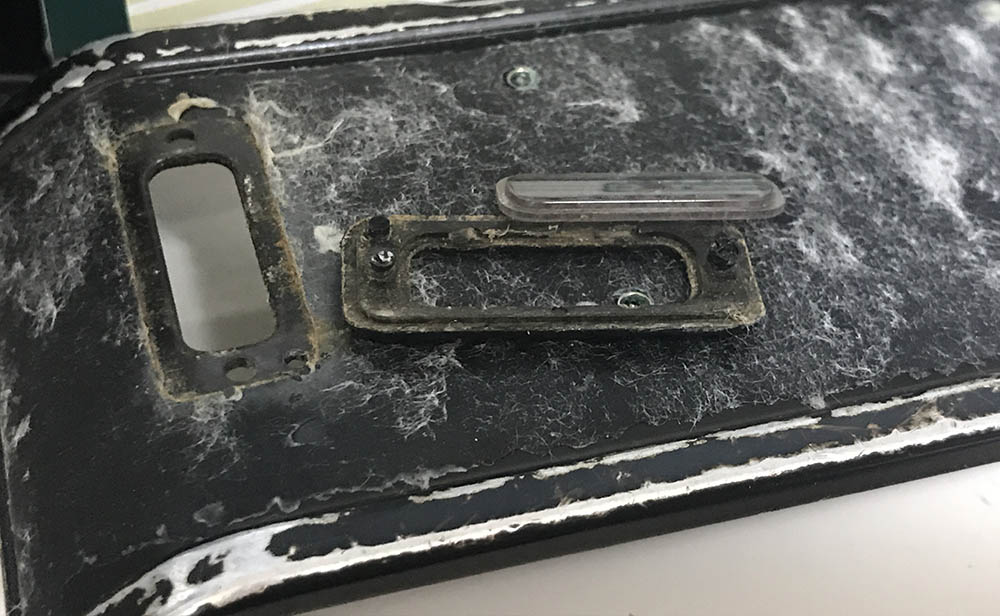
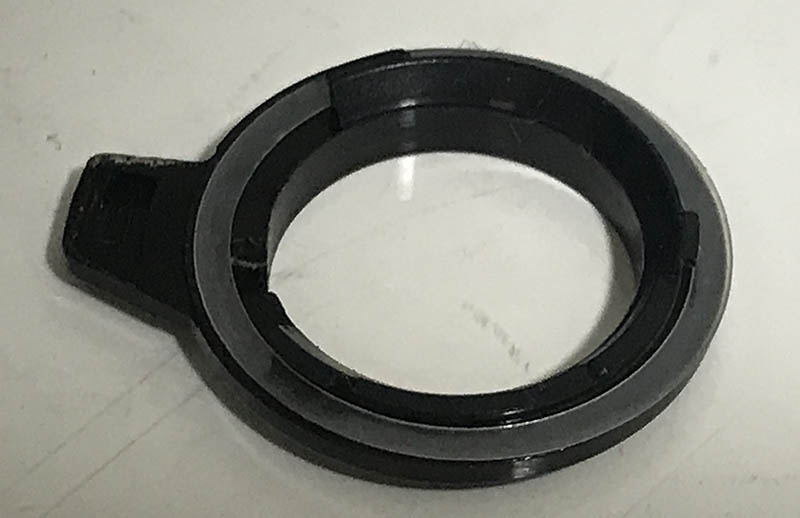
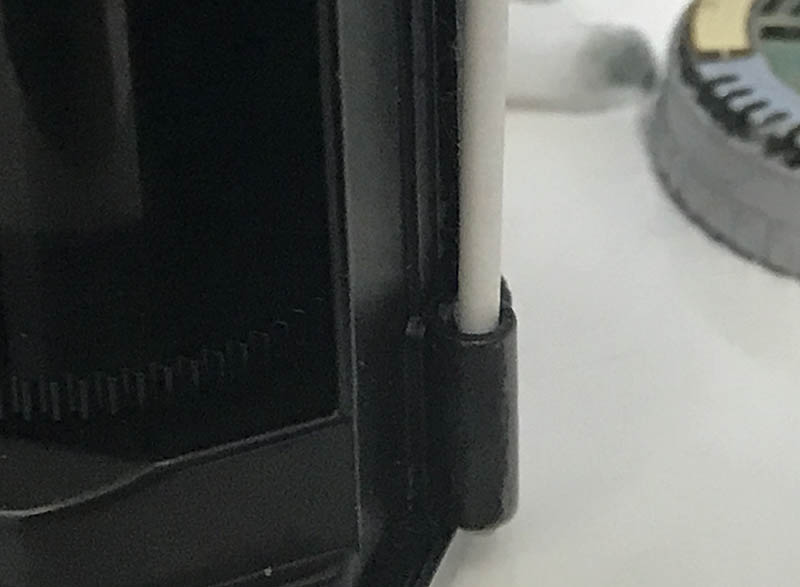
The window and its frame had to go, too. It was “peened” by mushrooming its short plastics lugs. I had to carefully pry the lugs to prevent any damage.
The cover of the advance-lever can be removed with a rubber cup. I am not sure if this is a right-handed thread so please be careful when you remove it to prevent damaging its stalk as it’s thin and it can easily be snapped.

Disengage this little spring with a pair of tweezers.
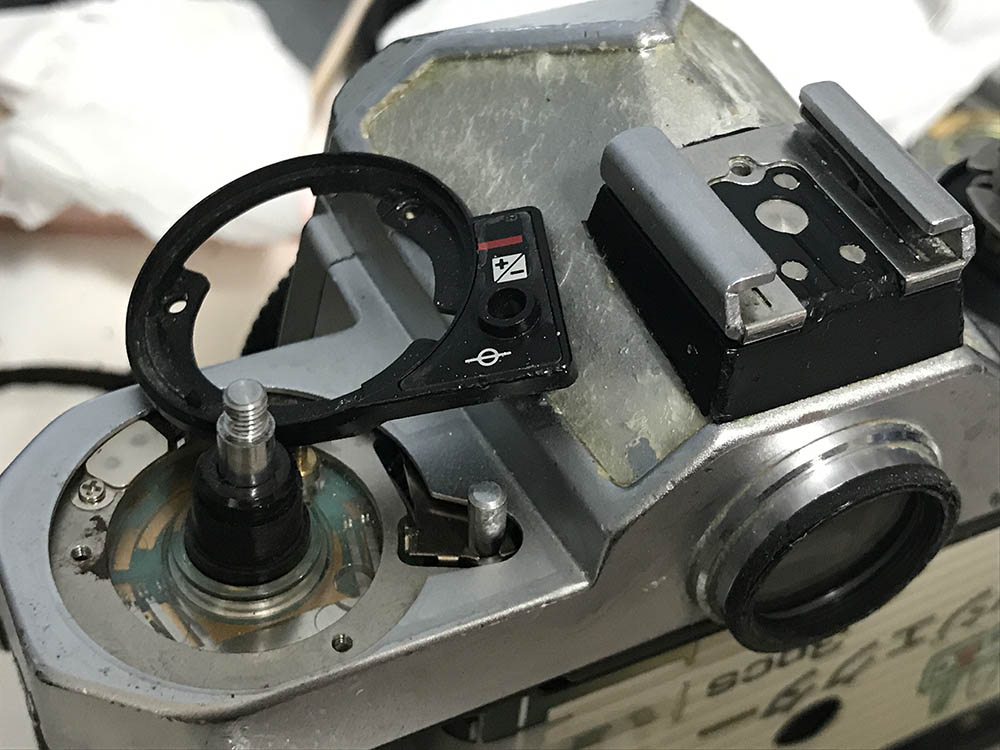
You can now remove the lever. Note that I removed the leatherette found at the prism portion. It can be difficult to remove because the inner edge was slipped-under the hot-shoe’s base. Peeling it after the base of the hot-shoe is gone is the safest way to do it. You won’t gain anything by removing it, this camera was filthy so I had to clean everything thoroughly.
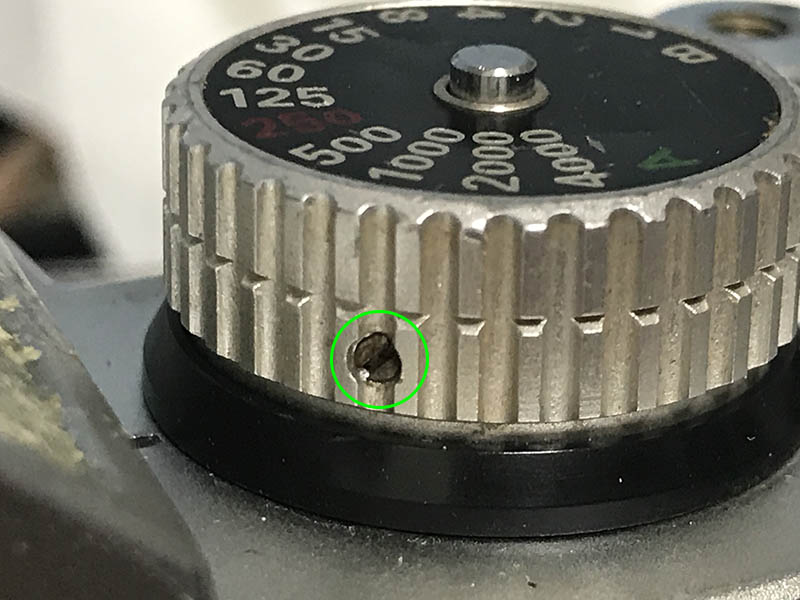
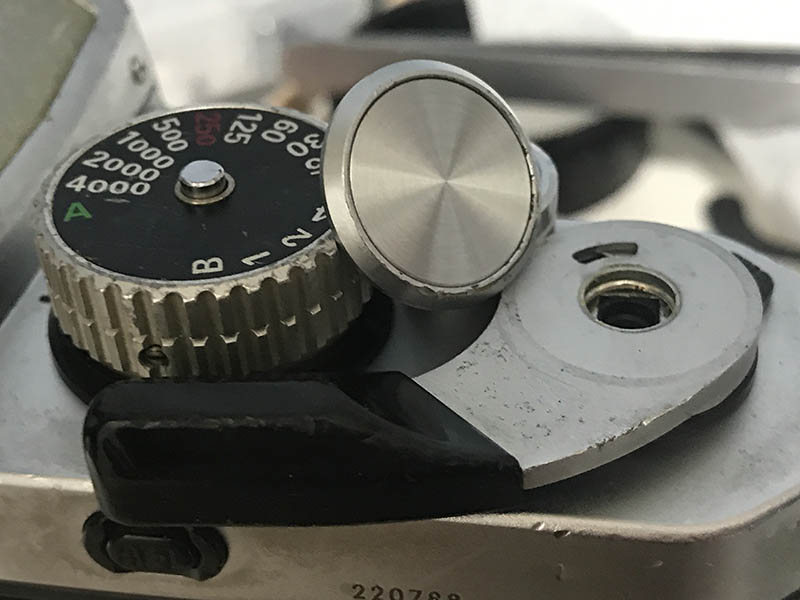
Locate and loosen this screw, I am not sure if there are more.
That will allow you to remove the speed-selector dial. This can be adjusted, I always install it while the speed is set to A so Ill easily know if I got it right.
It really doesn’t matter which speed it’s at when you remove it but here’s its position at 1/250s.
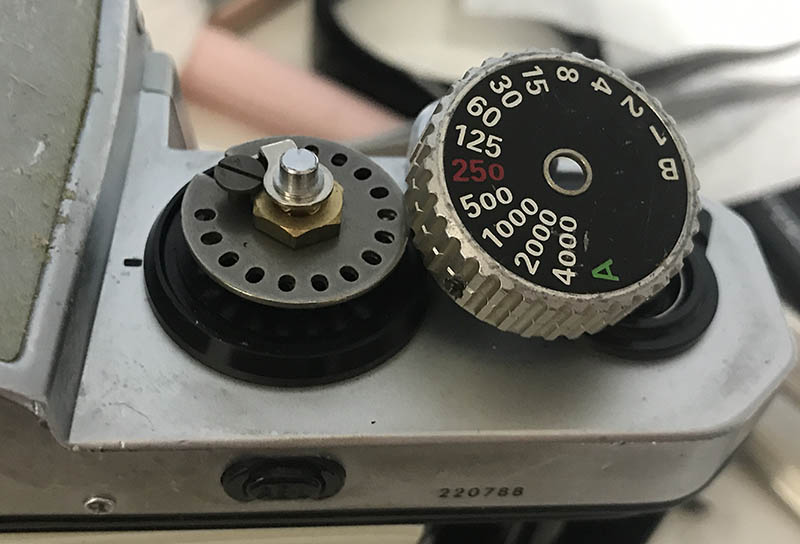
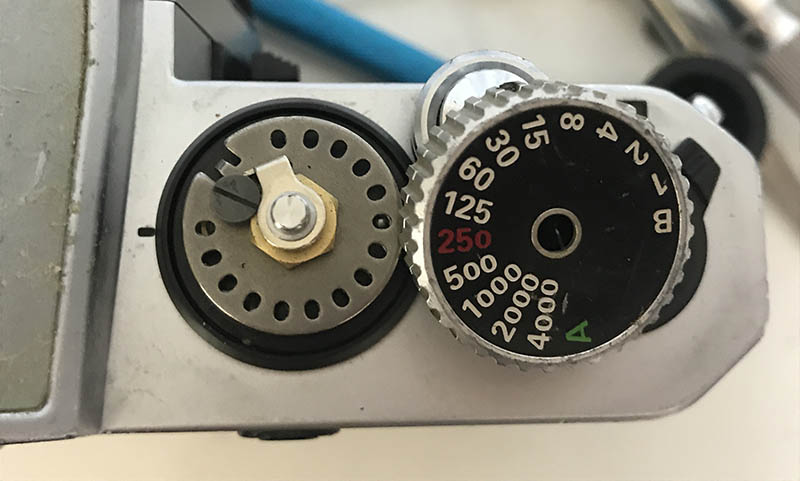
I forgot to remove this earlier. This is the multiple-exposure lever. There’s a thin strip of nylon bush here that you should never lose or damage. It can at time get worn, jamming the advance-lever.
Remove the leatherette covering of the self-timer’s lever. I think you’ll find a thin metal cap underneath the leatherette, don’t lose that thing. You don’t have to do this if there’s nothing wrong with the mirror-box or the shutter. I just wanted to remove the leatherette covers to clean them thoroughly.
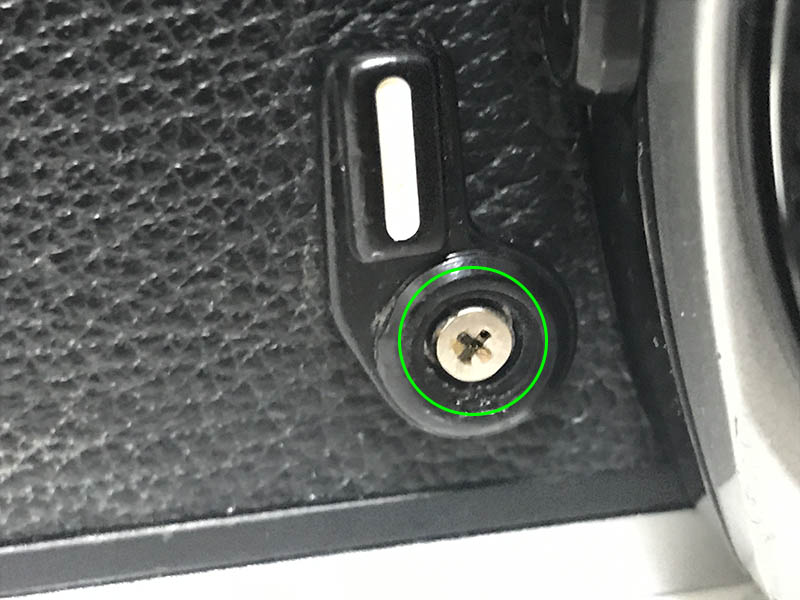
Remove the leatherette on both sides of the camera’s front panel. There is a small panel that may come-off. That’s the cover for a couple of access holes. There’s a bigger brass panel beside it, you can leave the alone for now. This can come-off easily so I simply removed it for safe-keeping. These holes are useful for accessing parts of the shutter for lubrication and correction.
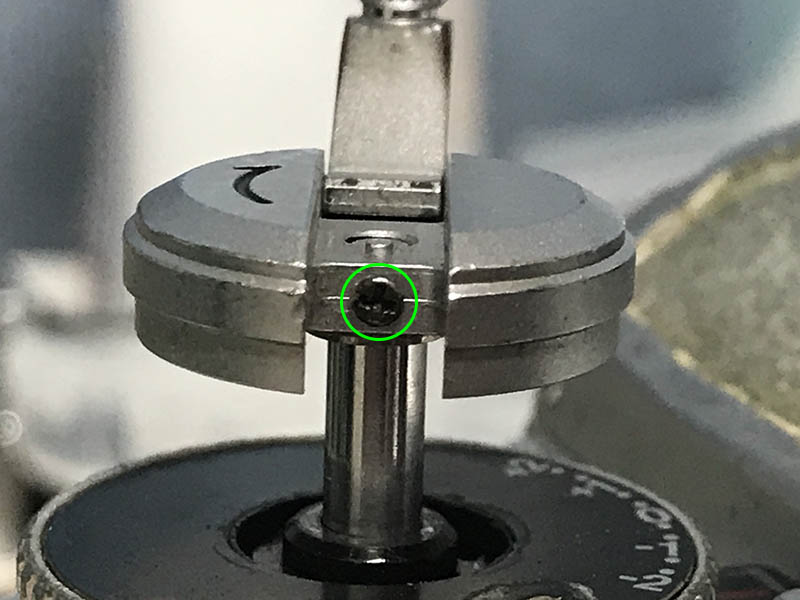
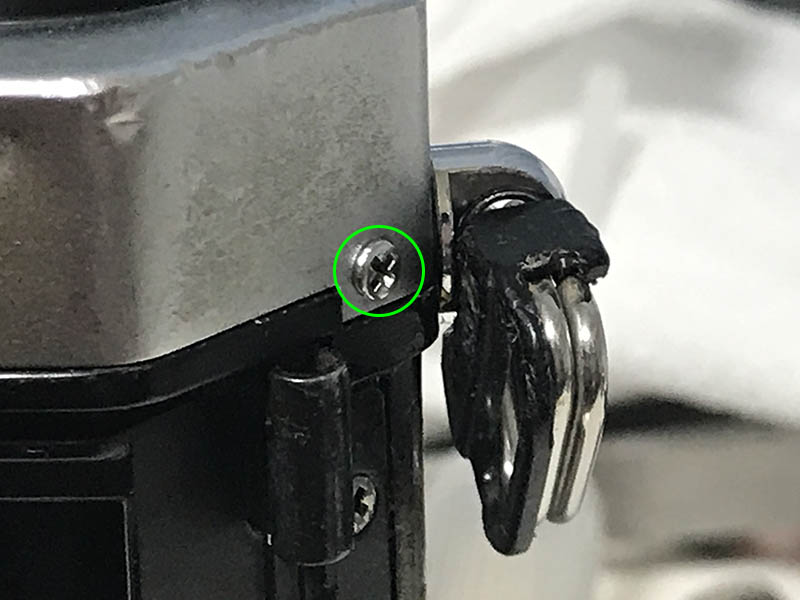
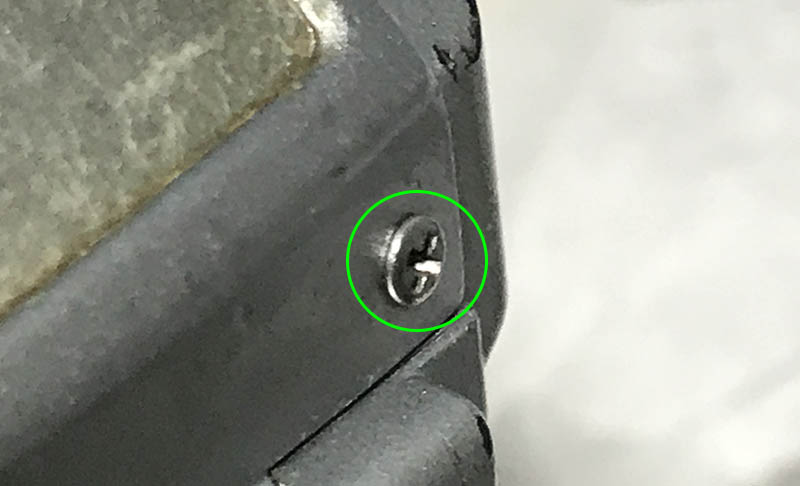
Loosen this screw so you can remove the rewind-crank.
Jam the fork with a wooden chopstick and unscrew the crank until it’s off.
This is the spring-lock of the crank’s handle, it sits atop a small bushing.

Just to make sure, I set the ISO to something that’s easy to remember.
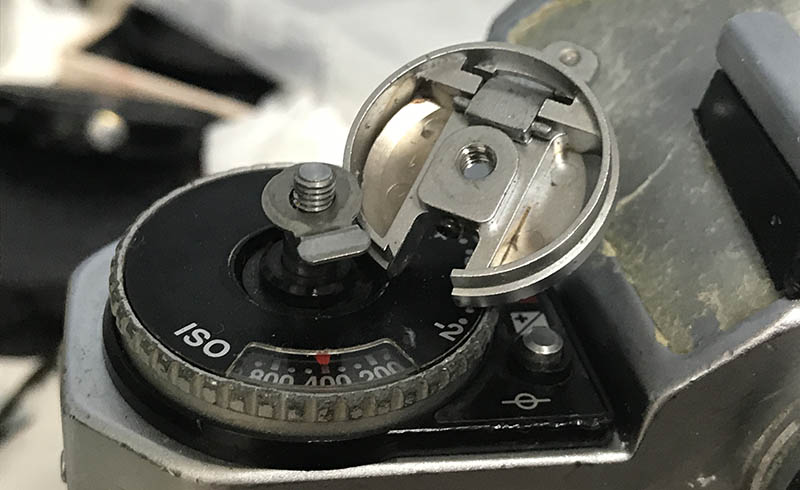
This can be difficult to remove, use a specialized tool for removing C-clips.
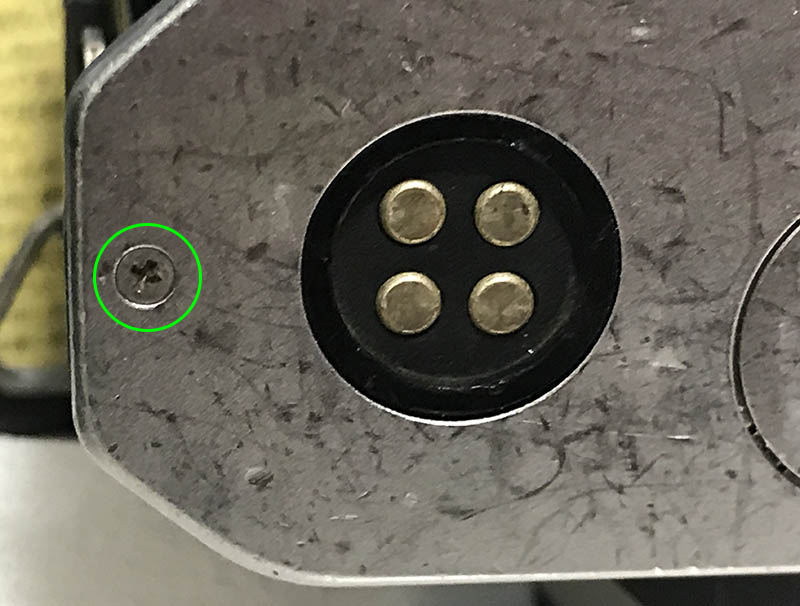
Once that clip is gone you can remove the ISO-selector dial. Be careful not to damage anything here, there are fine contacts in this area. Mine was filthy, you can find crusts around the rim which can can get worse if not cleaned. I think it’s a mixture of dead skin cells, salts from sweat and fungus. Wipe the contacts clean with a Q-tip soaked in alcohol.

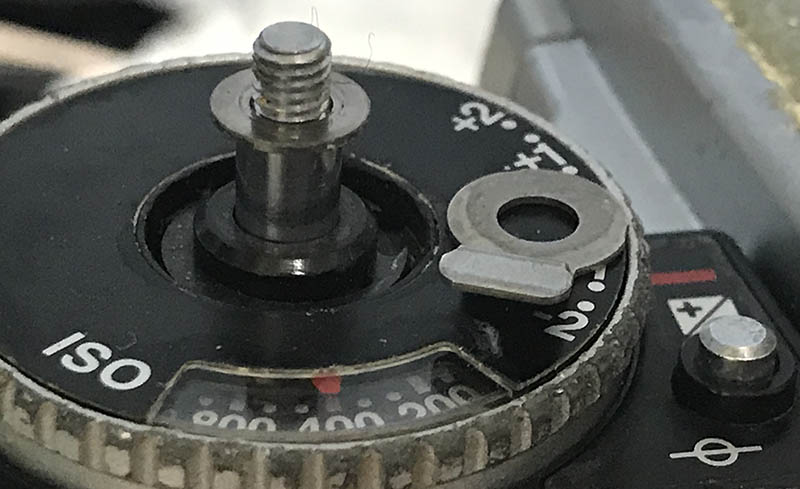
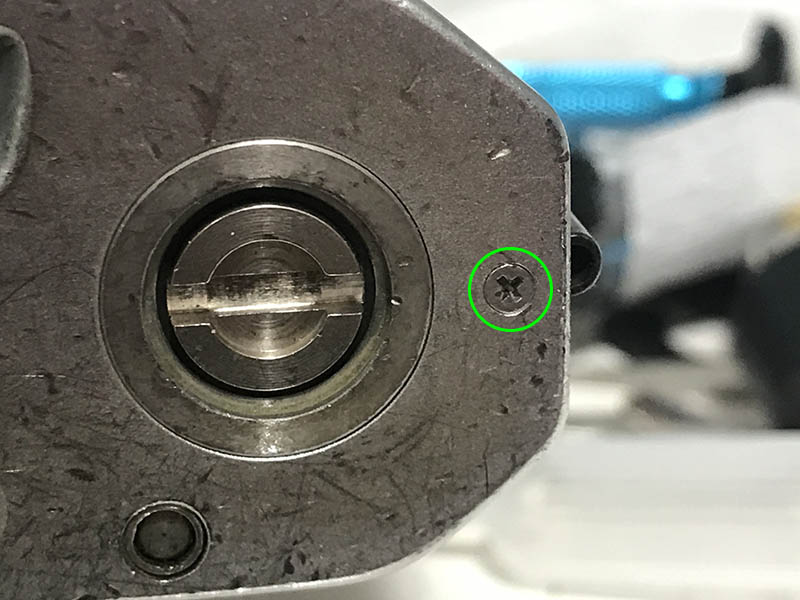
Extract these to remove plastic bezel of the ISO-selector dial.
It can easily be removed once the screws are gone.

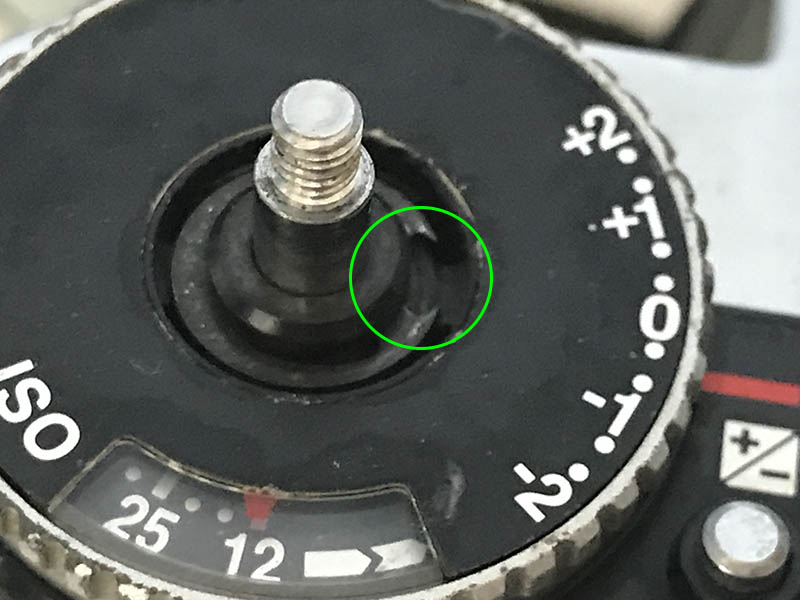
(Click to enlarge)
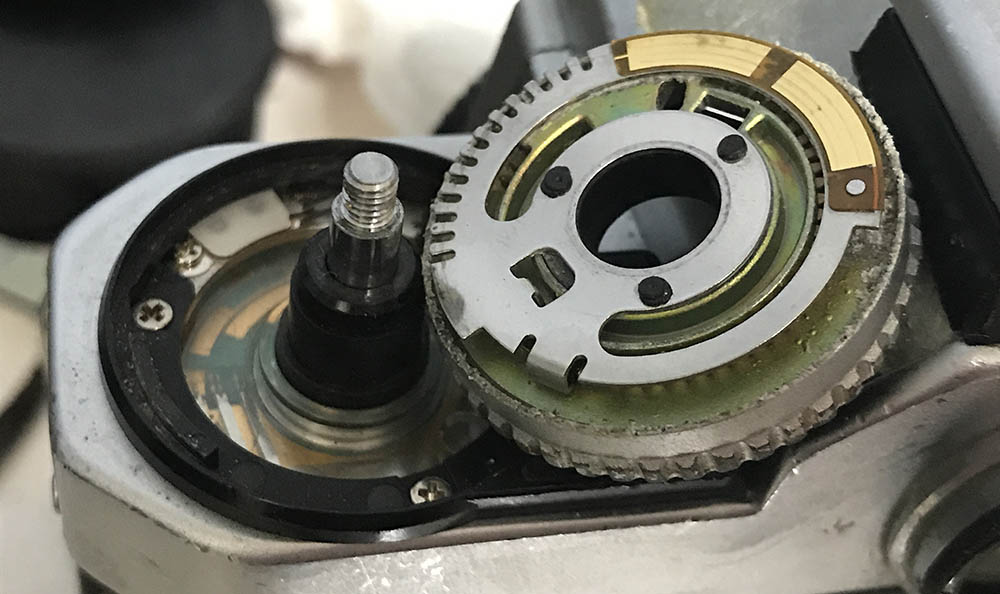
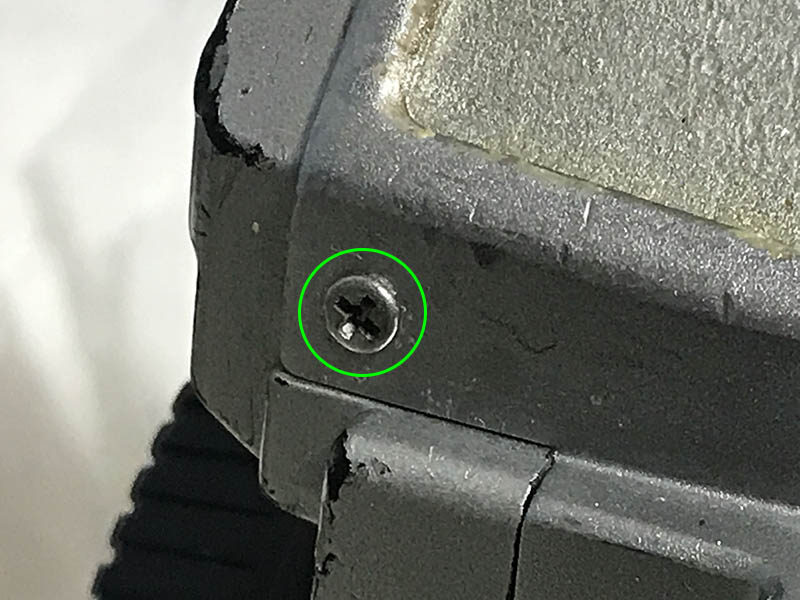
Extract these screws so you can finally remove the top panel. Make sure the drivers that you use fits perfectly so you won’t damage these.

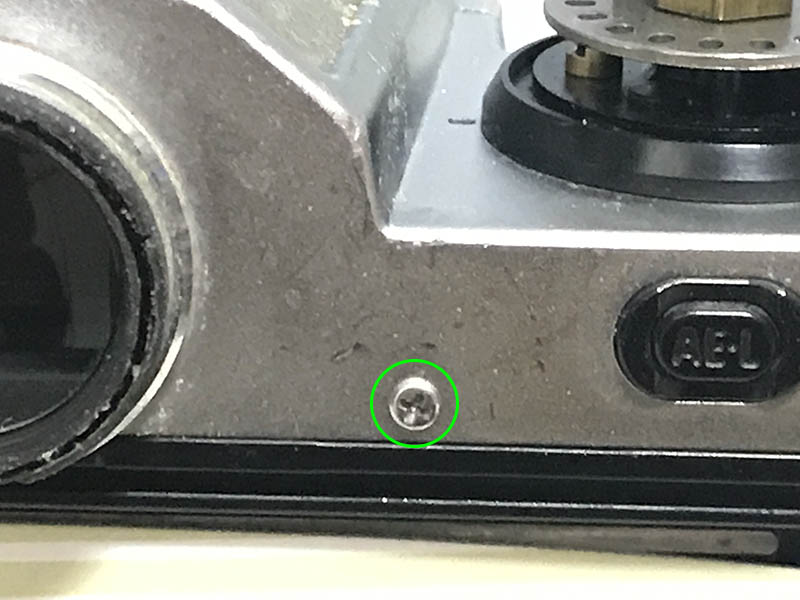
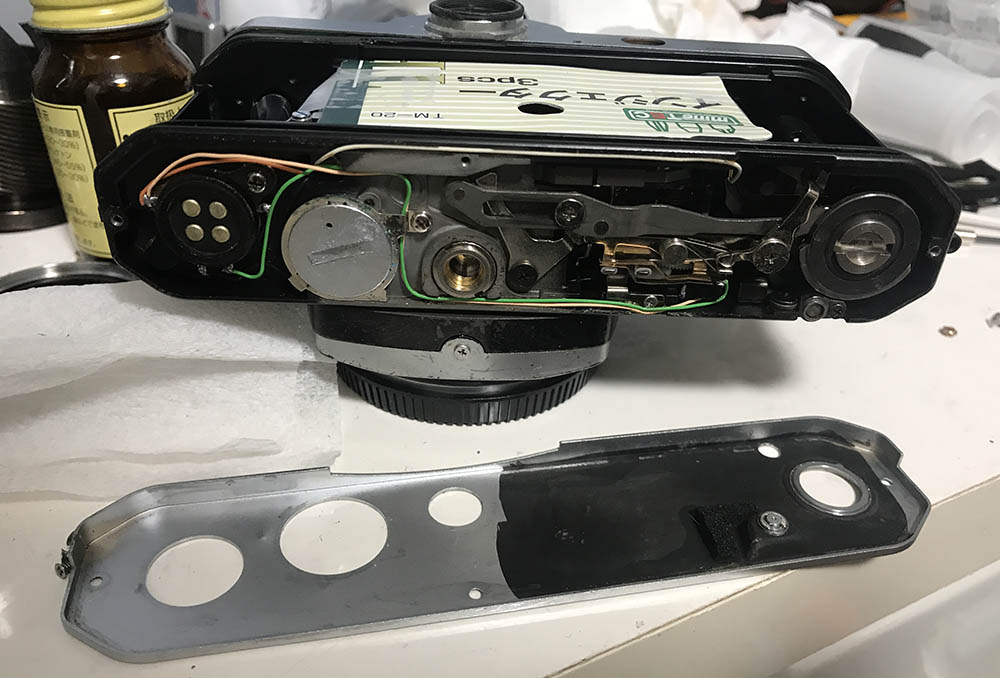
Be careful when removing the top panel so you won’t damage these. There’s a few soldered connections here that can be delicate as they’re connected to a strip of flexible circuitry. The best way to deal with this is to extract all of the screws at the hot-shoe part. Do this carefully, these screws can be tough to extract since they were sealed.

Here’s what’s underneath the top panel. There are plenty of electronics, you can easily damage anything here if you’re not careful and brick the camera. If that happens then you’ll have an all-mechanical camera. Clean whatever you can without disturbing the electronics. The AE-lock contacts should be cleaned, too. Condensation and dirt can make it conduct poorly.

(Click to enlarge)
Extract these to remove the bottom cover.
With the bottom cover gone you can easily clean the mechanisms found at the base of the camera. Wipe-clean and lubricate any moving parts. Use the best-quality oil and grease on parts that need them. Things that move using the power of your hand when you cock the shutter can be greased while the parts that operate on their own should be oiled at the pivots. Contact points should be greased, too. Never flush anything here, solvents can deteriorate or short any delicate parts. Your camera should operate a lot smoother once the important parts were cleaned properly, you’ll feel that as you advance it to the next frame.
I cleaned everything really well, soaking some of the parts in alcohol and it also had its prism wiped-clear of dust and minor fungus. The camera is now one of my most-used Nikons. It’s such a joy to use now that it’s clean and all of its parts now turn smoothly. It had its share of heavy-use as evident in its scratches and patina, I really don’t mind those at all since I consider them to be part of the camera’s history. Those make this even more interesting, it’s a unique camera because of the things that it went through.
Conclusion:
This was a fun project, I finally got the chance to own a Nikon FM3A for not a lot of money. Cleaning it made me feel safe using it unlike before where it smelled like feet and you could see brown deposits in the leatherette. That’s disgusting and unhealthy to use, I could’ve gotten sick just by using it. All of the time spent on cleaning this camera was worth it but I found a problem with it several weeks after I worked on it. It’s not a big issue, I’ll share what that is later in the article.
Clean the hinges properly. These usually contain plenty of germs, mine was so filthy that I had to clean it multiple times until the cotton came-off clean.

The leatherette cover was reinstalled after cleaning the back cover carefully until no traces of the old glue can be found. I used contact cement instead of the double-sided adhesive that was used originally for this. I reinstalled the window and its frame after, the tabs of the frame was heated so that what’s left of the tabs mushroomed-out. I had to glue it back for good safety, too.
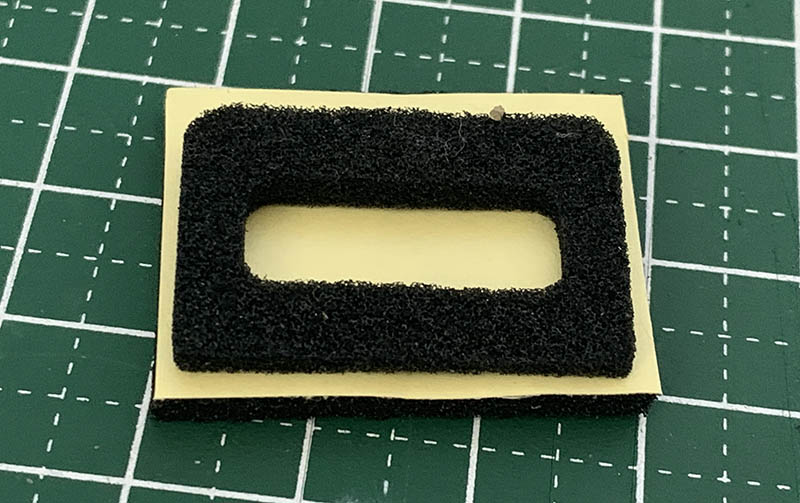
The old foam of the acrylic window had to be replaced so I made one from a strip of thick foam insulator used for the mirror-box.
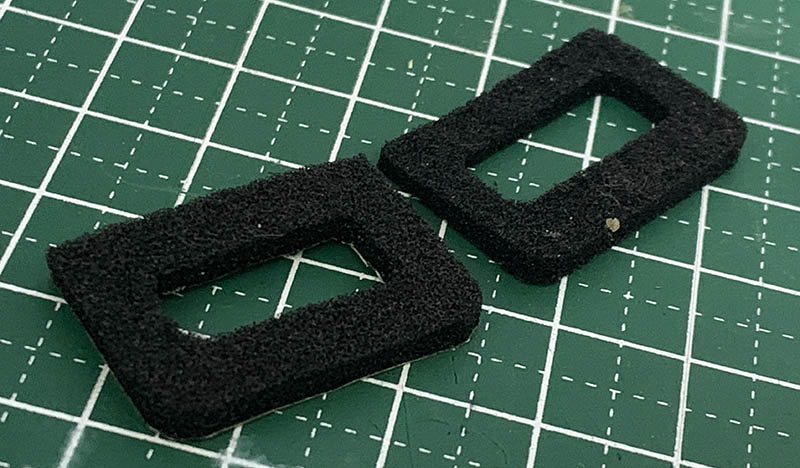
It’s close and it does its job well.
Everything works perfectly after cleaning my Nikon FM3A but there will be times when the mirror-box would get stuck. It’s a rare occurrence and hard to trace. Since it doesn’t occur often I just leave it like that, I suspect that it’s something to do with metering circuit, it only happens with the A mode. It’s not much of an issue and I can certainly live with it.
That’s it for this article. Did you enjoy it? It isn’t really a repair article, more like sharing how I cleaned this camera from a soiled machine to something I can use daily. If you enjoyed this article please share this online with your friends. If you loved this article, please consider supporting the site. It helps me a lot because it offsets the cost of hosting, I also use your support to buy, process and scan film for the blog. This keeps the blog alive so more people will enjoy it in the coming years.
Help Support this Blog:
Maintaining this blog requires money to operate. If you think that this site has helped you or you want to show your support by helping with the site’s upkeep, you can make a small donation to my paypal.com (richardHaw888@gmail.com). Money is not my prime motivation for this blog and I believe that I have enough to run this but you can help me make this site (and the companion facebook page) grow.
Leave me some tip?
Thank you very much for your continued support!
$2.00
Helping support this site will ensure that this will be kept going as long as I have the time and energy for this. I would appreciate it if you just leave out your name or details like your country’s name or other information so that the donations will totally be anonymous. This is a labor of love and I intend to keep it that way for as long as I can. Ric.

Apr 10, 2020 @ 11:38:47
Great article Richard, such a shame to see how the previous owner treated this camera. I’m glad that you could get your hands on it, bring it back to life, and share it with all of us!
Aug 13, 2020 @ 16:46:22
Very interesting! I have one FM3a but if used in A mode the mirror and the meter locks. To unlock the mirror you need to move the selector away from A, and to unlock the meter you need to move the selector all the way to B to turn it off. For what I have seen online this seems to be a recurring issue with this camera. I noticed you mentioned that your camera sometimes locks which is interesting. Any ideas on how to approach this repair? I also noticed that the meter locks every time I take a picture and also locks when the AE-L is pressed, the only way to unlock and make the needle move again is to select B to turn the meter off. The meter is basically useless. Could this be a progressive damage? Thanks for the great content.
Jan 26, 2021 @ 18:14:11
Hi Richard, nice, recenlty planning to replacre my wrinkled shutter curtain, any idea if the curtains used in fm3a is the same as those used in FA or Fe2? thanks
Nov 23, 2021 @ 11:41:52
Hi Richard, this is the best info I’ve found about working on the FM3a. I need to replace the top plate on mine, as years of using the DR-4 angle finder caused the eye piece rim to sheer off (it is peened in on the circular opening of the top plate, actually quite weak against screwing and unscrewing accessories, in my opinion).
I was planning to just desolder and re-solder the TTL wiring, but you mention removing the 4 screws. For what purpose are they sealed, and what with? Is it a simple case of thread locker? Also, was it a reverse thread for the removal of the advance lever? I think I’ll scour the FE2 / FM2 service manuals to check. (The FM3a repair manual says to consult those, rather than stating anything itself).
This will be the first time I’ve repaired a camera, although I’ve done dozens of old gaming consoles. Is there anything to watch out for during the simple replacement of the top plate? I’ve read all your prep articles! Cheers, (also in Japan, what a coincidence).
May 13, 2025 @ 15:22:42
Glad to read this, Richard, just to be aware of what’s under the covers. (frightful monsters!)
I have had my FM3a since new, and I guess it’s about time for new seals and a CLA. It’s difficult to trust just anyone, a feeling made worse by your article.
Do you have any recommendations as to where, in 2025, I might get reliable service? Camera continues to work wonderfully, with my only reminder of maintenance being a slight drift in the foam seal where the sticky side mounts around the film viewing window.
Thanks for any suggested repair depots.