
Hello, everybody! There is lots of hype today regarding the iPhone’s camera. Phone photography has evolved to new-heights and they take great pictures so many people just ditch digital cameras because smart phones made them obsolete. This is most apparent when it comes to compact digital cameras, if we are talking about cameras with a decent-sized sensor then that’s another story. The hype is true, I don’t see the need to carry a small camera anymore just to shoot mundane things, I can easily share my photos, too. Speaking of hype, we’ll talk about something that’s hyped in the internet so it now has a cult following. Let’s see if this will live up to its reputation.
Introduction:
The Nikkor 135mm f/2.8 Ai-S debuted in 1981, succeeding the Nikkor 135mm f/2.8 Ai. It’s a very popular lens because of its optical quality and utility. It is one of the best portrait lenses you can buy today despite production halting in 2005. Its production run is quite high, a lens that’s made for 24 years is a sign of success. The prices went down for a time but the internet hyped this recently so the prices went up again. Let’s find out if the hype is true in this article.

The build quality is top-notch but not as solid as the Nikkor 135mm f/2.8 Ai. The older lens was made tougher, with plenty of screws while this one was made with more-modern production techniques which includes the use of scotch tape and other cost-cutting techniques. While that is efficient it’s not what I would call “durable”. The Ai-S lenses were made with high quality in general but they pale in comparison to the earlier Nikkors when it comes to toughness, just read my other articles and you’ll see what I mean.
Optically, the Nikkor 135mm f/2.8 Ai-S is identical to the older Nikkor 135mm f/2.8 Ai except for what I assume to be better coatings. The later lenses made since or around 1999 should have Nikon’s Super Integrated Coatings applied to them. The older Nikkor 135mm f/2.8 Ai has a very good optical design and this lens inherits all of its wonderful qualities. It’s the last lens in the 135/2.8 family which is a shame because I can see this lens being a big hit if it were to be adapted for autofocus. This is not probably possible as the objective is quite heavy, it would require a bigger barrel just to house a more powerful motor to move the optics. While this lens’ optical design was inherited from the older Nikkor 135mm f/2.8 Ai the barrel is new, it’s built to Ai-S standards, making it lighter since it uses less parts. The main barrel uses lots of clever manufacturing tricks to cut-corners, resulting in less parts compared to the older Nikkor 135mm f/2.8 Ai.
Why would you want to buy this lens instead of the Nikkor 135mm f/2.8 Ai if they’re mostly similar? Well, if you like to shoot in P mode then it’s the only option for you. Like most Ai-S lenses, its focus-throw is shorter compared to their older variants. This makes it easier to focus in fast-moving situations. I don’t think you’ll notice much compared to the older model but that’s how it is on paper.
Our friend Roland Vink has this to say about the issue:
“The focus throw of the Ai-S version is 180°, compared to 270° for the older versions (only 2/3 as long). The focus throw is still adequate – it’s still longer than the 170° focus throw of the Nikkor 105mm f/2.5 Ai which is generally regarded as having a good focus throw and much longer than the 140° of the Nikkor 105mm f/2.5 Ai-S. The Nikkor 200mm f/4 Ai and the later Nikkor 200mm f/4 Ai-S has identical focus-throw.”
Thank you very much, Roland Vink. Your guidance is a treasure to all of us.

The front element is quite huge but Nikon still managed to utilize the 52mm filter threads that was the standard of its day. This makes it easy to buy and collect accessories for it.
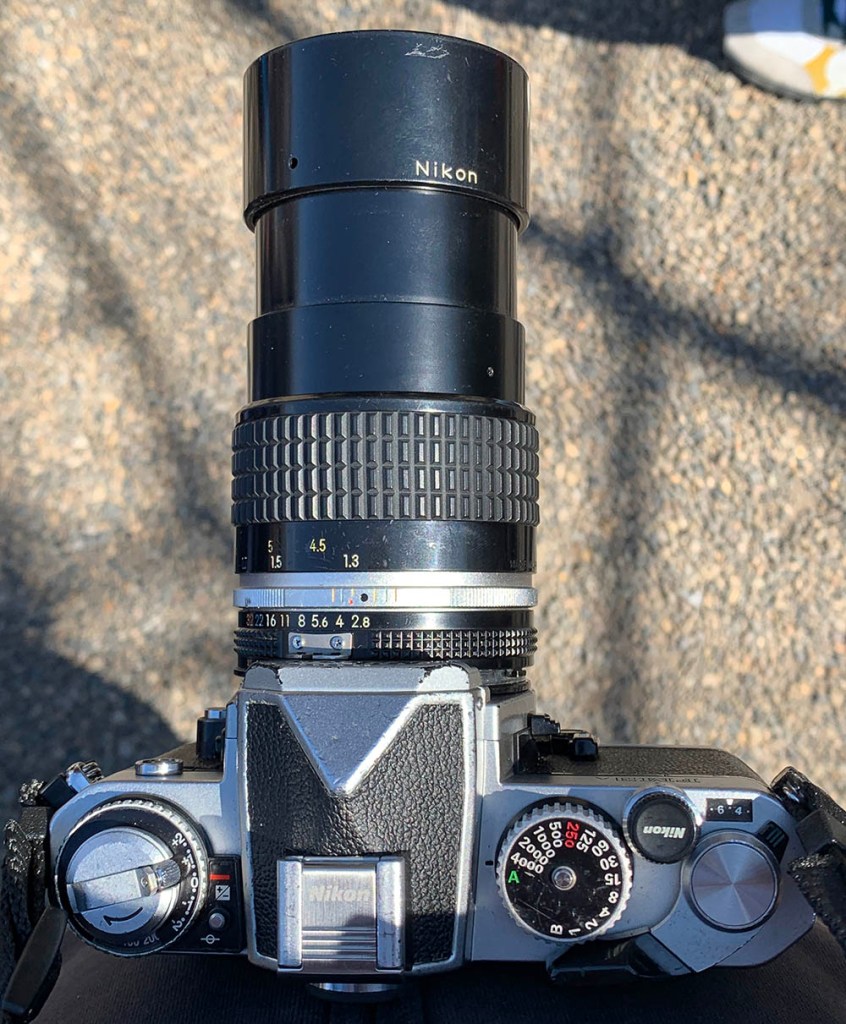
It still retained the built-in hood which is a tradition for this lens family. It’s handy but it can be knocked-off position rather easily. It’s not flimsy by any standards, it’s just not as rigid as the screw-in variety. Despite that I will still prefer this over anything as I don’t need to carry or buy a separate hood for this. I recommend that you always deploy it while shooting except for times when you will need to use a circular polarizer. The focusing ring’s rubber is wider with this lens compared to the older Nikkor 135mm f/2.8 Ai.

Being an Ai-compliant lens it’s able to be mounted on newer Nikons. You’re going to love using this with all of your Nikons from the Nikon F to the new ones that are current-models. It balances perfectly with most Nikons but the smaller, plastic ones such as the Nikon FG will require a motor-drive just to be able to balance this well. The handling is as-expected, it’s minimalist and practical design makes this easy-to-use for any occasion.
This is a great all-around lens if you can live without autofocus and VR. The Nikon Z series all have in-built stabilization so that takes care of VR but you will still have to deal with manually-focusing this lens. I won’t use this lens for shooting fast-paced sports or events where my subjects are moving in a fast manner. You can anticipate their movements or pre-focus but you will get better results with an autofocus lens so long as its motor is fast-enough to track your subjects. If the lens can’t autofocus fast then it’s better to just focus your lens manually. In my experience, even a fast-focusing lens won’t track a subject reliably in tough situations such as lowlight or backlit scenes so I end-up manually focusing instead.
Let’s now see some sample photos taken with this lens. Learning about your lens is important because you’ll know its strengths and weaknesses. You’re going to know when to use it and when not to. You will learn to maximize it and workaround its weaknesses. These photos were taken using a Nikon Z6, I took these from f/2.8, f/4, f/5.6 and f/8 from left-to-right. These are the most common apertures that people will want to use this lens with, I assume. You will also see the most changes happen in these apertures, smaller apertures tend to look the same except that they will show the effects of diffraction as you stop the iris down further. I am not interested in them so I assume that you won’t be, too.


(Click to enlarge)
Vignetting can be observed wide-open, it’s not terrible but it can be heavy if you under-exposed your photo. It’s mostly-gone by f/4, you won’t see it from f/5.6 on. Sharpness is excellent wide-open and the resolution is sufficient to support it. You’ll see some chromatic aberration in your shots, ranging from slight to strong depending on circumstances. Spherical aberration can also be seen but it’s totally acceptable in my opinion, it adds a “special layer” to your photo making it look more interesting. Stopping it down to f/4 helps a lot in taming sphero-chromatic aberration. Sharpness improves somewhat, it is already good wide-open but the improved resolution at f/4 enables this lens to resolve finer details. The wider depth-of-field also makes things look sharper, too. The lens is operating at its peak at f/5.6 and f/8 is amazing. The only reason to stop it down beyond f/5.6 is to get better corners. The corners look really good by f/4 but stopping it down to f/5.6 makes it even better. It’s a lens with a thin plane-of-focus, if you want more things in-focus it’s better to stop the iris down further to f/8 or f/11 depending on your needs. If you’re shooting in a studio these apertures will be your go-to apertures if you are shooting with strobes.

The bokeh quality is amazing, it deserves to be part of the 135/2.8 family of Nikkors. No lens in this family has bad bokeh quality, they’re all know to be the better Nikkors in this department. It’s sharp wide-open, very sharp but it’s not too-sharp as to make your subjects’ skin look like stucco.

Foliage and twigs are traditionally difficult subjects to render but it’s not a problem for this lens as the bokeh characteristics looks smooth. You will not see any clumping or smearing in the defocused areas.

Here’s another photo showing how good it handles twigs and foliage. This is also a nice photo showing how well it can isolate your subjects, it can make your subjects stand-out from their backgrounds.

You’ll find traces of spherical aberration in this photo but it helps make the photo look more “delicate” as it wraps the bright spots with a slight glow. It is best used for shooting portraiture or jewelry, helping make your subjects appear like they’re in a “dreamy” setting.

Sharpness is top-notch, the resolution is also very good. It’s able to resolve a lot of smaller details even wide-open, this makes it tempting to use this lens at wider apertures.


(Click to enlarge)
Here are more photos that I took with my Nikon Z6. It’s an amazing lens, all the hype surrounding this lens is all true. It’s one of the best lenses you can have for portraiture even today and you can buy one for less than what you will have to spend on a fancier lens that can autofocus. The quality of your photos have little to do with your gear, even if your lens is all-manual it can give you great photos so long as it’s good-enough.
Let’s now see some photos that were taken with film. This lens was made to be used with film so it’s only fair that we judge it with its intended medium. Film has a unique look that’s difficult to simulate with a digital camera and that’s because of film grain. Grain looks different to noise, some flaws won’t appear in film since grain helps mask it. Film is not as reflective as a digital sensor, that helps with internal reflections coming from within the camera to some degree. I personally love shooting with film, it’s “romantic” and for me, it’s closer to “real photography” if there’s such a thing. These are all my opinions so don’t take what I said as the truth.

This is a very good lens for use with film. It gives you that nice, vintage look that many people are after these days. The rendering is delicate and you’re going to get addicted using this for portraiture.

It can be hard to focus at times, specially at f/2.8 where the depth-of-field is thin. If your subject even moves a bit you’ll lose your focus. You’ll see some chromatic aberration in this photo around the tiara but it adds to the photo instead of making it ugly.

You’ll see chromatic aberration at the hand of this mime, that’s ok since the area where it appears is at the defocused area. It will be troubling if you see it somewhere near your plane-of-focus, that’s not a sign of a good lens.

Stopping the iris down by a bit will give you sharp, high-contrast photos. It’s amazing what an old, obsolete lens can do. Pay attention to his glove, you’ll see some bits of chromatic aberration but this is an extreme scenario so it’s natural to see some of it in the over-blown parts of the frame.

If you nailed your focus you’re treated with a nice, sharp photo. His hair is rendered beautifully, you can see how delicate his hair looks. It looks more like a wig to me but that’s not the issue here.

The details were rendered beautifully here, her straw hat looks nice, it’s an amazing photo if you ask me. The 135mm focal length enables you to shoot nice candid photos of your subjects.

This is how good this is when it comes to subject isolation. You’ll be able to single-out your subject in a crowd.

Stopping the iris down for more depth-of-field is important and you will get a sharper photo in the process, too. Even at smaller apertures you are going to get nice subject isolation from this lens thanks to its longer focal length.

This photo shows the foreground blur characteristics of this lens. There are some lenses that render better background blur than foreground blur, this one does both really well. You’ll be amazed at how beautiful the rendering of this lens is.

Here’s a good example of why you should stop the iris down. This would’ve been a better photo if I have a deeper depth-of-field. The workaround is to have the faces of your subjects roughly at the same plane so you can get the faces in-focus while still maintaining a wide aperture.


(Click to enlarge)
Here are more sample photos for you to enjoy. I love using this lens a lot, it’s very addicting to use it and you’ll find yourself wanting to use it if you don’t have it in your bag with you. It’s a fine optic that will last the test of time, it’s going to be relevant many decades after this article’s published. People will still be talking about this lens by then and I imagine that people will still be using these to take great photos.
Will I recommend this lens? Yes, but for a lot less money you can purchase the older Nikkor 135mm f/2.8 Ai which is almost the same lens as this. This one has been hyped in the internet so the prices for this remain high. Don’t let the internet fool you, the Nikkor 135mm f/2.8 Ai is just as good as this. It’s the best deal in town. If you want an even better deal, the Nikkor-Q 135mm f/2.8 Auto is an even better lens. It’s not as good as the Nikkor 135mm f/2.8 Ai but you buy it for a special reason, it has a magical quality unique to it and only people who know about it look for it. I hope that my advice helps save you money and you can use that money to buy more lenses or a flash. What variant you end up buying is irrelevant, the most important part is it should have a factory-supplied Ai-ring. This will enable you to use it with cameras with the Ai-interface. Without it, you’ll just damage your camera when you mount it. You can’t go wrong with any of these lenses.
Before We Begin:
If this is your first attempt at repairing a lens then I suggest that you check my previous posts regarding screws & drivers, grease and other things. Also read what I wrote about the tools that you’ll need to fix your Nikkors.
I suggest that you read these primers before you begin (for beginners):
Reading these primers should lessen the chance of ruining your lens if you are a novice. Before opening up any lens, always look for other people who have done so in Youtube or the internet. Information is scarce, vague and scattered (that is why I started this) but you can still find some information if you search carefully.
I highly recommend that you read my working with helicoids post because this is very important and getting it wrong can ruin your day. If I can force you to read this, I would. It is that important!
For more advanced topics, you can read my fungus removal post as a start. This post has a lot of useful information and it will be beneficial for you to read this.
Disassembly (Main Barrel):
I was in the impression that this lens is similar to the Nikkor 135mm f/2.8 Ai in terms of construction but I was wrong. This lens deserves its own article, the construction isn’t anything close to what I have seen so far. This isn’t an easy lens to work with if you’re a beginner but it’s not difficult for those like me either. I won’t recommend this to a beginner to work on, you need tools and experience to tackle this. If your lens needs repair, send it to a repairer. It’s cheaper that way since you won’t have to invest in tools and lubricants. I would advise you to ask your friends for a reliable repairer, there are many cheats out there who’ll claim that they can fix everything but they’ll butcher your lens. If you found a repairer who’s honest enough to tell you that he is not familiar with this lens, tell him to view this article so it can guide him to a successful outcome.

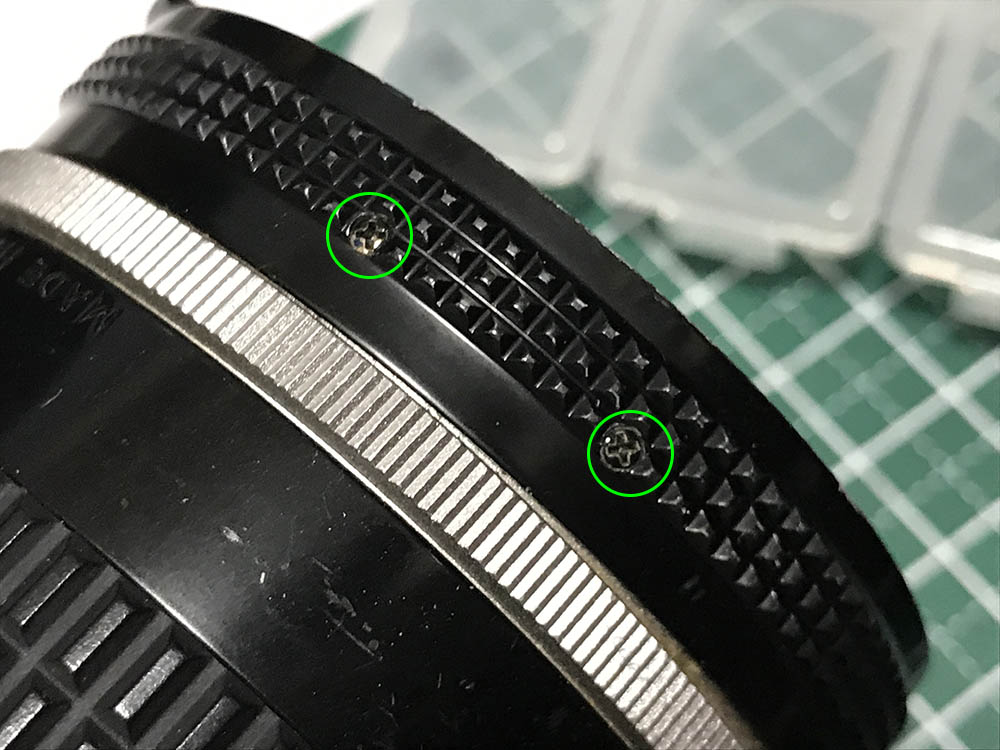
Carefully extract these, use only JIS drivers for this or else you’ll strip their heads. If you haven’t seen my article on how to remove bayonet screws you should read them now. Many people strip these because they lack the right tools and knowledge, they get stuck and then sell the lens online. Do not do the same mistakes and read my article.

The bayonet mount can be easily removed once its screws are gone.
The aperture ring can’t be removed because these connect it to the aperture fork underneath it. These can be difficult to remove, you may have to use a soldering bolt to heat these or apply a strong solvent to soften their seals. If you stripped or decapitated these screws then it’s bad news for you.
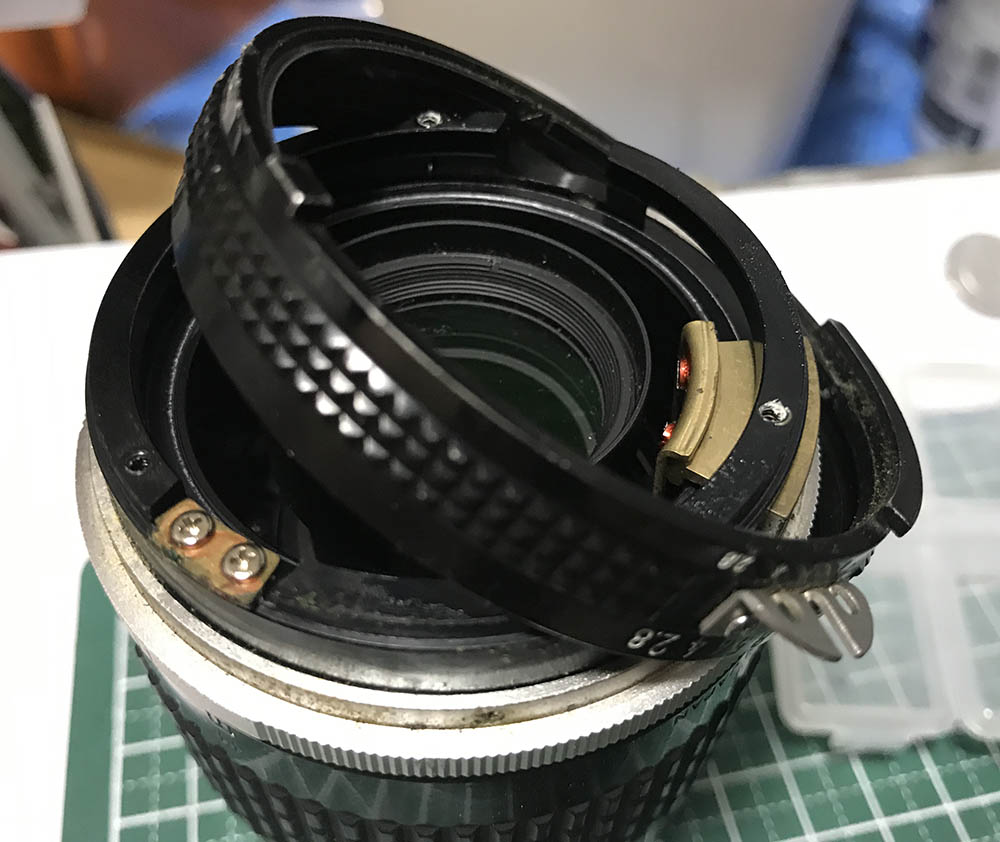
The aperture ring can be easily removed once those screws are gone.
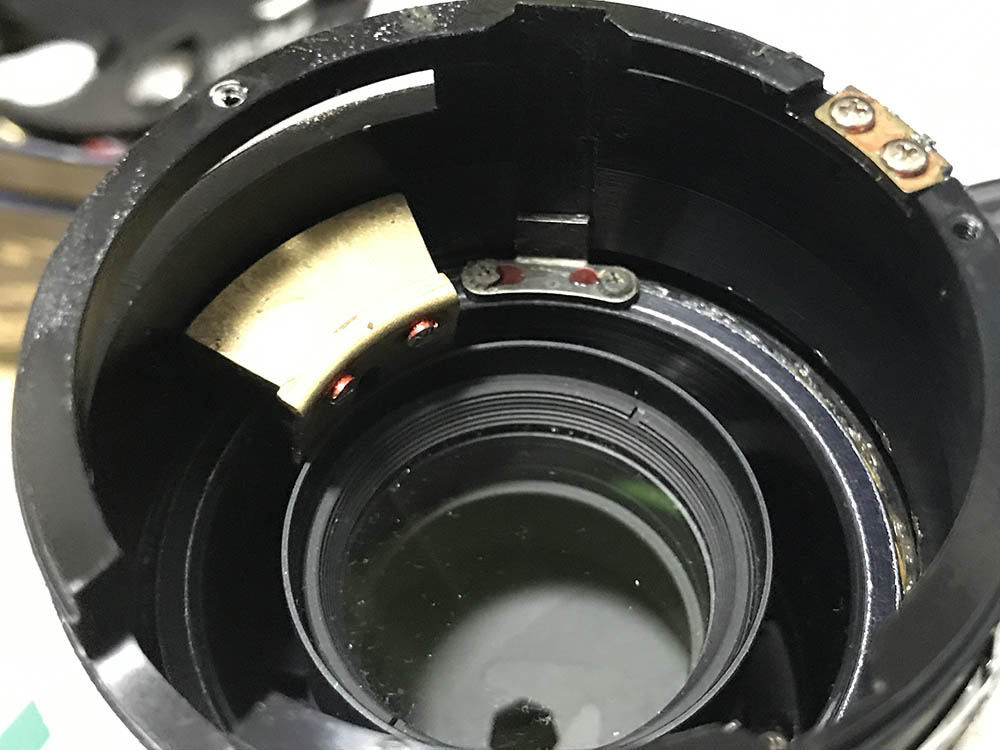
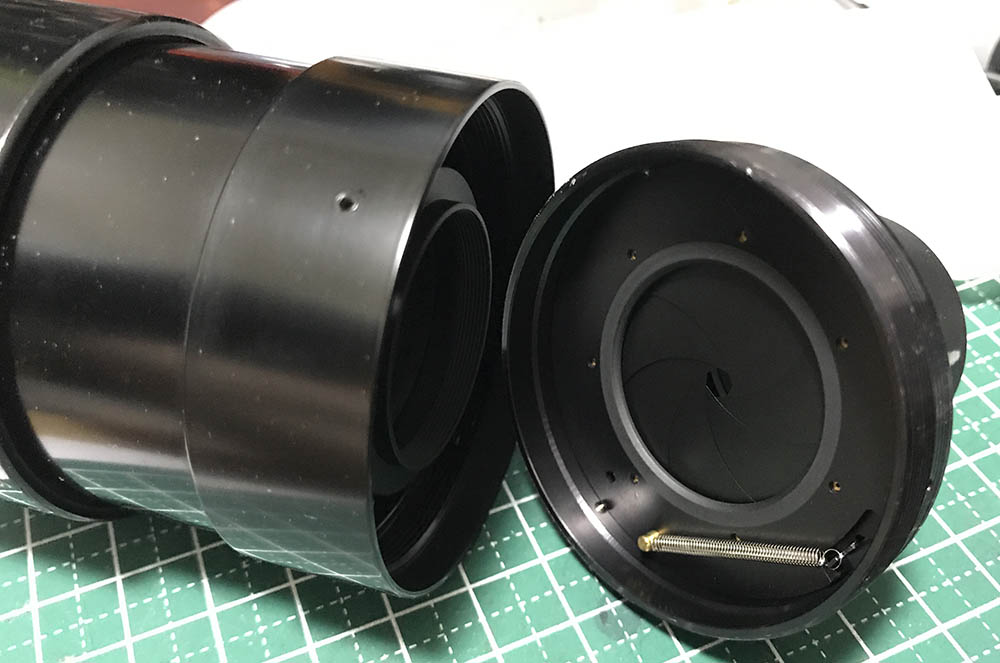
This is the aperture fork, it couples the aperture ring to the iris mechanism. Turning the aperture ring will enable it to control the size of the iris thanks to this.
The objective is being secured by these screws, extract these to remove the objective from the barrel.

Here’s another one.
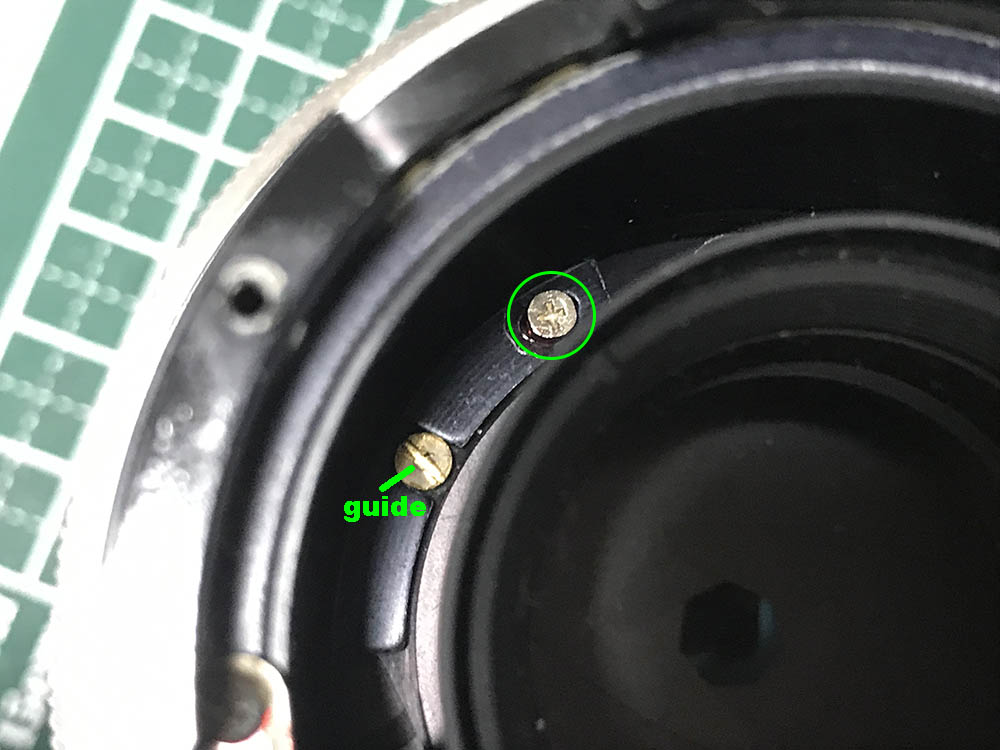
This is the last one. Note that there’s a guide screw here, I am not sure if this is an eccentric screw that’s used for fine-adjustments but leave this alone.
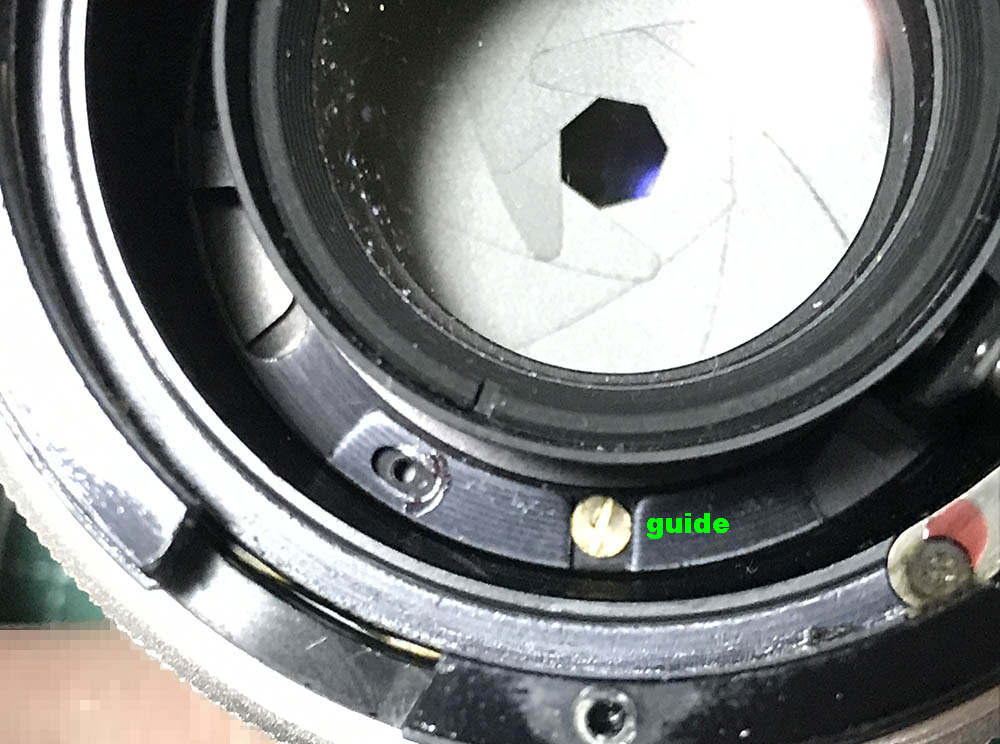
The objective can be adjusted in small increments, my suspicions are right, the guide screw is most likely an eccentric.

Pull the objective off from the main barrel. Store it in a safe place so it won’t get damaged.

The grip can be removed once these screws are gone, there are 3 in total.

You may have to remove the detent spring, too. Don’t forget to note or mark its position so you won’t have a hard time adjusting it later.

The grip can be easily removed. In most, if not all Ai-S lenses it functions as a limiter to prevent the focusing ring from turning beyond its range.
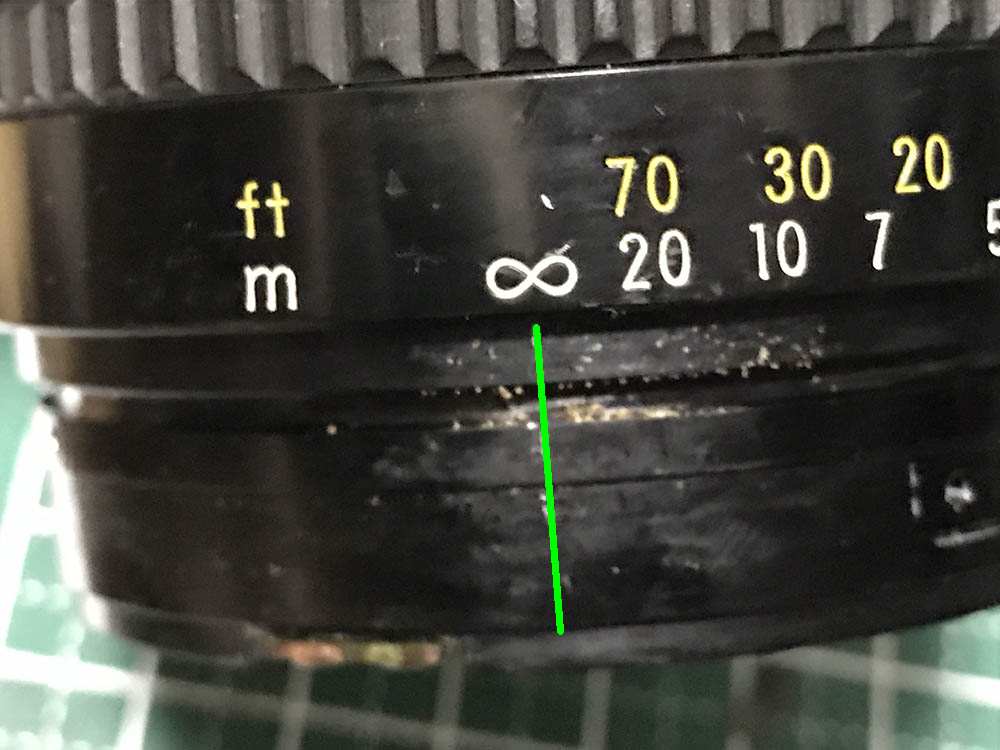
This is the position when the focusing is at infinity. Note this position as this will become handy later. You’ll have to work on the barrel while it’s at this position from now so you’ll have a point-of-reference.

Also note the height of the helicoid key, this is also a reliable reference.
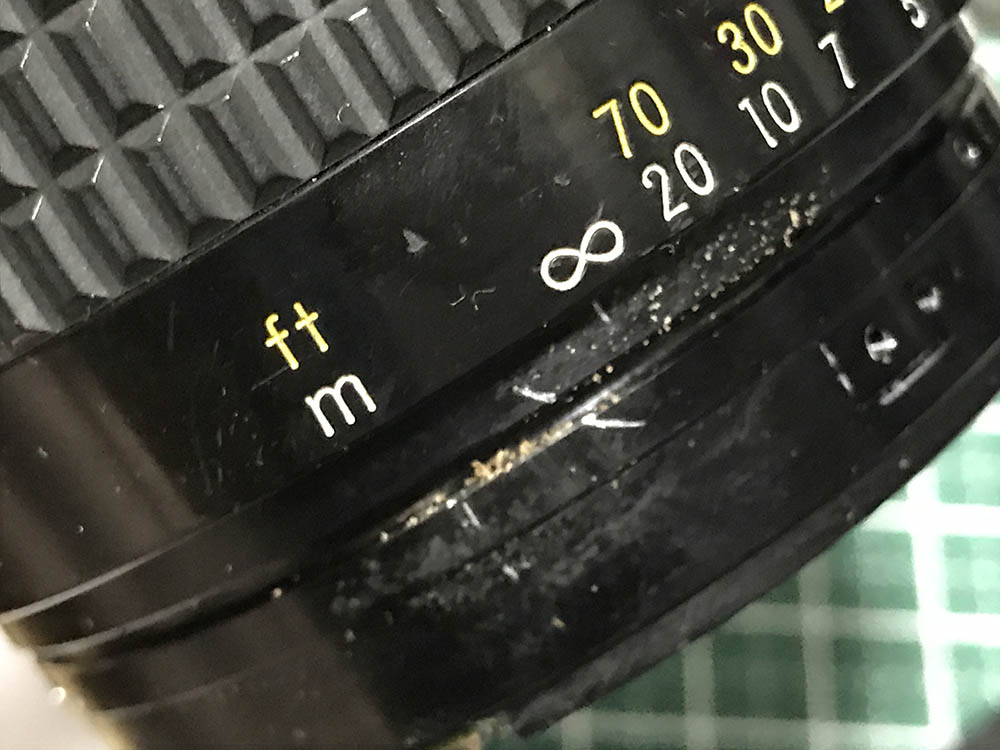
Collapse the barrel fully and make a diagonal line so you’ll know how to put this back again later. If you can reproduce this then you’re all good.
Remove the rubber grip carefully by running a toothpick underneath it. The toothpick should lift it and separate it from its bond. Be careful not to tear it as you remove it, the rubber can be brittle due to age and wear.
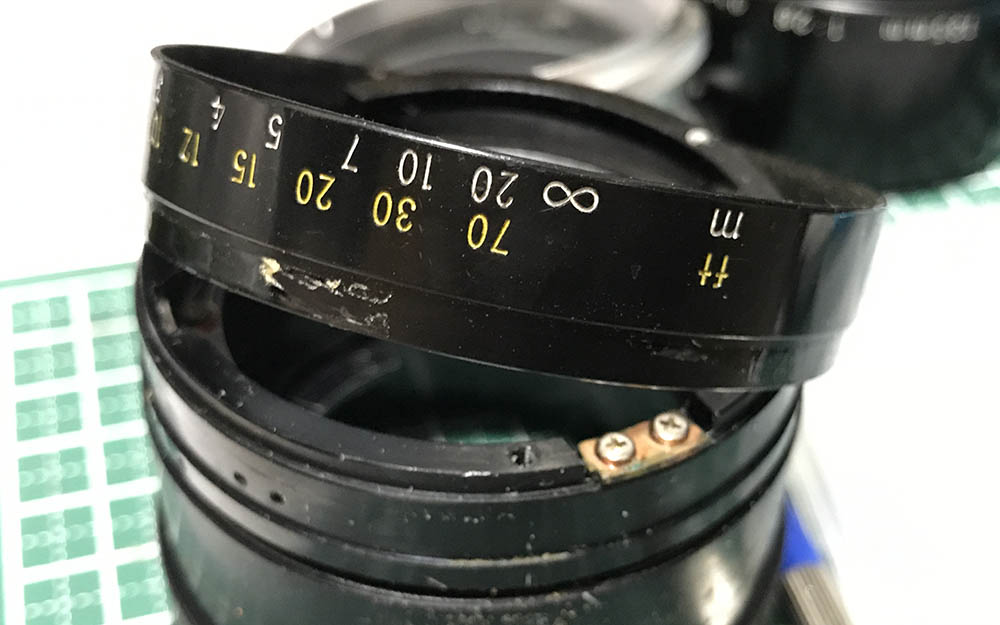
The distance scale can be removed once its tape is gone.

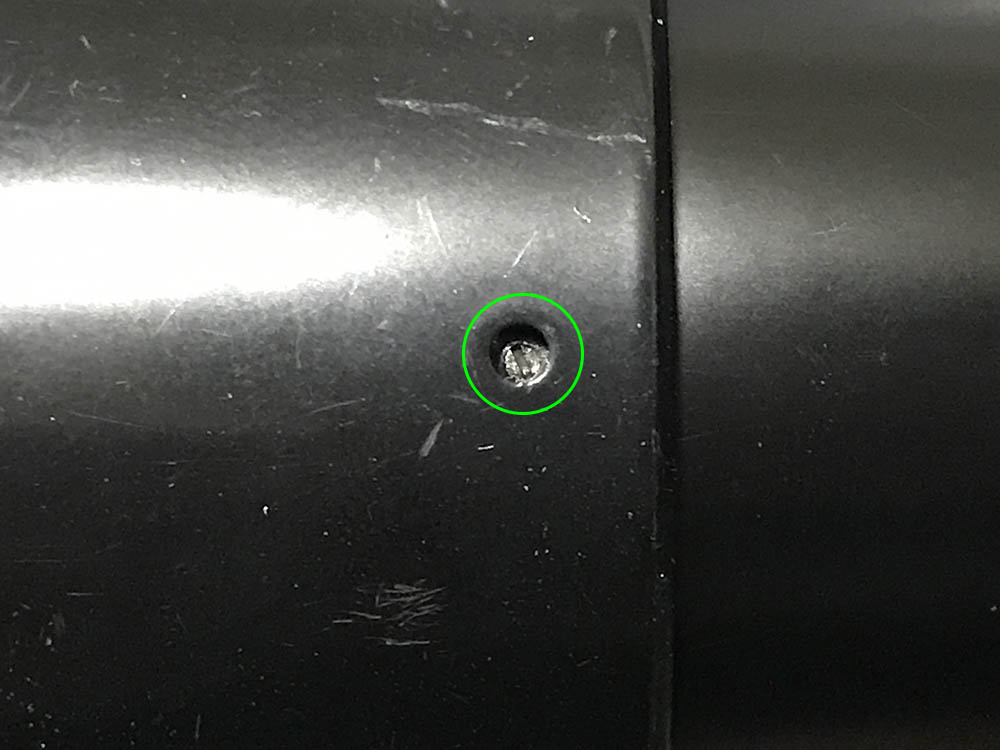
Carefully extract these so you can remove the helicoid keys. There are 2 of them so you don’t want to jumble these up, you’ll have to put them back to their original places later since these are broken-into their respective slots. A small scratch at the back of the keys is enough to serve as reference.
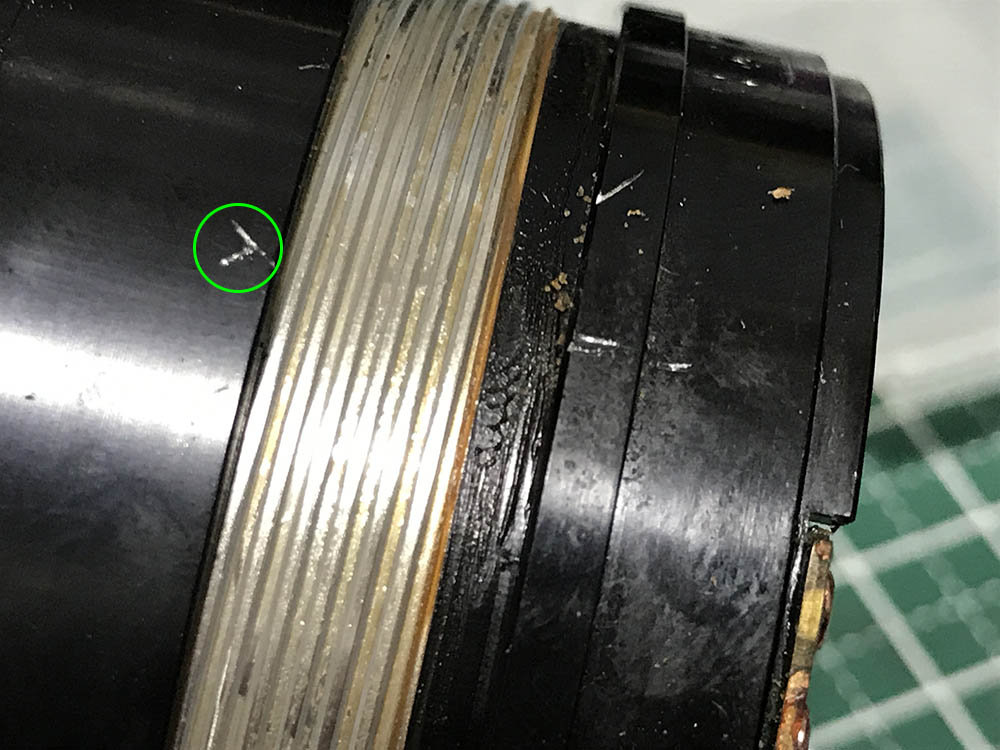
Once the helicoid keys are gone you can separate the helicoids. Mark where they separated, this is also the same spot where they should mesh. If you’re new to lens repair, read my article on how to work with helicoids so you’ll know how to handle this. Many people get stuck here because they did not take any notes or made any marks.
The helicoid keys constrain the helicoids so they will turn at the same rate. This makes the barrel extend or retract depending on the turn direction.

This is how it separates.
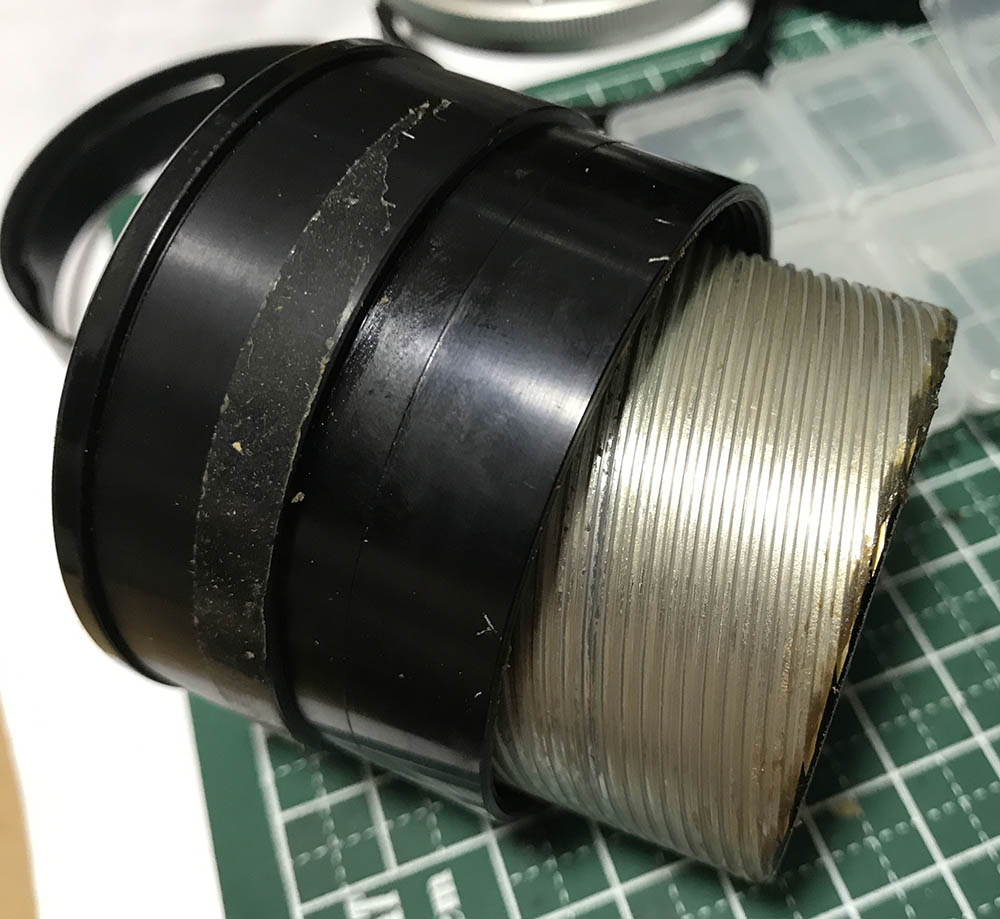
Do the same thing for the inner helicoid. It may be more difficult to spot the place where they separated but you should still note the position where the helicoids separated.
Clean the helicoids very well and don’t leave any residue. Use a grease that’s not too-thick or you’ll end-up making the helicoids stiff and focusing it can become a problem. Don’t apply too much or the excess grease will end up in the optics or iris mechanism. This is a common problem and you can avoid it by only applying the right amount of grease. Applying too-little isn’t good either, the helicoids will feel loose as if the helicoids are dry.
Disassembly (Objective):
This section isn’t strictly confined to the objective, I grouped the disassembly of the front barrel along with for convenience as it makes more sense. This is typical of many Ai-S lenses wherein smaller assemblies are combined and grouped into a larger part. Working with this assembly can be scary since it has large chunks of glass that can be too-heavy to handle with a lens sucker so I used a stronger tool in the form of a common suction cup that you use in toilets to hang toothbrushes and the like. Its construction isn’t difficult to understand and everything made a lot of sense.
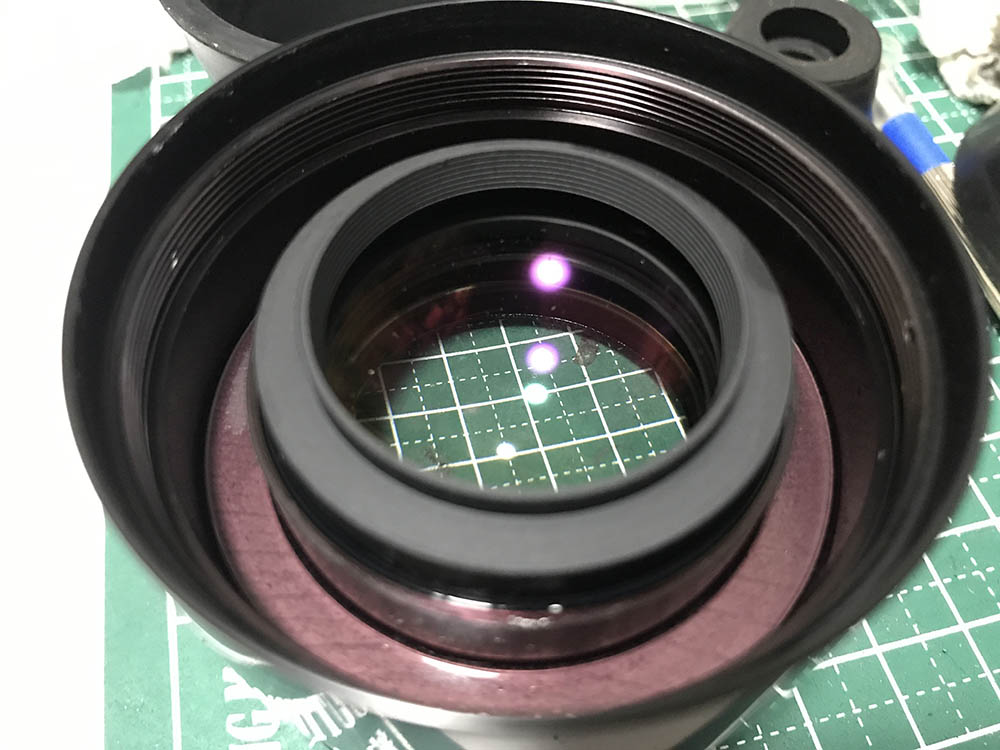
Locate this screw by turning the extended hood. Carefully extract it so you can remove the front ring.

The front ring can be unscrewed but it can be tight, a drop of alcohol helps a lot in dissolving its seal.

Removing the front ring will enable you to remove the built-in hood. There is a strip of felt glued to a thin strip of brass. This helps keep the hood in its place once extended.

The front element is secured by this retainer. Place a drop of alcohol at the threads to soften the seal and use a lens spanner to carefully unscrew this.

Removing the retainer will enable you to remove the front element.

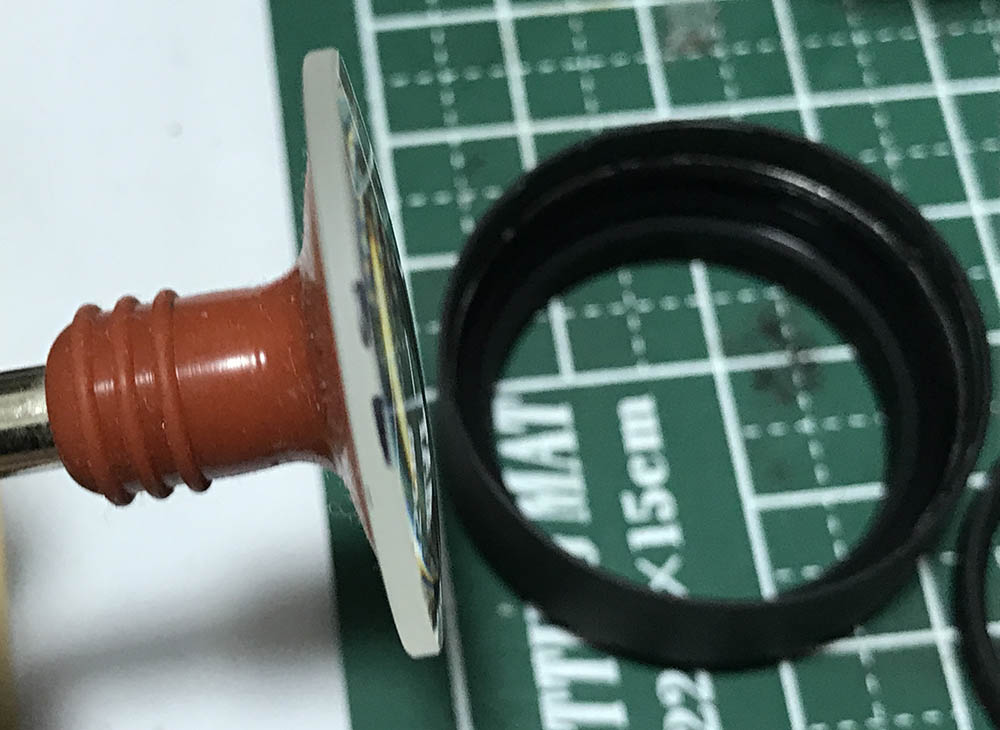
Use a lens sucker to remove the front element.

There’s a spacer underneath the front element. Carefully pick-it-off and you should note which side should be facing front.

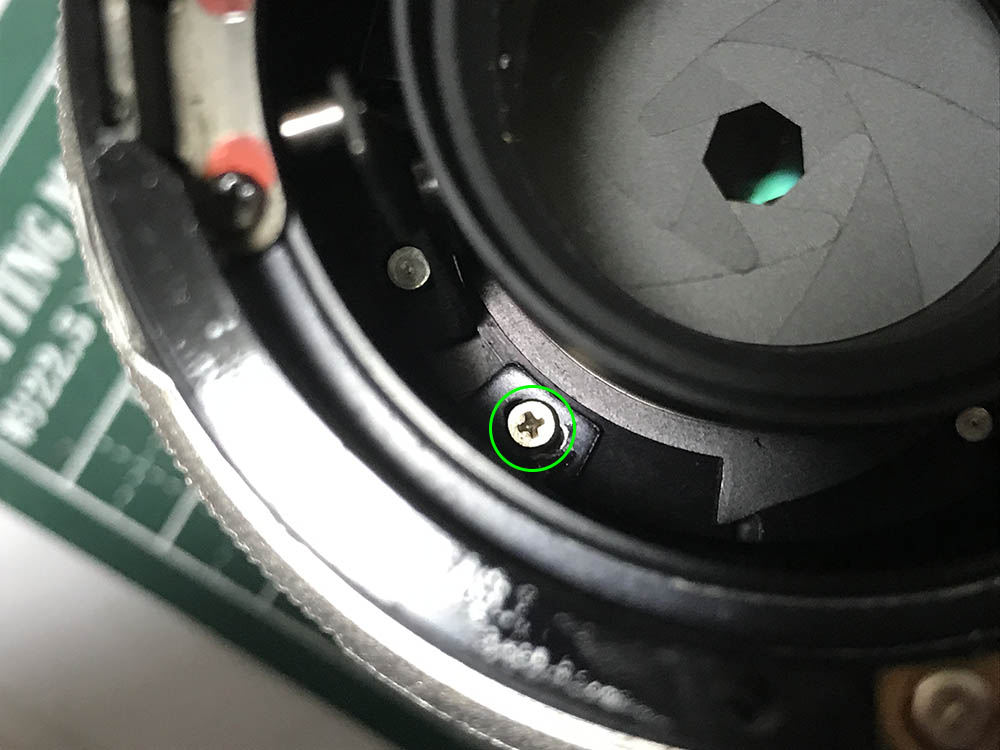
Extract this to unscrew the iris mechanism from the front barrel assembly.
Carefully separate the iris mechanism and make sure not to damage any of the blades.

The last element is housed in this assembly, carefully unscrew to remove it. Store it in a safe place and work on it later.

The 2nd element can be extracted with a lens sucker.
The 3rd and 4th elements were cemented to form a single unit. Avoid using solvents near this to prevent it from damaging the doublet. The vapor alone may be enough to dissolve parts of the cement if the solvent is potent. This is secured by its own collar which can be easily removed with a rubber cup. Don’t use metal tools here to prevent damaging anything here.

It’s glued to its housing so unscrewing the housing will enable you to extract the doublet along with it, be careful not to scratch it in the process.

The rear element is secured by this retainer.

It can be difficult to remove since it’s sealed. A drop of MEK to its threads is all it takes to dissolve the paint used to seal it. It make take some time for it to work and you may have to apply it several times. Once it starts moving, I used a lens spanner to remove the retainer while making sure that I do not scratch the rear element.
Extract the rear element using a lens sucker. I marked the front-edge of the rear element so I will know which side should be facing the front.
You don’t have to disassemble everything just to clean your lens, only clean what you have to. I had to dismantle everything because my lens was dirty but If it wasn’t then I would only clean the things that I need to. This is not something that I normally do but this is a good chance to show you how to dismantle everything completely (apart from the iris mechanism). If you’re not sure how to clean fungus in a lens, read my article on cleaning fungus.
Conclusion:
I had a very good time servicing this lens. I thought that the construction is similar to the Nikkor 135mm f/2.8 Ai but it turned out to be different. That’s something good as I am not wasting my time writing this article for you. It’s a nice, compact lens for nearly-everything, I’m glad that I got one for cheap because the internet has hyped this so much that prices became irrational. I am not saying that it doesn’t deserve the hype, I just don’t want the hype to affect its price. It’s lucky that I found a nice-looking junk that I could repair and use later after a thorough overhaul.
Before you put everything back, be sure to calibrate its focus, you do that by adjusting the focusing scale. If you’re not familiar with the process, read my article on how to adjust the focus of your lens. It contains valuable tips so it’s easy for you to adjust your lens in a DIY setting.
Thank you very much for your support, you enable my work to continue. It has helped and entertained many people through the years. Your support is important as it helps me offset the cost of maintaining this blog. It helps me purchase, process and scan film so I can show you samples that were taken with film in order to give you a more holistic review of the lens. Sharing the blog to your friends help me, too. I get a few cents for each view and click. It is the main source of income for this blog. Thank you again, Ric.
Help Support this Blog:
Maintaining this blog requires money to operate. If you think that my work has helped you or you want to show your support by helping with the site’s upkeep, you can make a small donation to my paypal.com . Money is not my prime motivation for this blog, I believe that I have money enough to run it but you can help me make this site (and its companion facebook page) grow.
Leave me some tip?
Thank you very much for your continued support!
$2.00
Helping support this site will ensure that this will be kept going as long as I have the time and energy for this. I would appreciate it if you just leave out your name or details like your country’s name or other information so that the donations will totally be anonymous. This is a labor of love and I intend to keep it that way for as long as I can. Ric.

Nov 06, 2020 @ 10:40:07
Hi richard,
Thanks for the detailed overview! I was wondering if it is possible order a front element somewhere?
Im looking forward to hearing from you.
Cheers!
Sjors (From the Netherlands).
Jan 11, 2024 @ 11:29:13
Hi Richard. Thank you for your (as always) splendid article. As an add-on: my lens has two very small retaining screws securing the front ring that keeps the lenshood in place (and has the 52mm filter thread). I removed one screw and tried very hard to remove the ring with no result. That’s when it occurred to me another screw was used. No problems after removing that one😉 First time on 135/2.8 two where used I reckon. Definitely 135/2.8 Ai-s with serialnumber #922445. Keep on doing the good work! Many greetings from The Netherlands! Kind regards, Huib