
Hello, everybody! I’m currently tired of what’s happening at work, life and the world. Things aren’t going smoothly and I have to deal with difficult and unreasonable people. Hopefully, that will all change as it’s driving me to my physical, mental and emotional limits. There’s always closure to everything, nothing is permanent. Speaking about closures, I’ll show you the last lens in one of Nikon’s longest-selling lens family. It marked the end of an era and it is a worthy lens to end it all.
Introduction:
The Nikkor 135mm f/3.5 Ai-S was sold from 1981 to 1983, a very short period as far as Nikkors go. It’s the last lens in the 135/3.5 family which began with the Nikkor-Q•C 13.5cm f/3.5 from the early days of Nikon. That lens family is known for being reliable, sharp and practical. With the arrival of autofocus and other technologies and trends, this lens family became redundant. The market demanded something else and that made it difficult to sell this lens.

It’s similar to the older Nikkor 135mm f/3.5 Ai in terms of dimensions but it’s lighter because it was made with fewer parts. It’s an elegant lens with clean lines and is a joy to hold in your hands.
It retained the Nikkor 135mm f/3.5 Ai‘s 4-elements-in-4-groups design which means that it is an excellent lens. I am not sure if there are coatings are the same but that does not matter much and you can consider both lenses to be optically identical.

It’s a lovely lens and it balances well with all Nikons. I love using it with my Nikon F3, it’s the perfect setup for a leisurely-stroll on the park.
Knowing how your lens performs is key to maximizing it. You’ll learn how to use its strengths and avoid its weaknesses. This knowledge will help you decide which lens to use at any given situation. I shot a series of photos for you to observe, I took them from f/3.5, f/5.6 and f/8. These apertures should show the most changes in this lens’ performance and these are the common apertures that people shoot this lens with. I took these with my Nikon Df.

Distortion can be slightly observed in this photo. It’s not bad but you can see traces of it near the edges. I won’t worry about it at this amount. This isn’t a professional-grade lens so this is forgivable.


(Click to enlarge)
Vignetting can be seen around the corners wide-open but it clears-up when you stop the iris down past f/5.6. It’s not bad at all and the good news is that it improves significantly after just stopping the iris down by a stop.


(Click to enlarge)
Chromatic aberration is the biggest issue with this lens. Over-blown parts or areas of high-contrast just around the plane-of-focus will bloom and give an annoying, purple glow when shot wide-open. It improves somewhat by f/5.6 but it still persists to some level. You’ll even see traces of it even by f/8 which is very sad. The first and last sets were cropped so you can see the effects of chromatic aberration better at both ends of the focus range.


(Click to enlarge)
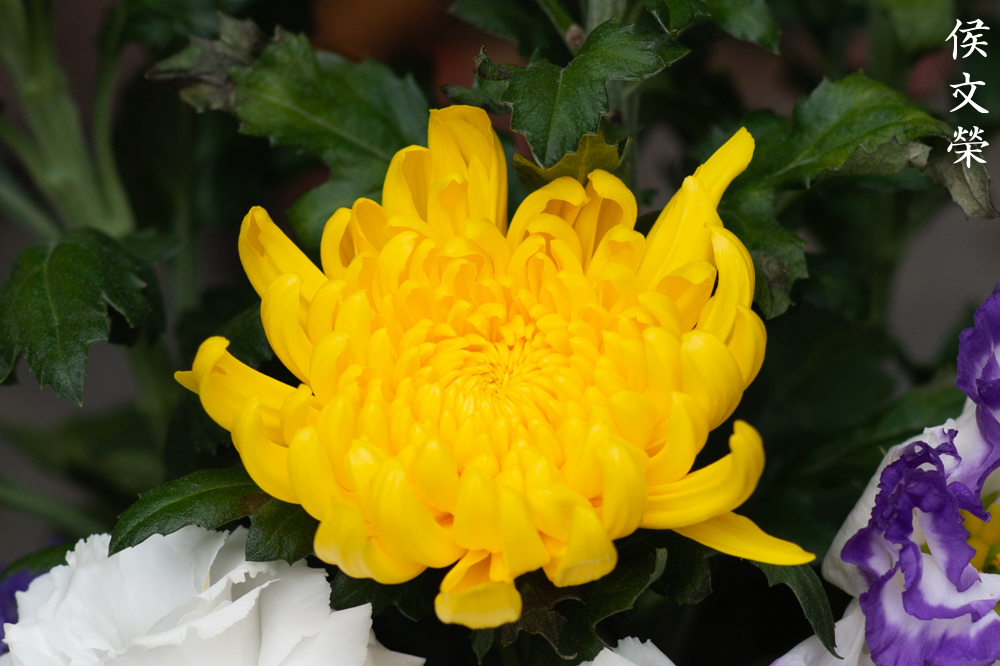
The quality and character of the bokeh is quite good for a cheap lens. It’s not bad at all and you won’t get weird artifacts. The discs look clean and even at f/3.5 with slight outlining but that’s still tolerable.


(Click to enlarge)
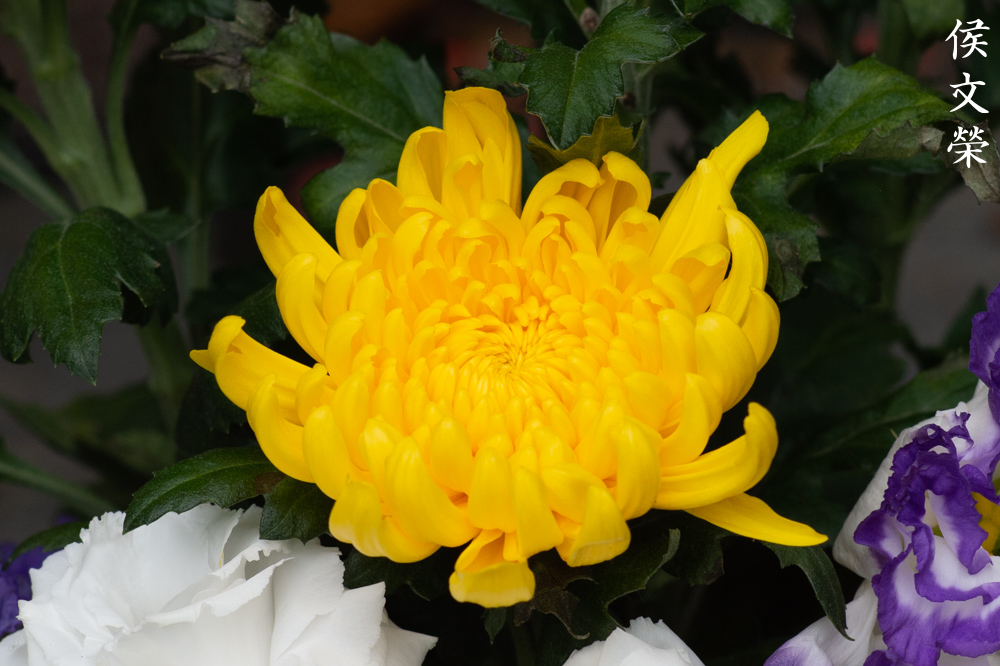
It’s a very sharp lens even when shot wide-open. Contrast is good and colors look saturated without looking “cartoonish”. Stop it down to f/5.6 and you’re going to get better center performance because the better resolution helps a lot in rendering finer details. The character of the rendering doesn’t change much since this is a lens with moderate-speed. Stopping it down to f/8 helps make things a bit better for the corners. This is the only reason why I would stop the lens down to this aperture, I would otherwise stay with f/5.6 for all of my photos so long as there’s enough light. The first set was cropped, that will help give you a good idea on how well it performs around the center at closer distances. It’s also great at further distances as you can see in the last set despite the disturbing amount of chromatic aberration. I can say that it’s a great lens in terms of sharpness and it maintains it across its focus range. The character of its bokeh is nice, too. It’s not at the same level of the Nikkor 135mm f/2.8 Ai-S but it makes-up for it by not rendering any smears, clumps and other unsightly artifacts.

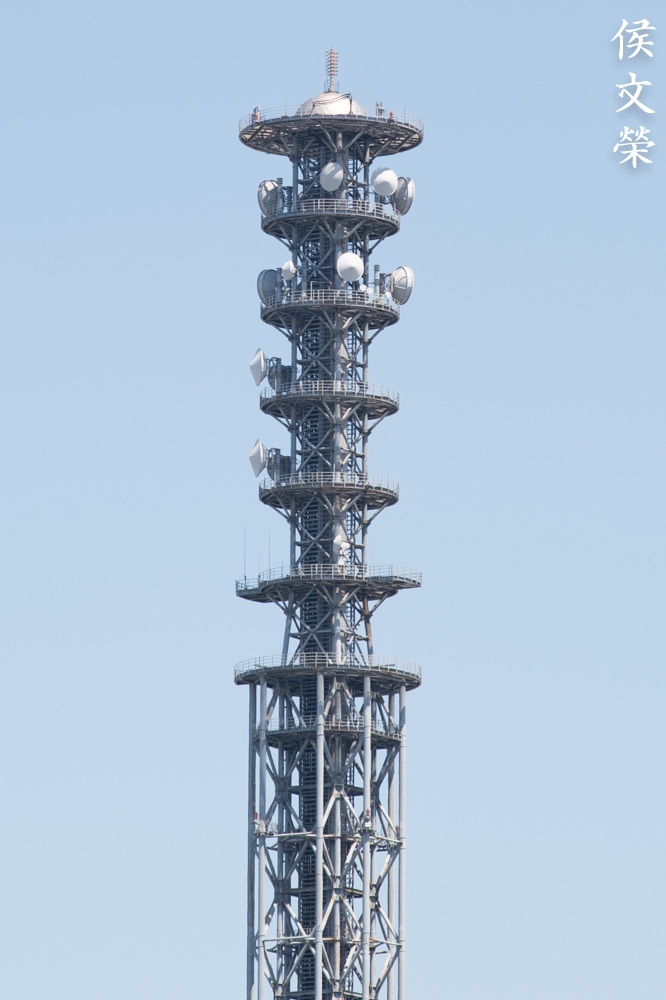
Its a nice short tele-photo lens for train-spotting. I’m not into the hobby but this will be nice for people who love trains. It rendering looks nice, natural and clean. You can see some chromatic aberration on the cables and that is all that I can nitpick about this photo.
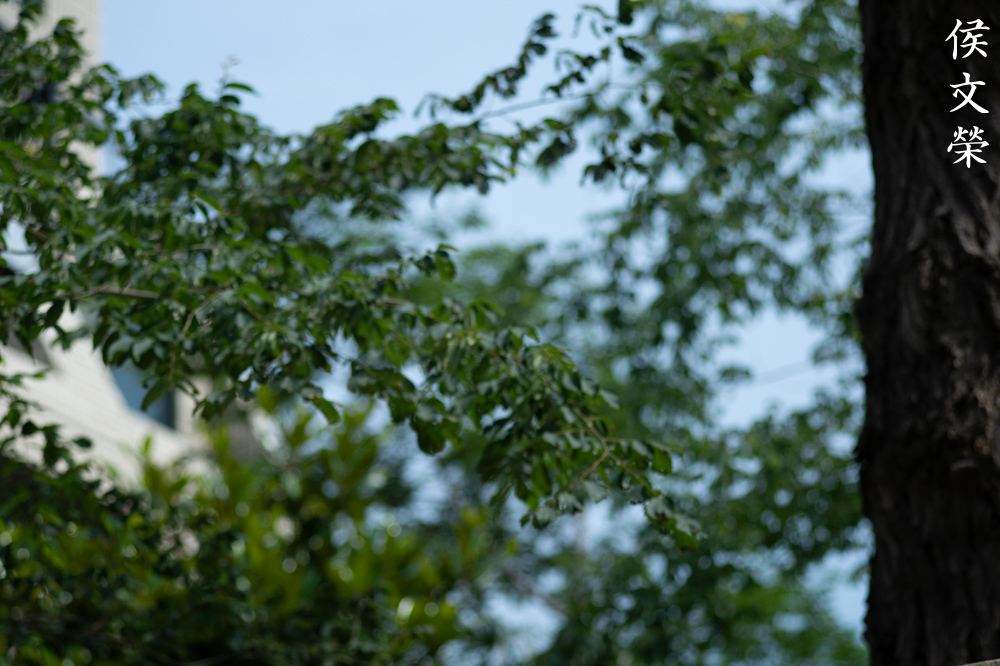
The tonality is nice, it has that “vintage-look” that people either love or hate.

Here’s a nice example showing how smooth the quality of the bokeh can be. The focus transition looks smooth without any abrupt shifts.


(Click to enlarge)
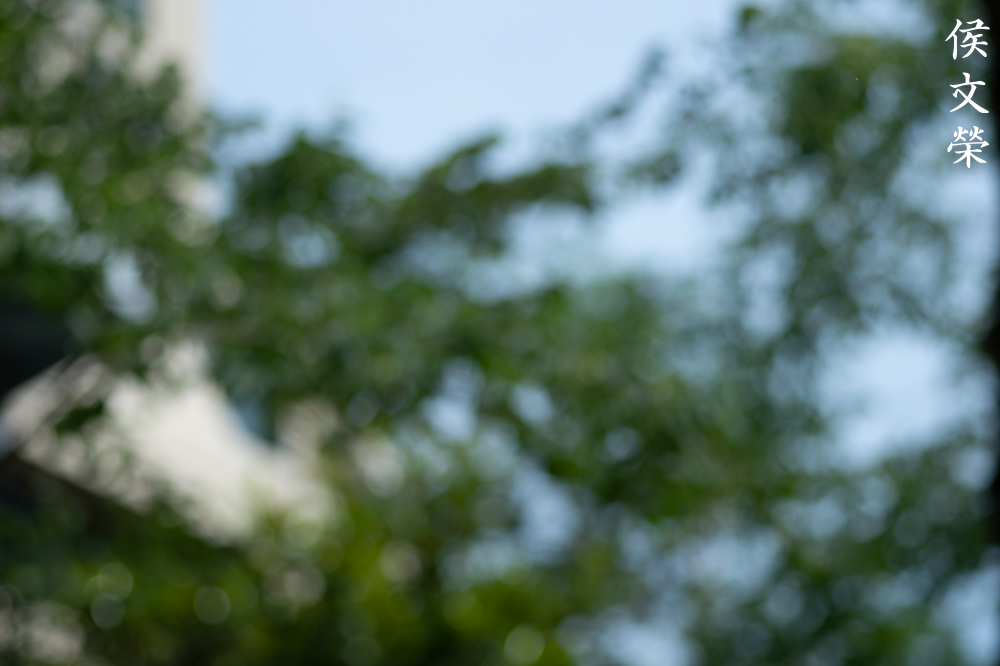
Here are more photos for you to enjoy. These should give you a nice idea on how this lens performs with real-world scenarios. Its biggest limitation is its modest speed which can be offset by shooting with a higher ISO.
How about some film photos? Film has a lovely look that is difficult to copy with a digital camera and that’s thanks to grain. It reacts differently to light and it can also mask some flaws depending on variables. Since it was made to be used with film it’s best that we judge it with its intended medium. The photos were shot with a Nikon F3 loaded with Kodak Gold 200.

This is a bit over-exposed but it shows you how nice it renders the details of the statue. The character of the bokeh looks a bit rough here but that’s more due to grain than the optics itself.
It’s an amazing lens for portraiture if you have enough light. It gives you the right compression and subject-isolation despite being a bit slow. The skin is rendered beautifully, this would not be possible if it was over-corrected for higher-contrast and you’ll end up with a posterized look.

Contrast is nice and the colors look great. I don’t know what’s happening, it seems like this lens has rougher-looking bokeh when shot with film. I do not see this happening with most vintage lenses where the opposite is true. This is something that I should look more into.


(Click to enlarge)
Here are more photos. It’s a lovely lens for portraiture and you will want to shoot with it more-and-more as you see the results. The more expensive or exotic Nikkors will out-perform this lens aesthetically but it’s hard to beat it when it comes to value.
I can highly recommend this to everyone looking for a cheap portrait lens. I enjoyed using this a lot despite owning more expensive ones. It’s compact, a feature that will appeal to people on a vacation. If you don’t mind the heavy Nikkor-Q 135mm f/2.8 Auto then that lens offers a much-better deal. That’s a cheap lens as well but looking for one with the factory Ai-ring can take time and it will cost a little but more. It’s hard to beat that one in terms of value. I would only consider that if footprint isn’t and issue. The Nikkor 135mm f/3.5 Ai is older but still worth looking, it shares the same optical design as this. It is cheaper but heavier. Forget about the older Nikkor-Q 135mm f/3.5 Auto, it is best left for collectors and people who love shooting with old gear.
Before We Begin:
If this is your first attempt at repairing a lens then I suggest that you check my previous posts regarding screws & drivers, grease and other things. Also read what I wrote about the tools that you’ll need to fix your Nikkors.
I suggest that you read these primers before you begin (for beginners):
Reading these primers should lessen the chance of ruining your lens if you are a novice. Before opening up any lens, always look for other people who have done so in Youtube or the internet. Information is scarce, vague and scattered (that is why I started this) but you can still find some information if you search carefully.
I highly recommend that you read my working with helicoids post because this is very important and getting it wrong can ruin your day. If I can force you to read this, I would. It is that important!
For more advanced topics, you can read my fungus removal post as a start. This post has a lot of useful information and it will be beneficial for you to read this.
Disassembly (Main Barrel):
The lens barrel itself is easy to service since this is a rather simple design. It took me about a few steps to figure out. Some of the screws here have been sealed with paint and it’s best to dissolve the paint first before you remove them. Like most lenses, it’s best to remove the glass so you could work with the main barrel without worrying about it. That’s not possible to do with all Ai-S lenses but this one allows you to do that. This requires moderate skill, it is not a lens for a beginner and an experienced repairer will find this easy. I had to use a couple of special tools to work on this but the main barre only requires special screwdrivers and a couple of precision-drivers.

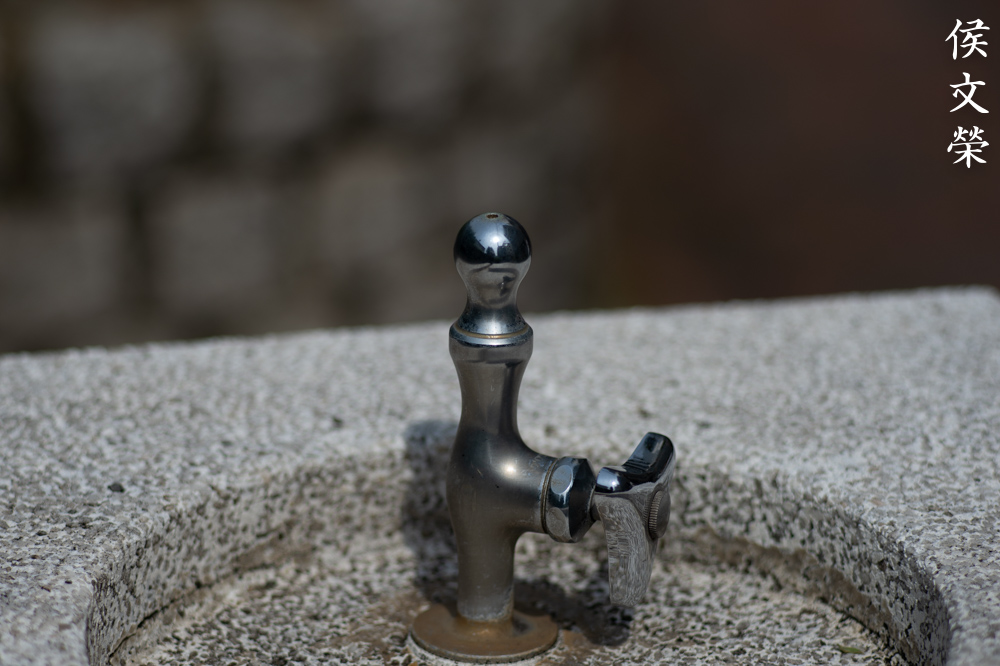
Locate and unscrew this. It secures the front barrel to the main barrel.
Unscrewing the front barrel shouldn’t be difficult.

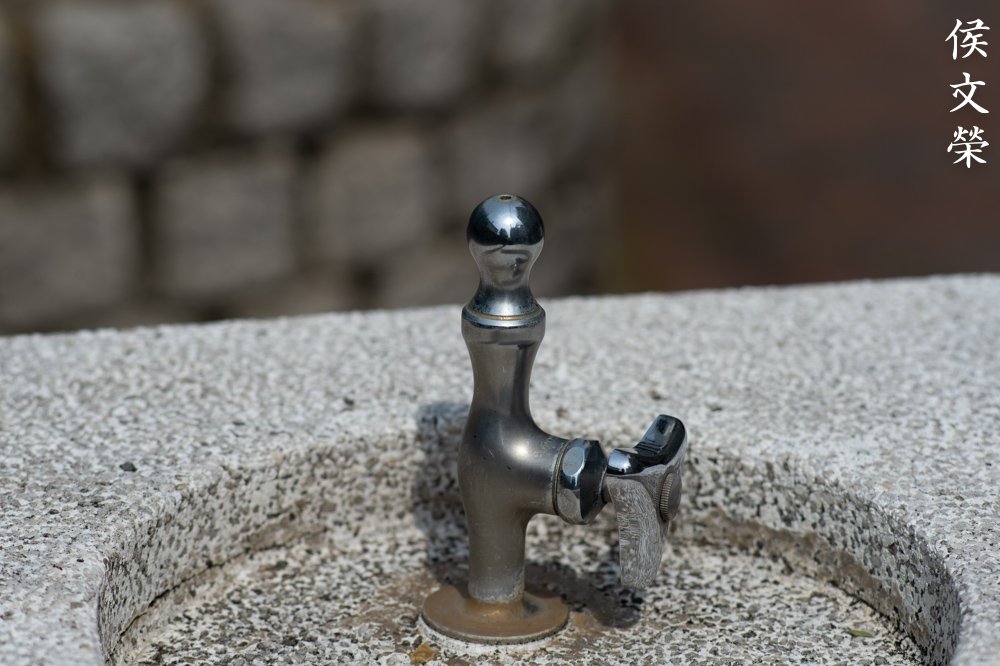
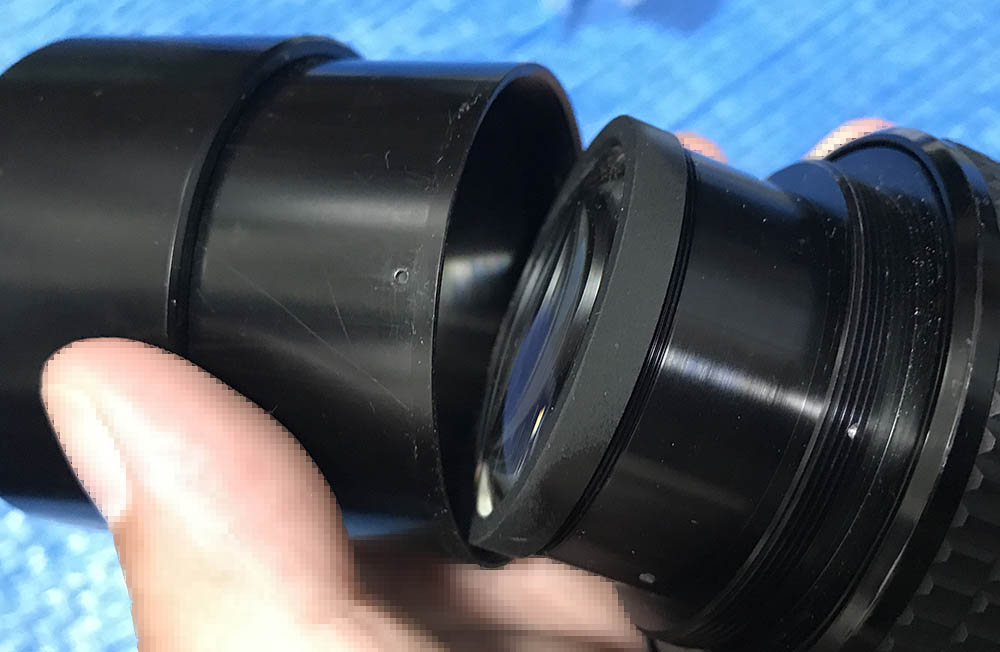
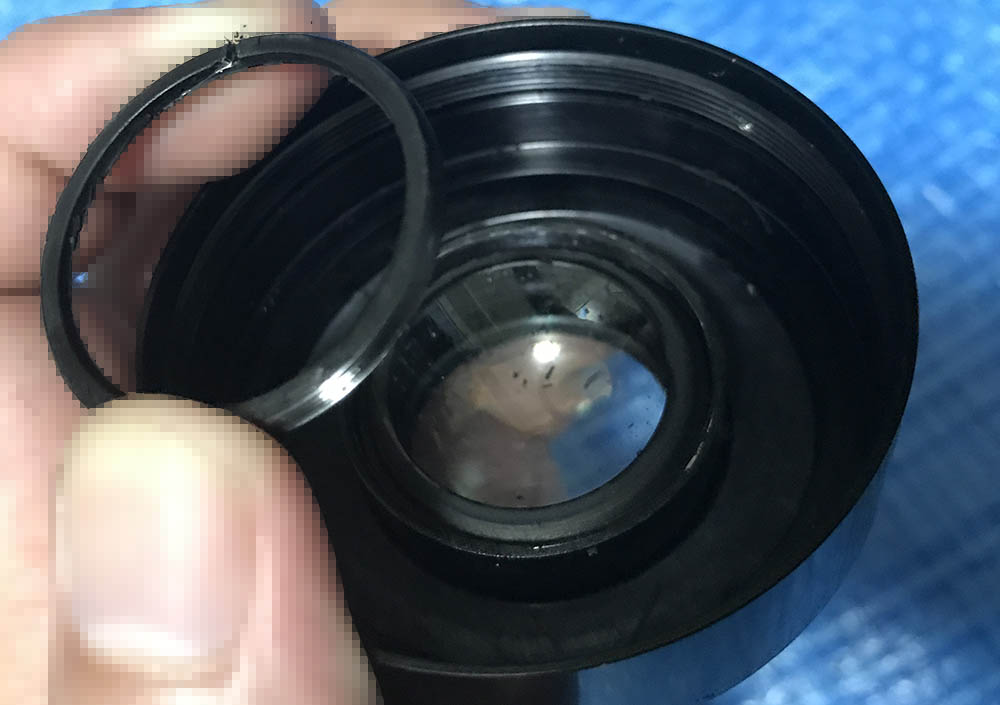
From this point you can remove the hood from the front barrel.
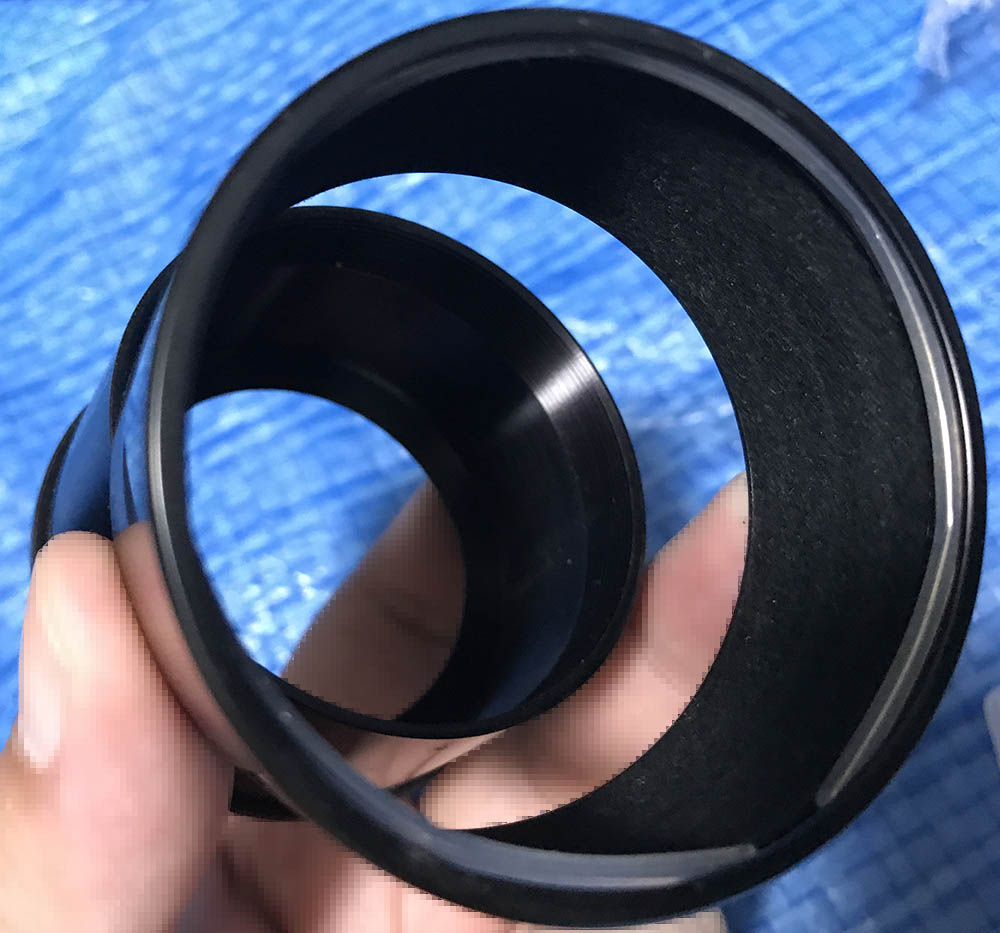
The hood is lined with felt and there’s a cheap cable-tie used for securing it, I found this unbecoming of Nikon but it worked.
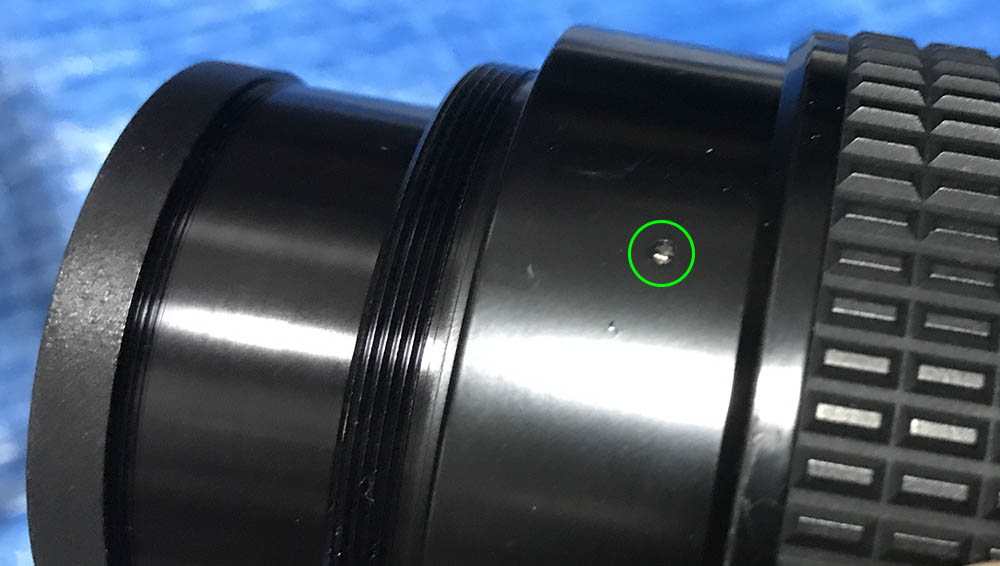
The front elements assembly can be unscrewed once you extract this.

It may be stuck, if that’s the case you simply apply a small drop of alcohol to the screw’s hole to soften the seals.

You can easily remove the rest of the objective, store it in a safe place.

You’re now free to work with the main barrel. Set the focus to infinity, keep it that way while you work with the barrel so you’ll have a reliable point-of-reference.
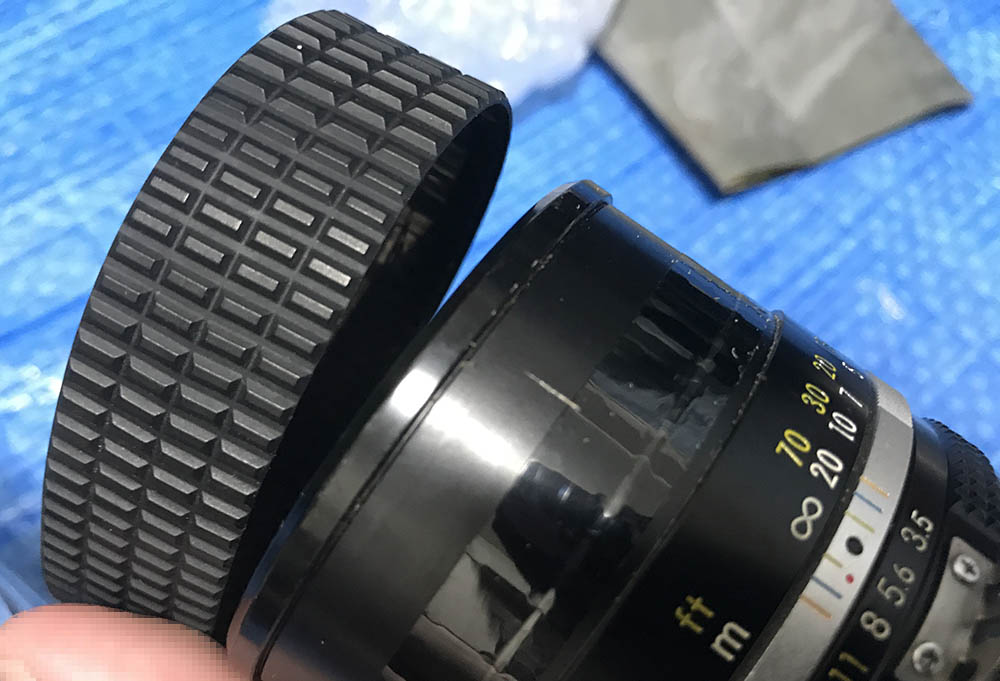
Carefully remove the rubber grip, you don’t want to tear this so go about it carefully.
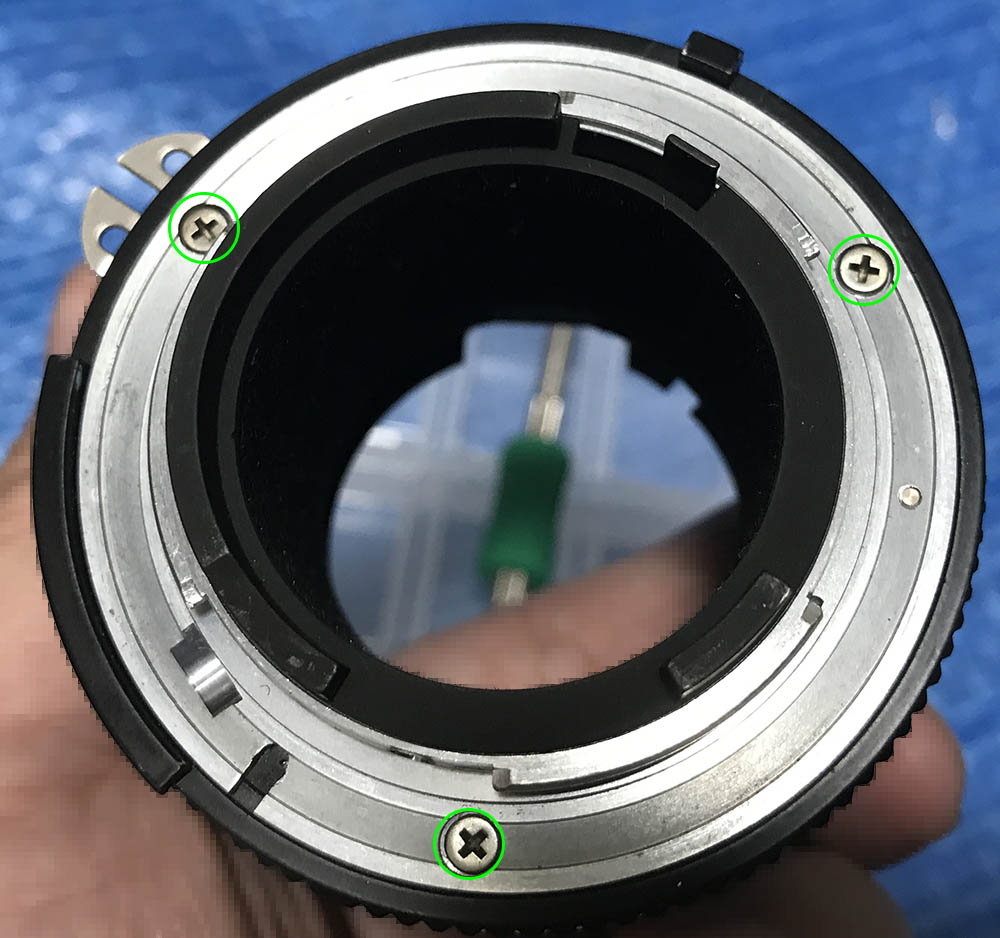
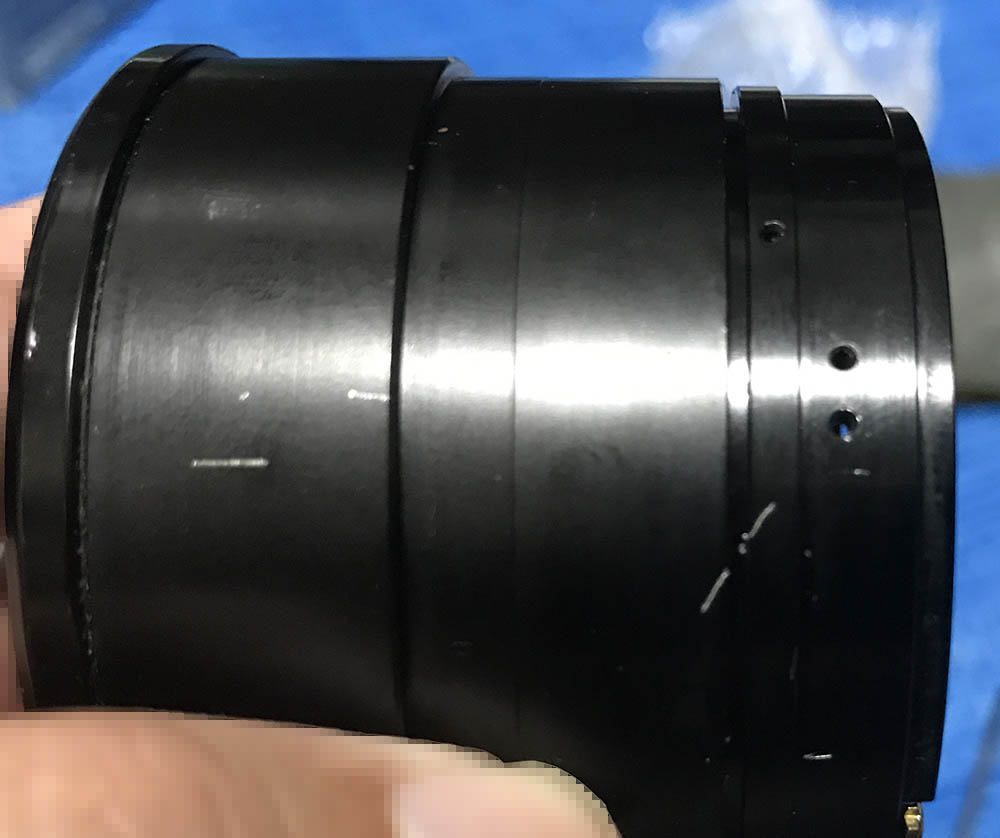
Extract these to remove the bayonet mount. Many people get stuck here, the heads get stripped because they used the wrong drivers. To prevent it from happening to you read my article on how to remove bayonet screws. Follow my tips and you should be fine.

The bayonet mount and the stop-down lever assembly can now be removed as a single unit.

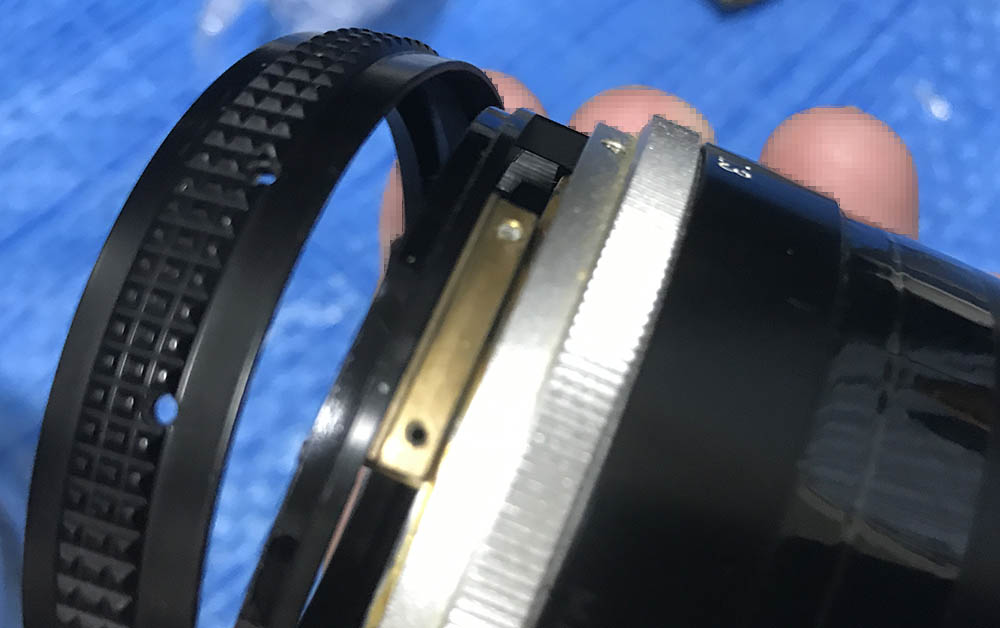
Before you remove the aperture ring you will have to extract these. There’s a block of brass connected to these that prevents you from removing it and only extracting the screws will get the job done. These are usually sealed, it can be softened by heating the opposing side with a torch. Be careful, these screws are soft and can snap easily.
You can now remove the aperture ring once the screws are gone.

You can now remove the aperture fork. It couples to iris mechanism so you control it by turning the aperture ring.

Here are the helicoid keys. Note which one should be seated where and you should also take photos so you’ll know how high or low these should be. It’s important to note this so you’ll able to reproduce this later.

Once you’re satisfied with your notes you can remove the metal grip. These should be extracted to since the detent spring is in the way.

Extract all of the screws on the grip and you should be able to remove it. It’s not only a grip, it constrains the turning-range of the focusing ring.

Strip the tape and you can remove the distance scale but before doing that I will advise you to make a small mark so you’ll know how these should align when set to infinity.

Do a final check and remove the helicoid keys. Note that they’re sealed, use a few drops of alcohol and dissolve the seals before you remove them.

This lens has a special way regulate the iris, it does that with a relay-tube. It has a tube that couples the aperture fork and the iris mechanism, turning it will allow you to control the iris mechanism.

The helicoid keys also hold secure this tube. The bottom-part is greased, use a small amount to lubricate it once you’ve cleaned the old grease away.
Collapse the helicoid all-the-way and make a diagonal mark. This will help a lot later to determine if you’ve reassembled the helicoids properly. If you’re not able to reproduce this then you’ll have to waste a lot of time guessing its right position, getting this off by a bit is fine but if it’s off by a lot then you’re screwed.

Separate the helicoids carefully and don’t forget to mark where they parted. Many people get stuck here because they don’t know how to do this right. It is important that you read my article on how to service helicoids and follow all of my tips to prevent any problems. Make a small mark to not where the helicoids separated, this is also the part where they should mesh.

Do the same for the inner helicoids and mark where these separated.
That’s it for the main barrel. Clean everything well and don’t leave residues so your fresh grease won’t get contaminated. Brush and clean the helicoids, soak them in an alcohol bath to make sure that no residues are left. This is a long lens so it benefits from a grease with moderate thickness. A lighter one will make it turn without any resistance while a thicker is too-stiff.
Disassembly (Objective):
The iris mechanism and objective are combined into a single unit. Mine has a clean iris so I didn’t have to overhaul it but the glass has to be cleaned. It’s of a conventional design but it’s tough to remove the elements since they’re all sealed with paint which is tougher to remove than lacquer seals. You will need some special tools to work with this and your grip has to be good or it will slip you’ll scratch the glass.
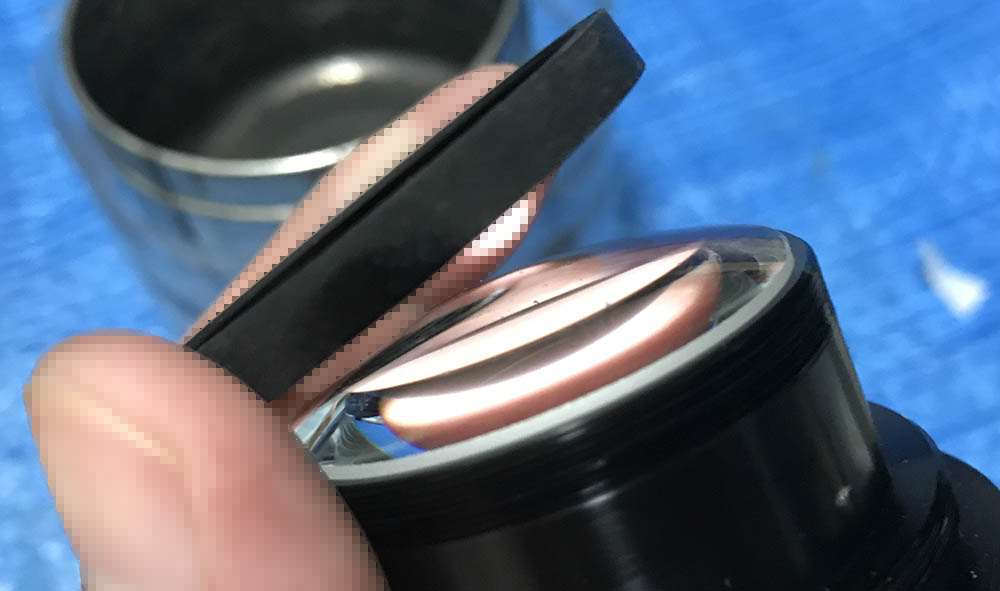
Unscrew this collar. It’s probably sealed so apply a small drop of alcohol to dissolve it. This is the only thing securing the front element.
Extract the front element with a lens sucker.

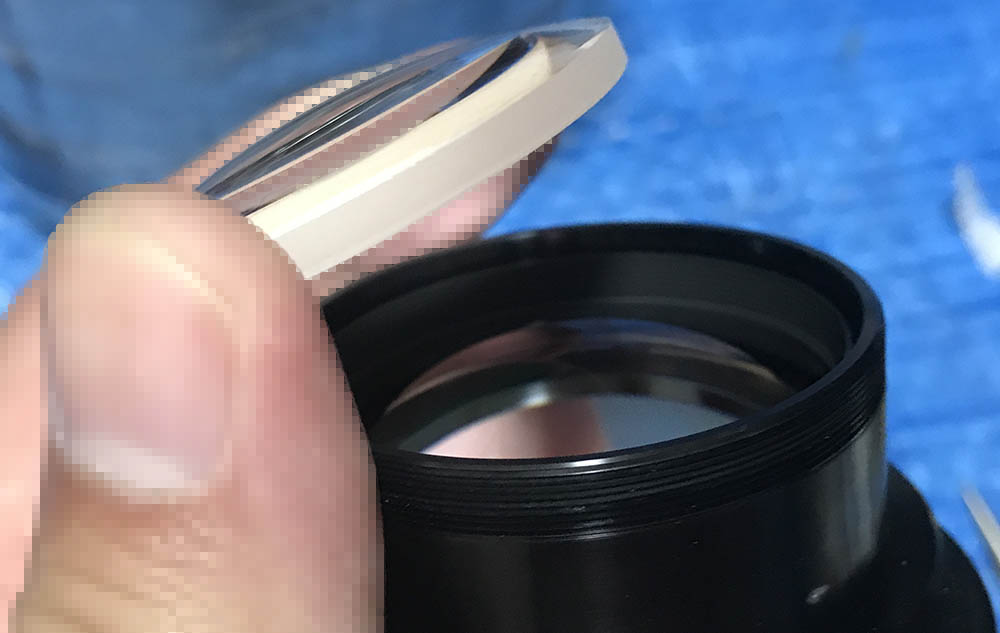
There’s a shim here, make sure that you note which is the front-facing side.

Carefully extract the 2nd element. It’s huge and heavy so be careful and do not drop this. A lens sucker may not be powerful enough to pull this away, I use a suction for things like this.
This is a very tough collar to remove, the threads were sealed with paint. Do not force it, the best way to remove this is to dissolve the paint with MEK. It can take several applications, a small drop each time over several hours. It’s the only way to remove this. Once the seal has been dissolved, unscrew this collar off with a lens spanner or pipe-key.

Carefully remove this.

Since its shape isn’t ambiguous you won’t have to make a small mark at the wall of the group using a permanent marker.

Unscrew this tube so you can clean the rear optics.
This would have been an easy exercise but the seals made it difficult and it took me a lot of time just to be able to dissolve the seals. The glass is clean, I didn’t have to do my fungus-removal routine on this.
Conclusion:
I enjoyed repairing this. I was thinking that it is similar to the older Nikkor 135mm f/3.5 Ai but I was wrong. It’s a different lens in terms of construction and I learned a lot repairing this. It took me about 2 nights to service this, it has lots of seals which had to be dissolve and that took a lot of time.

Reassemble your lens up to this point and calibrate the focus. My article on how to adjust your lens’ focus will help you do it in a DIY setting using tools which are readily-available to anyone. Once you’re happy with the results, secure the focusing ring with tape.
That’s all for this article. I hope that you enjoyed this and please share this with your friends. Every view counts, I’m getting $0.2 a day from views. I’m very thankful to all my supporters, your contribution helps me in this tough time, the coronavirus is something that we’ll have to live with from now on. Not only are you helping maintain this site but you’re also making sure that I have the means to continue this. See you again next time, Ric.
Help Support this Blog:
Maintaining this blog requires money to operate. If you think that this site has helped you or you want to show your support by helping with the site’s upkeep, you can make a small donation to my paypal.com (richardHaw888@gmail.com). Money is not my prime motivation for this blog and I believe that I have enough to run this but you can help me make this site (and the companion facebook page) grow.
Leave me some tip?
Thank you very much for your continued support!
$2.00
Helping support this site will ensure that this will be kept going as long as I have the time and energy for this. I would appreciate it if you just leave out your name or details like your country’s name or other information so that the donations will totally be anonymous. This is a labor of love and I intend to keep it that way for as long as I can. Ric.

Jun 21, 2020 @ 07:07:15
AF ONLY lenses are useful in certain cases but NOT SO RELIABLE as old manual focus and this a good reason to keep using old lenses. YOU ARE DOING A GREAT JOB. Paolo Messeca
Aug 01, 2020 @ 18:00:38
Rich, where you seen chromatic abberations? I can/t see that at photos presented.