
Hello, everybody! I was craving for some Dunkin’ Donuts but we only have Mister Donut here. Their doughnuts look, taste and priced similarly so that will do. I personally don’t think that one is better than the other but there’s a few things on the menu that can make you decide better and one of them is the coffee. I always love Mister Donut’s coffee, it just tastes better. It offers better value than the hipster cafés’ offerings and it’s real coffee unlike what many kids like these days which are closer to confectionary than coffee. The taste and aroma should be clean. Today, I’m going to show you 2 lenses and let you decide which one is better. They’re nearly-identical like my example with the 2 doughnut companies, choosing which one is better is personal, it is something that only you can decide and I’ll help guide you through it.
Introduction:
The Nikkor 50mm f/1.8 Ai-S replaced the older Nikkor 50mm f/1.8 Ai during the time when Nikon was in full-swing to replace older Nikkors for the then-new Nikon F3. The version we’re going to talk about is the older “long-nose” model. This was sold from 1981 to 1985, a short time for a Nikkor. It was not sold domestically in Japan where the newer, compact Nikkor 50mm f/1.8 Ai-S was sold instead of this. It can be very confusing talking about both lenses in the same article so I’ll refer to both lenses using adjectives.

This is a beautiful lens, the last of its kind. It’s the last 50/1.8 manual Nikkor that was made with a standard-sized barrel. This may not mean much but it can be a huge deciding factor for some. This is also the last 50/1.8 that has a pair of claws for use with older cameras.
There was nothing wrong with the older Nikkor 50mm f/1.8 Ai but it had to be updated for the new standard so this lens was designed for that purpose. Since the older lens was pretty good and its design was still new all that was needed was to redesign the barrel, the optical formula remained the same. I am always confused when I see both lenses side-by-side because they’re like twins. It’s difficult to distinguish which lens is which when viewing both of them from a short distance until you get close enough to see the details.
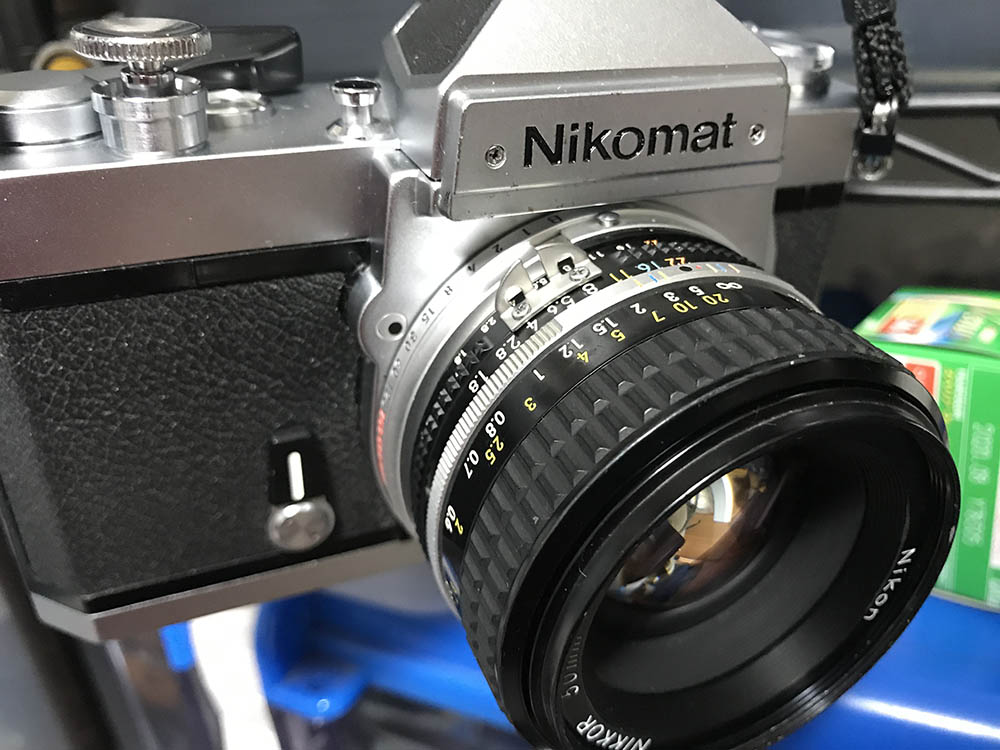
It balances really well on every Nikon ever-made, it has the perfect size and weight so it handles perfectly with smaller or bigger Nikons. It’s not smaller than the usual Nikkor prime but it’s still compact. Mount it on a Nikkormat and you can shoot with it all-day.
Here’s a visual example of how it looks compared to the Nikkor 50mm f/1.8 Ai which it replaced. There’s not a lot of differences between these if you’re only looking at them from an aesthetic standpoint but there are numerous minor differences that I’ll point out.

The Nikkor 50mm f/1.8 Ai has a longer focus-throw which is a bit too-long if you ask me. I prefer the shorter one on the Nikkor 50mm f/1.8 Ai-S which is perfect for my taste. The baffle and bayonet mount is different, too. The old lens has no way to tell the camera that you are using an Ai-S compliant lens obviously and it won’t give the camera the ability to actuate it automatically using P and S modes. Both will allow you to shoot in A mode which matters the most to the majority of photographers.

There’s even less differences when viewed from the front. Whatever you’re going to find here is merely cosmetic. The color of the coatings are similar, I think they’re identical in this respect.
While their dimensions look similar which will lead many to assume there’s nothing different mechanically inside, the truth is they’re entirely different on the inside and there’s nothing interchangeable between these. The optics are identical in terms of design but that doesn’t mean that the elements can be swapped between them.
Many people compare it with the slimmer Nikkor 50mm f/1.8 Ai-S version so I’ll make a visual comparison between these. This will help a lot of people in deciding which lens to purchase and for what reasons.
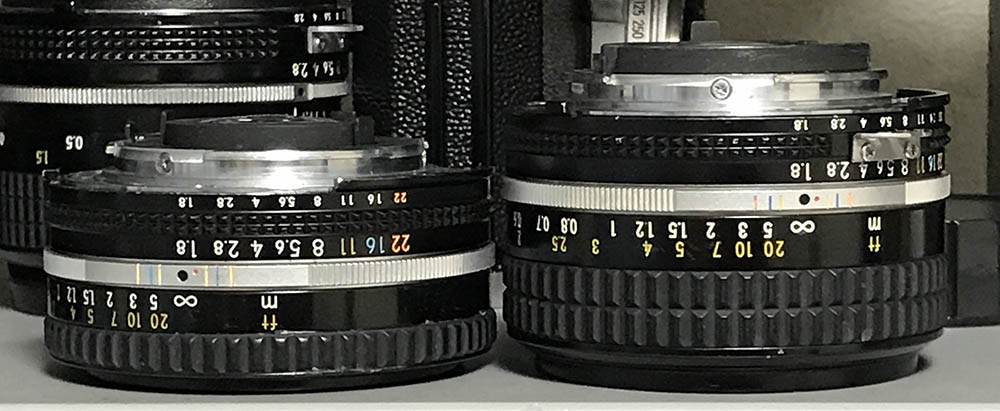
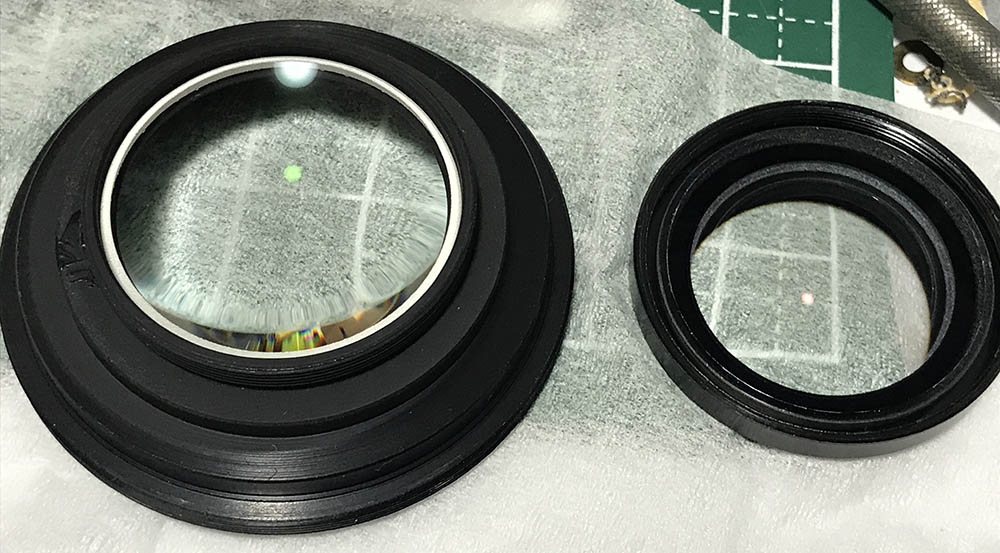
The most obvious difference you can see here is the height. While I love the size of the later one I prefer the handling of the earlier version. I sometimes struggle with how small the slim version is, the rings can be a bit confusing to the touch. Muscle memory plays a huge role so I like the taller one. Being small has its advantages as well but the longer Nikkor 50mm f/1.8 Ai-S is not really a big lens at all. You’ll also see that the long-nose version still has that aperture-coupling prong attached to the aperture ring which you can’t find on the slimmer version.
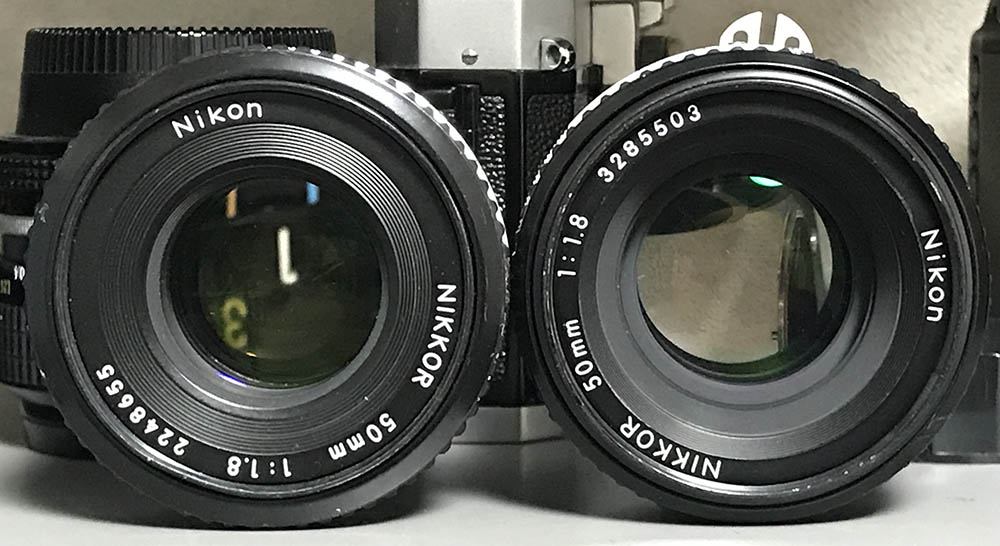
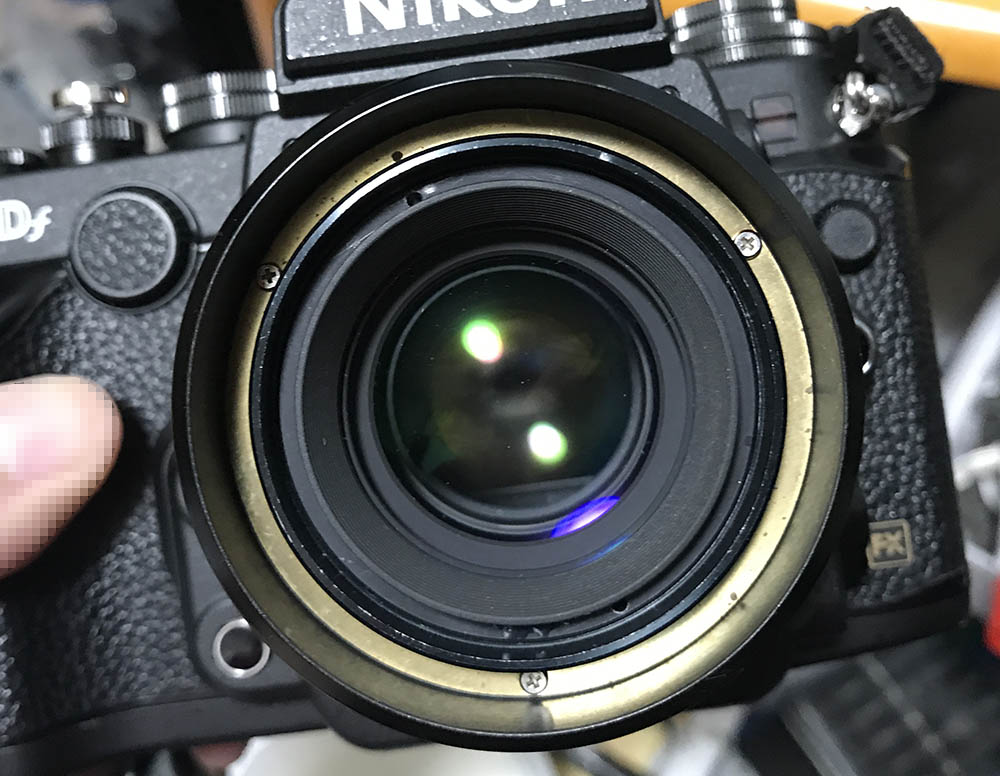
The diameter is roughly identical. The biggest thing you’ll notice here in this photo is the position of the front element. The slim Nikkor 50mm f/1.8 Ai-S‘s front element isn’t as recessed compared to the long-nose’s which is situated a bit deeper and is better-protected. This matters a lot to me. One factor that is in favor of the later one is its ability to focus a bit closer. You’ll also notice that the size of the front element is a bit different which is a given since the optics aren’t the same. The smaller Nikkor 50mm f/1.8 Ai-S‘s optical formula was inherited from the Nikon 50mm f/1.8 Series-E if I am not mistaken. The thing that I can be sure about is they share the same optical formula but it’s the coatings that differ between the two.
Knowing how your lens performs is key to maximizing it. You’ll know what its strengths are and capitalize on them and avoid its weaknesses. I don’t do scientific tests, I usually shoot a series of photos and share what I observed in my photos. The real judgement comes after I used a lens to take pictures in real-world scenarios, I think that’s the best way to judge if a lens is bad or good. I took the pictures from f/1.8, f/2.8, f/4 and f/5.6 from left-to-right. We’ll see the most changes happen from these apertures and these are also what I believe to be the most common apertures that people would want to use it with. I took the photos with a Nikon Z6 so let’s see how well it holds-up to a 24mp sensor. Its performance is identical to the Nikkor 50mm f/1.8 Ai, if you want to see a more detailed analysis, go and read that article.


(Click to enlarge)
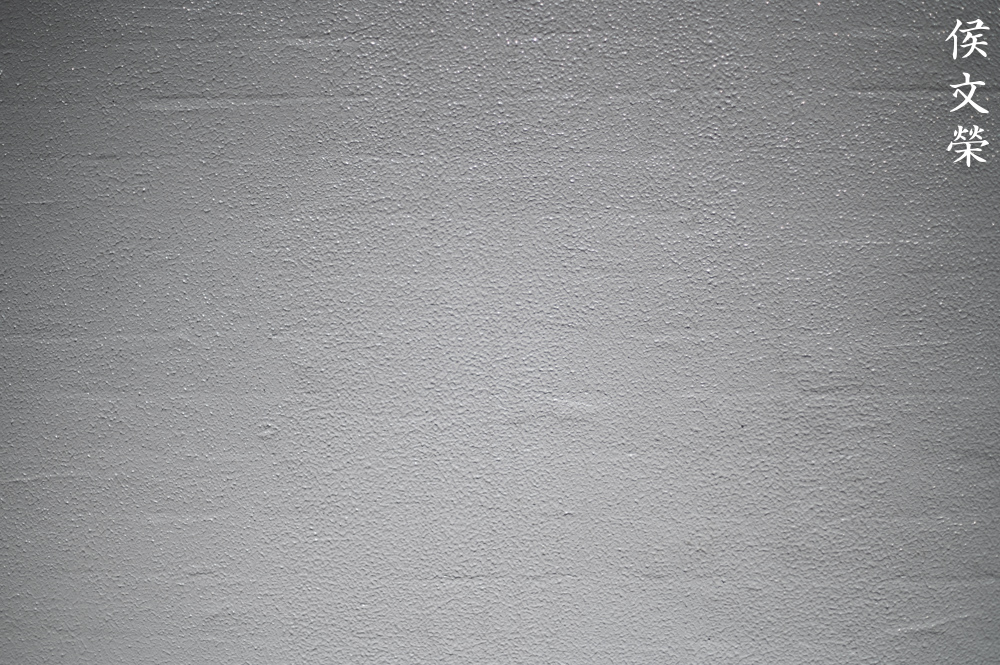
Vignetting is heavy wide-open but you won’t see much of it from f/2.8 and it is almost-gone from f/4 onwards. Sharpness is quite good wide-open but the corners lag a bit. Resolution is decent, it will improve once you reach f/2.8. It is a nice lens with good contrast even at wider apertures. The main reasons for stopping the iris down further is to get wider depth-of-field and sharper corners which you’ll get once you reach f/5.6. You can read my Nikkor 50mm f/1.8 Ai to see more sample photos, since the optics are identical it should be relevant to what we see here.
This is how much distortion you’ll get from this lens. You won’t notice much of it when taking real-world photos.

This photo should show how smooth the focus-transition is. It looks natural and you won’t get an abrupt shift.

The character of the bokeh is quite nice and refined but there will be times when you’ll notice some ugly artifacts but that’s only when you are shooting photos with challenging backgrounds that will trigger it.

This was shot at f/2.8, it has a nice, pleasing character to it and I love how it rendered the bottles. It shows a nice progression from sharp-to-blurred.

It has the ability to render painterly-like pictures which makes them look a bit more interesting.
It’s great for taking environmental portraits. The 50mm focal length is great for this application since it’s close to how the eyes see, giving you a natural, pleasant-looking photo.
Stopping the iris down to f/4 will give you near-peak performance. You can see how sharp it is even at the corners. The contrast is quite high but it will not give you an over-corrected look which I hate, it still looks natural.


(Click to enlarge)
Here are more photos for you to enjoy. This is a very versatile lens and it’s a real joy to use with any Nikon. You can build an entire career with this lens alone, you don’t need the latest-and-greatest to take nice photos and have a good time.
Some people debate about which version is better but both lenses perform similarly to me. In order to clear things up I took some sample photos from both lenses, let’s see if you could tell which photo was shot using which one and observe the subtle differences. I took these with my Nikon Df.


(Click to enlarge)
Could you tell which photo was shot using which lens? The ones on the left were taken with the slim Nikkor 50mm f/1.8 Ai-S. I won’t tell you which one is better and I’ll leave that decision to you. I would like you to look at these and scrutinize them for yourself. I know that these are simple tests and are not detailed enough to make a definitive decision and whatever you’ll find in these photos can be attributed to sample variations. This isn’t meant as a conclusive test, it’s just to give you a simple idea of how these lenses differ.
Let’s now see some photos that were taken with film. I love shooting film, it has a unique look that’s difficult to simulate with a digital camera. Film has grain which has an organic-looking structure that’s different from what you will get from a digital camera. It’s aesthetically-pleasing and it can also help mask a lens’ flaws or amplify them depending on what you’re talking about. Since this lens was design for use with film it’s best that we judge it with its intended medium. I took these pictures with a Nikon F4 loaded with Kodak Gold 200.

The quality of the bokeh appears a little smoother with film as far as I could see since grain helps mask some of the details that could make it look rough or smudgy.

Contrast is quite nice but not overwhelming so it doesn’t make your photos look like they’re posterized. It looks natural and pleasing. Some lenses were over-corrected and the resulting photos look harsh.

Here is a photo showing how natural the focus-transition is. You won’t get a “wall of focus” where things abruptly transition from being smooth to sharp which I dislike. It doesn’t look natural and quite frankly, painful to look at.

The amount of compression a 50mm lens offers is nice, it’s close to what the eyes see which makes photos taken with them look so pleasing.
The foreground blur’s characteristics is quite smooth. It’s not perfect in this regard but it’s better than some of the lenses that I tested in this blog.


(Click to enlarge)
Here are some more photos that I took with film. I love how it renders, this is nice lens if you know how to use it. It has that “vintage-look” to the photos that it takes which is something that I like. It begs to be shot with film, use it with a Nikon F3 and you’re back in 1983.
I can highly recommend this lens to everyone. If you’re thinking of buying a Nikkor 50mm f/1.8 Ai-S (pancake version) then consider this, too. This is not as compact but it handles a lot better. If your budget is limited then the old Nikkor 50mm f/1.8 Ai is an even better deal, they are optically identical. You will lose the ability to use it with P or S modes but that isn’t a problem since aperture-priority is more useful. The focus-throw is longer, too. That can be a big thing for videographers. It’s a great lens and the same goes for all of its successors. The slim Nikkor 50mm f/1.8 Ai-S focuses a bit closer which is one thing that you should also think of as well. Forget about the cheaper plastic Nikon 50mm f/1.8 Series-E, it is an overpriced and overhyped lens, you have much better options for less than what they go for these days. If you use old Nikons that requires an aperture-coupling prong then you’re stuck with this one or the Nikkor 50mm f/1.8 Ai. I hope that you enjoyed this introduction, it aims to clean things a bit and help people decide which lens is the right one for them. Don’t take my word as final but this should help guide you in your purchase and I hope that I could help save you some money.
Before We Begin:
If this is your first attempt at repairing a lens then I suggest that you check my previous posts regarding screws & drivers, grease and other things. Also read what I wrote about the tools that you’ll need to fix your Nikkors.
I suggest that you read these primers before you begin (for beginners):
Reading these primers should lessen the chance of ruining your lens if you are a novice. Before opening up any lens, always look for other people who have done so in Youtube or the internet. Information is scarce, vague and scattered (that is why I started this) but you can still find some information if you search carefully.
I highly recommend that you read my working with helicoids post because this is very important and getting it wrong can ruin your day. If I can force you to read this, I would. It is that important!
For more advanced topics, you can read my fungus removal post as a start. This post has a lot of useful information and it will be beneficial for you to read this.
Disassembly (Main Barrel):
I initially thought that this would be similar to the Nikkor 50mm f/1.8 Ai but the barrel and the internal housings are completely-different so a separate article has to be made. The construction isn’t complex and it follows the Ai-S standard so repairers who are familiar with Nikkors won’t find this difficult to service. Novices will find this a bit challenging but beginner shouldn’t do anything to it, this requires tools and skills to repair, both are investments. I spent money, time and effort learning the craft despite my experience with watches, radios, cars amongst other things. If you’re thinking that this is an easy lens for a beginner, you’re wrong.
Like most smaller Ai-S primes the objective’s housing is incorporated to the inner helicoid’s barrel. You can’t simply remove the objective and work on it like you do with earlier Nikkors. Since this is the case, you will remove all of the optical assemblies at different stages of repair. This is troublesome but I will guide you through the whole process.
This lens isn’t difficult to service but I won’t recommend this to beginners. It is best that you send this to a repairer than ruin your lens because you don’t have the right tools and experience for the job.
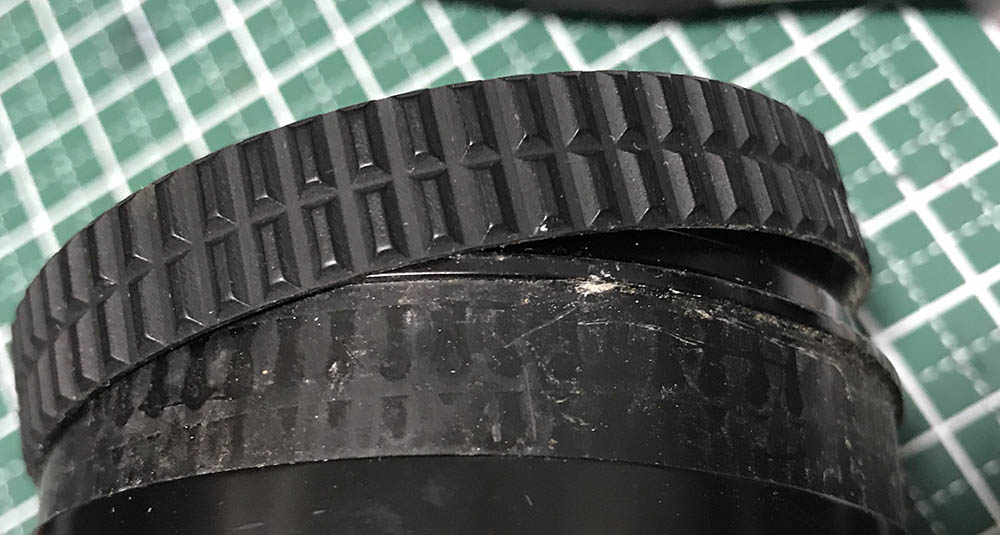
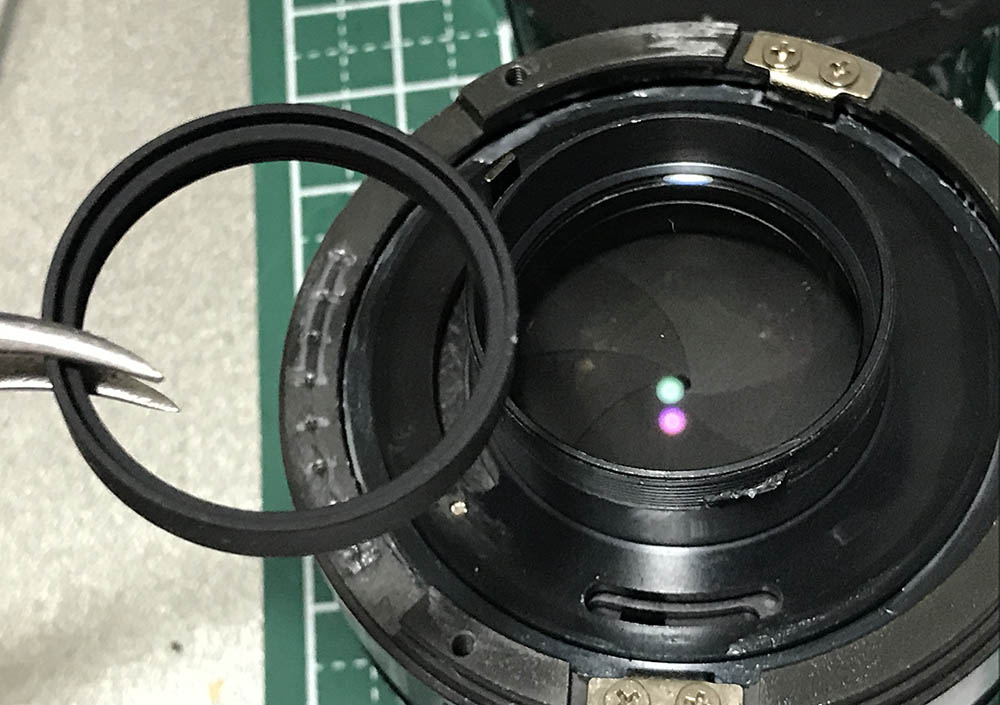
The rubber grip can be removed by running a thin, rounded rod under it. It can be brittle so be careful so you won’t tear it apart.
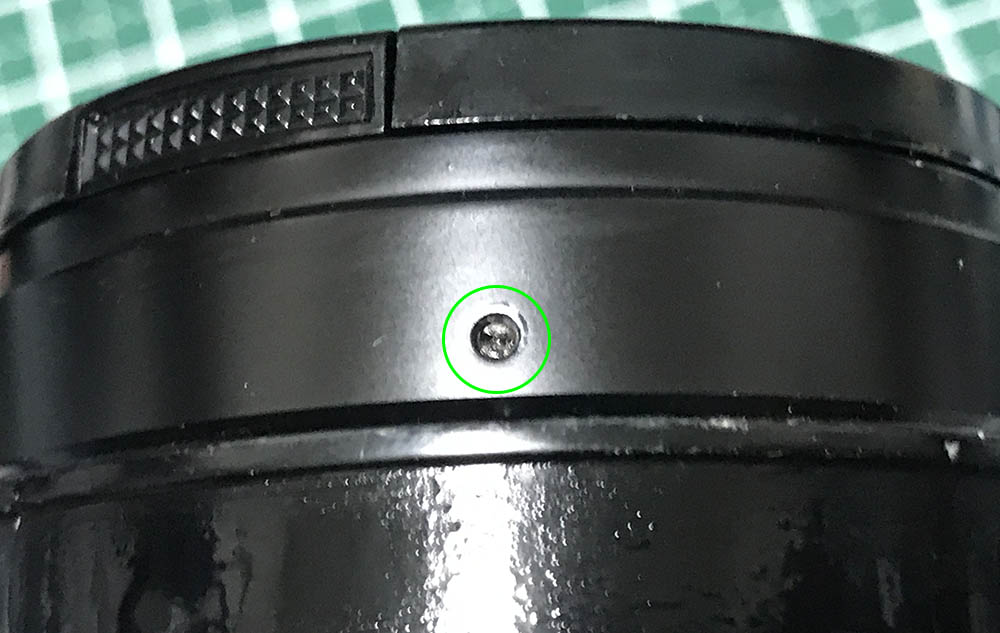
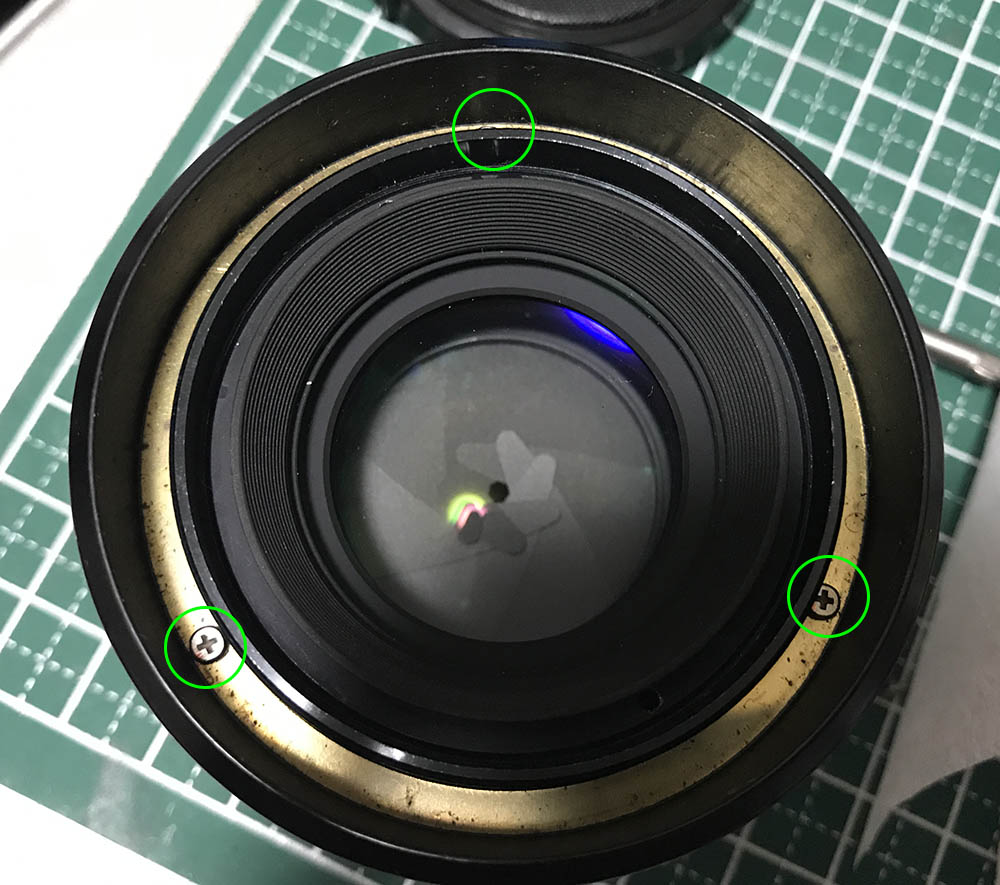
Locate and extract this screw. It’s usually sealed paint so you should remove it only after the paint has been dissolved. I use MEK or whatever it reacts to, all you need is a drop or less.

Once the screw has been extracted you can unscrew the front barrel. If the front barrel won’t turn apply several drops of solvent into the screw hole to dissolve whatever is making it stuck. Give that a bit of time before you try it again, repeat the whole process until you could remove it easily.
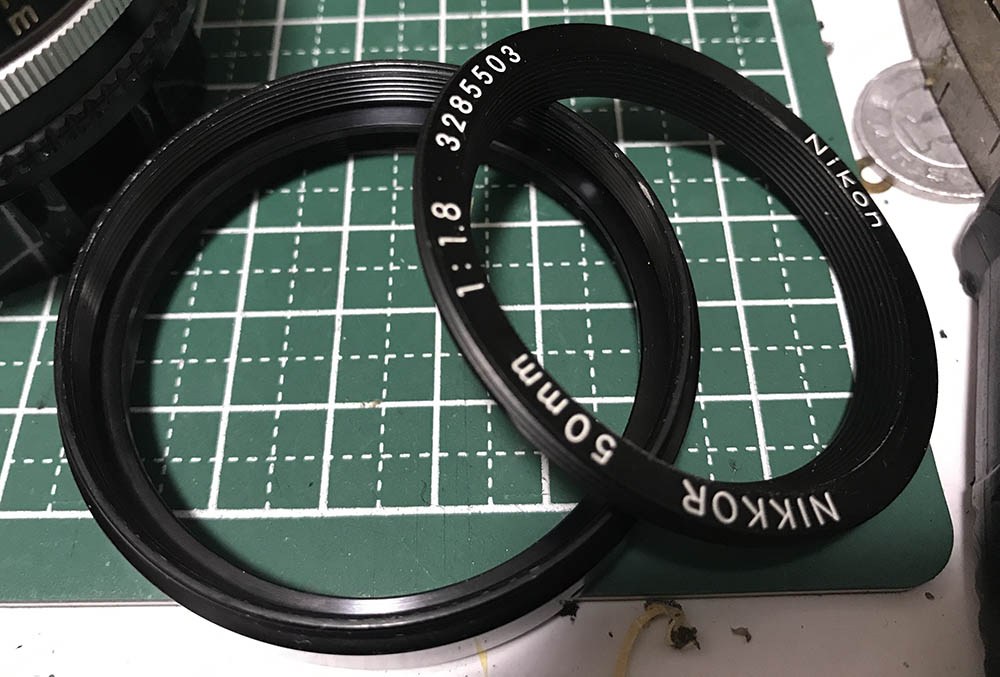
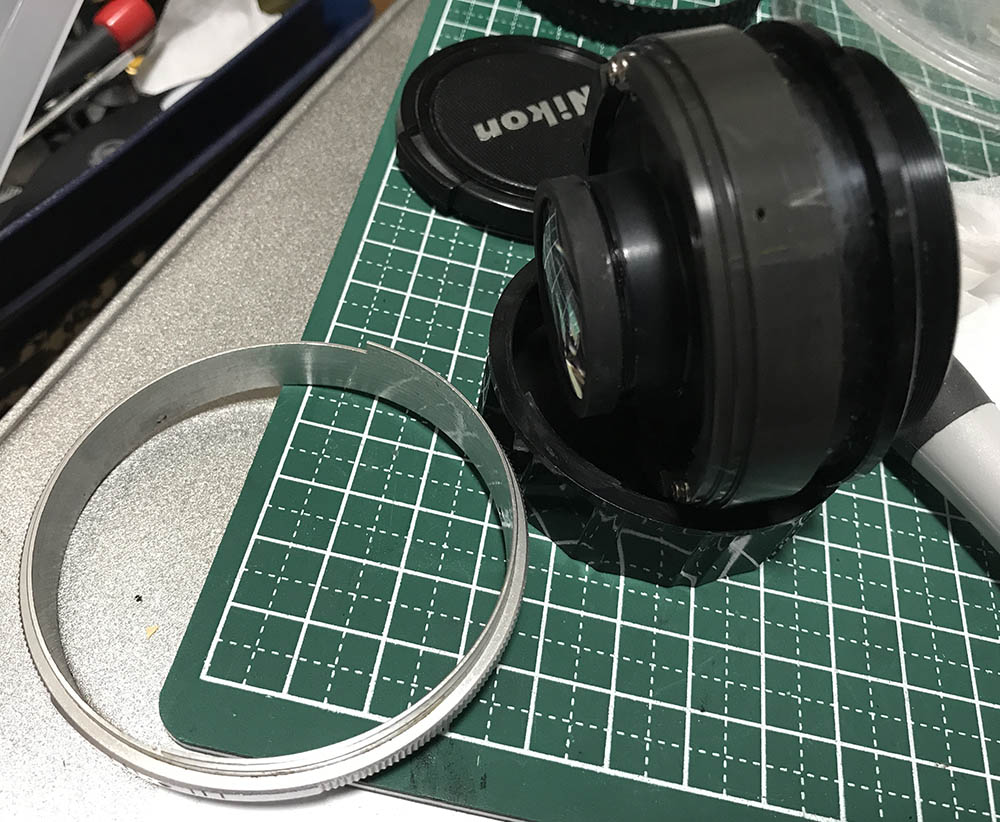
The front barrel consists of 2 parts, the bezel and the barrel itself.
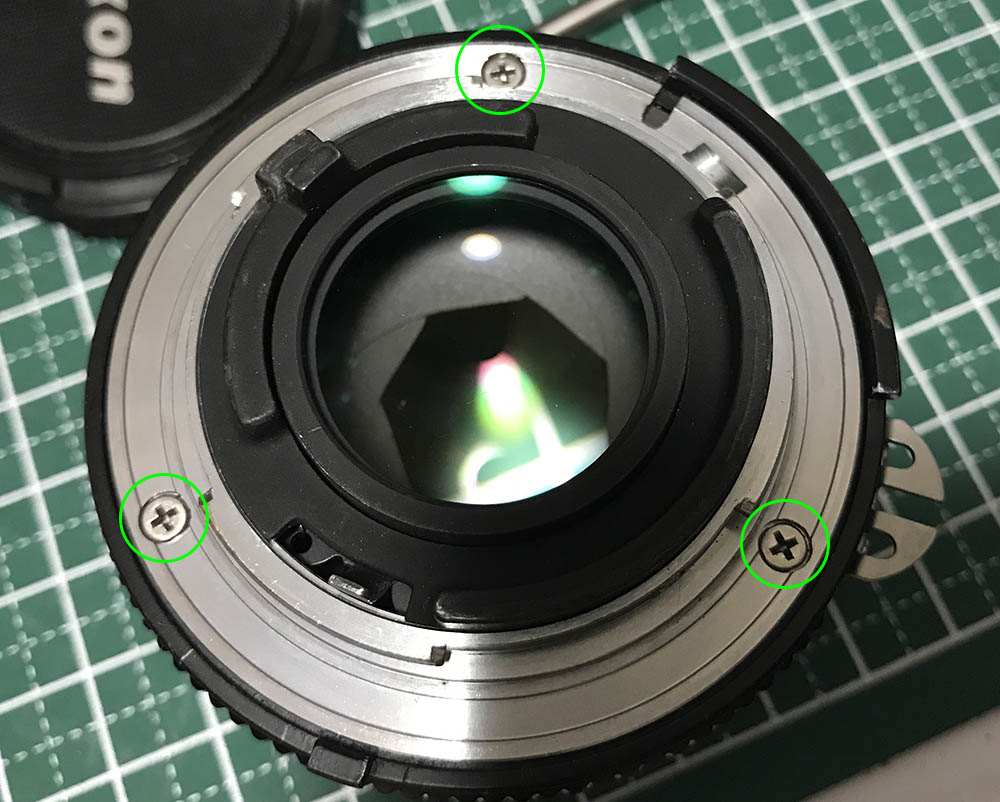
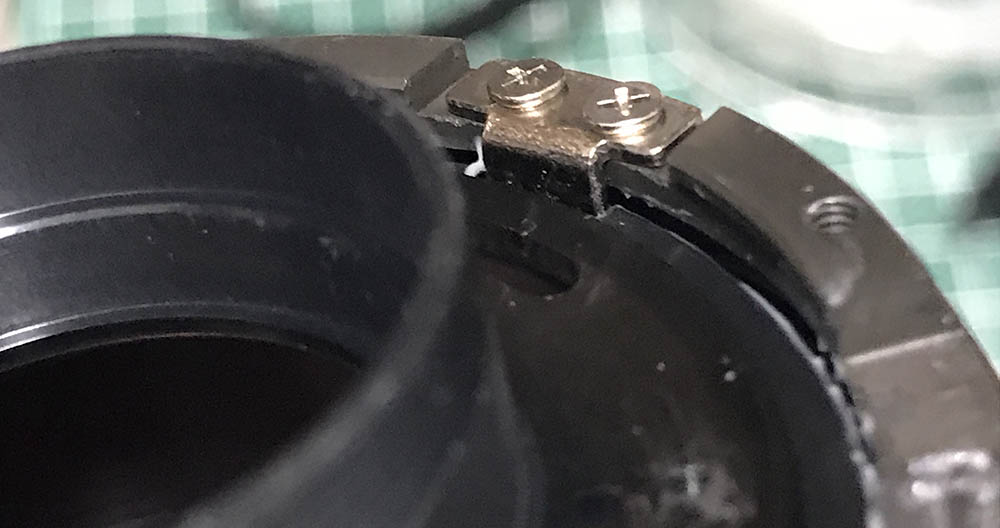
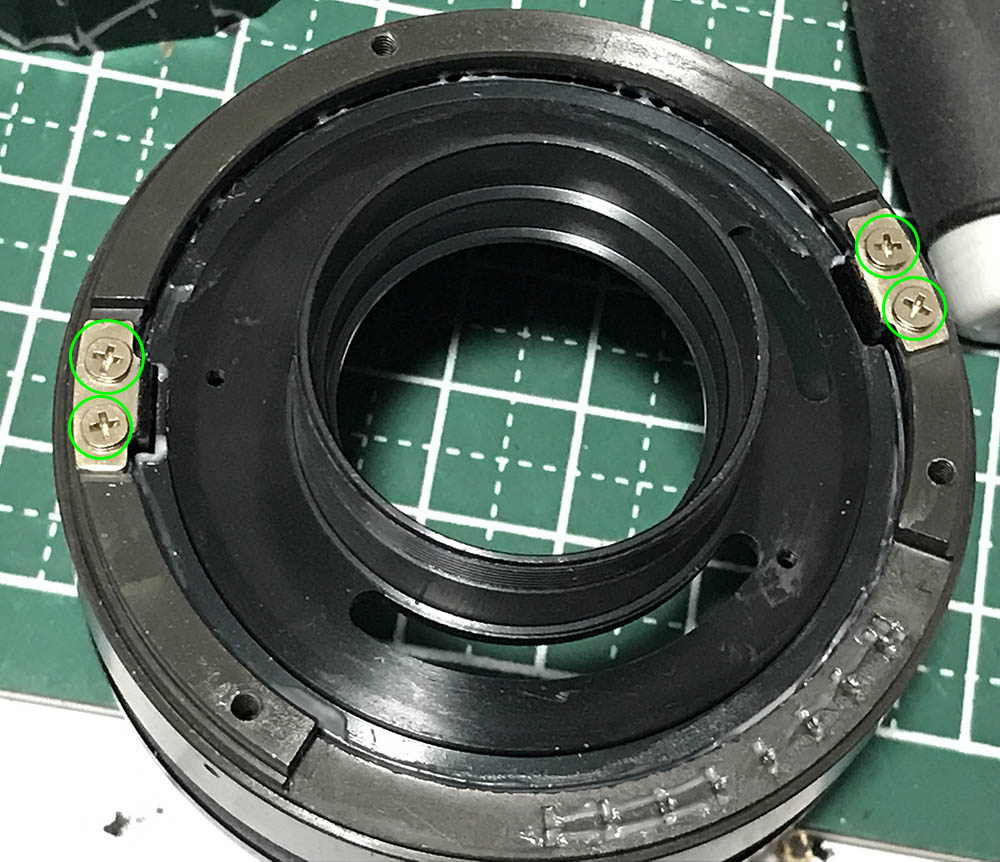
Extract these to remove the bayonet mount. Only use JIS drivers for these, it is important that you read my article on how to remove bayonet screws. The screws are usually stripped because some people do not have the right type of drivers for the job or don’t have the skills for these. They get stuck, then it gets sold and he poor guy buying the lens has to deal with a botched job. Do not fall for the same mistake and read my article and follow what I do.
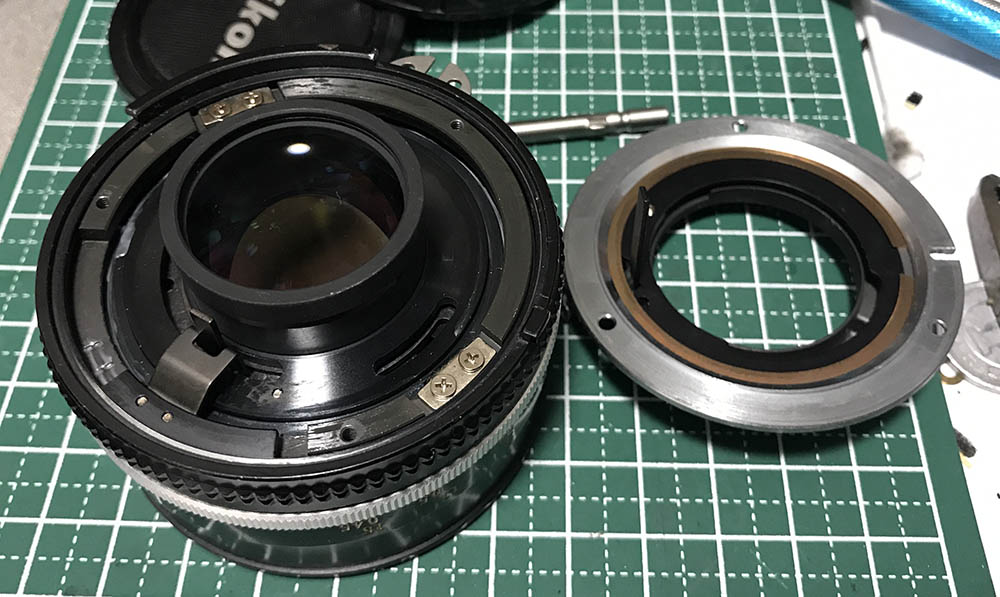
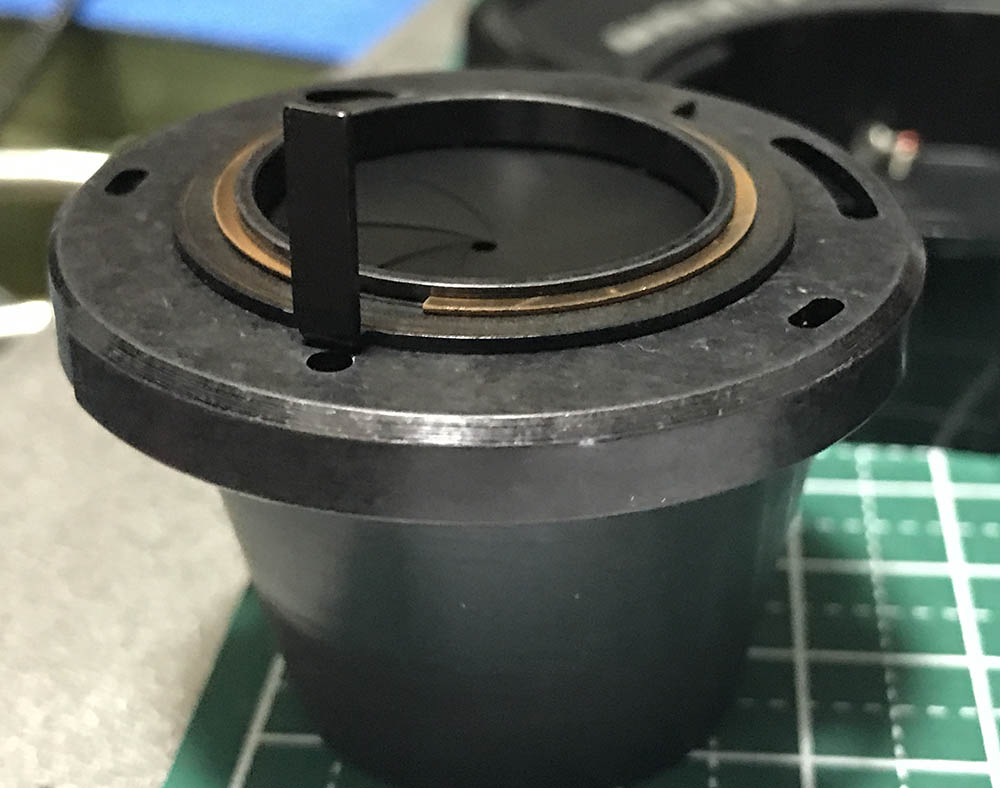
The bayonet mount comes off easily. There’s a lever that couples to the iris mechanism, enabling the camera to actuate the iris. Remember to put that back properly later.
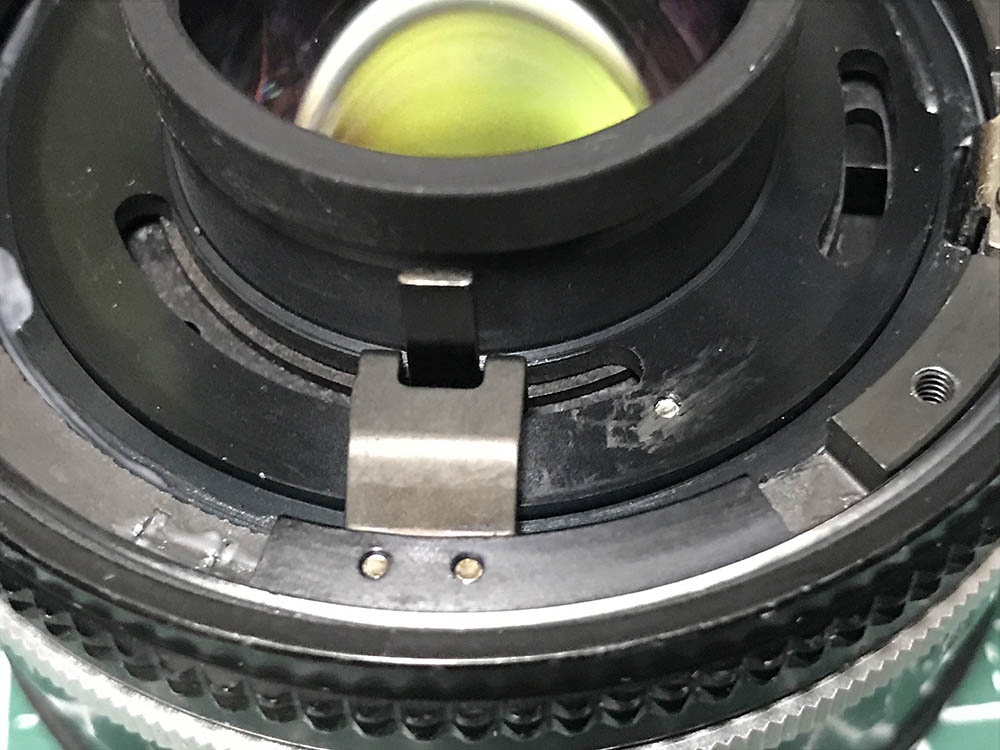
This is how the aperture ring’s fork looks like, it links to the iris mechanism so turning it will also regulate the size of the iris.

Remove the aperture ring and set that aside.
The focusing ring is secured to the main barrel by this brass ring. Extract its screws to remove the whole assembly. This is also where you can adjust the lens’ focus which you should do each time you service a lens that allows you to adjust it.

Remove the focusing ring and clean it thoroughly.

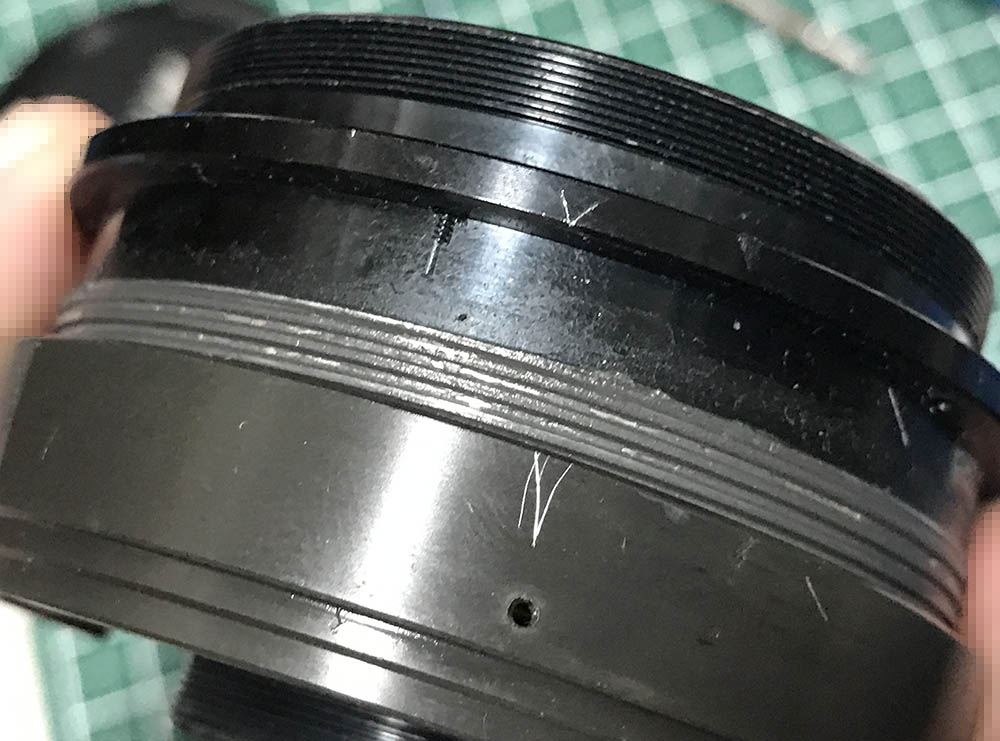
You can remove the depth-of-field scale and the grip by extracting these. It’s important that you take plenty of notes and photos so you’ll know how the barrel is when it’s focused to infinity so you’ll have a point-of-reference. It’s quite shallow but you’ll see small scratches made by me in the photo to help me determine its alignment at infinity.
Remove the grip and brush it clean. The raised part constrains the focusing ring so you won’t turn it beyond its focus range.

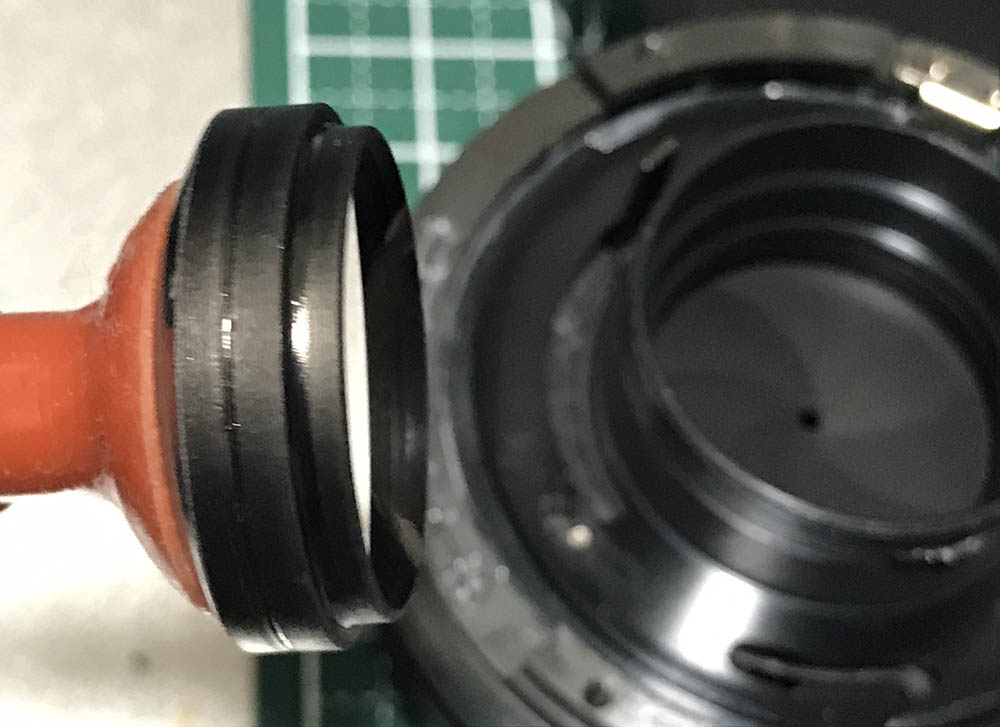
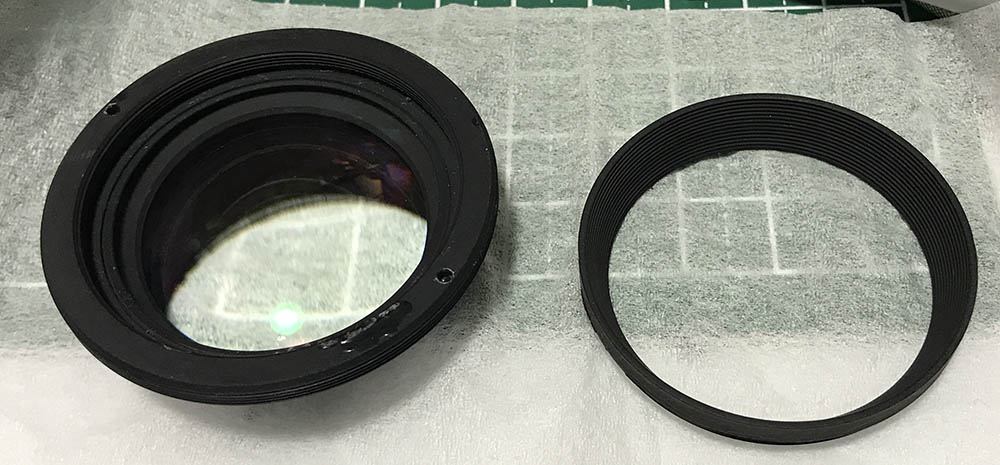
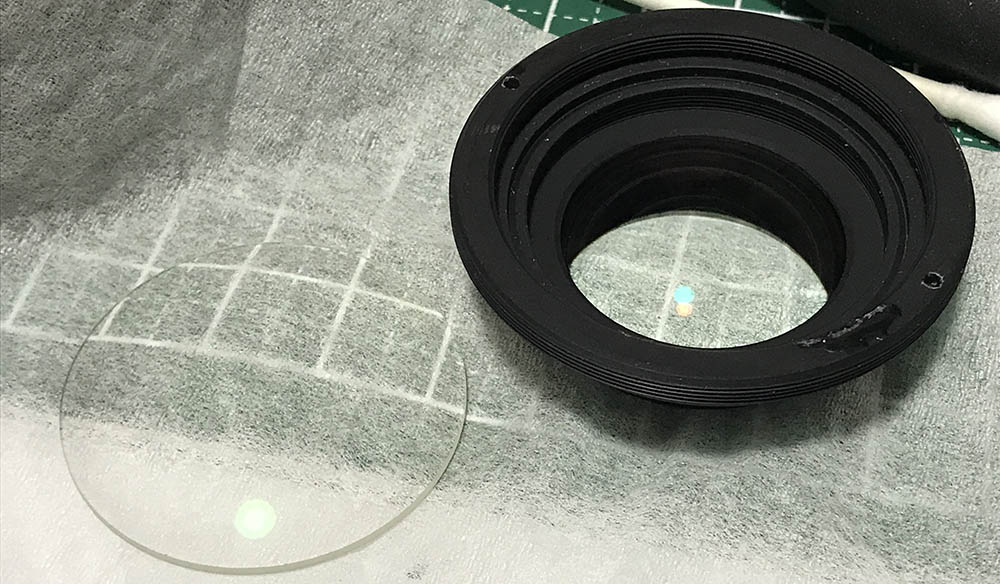
The front elements assembly can be removed with a lens spanner. This can be tough to remove at times and you will need to apply a bit of alcohol to its threads to soften the seal before you can remove this safely.
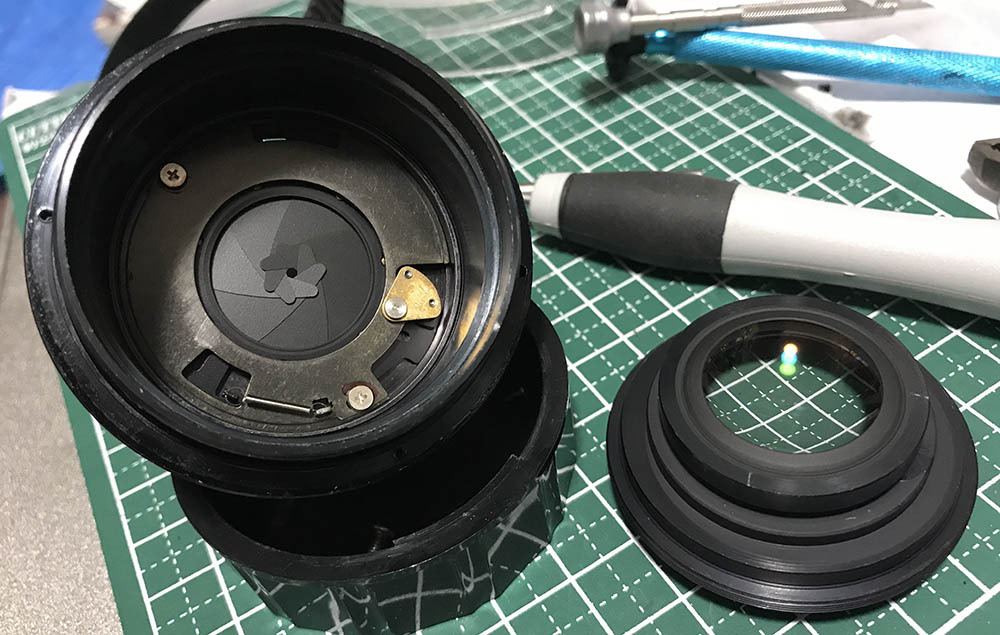
Unscrew the front elements assembly and store it in a safe place while you work with the rest of the lens.

Unscrew the retainer of the rear element so you can extract it. As usual, it’s sealed with lacquer so you’ll have to apply a drop of alcohol to help soften it up before you unscrew it.

Extract the rear element with a lens sucker, use a sharpie to mark the edge that faces the front so you’ll know how to put it back again later. Putting an element back facing the wrong way can and will damage the lens.
Extract the spacer and don’t forget to note which side faces the front.
The rear doublet can be extracted with a lens sucker. Don’t apply alcohol to it, the cement can be damaged by it. Now that all elements are gone you can safely work with the rest of the barrel.

Before you remove the iris mechanism, make small marks so you will know how to align it back again later. It’s adjusted accurately at the factory, if you get this wrong then you won’t get accurate exposures at all.
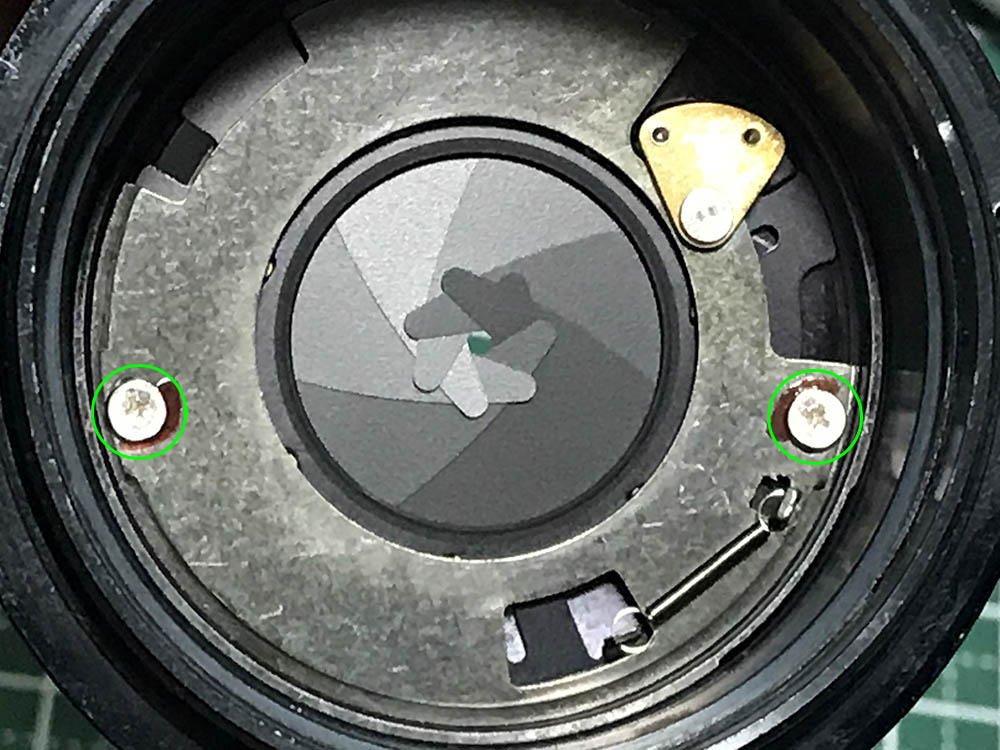
Extract these to remove the iris mechanism. As usual, these were sealed and the red lacquer can be obviously seen here. Dissolve the seal with alcohol so you won’t strip the screws.
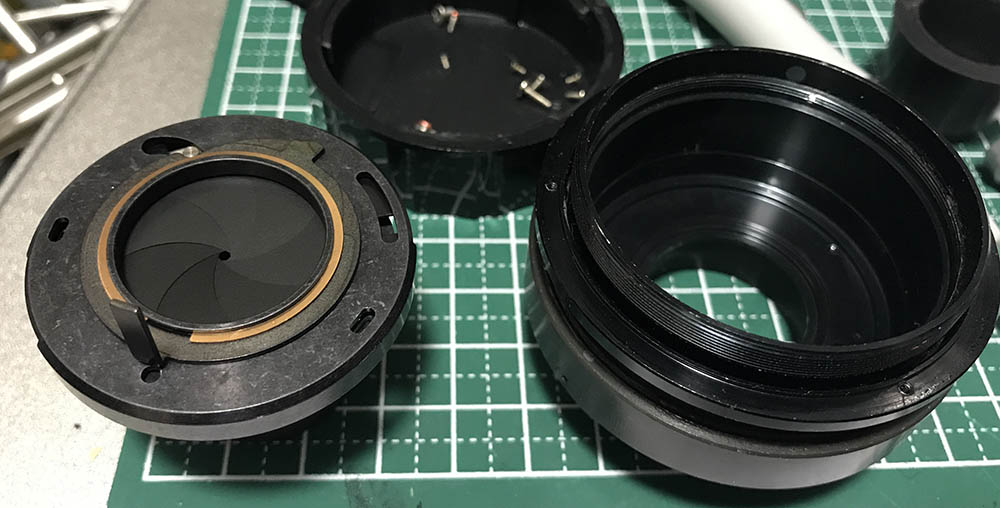
You can remove the iris mechanism, be careful so you won’t damage the iris and its blades or bend any posts here.

It’s time to separate the helicoids. Turn the helicoids until you can’t collapse it further and make a diagonal mark. You should be able to reproduce it and this mark shouldn’t be off by much. If you couldn’t do it then you got this all wrong and you’ll waste a lot of time figuring how the helicoids should mate.
Note how deep the helicoid keys go, too. This is an indicator of how deep the inner helicoid should go and you should be able to reproduce this, too.
The helicoids are secured by these helicoid keys. These keep the synced and turning the central helicoid will allow you to turn all of the helicoids at the same rate, allowing you to extend-or-collapse the barrel. Heat the screws so you can remove them easily. Don’t forget to note the position of one key, the keys were broken-in to their respective slots so you should put them back in their proper holes. We all know that inserting anything in the wrong hole is bad news in camera repair.
Separate the central helicoid from the outer barrel/helicoid. Don’t forget to mark where they separated as this is also the spot where they should mesh. Man people forget to do this and they get stuck. I made an article on how to work with helicoids to help prevent people from getting into this situation.

Separate the inner helicoid from the central one and don’t forget to make a small mark here, too.
Clean the helicoids very well, scrub them with strong kitchen detergent and soak them in an alcohol bath for some time to remove residue. Clean these again and make sure that the rag wipes clean without any traces of grease, I even brush these before I put them back. Using a grease that’s a bit heavy is beneficial for this lens but don’t apply too much of it. Avoid using ones that offer too much resistance as it will make the focusing ring difficult to turn.
Disassembly (Optics):
Since this lens doesn’t have a separate housing for the objective we’ll have to separate the elements while we service the main barrel. It’s not difficult and it’s quite a common procedure for newer lenses. You’ll need special openers to access some of the elements here such as rubber cups and lens spanners.
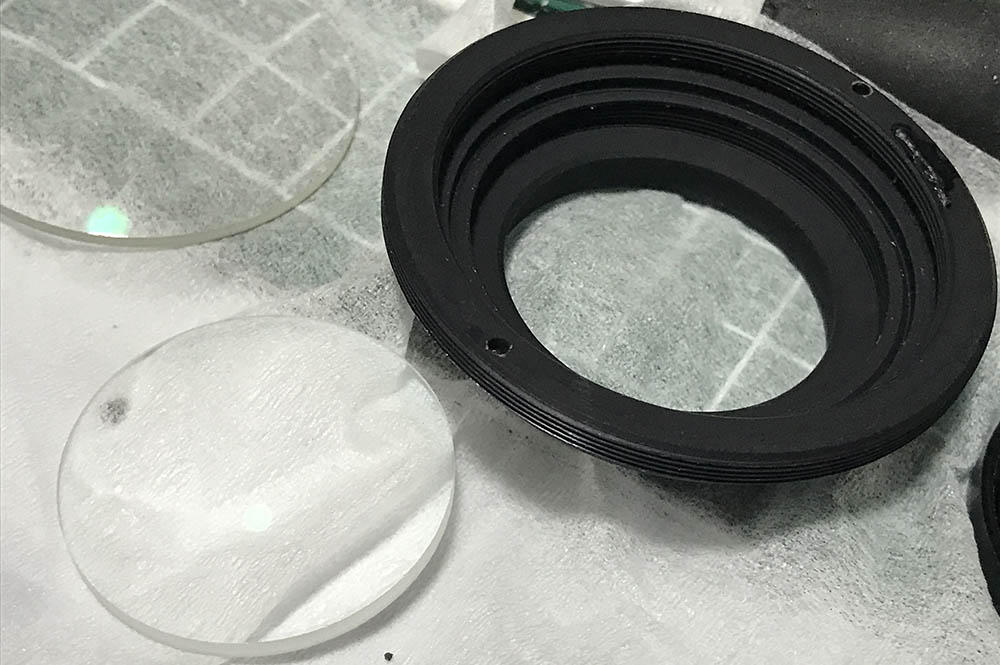
The front element can be removed once you unscrew its retainer off. This is also the baffle for the front element and it prevents light from reflecting off from it. Apply a drop of alcohol to its threads to soften the seal and use your rubber cup to remove it.
Extract the front element with a lens sucker.
The rear can be removed by unscrewing its housing. Don’t bother to remove the front cemented group from its housing as it’s sealed, you’ll damage it so just leave this alone.
Extract the rest of the glass with a lens sucker.
Clean everything well before you put the elements back. Read my article on how to clean lens fungus if your lens is infected with fungus. Be careful with the chemicals since the solution is so potent it can damage the glass and the coatings. Thin it with distilled water and that should help make it safer. The housings and barrels have to be cleaned as well if your lens has fungus. It’s the only way you can ensure that it won’t come back again apart from using your lens regularly. Fungus loves stale air and dark conditions.
Conclusion:
It took me a few hours to service this lens with most of that time wasted on cleaning the disgusting grease that the previous repairer applied. This is an easy lens for experienced repairers, it’s peanuts for me. I enjoyed every bit of it because I was expecting that this lens is similar to the older version but I found out that the construction is totally-different and I learned something new and share with you whatever I found.
The iris mechanism wasn’t dismantled since it’s clean but it’s similar to a lot of Ai-S Nikkors in terms of construction so read my other articles to find out how to do it. The right way to put the iris mechanism back inside the barrel is to prop it atop a rubber cup and lower the barrel on it. This is the easiest way to do it. Secure it with its screws and you’re done.
Reassemble everything back to this point and adjust its focus. I wrote an old article on how to adjust a lens’ focus. Read it so you’ll know how it’s done in a DIY setting. Once you’re happy with the results, tighten these and reinstall everything back and you’re all done.
Many people covered the repair of this lens but I would like you to see what I do so you’ll have a different perspective. I hope that you enjoyed this and I also hope that this helped somebody. If you loved this article, please share it with your friends. I get $0.70 a day from views so every visitor counts. You can also consider supporting my work, you are helping me offset the cost of hosting this site and help me purchase, process and scan film. I promote the use of film in this site and you’re helping me do a service to the community. Thank you very much and see you again in the next article, Ric.
Help Support this Blog:
Maintaining this blog requires money to operate. If you think that this site has helped you or you want to show your support by helping with the site’s upkeep, you can make a small donation to my paypal.com (richardHaw888@gmail.com). Money is not my prime motivation for this blog and I believe that I have enough to run this but you can help me make this site (and the companion facebook page) grow.
Buy me a roll of film or a burger?
Thank you very much for your continued support!
$2.00
Helping support this site will ensure that this will be kept going as long as I have the time and energy for this. I would appreciate it if you just leave out your name or details like your country’s name or other information so that the donations will totally be anonymous. This is a labor of love and I intend to keep it that way for as long as I can. Ric.

Sep 28, 2020 @ 20:44:26
Hi Richard,
1)How much would be to change the focussing barrel of my AI-s 50mm f1,8 pancake?
2)How much would be to clean the fungus on the same old lens?
Thanx!
Mar 12, 2022 @ 21:27:13
Hello Richard,
I am curious why there appears to be a strange protuberance on the mount of the 50 mm f/1.8 long nose that I do not see on other Nikkor lenses. I have lens number 3236597. If we look at the lens from the back and the mount black dot is at 12 noon the weird bump is at about 6:30 coming out of the fixed black ring surrounding the movable element holder.
(Sorry that I do not know the name of these parts of the lens assembly. It projects away from the element and also back into the camera body. Other Nikkor lenses have similar complex structure on the correspond black ring, but none that I have examined have a bump that projects into the camera body. The reason I am curious is that I am trying to use this lens as part of some scientific apparatus and the bump
interferes with some other parts I am trying to mate it to.
Do you have any understanding of the purpose of those features in the design?
Jerry