
Hello, everybody! Me and the family just had a Korean dinner at Daruma, one of the best shops for Japanese-style Korean food in Nakano. It’s not the cheapest shop around but it offers the best value when it comes to selection and quality. There are many shops near it that serve similar things for a bit less but this shop is hard-to-beat so we keep on going back when we have a chance to. Other shops may have better reviews on the food review sites or may have better/cleaner place but they are all just hype and you will soon realize it as soon as the food is served. Some customers just do not know the difference or ignorant about this shop so they thought that they had a great deal when in fact they just got ripped-off. This also applies to photography gear and there are plenty of examples of a hyped product and I’ll show you one now.
Introduction:
The Nikon 50mm f/1.8 Series-E lens is very popular. It was made to be cheap so it carries the Series-E brand instead of the Nikkor trade name. The Series-E lenses are basically just Nikon lenses that were made with cost-cutting in mind while maintaining acceptable performance and decent build quality. Cost-cutting was made by using a lot of plastic instead of alloys and parts simplification. The optics were also at times tweaked to give the impression of sharpness and contrast wide-open at the expense of other important but subtle factors. It will attract the attention of beginners but the experienced photographers will know if something is missing. The good news is this lens is one of the few Series-E lenses that did not have the optics watered-down in order to make it affordable. This lens shares the same optical formula as the Nikkor 50mm f/1.8 Ai-S, a lens that has a great reputation amongst many photographers for being sharp, small and well-rounded. It makes this a nice lens because you get similar performance for much less. That was generally true until the internet hyped this lens so much that you can buy the Nikkor 50mm f/1.8 Ai-S at times for a bit less than this one. It used to cost about half so buying this lens had a purpose but that line has been blurred today and I will explain everything to you in the introduction and the repair section so you can compare what’s inside of this and the Nikkor 50mm f/1.8 Ai-S.

The lens is small and can be considered one of Nikon’s smallest and lightest lenses ever. I personally prefer the Nikkor 50mm f/1.8 Ai-S because it’s more durable and it feels better in my hands but I certainly won’t mind bringing this out with me at all. In this photo, it’s mated to the Nikon EM. The Series-E lenses were made for the Nikon EM so Nikon can have a cheap line of lenses to sell to budget-conscious consumers. Produced from 1979 to around 1985, it has a moderate production life and is considered to be a successful lens. I am sure that this lens sold really well considering how common it is to find these in the used market.

It’s so compact when mounted on a Nikon Df and it will be tiny compared to bigger cameras like the Nikon F5 or the flagship Nikon D series. One part of cost-cutting is omitting the Ai-coupling claws, you can only meter with this lens in stopped-down mode when you use it with a Nikon camera using the older-style non-Ai-metering interface that uses the claws to communicate its aperture to the metering module of the camera.

This lens shares the same hood with its more expensive brother. The Nikon HS-11 hood is a must-have gadget for this lens to help shield it from stray-light hitting the front glass at an angle and creating flare and ghosts in your pictures. The lens you see in this picture is the later version with metal grip and a Nikkor-like rubber grip. The older version has a plastic grip and the overall feel is much cheaper. That’s the version that I had many years ago and I loved that lens a lot because it was the smallest lens that I had in my collection at that time.
Let’s see some photos taken with this lens. Knowing how a lens performs is important so you can exploit its strengths and you can avoid its weaknesses. You can blame your gear all-day for a bad picture but you should probably blame yourself more because you did not know how to maximize its use. I hope that these pictures will help give you the knowledge you need to help determine when or where you should use this. The good news is this shares the same optical formula with the Nikkor 50mm f/1.8 Ai-S so you should also read my article for that lens since what I said for that lens’ performance is also true for this lens and vice versa except for a few things that you’ll soon find out later in this article.


(Click to enlarge)
Unlike the Nikkor 50mm f/1.8 Ai-S, this lens has the tendency to form ghosts when you have really bright light sources within your frame and the blobs tend to look bluish in color. It is very annoying and stopping the lens down won’t help and may even make the orbs much more obvious. This hints that the lens has inferior coating compared to a true Nikkor. If this bothers you, get the Nikkor and you won’t see this happen as much. Also note that digital sensors are more reflective compared to film so it may affect the resulting image. That is why Tamron, Tokina and Sigma release “digital” equivalents of their lenses when DSLRs became popular some 16 years ago.


(Click to enlarge)
These photos were shot from f/1.8, f/2.8 and f/4. Wide open, the lens is sharp and colors look good. Contrast is also good and resolution seems decent. The thin DOF makes it look a bit soft but once you see what’s really happening you will realize how sharp this lens is even at wider apertures. It won’t flare much but ghosting will be prominent as you saw in my samples. Stopping it down to f/2.8 will give you a big improvement in all parameters. Resolution drastically improves by f/2.8 so it can resolve finer details beautifully from this f-stop on. While vignetting isn’t too bad with this lens it’s present wide-open but generally goes away by f/2.8. Stop the lens down to f/4 and the lens is near its peak performance at the expense of the blurry background since the DOF is much deeper by now. The lens reaches peak performance at f/5.6 and stopping it down further won’t give you much in return. The quality of the bokeh is smooth and rendering is good to say the least, I’m impressed, it reminds me very much of the Nikkor 50mm f/1.8 Ai-S and how beautiful it renders the background.


(Click to enlarge)
I took these pictures many years ago when I was still living in Singapore. I used my main camera at that time (Nikon D700) to take these and I was very happy with the contrast and character of the photos. These are just some of the defining traits of this lens and these are what you will notice first when you see the photos you took with it. Pardon the panning-shot of the old man in the bike but I just wanted to add that picture for nostalgia. The photo still uses the old watermark that I used many years ago and people would make fun of it because it reminds them of the 老夫子 comic books that’s popular with people of my generation. I don’t know if kids still read them today.
Let us now see some pictures that were shot with film. I took these pictures using Fujifilm Industrial 100 so we’ll find out how this lens renders pictures with film. Film renders the scene differently compared to digital and this is why we’re doing this. This was designed in the film era so shooting this lens with film will give us a better understanding of what the lens designers had in mind when they designed it. This is as close as we can get to experiencing the “true essence” of this lens.

One of the features of this lens is the ability to focus really close at 0.45m. I shot this close to its minimum focusing distance and the lens shows good sharpness even wide-open. I missed my focus by a bit so the yellow string at the left edge is in-focus. This turned out to be a happy accident because we can now see how sharp this lens is at the far-corners of the frame.


(Click to enlarge)
More photos with the subjects closer to the frame. The bokeh is smooth and the transition from what’s in-focus to what’s blurred is smooth unlike some Series-E lenses which tend to have a harsh transition due to over-corrected optics to give you sharper, more contrasty photos at wider apertures. This also affects the quality of the bokeh balls and is just one the causes for the annoying concentric rings within them.


(Click to enlarge)
Some pictures taken with the subjects further into the frame and the lens stopped-down to about f/8. The details are very nice and you don’t see any ugly smudging in the needles of the Japanese pine. Fujifilm’s X-trans sensor does that and that’s one of the reasons why I got turned-off and sold all my Fuji gear but that’s another story. Some lenses will render the needles with an ugly halo or smudging because it lack the resolution to resolve all of the fine details and geometry of the needles, some older lenses will exhibit this when given just the right conditions for it to trigger. Vignetting won’t be a problem at these smaller apertures and should be largely gone by f/4 or so.


(Click to enlarge)
It is really difficult to take a bad photo with this lens unless you are doing something totally wrong. Head to the next section and see more photos that were taken using film but this time for low-light photography.
The next couple of pictures were taken with a Nikon F6 and Cinestill 800T. I love taking low-light photography and I use this film a lot for it. It has a nice glow that surrounds bright light sources which makes it unique. It’s also a fine-grained film so it’s good for resolving fine details.

Sharpness is nice wide-open and Cinestill 800T captures every detail for you to appreciate after you develop your roll.

The quality of the bokeh is nice which compliments the pretty girl’s portrait. The rendering is quite natural and the subject isolation is pretty good, too.

The focus throw is just right so you can quickly focus with this lens but it is also long-enough to allow you to focus it precisely.

A lens with a longer focus throw can be slower to focus and that will mean that you may lose some shots. A lens with a short throw solves that but this also means that you can’t focus precisely since the turn rate is greater. This lens got it right and it’s one of the things that you’ll be glad with.


(Click to enlarge)
Here are some more photos that were shot with Cinestill 800T. This lens is a good partner for Cinestill 800T because it’s fast enough and the resolution is pretty good wide-open which makes this great for low-light photography.
With all the sample pictures that I took and all of the commentaries I made regarding this lens’ use and history do you think that this is for you? Well, if you’re going to ask my opinion then I will just recommend that you just buy the Nikkor 50mm f/1.8 Ai-S since it’s just about $30 more these days and you can even find them even cheaper if you got lucky. It is almost the same lens but the build is better inside-and-out so you’re getting a better lens for a few dollars more. It’s a much better deal and you’ll notice it as soon as you held both lenses in your hands. The internet has hyped this lens too much so the prices for these at the used market is inflated because of the demand. These used to be sold for $40 back then on average and the price has doubled in recent years so it’s not a “secret” anymore. If you found one for around $40 then buy the lens because it’s a great deal for that price but make sure that it’s clean and the lens has no hidden problems or it should sell for much less than that. The internet can sway people’s opinions on so many things that is why I’m writing this to help educate people on what’s a real good deal from what’s been artificially-hyped by reviews so I hope that I can help point you in the right direction. If you still want this then it’s perfectly fine, you’re still getting one of Nikon’s best lenses from the film era, it will serve you well. I hope that my article showed you how to make the most out of your money. Compare this article with my Nikkor 50mm f/1.8 Ai-S article and inspect the sample pictures there then you can tell me if I am wrong about the inferior coating and build quality. You be the judge.
Before We Begin:
If this is your first attempt at repairing a lens then I suggest that you check my previous posts regarding screws & drivers, grease and other things. Also read what I wrote about the tools that you’ll need to fix your Nikkors.
I suggest that you read these primers before you begin (for beginners):
Reading these primers should lessen the chance of ruining your lens if you are a novice. Before opening up any lens, always look for other people who have done so in Youtube or the internet. Information is scarce, vague and scattered (that is why I started this) but you can still find some information if you search carefully.
I highly recommend that you read my working with helicoids post because this is very important and getting it wrong can ruin your day. If I can force you to read this, I would. It is that important!
For more advanced topics, you can read my fungus removal post as a start. This post has a lot of useful information and it will be beneficial for you to read this.
Disassembly (Lens Barrel):
The lens barrel is simple to disassemble and put-back but there are a couple of things that you should be mindful of. This lens has plastic parts so never use any naphtha or acetone or other aggressive solvents. Plastic threads are easy to damage so don’t forcefully remove anything. The threads sometimes become harder to unscrew when you use force since they flex, using a light touch makes it easier to remove certain plastic parts. Screws should never be over-tightened because that will damage the threads or crack the plastic. If you need to screw something, screw it back first in the opposite direction until the parts that you are screwing meshed and then proceed to tighten it the usual way. Always do this for metal screws or else the screws will tap a new thread on the existing plastic thread. This is called “cross-threading”, it causes many plastic threads to become loose and useless.
We usually separate the objective first when repairing a lens but this is not always possible. In this case, the housing of the objective is also part of the inner helicoid since the threads were molded directly to the outer walls of the housing. Removing the front optical assemblies is easy but the rear ones can be a bit tricky if you haven’t separated the helicoids yet. Read the whole article so you will understand what I mean.

The front bezel can be easily removed with a rubber cup but since it’s made from cheap plastic the fit can be imprecise. You will find that slight pressure can stop you from unscrewing it. The easiest way is to use tape and stick to it. Use the tape to turn the bezel until you take it off. That’s also going to be the same routine for you when you try to put it back again later.

The threads on the bezel are molded onto it. This is as cheap as it gets as far as Nikon-made lenses are concerned.

Remove these screws so you can separate the front barrel from the rest of the lens. This is made of metal but it’s secured to a plastic part so be gentle with the screws.
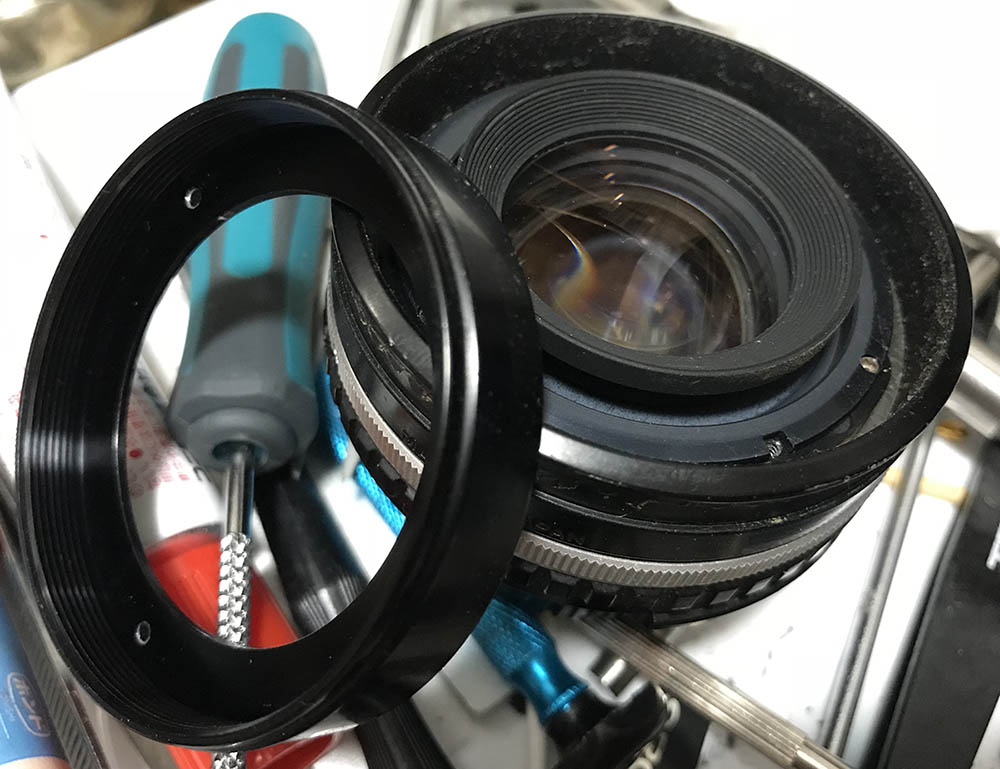
The front barrel should easily come-off as it wasn’t glued at the factory. This is the reason why it’s easy to damage this since it’s only secured to a plastic base underneath.
The front elements assembly’s casing is made of plastic, it’s secured by these screws. Remove these screws and you can extract it.
The housing itself seems to be made from real metal but just like the front barrel, it’s secured to the same plastic base. You can unscrew this with your fingers if you want.
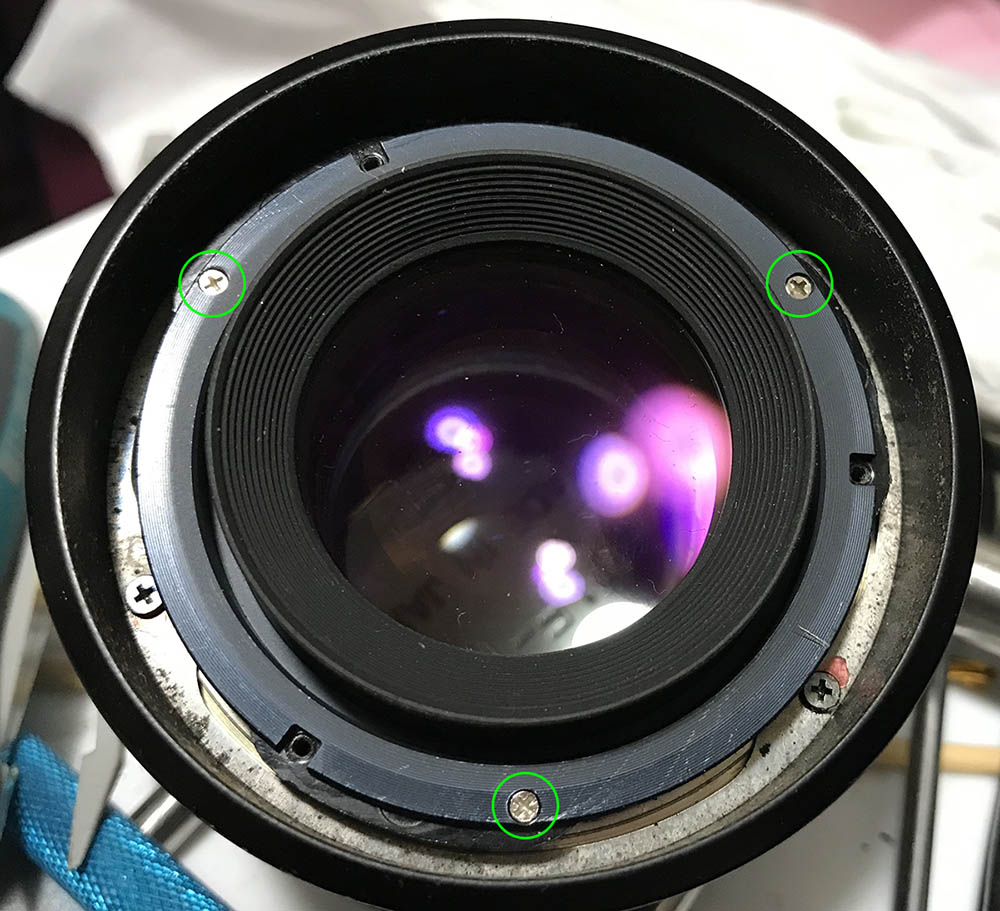
Separating the focusing ring is simple. You just remove these 3 screws and carefully pull it off while being careful not to ruin the brass fastener around it. The screws are secured with red lacquer at the factory to indicate that it’s a precise adjustment point. If a Nikon staff saw that this has been tampered then he will not service it. The lacquer is also used to secure these screws so they won’t get loose accidentally. You adjust the focusing ring and your lens’ focus here and that’s why you want it to be as secure as possible.
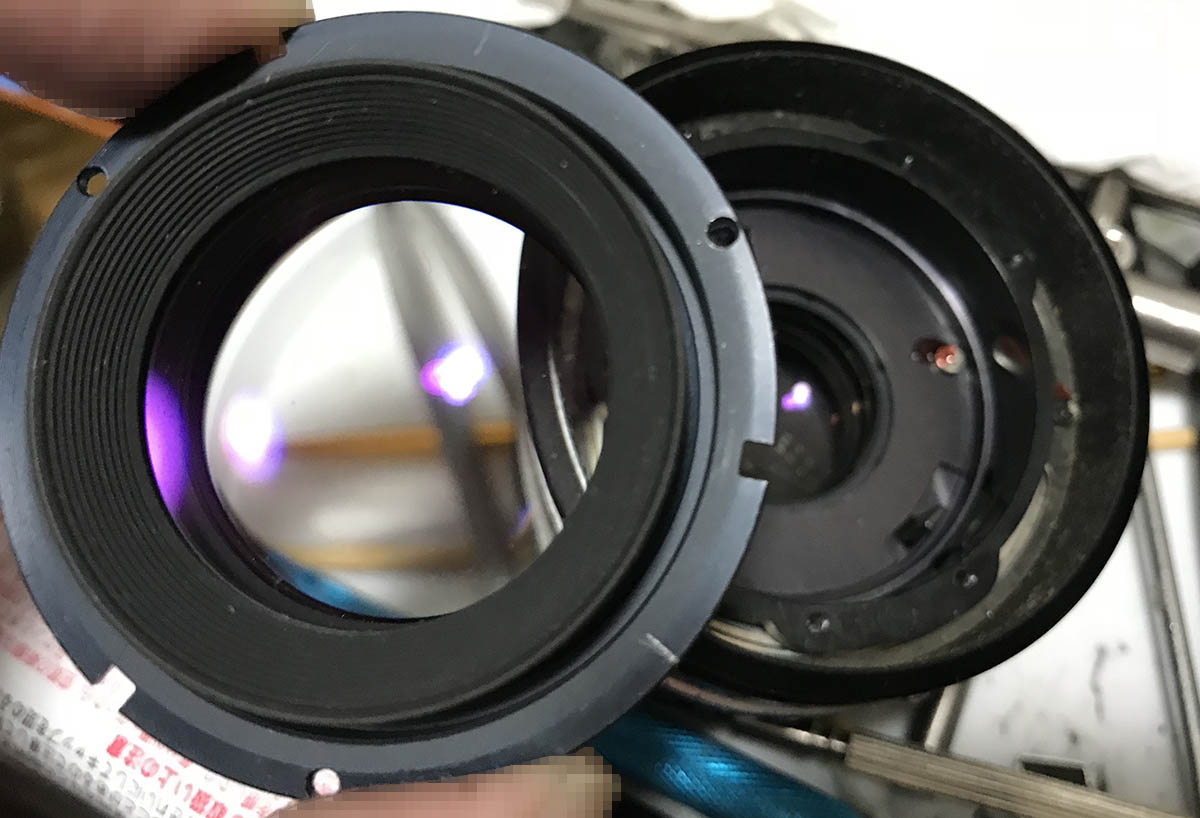
You can remove the focusing ring as soon as you remove those screws. The brass fastener is still stuck to the focusing ring but it can be safely removed as nothing is securing it.
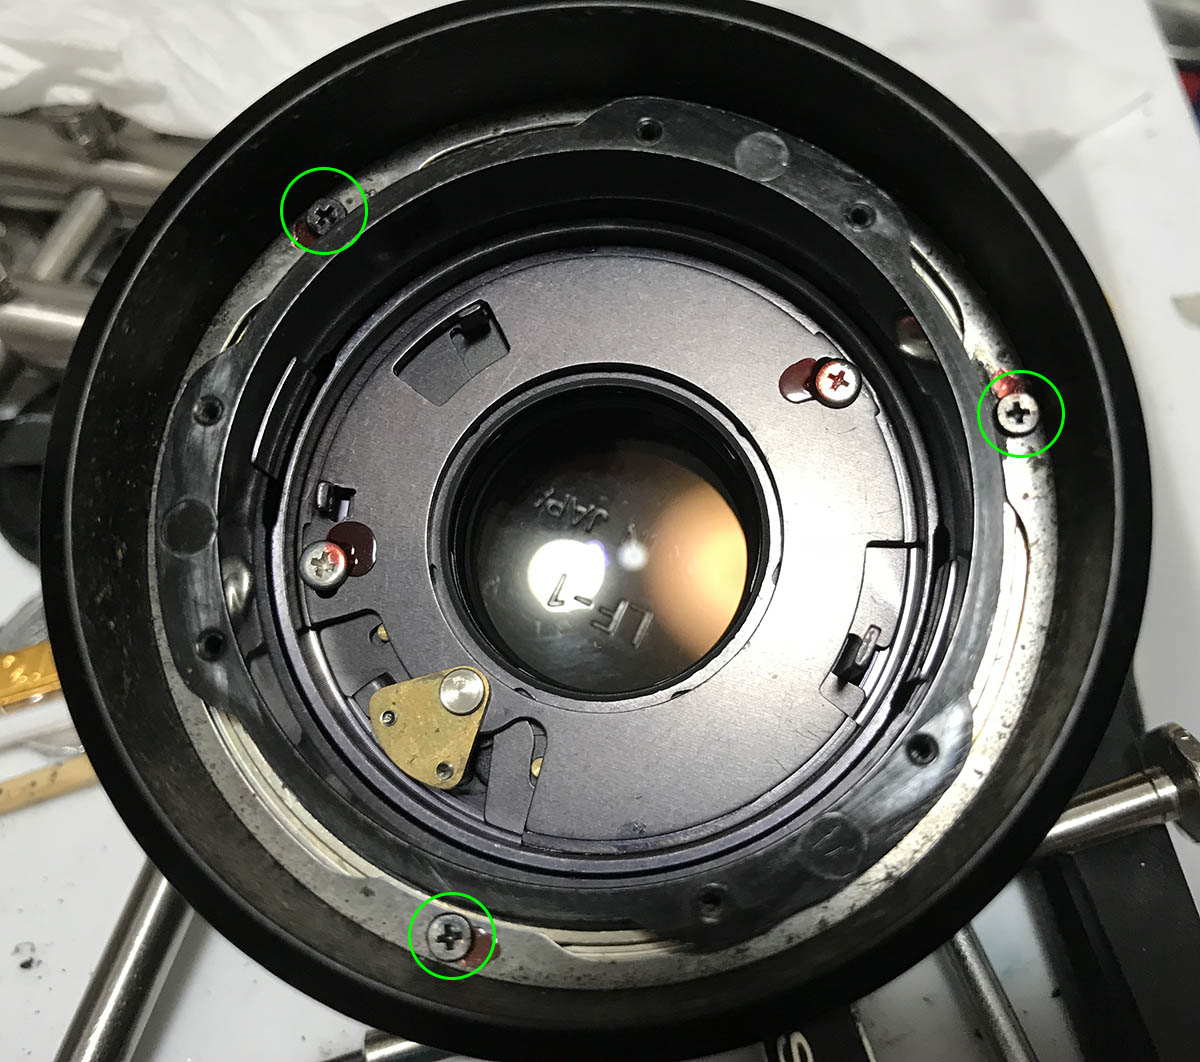
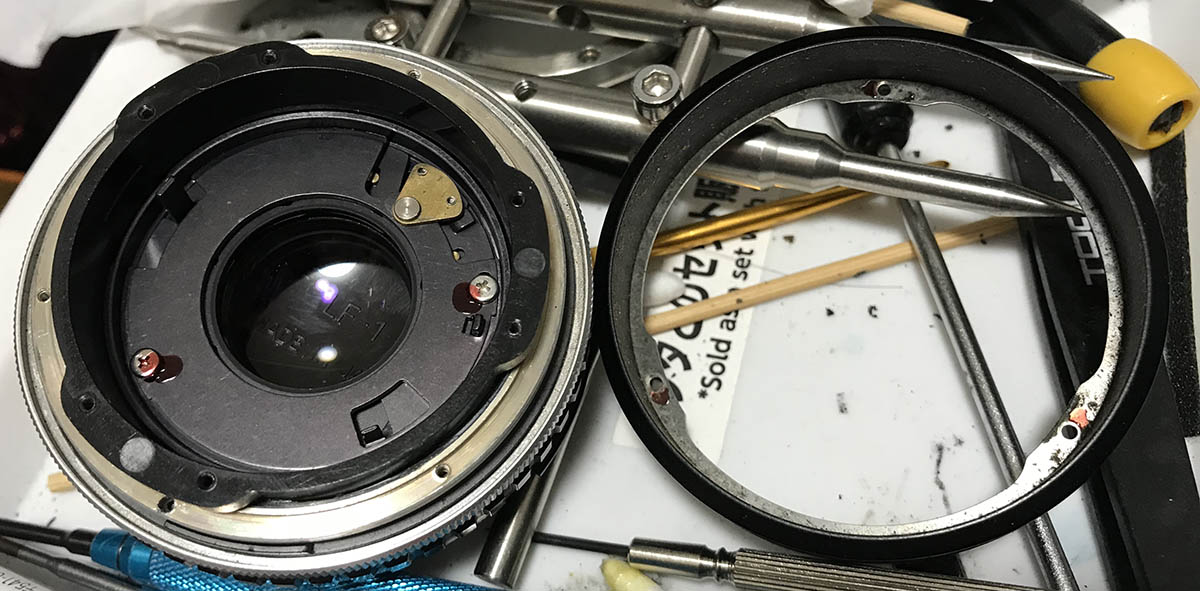
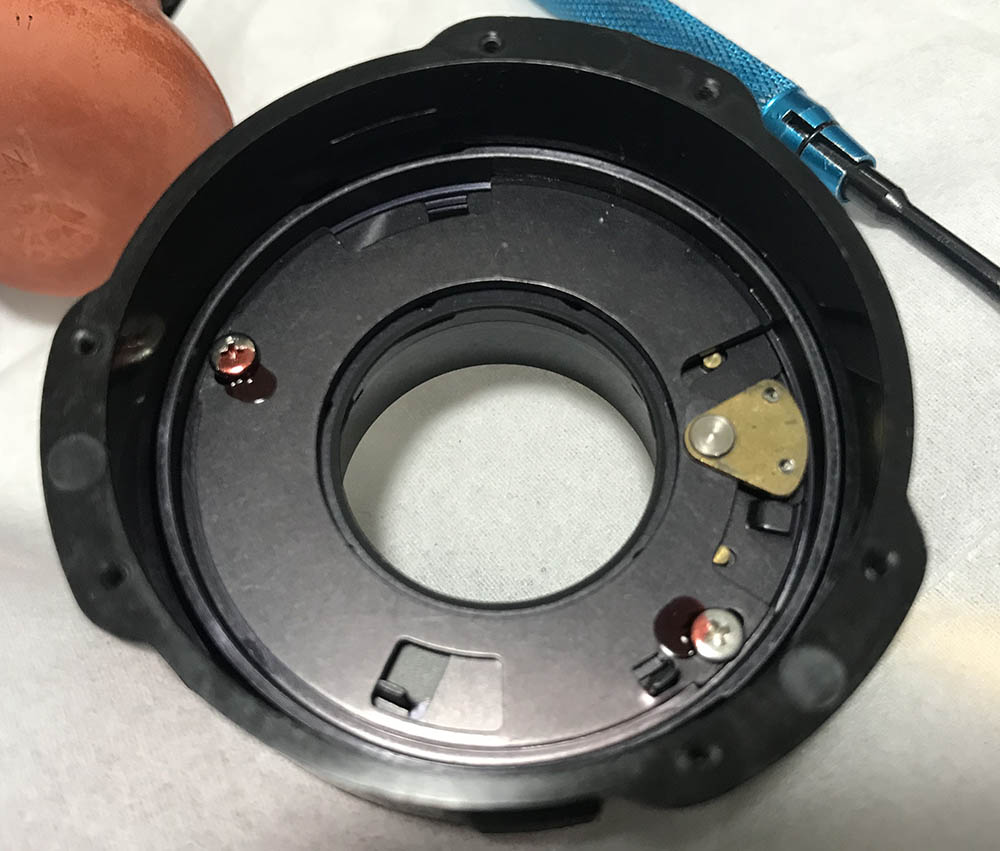
Time to remove the bayonet mount just unscrew these and you can remove the bayonet mount safely. Many beginners get stuck here because they lack the tools and the knowledge to remove these screws. These are not phillips screws as some people will want you to think. To know more about it, read my article on how to remove bayonet screws and you won’t make the same mistakes and get stuck like many beginners do. If you heard somebody tell you that these are phillips screws, slap them in the face because you want them to stop spreading fake news.
The mount can now be removed. Be careful with the stop-down lever when you remove the mount. It’s inserted into a slot in the iris mechanism so that makes it possible for the camera to actuate the iris.

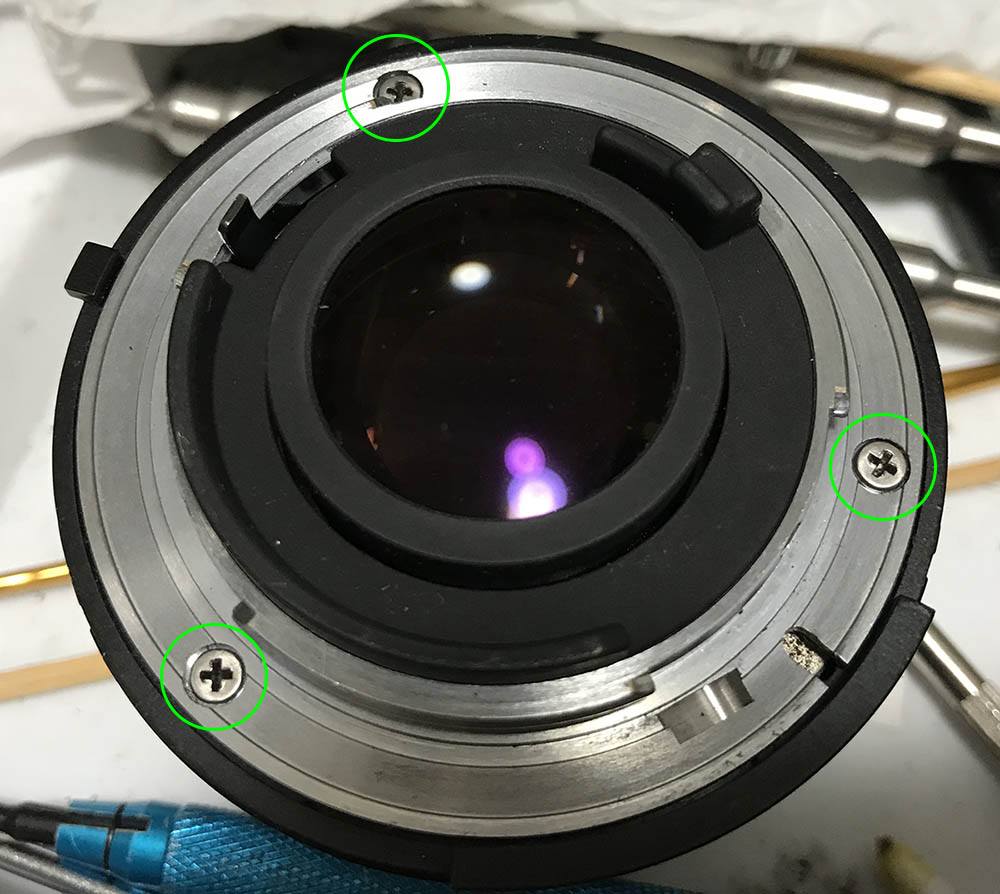
The aperture ring can be easily removed just like this. Do note that the claw should catch the iris mechanism’s post. It’s how it controls the regulator for the iris.


(Click to enlarge)
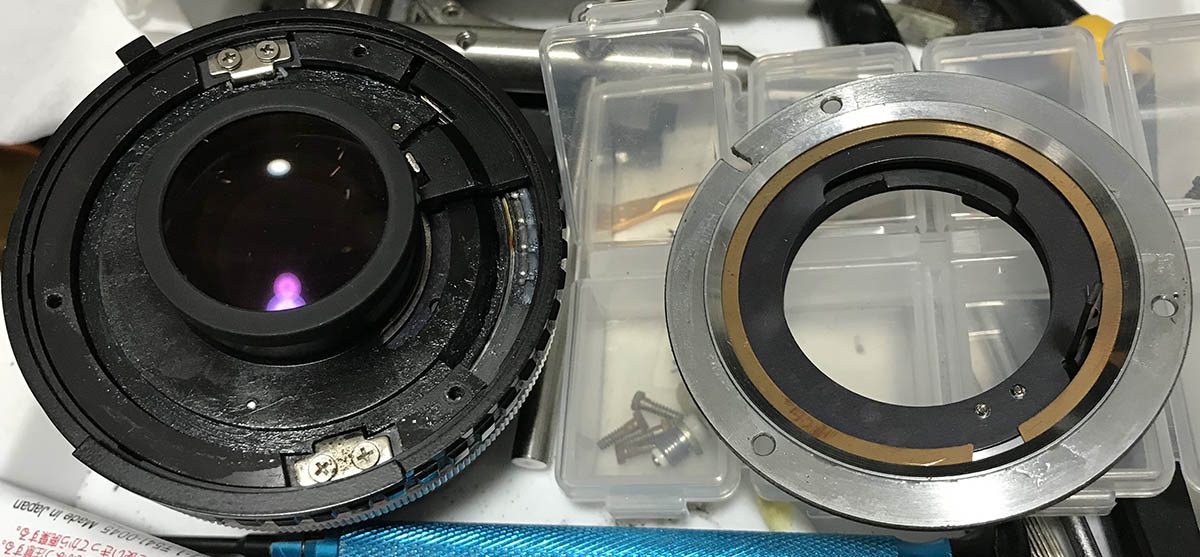
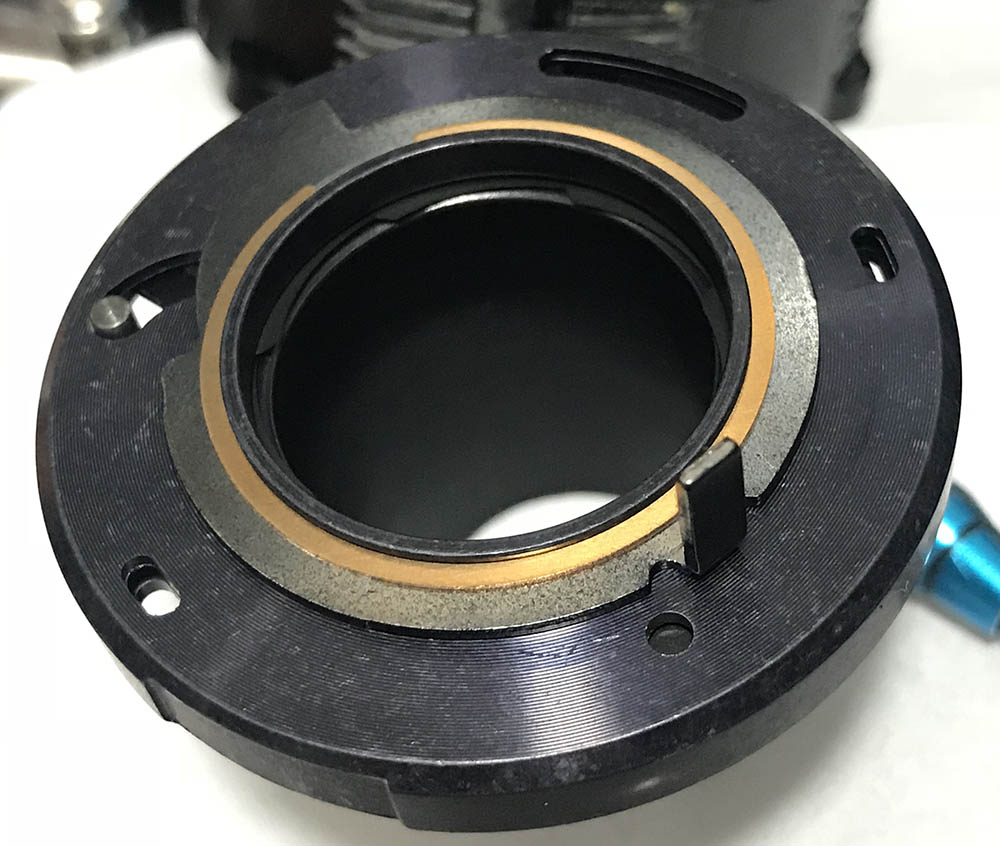
It’s now time to separate the helicoids. Before you proceed, take plenty of pictures so you will have plenty of references later when you re-assemble your lens. Take measurements of everything related to the helicoids and their relation to each other. These are vital and putting the helicoids back the wrong way can prevent your lens from focusing properly.
The helicoids are kept-together by helicoid keys. These keys make sure that they move in-sync so turning the central helicoid will enable you to extend or retract them as a single unit, enabling your lens to focus as the optics are positioned closer or further away from the film plane.
The keys can be extracted by removing their screws. Make sure that you do not forget how and where they were originally so you can put them back to their original slots. Take plenty of photos before you remove them so you’ll know how the helicoids should be positioned or how high/deep they should be in relation to each-other.
Here’s another picture that I took to note the helicoids’ original positions. I also forgot to remove the shiny alloy grip earlier so I’m just doing this now. You should remove this part before you remove the helicoid keys.
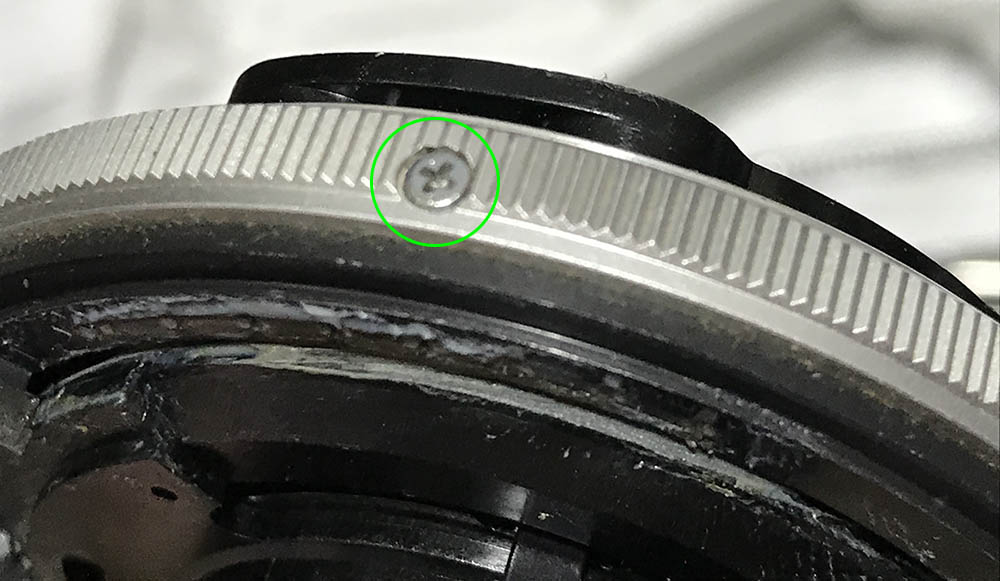
To remove the grip, remove these screws and you can pull it away from the main barrel. Make sure you use a driver that’s a perfect fit for these screws, if it’s bigger it can scar the surrounding fluted details, if it’s too small you’ll risk stripping the head.
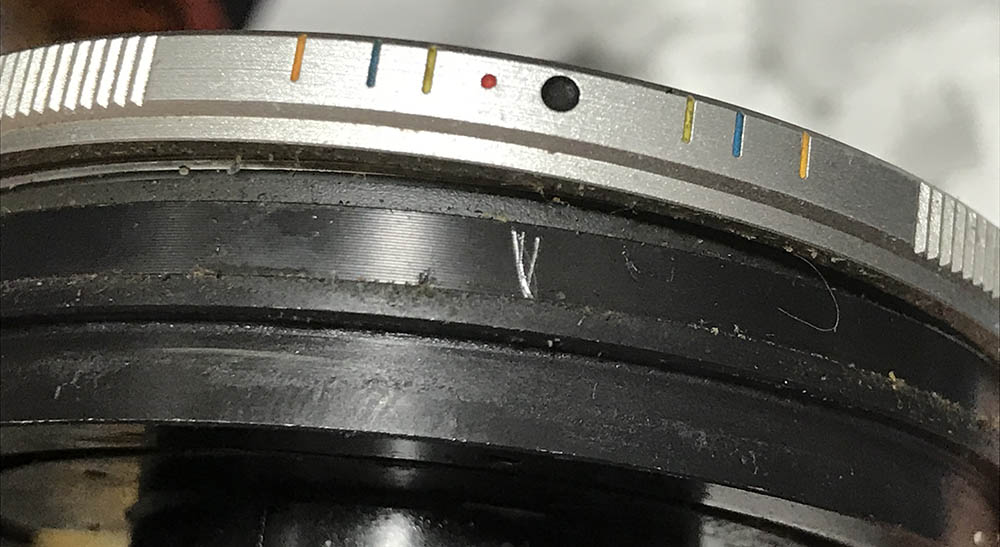
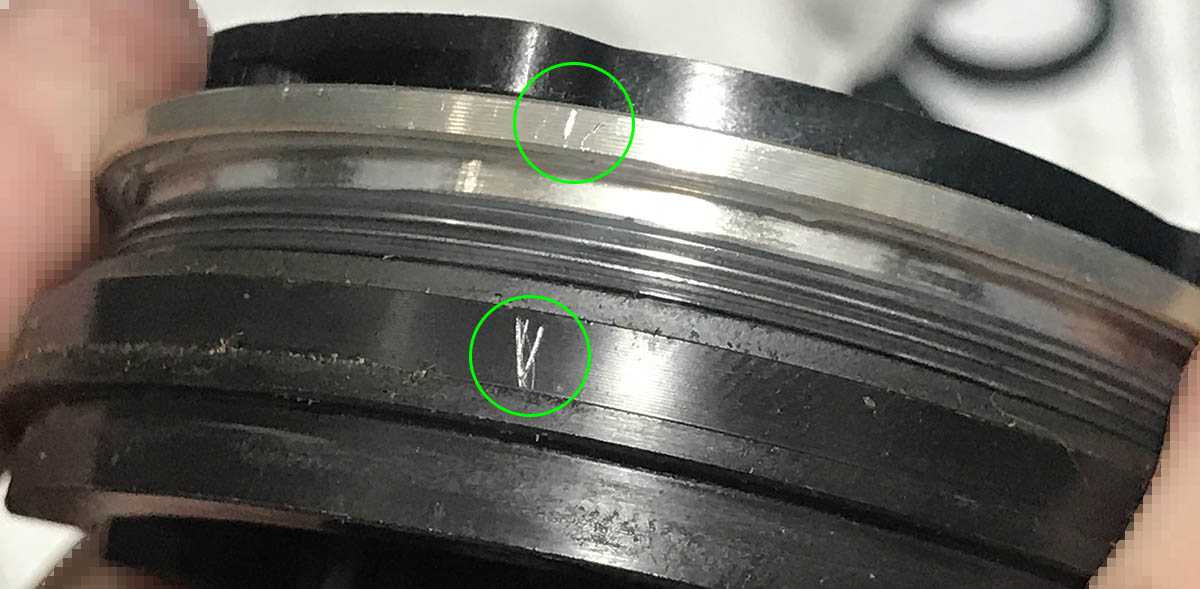
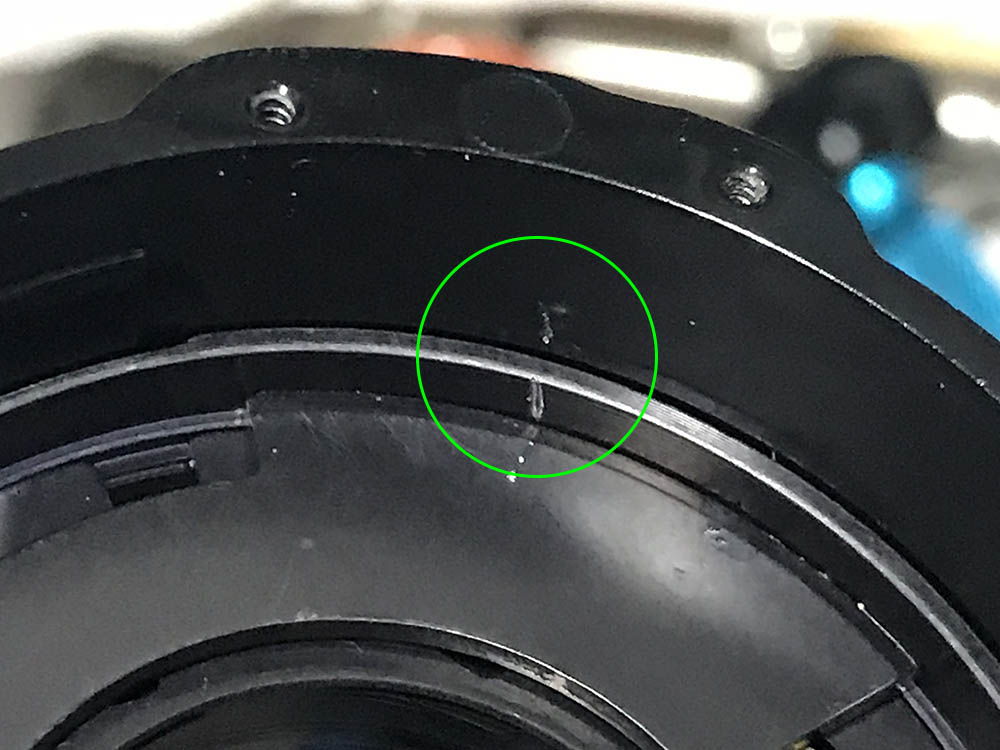
To make sure I will know how to orient this thing back again later, I made a mark so can see where the midline of the lens should be. This is also useful as a reference point so make sure that you make a small mark in your lens (much smaller than mine, please).
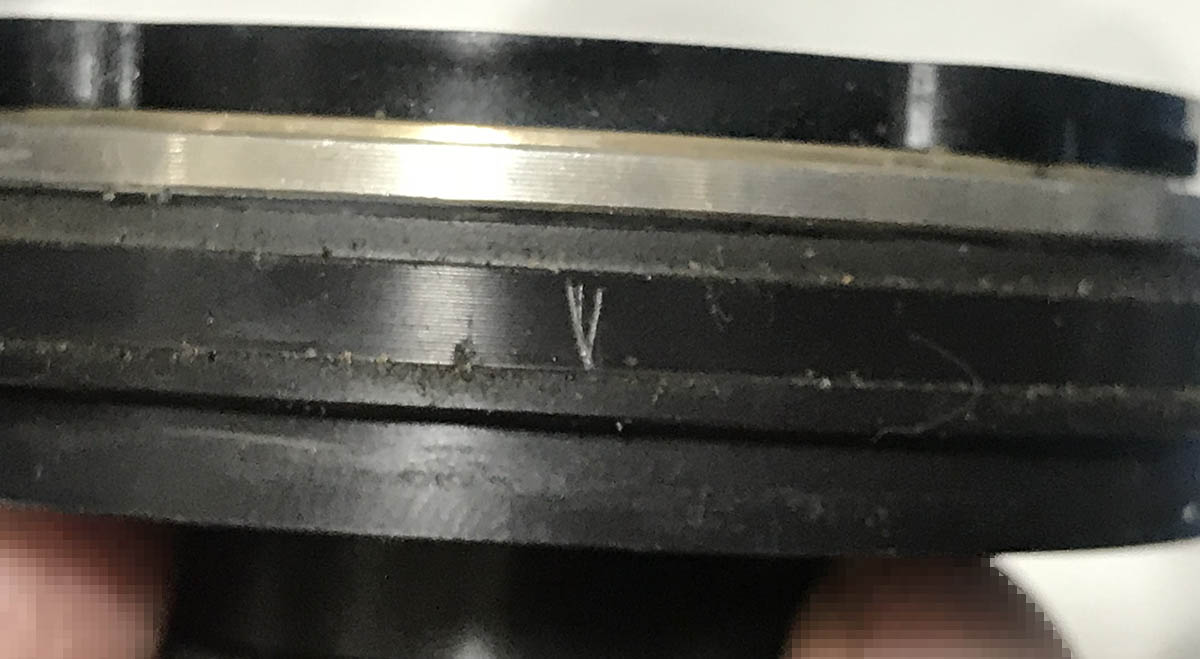
Here’s how wide the slit should be when the lens is focused to infinity. Some people rely on how many turns were needed to remove a helicoid in order to determine the original position of the helicoids but I use distance instead and note the features of the helicoids in relation to each-other since I find it more reliable.
It’s now time to separate the central helicoid from the outer helicoid. Don’t forget to note where they separated because this is also where they should mate. Many beginners don’t know this so they get stuck during re-assembly. To avoid this, please read what I wrote about working with helicoids. Make sure that you follow my tips.

Remove the inner helicoid and be careful not to scratch the optics because the housing of the objective also serves as the inner helicoid. Again, never forget to mark the part where they separated.
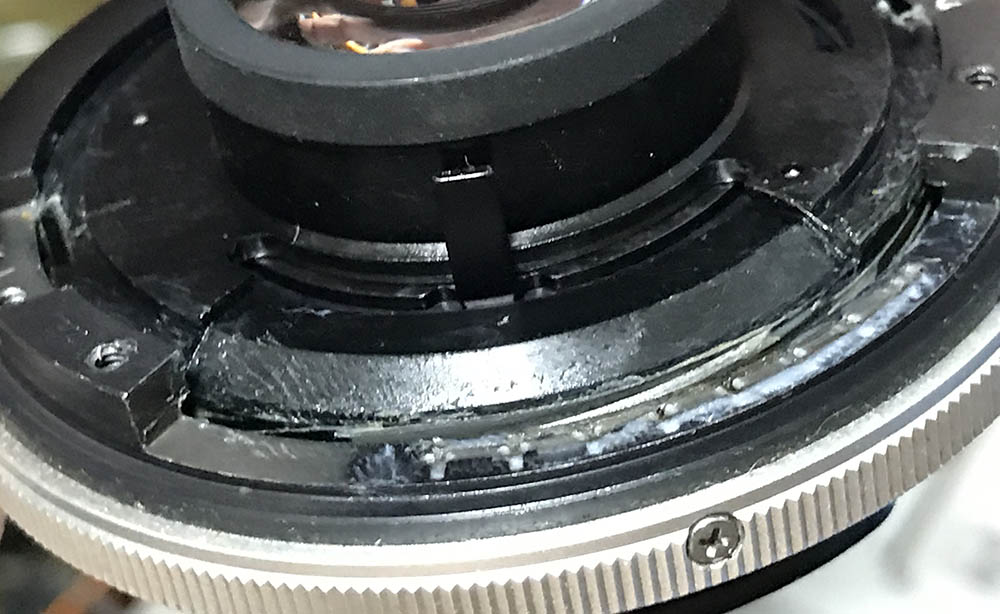
The dirty grease looks like a mix between 2 different grease types and that’s the cause of this lens’ stiff-focusing problem. This is the reason why I began this blog. I wanted to help people to understand that lens repair is never as simple as what many people think, the key to a successful repair is having the right tools, know-how and experience.
Clean everything very well and make sure that you don’t leave any residue. Only use the best grease you can get and only use plastic-safe grease types for this lens and I will tell you why later in this article.
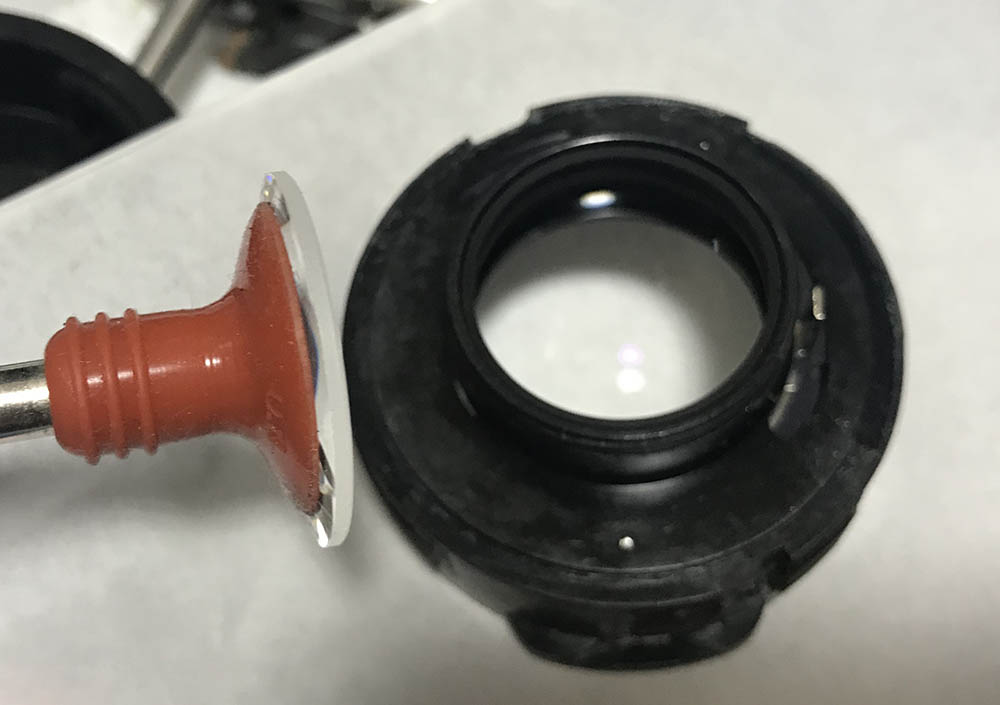
Disassembly (Objective):
Dismantling the objective is relatively easy since all Series-E lenses share a common and simple design. One very important thing to remember is to be careful when using alcohol or stronger solvents, the housing is made from plastic. Acetone will dissolve this and avoid MEK or other similar chemicals. This particular lens doesn’t have to be dismantled completely since it wasn’t super dirty so I will skip the iris mechanism, I’ll also skip the front elements assembly. If your lens needs to be thoroughly cleaned, read my work on the Series-E lenses because they share a similar scheme so you can use them as guides to work with your lens.

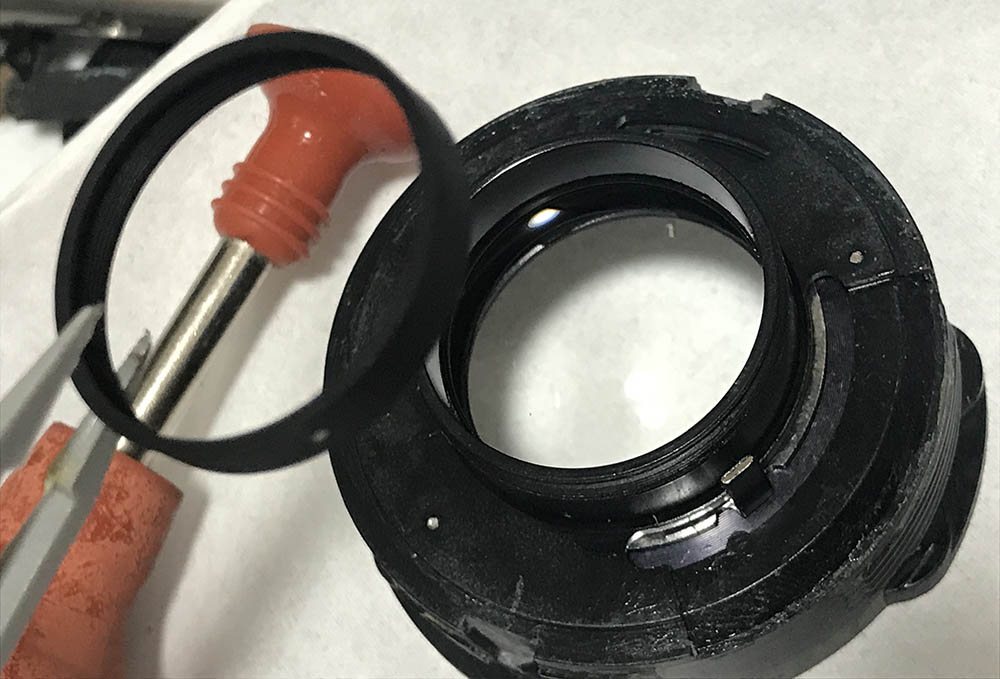
The rear elements are secured by a collar. Use a little bit of alcohol to soften the lacquer if it was sealed at the factory. Don’t use anything stronger than that, acetone and more aggressive solvents will melt the plastic housing. If you forced it, you run the risk of cracking the threads. A cheap plastic lens has to be treated like the cheap and dinky toy that it is.
The rear element can be extracted using a lens sucker. Make sure that you note where the element should be facing so you don’t put them back in the wrong direction.
There’s a shim underneath the rear element. Make a small mark at its outer wall so you will know which direction should be facing the front when you put this back later.
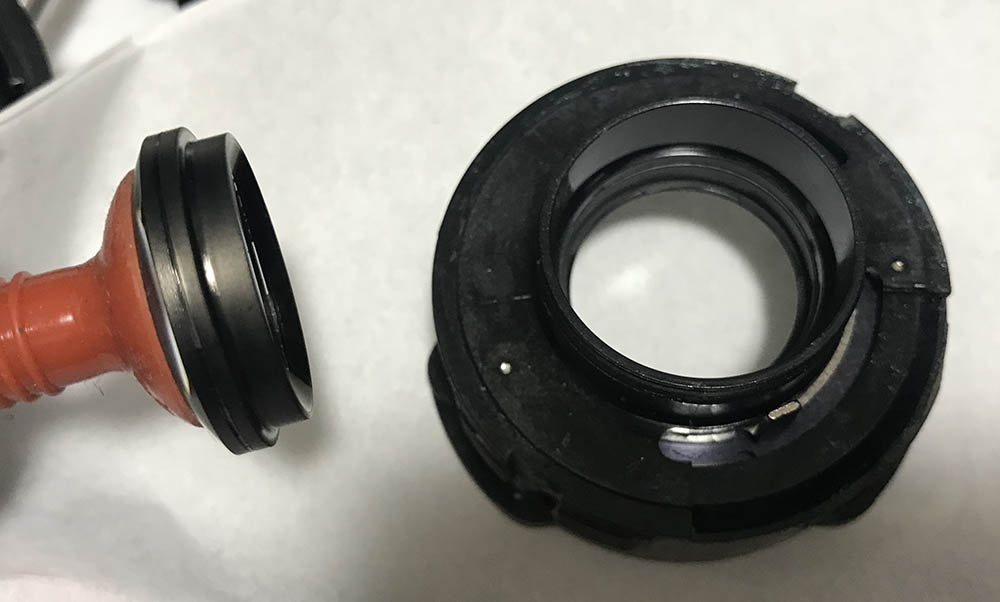
Extract this doublet and be careful not to drop it. This is a cemented group composed of two separate elements. Alcohol and other solvents will damage the cement so never use any solvents near this thing.
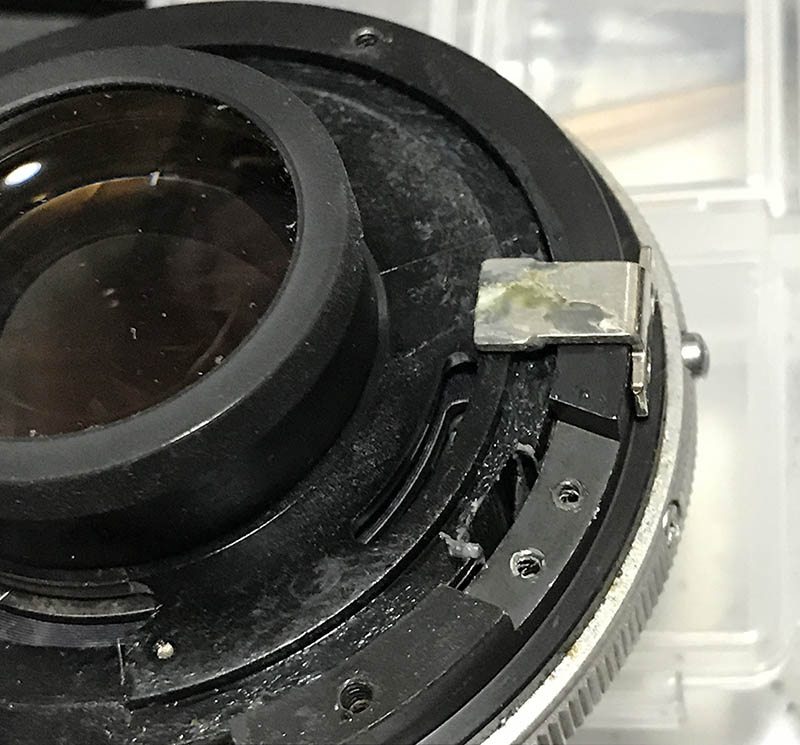
The iris assembly is being secured by two screws that were sealed with red lacquer. Seeing the red seal indicates that this part can be adjusted and you should put it back together again like the way it was before you dismantled it. It also helps indicate if it has been tampered by a non-Nikon repairer and they can refuse to service it. Soften the seal with a little bit of alcohol and it should be easily lifted-away using a Q-tip.
Before removing the iris, make small scratches to serve as keys so you can reassemble it back as close to how the factory adjusted it. Aligning the lines should give you the correct position of the parts involved.

There’s a weird feature in the iris mechanism of this lens, it has anchors for a spring but it doesn’t have a spring installed when I opened it and it doesn’t need one since the tension is supplied by the spring at the stop-down lever mechanism. This is probably a sign that it is a common part that is shared with other Nikon lenses. For all intents and purposes, this is just a vestigial feature and should be treated only as a curiosity than anything functional.
And here’s the iris mechanism. You can remove it in one-piece if you didn’t dissolve the lacquered parts near the seams of the mechanism’s housing. I didn’t have to clean mine so I just took a Q-tip and saturated it with alcohol to clean the housing and that’s it. If you have an oily iris then you will have to open it up and clean everything.
That’s all for the objective. It has very few parts so you won’t spend a lot of time repairing yours. Remember to never put excessive amounts of grease at the helicoid threads at the outer surface of the housing, the grease can migrate to the iris and cause a mess. You don’t need to apply a lot because the threads are segmented so there are not a lot of surfaces that come into contact with each other. When lubricating the plastic threads, use silicone-based greases as much as possible. Lithium-based greases are fine as well but do not used petrol-based greases or molybdenum-type greases because they can damage or clog the threads. This is what happened to this lens and that’s how it became a junk lens that found its way to me.
Conclusion:
Cleaning this lens took me about 2 hours. Most of that was spent cleaning-away old and dirty material from the parts and killing the germs using an alcohol bath. It was easy for me since I am familiar with these lenses. I got lucky this time because the glass does not need any serious cleaning. The main issue lay with the helicoids because they were in a terrible state.
Would I recommend this to a beginner? Yes, but only if you have practiced on a cheap non-Nikon lens first. These are not cheap these days because of the hype they generated so a cheap Canon FD lens will be a better candidate for butchering as your first project. You’ll also need to get the proper tools and materials before you contemplate on repairing your lens so that is also part of the investment. If you don’t want to learn new sets of skills and you don’t have the time then I advise that you just send the lens to a competent repairer. This is a simple lens and it should be easy to find somebody who has the expertise to fix this. I do not think repairing these will cost much so think about that option first before you go out and buy tools to repair your lens.

It’s perfect now. The helicoids are smooth and the pictures that I take with it are sharp and beautiful! This was how I remembered this lens to be when I still had the old one with me (that I sold) about 7 years ago.
That’s it for this week’s lens repair article. There’s a lot of information about this lens on the internet including repairs but I want to show you guys how I did it since some of you have been asking me to write an article for it so I obliged. If you’re one of those who prefer videos, I have a recommendation for your watch-list.
Here’s a good video by Kenneth Ølsen. He has many incredible videos on his channel, do yourself a favor and subscribe to his channel and watch all the amazing videos. There are a lot of people making videos about “hacks” and “repairs” but Kenneth’s videos will teach you how to do it properly. Many of those “repair” videos show people spraying WD-40 into the camera or other similar solutions and they’re not the right way to do it because they’ll cause more harm than good, follow what Kenneth does and you should be fine.
If all you need is to service the oily iris you can check our friend, Kenneth’s useful video. Please subscribe to his channel.
See you guys again in the next article. If you liked this article, please share it and spread the word about this blog. It will help inform more people about old lens repair or how to enjoy old camera gear in the age of electronics and plastics. The blog has grown so much and I thank you all for that. To all the people who support the blog, I thank you from the bottom of my heart. I do not have much time these days, I don’t even have the time to update this site regularly in the near-future because I’m getting promoted at work but I will find the time just for you. Thank you again, Ric.
Help Support this Blog:
Maintaining this blog requires money to operate. If you think that this site has helped you or you want to show your support by helping with the upkeep of this site, you can simple make a small donation to my paypal.com account (richardHaw888@gmail.com). Money is not my prime motivation for this blog and I believe that I have enough to run this but you can help me make this site (and the companion facebook page) grow.
Leave me some tip?
Thank you very much for your continued support!
$2.00
Helping support this site will ensure that this will be kept going as long as I have the time and energy for this. I would appreciate it if you just leave out your name or details like your country and other information so that the donations will totally be anonymous it is at all possible. This is a labor of love and I intend to keep it that way for as long as I can. Ric.

Dec 18, 2019 @ 10:28:20
Thanks a lot for the inspiration I found here on your blog. The instructions helped me repairing two old Nikkor-lenses so I can now fully enjoy their quality.
Dec 21, 2019 @ 03:16:03
thanks!
Sep 01, 2023 @ 01:15:52
I just needed to clean the grease off my diaphragm, but this really helped! Thank you!
Mar 07, 2026 @ 11:36:33
I have followed the steps mentioned in the article to clean a lens that was given to me by the seller because the front lens group had mold. At least for now, it looks to be in great condition, and I hope its functionality remains unaffected.