
Hello, everybody! Smart phones are getting bigger these days. It used to be opposite, I remember how phone brands were trying to make smaller and smaller phones each release. I sometimes think that it may be time for the smart phones to get smaller for portability. The downside is it will be hard to read my blog so it may be better to leave them the way they are. There’s something that we can miniaturize without losing any functionality. Wrist watches, wallets, etc. Today, I’m going to show you one of those things that gets better as it gets smaller. It’s not my favorite but I certainly like it.
Introduction:
The Nikkor 50mm f/1.8 Ai-S has a big following because it is Nikon’s smallest 50mm lens. It was made from 1980 to 2005, it had a long production run. It’s preceded by the short-lived Nikkor 50mm f/1.8 Ai-S (long-nose). If I recall, its optical formula is different and that allowed it to be more-compact. Despite being small it could perform quite well so it soon became a favorite of many photographers.
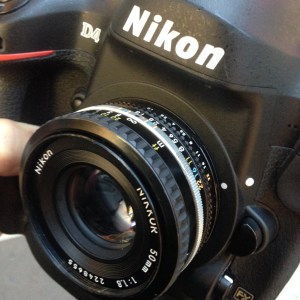
I remember that you could still buy these brand-new some 12 years ago. Its price has remained steady since there’s always a demand for it. Despite the hype and novelty, I don’t think of it as extraordinary apart from the fact that it’s small. It’s dwarfed by the Nikon D4 which can make handling awkward as you can see in this photo.
Considering its quality, it’s funny how the Nikon 50mm f/1.8 Series E costs as much as this one or just a bit cheaper. The former is made of plastic, it’s not in the same league as this lens, the coatings are inferior, too. The optics are similar but this one will perform better due to the better coating. I did some tests and the Nikkor is a lot better when shot in contra-light.

It has a low profile, but the GN Auto-Nikkor 45mm f/2.8 is shorter but not by much. It’s amazing how Nikon made it smaller without sacrificing its image quality, it could rival the larger Nikkor 50mm f/1.4 Ai-S in performance. The compact nature of this lens makes it great for travel photography since size and weight are important considerations.

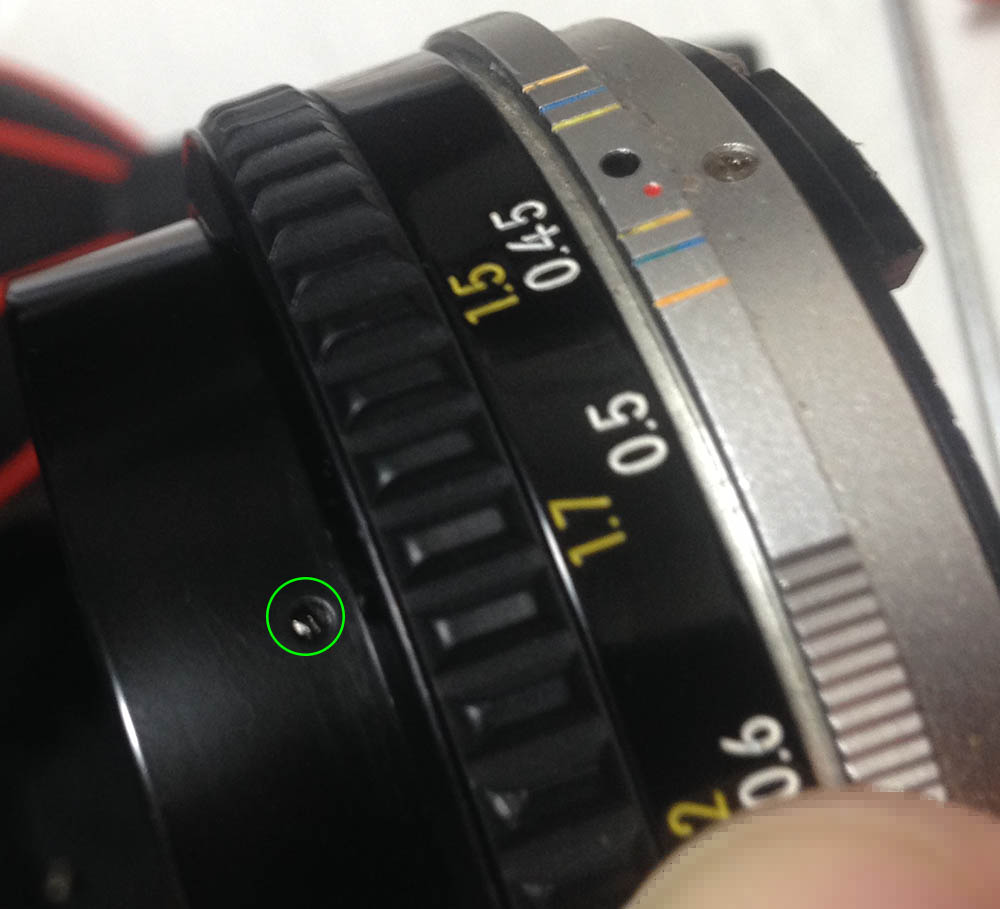
This setup fits in my little bag perfectly. Your neck won’t hurt carrying it all-day. The Nikon FA doesn’t have an overhanging prism so it’s easy to see the numbers at the focusing ring.

Here it is with my Nikon FA and Nikon MD-15. Handling can be awkward if you have bigger hands since its rings are considerably narrower compared to standard-sized lenses. It can be confusing at times and you could turn the wrong ring while in a hurry. The overhanging-prism can also obstruct it so it can be difficult to view the aperture numbers in certain situations.

The Nikon HS-11 is its dedicated hood. It helps protect the front element and it prevents stray light from reaching it at an angle. This is a useful accessory but it makes your setup a bit longer.
Knowing how your lens performs is key to maximizing its use. You’ll learn how to utilize its strengths and avoid its weaknesses. This knowledge helps in determining which lens to bring on assignment. I shot these photos from f/1.8, f/2.8 and f/4, these are the most common apertures that people would want to use it and we’ll see the most changes happen within these values.


(Click to enlarge)
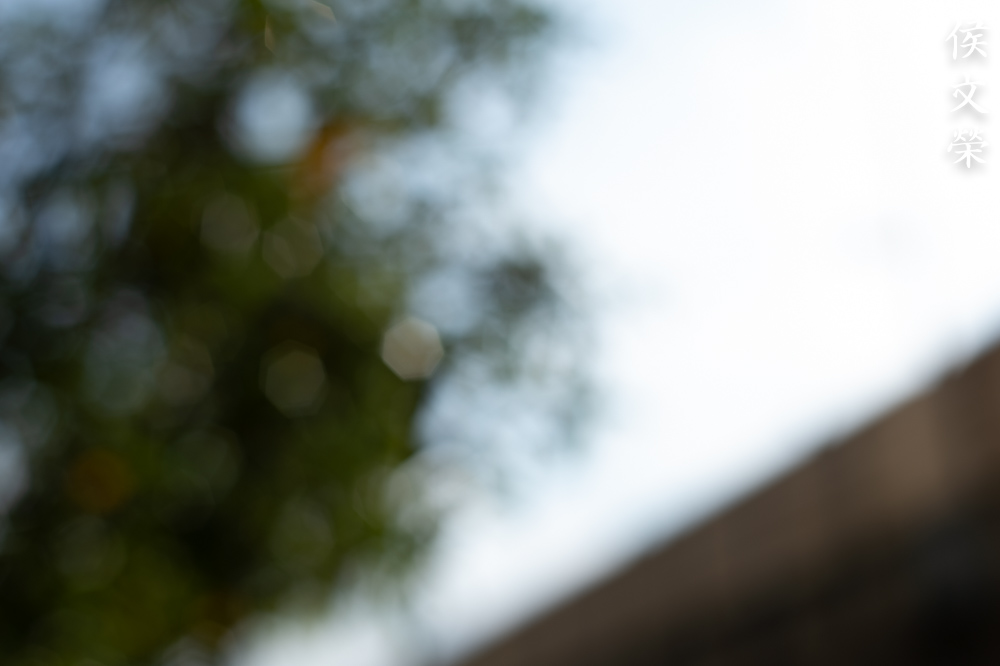
Flaring isn’t going to be much of a problem but ghosts can and will appear if you have strong light sources within the frame. Stopping it down helps with eliminating flare but the ghosts will look more-defined.


(Click to enlarge)
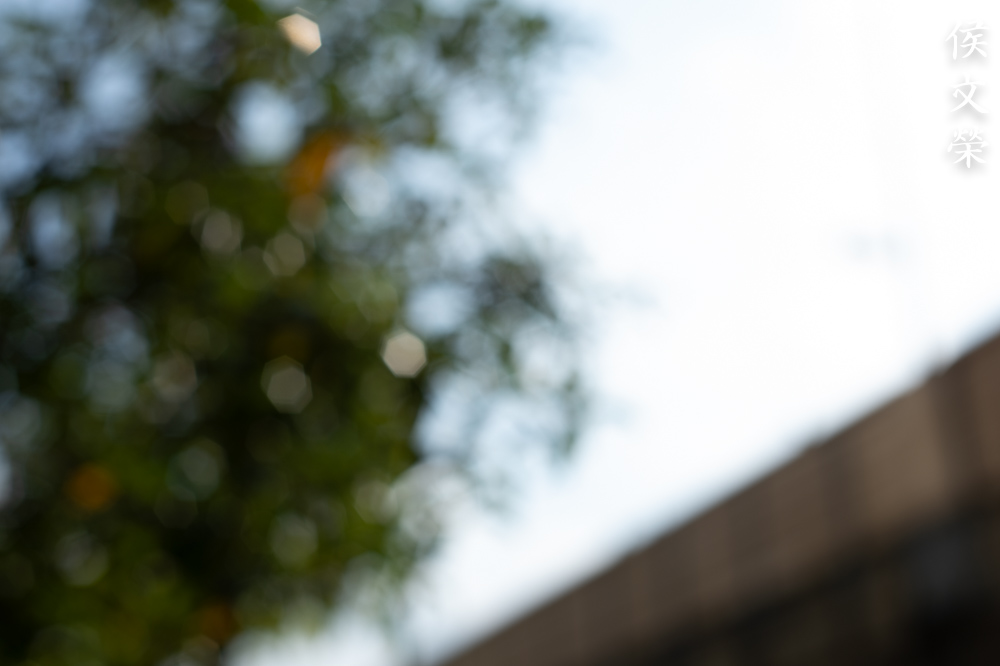
It’s sharp wide-open and the contrast is quite good. There’s some vignetting but the falloff is linear so you won’t notice it much. Chromatic aberration is observable at overblown areas of the scene. The bokeh character is not bad at all but I have seen better ones. Resolution is adequate wide-open but this will improve as you’ll see later. Stopping it down to f/2.8 improves contrast, sharpness and resolution. Vignetting is mostly gone, making the corners a lot brighter. Chromatic aberration is better controlled, too. I couldn’t see it in my photos. The character of the bokeh changes, the angular iris makes it look a bit rough for my taste. The corners look better, too. It’s approaching its peak at the center by f/4, the image quality there is excellent. It begins to exhibit some clumpy-looking details in its bokeh, which I don’t like but this is still not bad, just mediocre in my opinion. The corners look much better, I think you should shoot this from f/4 if the corners matter a lot to you. Your going to get blown-away by its image quality when shooting it at f/5.6, it will be sharp from edge-to-edge. I don’t have photos to show you but I have shot with it for a long time so you’ll just have to trust me on this.

The character of the bokeh isn’t bad at all but it could be better. This is why I consider the older Nikkor 50mm f/1.8 Ai-S (long-nose) to be better when it’s time to talk about the smoothness of the bokeh. Performance seems similar between the two apart from that, with this one being just a bit sharper.

It’s able to focus really close. This is one of its more important features. You are able to take nice, detailed photos of smaller things. Shoot this in-reverse and you could take high-magnification photos with it.

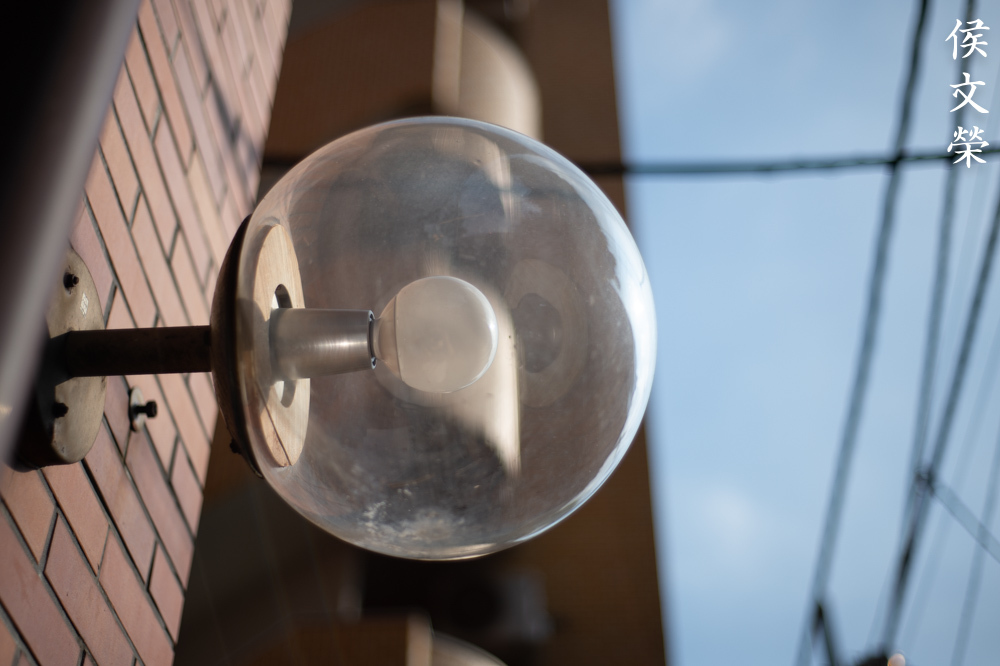
This is an amazing lens when shot at f/2.8. Contrast and saturation looks so good specially when you have good-light.

It renders beautifully in my opinion, it’s able to give you a vintage-feeling to the photos it takes. The focus-transition appears to be smooth which make it able to give you natural-looking photos.


(Click to enlarge)
Most, if not all of the photos were shot wide-open. This is an amazing lens, it is able to produce exquisite-looking photos with a nice character. This is the reason why so many people keep this in their collections. It will continue to take great photos for more decades to come.
The following pictures were shot with my Nikon FA using Fujifilm Industrial 400 film. The pictures are all lovely and I love how this lens performs with film. This was designed to be used with film since it debuted during the film era so showing pictures that were shot with film should give you an idea as to what the designers aimed for when they designed this. It’s best to judge it with its intended medium to give it a fair assessment.

I think this was shot at f/4 since I was shooting in P mode, I could tell by the character of the bokeh. It has a refined-look and there’s a 3D-feel to this. The details appear sharp and the background looks smooth. The foliage looks a bit clumpy but the character of the bokeh doesn’t look bad at all. At least the twigs and branches don’t look smeared which is a good sign.

The depth-of-field is quite shallow wide-open so you’ll be able to isolate the subjects from the background better.

The subtle tonality and the smooth focus-transition works together well and that’s the reason why this photo looks so natural.


(Click to enlarge)
Here’s more from the same roll. It’s an amazing lens when used with film, I am pleased by the results that I got. This lens is certainly a keeper. Despite the film being cheap, it’s able to render premium-looking results. This is an excellent lens when shot with film so I recommend you shoot this with it.
Buy this instead of the Nikon 50mm f/1.8 Series E. I don’t see why the plastic lens is selling for that price, just add a bit more and you could buy this one instead. The build quality and coatings are better. When looking for one of these, be sure that the iris is dry and snappy when you actuate it. This lens is prone to the oily iris problem as you will soon see why. Turn the ring and make sure that they don’t wobble. They should be smooth and positive. You can also opt for the Nikkor 50mm f/1.8 Ai-S (long-nose) instead if you want a smoother look to your bokeh but both lenses perform similarly in every way you can consider them to be identical in performance. Happy hunting.
Before We Begin:
If this is your first attempt at repairing a lens then I suggest that you check my previous posts regarding screws & drivers, grease and other things. Also read what I wrote about the tools that you’ll need to fix your Nikkors.
I suggest that you read these primers before you begin (for beginners):
Reading these primers should lessen the chance of ruining your lens if you are a novice. Before opening up any lens, always look for other people who have done so in YouTube or the internet. Information is scarce, vague and scattered (that is why I started this) but you can still find some information if you search carefully.
I highly recommend that you read my working with helicoids post because this is very important and getting it wrong can ruin your day. If I can force you to read this, I would. It is that important!
For more advanced topics, you can read my fungus removal post as a start. This post has a lot of useful information and it will be beneficial for you to read this.
Disassembly (Lens Barrel):
Its construction is simple but quite cramped inside so it can be intimidating for beginners to work on this. Ai-S lenses usually employ clever tricks when it comes to manufacturing to cut-cost and make things lighter so it makes a lot of sense to take plenty of notes and photos as you go along so you could get the reassembly sequence right. There are a few things which you should be aware of and I will point them out later.
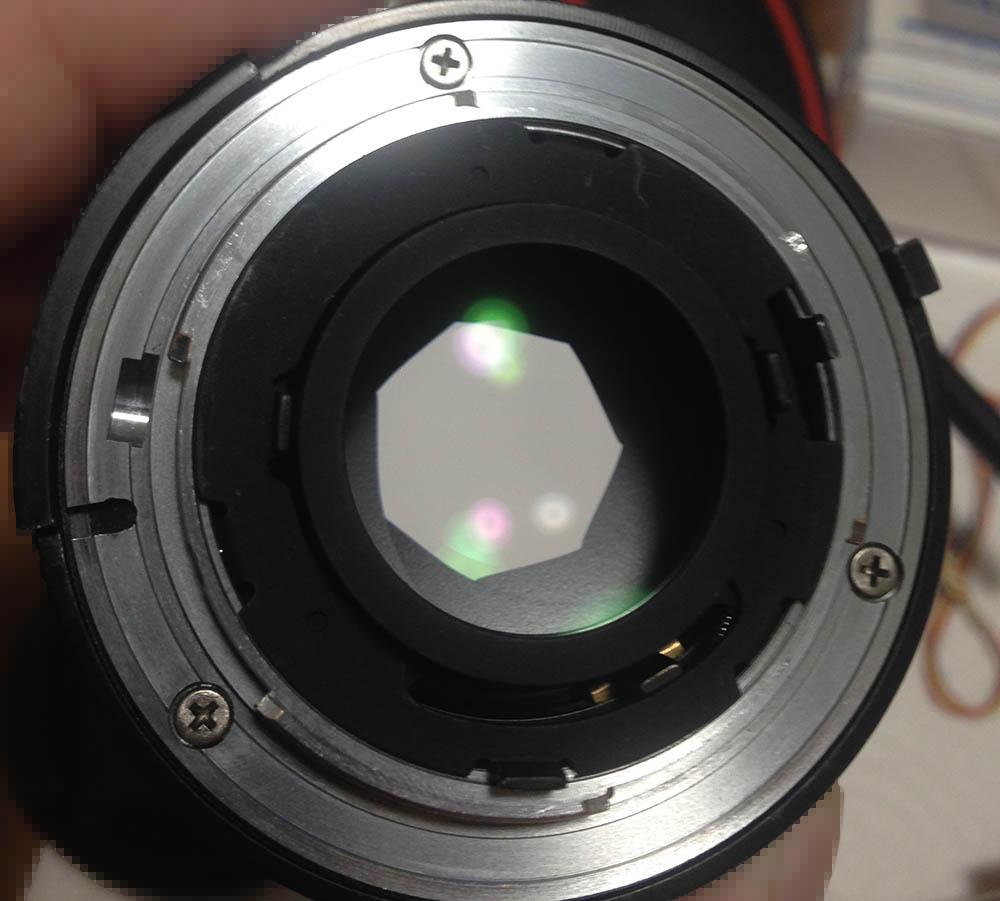
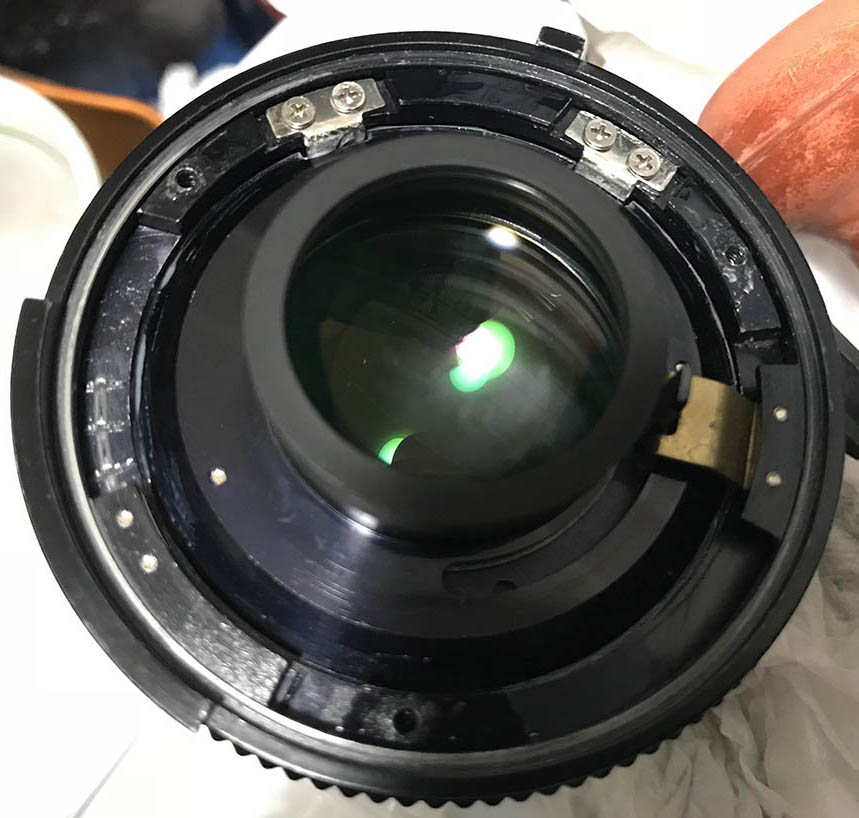
Extract these to remove the bayonet mount. Many people strip these screws because they’re using the wrong type of drivers. Read my article on how to extract bayonet screws to prevent this from happening to you.
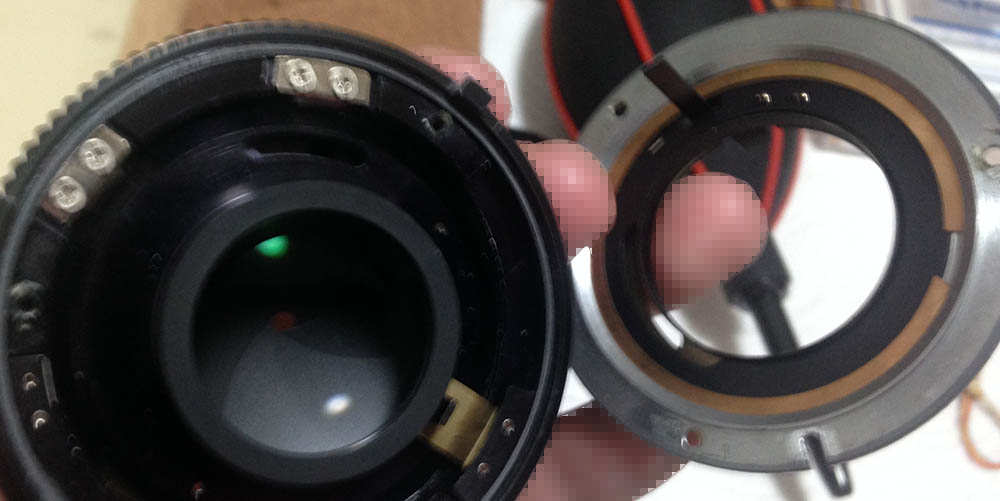
Carefully remove the bayonet mount, make sure not to bend the lever. You can remove the aperture ring after that.

Locate and carefully extract this. If it’s stuck, soften its seals with alcohol.
Here”s a closer view.

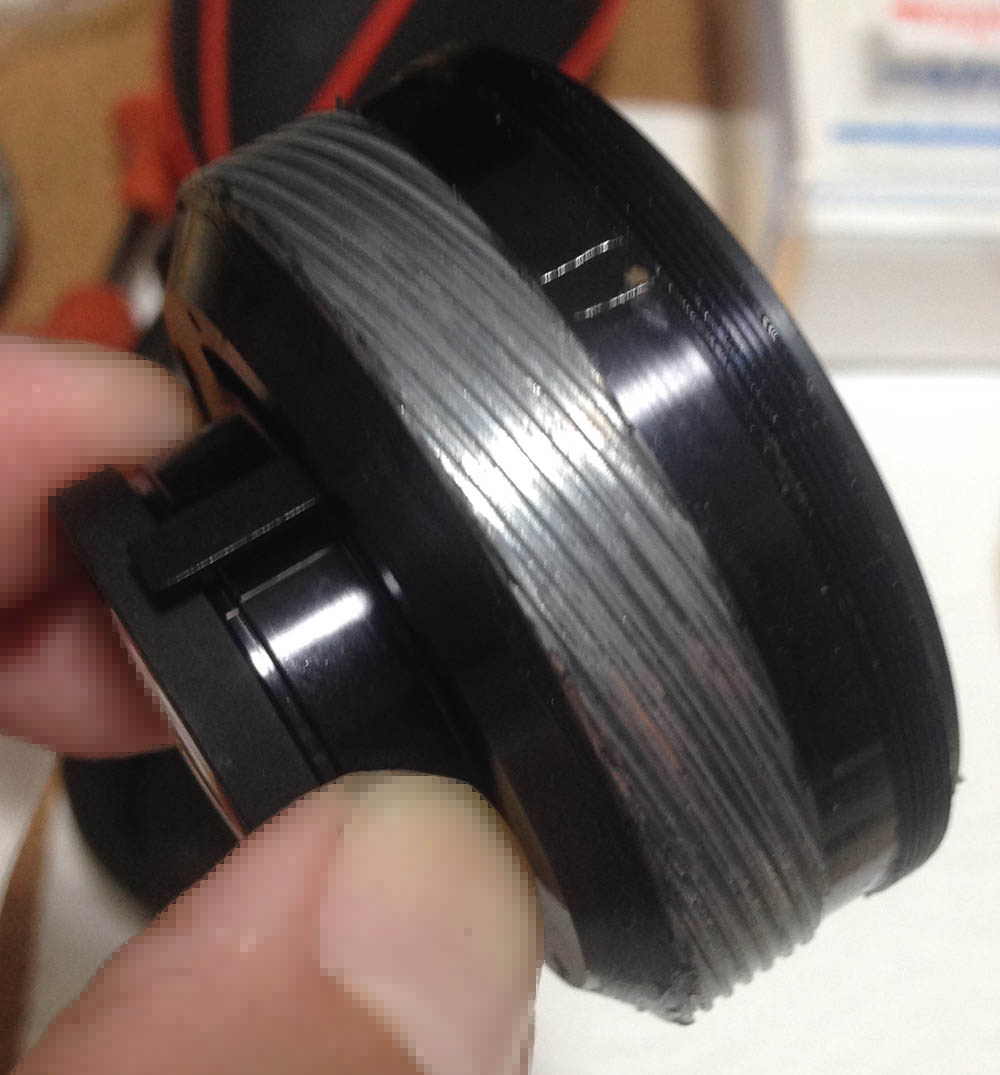
Unscrew the front barrel with a rubber tool.
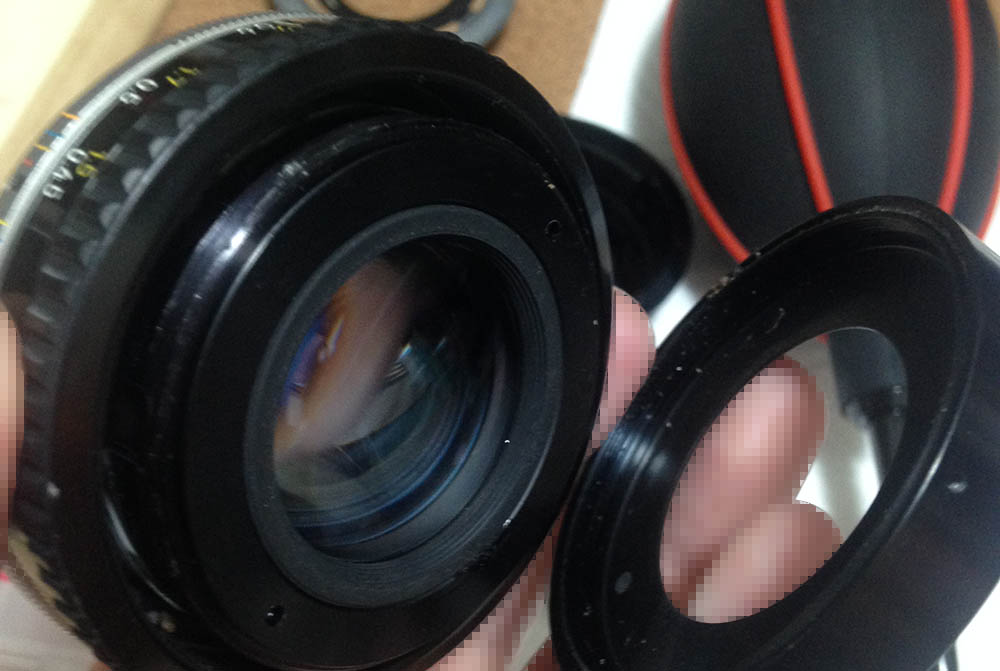
Carefully remove the front barrel, be sure not to scratch the front element.

Extract the screws at the base of the chrome grip to remove it. Take several photos of this before you take it off so you will know how the focusing ring should be aligned since the grip serves as a helicoid stop, too. Without this, it’s possible to turn the focusing ring beyond its range.

I removed the grip with disturbing the focusing ring so I could make a mark to help me later for reference.
Extract the screws of the helicoid stops. They sync the helicoids’ turn rate so you’ll able to extend-or-retract the barrel. Be sure to note which one should go where so you’ll be able to put them back at the same place later.

Take photos and notes so you’ll know how deep the helicoids should be,

The rubber grip can be removed easily, be careful not to tear it. You’re now able to see these screws underneath it. Extract them so you can remove the focusing ring.
This is also where you could adjust its focus later after reassembly. Loosen the screws and turn the focusing ring until you’re satisfied with the results.

Carefully remove the focusing ring. It’s merely-held by those screws so you should not forcefully turn this ring.
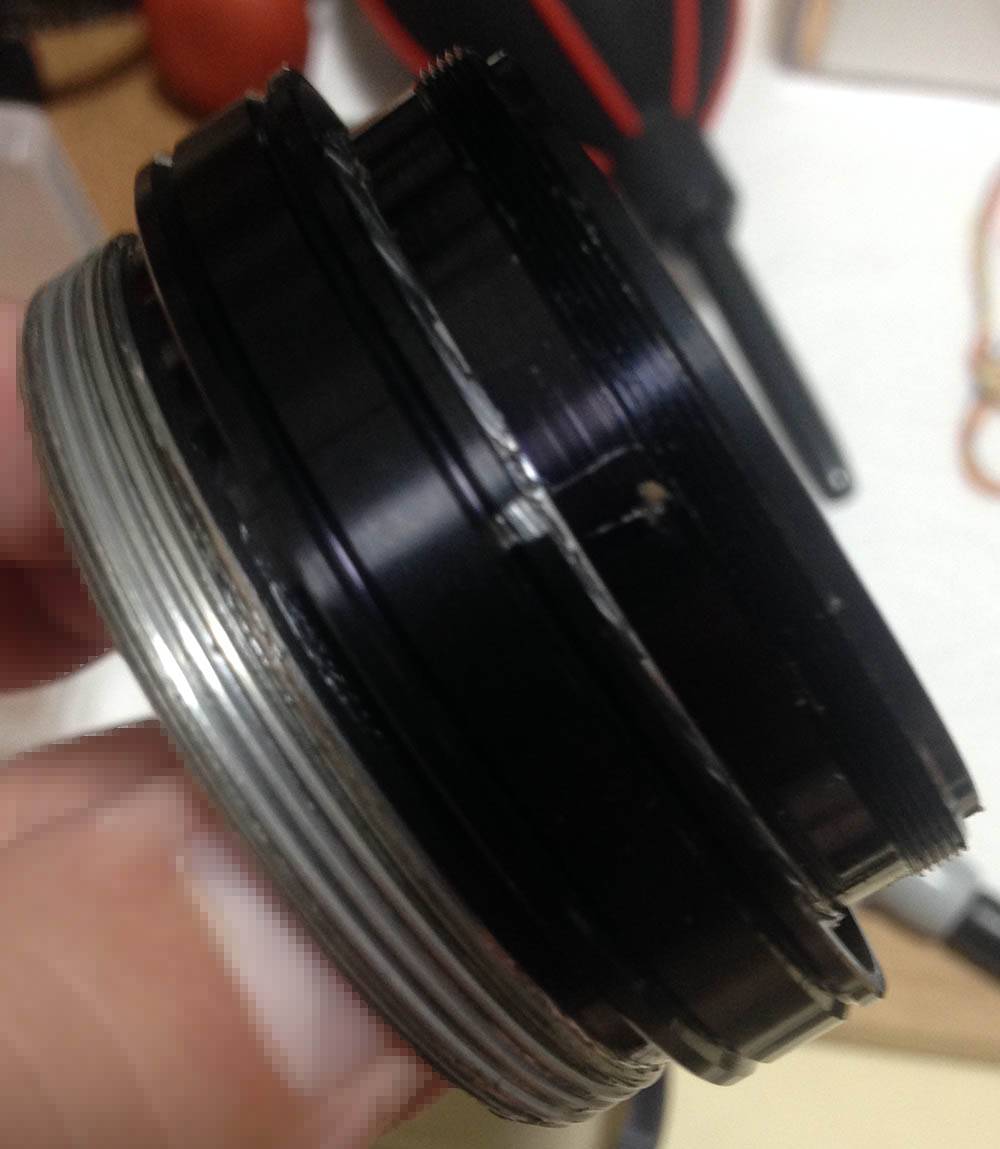
Separate the central helicoid from the outer one. Don’t forget to note where they separated, this is also the same place where these should mesh. Many people forget to do this so they get stuck. To prevent this from happening to you, read my article on how to work with helicoids and follow my guide.
The inner helicoid also houses the objective. Unscrew it and do not forget to mark where this separated. This is the reason why it’s prone to the oily iris problem, the optics are situated too-close to the helicoids. Dismantle this so you can clean the helicoids properly. The next section should show you the proper way to do it.
Once all of the glass and iris mechanism is removed, clean everything really well and be sure not to leave any residue. Scrub the helicoids with a strong detergent and soak them in an alcohol bath overnight to soften and remove any hardened gunk. Polish the threads with a clean cloth and dry them well before you apply a fresh coat of grease. Don’t use a thick grease for it and do not use a grease that’s too-light either. Only apply a thin coat to the threads, applying excessive amounts of grease will only create a mess and it will also migrate to the iris eventually, creating an even bigger problem later.
Disassembly (Objective):
Dismantling the optics is easy since it’s of conventional design. Be careful if you’re using metal tools so you won’t scratch the glass. If anything is stuck, a small drop of alcohol to the threads should soften it up. I didn’t have photos of how I dismantled the iris assembly but it should be easy, be sure to take a lot of notes so you’ll know how to adjust the iris mechanism again later. It’s an adjustable part so make small marks to serve as keys.
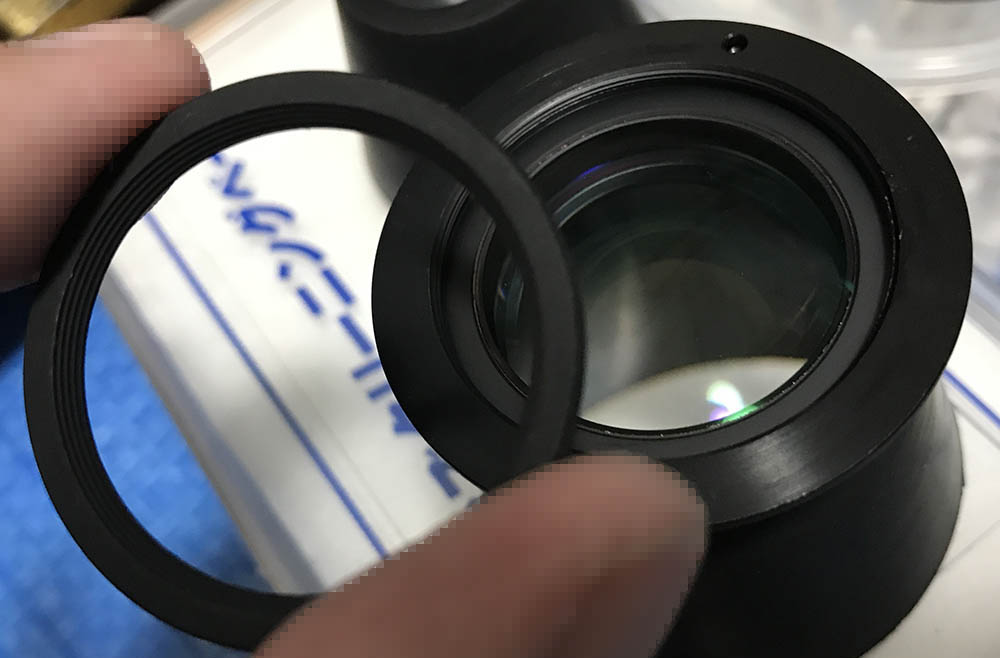
Unscrew the retention ring to remove the front elements.

Extract the front element with a lens sucker.

Unscrew the 3rd element and its housing, they’re glued together so leave it alone and don’t dismantle them. The 2nd element is loose now since there’s nothing securing it, be sure not to drop it.

The bulbous 2nd element can be safely removed with a lens sucker.
I forgot to take photos on how to remove the rear elements. I’ll elaborate on it here without using any pictures. I will update this in the future when I get the chance to open the rear elements again on another lens.
- Remove the retention collar by unscrewing it. It may be sealed so place a small drop of alcohol at the threads to soften the lacquer seal.
- Get a lens sucker and remove the rear element. Use a permanent marker and write a small dot at the wall of the element so you’ll know which side should be facing the front.
- There’s a metal shim in-between the rear element and the one in front of it, I suggest using a pair of tweezers to pick that out. The lens group isn’t symmetrical so mark which way should be facing forward with a pen.
- The inner elements can now be accessed. Use a lens sucker that will fit inside the diameter of the housing.
Carefully clean the elements. If your lens has fungus, read my article about cleaning lens fungus. Never use the solution at full-strength, dissolve it with distilled water. Don’t leave the glass in the solution for too long, it is enough to etch the coatings and the glass. Never soak the cemented group in it, too.
Conclusion:
This would’ve been an easier lens to service if the objective is separate from the inner helicoid but it couldn’t be helped. It took me around 3 hours or so to overhaul which is just a bit longer than I expected. This is not something that a beginner should be tackling as a first-attempt. If your lens needs to be serviced, send it to a competent repairer. There are many posers out there, be sure to ask your friends so you won’t regret your decision.

It’s now time to reassemble everything. Get everything back but don’t install the focusing ring’s rubber grip yet so you can adjust the focus. My article on how to adjust a lens’ focus should help you understand how it is done easily within a DIY setting.
When putting the focusing ring back, tighten the screws evenly. What you do is turn the screws at the same rate until they are all tightened properly. This is important because if you tightened them in an uneven fashion then the focusing ring will be a bit offset to one side, that will cause the focusing ring to feel uneven. Never over-tighten these, if you did it you may warp the focusing ring or strip the threads. Reinstall the rubber part, secure it with a small amount of contact cement.

It’s now working perfectly, it’s such a joy to use and it will continue to take a lot of photos for more years to come. This is why I love manual lenses, they will last longer than their electronic equivalents.
Thanks for following my work, if you liked this article please share this with your friends so it will get more views. This site earns around $0.30 a day, it’s totally reliant on views. You can also support this site, it helps me offset the cost of maintenance and hosting. You are also helping me purchase, process and scan film. This site promotes the use of film so we’re all in this together. See you again in the next article, Ric.
Help Support this Blog:
Maintaining this blog requires money to operate. If you think that this site has helped you or you want to show your support by helping with the site’s upkeep, you can make a small donation to my paypal.com (richardHaw888@gmail.com). Money is not my prime motivation for this blog and I believe that I have enough to run this but you can help me make this site (and the companion facebook page) grow.
Helping support this site will ensure that this will be kept going as long as I have the time and energy for this. I would appreciate it if you just leave out your name or details like your country’s name or other information so that the donations will totally be anonymous. This is a labor of love and I intend to keep it that way for as long as I can. Ric.

Feb 19, 2016 @ 07:15:44
Ang galing naman..salamat sa pag share uli..
Aug 06, 2016 @ 19:54:53
I have a 50mm 1.8 AIS that had some fungus and a loose focus ring. It looked like an easy job, so I opened and cleaned the optics. Didn’t like the loose focus ring, so I disassembled the helicoids too. Unfortunately, I saw this article after I messed up. Didn’t mark the focus position and I have no idea how to realign. Any suggestion will be immensely useful.
Aug 07, 2016 @ 03:55:56
Hello, Fadioni! Unfortunately, you will have to find that out for yourself. You can check the other guides online and see where their helicoids lineup and try to guess it yourself. Ric.
Apr 04, 2024 @ 16:38:45
Late but with a sharp probe track the helix around a find out angle between start and finish e.g. 270deg. Locate where you want it to end & track back 270 to start. Difficult to be right 1st time but should give you a clue, within a thread or two either way and adjust from there. Hope this makes sense.
Aug 06, 2016 @ 19:55:33
I have a 50mm 1.8 AIS that had some fungus and a loose focus ring. It looked like an easy job, so I opened and cleaned the optics. Didn’t like the loose focus ring, so I disassembled the helicoids too. Unfortunately, I saw this article after I messed up. Didn’t mark the focus position and I have no idea how to realign. Any suggestion will be immensely useful.
Oct 09, 2016 @ 11:12:32
Ive made the same mistake not marking before separating helicoids. Driving me crazy, trying to find some footage of re assembly. There must be a method approach?
Oct 10, 2016 @ 10:26:47
Hi, Scott!
Unfortunately, there isn’t. You rally have to mark where they separate. You could guess where they mate by rotating one of the helicoids the other way and hear a slight audible click. That click where the helicoid would mate. Looking at the thread also helps. If something like that happens to me, I would look at other people’s assembly notes to find some clues. Check my post on helicoids, it may have something. Ric.
Feb 19, 2017 @ 18:54:54
Hi,
Need some help, at least just to know if the following has even happened to you.
I have followed your post and have disassembled a nikkor 50mm 1.8 e-series ( silver version) . It is a bit different from this post but allowed me to have a direction and the necessary advice.
Anyway, I had a problem while putting the lens back together.
I have stiff, very stiff focus. It is almost has the helicoidal don’t fit any more.
It is if the plastique male helicoidal and the female aluminium do not fit any more.
Has this even happened to you ?
If so it there a solution ?
Thanks for your help.
Carlos – Portugal
Feb 20, 2017 @ 05:37:19
Hello, Carlos!
I think I may have made a mistake there, I checked and the helicoids are indeed both made of metal, they only look like plastic so that tricked me.
As for stiff focusing, be sure to check the helicoid keys and see if they are seated properly. Sometimes, they may not have been seated properly. What I do is before I tighten the screws of the helicoid keys, I focus the lens in and out to see if it’s OK and then I tighten the screws. Good luck, please message me when you have problems. Ric.
May 01, 2017 @ 16:17:14
Hello Ric
Thanks, You were right, I have taken the lens apart again, and very carefully followed your “instruction”. Its working very very well.
I have a slight problem but I will ask on another thread.
Thanks one again.
Carlos
May 02, 2017 @ 09:09:47
Good!
Sep 20, 2017 @ 15:24:11
Hello Richard,
I’ve just acquired one of these lenses. It has two main faults: the corners are very soft up to f/2.8, and when you turn the focus ring back and forth, the image shifts slightly, I’m guessing due to a loose helicoid. Can you please advise, is there anything I can do to remove the slop in the helicoid? (I have not yet taken the lens apart.) And is there anything I can do about the corner softness?
Regards,
Chul
Sep 22, 2017 @ 01:22:36
Hello,
As you focus in and out, sometimes the framing would change. This is called focus breathing and is normal with many lenses.
I am not sure about the corner sharpness. Very hard to tell unless I have the lens with me. Best thing to do is look for a similar lens and then try that. If that lens is OK then yours is probably not. Ric.
Sep 20, 2017 @ 15:24:37
Hello Richard,
I’ve just acquired one of these lenses. It has two main faults: the corners are very soft up to f/2.8, and when you turn the focus ring back and forth, the image shifts slightly, I’m guessing due to a loose helicoid. Can you please advise, is there anything I can do to remove the slop in the helicoid? (I have not yet taken the lens apart.) And is there anything I can do about the corner softness?
Regards,
Chul
Nov 18, 2017 @ 22:59:18
Hi Richard, I just got this lens from Japan and it had a sticky focus ring. I disassembled and re greased the outer helicoid which fixed the problem, you tutorial was invaluable. Thank you so much. One thing you might want to add is that the outer helicoid separates without warning. I was ready to mark it for re-assembly but by the time I realized what had happened I was too late. I ended up trying each starting position methodically until I reached the right one… a long afternoon and evening. but the lens is so much smoother now. Thank you so much for these tutorials. I did the Micro Nikkor Auto 55 3.5 from your tutorial too. I looked for the Nikkor 85 1.8 H Auto from you but alas you don’t have this one. However I did find something in the end…. All the best. and many many thanks again for this valuable resource. Steve.
Nov 18, 2017 @ 23:45:20
Glad that helped! Remember, always maintain a gentle and constant pulling action so this won’t happen again. Ric.
Apr 27, 2019 @ 11:13:04
hi Richard i,ve got a 50 1.8 ai lens and unfortunately the set screw for front lens group has been stripped any ideas , many thanks
Jan 12, 2020 @ 01:28:34
Excellent way of describing, and nice article to
get data regarding my presentation focus, which i am
going to convey in university.
Feb 24, 2022 @ 06:43:33
Hi Richard, I am not sure you will see this, but I have to thank you for all the great contents. I just maintained my 50 1.8 AIS and 20 F/4. It was my first time, but it was fun and rewarding. I made several mistakes, but finally I got them. I aimed to add grease to focus ring for both lenses, and it worked!
Thank you again , and I think I am addicted to this hobby!
Leon
Jun 22, 2022 @ 10:09:03
Hi Richard
Often to read your website about those old lens repair, you are the great experts in this field, and lightening me very much.
Recently I got a trouble that when I cleanning an old nikkor AIS pancake 50/1.8, I didn’t aware that your warning
“Carefully extract the doublet. Solvents will damage the cement used on this, never saturate anything here with solvents”
And then it became a tradedy ;(
So do you have an idea how I can remove those ethenol seeping into the cement layer?
Thanks in advance
Jan 18, 2024 @ 22:59:58
Hey Richard,
amazing blog and great work you do for all Nikon fans out there!
I’ve got a european version of that lens, as you may know it is a bit different – it has a plastic focus and aperture rings and a minimal focus distance of 60cm. I got it really cheap in a nearly perfect condition and it makes great pictures, too 😉
Those japanese all-metal versions are pretty rare in Europe. But I recently got one for a reasonable prize with damaged coating on the rear lens element.
Now I’m curious if it is possible to implant the glass of other versions, e. g. from that european version or maybe from later AF version in such a lens. The optics should be the same as far as I recall.
What do you think?
Thanks in advance