
Hello, everybody! Do you shop online? The products you see may look great but they look different once you have unboxed it. It’s amazing what presentation can do to enhance a product’s image. Internet hype and rumors can make a shabby product turn into the best one ever made. This is why influencers make money. I was approached once to be an influencer for a lens company, I turned it down because I didn’t like how they treat their employees. Money and influence aren’t everything for me and I won’t sell my honor just for those. Today, I’ll be showing something to you that has been hyped on the internet thanks to these so-call influencers. I am going to review it for you and see if the hype is actually true or not. Let’s search for the truth together in this article.
Introduction:
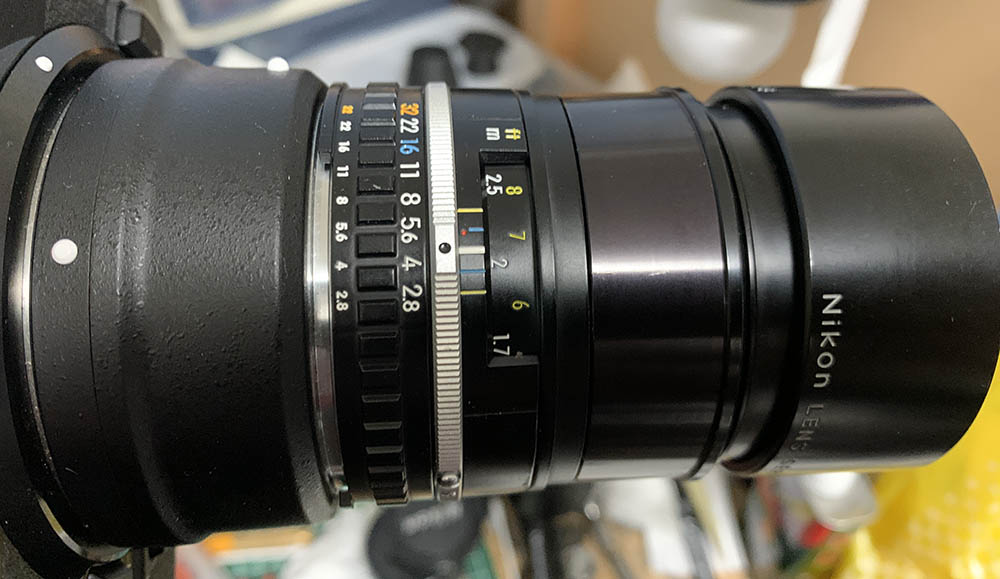
The Nikon 135mm f/2.8 Series-E was sold from 1981 to 1985. It was made to complement the Nikon EM under the trade-name of “Series-E”. The lenses under the Series-E brand were made to be cheap but still retain a respectable amount of optical performance in order to be appealing to new photographers. Many Series-E lenses are quite good optically despite having lesser performance or build-quality compared to the true Nikkors, only missing the points due to poor coatings and a cheap-looking rendering. Despite all that, many people still hold-on to them because of the value they represented. Unfortunately, the hype has gotten a bit too much so they now cost more than their Nikkor counterparts. Of all the overhyped Series-E lenses this one gets the prize but it’s justifiable as its performance is quite good, rivaling the image quality of the Nikkors.

The build is decent but nowhere near Nikkor standards. Despite that, the plastic parts are durable and I think it will endure abuse in the field to some extent. The focus-throw is just-right if you ask me and handling is superb. It’s light and compact, It is the smallest 135/2.8 that Nikon has ever made. One funny thing about this lens is it was never sold within Japan and is considered rare locally. I have always wondered why but it seems that Nikon had a policy of not selling Series-E lenses in the domestic market if there is an equivalent Nikkor being sold at the same time. This was to prevent any conflicts in sales.
It has a simple 4-elements-in-4-groups design, somewhat odd since many lenses in its time have more glass. I find this optimal, the less elements a lens has, the better. This means that the designer has reasonably corrected every major aberration using only a few elements. But this may not be the only impetus for reducing the elements-count, we all know that the Series-E lenses were made to be cheap so having less elements mean that it’s cheaper to manufacture. One more thing to make it cheaper is to omit multi-coated surfaces, to my knowledge, Series-E lenses are only single-coated. This means inferior flare and ghosts resistance compared to the true Nikkors, something that I have documented several times in this blog when I reviewed the other Series-E lenses.

It balances well with smaller Nikons such as this Nikon FG but it will make your setup front-heavy since the camera is so light. It’s best-paired with a slightly-heavier camera such as a Nikon FE. Forget about using it with older pre-Ai Nikons, it doesn’t have any way to communicate with it since it doesn’t have the prongs to couple to the meter.

This is how long it gets once the built-in hood is deployed. This is the only Series-E prime lens that has this feature. This is useful, I don’t need to buy a separate accessory for it. It’s not deep but it will do its job well.
Learning how your lens performs is key to maximizing it. You will learn how to utilize its strengths and avoid its weaknesses. This knowledge helps in determining which lens to bring on an assignment. I shot these from f/2.8, f/4 and f/5.6 since these are the most common apertures that people would want to use this and we’ll see the most changes happen with these values. These photos were shot with my Nikon Df, some of the photos were cropped close to 1:1 magnification so we can see the details better.


(Click to enlarge)
Vignetting appears to be quite heavy wide-open which even affects the center. Stop it down to f/4 and most of it is gone, the center looks a lot brighter. The improvement is significant, around 2-stops’ worth of light at the extremities. You will only see traces of it by f/5.6, it’s as good as gone. The distortion profile is of the pincushion-type, the amount is so small that you won’t see it easily. It’s a great lens for shooting architecture because of this.


(Click to enlarge)
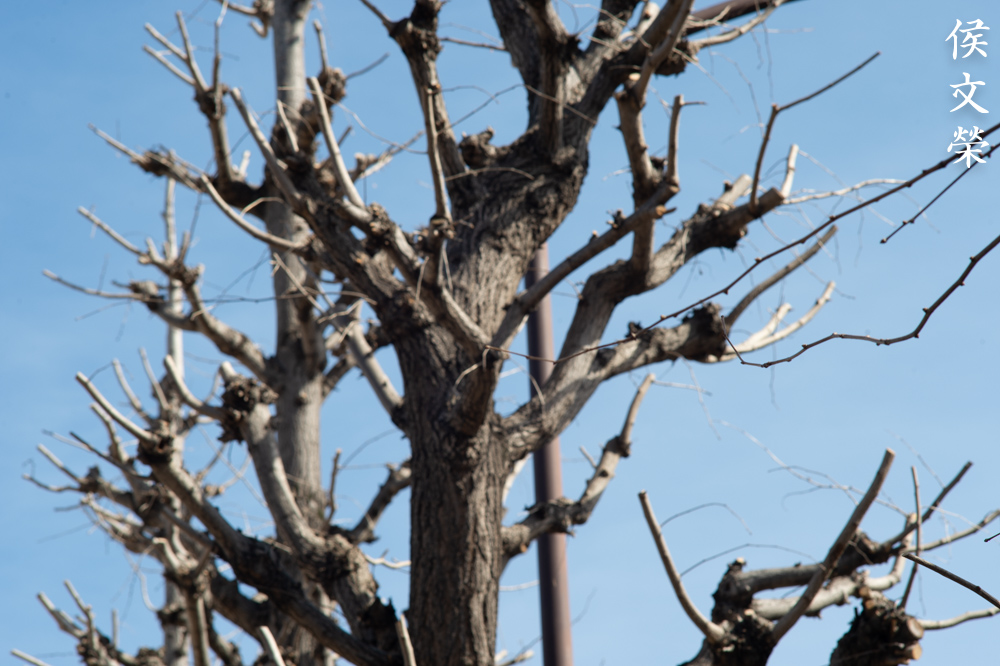
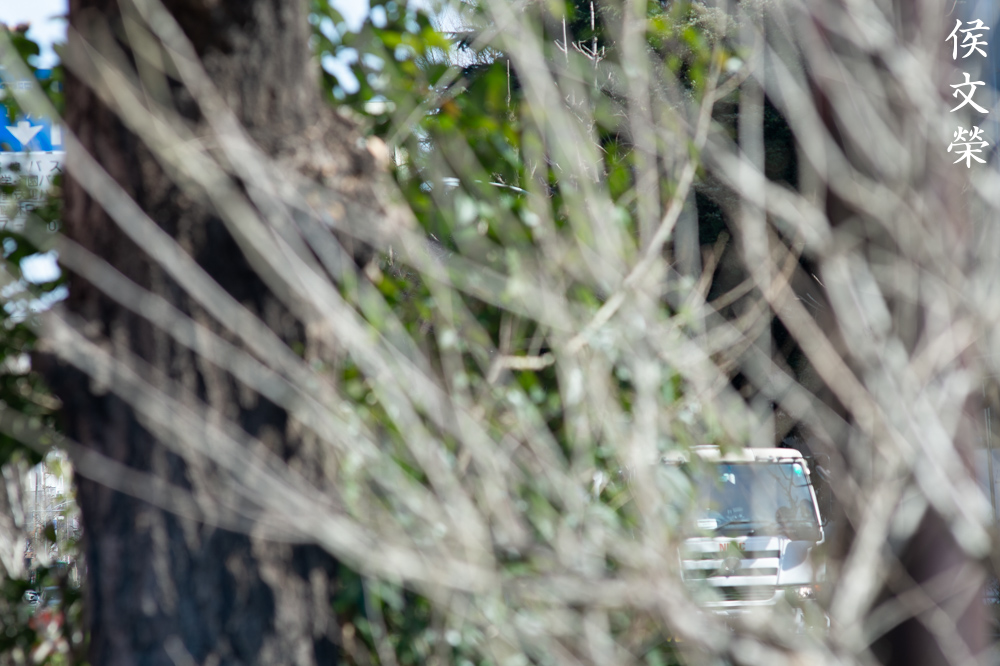
As expected from a lens of this class the character of the bokeh is rather pleasing. I tried to get it to render ugly details but I failed to do it. This doesn’t mean that you won’t get bad-looking bokeh quality with it, you could get it to render these if there are things in the background that will trigger them. If you managed to do so, it won’t look as bad and the tendency will far-less compared to a lens with lesser bokeh quality.


(Click to enlarge)
It flares terribly, covering the whole frame at worst. This is typical of many Series-E lenses since they were merely single-coated. I don’t remember the Nikkor 135mm f/2.8 Ai-S producing anything like this at all, this is the reason why I prefer the Nikkors. This is a nice set for studying chromatic aberration as well, observe the last pair to see how it looks like. The next set should show you the effects of chromatic aberration in more detail.


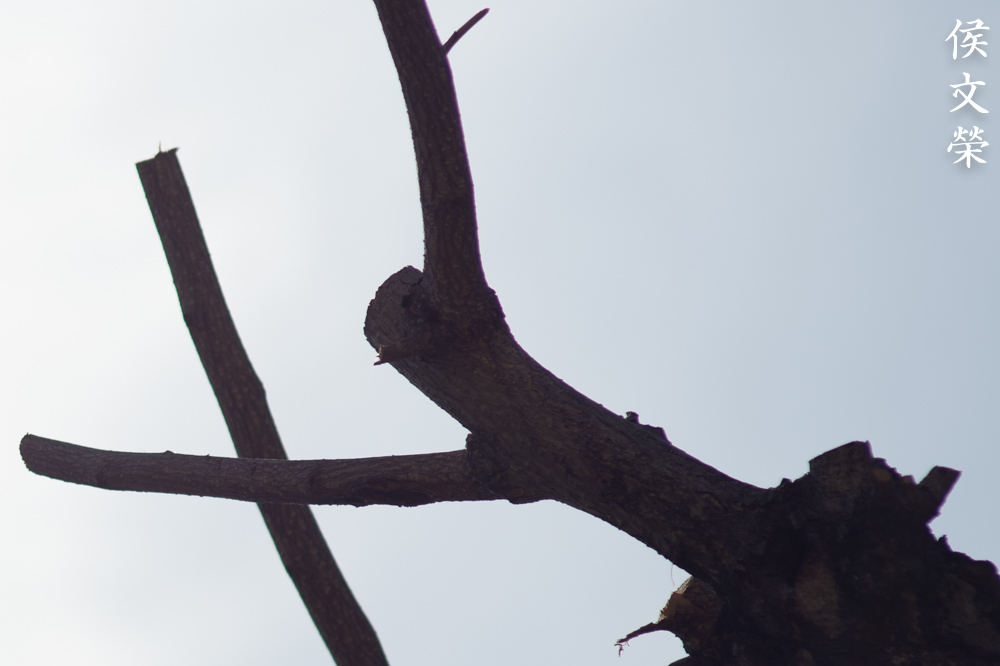

(Click to enlarge)
Chromatic aberration can be easily-triggered when you have shiny objects or areas of extreme-contrast in your scene. I didn’t even have to work hard to be able to show it. You could easily see it wide-open specially in tough situations, it blooms purple and green which looks horrible. Stop it down to f/4 and most of it gets eliminated but you’ll still be able to see it in difficult scenarios. You’re still going to see some even by f/5.6 but in much-smaller quantities and only in extreme cases. In normal scenarios, you’ll only see traces of it by f/5.6 so this shouldn’t be a problem and whatever you’ll see is probably localized flare. Spherical aberrations appears to be well-controlled, you’ll only see some of it wide-open and it’s gone from f/5.6 on.


(Click to enlarge)
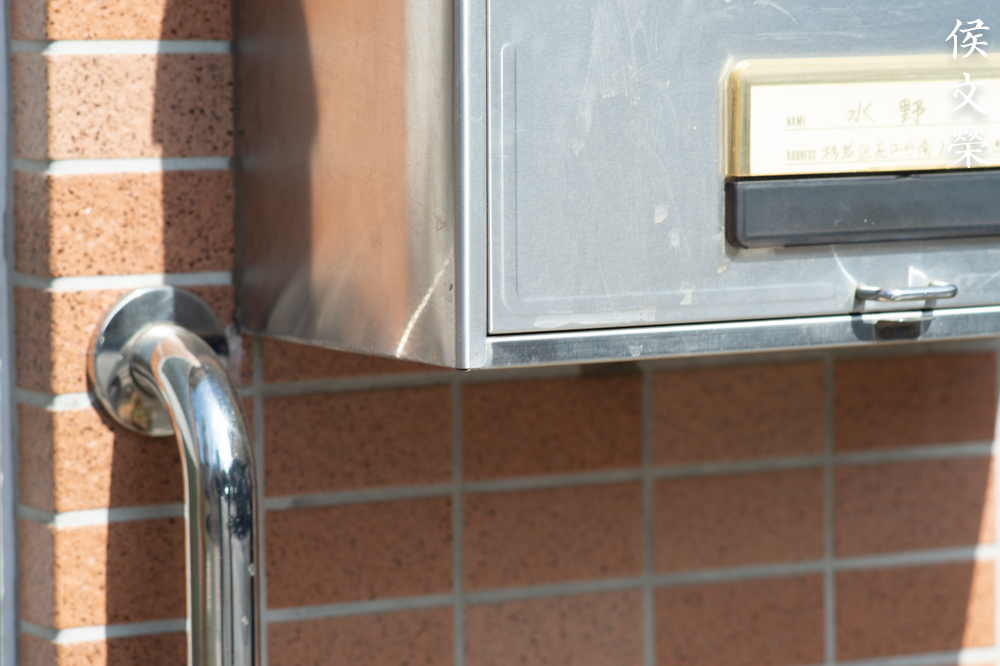
Sharpness is very good wide-open but resolution appears to be rather weak, it’s sufficient so long as you’re not going to view larger versions of it. The corners look terrible wide-open, the good thing is you don’t usually shoot this type of lens for framing important things at the extreme corners. Stopping it down to f/4 will improve sharpness considerably, the improvements can be seen easier at the corners where it looks much better compared to f/2.8. The improved resolution is the biggest factor in this bump in sharpness, I also observed that contrast has improved, too. It appears to perform at its peak by f/5.6 where the center looks great and the corners look better as well but still not as good as the center at f/2.8. Mine tends to perform better at closer distances and performance dips as it gets closer to infinity where it looks acceptable at best and ugly at worst.
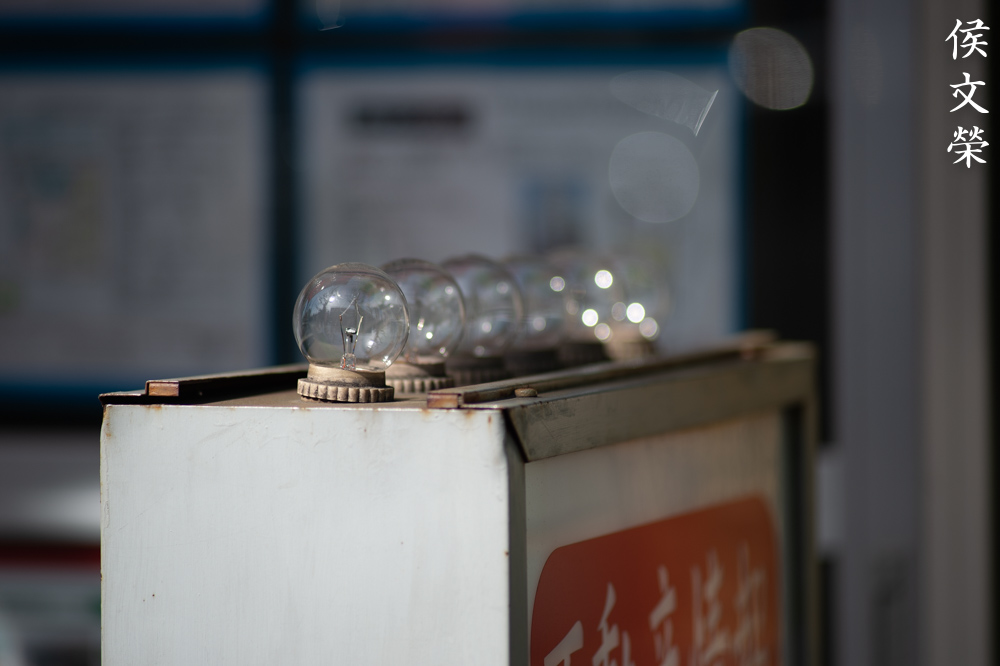
With that said, this is a sharp lens but not as good as what many people are making it out to be and specially not for the prices that these things are going for these days. It’s nice but it somehow lacks the subtlety of its Nikkors counterparts and flare-resistance or ghost resistance is not on-par either. Chromatic aberration can be easily-triggered, too. I’d like you to look at the first set in the last section, the one with the light bulbs, click on the photo and you will see some weird-looking artifacts. I guess this is what you get for the price that these were selling for back then. I’m not putting this lens down, I think it’s a great lens but it just didn’t meet all of my high expectations because I was preconditioned by many internet experts about its performance. At least you now have a better pool of references when you shop-around for opinions about this lens.

I think that this lens is best used for portraiture, lenses of this class are traditionally accepted to be great for shooting people. These usually have the reputation of being sharp and could render beautiful details and exquisite background blur.

It could render subtle details quite well, specially of skin. This is important specially if you’re going to use this for portraiture. The character of the bokeh looks nice, you won’t get any rough-looking artifacts with it.

The subject-isolation properties of this lens is quite good thanks to its long focal length. You’ll be able to make your subject stand-out from the rest of the scene easily. It renders beautiful blurs, there are many objects in the background that could trigger the ugly and rough-looking details associated with a cheap-look but this lens won’t give you any of it.

It’s sharp when you stop the iris down, enabling you to capture small details that look great when viewed with a large monitor.

Despite shooting at a smaller aperture you’ll still get traces of chromatic aberration on difficult cases, this can easily be observed in the coat of the monkey.

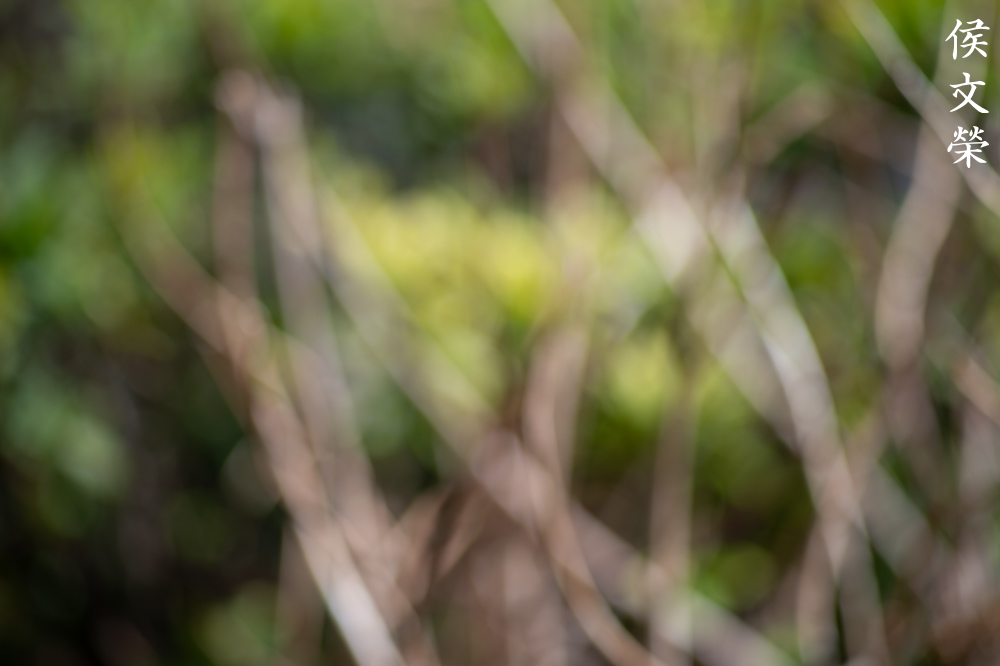
It’s great for candid pictures, allowing you to take photos without being noticed. I’d also like to point your attention to the blurred parts of the background. This is the ugliest I could get from it, it’s starting to show a look, but barely. Stopping the iris down helps or just shift your focus so the background will look even blurrier, whichever works for you shot.

Going back to its good subject-isolation quality, you’re able to focus the attention of your viewers to what’s important. Despite the focus being a bit further and the iris stopped-down I’m able to get this effect going. For me, this is a very desirable attribute as it’s going to enable me to take unique-looking photos.

One more practical use for this lens is shooting distant subjects. You don’t only use its reach to fill your frame but also harness the effects of foreshortening to make them appear “flat”.

Shoot it with a smaller aperture and you’ll be able to capture nice details on distant subjects. On a sunny day you will want to use a skylight filter to remove haze from your photos and improve the contrast.


(Click to enlarge)
Here are ore photos, check them out to see how nice this lens performs for portraiture. I think it’s still a great lens today, it’s small, light and sharp, just learn to shoot manually and you could take plenty of great photos with it. Autofocus and VR helps but you’re not going to take nice photos because of them. Skill and experience is what you’ll need and there’s no better way to teach you the discipline required than shooting with a manual-focus lens.
Let’s now check some film pictures. Film has a unique look that is hard to simulate with a digital camera thanks to grain. It reacts differently to light, this means that it could mask a lens’ flaws or amplify them. Since it was designed to be used with film, it’s best that we judge this using its intended medium. I shot these with a Nikon F6 loaded with Kodak Gold 200.

Please disregard the fact that this is a mis-focused photo because I’d like to point your attention to the flare. It’s single-coated so the flare could cover a huge part of your frame. This is not a bad thing since you could use this effect for creative purposes.

It’s very sharp when used with film, this was taken with the iris stopped-down a bit. The details look great, you wouldn’t think that I took this with a cheap film.

The character of the bokeh looks pleasing when shot with film. Grain affects the character of the blurry parts, it looks different and is more organic compared to film.

Shooting this with film brings out the best in this lens, I believe that it performs a lot better with it compared to a digital camera.

It doesn’t seem that chromatic aberration affects film as much as it does with a digital camera but that doesn’t mean that it can’t be produced with film, you will see slight traces of it when you look closer.

This film stock is known to add a slight yellowish tint to your photos which can be nice if you want to portray a hot, sunny day.

This was shot at about f/8 so you won’t see any vignetting. When shooting with film it’s a good idea to use skylight filters, it helps a lot in preventing a bluish-cast and slight fogginess when shooting distant objects.


(Click to enlarge)
Here are more photos that I took that afternoon. I believe that it’s best used with film, it brings out the best in it. It performs better and you won’t see the usual issues with it as you did with digital. If you own this lens I encourage you to shoot film with it, this is going to give you your best experience with it and you may not want to shoot it with anything else again.
This is a nice lens but I don’t see why it should be selling for so much these days. For what they’re being sold for you could get the Nikkor 135mm f/2.8 Ai instead which performs better specially in back-lit situations. If you’re on a tight budget, the old, cheap and good Nikkor-Q 135mm f/2.8 Auto is also a great bargain. You could buy 2 of these for the price of one Nikon 135mm f/2.8 Series-E which is absurd. The only real reason to prefer this plastic lens over the Nikkors is its size, this is the smallest one in its class, your neck won’t ache when carrying one all-day. If that’s enough for you to sacrifice some image quality then that works for you. Don’t believe everything you see on the internet, this is a great lens but it’s not what some people make it out to be. I hope that this article could clear some things for you so you can make better decisions on your next purchase. If you’re convinced that this lens is what you need, make sure that the barrels operate smoothly and check the focus and see if it’s accurate. The glass has to be clean, there should be no fungus and the coatings should be even. The Series-E lenses have coatings that are easily-etched by fungus and there are many being sold with blemishes due to this. Actuate the iris, they should be dry and snappy. These are usually sold for $120.00 and up, I got mine for $100.00 with a defective rear element (advertised as excellent). You should just wait and find one being sold for cheap, just be patient and you can find one for not a lot of money, happy hunting.
Before We Begin:
If this is your first attempt at repairing a lens then I suggest that you see my previous posts regarding screws & drivers, grease and other things. Also read what I wrote about the tools that you’ll need to fix your Nikkors.
I suggest that you read these primers before you begin (for beginners):
Reading these should lessen the chance of ruining your lens if you are a novice. Before opening up anything, always look for other people who have done so in YouTube or the internet. Information is scarce, vague and scattered (that is why I started this) but you can still find some information if you search carefully.
I highly recommend that you read my working with helicoids post because this is very important and getting it wrong can ruin your day. If I can force you to read this, I would. It is that important!
For more advanced topics, you can read my fungus removal post as a start. It has a lot of useful information, it will be beneficial for you to read this.
Disassembly:
This is not difficult to disassembly but it can be tricky because some of the parts are difficult to distinguish so you won’t know the right alignment of things just by looking at them. The best way to tackle this is to take plenty of notes and measurements. If your lens needs to be serviced, send it to a professional. This is not a lens for a beginner to practice on since you will require skill and special tools to remove some of the parts.
Since its optics look clean apart from the rear element’s inner surface I won’t dismantle the front optical block this time. The iris is also clean so dismantling that is pointless, too. Read my other articles to get hints on how to do this properly.

Extract the screws of the bayonet mount so you can remove it. Many people get stuck here because they don’t have the right tools and strip the screws. To prevent this from happening to you, read my post about how to remove bayonet screws. Follow my guide and that should help educate you on how its done and which drivers you should use.
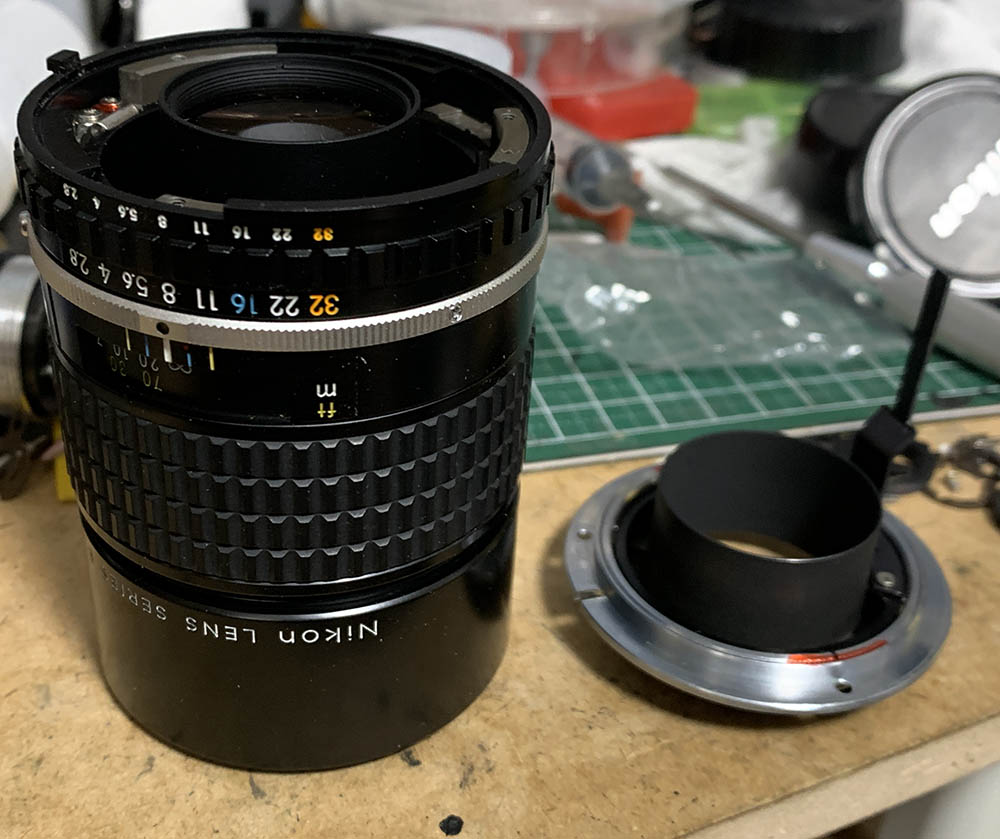
Carefully remove the bayonet mount and be careful not to bend the long stop-down lever’s shaft. It connects to the iris mechanism that sits deep within the objective’s housing.

Note how things were connected before you remove anything such as this fork that connects to the iris mechanism.
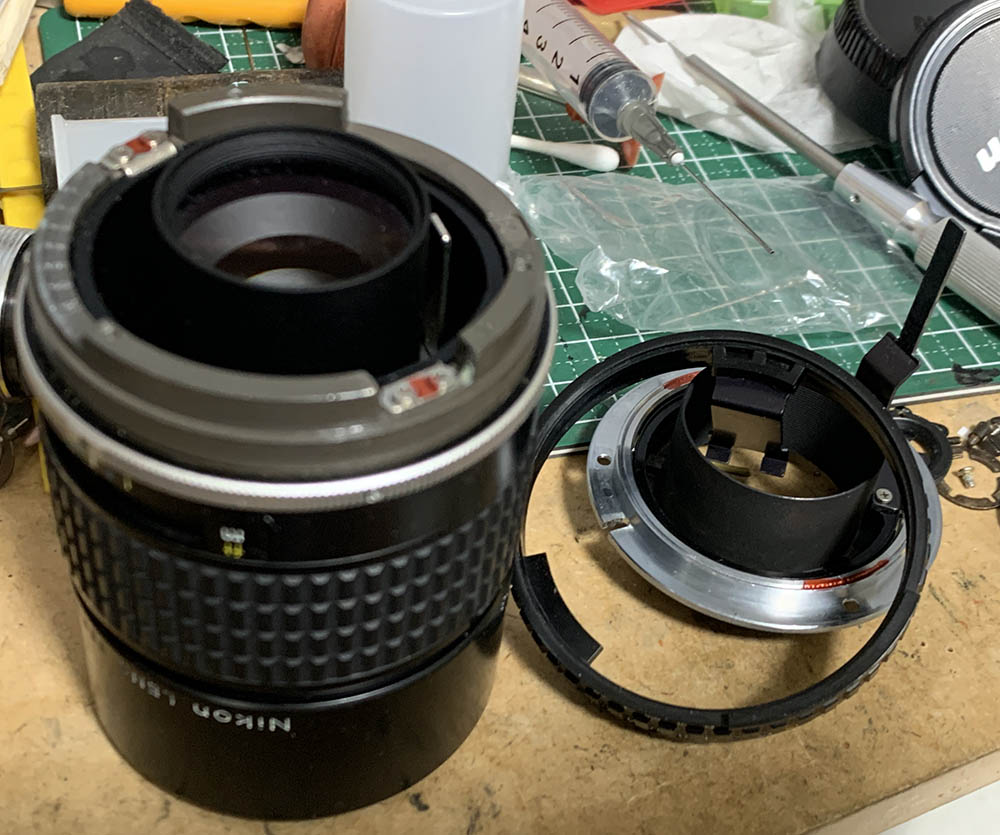
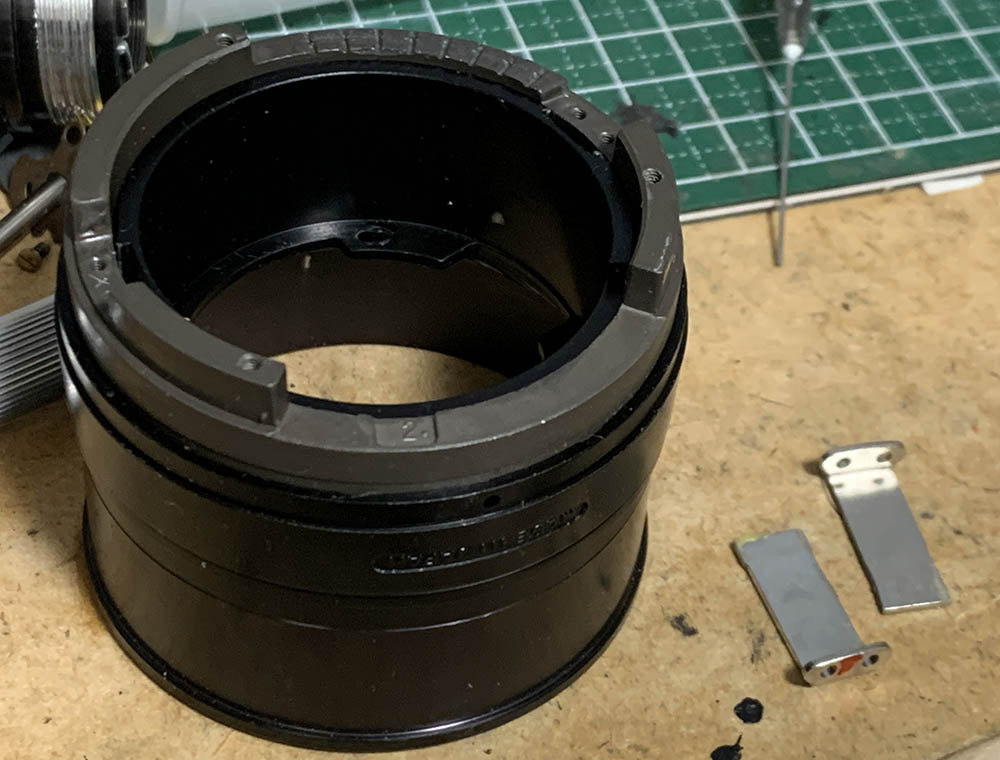
Carefully remove the aperture ring, it’s made of plastic so some of the parts are delicate.

There are 2 helicoid keys inside the barrel. Note their positions and alignment before you remove anything. You can see plenty of blemishes in the rear element, it’s fortunate that I managed to cleaned them all off. This was advertised as “EXC+++” or anything to that effect but it looked like this when I got it, very typical of online sellers.

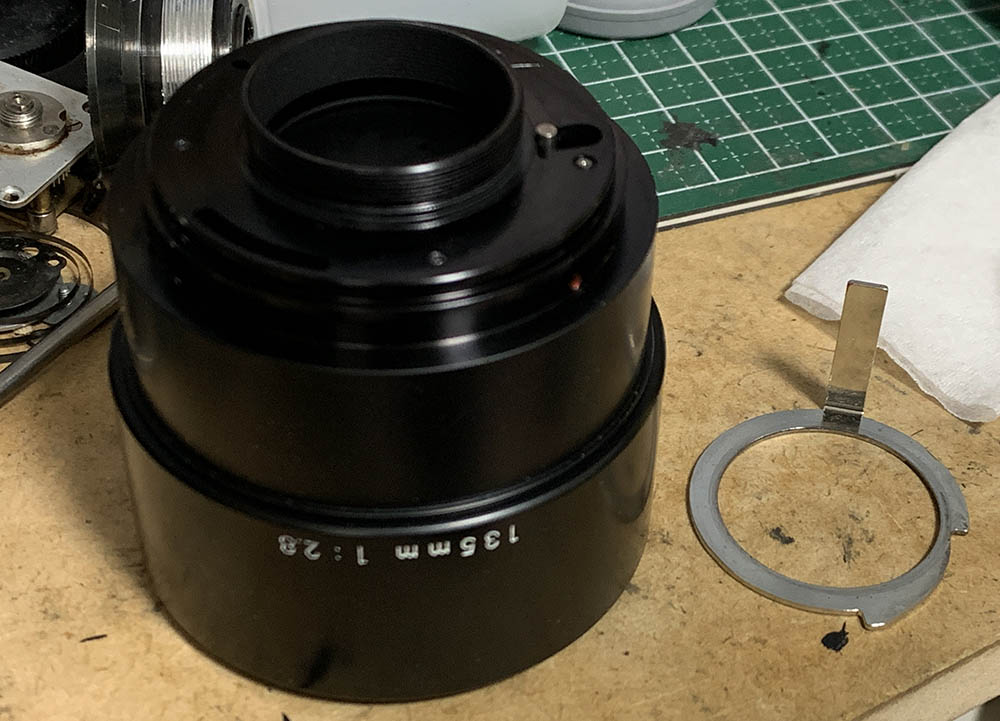
This is how deep it is when the lens is focused to infinity.

There are 3 screws securing the objective to the main barrel. Extract them so you could separate the lens into its basic components.

Carefully pull the front barrel off from the main barrel and set it aside.

Remove the rubber part from the focusing ring, carefully run a thin, rounded rod underneath it to lift it from the adhesive. Be sure not to tear the rubber since there are no replacement parts for it.

Extract the screws of the grip to remove it.
Once you are satisfied with your notes, extract the screws of the keys and don’t forget to note which key came from where so you will be able to put everything back properly. The keys keep the helicoids sync so turning the central one will allow you to turn the others at the same rate, enabling you to extend or retract the helicoids.

Collapse the helicoid all-the-way and create a small diagonal mark. You should be able to reproduce this later or else you got it all wrong.

Separate the central helicoid from the outer one. Don’t forget to note where they parted since this is also the same spot where they should mesh. People forget to do this and waste a lot of time later figuring how to put these back. To prevent this from happening to you, read my article on how to work with helicoids. The threads are thin and it can be difficult to distinguish when they part, just be careful and go slowly at it so you will be able to feel it when the helicoids parted.

Once the outer helicoid is gone you can now remove the protective sleeve and the distance scale.

Separate the inner helicoid from the central one and don’t forget to note the spot where they parted.

Unscrew the rear optical block from the housing of the objective.
Remove the regulator ring and don’t warp anything or else it won’t turn properly. Mine was oily so I had to clean it very well. The timing is perfect because if it stayed there longer without cleaning the oil will certainly reach the iris mechanism and cause an even bigger mess.

Carefully use a lens spanner to unscrew the retainer of the rear element and extract it with a lens sucker. Don’t forget to note where it should be facing so you can put it back properly later.
Clean the parts thoroughly and do not leave any residue. I scrubbed the helicoids using a strong detergent and pickled them in an alcohol bath to remove grime and other hardened gunk. Only apply a thin film of grease to the helicoids, I used something that is a bit light since it has a long focus-throw. Don’t lubricate anything that’s close to the iris mechanism. Applying excessive grease will lead to a bigger mess later and you’ll have to open the lens again for an overhaul.
Clean everything that’s accessible to you while you’re at it. If your lens has fungus, read my article on how to clean lens fungus. Dilute the solution with distilled water, using it at full-strength will etch the coating and the glass will get damaged, too. If it has an oily iris problem, wipe the blades with naphtha and lens tissue. Do not damage the blades and only handle them by their pins.
Conclusion:
This one took me a night to service with most of that time spent cleaning the helicoids and other things. This is the best in terms of build quality amongst all the Series-E prime lenses, it doesn’t have any plastic helicoids that are typical of its peers. Despite that it doesn’t have the same level of quality that you will find in a Nikkor. Having said that, I enjoyed servicing this, I learned a lot from this exercise and I was glad to have completed my Series-E collection.
Reassemble everything up to this point, you’ll need to adjust the focus in order to get accurate readings from the distance scale. If you are new to this, read my article on how to adjust a lens’ focus. That article will show you how it’s done in a DIY setting using readily-available tools. Once you’re satisfied with your adjustments, finalize it by taping the focusing ring and distance scale. Use good quality tapes for this so it will last longer. Reinstall the rubber part once you’re done.
This is a popular lens today thanks to the hype it generated on the internet, I was expecting to find many repair articles of it but I’m surprised to find nothing about its repair, just casual reviews and people praising it. I hope that this article will help you service the helicoids. Again, this is not for amateurs, bring it to a professional repairer.
Thanks for following my work, if you liked this article please share this with your friends so it will get more views. This site earns around $0.50 a day, it’s totally reliant on views. You can also opt to support this site, it helps me offset the cost of maintenance and hosting. You’re also helping me purchase, process and scan film. This site promotes the use of film so we’re all in this together. See you again in the next article, Ric.
Help Support this Blog:
Maintaining this requires resources and a lot of time. If you think that it has helped you or you want to show your support by helping with the site’s upkeep, you can make a small donation to my paypal.com at richardHaw888@gmail.com. Money isn’t my prime motivation for this blog and I believe that I have enough to run this but you can help me make this site (and the companion facebook page) grow.
Buy me a roll of film or a burger?
Thank you very much for your continued support!
$2.00
Helping support this site will ensure that this will be kept going as long as I have the time and energy for this. I would appreciate it if you just leave out your name or details like your country’s name or other information so that the donations will totally be anonymous. This is a labor of love and I intend to keep it that way for as long as I can. Ric.

Aug 12, 2023 @ 15:32:28
Hello from Argentina!
I need help, i can’t set to infinity the re assembly.
I don’t put a marks in the helicoids. I’m so fool.
Can you tell me how to re assembly?
Thanks!!
Ariel.