
Hello, everybody! I’m going to begin my new job 2 days from now. I see it as a new beginning, away from the toxic work environment that I had. This is a time to make new friends and learn new skills. It’s always exciting to join a new team, I love meeting new people so this excites me a lot. Speaking of new beginnings, I’ll show you something today that signaled a new start for one of Nikon’s longest-running lens line. Read this to know what that is.
Introduction:
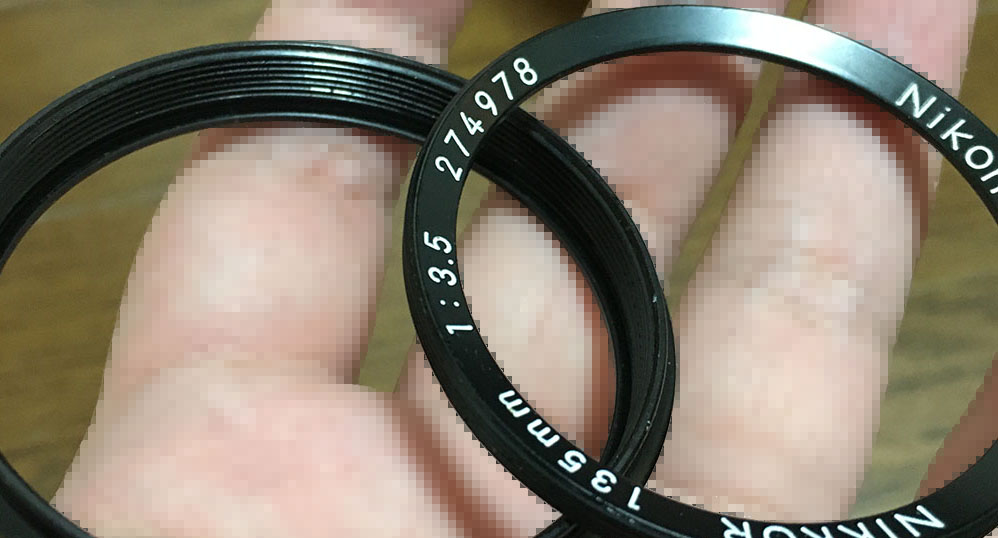
The Nikkor 135mm f/3.5 Ai was sold from 1977 to 1981. It replaced the older New-Nikkor 135mm f/3.5 Ai which was a popular lens but it could be better. The new lens is smaller, lighter and just as good, if not better than the older one. That’s a difficult act to follow since the New-Nikkor 135mm f/3.5 Ai is a good performer. Nikon succeeded so we now have this lens.

It’s a good-looking lens. Its practical specs and its compactness makes it nice as a travel lens. Despite being small it’s quite dense when held, you can feel how well-built it is, this will certainly survive professional use. It looks very modern for a lens made in the 1970s, too.
It has a new 4-elements-in-4-groups design, a departure from the traditional 4-elements-in-3-groups design that followed this lens family since 1951. This is the biggest change in terms of optical design for this lens family. It got an update in 1969 wherein the original design from the 1950s was revamped, it retained the original layout but the optics’ geometry is different. I consider that to be just a variation of the original design but this one is brand-new. It enabled the engineers to make the barrel more compact, it’s also lighter due to the fact that the elements are now smaller compared to the older design wherein the 3rd element is a huge chunk of optical glass. This soon became popular and people began to forget the older lens in favor of this one.

These are the major variations of this lens family with the earliest model to the right. From right-to-left, these are:
- Nikkor-Q 13.5cm f/3.5 Auto
- Nikkor-Q.C 135mm f/3.5 Auto
- New-Nikkor 135mm f/3.5
- Nikkor 135mm f/3.5 Ai
- Nikkor 135mm f/3.5 Ai-S
There are more sub-variations than what’s shown here but the differences are insignificant so I did not include them here.

It has a beautiful 7-sided iris that helps create smoother-looking bokeh. The new design also allowed it to add another feature which is a built-in hood. I like it a lot because I don’t have to purchase a separate accessory for it.

This is how it looks like with the hood extended, it makes it longer but it still remains compact. It balances very well on all Nikons, handling is superb so it’s such a wonderful lens to shoot with all-day. My only complaint is its long focus-throw but that couldn’t be helped, every lens from this family has the same focus-throw range. It can be a bit challenging when focusing on faster subjects since tracking them can be quite slow. The good news is you’re able to precisely focus with it.
Learning how your lens performs is key to maximizing its use. You’ll learn how to utilize its strengths and avoid its weaknesses. This knowledge helps in determining which lens to bring on assignment.
I shot these from f/3.5, f/5.6 and f/8, these are the most common apertures that people would want to use it and we’ll see the most changes with these values. The photos were shot with my Nikon Df.
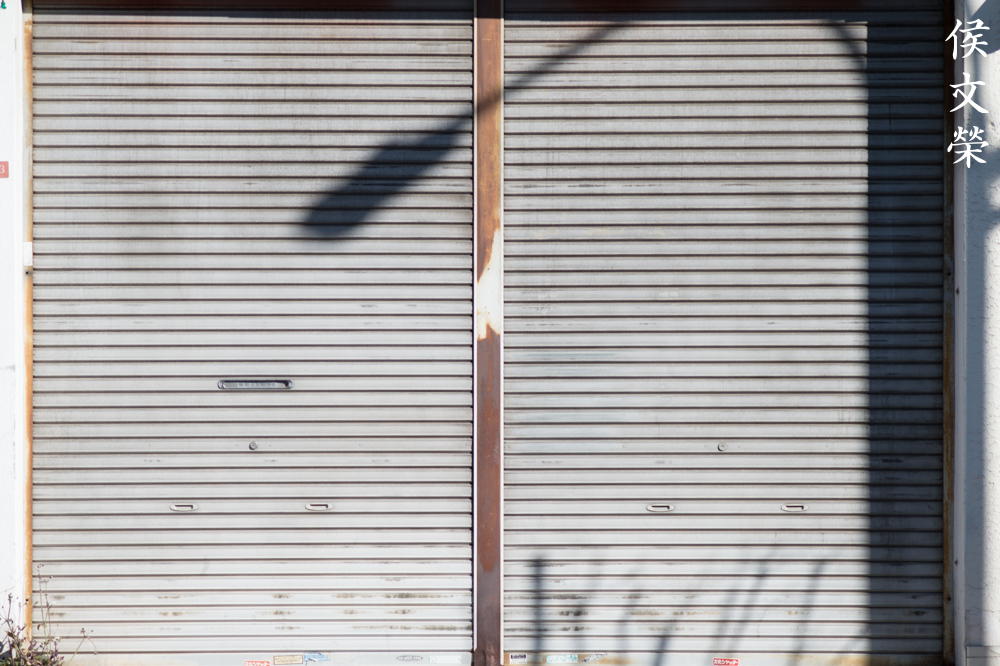
There’s a slight pincushion-type distortion which is insignificant. You won’t see much of it in real-world scenarios.

Chromatic aberration is visible wide-open on overblown areas but this lens controls it quite well. I can’t say the same for spherical aberration, it isn’t so bad so I don’t really mind having it in my photos as it adds a unique look to them. It does have a tendency to flare more compared to the older design, it may be due to the fact that the new design has more air-to-glass surfaces so there are more surfaces for light to bounce-around inside the barrel.


(Click to enlarge)
Vignetting can be seen wide-open but you’ll only see traces of it by f/5.6. It’s gone by from f/8 and beyond.


(Click to enlarge)
It’s sharp wide-open and resolution seems adequate at the center. It’s not as nice at the corners but they’re barely-acceptable. Chromatic aberration can be seen wide-open in overblown areas but it’s not terrible. Stopping it down to f/5.6 makes the center even sharper and the resolution is now a bit better. The corners begin to look a lot nicer, too. Chromatic aberration is now gone and you’ll only see slight traces of it. Spherical aberration is still present but it’s not ugly at all. It appears that the center is performing at its peak when it comes to sharpness and resolution. Stopping this down to f/8 will make its corners look better. I’d say that its sweet-spot is f/5.6. The bokeh character is quite nice but it has the tendency to exhibit smudgy-looking artifacts when given the chance, stopping it down will help alleviate it. Despite that, it has an above-average bokeh quality. The discs look clean and even, too. There’s only slight traces of outlines, I’m actually quite impressed by it.


(Click to enlarge)
This is a nice lens overall when used with a digital camera. It doesn’t have a shallow depth-of-field so focusing with it can be challenging at times. If you are shooting with a split-screen the center prism will get dark when there’s not enough light so I’ll vote against using a split-screen with it. Despite all I said, it’s still a capable lens today even with modern Nikons.
Let’s now see how it performs with film. Film has a unique look that is hard to replicate with a digital camera because grain reacts differently to light. It can either mask or amplify a lens’ flaws. Since this was originally made for use with film it’s best that we judge this with its intended medium. This will give us a better assessment of how it really performs. These were shot with my Nikon FG loaded with Fujifilm Industrial 100.

It renders beautifully with film. The colors look great and sharpness is quite high even wide-open. It renders skin beautifully, too.

The depth-of-field can be quite shallow despite not having a fast maximum aperture so you’ll miss a couple of shots if you’re not careful.

Resolution is quite nice as you can see here. The bokeh quality is smooth so far as there’s nothing in the background that could trigger the smudgy and rough-looking artifacts such as twigs and lines.

The focus-throw is kind of long for my taste so it can be difficult at times to track your subjects if they’re moving fast. You should practice your manual focusing skills in order to make effective use of it for action photography. It will give you amazing results once you’ve managed to nail your shot.

It renders skin beautifully, there’s a nice glow on the highlights, this is what I like about spherical aberration, it adds another layer of interesting effects to your photos.

It’s a great portrait lens for people who couldn’t afford the more expensive lenses but there’s nothing cheap with its ability to take great portraits. This is a wonderful lens when used with film and I highly recommend shooting this lens with it.


(Click to enlarge)
I love the results it gives, this is certainly a good lens for film photography. I think this is the best deal in town when it comes to compact portrait lenses. Film grain helped hide some of the nasty, smudgy-looking artifacts found in the bokeh.
I highly recommend this for anyone looking for a compact 135mm lens. It’s sharp and it renders backgrounds nicely. It’s a great lens for traveling, pair it with a New-Nikkor 50mm f/2 and Nikkor 28mm f/2.8 Ai and you get a great setup for traveling light. The best thing is these are sold for around $50.00, I got mine for $10.00 since it was in terrible shape. If you don’t want to spend much, you can look for a New-Nikkor 135mm f/3.5 instead. It’s heavier and a bit larger but they’re sold for less money these days. If you could stretch the budget a bit more, a Nikkor 135mm f/3.5 Ai-S will be even better specially if you need to shoot in complete PSAM modes. If weight is not a concern and you could spare a bit more, a Nikkor 135mm f/2.8 Ai will even be better. Its faster maximum aperture speed is a delight to use. If you’re decided on this one, be sure that the iris is dry and snappy when you actuate it. Turn all of its rings and make sure everything operates smoothly. Check if the optics is clean and clear, too. Just be patient and you’ll find one in great condition.
Before We Begin:
If this is your first attempt at repairing a lens then I suggest that you check my previous posts regarding screws & drivers, grease and other things. Also read what I wrote about the tools that you’ll need to fix your Nikkors.
I suggest that you read these primers before you begin (for beginners):
Reading these primers should lessen the chance of ruining your lens if you are a novice. Before opening up any lens, always look for other people who have done so in YouTube or the internet. Information is scarce, vague and scattered (that is why I started this) but you can still find some information if you search carefully.
I highly recommend that you read my working with helicoids post because this is very important and getting it wrong can ruin your day. If I can force you to read this, I would. It is that important!
For more advanced topics, you can read my fungus removal post as a start. This post has a lot of useful information and it will be beneficial for you to read this.
Disassembly (Lens Barrel):
It’s simple to dismantle but it’s a bit more complicated for a beginner to fix as their first attempt in lens repair. Most of its parts were glued and you’re to need some special tools to open some of the parts. Like most lenses, we’ll want to remove the objective as soon as possible so we can work on the lens barrel without worrying about scratching the glass. This can be done easily with this lens.
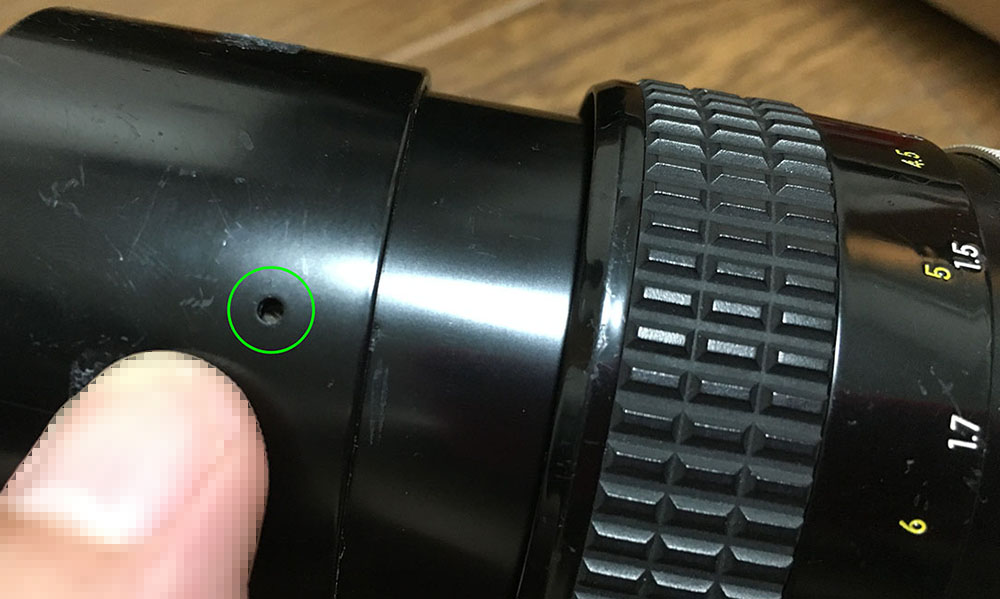
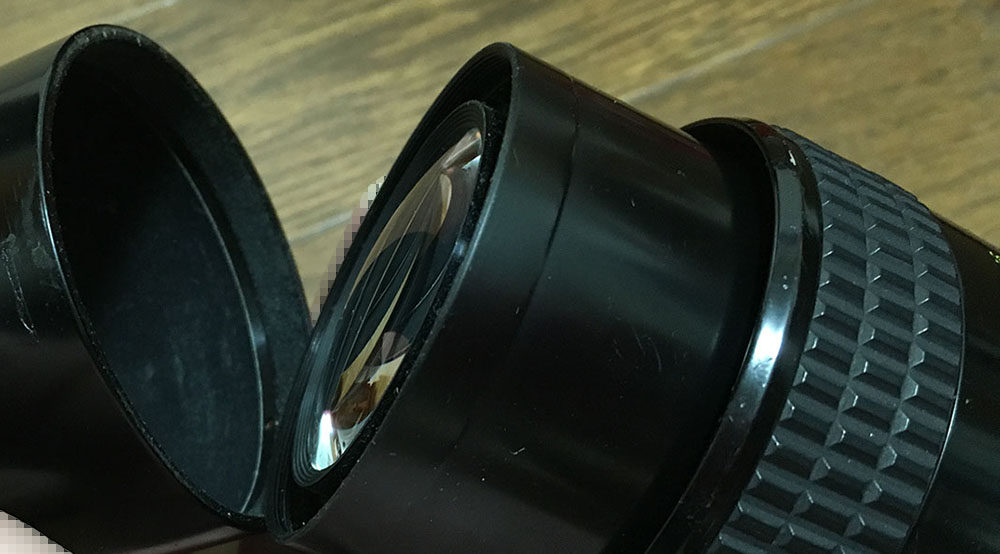
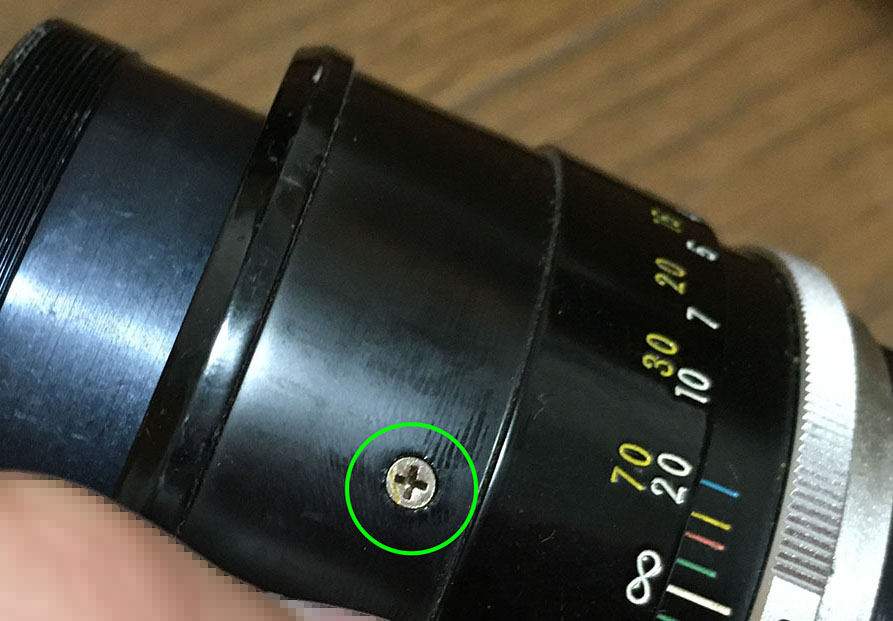
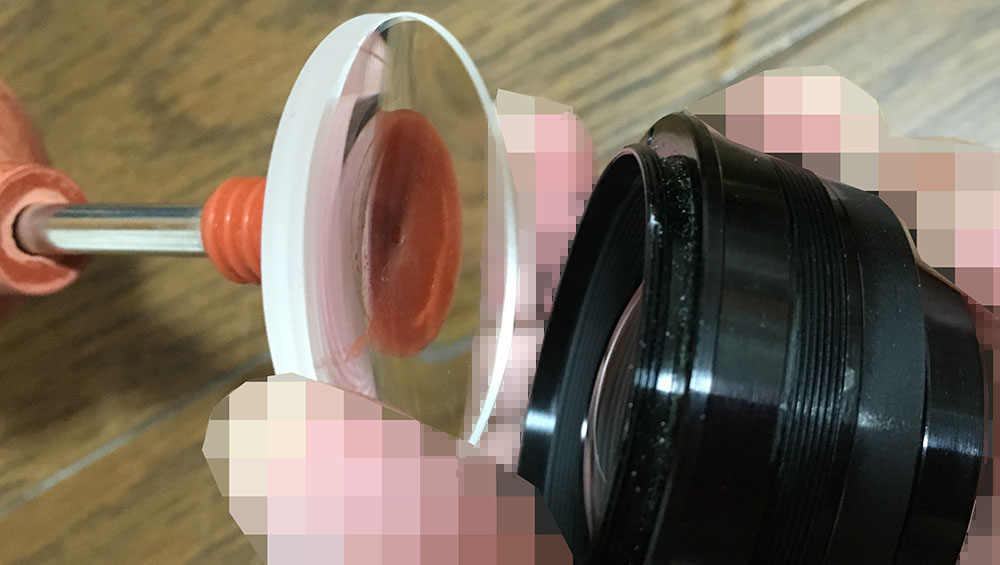
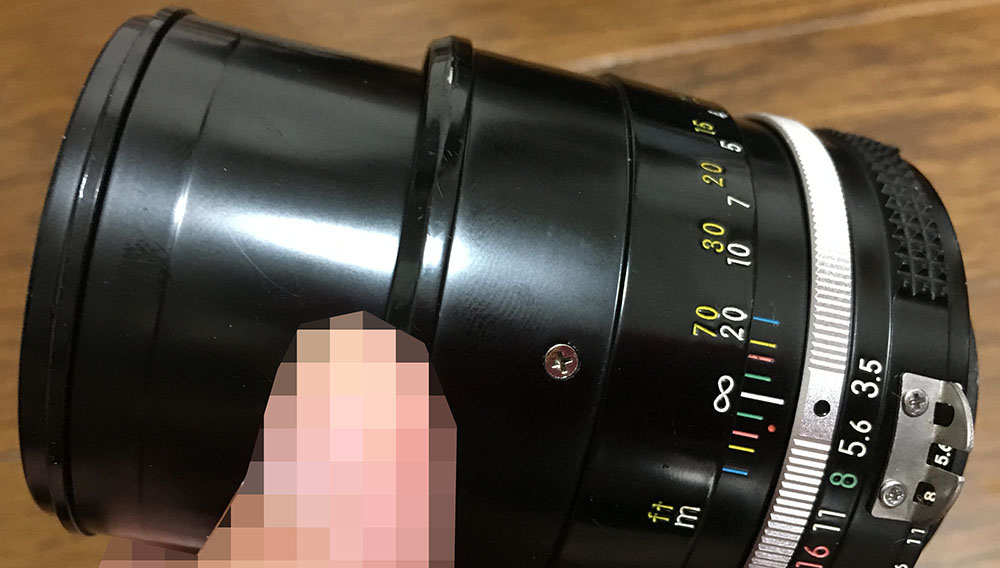
Locate and extract this set screw to remove the front ring.
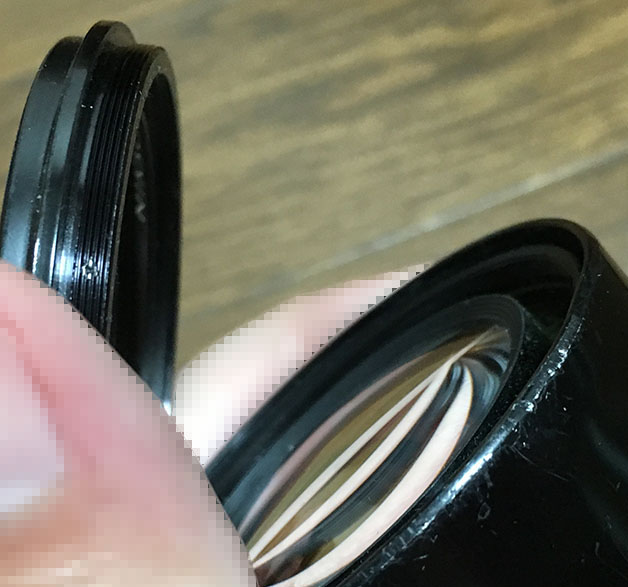
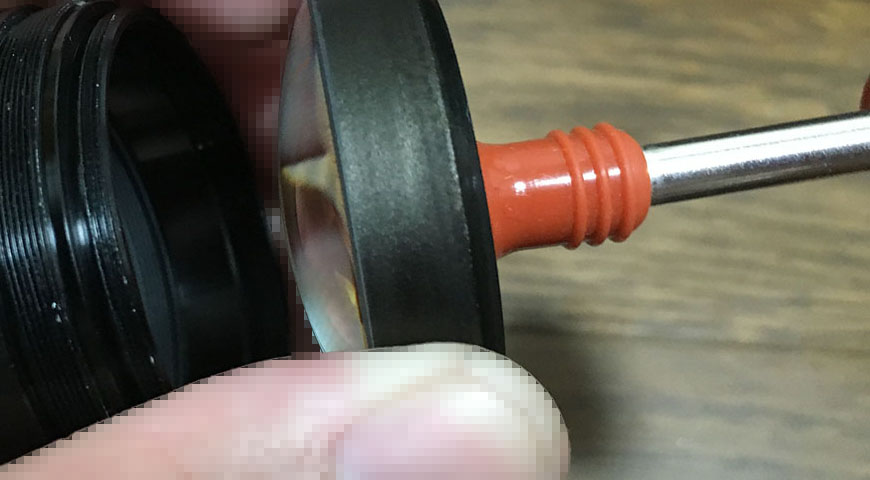
Unscrew the front ring with the help of a rubber tool. It’s usually glued and a drop of alcohol to the threads will help soften the seal.
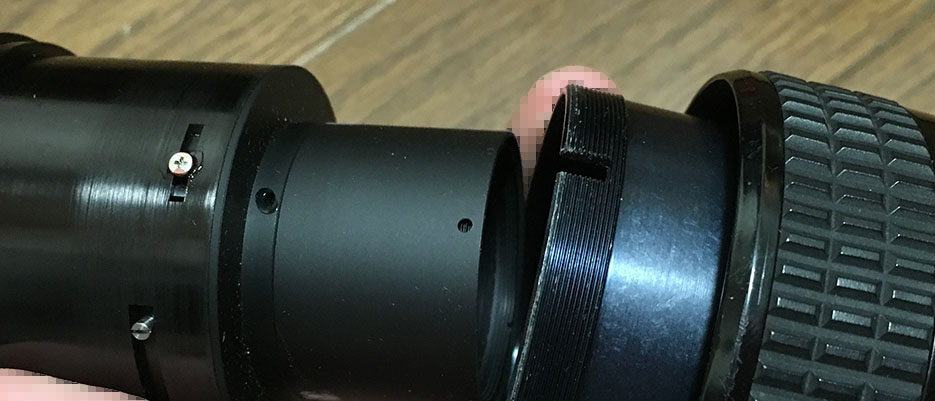
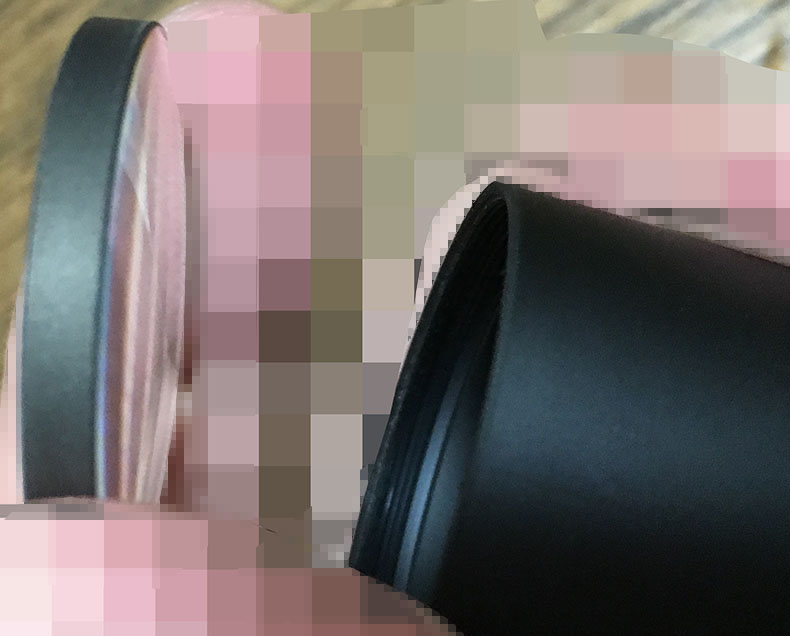
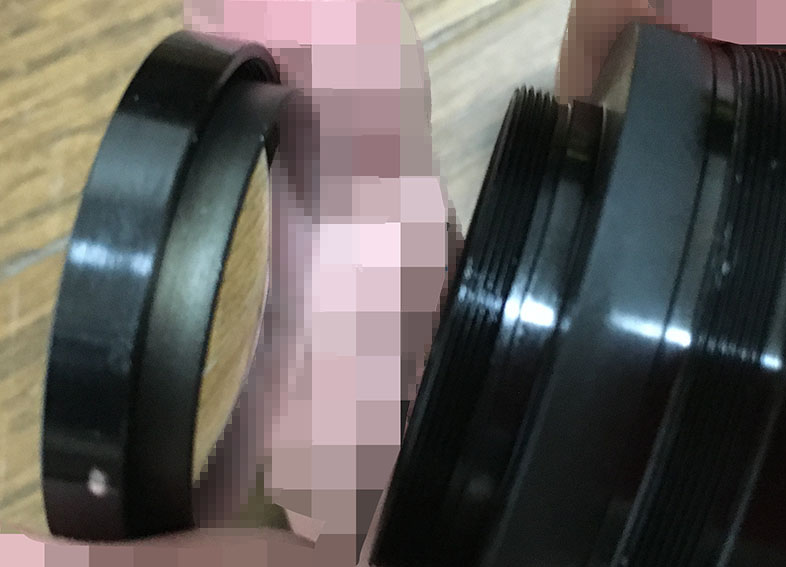
You could further dismantle the front ring by unscrewing the bezel. This is not necessary but it would be nice if you could clean it thoroughly.
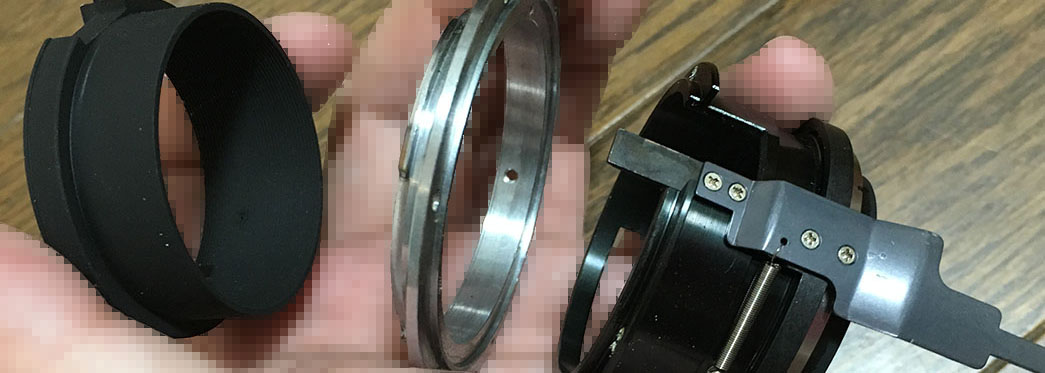
Pull the shade off once the front ring is gone. Clean the felt lining very well by scrubbing it with a stiff-bristled brush. I replaced everything with fresh material in order to get rid of germs.
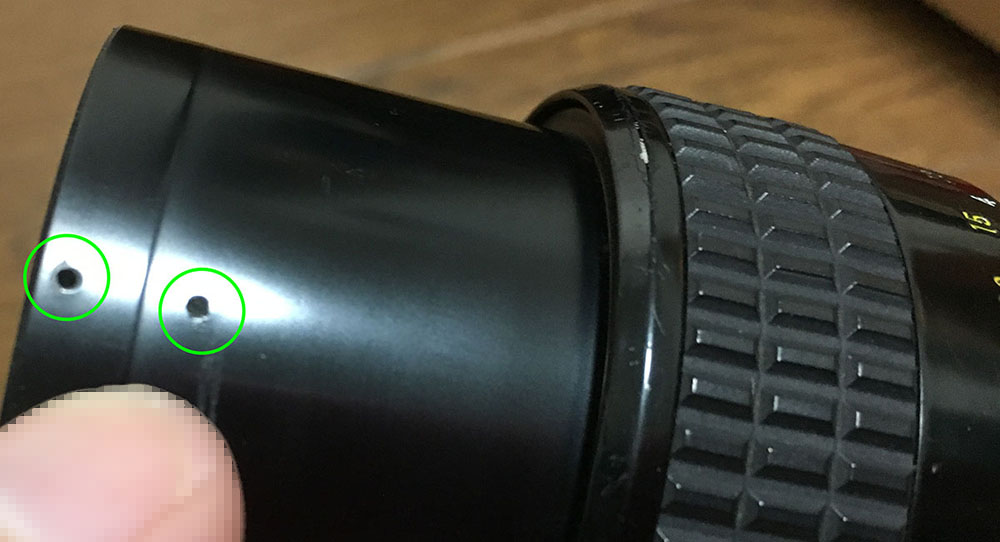
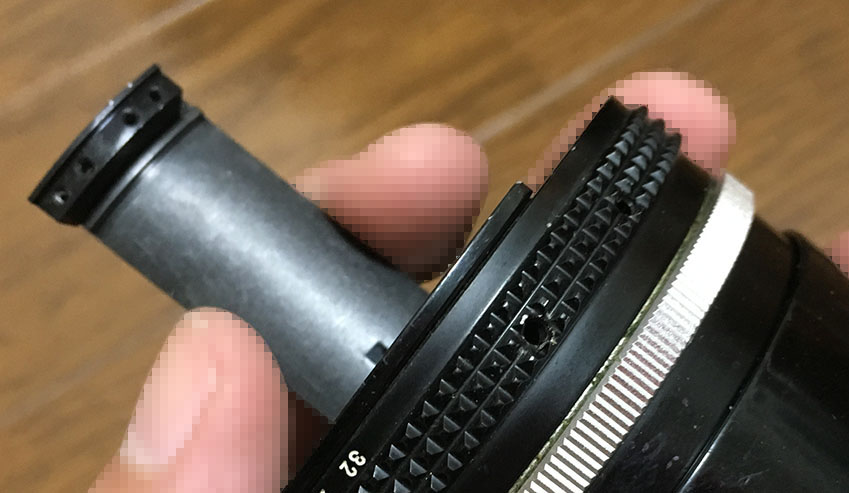
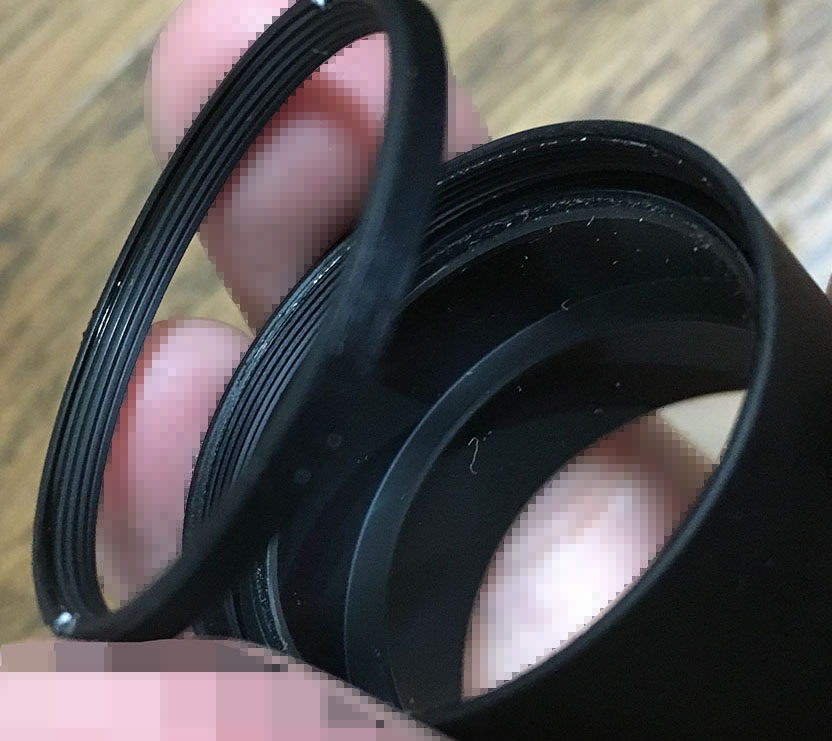
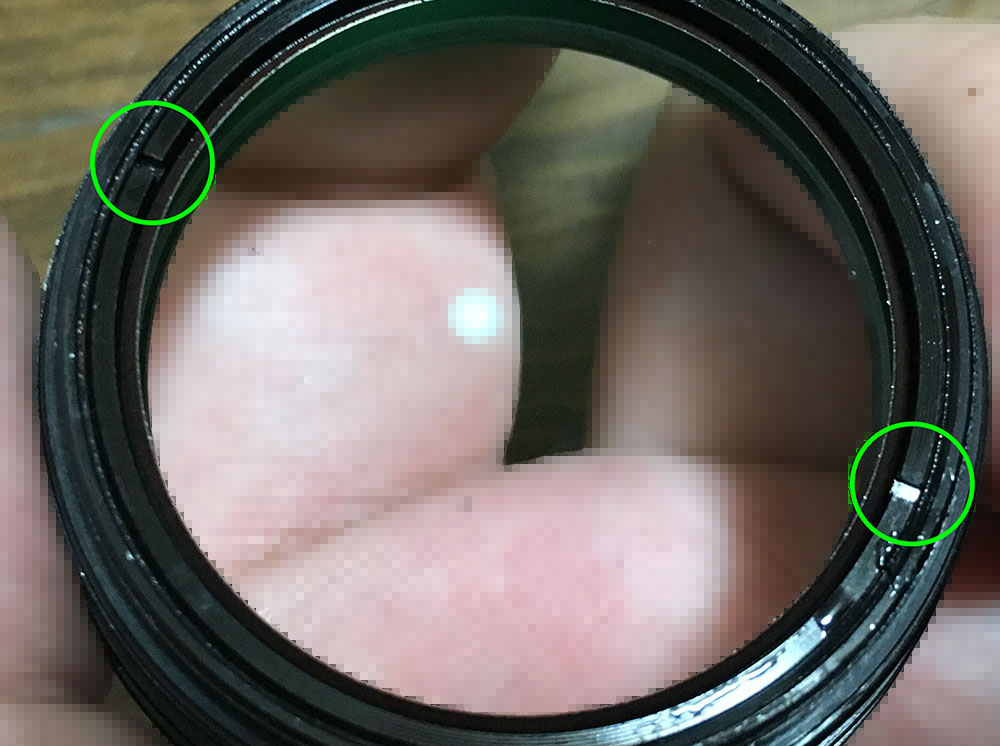
There are 2 holes here, extract the screw found at the lower one so you can unscrew the front barrel.

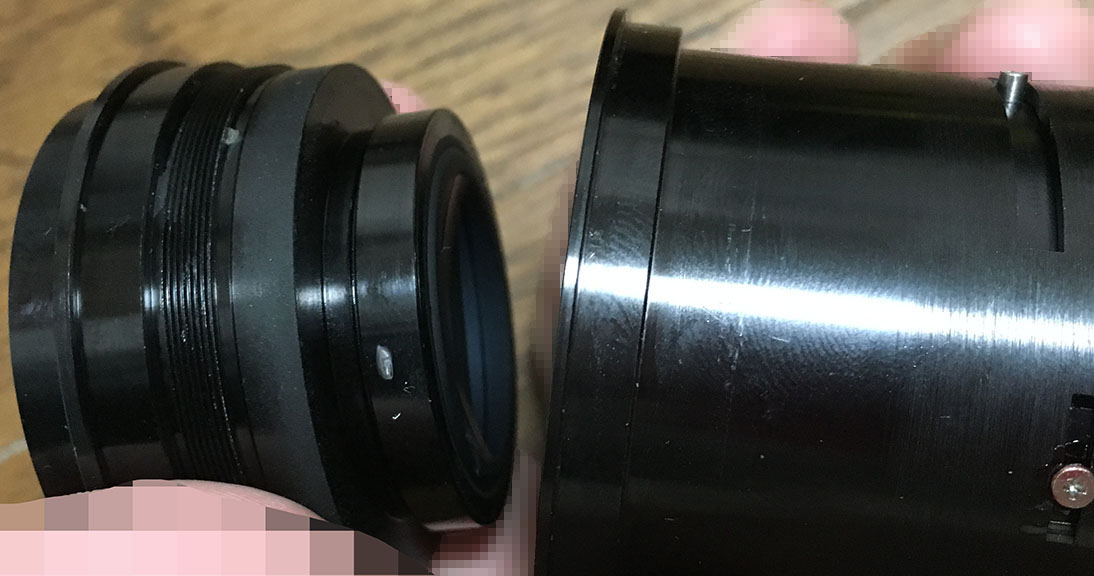
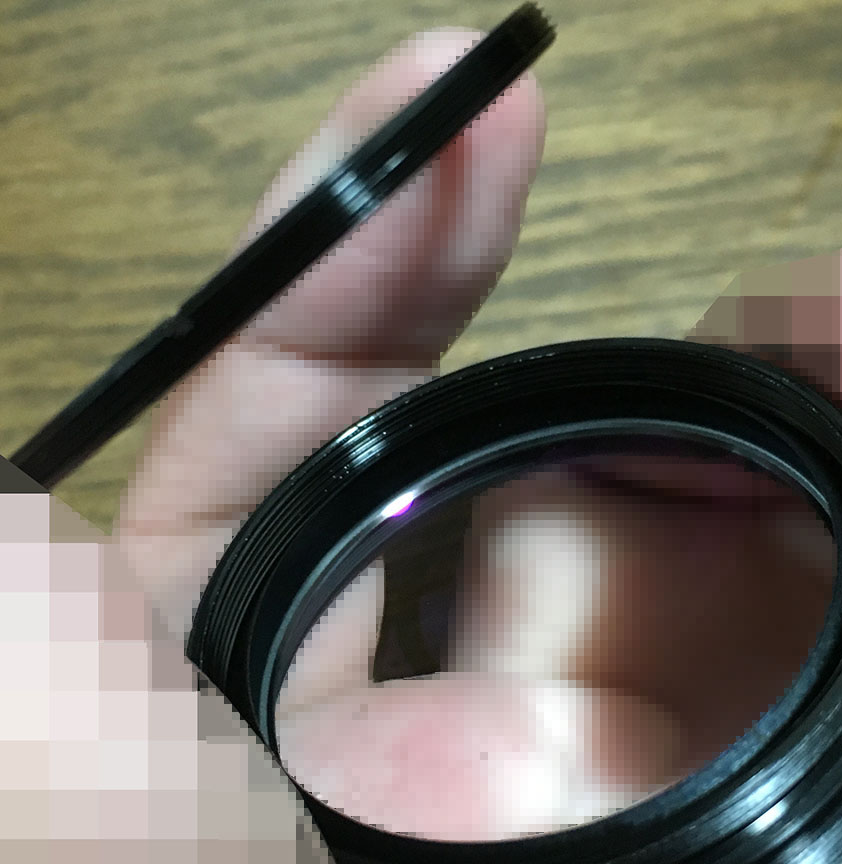
Unscrew the front barrel to remove the objective.
Remove the objective and store it in a safe place
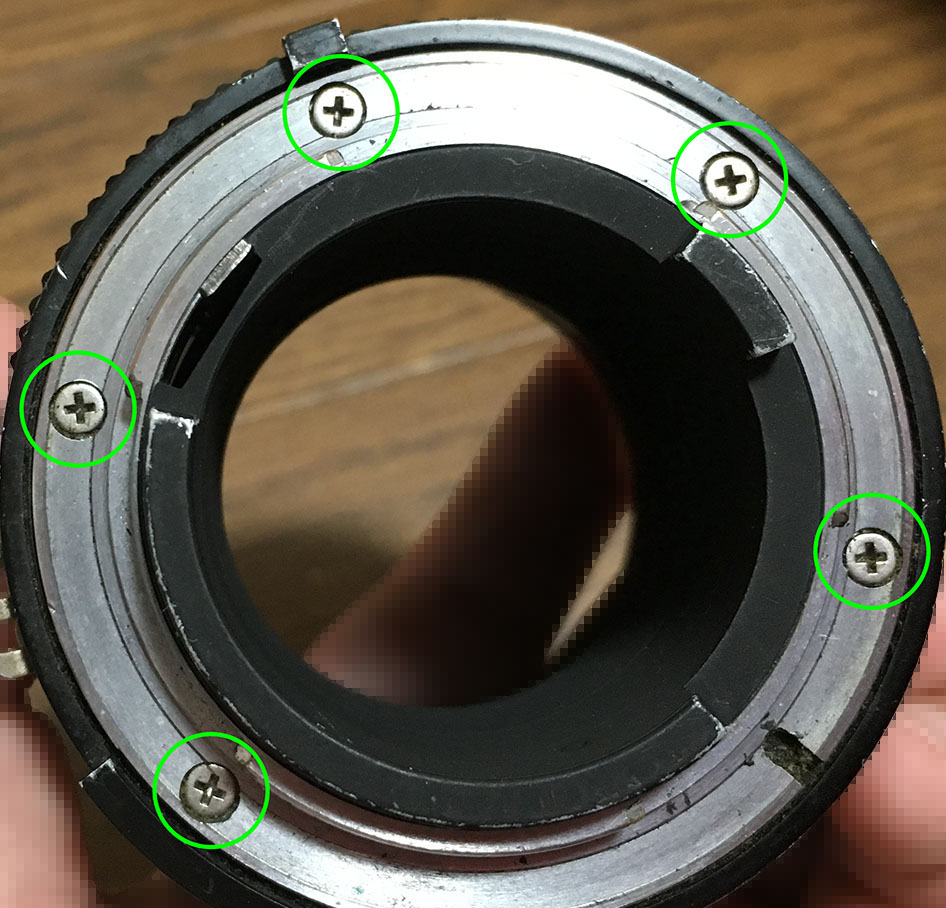
Extract these so you can remove the bayonet mount. Many people get stuck here because they have stripped them. To prevent this happening, read my article on how to remove bayonet screws. Use the correct type of driver, the screws are JIS so you should only use a JIS driver for them.

Carefully remove the bayonet mount.
You could dismantle the bayonet assembly even further to clean it better. Be careful since one of the screws in the bayonet’s throat is different. It’s taller and it’s located at the 6:00 position. It prevents you from turning the barrel too much and damage the lens mount in your camera.

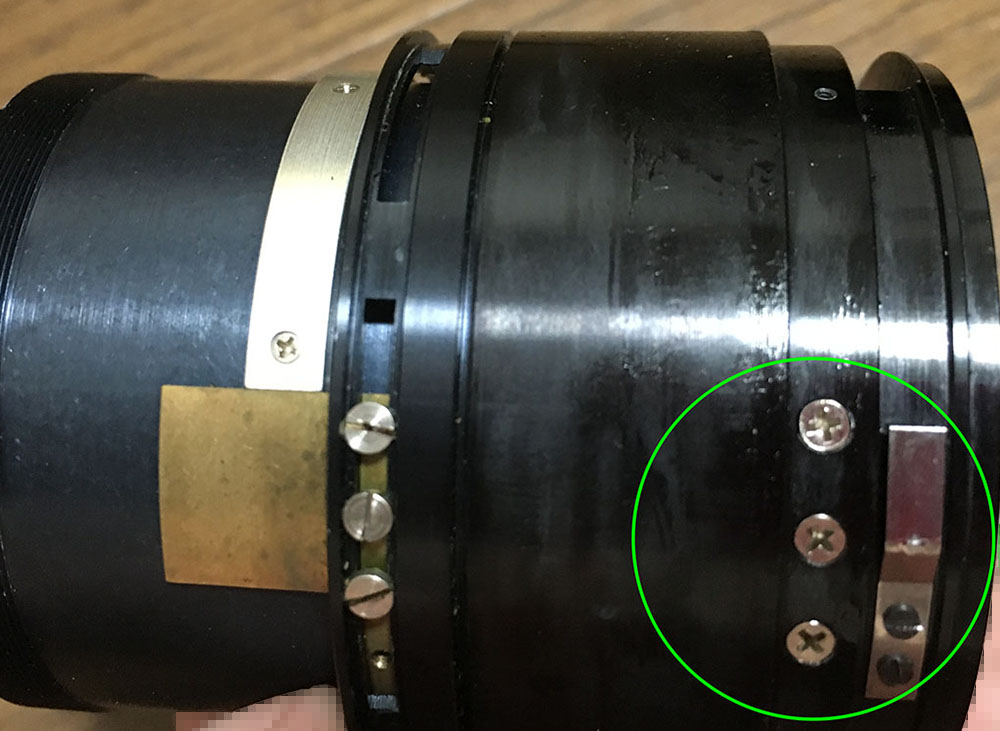
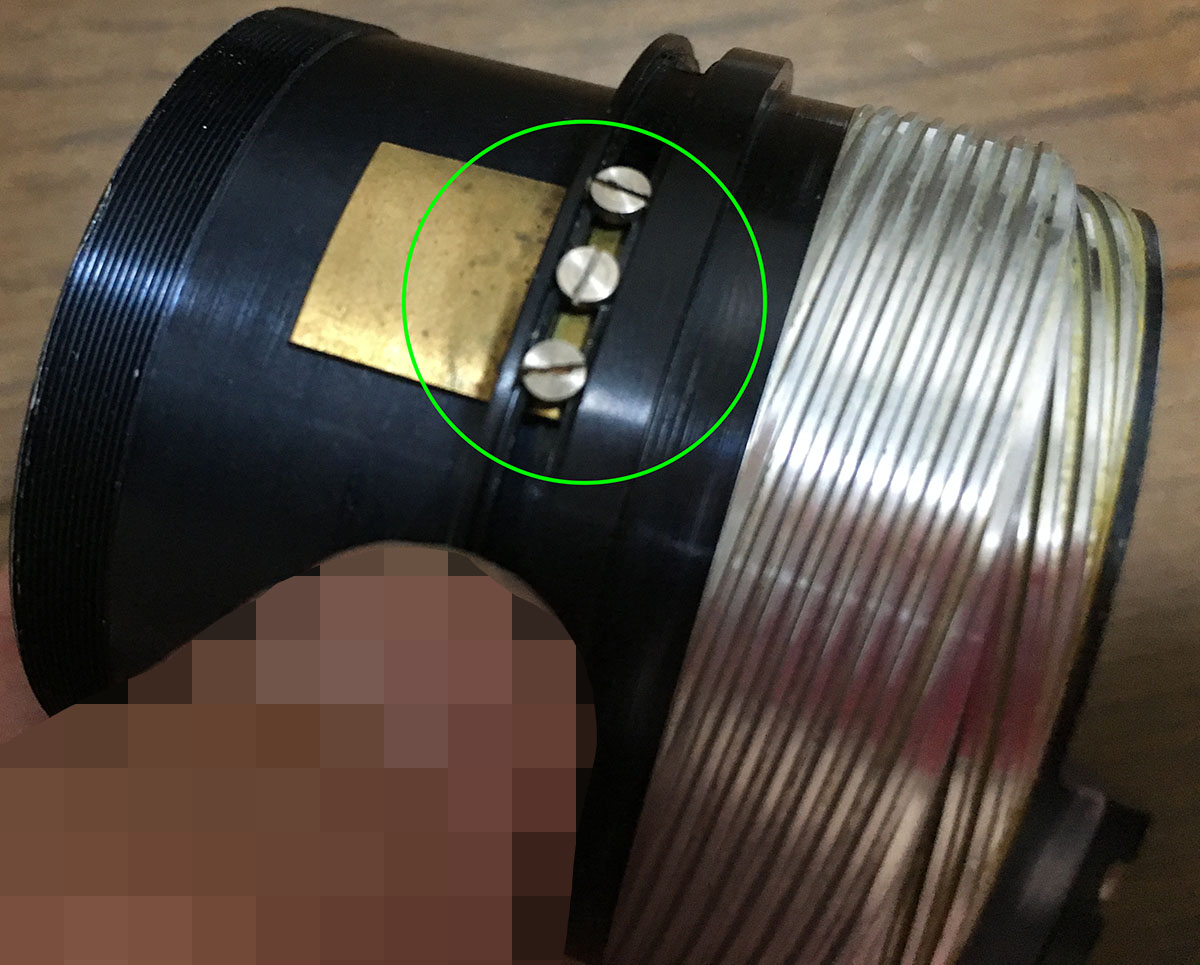
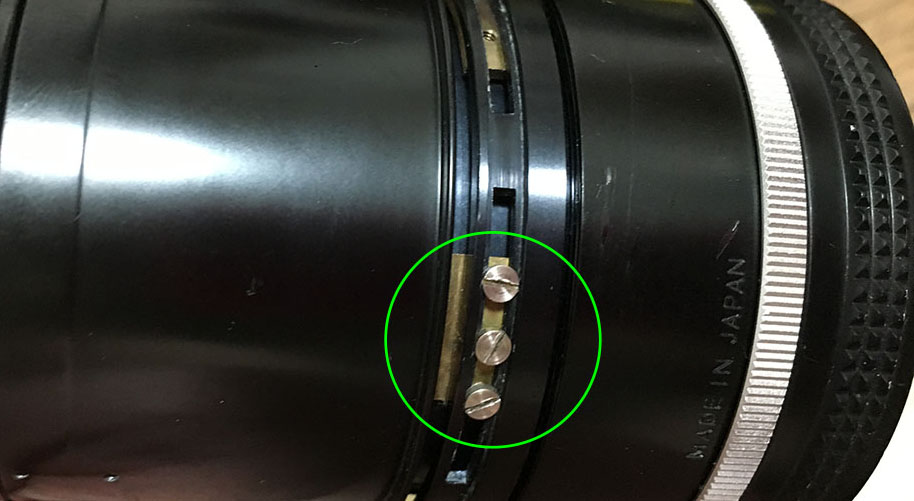
You can’t remove the aperture ring without extracting these. They’re tough to remove so I usually heat them from-behind to soften their seals. Be sure not to snap these when you extract them
Those screws secure the aperture-coupling fork, it couples the aperture ring to the iris mechanism.

You can now remove the aperture ring.
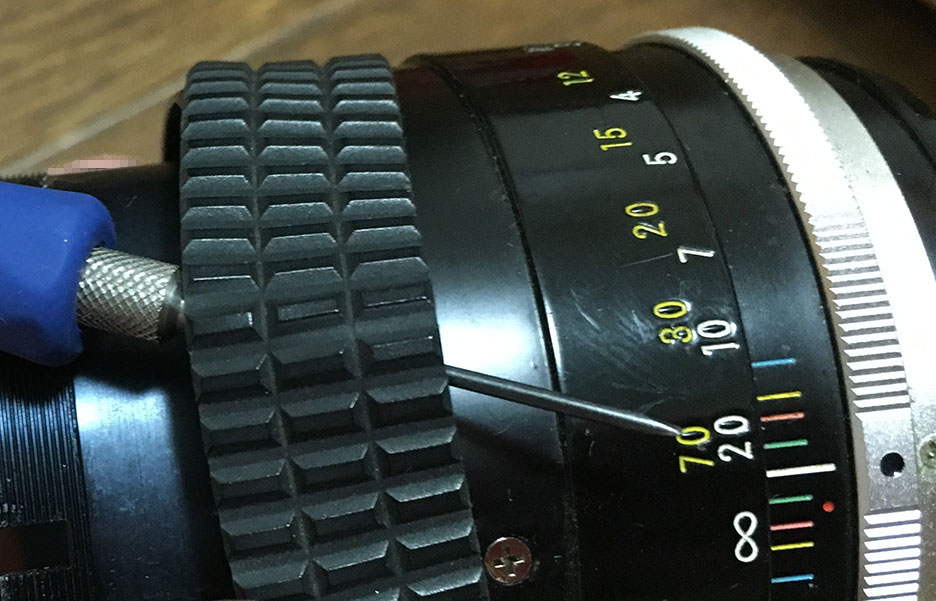
Carefully remove the rubber part of the focusing ring. Run a thin rod under its circumference to lift it from its adhesive. Be careful not to tear it.
You can now access these once the rubber part is gone. Extract these so you can remove the focusing ring.
Remove the focusing ring.
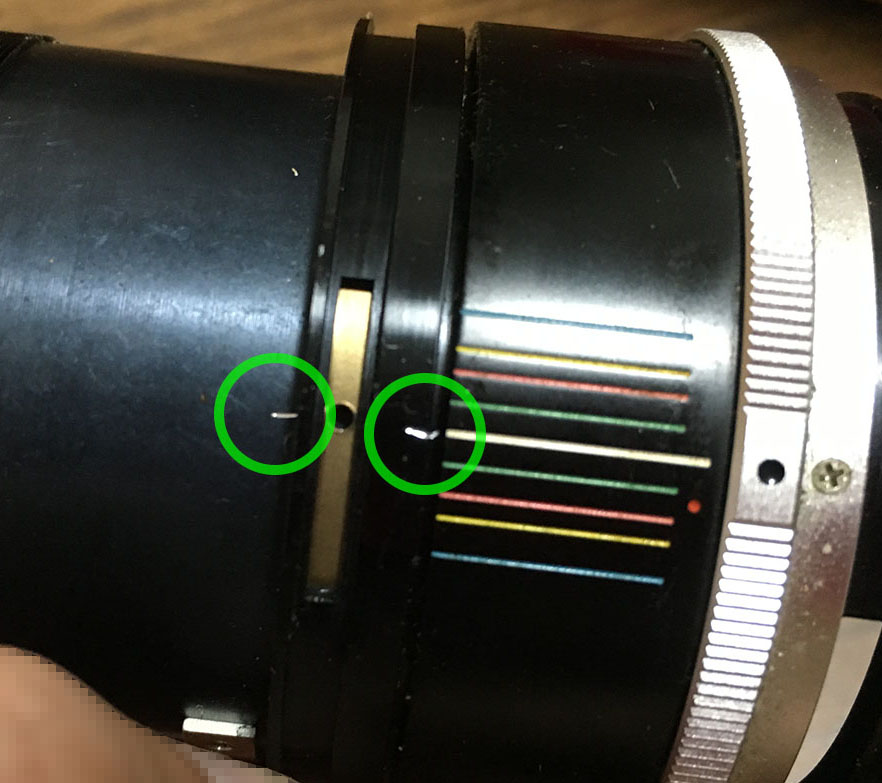
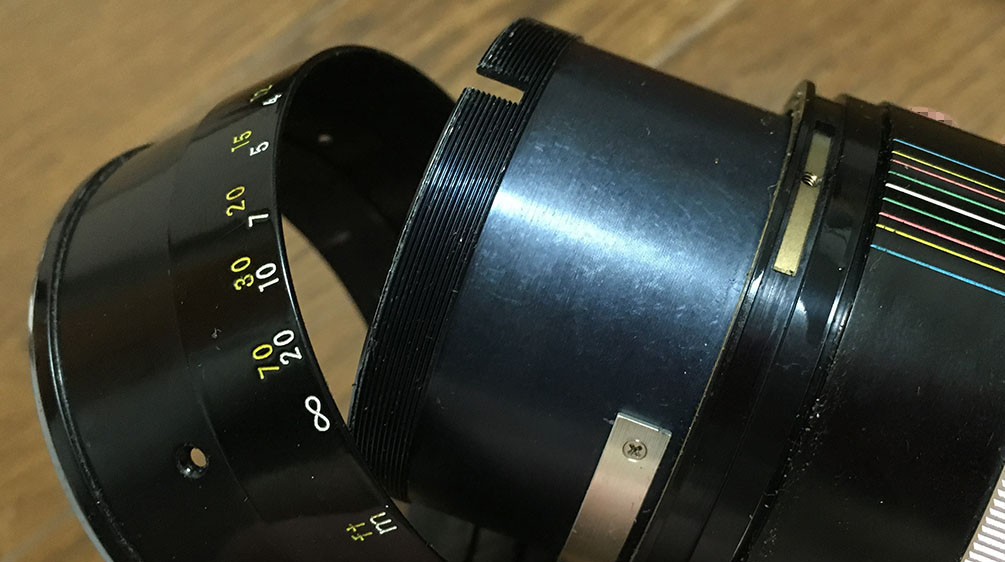
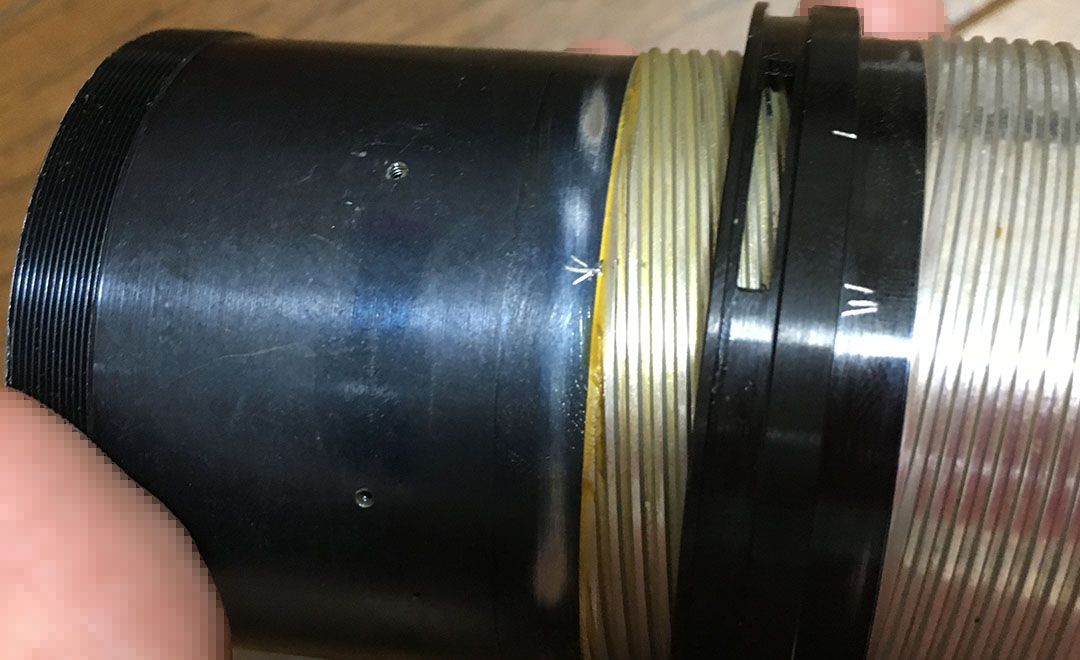
Turn your lens to infinity and make small marks so you’ll know how things should be aligned, this will help you later during reassembly.
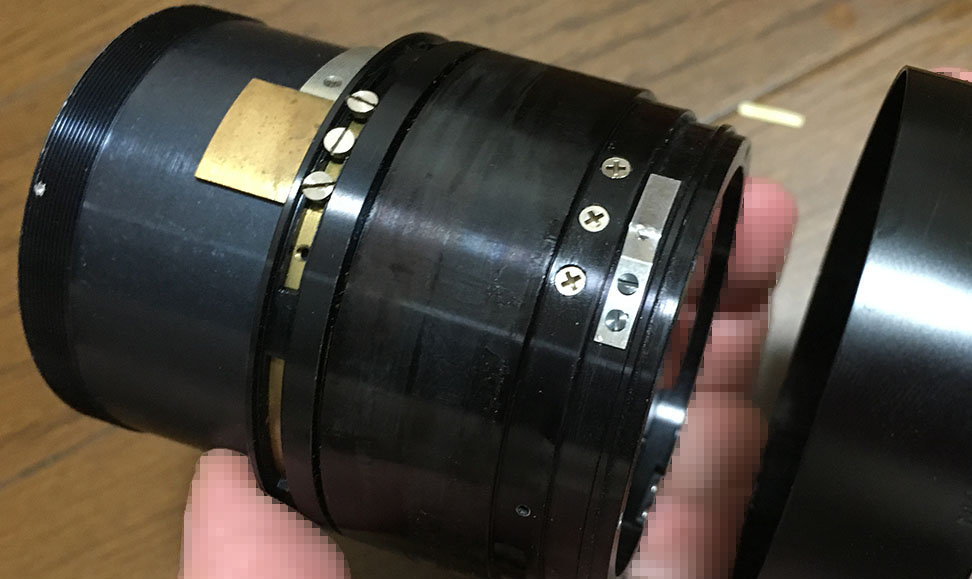
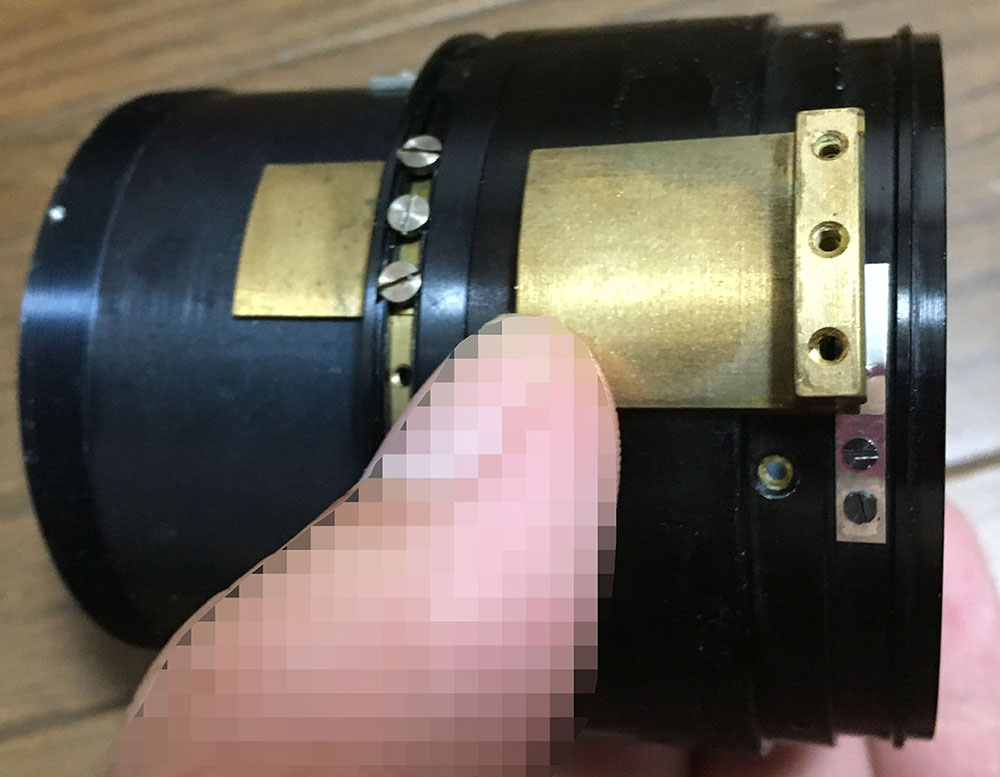
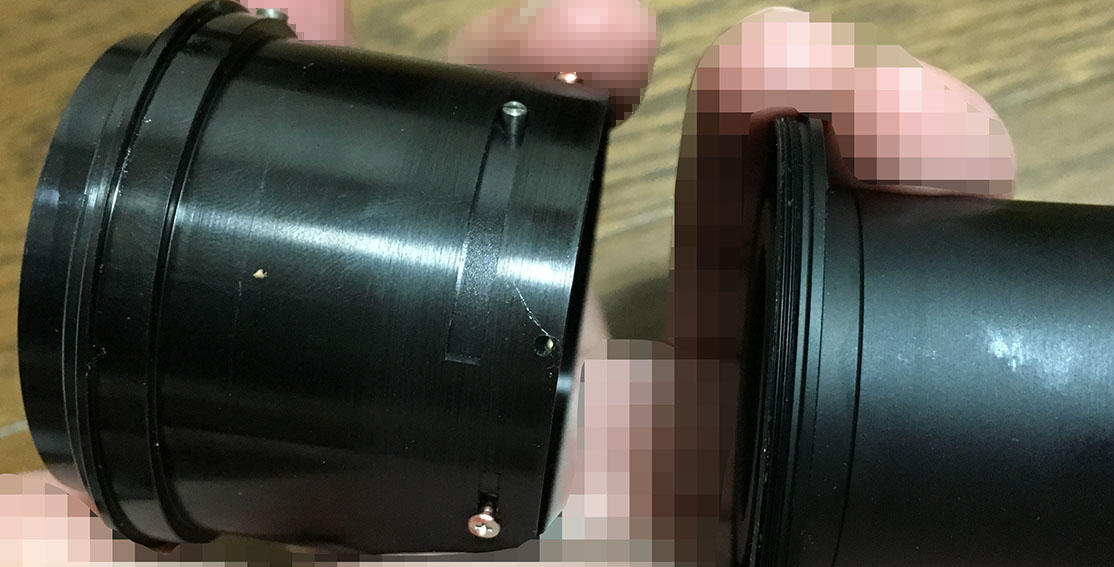
The grip and sleeve can be removed after extracting the grip’s screws. Use a bit of alcohol if the sleeve or grip is glued to the barrel and try again later.
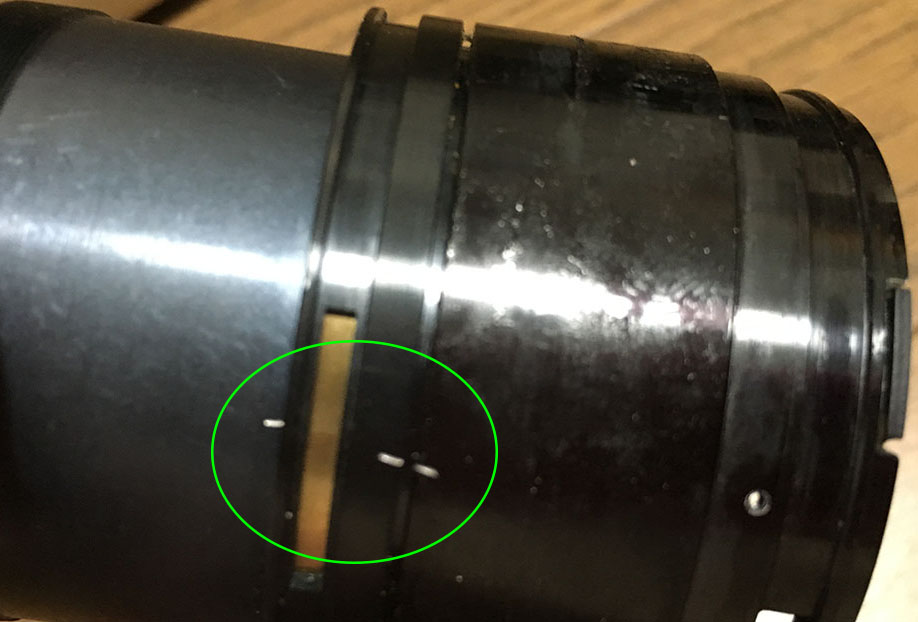
I made a few marks here just to be sure. I should be able to replicate these.
Extract these to remove the helicoid key. They can be tough to remove, heat them well with a torch from the other side to soften the epoxy. I could tell it by the smell it emits when heated.
The helicoid key keeps the helicoids synced, turning the central helicoid will allow you to extend-or-retract the barrel. It also keeps the helicoids together so you can’t take them apart.
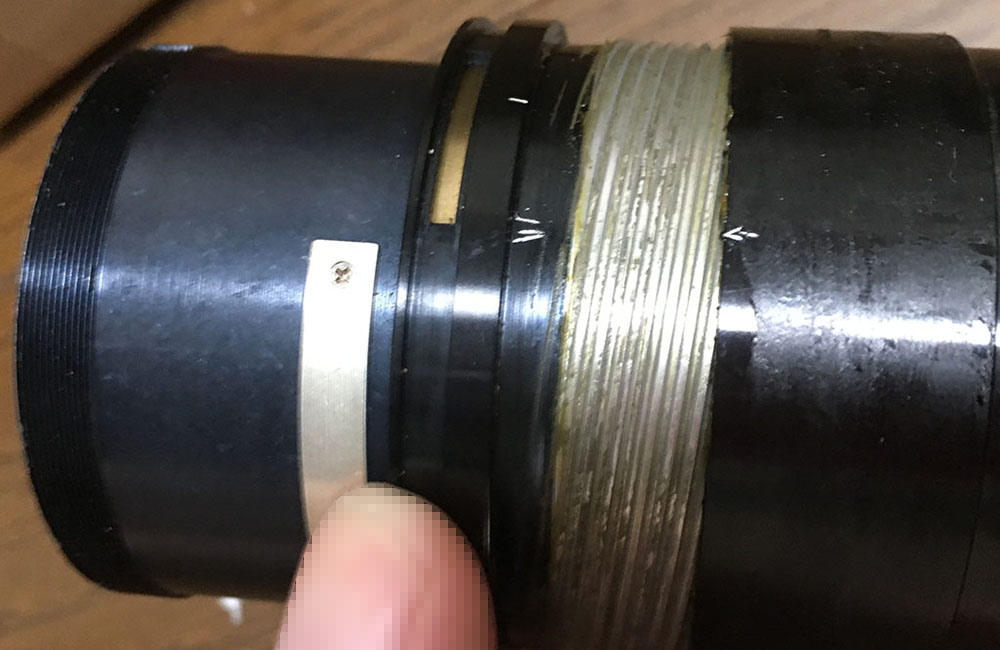
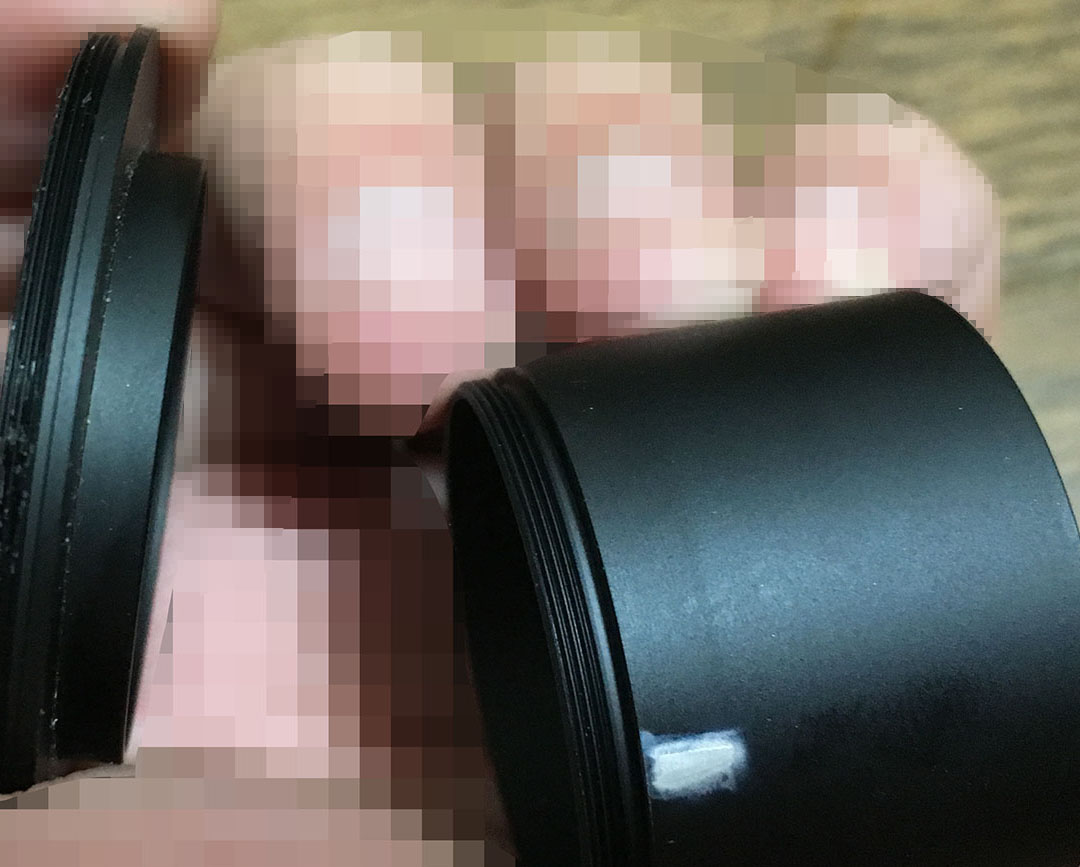
Separate the central helicoid from the outer one and never forget to make a small mark to know where they separated as they should mesh at the same spot, too. Many people forget to do this so they waste a lot of time guessing. Read my article on working with helicoids to prevent this from happening to you.

This prevents you from separating the inner helicoid from the outer one. It constrains the range of the helicoids so they won’t turn beyond it. Remove these screws in order to separate this part, don’t forget to note which side should be facing-up.

It can be tough to remove because it’s glued.
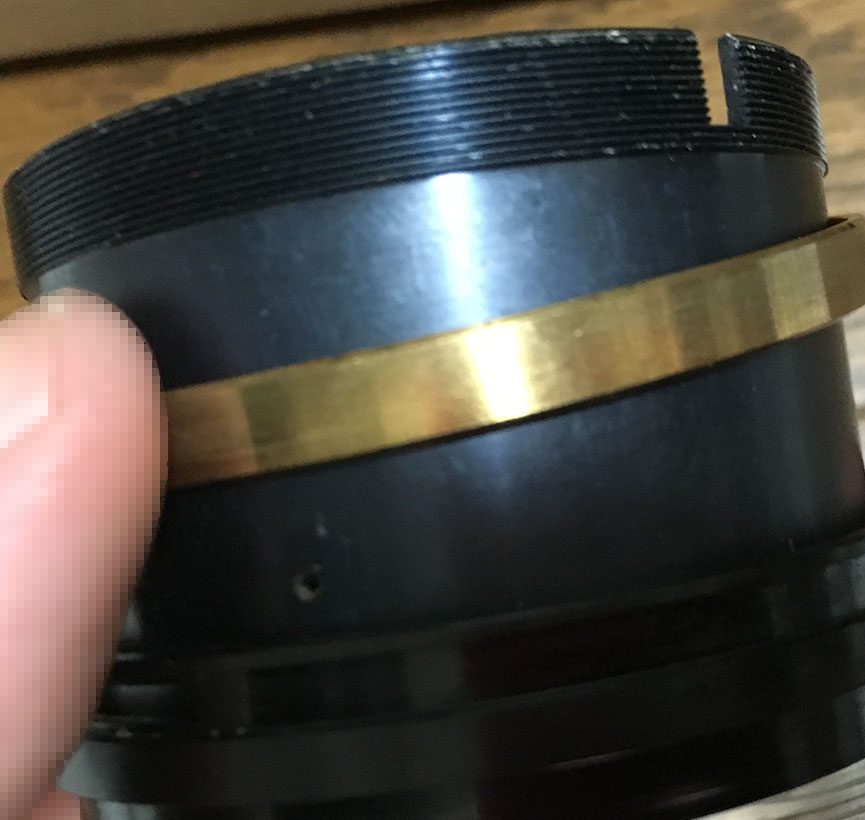
Remove this brass ring, this is where the focusing ring’s screws are attached to. This is also where you adjust the distance scale.
Extract these to remove the helicoid stop, adjusting this part will allow you to adjust your lens’ focus.
Separate the inner helicoid and never forget to mark where it parted.
Clean the parts thoroughly and don’t leave any residue. I scrub the helicoids with a strong detergent and pickle them in an alcohol bath to remove grime and other hardened gunk. Only apply a thin film of grease to the helicoids, I use something that is neither light nor thick since this lens has a long focus-throw. Never lubricate anything that is close to the iris mechanism. Putting excessive amounts of grease will lead to a bigger mess later and you’ll have to open the lens again for an overhaul. The only other place where grease is needed is the slot where the helicoid key is supposed to slide-in. Only apply a thin coat to the slots and exercise the barrel so it can coat the helicoid key evenly.
Disassembly (Objective):
There is nothing special about the construction of the objective, its design is conventional and there’s nothing complicated or difficult about it. I did not clean the iris because mine is clean but if yours needs to be cleaned, check my other articles and look for hints. It should be difficult to take-apart, just take plenty of notes so you can put it back properly again.
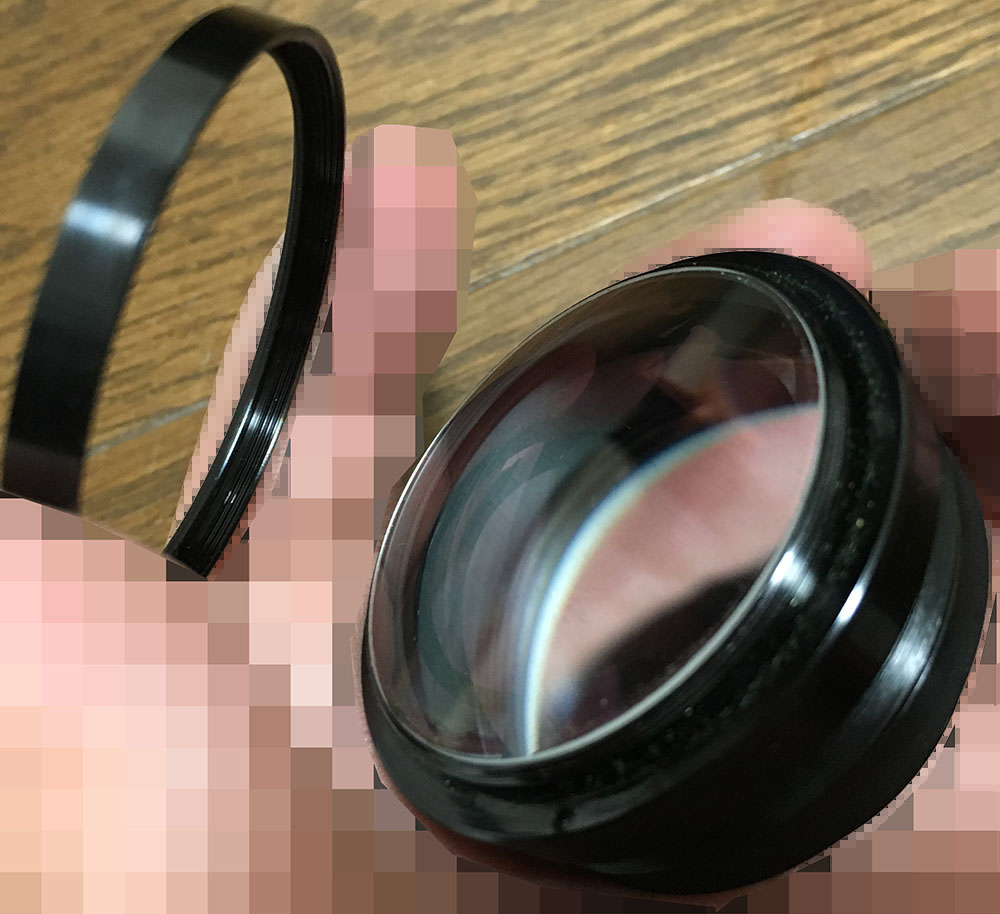
Separate the rear optical assembly by unscrewing its housing off.
Unscrew the tube to dismantle it further.
Unscrew this retainer to remove the rear element. It can be tricky to reach, use a special tool like a pipe-key to remove it. Mine was sealed, applying a drop of MEK to the threads helped in softening the seal.
Remove the rear element with a lens sucker. Note its direction by writing a small dot at the leading edge on the element’s wall with a permanent pen. It will help you later so you won’t put it back facing the wrong way.
Unscrew the front elements assembly from the objective’s housing.
Carefully unscrew the collar to remove the front element.
Extract the front element with a lens sucker.
Unscrew this collar to access the other elements. Do not remove the element that is glued to the collar, leave it alone. It’s merely secured by paint and an accidental push is all it needs to dislodge it, making it drop to the floor.

Unscrew this collar to go deeper.
Carefully unscrew this retainer. I applied some alcohol to its threads since it was sealed at the factory with lacquer.
A lens spanner is used to remove it. Be careful not to scratch the glass.
Extract the 2nd element with a lens sucker. The fit may be tight, don’t force it or it may crack.
Clean the glass carefully. If your lens has fungus, read my article on how to clean lens fungus. Don’t use the solution at full-strength, thin it with distilled water. Don’t soak the elements in the solution for too long or it will dissolve the coatings. The cemented group is fragile so handle it with a lot of care.
Be careful when putting the elements back and be sure not to reinstall any of the elements facing in the wrong direction.
Conclusion:
This lens took me more time than expected because of all the parts involved but it was a nice experience so far, a great project after a hard day’s work at the office. There are few things that can go wrong here so long as you took notes and references to aid you later in reassembly. Before you call it a day, there are still some things that you should do with it.

Reassemble everything but don’t install the focusing ring and hood. Adjust your lens so it could focus properly. Read my article on focus adjustments, that will give you an idea as to how it could be done under a DIY setting.
Focus adjustments are done through this part, loosen these and adjust how your lens focuses then tighten them to finalize your changes.
Reinstall the focusing ring and align the infinity mark correctly.

The hood was deformed so I had to bring it back to shape.
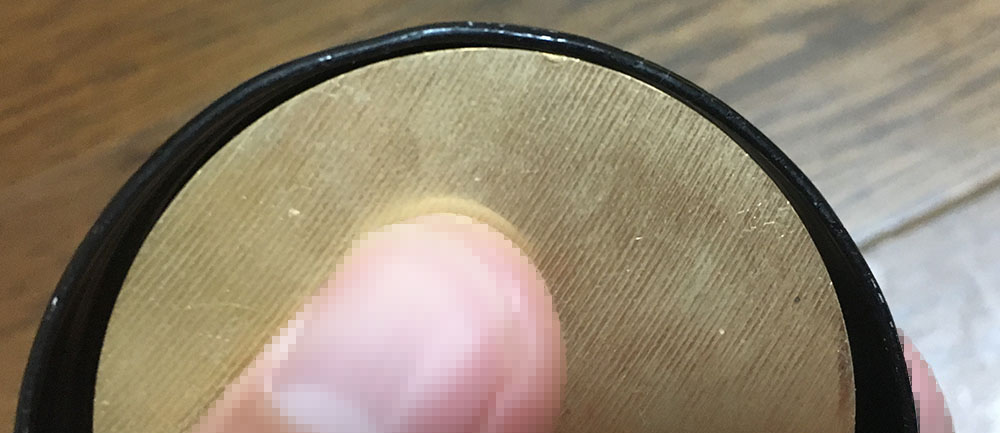
I use a die made from a circular cut of brass, a tube will work, too.
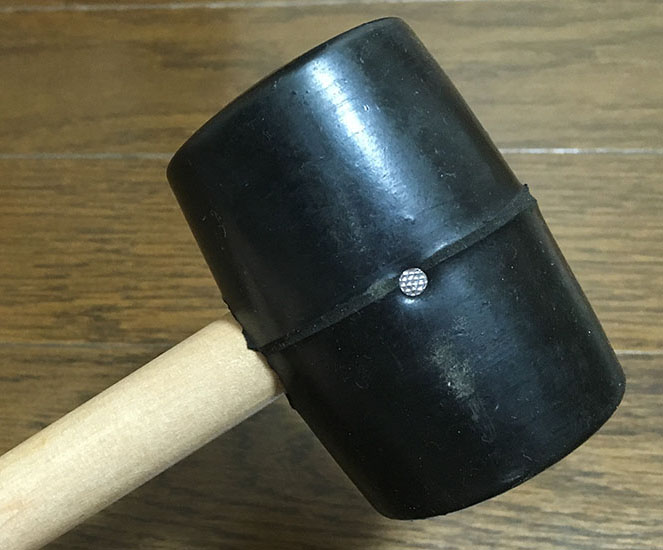
This will help shape things up. A rubber mallet will make sure that it won’t scratch the finish.

After hammering the hood back to shape as best as I could it’s now possible to slide the hood effortlessly. It’s not perfect but at least it now works better than before.
Thanks for following my work, if you liked this article please share this with your friends so it will get more views. This site earns around $0.30 a day, it’s totally reliant on views. You can also support this site, it helps me offset the cost of maintenance and hosting. You are also helping me purchase, process and scan film. This site promotes the use of film so we’re all in this together. See you again in the next article, Ric.
Help Support this Blog:
Maintaining this blog requires money to operate. If you think that this site has helped you or you want to show your support by helping with the site’s upkeep, you can make a small donation to my paypal.com (richardHaw888@gmail.com). Money is not my prime motivation for this blog and I believe that I have enough to run this but you can help me make this site (and the companion facebook page) grow.
Leave me some tip?
Thank you very much for your continued support!
$2.00
Helping support this site will ensure that this will be kept going as long as I have the time and energy for this. I would appreciate it if you just leave out your name or details like your country’s name or other information so that the donations will totally be anonymous. This is a labor of love and I intend to keep it that way for as long as I can. Ric.

Jul 12, 2019 @ 18:32:02
Would love to see disassembly of the Nikon 135 2.8 manual lens to clean and lube the shutters thanking you very much. John.
Apr 21, 2025 @ 21:03:09
what if I it go beyond the infinity focus? I mean I put it back together correctly but with the focus ring to infinity I’m out of focus pointing like a mountain far from me… To make all focused i must turn back the focus ring a lot, instead with the focus to closer position it seems correct