
Hello, everybody! Sorry for skipping the past couple of weeks as I was busy with work. It was a very unremarkable month and all I did was work work and work. Couple that with a cold front and you get a very lazy and tired me. Apart from people messaging me that they saw my name in the latest Final Fantasy credits, this month passed on unremarkably and I would like to continue on that tangent by talking about an unremarkable lens today.
Introduction:
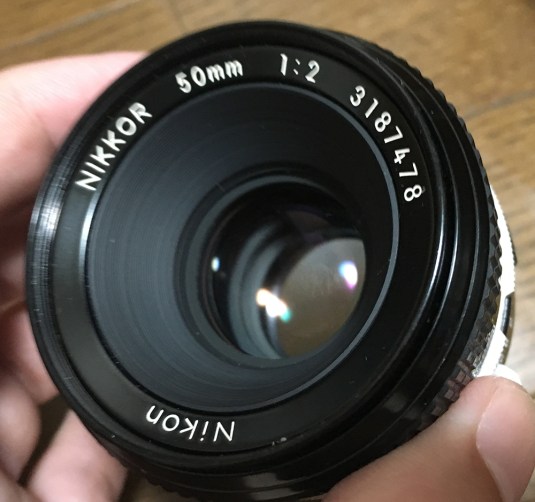
Today, we’ll be talking about the Nikkor 50mm f/2K (New-Nikkor) lens! I was busy in the past few weeks and I cannot decide on which lens I should make a teardown of so I made a poll and this one got the 2nd highest vote. It was such a boring month anyway and it’s just fitting that I make a teardown of a boring (but excellent) lens.
 The New-Nikkor 50mm f/2 feels heavy and well-built. This feels pleasant in the hands so I would sometimes use this lens just for the heck of it. It has the right heft and balances so well on all cameras without a built-in motor drive/grip.
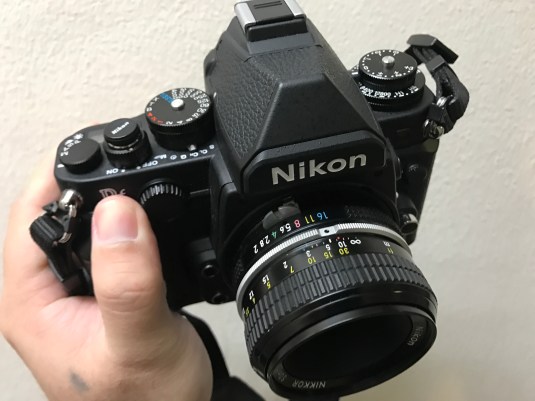 Despite being a simple 50mm lens, it feels more like a more expensive lens. It balances very well on both digital and film cameras. You will want to buy one with an Ai-ring to use them with newer Nikon cameras or use a camera that can use the pre-Ai lenses like the Nikon F3 or the Nikon Df.
This lens replace the Nikkor-H•C 50mm f/2 Auto in the mid-70s and it uses the same optical formula. The barrel is completely new, it now has a rubber grip on the focusing ring that’s typical of the New-Nikkor line and it looks more discreet compared to the shiny old lens. One thing that I am sure of about the optics is it now focuses a little closer compared to the older one, this suggests that the formula was tweaked a bit but we can’t be sure of that unless we get an official source from Nikon.
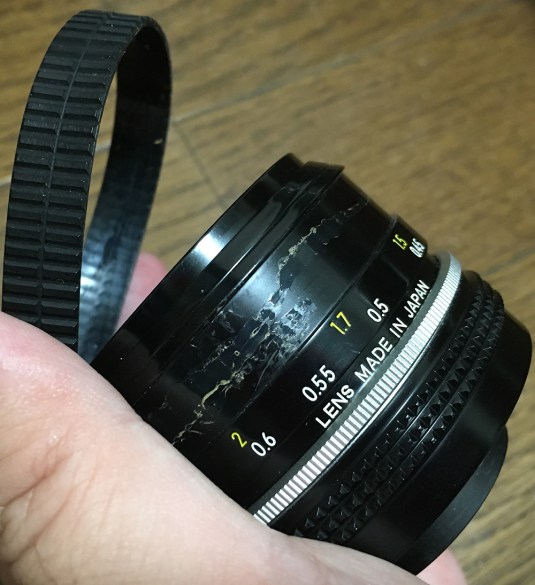
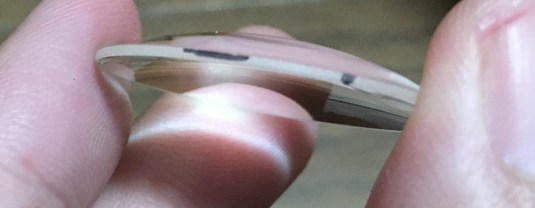
 If you pay attention to the glass you can see that fungus has made the inner surface of this lens its home. The helicoids were in poor shape because of the dry grease so a full overhaul is in order. The good thing is this is simple to repair and it didn’t take me long to work on this lens.
This lens is usually found coupled to a Nikkormat FTn or a Nikon F2 because this lens served as a kit-lens for Nikons that were sold during its time. This makes them common so finding one shouldn’t be a problem and they do not cost much, too. On the down-side of things, they are usually treated terribly since they’re not rare so most of what you’ll find are in a terrible state.
Let’s now see some pictures that were taken with this lens. Knowing how a lens performs helps because you will know when to use it and how to avoid its weaknesses. This will help you maximize your gear so you will get the most out of your lens. This is an old lens and it shows in the results but the good thing is it’s still a nice lens for those who prefer to use older lenses to get that “vintage-look” in their photos.
The pictures below were taken from f/2, f/2.8 and f/4 where we see the most changes in how this lens renders things. Beyond these apertures, the lens shows a uniform character with f/5.6 to f/8 being the best when it comes to resolution. Since the lens uses the same optical formula as the Nikkor-H•C 50mm f/2 Auto you can also refer to that article to some extent.


(Click to enlarge)
Vignetting is average at f/2 and is typical of many lenses from this era. It’s mostly gone by f/4 and you won’t see any from f/5.6 and beyond. The 2nd set shows that this lens has a bit of chromatic aberration at f/2 but goes away by f/2.8. This is still pretty good if you ask me and is at-par or better than many lenses today. There’s some barrel distortion so I will avoid using this lens when I need to take straight lines near the edges of the frame. It’s not terrible but you’ll able to see it in pictures like the ones I have in the 3rd set.


(Click to enlarge)
The bokeh balls look nice wide-open but can exhibit some edging artifacts wide-open. Stopping down will make them look like lozenges because of the 6-bladed iris. Some people like this while some people don’t. I prefer 7-sided irises myself so I won’t use this lens to take pictures like these. It’s smooth in general but has the tendency to be a bit harsh if your background has a lot of high-frequency details and lines. It’s not bad but it’s certainly not at the same level as most 50/1.4 lenses.


(Click to enlarge)
It’s sharp wide-open but spherical aberration will make it look soft. It veils any bright spots with a soft glow which can be useful for adding an extra layer of character to your pictures. This will be useful for making skin look nice and if you like to shoot jewelry this will make them look “glamorous” because the bright highlights will have a nice, soft glow. Stop the lens to f/2.8 and you get a sharp rendering. Contrast improves a bit but it’s already good wide-open. Resolution also improves and it’s going to make the lens resolve finer details. The bokeh quality remains smooth and doesn’t change much until f/4. Everything looks sharp and clear by f/4 because it’s performing close to its peak (by f/5.6). In case you haven’t noticed, you won’t see any spherical aberration from f/4 so use this knowledge to your advantage.


(Click to enlarge)
One feature of this lens is it focuses closer than the older one so let us see some pictures that were taken at the minimum focus distance or close to it. The lens performs a bit better at closer distances if you look at my samples. The results mirror that of the previous set of pictures but you’ll notice that spherical aberration is bit less.


(Click to enlarge)
As you can see from the samples, this lens flares pretty badly and the blobs it forms can be annoying. You can use the flaws to your creative advantage if you choose to. But if the sun isn’t in the frame or close to it, the images it makes are pretty sharp. The first picture of the leaves will show you that it’s decently sharp and it can focus really close,too. It is a utilitarian lens and is a practical choice for anyone wanting a good lens for street photography. The strength of this lens in my opinion is it’s good at everything to the point that it doesn’t do one thing really well and that’s just a nice way to say that it’s a boring but useful tool. Would I recommend it? Yes, especially for the price that it is selling for these days. I can imagine that this is a great lens to use with a Nikkormat or the Nikon FM/FE series of cameras. These cameras make for a light and compact setup. There is a really good write-up made by Nikon in this page and I advise that you read that as well.
Let’s now see some pictures that were taken with this lens using film. Since this lens was designed to work with film so it’s best to see some photos that were taken with film. This will help us understand it better and see what its designers wanted when they made this lens. Film also has this unique look that you cannot simulate with digital because of grain and how film reacts with light. I took these using a Nikon FG loaded with Fujifilm Industrial 100 and had the roll processed in a lab.
 The lens works excellent with film. The contrast and color looks great and sharpness is good. It’s sharp but it does not look too harsh like what some lower-end lenses tend to do. It does have a slight tendency to render harsh details but you won’t see that happen in pictures like this because the lens was stopped-down a bit.
 These are kids so I’ll obscure their faces. This lens and film combination is perfect and I love the results that I am getting from this setup. This makes me want to shoot with this combination more. I think this was shot at f/4, I wanted to get more things focused.
 Wow, just look at that nice three-dimensional feel! This is what a simple 6-element lens is all about. This was shot at f/2.8 or so if I am not mistaken. It can be hard to focus on moving subjects when you cannot anticipate their movement so I stopped it down a bit. Notice that the background looks a bit harsh but it’s still acceptable in my opinion. I have seen worse so this is not going to bother me at all. The bokeh quality is still decent if you ask me.


(Click to enlarge)
Here’s some more pictures that were taken with this combination. This lens will make for a great travel lens because it is small and light, you can take great pictures with it and the decent f/2 maximum aperture will be handy for shooting in darker places. Just pair this lens with a Nikkor 135mm f/3.5 Ai and have a nice 2-lens combo that costs less than a fancy meal.
Do you like my samples? They’re simple pictures that won’t win any awards but these were taken under real-world conditions so these should give you a nice idea of how this lens performs. I highly recommend that you get one of these, they’re cheap so you won’t have to justify your purchase. Whatever you do, make sure that you get one with an Ai-ring. They may cost just a bit more but that extra $15 will be well-spent because of the convenience an Ai-ring offers. Those who use their pre-Ai lenses on older Nikons should get whatever they want because older cameras can use lenses up to the AF-D models. It is a great lens for videography if you want to have that vintage-feel to your videos and its focus throw is adequate so you do not have to use a larger ring for your rig just to be able to turn the focusing ring precisely. It’s easy to de-click this lens and since it also uses 52mm standard filters you won’t spend a lot of money on attachments and other things. For those who want to shoot this with a mirrorless camera or DSLR, this is still a nice lens despite its age and it is more than capable of giving you great pictures if you know how to use it. It’s great if you want to learn the disciple and patience that photographers were used to know for. That’s all for the introduction, let’s now begin with the repair article.
Before We Begin:
If this is the first attempt at opening a lens then I suggest that you read my previous posts regarding screws & drivers, grease and other things. Please also read what I wrote about the tools that you will need in order to fix your Nikkors.
I highly suggest that you read these primers before you begin (for beginners):
- Essential tools
- Best practices 1
- Best practices 2
- Best practices 3
- Ai conversion
- Working with Helicoids
Reading these primers should lessen the chance of ruining your lens if you are a novice. Before opening up any lens, always look for other people who have done so in Youtube or the internet. Information is scarce, vague and scattered (that is why I started this) but you can still find some information if you search carefully.
I highly recommend that you also read my working with helicoids post because this is very important and getting it wrong can ruin your day. If I can force you to read this, I would. It is that important!
For more advanced topics, you can read my fungus removal post as a start. This post has a lot of useful information here and there and it will be beneficial for you to read this.
Disassembly (Lens Barrel):
I have never opened up the Ai version of this lens but from the looks of it I can guess that the Ai version should be roughly the same as this one when it comes to engineering so this teardown will also be applicable to the new Ai version despite being a K (New-Nikkor).
As usual with primes, we need to separate the objective first while working with the lens barrel to avoid damaging the delicate optics in it. Before you attempt working on this you’ll have to be sure that you have the right tools such as screwdrivers and I will also warn you that you will need plenty of alcohol and solvents to soften up the glue used on this lens during assembly in the factory. Patience will get you through this project.
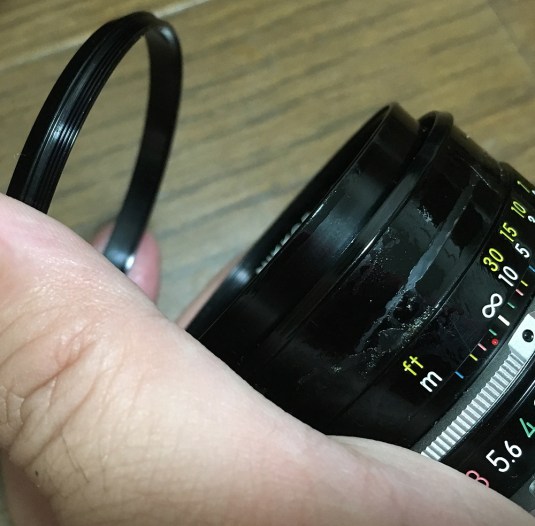
 Carefully remove the rubber grip from the focusing ring by wedging a small screwdriver or toothpick under it and running it through the circumference of the rubber grip to loosen up the old adhesive that was used on it.
 Carefully remove the rubber and be sure not to tear it. These older lenses have brittle rubber for the grips and they tear rather easily. Notice the old adhesive in the picture?
 Once the rubber is gone you can go on and remove the bezel of the focusing ring. This can be difficult to separate since they’re usually sealed. Place a couple of drops of solvent or alcohol and let it work on the glue before you attempt removing that thing with a rubber sheet to add some friction to your grip.
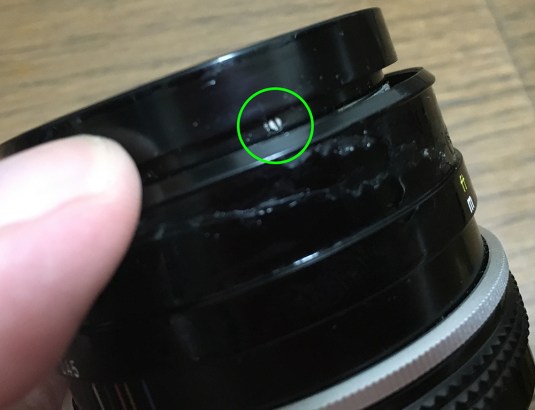 You can now access this small set screw. Unscrew that and store it in a safe place so you will not lose it. These tiny screws can get lost easily, I warned you.
 Now that the set screw securing the front ring is gone you can now proceed with unscrewing it.
 The front ring secures the objective so you can now pull it off from the lens barrel and keep it in a safe place while you work on the rest of the lens.
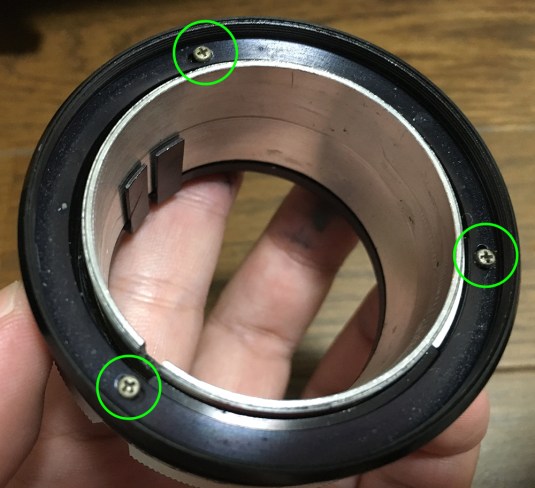
 Remove these screws from the bayonet mount. Be careful with these since they’re usually secured with Loctite or some kind of adhesive. If the screws will not come off then drop some alcohol or solvent in it and wait for it to soften whatever was used on it before you attempt to remove it. If you are new to lens repair be sure to read my article on removing bayonet screws. Many people get stuck in this process because they used the wrong type of driver or don’t have the right skills so read what I wrote to prevent you from getting into the same situation.
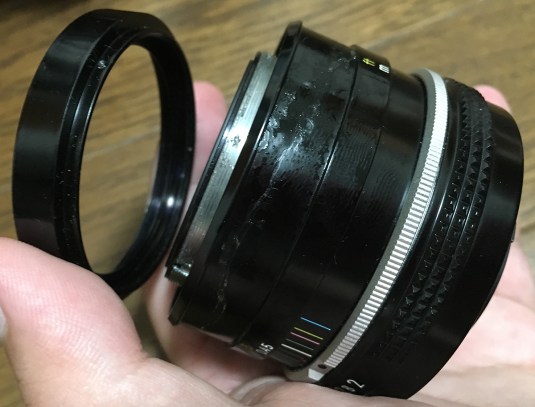
 The bayonet should come off without any trouble since nothing is attached to it like a tiny screw or spring.
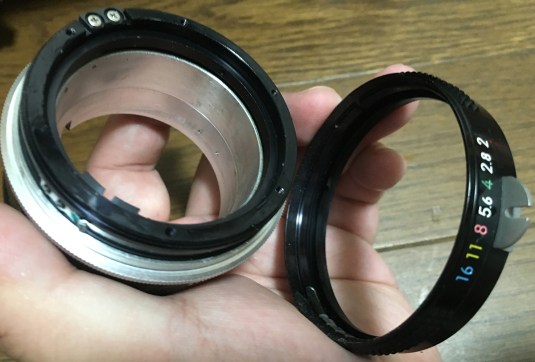 Next, remove the aperture ring. There are no screws attached to it unlike some of the early types of Nikkor lenses.
 Let’s go back to the front. Before you remove the aperture ring, be sure to tale a picture of it first or make some marks. This is an adjustable section so you’ll want to take some notes for reference later during reassembly. These 3 screws secure it to the central helicoid and unscrewing these will allow you to remove the focusing ring.
 And off it goes…
 We need to remove the chrome grip in order to access some parts under it like the helicoid key. Remove these screws to take it off.
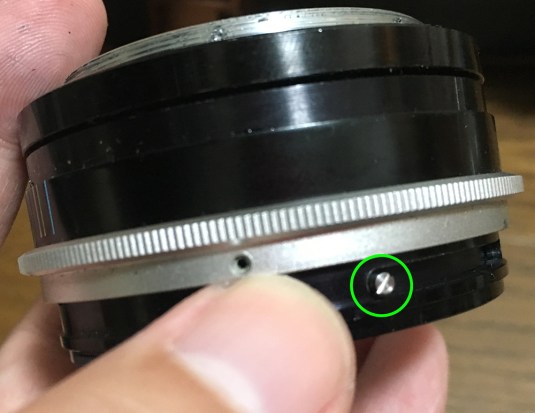 Ok, you got rid of the screws but the grip still won’t come off! The reason is because this tiny screw is in the way. Remove this screw to get it out of the way so you can remove the grip. This screw acts like a pin that connects the aperture fork inside to the aperture ring. This is a delicate part and is easily damaged to be careful.
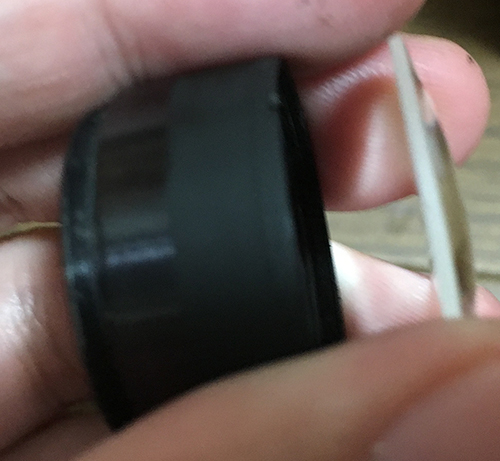
 The chrome grip is sometimes glued in place so you will want to use some solvents and a little bit of patience.
 Once the grip is gone, the sleeve with the depth-of-field scale can now be removed as well. Mine was glued into place and it took some solvents and effort to get this loose.
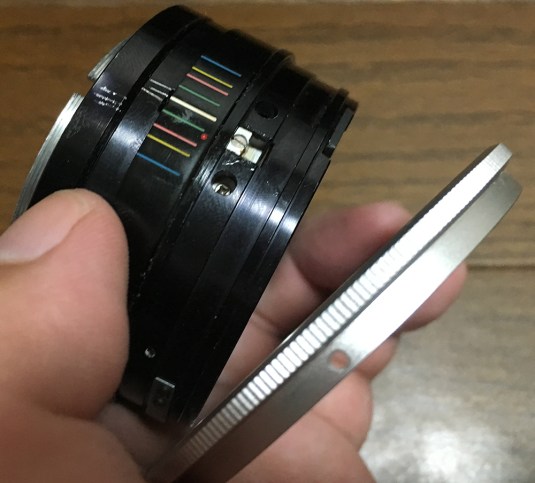
 After so many steps we can now finally access the helicoid key! Remove the screws to free the helicoid key. Note that the helicoid key is is mounted wide side-up. It was designed this way to conserve space I think.
The helicoid key is there so that each helicoid will maintain it’s position while you rotate the central helicoid.
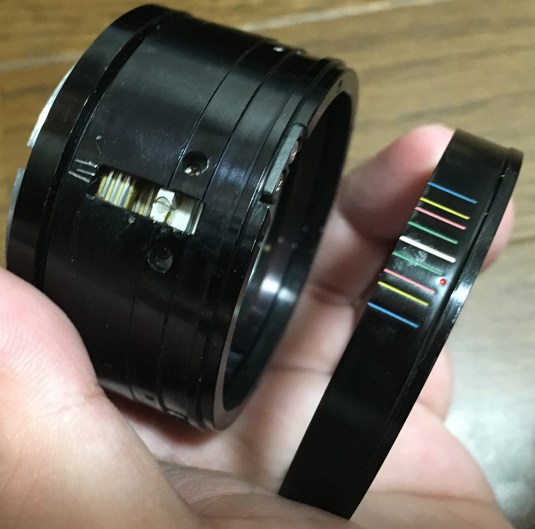
 With the helicoid key gone, you can now separate the central helicoid from the outer one. I made a few marks on the surface of the helicoids to indicate where they separated. This will help me later in determining where these should mate. Never forget this procedure!
 For a thorough cleaning I had to strip it down to its bare components. It is advisable to do this since you don’t want any old crud hiding in the crevices of the lens to contaminate the fresh grease that you are going to apply later.
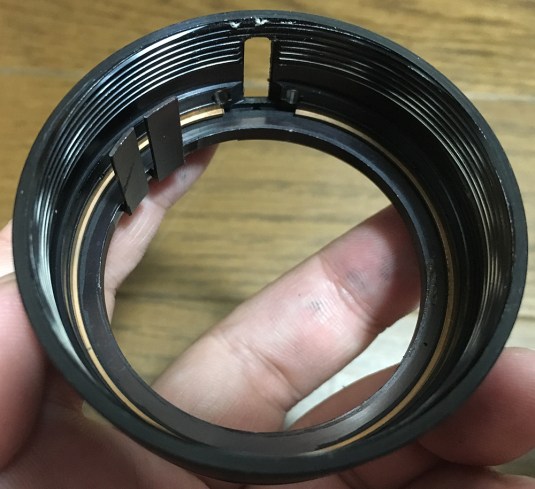
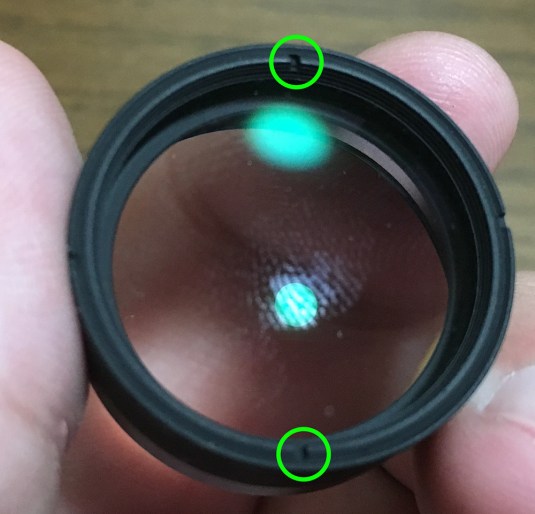
To remove the aperture coupling fork and it’s ring, you will have to remove this brass ring. This brass ring can be hard to remove but the easiest way that I can think of is to turn the ring until the ends are near the slot/rail of the helicoid key. Once it’s in place like the one in the picture you can use a small screwdriver to pick it out from the slot.
 This part should come off easily since you already removed the screw in the previous steps. You can’t get this far anyway if the screw is still there.
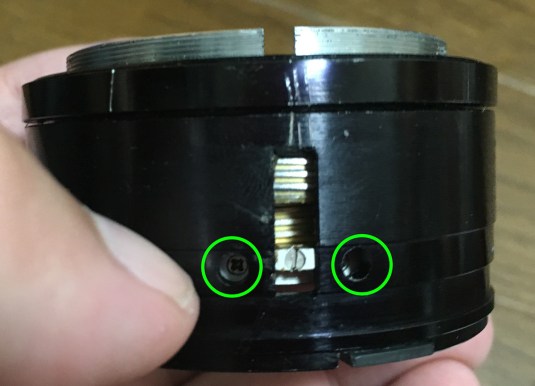
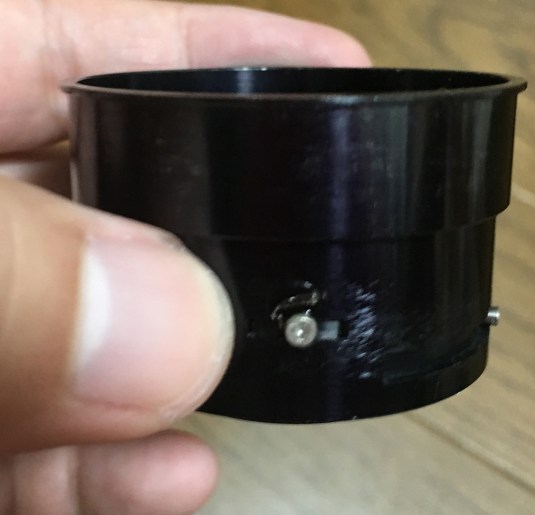
 Removing the central helicoid from the inner one requires that you remove this helicoid stop. This part limits the range of the helicoid to its minimum and maximum distances. It’s also keeping you from separating these so we have to get rid of it.
 Rotate the inner helicoid until the screws of the stop is revealed. Unscrew these 2 and then remove the stop. It may be glued in place so you may want to wedge it with a screwdriver. Just be careful not to damage the delicate threads.
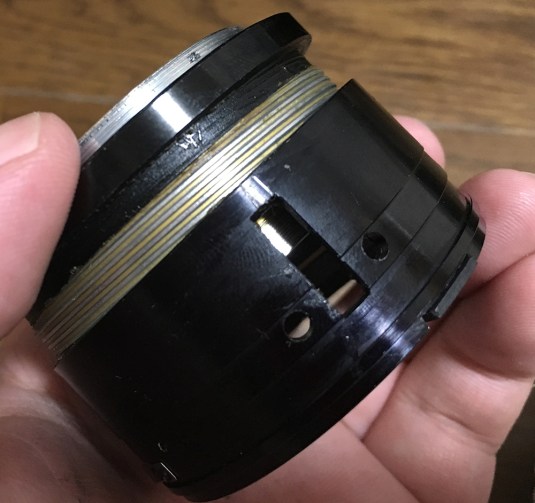
 They separate like this with the inner helicoid exiting from the lower part. Do not forget to mark where they separate. If you forgot to do this then you are an idiot.
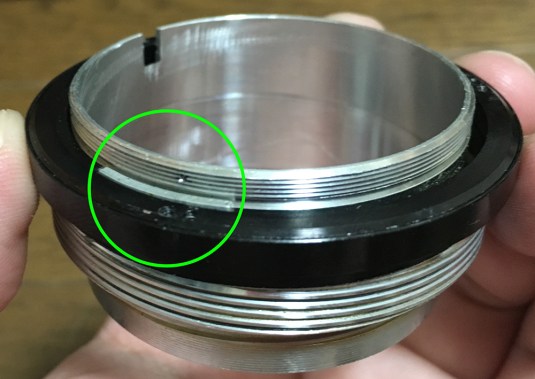
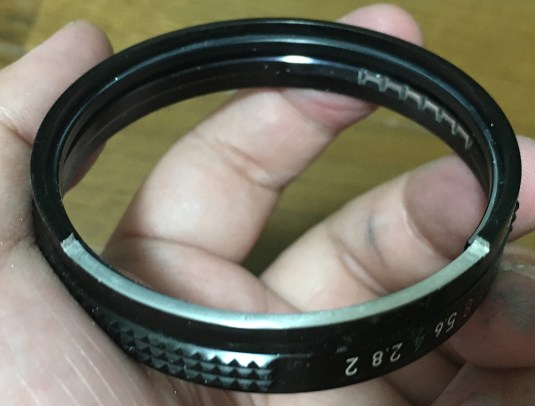
 The central helicoid comes in two pieces, the helicoid itself and the rotation limiter. This ring and the helicoid stop constrains the focusing ring. Grease and old crud tend to accumulate under the ring so I open it up to clean it despite the effort and patience needed to remove this.
Before you do anything, make sure to mark it’s position by scribing a small mark on the ring and the helicoid to serve as marks to help you align this ring again later.
This ring’s sealed so I usually soak this part in alcohol first for several hours or overnight to dissolve the glue. Remove the screws and unscrew the ring off. If this doesn’t work then soak in in alcohol again until you think it’s OK to attempt again.
 The ring should come off easily now, revealing the dirt underneath it. Clean these thoroughly and be sure that nothing is left in there.
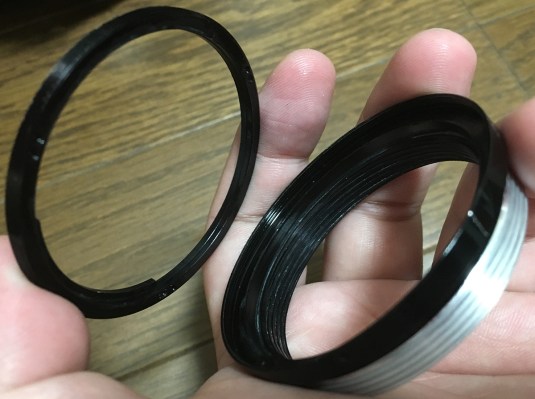
 Going back to the front end of the lens, the front ring comes in 2 pieces. The name ring is also hiding some dirt underneath it so I unscrew it off to clean the underside of it.
Cleaning the helicoids will take most of your time. Clean it very well using a grease remover and make sure that you don’t leave any residue because that will contaminate the fresh grease that you’ll apply later. I used a thin- type of grease for this, if I used a thicker type then it’s going to be harder to turn this lens. Use what you feel is adequate but just make sure that you do not apply too much grease or else it will migrate to the optics and cause an even bigger problem.
Disassembly (Objective):
The objective itself is pretty straight-forward. There are no surprises so far but I will have to just warn you about accidentally dropping an element or two just in case. You’ll need a rubber stopper and a lens spanner for this job so be prepared. The rear element was sealed with paint and I will show you how I safely opened it.
 Remove the front baffles to reveal the ring under it. The baffles should be removed using a rubber stopper. Do not use anything that’s not made of rubber on it and be careful not to damage the beautiful ridges milled into it.
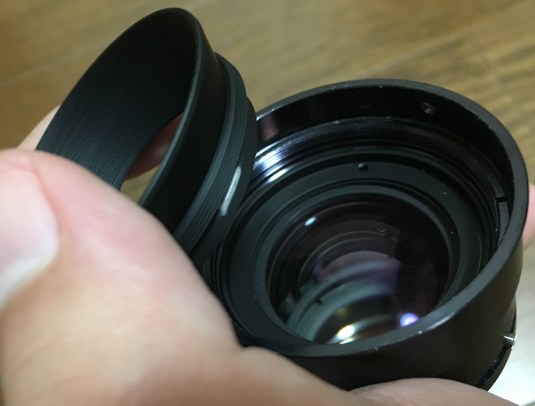
 The front elements assembly can be removed by unscrewing it off from the casing.
 Use a lens spanner to remove the retention ring securing the front element.
 My lens spanner has sharp tips so I scratched the metal surface underneath it. If you have a round-tipped one then use it.
 Use a lens sucker to remove the front element. Be careful not to drop this to the floor!
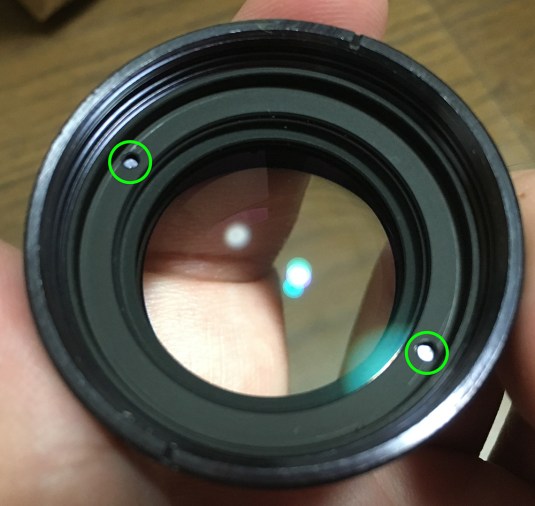
 To make sure that I put the elements back in the same order and direction, I used a sharpie to mark the leading edge and a circle to indicate the element number.
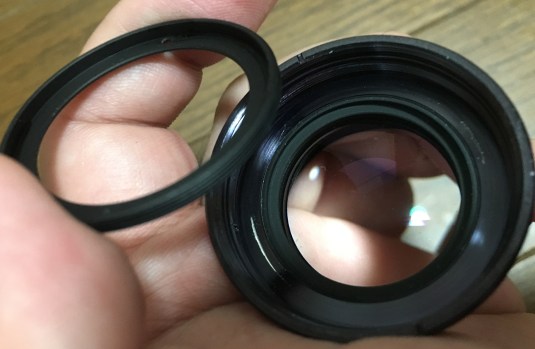
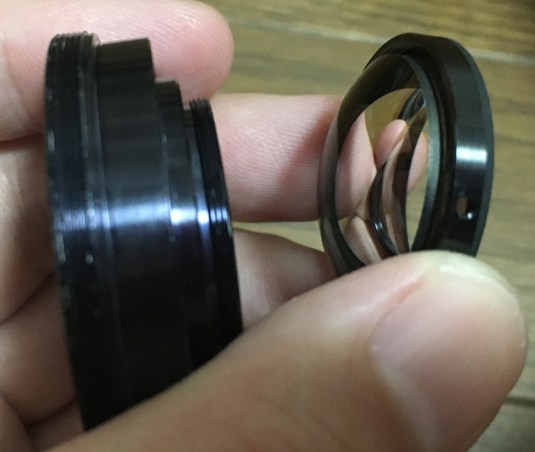 The 2nd element group can be unscrewed from the case. The ring around it is usually glued to the 2nd element group on most lenses.
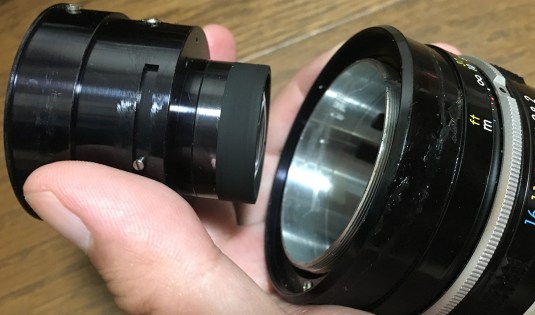
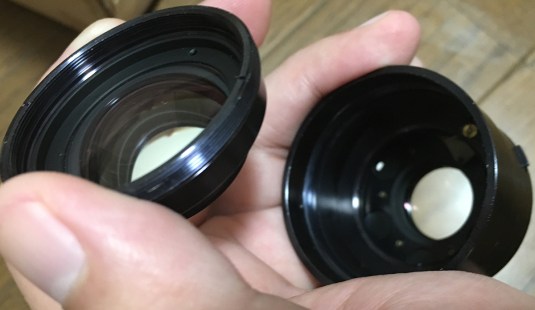
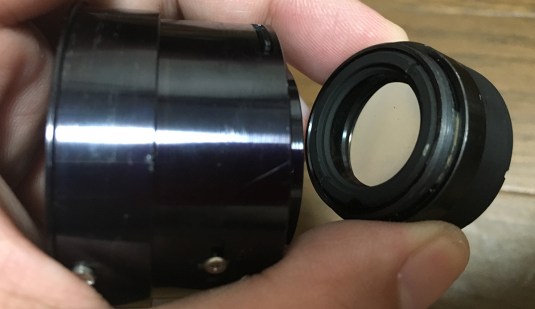 On to the other end. The rear elements group can be screwed off from the main casing. Use a drop of alcohol on the seams if it’s stuck.
 To remove the 3rd element group, you will have to use a lens spanner to remove this ring.
 The 3rd element group can then be removed using a lens sucker. Be careful not to drop it!
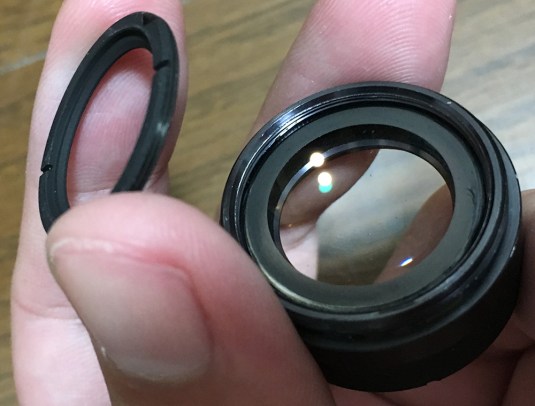
 The rear element can be removed by getting rid of its retainer but it’s sealed by paint. I use the tip of a precision screwdriver to scour the the paint off so that I can drop some alcohol into the thread underneath it.
 A lens spanner should be used to remove the retention ring. Be careful not to scratch the delicate glass of the rear element!
 Use a lens sucker to remove the rear element or drop it into your palm (and not the floor!).
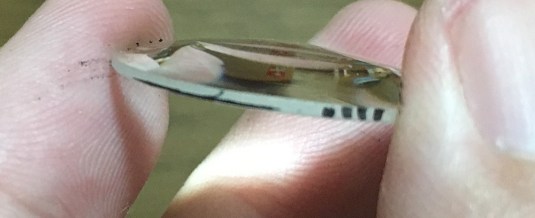 To distinguish which element is which, I used a sharpie to mark the leading edge and the element number with a series of dots. Well, this lens is simple enough that you won’t get confused with which element should go where but this is going to be helpful once you work on a lens with more element groups.
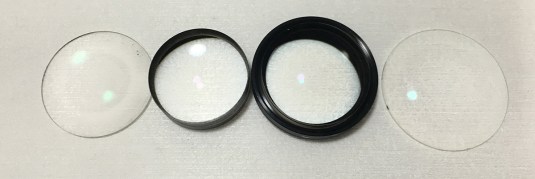 And here they are, ready to clean! I cleaned them using the method described in my fungus removal post.
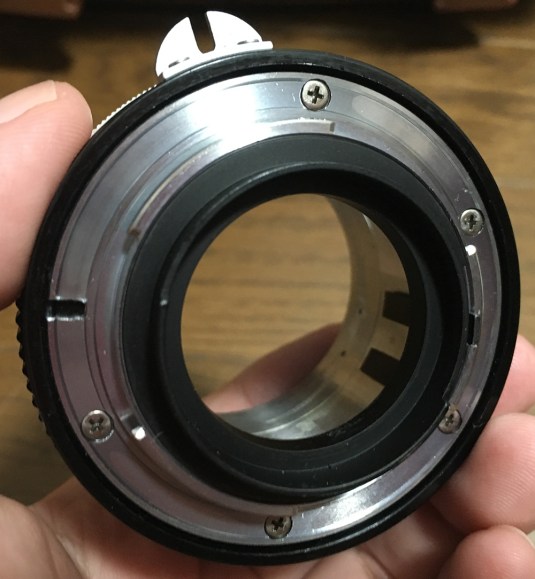
 My iris assembly still looks OK so I won’t be doing anything to it but if you have to clean yours then you can start by removing these screws. Before doing anything to these, make sure that you marked their position because these were adjusted carefully at the factory and you will want to put them back together properly or your camera won’t meter accurately because the iris is not calibrated precisely.
That’s it for the objective. it’s of conventional design and you will get more information about it when you read my other repair articles of lenses with similar construction. This is as bog-standard as it gets when it comes to Nikkors.
Conclusion:
The lens is simple with nothing noteworthy as far as disassembling goes but I noticed that this lens was built much better than most versions of this lens family. The build itself mirrors that of the more expensive mid-ranged (cost) primes in quality, something that most lenses today lack with all the plastic parts. After giving this lens the care it longed for, I can assure myself that it will last me many more decades before it decides to retire or need another overhaul. I treasure all my Nikkors and I’ll sure make most of them family heirlooms in the future for my descendants.
This job will probably take you a whole afternoon to do, it isn’t difficult as long as there’s no stripped/rusted screws or anything of that nature which will require additional effort. I was slowed down by the glue but that was as expected and it’s part of my workflow to account for the time needed to fix that.
 The aperture ring was milled so that I can use it with newer Nikon cameras without the risk of damaging the delicate aperture coupling tab. I milled it using the method described in this link. If you have a Nikon Df you can use this safely with that camera.
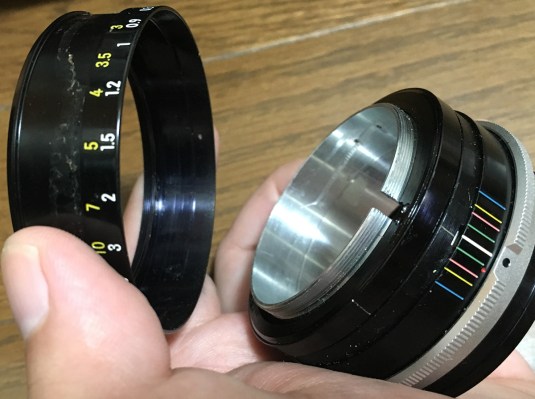
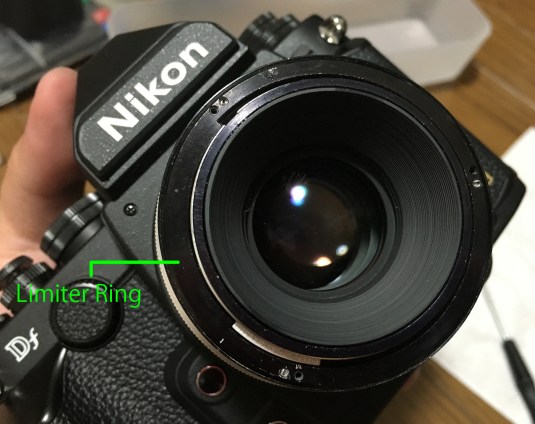 To calibrate the focus, rebuild the lens up to the point you see in the picture. With the focusing ring off and the limiter ring in place (but the 3 set screws loose), adjust your lens until you are satisfied with its focus. Read my article focus calibration so you will know what to do. This method is good-enough for people who are working in a DIY setting.
This article took longer to finish because we had to cover the objective and its tear down. While this article did not teach you anything new if you are an experienced hobbyist or if you have been following my blog for a while, it helps to know how things were put together so that you will have a guide just in case you need to fix one yourself and prevent any surprises. It’s also nice for collectors so they will know if somebody is trying to sell something fishy.
Thank you very much for your continued support since that is the only motivation I get for making these posts and if you’re not yet a member of the companion facebook page, click on this link to get there and “like” the page so that you get updates every time something new is posted or ask for parts and advise from other members. That’s all for now and I hope that you enjoyed this post, Ric.
Help Support this Blog:
Maintaining this blog requires money to operate. If you think that this site has helped you or you want to show your support by helping with the site’s upkeep and maintenance of this site, you can simply make a small pledge to my paypal.com account (richardHaw888@gmail.com). Money is not my prime motivation for this blog and I believe that I have enough to run this but you can help me make this site (and the companion facebook page) grow.
Helping support this site will ensure that this will be kept going as long as I have the time and energy. I would appreciate it if you just leave out your details like your country and other information so that the donations will totally be anonymous it is at all possible. This is a labor of love and I intend to keep it that way for as long as I can. Ric.

Jul 27, 2025 @ 21:54:28
Hello,
I read your article because I have fungus in my lens, which I found very interesting. However, when disassembling it, the ring to remove the screw holding the optical block gets stuck despite using isopropyl alcohol or acetone. The ring won’t move.
Do you have a solution?
Kind regards.
May 20, 2026 @ 16:03:13
Incredible work. Very useful and informative article. Nice photos. I can’t wait mine to arrive;) Best regards from Slovenia.