
Hello, everybody! I was watching Mad Max 2 or The Road Warrior to some of you. I love this movie a lot when I was young, some people though that it is rubbish. It’s polarizing since it’s such an extreme movie in the sense that there’s nothing much in-between, it’s a real “non-stop” action movie. This is something that some critics don’t like, citing how shallow the plot is but you don’t watch Mad Max movies for that and that’s the whole point of it. Today, I’ll show you a lens that has a divided opinion on the internet. Some will say that it’s one of the best-performing lens that they’ve used while some won’t even mount it to their cameras. It’s polarizing so let’s see what all that noise is and I hope that I can settle it here in this article.
Introduction:
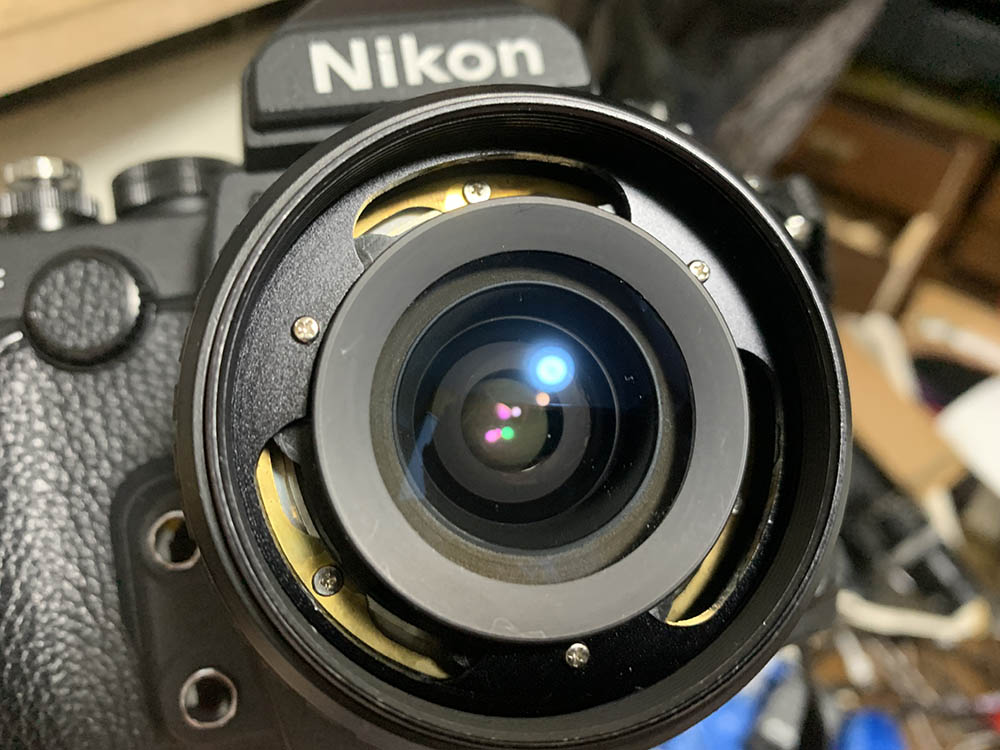
The Nikon 28mm f/2.8 Series-E was sold from 1979 to 1985, it first appeared as an all-black lens like what you’ll see here and was later upgraded with a more Nikkor-like look with a metal grip and better focusing ring rubber. It’s a cheap, mostly-plastic lens that was targeted towards the budget-conscious much like the rest of the Series-E lenses and the Nikon EM. It shares a lot of similarities with the Nikon 35mm f/2.5 Series-E in terms of aesthetics and it’s easy to mistake both lenses at first glance. Since this wasn’t built to the high standards of a Nikkor the brand was not used for it, instead it only uses the company’s name.

Despite being a dinky lens it still has a lot to offer. Some people either love it or hate it with the latter being the majority. The build quality is in-line with the rest of the Series-E lenses which is not good at all but it’s still better than some of the lenses that we see from other manufacturers. The use of plastic is controversial because customers are used to Nikons being tough and back in those days it was considered a mortal sin for Nikons to use plastic. It isn’t something that sat well with many Nikon fans.
The optical design is quite simple, it’s a 5-elements-in-5-groups design that’s different from the excellent Nikkor 28mm f/2.8 Ai and certainly a lot simpler than the complicated Nikkor 28mm f/2.8 Ai-S which has CRC used on it. This is a simple lens made with budget restrictions so the optical design reflects that mind-set. Handling is typical of most Series-E lenses, it is light, compact and its focus-throw is really short. This makes it convenient for beginners to focus and its weight and dimensions make it a great lens for travel. You will not get a sore neck using it with a Nikon FG all-day.
Going back to the optical formula, an interesting thing about it is the earlier AF-Nikkor 28mm f/2.8 shares the same optics with this lens but the coatings are much better. This is the reason why the that lens have poor reviews, it’s not fair because the later AF-Nikkor 28mm f/2.8D has a totally different lens design and it’s a lot better. Some people don’t know the difference and make mistaken claims about the latter when they are actually thinking about the former and its poor corner performance.
Since this lens was made for people who have “lesser requirements” it is not mandatory for it to exhibit finer traits in terms of image quality. Things like “fine rendering” and smooth focus transition were overridden by sharpness and high-contrast at the center which will impress those who just wanted to take good photos for cheap. If you’re a lens aficionado then this lens wasn’t made for you and you deserve a Nikkor. I am not saying that this lens is bad but far from it, it’s an excellent lens in the proper context and I believe that it’s a successful design with those parameters in-mind.
If I am not mistaken, this wasn’t sold domestically in Japan just like its long brother, the Nikon 135mm f/2.8 Series-E. It’s an “overseas-only” lens so this is rare in Japan. These are usually cheap elsewhere but it’s a bit more pricy in Japan where it’s rarely-seen, some people don’t even know it exists. This is a junk lens that I got for a small premium only because it’s “rare”. This could have been much cheaper when bought elsewhere but shipping will negate that. For the price that these things are going, locally and elsewhere, you’re better-off buying a Nikkor 28mm f/2.8 Ai which I consider to be a better lens in nearly everything. It doesn’t make sense to buy this for any price since it makes more sense to buy the Nikkor 28mm f/2.8 Ai which is often cheaper.
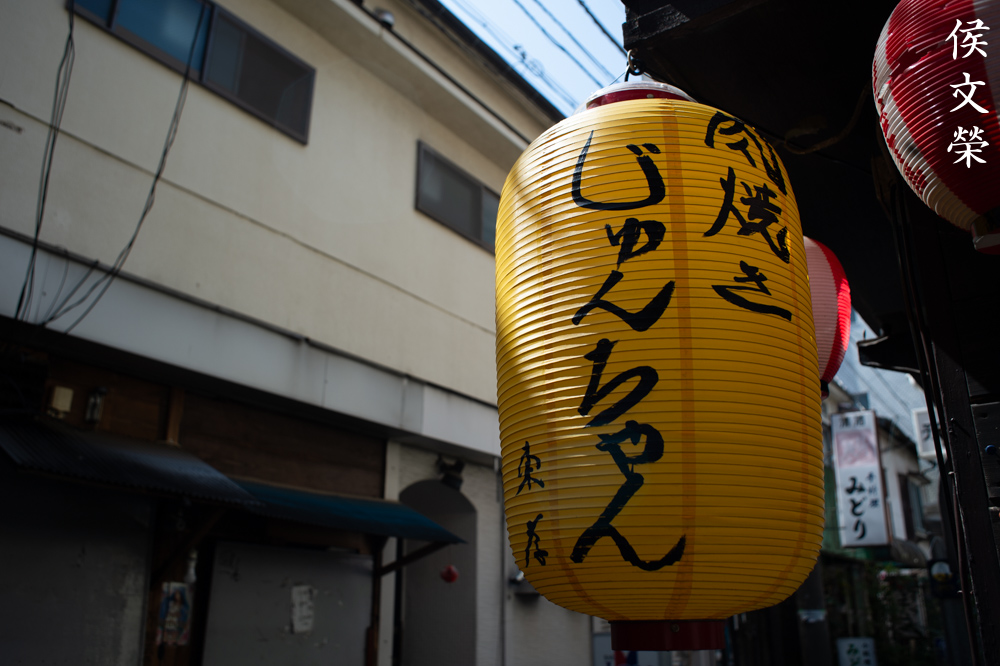
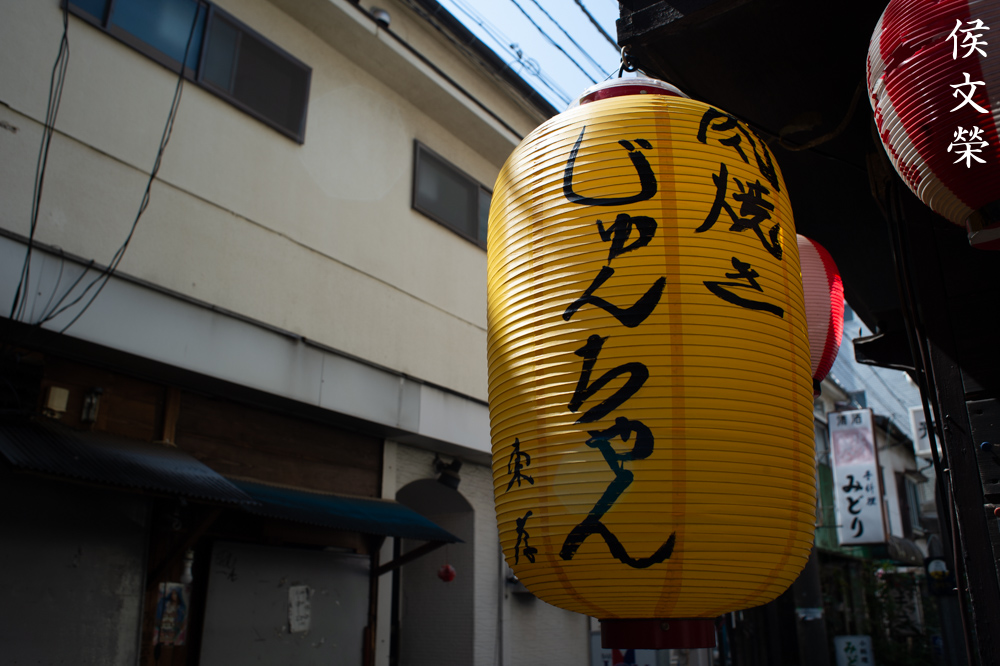
Let’s now see some photos that were taken with this. You should learn how a lens performs in order to maximize it. You will know how to exploit it and avoid its weaknesses. This knowledge will help you take better photos and it will give you a more intimate understanding of your lens. I took these from f/2.8, f/4, f/5.6 and f/8 from left-to-right because these are the most common apertures that people will want to use this lens with, we’ll also see changes in image quality easier with these apertures. I took these with my Nikon Df.


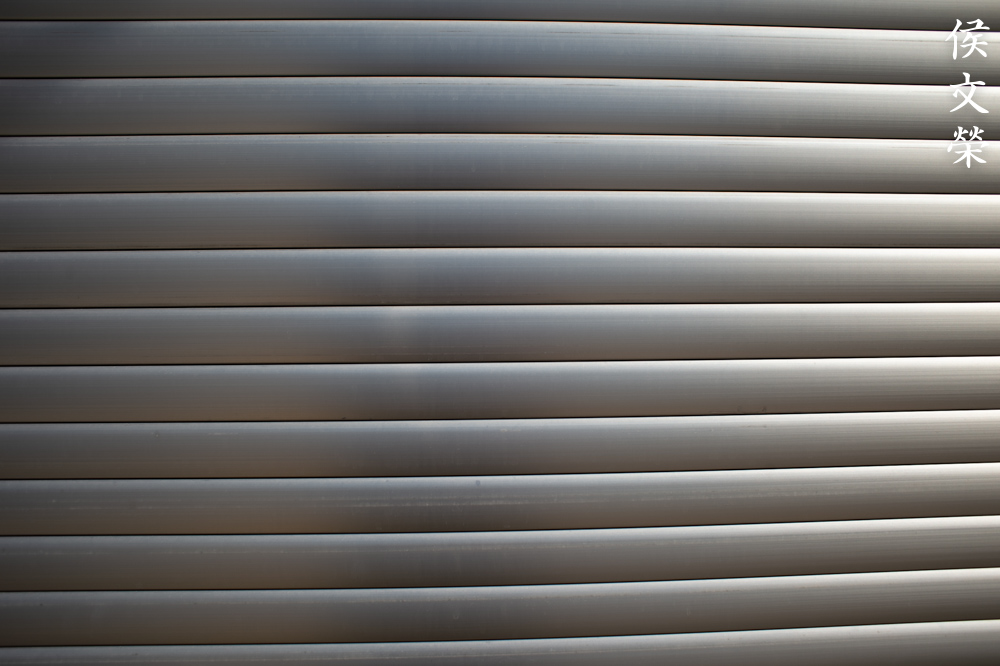
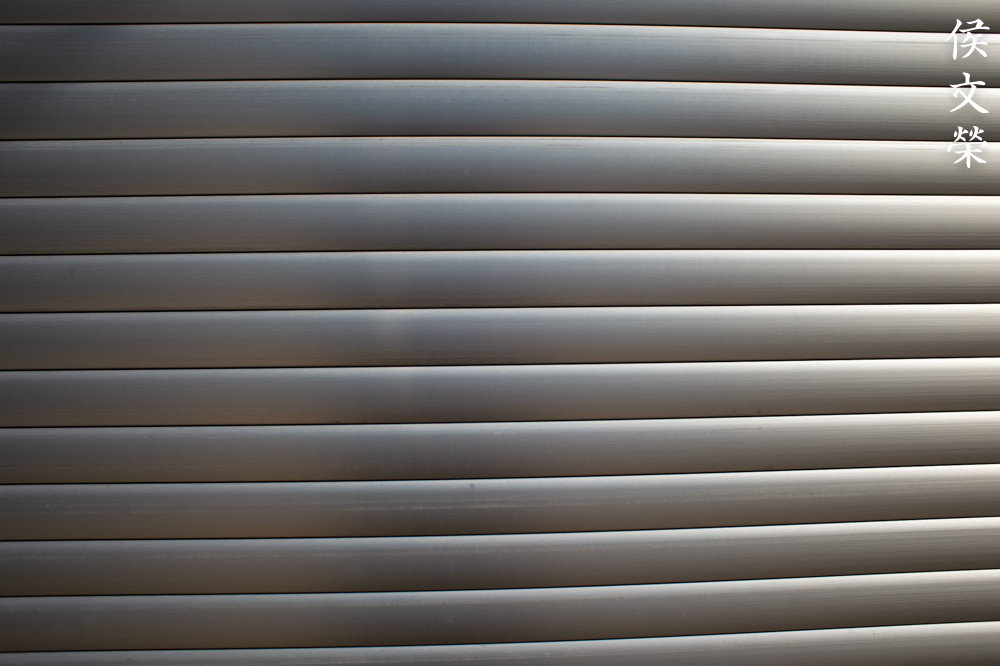


(Click to enlarge)
Distortion is quite heavy, even for a 28mm lens. It’s annoying, you will see it easily even on smaller photos. It is distracting, your viewers might get dizzy just by looking at your photos. I won’t recommend this for shooting art and architecture. It will be a good lens for puppy and baby photos, though.
Vignetting is quite heavy wide-open, it improves by f/4 but will still be seen in small amounts by f/5.6 and it’s gone from f/8 on. This is one of the biggest problems that I have with this lens. The coatings on this lens isn’t as good as the ones you’ll find on a Nikkor 28mm f/2.8 Ai as it flares easily and you can get ghosts in your photos if you have the sun within or just-outside of your frame. It looks terrible, they form blobs with distinct edges instead the ones that look softer around the edges.


(Click to enlarge)
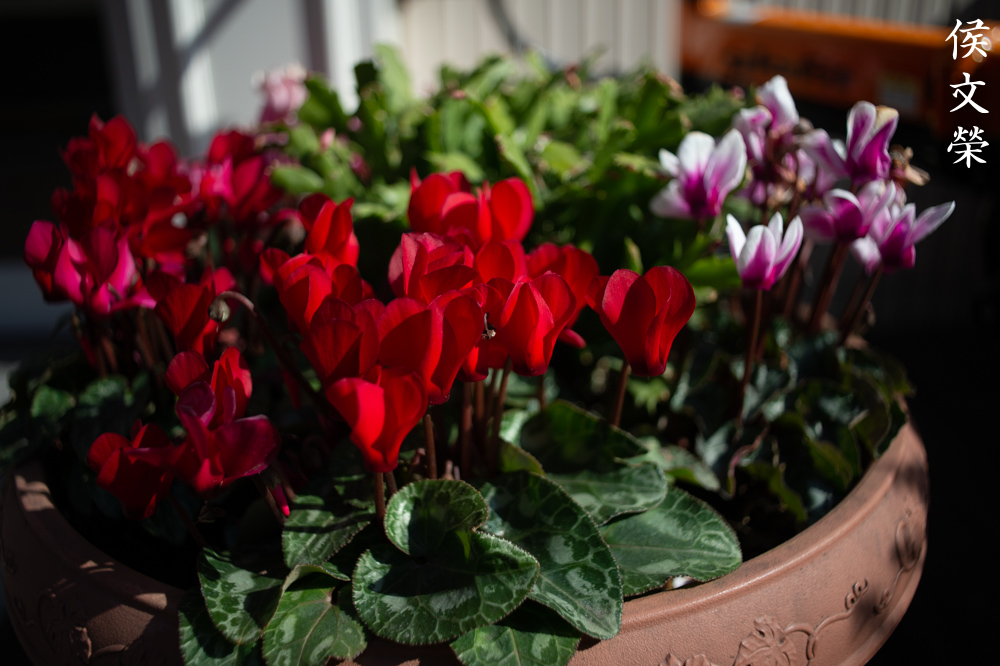
Since this lens was aimed at the amateur market, sharpness and contrast is going to be the selling-point and it delivers in this department. It’s sharp at f/2.8 and the contrast is quite good, specially at the center. The corners don’t look bad either but is 1-2 stops behind. Saturation is quite good, too. You can resolve lots of smaller details with this even wide-open which is surprising. Chromatic aberration can be observed wide-open and spherical aberration is near-absent. Stopping the iris down to f/4 helps with center performance, chromatic aberration is handled much-better from here onwards. Contrast, sharpness and resolution improves quite a bit at the center but the corners benefit from stopping the iris down the most. Shooting with this at f/5.6 will give you peak-performance at the center and things look even better at f/8. I personally prefer to shoot with this at f/4 or f/5.6 if I can, vignetting is not an issue and I’ll get excellent image quality at the center. The corners aren’t so bad, it’s just not as good as the center. If you like shooting landscape photos, you’ll probably benefit more from using another lens.

The bokeh-quality of this lens isn’t the best, you’ll get distracting details with it but it’s not to the point where you can’t use it. The subject-isolation traits of this lens is quite good when shot at closer distances.

The quality of the bokeh looks quite harsh if you ask me, it hints that it was over-corrected at the expense of some of the more delicate things that you’ll want to find in a fine lens. The focus transition isn’t as smooth as what I am accustomed to, it’s quite distracting if you ask me. Now, this lens class is not for taking these kinds of photos but it could have been better because you’ll get better performance with some of the more expensive 28mm Nikkors.

If your background isn’t deep you can get-away with it to some extent. Look at the details of the hot sauce’s label, it looks harsh, almost dizzying to focus your eyes on it but that’s the worst it can get at this setting.

This makes for a good walk-around lens, it’s wide angle-of-view is handy for a lot of settings and you’ll definitely enjoy its utility. While it excels as a lens for sunny days it’s not-so-bad for lowlight photography. Its modest speed is going to be a big problem but digital cameras these days have phenomenal high-ISO performance that this isn’t an issue anymore unlike some 12 years ago. I remember how afraid I was to go beyond ISO1600 with my Nikon D90.

It’s a lovely lens if you can live with its rather mediocre bokeh quality. It will certainly give you plenty of great photos. The key to using this is learning its strengths and that’s its amazing performance at the center so use it to your advantage.
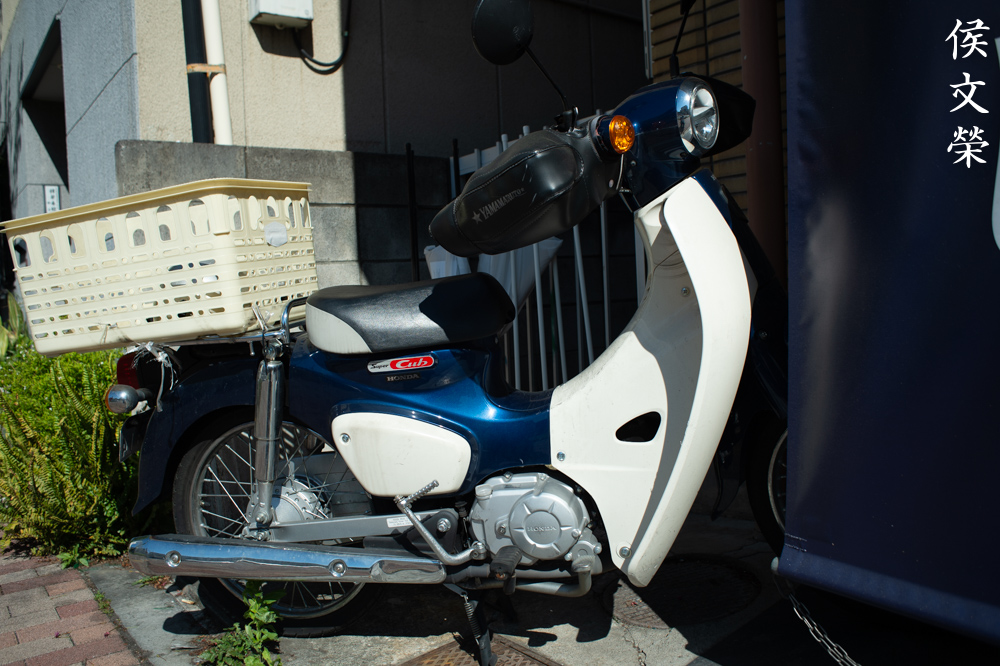
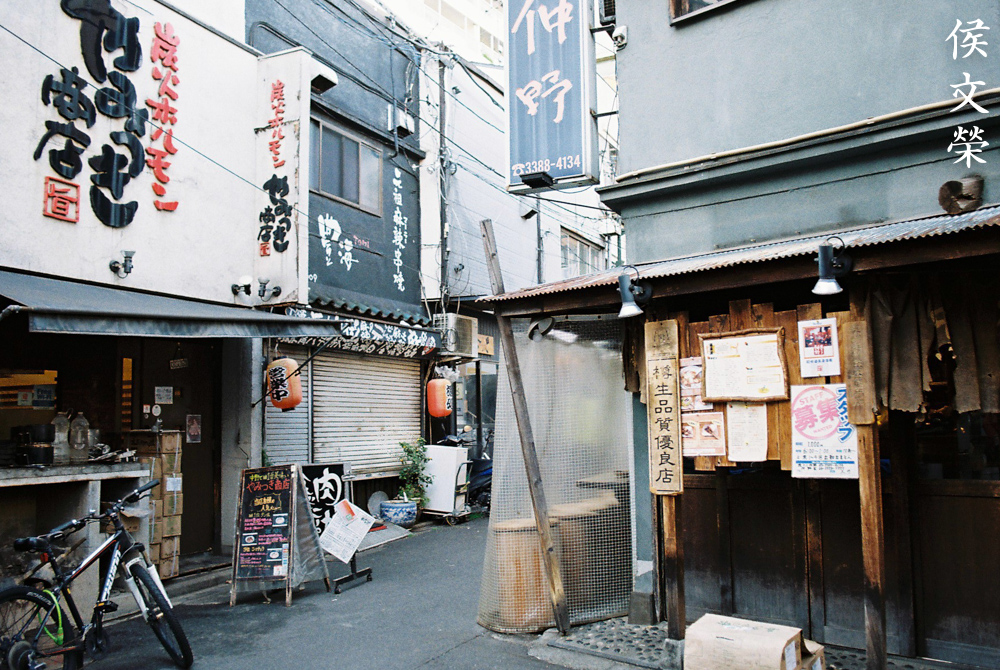
Here are some photos that were taken with film. Film has a unique look, it’s difficult to replicate that with a digital camera because of grain. Grain does not have the rigid structure of noise so it looks better and more natural. It’s important that we observe how a lens works with film since grain can help mask some of its flaws. Photos from digital cameras are so-clean that you’ll see everything in better detail, this means that flaws that the designers did not account for while designing this lens can show-up. Since this was made to be originally used with film it’s fair to judge it with its intended medium. I took these photos with my Nikon FM3A loaded with Kodak Gold 200.


(Click to enlarge)
These pictures show the effects of distortion on real-world photos. It can be distracting specially if you print your photos large. Amateurs won’t mind it and that’s fine since this lens was targeted to that market segment.

Its ability to focus really-close is handy for taking detail shots. It’s sharp and the contrast is quite-high even wide-open.

Its resolving power wide-open is decent and you’ll able to take sharp photos with it. This isn’t a remarkable photo by any stretch but it’s good for seeing how it resolved all of the faucet’s details and corrosion. Even if I was using a cheap film this lens was able to maximize the emulsion, making this look a lot like it was taken with more expensive film.

The character of the bokeh isn’t bad at all but it can look terrible at times. It all depends on what’s in your background. This isn’t the lens for this kind of thing so this is something that I can overlook.

Film grain helps render the background smoother but it won’t help much in preventing this lens from rendering defocused lines with the ugly, dreaded “double-line” artifact. It looks terrible specially at the corners.

Despite having a modest f/2.8 maximum aperture it is able to blur-out your background a bit, guiding the viewers’ attention to your subject. You can see the effects of distortion in this photo, it’s quite strong and hard-to-miss.

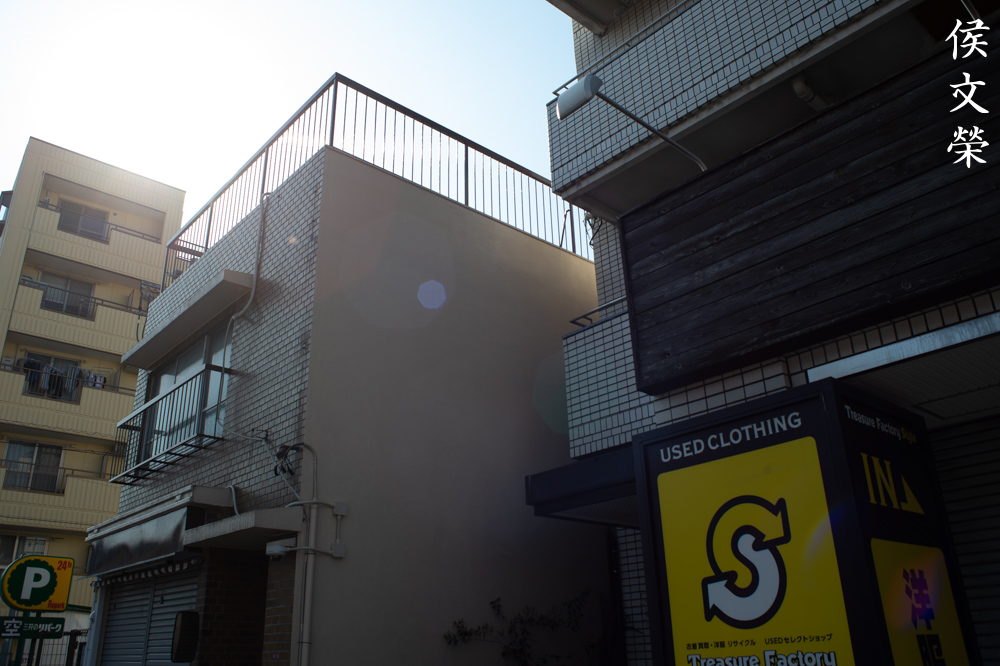
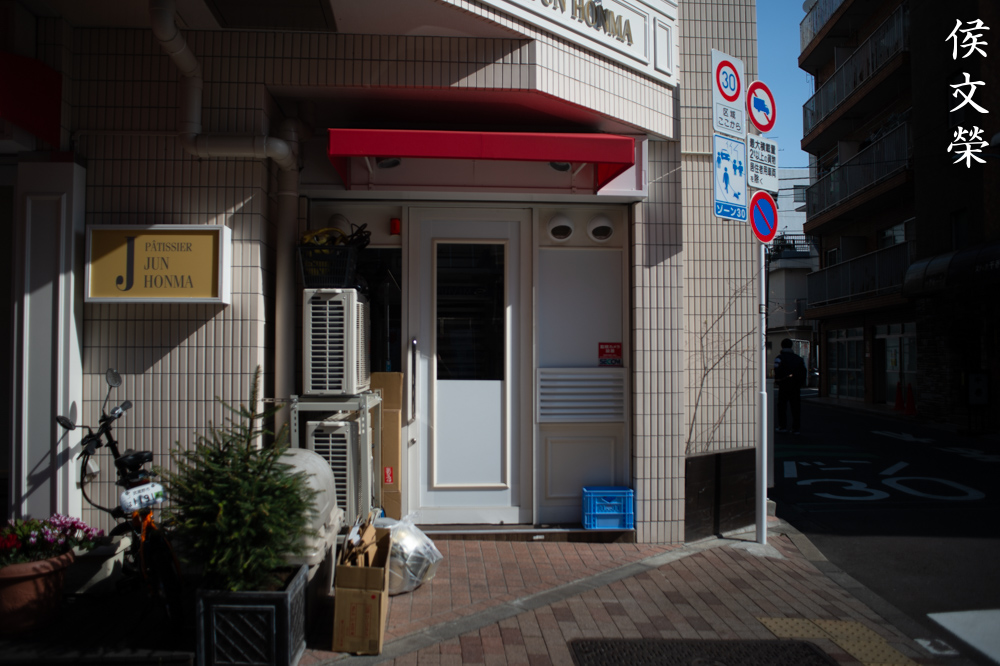
The effects of distortion can be easily-seen in photos like this where there’s a lot of straight lines in your scene that’s parallel to the edges. The buildings at the center looks like their foundations have caved-in to their weight. This can be disorienting to some people.

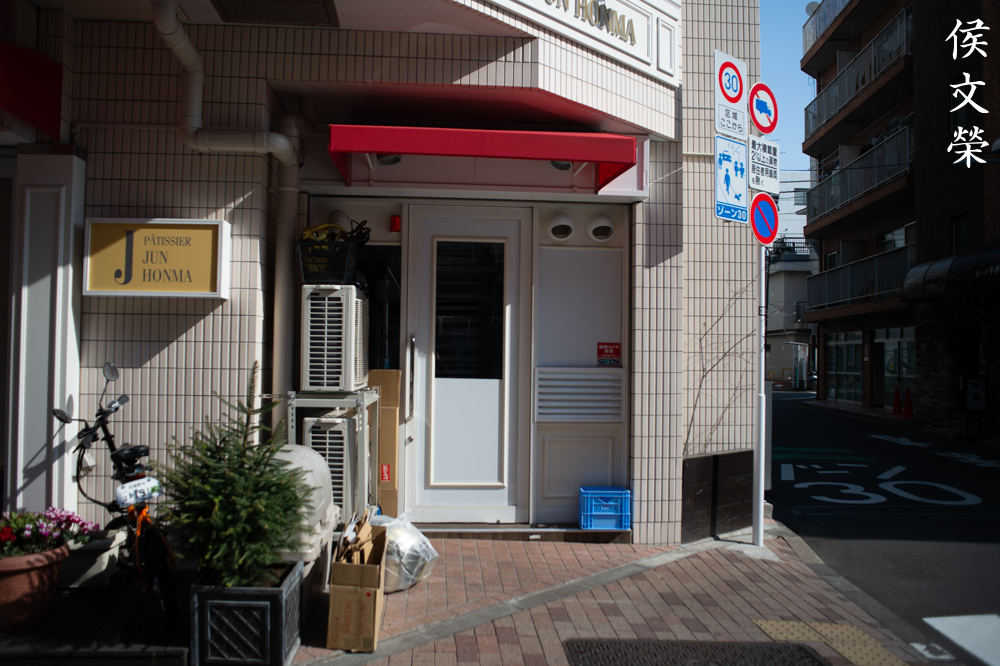
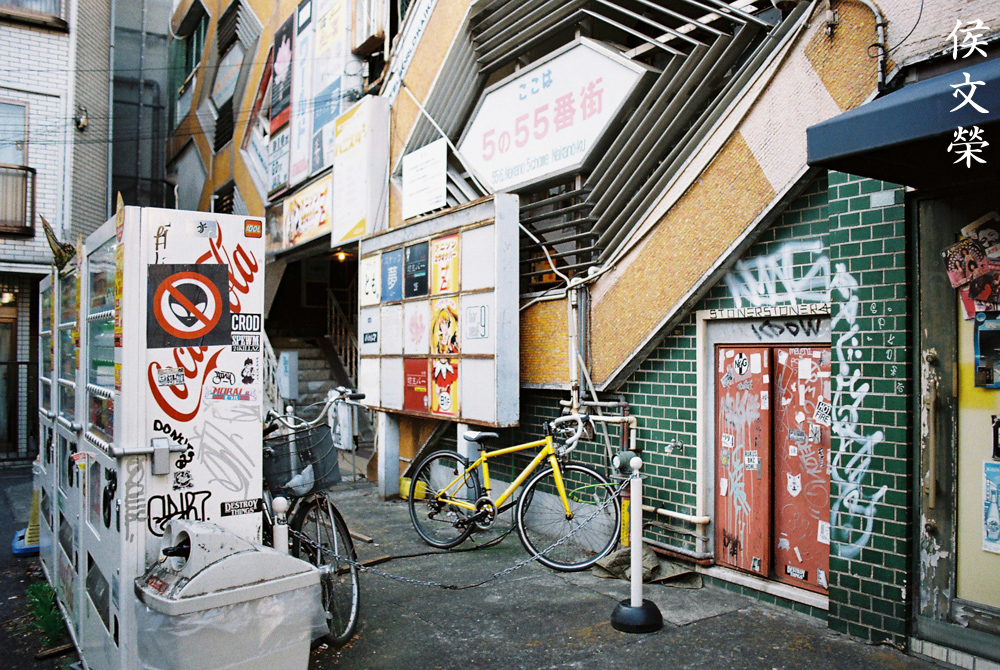
Position your straight lines diagonally and you’ll help mitigate the effects of distortion by hiding it. It’s there but you just won’t notice it much. This lens is too-slow for night photography but it shouldn’t prevent you from using it. Make sure that you have a fast-enough film and that should help a lot. You’ll see the effects of vignetting here but it made this photo look interesting. It’s going to look terrible if we have a clear, sunny sky but it’s forgivable here.

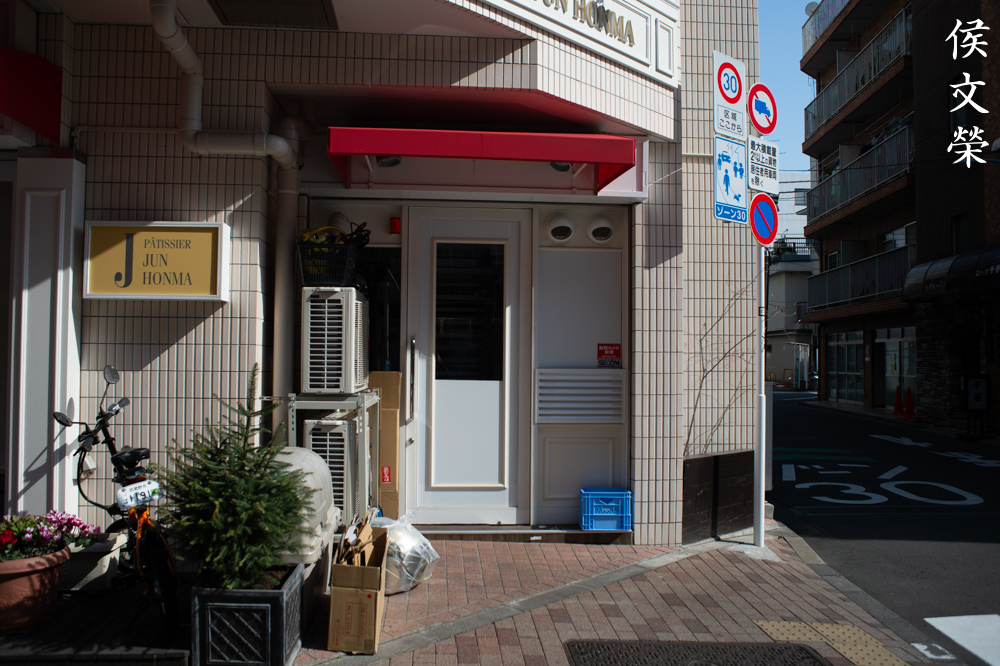
Here’s another example using the trick I mentioned above. You can see how the straight lines of the buildings near the edges bow-out but the ones near the center looks fine. This is what I do when I shoot with a lens that has lots of distortion. This was taken at around f/8 so everything looks sharp except for the far-corners which looks quite weak. It’s this lens’ biggest weakness.

The corners aren’t as sharp as the center but they’re not bad at all. There’s a lot of lenses that perform much-worse than this at the corners.

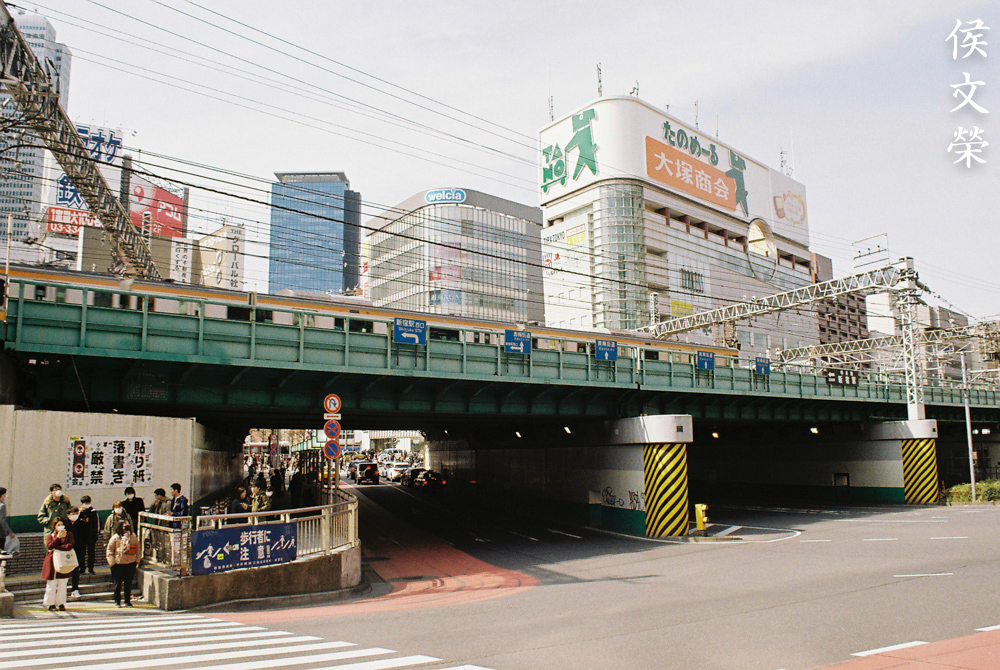
This makes for a nice walk-around lens. If you’re traveling, just pair it with a 50mm lens and you’re good. Please pardon the Dutch-angle.

I love how this lens is able to consistently give me nice, high-contrast, sharp and saturated photos wide-open. You’ll find a lot of flaws in this picture but the pros will outweigh the cons and that’s what matters. If you have a keen eye you will notice a lot of chromatic aberration in the cables. It’s expected, that part of the frame is over-blown.


(Click to enlarge)
These photo should give you a better understanding of how good this lens is when used with film. It is a very good lens for its price, it will certainly give a Nikkor a run for its money. While not optically as good as the older Nikkor 28mm f/2.8 Ai it’s still an excellent lens for general use. The corners aren’t as good as the Nikkor’s but people won’t really notice that if the photos are not printed large for scrutiny. It certainly is a “B-grade-Nikkor” if you can call it that. Film is more forgiving in terms of masking a lens’ flaws if you ask me.
I highly recommend this lens only if you could not find a reasonably-priced Nikkor 28mm f/2.8 Ai. The latter is usually cheap these days and it built a lot better. The coatings seem better and I love the image quality from that even better. The Series-E lenses have appreciated in price thanks to the internet, I do not see the point why they should cost that much to be honest. You could buy a better lens for less, one that will last longer and is more worthy of the Nikon brand, don’t settle for less. If you really want to own one, make sure it doesn’t have any oil on the iris and all the rings turns smoothly. Check all of its glass and check for any signs of fungus or coating damage. It’s weird but I notice that the coatings on Series-E lenses tend to be easily-damaged when fungus infected it, the result is etched-glass which doesn’t seem to be usual with most Nikkors except from the ones that are known to have softer glass in one or some of their elements. Despite what I wrote, this lens is amazing, it’s just not worth what people are willing to pay for it these days.
Before We Begin:
If this is your first attempt at repairing a lens then I suggest that you check my previous posts regarding screws & drivers, grease and other things. Also read what I wrote about the tools that you’ll need to fix your Nikkors.
I suggest that you read these primers before you begin (for beginners):
Reading these primers should lessen the chance of ruining your lens if you are a novice. Before opening up any lens, always look for other people who have done so in Youtube or the internet. Information is scarce, vague and scattered (that is why I started this) but you can still find some information if you search carefully.
I highly recommend that you read my working with helicoids post because this is very important and getting it wrong can ruin your day. If I can force you to read this, I would. It is that important!
For more advanced topics, you can read my fungus removal post as a start. This post has a lot of useful information and it will be beneficial for you to read this.
Disassembly:
The disassembly of this lens won’t be separated into different sections. It’s a simple lens and its construction is inter-connected so it’s hard to separate it into different sections. This is not what I will call a beginner-friendly lens. It is simple in terms of construction but it’s still puzzle-like and the latter will drive beginners crazy because the disassembly sequence has to be followed perfectly. If you don’t have any idea on lens repair or you lack experience, I would advise you to send your lens to a professional and have them fix it. It is better that you practice your skills with cheap Canon or Soviet lenses first as they are disposable, just joking but you knew that I meant it.
The barrel is mostly made of plastic, avoid using acetone, MEK, naphtha or any strong solvents with it. Alcohol is generally fine but you want to keep it to a minimum. You’ll also want to be careful with screws, it’s easy to strip or cross-thread the holes for them if you’re not careful. Plastic is soft, it can be easy for any metal screw to self-tap its hole and that’s not what you want to happen. You should first turn the screw the other way and feel it engage its thread and only then tighten the screw properly. Over-tightening isn’t good since the screw will just strip its own thread.
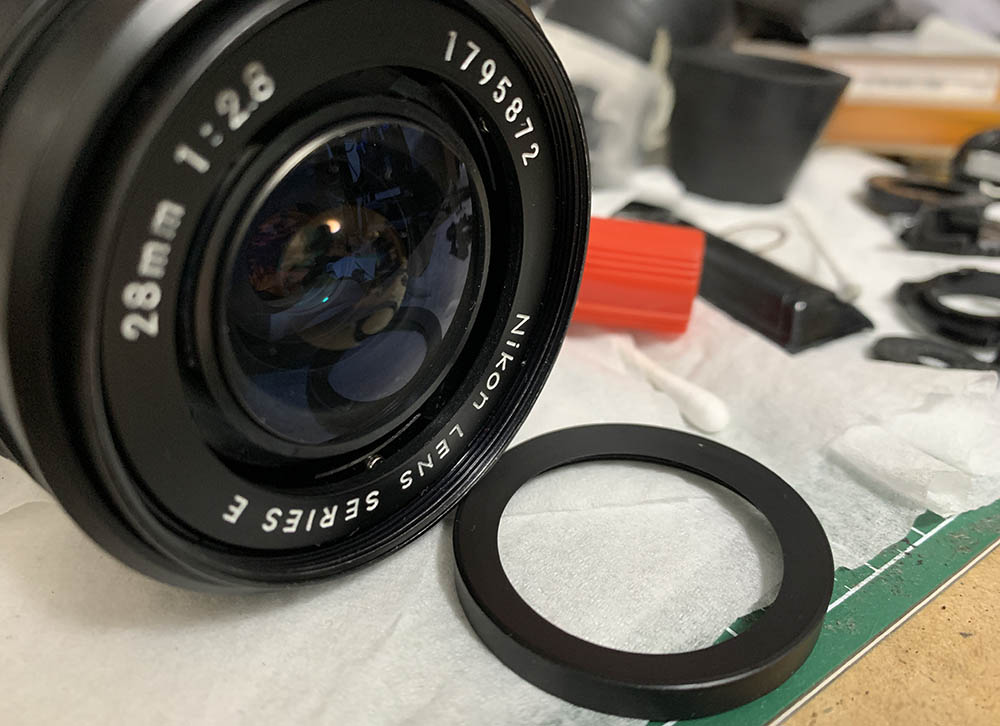
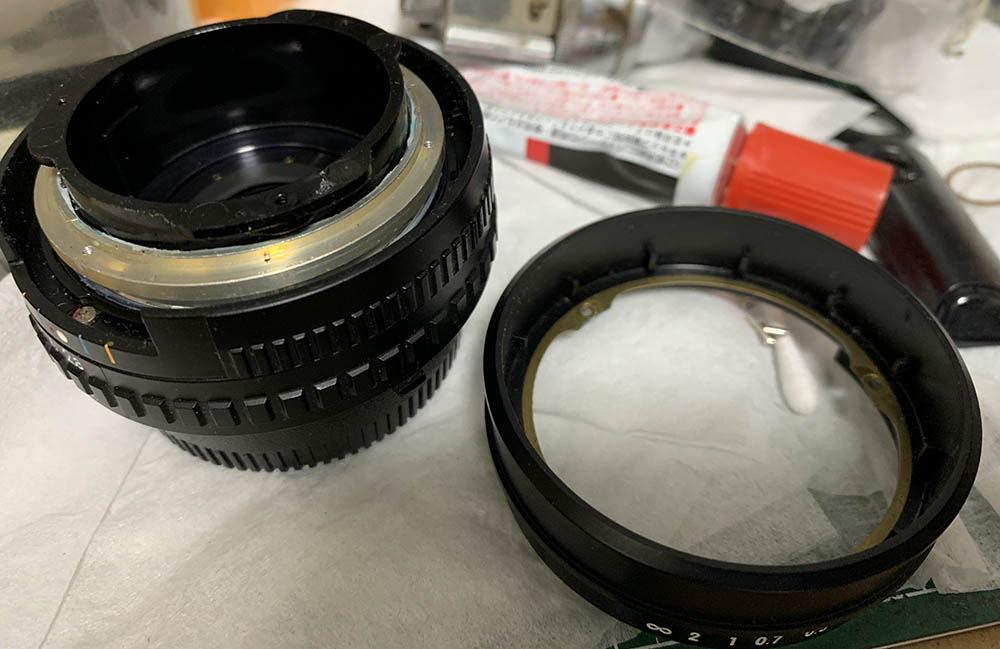
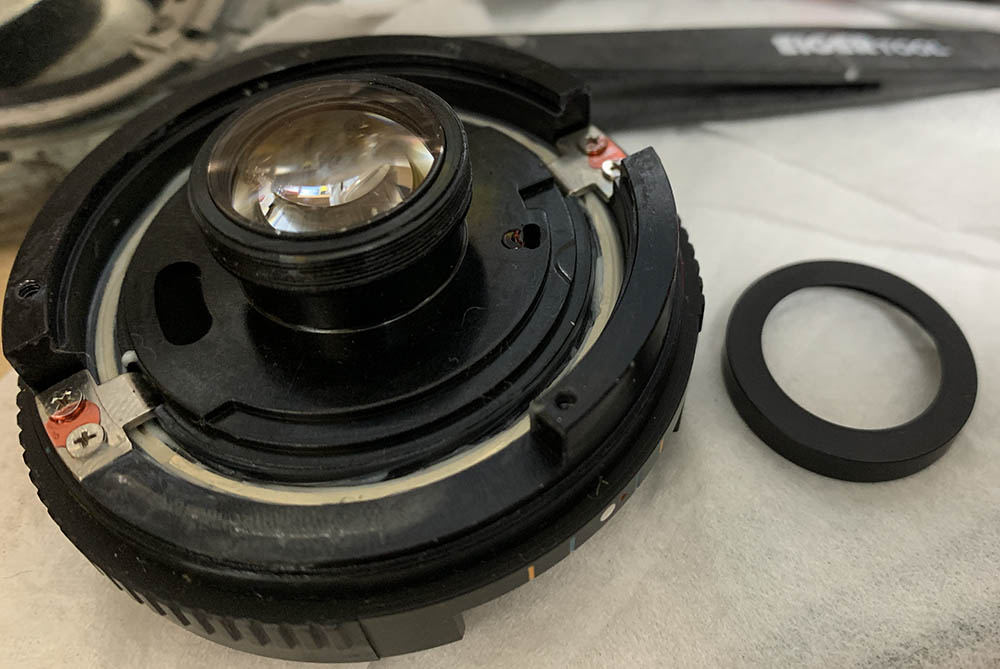
This is something that should not happen, while trying to remove the bezel I accidentally removed this retainer ring, it secures the front element. This is dangerous and you should put this back if the same thing happened to you.
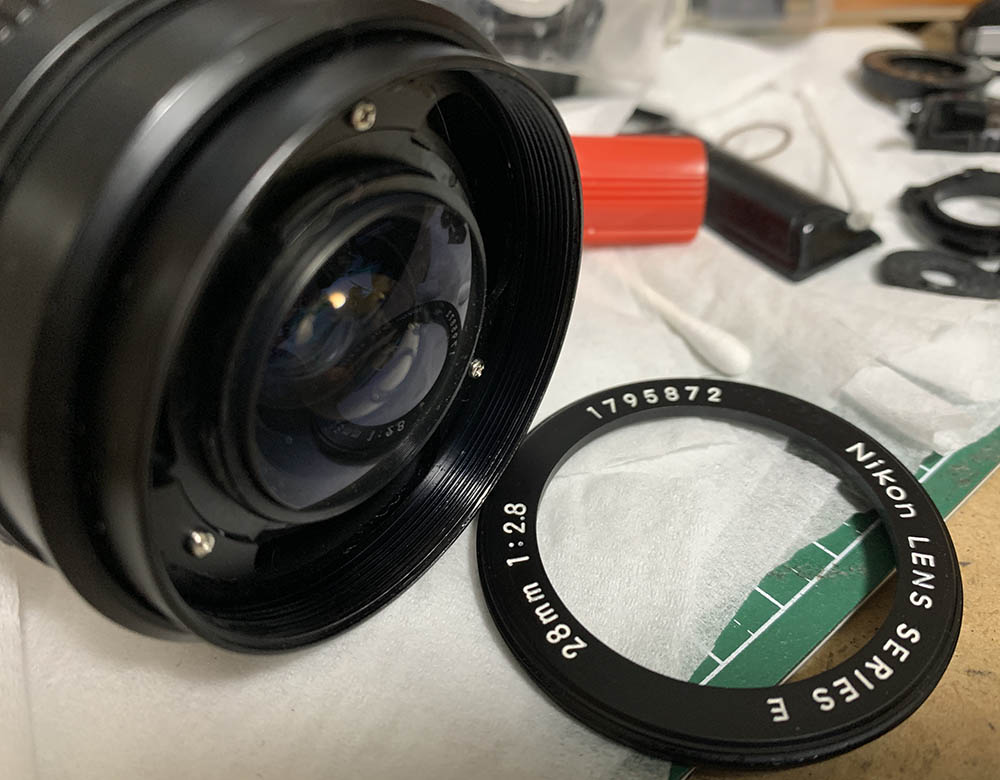
The bezel can be removed by using rubber cup but it can be tricky. Using a strip of tape is more effective, the bezel is made of plastic so it flexes. Using too-much pressure won’t make it move, it will just flex. Never use acetone, I only use alcohol here in cases when it’s sealed. Acetone will melt it and you won’t be able to remove the bezel without damaging it.
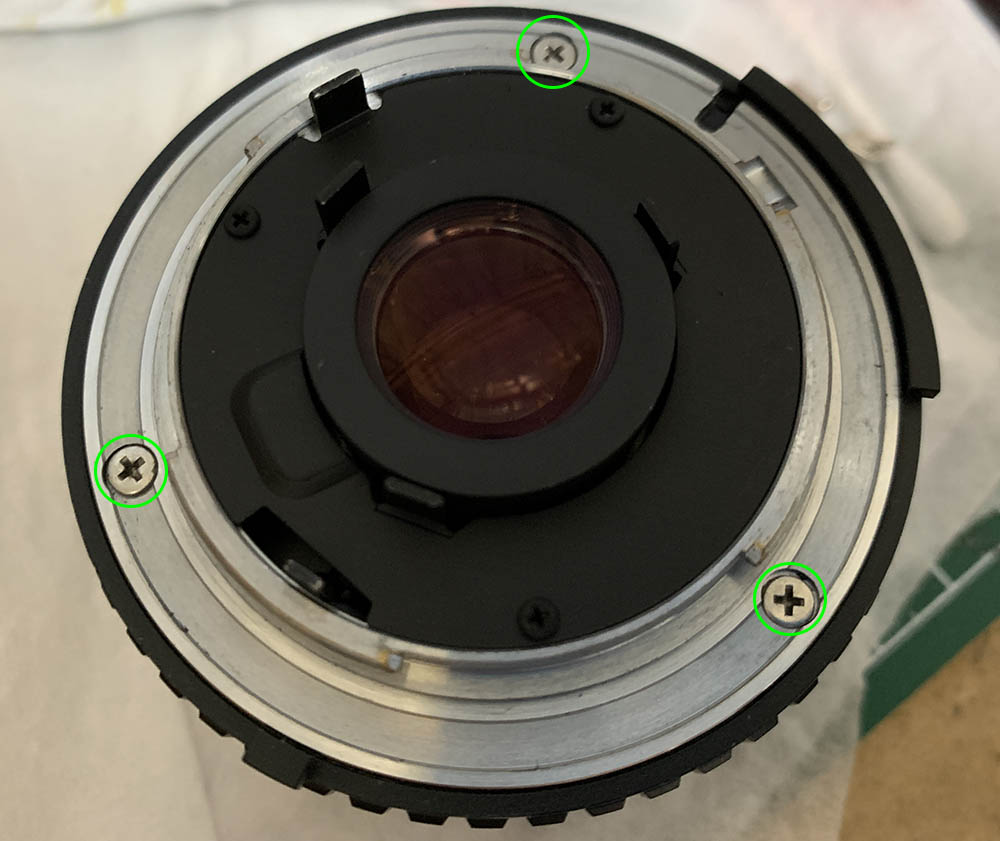
Removing the bezel will give you access to these screws, extract these so the front barrel can be removed. Be careful when handling these, they are only screwed to a plastic part which can be easily cross-threaded.

The front barrel can now be removed. While it’s made of metal it still feels a lot cheaper than what we’re normally accustomed to in true-blue Nikkors.

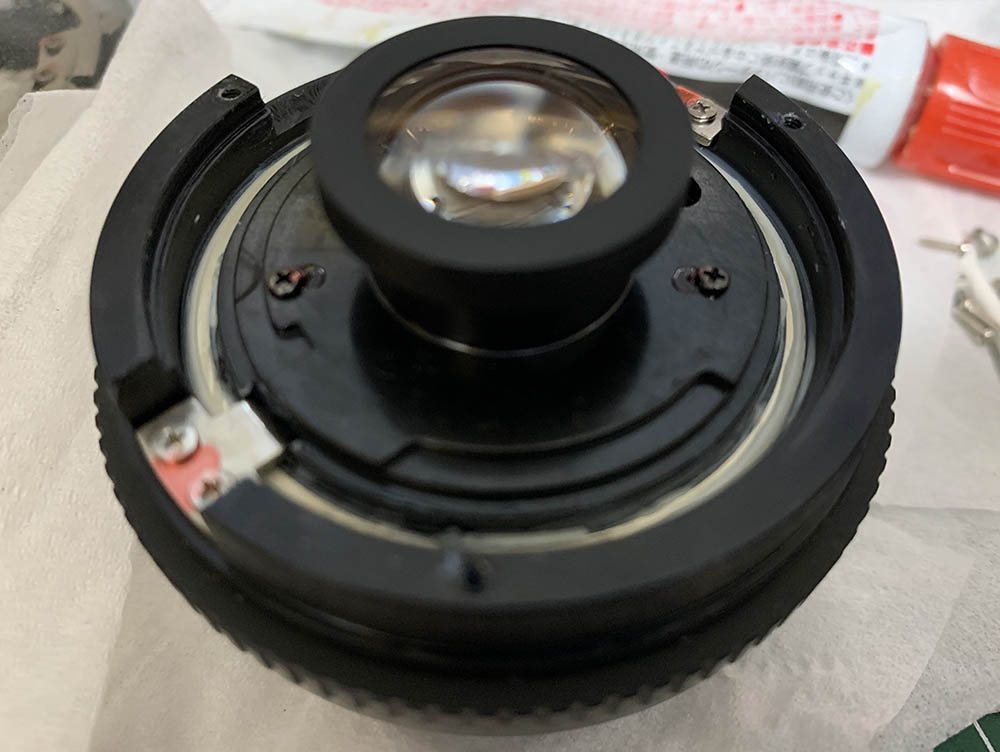
The same screws that secure the front barrel also secure the front elements assembly. I have them here in this photo but they should be gone since they were extracted previously. You can also see screws on the brass ring, extract these and you can remove the focusing ring. Loosening these will allow you to adjust the focusing ring and the lens’ focus which you should do later.
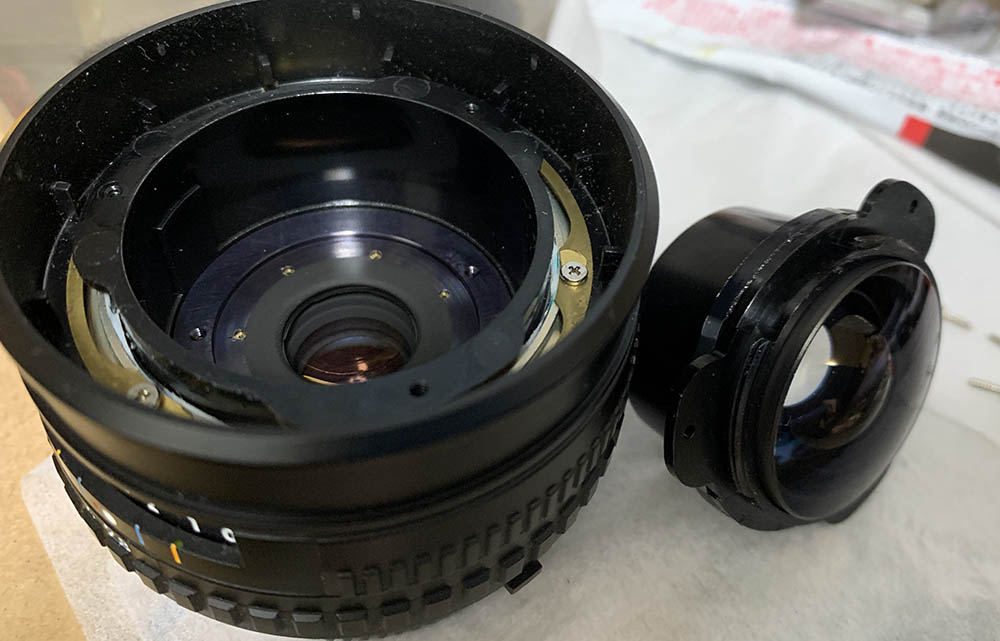
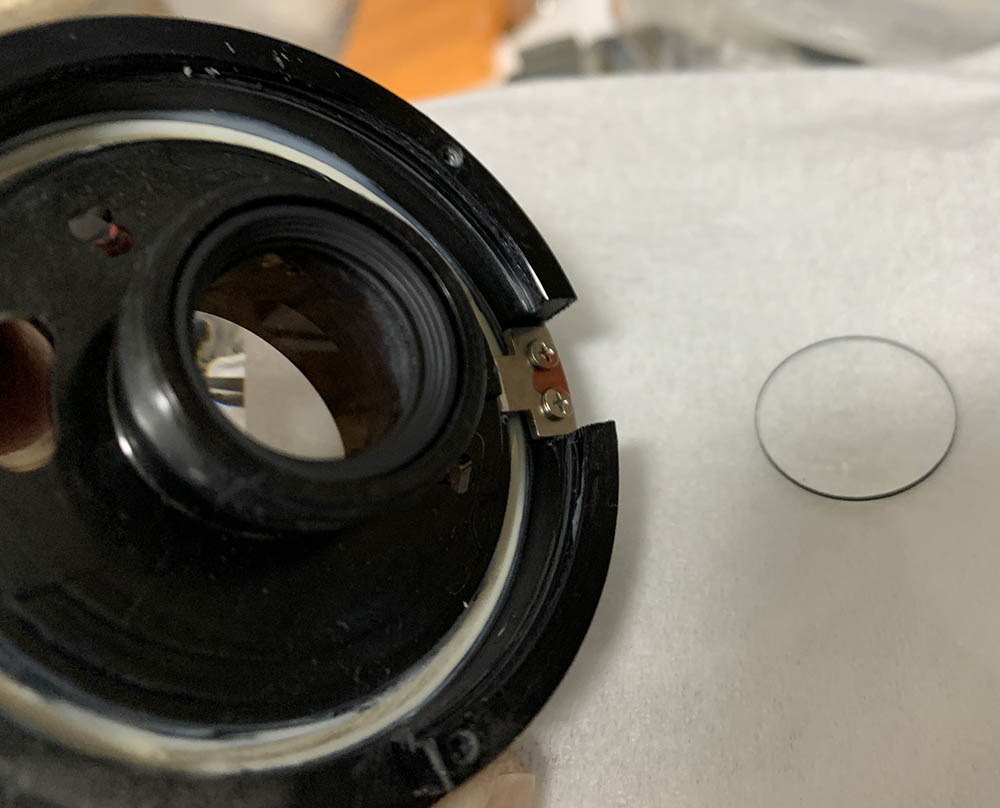
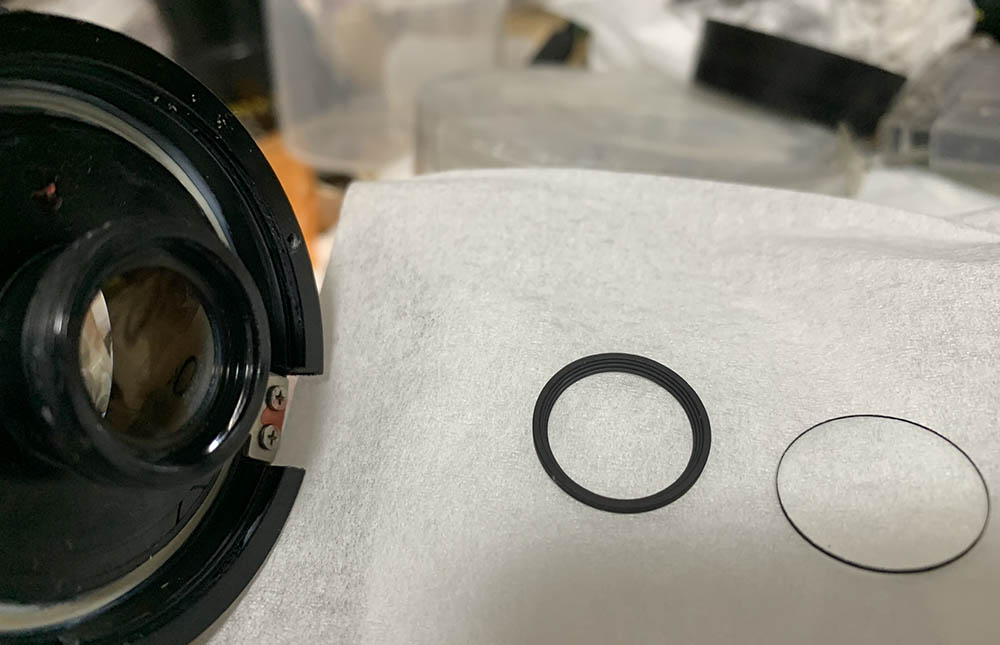
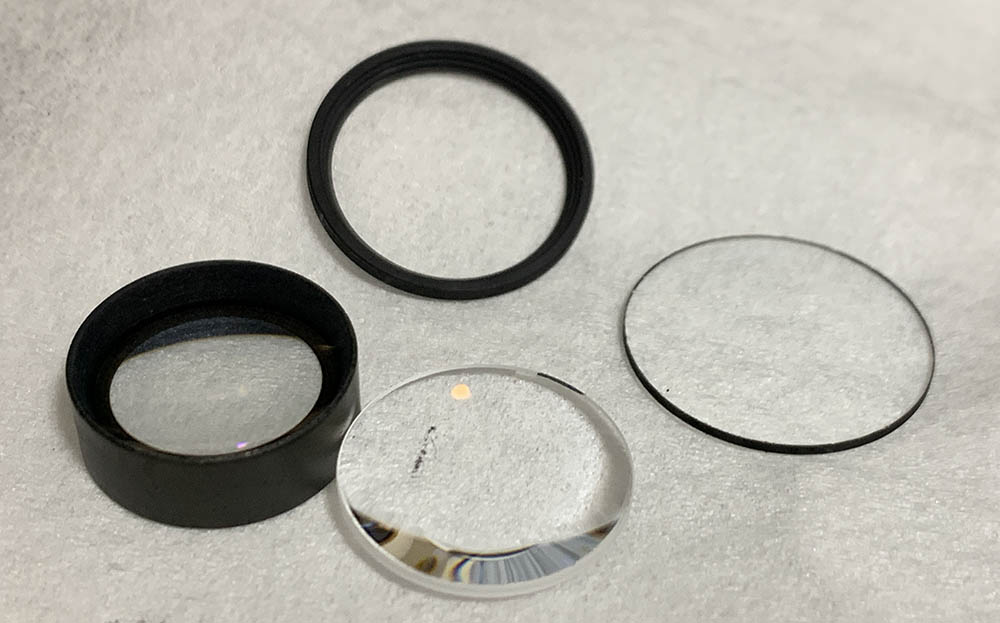
The front elements assembly can now be removed. Note that the retainer of the front element is not in the picture, it should be installed so disregard the fact that it’s not installed in the photo. Store the front elements assembly in a safe place to avoid damaging it accidentally.
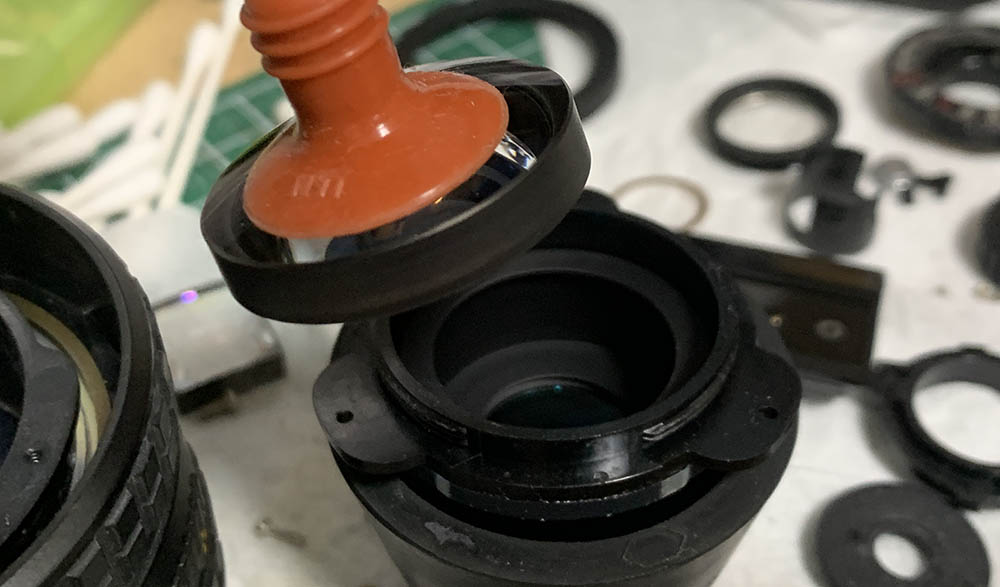
You can remove the front element with a lens sucker once its ring is gone. It is a convex lens so it’s easy to note its direction. Leave the 2nd element it its housing, I don’t see the need to remove it.
The focusing ring can be removed once its screws are gone. You can remove the brass ring and clean it if you want to.
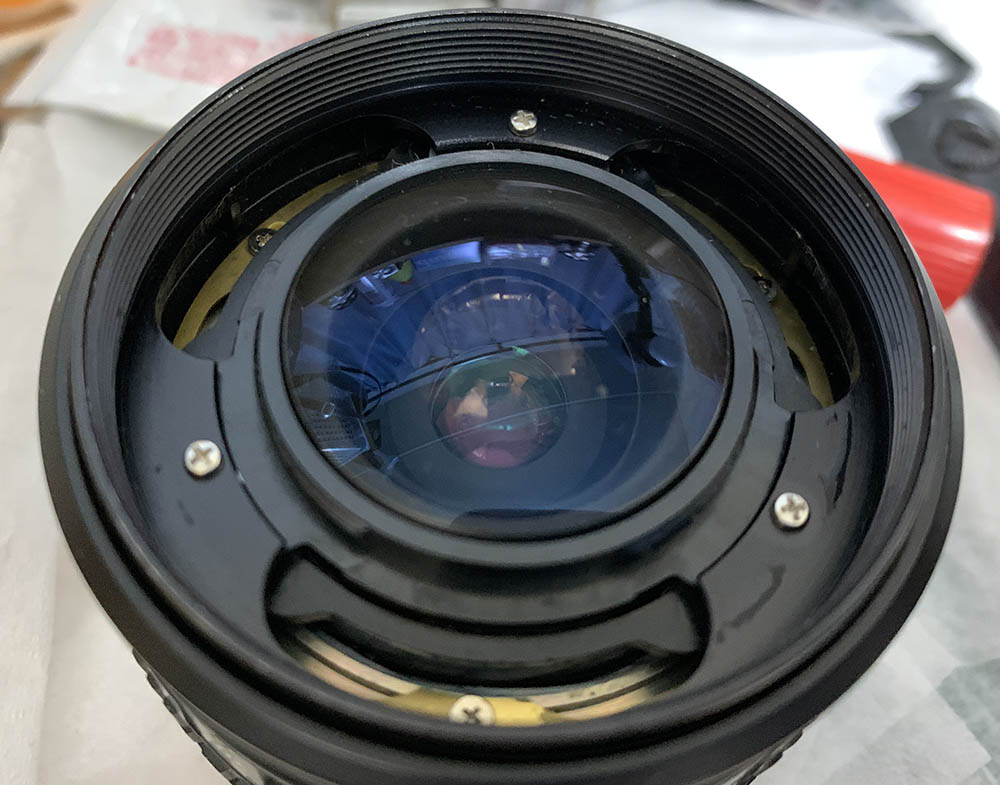
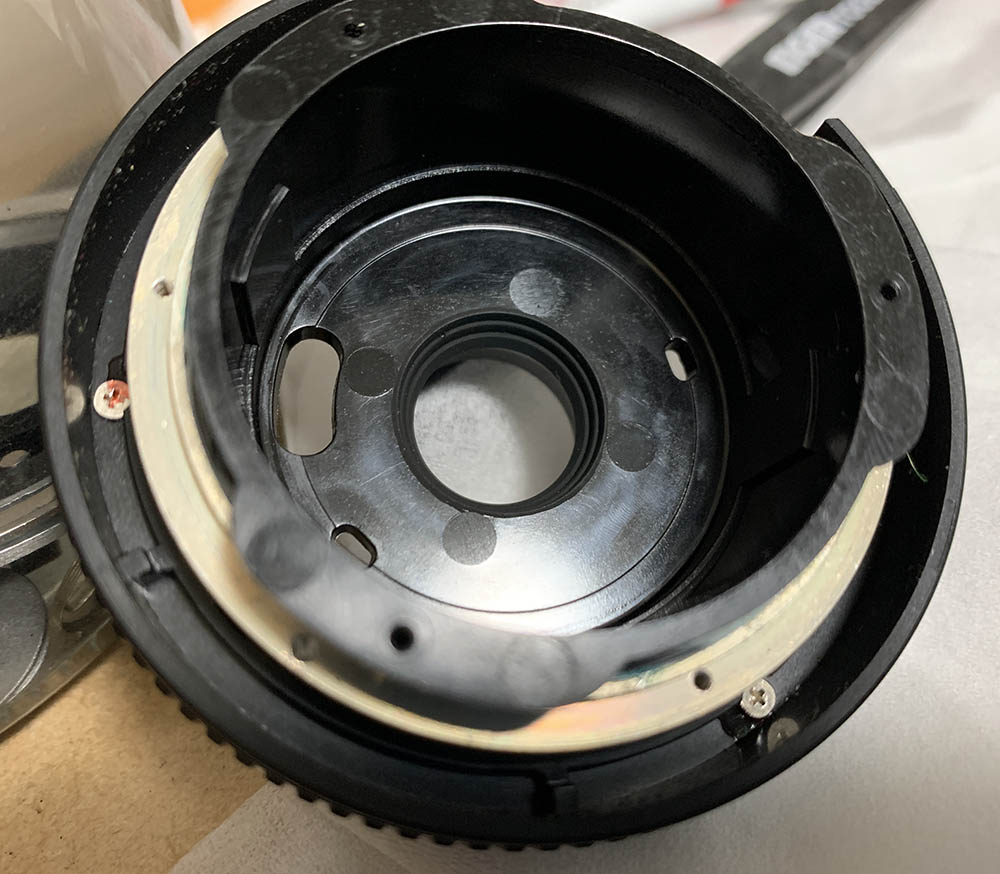
Extract these to remove the bayonet mount. Many people get stuck here, the reason for that is because they used the wrong drivers or they do not have the experience for the job. This results in stripped screw-heads which is not something that will never happen with an experienced repairer. If you’re a novice, read my article on how to remove bayonet mount screws. Reading it will prevent you from doing the same mistakes that a lot of beginners do.

The bayonet mount can be easily removed. Note that there is a notch in the spring-loaded arm, a rod found on the iris mechanism should be inserted in this slot in order for it to control the movement of the iris mechanism.

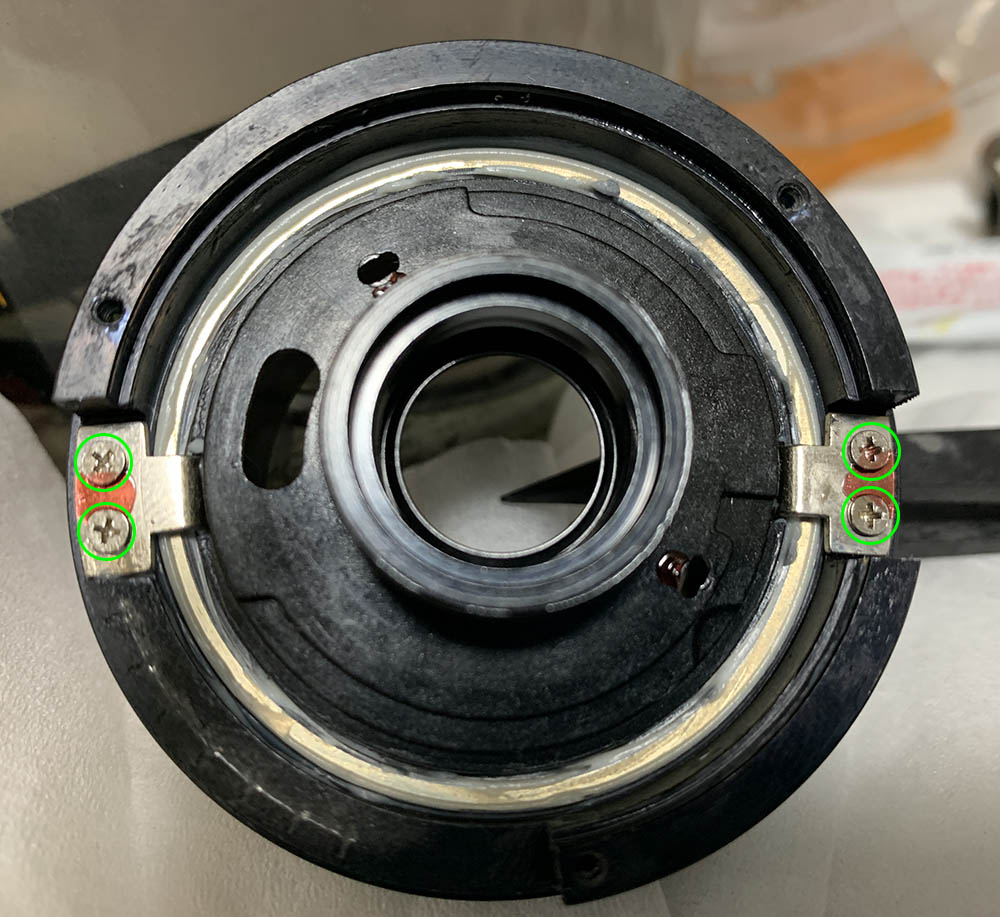
Study how everything looks like before you remove anything. You can see a rod around the 5:30 mark, that’s the rod that I was talking about in the past step. There is a thin ring that couples to the aperture ring via a tab. Turning the aperture ring will also turn it since they are coupled. It controls how big the aperture of the iris is by limiting it actuation.

Remove the aperture ring and the regulator, don’t forget to clean these. You should put these back properly later in order for them to work properly.
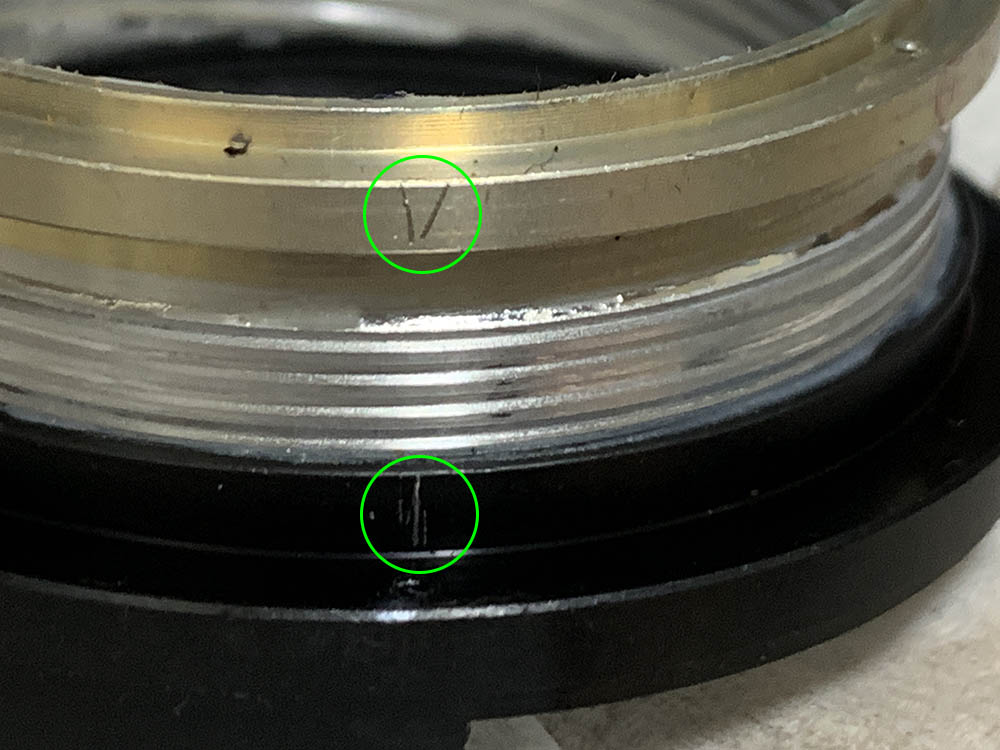
You’ll see 2 screws at the base of the objective’s housing, these screws secure the iris mechanism. Don’t remove these until you’ve made some marks.

Look inside the objective’s housing and make a small mark so you will know how to put the iris mechanism back again. This is an adjustable part, do not forget to put it back the right way or you won’t proper exposure readings.
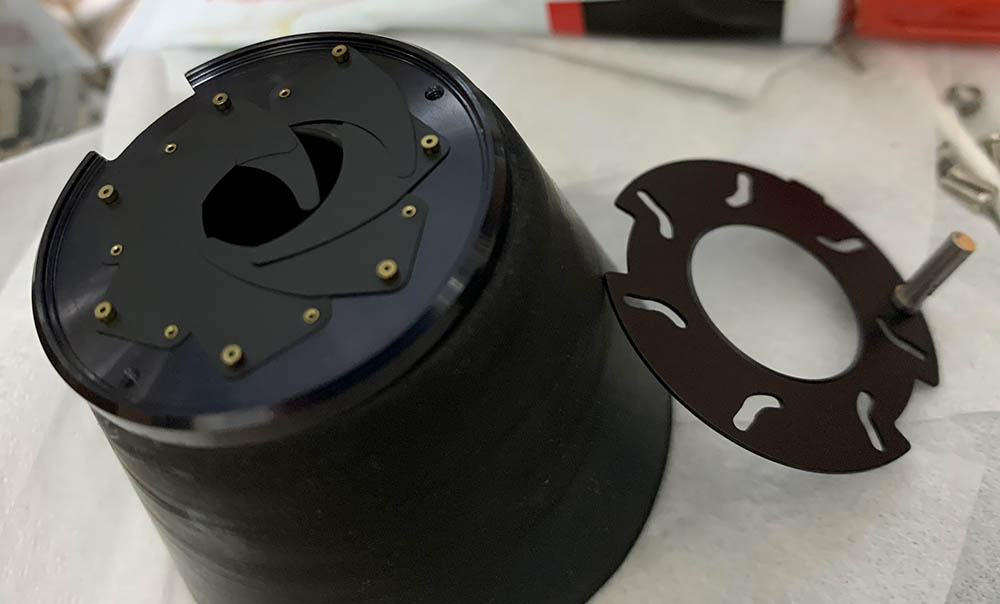
Carefully remove the iris mechanism by resting it on something and extract its screws. Once the screws are gone you can lift the main barrel, leaving it seated. This is the safest way to remove the iris mechanism. The iris blades are delicate so handle them with care.
The rear element can be removed once its retainer is gone. The retainer can be stuck at times, a small drop of alcohol applied to its threads will dissolve its seal, just wait for it to soften-up and unscrew the retainer. You shouldn’t use any metal tools for this, your hands are enough for the job. The part it’s attached to is plastic, you do not want to damage it. Extract the rear element with a lens sucker.
Extract the 4th element with lens sucker. Use a permanent marker to mark its leading edge so you’ll know which side should be facing the front.
Underneath it is a spacer. Don’t forget to note which side faces the front just like with the 4th element. Putting this back facing the wrong way will crack the 4th element when you tighter the rear element’s retainer.
You can extract the 3rd element once you’re done. Again, use a marker pen to mark the 3rd element’s leading edge.
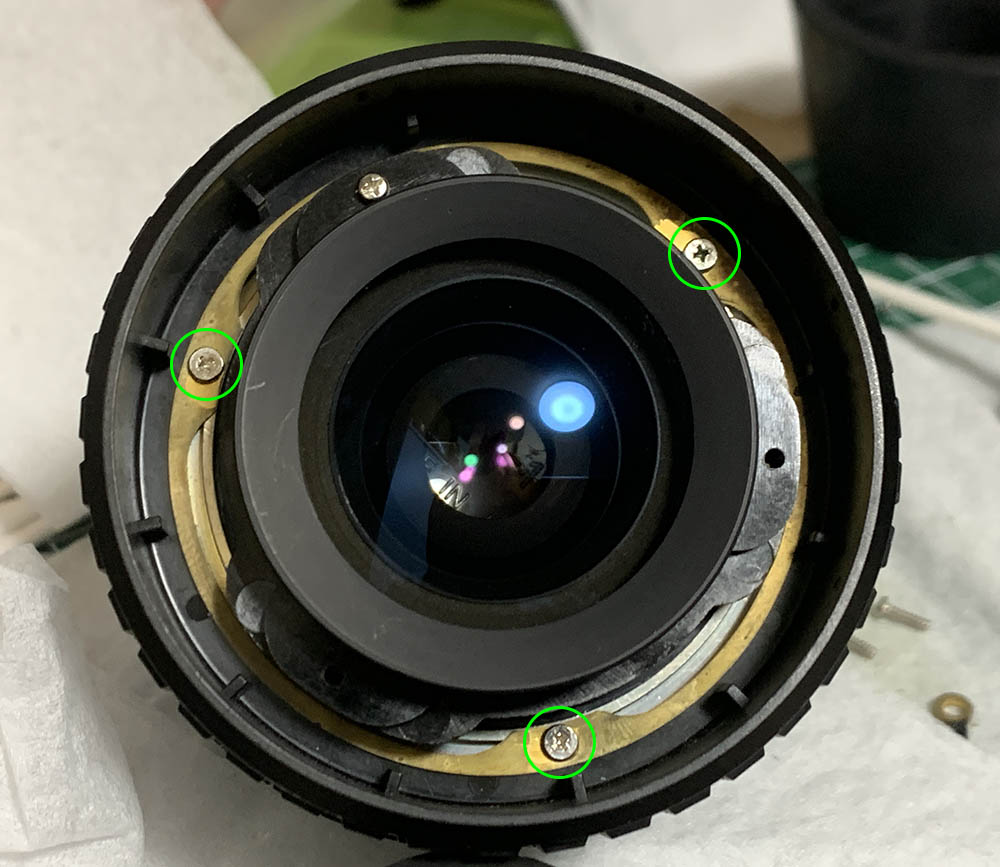
You can clearly see in the photo the screws that secure the outer barrel. The screws (3 of them) can be extracted with the help of a driver that has a thin, long shaft.

The outer barrel is simply made from plastic so you won’t want to use MEK or similar solvents near it.
To remove the helicoids you’ll need to extract these screws. The helicoid are secured by these keys, they keep the helicoids’ turn synced. You will want to mark one of the helicoids so you’ll know which key goes to which slot. They were broken-in to their slots and you’ll want to put them back again in their proper slots. Before you remove these, take lots of notes or measurements. I always take plenty of photos before I remove these, the photos will help me determine if I have meshed the helicoids properly.

Once the helicoid keys are gone you can proceed to separating the helicoids. Don’t forget to mark where they separated, small marks are enough. I made mine too-big only because this lens belongs to me. Please read my article on how to work with helicoids, many people get stuck here because they do not know how to service these properly, reading my article will educate you on how to work on these. Basically, you’ll want to mesh them at the exact place where they separated. I start be separating the inner helicoid, look at all the grease applied to it, it’s the type of cheap lithium grease used for lubricating toilet fixtures.
Do the same for the central and outer helicoids, be sure to mark where they separated since this is also the spot where they should mesh.
Clean the helicoids and all of the bigger parts with detergent. Use a brush to remove any stubborn dirt or to clean the lettering. Don’t over-scrub it or the paint on the lettering will be scrubbed-clean, too. The substrate is plastic so it’s easy to remove the paint.
I lubricated the helicoids with grease that is more on the stiff-side, that will be beneficial because the focus-throw of this lens is so short. Only use ones that are either silicon or lithium-based since there’s a lot of metal-to-plastic threads. Only apply a thin film, that should be enough. Applying too much will result in the gloop that you just saw earlier. That excess grease can and will migrate to the iris mechanism and cause more problems later.
In the event that yours has fungus, read my article on how to remove fungus. Do note that you should dilute your solution when working with this lens. It has coatings and glass that’s easier to etch with chemicals. Simply wipe it all clean with the solution and then do a final wash with distilled water. If you can avoid using strong chemicals then that should be much safer.
Conclusion:
Repairing this lens was rather boring but it took me longer to repair it since the rod/pin of the iris mechanism was damaged and it’s not easy to fix this. I spent a lot of time correcting it, I couldn’t brute-force it because the iris is a very delicate mechanism and everything should work flawlessly. If this lens didn’t have a broken iris mechanism I could’ve repaired this within an hour or so. Seasoned repairers will find this an easy task, moderately-skilled ones will find this perfect. Was all that effort worth it? I would say, yes. This lens is such a joy to use and all that trouble that I went through was all worth it.
Remember what I told you earlier about these screws? Do not forget about these since you’ll have to work on these in the next step.
Reassemble your lens up to this point. The screws of the focusing ring needs to be accessible, you can reach them through the ports of the front barrel. It is now time to adjust your lens’ focus. If you don’t know how to do this, read my article on how to adjust your lens’ focus to help you understand how this is done in a DIY setting. Once you are satisfied with the results, loosen these screws to finalize your adjustments and you can now reinstall the bezel.
I hope that you enjoyed this article, I wrote it since there’s a lot of buzz for this lens on the internet saying that this lens is bad or this lens is the best. I don’t even know who’s telling the truth so I hope that this article settles the issue, at least for us. You saw pictures that were taken with a digital camera and plenty of photos that were shot with film, look at those pictures and let them help you decide if this lens is good or not.
Thank you for following my work. If you enjoyed this, please share this with your friends. If you benefitted from my work or you want to help others see and benefit from this, please consider supporting my work. Your support is helping me a lot in offsetting the cost of maintenance and hosting. Your help is also used for purchasing, developing and scanning film, all of which costs a small sum here. Thank you very much again, see you guys next time, Ric.
Help Support this Blog:
Maintaining this blog requires money to operate. If you think that this site has helped you or you want to show your support by helping with the site’s upkeep, you can make a small donation to my paypal.com (richardHaw888@gmail.com). Money is not my prime motivation for this blog and I believe that I have enough to run this but you can help me make this site (and the companion facebook page) grow.
Leave me some tip?
Thank you very much for your continued support!
$2.00
Helping support this site will ensure that this will be kept going as long as I have the time and energy for this. I would appreciate it if you just leave out your name or details like your country’s name or other information so that the donations will totally be anonymous. This is a labor of love and I intend to keep it that way for as long as I can. Ric.

1 Comment (+add yours?)