
Hello, everybody! It is the middle of autumn but the trees here in have not reached their peak autumn colors yet. This is starting to get frustrating for me because this is the only time of the year that I can justify shooting with Fujifilm Velvia. Autumn is about the time I use my wide lenses for landscape photography and I will show you one of my favorite lenses for shooting the gorgeous colors of autumn.
Introduction:
The Nikkor 28mm f/3.5 Ai-S is one of Nikon’s cheaper but better-performing wide-angle lenses, you’ll want to shoot with it as soon as you see what this little thing could do. It was made from 1981 up until 1989 and it’s the last of the beloved 28/3.5 family that started in 1960 with the Nikkor-H•C 28m f/3.5 Auto. For many, these represent a time when lens speed isn’t the only thing that mattered but what a lens could do despite not having a fast maximum aperture value. People back then were less-concerned with the charts than they are today so these sold really well. These were loved for their value, a good ratio of price-over-performance that’s hard to beat. These aren’t really dirt-cheap when they were new but they’re certainly cheaper compared to their faster siblings and that meant a lot for some people.

The 28mm focal length is one of my favorites and I own many 28mm lenses. Here’s the Nikkor 28mm f/3.5 Ai-S with a Micro-Nikkor 55mm f/2.8 Ai-S. They make for a good setup for general photography since they compliment each other well in terms of focal length and use. You can take plenty of beautiful pictures with just these lenses and make a whole career out of them.
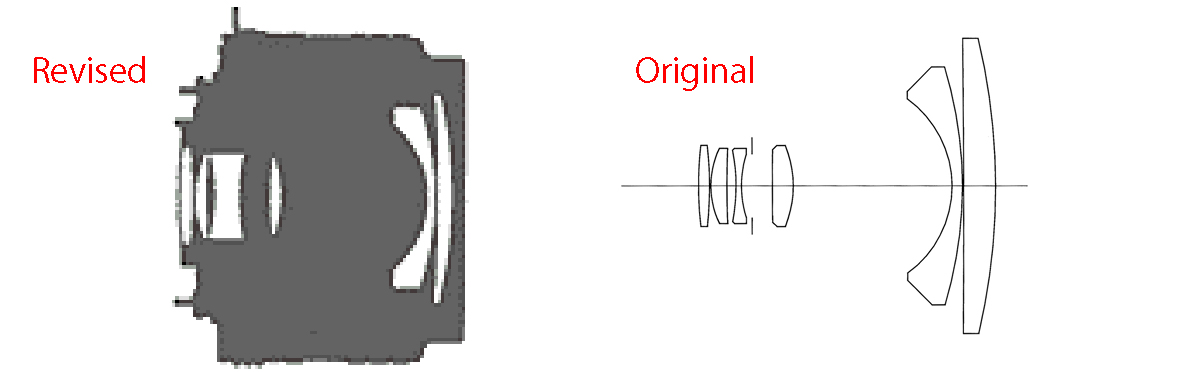
The optical design is different from the original one but the basic design has remained quite similar. The change happened around the late 1970s. It still has the same 6-elements-in-6-groups layout despite being totally-different. It is a real testament to the original design’s performance.
This family of Nikkors have a long, rich history. The first version is the older Nikkor-H 2.8cm f/3.5 Auto and it’s one of the first Nikkors sold for the Nikon F – Nikon’s first SLR camera. Before that, the W-Nikkor 2.8cm f/3.5 is the first Nikkor to have this focal length. This focal length is still part of Nikon’s lens catalog today but the modern versions now have faster maximum aperture speed.

It’s a handsome lens and pairs really well with a Nikon F3. This is a compact setup that won’t hurt your neck. It’s great for street photography despite its wide field-of-view, it all depends on your style.

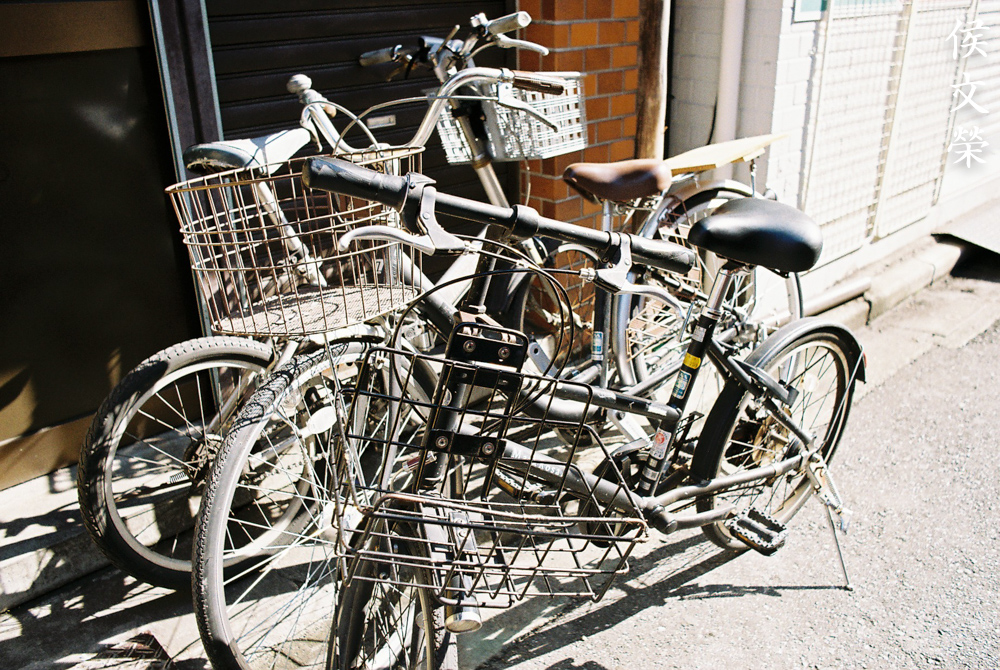
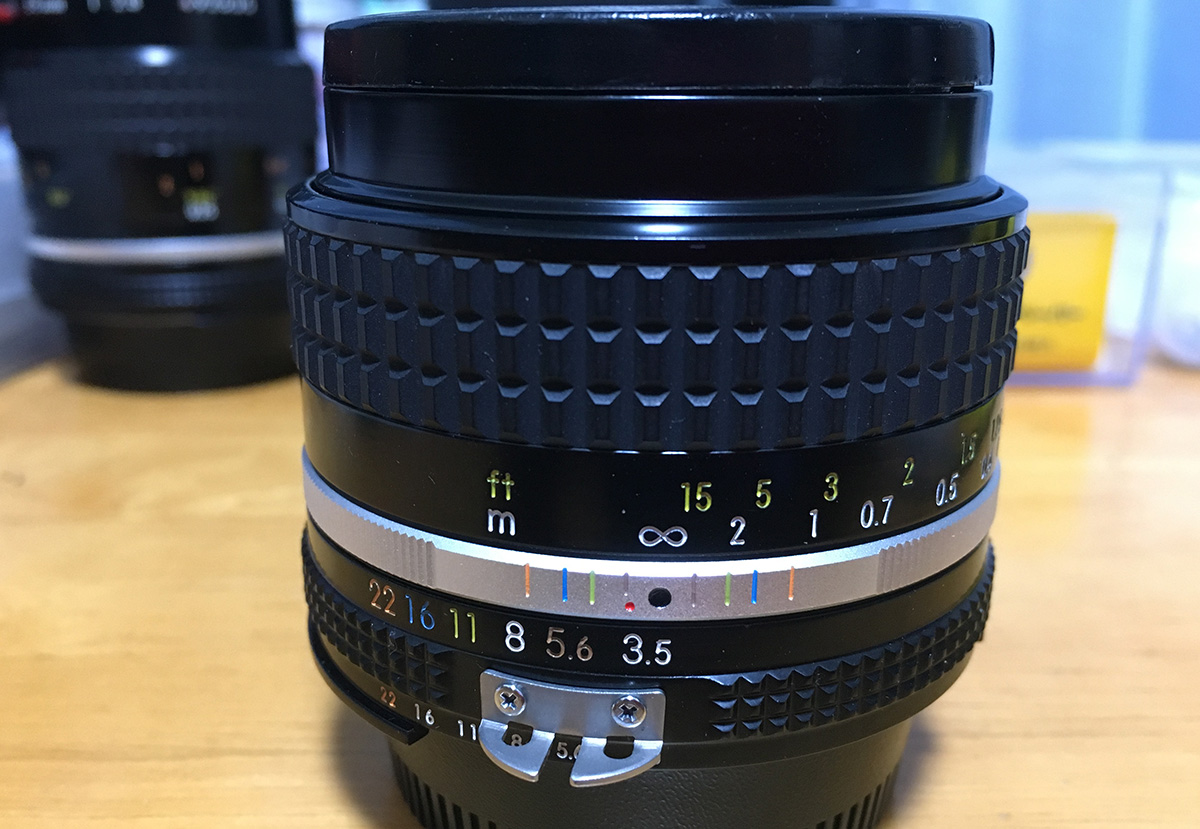
As you can see from the photo, the Nikkor 28mm f/3.5 Ai-S couldn’t focus all the way to infinity and stop at around 5ft only. That was the reason why this lens was sent in for repairs. The lens is otherwise near-mint despite having caked grease underneath the focusing and aperture rings. Its grease started to go bad so I just couldn’t let it degrade further, I’ll do a complete overhaul of the lens barrel. The optics look spotless so far and I’ll leave that alone, it doesn’t make sense to open this thing up just for fun since it’s not my lens so I will keep the repairs to a minimum if possible. Unnecessary trauma is bad for a lens so only repair what you have to.

Here it is together with the Nikkor 85mm f/2 Ai-S . One for wider shots and a telephoto for tighter framing.

Here it is with the Nikon HN-2. Some older Nikkors flare badly so contrast is sometimes quite poor. As better coatings were developed and implemented, this problem started to go away. This lens is resistant to flare even when it’s shot against the Sun but a hood will always be good just-in-case. It balances really well on small but heavy cameras like the Nikkormat EL.
Using this on older film cameras can be challenging due to the darker view that the slower f/3.5 maximum aperture gives you but it’s not that bad and you will get the hang of it really quick.
It’s important to know how your lens performs. You will know its strengths and weaknesses, this knowledge will help you determine which lens to use for an assignment. The following photos were shot from f/3.5, f/5.6 and f/8. I chose these apertures since you’ll see the most changes happen here. These are also the most common apertures that people may want to use this with, at least that’s what I assume to be. I shot these with my Nikon D3.


(click to enlarge)
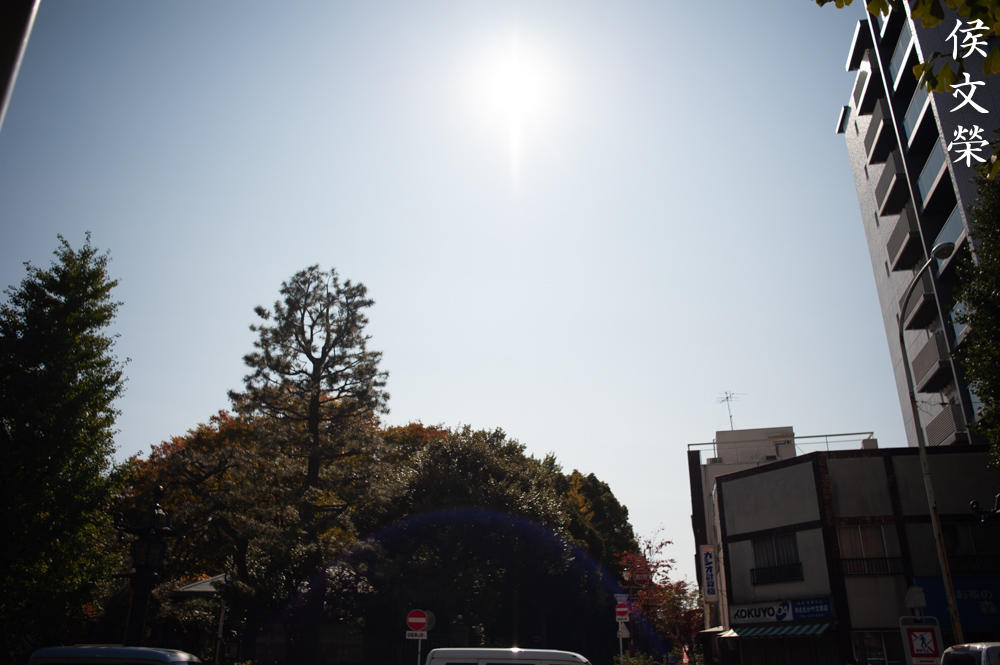
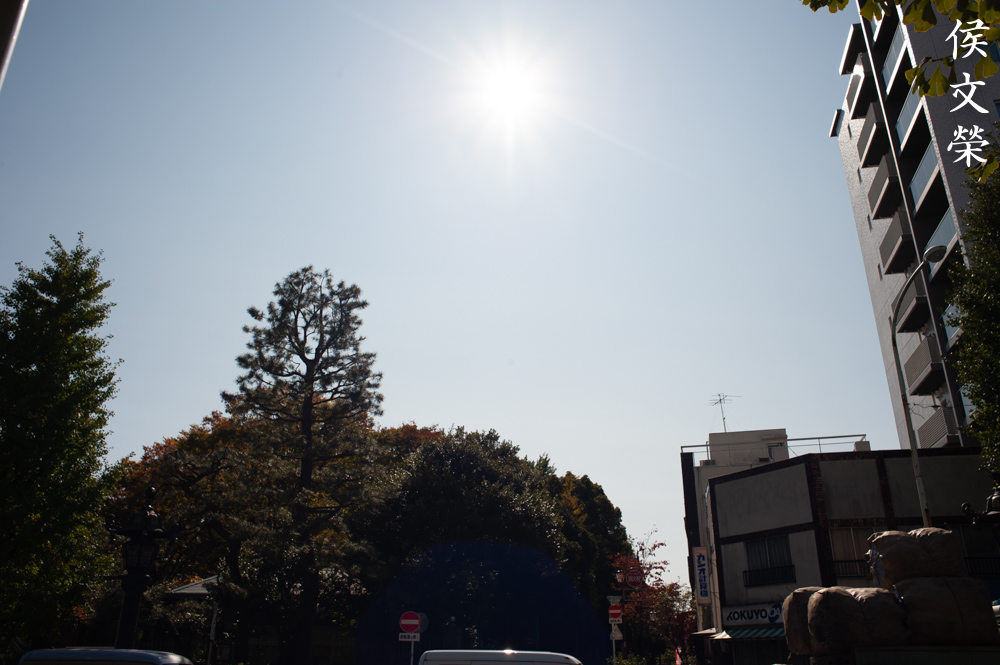
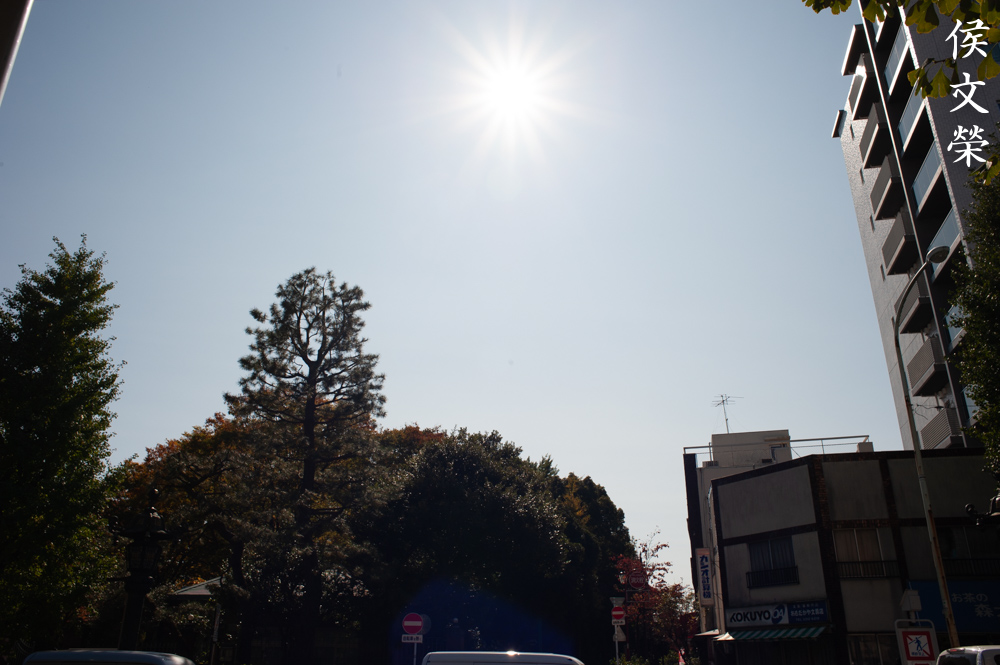
Vignetting can be seen wide-open, it cleans-up quite well by f/5.6 and you’ll not notice it by f/8. Distortion is quite high but the profile isn’t complex, it is not terrible at all and I have seen worse. Surprisingly, it is quite resistant to flare and ghosts but you will still get them under certain scenarios. You will get nice-looking sun-stars by f/8.

Distortion will make the straight lines in your scene look curved. Avoid this by not positioning any straight lines close to the edges of the frame.

Even on a rustic scene the distortion can be quite distracting. I won’t use it for shooting architecture or art.
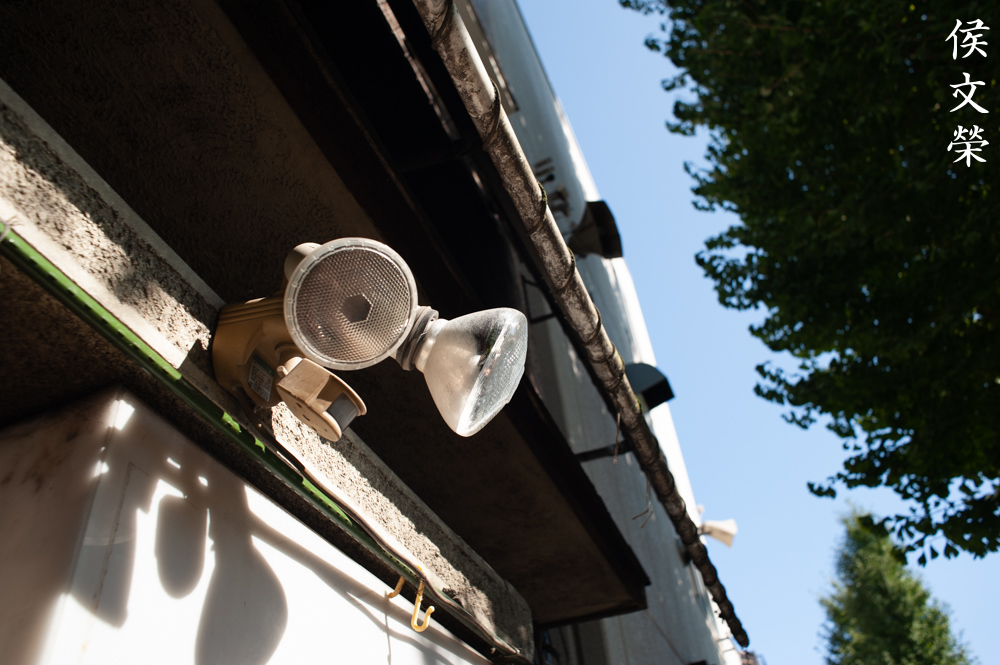
This is the worst that I could get this to exhibit flare and ghosts. This could be used to your creative advantage as an additional element.


(click to enlarge)
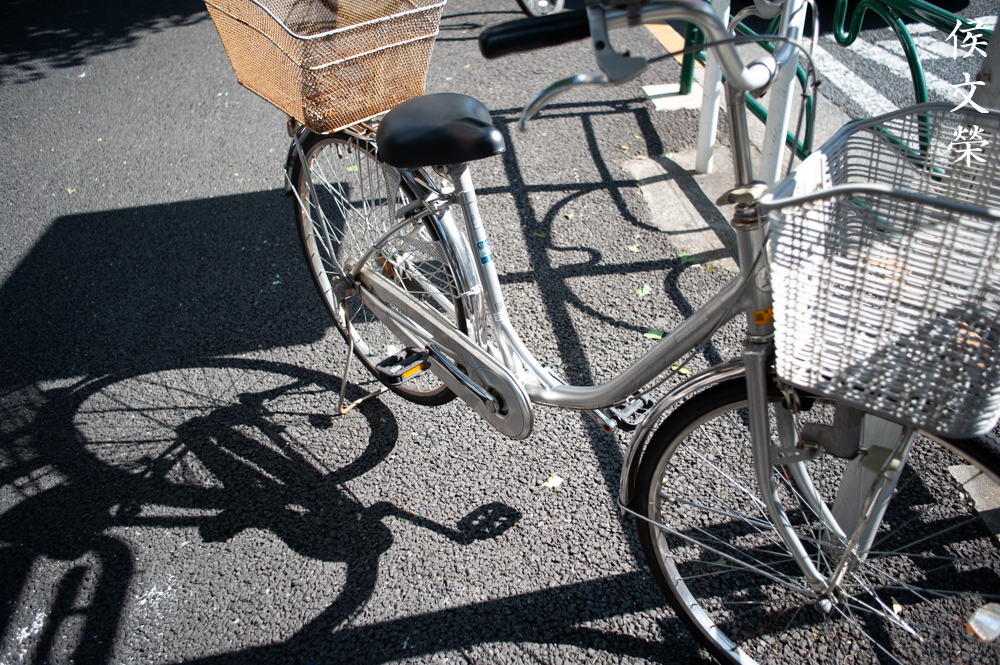
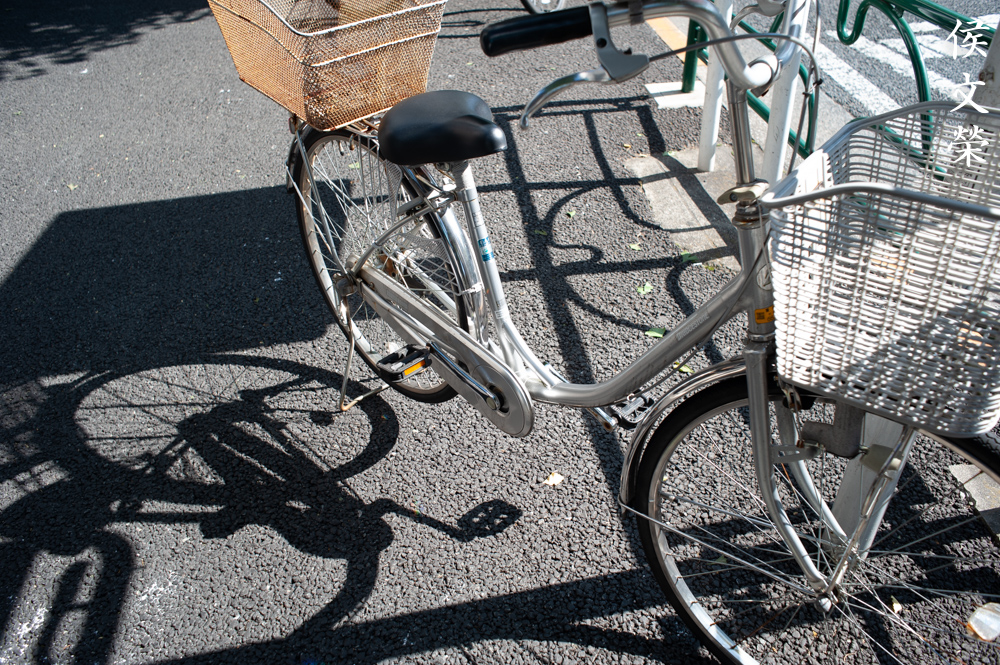
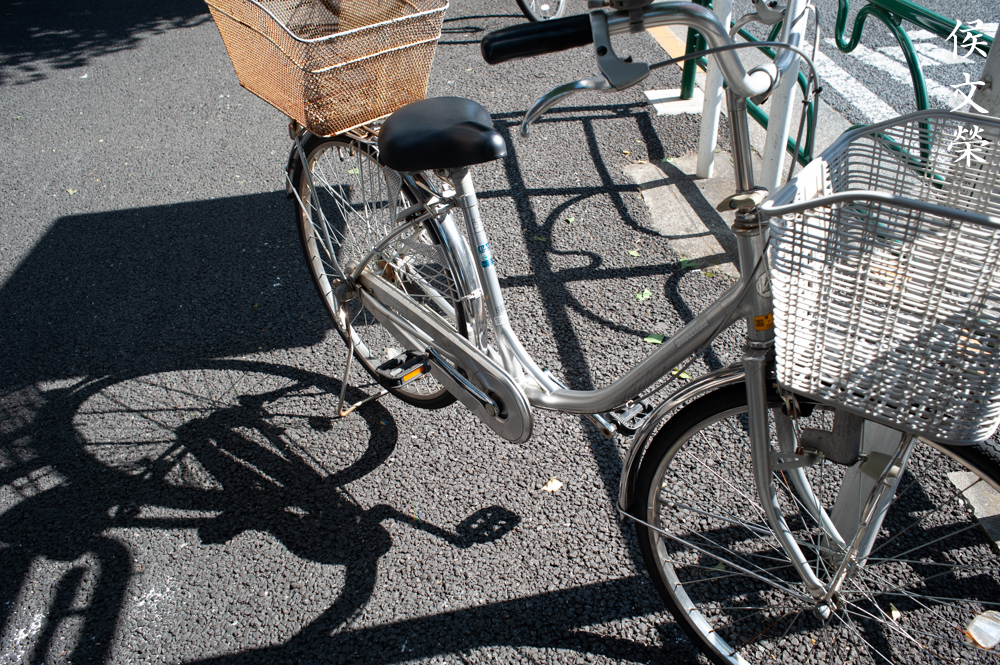
Chromatic aberration is kept-low but you could still see it in extreme cases. It’s visible wide-open in overblown areas but you won’t see much of it after stopping the iris down to f/5.6. In severe cases, you could still see it even by f/8 like in the first set. Inspect the spokes of the front wheel and you will see what I mean.
Apart from flaring you could also see some chromatic aberration here. This is an extreme case but the lens handled it quite well, I have seen worse.
(click to enlarge)
You don’t shoot this lens for its bokeh quality but it’s not bad at all. I think it has above-average bokeh quality for a wide-angle lens.


(click to enlarge)
Sharpness is quite good wide-open and resolution is adequate. The corners aren’t bad but it doesn’t look as nice as the center. Stop the iris down to f/5.6 and the center looks better thanks to the improved resolution. The center is going to get marginally better by f/8 but the corners look a lot better. This is probably the main reason why you would want to stop it down beyond f/8. I like shooting this at f/11 and use the depth-of-field scale to focus.

Focusing with the depth-of-field scale is useful but it can be tricky, too. Wide lenses are easier to pre-focus compared to a standard lens.

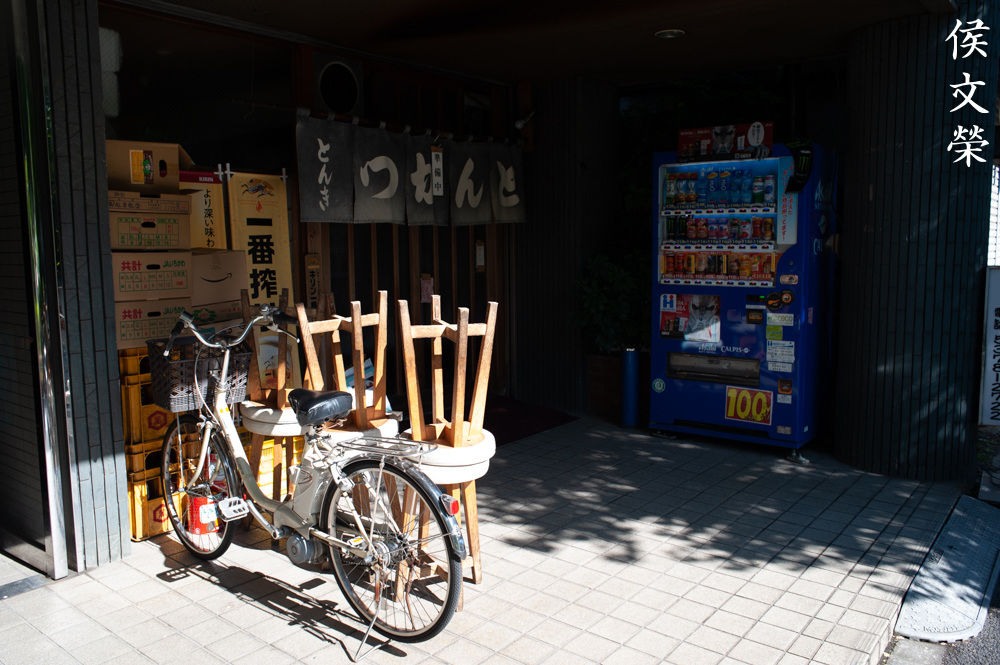
Using this for street photography means you could get more of the scene in your frame. It’s challenging since you will need to get closer to the subjects. It’s the widest lens I would use for street photography.

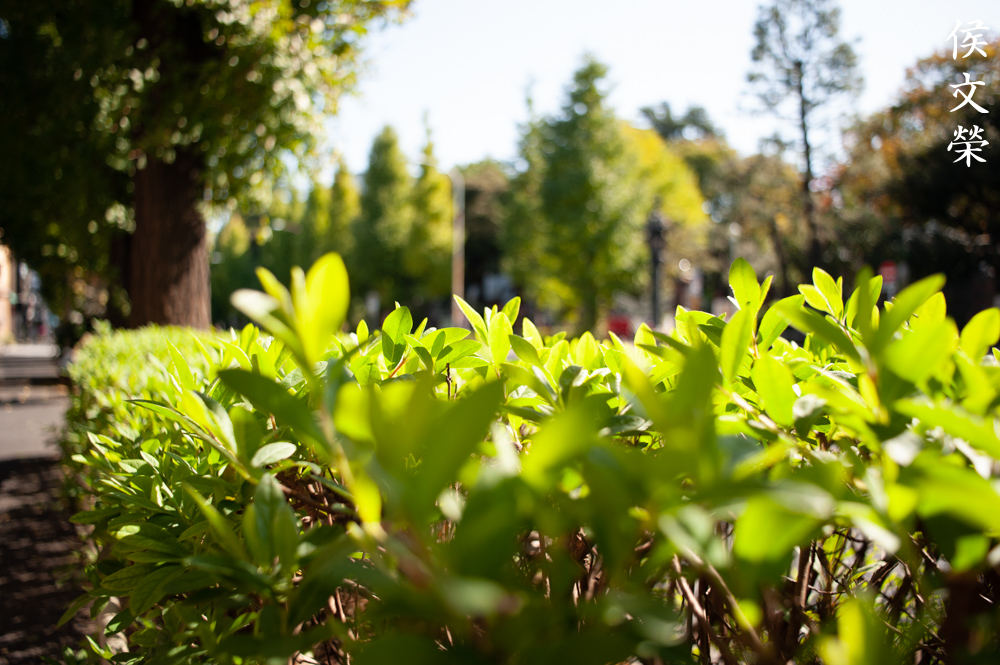
I love the contrast and saturation from this lens, this is one of its best traits. The rendering looks natural despite having a higher-than-average contrast.
Shooting it at low-light scenarios is going to be challenging since it does not have a fast maximum aperture speed. On the flip side, you could drag your shutter-speed longer since it’s a wide-angle lens.

Its best use is for travel photography so long as you have enough light. You could partner it along with the Micro-Nikkor 55mm f/2.8 Ai-S and that is all you’ll ever need.

Angle your lines so they won’t be parallel to the edges of the frame, this will help alleviate the effects of distortion in your photos. It’s still there but your eyes couldn’t see it since it’s not going to be as obvious.

When shooting architecture, angle your horizontal lines so they won’t look curved.

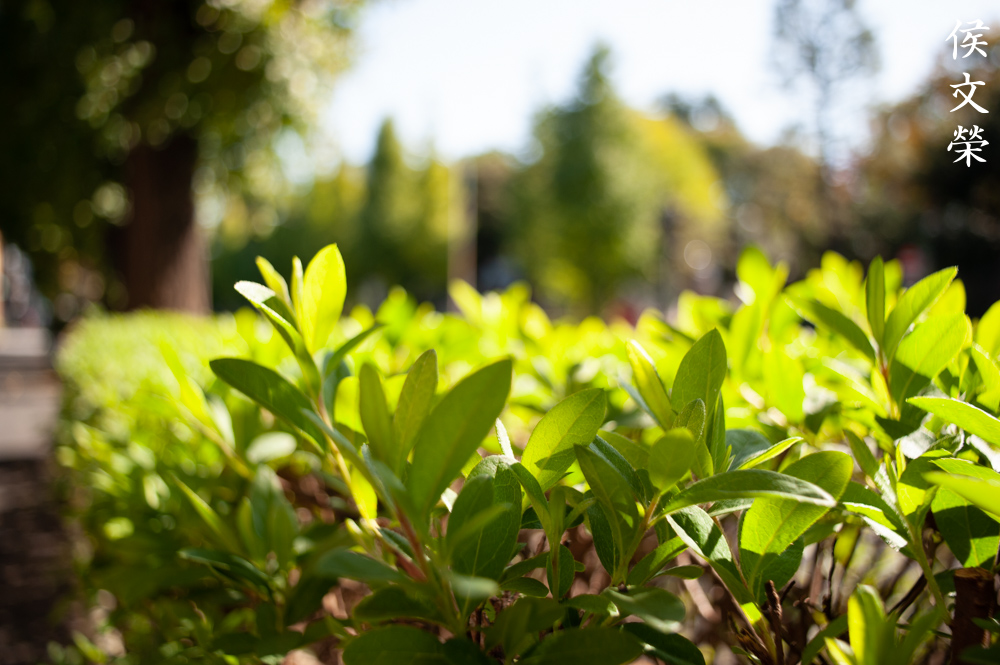
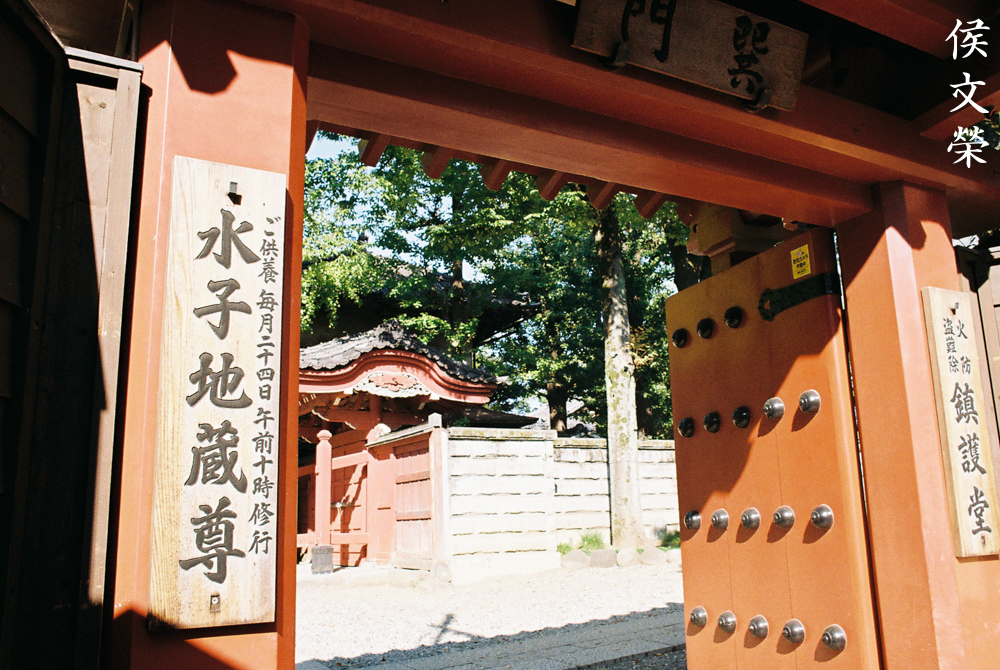
It could resolve details quite well, stop the iris down and you’re going to get some of the nicest photos you have ever taken.
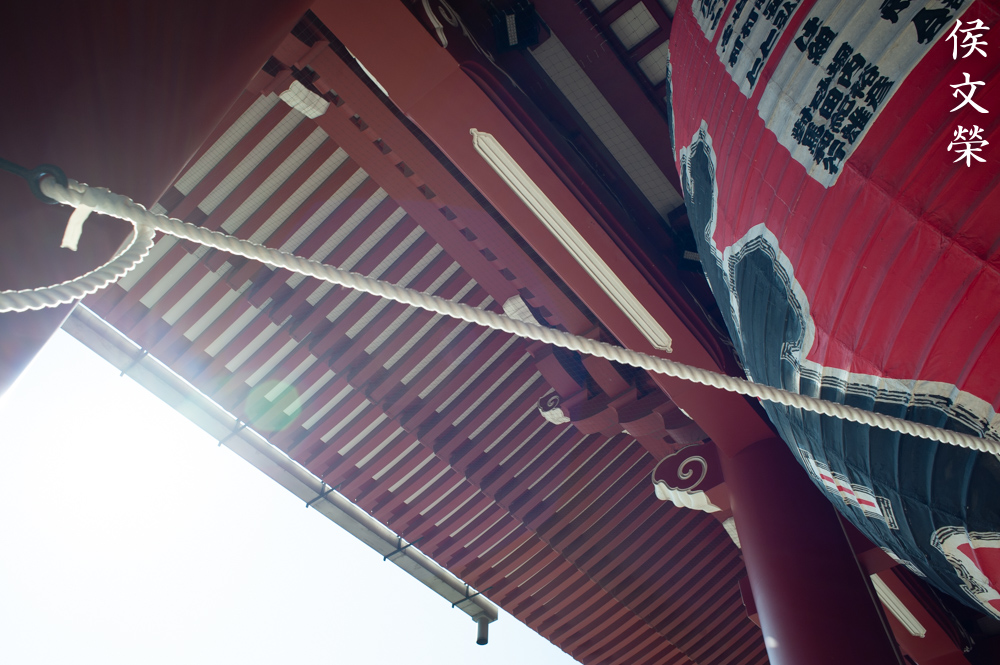
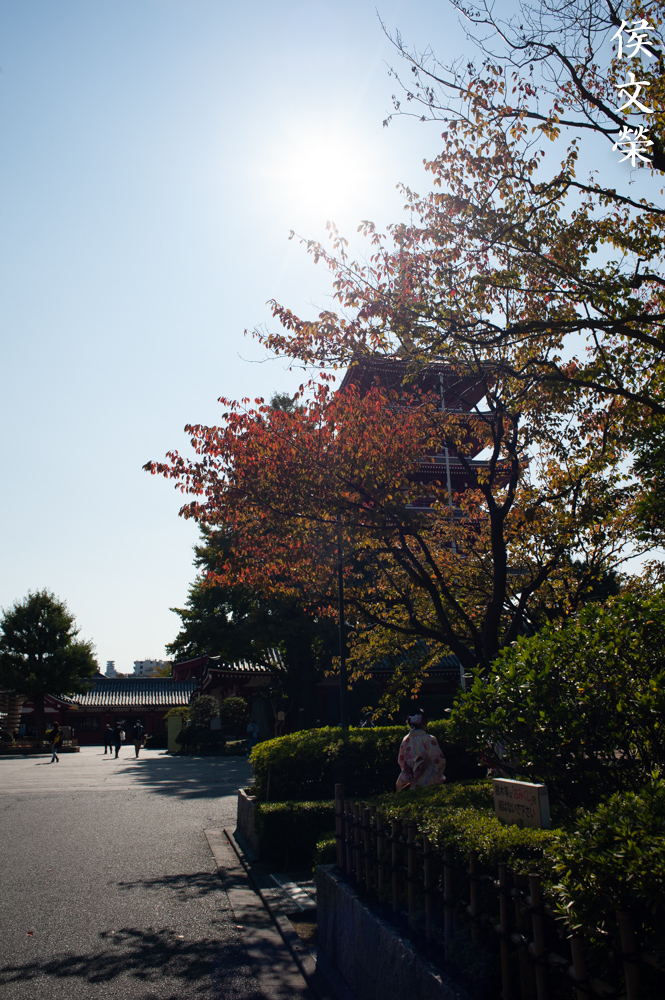
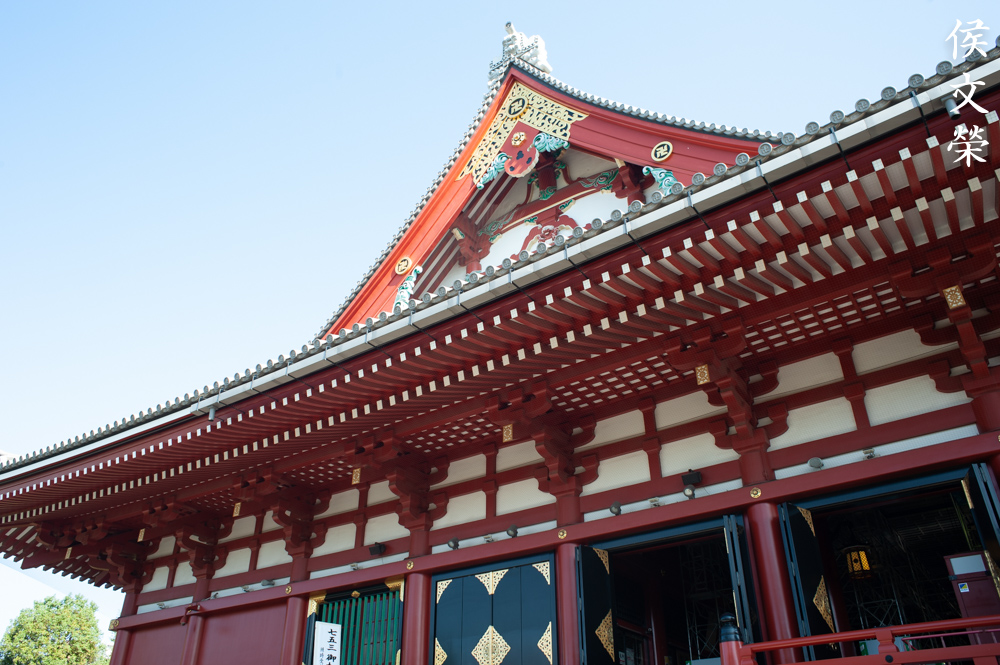
The reds look amazing, saturation is quite high without making the picture look like a caricature or cartoon.

The foliage and the overblown background could have exhibited plenty of chromatic aberration but this lens handled it pretty well.

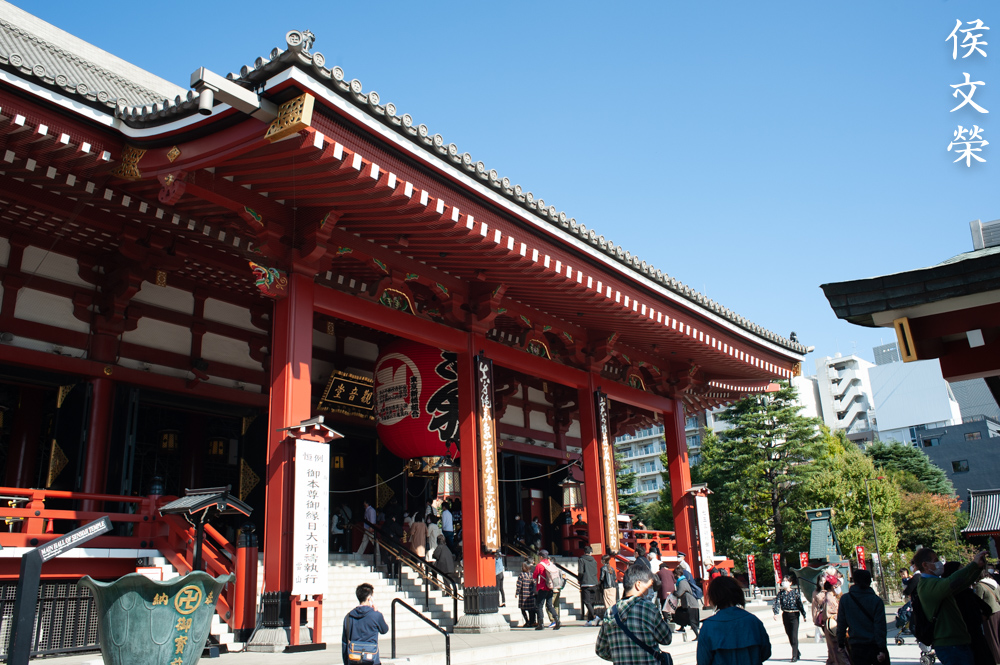
Beautiful rendering. I took plenty of photos at this temple complex for a lot of years and this is definitely one of the best photos that I took there when it came to color rendition and saturation.


(click to enlarge)
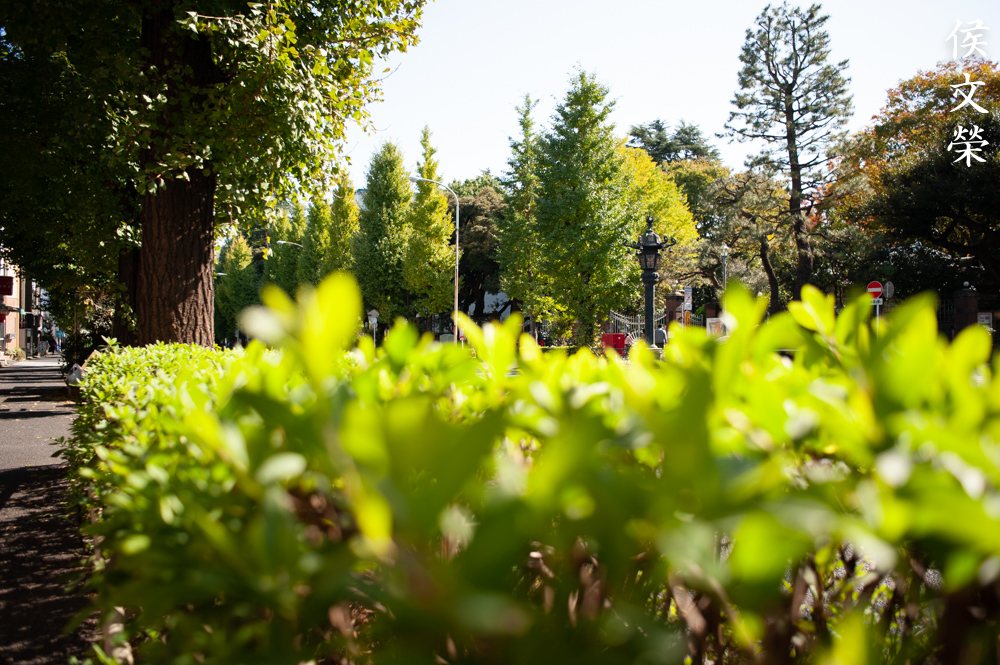
Here are more photos for you to enjoy. It’s a great lens for a variety of uses, you could even use it in-reverse for shooting high-magnification photos. It’s one of my favorite lenses and these photos should show you why.
Let’s now see some photos that were shot with film. People try to simulate it with digital cameras but found it difficult because grain acts differently. It’s reaction to light differs from that of a sensor, too. This lens was made to be used with film so it’s only fair that we judge it using its intended medium.


(click to enlarge)
Here are 2 beautiful photos shot with Fujifilm Provia 100 slide film. I really love Provia but It’s not cheap so I only shoot with it occasionally. It’s able to compliment the film’s fine grain thanks to its resolving power.

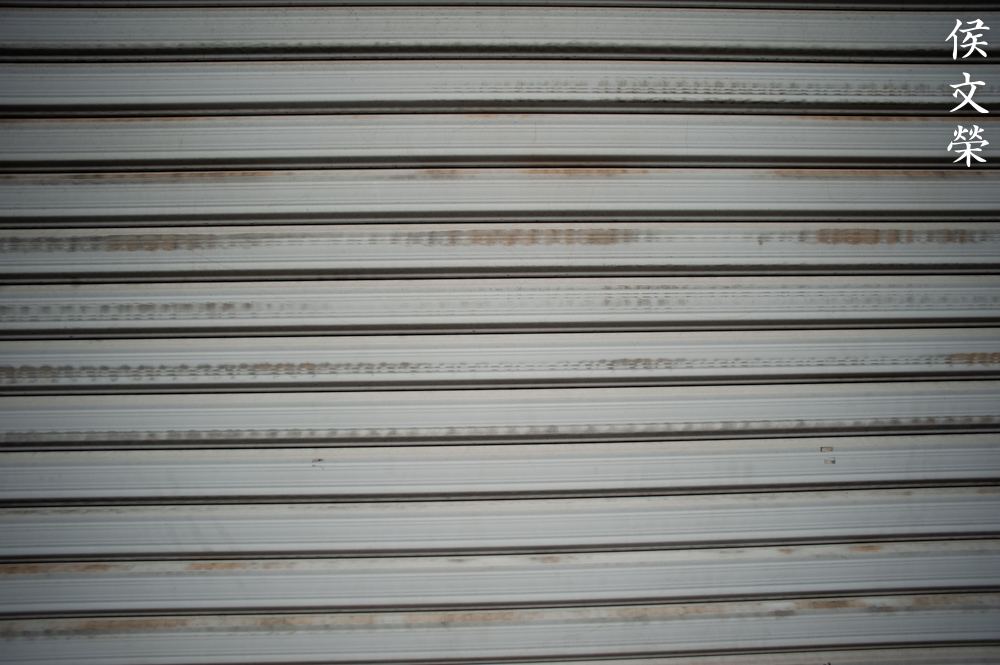
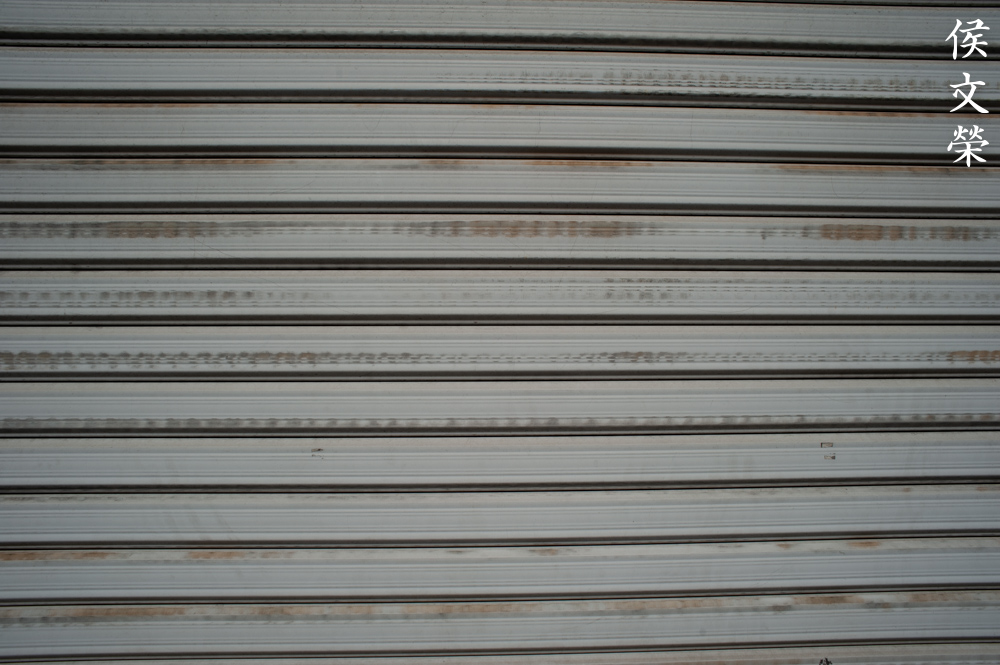
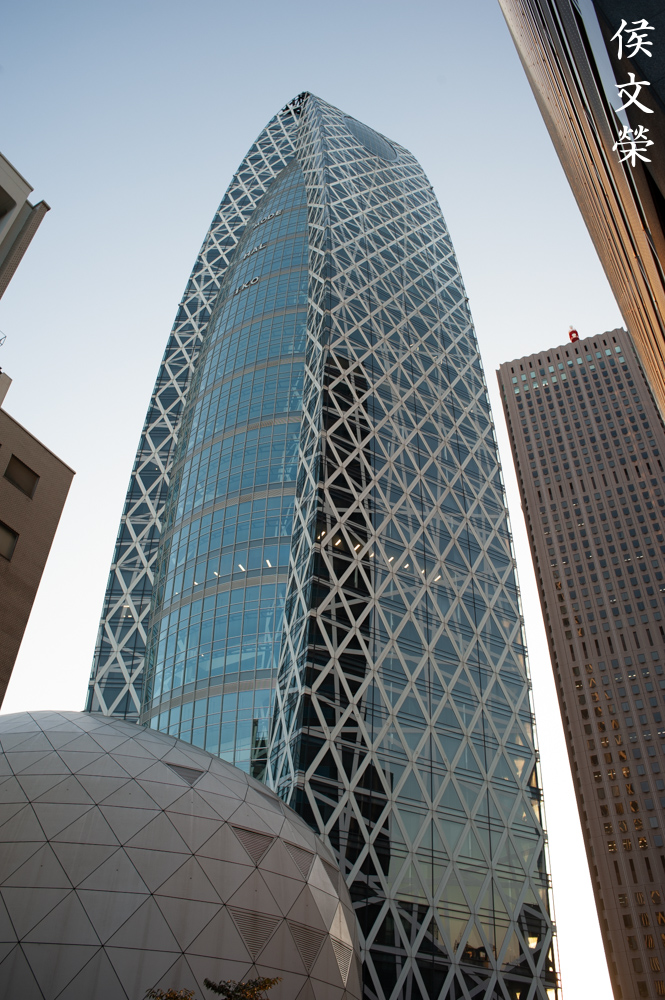
Distortion is observable at the top-edge, the tablet and beam looks bent.

The screens were resolved quite well, you could see every detail.

This is a great lens for travel photography, this may be the only lens you will ever need in case you want to travel light.
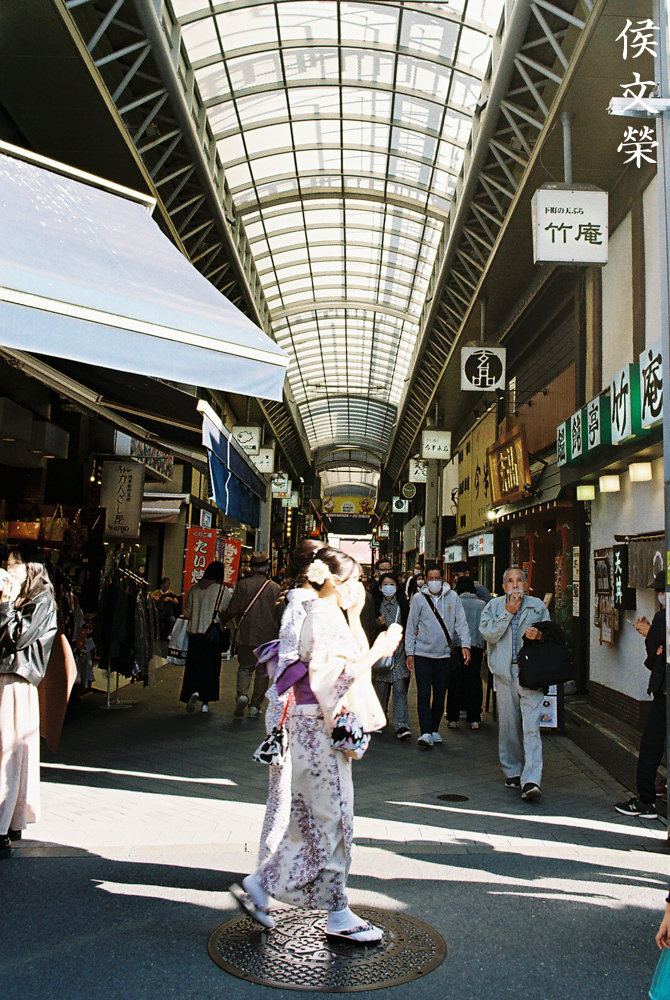
This is the widest lens I would use for street photography, any wider than it and it just won’t feel right at all.


(Click to enlarge)
This is very versatile, you can use this as a walk-around lens. if I were given an option to only choose one lens when I travel to a dangerous country, this will be on top of my list.
I highly recommend it to anyone who wants a compact 28mm lens. You will enjoy it a lot for its high-contrast photos and great performance. However, I will also recommend the amazing Nikkor 28mm f/2.8 Ai which is even better in nearly-everything. The former is cheaper these days so it makes no sense to buy the slower lens now unlike 40 years ago when these were still sold at higher prices. The Nikkor 28mm f/2.8 Ai-S is another one I could recommend but I prefer the Nikkor 28mm f/2.8 Ai over it. Choosing which is best isn’t the easiest choice to make because they all have their strengths and weaknesses so just read my articles and follow your intuition. Skip the Nikon 28mm f/2.8 Series-E as I don’t think it compares to any of its Nikkor equivalents. If your heart is bent on buying this lens, make sure that the iris is dry. It needs to be snappy as you actuate it. This lens is prone to the oily iris problem, that’s its only issue as far as I know. Happy shopping.
Before We Begin:
If this is your first attempt at repairing a lens then I suggest that you check my previous posts regarding screws & drivers, grease and other things. Also read what I wrote about the tools that you’ll need to fix your Nikkors.
I suggest that you read these primers before you begin (for beginners):
Reading these primers should lessen the chance of ruining your lens if you are a novice. Before opening up any lens, always look for other people who have done so in Youtube or the internet. Information is scarce, vague and scattered (that is why I started this) but you can still find some information if you search carefully.
I highly recommend that you read my working with helicoids post because this is very important and getting it wrong can ruin your day. If I can force you to read this, I would. It is that important!
For more advanced topics, you can read my fungus removal post as a start. This post has a lot of useful information and it will be beneficial for you to read this.
Disassembly (Lens Barrel):
This lens is pretty basic. It has a lot in common with the Nikkor 85mm f/2 Ai-S when it comes to the lens barrel. It can get really tricky because there are two helicoid keys and you should align them properly. If you got it the other way around then the lens will not focus properly and you will have to open it up again. Just take lots of notes and don’t forget to take pictures and you’ll be fine. If you don’t have the proper tools then please stop now! Don’t work on this lens until you have acquired the right tools and skills. Practice on an inexpensive lens from another brand first.

Focus the the lens to its minimum focusing distance to reveal this set screw. Unscrew the thing carefully and store it somewhere safe so it won’t get lost.
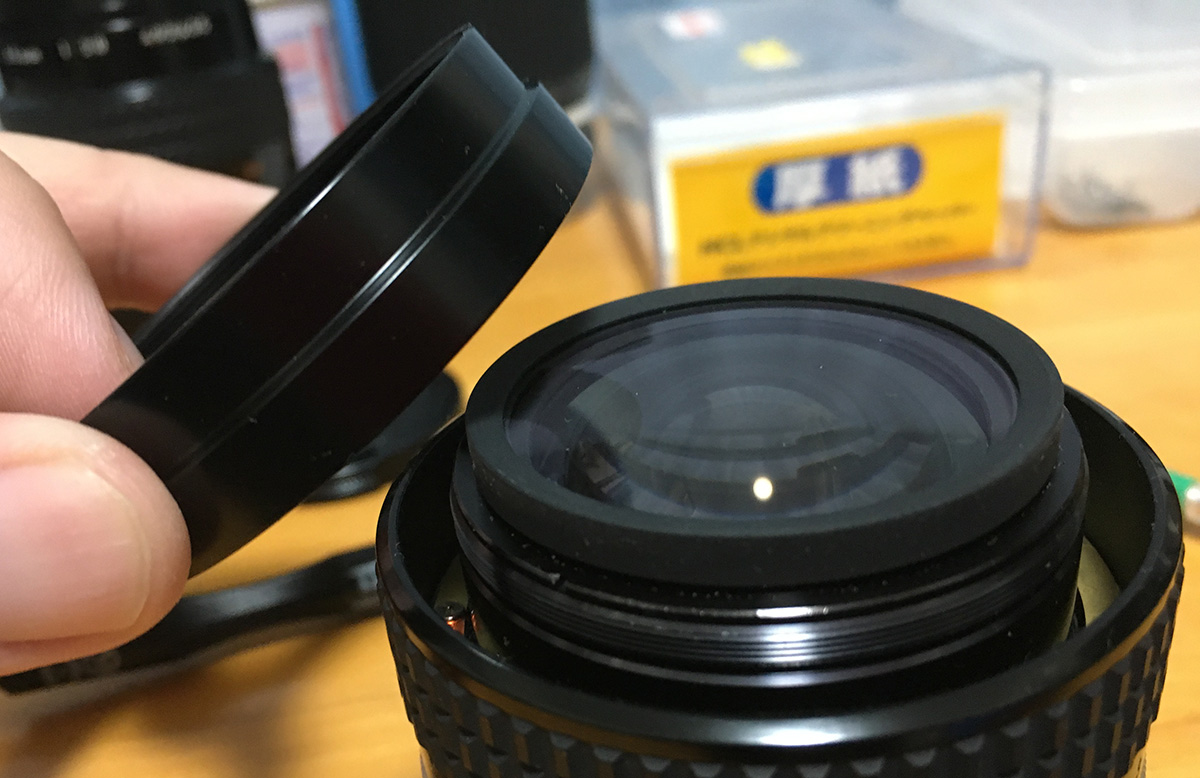
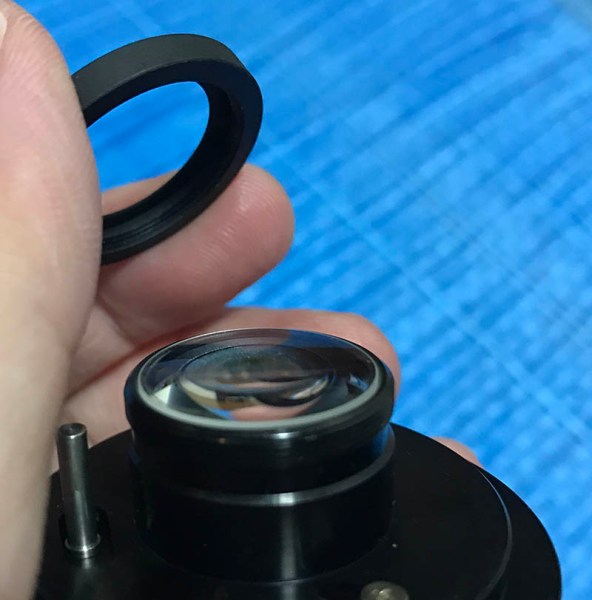
You can now unscrew the front barrel. It can’t be remove unless the screw is gone because it secures the ring by sinking into the thread through a hole that was drilled using a pin vice, a Dremel would have been too powerful.

Extract these from the bayonet plate. If they won’t come off, place a drop of solvent and wait for it to work before you try to remove them again. If you haven’t read my article on removing bayonet screws please stop and read it now. Many people get stuck because they stripped their screws, reading my article will help you prevent this from happening.

The bayonet should come off rather easily since there are no springs or any mechanisms that are connected to it.

The aperture ring comes off just like this and is not screwed to the aperture fork inside. It is good that I got to work on this before it got worse, just look at that caked grease on the chrome. It is a sign that the grease is starting to go bad. In fact, the helicoids felt a bit dry.

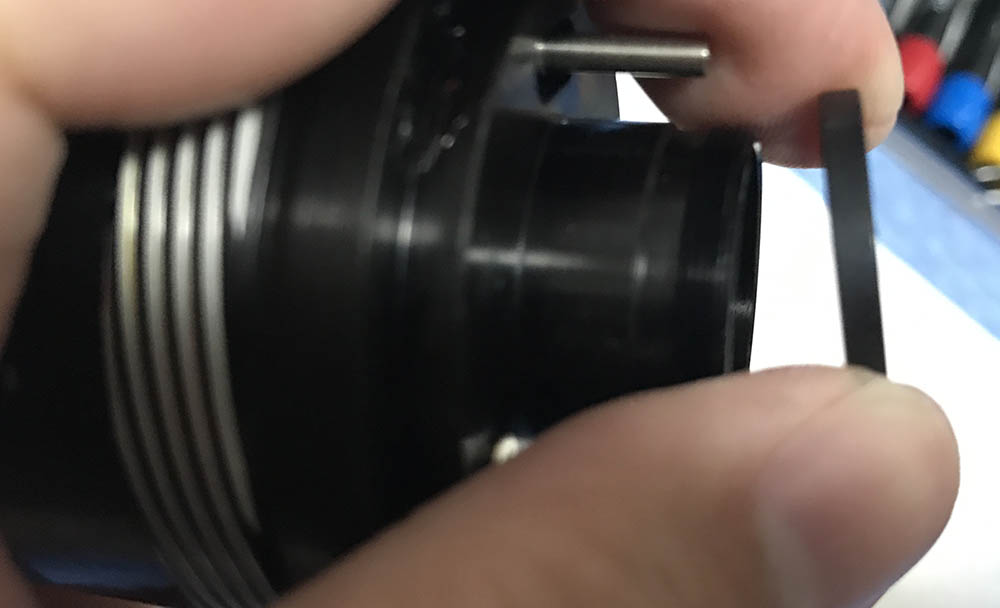
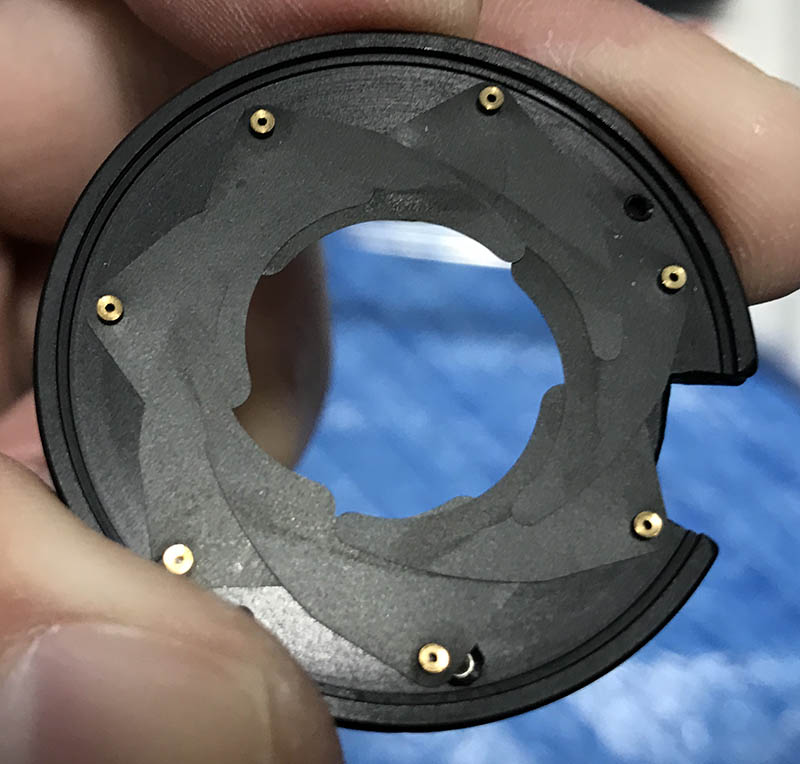
Carefully remove this ring. This is what couples the aperture ring to the iris mechanism in the objective’s housing. It restricts the movement of the lever that controls how much the iris should open-up. Never lubricate this part, it operate without any lubrication.
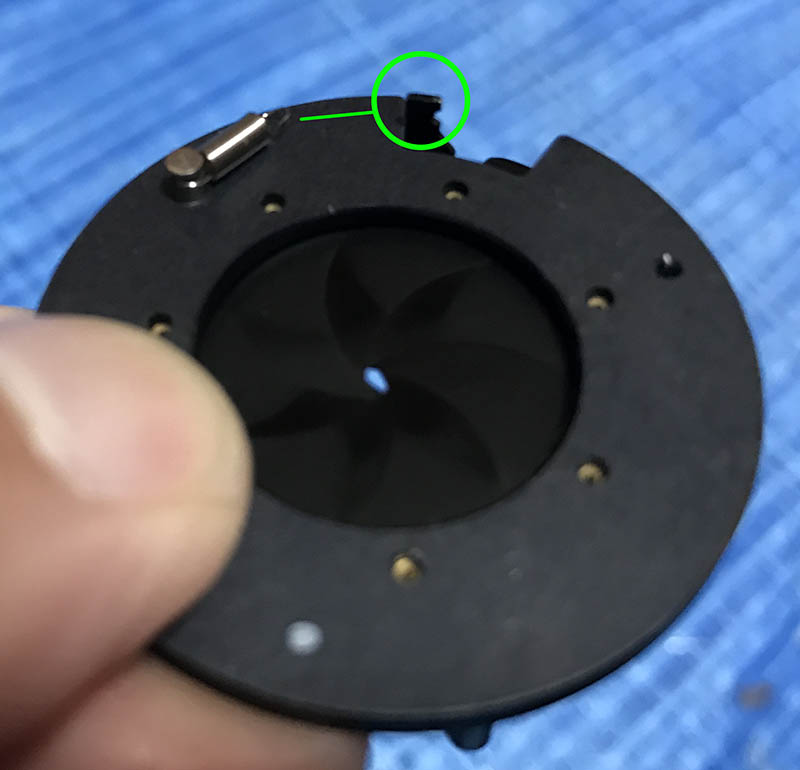
See that screw that I encircled? That screw should not even be there, it did not come-off from any of the parts inside the lens and there is not way this thing could have come from outside since it is too big.
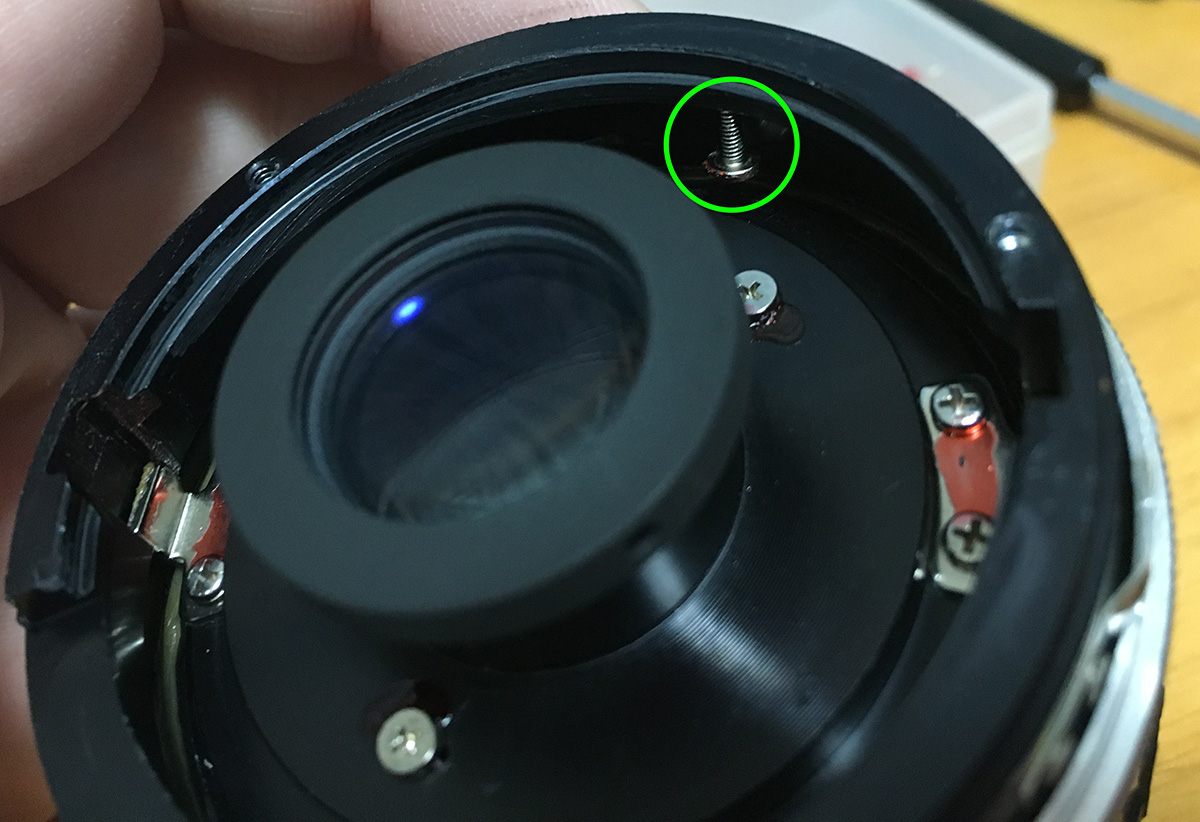
This rogue screw is what’s keeping this lens from focusing to infinity. It is in the way of the objective’s housing’s path and the lens will not collapse to its shortest length. Its size is a hint that it belongs to a bigger lens, it is possible that this got there by accident in a workshop somewhere.

The helicoids has two keys to keep it synced, extract their screws to remove the keys, be sure to mark which one should go where because the keys were broken-in to their slots, it’s best that they should be reinstalled back to their respective slots to ensure their smooth operation.

Before I removed the keys I focused the lens all the way to infinity and took the time to document their positions for reference so I’ll know how high the keys should be as a guide. It’s easy to get confused and swap the position of the keys because there are two of them instead of the usual one.

Extract these screws to remove the focusing ring. These hold that brass ring into place, the ring acts like a pressure plate to hold the focusing ring down.

It wasn’t glued so you shouldn’t have any trouble. Notice that I have made a few shallow scratches to indicate how things should align with the infinity dot at the chrome ring. These marks are more than adequate to inform me about their alignment when the barrel is set to infinity.

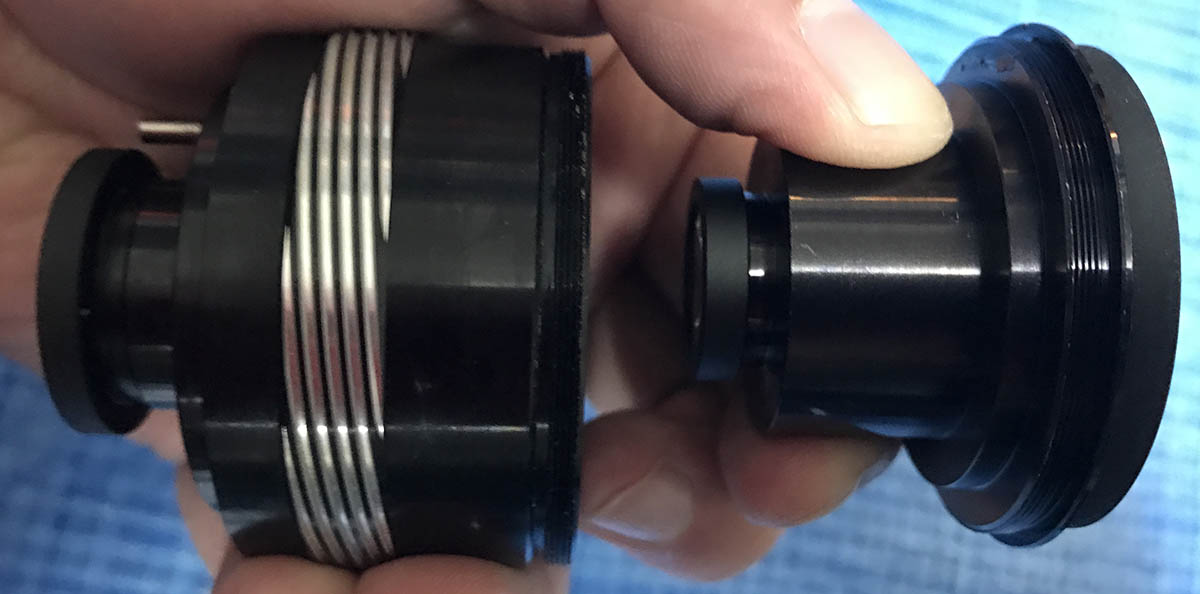
It’s time to separate the helicoids, do not forget to mark where the helicoids separate so you’ll know where they should mate later when you reassemble them. Check my article on working with helicoids so you won’t get stuck. It’s important to do this since many people get stuck here.

Same with the outer helicoid, don’t forget to mark the position where these separated. For this, I even added another one to indicate how high it should be when it’s seated properly (at infinity).
This lens is annoying because the inner helicoid is milled into the objective’s casing. This also makes the objective prone to oil contamination. In fact, this one is close to having its optics contaminated. It’s a good thing that I got to it just in time. Clean everything thoroughly and apply a thicker type of grease because it has a short focus throw. This will help you focus with it precisely. Don’t forget to remove any residue before you apply a fresh coat so the new grease won’t get contaminated. Do not apply too much, a thin film is enough to make it smooth. Excessive grease will only create a mess.
Disassembly (Objective):
I mentioned that the optics looked clean but I am going to show you another lens that wasn’t so lucky since it was dripping with oil when I got it. It was a pain so I decided to take the whole thing apart except for the front elements assembly.
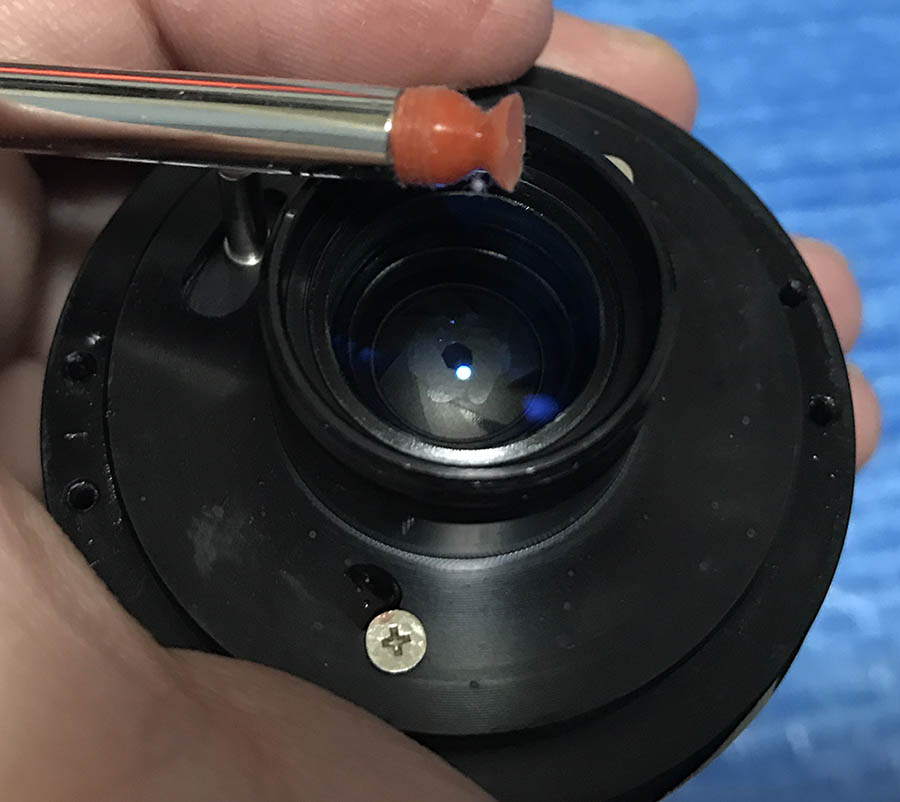
After cleaning the helicoid threads properly, I unscrewed the front elements assembly off. I then placed it somewhere safe and made sure that it doesn’t roll-off the table.
Unscrew the retention ring with your fingers, be sure that the rear element is facing up. This retention ring is what keeps it in place, without it, the rear element will fall to the ground.
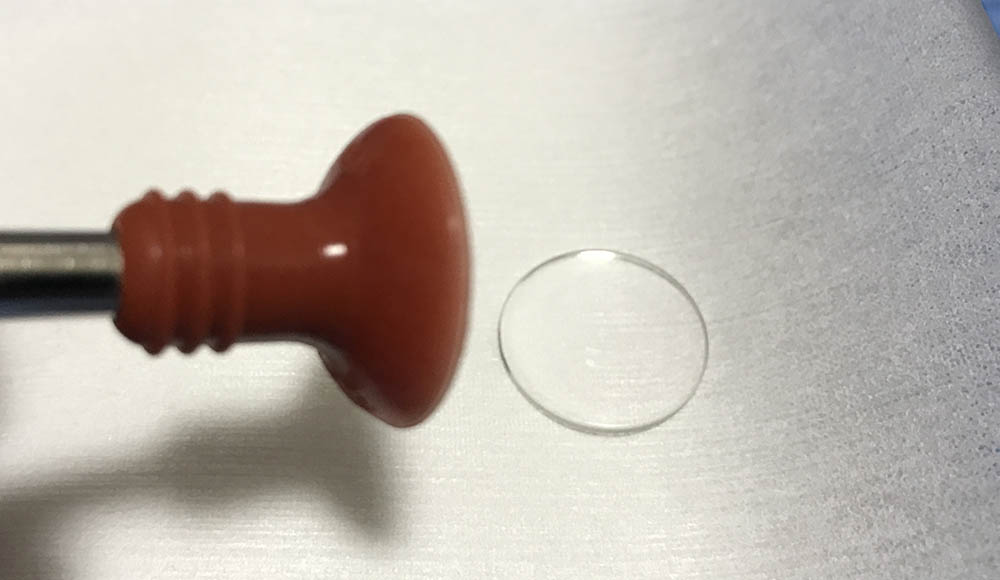
Use a lens sucker to remove the rear element safely and be sure to mark the leading edge with a dot using a Sharpie. The mark does not have to be big so long as you know which way faces the front. I do this for all of the elements unless it’s obvious to me which way an element should be facing. I gave it a code by drawing small dots that correspond to the element’s position. As an example, the 4th elements will have 4 small dots marked on its wall.
You can continue by removing this spacer that is placed in-between the rear and the 5th element. Be sure to mark which side should be facing the front because if you get this wrong you’ll end up with a cracked element because the pressure from the incorrectly-mounted spacer will damage the glass.
Use a lens sucker to remove the 5th and then the 4th element, don’t forget to mark their element numbers and directions with a Sharpie.
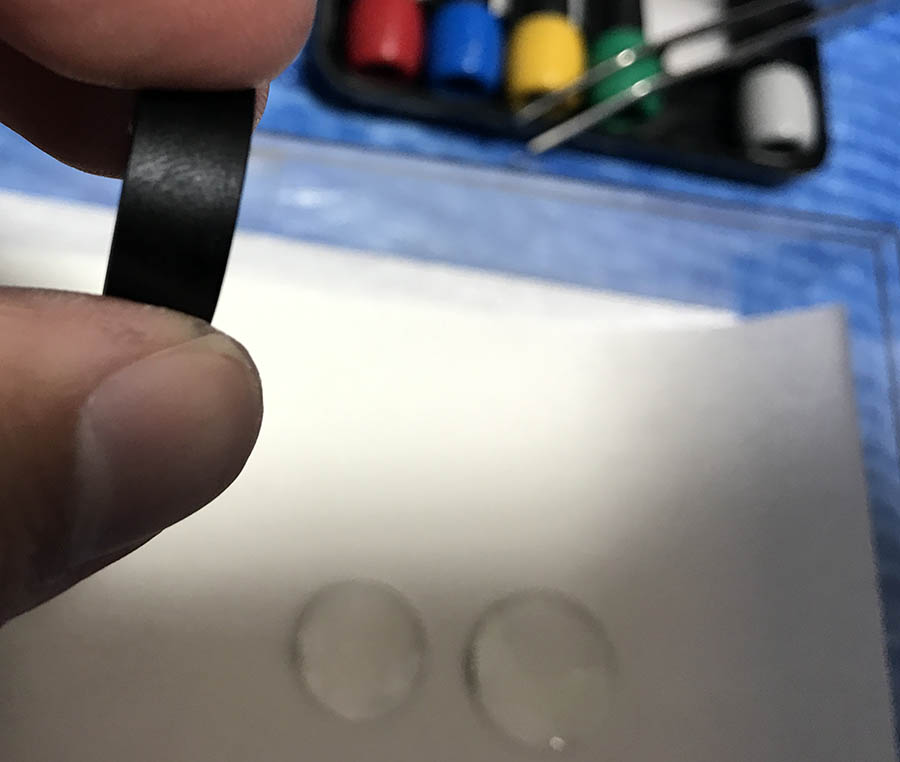
Here is the 4th element. Notice that it looks ambiguous so you should mark its direction. The 4th element was also drenched in oil, I had to wipe it clean with lighter fluid and lens tissue.
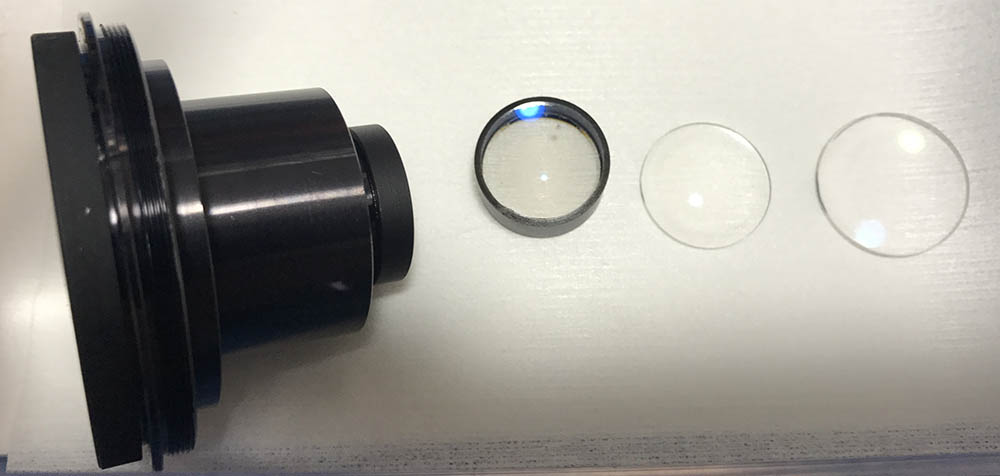
Here are the lens elements placed in their proper order. They’ll be cleaned properly. I also made sure that they are dust-free before I install these back to their casing.
That’s it for the objective. Only service what you need and do not open what is clean just for the sake of fun. If your lens has fungus, follow my article on how to remove lens fungus but do not use the chemicals at full-strength. Use distilled water to thin the solution, the coatings and glass could be damaged if the solution is too-strong or you left them soaking for long.
Disassembly (Iris Mechanism):
The iris was soaked in oil, this affects exposure because the iris is sticking to itself. This is a common problem with this lens since the helicoids are closer to the iris mechanism compared with other lenses.
Before you disassemble the iris mechanism, be sure that you took plenty of notes or take a few pictures as reference.
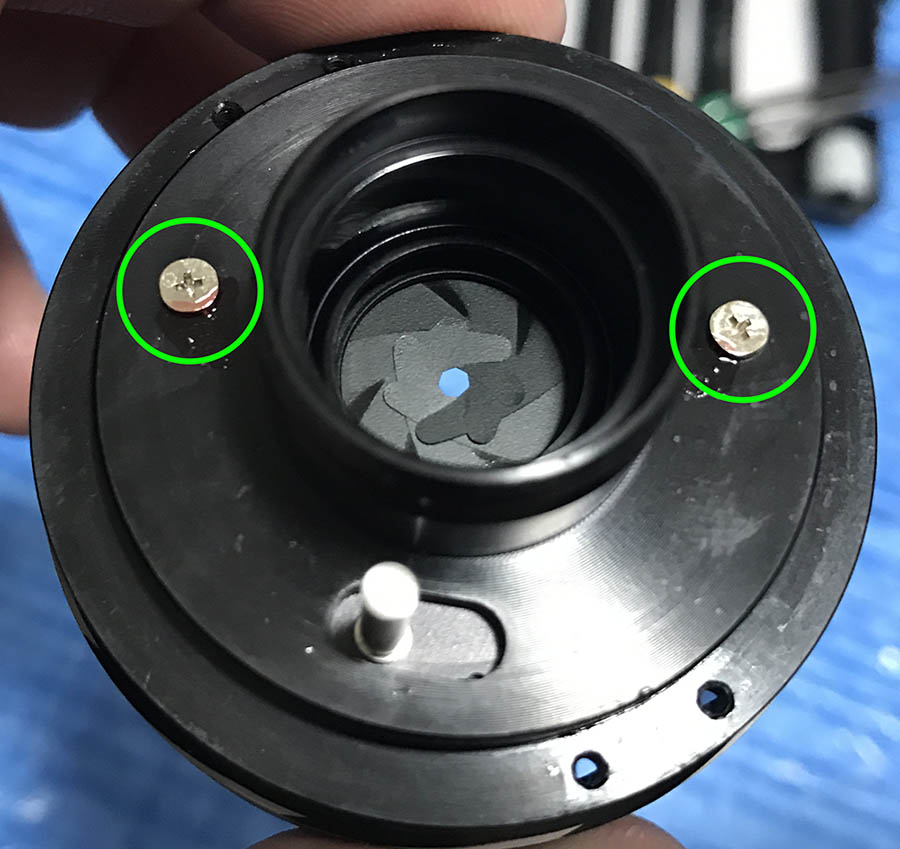
Extract these. This will free the iris assembly from the objective’s casing and be careful not to drop the iris mechanism. Before you remove these, be sure that you took the position of the iris mechanism earlier since it’s adjustable. Putting this back incorrectly will lead to wrong exposure settings.
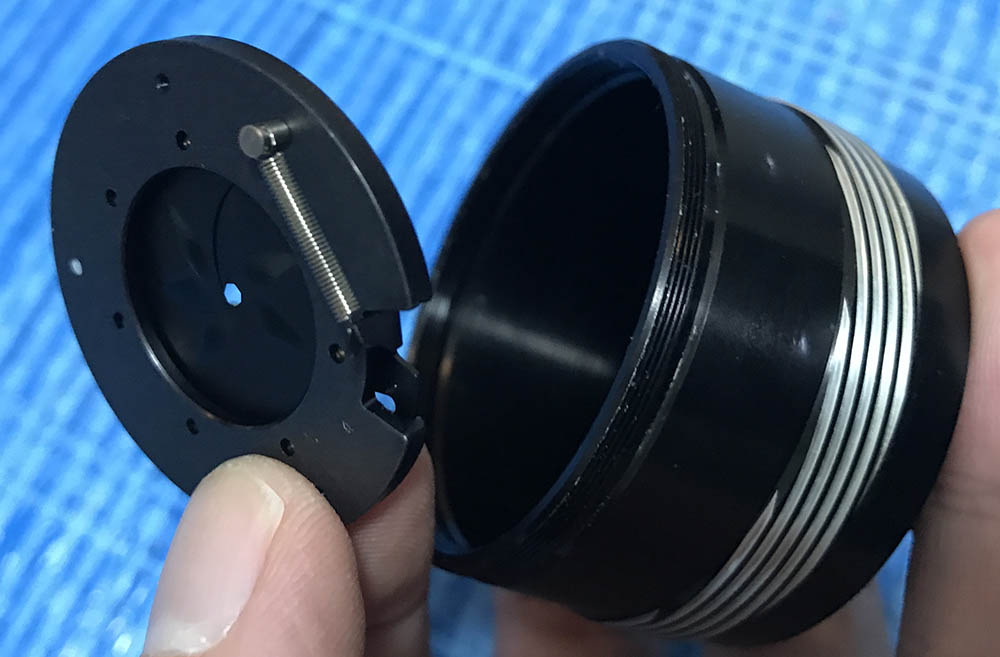
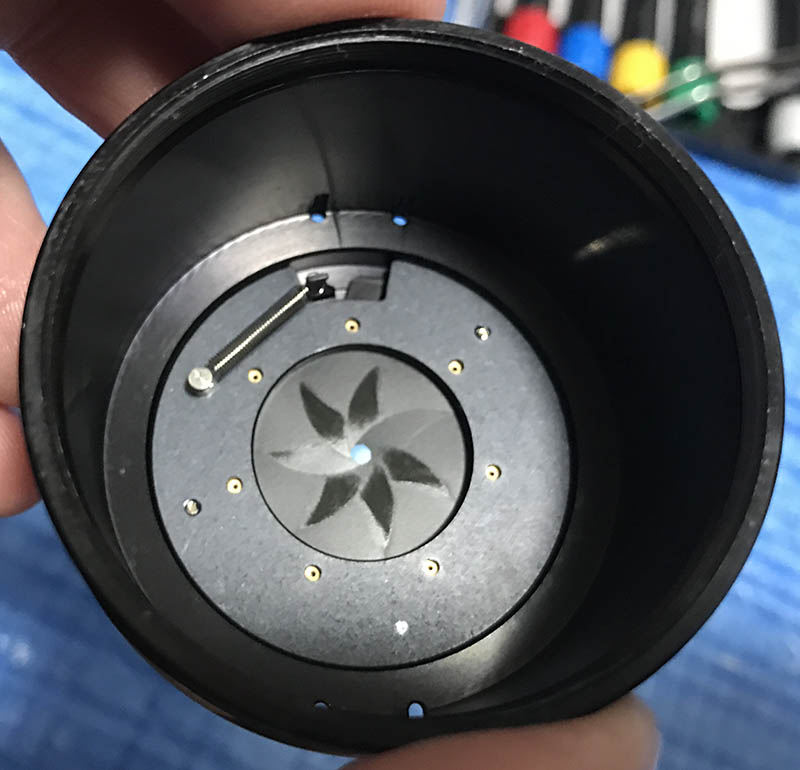
Carefully pick the iris assembly with a pair of tweezers while being careful not to touch any of the blades in the iris itself. These are delicately thin and they will warp easily.
It’s good that the iris assembly can be removed as a unit, that makes it a lot easier but before you go further you have to decouple this end of the spring from a hook that can be found in the rotator plate. Use a nice pair of sharp tweezers and be careful not to ruin it.
Now that the spring is detached from the rotator plate, you can now remove it safely. Notice that the iris blades were kept in place by the oil and without the oil, the blades will drop to the floor so open it like this to prevent it from happening.
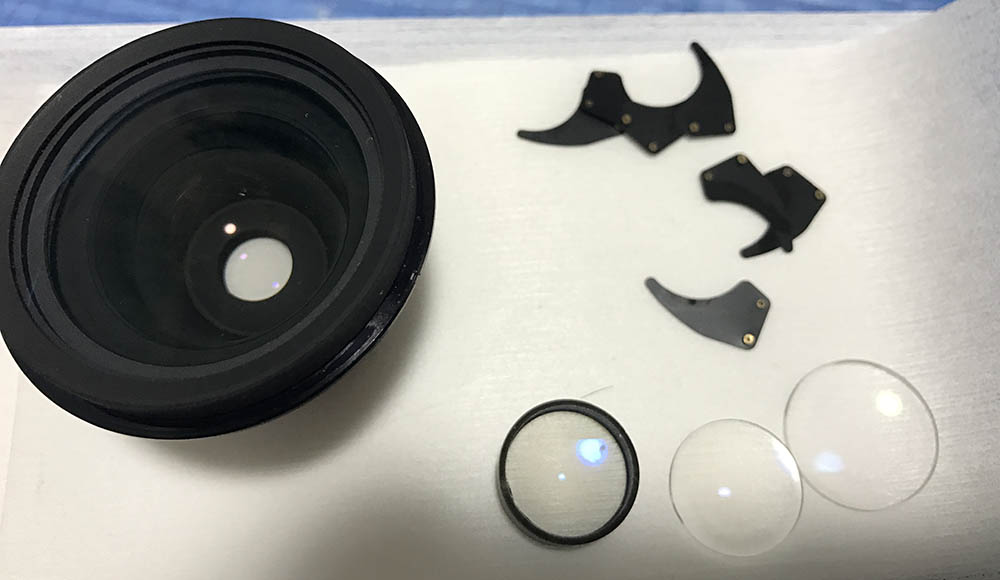
The oily blades were dropped into a clean sheet of tissue to cushion the fall. They are going to be wiped clean using lens tissue and lighter fluid.
Clean everything really well and reassemble the iris carefully. Never oil the iris because it should operate dry. When handling the blades, only hold the base of the blades using a pair of tweezers.
Conclusion:
If you have been following my blog then you’ll note the similarities between this thing’s construction and that of the Nikkor 85mm f/2 Ai-S‘s. These lenses were made around the same era so they share a lot in common. Will this be a good project for a beginner? Maybe not. You’ll have to be repairing lenses a bit longer than that before you attempt this. You may not get the helicoids right or strip the screws.
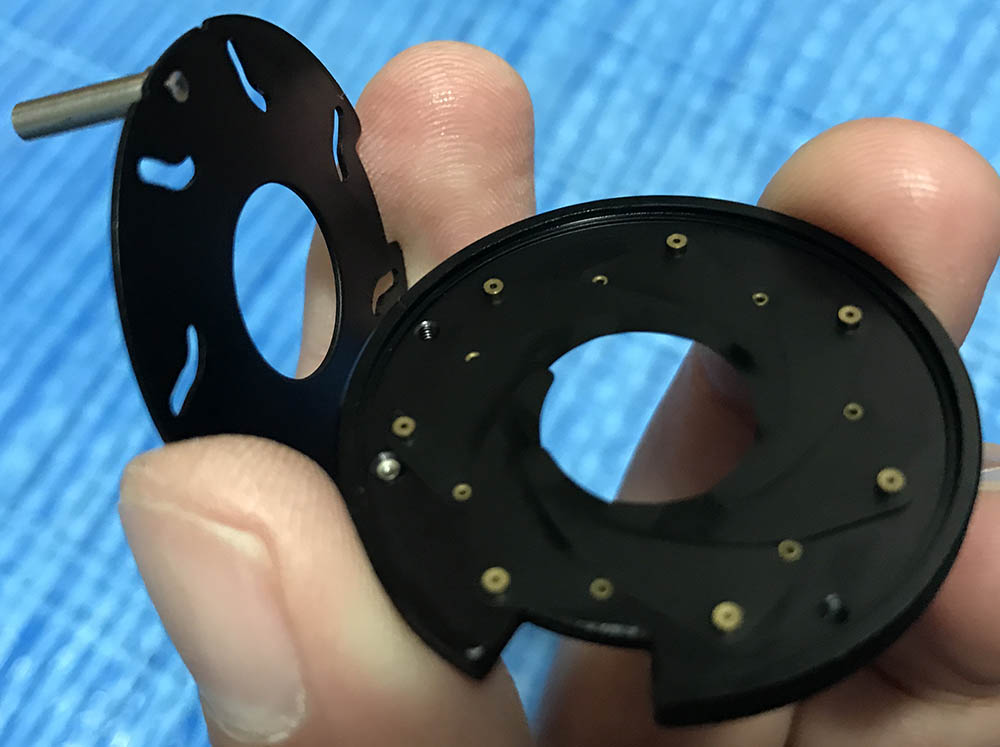
After a thorough cleaning, the blades were put back into the casing. As you can see, the oil left permanent marks on some blades. This is just cosmetic, it will not affect the performance of the iris in any way.
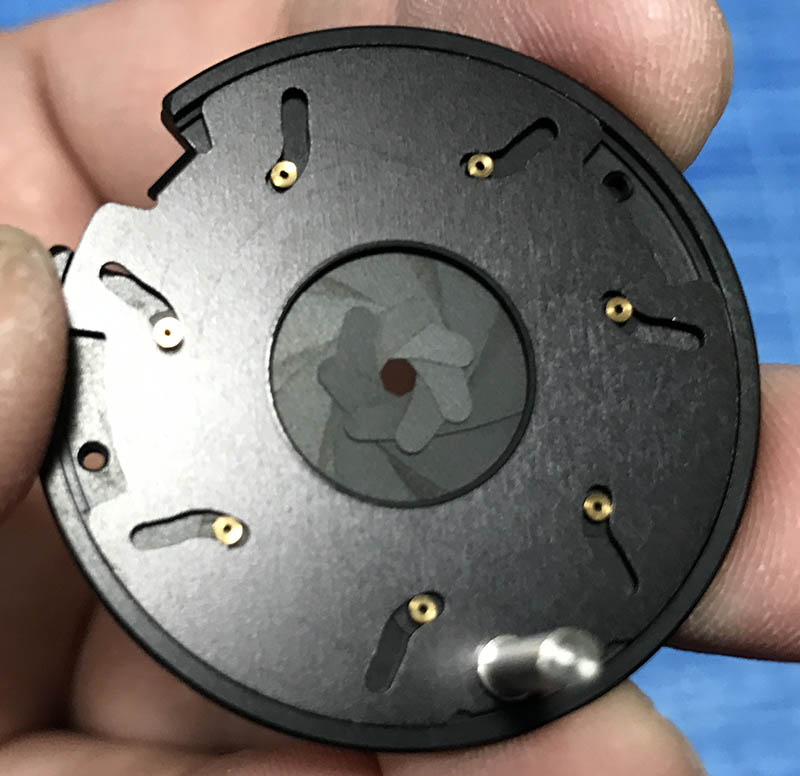
Install the plate, be sure that the pins of the blades are in their proper slots.
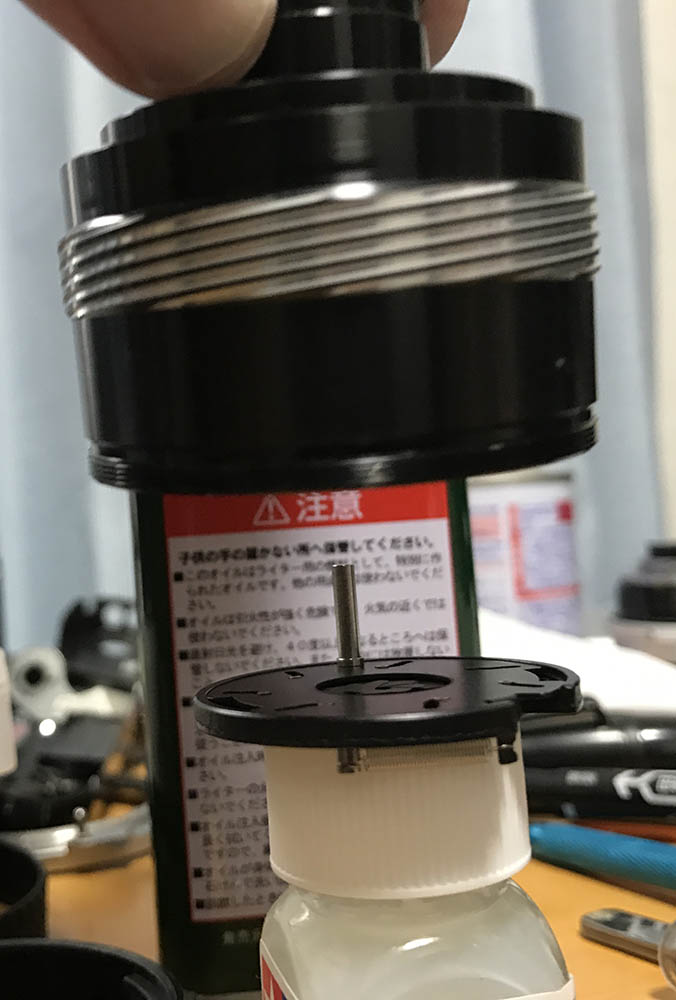
This is the tricky part. In order to save a lot of time and trouble putting the iris mechanism back into the objective’s housing, rest the iris mechanism on something that can fit into the interior of the casing. In this case, an enamel paint bottle was used. Slowly lower the objective’s casing, carefully put the 2 screws back before you flip it back. Check if everything is aligned with your mark and then tighten the screws until you are satisfied that it’s secure.
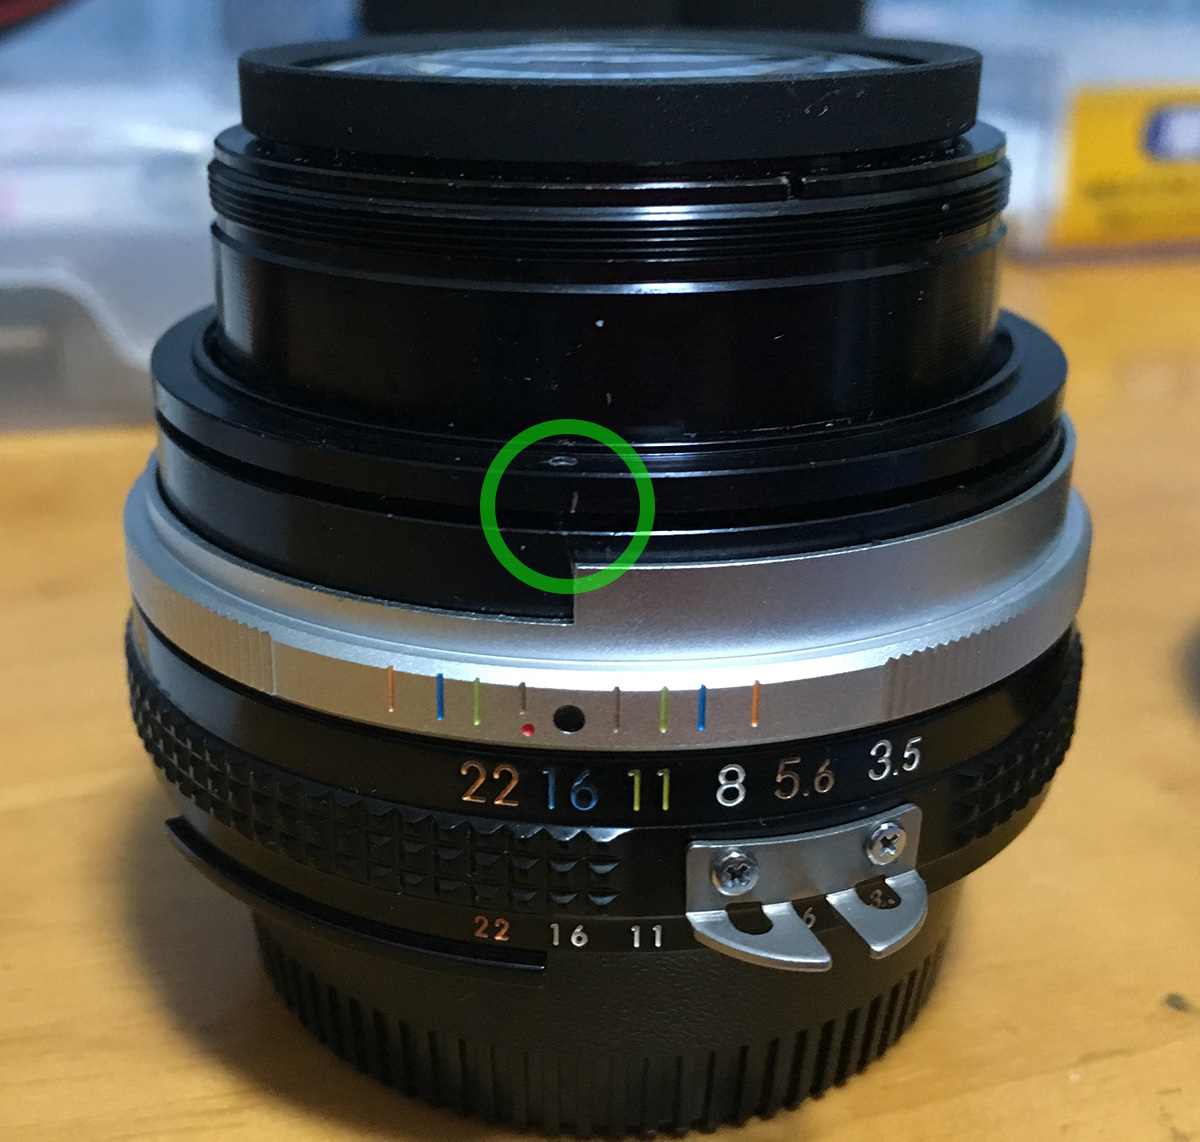
Before putting the lens back together, assemble it up to the point that I have here in this picture and adjust your lens’ focus. Note that the mark lined up with the lens’ centerline perfectly and that means the helicoids are perfectly aligned. Let us now begin adjusting, read my article on focus calibration and follow the steps carefully.
It’s now working perfectly, all that work certainly paid-off. This is a nice and useful lens, servicing it ensures that it will still continue to work for decades and give joy to more people.
Thanks for following my work. If you enjoyed this, please share it with your friends. Doing so will help spread the joy of lens repair. Supporting this site ensures that it will continue to help people for years to come. That helps me offset the cost of hosting and maintenance. It also helps me buy and process film. This site promotes the use of film and we all want more people to take more photos with it so it won’t go away. Thank you very much, Ric.
PS: Thanks to reader Keith Barefoot for his input.
Help Support this Blog:
Maintaining this blog requires money to operate. If you think that this site has helped you or you want to show your support by helping with the site’s upkeep, you can make a small donation to my paypal.com (richardHaw888@gmail.com). Money is not my prime motivation for this blog and I believe that I have enough to run this but you can help me make this site (and the companion facebook page) grow.
Helping support this site will ensure that this will be kept going as long as I have the time and energy for this. I would appreciate it if you just leave out your name or details like your country’s name or other information so that the donations will totally be anonymous. This is a labor of love and I intend to keep it that way for as long as I can. Ric.

Nov 20, 2016 @ 20:03:50
Hi Richard,
Thanks, as always, for your instructive service by posting these disassembly guides.
One note: In this one, you state that ” The optical formula for this[the 28/3.5 AiS] has hardly changed since it’s debut in 1960 and was only tweaked minimally throughout it’s very long life.”
In reality, the optical formula changed in a major way in early 1977. The old lens was the evolution of the Nikkor-H 28/3.5, which ran from the beginning to 1977. It originally had a pentagonal iris, and despite it’s mono-coating was unusually resistant to flare from strong point light sources like the sun. Multi-coating in the early 1970’s (the .C and K era) further improved the flare performance. The present lens was an all-new design in 1977. If you are a ’28mm nut’ as I am, it is probably worth owning both, as there are fascinating differences in the look of the images they produce.
Nov 21, 2016 @ 00:23:33
Hi, Keith!
Thanks for pointing that out, I will edit it. What were the changes? it seems like the design was refined somewhat. I love the 28mm 3.5, in fact I actually own all of the Nikkor-H series. I don’t know I find that they flare more than I am comfortable with. Yes, the 5 sided iris takes a little bit of getting used to hahaha. Thanks again,Ric.
Nov 21, 2016 @ 03:56:41
The old design 28/3.5 has a strong “old time”, optically primitive style of correction. If you can get one cheap, check it out.
Nov 21, 2016 @ 05:47:52
Thanks, Keith. I own all 3 Nikkor-H versions and I like the rendering a lot. I use them a lot specially on my Nikkormats. Ric.
Nov 26, 2016 @ 03:12:45
Do you do repairs for other people? I’ve a 135 f2 DC that is badly fungus affected and a 50 f1.2 with some starting to show at the edges. The 135 is junk to me unless (or if) I can get fixed so I don’t mind taking a risk with it if you are willing to give it a go.
Thanks
Nov 28, 2016 @ 13:49:53
Hello, John!
Unfortunately I rarely do repairs for other people because of my long hours at work. How bad is the fungus on the 135 anyway and how bad? AF Nikkors are a pain to work with since they are engineered like puzzles. The 50mm f/1.2 is known to attract fungus under the front element. If the growth happened under the front element then you’re in for a hard time because it seems like it is in a sealed compartment together with the 2nd element. Ric.
Sep 08, 2019 @ 20:21:44
Hello !
Thank you for this very informative step by step approach !
I have a copy of this lens where fungus is inside the front glass element. I am not able to open this one. You did not have to open it on your copy but if you had had to do it, how would you have performed this ?
Thank you.
Sep 12, 2024 @ 00:21:15
Hi Richard,
I have a 28mm 3.5 AI-S lens. The set screw is removed, but the front barrel will not budge. I have even tried using a non marring strap wrench, no help. Any suggestions on how to remove it?
Thanks,
Steve