
Hello, everybody! I went to Tim Ho Wan to have the cheapest Michelin Star dinner I can give to my family. I liked how the dim-sum tasted, it reminded me of the food that I’m used to back home. It’s great how high-end dim-sum can be made affordable and accessible to the masses. Tasting food this nice used to cost a lot of money but you get value with with Tim Ho Wan. I’m not sponsored by them in case you are wondering, but they can contact me and I’ll happily accept their offer to eat their food. Today, we’re going to look at a lens that used to be expensive but you can get them now for cheap. They’re the best that you can buy back then as far as wide Nikkors go but they were soon replaced by better options so their price has gone down. Please stay so you can read more about this wonderful lens.
Introduction:
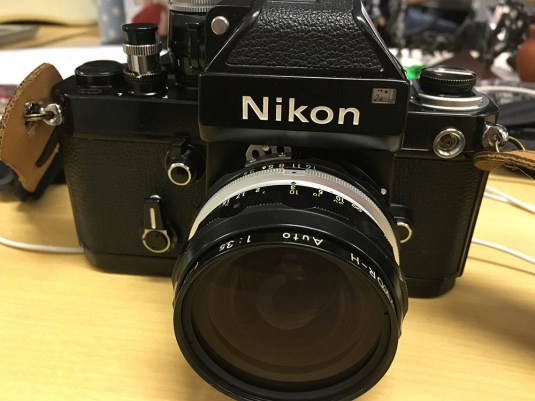 Its size is perfect for all of Nikon’s cameras as it’s not too small or too big. It’s great as a walk-around lens on a bright day. Pair it with a longer lens which will give you a little bit more reach and you have a complete setup. The lens looks great when paired with a camera of similar vintage and you’ll attract a lot of attention. They’re not that expensive either so people who want the cheaper option will be happy to own this lens. There’s nothing cheap about its performance as you will see later in this article. It’s not the best lens out there for the price but it sure does its job in style. It is like wearing a pair of nice British bespoke shoes with a nice suit.
 The lens is compact but it feels dense because there’s a lot of things that are packed inside its small barrel. It’s amazing how Nikon made this lens small, considering how early the design is. It would have been one of the earliest if it made it in time for the Nikon F’s debut. My article on prototype Nikkors is proof that this was intended to be one of the earliest F-mount Nikkors.
This lens has a huge front element and a tiny rear element and its formula is a simple 6-elements-in-6-groups design. It was considered a marvel when it came out because it was challenging to design wide lenses for the SLR due to the space required to stay-clear of the flapping mirror but Nikon made it. It used to be the widest F-mount Nikkor that you can mount without having to use the camera in the mirror-up position and this was revolutionary due to the fact that many wide lenses in those days won’t allow through-the-lens viewing and metering. We are so spoiled today but those who came before us had to make-do with what they had back then.
 Here’s a comparison of how the lens formula evolved from the original lens to the later ones that sports a revised formula. The Nikkor 28mm f/3.5 Ai-S is the last lens in the line and it uses the improved design to the left.
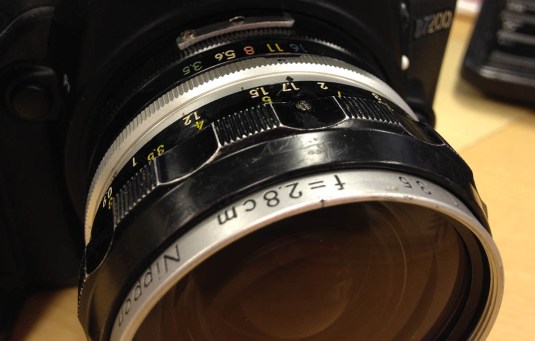 The early version of this lens has the focal length in centimeters. There are many small differences between the versions, some are obvious while some can only be seen when you open the lens.
This particular model (Nikkor-H) was made from 1960 t0 1975, it enjoyed a long production run and its optical formula was still used on the later New-Nikkor 28mm f/3.5 that ended production in 1977. Nikon might have made a few changes in the formula between these models but there’s no way for us to know because they all look identical in technical drawings. This used to be a popular lens and it’s one of the lenses that were used regularly by the people who covered the Vietnam War because of its performance and how tough they are. You can see pictures of newsmen with these mounted on the Nikon F along with other Nikkors from the same era. It’s a legend in its own right, a highly-respected Nikkor that earned its name in the war zone.
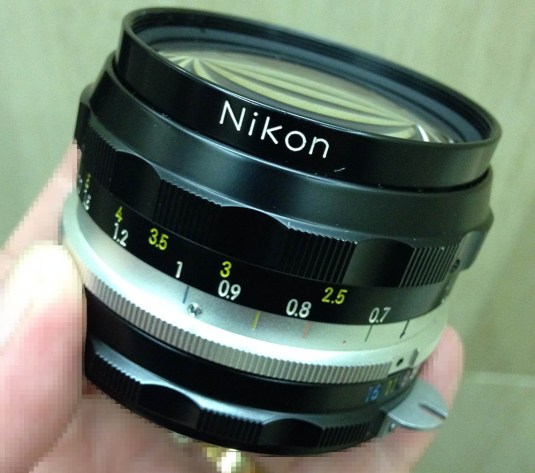
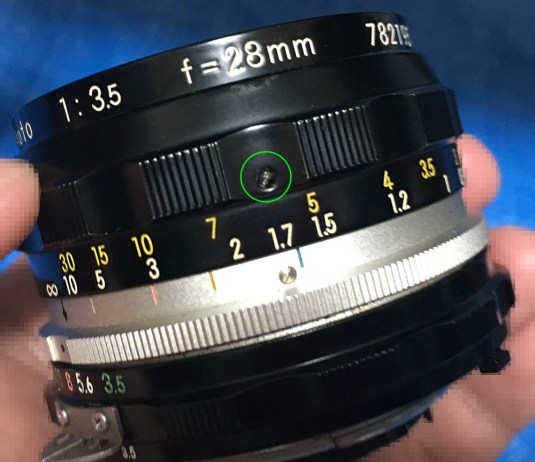
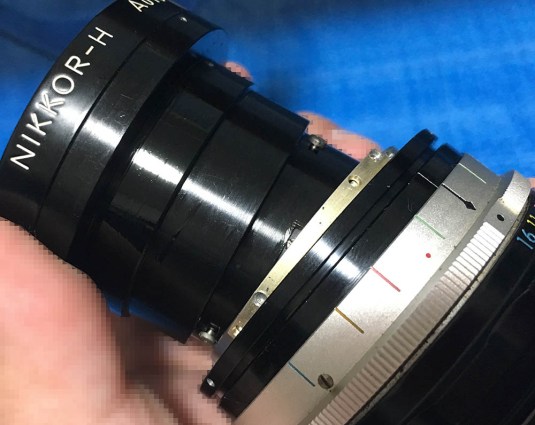
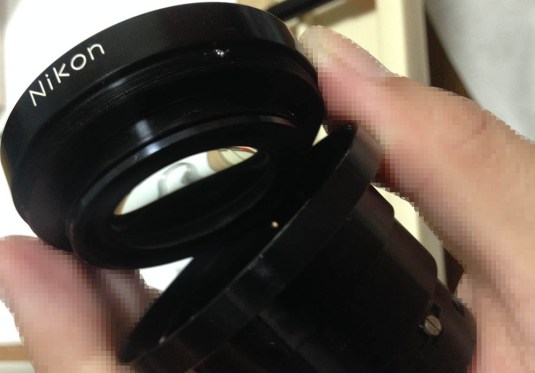
 The early versions have a narrower aperture ring which can clear many, if not all of Nikon’s cameras that has the Ai-coupling tab. This makes it simple to modify them and this alternative Ai conversion method is perfect for it.
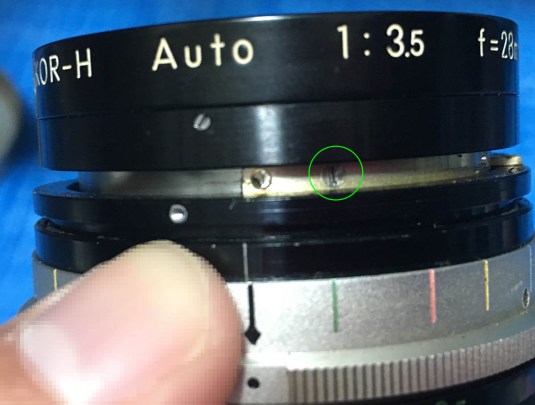
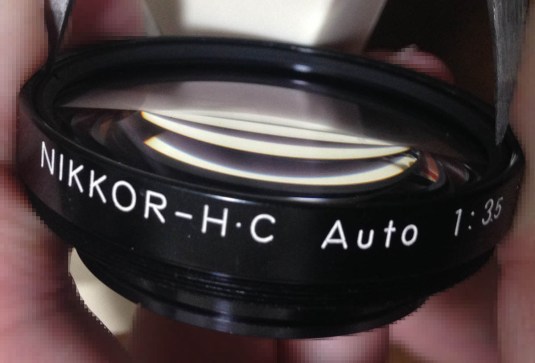
The biggest difference between the earlier models can be seen in the design of the barrel with the newer ones having a different aperture ring. You will also notice that the front barrel is now black instead of silver and there are many small details that are different such as the design of the grip. The late one also has a better coating and they’re now called Nikkor-H•C 28mm f/3.5 Auto instead of Nikkor-H 2.8cm f/3.5 Auto to denote the change. The late one performs much better due to the improved coating and you will notice that when shooting against the Sun or observing distant, hazy objects. They look better and less washed-out. I don’t have any tests in this article and I will do a simple test when the weather improves.
Let’s now see some sample pictures. Studying how a lens performs will help you maximize your lens because you’ll know when to use it and what to do to avoid its flaws or use them to your creative advantage. These were taken from f/3.5, f/5.6 and f/8 from left-to-right so you’ll see the changes easier. My observations are just based on impressions and there’s nothing scientific in my commentaries so don’t expect me to mention any measurements. I don’t do that kind of thing in this blog as I am more interested in the pictures that I can get with the lens and not its specs.


(Click to enlarge)
This lens vignettes horribly wide-open, up to 3-stops worth of light at the far corners of the frame. Stopping it down to f/5.6 helps a bit and it’s gone from f/8 and beyond. I wouldn’t use this lens wide-open when I have to shoot the sky or any even-colored background. I will be careful I have use filters with this and attaching a step-up ring with a bigger filter is the only way to go.


(Click to enlarge)
The corners look decent wide-open but not great at all. The good news is the center looks from f/3.5. By f/5.6, the corners start to look a lot better and the center looks really sharp. The corners look great from f/8 and you can now see the lens resolve in better detail, the center is now at its peak. I didn’t see any big changes in terms of rendering as I stop the lens down. It all looks to be the same to me. I kept on mentioning the corners because people tend to inspect the corners if using a wider lens specially for landscapes. It’s sharp wide-open up to the middle of the frame and then the performance takes a dip as you approach the far-corners. It’s still useable but not if you have lots of fine details at the corners of the frame so stop it down by at least f/5.6 for better corner resolution and sharpness. Spherical aberration can be seen in the bright areas of the frame but it’s not so bad and you won’t even see it.


(Click to enlarge)
You will get a big blog when the sun is near the corners of your frame. You can’t do much about this except for attaching its pathetic shade which is not going to help much because it’s shallow.


(Click to enlarge)
One of the unique traits of this lens (as far as Nikkors) is its 5-sided iris. You will get pentagonal “bokeh balls” with this lens and people can identify your lens easily because there are very few Nikkors that have this. I don’t like the look at all but I am sure some people will like this. Your sunstars will also be 5-sided like a “Christmas star” and can make your pictures look unique.
Let’s now see some “real-world pictures”. It’s pointless seeing boring photos of pictures that nobody will take so let’s talk about using the lens for taking some less-boring photos.
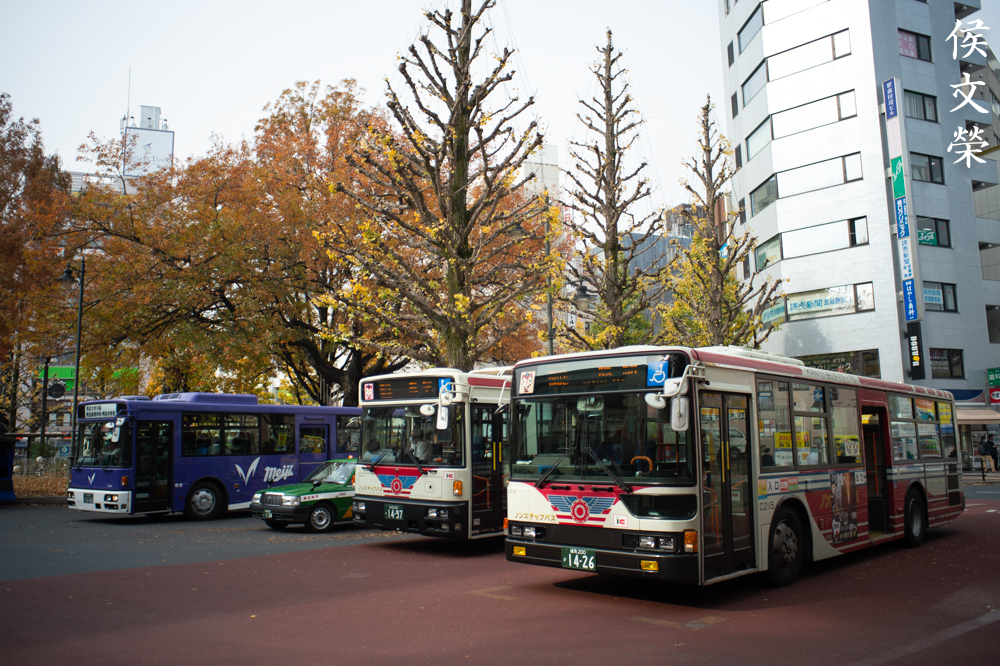 The 28mm focal length is handy for general photography. It was considered to be an ultra-wide lens before but now falls under the wide category. You’ll be happy with just having this lens when traveling as it’s great for scenery and environmental portraits, the type of photos you take when on the road.
 Geometric distortion doesn’t seem to be too bad and you can get away with it for shooting architecture. The sharpness of this lens (at the center) is good so shooting wide-open isn’t a problem. The vignetting isn’t obvious here, the sky is dark so we don’t see much of it.
 This isn’t the right lens for night photography and you’ll want a faster lens. I consider f/3.5 to be slow and it can be hard to focus because the viewfinder will be darker compared to a faster lens. It’s OK when you’re using a DSLR, I won’t do this when shooting film unless I push the film to ridiculous speeds.
 Shooting at night with this lens means that you’ll have to shoot it with much slower speeds than usual so blur can be a problem unless you use a the new Nikon Z cameras which has in-body stabilizers.
Let’s now see some photos that were taken using film. Photos that were shot with film has a unique look because of grain and it’s hard to mimic the look digitally since grain looks organic compared to the orderly array of sensors. This lens was also made for film and it’s going to be beneficial for us to see it render using its intended medium. Seeing the results from both media is going to give us a more holistic view of this lens’ performance so I’m always showing you pictures from both film and digital.
 Shooting at f/8 helped me avoid dark corners and it also give me very sharp details up to the corners. Film is more forgiving when it comes to sharpness unless you’re shooting with a fine-grained film.
 The center looks great and clear but the quality of the bokeh looks smudgy. I usually judge a lens’ bokeh quality when shooting at foliage and twigs, these are great for showing any flaws in the bokeh. To be fair, you don’t shoot this lens for it’s smooth bokeh characteristics (or the lack of it).


(Click to enlarge)
I didn’t shoot any brick walls this time but these should help give you a nice idea about the distortion profile of this lens. I have seen worse performance from a 35mm lens, this is just me saying that this lens is good and it will not distort your pictures as much.
 A wide lens has to focus close to be useful and this lens focuses down to 2ft. It’s not really close compared to what many later lenses can give you but it’s decent enough considering how old this lens design is. The bokeh looks busy and it looks worse at closer distances, looking at it makes me dizzy.
 Don’t be afraid to put your subjects near the corners, this lens is sharp up to that point even wide-open! Despite having poor bokeh quality, the transition from what’s focused to what’s blurred is OK and you get nice separation for your subjects so you get a nice 3D-like photo.


(Click to enlarge)
Here’s how it looks like when the lens is stopped-down compared to f/3.5.


(Click to enlarge)
I love how this lens performs despite its age. you will notice that the coating is dated by looking at these pictures but it gives them a nice vintage-look. It renders nicely and the flaws make the pictures look more natural.
Will I recommend this lens? Not really unless you’re a collector of if you are looking for a pre-Ai lens to use with your classic Nikon. For the same money you can buy a better lens with more convenient features such as having the useful Ai-ring or a faster maximum aperture. A Nikkor 28mm f/2.8 Ai will be a more practical lens and the Nikkor 28mm f/3.5 Ai-S will be more useful. If you want a 28mm lens with a lower-than-average distortion profile then the answer should be clear. The unique 5-sided iris should also appeal to some people but it’s kind of unusual for somebody to want that. Having said that, this is a lens for those who knows what they want and if you already have it then I hope that I have inspired you to take it out and shoot with it.
Before We Begin:
If this is your first attempt at repairing a lens then I suggest that you check my previous posts regarding screws & drivers, grease and other things. Also read what I wrote about the tools that you’ll need to fix your Nikkors.
I suggest that you read these primers before you begin (for beginners):
- Essential tools
- Best practices 1
- Best practices 2
- Best practices 3
- Ai conversion
- Working with Helicoids
Reading these primers should lessen the chance of ruining your lens if you are a novice. Before opening up any lens, always look for other people who have done so in Youtube or the internet. Information is scarce, vague and scattered (that is why I started this) but you can still find some information if you search carefully.
I highly recommend that you read my working with helicoids post because this is very important and getting it wrong can ruin your day. If I can force you to read this, I would. It is that important!
For more advanced topics, you can read my fungus removal post as a start. This post has a lot of useful information and it will be beneficial for you to read this.
Disassembly (Lens Barrel):
This lens is simple to repair if you have the right tools. Taking notes will be a lot of help so you won’t get confused when it’s time to put things back. The earlier versions of this lens will be slightly different but you can use this for a guide and just read my other articles and look for a similar lens and use it as your additional reference. As usual with most Nikkors it is best that we remove the objective first so we can safely work with the barrel without the hassle of worrying about accidentally damaging the glass and that’s exactly what we’re going to do now.
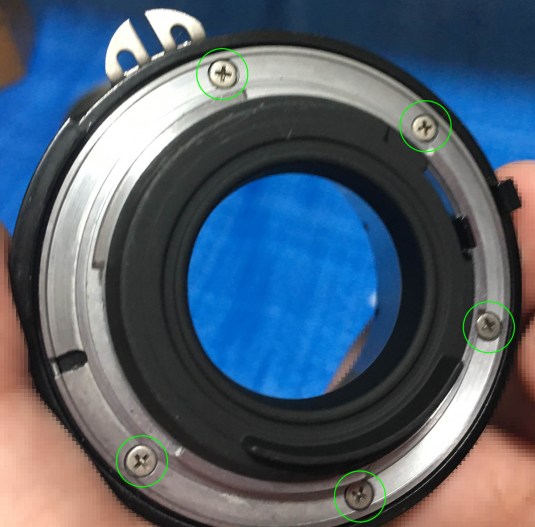
 Begin by removing these screws so you can remove the focusing ring.
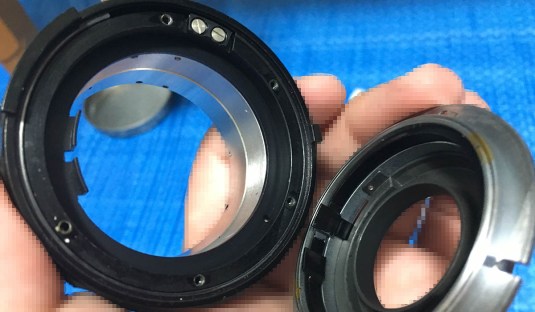
 Removing the focusing ring will allow us to access these screws. Removing these (3 screws) will allow us to remove the objective.
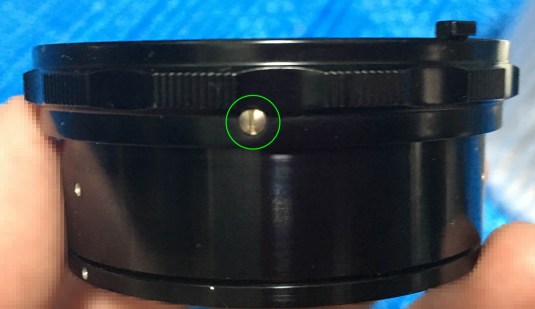
 Here’s another one. There may be a screw under the helicoid stop on some lenses so you may want to check that, too. Those screws of the helicoid stop are sometimes long and they also help secure the objective.
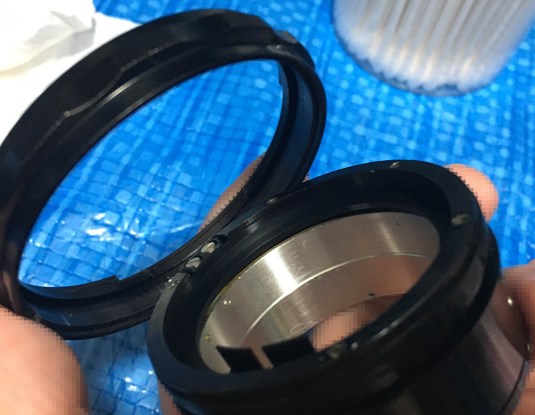
 The objective can now be safely removed from the barrel.
 Remove the helicoid stop and note which side should be facing the front.
 The sleeve should be removed so you must carefully remove these.
 The sleeve should be easy to remove once its screws are gone. Notice that it has some shallow scratches on the midline. It was made by a repairman to indicate how the helicoids should align when the barrel is set to infinity.
 The bayonet’s screws should be removed but be sure that you are using the right type of JIS drivers. Many people get stuck because they stripped these so read my article on how to remove bayonet screws so you won’t get stuck while repairing your lens.
 The bayonet mount can now be safely removed.
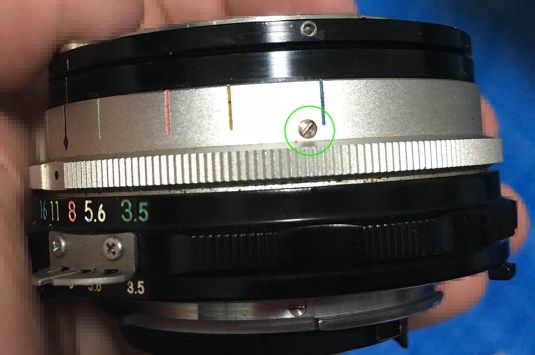
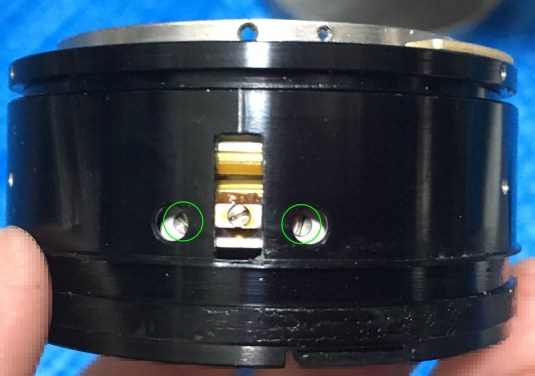
 The aperture ring is coupled to its fork via this screw so carefully remove it first before removing the aperture ring.
 Carefully remove the aperture ring once the screw is gone. That screw acts like a pin that couples it to the aperture fork underneath it so turning it will regulate the iris of your lens. From this point on, you’ll want to work on the lens while the barrel is set to infinity (when possible) so you’ll have a point of reference when taking notes.
 The helicoids are constrained by the helicoid key so turning the central one will turn the inner one, too. This enables the barrel to extend or retract and this is how your lens focuses. Turn the helicoids a bit until these screws are easy to access and carefully remove them.
 Remove the helicoid key and don’t forget to put it back facing the right way up. Clean it carefully and set it aside.
 Separete the helicoids and don’t forget to mark where they separeted. Many people forget to do this and they end up being stuck because this is also the same spot where the helicoids should mate. Read my article on how to work with helicoids to prevent that happening to you.
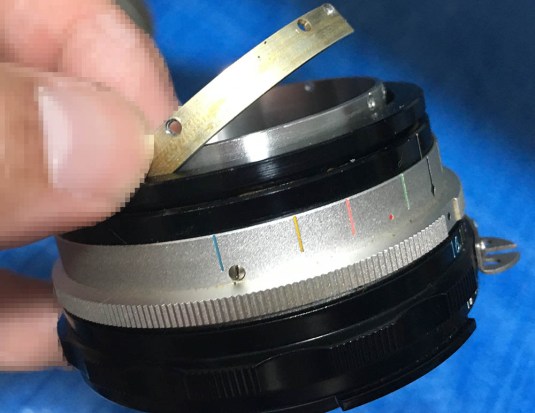
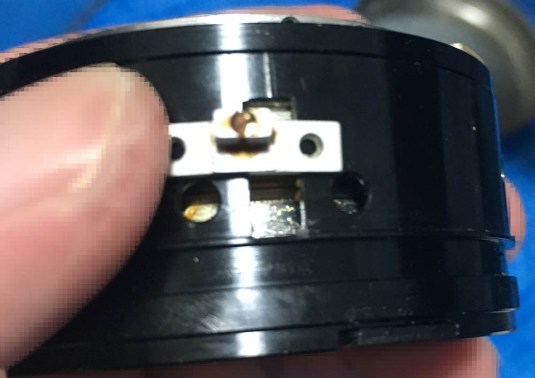
 Remove this brass ring to remove the aperture fork and its ring. The safest way to remove it is to move one of the open ends near the helicoid key’s slot and then pick on it using a plastic toothpick to lift it from its rail.
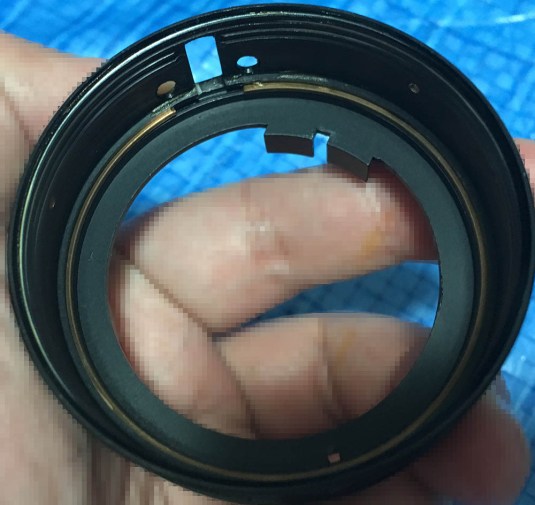
 You can now safely remove the aperture fork and its ring.
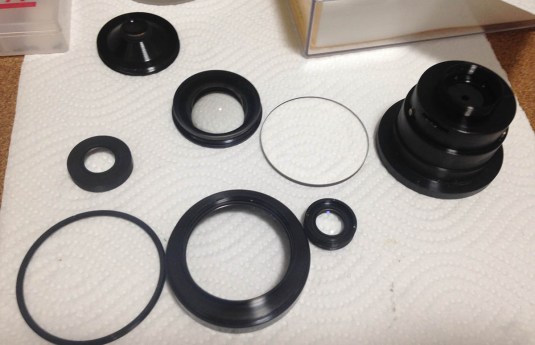
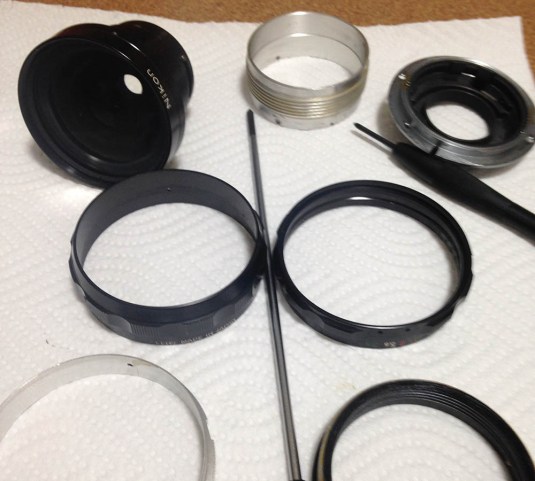 You should now have the same thing as what I have here in the picture. You can now proceed with carefully cleaning everything.
Clean everything really well and make sure not to leave any residue so your fresh grease won’t get contaminated. I didn’t use a thick grease for this since the focus throw is a bit long for a wide lens. Make sure that you don’t apply too much grease or it will migrate to the iris after some time.
Disassembly (Objective):
The objective is simple to work with but you will want to be careful with the retainers since some of them are sealed with lacquer. Alcohol will be useful for softening the seals and you should be patient so you won’t damage any part that’s stuck. The front assembly will be the trickiest part because of the big front element and the rest should be easy.
 The front lens assembly is being secured by this small screw. Remove it and you can unscrew the front lens assembly off.
 The front lens assembly can now be safely removed.
 The front lens is being secured by its retainer so carefully remove it using a lens spanner and be sure not to scratch the glass.
 I forgot to take pictures of the other steps but it should be easy to dismantle the objective to this state.
It didn’t take me a long time to work on the objective because it only has few parts in it thanks to the simple 6-elements design. The iris is also simpler to work with and it shouldn’t take you a lot of effort to work on it.
Conclusion:
It shouldn’t take you a lot of time to overhaul this lens, 2 hours is probably a good estimate for a simple lens like this. It’s a nice project for a nice Sunday afternoon and beginners should be OK with this lens so long as they have a complete set of tools and some experience working on other lenses. I advise those who are new to first work on cheaper lenses from other makes before they work on this so they can acquire the right skills. This lens was made in such a way that there’s no adjustments for focus apart from what was set at the factory so there’s no need to adjust the focus after cleaning.
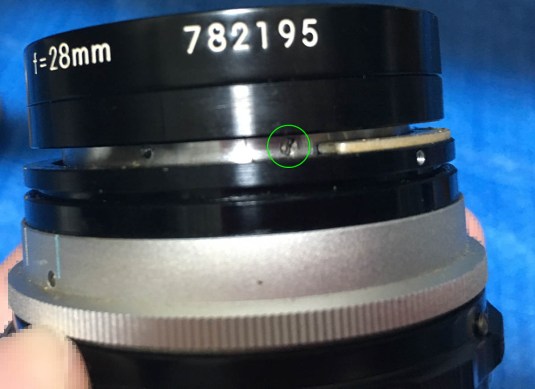
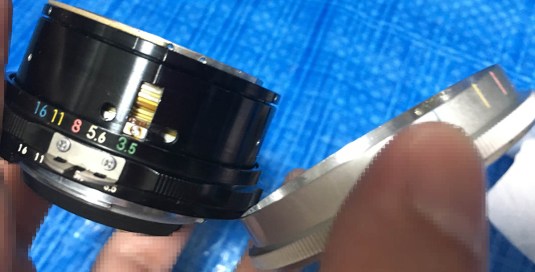
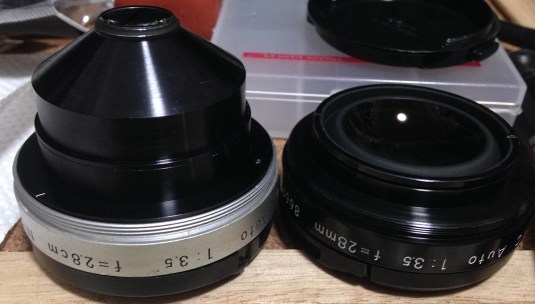 Here’s one difference between the early version and the later ones. You will find many small differences here-and-there but everything should be easy since they both follow a similar scheme.
That’s all for this lens. If you liked this article, please share this online with your friends at social media so they will also know about this blog. This is a fun and educational site and I want to share the joy of repairing lenses and cameras with everyone. See you again next time, Ric.
Help Support this Blog:
Maintaining this blog requires money to operate. If you think that this site has helped you or you want to show your support by helping with the site’s upkeep, you can make a small donation to my paypal.com (richardHaw888@gmail.com). Money is not my prime motivation for this blog and I believe that I have enough to run this but you can help me make this site (and the companion facebook page) grow.
Leave me some tip?
Thank you very much for your continued support!
$2.00
Helping support this site will ensure that this will be kept going as long as I have the time and energy for this. I would appreciate it if you just leave out your name or details like your countrym name or other information so that the donations will totally be anonymous. This is a labor of love and I intend to keep it that way for as long as I can. Ric.

Jul 05, 2022 @ 19:28:31
Great reviews and information is really helpful. I have a 1963 F with a few pre ai lenses including this one. As an artist I love the authentic rendition. A groundbreaking lens in its day and served to help reproduce so many published photos by Don McCullum and more. I dont care for digital and chasing A characterless image. I have returned to film after a 20 year break with more enthusiasm for film than ever so a huge thank you for helping.