
It’s starting to get really cold now, so cold that sitting on the wooden floor of my workshop makes my ass numb after a few minutes and we’re still at the early weeks of Autumn! The sun now sets at around 4:30PM and it gets dark around 5:00PM so taking photos during the night is fast becoming one of my primary considerations as far as making a choice as to which lens I should bring for the day. Today, I’ll show you one of the lenses that I love to use for taking photos in dark situations. It’s not the fastest lens available to me but I like it because of its practical specs. It’s an old lens that’s still useful today, it can be bought for not a lot of money these days so it’s a good choice for the cheap photographer.
Introduction:
Today’s lens is the amazing Nikkor-O 35mm f/2! This was introduced back in 1966, it was Nikon’s fastest 35mm lens for a few years until the even faster Nikkor-N 35mm f/1.4 Auto was introduced in 1970. Not only was this fast at f/2, the minimum focus distance is also very short at just 0.35m. This allows for really close focusing and combine it with the shallow depth-of-field that an f/2 lens would give you wide-open and you can get creative with its use. I love how practical it is for both day-time and night photography and people throughout the decades swore by its utility so this is certainly one of Nikon’s more popular lenses.

The Nikkor-O 35mm f/2 Auto is rather big for a smaller Nikkor prime but not so big as to make it look and feel unbalanced. It is common knowledge that this lens was rather difficult to manufacture for its time because it is a bit complicated but this design stood the test of time, the optical formula stayed for quite some time until the advent of the AF model lens and that says a lot.

Here it is on my Nikon F, it balances really well on older film bodies despite the size. It is a bit larger then your usual Nikkor prime of the same era like the Nikkor-H 28mm f/3.5 Auto or the Nikkor-S 35mm f/2.8 Auto. I was lucky to find one in the junk section of my favorite camera shop for a cheap price but the inner elements were terrible and the lens was full of fungus. Fungus on the inner elements seem to be common with this lens for some reasons, check the end of the article to see what’s wrong.

Knowing how a lens works is important so you can maximize its use. These photos were taken from f/2, f/2.8 and f/4 from left-to-right. You see the most changes in these apertures in terms of rendering. These are also the usual apertures that people are going to use this lens with, if you want to use the lens from f/8 and on then just use a slower, smaller one.


(Click to enlarge)
Vignetting can be observed wide-open, it improves a bit by f/2.8 and you’re not going to see much of it from f/4 and on. This is pretty good if you ask me, many lenses from this class perform much worse. Sharpness is very good at f/2 and the only thing keeping it from being better is the lack of resolution. I only had to stop the lens down to f/2.8 and that improves the resolution a lot and the details start to look much better. It’s performing near its peak by f/4 and f/5.6 is near-perfect. Sharpness at the corners and edges is good but not as good as the center. It’s almost-always 1-2 stops behind but it’s not as bad as I made it sound. Distortion is high and you will see straight lines bend at the edges of the frame. I guess this lens wasn’t calculated for this and what the lens designer wanted was a sharp and fast lens for practical use such as reportage and events.

This is how much the geometric distortion looks like. It’s very distracting so it’s best not to position any important lines in your composition near any of the edges of the frame or they will look terrible. This is typical for this lens family up to the last version and is something that you should get used to. If you need to shoot architecture or art then the Nikkor 35mm f/2.8 Ai will be a better lens for that kind of job.


(Click to enlarge)
Awesome performance wide-open at the closest focusing distance, it’s sharp and it gets even better at f/2.8 where the added resolution helps support the sharpness of the lens, enabling it to resolved small details. It’s near its peak performance by f/4 and it’s great at f/5.6. The bokeh quality looks smooth, it’s able to render the details without any smudging or roughness.
Many people compare this lens to its more expensive Leica rivals that costs multiple time more. The only complaint I am hearing from other people is that this lens flares really bad but from my experience the flare looks quite natural and compliments the photo. This is subjective so I will just leave it there.
I also own the Nikkor 35mm f/1.4 Ai-S and all variants of the 35/2.8 Nikkors. Between those lenses and this, I would almost always pick this. My reason for doing so is its handling and the f/2 maximum aperture is just perfect for my style of candid street portraiture.


(Click to enlarge)
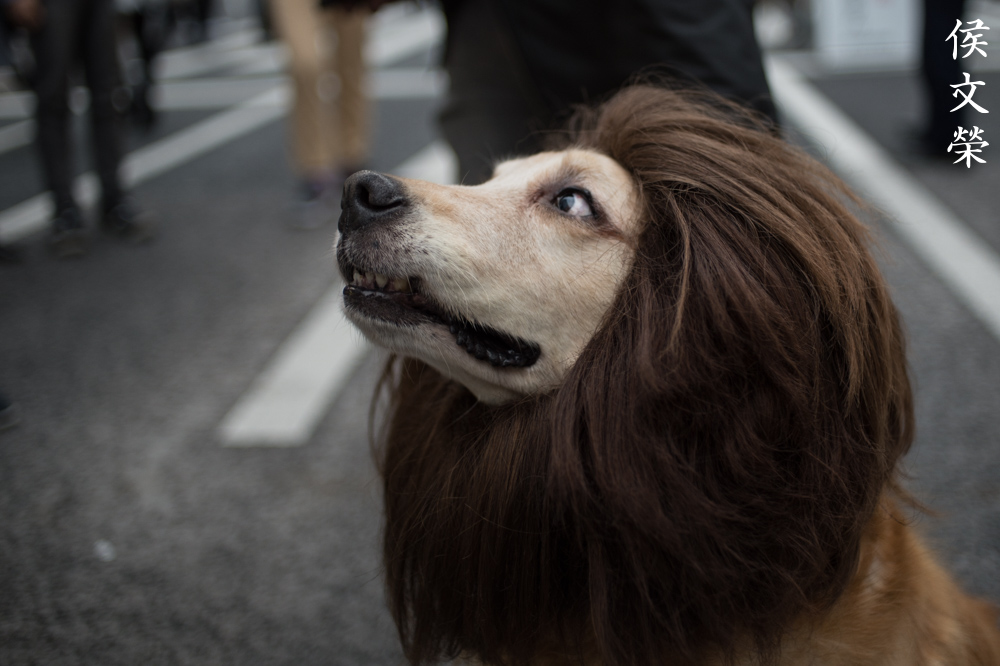
The pictures above were mostly taken wide-open. Check out the picture of the dog with the wig and see how sharp this lens can be wide-open. This has a very neutral feel to it and the pictures it produces feel really natural. It is sharp where it’s focused and the sharpness falls-off rather smoothly and it blends into the rest of the frame. Can you see those attributes in my sample pictures? I can say that this is a good walk-around lens for everyday carry specially if you like to take portraits of people on the street. The reasonably fast maximum aperture is also helpful when it starts to get dark. The focus throw is just right for me and not short like the later Ai-S lenses.
Let’s now see some pictures that were taken with film. This lens was made for use with it so it’s only fair that we see some pictures taken with it. This will give us a holistic idea as to how this lens really performs in its original context. Film has a unique look that’s difficult to replicate with digital. Film grain can help hide some of the lens’ flaws, too. I took these with a Nikon F2 loaded with Kodak Color Plus 200. Most, if not all of the pictures were taken with the lens stopped-down since it was still early into the evening. The Sun sets later in Summer.

This lens and all the lenses that were based from it are known to be terrible when it comes to flaring and ghosts, I guess this has more to do with coating technology rather than the optical design. It’s bothersome but you can use it to your creative advantage. Using a hood helps but it’s a bit shallow to be of any practical use but at least it’s better than nothing.

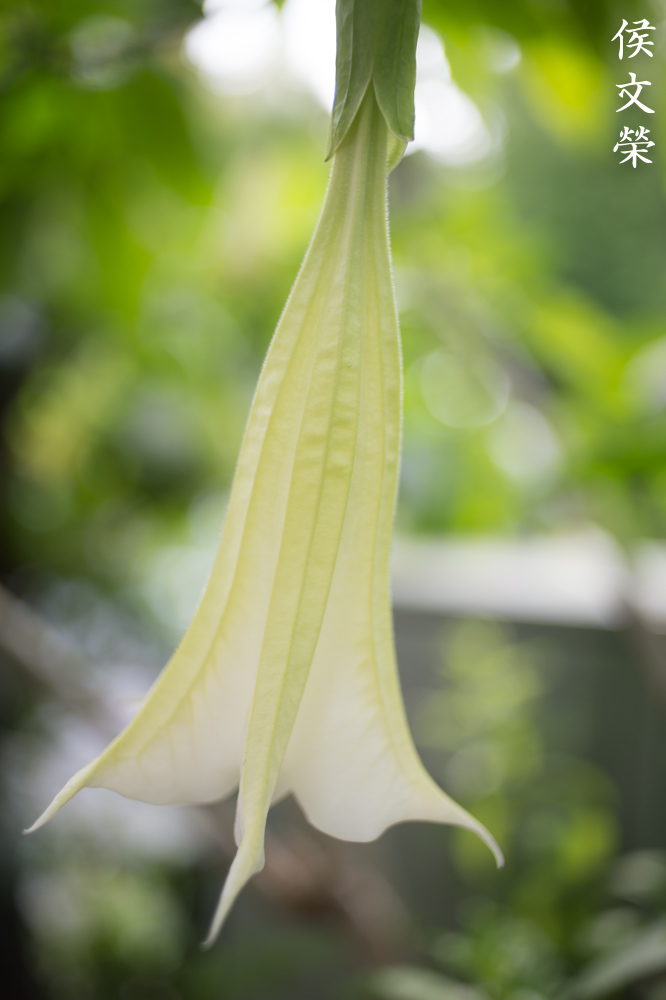
This lens is perfect for documentary and travel photos. It’s very versatile so it’s one of Nikon’s most popular lenses. This lens renders beautifully, look at how nice the subject separation is, the subjects have this nice 3D-look.

This lens will give you that nice vintage-feel to your photos. You don’t need to use filters just to get that look, just shoot it with film and you will get this effect in an authentic way. No pretending, just the real thing.

This was taken at f/4 or so as evident by the deeper depth-of-field. This is an amazing lens, it achieves peak sharpness at around f/4 and it looks better at f/5.6. Contrast is nice and the rendering looks very natural, not “forced”.


(Click to enlarge)
Here’s some more pictures from the rest of the roll. I love shooting this lens with film as I get that nostalgic look that many of us remember and miss. It is a great lens for your Nikon F and Nikon F2, this is period-correct for both cameras if you are into that sort of thing.
I can recommend this lens to anybody looking for a non-Ai 35mm lens. It is a tough lens that will take a lot of abuse and it’s cheap, too. People who use later film Nikons and digital Nikons apart from the Nikon Df should look for a lens that has an Ai-ring. This will enable you to meter with the lens and it will also prevent any damage to your cameras. The Nikkor 35mm f/2 Ai is a bit more expensive because of this but it’s worth the money. If you don’t use older film Nikons then I will advise you to get that lens instead. The optics is the same and later ones have better coatings, too. The Nikkor 35mm f/2 Ai-S is the last version and is the most expensive manual lens in the family. This gives you 3 choices when it comes to this lens type and you should choose a version that suits your choice of cameras and budget. Let’s now begin with the lens repair section.
Before We Begin:
If this is your first attempt at repairing a lens then I suggest that you check my previous posts regarding screws & drivers, grease and other things. Also read what I wrote about the tools that you’ll need to fix your Nikkors.
I suggest that you read these primers before you begin (for beginners):
Reading these primers should lessen the chance of ruining your lens if you are a novice. Before opening up any lens, always look for other people who have done so in Youtube or the internet. Information is scarce, vague and scattered (that is why I started this) but you can still find some information if you search carefully.
I highly recommend that you read my working with helicoids post because this is very important and getting it wrong can ruin your day. If I can force you to read this, I would. It is that important!
For more advanced topics, you can read my fungus removal post as a start. This post has a lot of useful information and it will be beneficial for you to read this.
Disassembly (Lens Barrel):
Following best practices and common sense, we will separate the objective from the lens barrel. This will prevent any accidents from occurring to the precious glass.
We usually only mention this in-passing but not for this lens. The Nikkor-O 35mm f/2 Auto was a difficult lens to produce for its time and part of it is its construction. Usual Nikkor primes of the same era have simpler means of securing the objective to the lens barrel but this one will require us to take apart more things in order to achieve the same thing.

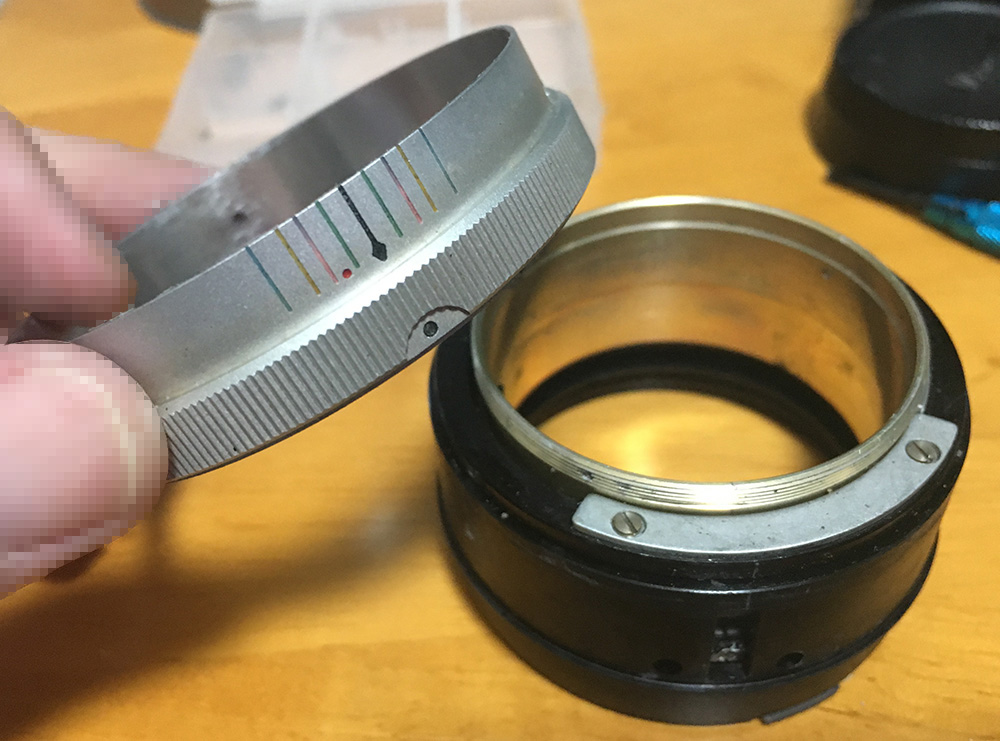
In order to remove the objective, we have to remove the focusing ring first. There are 3 of these screws that you should get rid of. They are sealed with paint so be careful when you unscrew them so you will not strip the head.

Make sure that the lens is turned to infinity when you remove the focusing ring and then mark where the infinity mark should be on the surface of the central helicoid. This will be your guide later.

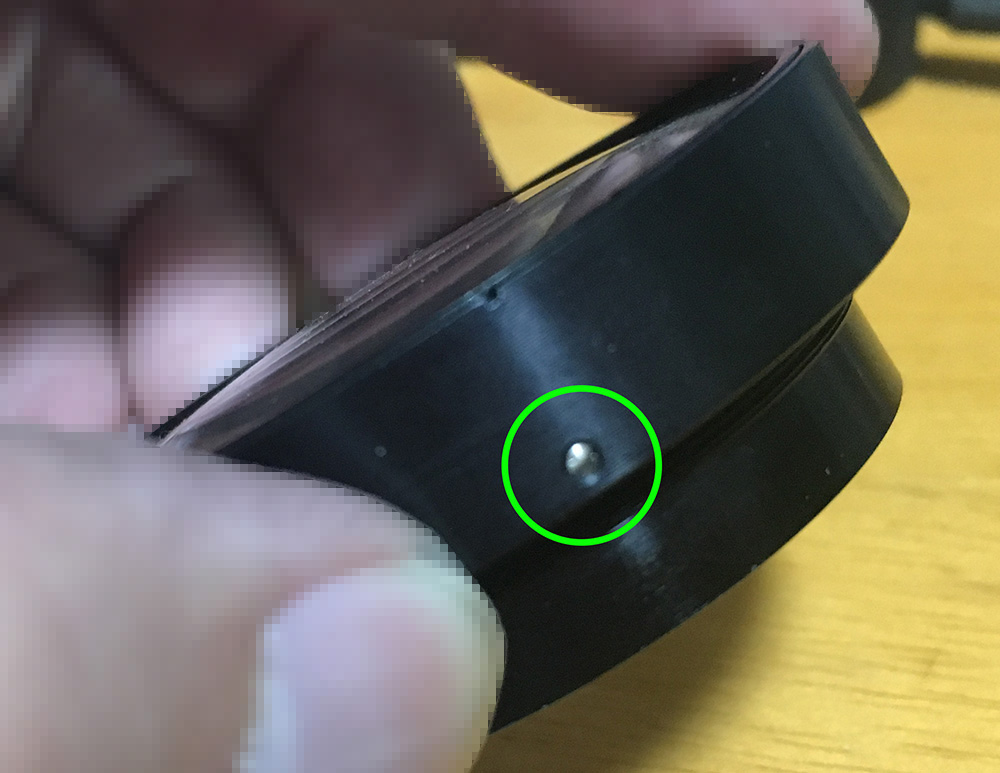
The reason for extracting the focusing ring is to access this little screw. This one is kind of long and may be sealed with lacquer. Extract it or loosen it so that you can unscrew the front barrel.

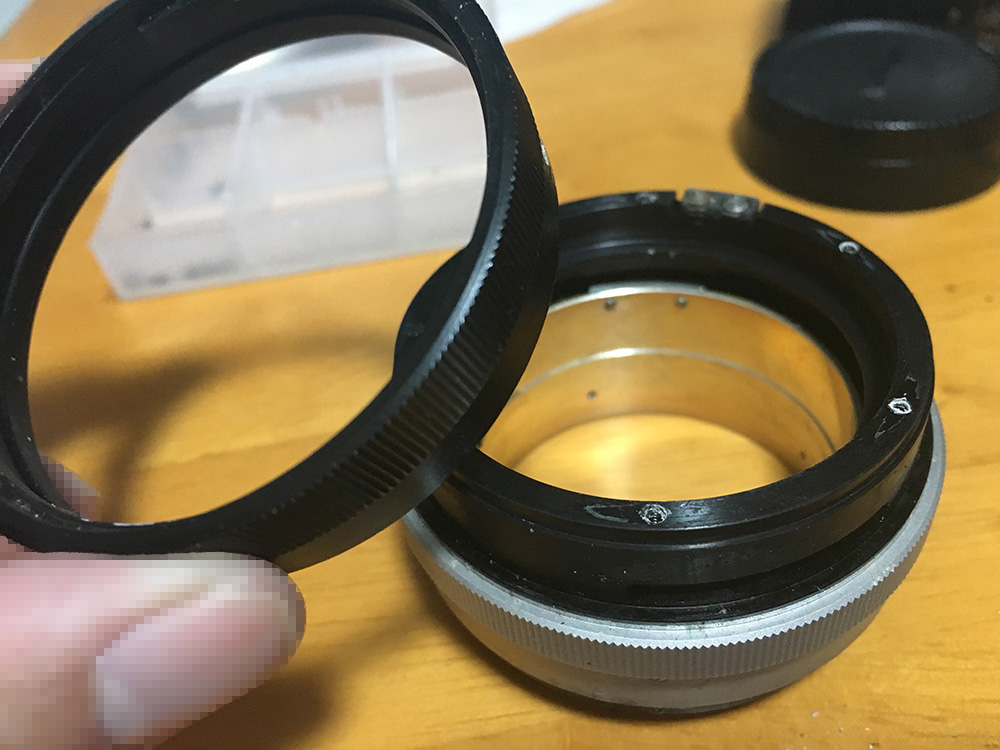
The front barrel is connected to the objective so if you pull the front barrel the objective comes off with it. This is unusual for this type of Nikkor and it’s more reminiscent of the Nikkor-H 28mm f/3.5 Auto’s construction.

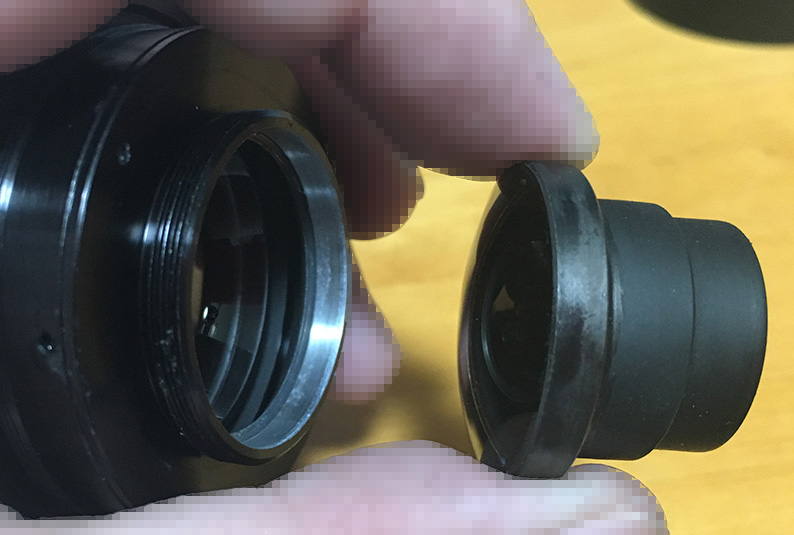
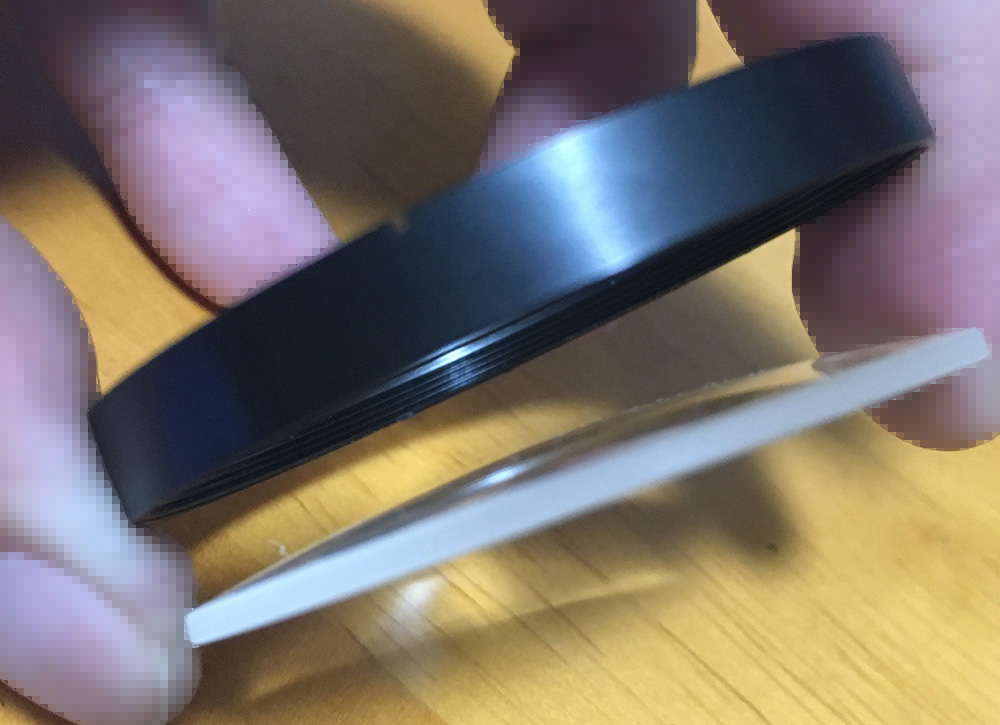
Look at the front part carefully and you will observe that there are 2 sets of slotted rings in there. What you want to do is get a lens spanner and fit it to the outer ring to unscrew it. The inner one is used to hold the front element so leave that one alone for now.

You can now separate the front elements group. You may be confused as to why we’re buggering with the objective since all we want to do is separate the objective from the lens barrel to keep it safe while we work on it. Head to the next step to see why.

The front ring is sandwiched between the front elements assembly and the casing of the objective. Who would have thought of that? Would you? It took me some time to figure this out for myself.

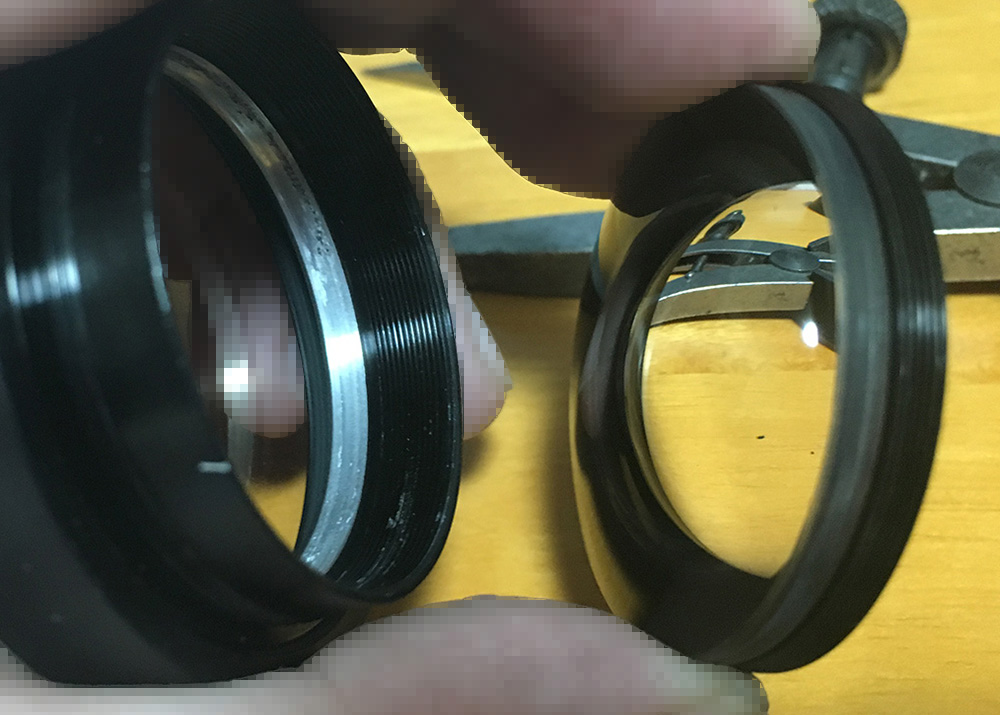
That was a lot of effort just to get the front ring off. Now, re-install the front elements assembly to the objective and keep it safe for now.
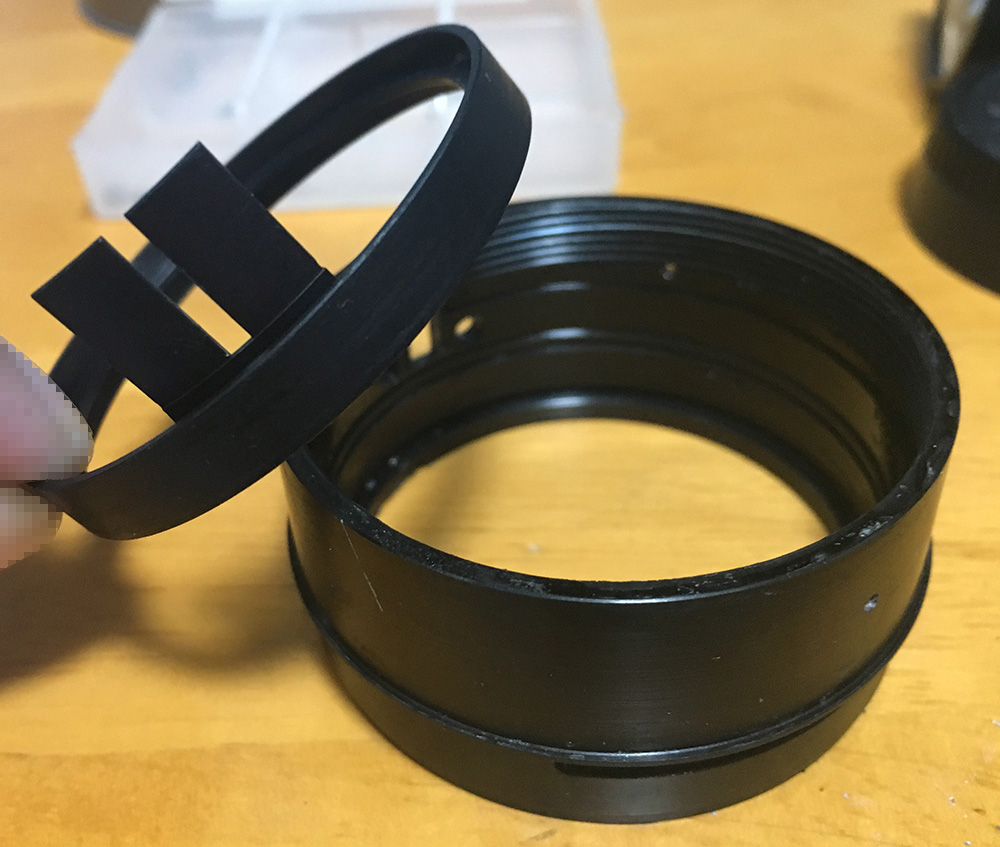
Now that the objective is out of the way, we can now begin with the barrel. The lens barrel’s construction is very typical of Nikkor primes made in the same era, there’s nothing noteworthy at all.
Beginners would have to follow every step precisely to avoid creating any mistakes. Care has to be taken when noting where the helicoids separate. If you are new to this, read my article tackling the topic of helicoids.
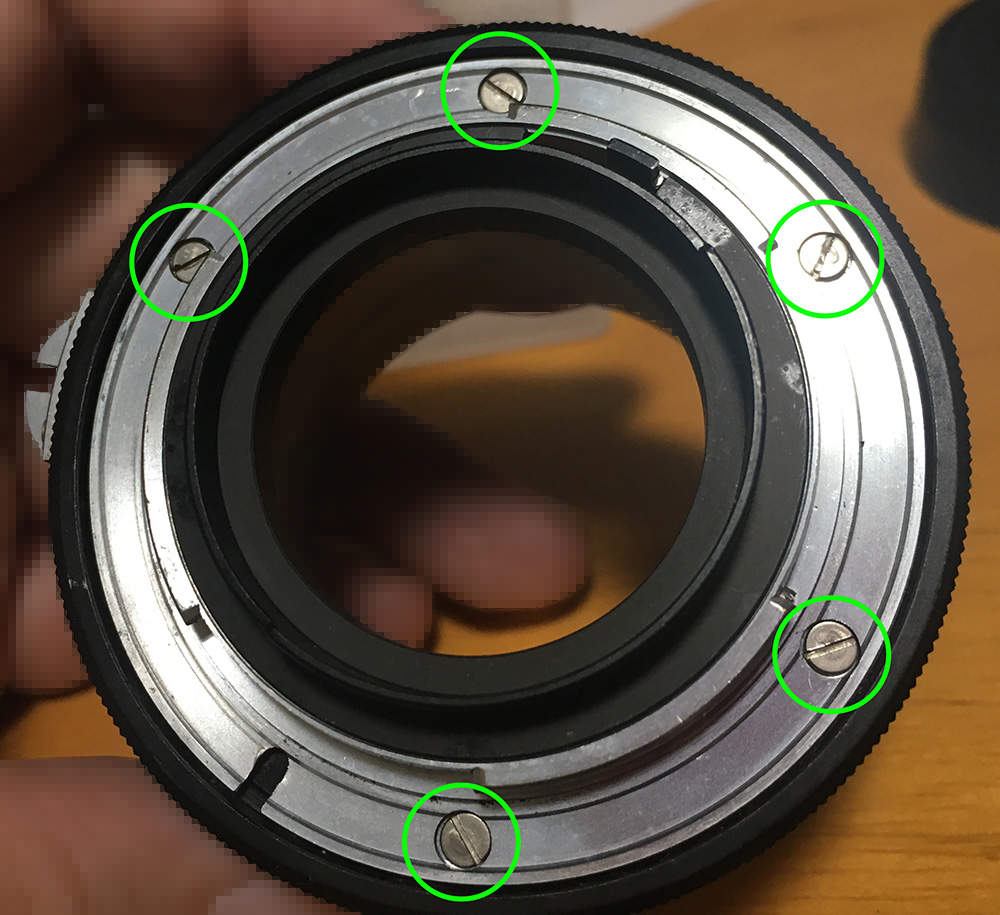
Extract these 5 screws from the bayonet plate to remove it. Observe how the screws are a bit scarred, this indicates that the lens has been opened before. Be careful when removing these screws as they may be sealed with Loctite. If they will not come off easily then place a drop of acetone or two into each screw and give it some time for it to soften the seal. A torch will make this a lot easier but it’s a dangerous tool for amateur use.

The bayonet plate comes off without any effort at all. See the white stuff on the holes for the screws? That’s either dried-up grease or Loctite residue.

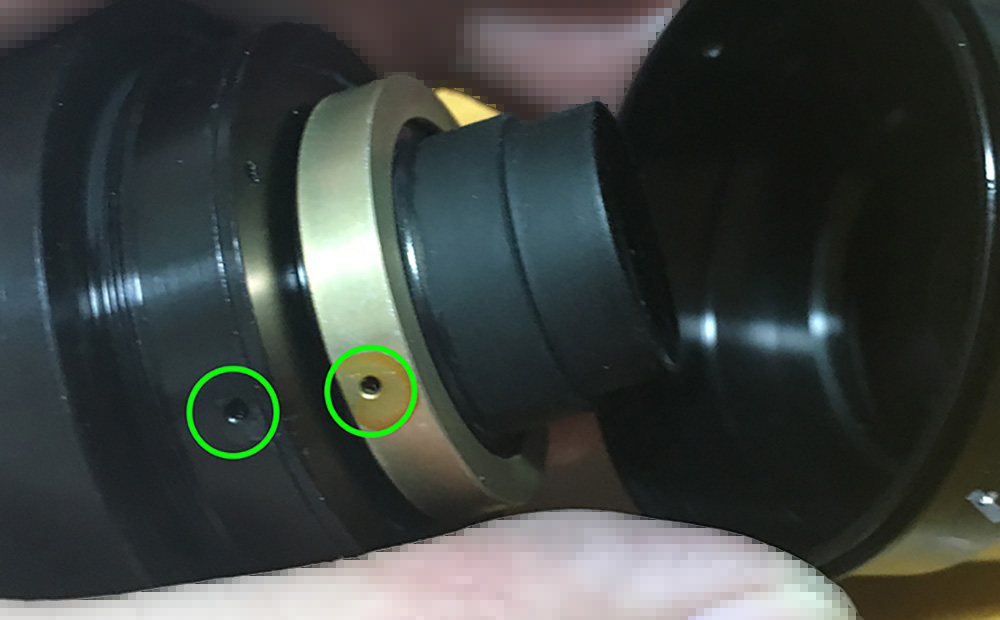
Before you remove the aperture ring, be sure to unscrew this one first. This screw serves as a pin to couple the aperture ring to a mechanism inside that is connected to the iris mechanism.
You can now remove the aperture ring. If you try to remove this before you got rid of the screw in the previous step then you’ll surely damage its fork inside the barrel.

We need to remove the shiny aluminum grip from the barrel. Remove these screws so you can pull the grip off, there are 3 of these. Be careful so you do not scar the the beautifully fluted pattern on the grip.
Just look at the dirt that was accumulated all these years.

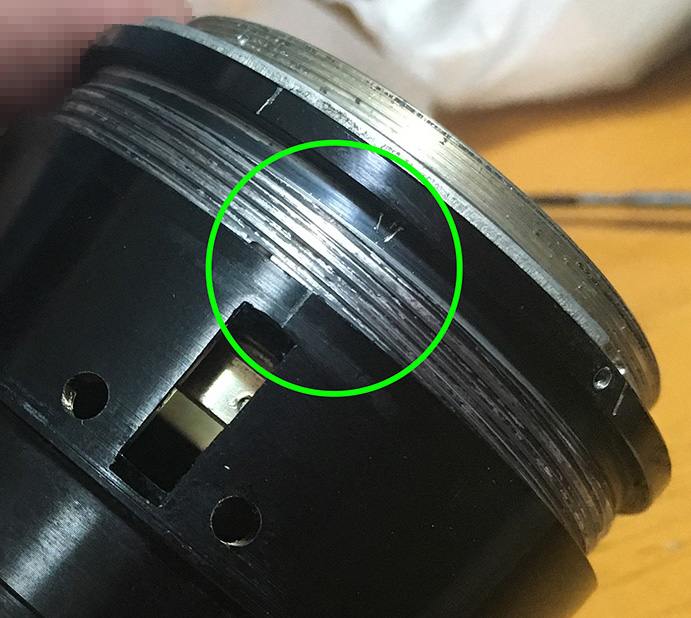
In order to separate the helicoids, you will need to remove the helicoid key first. Look for 2 circular holes on the lens barrel and use these to access the screws of the helicoid key. Use a correct-sized screwdriver for these because they are easily-stripped. I remember that mine was already slightly stripped indicating that the person who opened this prior had a bad time with these. For safety’s sake, I replaced these with good ones from my spares.

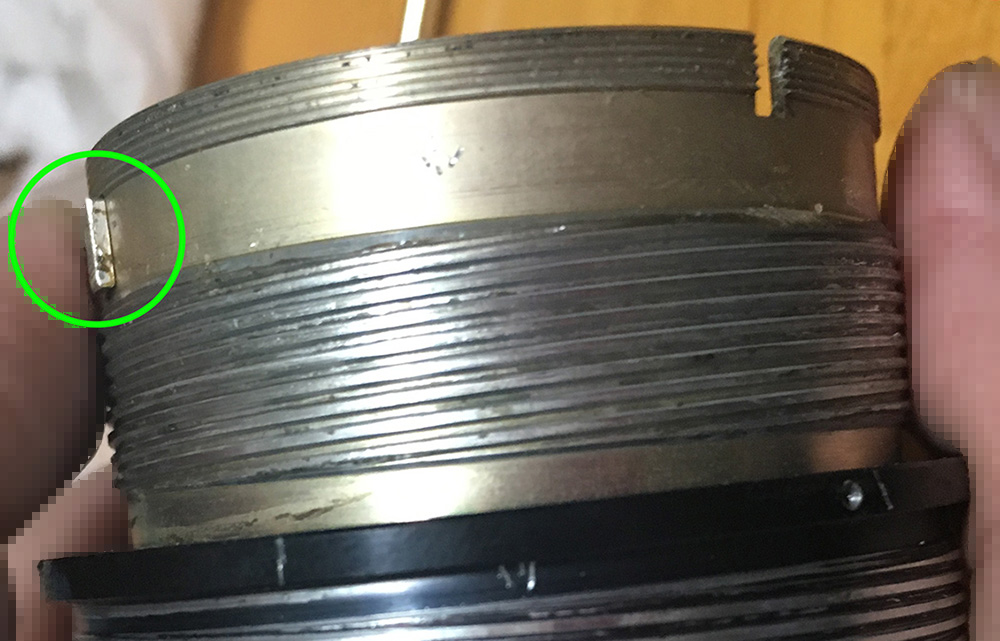
Here’s the helicoid key. You may need to loosen the helicoids a bit to get this off. Observe this picture and you will see that the helicoid key is mounted in reverse, keep this in mind.
Separate the outer helicoid from the central one and be sure to mark where they separated. Failure to do so will result in a hard time for you later when you re-assemble your lens as you guess where these should mate. Read my article on how to work with helicoids to avoid any problems.

In order to separate the central and inner helicoids, you’ll have to remove this helicoid stop first. This constrains the helicoids’ rotation to correspond to the focusing ring’s scale. This is in the way so get rid of these 2 screws to remove this part.
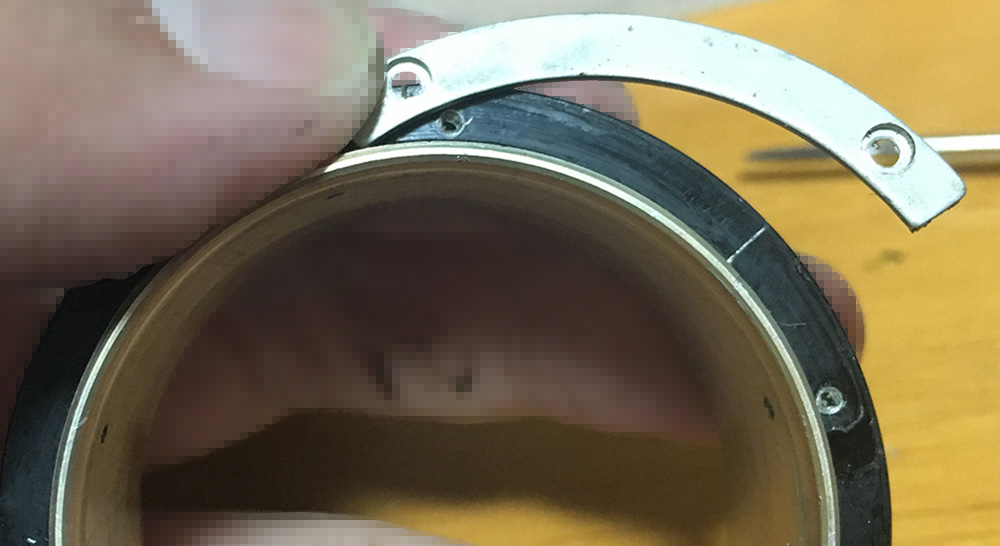
This part is glued most of the time, it can be hard to remove.
You can now separate the inner and central helicoids now that nothing is in the way. The circled part is what’s contacting the helicoid stop. You can opt to extract either one, I always just prefer to remove the bigger part most of the time because they are less likely to be damaged.

It’s time to strip the barrel down to its bare components. Remove this brass ring by using a small screwdriver as a pick.
With the brass ring gone, you’re now free to remove the aperture fork. This fork is attached to a ring and this is in charge of coupling the aperture ring to the iris.
That was more complicated than I expected but I managed to dismantle this down to the last screw. Clean everything really well and make sure that the old grease is gone and no residue is left. This lens benefits from a thick type of grease because of its rather short focus throw. It will all depend on what you want, some people prefer less resistance when turning the lens.
Disassembly (Objective):
As I mentioned previously, you will spend most of your time working on the objective. It is easy to dismantle but you’ll have to be a bit careful because a lot of the parts have been glued at the factory. This has 2 cemented groups, you will want to be careful with solvents and acetone. These chemicals will dissolve the cement used on these if you are not careful.
This should look familiar to you. Separate the front elements assembly from the housing. Notice the holes that I encircled? Place a small drop of acetone or alcohol into these and wait for it to work on the adhesive. It is also a good idea to do this the first time you open the lens.

Twist this brass collar until it comes off.
The brass collar secures this doublet. Mine was tight, be careful pulling this thing off or you can damage it. A doublet is basically 2 elements cemented together to form a single unit.

Next, remove this plate by using a spanner on these 2 dimples.

Once the plate is off, use the spanner again and remove this part. Be careful not to scratch the glass.
The 3rd element is housed in the ring that you previously removed. This is sealed and forget about removing this from its housing. It’s not worth it.
Now, back to the front. Remove this screw carefully.

The screw holds this ring in place, simply unscrew it from the front element group’s case.

Be careful with this step or you will end up with an expensive paperweight. With this facing down, unscrew this ring and be sure not to drop the front element.
The front element isn’t glued and you can easily remove it from its ring. The rear part of the objective isn’t as complicated as the front assembly. It could be if we’ll talk about the iris but since my iris assembly is working perfectly, I will just skip it.

The baffle for the rear element can be easily unscrewed with your fingers.

The rear element is glued to its housing so don’t bother removing it. You can unscrew this off easily with your fingers.

Lastly, use a spanner to remove this part containing the inner elements.
I cleaned the glass really well to make sure that the fungus is gone. You can’t remove every spore and even if you did there’s no guarantee that your lens won’t be infected in the future. The only way to prevent it is to store the lens in a dry place and use your lens often.
Conclusion:
This was written by request so I hope that our friend will benefit from this when he takes his lens apart. It’s not a hard lens to work with if you know how and where to open the parts. With this guide, you will skip much of the guesswork and prevent any accidents. This is certainly not a lens that I can recommend to any beginner due to its slight complexity. I probably spent 2 nights working on this, one for the main barrel and another for objective.
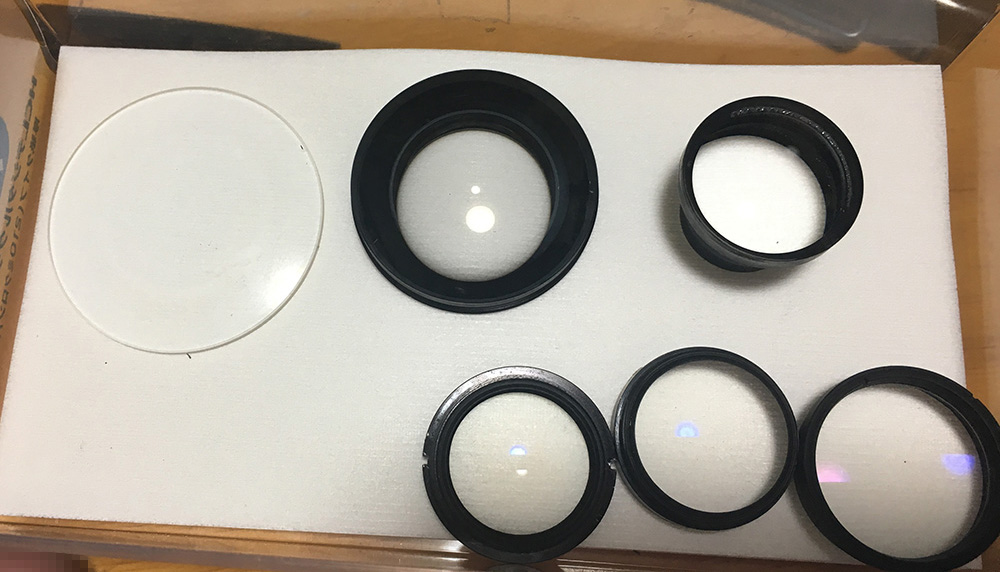
Here are the elements in their proper order, 8-elements-in-6-groups.
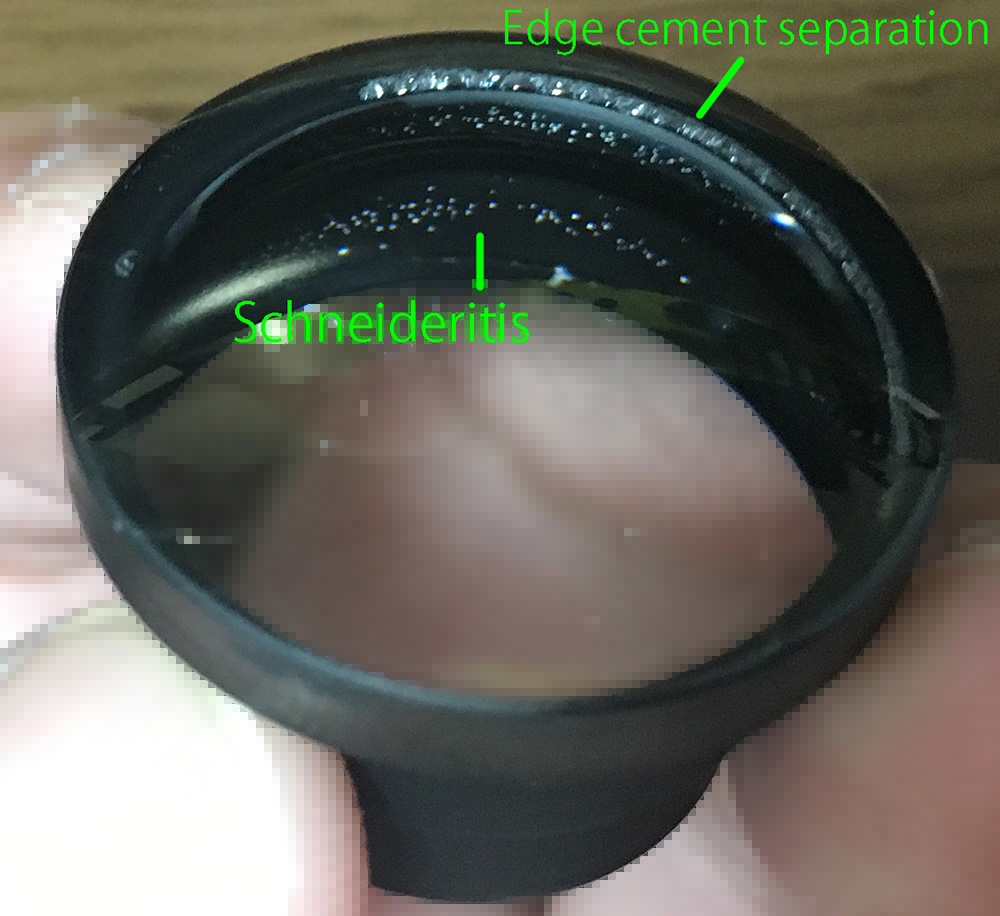
The inner element has started to degrade, showing signs of “Schideritis” and cement separation on some of the edges of the doublet. Both will not affect the image quality of the pictures taken with this lens but really severe cases will probably have an effect. If you recall what I said in the introduction to this article, I mentioned that these problems seem to be common with this lens so be on the look out for this when shopping for this lens. Search for a good copy and carefully look at the inner elements and look for any white or silver edging near the middle of the lens as if it has some sort of cataract and if you did see any, be sure to ask for a discount or just skip it.
If you think this was helpful, please feel free to share this with your friends. You can also help me maintain this by supporting this blog. That will help a lot in offsetting the cost of maintaining this site. Thank you very much and see you again in the next article, Ric.
Help Support this Blog:
Maintaining this blog requires money to operate. If you think that this site has helped you or you want to show your support by helping with the site’s upkeep, you can make a small donation to my paypal.com (richardHaw888@gmail.com). Money is not my prime motivation for this blog and I believe that I have enough to run this but you can help me make this site (and the companion facebook page) grow.
Leave me some tip?
Thank you very much for your continued support!
$2.00
Helping support this site will ensure that this will be kept going as long as I have the time and energy for this. I would appreciate it if you just leave out your name or details like your country’s name or other information so that the donations will totally be anonymous. This is a labor of love and I intend to keep it that way for as long as I can. Ric.

Nov 24, 2017 @ 02:25:17
Really interesting Ric!
I’m trying to remove the three screws around the bayonet. I’ll by a vessel screwdriver but what is the specific size I need for those screws?
Dec 09, 2017 @ 23:14:07
Hello, Jon. I use O or 1 depending on the case. Ric.
Apr 27, 2021 @ 16:38:55
Thanks Richard for all you do . When looking for info on the qualities of a particular Nikkor lens I look you up first .
I have this Nikkor O 35mm f/2.0 and love it . I shoot it on a d850 mostly. Used it a ton this past year in a Nikkormat and a Nikkomat. If mostly shot the FE bodies then got a Nikkormat for a try and just love them .
Back to the 35mm f/2 , I love how this lens renders. Light rolls off skin so nice , backgrounds are soft and beautiful. I love using it for concert photos too . I’m a live music photographer and videographer. I shoot this lens and the 28mm f/2 non ai for live music.
I just purchased another Nikkor O that’s ai converted. I need to convert all of my non ai glass . I broke off the ai tab on my d850 . I used some epoxy and phenolic to fab a tab back on . Could have been a costly mistake. Well it wasn’t a mistake, I knew better.
May 03, 2021 @ 22:12:33
Hello Richard, I have this Nikkor O 35mm f2 in beautiful condition, but with a slight balsam separation in the middle elements.
I have noticed that this is a fairly common flaw with this lens, my repairman says it may be a factory problem because these old lenses were handcrafted.
What do you think about it?